Goddess braids have exploded in popularity over the past few years—and honestly, it’s not hard to see why. They’re regal, stunning, and somehow manage to look effortlessly gorgeous whether you’re headed to a music festival, a special event, or just wanting to elevate your everyday look. But here’s the thing: goddess braids actually work better on straight hair than they do on textured hair. Straight hair holds the intricate patterns crisply, lets the braids stay tight and defined, and showcases the actual braid design without frizz getting in the way. If you’ve got straight hair and haven’t explored goddess braid styling yet, you’re seriously missing out.
The beauty of goddess braids is their incredible versatility. Whether you want thick, chunky statement braids that frame your face or delicate, intricate designs that wrap around your entire head, there’s a goddess braid style for every hair length, face shape, and occasion. Some versions are intricate and take time; others come together surprisingly quickly. Some require extensions to achieve that full, voluminous look, while others work beautifully with just your natural hair. The key is finding the specific style that matches what you’re going for—and understanding exactly how to execute it.
Below, I’ve detailed ten of the most stunning goddess braid styles you can wear with straight hair, along with the specific techniques, tools, and tips you need to recreate each one. Whether you’re looking for something bold and statement-making or soft and romantic, you’ll find an option here that works for you.
1. Two-Strand Goddess Braids Framing the Face
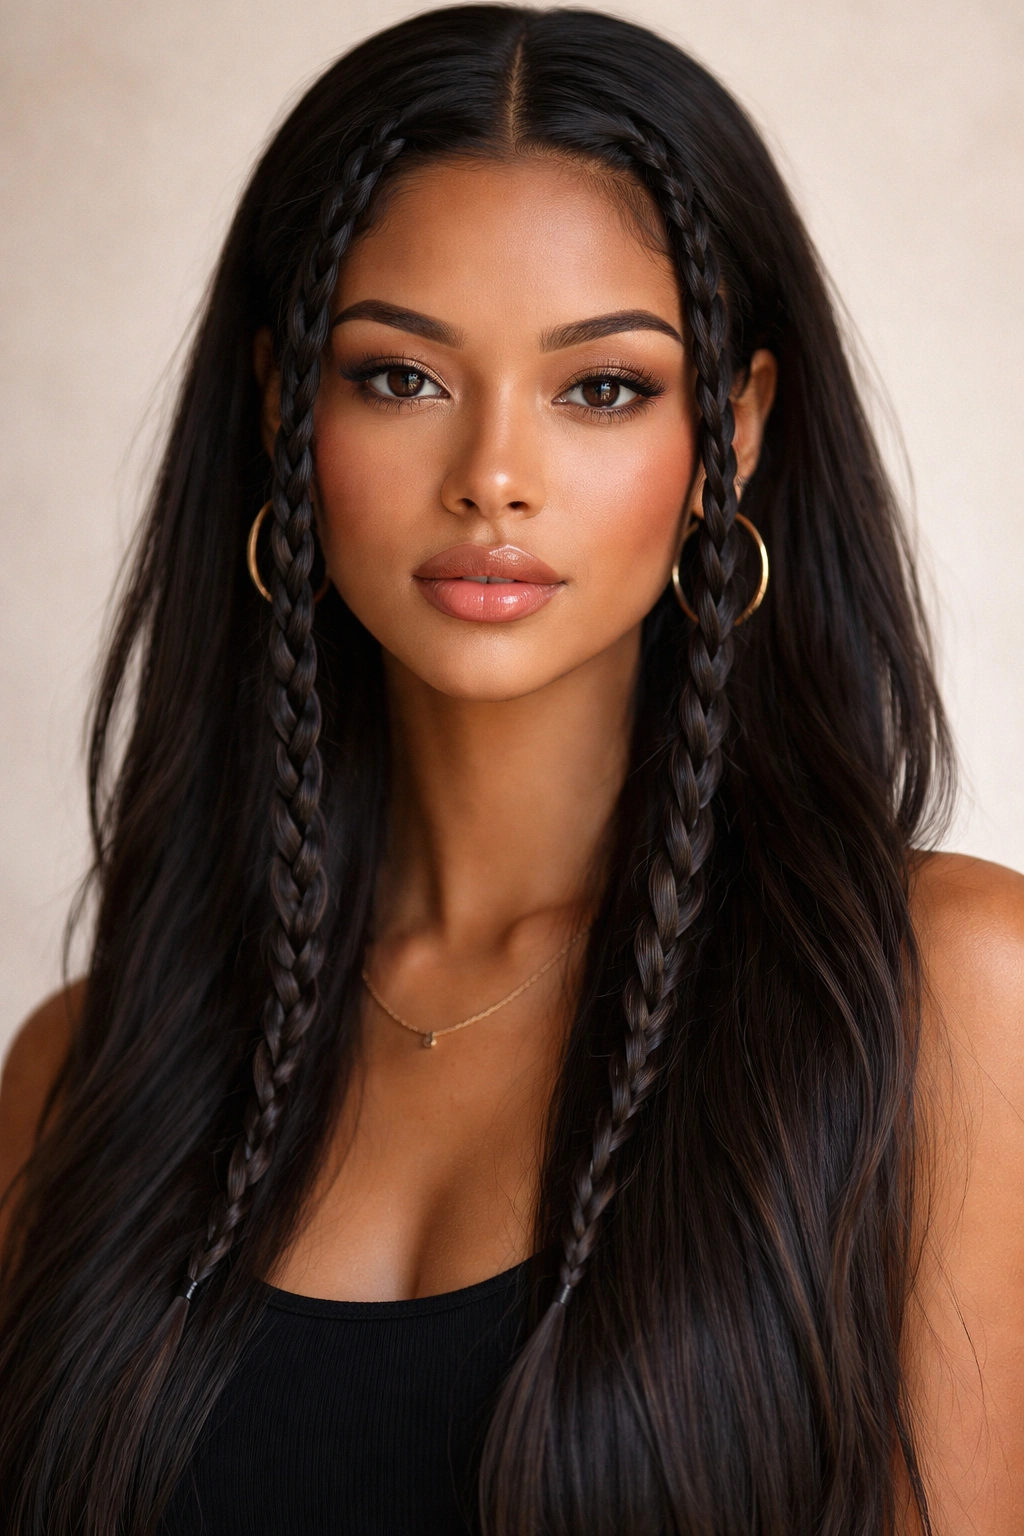
Two-strand goddess braids are the foundation of the goddess braid aesthetic—thick, chunky, sculptural braids that look more like works of art than everyday styles. The version that frames your face starts with two substantial braids on either side of your head, typically beginning at the temples and weaving down past your shoulders. This style is flattering on most face shapes because the braids draw attention downward and create a soft frame around your features.
Why This Version Stands Out
The two-strand goddess braid works exceptionally well on straight hair because straight hair naturally lies flat and allows the two interlocking strands to remain taut and defined. The contrast between the thick, chunky braid and the sleek straight hair surrounding it creates visual interest and drama without requiring any texture or curl to support the style. The braids stay pristine throughout the day, maintaining their crisp edges and perfect symmetry. This style reads as intentional and polished—it’s the kind of braid people notice and comment on.
How to Create This Braid
- Begin by sectioning your hair from your temple straight back toward your ear, creating a deep side part if desired
- Take your first section and divide it into two equal strands—thicker strands create the chunky aesthetic, so don’t be shy with section size
- Cross the right strand over the left, then the left over the right, adding small sections of hair from your scalp into each strand as you move down the head
- Keep tension even but not painfully tight; the goal is defined and structured, not strained
- Continue to the ends of your hair and secure with a clear or matching elastic
- Repeat on the other side of your head, then gently pancake (loosen) the braid by pulling out sections on the sides to create dimension and fullness
Pro tip: Use a texturizing spray before braiding to give your straight hair slightly more grip and hold—it makes the braid structure crisper and helps it last longer without unraveling.
2. Crown Goddess Braids Wrapping the Entire Head
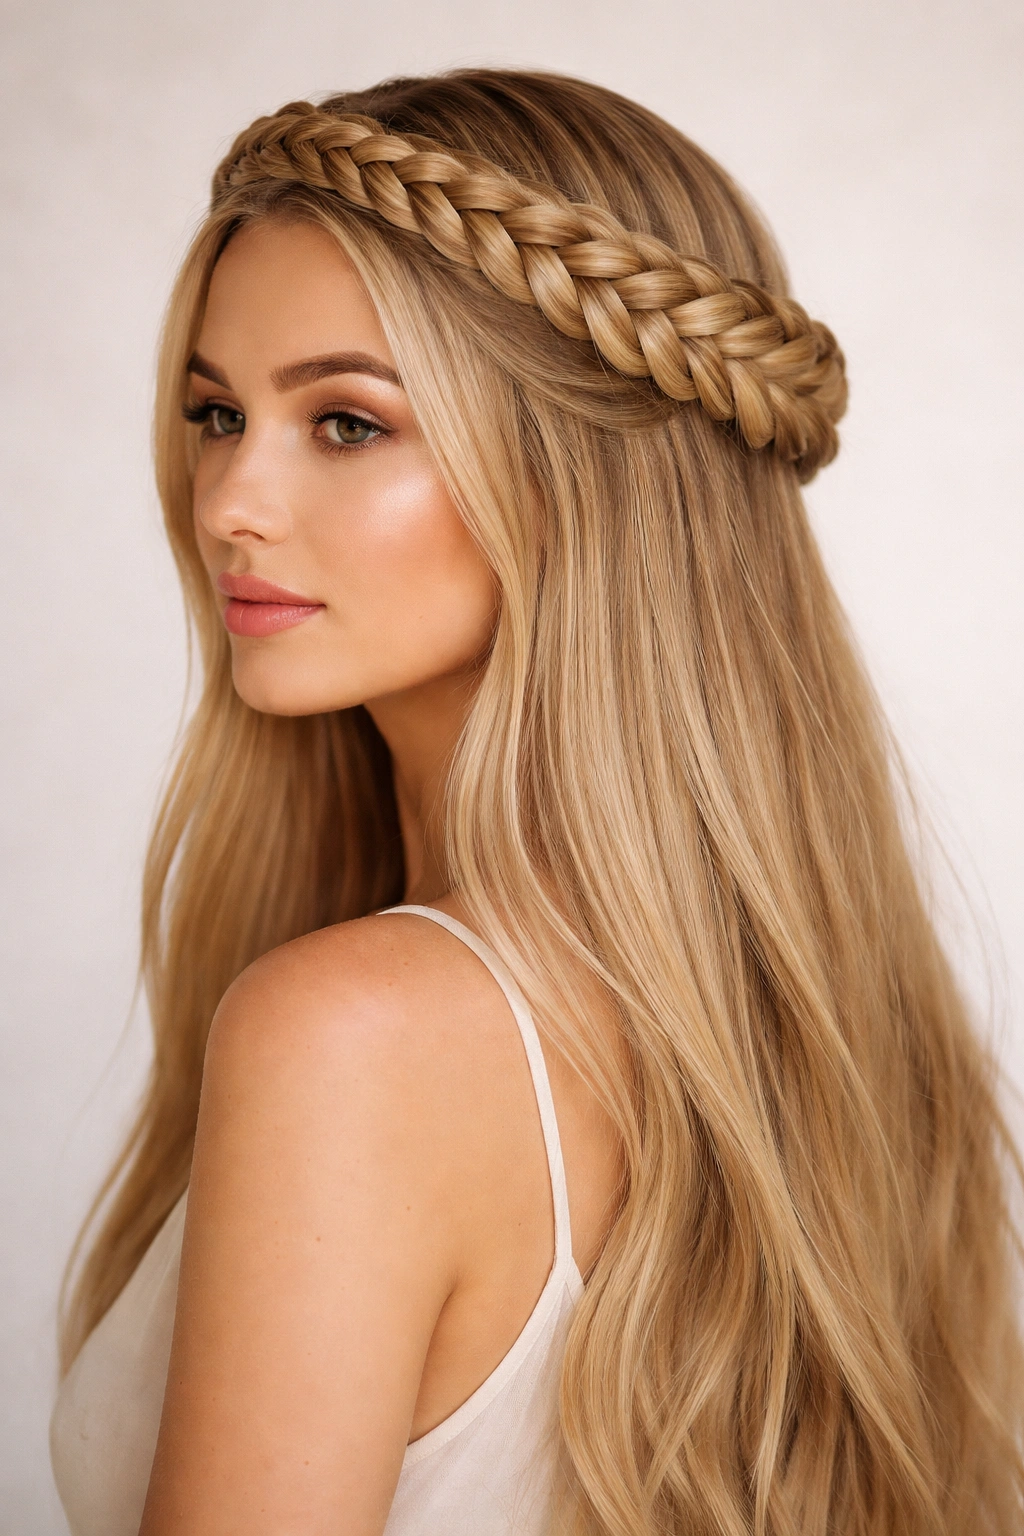
A crown goddess braid is basically a halo of interlocking strands that wraps all the way around your head like a crown, with loose hair flowing down beneath it. This style is breathtakingly romantic and works beautifully for weddings, formal events, or any occasion where you want to look absolutely stunning. The braids literally frame your entire face and head, creating a romantic, ethereal effect.
What Makes This Design Special
The crown goddess braid transforms straight hair into something that feels almost otherworldly. Because your hair is straight and lies flat naturally, the braids maintain their neat, defined appearance against your scalp, which actually makes the crown effect more visible and striking. The contrast between the structured braids and the flowing straight hair below creates a compelling visual hierarchy. This style also stays secure for hours without the braids loosening or shifting, which is crucial for an all-day event.
Construction Steps for Crown Braids
- Start at one side of your head, near your ear, and begin a standard two-strand or three-strand braid
- As you braid, add hair from the top of your head into the braid with each crossing, gradually working the braid up toward the top of your head
- Once you reach the crown, continue the braid diagonally toward the opposite ear, maintaining even tension and adding hair from the top half of your head as you go
- The braid should end just above your opposite ear, at a natural endpoint where you can secure it with a small elastic
- Loosen the braid gently by pancaking—pull out sections along both sides to create fullness and dimension
- If desired, wrap the braided section even more loosely to create a softer, more romantic effect
Worth knowing: This style works best on hair that’s at least shoulder-length or longer, as you need sufficient length to create the full crown effect and have loose hair flowing below it.
3. Sleek Goddess Braids With Center Part
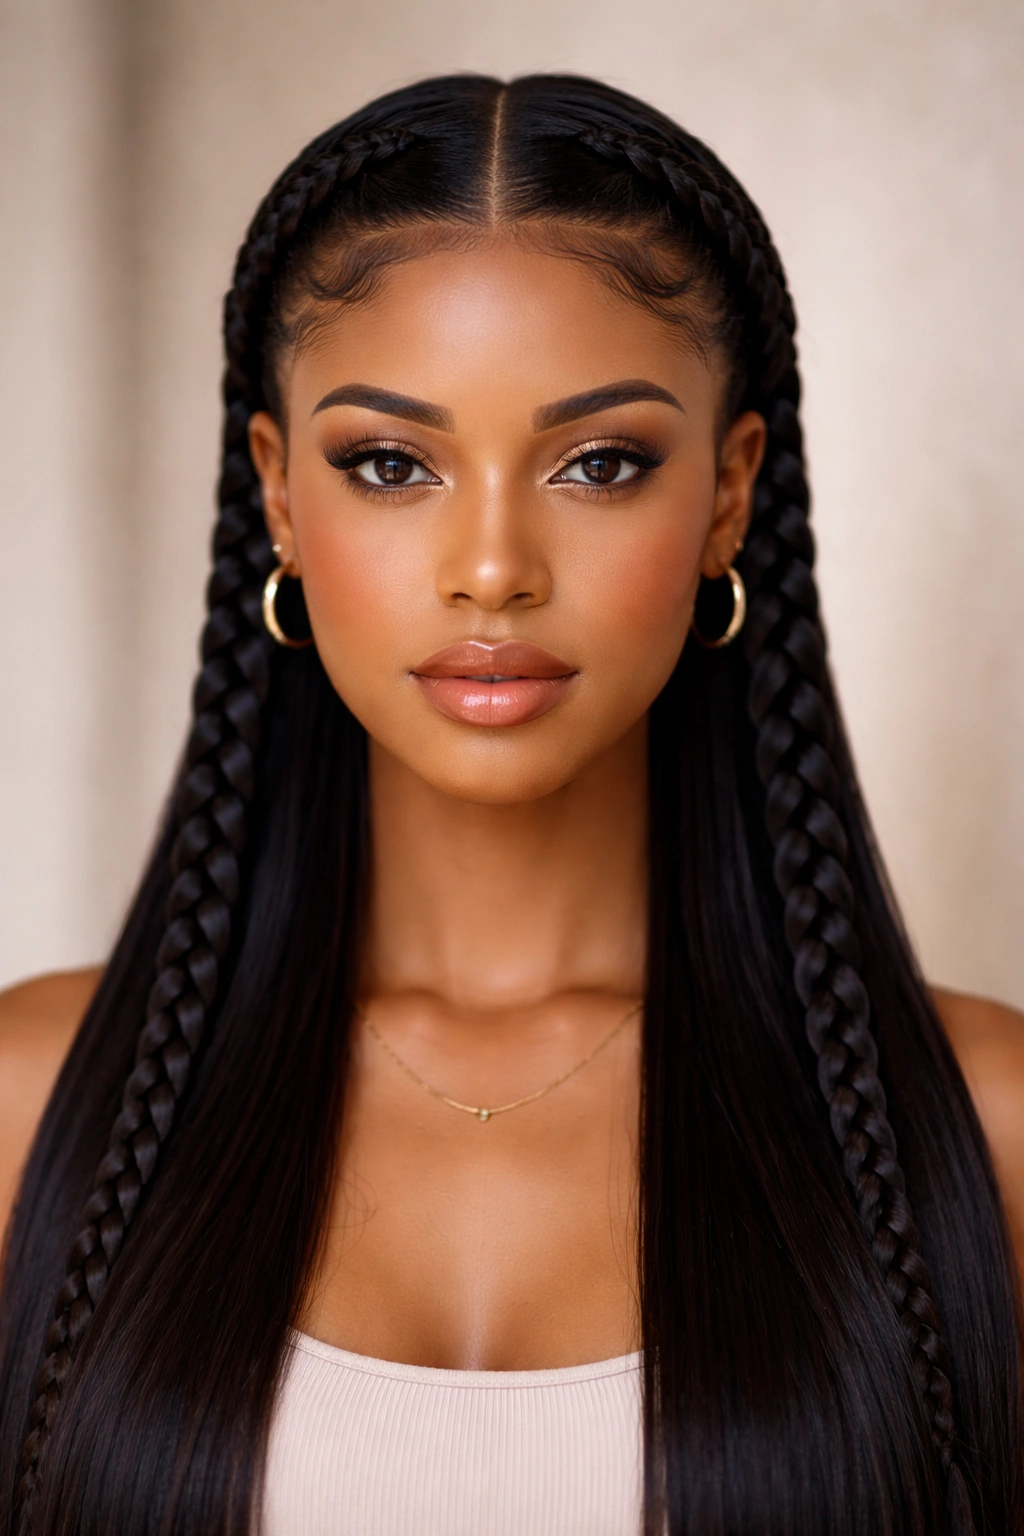
A sleek center-parted version of goddess braids is all about clean lines and symmetry. Two identical braids start at your center part line, one on each side, and travel down toward your shoulders. There’s something incredibly satisfying about the precise, mirror-image nature of this style—it’s geometric, balanced, and undeniably elegant.
Why Straight Hair Shines Here
Straight hair takes a center part beautifully, creating a perfectly clean division from crown to nape. The braids, when placed symmetrically on either side, create an almost architectural effect that would look muddy or less defined on textured hair. With straight hair, every element of the design is crystal clear—you can actually see the braid structure, the part line, and the precision of your work. This style reads as high-effort and intentional, even if you’re capable of pulling it off relatively quickly.
Execution Details
- Create a precise center part from your forehead all the way to the nape of your neck using a fine-tooth comb
- Section off hair from the scalp on one side of the part, starting at the crown and moving down
- Create a two-strand or three-strand braid, adding hair as you move down the head
- Keep the braid as close to the part line as possible for maximum precision
- Repeat identically on the other side of your head
- This style is optional to pancake—some people prefer the sleek, tight look, while others loosen it slightly for dimension
Insider note: Use a smoothing serum or anti-frizz cream before parting and braiding to ensure your straight hair stays perfectly smooth and your part line remains sharp throughout the day.
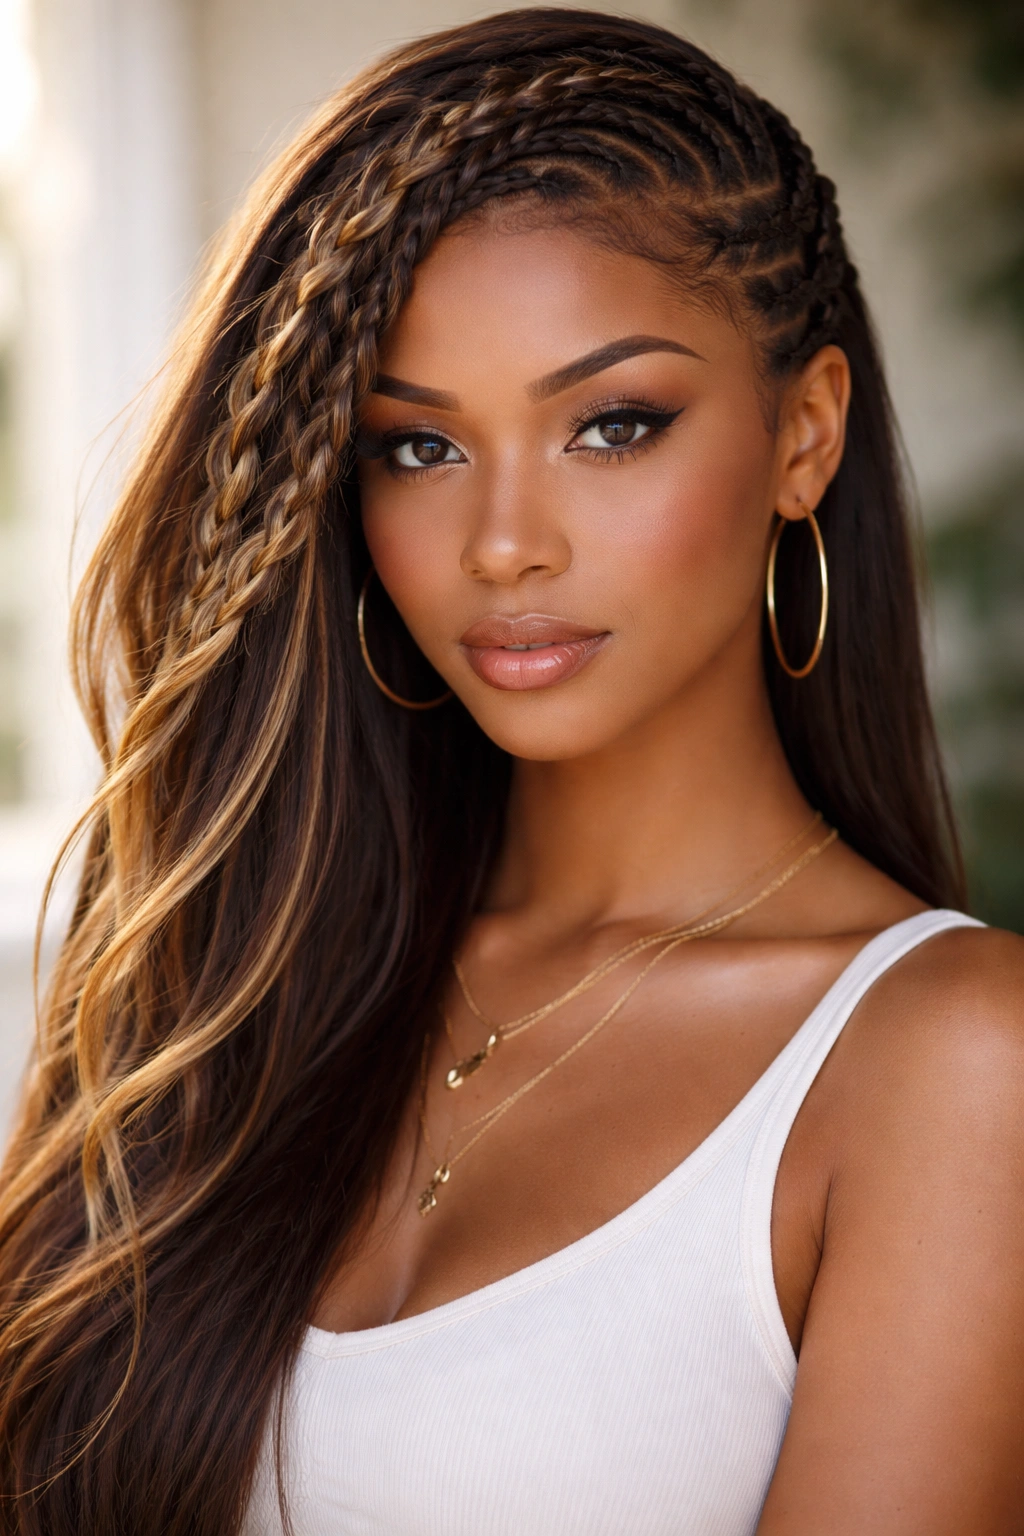
4. Braids With Facial Framing Pieces
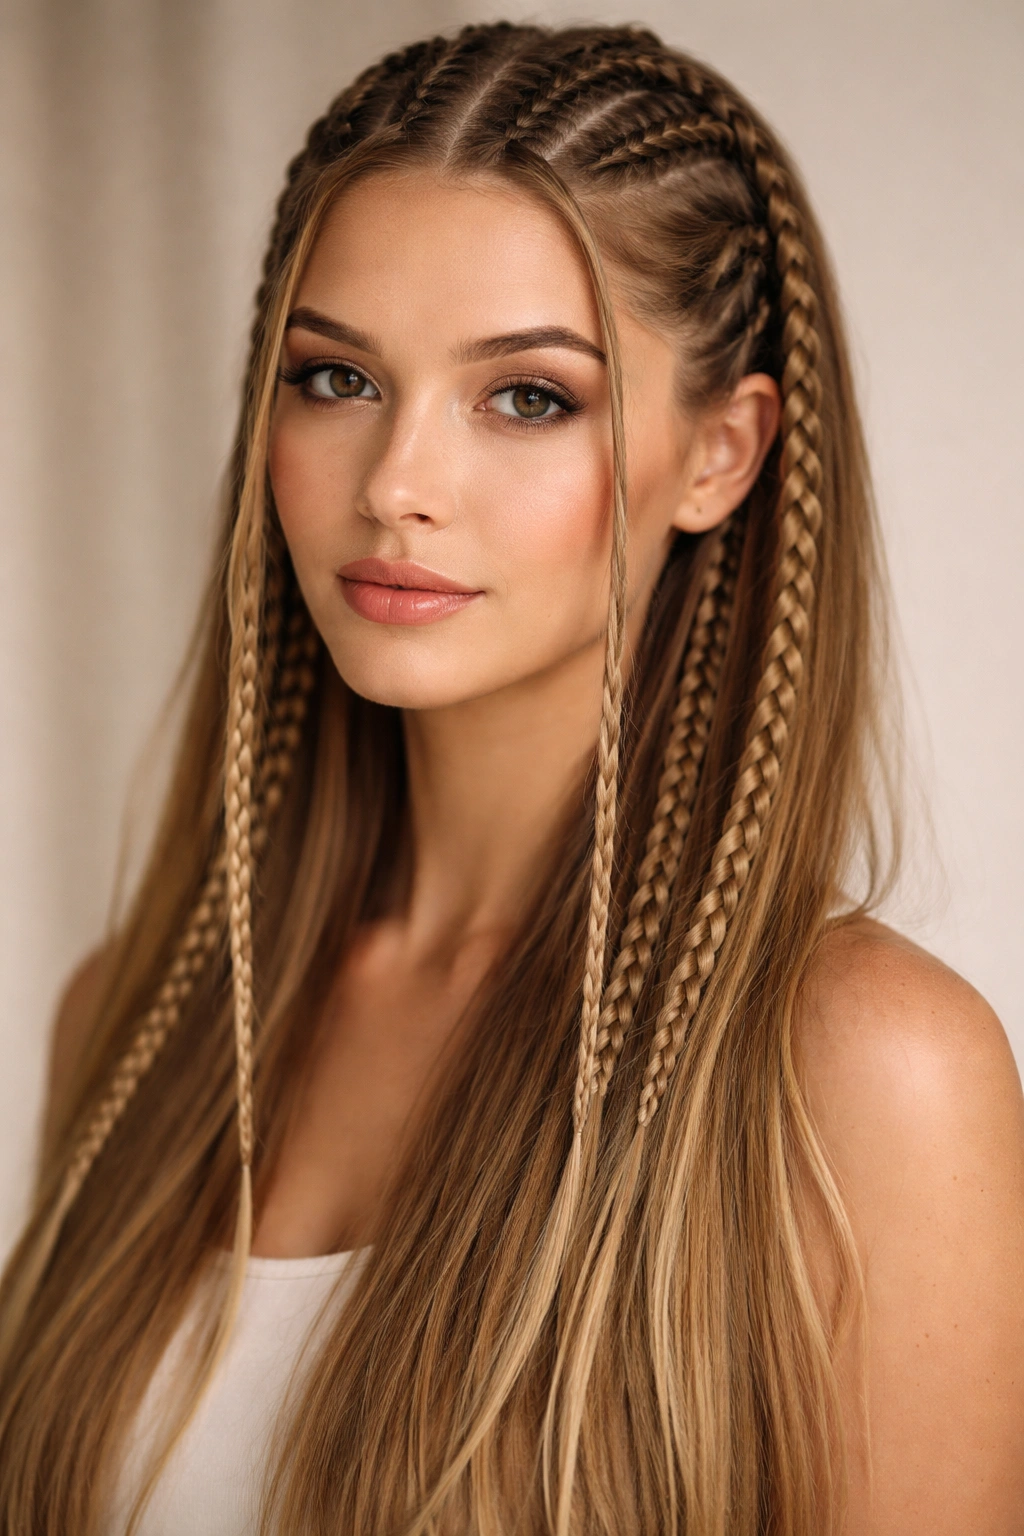
This version of goddess braids incorporates a modern twist: thin, delicate braids that frame just the front sections of your face, with thicker braids layered behind them or wrapping elsewhere on your head. The facial framing pieces create a softer, more romantic effect than braids that pull all your hair back, because they keep some movement around your face.
The Appeal of This Style
Facial framing pieces are incredibly flattering because they draw attention to your features without covering your entire head. On straight hair, these thin braids remain visible and defined—you can actually see the intricate pattern of the braid, which adds delicate detail to the overall look. The combination of thin framing braids with thicker statement braids elsewhere on your head creates visual interest and depth. It’s a more modern, nuanced take on the classic goddess braid aesthetic.
How to Add Facial Framing Braids
- Begin with small sections of hair at your temples on each side of your face
- Create thin two-strand or three-strand braids on each side, starting at the temple and moving straight back toward your ear
- These braids can end at ear-level and be secured with a tiny elastic, or they can continue back and be incorporated into a larger style
- The key is keeping them thin and delicate, not chunky—they’re meant to feel light and refined
- You can leave them as-is or combine them with a larger braid style for added complexity
- Pancake the facial framing braids gently, pulling out very small sections to create a lacy, delicate appearance
Pro tip: Use a lightweight texturizing spray rather than a heavy gel or mousse when creating facial framing braids on straight hair—you want hold without weight.
5. Mohawk-Style Goddess Braids
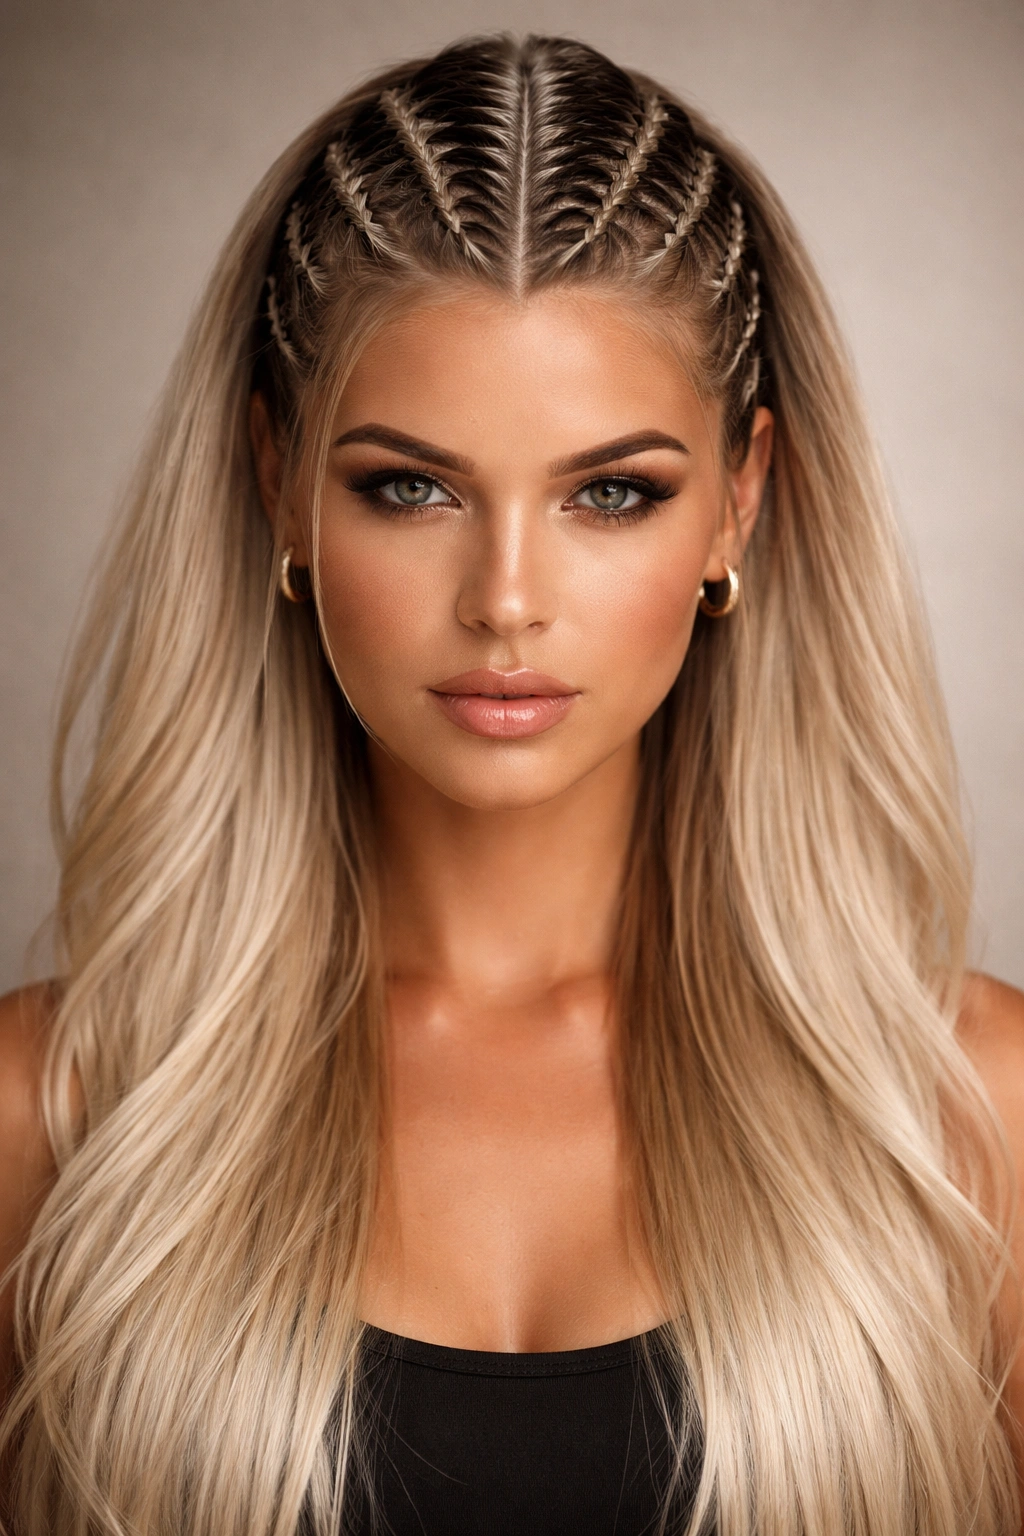
A mohawk-style goddess braid is a bold, high-impact version where braids run vertically down the center of your head from forehead to nape, creating a statement-making centerline. Your hair flows loose on either side, so you get the sculpted braid detail without pulling all your hair back. This style is perfect if you want maximum impact with minimal coverage—it’s edgy and fashion-forward.
What Makes Mohawk Braids Stand Out
Mohawk-style goddess braids are the most dramatic version of the goddess braid family, and they work beautifully on straight hair because the vertical line of the braid creates a striking visual focal point. The straight hair on either side doesn’t compete with the braid for attention; instead, it frames the braided centerline and makes it the obvious focal point. This style suits people with rounder or wider face shapes particularly well, as the vertical line creates a lengthening effect. It’s also incredibly practical if you want your hair partially styled but still want some loose movement.
Building the Mohawk Braid
- Create a vertical section from your forehead to your nape—the width is up to you, but typically 2-4 inches works well
- Divide this section into three strands and begin braiding at the crown or just above your hairline
- Add hair from the sides into your braid as you move down, pulling from both the left and right edges of your center section
- The braid should sit directly in the center of your head, visible from above and in profile
- Continue all the way down to your nape and secure with an elastic
- Pancake the braid generously to create dimension and fullness—this counteracts the potential severity of the style
- Leave your hair loose on either side of the centerline, or add additional smaller braids for more texture
Worth knowing: This style works better on people with more hair volume; fine or thin hair can look sparse when the sides are completely loose. If you have finer hair, consider adding extensions or incorporating additional smaller braids into the loose sections.
6. Goddess Braids With Spiral or Coil Ends
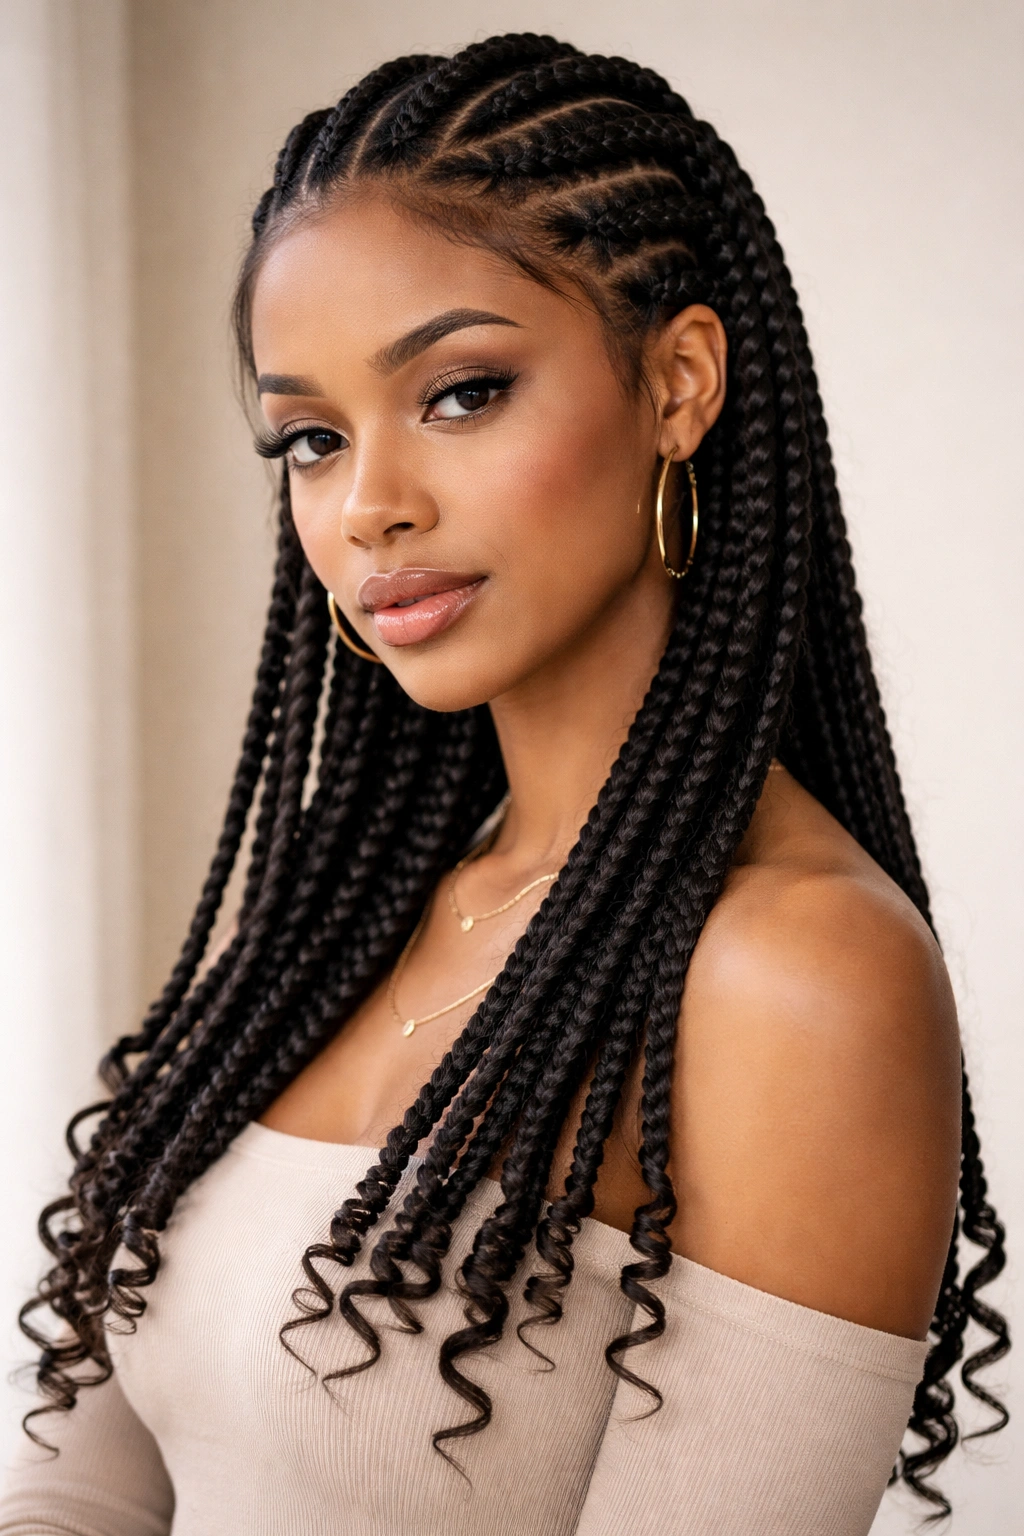
Instead of securing your braids at the ends with a simple elastic, you can create spiral or coil effects at the bottom by leaving a section of hair unbunched and twisting it around the base of the braid. This adds an extra layer of detail and sophistication, making the style feel more intricate and design-forward. It’s the kind of detail that elevates a simple braid into something truly special.
Why This Finish Works on Straight Hair
On straight hair, the spiral or coil at the bottom of a braid remains perfectly visible and defined. You can actually see the pattern and structure of the twist, which makes the style feel intentional and well-executed. The spiral creates a natural endpoint for the braid without needing an elastic, which is both practical and aesthetically pleasing. The twisting motion also helps secure the braid without obvious hardware, creating a seamless, finished look.
Creating Spiral Ends
- Braid normally until you reach the last 2-3 inches of your hair
- Separate the three strands and let them fall loosely
- Take one strand and twist it tightly, wrapping it around the base of the unbunched section in a spiral motion
- Wrap this strand around the base once or twice, securing it with a small clear elastic or bobby pin
- Repeat with the other two strands if desired, creating multiple spirals, or just use one strand for a simpler effect
- Pull gently on the spiral to slightly loosen and soften it if you prefer a more romantic appearance
- Tuck in any loose ends with a bobby pin
Pro tip: Use a light hairspray on the spiral sections to keep them from unwinding and to maintain the twisted shape throughout the day.
7. Side-Swept Goddess Braids
A side-swept version of goddess braids begins at one side of your head and sweeps all the way across to the opposite side, creating an asymmetrical, romantic look. This style is fantastic for people who love a one-sided aesthetic or who want to wear their braids without the weight being centered on their head. The asymmetry is instantly flattering and feels more modern than perfectly centered, symmetrical braids.
The Appeal of Asymmetry
Side-swept goddess braids feel effortlessly chic on straight hair. The braid sweeps across your head and emphasizes your facial structure in an asymmetrical way that’s incredibly flattering. Straight hair makes this asymmetrical design visually clean and readable—you can clearly see the braid traveling across your head. The style also allows you to show off your hair length on the unstyled side, which is nice if you’ve worked hard on growing your hair out.
How to Execute Side-Swept Braids
- Create a deep side part, placing it where you want the asymmetry to begin
- Start your braid on one side of your head, at or near the temple on the fuller side of your part
- Begin braiding and add hair as you move across the crown toward the opposite side
- As you braid, gradually shift the braid down toward the side of your head, so it sweeps diagonally across rather than going straight back
- By the time you reach the opposite ear or side of your head, the braid should be positioned below ear-level
- Secure at the end and pancake for fullness
- Leave the unstyled side of your hair down and straight, allowing it to create contrast with the braided side
Worth knowing: This style looks particularly good on people with longer hair, as you get the full effect of the sweep and the contrast between the braided and unbraided sides.
8. Stacked Goddess Braids for Extra Dimension
Stacked goddess braids involve creating multiple braids on top of each other—typically a thinner braid on top of a thicker braid, or three or four thin braids positioned parallel to each other. This approach creates incredible visual dimension and makes your braids look more intricate and elaborate. It’s a technique that instantly elevates the goddess braid aesthetic into something more high-fashion and editorial.
Why Stacking Creates Impact
Stacked braids on straight hair look absolutely stunning because each braid remains crisp and defined, and the visual complexity of multiple braids creates a sense of movement and sophistication. The texture created by stacking—the interplay of shadows and the layered appearance—makes the style feel more three-dimensional and interesting. This approach also allows you to cover more of your head with braids while keeping individual braids thinner and more refined. On straight hair, the stacked effect is clean and organized, not chaotic.
Technique for Stacked Braids
- Begin with your first braid as you normally would, starting at your hairline or crown
- Secure this braid when you reach the end, using a small elastic
- Now take a thin section of hair directly next to or below your first braid
- Create a second braid, paralleling the first braid and positioned right alongside it
- You can repeat this process to create three, four, or even five thin braids in a row if your hair is long and thick enough
- Pancake each braid individually for dimension
- These stacked braids can run straight back, diagonally, or wrap around your head depending on the effect you want
Insider note: Stacked braids require more time and patience than a single braid, but the visual payoff is significant. Use this style when you have time to really get it right, or practice it several times before an event.
9. Goddess Braids Incorporating Ribbons or Beads
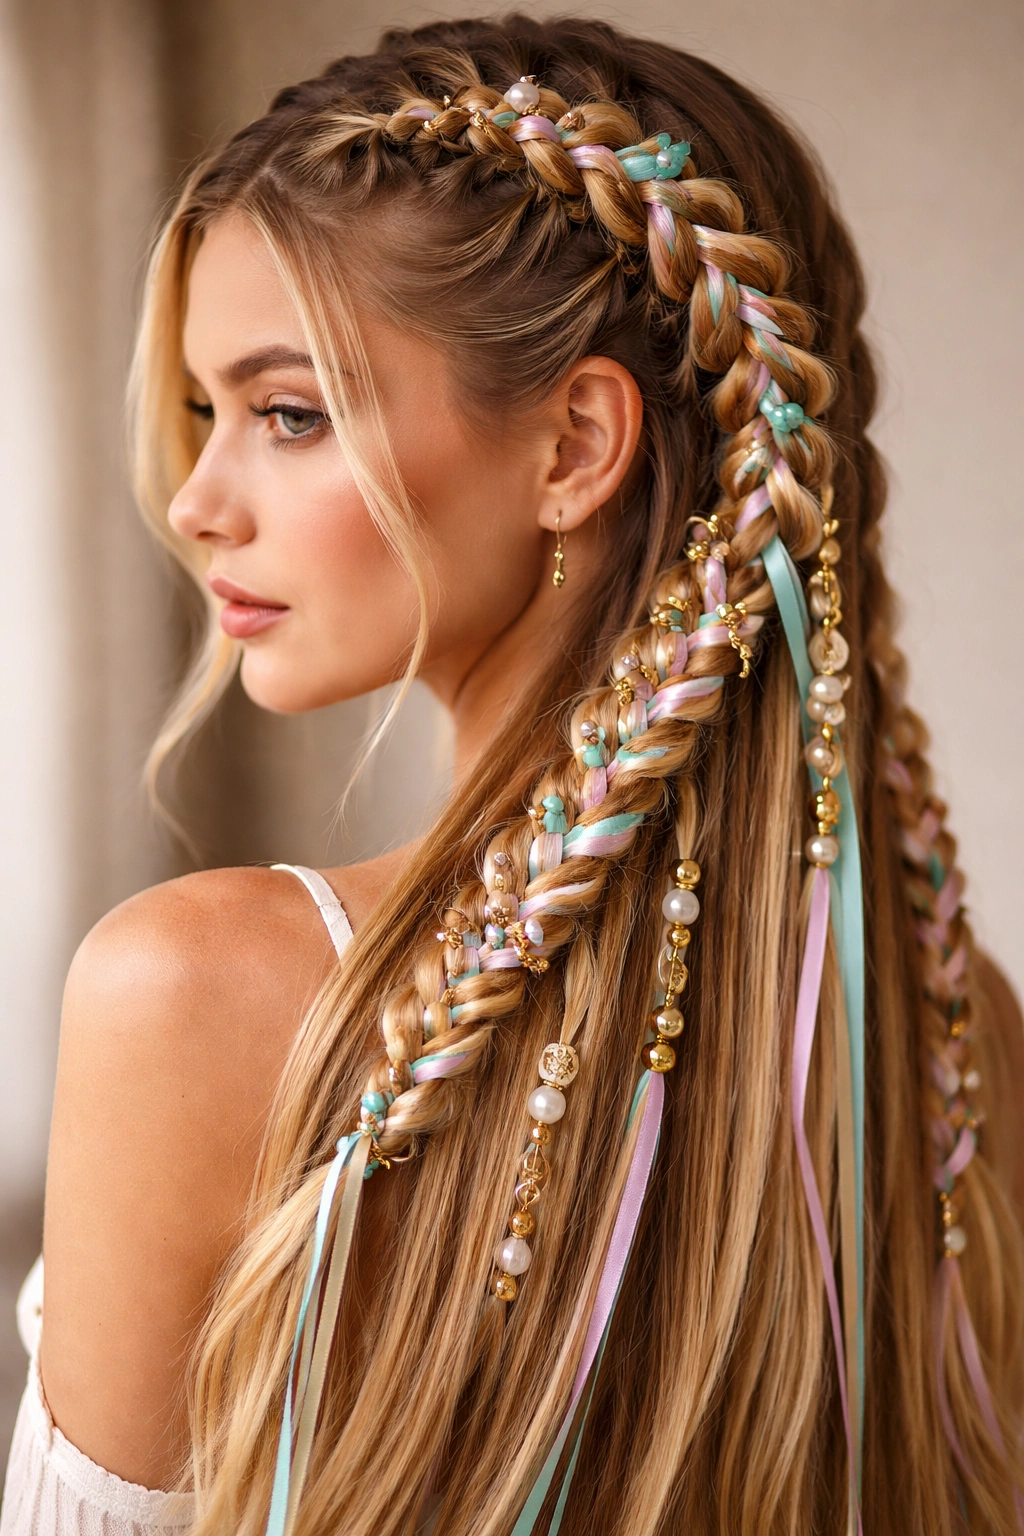
One of the most creative ways to elevate goddess braids is to weave ribbons, thin fabric, or small beads directly into the braid structure. This adds color, texture, or sparkle depending on what you choose. Ribbons in metallic gold, silver, or jewel tones create an instant dress-up effect. Thin fabric in patterns adds visual interest. Beads create a more bohemian, festival-ready aesthetic.
How Accessories Transform the Style
Ribbons and beads make your braids immediately feel more intentional and special-occasion-appropriate. On straight hair, these additions are incredibly visible—the crisp backdrop of your straight hair actually makes any accessories more noticeable and striking. A simple two-strand braid becomes infinitely more interesting when woven with a ribbon. Beads create rhythm and pattern within the braid structure. These additions also give you a way to add color if you’re not ready to dye your hair but want to experiment with a new shade.
Adding Ribbons or Beads to Your Braids
- Choose ribbons 1/4 to 1/2 inch wide, or thin fabrics, or beading thread if you’re using beads
- Start your braid normally, but incorporate the ribbon or beading thread as one of your three strands
- As you braid, the ribbon will naturally weave in and out, creating a beautiful striped or colored effect
- For beads, you can thread them onto a thin strand before braiding, or add them individually as you braid by threading the braid strand through each bead
- Pancake the braid afterward to make both the braid and the ribbon or beads more visible
- Secure the ribbon or beading thread at the bottom with the hair elastic
Pro tip: If using ribbons, seal the cut ends with a lighter (carefully) to prevent fraying, or use grosgrain ribbon which naturally resists fraying.
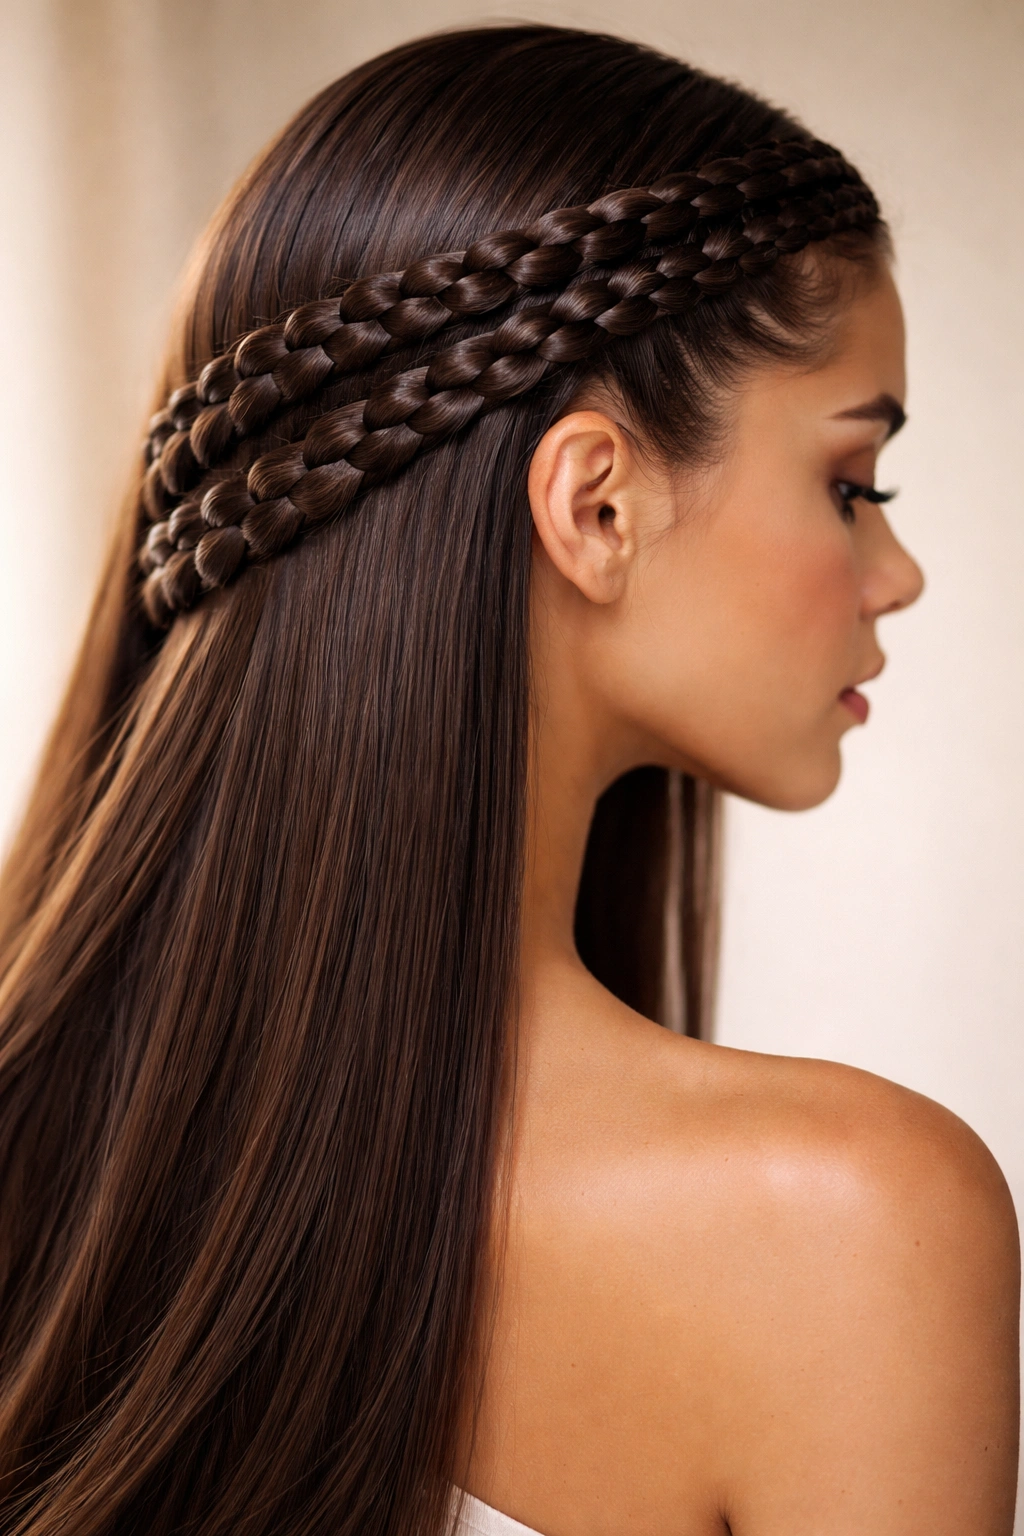
10. Double Goddess Braids Wrapped Around the Crown

A double goddess braid creates two thick, substantial braids that wrap around your head in parallel, creating a crown-like effect that’s both elegant and intricate. This style is similar to the full-crown braid but uses two distinct braids rather than one continuous one. It’s a beautiful middle ground between simple two-side braids and a complex full-crown style.
The Elegant Impact
Double-wrapped goddess braids create an almost regal appearance on straight hair. The two parallel braids frame your head beautifully, and the symmetry is incredibly flattering. This style works well for formal events, special occasions, or anywhere you want to look particularly polished and put-together. The two-braid structure also means you have slightly more control over how much hair you’re managing, compared to a single full-crown braid, making it easier to execute without feeling overwhelmed.
How to Build Double-Wrapped Braids
- Start on one side of your head, at about ear-level or slightly higher
- Create your first thick goddess braid, adding hair from the top of your head as you move upward and across
- Let this braid travel diagonally across the crown from one side of your head to the other
- Secure it on the opposite side with an elastic
- Now start your second braid on the lower part of the same side where you started the first braid
- Create this second braid in the same direction as the first, positioning it below the first braid
- Both braids should travel in the same direction, creating a parallel, wrapped effect
- Pancake both braids for dimension and fullness
- You should have loose hair hanging down in the center-back and both sides, creating a romantic, flowing effect
Worth knowing: This style requires careful planning to ensure both braids are positioned correctly and symmetrically. Using clips to section off each braid area before you start can help you stay organized.
Final Thoughts

Goddess braids on straight hair are genuinely the best-case scenario for this style. Your straight texture allows every detail of the braid to shine, every precision line to remain sharp, and every design element to stay structured and defined throughout the day. Whether you’re drawn to simple, elegant two-side braids or you want to dive into something more complex like stacked braids with ribbons, there’s a version of this style that works for your hair, your skill level, and your occasion.
The most important thing to remember is that goddess braids reward patience and practice. Your first attempt might not be perfect, and that’s completely normal. Each time you braid, your hands learn the motion a little better, your tension becomes more even, and you develop an intuition for how tight to pull and when to add hair. Start with simpler styles like the two-strand side braids, practice until those feel comfortable, then gradually work toward more complex designs. Before you know it, you’ll be creating stunning, intricate braids that look like you’ve been doing this for years.