Rubber bands are the unsung heroes of hair styling—they’re affordable, accessible, and surprisingly versatile when you know how to use them effectively. If you have straight hair, you’ve probably noticed that your texture holds styles beautifully and shows off clean lines that other hair types can’t quite achieve in the same way. The smoothness of straight strands makes rubber band hairstyles look polished and intentional rather than undone, which is why so many of the most chic looks rely on simple elastic bands to create definition and shape.
The thing about styling straight hair with rubber bands is that you get instant gratification. Unlike wavy or curly hair that needs texture to hold a look, straight hair grips onto rubber bands and maintains those styles without frizz or flyaways derailing your vision. Whether you’re going for minimalist elegance, playful and fun, or something that lands right in the middle, rubber band hairstyles work because they emphasize the smooth, sleek quality that makes straight hair so desirable in the first place.
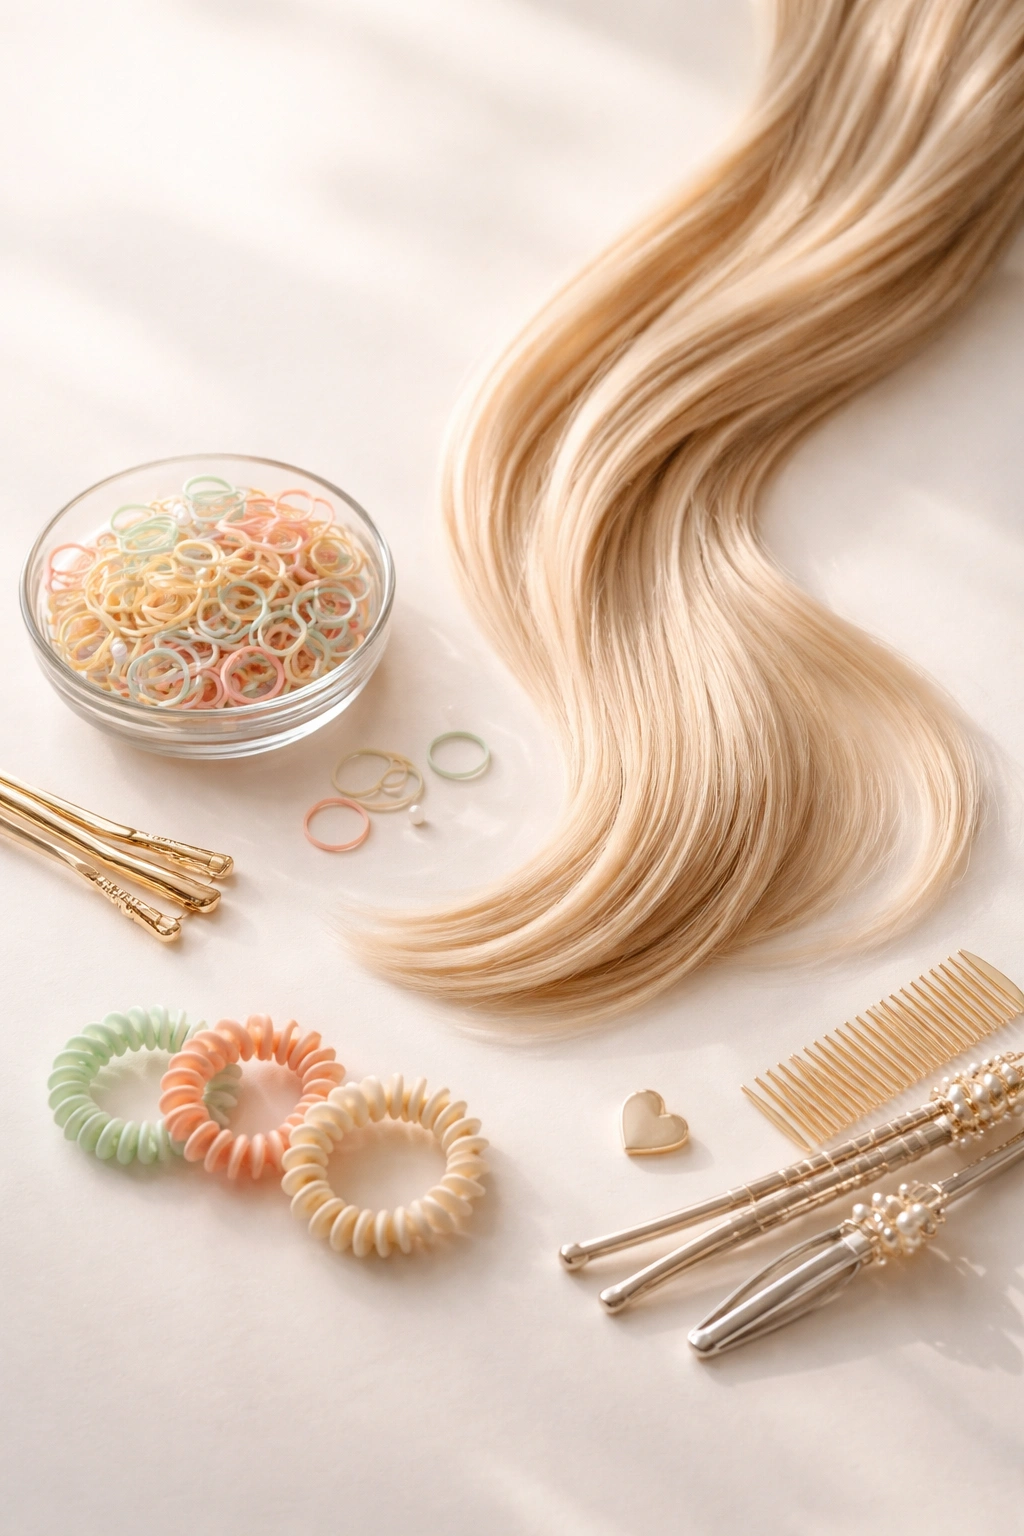
What makes these styles so practical is that they work for virtually every occasion and hair length. You can create them before work, during a weekend hangout, or right before heading out for an evening. Best of all, they require almost no styling products—just hair and rubber bands, maybe a brush or comb if your hair needs smoothing. Once you master a few of these looks, you’ll have endless options that take just minutes to create but look like you spent way longer on them than you actually did.
1. Classic High Ponytail
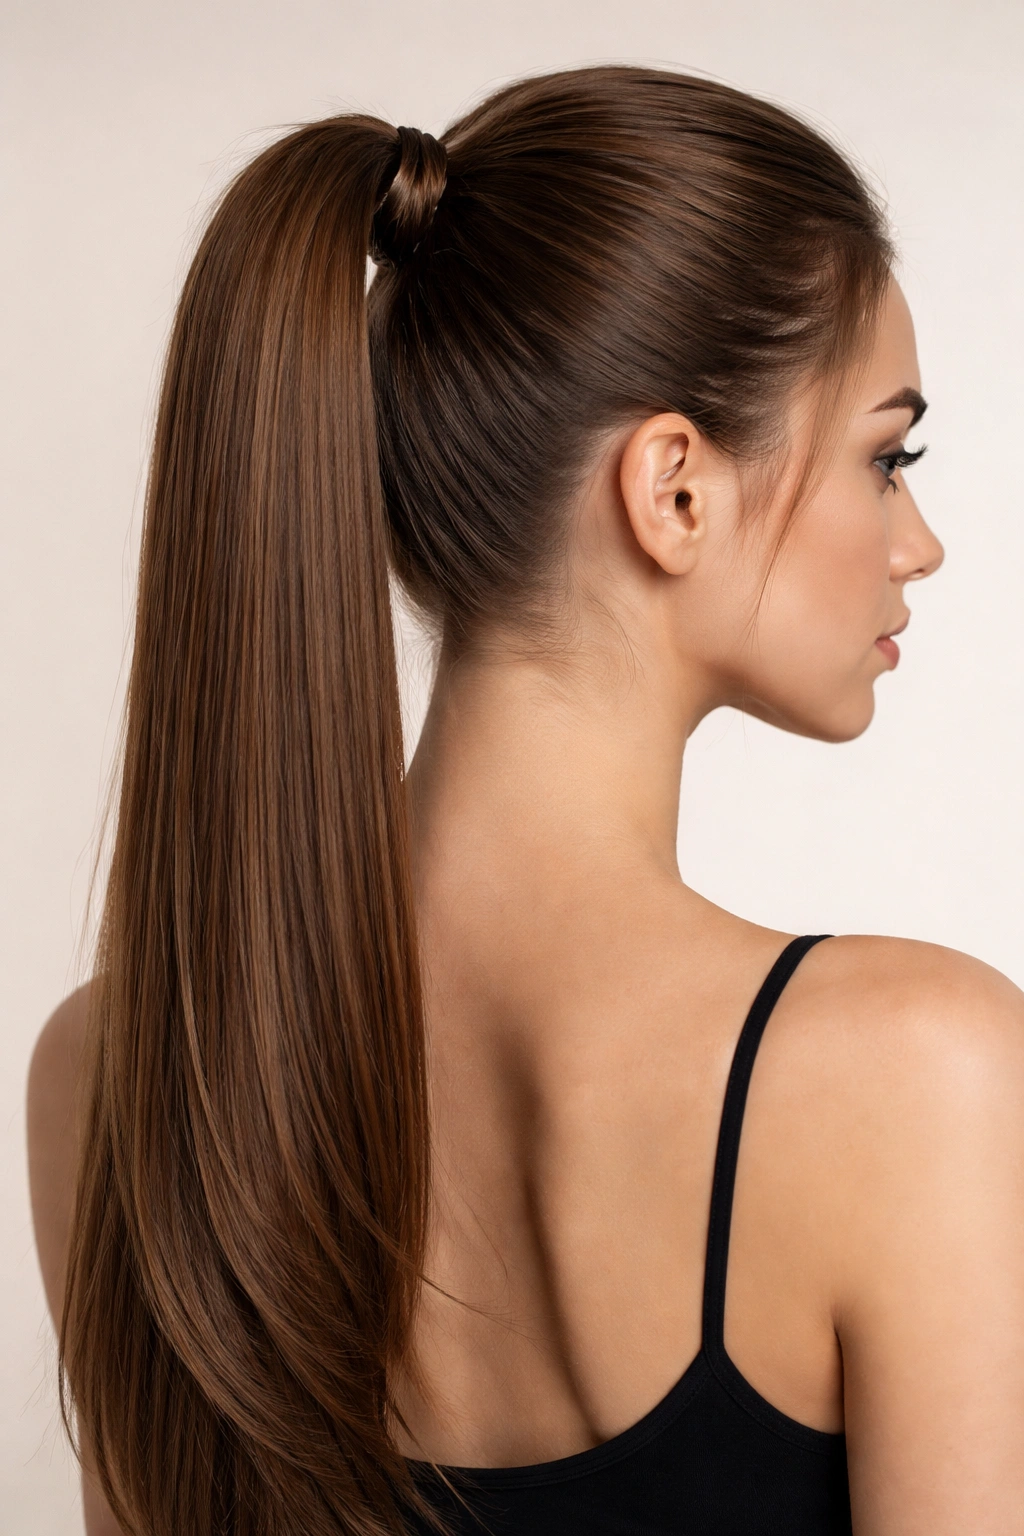
A high ponytail is the foundation of so many hairstyles, and it’s especially striking when you’re working with straight hair. The sleekness of your strands means you can pull the ponytail taut without worry, creating sharp, clean lines from your scalp all the way down to the tail. This look works for casual days when you want your hair off your face without sacrificing style, and it’s equally appropriate for more polished settings like work or formal events.
The magic of a high ponytail on straight hair is how the smoothness frames your face while the gathered length creates movement at the back. When your hair is perfectly straight, you don’t need texture or backcomb to make the ponytail look full—the density of your hair does that work for you naturally. The tail itself falls in a sleek column that can catch light beautifully, especially if your hair has any natural shine to it.
Why Straight Hair Makes This Style Pop
Straight hair creates an ultra-polished version of a high ponytail that’s nearly impossible to achieve with other textures. The rubber band sits smoothly against your strands without catching on waves or curls, and the tail hangs uniformly without the weight of your hair causing odd sections to fold or bend in unexpected places. You get a genuinely sharp, intentional look that reads as well-groomed and effortless at the same time.
How to Perfect Your High Ponytail
- Brush your hair thoroughly from roots to ends before gathering it, making sure there are no snarls that could create bumps in the final style
- Gather the hair into your hands at the crown—typically 3 to 4 inches above your natural hairline—and use a rubber band to secure it, wrapping the band twice for a firm hold that won’t slip
- Use a fine-tooth comb to smooth down any baby hairs or flyaways around your face and hairline, creating a polished frame
- For extra smoothness, apply a light smoothing serum or anti-frizz product to the gathered section before banding, which helps everything stay in place
- Gently pull the ponytail taut to ensure the rubber band grip is secure, testing it by tugging lightly—you want it firm enough that it won’t shift throughout the day
Pro tip: Wrap a thin section of hair around the base of your ponytail to hide the rubber band and instantly elevate the look. Simply take a 1-inch section from the bottom of the gathered ponytail, wrap it around the rubber band, and secure the end with a small bobby pin tucked underneath.
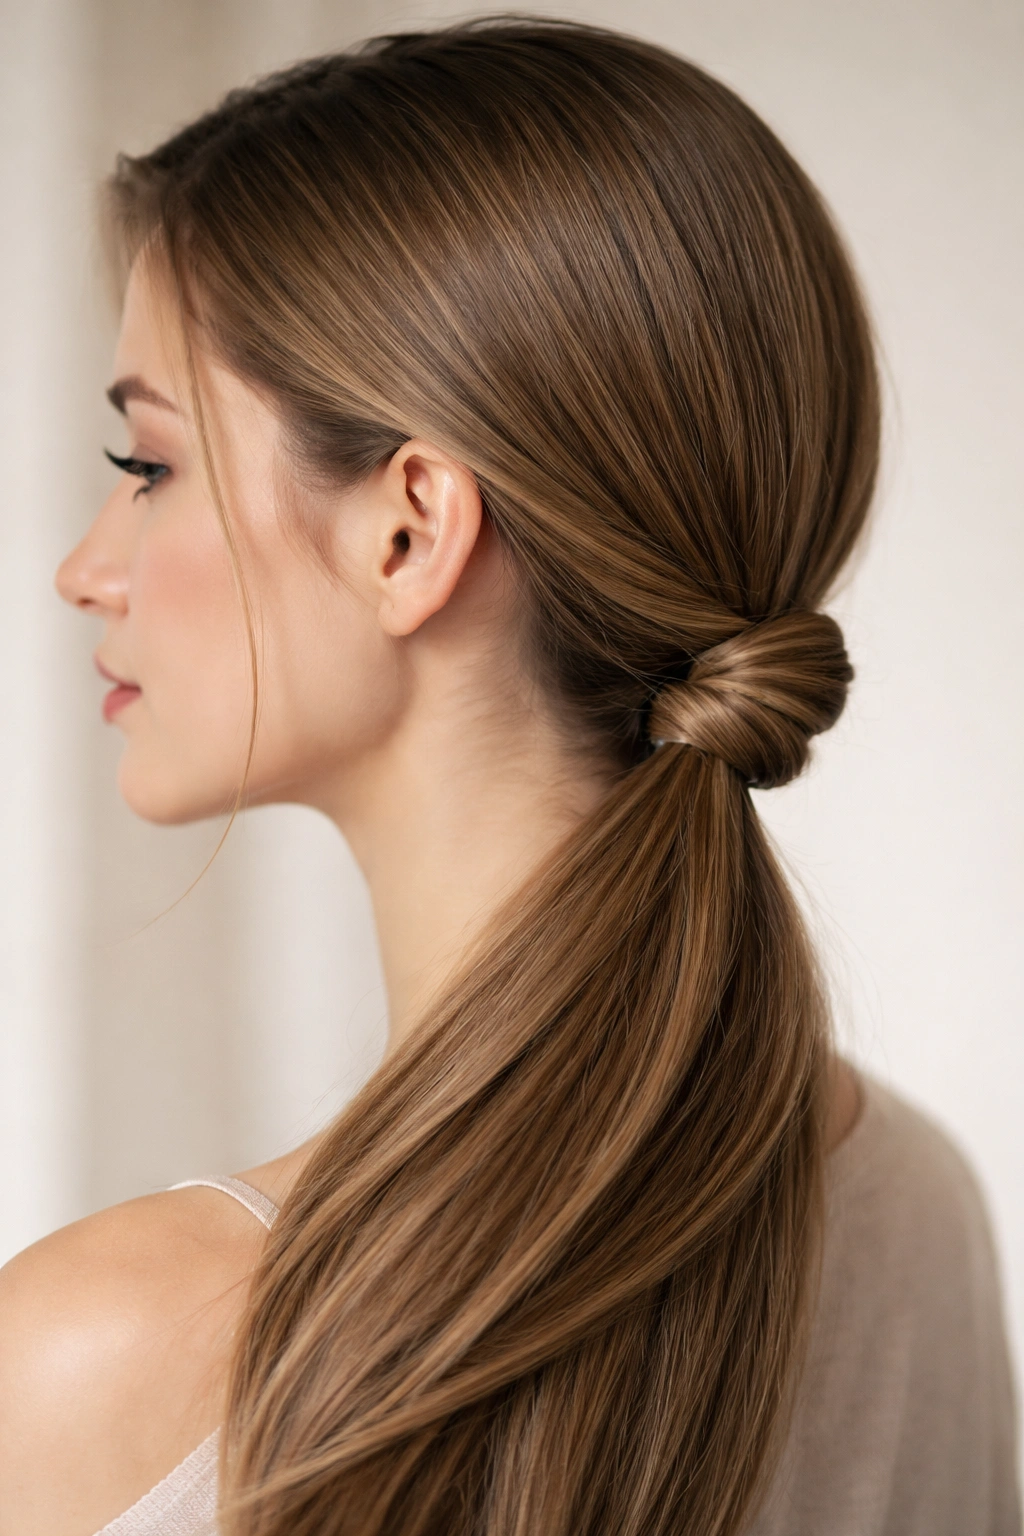
2. Sleek Low Bun
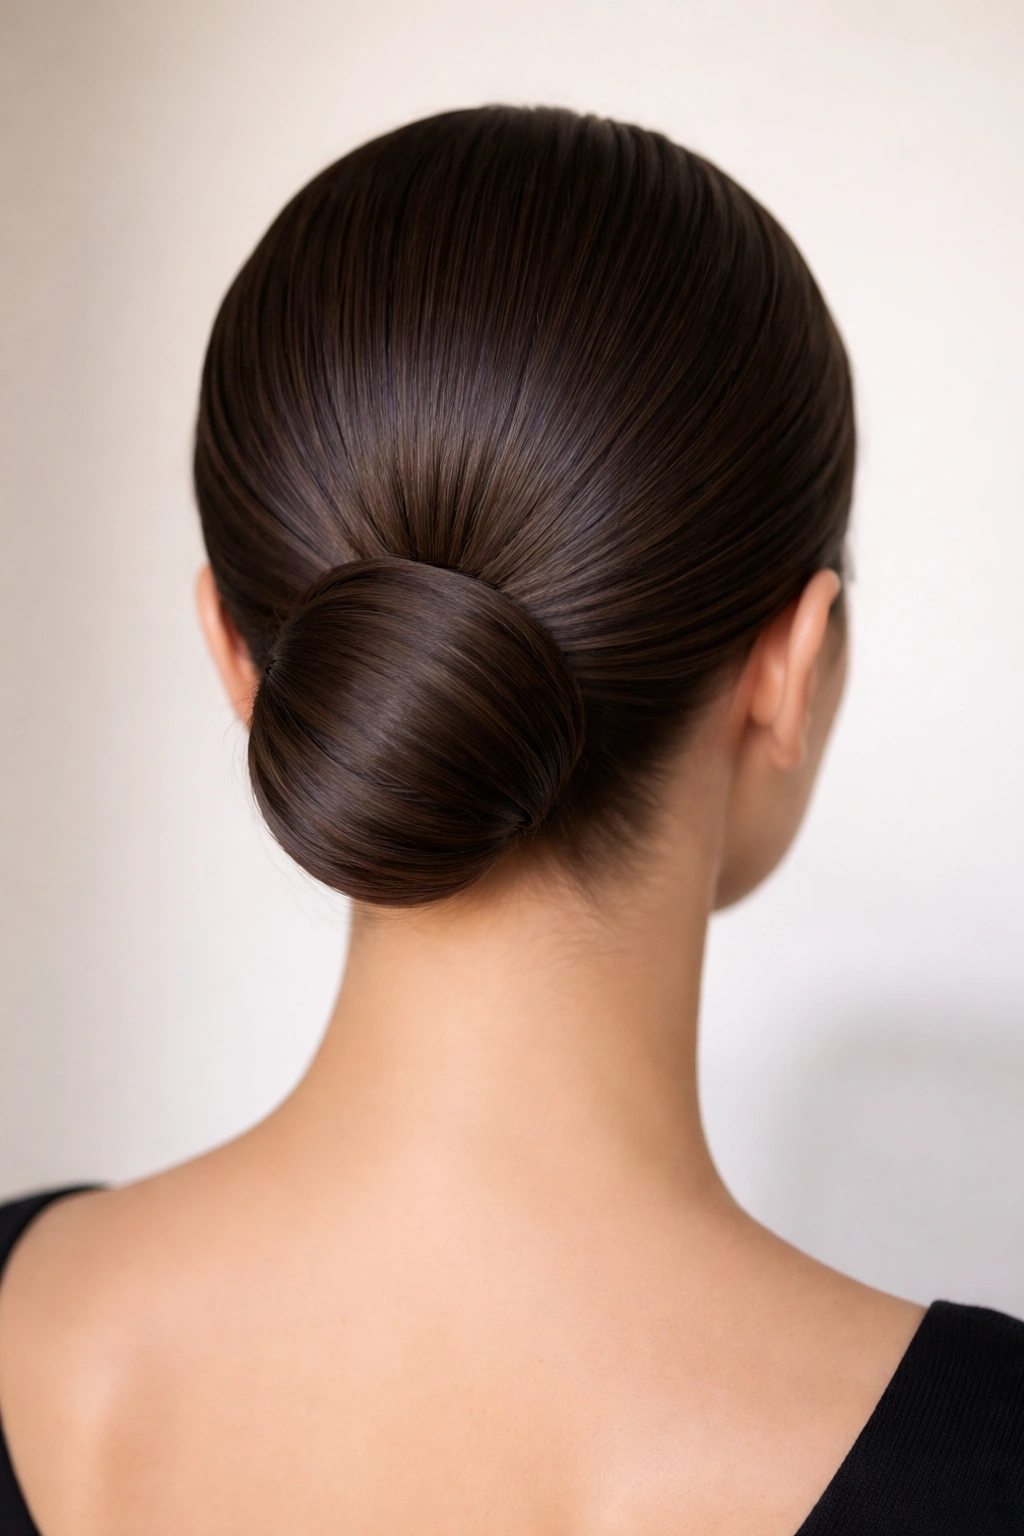
A low bun channels understated elegance, and when your hair is straight, you get a bun that sits smooth and symmetrical against the back of your head. This is the hairstyle that works whether you’re running errands or heading to an important meeting—it’s professional without being overly formal, and practical without sacrificing polish. The straight texture of your hair allows the bun to stay compact and neat all day without the flyaways and wisps that can make other hair types look less intentional.
The beauty of a low bun on straight hair is its geometric perfection. Your strands won’t have natural texture to create volume or fill in gaps, which means the bun sits tight and defined against your head. You get clean lines and a professional silhouette that screams “I have my life together,” even on days when styling is the last thing you felt like doing.
Creating a Bun That Actually Stays Put
The key to a low bun that doesn’t unravel or slip is positioning and securing it properly. Straight hair actually makes this easier because the strands won’t grab onto the rubber band the way textured hair does—instead, you’re working with a smooth surface that requires a firm, secure hold. The rubber band needs to grip tightly, and the twisted or rolled section that forms your bun needs to be wrapped securely around the base to prevent any part from coming loose.
Step-by-Step for a Long-Lasting Low Bun
- Brush your hair back smoothly into a low ponytail positioned at the nape of your neck, about 2 inches above where your neck meets your shoulders
- Secure the ponytail with a rubber band, wrapping it at least twice for a secure foundation
- Twist the ponytail around itself to form a coil, wrapping it around the rubber band base until all the hair is gathered into a knot shape
- Use a second rubber band to secure the twisted bun, wrapping it around the coil multiple times to lock everything in place
- Tuck any loose ends underneath the bun and secure with bobby pins, making sure no stray pieces are visible on the outside
- Smooth the surface with a fine-tooth comb and apply smoothing serum to catch any flyaways
Worth knowing: If your bun feels too loose or slips throughout the day, you can reinforce it with bobby pins placed horizontally through the bun, then hidden underneath the outer layer. Straight hair doesn’t grip bobby pins as much as textured hair does, so placement matters—slide them through the bun parallel to your scalp rather than perpendicular for better grip.
3. Half-Up Half-Down Style
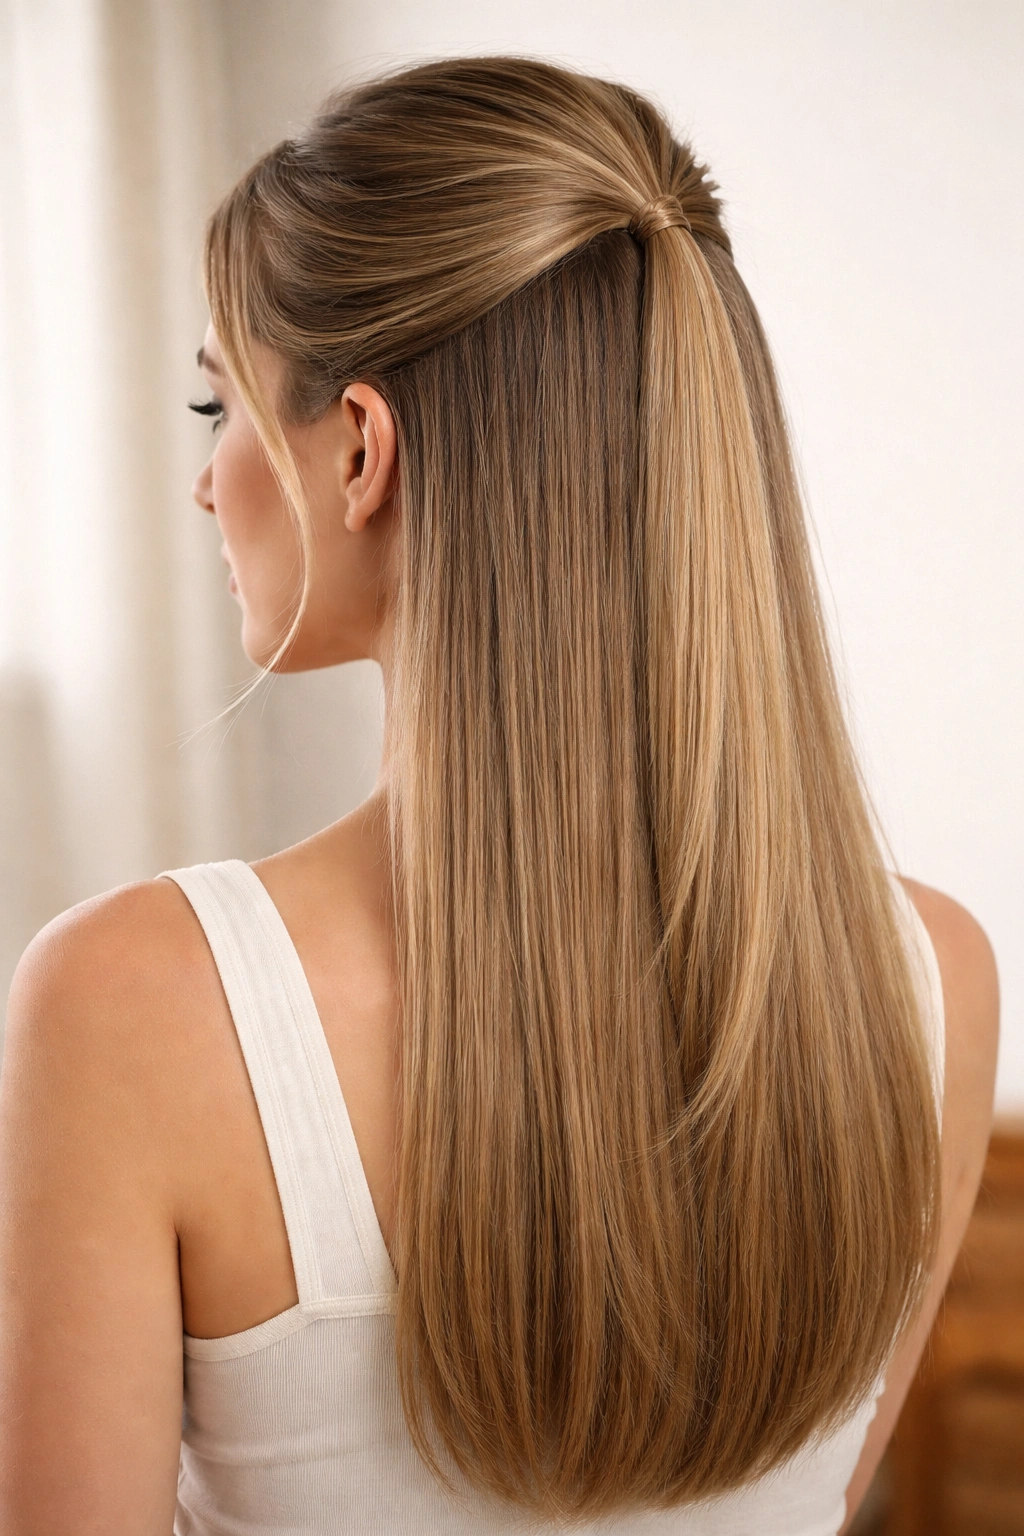
The half-up half-down look is arguably the most versatile rubber band hairstyle because it gives you the best of both worlds—some hair down for length and movement, and some gathered up for a polished, intentional appearance. On straight hair, this style is particularly striking because the down section remains perfectly smooth and straight, creating a strong contrast with the gathered section above. It’s formal enough for semi-dressy occasions but casual enough for everyday wear, and it works on hair of any length.
What makes this style work so beautifully on straight hair is that you don’t need any texture or waves in the down section to make it look good. The smoothness is the point—it emphasizes your hair’s natural quality and creates clean, defined lines between the gathered and loose sections. When you look at the back, you see two distinct visual areas, which adds interest and intentionality to what could otherwise feel like you’re just wearing your hair down.
Why This Works for Straight Hair
Straight hair makes the half-up half-down look read as genuinely styled rather than accidental. There’s no question about whether you meant to put that portion up or if it just ended up that way—the clean division makes your intention crystal clear. The gathered section sits smoothly against your scalp, and the loose section hangs without any texture to interrupt its flow. It’s a look that shows you know how to work with your hair type’s natural strengths.
Perfecting the Half-Up Half-Down
- Brush all your hair straight back and smooth, starting from the crown and working toward the ends
- Determine where you want the division to occur—typically at ear level or slightly higher—and separate the upper section
- Take the upper section and secure it with a rubber band at the back of your head, roughly where the crown meets the back
- Leave the lower section completely down and smooth
- For extra definition, you can gently pull a few small sections of the down portion away from the face to frame your cheeks—just brush them lightly to separate them from the main mass
- If desired, loosely twist the half-up section before securing it for added visual interest and dimension
Pro tip: Try securing the half-up section slightly off-center or to one side for a more modern, editorial look instead of the centered, symmetrical version. This small shift makes the style feel more intentional and personality-driven.
4. Double Buns
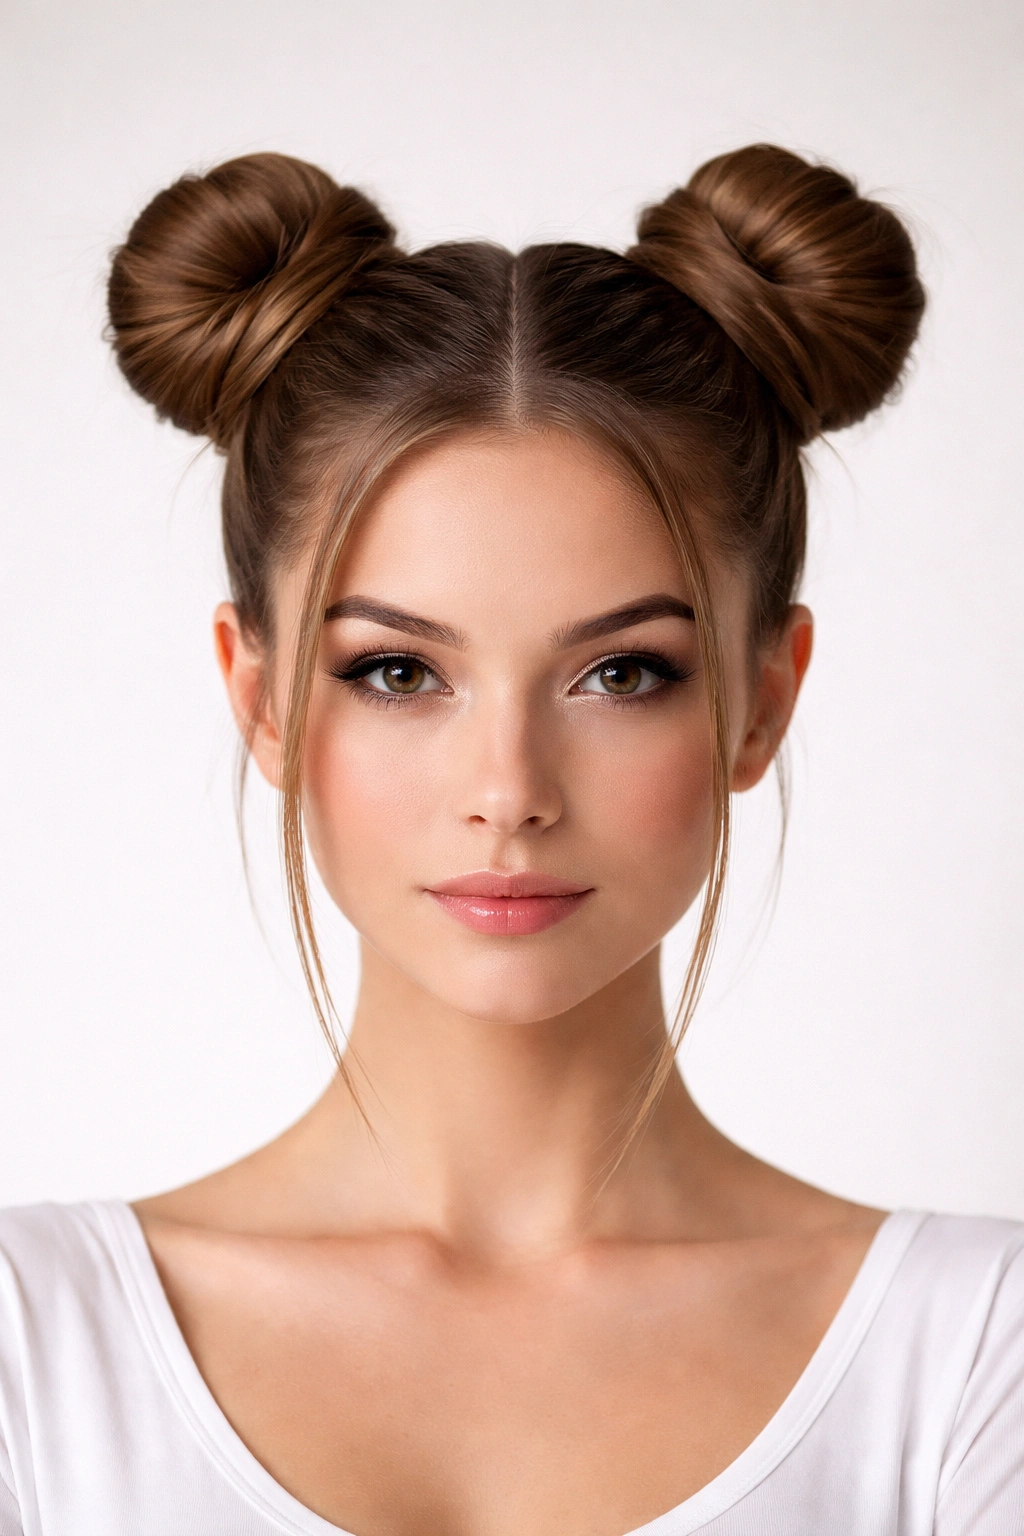
Double buns are the playful sibling of the low bun, and they’re especially fun on straight hair because the geometry is so clean and defined. This style works best if you have medium to long hair, and it’s perfect when you want something that looks intentionally cute and fashion-forward rather than trying to achieve a polished, corporate look. The two symmetrical knots on either side of your head create a balanced, stylized appearance that’s become increasingly popular in contemporary fashion.
The appeal of double buns on straight hair is the visual clarity and symmetry they create. Each bun is a distinct, defined shape that sits smoothly against your head without any texture to soften or blur the lines. When you gather straight hair into a tight, compact bun, you get that satisfying, pristine aesthetic that makes the style feel purposeful and well-executed rather than casual or undone.
Creating Symmetrical, Secure Double Buns
The trick to making double buns that look professional rather than haphazard is securing each one firmly and ensuring they’re placed at equal heights on either side of your head. Straight hair is actually easier to work with here because the strands won’t slip or shift as much as textured hair—you’re working with a smooth surface that holds its shape once secured. The key is taking time to position each bun at exactly the right spot so they’re visually balanced.
The Double Bun Process
- Section your hair down the center back, from your crown to the nape of your neck, using a comb or your fingers to create a clean vertical division
- Create a high ponytail on one side by gathering the hair from that side section, leaving some length out if you want face-framing pieces
- Twist that ponytail into a bun and secure it with a rubber band, tucking the end underneath and pinning if needed
- Repeat on the opposite side, creating a mirror-image bun at the same height and distance from center
- Smooth both buns with your hands or a fine-tooth comb and use bobby pins to secure any loose sections
- Check that both buns are even in height and distance from the center by looking in the mirror and adjusting if necessary
Insider note: If you want the double buns to look extra intentional and polished, wrap a thin section of hair around each rubber band to hide it, just like you would with a single ponytail. This small detail elevates the look significantly and makes it feel less casual.
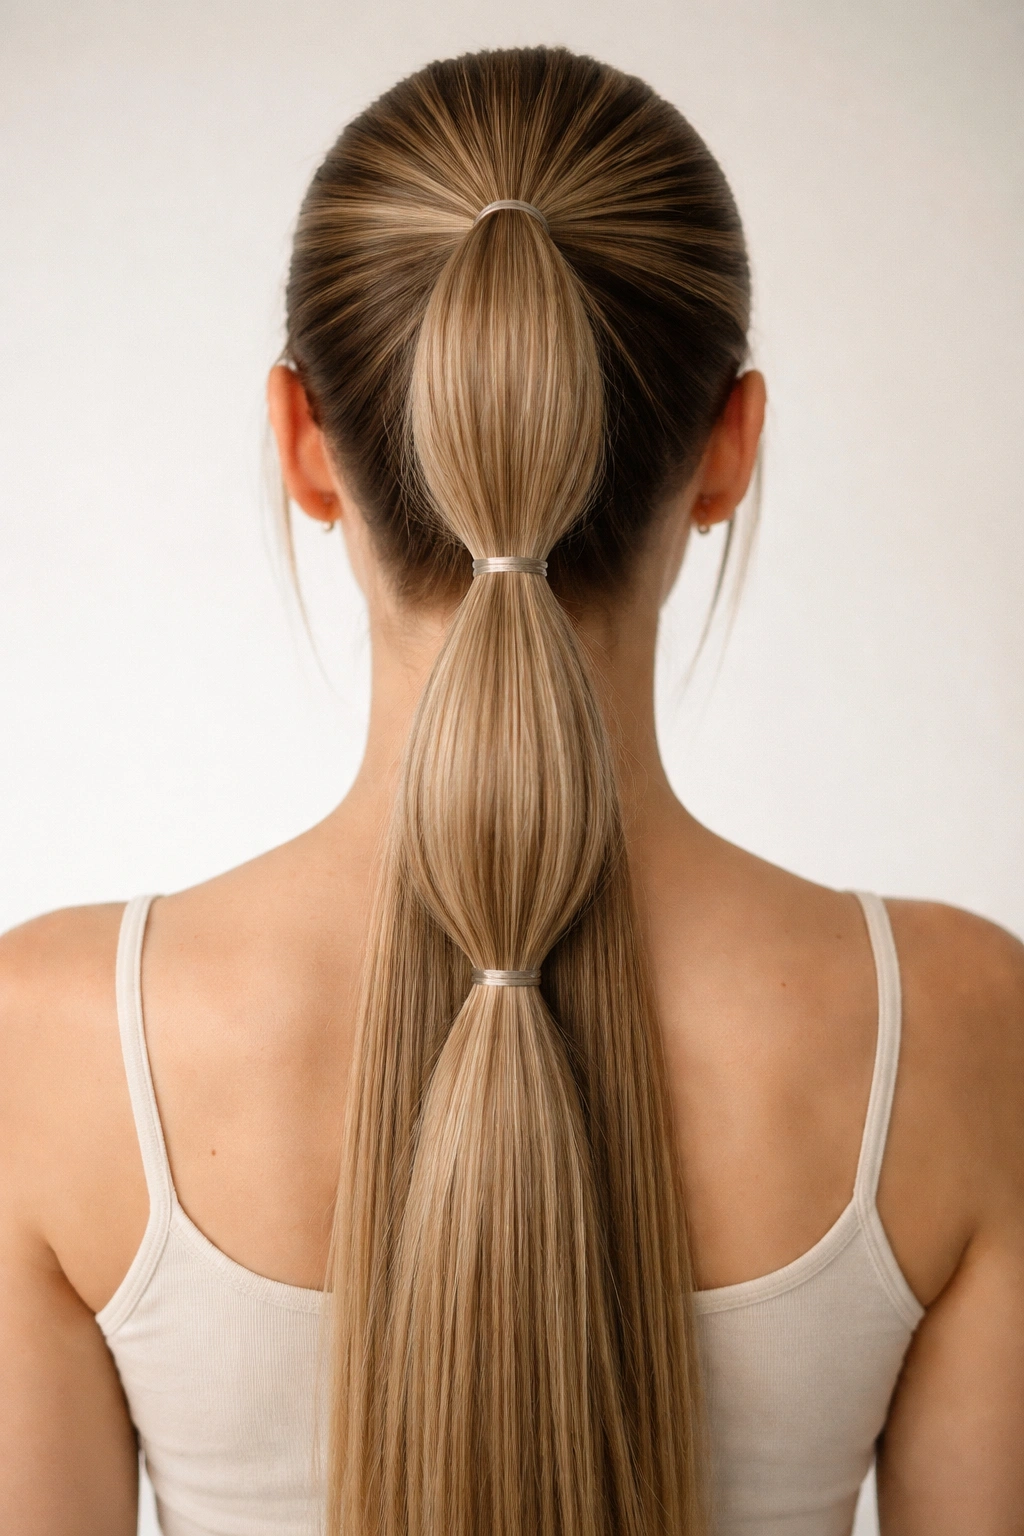
5. Bubble Ponytail
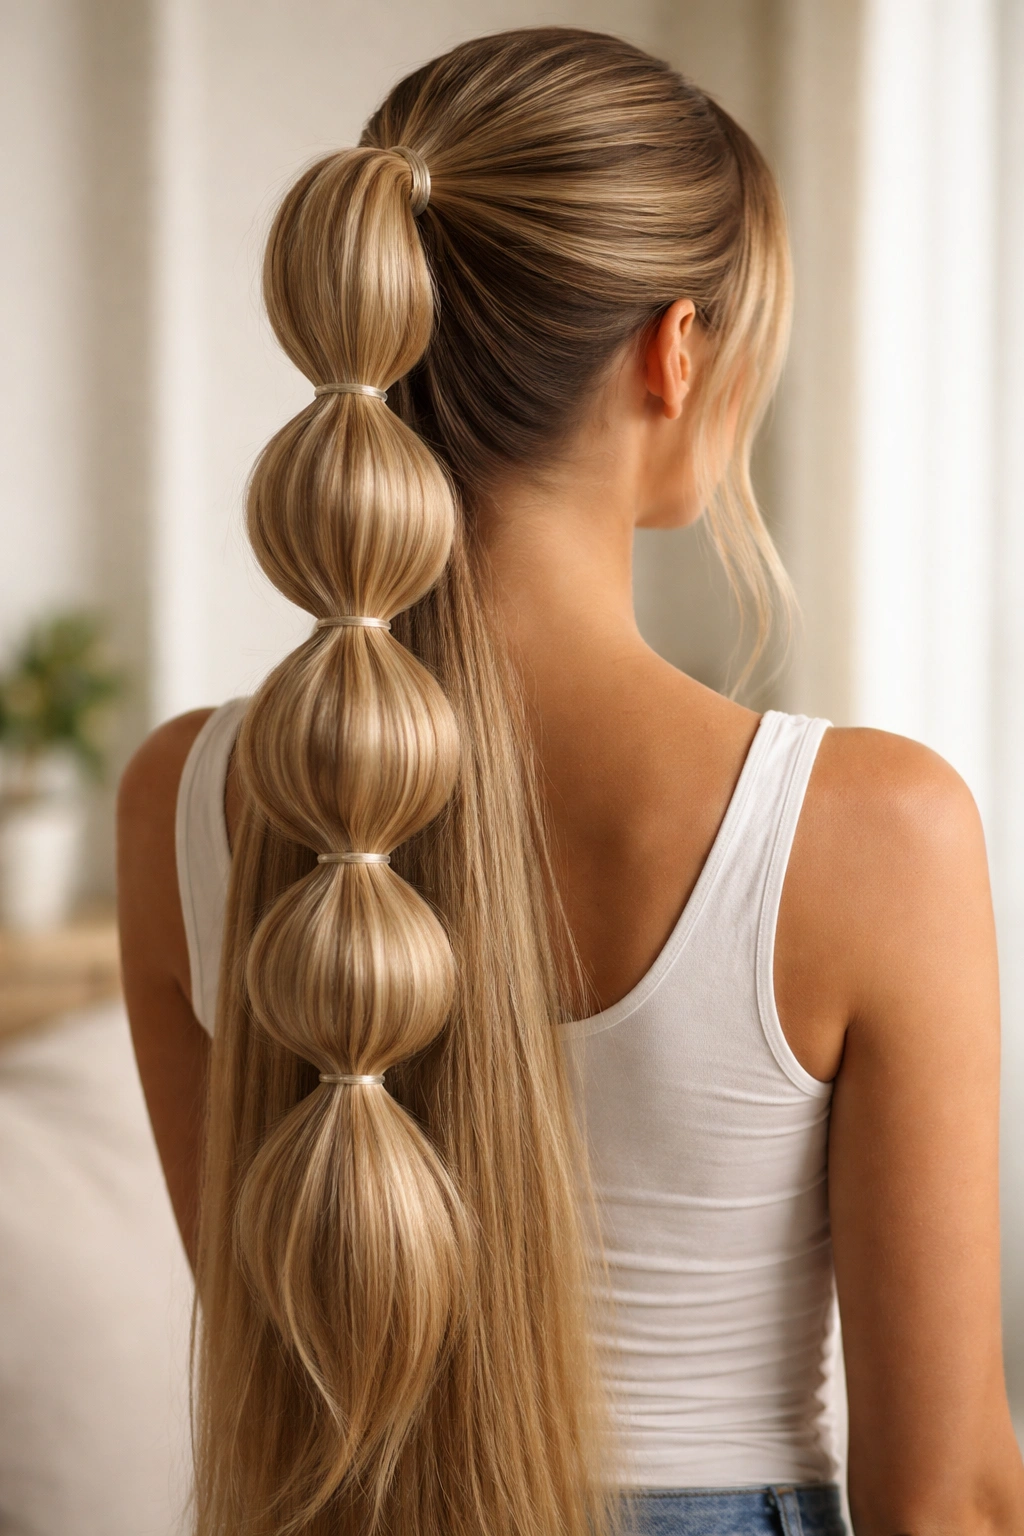
A bubble ponytail is a creative way to add visual interest and dimension to a straightforward style by creating stacked sections that look like bubbles stacked on top of each other. This style works best on longer hair and is perfect when you want something that’s clearly styled and thoughtful but still relatively simple to create. The bubbles are formed by gathering sections of the ponytail with rubber bands spaced evenly down the length, which creates separated, puffy segments that catch light and movement beautifully.
What makes a bubble ponytail particularly striking on straight hair is that each bubble sits as a distinct, defined unit without the overlapping waves or texture that can make the style harder to read on other hair types. The smooth strands make the bubble structure obvious and clean, which is the whole point of the style. It’s a look that demands attention and works great for anyone who wants their hairstyle to be a statement rather than simply functional.
Why Straight Hair Shows Off This Style
Bubble ponytails rely on clear visual separation between each bubble section, which is much easier to achieve on smooth, straight hair. The bumps created by rubber bands sit precisely where you place them, and the sections between don’t have texture to blur the lines. You get a sharp, intentional look that reads as intentionally styled rather than randomly banded. The smooth shine of straight hair also means light bounces across each bubble evenly, which adds to the visual impact.
Building Your Bubble Ponytail
- Create a high or mid-height ponytail and secure it with a rubber band, making sure it’s tight and secure at the base
- Place a second rubber band about 2 to 3 inches down from the first, creating the first “bubble” of separated hair between the two bands
- Gently pull the section between the two rubber bands outward and away from your head to puff it out, creating visible dimension
- Place a third rubber band another 2 to 3 inches down and repeat the puffing motion
- Continue this pattern down the entire length of your ponytail, spacing the rubber bands evenly
- Adjust all the bubbles so they’re roughly the same size and puffed out equally, creating a balanced, uniform look
Pro tip: If your bubbles look flat or lifeless after you’ve created them, gently backcomb the section between each rubber band with a fine-tooth comb. This adds texture and volume to the bubble, making it puff out more dramatically. Straight hair responds beautifully to light backcombing and will hold the volume without it looking messy.
6. Slicked-Back Wrap Style

A slicked-back wrap style is sleek, modern, and absolutely works on straight hair because the smooth texture allows you to pull every hair back tight without creating bumps or flyaways. This look uses a rubber band to gather all your hair back, then wraps another section around the base to hide the band and create a polished finish. The result is a completely hair-off-face style that’s perfect for workouts, work days, or any time you want to look intentional and put-together without any softness around the frame.
This style is all about embracing the smoothness of straight hair and using it as your primary styling asset. There’s no curling or texturizing involved—just brushing, gathering, and securing. The sleekness is the whole point, and straight hair makes it easier to achieve that ultra-polished look that makes you feel confident and ready for whatever the day brings.
Creating the Perfect Slicked-Back Wrap
The key to a slicked-back wrap that looks polished rather than severe is using the right products and securing the rubber band tightly so nothing comes loose. Straight hair makes this easier because it naturally stays smooth once you’ve brushed it, so you don’t need heavy products or multiple passes with a brush. A light smoothing serum is usually sufficient to create that polished, almost wet-looking finish that makes the style feel intentional and editorial.
Step-by-Step for a Slicked-Back Wrap
- Brush your hair back from your face smoothly, working from your hairline all the way to the nape of your neck
- Apply a small amount of smoothing serum or light gel to your hairline and brush to create that polished, controlled finish
- Gather all your hair at the back of your head into a low or mid-height ponytail, depending on your preference
- Secure the ponytail with a rubber band, pulling it tight and wrapping the band multiple times for a very secure hold
- Take a thin, 1-inch section from the bottom of the gathered ponytail and wrap it around the rubber band, covering it completely
- Secure the wrapped section underneath with a bobby pin, tucking it in so it’s invisible from the outside
- Use a fine-tooth comb to smooth any flyaways and add another light application of smoothing product if needed
Worth knowing: If you find that your slicked-back style feels too severe or uncomfortable pulling at your scalp, you don’t have to pull it as tight. A slightly softer grip still looks polished and intentional on straight hair—the key is that it’s clearly pulled back and controlled, not that it has to be painfully tight.
7. Side Ponytail
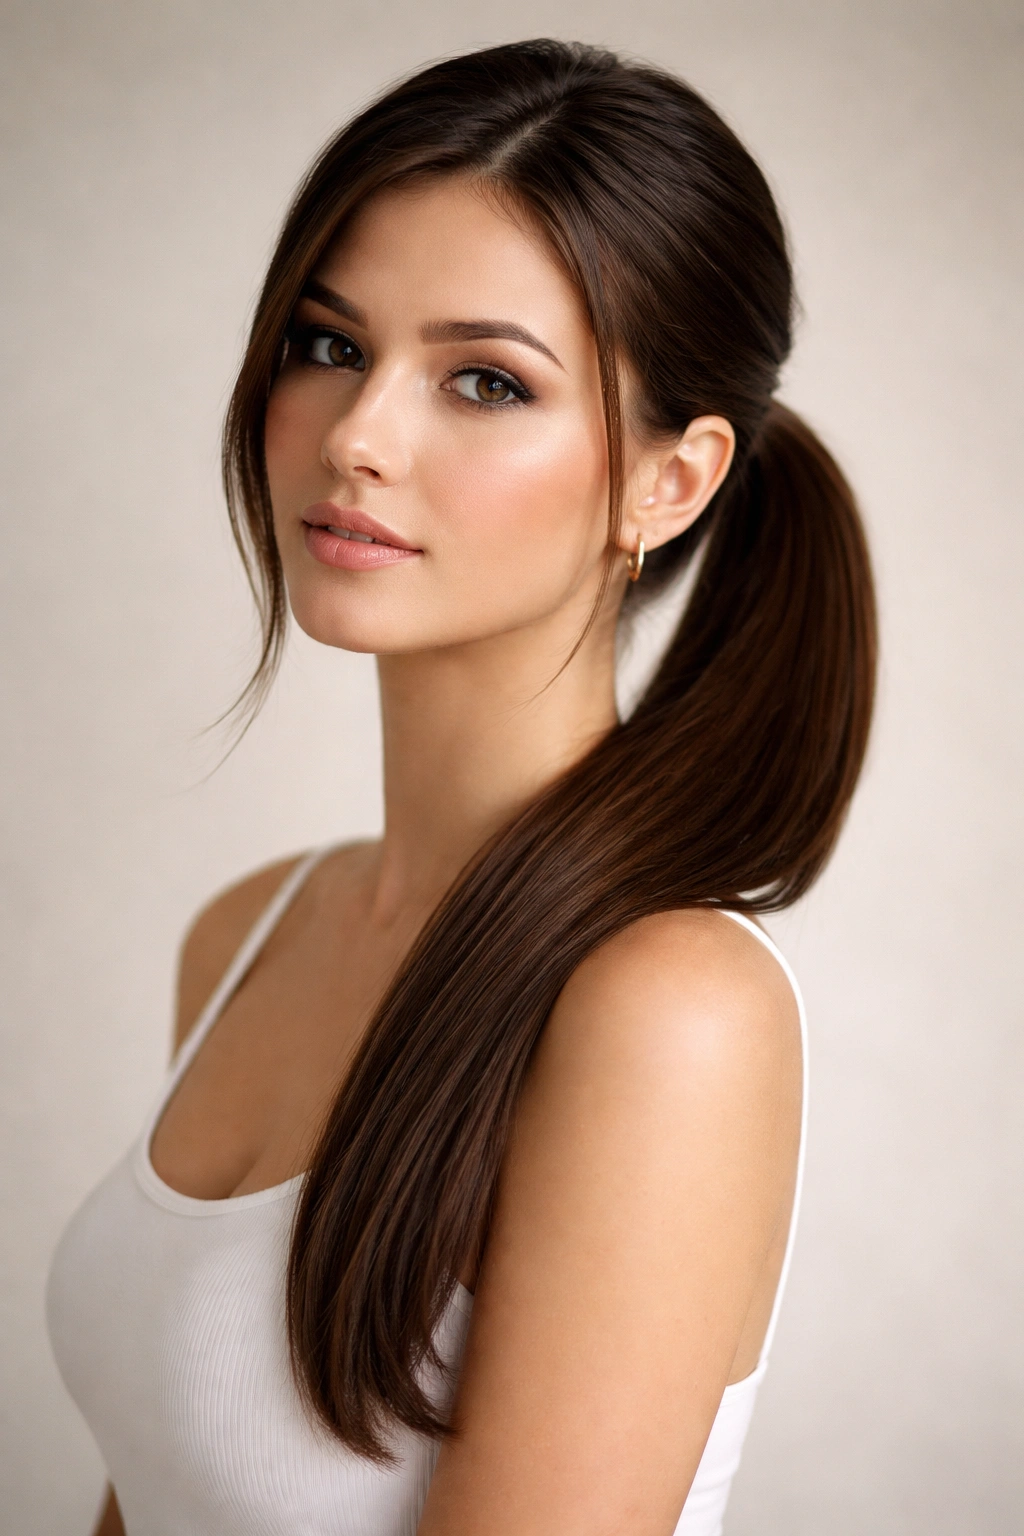
A side ponytail moves the center of attention away from center and creates an asymmetrical, romantic look that feels less corporate and more personality-driven than a center ponytail. This style works beautifully on straight hair because you get a clean, sleek tail that drapes over one shoulder, and the asymmetry is clearly intentional. It’s versatile enough for casual days, polished enough for more formal occasions, and it genuinely flatters most face shapes by creating visual balance through asymmetry.
The appeal of a side ponytail on straight hair is that the smooth texture allows the full length of the tail to drape beautifully over your shoulder without curling or twisting in unexpected ways. You get a clean, flowing line that moves with you, and the side positioning creates an interesting silhouette that’s more interesting than the standard center arrangement. It’s a small shift that creates a noticeably different look and feel.
Why Straight Hair Makes This Style Effortless
Side ponytails rely on the tail draping smoothly over the shoulder and down the front or back, which straight hair does naturally without any extra effort. There’s no texture to interrupt the line or create waves that might make the drape look unintentional. The smoothness of your strands actually emphasizes the side positioning and makes the asymmetrical arrangement feel like a deliberate style choice rather than a casual accident.
Creating a Picture-Perfect Side Ponytail
- Brush your hair thoroughly and smooth it back with your hands
- Gather the hair toward the side of your head where you want the ponytail to sit—this is typically about 1 to 2 inches to one side of center, at approximately ear level or slightly higher
- Secure the gathered section with a rubber band, wrapping it two to three times for a secure hold
- Let the tail drape over the front of your shoulder or toward your back, depending on your preference
- Use a fine-tooth comb to smooth the gathered section and any flyaways
- For a softer look, you can gently pull a few pieces loose from the side of your face to frame your features
Pro tip: A side ponytail looks extra polished if you twist the ponytail gently as you’re gathering it, creating a subtle spiral in the base that adds visual interest and dimension at the back of your head. This doesn’t require any additional products or time, just a simple twist as you’re bringing the hair together.
8. Triple Ponytails
Triple ponytails are three separate ponytails created by sectioning your hair and gathering each section with its own rubber band, usually arranged vertically down the back of your head. This playful style is perfect for anyone who wants something that’s clearly intentional and fun without being overly complicated to create. On straight hair, triple ponytails work particularly well because each distinct section remains smooth and defined, creating a visually interesting pattern that catches attention and demonstrates creativity.
This style is great for people with longer hair who want something that feels special and stands out, but it also works on shorter lengths if you have enough hair to create three separate sections with decent volume. The straight texture of your hair means each ponytail sits firmly in place without slipping, and the clean lines between sections make the style look polished and well-executed rather than random or messy.
Creating Clean, Defined Triple Ponytails
The trick to triple ponytails that look intentional is spacing them evenly down the back of your head and securing each one tightly so nothing shifts or loosens throughout the day. Straight hair is ideal for this because the smooth strands grip the rubber bands securely and stay exactly where you place them. You want each section to be roughly the same size and placed at equal distances apart so they look visually balanced and deliberate.
Building Your Triple Ponytail System
- Brush your hair straight back and divide it into three equal horizontal sections from crown to nape
- Create the first ponytail with the top section, gathering the hair at the upper-back of your head and securing it with a rubber band
- Create the second ponytail with the middle section, positioning it a few inches below the first, and secure with another rubber band
- Create the third ponytail with the bottom section, positioning it a few inches below the second, and secure with a final rubber band
- Ensure all three ponytails are positioned on the center line down your back, creating a vertical arrangement that’s visually balanced
- Gently tug each rubber band to make sure the ponytails are secure and won’t slip throughout the day
- For extra polish, wrap a thin section of hair around each rubber band to hide it, creating three finished, polished ponytails
Insider note: If you want the triple ponytails to flow into each other, you can twist or braid each individual tail, or even weave them together partway down. The distinct sections at the base create interest and structure, while the tails themselves can be whatever style best suits your mood and the occasion.
9. Wrapped Crown Braid
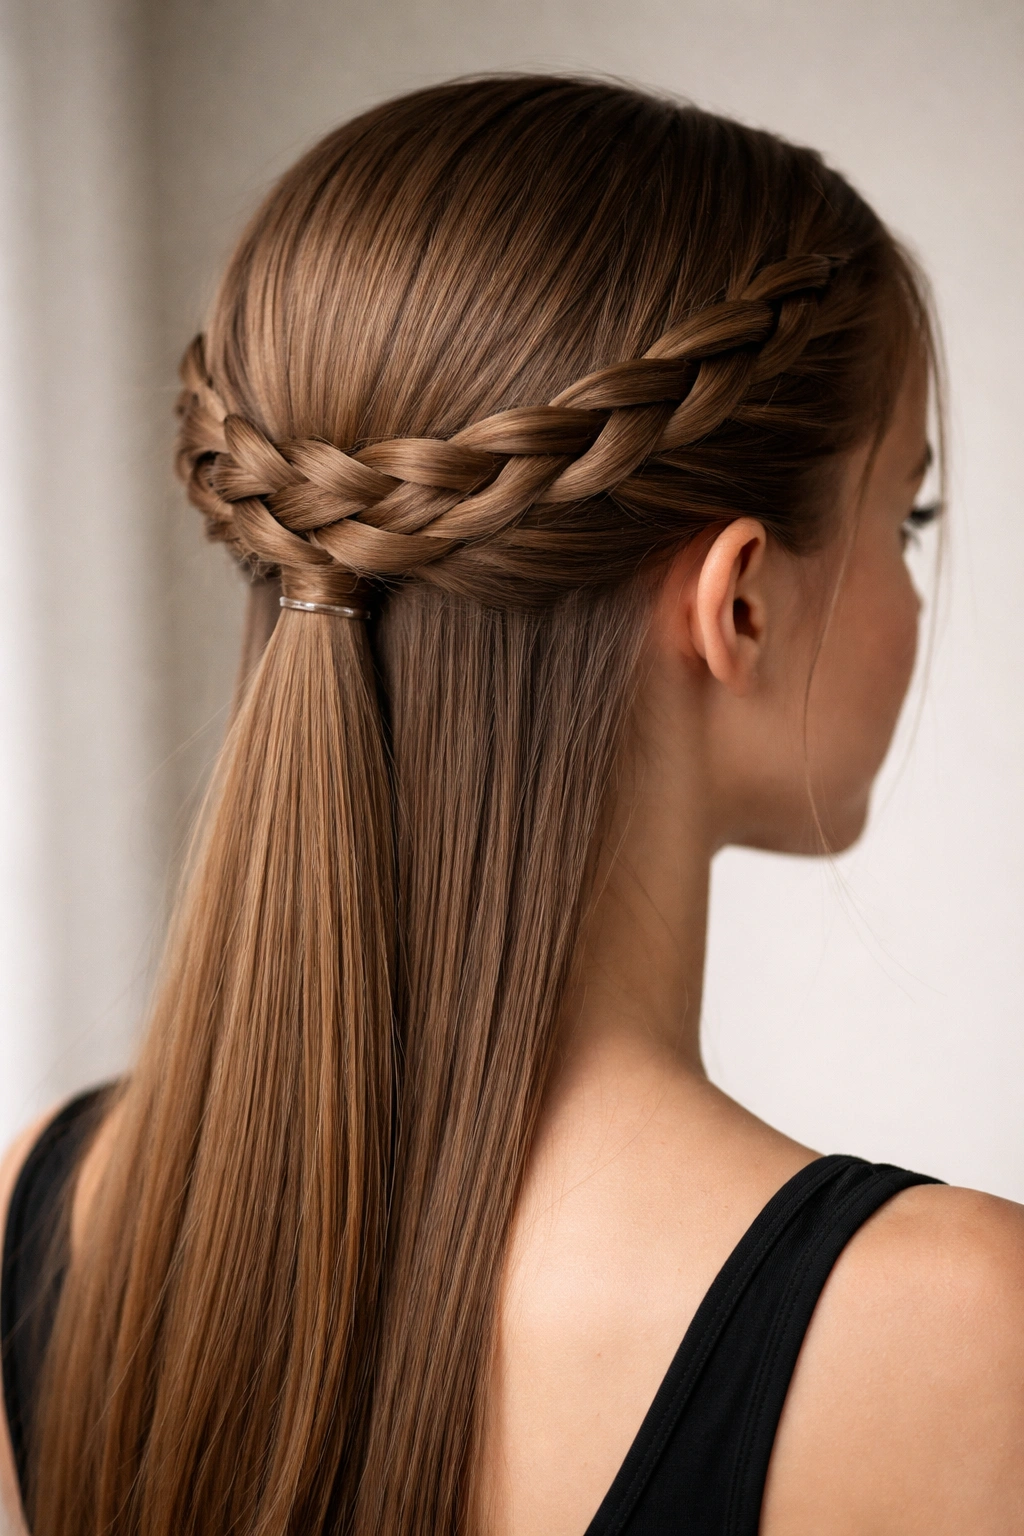
A wrapped crown braid combines the smoothness of a braid with the clean lines of a rubber band–secured style by creating a braid that wraps around the back of your head and is secured with a rubber band at the base. This style is more intricate than some of the other rubber band styles, but it’s still achievable if you can braid, and it creates a really elegant, put-together look that works for both casual and formal occasions. Straight hair is perfect for this because the braid strands remain crisp and defined, showing off the braid pattern clearly without texture to soften or blur the lines.
The appeal of this style is that it uses a rubber band as the finishing element rather than the foundation, which gives you more flexibility in how the style looks. The braid provides the visual interest and movement, while the rubber band secures everything in a neat, finished way. It’s a look that reads as thoughtfully styled and creative without being overly complicated or time-consuming to create.
Why This Braid Works on Straight Hair
Braids on straight hair show off their texture and pattern more clearly than they do on wavy or curly hair because each strand remains visible and defined throughout the braid. The smooth texture means the braid sits flat against your head and doesn’t have flyaways or loose pieces interfering with the pattern. You get a crisp, clean braid that’s beautiful to look at and feels structured and intentional, which is exactly what you want for this style.
Creating Your Wrapped Crown Braid
- Brush your hair smooth and position yourself so you can see the back of your head in a mirror or use a second mirror
- Start at one side of your head near your temple and begin a three-strand braid, taking hair from that side of your head
- As you braid, gradually incorporate hair from the back of your head, moving the braid across the back like you’re braiding a crown
- Continue braiding until you reach the opposite side of your head, ending with a three-strand braid that wraps around the back
- Secure the end of the braid with a rubber band, making sure it’s tight and the braid won’t unravel
- Gently tug the braid strands to loosen them slightly and create more dimension and visual fullness
- Tuck the secured end underneath so the rubber band is hidden, and pin it in place if needed
Pro tip: If you’re nervous about braiding, you can create a simpler version by twisting a section of hair instead of braiding it. A twisted crown works the same visual magic as a braid, holds just as well with a rubber band, and is easier to execute if you haven’t practiced braiding extensively.
10. Twisted Side Knot
A twisted side knot combines the romantic asymmetry of a side style with the clean finish of a rubber band–secured knot, creating a style that’s fun, flirty, and surprisingly sophisticated. This style is perfect for when you want something that looks more styled than a simple ponytail but isn’t as formal as an updo. On straight hair, the twisted section creates a nice visual element that catches light and shows off the smoothness of your strands, while the secured knot at the end keeps everything neat and intentional.
This style works on almost any hair length, and it’s one of those looks that works equally well for a weekend hangout or a date night because it’s versatile enough to be either casual or dressy depending on how you style the surrounding hair. The straight texture of your hair means the twist sits smoothly without any flyaways or wisps undermining the look, and the secured knot is visible and intentional rather than hidden or blended in.
Making a Twisted Knot That Actually Stays
The key to a twisted side knot that doesn’t unravel is twisting tightly enough that the twist grips itself, then securing the end firmly with a rubber band. Straight hair makes this easier because the smooth strands grip each other well once twisted, and they won’t slip out of the twist the way textured hair sometimes does. You want a twist that’s firm and defined, not loose and wispy, because that’s what makes the style feel polished and intentional.
Building Your Twisted Side Knot
- Brush your hair smooth and gather a section from the side of your head—you can take hair from one side from temple to behind your ear, or create a larger section if you want a more substantial knot
- Twist that section tightly, rotating it away from your face and toward the back of your head
- Bring the twisted section to the opposite side of your head and wrap it around to create a knot shape, tucking the end underneath
- Secure the knot with a rubber band, wrapping it tightly around the looped section so everything stays in place
- Tuck any loose ends underneath the knot and secure with bobby pins
- Gently tug the knot to loosen it slightly and create dimension, or leave it tight for a more structured look
Worth knowing: You can wear a twisted side knot with hair down and loose for a romantic, asymmetrical look, or with the back section gathered up into a ponytail for a more polished appearance. The twist itself adds interest while the gathered section creates a finished, intentional style either way.
Key Takeaways
Rubber band hairstyles are your secret weapon for creating polished, intentional looks in minutes, and straight hair’s smooth texture makes every style look refined and well-executed. The ten styles covered here—from the classic high ponytail to the more playful twisted side knot—demonstrate just how versatile rubber bands can be when you understand your hair’s natural strengths and know how to work with them. Each of these styles requires minimal products and expertise, which means they’re genuinely accessible regardless of your skill level or styling experience.
The real power of rubber band hairstyles on straight hair is that they’re forgiving and reliable. Your strands won’t slip out of the rubber band unexpectedly, flyaways won’t undermine the finished look, and the clean lines you create actually stay put throughout your day. Whether you’re looking for something effortless or something that demonstrates more creativity and intention, these styles give you options that work for casual days, professional settings, and special occasions alike.
Start with one or two styles that feel most appealing and practice them until they become automatic, then gradually expand your collection as you gain confidence. Once you’ve mastered the basics, you can mix and match elements—adding bubbles to a ponytail, twisting instead of braiding, or creating your own variations on these foundations. The key is understanding that straight hair is an asset to be celebrated, and rubber bands are the simplest, most effective tool for showing off exactly what makes your hair special.