Straight hair has an inherent elegance that makes it uniquely suited to formal occasions. While many people assume that formal hairstyles require elaborate curls or volume, the truth is that sleek, polished straight styles often convey more sophistication and refined grace than anything else. The key lies in working with your hair’s natural texture rather than against it, using technique, product, and strategic styling to transform straightness into a weapon of understated elegance.
What makes straight hair so powerful for formal settings is its ability to project control, confidence, and intentionality. When you choose a formal hairstyle for straight hair, you’re making a deliberate statement. There’s no hiding behind texture or relying on curl pattern to create visual interest—every line, every placement, every detail matters. This is actually liberating, because it means you can create looks that are polished, modern, and absolutely memorable without fighting against your hair type.
The challenge most people face isn’t that straight hair can’t look formal—it’s knowing which styles actually work, how to execute them properly, and how to make them last through an entire event without slipping, flattening, or losing their intended shape. That’s where this guide comes in. We’re breaking down ten formal hairstyles that celebrate straight hair’s natural strengths, complete with the specific techniques and products that make each one work flawlessly.
1. Sleek Low Bun
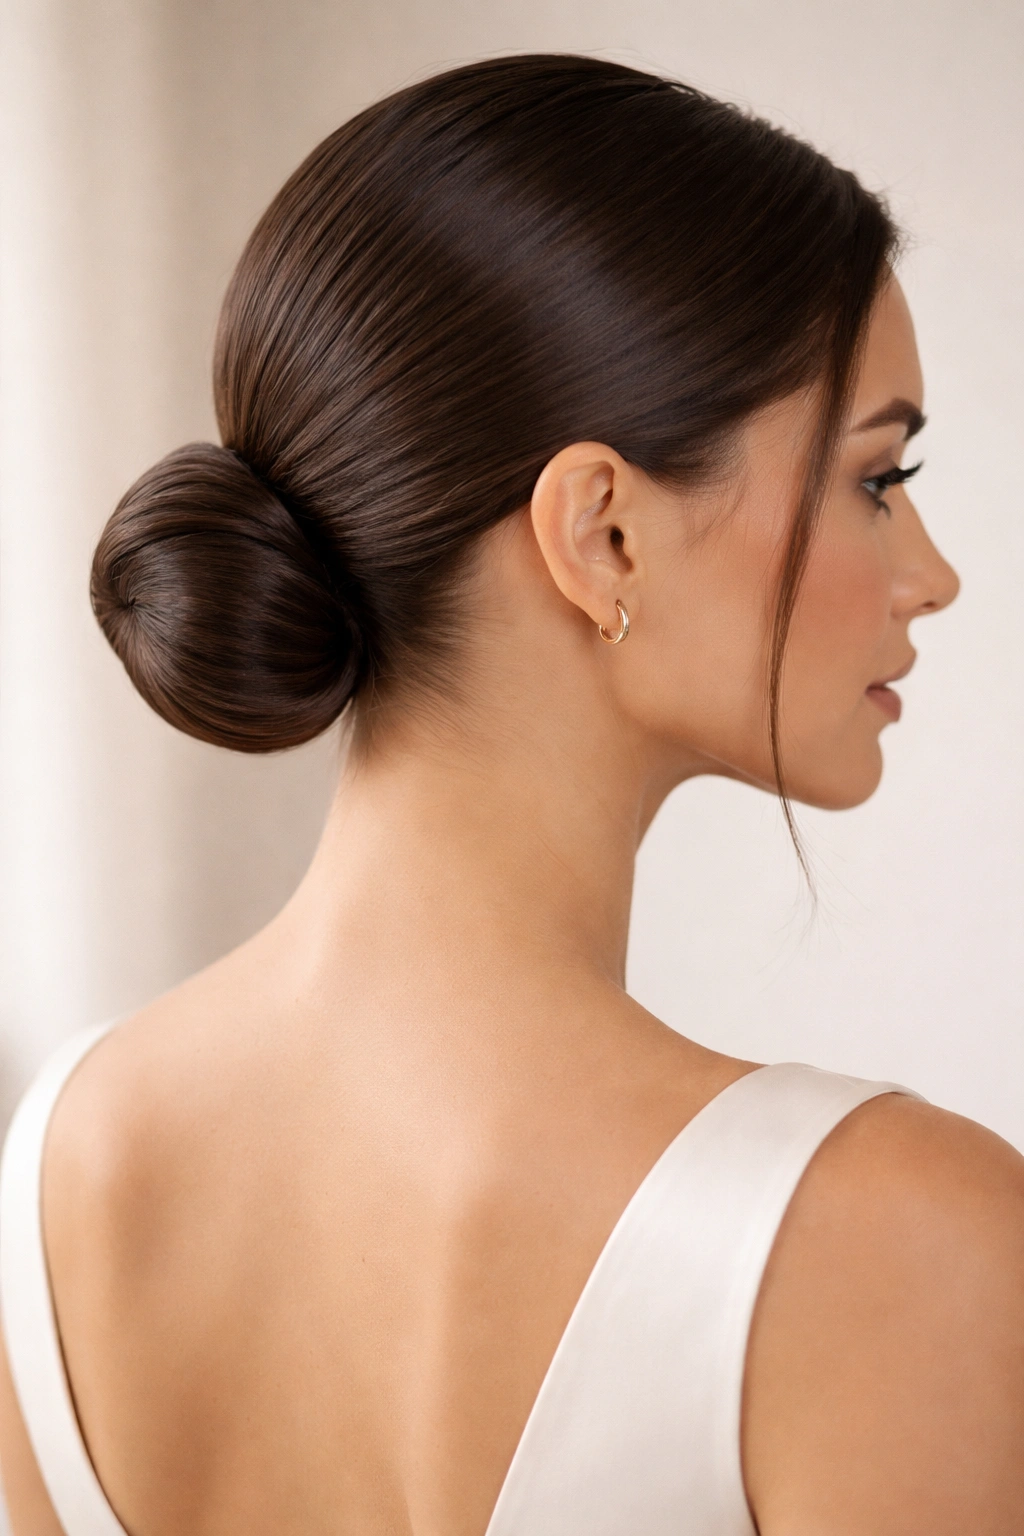
The sleek low bun is the gold standard of formal elegance for straight hair. This is the hairstyle that works for everything from black-tie galas to professional award ceremonies because it’s both refined and endlessly wearable. The beauty of this style on straight hair is that your hair’s natural smoothness becomes the entire point—every strand lies perfectly flat, creating an almost architectural quality that photographs beautifully.
Why It’s Perfect for Formal Occasions
The low bun conveys sophistication precisely because of its restraint. You’re not trying to create drama or volume; you’re presenting clean lines and meticulous polish. On straight hair, this effect is magnified because there’s no frizz to fight, no texture to tame. The style elongates the neck, flatters virtually every face shape, and keeps the focus exactly where you want it—on your face, your jewelry, or your overall look rather than competing with your hair.
How to Create the Perfect Low Bun
- Start with completely straight hair that’s been blow-dried smooth with a paddle brush and a smoothing serum. The foundation is everything—any slight waves or flyaways will show once your hair is slicked back into this style.
- Apply a lightweight smoothing cream or gel to your hands and run them over the surface of your hair, smoothing any flyaways down flat against your scalp.
- Gather your hair at the nape of your neck into a low ponytail. Use a fine-tooth comb to smooth the hair as you gather it, eliminating any bumps or irregular sections. Secure it tightly with a clear elastic band.
- Twist the ponytail loosely and wrap it around the base of the elastic, pinning it into place with bobby pins that match your hair color. Tuck the ends underneath so no hair sticks out.
- Use a finishing spray—not hairspray yet, but a lightweight smoothing spray—to tame any surface flyaways. Once it dries, apply a strong-hold hairspray from about 6 inches away to lock everything in place.
Pro tip: If your low bun feels too flat or lacks definition, create subtle texture by gently teasing the twist before wrapping it around the base. This gives the bun a bit more visual interest without sacrificing the polished look.
2. Smooth High Ponytail
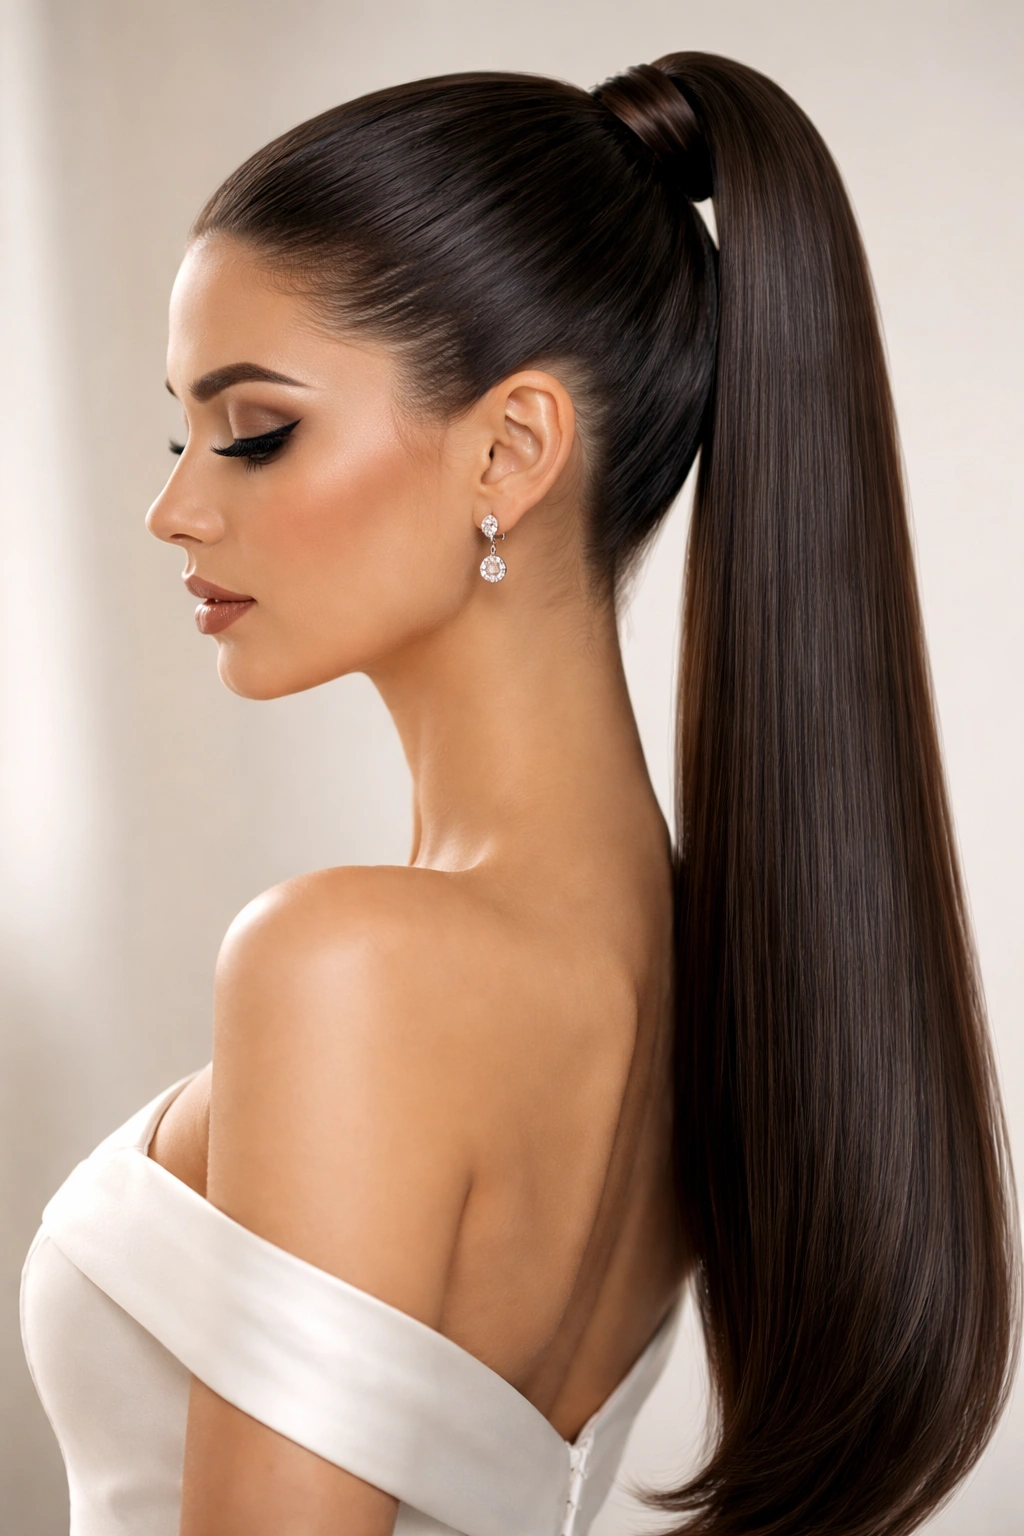
A high ponytail might seem simple, but on straight hair, a perfectly executed version becomes a statement of modern elegance. The key difference between a casual ponytail and a formal one lies in execution: the formal version is sleek, the positioning is precise, and every detail from the placement of the elastic to the finish of the ends matters enormously. This style works beautifully for younger events like galas, awards shows, and formal dinners where you want to appear polished but contemporary.
The Formal Difference from Casual Styling
What separates a formal high ponytail from an everyday one is attention to detail. The ponytail sits precisely at the crown, the section is completely smooth with zero bumps, and the hair is uniform in thickness and appearance from scalp to ends. There’s no piece-y texture or intentional messiness—those belong to casual styling. For formal occasions, you want everything to look intentional and controlled, with hair that appears almost liquid-smooth from every angle.
Step-by-Step Application Process
- Blow-dry your hair completely straight using a paddle brush to create a smooth base. Make sure you dry slowly enough that the hair has time to set in its straight form rather than retaining any wave pattern.
- Apply a smoothing serum or lightweight anti-frizz cream from mid-length to ends. This prevents flyaways and creates a glossy finish that photographs gorgeously under formal lighting.
- Create a clean part if desired—center or side, depending on your face shape and the overall look you’re aiming for. Use a fine-tooth comb to define the part clearly.
- Gather your hair at the crown in a high ponytail. Use a fine-tooth comb to smooth every section as you gather, working from the hairline backward to eliminate any bumps or irregular areas.
- Secure the ponytail with a matched elastic. Wrap a small section of hair from the ponytail around the elastic and pin it in place to hide the elastic entirely.
- Straighten the ends of your ponytail with a flat iron if needed, creating a perfectly blunt or slightly textured edge depending on your preference.
Worth knowing: The position of a formal high ponytail should feel slightly higher than feels natural—higher than you’d normally wear it—because it photographs better and reads as more intentional. Sit in front of a mirror and adjust the position until it looks slightly elevated, not quite at the very crown of your head but definitely in the upper-back region.
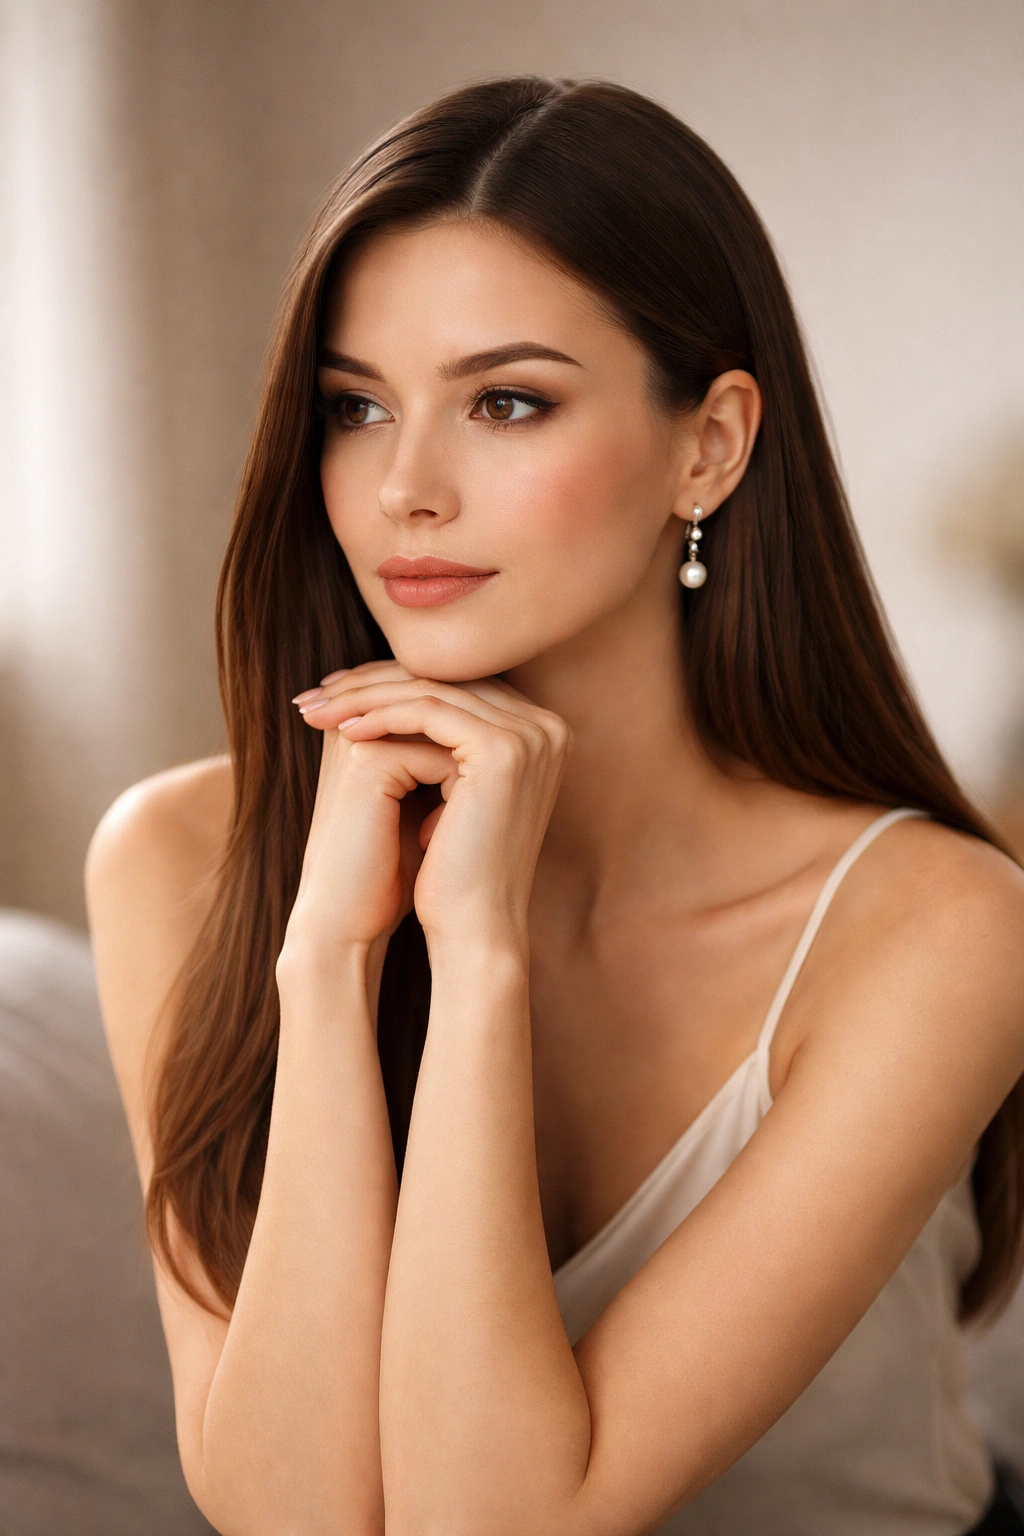
3. Deep Side Part with Face-Framing Waves
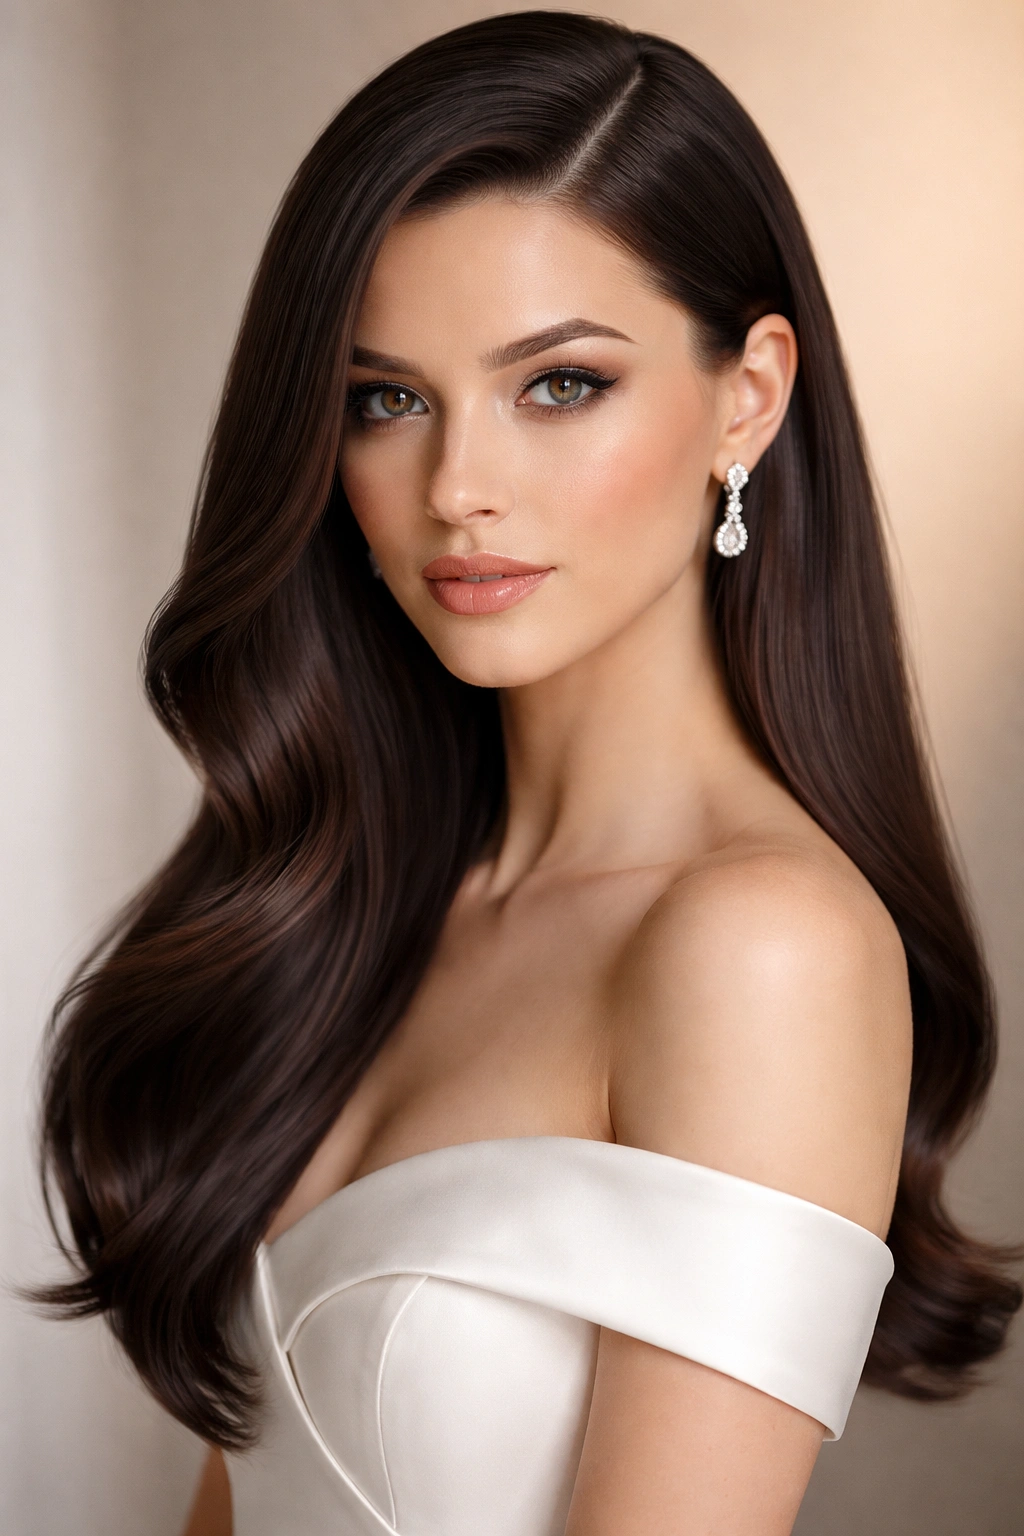
This style bridges the gap between completely straight and softly textured, making it ideal for formal occasions where you want to appear polished without looking overly severe. A deep side part gives you visual interest and elegance, while the subtle waves keep the overall effect soft and sophisticated rather than harsh. On straight hair, you control exactly where the waves go and how pronounced they are, meaning you can dial the texture up or down depending on the event and your personal preference.
Creating Visual Balance with the Side Part
A deep side part works best when the larger section of hair flows smoothly over one shoulder while the smaller section is tucked or pinned behind the ear. This asymmetrical arrangement is inherently more elegant and interesting than a center part, and it flatters most face shapes by creating a vertical line that can slim the face or bring balance to certain proportions. On straight hair, the part itself becomes a striking design element—it should be clean, defined, and completely smooth.
Technique for Subtle Formal Waves
- Start with blow-dried straight hair and apply a heat protectant spray to all surfaces before introducing heat.
- Create your deep side part using a rattail comb and a fine-tooth section for maximum definition. Secure the smaller section loosely with a clip on the opposite side.
- Using a 1.25-inch curling iron or wand, wrap sections of the larger side of hair around the barrel, holding for 5-8 seconds. Wrap from mid-length through the ends, allowing the very top section near your part to remain straight. Point the ends slightly downward to create soft waves rather than tight curls.
- Once you’ve waved one side, carefully unclip the smaller section behind your ear. Lightly wave just the very ends of this section if desired, or leave it completely straight for contrast. Pin this section smoothly back using bobby pins hidden beneath the hair.
- Tousle the waves gently with your fingers and apply a medium-hold hairspray. The waves should feel soft and natural, not crunchy or overly defined.
Insider note: The waves hold better if you allow your hair to cool completely before touching them—cool hair sets the wave pattern more effectively than warm hair. Wrap each section loosely in a pin curl after waving and let it cool for a few minutes before releasing.
4. Center-Parted Half-Up Half-Down Style
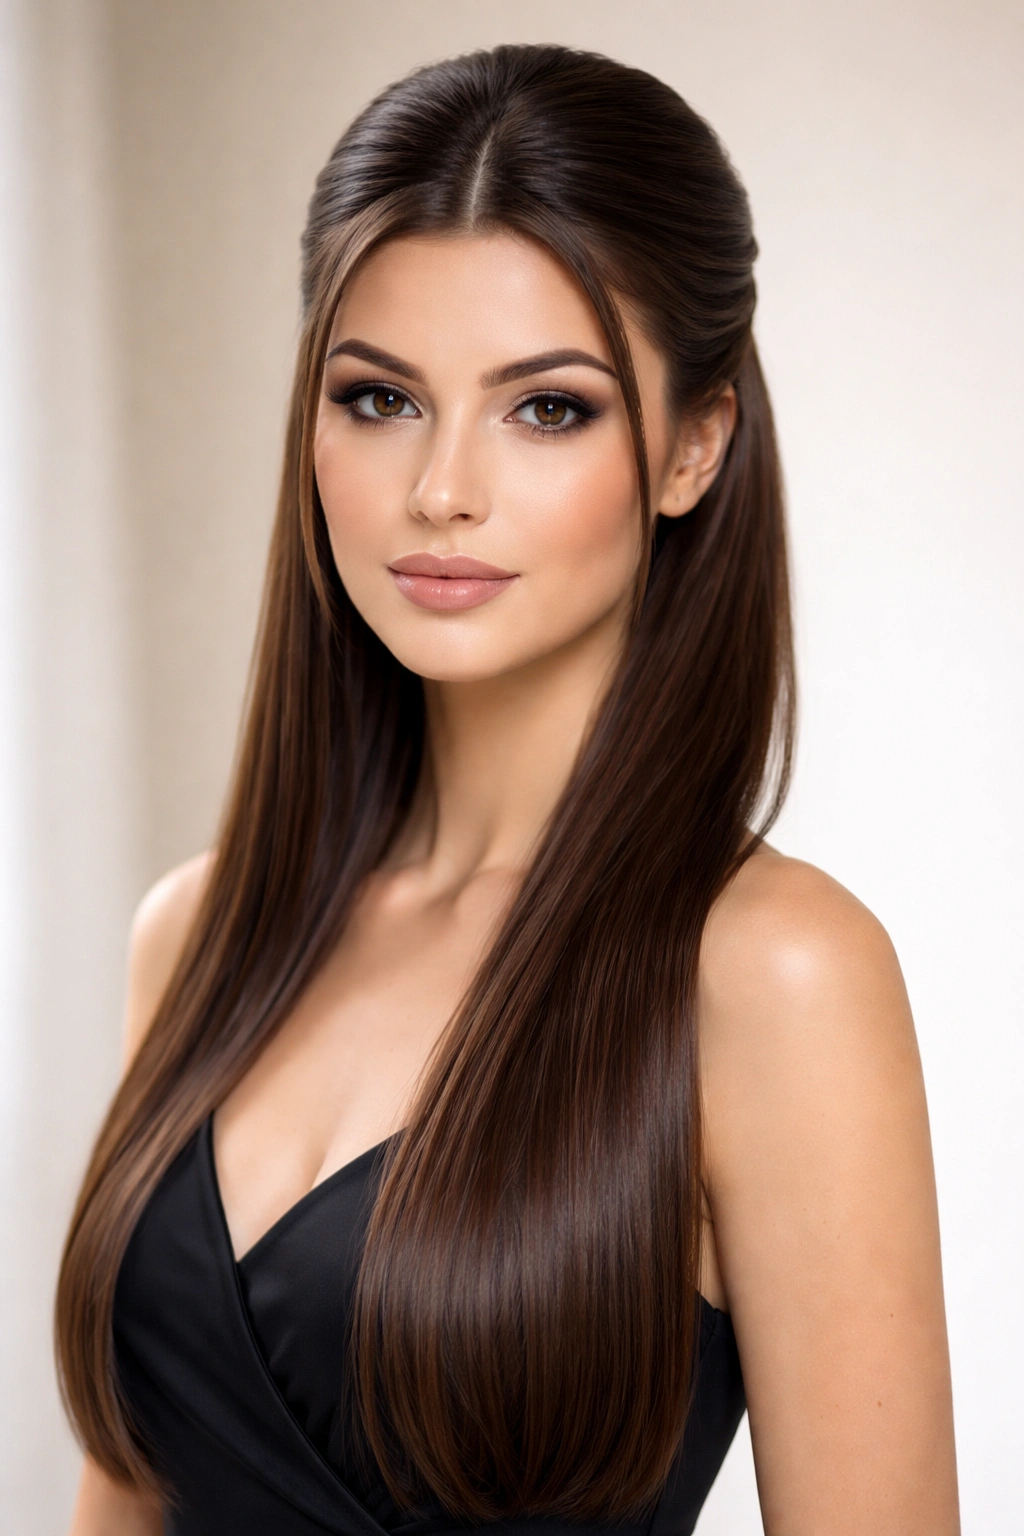
The half-up style is deceptively sophisticated. It allows you to showcase the length and shine of your straight hair while creating an intentional hairstyle rather than simply wearing your hair down. This style works beautifully for formal dinners, weddings as a guest, and elegant events where you want to present a polished appearance without the severity of a fully pinned style. The key to making it feel formal rather than casual is in the execution of the gathered section—it must be smooth, secure, and deliberately styled.
Why Half-Up Works for Formal Settings
A half-up style keeps hair off the face and neck (important for showing off jewelry or makeup) while maintaining an overall softness and accessibility that feels contemporary and elegant. On straight hair, this style has the added benefit of displaying your hair’s natural shine and smoothness, which becomes a visual feature rather than something to hide under texture. The gathered section becomes a focal point, and you can embellish it with clips, ribbons, or pins if desired.
Construction Method for Long-Lasting Hold
- Begin with straight, blow-dried hair that has been treated with a smoothing serum for shine and frizz prevention.
- Create a clean center part from your hairline all the way down the back of your head using a fine-tooth comb.
- Identify where you want the half-up section to sit—approximately 2-3 inches back from your hairline. Section off a horizontal band of hair from ear to ear at this depth.
- Gather this band gently, smoothing it back with a fine-tooth comb to eliminate bumps. Secure it tightly with a matched elastic or decorative clip. For extra security, you can insert bobby pins vertically through the gathered section before adding the elastic.
- Leave the remaining half-down section smooth and straight, or gently curl the ends for a softer finish. Apply smoothing serum to the ends if they look dry.
- Conceal the elastic by wrapping a thin strand of hair from the secured section around it, pinning the strand underneath.
Pro tip: If you want this style to feel even more formal, create a subtle twist or braid with the gathered section before securing it. A twisted half-up looks slightly more intentional and styled than a simple gathered ponytail.
5. Straight Blowout with Formal Pin Curls
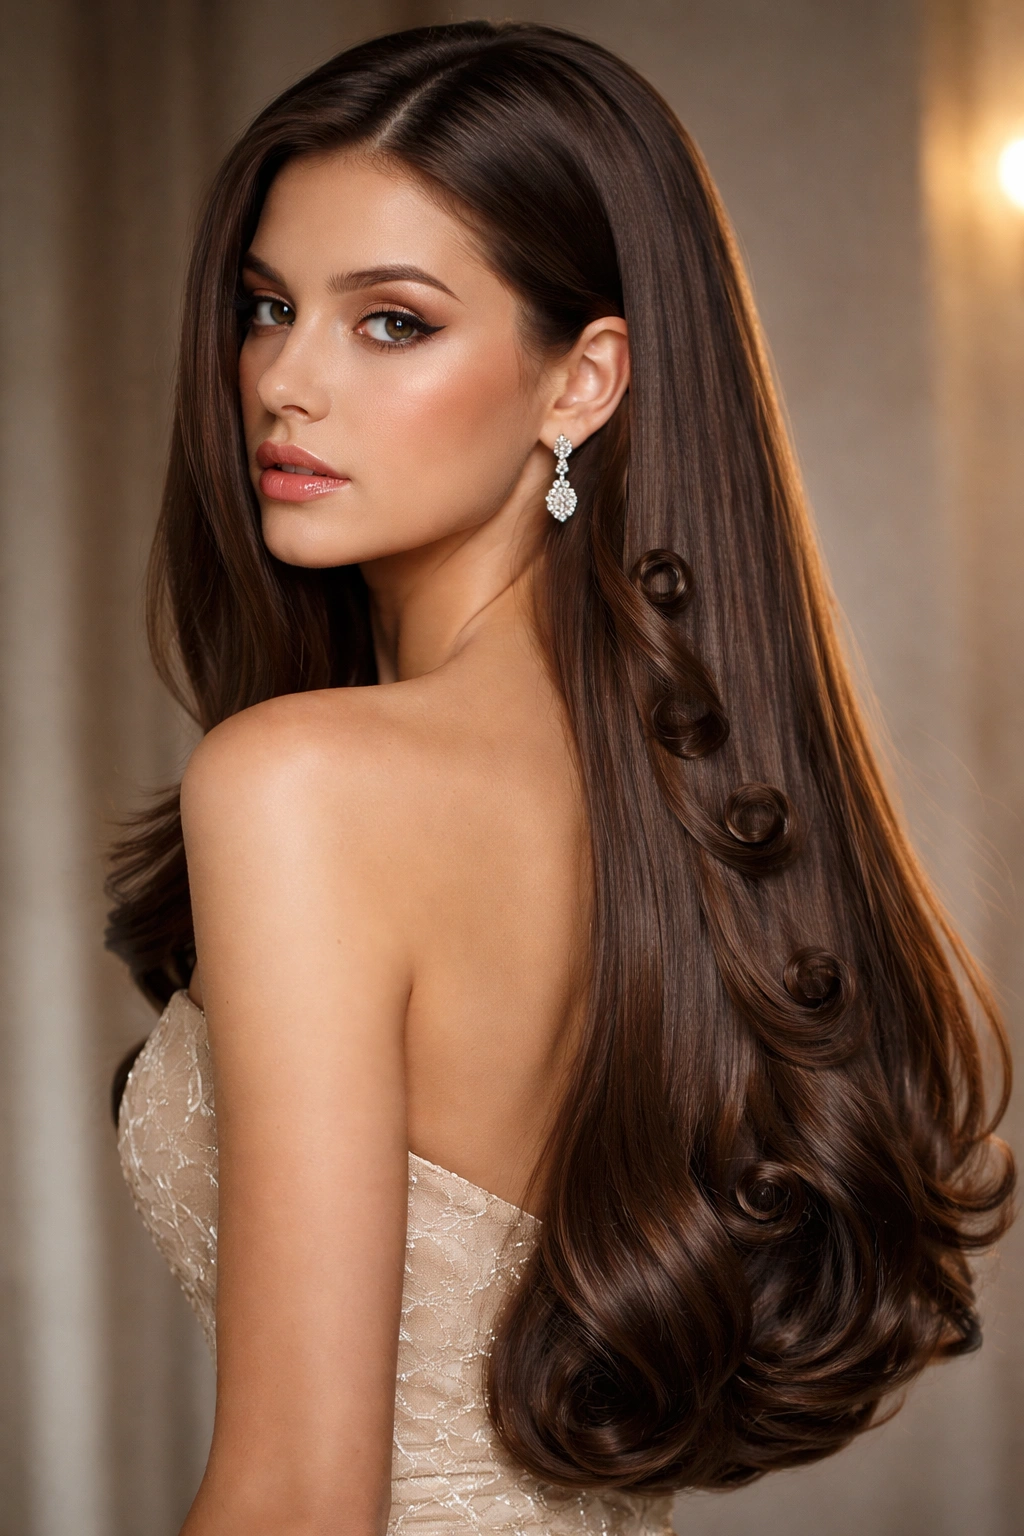
This is a style for occasions where you want shine, movement, and sophistication all at once. By adding pin curls to a beautifully blown-out straight base, you create movement and visual interest while maintaining the polish and smoothness that straight hair naturally provides. The pin curls read as intentional and formal rather than casual, and they photograph beautifully because the individual curls catch light differently, adding dimension to your overall look.
Building the Perfect Foundational Blowout
The blowout is your canvas, and it needs to be flawless. Start by sectioning clean, damp hair into four quadrants (top, back left, back right, and sides). Blow-dry each section using a paddle brush, working from the roots to the ends with the blow dryer held at a downward angle to smooth the cuticle. The goal is silky-smooth, shiny straightness with no frizz. Once completely dry, run your flat iron over each section one more time to ensure a polished finish. This foundational work determines whether your final style looks polished or sloppy.
Creating Formal Pin Curls for Texture and Hold
- Starting with your finished blowout, decide which sections will receive pin curls—typically the sides and back create the most elegant effect.
- Take a 1-2 inch section of hair and wrap it around your index and middle finger to create a loop, as if you were making a curl. The curl size determines your final texture—smaller curls create more defined waves, larger curls create looser movement.
- Slip the loop off your fingers and pin it in place flush against your scalp using bobby pins that match your hair color. Insert the pins horizontally through the loop to secure it firmly.
- Work your way around the head, creating as many pin curls as desired. For a formal look, aim for symmetry—if you curl one side, curl the other.
- Allow the pin curls to set for at least 15-20 minutes. For best results, use a setting spray before pinning.
- Carefully remove each pin and gently brush through the curls with your fingers or a soft brush to soften them into gentle waves rather than tight ringlets.
Worth knowing: Pin curls hold better if your hair is completely dry before you pin them. Setting spray helps, but the primary factor is allowing your blow-dried hair sufficient time to cool and set before introducing the pin curls.
6. Slicked-Back High Bun
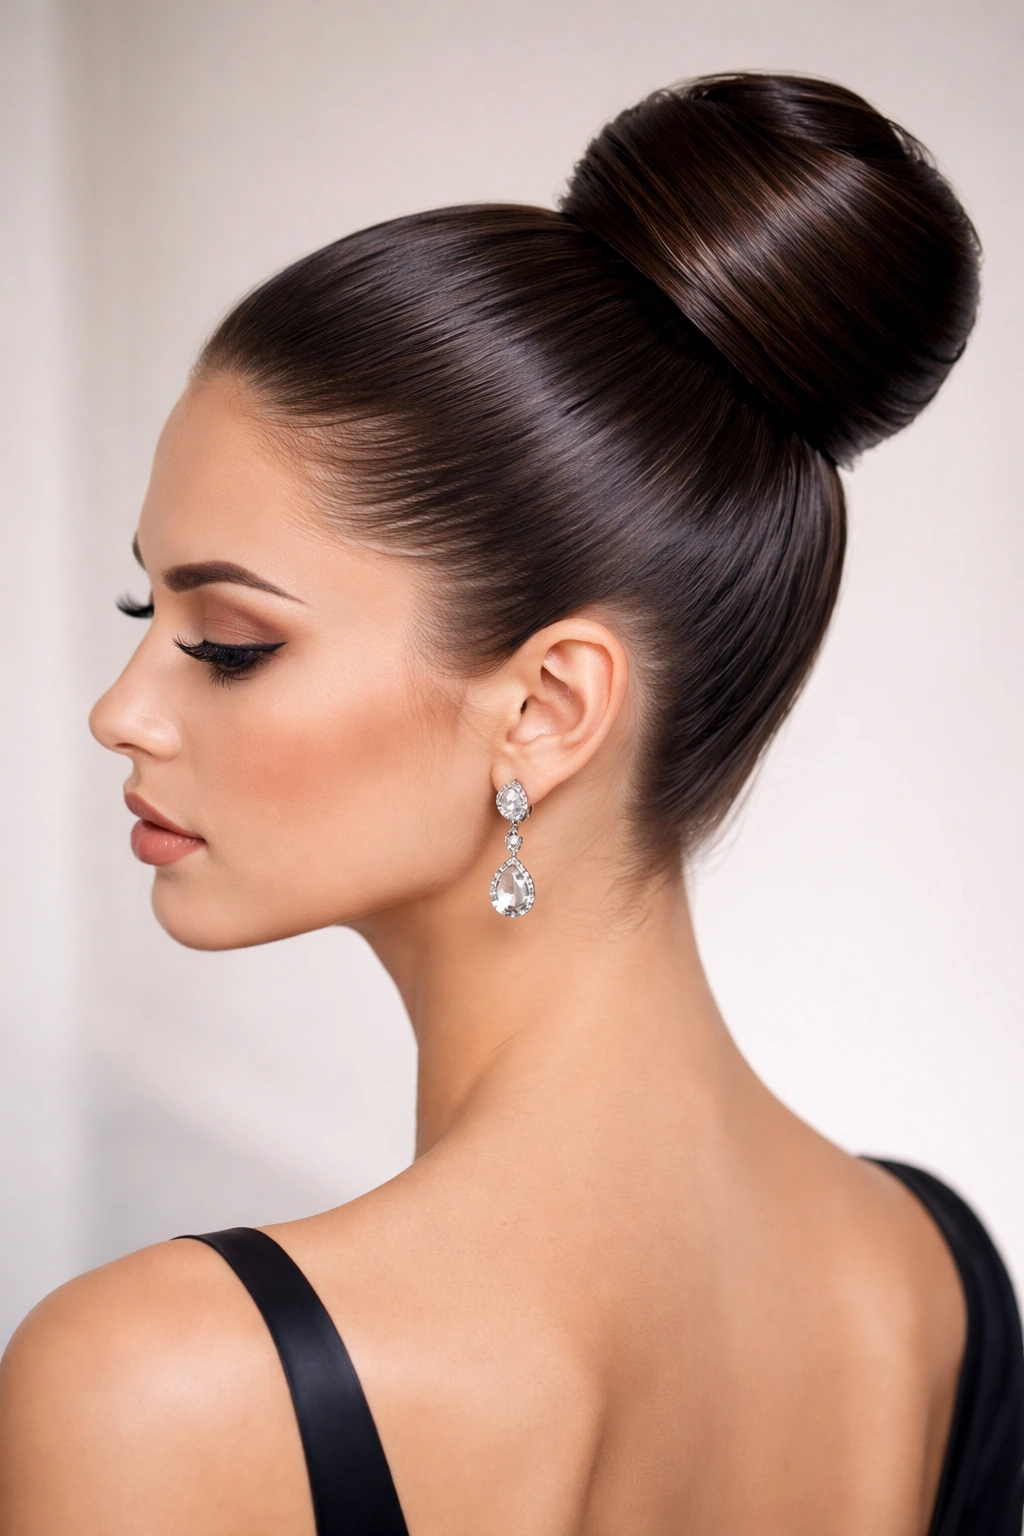
If you want to make a bold, high-impact statement, a slicked-back bun is unmatched. This style is ultra-polished, flatters all face shapes by opening up the face completely, and reads as inherently elegant and intentional. It requires more product and more precision than a low bun, but the payoff in terms of sophistication and modern elegance is enormous. This style works beautifully for black-tie events, formal galas, and any occasion where you want to project confidence and polish.
The Technique for Achieving Genuine Sleekness
Creating true sleekness (rather than greasiness) is an art. The goal is hair that clings smoothly to your scalp without any bumps, flyaways, or visible frizz, but also without looking wet or sticky. This requires the right product combination and application technique. Start by applying a smoothing cream to damp hair before blow-drying, which creates a smooth cuticle layer. Once dry, apply a lightweight gel or mousse designed for sleek styles—not heavy pomade, which can look greasy on straight hair.
Step-by-Step Execution
- Begin with blow-dried straight hair that’s been treated with a smoothing product. Your hair should already be smooth and shiny before you start slicking it back.
- Apply a lightweight smoothing gel or mousse to your hands. Work it through your hair from roots to ends, distributing the product evenly. The product should feel barely-there on your hands.
- Using a fine-tooth comb, comb your hair straight back from your face with firm, confident strokes. Work section by section, smoothing from the hairline backward. Comb repeatedly in the same direction until every strand lies flat.
- Gather all your hair at the very crown of your head (the highest point possible) into a high ponytail. Secure it tightly with a strong elastic that won’t slip.
- Twist the ponytail and wrap it around the base to form a bun. Secure every inch with bobby pins, working your way around the bun and pinning multiple times to ensure it doesn’t shift throughout the event.
- Apply a strong-hold hairspray—the strongest you can find—over the entire slicked-back section and the bun. Let it dry for a few seconds before touching it.
Critical warning: If you have a sensitive scalp, be aware that the tension of a high slicked-back bun can cause discomfort if worn for many hours. Make sure the ponytail isn’t so tight that you have constant tension on your hairline. Tight enough to be secure, but not so tight that you’re in pain by the end of the event.
7. Straight Hair with Decorative Metal Pins and Clips
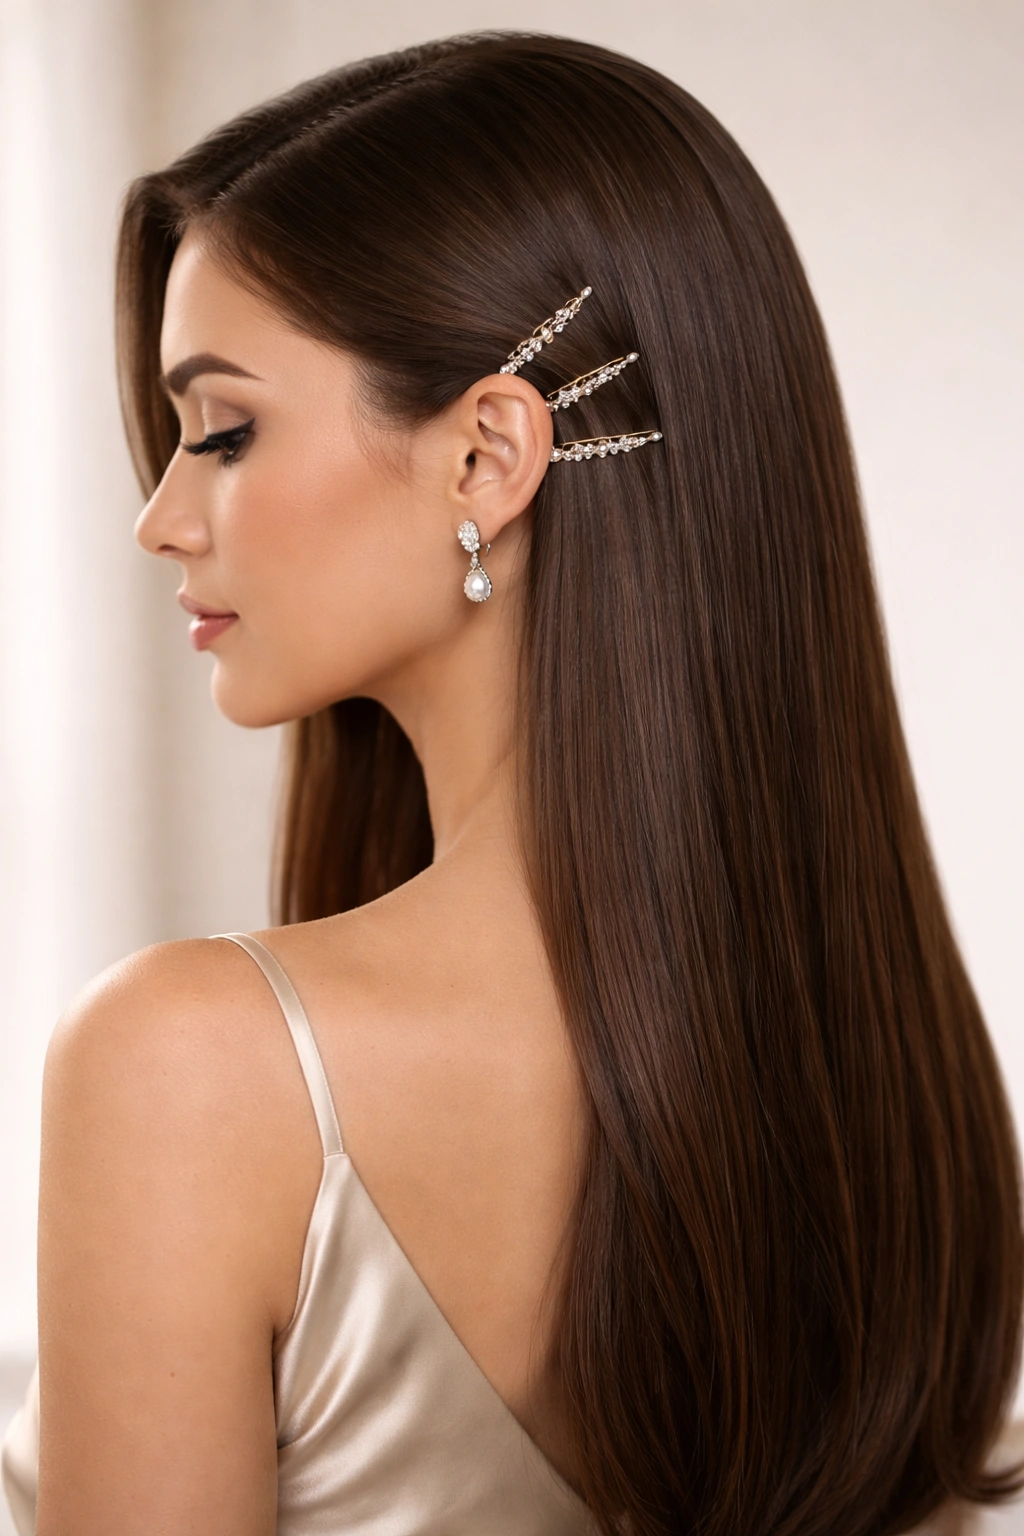
Sometimes the most elegant formal styles are those that keep your hair simple and straight while adding sophistication through accessory placement. Decorative metal pins, clips, and barrettes can transform a simple straight hairstyle into something distinctly formal and elevated. This approach is especially effective if you want to showcase your hair’s natural texture and shine while adding visual interest through intentional accessory placement.
Choosing Accessories That Read as Formal
Metal gold, silver, or pearl-finish accessories communicate formality more effectively than plastic or resin options. Look for styles that are substantial but not chunky—delicate, refined pieces that sit close to the head rather than oversized statement clips. Geometric shapes and minimalist designs read as more formal than highly decorative or ornate options. The placement of accessories matters equally: near the ear, along the back in a line, or at a strategic gathering point all read differently in terms of perceived elegance.
Styling Approach with Accessory Integration
- Style your hair with a clean center or deep side part and ensure it’s completely straight with a glossy finish.
- Decide whether you want to gather a small section of hair for pinning or work with loose, straight hair. Gathering a section (like a small section at the temple) and pinning it back creates definition and intentionality.
- Clip or pin your chosen accessories into place, ensuring they’re secure and hidden in the hair rather than sitting loosely on top of it. Test the placement by gently tugging on the clip—it shouldn’t move.
- If using multiple accessories, create visual balance. Two matching clips on either side of the head, or a progression of smaller clips working backward, both create elegant symmetry.
- Ensure your finished style doesn’t look overwrought. One or two statement pieces usually photographs and reads better than numerous small clips competing for attention.
Pro tip: Barrettes and clips hold best when placed in completely dry hair. If you place them immediately after styling, they may slip as your hair continues to set and dry. Wait a few minutes, then add your accessories.
8. Smooth Wrap-Around Braid
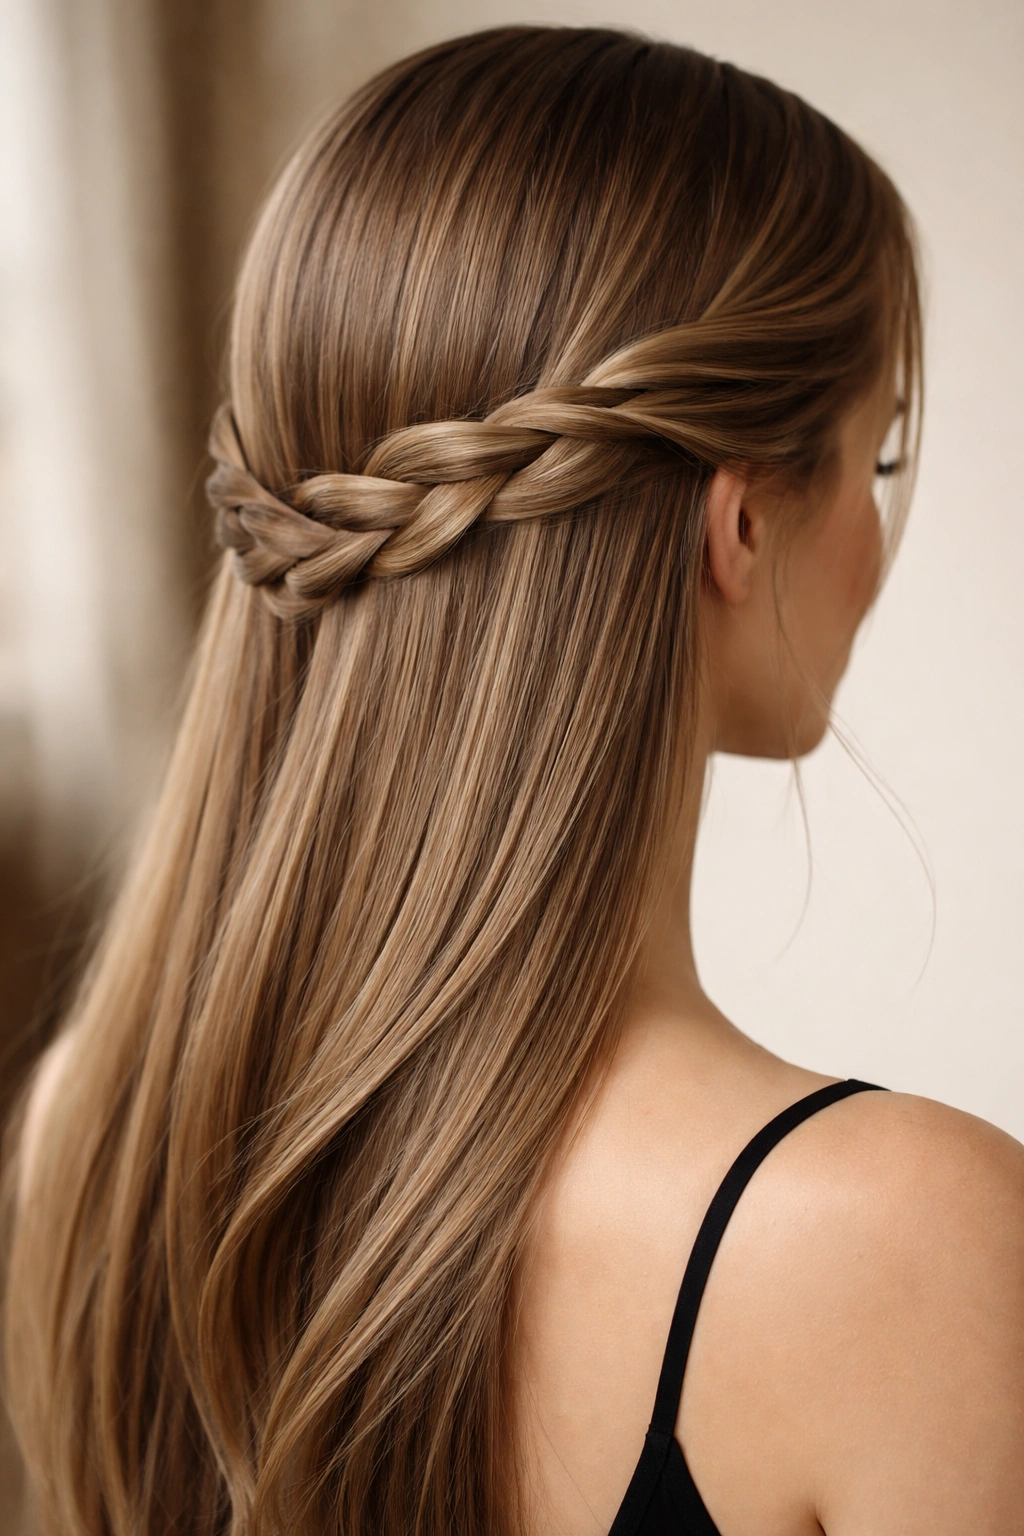
A braid woven through otherwise straight hair is an elegant, unexpected choice for formal occasions. This style gives you the sophistication of gathered hair with the softness and texture of a braid, and it works beautifully on straight hair because the braid stands out as an intentional design element rather than blending in with the surrounding texture. A wrap-around braid that sits low and is woven loosely reads as romantic and refined without being overly formal or severe.
Understanding Wrap-Around Braid Construction
A wrap-around braid typically starts at one temple, winds around the back of the head, and finishes at the opposite temple. It sits relatively low on the head and incorporates increasingly more hair as it winds backward, creating a substantial braid that frames the face and back of the head. On straight hair, this style is particularly striking because the braid’s internal structure and interweaving creates visual contrast with the smooth straight sections.
Technique for a Formal Wrap-Around Braid
- Start with blow-dried straight hair that’s been treated with a light smoothing serum.
- Create a section at one temple approximately 2 inches wide and 3 inches deep. This will be the starting point of your braid.
- Begin braiding this section loosely and gently, working backward and slightly downward. As you braid, gradually pick up thin sections of hair from below the braid, incorporating them into the weave.
- Continue working your way around the back of the head, always adding new hair from below the existing braid. The braid should gradually become thicker as you add more hair.
- Once you’ve wrapped the braid all the way around to the opposite temple, secure the end with a small, matched elastic hidden within the braid.
- Gently tug on each section of the braid to loosen it slightly, creating a softer, more romantic appearance. This also makes the braid appear larger and more visually substantial.
- Set the style with a light hairspray that won’t make the braid feel stiff.
Worth knowing: The looser your braid, the more elegant and intentional it appears for formal occasions. A tight, neat braid reads as more casual or everyday, while a deliberately softened braid reads as styled and elegant. Embrace the slight looseness as a design feature rather than a mistake.
9. Straight Hair in a Twisted Updo

A twisted updo combines the refinement of gathered hair with the textural interest of a twist, creating a style that’s formal and sophisticated without being overtly complicated. Unlike a braid, which requires three-strand coordination, a twist is simply two sections of hair wound together—much easier to execute, but equally elegant in appearance. This style works beautifully for events where you want to convey polish and intentionality.
The Visual Appeal of a Twisted Structure
Twists are inherently elegant because they create a spiral design that catches light differently than smooth hair. On straight hair, this light-catching quality becomes a major visual feature, adding depth and dimension to your overall style. A twist doesn’t require curl or texture to be visually interesting—the spiral structure itself provides all the visual interest needed. This makes twisted updos particularly suitable for straight hair, where you’re working with a smooth base.
Construction Steps for a Formal Twisted Updo
- Begin with completely straight, blow-dried hair treated with a smoothing serum.
- Create a clean center or deep side part, depending on your preference and face shape.
- Gather a horizontal section of hair from ear to ear at the back of your head, just above the nape of your neck. Secure this with a matched elastic.
- Divide the gathered section into two equal parts. Twist these two parts around each other (not over and under like a braid, but actually twisting like wringing a towel) until you’ve twisted the entire gathered section into a rope-like spiral.
- Wrap this twisted section around the base and pin it into place, tucking the ends under to hide them. You now have a low twisted bun.
- For a variation, create two twists from your gathered section by dividing it into four parts instead of two, and twisting two separate pairs, then wrapping both around the base. This creates a more visually complex updo.
- Set with a strong-hold hairspray applied from a distance.
Pro tip: Twisted updos hold better if you don’t twist so tightly that you strain your hands. A twist that’s firm enough to stay in place but loose enough that you’re not pulling hard maintains its shape better throughout the event and is more comfortable to wear for extended periods.
10. Sleek Straight Blowout with Headpiece or Tiara
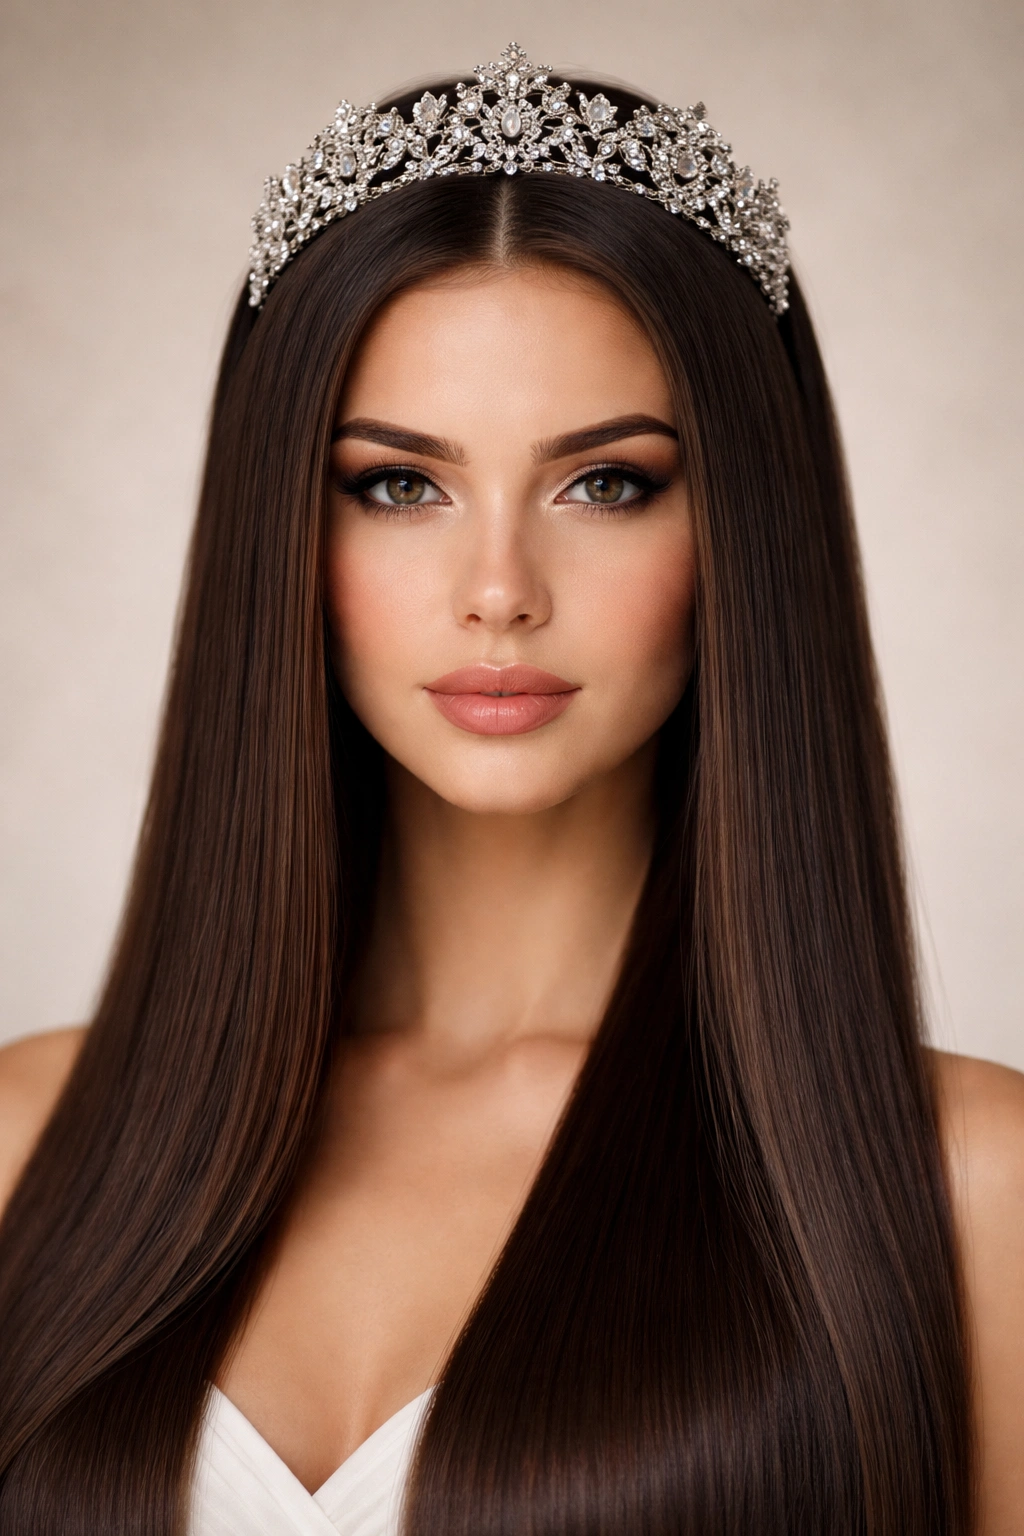
For the most formal occasions—black-tie events, galas, or weddings—sometimes the most elegant choice is to keep your hair completely straight and polished while crowning it with a statement headpiece or tiara. This approach puts all the visual weight on a single, intentional accessory while maintaining the sophistication that comes from perfectly executed straight hair. The straightness becomes the backdrop that allows the headpiece to shine as the focal point.
Selecting a Formal Headpiece
The headpiece or tiara should feel substantial and elegant, not lightweight or costume-like. Look for pieces that sit securely on the head (not just balanced precariously on top), are made from quality materials, and complement your hair color. Gold and silver finishes work universally. The piece should anchor itself into your hair rather than sitting loose on top of it—this is both more comfortable and more secure for an extended event.
Execution for Maximum Impact
- Create a flawless blow-dry using the techniques described earlier: sectioned drying with a paddle brush, smooth passages with a flat iron, and application of smoothing serum for shine and frizz control.
- Style your hair into your preferred arrangement—fully down and straight, or in a half-up style, or with gentle movement through the lengths. The key is that it be completely polished and finished-looking before you introduce the headpiece.
- Decide whether you want a deep side part, a center part, or no defined part. A defined part often reads as more formal than an undefined, smooth combed-back style.
- Place the headpiece and secure it by securing the hidden comb or clips into your hair with bobby pins. Test the security by gently pulling on it—it should not move.
- Ensure the headpiece sits at the correct angle for your face shape and the overall aesthetic you’re going for. It should feel intentional, not accidental.
- Make any final adjustments to flyaways using a smoothing serum and then seal everything in place with a strong-hold hairspray.
Worth knowing: If you’re wearing a tiara or ornate headpiece for a long event (like a multi-hour wedding or gala), choose one with interior padding rather than hard metal directly against your scalp. Padded versions are significantly more comfortable to wear for extended periods without causing headaches or pressure points.
Final Thoughts
Formal hairstyles for straight hair celebrate what makes your hair remarkable: its smoothness, shine, and refined elegance. Rather than fighting against your hair’s natural texture or trying to add curl and volume where they don’t exist, these ten styles work with your hair’s strengths, using technique and styling to create looks that are modern, sophisticated, and absolutely appropriate for any formal occasion.
The most important factor in executing any of these styles successfully is starting with a flawless blow-dry foundation and using the right products—a smoothing serum, a good hairspray, and potentially a styling cream or gel depending on which look you’re aiming for. The base matters more than the finishing touches; if your foundation isn’t smooth, shiny, and polished, even the most elegant styling technique can’t compensate.
Remember that formal doesn’t mean severe or uncomfortable. Choose the style that makes you feel confident and beautiful, even if that means the half-down option instead of a full updo, or a lower-positioned style instead of a high one. The most elegant style is always the one that makes you feel like yourself—just your most polished, intentional self. When you feel good in what you’re wearing (including your hair), that confidence becomes the real focal point.