Straight hair has a reputation for being harder to work with when you’re going for that effortlessly undone messy bun look—and honestly, there’s some truth to that. Without natural texture to grip and hold a style, silky strands tend to slip out of elastics, fall flat at the crown, and generally refuse to cooperate with anything that looks intentionally messy. But here’s the secret: the right techniques and styles can absolutely make messy buns work beautifully on straight hair. It’s not about fighting your hair type; it’s about choosing bun styles that complement your strands’ natural behavior and using tricks that add grip and dimension.
The key difference between a messy bun that looks chic on straight hair versus one that just looks unfinished comes down to intentionality. You need styles that either create the illusion of texture and fullness, or that embrace the sleekness of your straight hair and build structure through deliberate technique. Some messy buns work better with backcomb, some with strategic teasing, and some with specific sectioning methods that make even perfectly straight hair look casually styled rather than negligently styled.
What makes a messy bun actually work on straight hair is understanding which bun variations suit your hair’s natural properties. Certain styles hide the smoothness that makes straightness look flat, while others amplify it strategically. The ten styles here aren’t random—they’re chosen specifically because they’ve been tested and proven to look intentional, polished, and genuinely appealing on straight hair textures. Each one includes the specific technique that makes it hold together without looking sparse or slippery.
Whether your goal is to look like you threw your hair up without thinking, or to create something that actually takes a few minutes of deliberate styling, these ten approaches will finally make messy buns feel manageable and genuinely flattering on your straight strands.
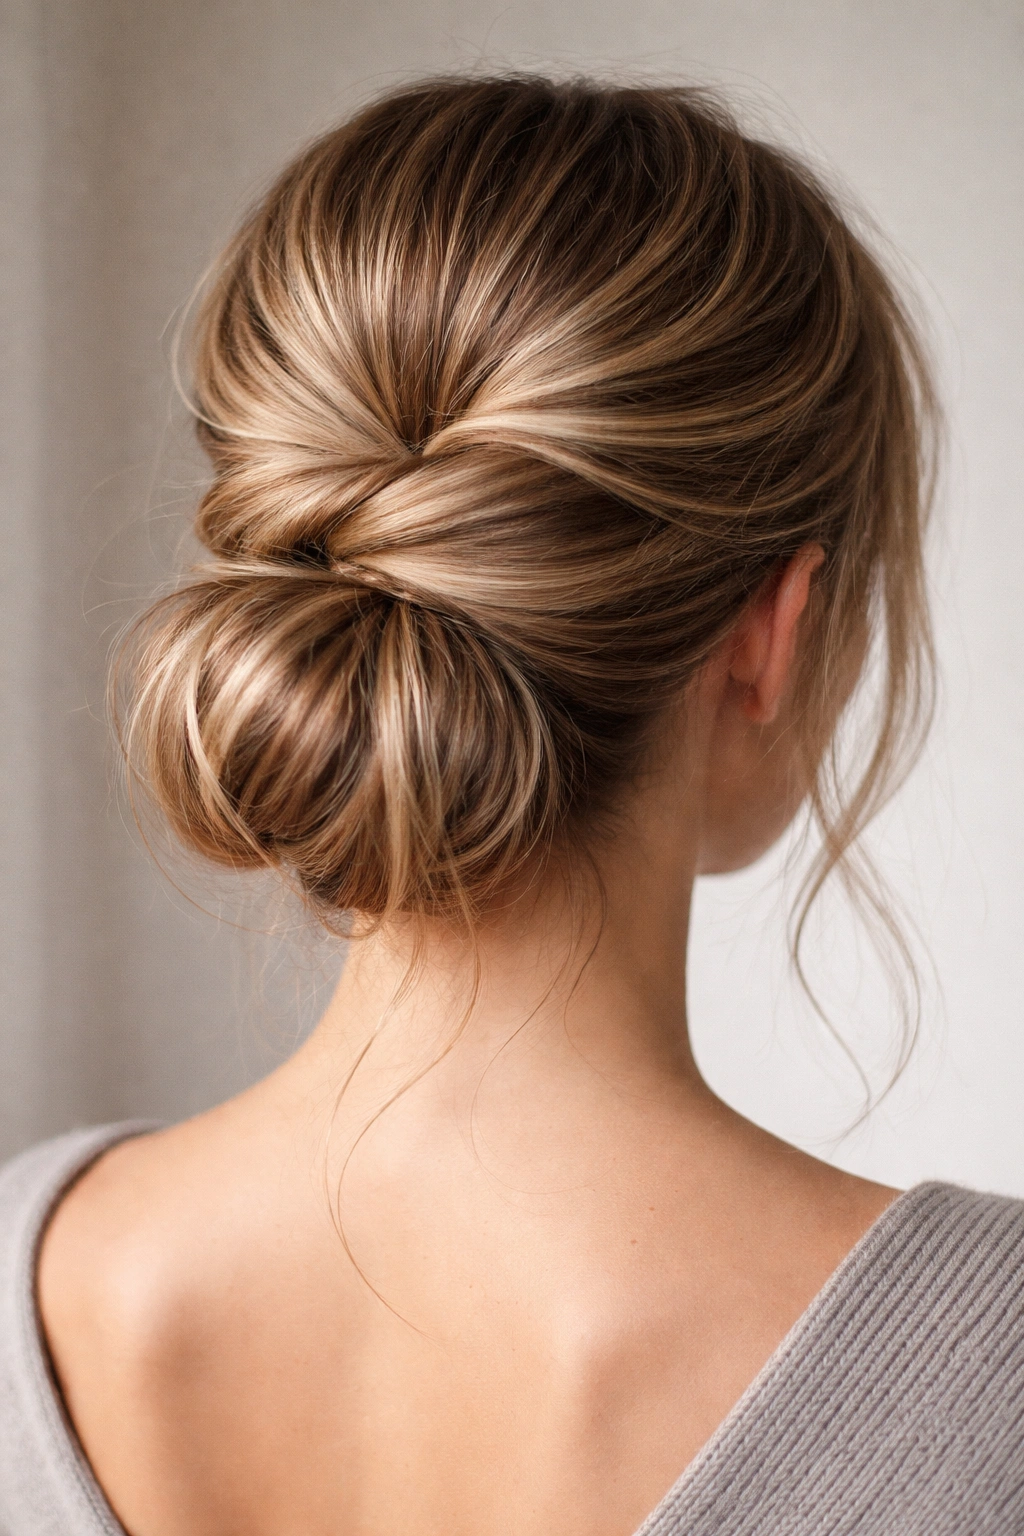
1. The Textured Crown Bun With Backcomb Base
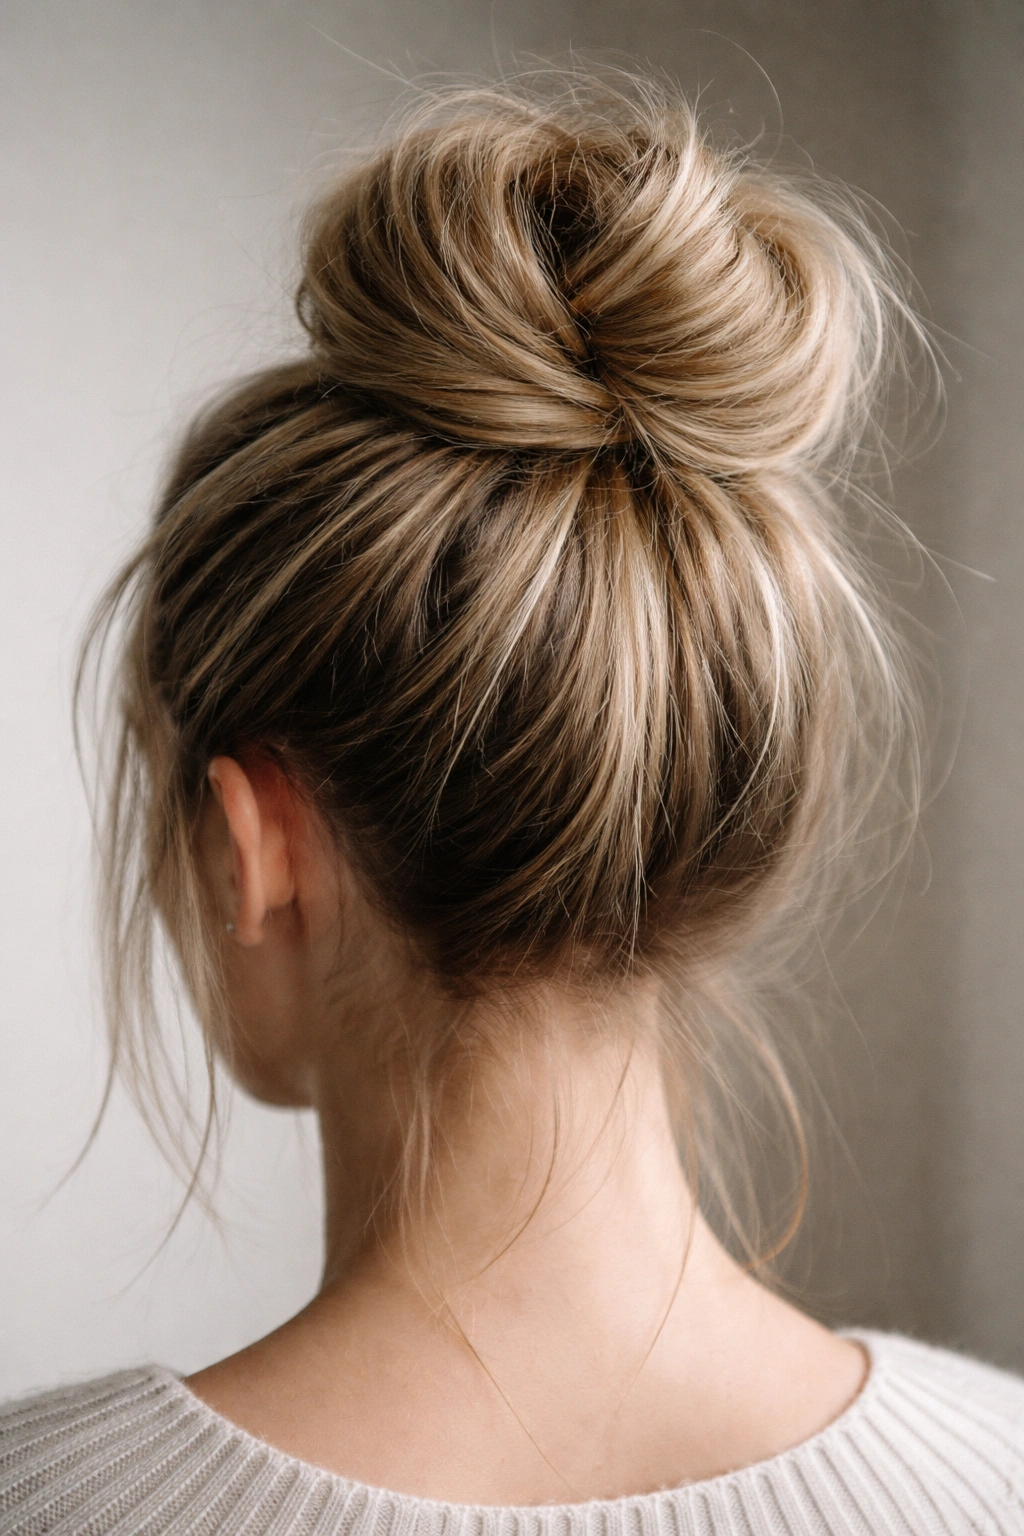
This style solves the biggest straight-hair problem: lack of grip. By backcombing the crown before anything else, you create friction and volume at the roots—the foundation that lets a messy bun actually stay secure without an army of bobby pins or an industrial-strength elastic.
How to Build the Structure
Start with dry or nearly-dry hair; dampness makes backcombing harder and the result less effective. Section off the top third of your hair at the crown, from your ears upward to your natural part line. Using a fine-tooth comb or a backcombing brush, gently comb short sections of hair backward toward the scalp with quick, short strokes. You’re not trying to create obvious texture—just enough grip that hair won’t slip. Do about three to five short strokes per section, then move to an adjacent section. Work through the entire crown area, but leave the underneath layer untouched.
Finishing the Bun
Once your crown section is backcombed, smooth the surface layer gently with a paddle brush—not to undo the work underneath, but to create a polished outer layer over the textured base. Gather all your hair into a high or mid-height ponytail, then twist the ponytail loosely and wrap it around itself to form a bun shape. Secure it with bobby pins pushed directly into the backcombed section for maximum hold. Pull a few face-framing pieces loose, and if you want more visible texture, gently pull a few strands away from the wrapped bun to create that artfully messy effect.
The whole process takes about eight minutes, and you’ll be amazed how much longer and more securely your bun stays in place compared to skipping the backcombing step.
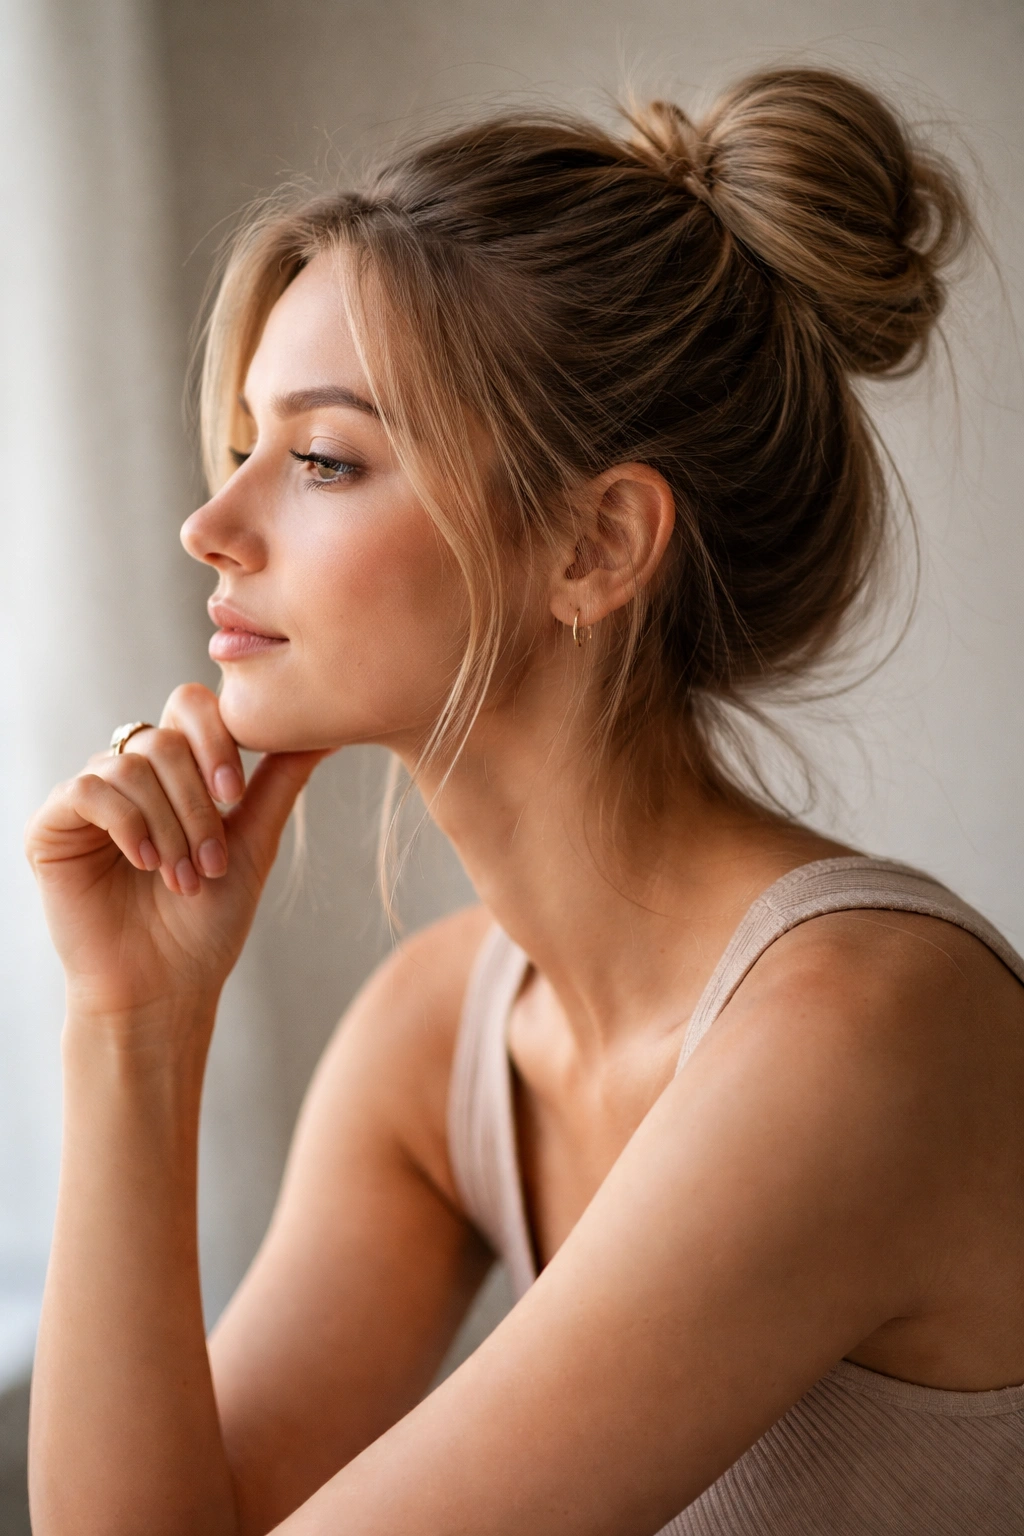
2. The Sleek High Bun With Intentional Undone Pieces
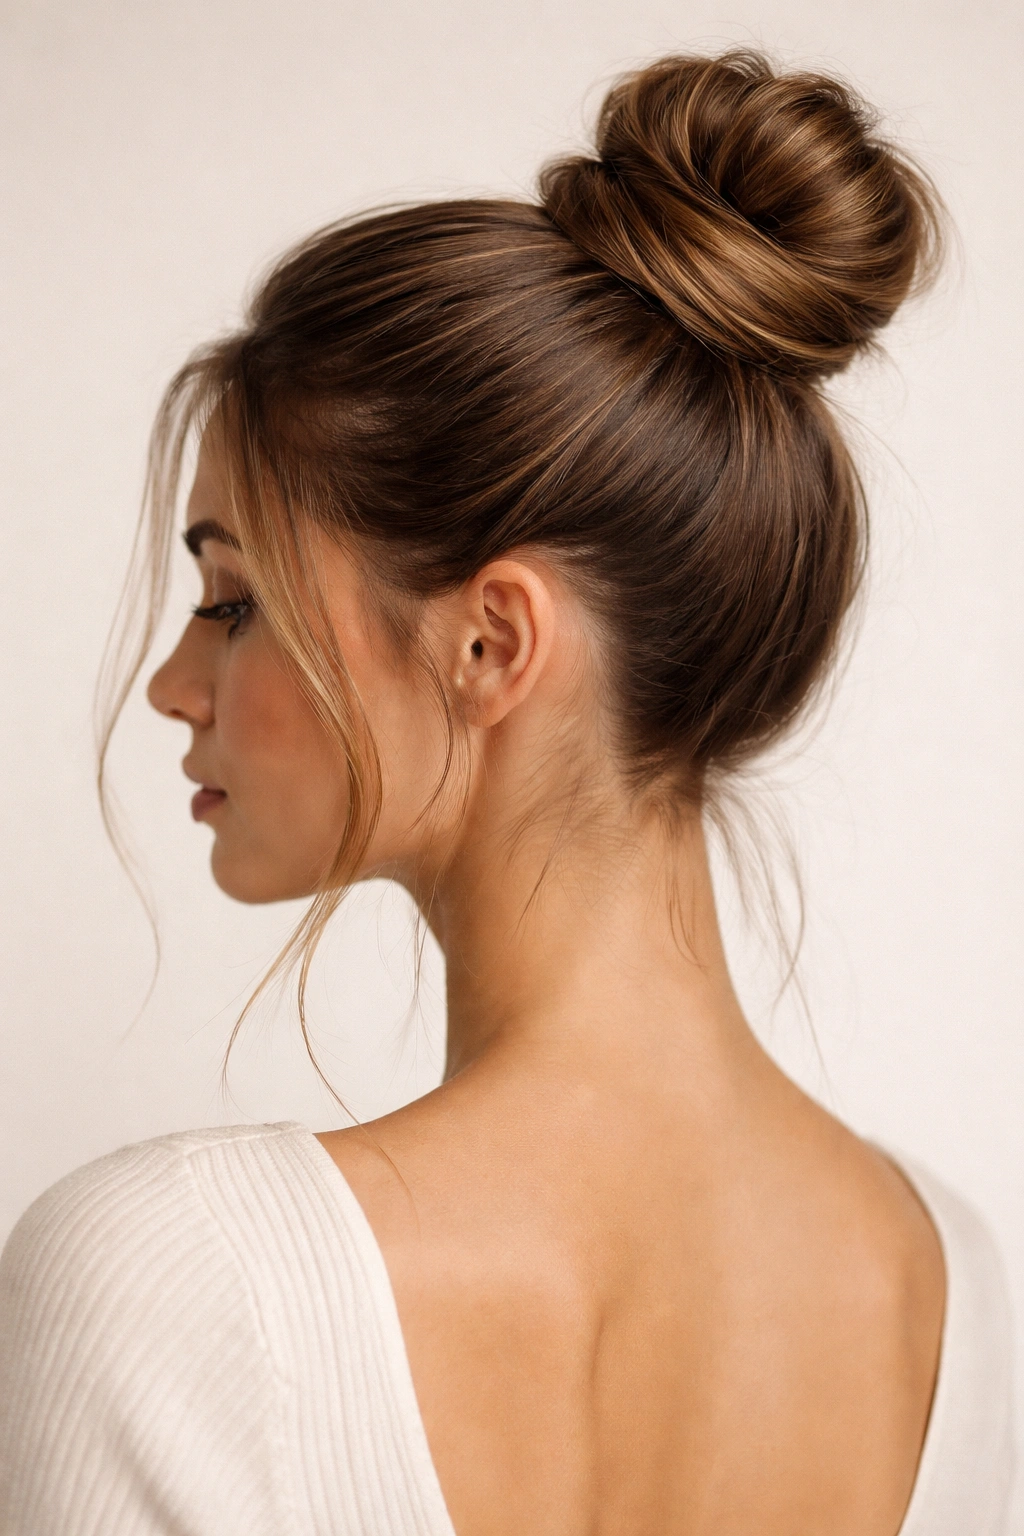
This style embraces the sleekness of straight hair instead of fighting it. Rather than trying to hide how straight your hair is, you highlight that quality while still achieving the relaxed, undone aesthetic of a messy bun—the visual trick is in the strategically loose pieces and the height.
Creating the Contrast
Pull your hair into a very high, tight ponytail at the crown. Use a fine-tooth comb and a light smoothing cream or edge gel to make the gathered hair as sleek as possible—this becomes the polished base. Twist the ponytail into a rope and coil it tightly around the elastic, securing every wrap with bobby pins. This creates a structured, almost geometric bun that feels intentionally crafted rather than careless.
The Undone Elements
Here’s where straight hair becomes an advantage: pull out longer, thinner pieces from around your face and ears and let them frame your features. Because your hair is straight, these pieces will fall in clean lines rather than frizzing outward—they’ll look deliberately placed rather than accident-prone. Gently pull a few individual strands away from the bun itself at the back—not whole sections, just a few wispy pieces—and pin them loosely so they catch the light and add dimension.
This creates visual interest while maintaining the sleek-meets-undone contrast that makes the style work. The polish of the tight bun against the softness of the face-framing pieces is what sells the whole look, and straight hair actually nails this balance better than textured hair.
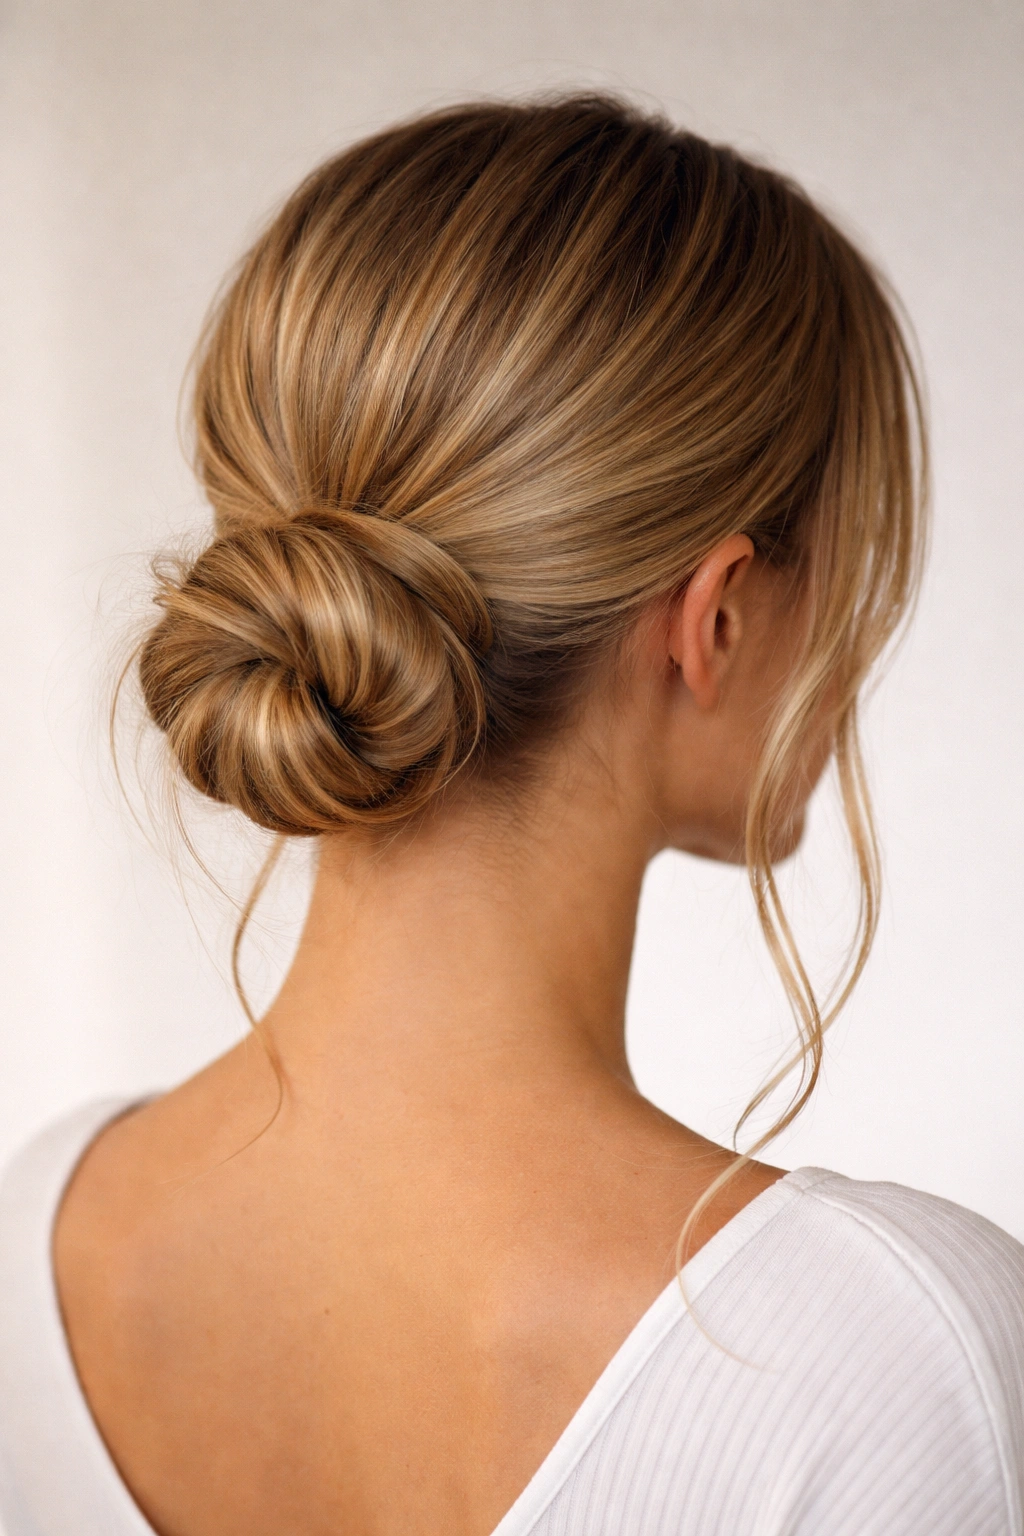
3. The Messy Side Bun With Hidden Bobby Pins
Side buns are trickier on straight hair than they are on textured hair—there’s more slipping and less natural grip at the sides of the head. This version solves that by using a strategic pin placement technique that actually becomes invisible once the bun takes its final shape.
Positioning and Securing
Create a side ponytail at about ear level, gathering it off to one side rather than the center-back. Bring the elastic to about two to three inches from the nape of your neck—lower than you might think, which gives you more area to work with and distributes the weight better on straight strands. Before you twist or coil the ponytail into a bun, insert two bobby pins horizontally across each other in an X pattern directly into your scalp at the point where the ponytail sits. This creates an anchor point that prevents the entire bun from slipping sideways.
Building the Bun Shape
Now twist the ponytail loosely and wind it around itself, tucking the end underneath and pinning it. Pull pieces out gently from around the wrapped bun—a few from the sides, a couple from the top, and one or two longer pieces to hang near your shoulder. The bobby pins you placed first are now hidden beneath the bun and the pulled-out pieces, invisible to the eye but holding everything in place. The beauty of this approach is that your hair can be as straight as glass and still stay put because the structure is underneath, not relying on the grip of the hair itself.
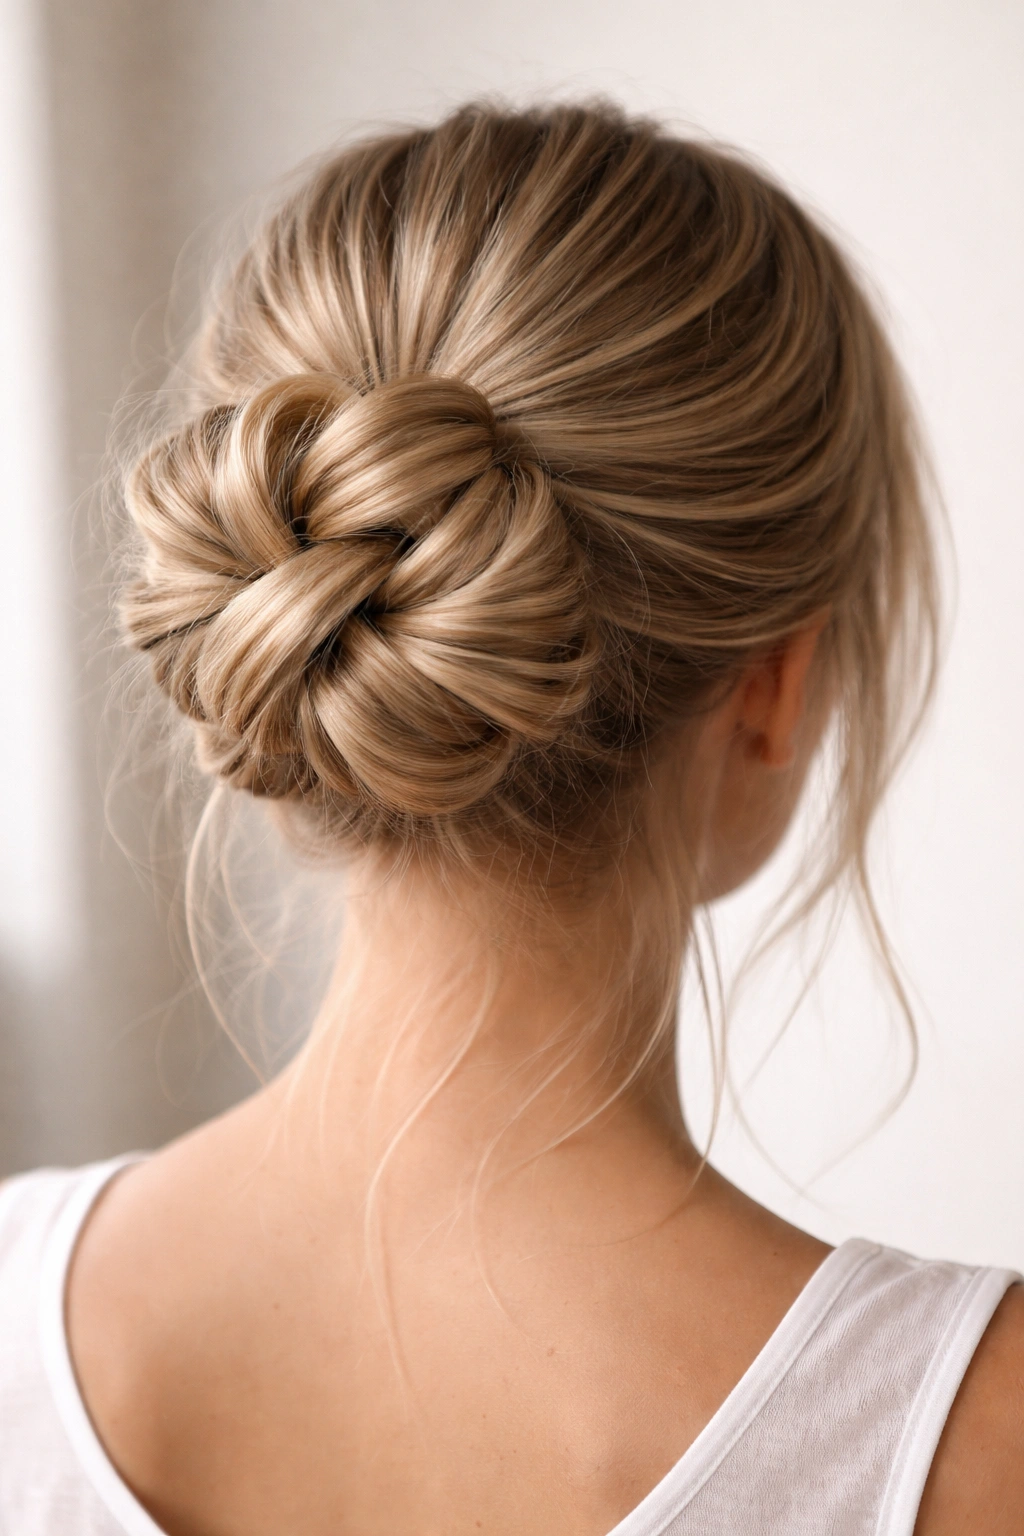
4. The Braided Bun Foundation For Extra Hold
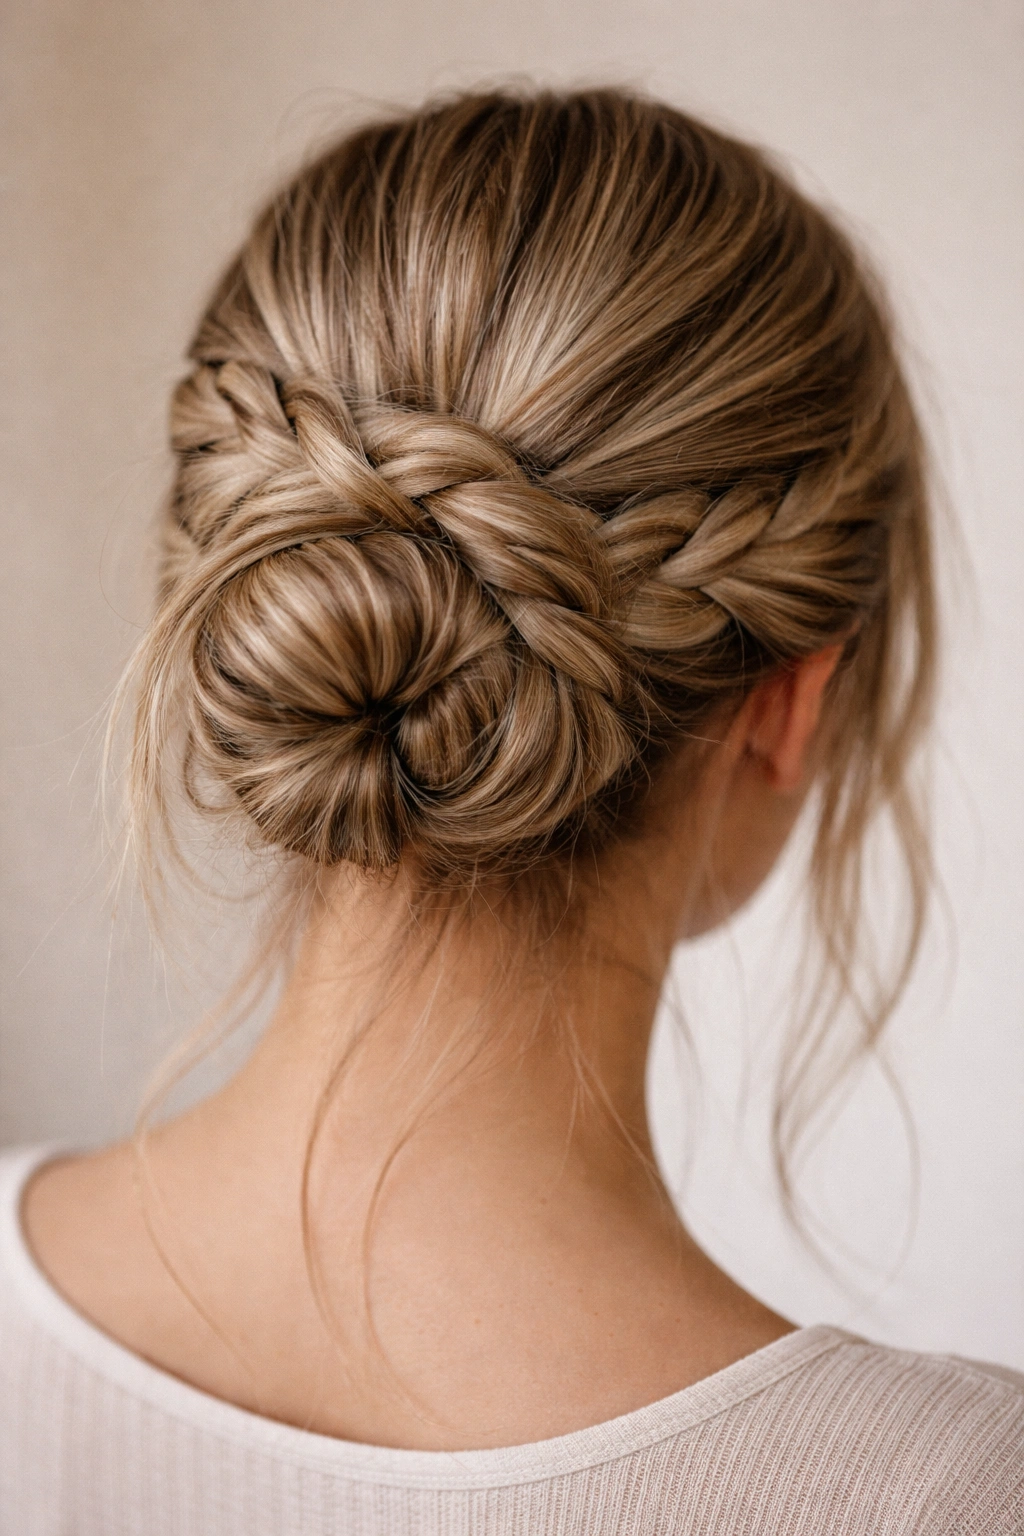
Braiding creates texture and grip even on straight hair—it’s basic physics. By incorporating a braid into the bun structure, you’re adding mechanical hold that doesn’t rely on the texture of your strands. This is especially effective for people with finer, straighter hair that tends to slip.
The Braid Setup
Gather your hair into a mid-height ponytail. Divide the ponytail into two sections and loosely French braid them together—not a tight, structural braid, but a loose, relaxed one where the sections are chunky and the braid itself is visibly casual. This loose braiding is what makes it look messy rather than precious. You’re using the braid purely as an anchor mechanism, not as a feature of the style.
Coiling Into the Bun
Once you’ve braided to the ends of the ponytail, begin coiling that braided rope around its own base to form a bun shape. The braid, even loosely done, holds significantly more tension and structural integrity than an unbraided ponytail would. Pin it securely, then—and this is the key part—gently pull individual sections of the braid outward and slightly downward. This unravels the braid just enough to create a visibly textured, intentionally messy appearance while maintaining the hold the braid provided underneath.
The result is a bun that has visible texture (the braided components showing through), dimension, and the secure hold that straight hair desperately needs. It stays put for hours without gradually deflating.
5. The Two-Section Twisted Bun With Volume
This style combats the flat appearance that straight hair can have when gathered into a single ponytail. By dividing your hair and twisting the sections separately before combining them into a bun, you create dimension and fullness that reads as “casually put together” rather than “I just shoved my hair up.”
Section and Twist
Create a horizontal line from ear to ear across the back of your head. Clip the bottom section out of the way. Gather the top section into a high ponytail at the crown and twist it loosely—not tightly, but with obvious, visible twists. Secure that twisted section to itself with a bobby pin at the base to hold the twist shape. Now release the bottom section, gather it into a ponytail just below the first one, and twist it as well, securing it with a pin.
Combining Into One Bun
Gather both twisted sections together at the same elastic, so they’re now one fuller ponytail made of two visible twisted components. Coil this into a bun and secure it. When you pull pieces loose from this bun, you’re pulling from a structure that’s visibly made of two twisted elements—meaning the pieces you pull out have more obvious texture and create more dimension than they would from a single ponytail bun.
This technique is especially effective on long straight hair, as the length gives you enough to work with to create real visual fullness.
6. The Wrapped Bun With Concealed Hair Section
This approach adds instant thickness to the bun without needing additional extensions or hair pieces. You’re using your own hair strategically by wrapping one section around another, which creates a fuller, rounder bun shape that photographs well and holds better on straight strands.
Creating the Wrap
Gather your hair into a high ponytail and divide it into two sections of roughly equal volume—more or less, depending on how full you want the final bun. Take the first section and twist it loosely, then wrap it around the base of the ponytail to form a bun, pinning as you go. Now take the second section and wrap that around the outside of the first bun, creating a layered, denser appearance. Tuck the ends underneath and pin securely.
The Finished Effect
The two-layer wrapping technique creates a bun that looks fuller and has more visible dimension than a single-twisted bun would. When you pull pieces loose for texture, you’re working from a structure that already has shape built into it. On straight hair, this matters because a single-twist bun can look thin and sparse if the hair is fine or if it’s pulled too tightly. The wrapped approach automatically combats that.
7. The Messy Crown Bun With Pencil Grip Anchor
This style works especially well on straight hair that’s on the finer or more slippery side. The technique uses a pencil, chopstick, or specialized hair stick as an internal anchor that your bun physically wraps around—providing hold that’s literally mechanical rather than relying on grip.
Threading the Anchor
Gather your hair into a high ponytail. Hold a smooth wooden pencil or hair stick horizontally across the base of your ponytail, just above the elastic. Now twist your entire ponytail and begin wrapping it around the pencil, going over and under it as you coil. The pencil becomes a fixed axis that the hair coils around, so even if the strands are slippery, they’re held in place by the physical object beneath them. Pin the bun in place once you’ve coiled it fully.
The Practical Advantage
The pencil or stick never shows in the finished style—it stays completely hidden inside the bun. But the hold it provides is remarkable on straight hair. You can pull the pencil out once the bun is set if you want, or leave it in place for the entire day. This technique was used for centuries specifically because it works on all hair types, including straight hair that doesn’t grip well on its own.
Pull a few pieces loose around the bun and at your nape to create the undone appearance, and the style reads as intentionally textured rather than structurally compromised.
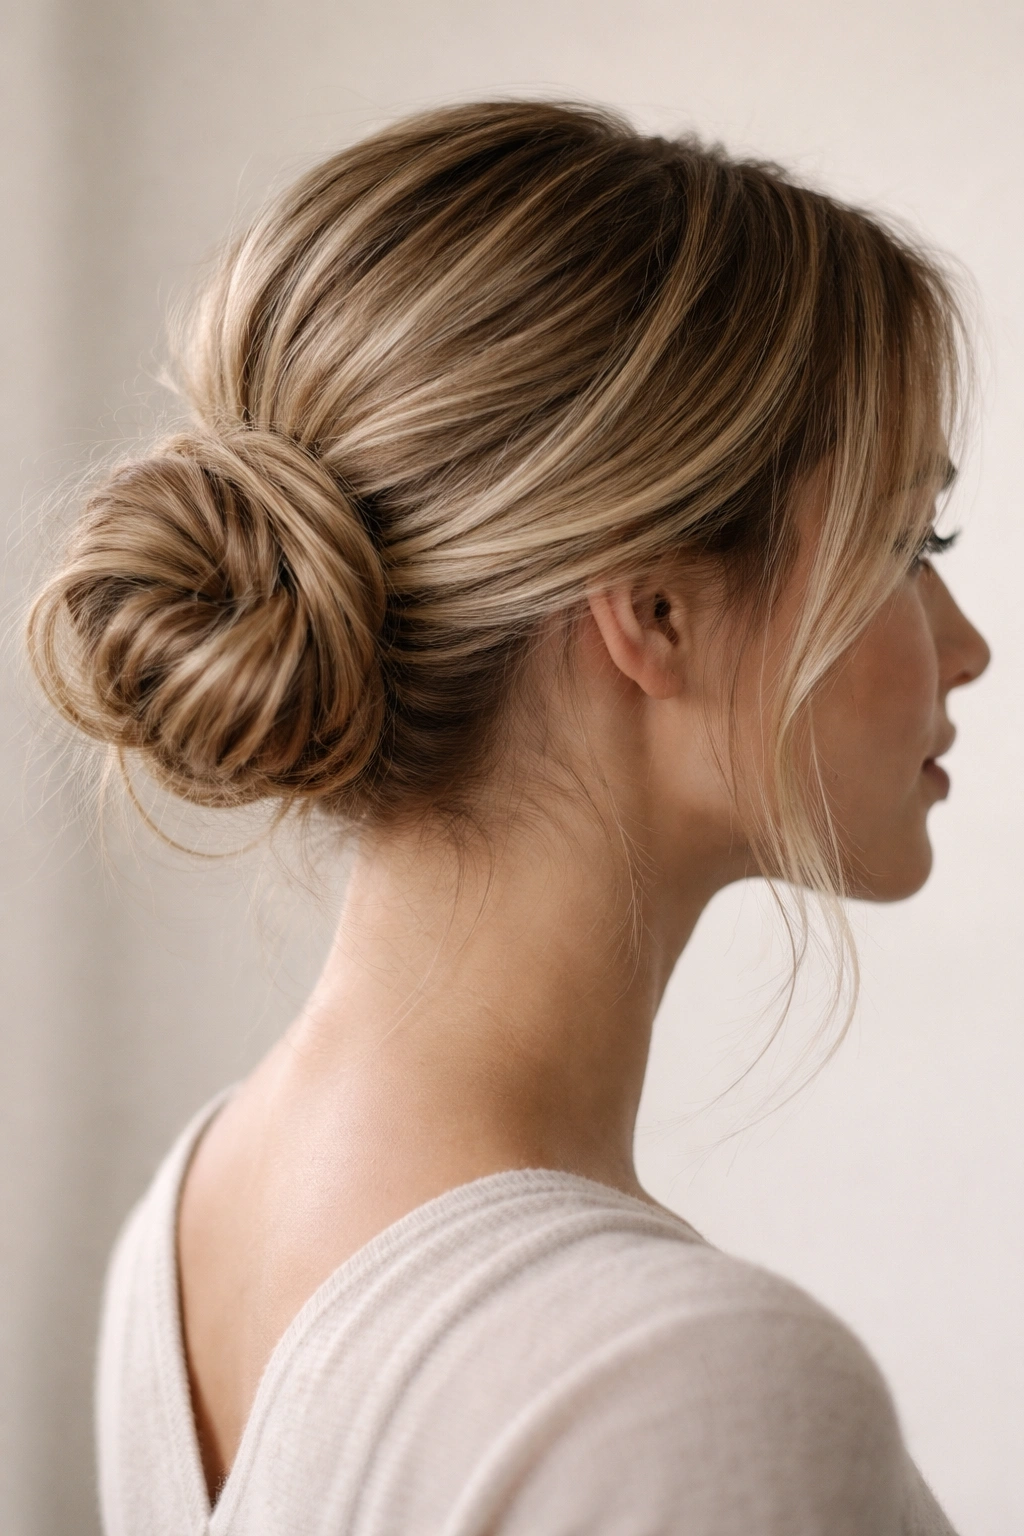
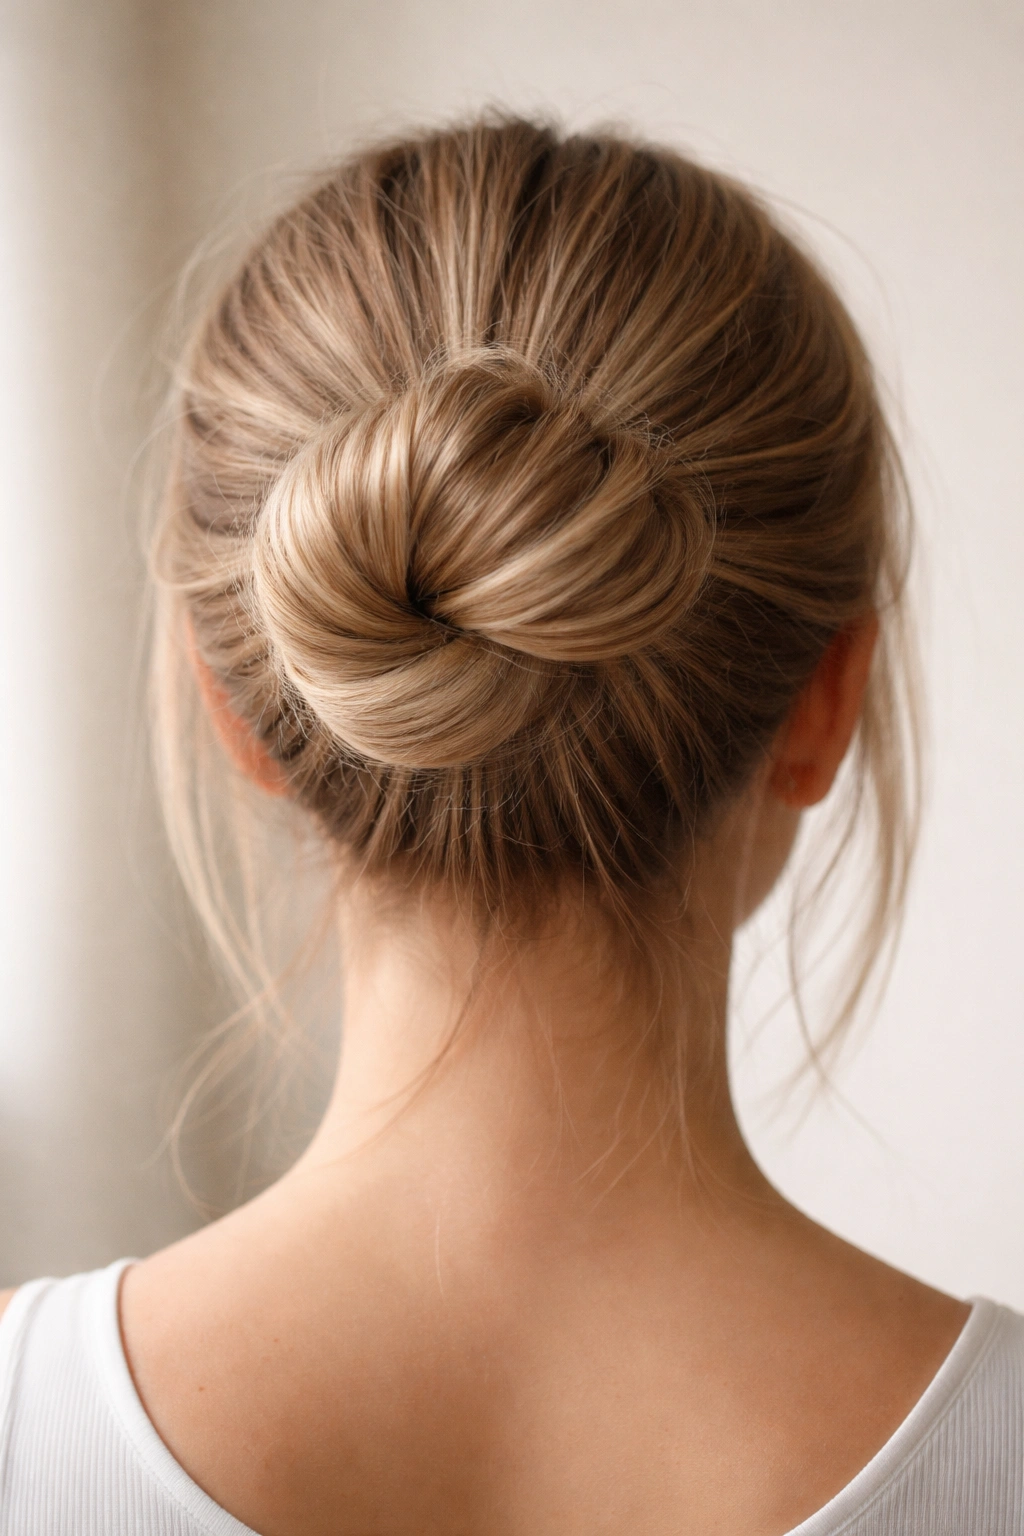
8. The Low Messy Bun With Smoothed Sides
This version plays to the strengths of straight hair by emphasizing the sleekness of the sides while creating volume and texture at the nape. It’s a style that balances polished and relaxed, which is often what people with straight hair are actually going for.
The Smooth Sides Technique
Pull your hair back into a low ponytail, positioning it just above your nape—significantly lower than a typical high bun. Use a fine-tooth comb and a smoothing cream or gel to smooth the sides of your head and the back of your head where hair would otherwise stick out. Make it intentionally sleek and almost severe in the smoothing. Use edge gel or a small brush to smooth any fly-aways around your face into place as well.
Creating Intentional Texture
Now twist your low ponytail and coil it into a bun, pinning it securely. Here’s the key: don’t pull pieces out randomly. Instead, deliberately pull out two slightly thicker pieces—one on each side of your nape—and pin them loosely so they curve down toward your shoulder blades. These pulled-out pieces are intentional and placed, not accidental. They create the contrast between the sleek, smooth top and sides and the softer, more textured nape area.
The style works beautifully on straight hair because the contrast is actually easier to achieve and more striking than it would be on naturally textured hair.
9. The Teased Bubble Bun With Stacked Sections

This style stacks multiple small ponytail sections vertically to create a bubble-bun effect that’s inherently fuller and more visually interesting than a single bun. On straight hair, this approach overcomes the flatness problem by creating obvious, dimensional sections.
Creating the Sections
Divide your hair horizontally into four sections from crown to nape. Secure the first (topmost) section into a small, tight ponytail with a clear elastic. Tease this ponytail gently with a fine-tooth comb to create texture and fullness, then smooth the outside layer with a paddle brush. Secure the next section into a ponytail directly below the first, making sure the elastic sits just below where you pinned the first one. Tease this section as well.
Building the Stack
Repeat for the third and fourth sections, creating a vertical stack of four distinct, teased ponytails. Once all four are in place, gently pull at the base of each ponytail and the hair above each elastic so the sections bubble outward slightly, creating a balloon-like, dimensional appearance. Pin any loose ends and pull a few strands from around the entire stack to create softness.
This approach creates so much inherent texture that the straight nature of the hair becomes almost irrelevant—the style has enough visible dimension and movement built into its structure.
10. The Faux-Textured Bun With Twisted Strands
This final technique uses a simple trick: twisting multiple thin strands and wrapping them together before coiling into a bun, which creates the appearance of texture throughout the entire bun without requiring actual hair texture.
The Twisted-Strand Method
Gather your hair into a ponytail. Divide it into four equal sections. Take the first section and twist it tightly. Take the second section and twist it tightly. Now wrap these two twisted strands around each other, creating a rope that has obvious visual texture—it looks braided or textured even though you’re just using straight strands twisted together.
Repeat with the third and fourth sections, then bring all four twisted-together ropes together and coil them into a bun shape. Pin securely. The bun now has visible texture and dimension throughout because of the way the twisted strands interact with each other, creating shadows and visual interest.
Why This Works on Straight Hair
Because you’re creating the appearance of texture through structure and twisting rather than relying on the hair’s own texture, this technique is arguably better on straight hair than on textured hair. The smooth, straight strands actually emphasize the intentional twists and wraps you’ve created, making them more visible and more striking. Pull pieces loose gently from around the bun, and you’re working with strands that have been deliberately twisted, so they hold that twisted shape rather than immediately reverting to straight.
Final Thoughts
Straight hair doesn’t require a different approach to messy buns—it requires a smarter approach. Rather than fighting the smooth, slip-prone nature of straight strands, these ten styles work with that quality by using techniques like backcombing, braiding, wrapping, and mechanical anchors that provide the grip and hold that smoothness doesn’t naturally offer. Each style also emphasizes intentionality over accident—the pulled-out pieces are placed deliberately, the texture is created strategically, and the overall effect reads as “casually styled” rather than “didn’t finish getting ready.”
The most important shift in mindset is understanding that straight hair’s smoothness is actually an asset for messy buns when you frame it correctly. You can create stunning contrast between sleek sides and undone pieces, you can emphasize any structure you create because there’s no competing natural texture to muddy the lines, and you can maintain hold and shape for hours when you use the right foundational techniques. Your straight hair isn’t working against you—you’ve just been using the wrong strategy up until now.
Start with whichever of these ten styles speaks to your lifestyle and hair length, then experiment with the others. You’ll likely find two or three that become your go-to styles because they consistently work, feel manageable, and get you the exact aesthetic you’re aiming for. That’s the real value of having these options—finding what works for your specific hair and sticking with it.