Your graduation day deserves a hairstyle that feels as special and polished as the moment itself. Straight hair is a blank canvas for timeless, sophisticated looks that photograph beautifully and hold up through hours of celebration — no frizz, no drama, just clean lines and intentional style. Whether you’re drawn to classic elegance, modern edge, or romantic details, there’s a straight-hair graduation hairstyle that’ll make you feel like the best version of yourself walking across that stage.
The beauty of graduating with straight hair is that you’ve already got the texture foundation for styles that demand precision and shine. A sleek foundation means your stylist can focus on creating dimension through placement, texture, and embellishment rather than fighting the hair itself. You can go statement-making or subtly refined, architectural or soft — straight hair delivers whatever vision you choose with real polish. Let’s walk through ten graduation hairstyles that work beautifully with naturally straight or smoothed-straight texture, complete with exactly what makes each one special and how to make sure yours photographs like the professional work you’re investing in.
1. Sleek Straight with Pearl Hair Clips
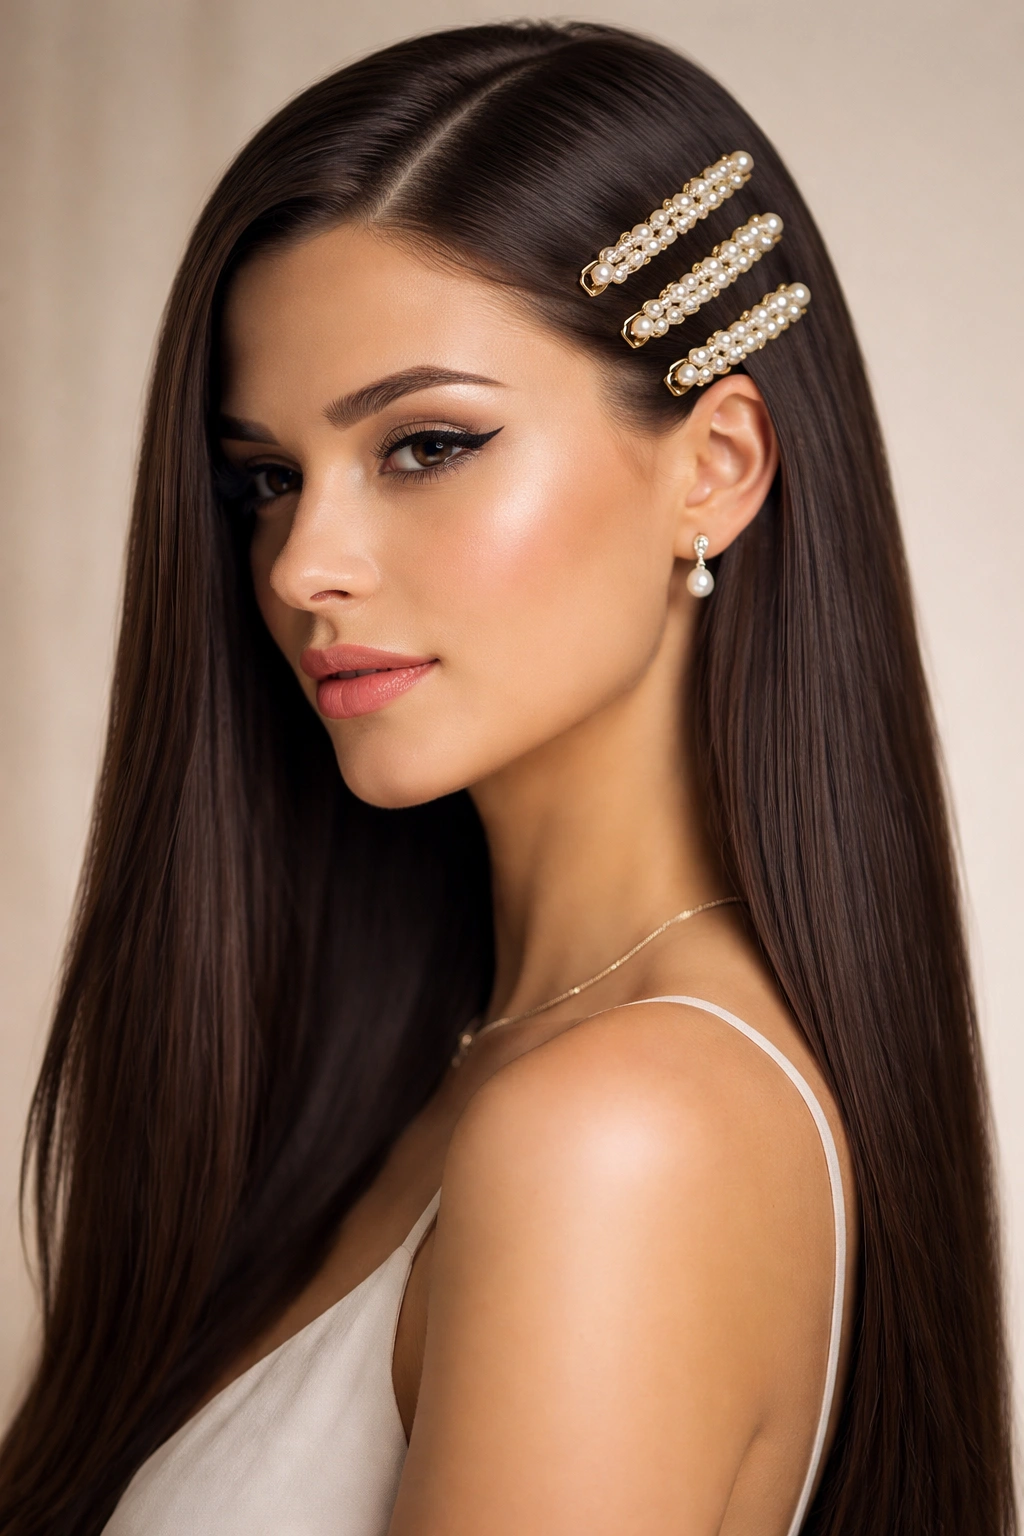
This is graduation elegance distilled to its simplest, most effective form. Your hair stays completely straight from roots to ends, with a deep side part that creates asymmetry and visual interest without any texture work or complication. Pearl or diamond hair clips — usually three to five scattered down one side or clustered near the part — become the entire focal point, catching light and adding understated luxury without trying.
Why This Works for Graduation
The reason this style reads as inherently sophisticated is because it prioritizes quality over complexity. Straight hair that’s genuinely shiny and healthy becomes the statement, and the clips simply punctuate it. You’re not fighting a flyaway or frizz situation because there’s no texture to misbehave — everything stays exactly where you position it from getting ready until your last photo. This style photographs exceptionally well because the straight lines and reflective surface of smooth hair show off detail, and the clips catch camera flash beautifully.
Execution and Styling Tips
- Start with hair that’s been smoothed with a flat iron or keratin treatment if needed, focusing on creating genuine shine rather than just straightness
- Use a fine-tooth comb to create a sharp side part about two inches from one side of your center
- Secure three to four pearl clips along the part line or clustered about two inches from the face on your longer side
- Apply a light hairspray (not heavy — you want to avoid that stiff, helmet feeling) to lock everything in place without visible product buildup
- Finish with a luminizing serum on the mid-lengths and ends for extra shine that reads beautifully in photographs
Pro tip: Bring your hair clips with you to your graduation day and do a quick reapplication right before photos — even if everything stayed perfect, one refresh ensures they’re positioned exactly where you want them and the shine is at its peak.
2. Textured Half-Up Knot with Ribbons
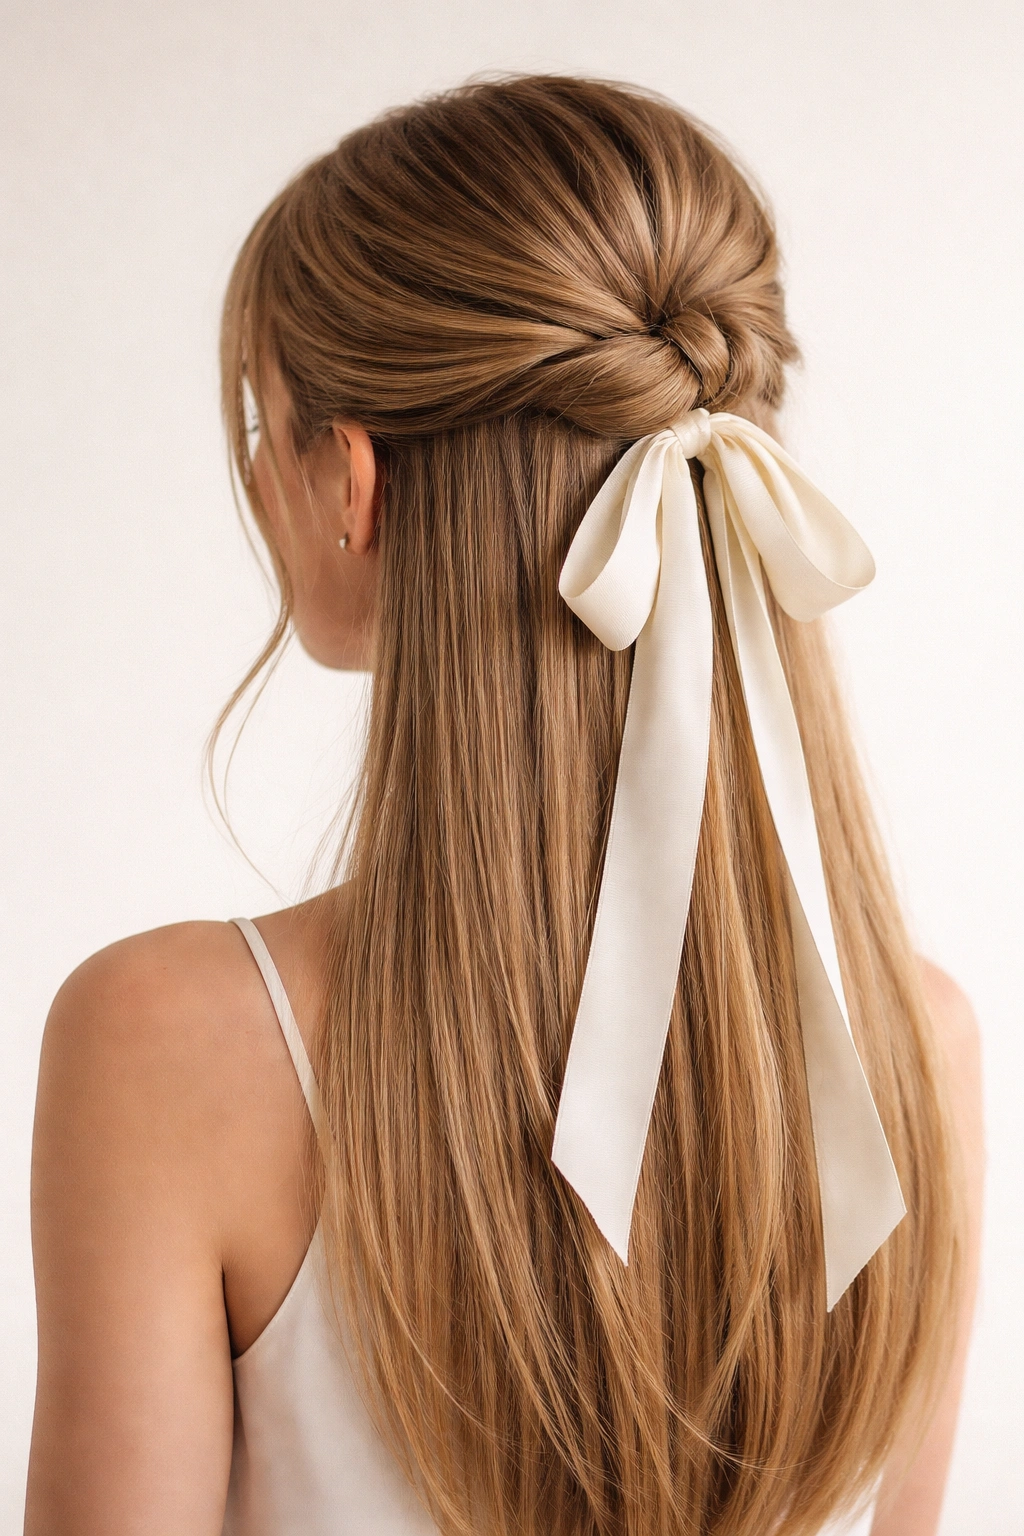
This style combines the polished sophistication of half-up styling with subtle texture that adds visual interest and dimension without departing from straight-hair territory. The top half of your hair gets gathered into a low knot right at the crown, and a ribbon — silk, satin, or velvet depending on your dress aesthetic — weaves through the knot and trails down your back.
Why This Works for Graduation
Half-up styling automatically feels more elevated than hair completely down, and it shows off your face and jawline while keeping hair off your shoulders for movement and elegance. The ribbon transforms what could be a simple knot into something intentional and detailed — it’s the small touch that shows you’ve thought through your whole look. This style works whether your dress is ultra-formal or less traditional because the ribbon can coordinate with your specific aesthetic.
Execution and Styling Tips
- Straighten your entire head of hair so everything has a consistent, polished base
- Gather the hair from your temples and crown area back to about where your crown would naturally sit if you were wearing a tiara
- Twist this section loosely — you want movement, not a tight rope — and wrap it into a low, soft knot, securing with bobby pins that match your hair color
- Thread your ribbon through the knot, letting it weave in and out so you see glimpses of the ribbon throughout the knot itself
- Let the ribbon ends trail down your back — they can hang as long as your dress allows or be pinned at the nape if you prefer a shorter finish
Worth knowing: Test your ribbon choice in natural light before graduation day. Some ribbons photograph flat and lose their color in bright sunlight, while others shimmer beautifully. Satin and silk ribbons typically photograph better than matte options.
3. Low Ponytail with Layered Texture
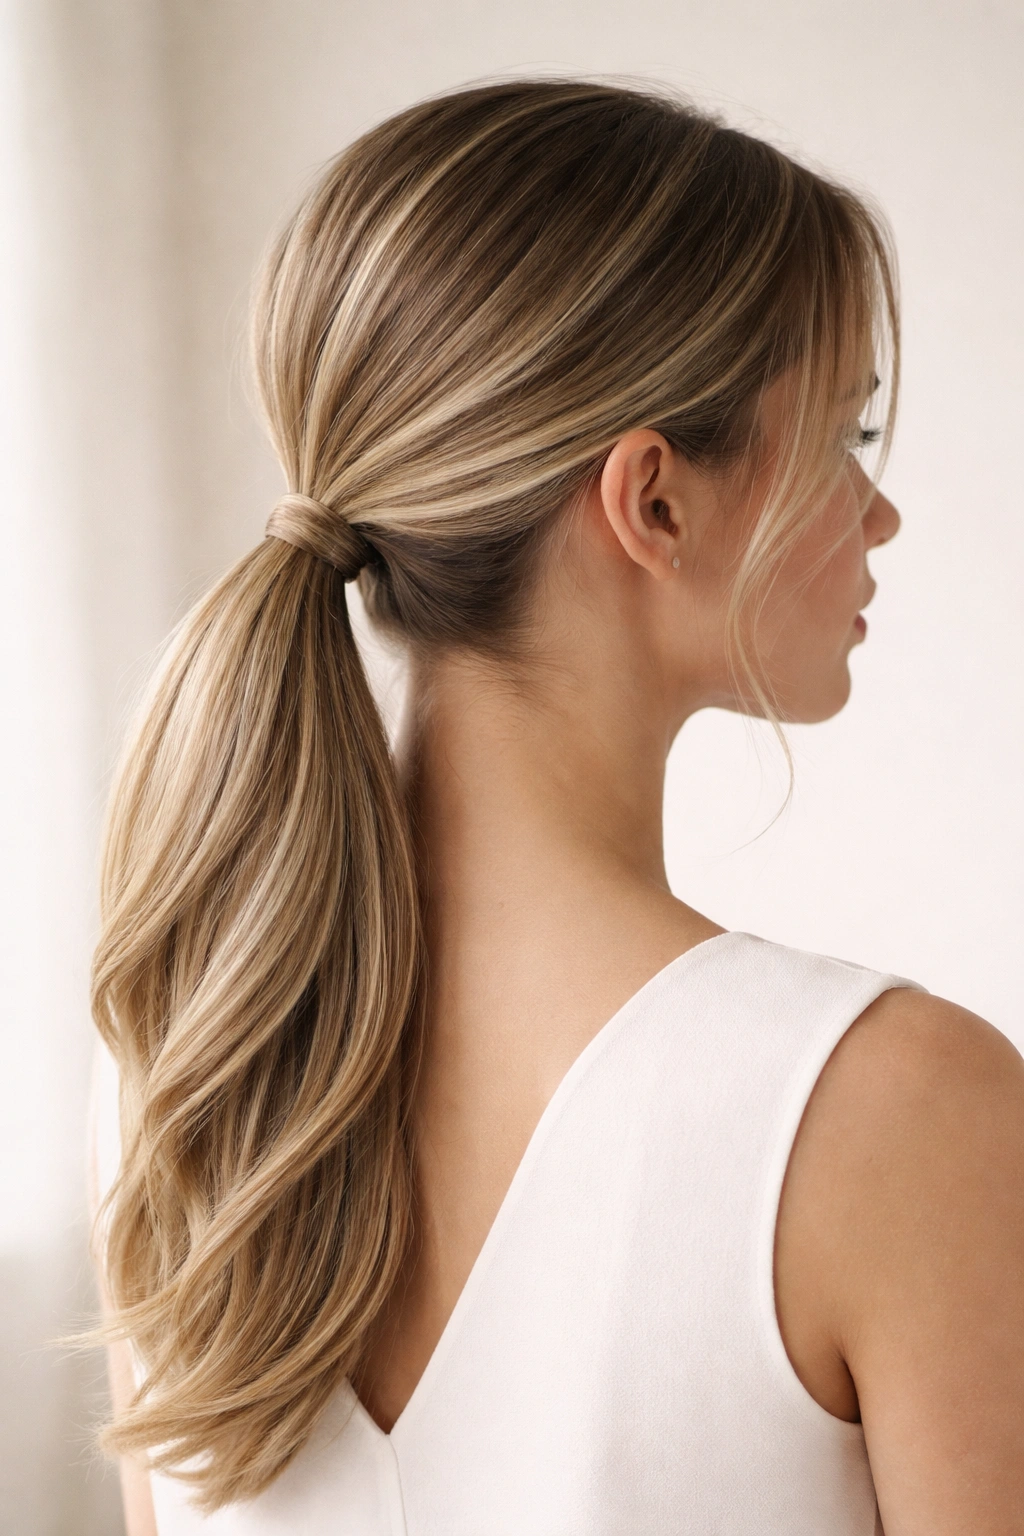
A low ponytail sits just above the nape of your neck and creates an instant sense of refined polish while keeping hair completely off your face and neck. This version adds subtle layers of texture — not full waves, but deliberate, controlled waves in the ponytail itself — that prevent the style from feeling too severe or corporate.
Why This Works for Graduation
Low ponytails read as sophisticated and timeless, and they’re comfortable enough to wear for a full day of events without your scalp feeling tight. The added texture in the ponytail portion keeps the style from feeling too minimal — it shows you’ve put thought and effort into your appearance without looking overdone. This is the style that photographs well from every angle and works with virtually any dress style or color.
Execution and Styling Tips
- Start by straightening your entire head to create a smooth base
- Section out the hair at the nape of your neck — the lower you position this, the more elegant and elongated your silhouette appears
- Use a fine-tooth comb and a smoothing serum to create a very sleek, tight base ponytail
- Once secured, take a 1.5-inch section of the ponytail and wave it gently using a 1-inch curling iron, holding for 8 to 10 seconds and releasing the curl (don’t wrap it fully around the barrel — just create a subtle S-curve)
- Repeat this with about five more sections throughout the ponytail, spacing them so waves are distributed evenly from top to bottom
- Gently brush out each wave with your fingers — you want layered texture that reads as movement, not individual ringlets
- Set with a light-hold hairspray that won’t create visible stiffness
Pro tip: Do your texture work at least 20 minutes before leaving for your graduation so the waves have time to fully set and cool. This makes them last significantly longer through the events of the day.
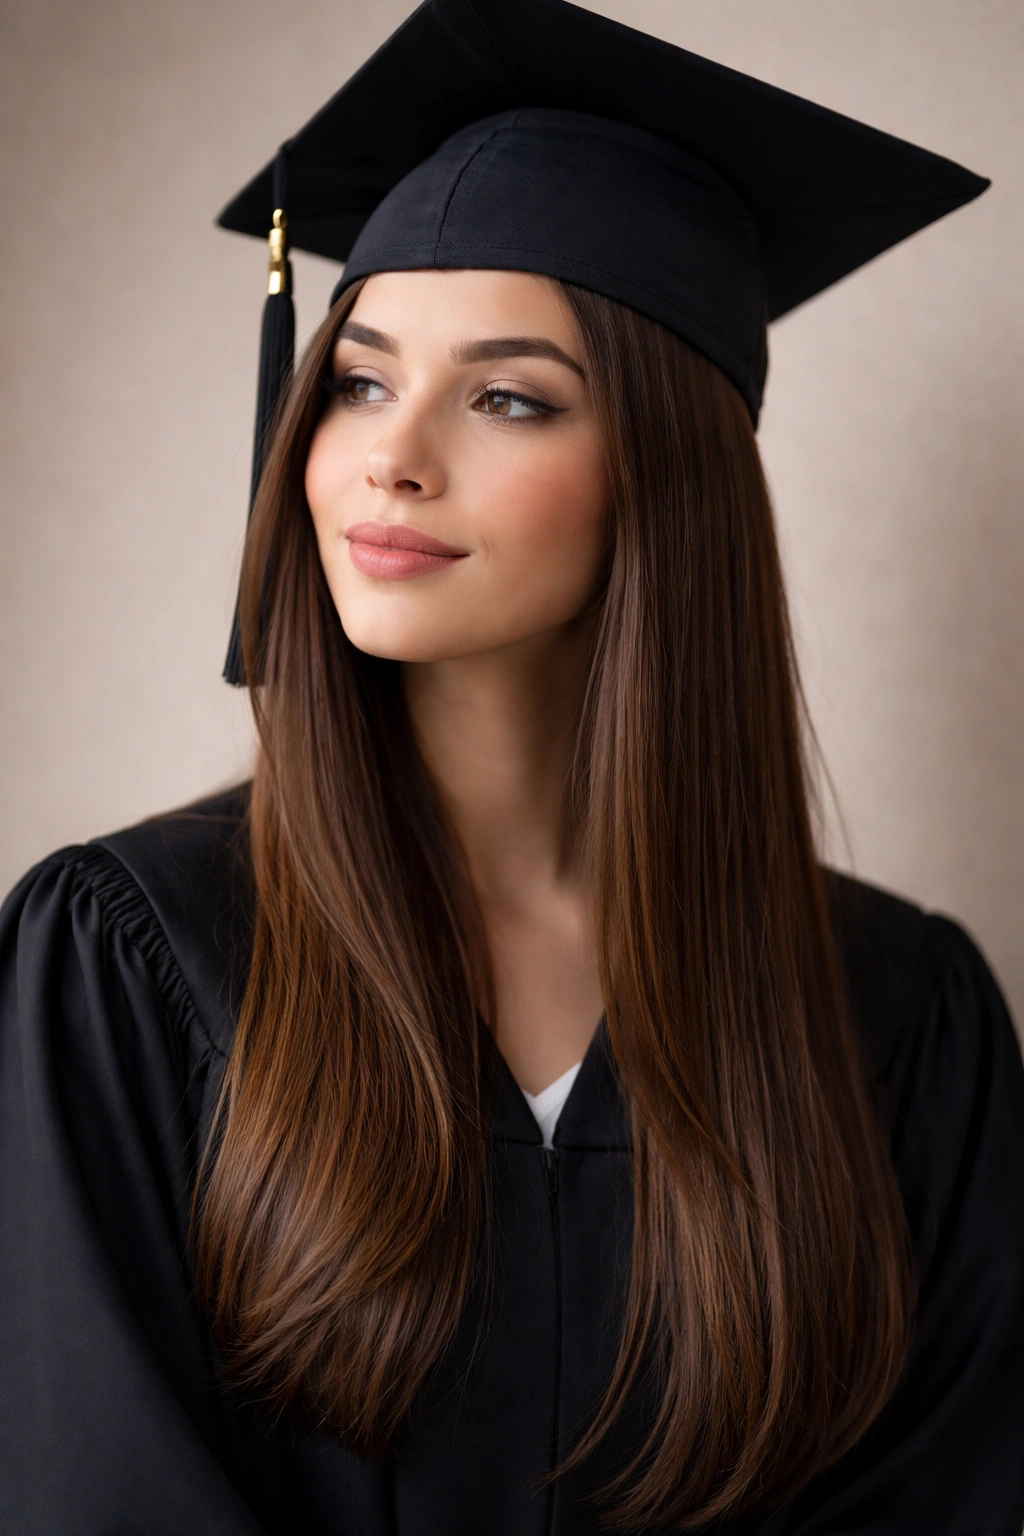
4. Center Part with Voluminous Waves
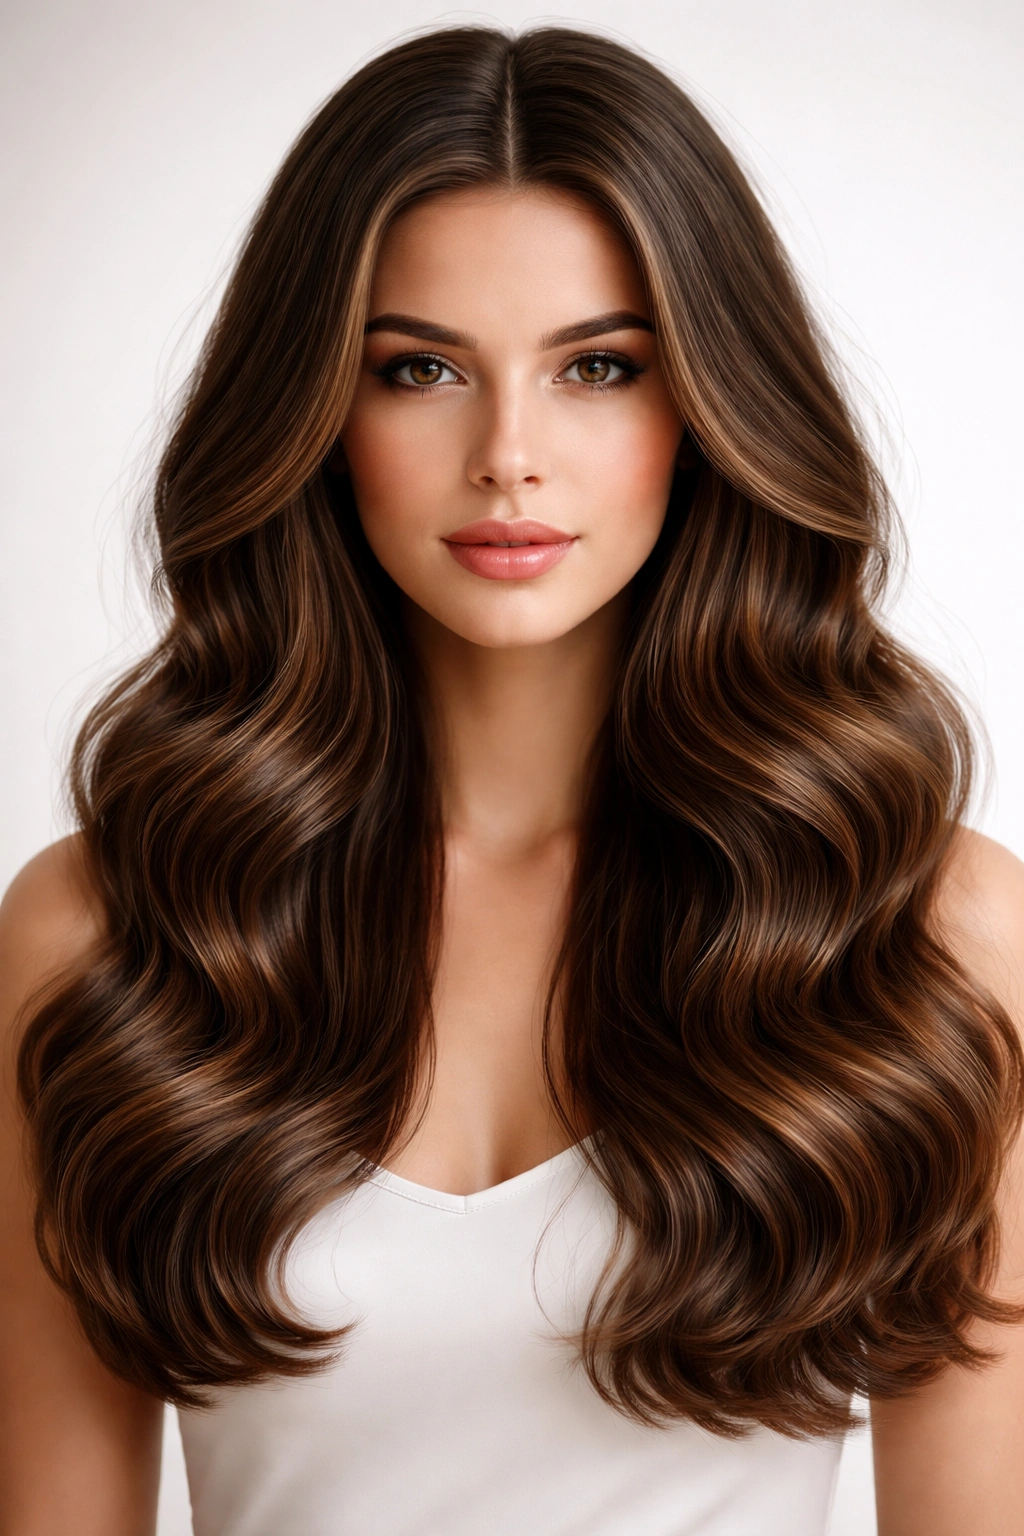
This style keeps your hair down, creating drama and movement through waves that cascade from a sharp center part. The volume comes from backcombing at the roots and the shape of the waves themselves — not from curling iron technique alone — which means the style holds beautifully for hours without looking flat by midday.
Why This Works for Graduation
A center part is inherently flattering because it draws the eye straight to your face rather than to the sides. Voluminous waves read as more formal and intentional than straight hair, and they photograph with real dimension and movement. This style feels romantic and modern simultaneously — it’s not vintage-inspired or overly trendy, just timeless and beautiful. The straight-hair base means waves stay defined and shiny rather than becoming frizzy or dull.
Execution and Styling Tips
- Create a very sharp center part using the pointed end of a tail comb, parting from your hairline straight back
- Apply a volumizing mousse to damp hair before blow-drying to give yourself a thicker foundation to work with
- Blow-dry sections using a round brush, lifting away from the scalp to create root volume
- Once completely dry, use a 1.25-inch curling iron to create waves: take 2-inch sections, wrap them loosely around the barrel, and hold for 15 seconds before releasing
- Alternate the direction you curl each section — one away from your face, the next toward — to create a natural, undulating wave pattern
- Once all sections are curled, gently comb through with your fingers and a wide-tooth comb to blend and soften the curls into waves
- Use a texturizing spray on mid-lengths and ends to prevent the waves from looking too perfect or uniform
- Finish with a flexible-hold hairspray that allows movement
Worth knowing: Waves created with a curling iron hold longest on hair that’s been blow-dried smooth first and has a volumizing product as foundation. Skipping these steps means your waves will fall flat by afternoon.
5. Twisted Crown with Bobbypins
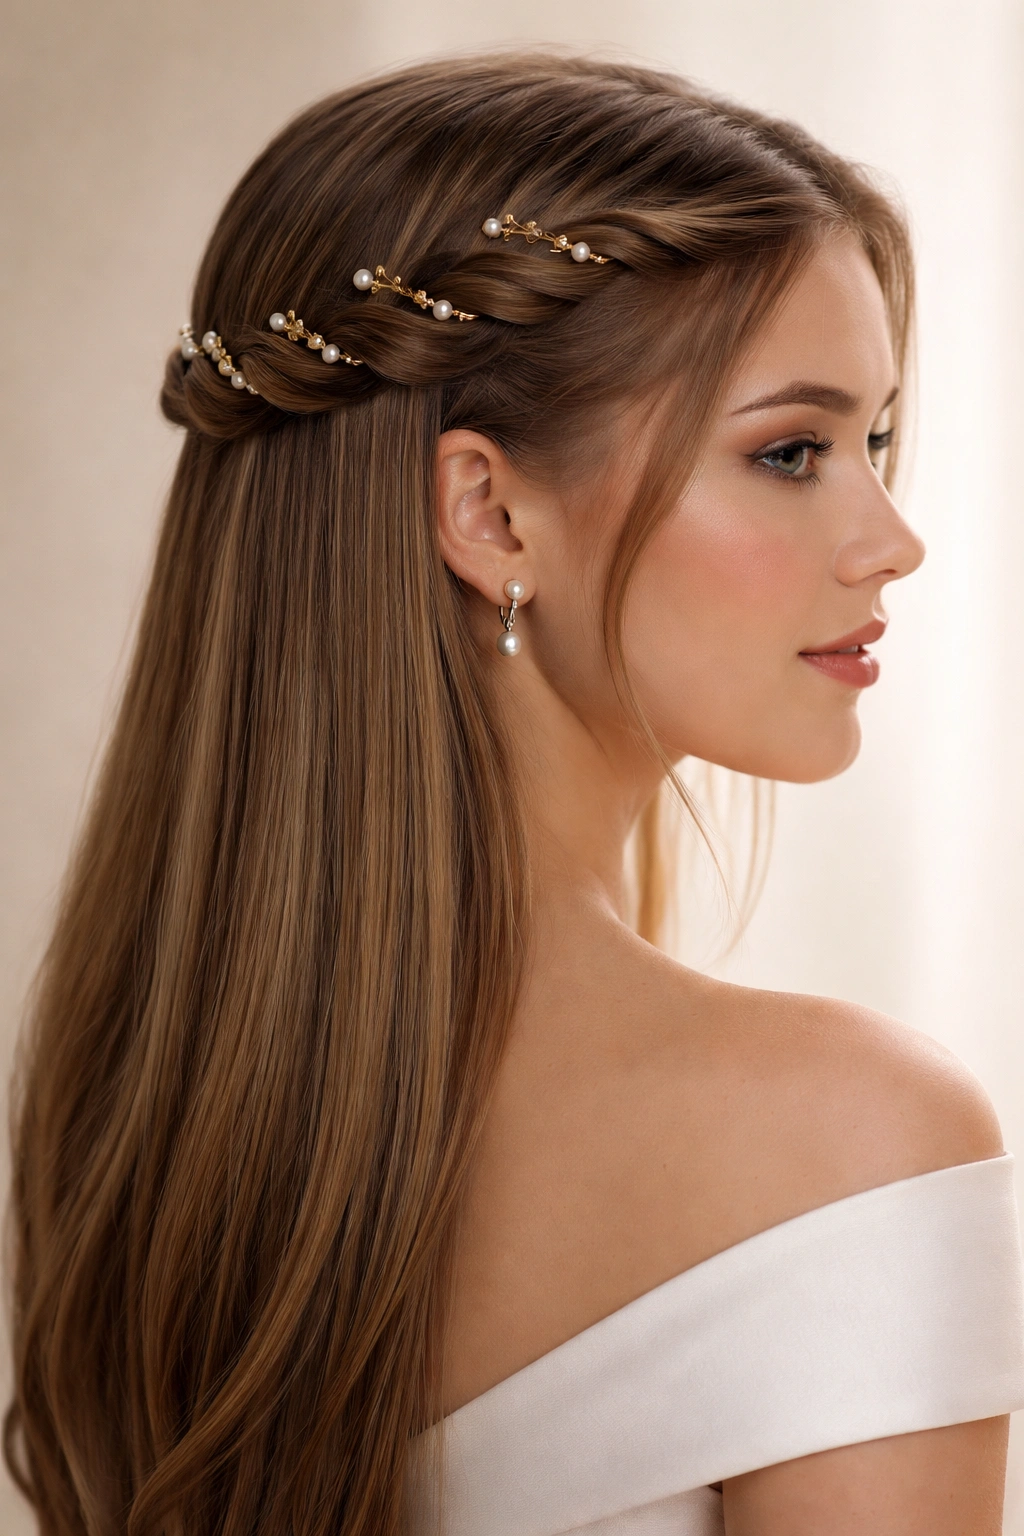
This is an ornamental hairstyle where two thick twists start at your temples and wrap around your head like a crown, meeting at the back and pinned with gold or jeweled bobby pins that become visible design elements. The rest of your hair stays completely straight and down, framing your face and shoulders while the twisted crown sits atop like a tiara.
Why This Works for Graduation
A twisted crown feels ceremonial and special without being costume-like or overly theatrical. It’s the kind of detail that makes you feel transformed and elevated without straying into unfamiliar territory. The twists themselves are technically very simple — anyone can create them — but the visual impact is significant. Because your straight hair is the foundation, the twists show up crisp and intentional rather than blending into texture.
Execution and Styling Tips
- Make sure your hair is completely straight and smooth, with a light smoothing serum applied for shine
- Part your hair in the center from hairline to nape
- Starting at your left temple, take a 2-inch-wide section of hair and create a simple two-strand twist (divide the section in half, twist one strand over the other repeatedly, keeping it snug)
- Twist this section all the way around your head, following your natural hairline, moving toward your right ear
- Once you reach the right side of your head at ear level, take a second 2-inch-wide section at your right temple and create another twist, wrapping it around to meet the first twist at the back center of your head
- Secure both twists together at the back using three to four jeweled or metallic bobby pins positioned so they’re clearly visible — they should be an intentional design element, not hidden
- Leave all remaining hair completely straight and down
Pro tip: Use bobby pins that match or complement your skin tone and dress color, and position them so they catch light. These pins become part of your styling, not something you’re hiding.
6. Slicked-Back High Ponytail with Metallic Cuff
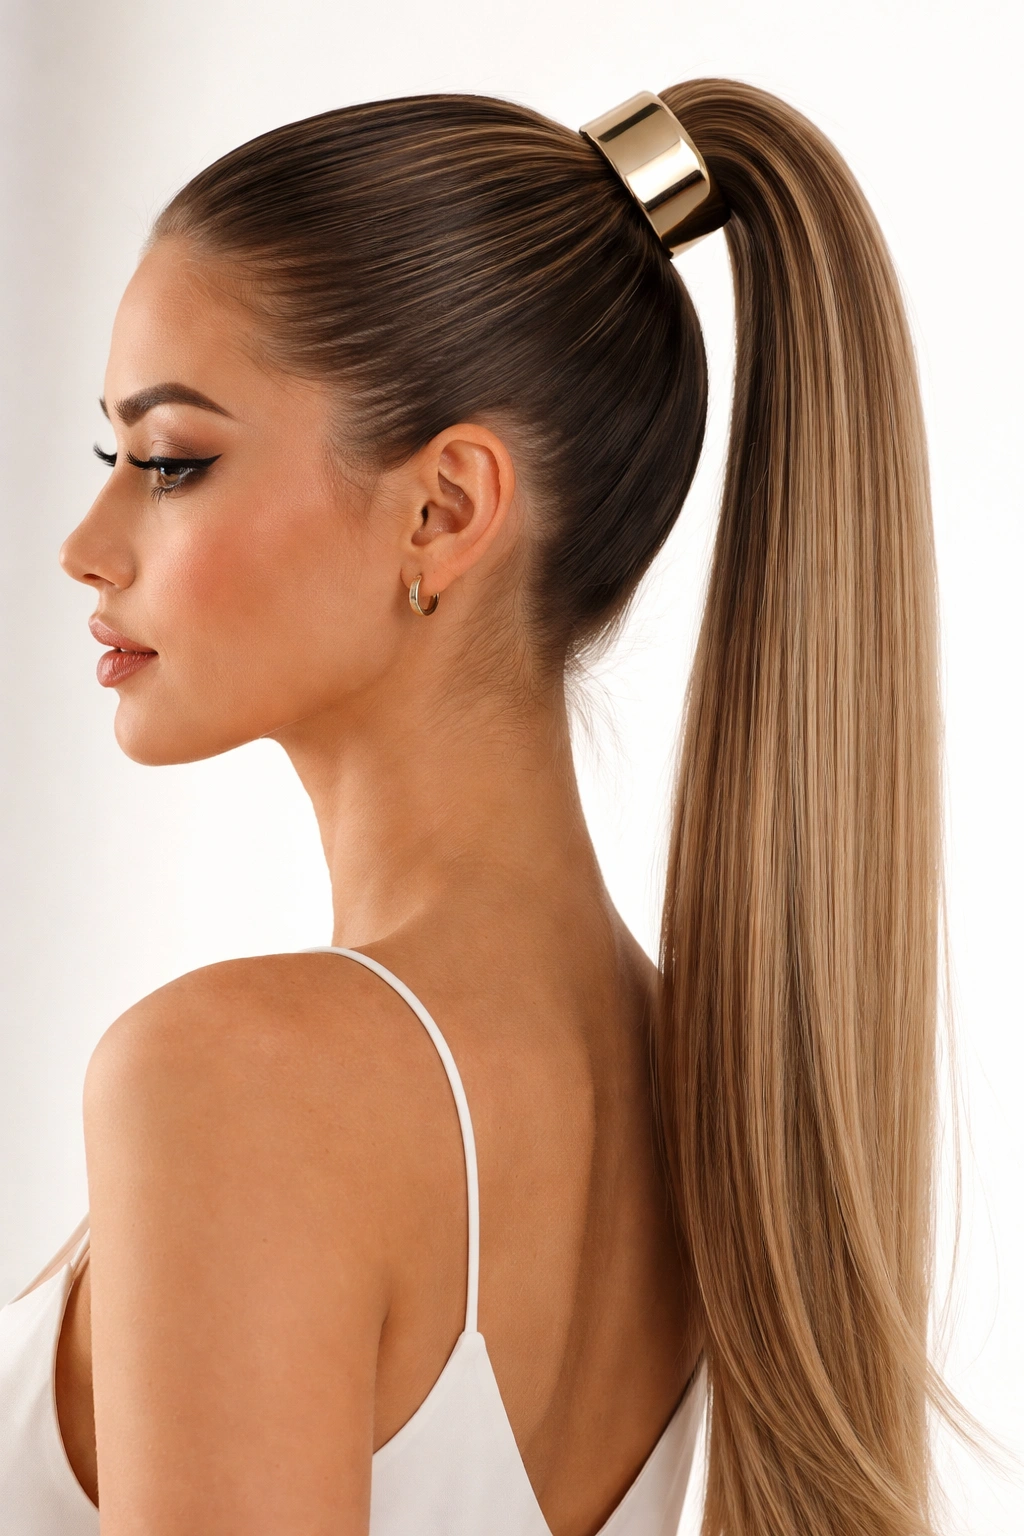
This modern, sharp style gathers all your hair into a very high, very sleek ponytail at the crown using smoothing gel for a polished base, then wraps a metallic cuff or hair ring around the elastic to elevate the look. The extreme sleekness and high placement create an architectural, editorial feel that’s very current and very intentional.
Why This Works for Graduation
A slicked-back style is bold and commands attention without relying on volume or texture. It’s contemporary and fashion-forward while still being completely appropriate for a formal event. The metallic cuff adds an unexpected luxury detail that transforms a basic ponytail into something statement-making. This style photographs beautifully because the clean lines and shine of the hair show up sharp and defined in photos.
Execution and Styling Tips
- Straighten your entire head of hair, focusing on creating maximum shine
- Apply a smoothing gel to your hairline and work it back through your hair, using a fine-tooth comb to pull everything back tightly toward your crown
- Create a very high ponytail — position it where you’d place a high bun, roughly 4 to 5 inches above your natural crown
- Secure tightly with an elastic that matches your hair color, wrapping it two or three times to ensure absolute stability
- Wrap your metallic cuff or hair ring around the base of the ponytail, covering the elastic completely
- Smooth any flyaways with the gel and a soft brush
Worth knowing: Slicked-back styles require either very fine, flyaway-free hair or a quality smoothing gel (not spray) to look polished rather than messy. If you have baby hairs or frizziness around your hairline, invest in a high-quality edge control product.
7. Side-Swept Straight with Hidden Braids
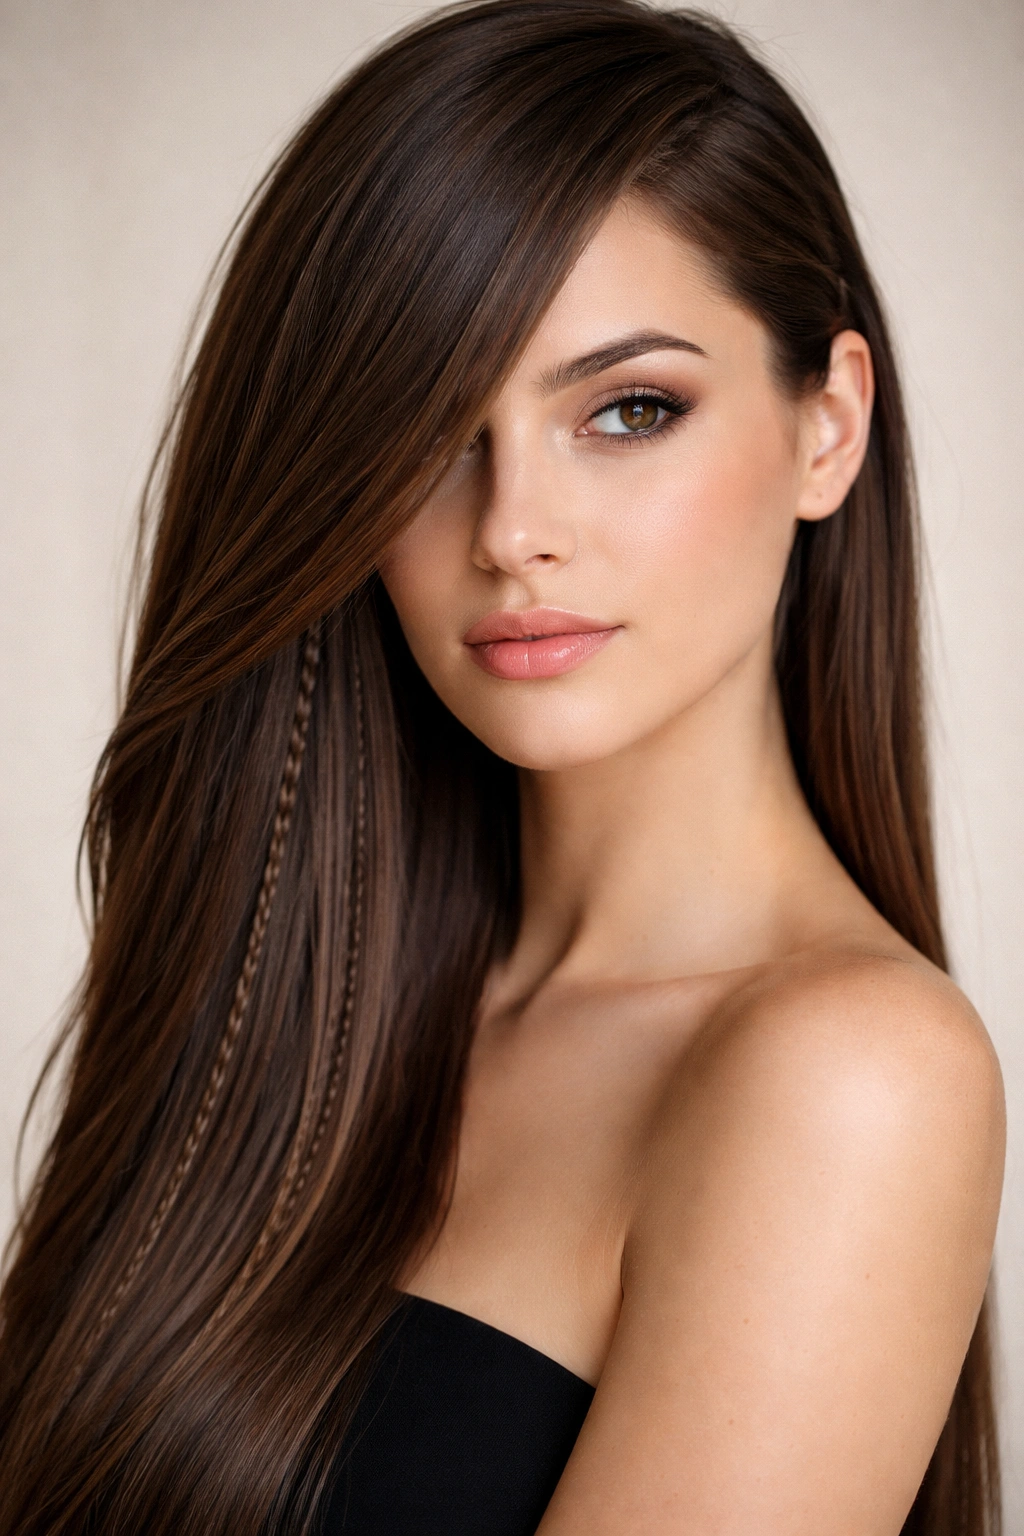
This sophisticated style creates an asymmetrical silhouette by sweeping all your hair dramatically to one side, then hiding thin braids within the straight hair to add subtle texture and detail that’s visible only up close. The overall impression is sleek and straight, but if someone looks closely, they see the intentional artistry woven throughout.
Why This Works for Graduation
Side-swept styling is universally flattering because it elongates the face and creates elegant, flowing lines. Hidden braids add interest and prevent the style from feeling too plain, but they’re subtle enough that the overall effect remains polished rather than trendy. This is the style that looks effortlessly sophisticated — like you just threw your hair to the side and somehow ended up looking editorial.
Execution and Styling Tips
- Straighten your entire head, aiming for maximum shine and smoothness
- Create a deep side part, positioning it about one inch from one side of your center part and extending from your hairline to the nape
- Using a fine-tooth comb, sweep all your hair toward the deeper side, using a light smoothing serum to keep everything sleek
- While the hair is swept to one side, create two to three thin, loose braids within the hair — one starting at the temples and running toward the back, and one or two more starting from the side part area
- These braids should be subtle and loose, not tight — the goal is a slight texture variation within the straight hair, not obvious plaited sections
- Secure the braids at the back of your head with bobby pins that match your hair color
- Let the bulk of your hair flow over and in front of your shoulders, with the swept side creating length and movement
Pro tip: Practice this style once before graduation day so you know exactly how far to sweep your hair and where to position the braids. Video yourself from the front and back to make sure the braids are visible but not the main focus.
8. Double Dutch Braids Down the Back
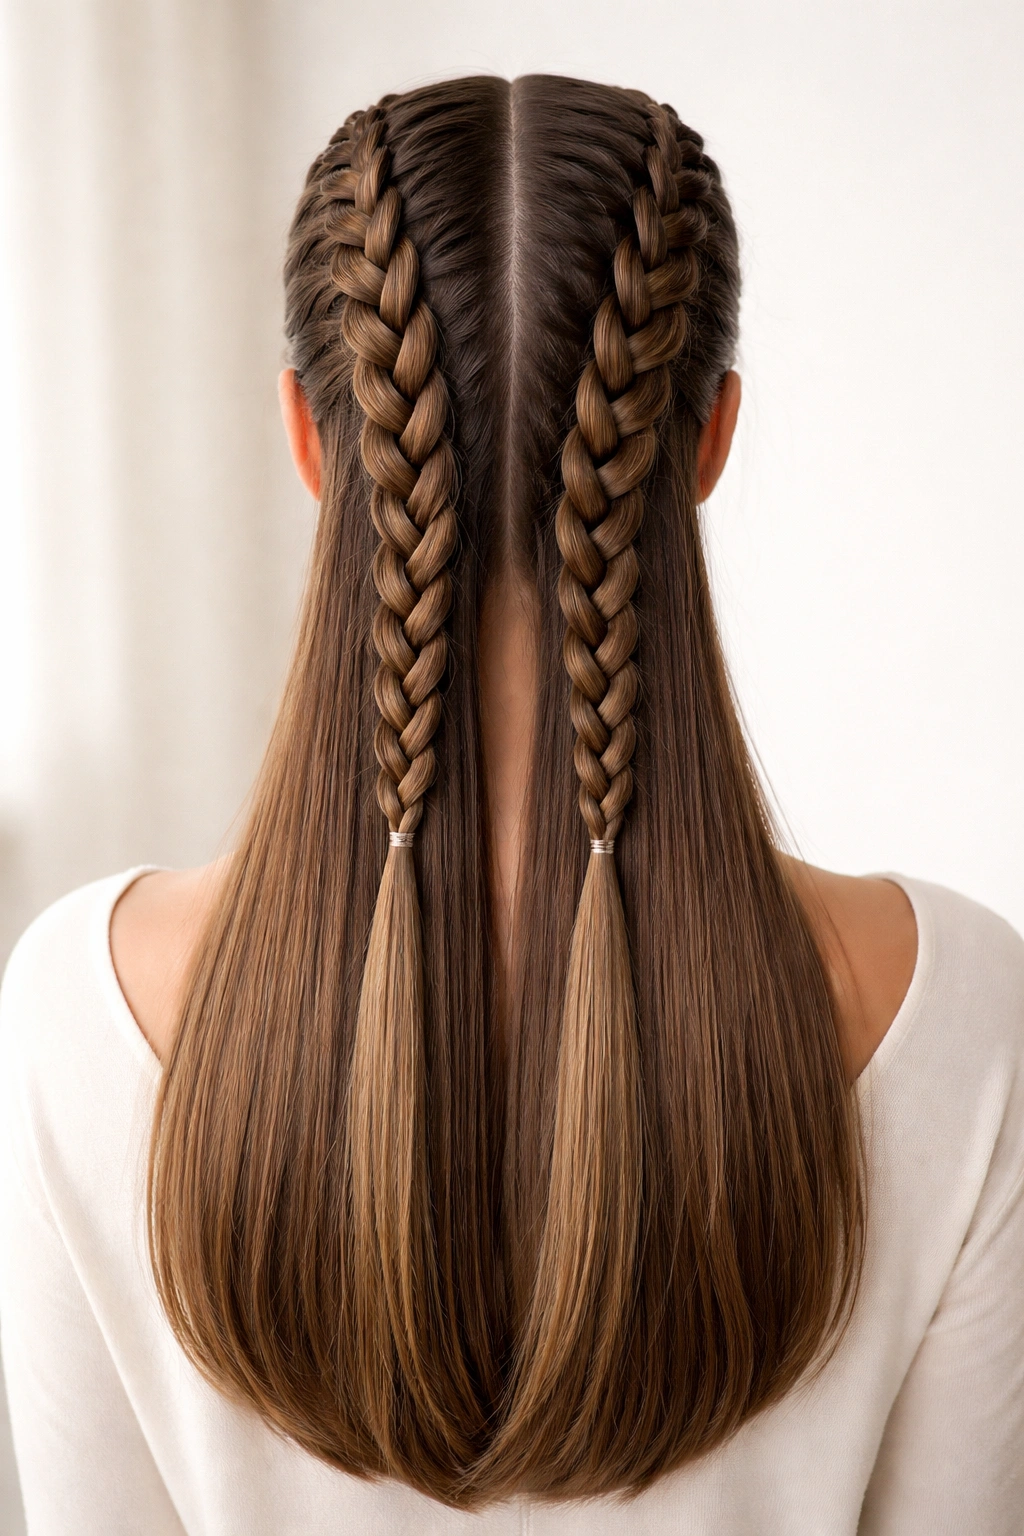
This playful yet sophisticated style features two Dutch braids (also called reverse French braids, where the sections are crossed under rather than over) running parallel down the back of your head. The rest of your hair stays completely straight, and the braids create a beautiful geometric pattern that’s especially striking in photos taken from behind.
Why This Works for Graduation
Double Dutch braids are technically simple to create, yet they look intentional and fashion-forward. They keep hair off your face and neck while adding visual interest and dimension. This style works beautifully for outdoor graduations and shows off your neck and shoulders elegantly. The braids against straight hair create sharp, defined lines that photograph incredibly well, especially from behind or in profile.
Execution and Styling Tips
- Straighten your entire head so the foundation is smooth and the braids show up with crisp definition
- Create two thin side parts at your temples, running them back to your nape — this divides your head into three sections (one Dutch braid on each side, with straight hair down the center)
- Starting at the left side part near your temple, create a Dutch braid by dividing that section into three parts and crossing each section under the center section (reverse of a normal braid) — this creates the raised, dimensional look
- Braid all the way down to the nape, keeping the braid snug and close to your scalp
- Repeat on the right side, ensuring both braids are even in thickness and tightness
- Secure both braids at the nape with a small elastic that matches your hair color
- Leave all hair in the center section (between the two braids) completely straight
Worth knowing: Dutch braids show up better in photos and on video than traditional French braids because the reverse technique creates more dimension. Make sure both braids are equally tight — mismatched tension makes one look intentional and the other accidental.
9. Curved Bob with Tucked Sides
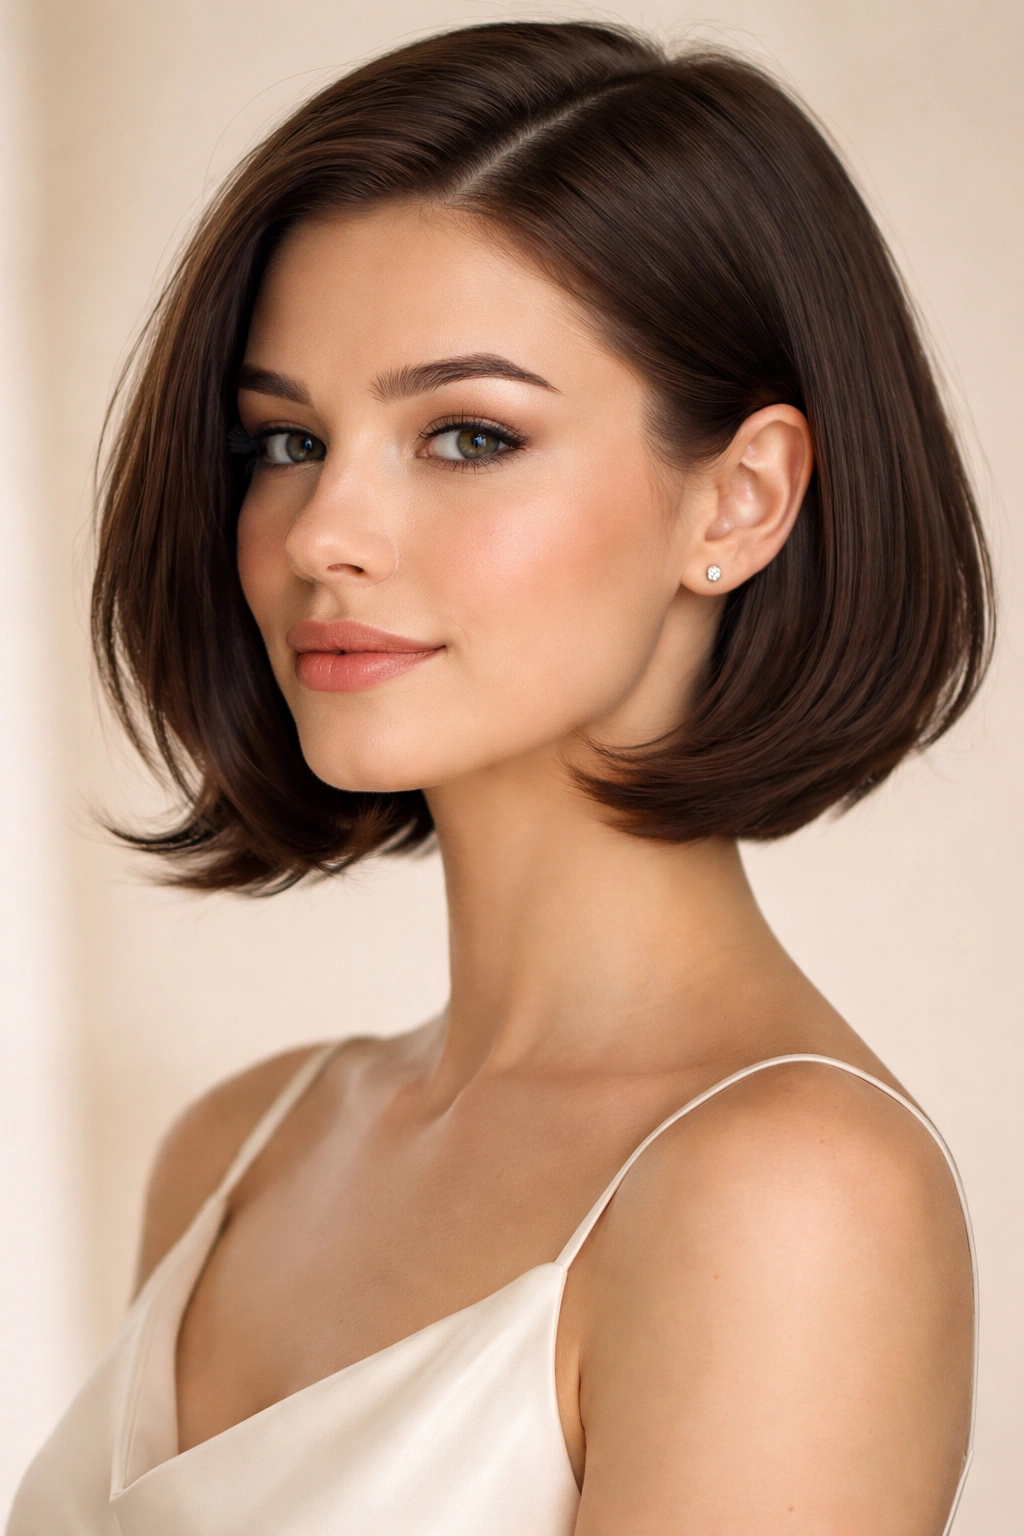
If you’re wearing your hair shorter or want a cut that reads as more polished for graduation, a curved bob with sides tucked behind the ears combines elegance with ease. The bob itself is straight and smooth, typically chin-length or slightly shorter, with a subtle outward curve at the ends. The tucking detail adds a refined touch that prevents the style from feeling too casual.
Why This Works for Graduation
A well-cut bob is one of the most elegant, timeless hairstyles available. The curved ends and tucked sides create a sophisticated silhouette that’s flattering on most face shapes. This style requires minimal styling effort but reads as intentional and polished. The straight, smooth texture means the cut itself is the statement, with no texture work needed to look put-together.
Execution and Styling Tips
- Start with a really well-executed cut — the curve at the ends and the overall length are essential, so invest in a skilled stylist familiar with graduated or curved bobs
- Blow-dry your hair straight using a round brush to create the outward curve at the ends naturally
- Once completely dry, use a 1-inch curling iron to add a subtle outward flip at the very ends if needed (the curve should be gentle, not dramatic)
- Apply a smoothing serum to create shine, focusing on the ends where the curve is most visible
- Tuck one or both sides behind your ears, securing with a small bobby pin if needed — the tucking should look intentional, not like you’re desperately trying to get hair out of your face
- Keep your center part clean and sharp, or wear your hair with a slight side part depending on which side you’re tucking
Pro tip: If you don’t normally wear your hair short, get the cut done at least a week or two before graduation so you have time to adjust to the style and practice how you like to wear it.
10. Sleek Bun with Face-Framing Strands
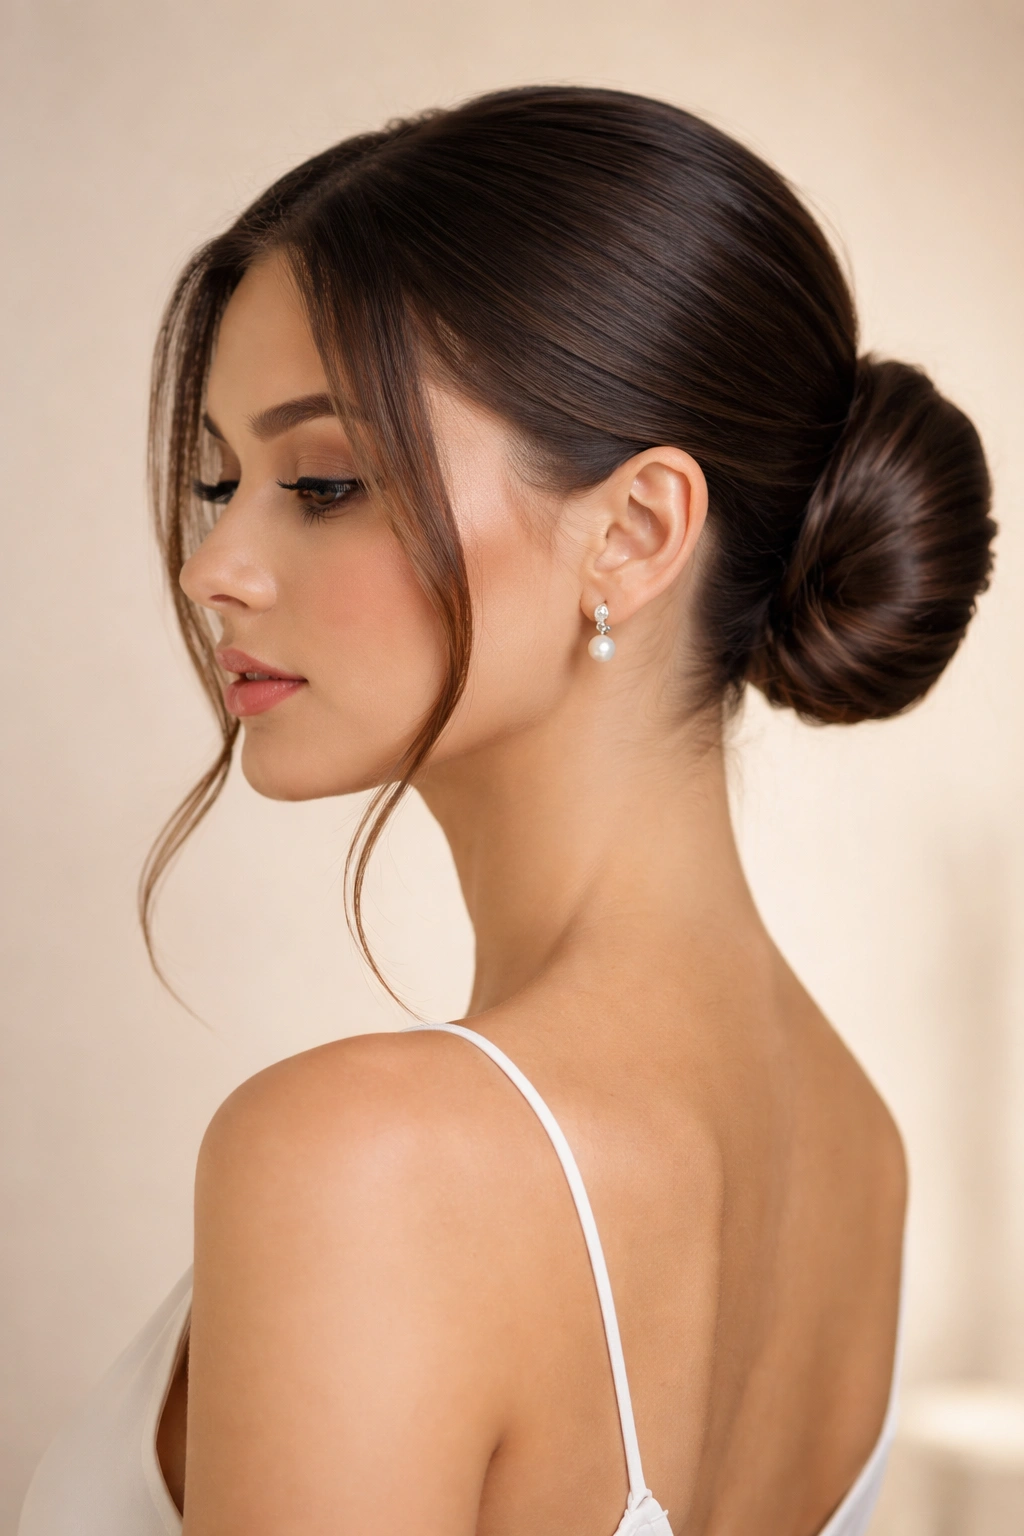
A low or mid-height bun is the ultimate in graduation elegance — it’s formal, refined, and shows off your face and neck beautifully. This version keeps the bun itself very sleek and smooth while allowing two thin strands to frame your face, softening the look and adding dimension without compromising the polished aesthetic.
Why This Works for Graduation
Buns are the most formal and universally appropriate hairstyle, perfect for any graduation event from the ceremony to formal dances or dinners. A sleek bun shows off your bone structure and facial features clearly. The face-framing strands add a romantic, intentional touch that prevents the style from feeling austere. This is the style that works with every dress style and every formality level.
Execution and Styling Tips
- Start with completely straight, smooth hair, using a flat iron to ensure there’s no texture
- Create a deep side part (about one inch from center), and before gathering your hair, pull out two thin strands from each side of your face near your temples
- Gather all the remaining hair back into a low bun — you can position it at the nape (very formal) or mid-back (slightly less formal)
- Create the bun by twisting the ponytail loosely and wrapping it around the base to form a coil, securing with bobby pins
- Smooth the surface of the bun with a fine-tooth comb and some smoothing gel so it looks polished and intentional
- Take the face-framing strands and gently wave them using a small curling iron, or leave them straight depending on your preference
- Tuck the strands behind your ears so they frame your face without falling across it
Worth knowing: Face-framing strands look best when they’re very thin and delicate — they should feel like an afterthought, not a major style element. If they feel too thick, they’ll look like you just forgot to put your hair up.
Final Thoughts
Choosing a graduation hairstyle when you have straight hair is actually an advantage because your foundation is already polished and photograph-ready — you’re just deciding what kind of refined look serves your mood and dress. Every style here works beautifully with straight hair because the texture doesn’t fight against you; instead, it provides a clean, shiny canvas for whatever you’re building. Whether you choose something architectural and modern like a slicked-back ponytail, or something romantic and detailed like braids or face-framing waves, your straight hair will keep everything looking intentional and elevated.
The secret to making any of these styles truly work is starting with genuinely smooth, shiny straight hair and committing to the style fully. Don’t half-tuck or partially braid or add clips hesitantly — these styles are most powerful when you own them completely. Practice your chosen style at least once before graduation day, ideally twice, so you know exactly how long it takes to create and what products and tools you’ll need. Bring backup bobby pins, extra hairspray, and any special clips or cuffs with you to graduation, and plan for a quick refresh before photos if you have the time.
Your graduation hairstyle is part of how you’ll be remembered in photos and videos of this special day — make it something that feels authentically like you, whether that’s sleek and modern, romantic and detailed, or timeless and classic. Straight hair gives you the freedom to choose any of those directions with complete confidence.