Some hairstyles look polished in a mirror and then fall apart the minute you move your head. Springy Afro twist updos are supposed to do the opposite. They need to hold shape through heat, sleep, errands, wind, and whatever else the day throws at them, which means the base has to do real work.
The styles that last usually share the same quiet rules: the hair is stretched enough to grip, the product is light enough not to soften the twist, and the pins go where gravity is weakest. Heavy grease at the root is a fast way to flatten the whole look. So is starting on damp hair and hoping it will “finish drying” into something neat later.
Coily hair gives you a gift here. It has memory, texture, and a built-in amount of hold, but it also shrinks fast and rebels when it feels weighed down. The best Afro twist updos do not fight the curl pattern. They work with it, then tuck, pin, and shape it into something that can survive a long day without turning stiff or helmet-like.
The 10 styles below are the ones I trust when the goal is bounce, shape, and staying power. Some are soft and low. Some sit high and proud. All of them lean on clean sections, a calm scalp, and a finish that does not ask the hair to do too much.
1. The Low, Pinned Crown Twist Updo
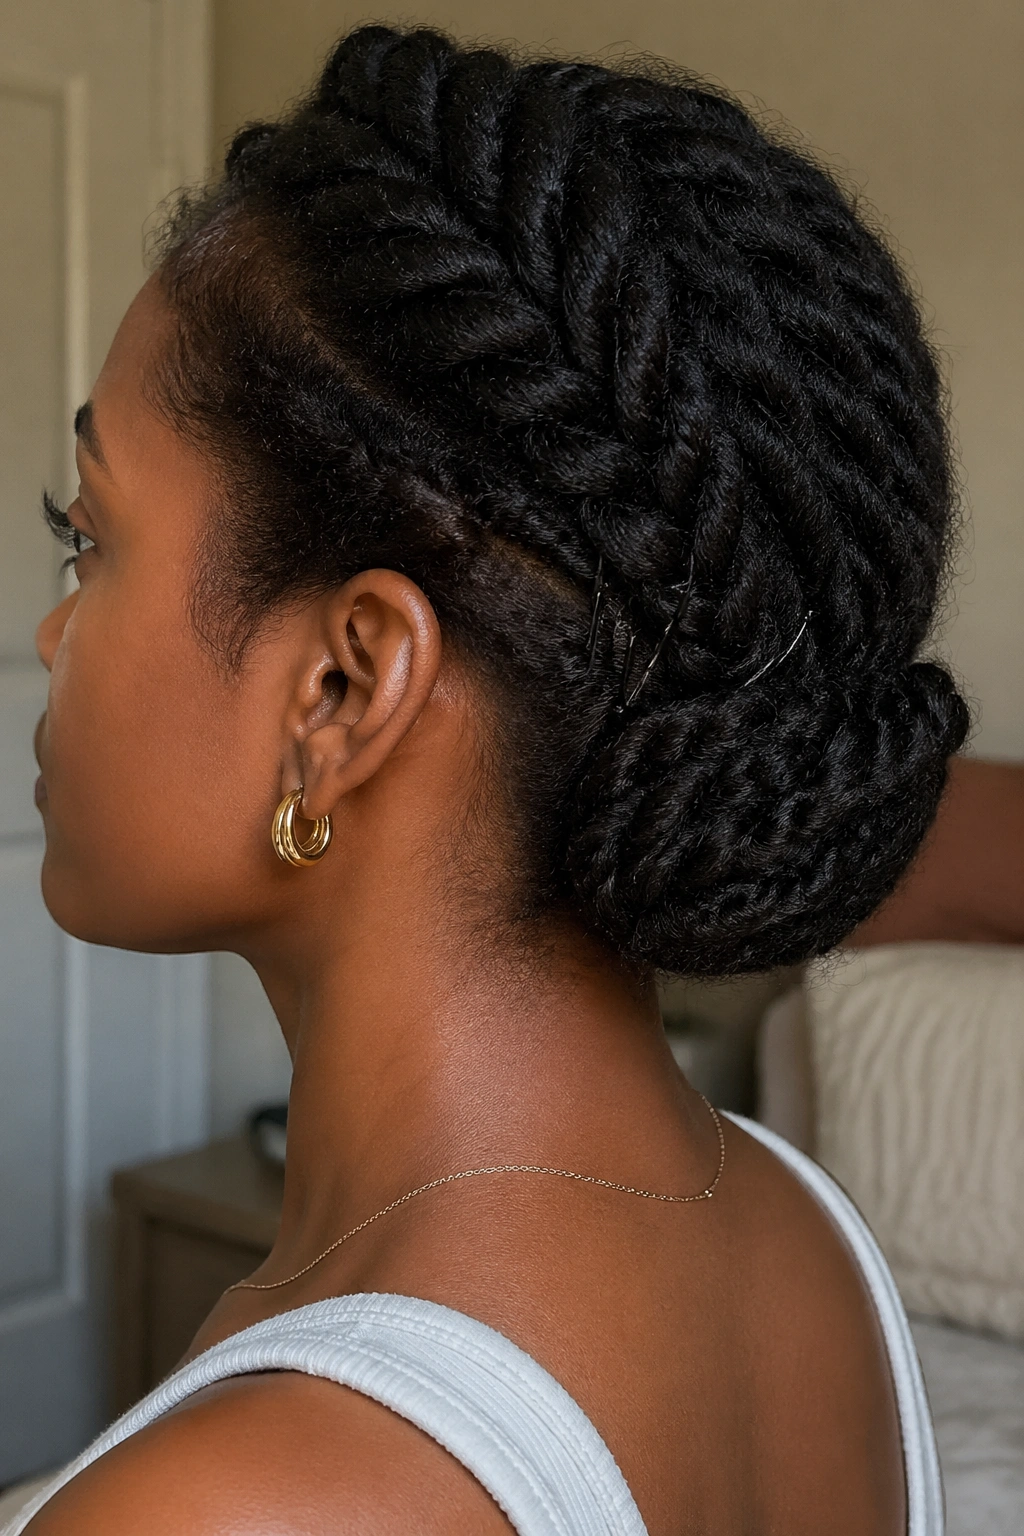
This is the style I reach for when I want a twist updo that behaves. It sits low, keeps the weight near the nape, and lets the texture do most of the visual work. There is nothing fussy about it, and that is exactly why it lasts.
The shape starts with two- strand twists made on stretched hair. Medium sections work better than tiny ones here; think 1/2-inch to 1-inch parts, depending on density. Once the twists are in, sweep them toward the back and tuck the ends into a low rounded shape. A few crossed U-pins at the base usually hold better than one big clip, because they lock the shape in place instead of squeezing it flat.
Why It Stays Put
Low placement means less swinging, less friction, and fewer chances for the style to loosen at the sides. That matters more than people think. Hair that sits high on the head has to fight more motion every time you nod, lean back, or rest against a chair.
A light leave-in and a soft styling cream are enough for most heads. Heavy butter at the roots will make the twists feel slippery by day two. If your hair tends to puff at the crown, let it dry stretched before pinning it up. Dry shape beats wet hope every time.
The Small Details That Help
- Use a rat-tail comb to make clean sections.
- Apply product in small amounts, not in a thick coat.
- Pin through the twist, not just under it.
- Cross two pins in an X if one section keeps slipping.
- Sleep with a satin scarf tied close to the hairline, but not tight enough to leave a crease.
A low pinned crown looks calm on purpose. It is one of those styles that can survive a long day and still look like it was meant to be worn that way.
2. The High Puff Twist Updo
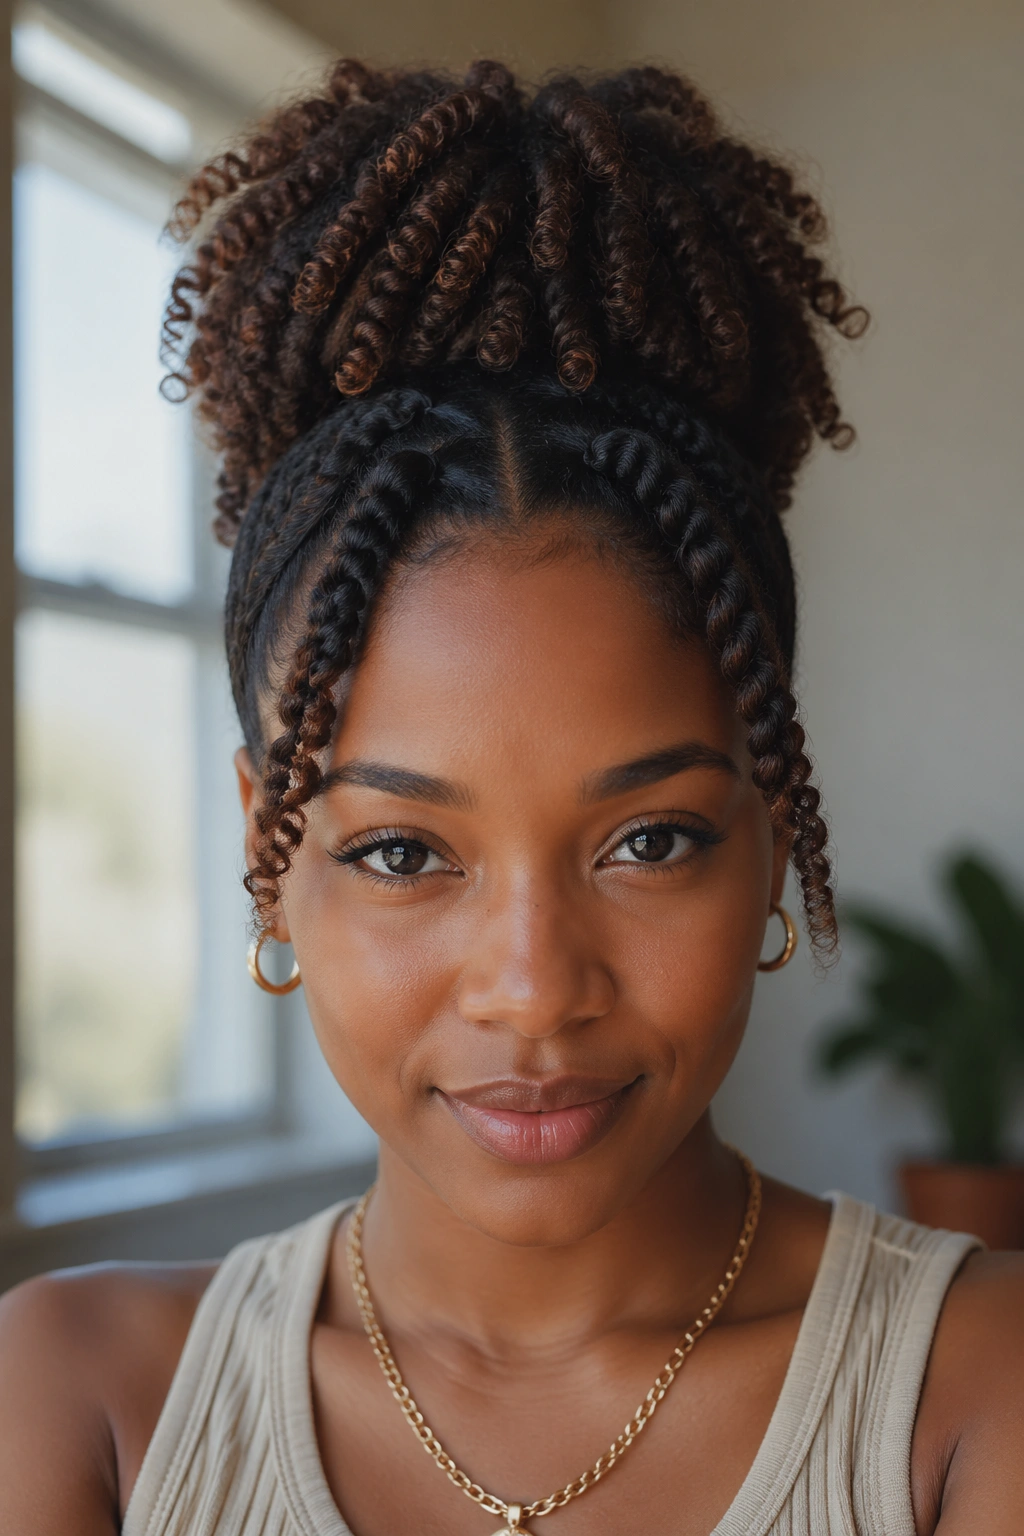
Why do high puff twist updos hold up so well? Because the puff does some of the structural work for you. The twists at the front frame the face, and the puff at the crown carries the volume, which means you do not need to build an elaborate base just to get a lifted shape.
This style works best on dense, soft, or medium-coarse coils that already have some natural loft. Start by stretching the roots first — banding, a blow-dry on low heat, or a twist-out that has been fully dried all help. Then make 2 to 4 front twists, pull the rest into a puff with a satin scrunchie or an adjustable puff cuff, and wrap the twist ends around the base so they disappear neatly.
What Makes It Last
The secret is not the puff itself. It is the tension balance. Too much pull on the front twists will leave you sore and make the style unravel faster. Too little hold at the base and the puff slumps by the afternoon.
A puff with a firm, snag-free band can hold shape for several days if you keep the perimeter smooth. A tiny amount of gel or edge control at the temples helps, but do not cake it on. Flaking is the enemy here, and flaking reads messy fast.
Quick Things to Watch
- Keep the front twists slightly looser than you think you need.
- Use a satin or silk scrunchie, not a rough elastic.
- Leave the puff itself a little airy; over-compressing it kills the shape.
- If your crown is tender, lower the puff by an inch. That small shift can save the style.
There is something satisfying about a high puff twist updo. It looks easy, but the good versions are built with care. And yes, they can last.
3. The Side-Swept Flat Twist Halo
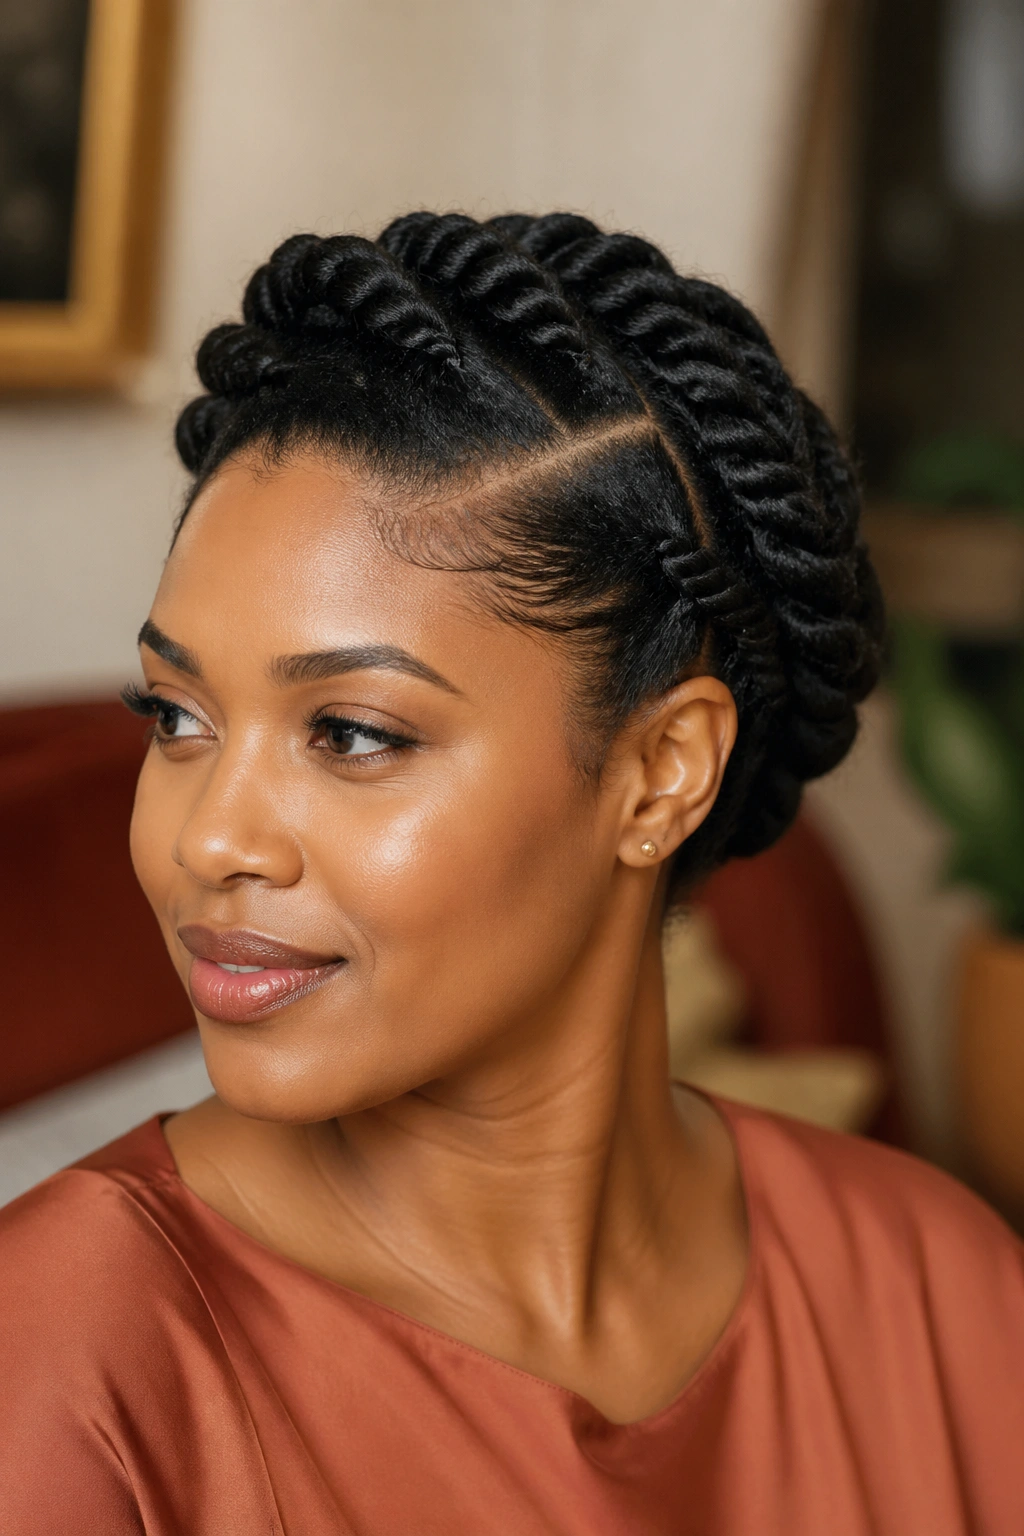
A side-swept halo has a useful trick: the hair moves in one direction instead of fighting the whole head. That alone helps it stay neat longer. Add flat twists along the hairline, and you get a style that feels polished without looking stiff.
I like this one for days when you want the face framed softly but still need the back secured. Part the hair deeply on one side, then flat twist from the heavier side toward the opposite nape. Let the twists curve naturally around the head rather than forcing a straight line. Once they reach the back, tuck them into a low side bun or a folded roll.
Pin the Fold, Not the Fluff
That line matters. People often pin the fluffy outer part of the twist and wonder why the style keeps loosening. The hold comes from the tucked base.
Use 4 to 8 bobby pins, depending on thickness, and slide them in so they catch both the twist and the hair underneath. If the halo keeps lifting near the temple, pin that section first before you smooth the rest. It feels fussy for about thirty seconds, then the shape settles.
A side-swept halo is especially nice on hair that has been lightly stretched. Not blown out flat. Just stretched enough that the twists can lie close to the head without fighting shrinkage.
A Few Practical Wins
- Slightly damp hair is a bad idea here. Wait until it is fully dry.
- A small amount of mousse on the finished twists can tame frizz without making them hard.
- Keep the part clean; a wobbly part makes the whole style look rushed.
- If one side is denser, let it do more of the visual work.
This style has range. It can look soft and romantic, or neat and serious, depending on how sharp you make the part and how tight you tuck the back.
4. The Braided-Base Twist Bun
A regular twist bun can slip if the hair is silky, freshly washed, or just not in the mood to cooperate. A braided base gives the style teeth. That is the whole appeal. You get the same twist bun finish, but with a much stronger anchor underneath.
Start with a center part or side part, then create 2 to 4 flat braids close to the scalp around the perimeter where the bun will sit. The remaining lengths can be twisted, then wrapped into the bun and pinned over the braided base. The braid acts like a track, and the bun sits into it instead of sliding across the surface of the hair.
Who This Suits Best
Fine hair. Soft hair. Hair that is prone to slipping out of pins. Also hair that was washed and styled on the same day, which is when a lot of buns start misbehaving.
The bun itself does not need to be huge. In fact, the smaller versions last longer because they carry less weight. A 4-inch bun with a braided base will usually hold better than a larger one made only from twists and optimism. If you want a fuller look, add volume by gently fluffing the wrapped twists after they are pinned, not by forcing the base wider.
A braid gives the style grip that a twist alone cannot always provide. That is the whole reason this one hangs on.
What I’d Do Every Time
- Keep the braids flat and close to the scalp.
- Use pins that match your hair color if you want the base to disappear.
- Wrap the twists clockwise or counterclockwise in one direction only.
- Tuck the ends under the bun twice before pinning.
This is the kind of style that looks simple from the outside and annoyingly smart from the inside. Which is usually a good sign.
5. The Chunky Two-Strand Rolled Updo
Chunky twists are not lazy. They are strategic. Fewer sections mean less manipulation, less parting time, and fewer tiny ends that frizz up before lunch. If you want an Afro twist updo that has real staying power, large two-strand twists can be a better choice than a pile of tiny ones.
Make the twists in medium-to-large sections, then roll or fold them into an updo shape that follows the natural curve of the head. I like a loose roll at the back or a wrapped twist knot near the crown. The look should feel full, but not crowded. If you pack too many chunky twists into one small space, the style starts to fight itself.
Smaller isn’t always better.
The Part Most People Get Wrong
They overwork the ends. Chunky twists do not need to be perfectly smooth from root to tip. A little texture at the ends is fine, especially if the hair has spring. What matters is that the root is neat and the twist has enough tension to hold shape.
A touch of foam on the finished twists can help them set without turning crisp. After that, use pins sparingly. Too many pins make chunky styles heavy, and heavy styles sag. Four to six well-placed pins often do more than a dozen random ones.
Quick Guide for Lasting Hold
- Keep sections consistent so the weight is balanced.
- Use a light cream, not a waxy layer.
- Let the style sit before you fluff it out.
- If one twist keeps slipping, pin the base first and the body second.
Chunky twist updos also age well. Day one looks tidy. Day two often looks softer in a good way. Day three can still be wearable if you protected the root well at night.
6. The Twist Mohawk With Hidden Pins
If you like height, this one keeps the energy without asking the sides to puff out by noon. A twist mohawk updo is dramatic in shape, but the best versions are built on hidden support, not sheer volume. That makes them easier to wear than they look.
Start by flattening the sides with small flat twists or simple cornrow-style rows that travel upward. Leave the middle section fuller, then create twists that stack along the center line from front to back. Pin the twists under each other so the mohawk ridge stays lifted, not lumpy. The finished shape should look long and narrow, with the sides neat and the center doing the talking.
The Hidden Pin Map
- Use one pin at the base of each twist, then another halfway up if the hair is heavy.
- Slide pins in at an angle so they catch more than one layer.
- Cross pins under the ridge instead of sticking them straight into the middle.
- If the center feels loose, add support from underneath, not on top.
That last part matters. A pin visible on the surface can make the whole style look unfinished. Hidden support keeps the line clean.
Why It Lasts
The sides do not have to fight for shape. They are laid down. The center ridge is supported at multiple points. That means less movement, less frizz, and less collapse when you put on a jacket or sleep with the style wrapped.
A twist mohawk also works well if you like a style that can shift from casual to dressed-up without changing the structure. Keep the twists chunky for a softer look or tighter for a sharper line. Either way, the hold comes from the anchors, not from stiffness.
7. The Flat Twist Updo With Springy Ends
Can an updo keep the ends springy instead of tucking every last coil away? Yes, and that bounce is exactly what makes this style feel alive. Flat twists pull the hair close to the scalp, but the exposed ends can be left coiled, set on rods, or tucked in a way that preserves the curl pattern.
The cleanest version starts with flat twists along the front and crown, then gathers the lengths into a low bun or folded roll. The ends are where the fun lives. Leave a few twist tips free, or set them on small perm rods before pinning them under. That gives you a little spring at the perimeter instead of a hard, sealed-off finish.
How to Keep the Ends From Puffing Out
Use foam or mousse on the last inch of each twist before setting it. Not the whole length. Just the ends. Then let them dry fully before you pin or fluff. If you pin damp ends, they flatten weirdly and the curl weakens fast.
A small rod set can help, but only if the ends are long enough to wrap without bending sharply. If they are too short, skip the rod and finger-coil the tips instead. Forced curls look awkward. Tiny, neat coils look intentional.
Best Use Cases
- Hair that holds a bend well after setting.
- Styles that need a soft finish around the face.
- Updos for events where you want movement, not a rigid shape.
- Medium to long natural hair with enough length to tuck cleanly.
This is one of my favorite looks for people who like structure but do not want the whole head to read as “done.” The springy ends keep it from feeling flat.
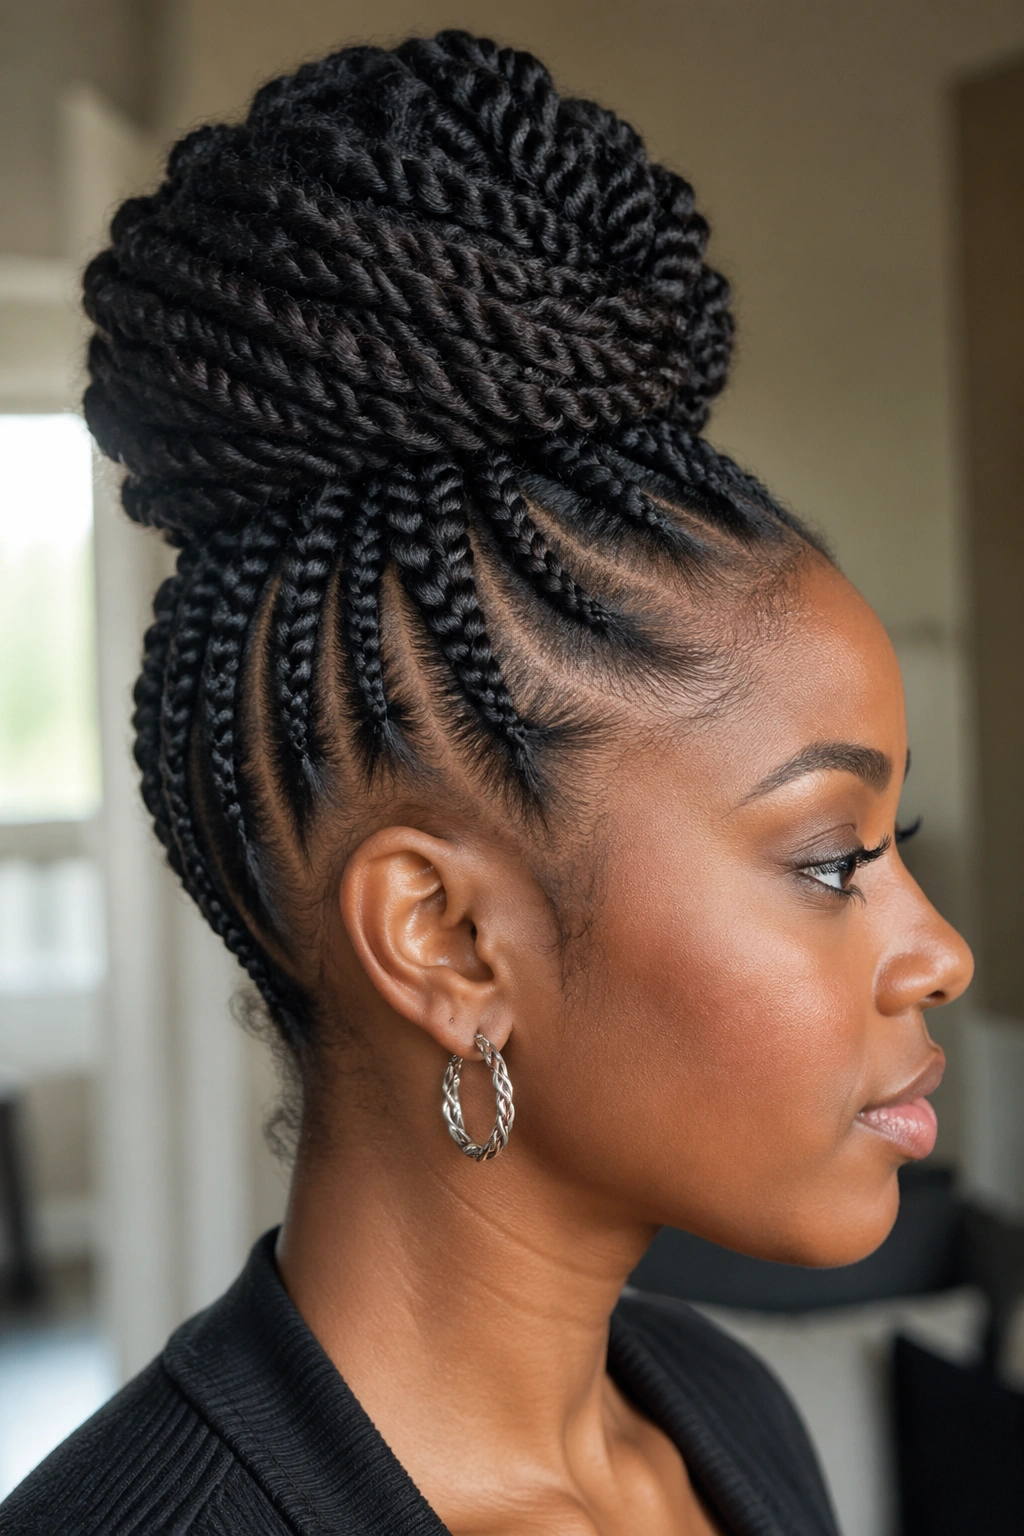
8. The Mini Twist Chignon

Tiny twists take patience, but they pay you back in neatness. A mini twist chignon sits close to the head, wraps into a compact knot, and tends to stay tidy longer than looser, bigger styles because the parts are small and the surface area is controlled.
You do not need to make the twists microscopic. That would be a long afternoon and a sore scalp. But if the sections are too large, the chignon starts looking bulky and the ends pop loose. A good middle ground is around 1/4-inch to 1/2-inch parts, depending on density and length. The result is dense enough to pin cleanly, but not so dense that the head feels crowded.
The charm of this style is in the finish. It looks neat from every angle. No loud shape, no big puff, no loose end waving around where it should not be.
Why It Holds So Well
Mini twists create friction. More twists means more places for the hair to catch and stay put. The chignon itself also sits low and compact, so the weight is spread out. That helps the style avoid the sideways sag that ruins a lot of small buns.
Use only a thin film of cream when making the twists. Too much product will soften the structure and make the chignon slide. Once the twists are done, wrap them into a coil or fold them into a knot and secure with a few U-pins hidden under the shape.
There is a reason this one keeps showing up in real life. It lasts, and it does not ask for constant fixing.
9. The Tapered Twist Updo for Short Hair
Can a tapered cut carry a real updo? Absolutely. You just have to stop fighting the shape of the haircut and work with the length you have. Shorter natural hair can still do a gorgeous twist updo, but the trick is to think in layers instead of trying to build one huge mass at the back.
Use the longest hair at the crown for the main shape and let the tapered sides do what they already want to do: stay close to the head. Tiny to medium twists work best here. If the hair is too short for a full two-strand twist, flat twists or finger coils can anchor the front and sides while the crown carries the visible volume.
Best Pin Layout for Short Hair
- Start with the longest section first.
- Build upward, not outward.
- Pin the crown against itself in small loops.
- Keep the sides sleek so the shape does not spread.
Short hair styles like this benefit from a little patience at the front. If the hairline is too loose, the whole look reads unfinished. If the crown is over-pinned, though, it can start to look cramped. The sweet spot is a soft stack, not a hard helmet.
Short hair can absolutely do this. It just needs the right shape.
A tapered twist updo is also a sneaky low-maintenance choice. Because there is less length pulling at the style, the finish can hold longer with fewer pins and less retouching. That makes it a smart option for busy days when you do not want to keep rebuilding the same look.
10. The Extension-Boosted Twist Updo
Unlike a full wig or a heavy sew-in, a little textured extension hair can give a twist updo extra shape without locking the whole head down. That is why this version is useful when you want fullness, height, or a bigger silhouette than your own length can comfortably build on its own. The key is restraint. Too much added hair and the style turns heavy fast.
Marley hair or another kinky-textured extension blends well because it matches the grip and roughness of natural coils. Use it only where you need it: at the crown for fullness, at the back for a longer roll, or in one accent twist that anchors the whole style. Keep the base of your own hair as the anchor. The extension should support the shape, not replace it.
Rules That Keep It Wearable
- Match the extension texture to your own hair as closely as possible.
- Keep the added hair light enough that the roots do not strain.
- Wrap the extension into the twist, not around a weak base.
- Check the weight near the temples and nape before you leave the style in place.
A lot of people add hair and then wonder why the style feels tired by the end of the day. Weight is usually the reason. If the scalp feels tugged, the style will not last as long, and it will not feel good either.
The best extension-boosted twist updos still look like real hair. They have movement. They have spring. They do not wobble, and they do not need fixing every hour. When the base is calm and the added hair is light, the style can hold shape for days and still keep that natural bounce that makes Afro twist updos worth wearing in the first place.