If your 4C hair shrinks the second water touches it, the smartest easy afro hairstyles for 4C hair are the ones that work with that shrinkage instead of fighting it. That’s the whole trick. You want shape, movement, and a style that still looks decent when your curls decide to bunch up and mind their own business.
The best home styles for this texture are usually the ones that respect moisture, sectioning, and tension. A clean part, a little leave-in, and a snag-free elastic do more than most people think. So does restraint. Pulling 4C hair too tight can make a style look neat for ten minutes and miserable by lunchtime, and that is never worth the trade.
There’s also a big difference between a style that looks easy on someone else’s hair and a style that is actually easy for you. Dense 4C hair can take more time to detangle, more product to coat, and a little more patience to secure. Some styles need stretched hair. Some look better on damp hair. Some are best on day-three curls that have a little grip left in them.
The sweet spot is simple: pick a style that fits the hair you have on an ordinary day, not the hair you had right after a perfect wash session. That’s where the useful options live.
1. High Puff for 4C Hair
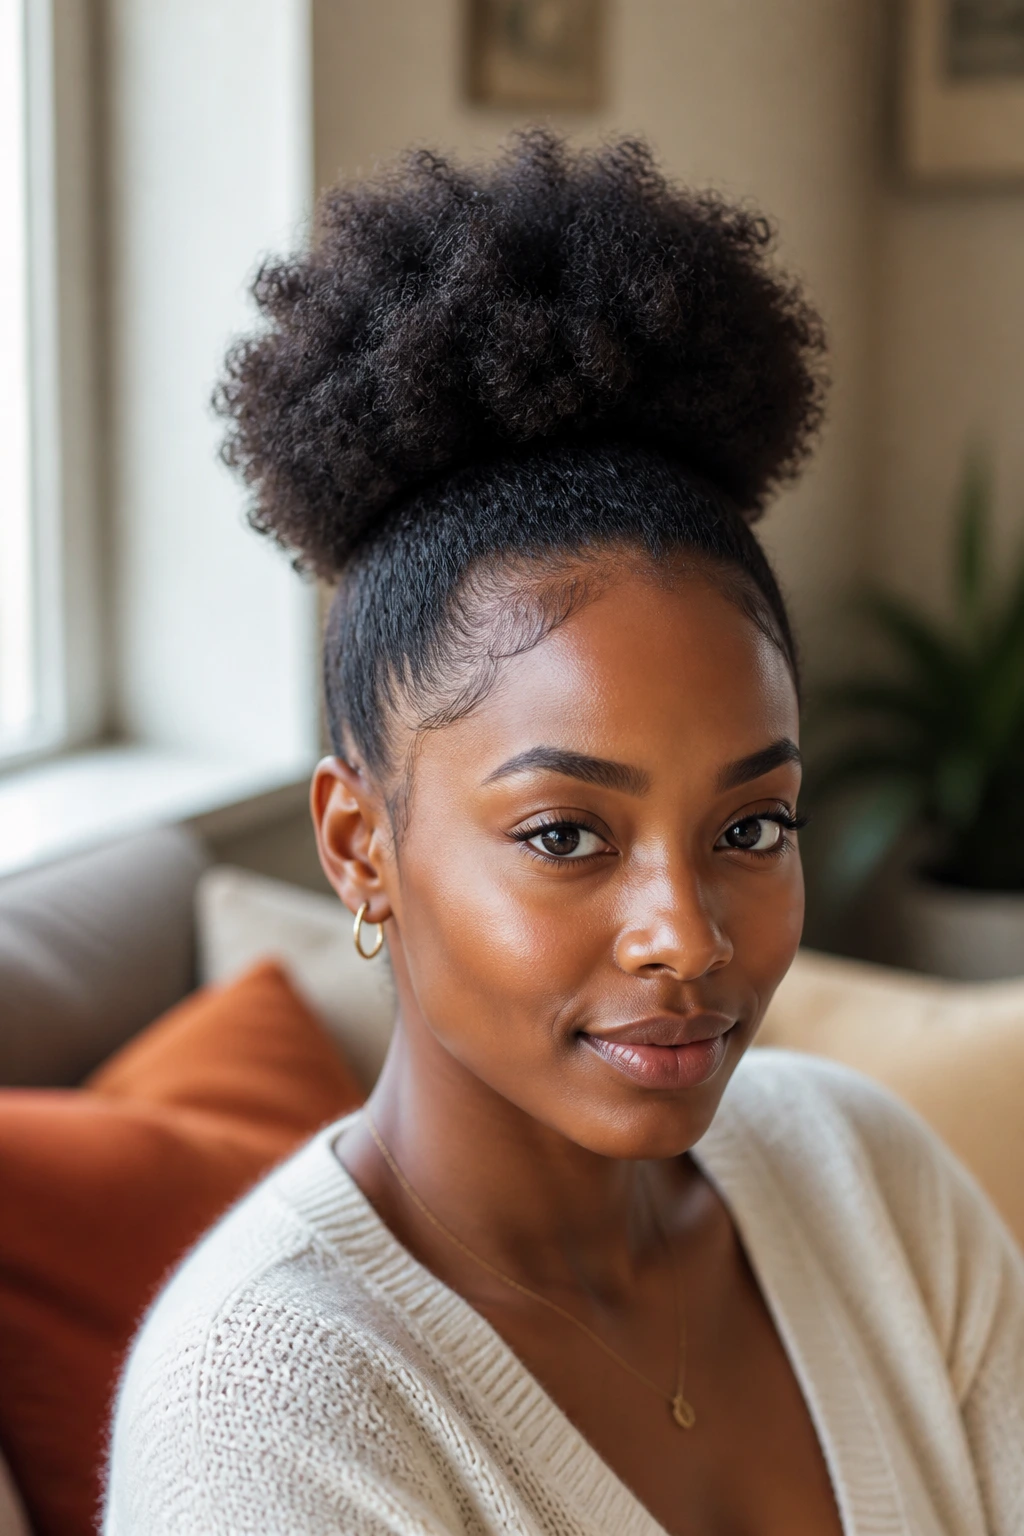
A high puff is the style I’d hand to almost anyone with 4C hair who wants speed without looking rushed. It works because it turns shrinkage into shape. Instead of stretching every coil into submission, you gather the hair upward, smooth the sides, and let the crown do the heavy lifting.
The key is balance. Brush the edges and sides up with a soft brush, but do not yank the hairline flat. A little lift at the roots keeps the puff full and rounded, which matters a lot more than making the front look glassy.
Why it works so well
A high puff gives you height, face-framing volume, and a clean outline in one move. It also hides uneven curl lengths, which is handy if your hair is in that awkward middle stage between a fresh trim and a much-needed one. If your curls are stretched from twists, bands, or a braid-out, the puff gets even bigger. Nice bonus.
- Use a water-based leave-in first so the hair has slip.
- Add a thin layer of gel or edge control only where you need hold.
- Secure it with a soft elastic or puff cuff rather than a tight hair tie.
- Fluff the crown with a pick if you want more height.
Tip: If the puff starts to flatten by midday, lift the roots with your fingers instead of adding more gel. Too much product makes 4C hair look stiff fast.
2. Low Puff with a Side Part for 4C Hair
A low puff feels softer than a high puff. It sits closer to the neck, which gives the style a calmer shape and takes some pressure off the edges. On 4C hair, that matters. A lot.
The side part is doing more work than people give it credit for. It breaks up the puff just enough to make the style look intentional, even when you put it together in ten minutes before leaving the house. I like this one on days when the hair is clean but not freshly styled, because the lower placement hides a little frizz and a little unevenness.
Start with moisturized hair and part it where your natural part wants to fall. If you force a hard side part against your cowlick, it will fight back. Smooth the sides downward with a brush or your hands, gather the hair at the nape or just above it, then secure it loosely.
The finish should feel gentle, not tight. If your scalp feels pulled, the puff is too small or the band is too snug. That’s the part people ignore, then wonder why their head hurts by dinner.
3. Half-Up, Half-Down Puff for 4C Hair
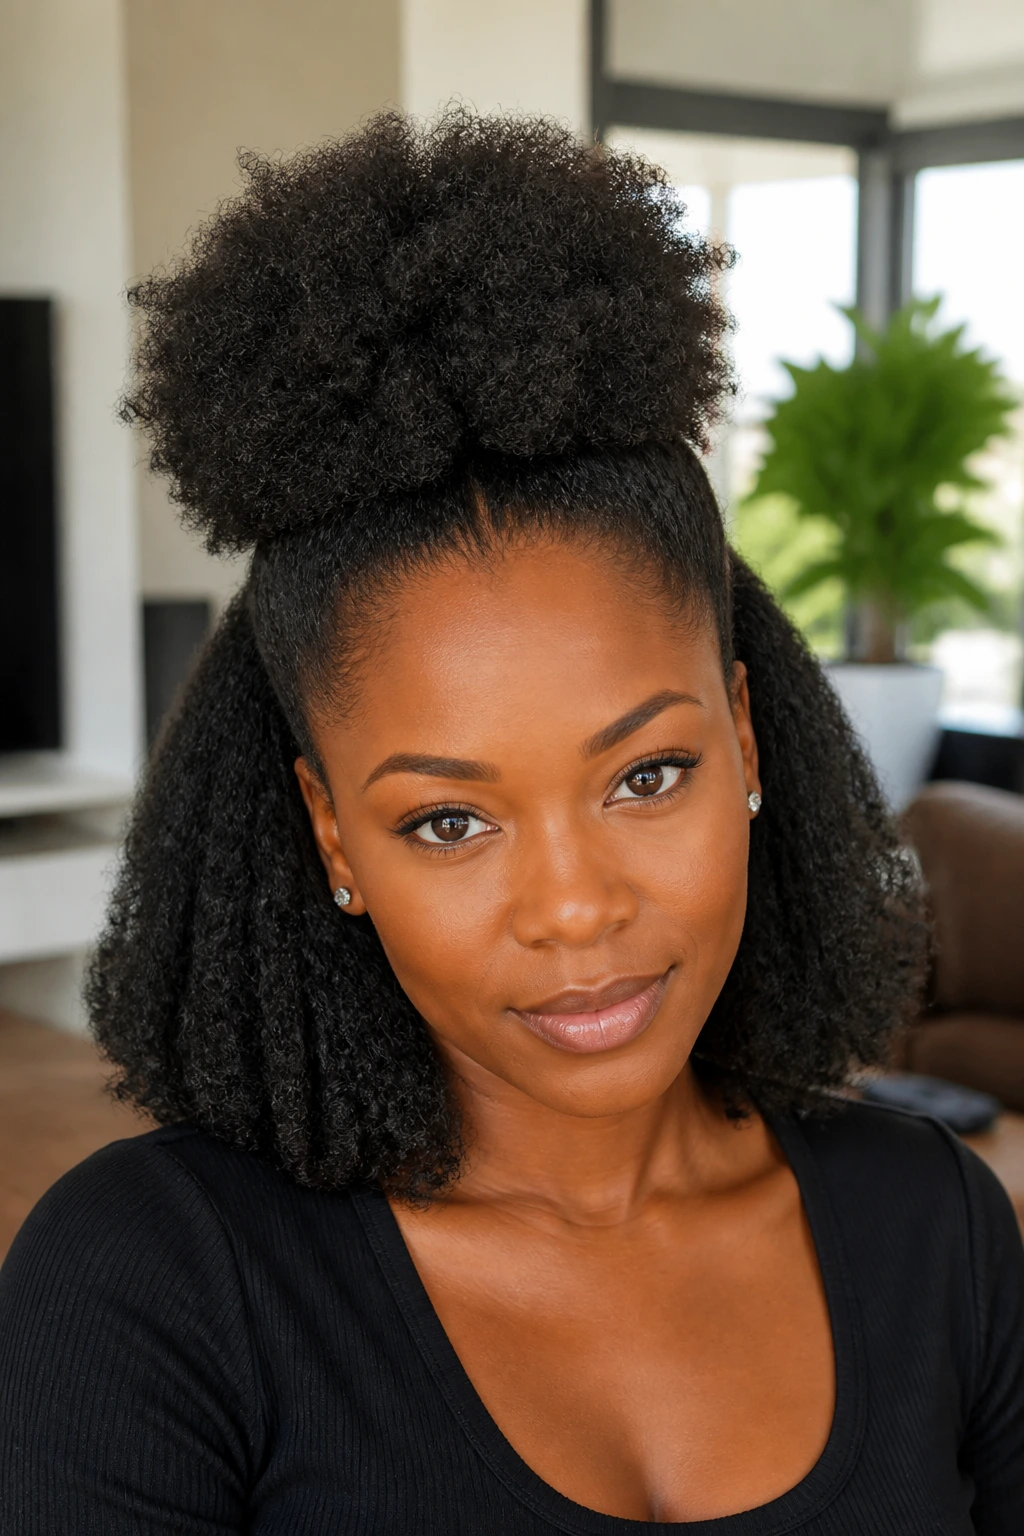
Want height and length at the same time? This is the one. Half-up, half-down keeps some hair stretched around the face while the top section gets gathered into a puff or small bun. It’s a good choice when your ends need to stay tucked but you still want the style to feel loose.
The split does not need to be exact. In fact, it usually looks better when the top section is slightly larger and sits a bit forward. That gives the style movement instead of a stiff line across the head. If your hair is dense, sectioning with your fingers can make it look less boxy than a sharp part.
What makes it work
The lower section can be left in a twist-out, braid-out, or even loose coils if the length is there. The top section carries the shape. That means you can fake a fuller style without a full head of manipulation.
If the bottom feels dry, mist it lightly before styling and seal the ends with a little cream or oil. Don’t soak it. Wet hair under a tight top puff can take forever to dry, and damp ends tucked away all day start to smell off if you do that too often. Keep it light.
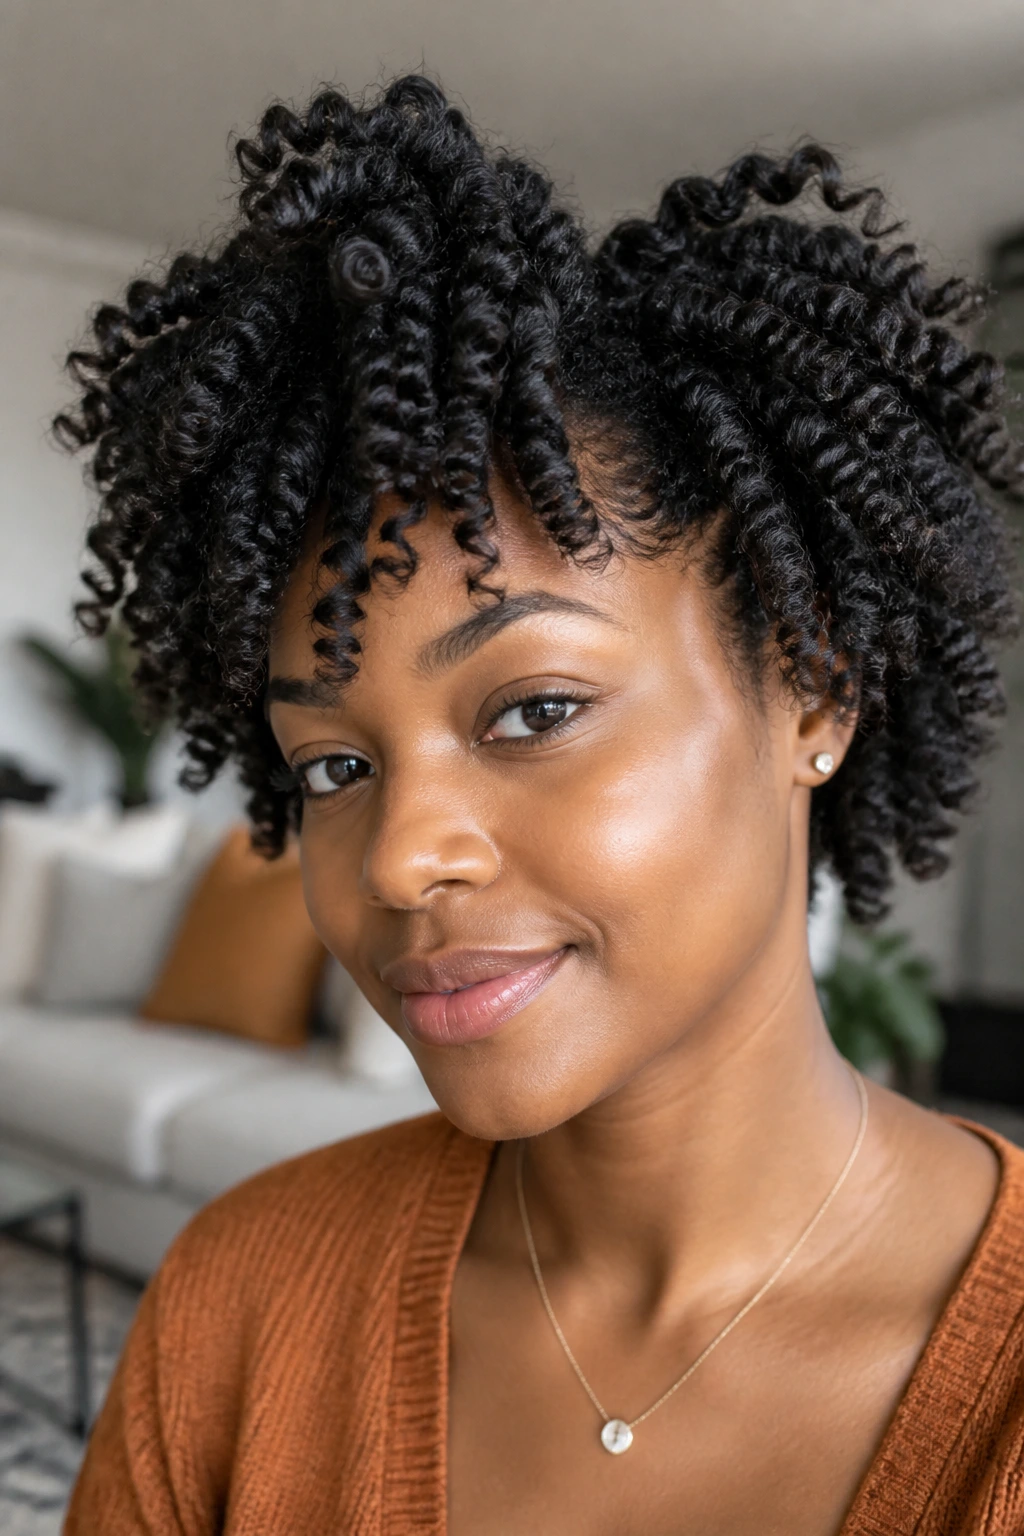
4. Two-Strand Twist-Out

A twist-out is one of the few styles that gives 4C hair stretch, definition, and softness without heat. It does take patience. No getting around that. But the payoff is a style with movement that can last several days if you handle it carefully.
The best twist-outs start on hair that is detangled in sections. Small to medium twists usually give the cleanest curl pattern, while larger twists make a looser, puffier finish. Both are fine. What matters is consistency in each section, because uneven twist sizes lead to uneven drying, and uneven drying leads to frizz in the wrong places.
How to keep it neat
- Work on slightly damp hair, not dripping wet hair.
- Use a leave-in plus a cream or gel with enough slip.
- Twist from root to end with the same tension on both strands.
- Let the hair dry completely before unraveling.
- Separate each twist only once or twice. Endless pulling ruins the curl clumps.
A good twist-out should feel light and springy at the roots, not crunchy. If it looks a little too neat on day one, give it an hour before fluffing. 4C hair often loosens into its best shape after it settles.
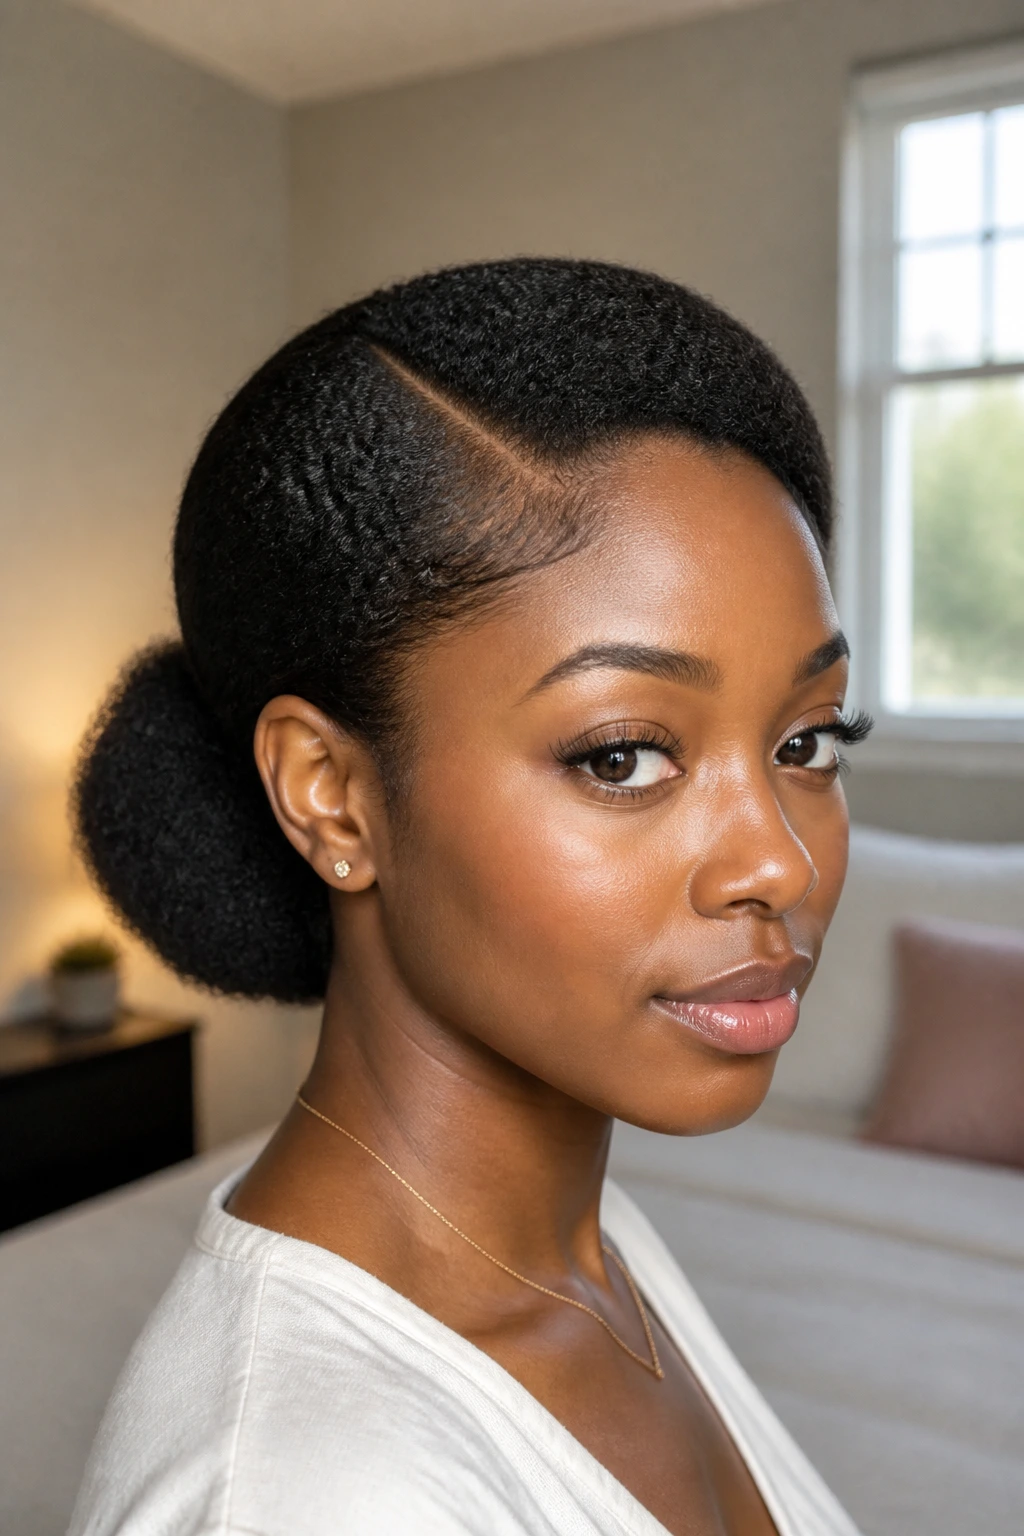
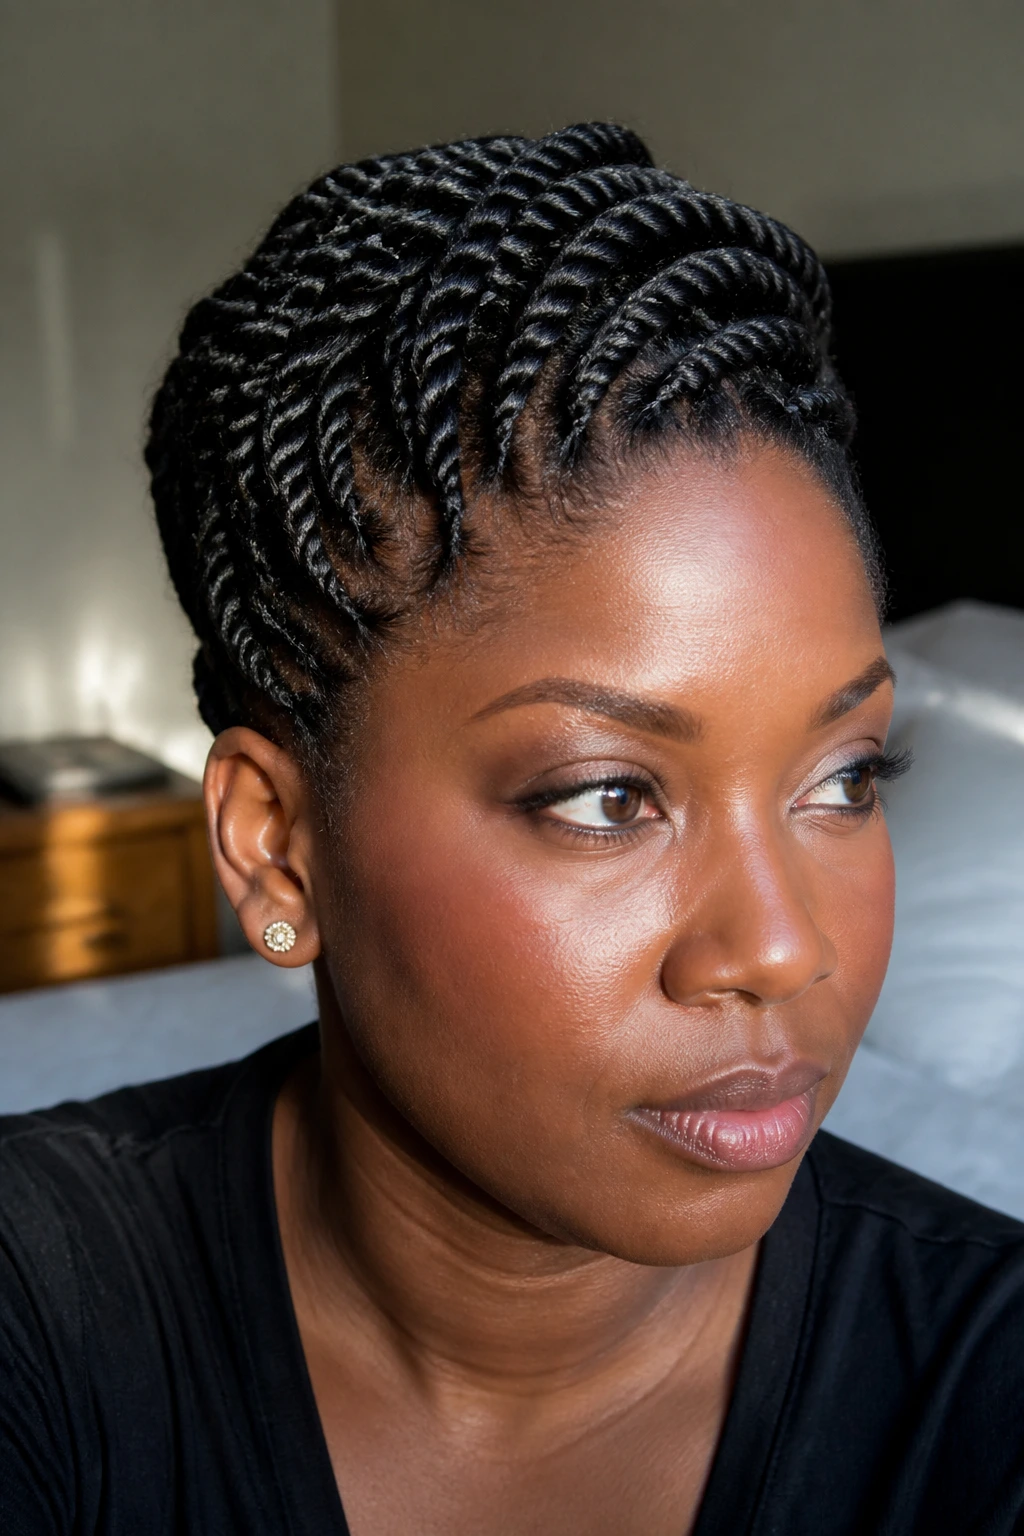
5. Flat Twists to the Back
Flat twists are the style I suggest when someone wants their hair off the face without doing a full braid set. They sit closer to the scalp than two-strand twists, so the finished look is tidy and practical. And because they are gentler than tight cornrows for a lot of people, they can be a good middle ground.
You can do two large flat twists, four smaller ones, or a row of twists that end in a puff. The parts do not need to be razor sharp. Clean enough is enough. That may sound lazy, but on textured hair, overly perfect parting often takes longer than the style itself.
Use a cream with enough hold to keep the twists from puffing up immediately. Start each section with a clean base, then add a little more product as you move down the strand. The twists should hug the scalp without digging in.
If you want a softer finish, leave the ends curled with rods or tuck them into a bun. If you want a no-fuss everyday look, let them trail into a low puff at the back. Either way, this style keeps your hands out of your hair, which is half the battle.
6. Finger Coils
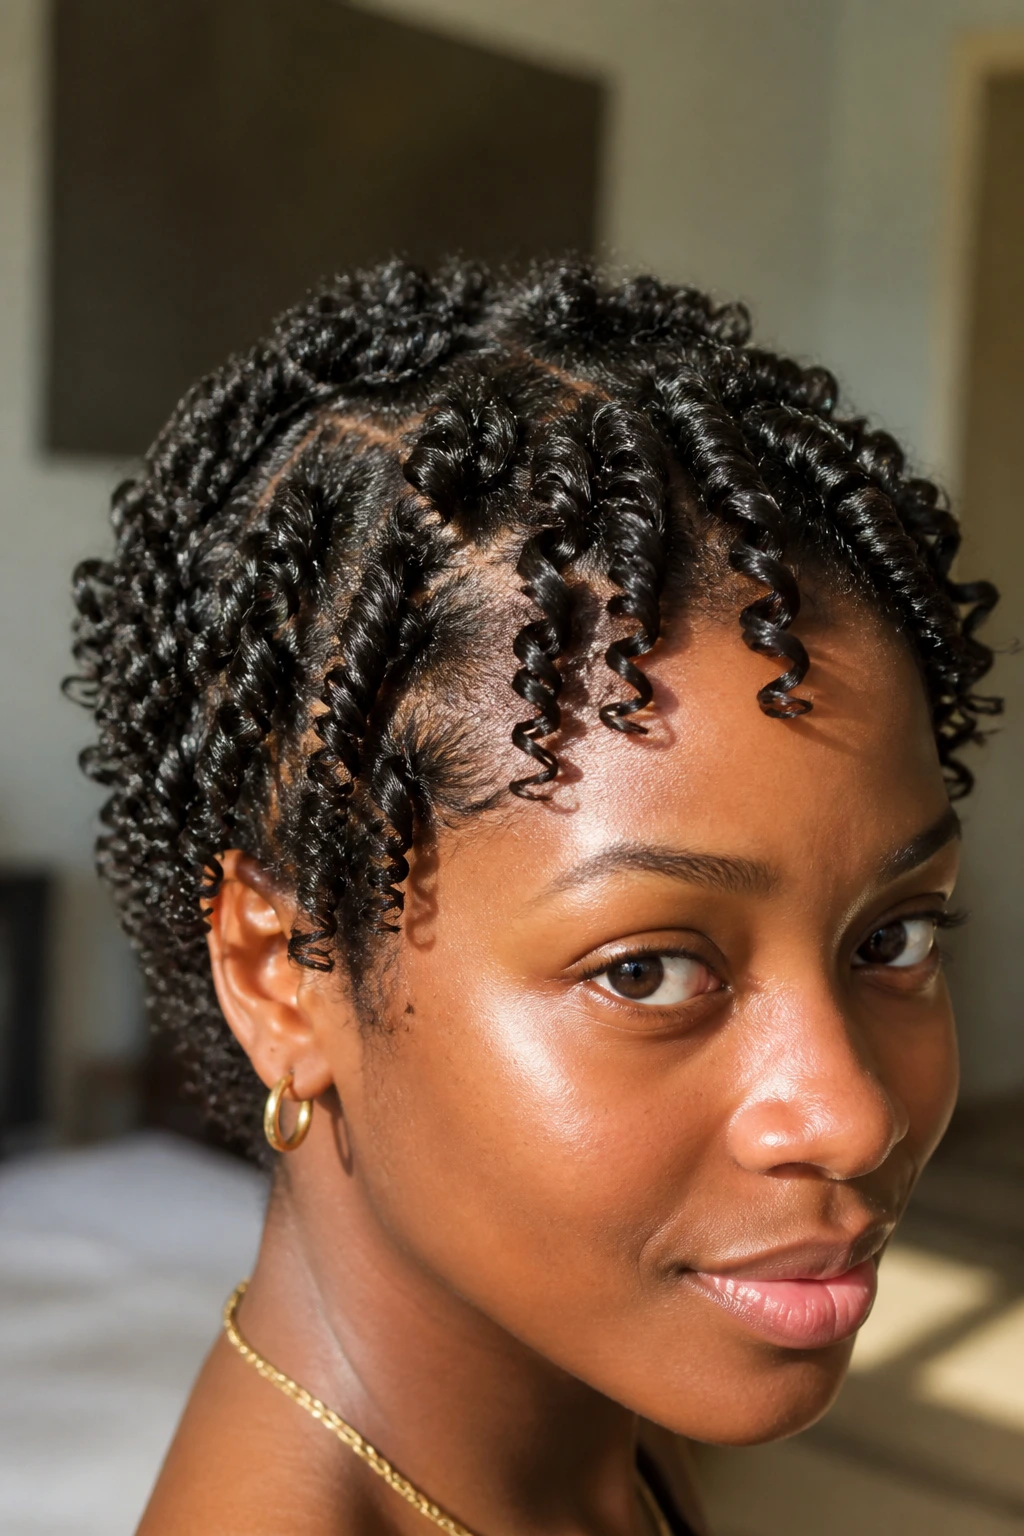
Finger coils are slower than a puff, and I won’t pretend otherwise. They earn their place because they make 4C hair look defined without heat, and on short to medium lengths, that definition can be sharp and clean.
The method is simple, but it punishes impatience. Take tiny sections, coat them evenly, then wrap each one around your finger from root to tip until it springs into a coil. If your hair is extra dense, work in four sections and clip the rest away so you are not constantly wrestling the same patch.
What to watch for
- Use a light gel or curl cream with hold, not a heavy butter.
- Keep each section the same size for a more even look.
- Let the coils dry fully before touching them.
- Skip heavy oils right before setting. They can make the coil slip apart.
The finish is crisp at the roots and springy at the ends. It’s a style with a little attitude. If the coils look too tight on day one, separate them only after they are dry and only if you want a softer shape. Pulling them apart while damp is how you end up with fuzz instead of coils.
7. Bantu Knots

Bantu knots do two jobs at once: they work as a style on their own, and they can become a knot-out later if you want texture the next day. That’s useful. Very useful.
The style starts with sectioning. The size of each knot changes the whole look, so think about what you want before you start. Larger knots give a bold, sculpted finish. Smaller ones look busier and take longer. For home styling, medium sections are usually the sweet spot because they’re easier to part and less likely to tug.
Coat each section with leave-in and a little styling cream. Twist the strand until it begins to coil around itself, then wrap it into a knot close to the scalp. Secure the ends by tucking them under the knot, not by jamming a pin through the middle like you’re pinning fabric. That just creates discomfort.
The best thing about Bantu knots is how deliberate they look. They do not read as an afterthought. They look like you meant it.
8. Bantu Knot-Out
A knot-out gives you a different kind of curl from a twist-out. The coils tend to be springier and a little more rounded, which makes the finish look fuller at the ends. If your twist-out tends to fall flat by day two, this is a smart change.
The real trick is dryness. Bantu knots hold moisture longer than people expect, especially when the sections are thick. If you undo them too soon, you lose the pattern before it has a chance to set. Let them sit until they feel dry all the way through, not merely cool on the outside.
How to get the best shape
- Coat the hair evenly before knotting.
- Keep the sections medium-sized for a balanced pattern.
- Separate gently with oiled fingertips.
- Lift at the roots instead of combing through the whole style.
I like knot-outs on hair that needs body more than polish. They are lively. A little unevenness can actually help them look better because the curl pattern feels natural, not carved.
9. Mini Twists
Mini twists are the style people underestimate until they try them and realize how long they can last. They take longer to install than chunky twists, but they also buy you more days of low-manipulation wear, which is a trade I’ll take any week.
The smaller the twist, the more patience you need during sectioning. Keep the parts neat but not tiny enough to snag. That balance matters because 4C hair can shrink around a twist so tightly that sections become hard to separate later if you start too small.
A good mini-twist routine
- Start on stretched or well-detangled hair.
- Apply product section by section, not all at once.
- Twist with even tension from root to tip.
- Oil the ends lightly if they feel dry.
Mini twists are also easy to pin up, tuck into a bun, or wear loose with a side part. They are not glamorous in a dramatic way. They are practical, and sometimes that is better. If you want a style that stays put while you sleep, work out, or just avoid touching your hair for a few days, this one earns its keep.
10. Chunky Two-Strand Twists
Chunky twists are the fast cousin of mini twists. Fewer sections, less time, more volume. They are one of the easiest styles to do at home when you want shape without sitting in front of the mirror all night.
I like them on hair that has been freshly conditioned and stretched a little, because the bigger sections show off the texture instead of trying to smooth it away. You can leave the ends straight, curl them with perm rods, or wrap them around each other into a loose bun. All three work.
The upside is obvious: you are done faster. The downside is also obvious: chunky twists can puff up sooner than smaller ones, especially if your hair is coarse and dry at the ends. A little extra cream at the ends helps, but heavy product near the scalp can make the style feel greasy.
That tension between neat and soft is the whole style. Get it right, and the twists look full without looking stiff.
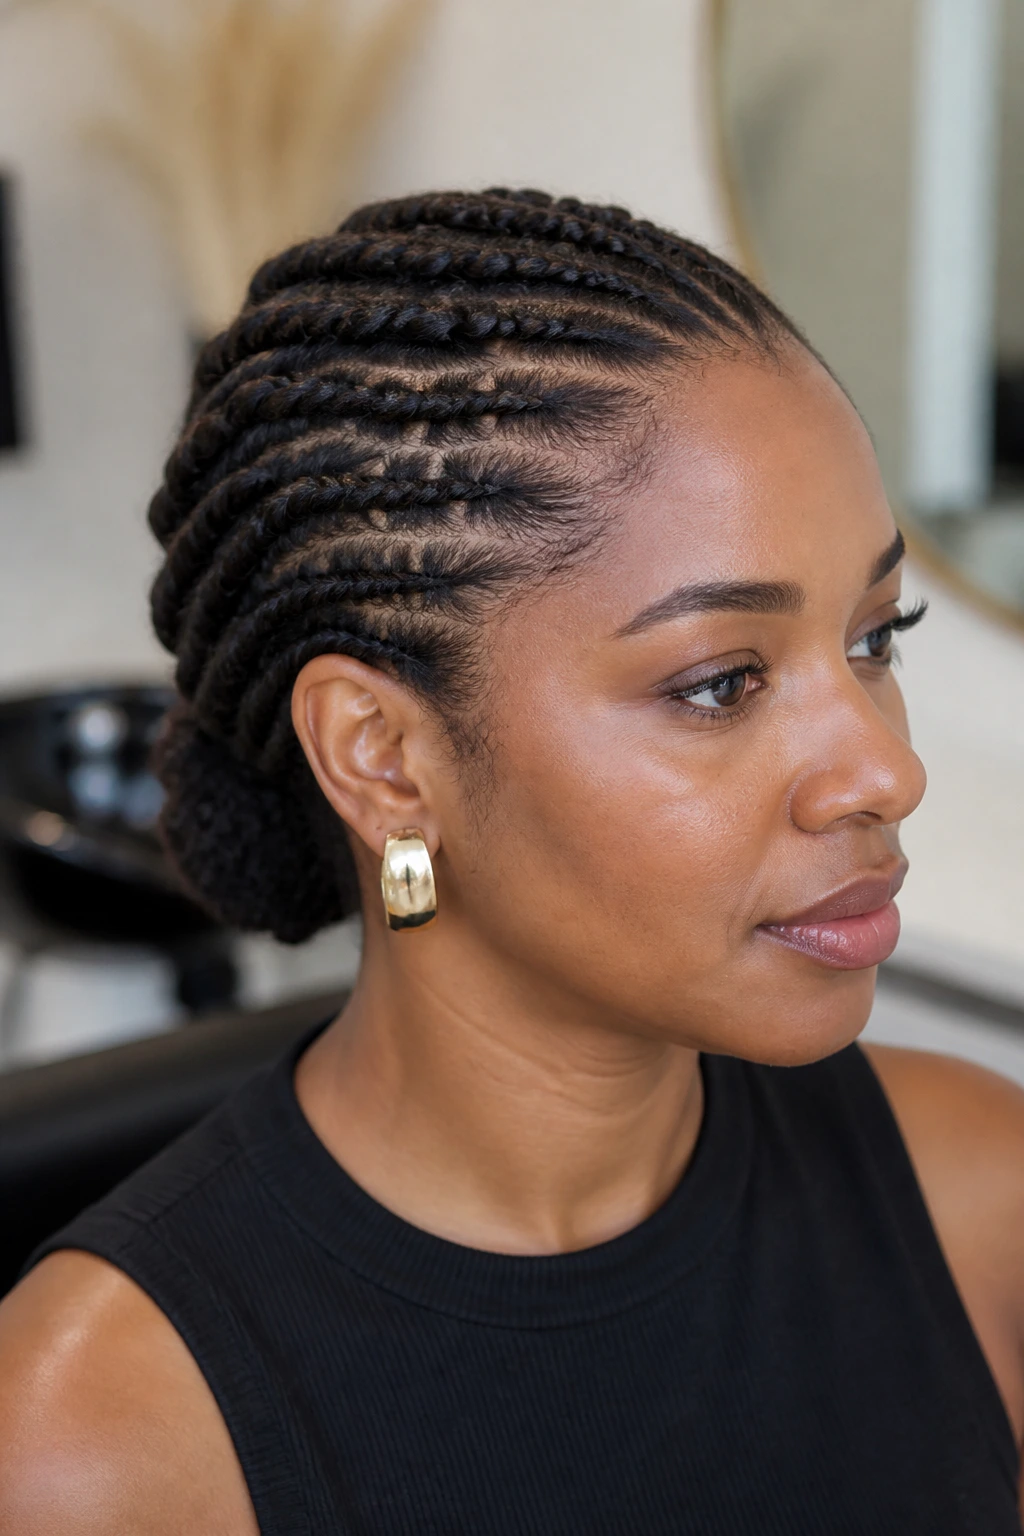
11. Side Cornrows Into a Puff
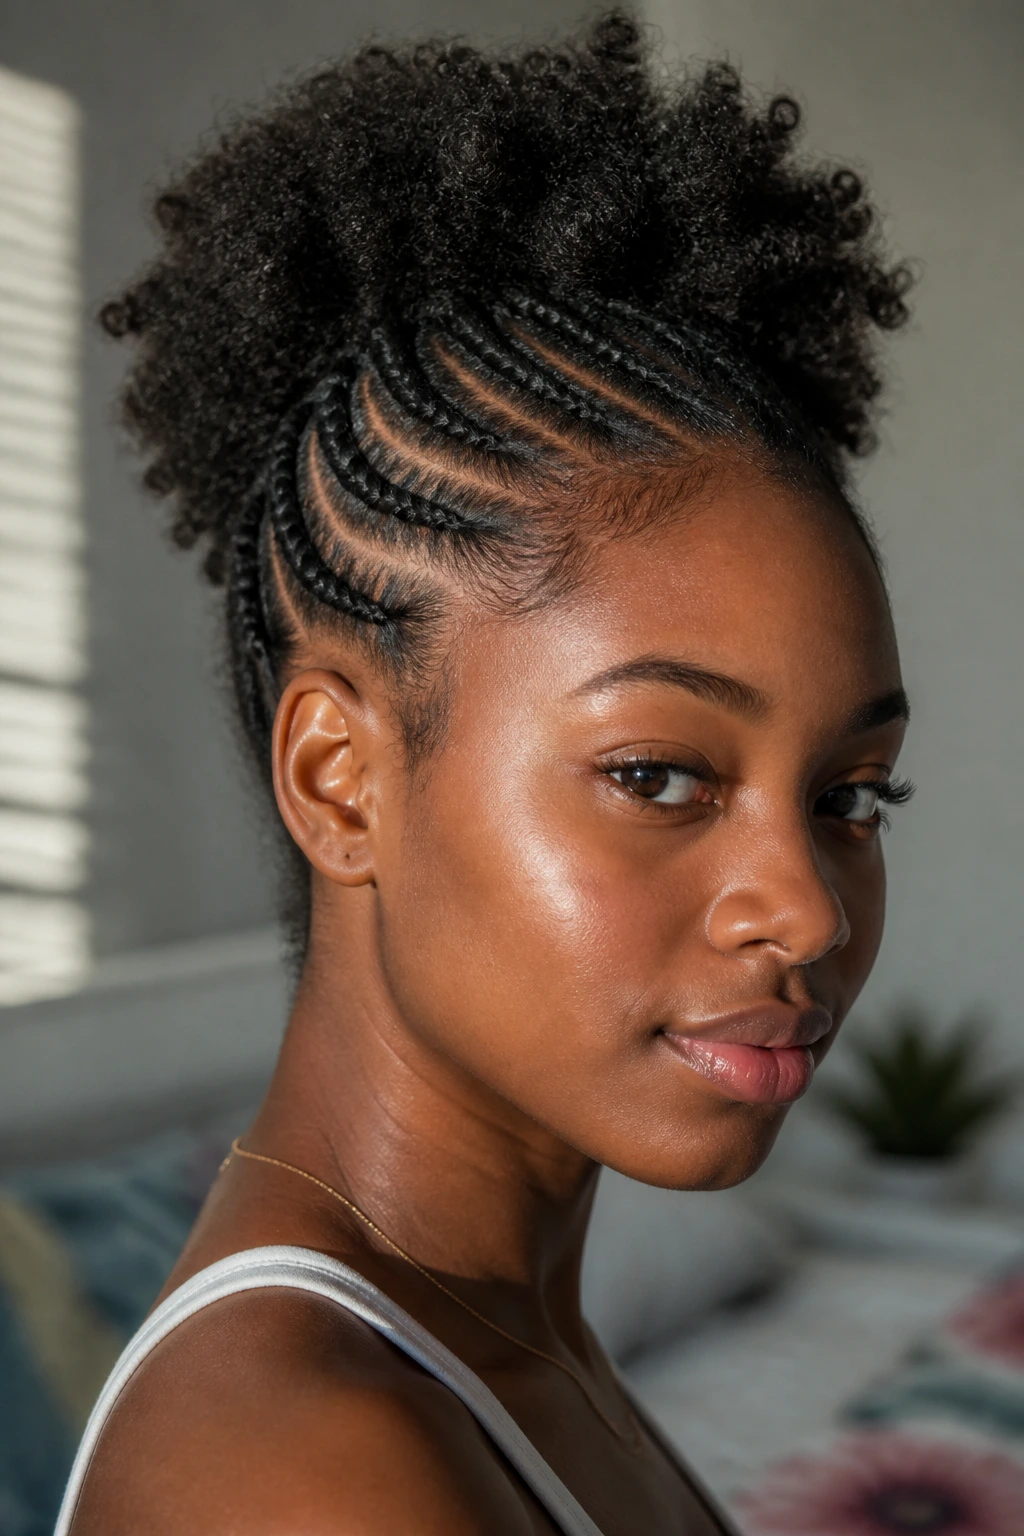
Side cornrows into a puff give you a crisp front and a fuller back, which is a nice combo when you want the style to look more finished than a plain puff. The braids frame the face, and the puff keeps the crown from feeling too tight or overly structured.
This one is easiest if you can braid close to the scalp for a few inches and then stop. The goal is not perfection. It is control. Even two or three cornrows on one side can change the whole shape, especially if you pull the rest into a mid or high puff.
Where the tension should stay low
The hairline should feel snug, not tight. If your corners hurt, the braid is too small or too pulled. That mistake is common, and it makes an otherwise useful style feel not worth it.
- Keep parts clean enough to see.
- Braid the front sections first so the outline stays tidy.
- Gather the rest into a puff once the braids are finished.
- Set the edges with a scarf for 10 to 15 minutes if you want them smoother.
This style works especially well when you want a little more polish for a dinner, meeting, or photo day without spending an hour on your hair.
12. Halo Braid Crown
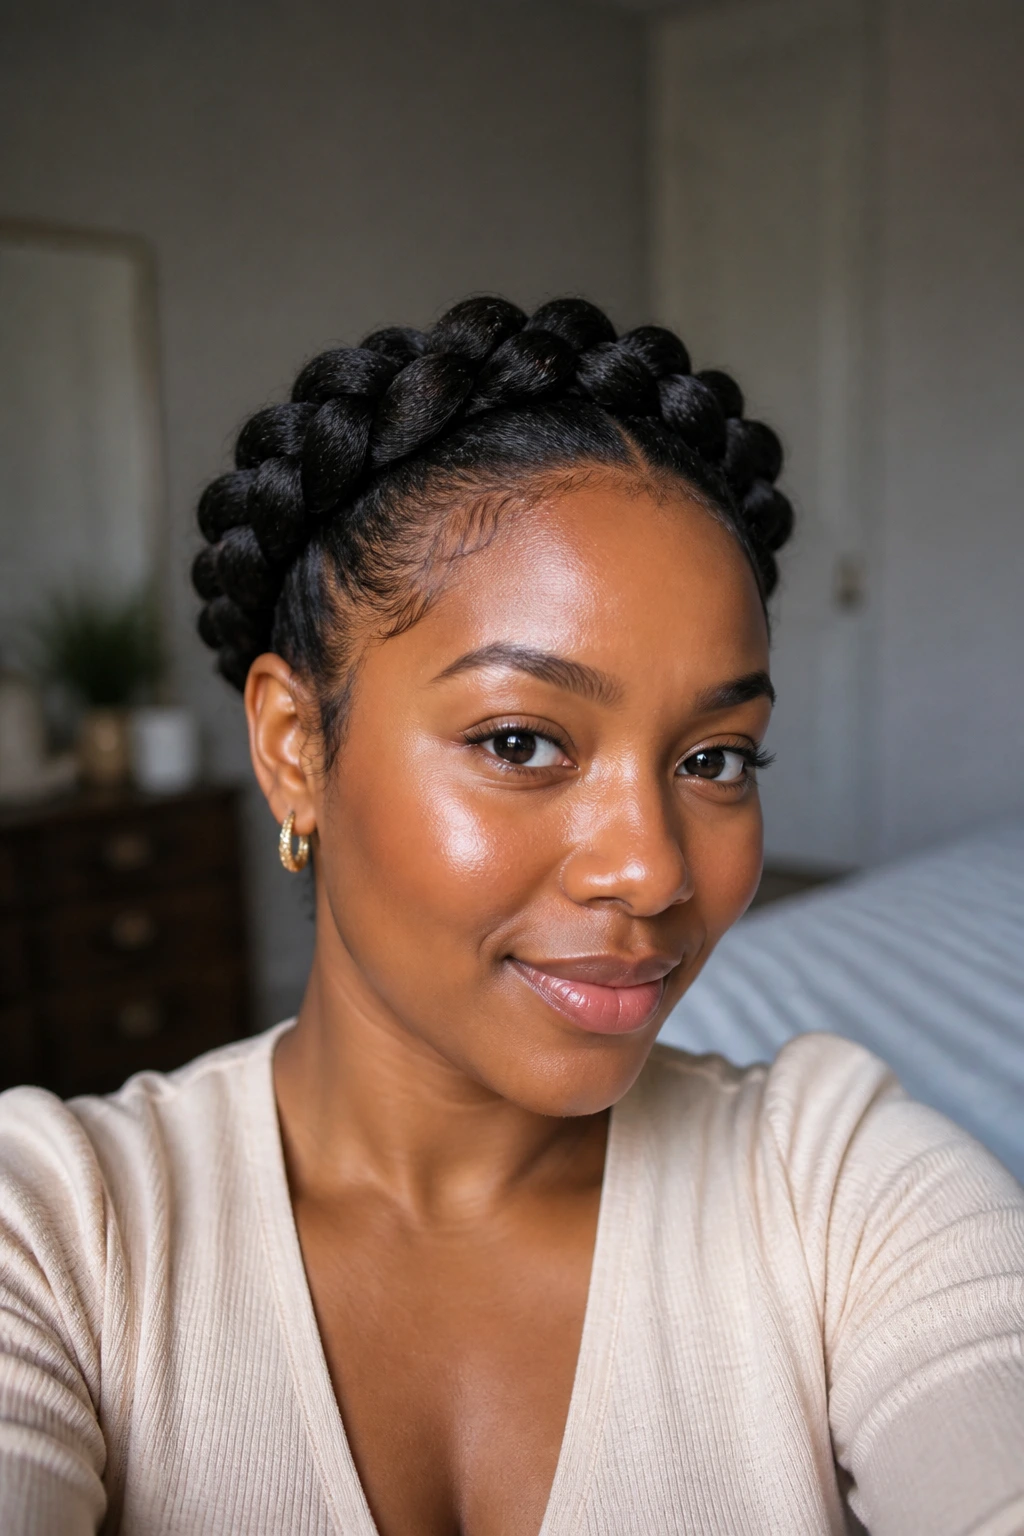
A halo braid crown looks fancier than it is. That’s one reason I like it. If you can braid around the head and tuck the ends, you can pull this off at home, even if your braid work is not salon-smooth.
The braid wraps along the hairline like a band, which keeps the front neat and sends all the attention to the shape around the head. On 4C hair, that shape tends to hold well because the texture gives the braid grip. A little grip is a gift here. Smooth hair can be slippery; textured hair usually is not.
You can start with a side part and braid along the perimeter, or split the hair into two braids that meet at the back and tuck the ends under each other. Both versions work. Use a little gel along the part and a firm but gentle hand. Too much pulling at the temples is a bad idea.
The final look is calm and rounded, not loud. Good for when you want your hair to stay put and still look deliberate.
13. Side-Swept Flat Twist Updo
Want something that feels dressier without a pile of pins? The side-swept flat twist updo is one of those styles that looks more complicated than it is. That’s part of its charm.
You section the hair into a few flat twists, direct them toward one side, then pin or tuck the ends into place. The sweep across the head creates shape, and the tucked ends keep the style neat. It also gives you a lot of control over how much volume stays on top.
If your hair is thick, make the front twists slightly larger so the style does not get too bulky near one ear. If your hair is shorter, smaller twists usually stay in place better. Use U-pins or long bobby pins and anchor them under the twist rather than across the top, where they show and slide out.
Best use case
This style is a solid choice for stretch hair, twist-out hair, or a fresh blow-dried base if you wear one. It does not need bone-straight hair. It needs enough length to grip and enough product to keep the twists from fluffing up too fast.
14. Space Buns on 4C Hair
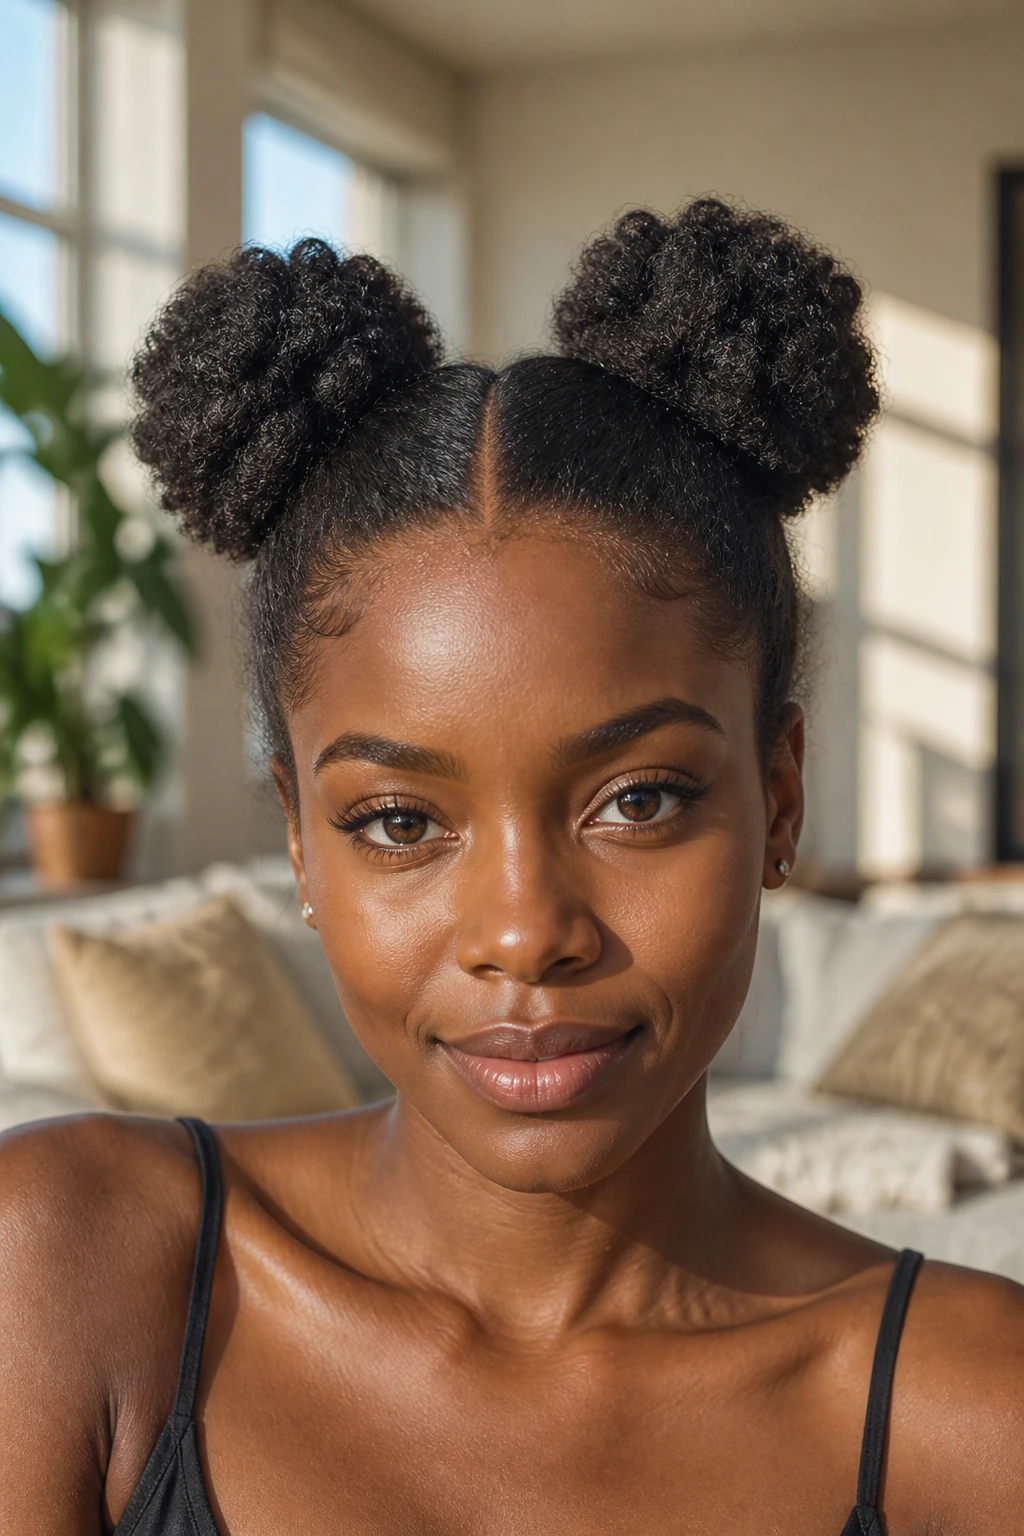
Space buns are not childish when the parts are clean and the buns are full. They just look fun. And fun is allowed.
Split the hair down the middle, gather each side into a puff or twist, then wrap or tuck the ends into two buns. If your hair is long enough, the buns can sit high and round. If it’s shorter, they may look more like compact knots. Both versions work. The shape is what matters.
The middle part gives the style its balance, so take a minute to make that line straight enough. It doesn’t have to be ruler-perfect, but it should not wander all over the head either. That part is doing a lot of visual work.
A few quick things help here:
- Use a snag-free elastic so you do not break off the ends.
- Smooth the hair in sections instead of brushing everything at once.
- Leave a little fullness at the roots for shape.
- Pin any loose ends under the buns rather than wrapping them too tightly.
Space buns are good for weekends, errands, or any day when you want your hair to look playful without needing a full styling session.
15. Faux Hawk Puff
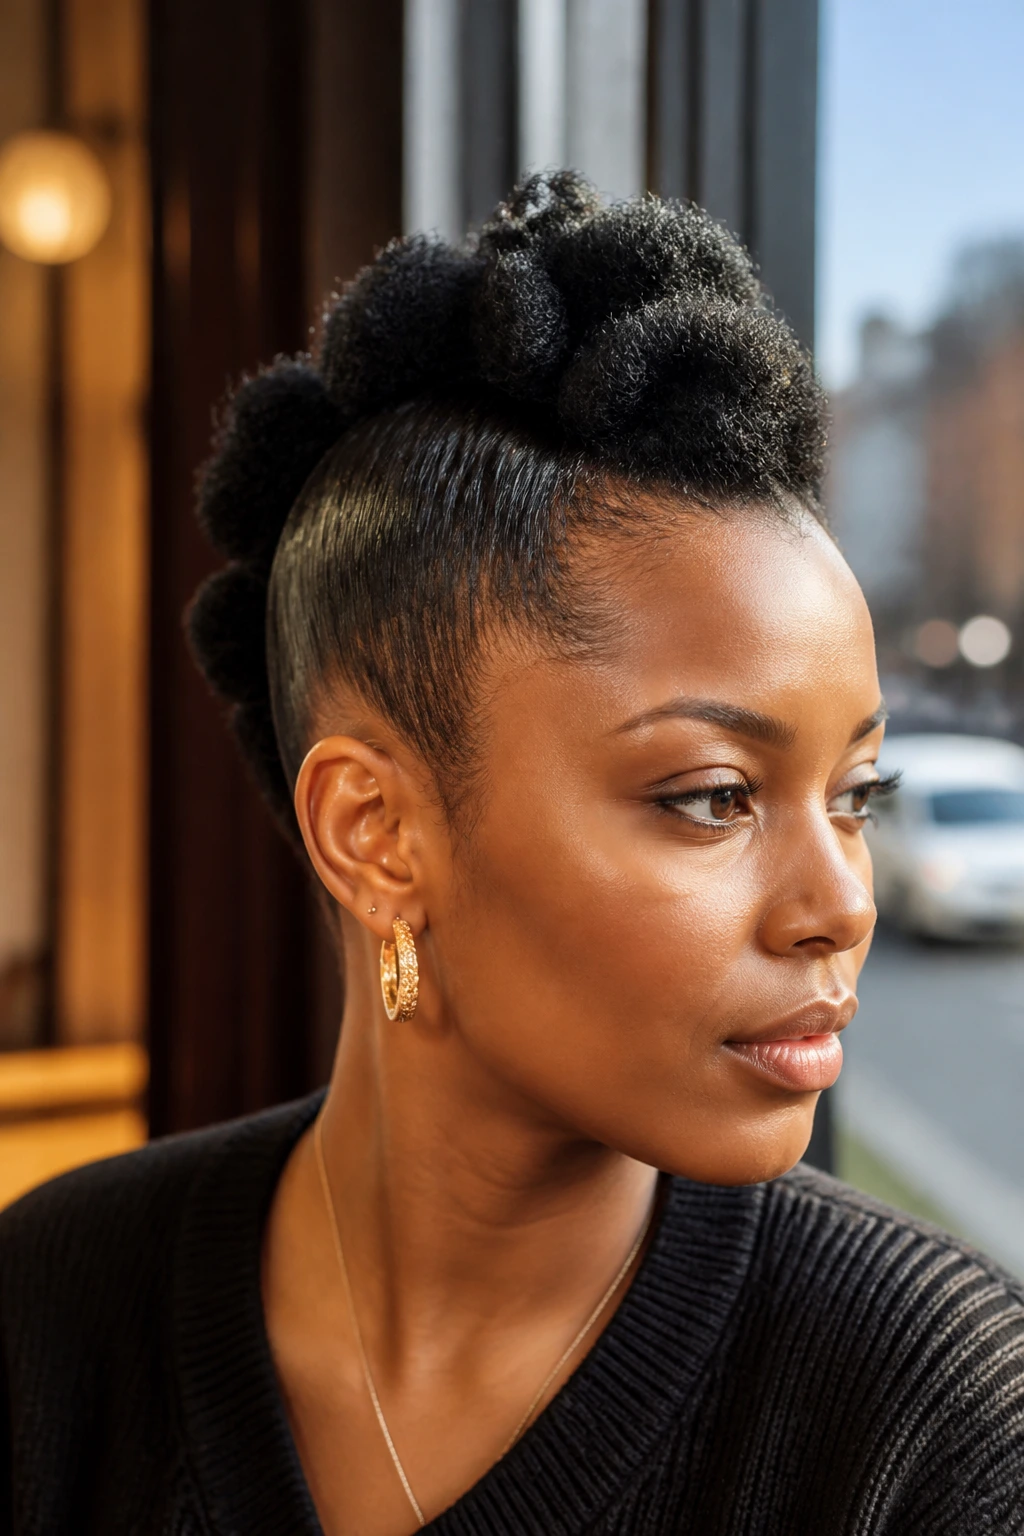
A faux hawk gives you height through the middle and control along the sides, which is a nice way to get drama without a complicated updo. On 4C hair, it looks especially good because the texture makes each section feel full instead of flat.
The style usually starts with side sections that are flattened, twisted, or pinned close to the scalp, while the center sections are left puffed or gathered into a line of small puffs down the middle. You can make it sleek, fluffy, or somewhere in between. The middle row does the showy part. The sides keep it clean.
If your hair is thick, do not try to make the sections tiny. Bigger sections hold shape better and save time. A little gel at the sides helps, but again, use enough to control the hair, not so much that it turns hard. You want lift in the center and a gentle taper on the sides.
This is the style I’d reach for when I want a little edge without spending forever in the mirror. It has shape, it has movement, and it does not ask you to flatten your whole texture just to look finished.