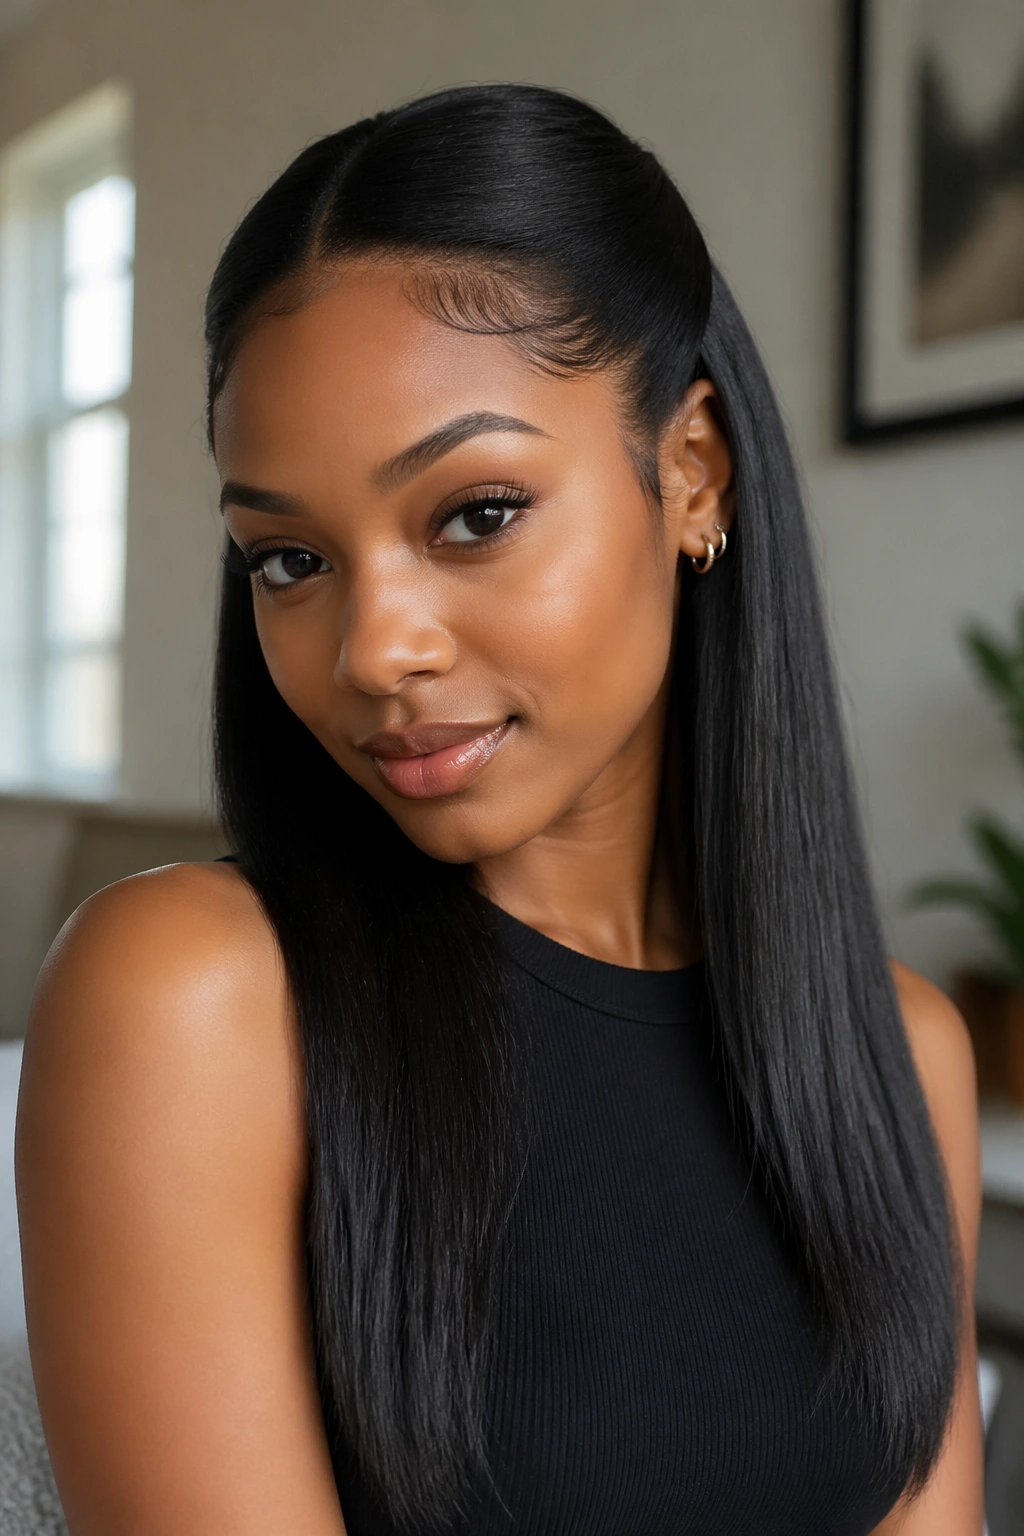
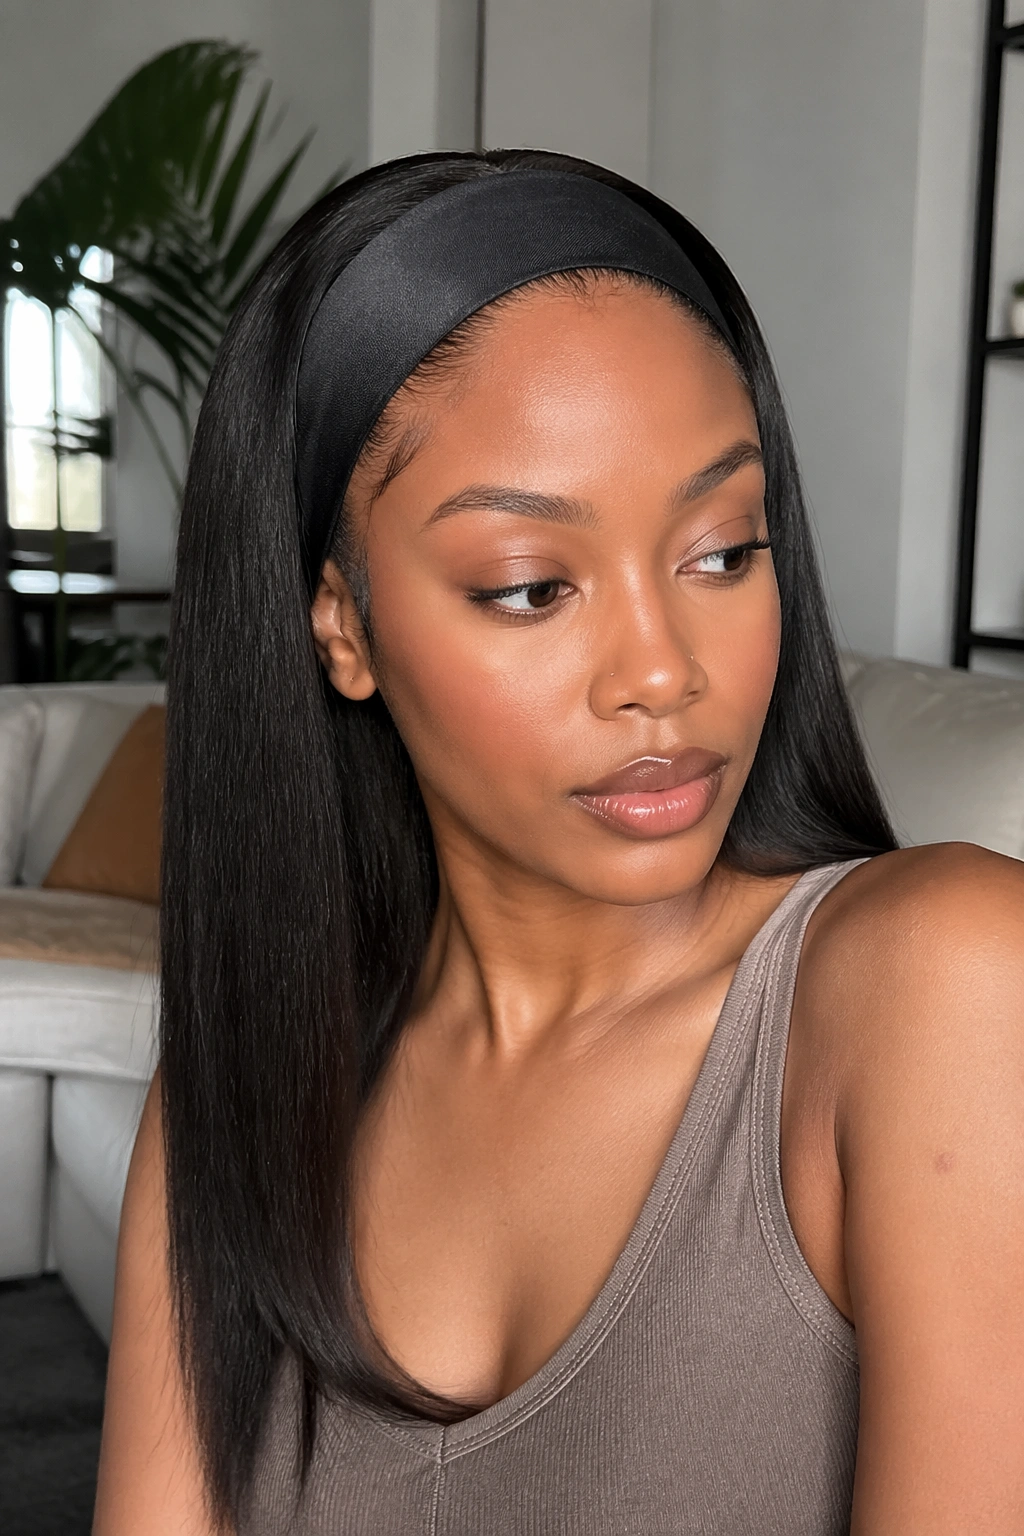
Straight styles for Afro hair hit differently when the cut is right. A silk-pressed bob that swings at the jaw, a long layered press that moves when you turn your head, a sharp middle part that puts every inch of shine on display—those looks can feel brand new, even if you wear your coils, kinks, and curls most of the time.
I like straightened Afro-textured hair most when it still feels like your hair, not a flat version of somebody else’s. That usually comes down to shape. Dense roots need a cut that can carry weight. Fine areas near the temples need softer lines. And the ends? They tell the truth faster than anything. If they’re dry, split, or uneven, a straight style will put a spotlight on it.
There’s also the care side, and it matters more than people admit. Hair-fiber studies have found that repeated high heat can rough up the cuticle and weaken the strand over time, especially when you stack heat on top of bleach or relaxer. Dermatologists have been saying a version of the same thing for ages: clean hair, conditioner, heat protectant, and fewer passes beat blasting the flat iron at top heat and hoping for mercy.
So if you’re craving a fresh look—one that feels polished, grown, soft, sharp, or a little dramatic—these are the straight hairstyles I’d keep on the mood board.
What keeps straight Afro hair smooth without beating it up
Heat does not create sleek hair; preparation does. The smoothest silk press or straightened natural style usually starts in the shampoo bowl, not with the flat iron. Product buildup blocks moisture, scorches faster, and makes you chase shine with more heat than your hair needed in the first place.
A clean scalp, a rich rinse-out conditioner, and a leave-in that doesn’t leave sticky film get you farther than a drawer full of styling products. I like a lightweight heat protectant layered from mid-length to ends, then a blow-dry with tension or a paddle brush. When the blowout is stretched well, the iron often needs only one slow pass per section.
Pick a temperature your hair can live with
Color-treated or fine strands usually do better around 340°F to 370°F. Healthy, dense Type 4 hair may need 375°F to 400°F to get a smooth result in one pass. I would not push past that unless a stylist who can see and feel your hair is making the call. Damp hair under a flat iron is where trouble starts.
The night routine matters more than people think
If you want your straight hairstyle to last 4 to 7 days, nighttime care is non-negotiable.
- Wrap or pin-curl the hair before bed so the ends stay tucked and smooth.
- Use a silk or satin scarf first, then a bonnet if you toss around at night.
- Skip heavy oils after day one; they can make straight hair limp and separate.
- Use humidity-resistant serum on the surface only, not on the roots.
And yes, trims keep showing up in this conversation because straight hair exposes every rough edge.
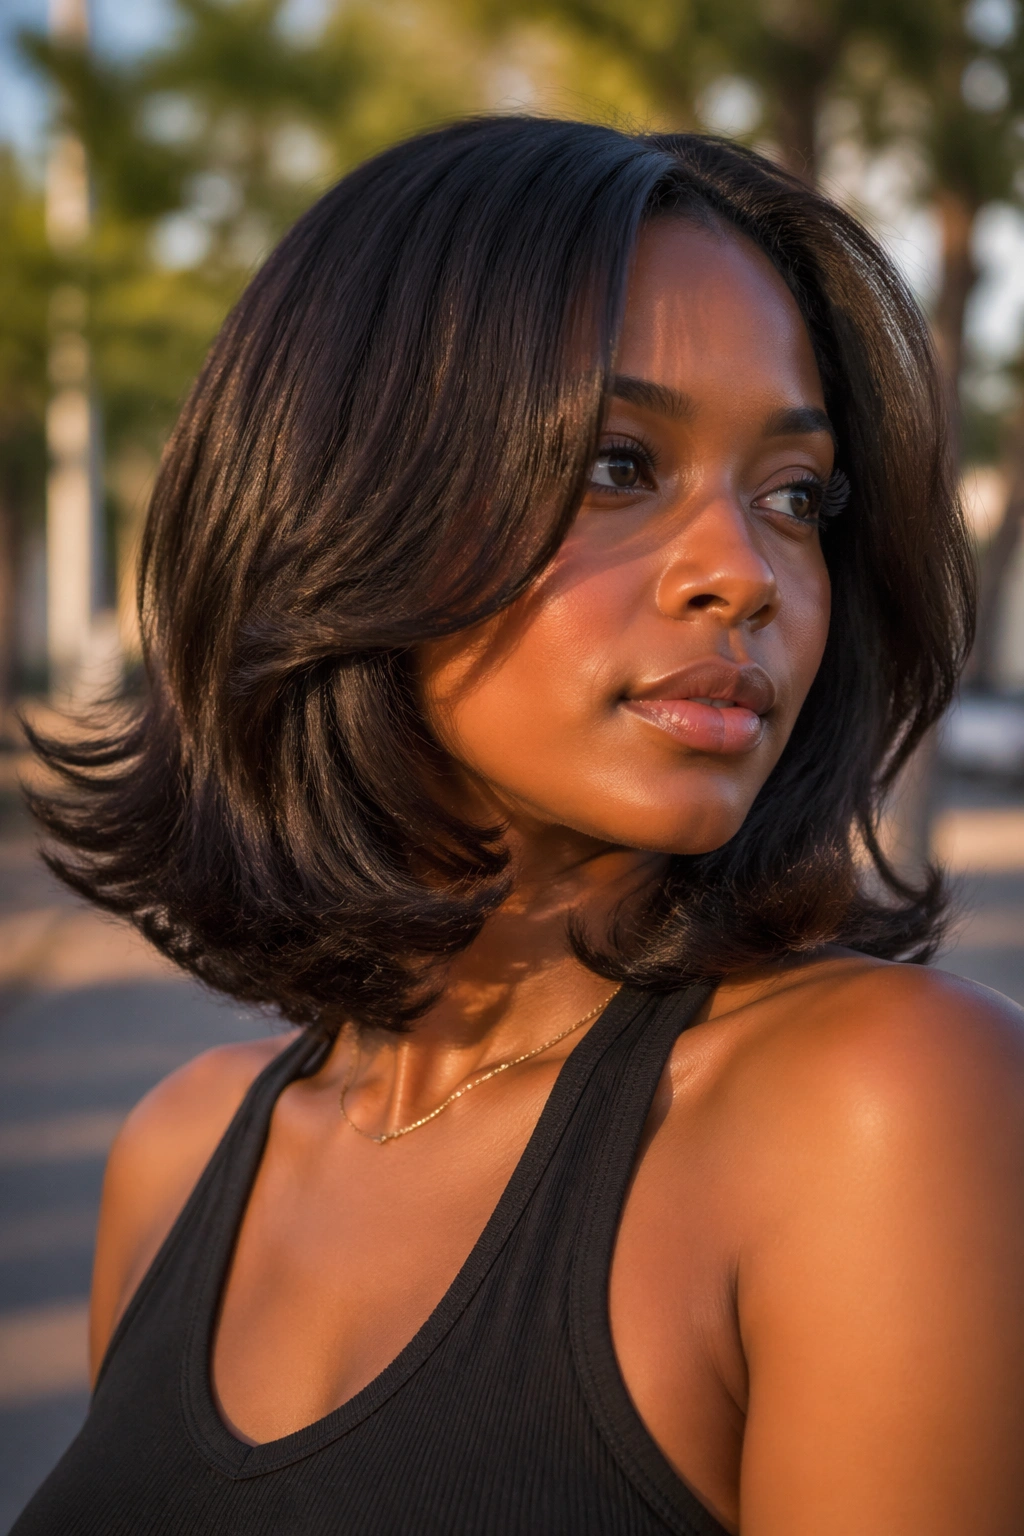
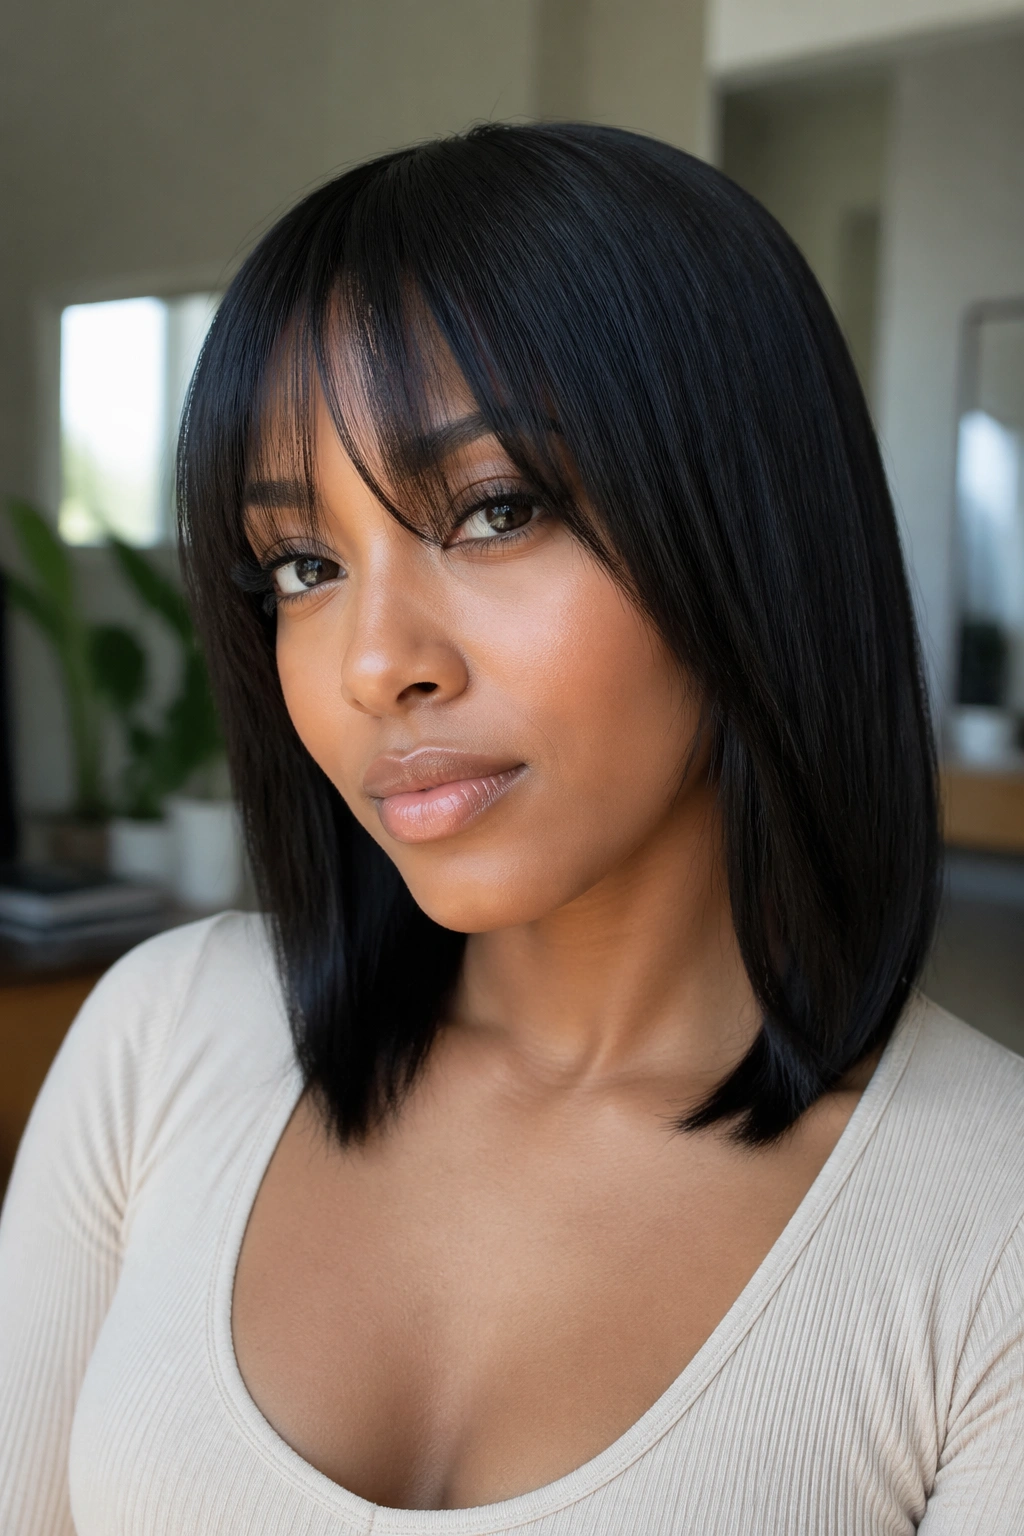
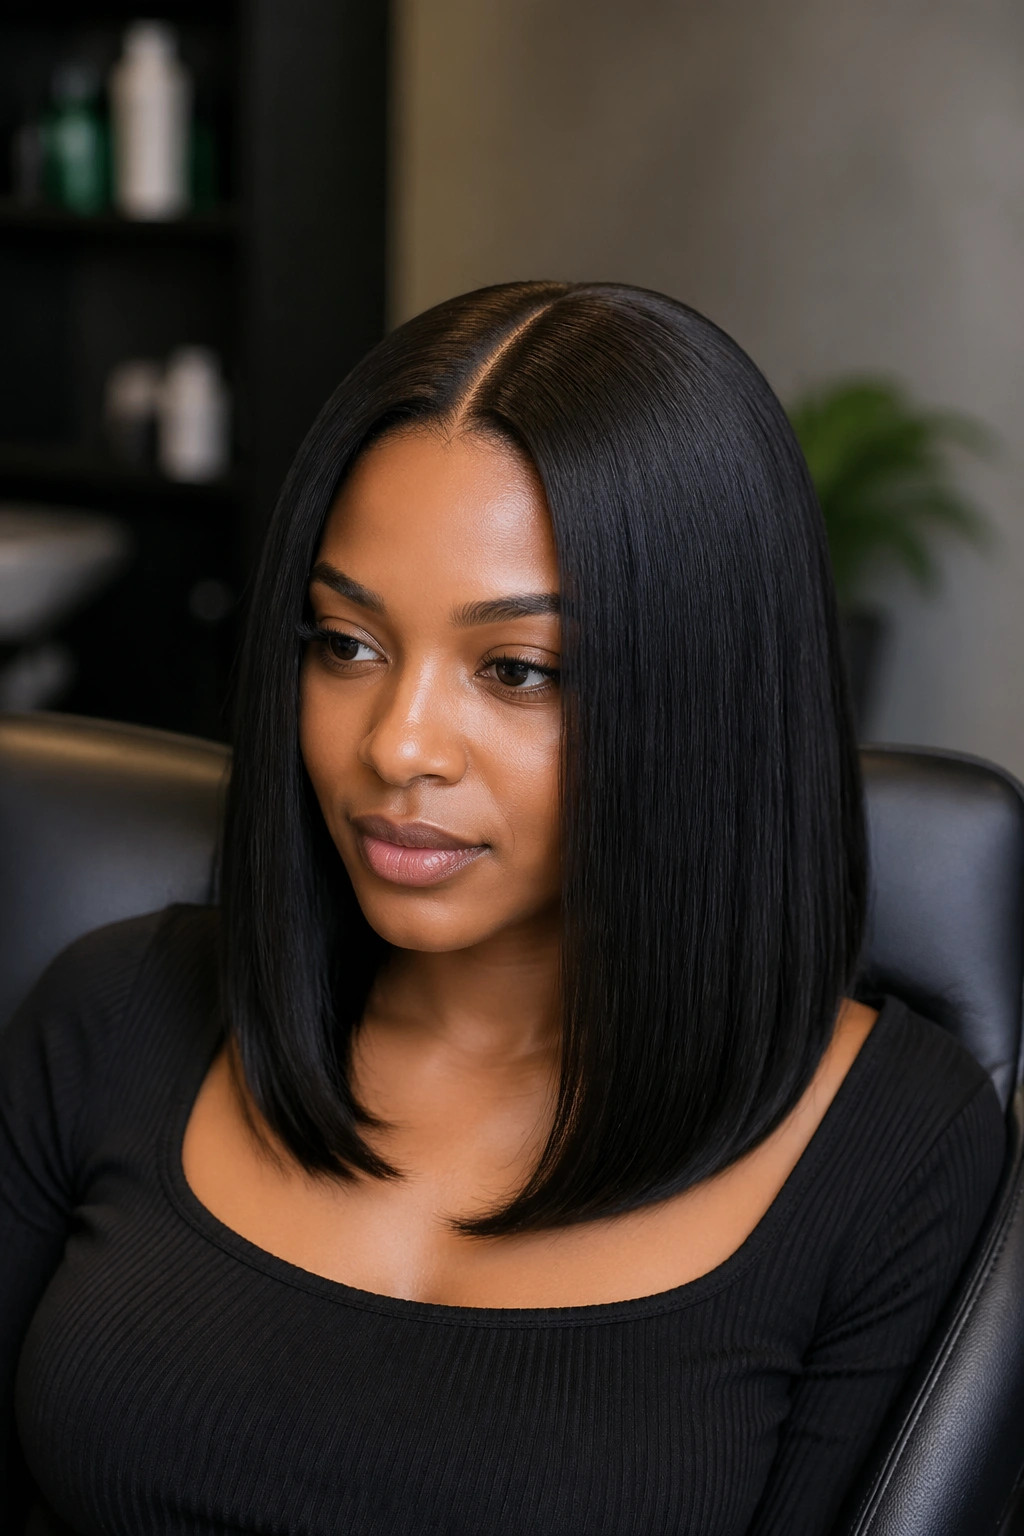
1. Silk Press Blunt Bob
A blunt bob is one of the cleanest straight styles you can put on Afro hair. No fluff. No hiding place. When it’s cut well, the line at the bottom looks crisp, the hair swings in one solid shape, and your jawline gets an assist.
Why this one works so well
Dense natural hair holds a blunt line beautifully after a silk press because the ends have body. You get polish without needing long length. I also like this style for anyone growing out uneven layers from old heat damage, since the cut removes weak ends fast and makes the hair look fuller right away.
Quick notes before you ask for it
- Best length: anywhere from lip level to just above the shoulders
- Best on: medium to thick density, relaxed hair, or healthy silk-pressed natural hair
- What to ask for: a dry cut after the press, so the line sits even when straight
- Maintenance: wrap it at night and trim every 6 to 8 weeks
My take: if you want one style that always looks intentional, start here.
2. Deep Side-Part Lob for Afro Hair
A deep side part can change the whole mood of straightened Afro hair without changing the length at all. That’s why I keep coming back to the lob. It sits between chin and collarbone, gives you enough hair to tuck behind one ear, and throws extra weight to one side in a way that feels softer than a center part.
The side part also helps if your hairline is thinner on one side or your crown grows in a stubborn direction. You can use the heavier side to cover a sparse patch, then flat-wrap the lighter side so it hugs the head. No fight. No bulky shape at the root.
I’d choose this cut for someone who wants movement without full layers. Layers can get tricky on Afro-textured hair once humidity creeps in; a lob keeps enough weight at the bottom to hold its shape. Shoulder grazing is the sweet spot.
Ask your stylist to keep the ends blunt and the side part deep enough to shift the balance, not a half-inch fake side part that disappears after one wrap. That little detail is the difference.
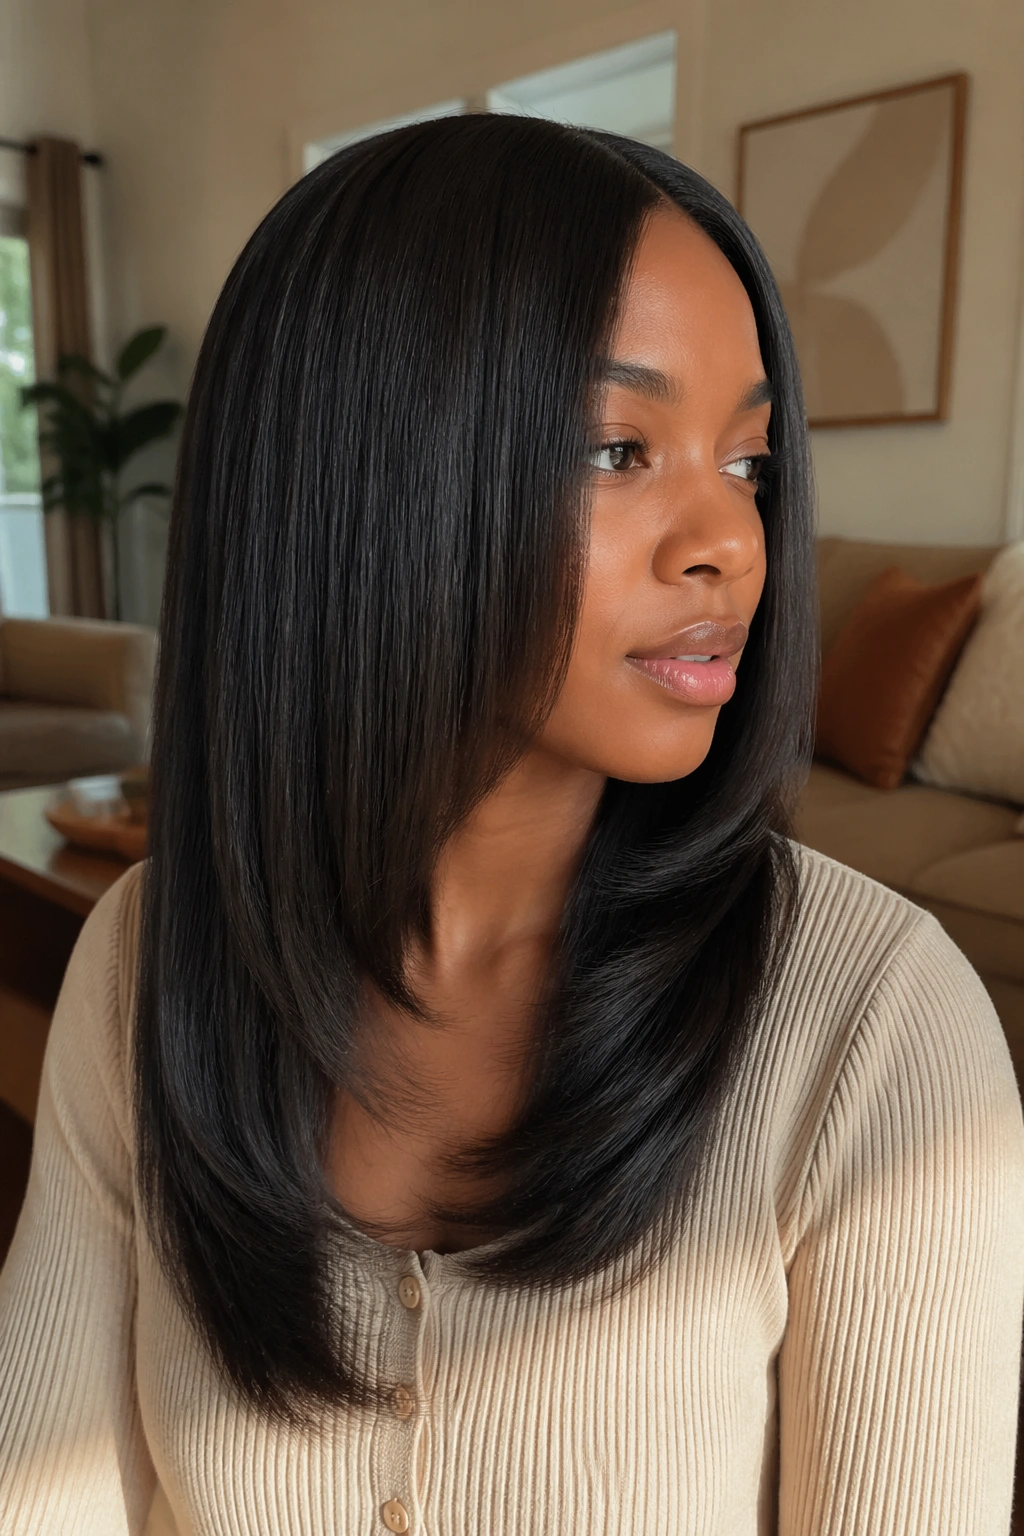
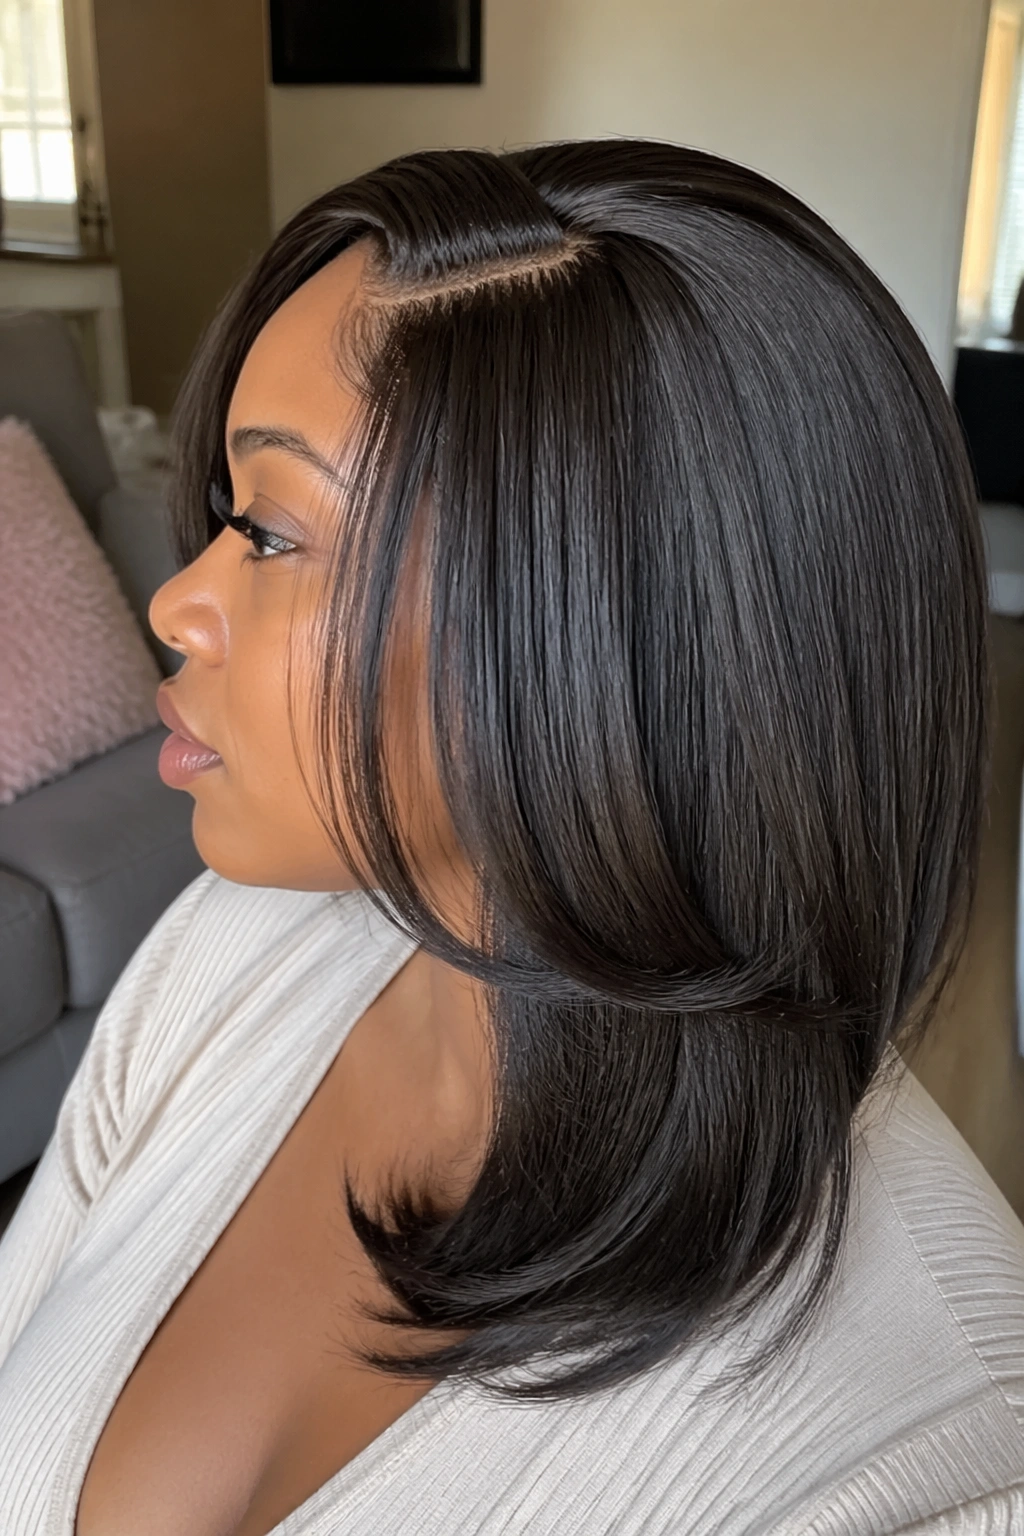
3. Layered Shoulder-Length Press
Why does shoulder-length hair look so good on straightened coils? Because it gives you motion without sacrificing density. Longer hair can pull flat at the crown. Shorter hair can puff up at the ends if the cut is off by even a little. Shoulder length sits right in the middle.
A layered shoulder-length press works best when the layers are placed with restraint. I’m not talking about thin, feathery strips carved all through the head. On Afro hair, that approach can make the ends look stringy once the style settles. You want long internal layers that take out bulk and free up movement, while the bottom still reads as full.
What to ask your stylist for
Tell them you want:
- layers that start around the cheekbone or chin, not at the crown
- a strong perimeter with softness inside
- enough weight left at the ends to survive day three, not only salon day
This cut earns its keep when you flip your head and the hair falls back into place. If it splays outward and stays there, too much weight came out.
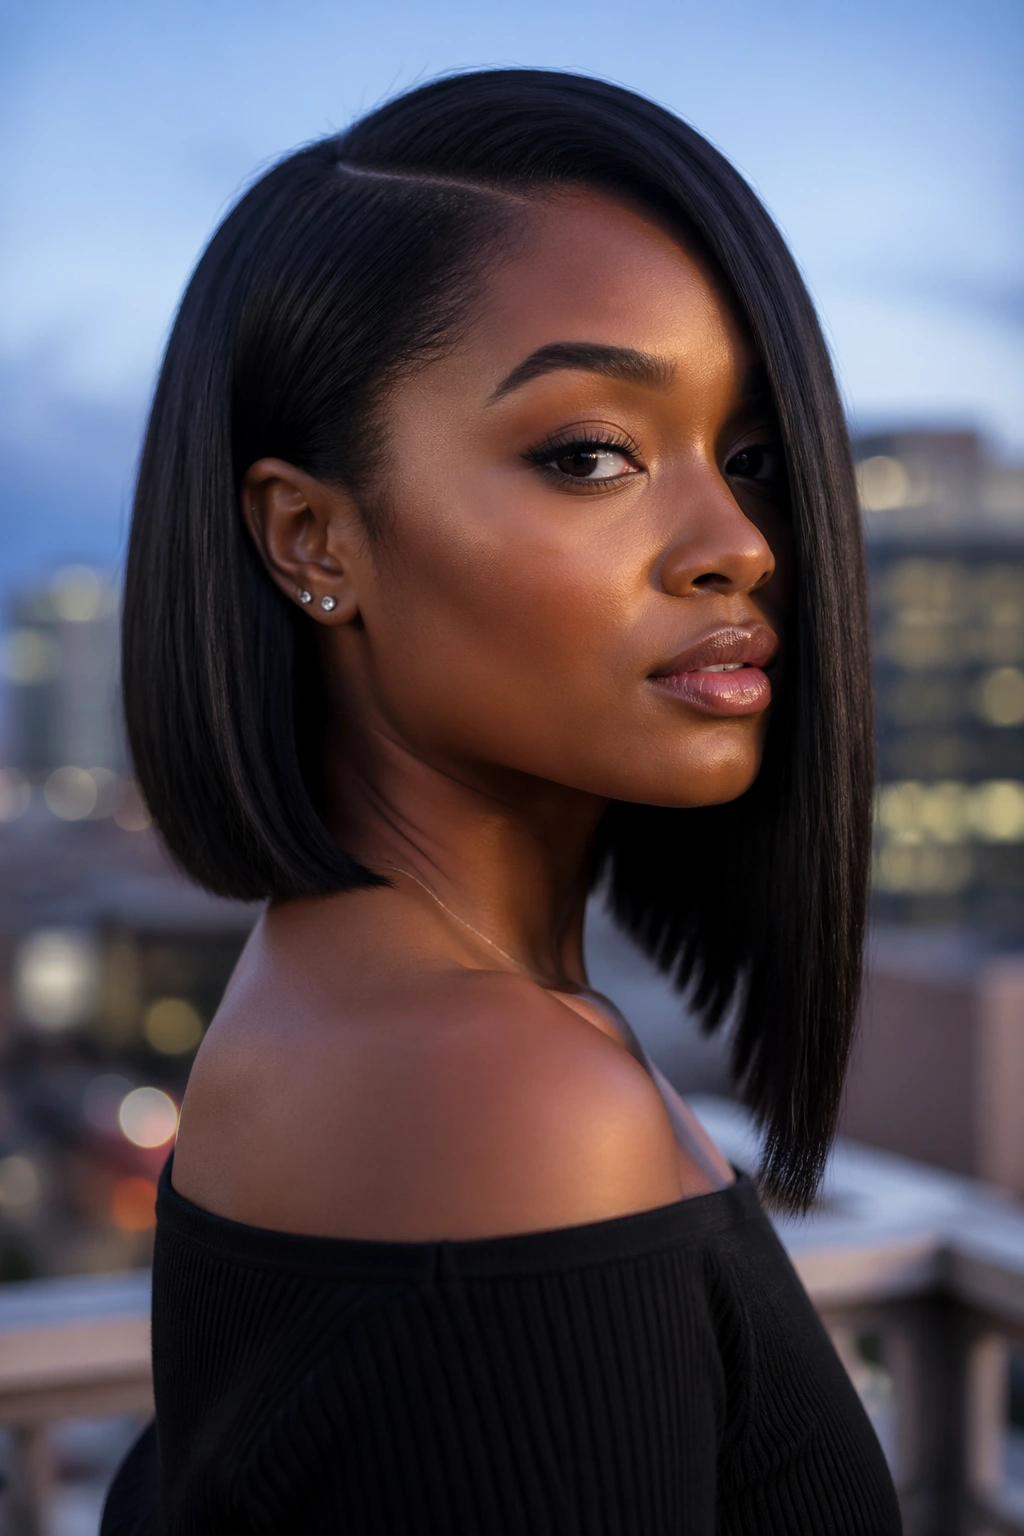
4. Bone-Straight Middle-Part Bob
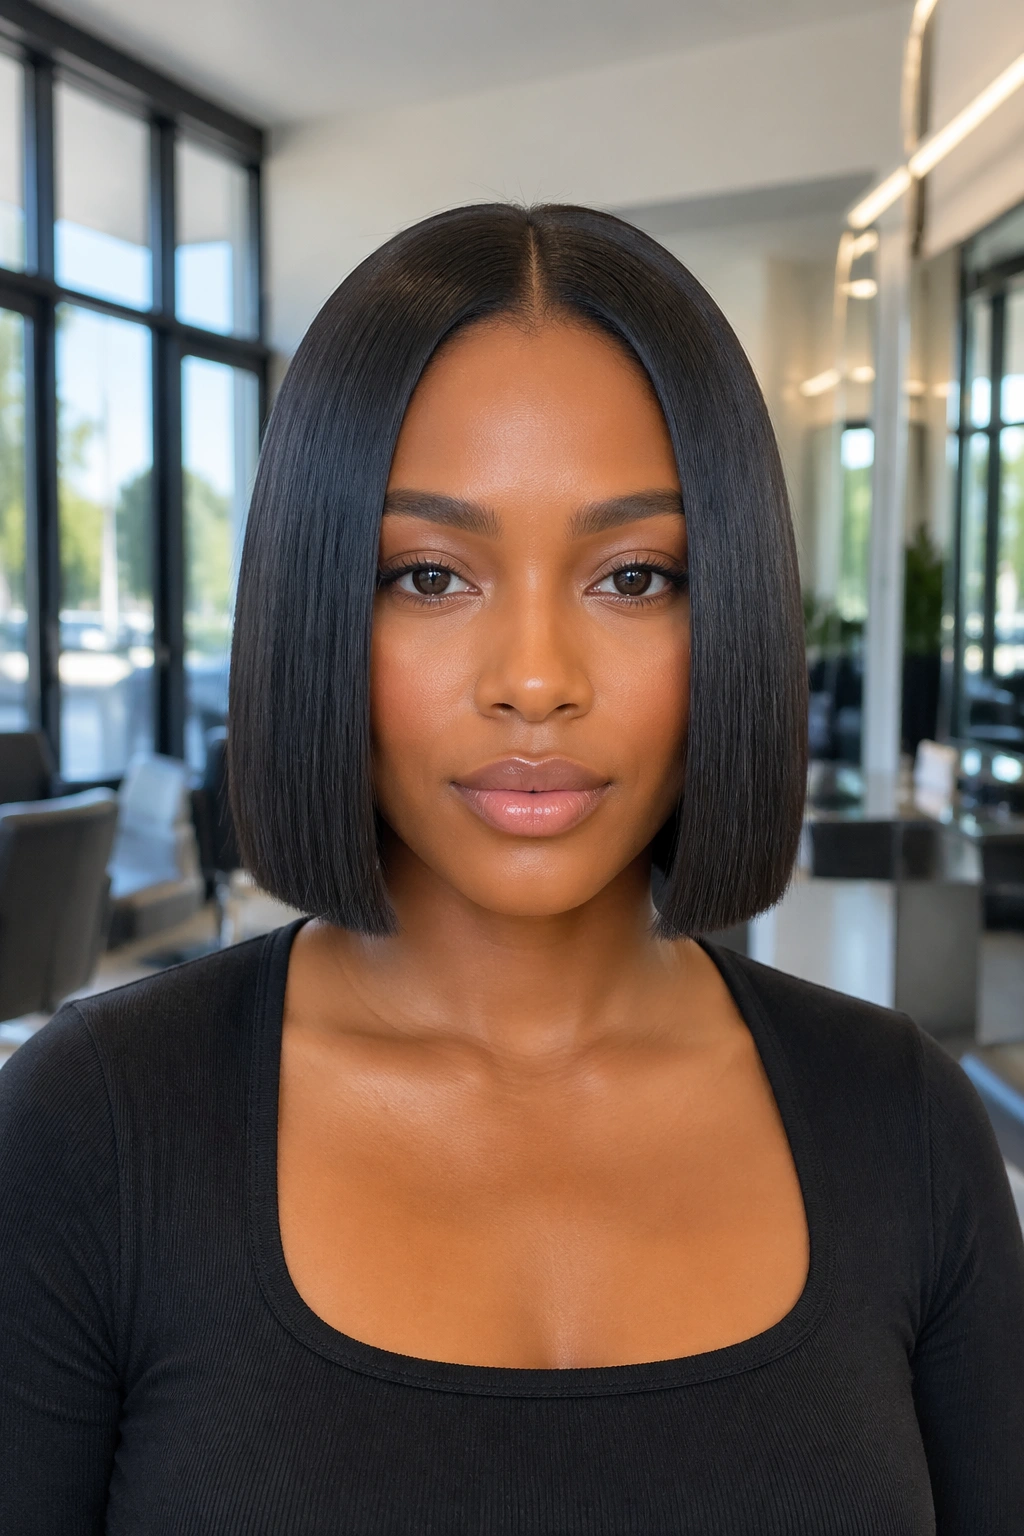
Picture the chair turning toward the mirror, the part dead center, the ends hitting at the chin or a touch below. A middle-part bob on Afro hair has that sharp, editorial look people chase with wigs, except it hits harder when it’s your own pressed hair and the cut is dialed in.
The reason it lands so well is structure. A center part divides the weight evenly, so both sides need to match. Afro-textured hair, once straightened, exposes any weak point in the perimeter. That sounds harsh. It’s also why the style looks so polished when the ends are healthy.
A few details make this one sing:
- Length matters: chin to collarbone keeps it crisp
- Density matters: if your ends are thin, go shorter
- Part placement matters: true center, not drifting off after two comb strokes
- Flat-iron technique matters: thin sections, comb chase, one clean pass
No style rewards precision quite like this one.
5. Sleek A-Line Bob for Afro Hair
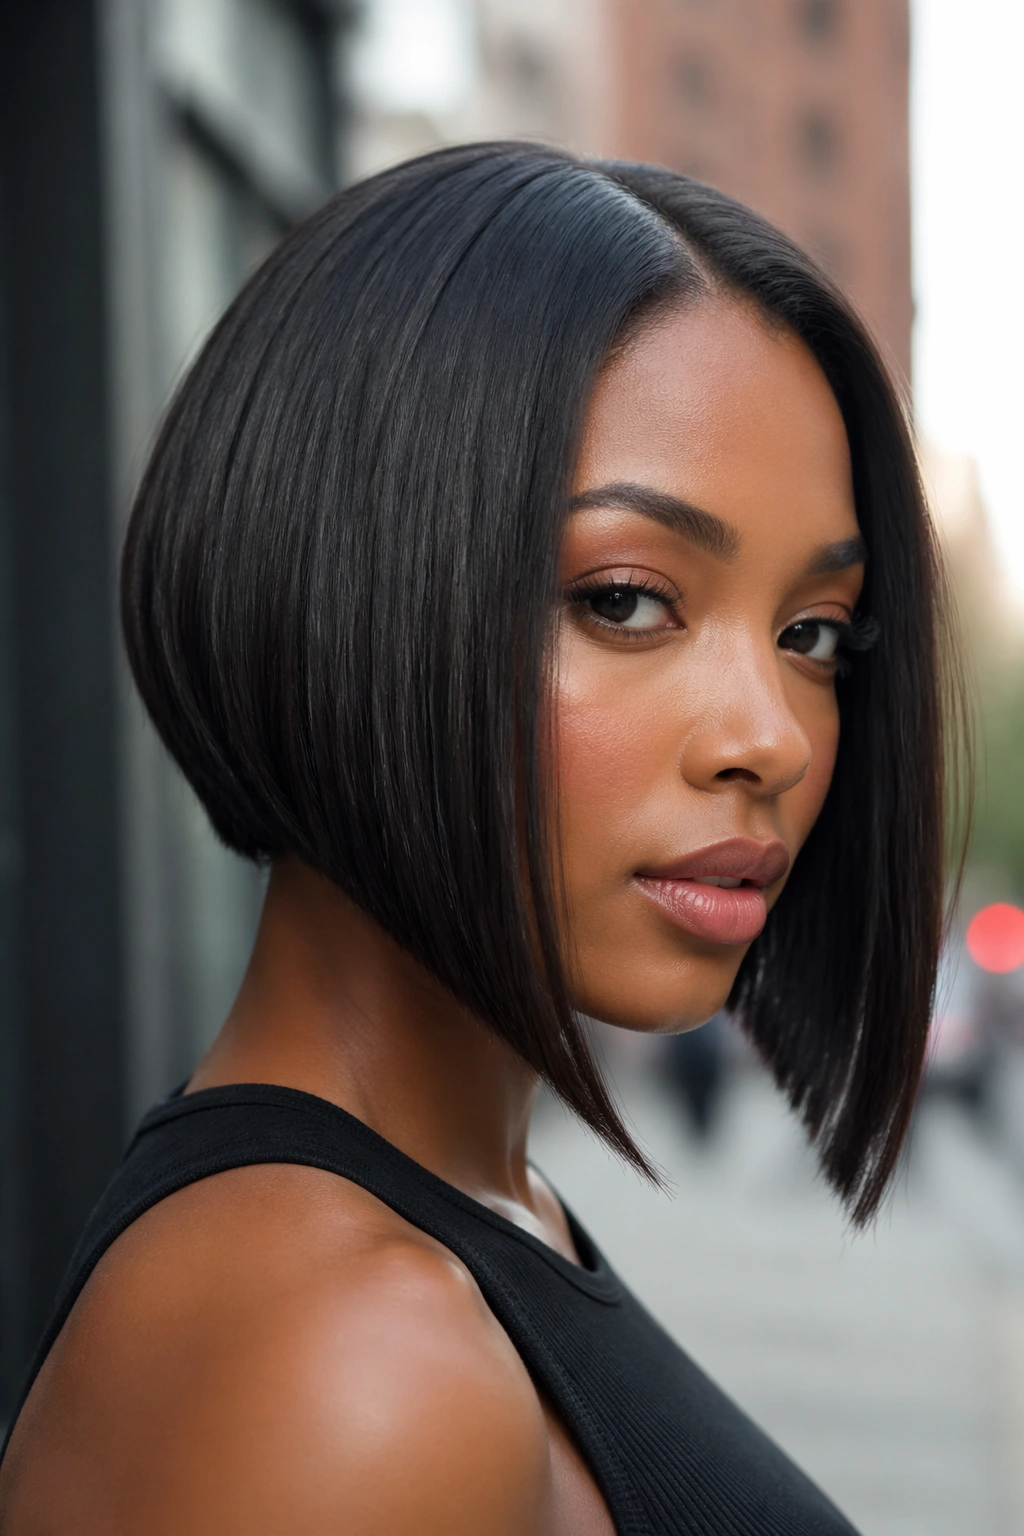
The A-line bob gives you a shorter back and longer front without swinging into full asymmetry. I love it on Afro hair because it solves a problem that dense strands often have when worn straight: too much weight at the nape and not enough shape near the face.
Cutting the back closer lets the neck show. Leaving the front longer gives you that elegant curtain around the cheek and collarbone. You keep drama, though not the heavy block shape that some one-length bobs can create on thick pressed hair.
This cut also behaves well through the week. Day one looks sharp. Day three still looks like a haircut, not an old press that lost its will to live. That’s a useful distinction.
Ask for the front to drop 1 to 2 inches longer than the back, with the transition smoothed rather than stacked in hard steps. On natural hair, I’d have this done after a silk press so the stylist can see where each side settles. Curly cuts and straight cuts are not the same conversation.
Humidity can still lift the back first—nape hair loves to tell on you—so a wrap strip at night pays off here.
6. Chin-Length Tucked-Under Bob
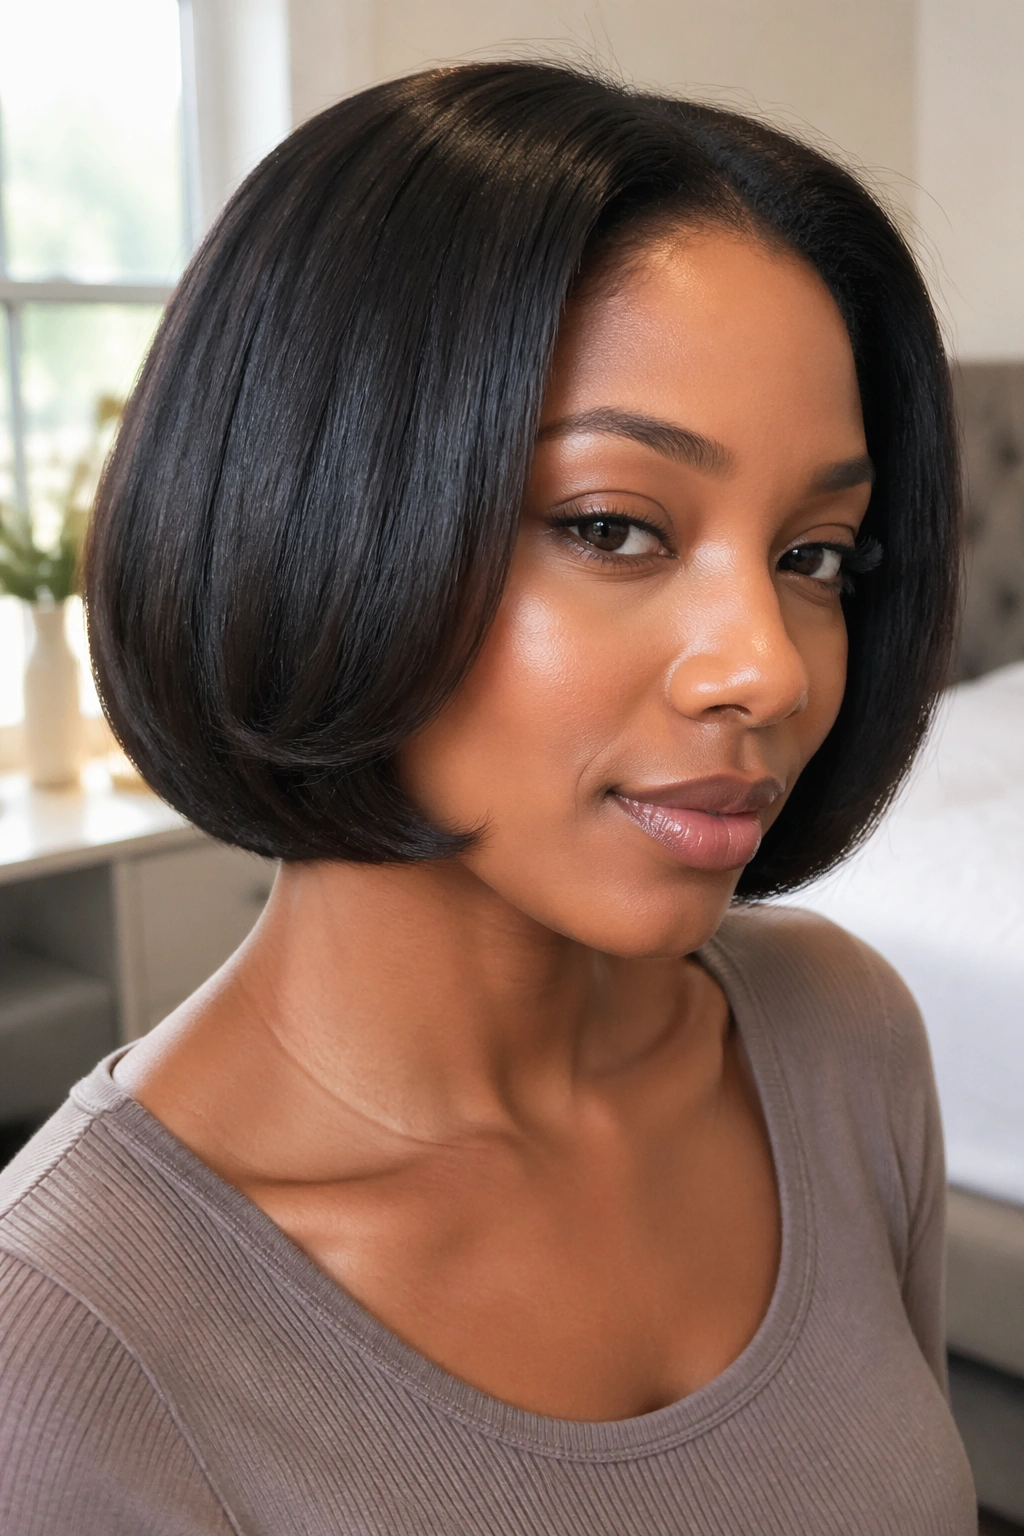
Unlike a blunt bob that hangs straight down, a tucked-under bob curves inward at the ends. That slight bend changes the whole face frame. It can make the style look softer, more polished, and a little fuller without adding layers.
The trick is control. If the ends are bumped too hard, the style starts drifting toward pageant hair. If the bend is too weak, it drops flat by lunch. What you want is a small inward turn, usually created with a round brush during the blow-dry or a flat iron bevel at the last inch.
This shape suits relaxed hair and silk-pressed natural hair alike, though the latter may need a wrap plus two large magnetic rollers at night to keep the curve alive. Sleep on it loose and the ends can flip every direction by morning.
Who should pick this? Anyone who likes bob length but wants less severity around the jaw. It’s forgiving, classy, and one of the easiest salon styles to wear again at home once you learn the bend.
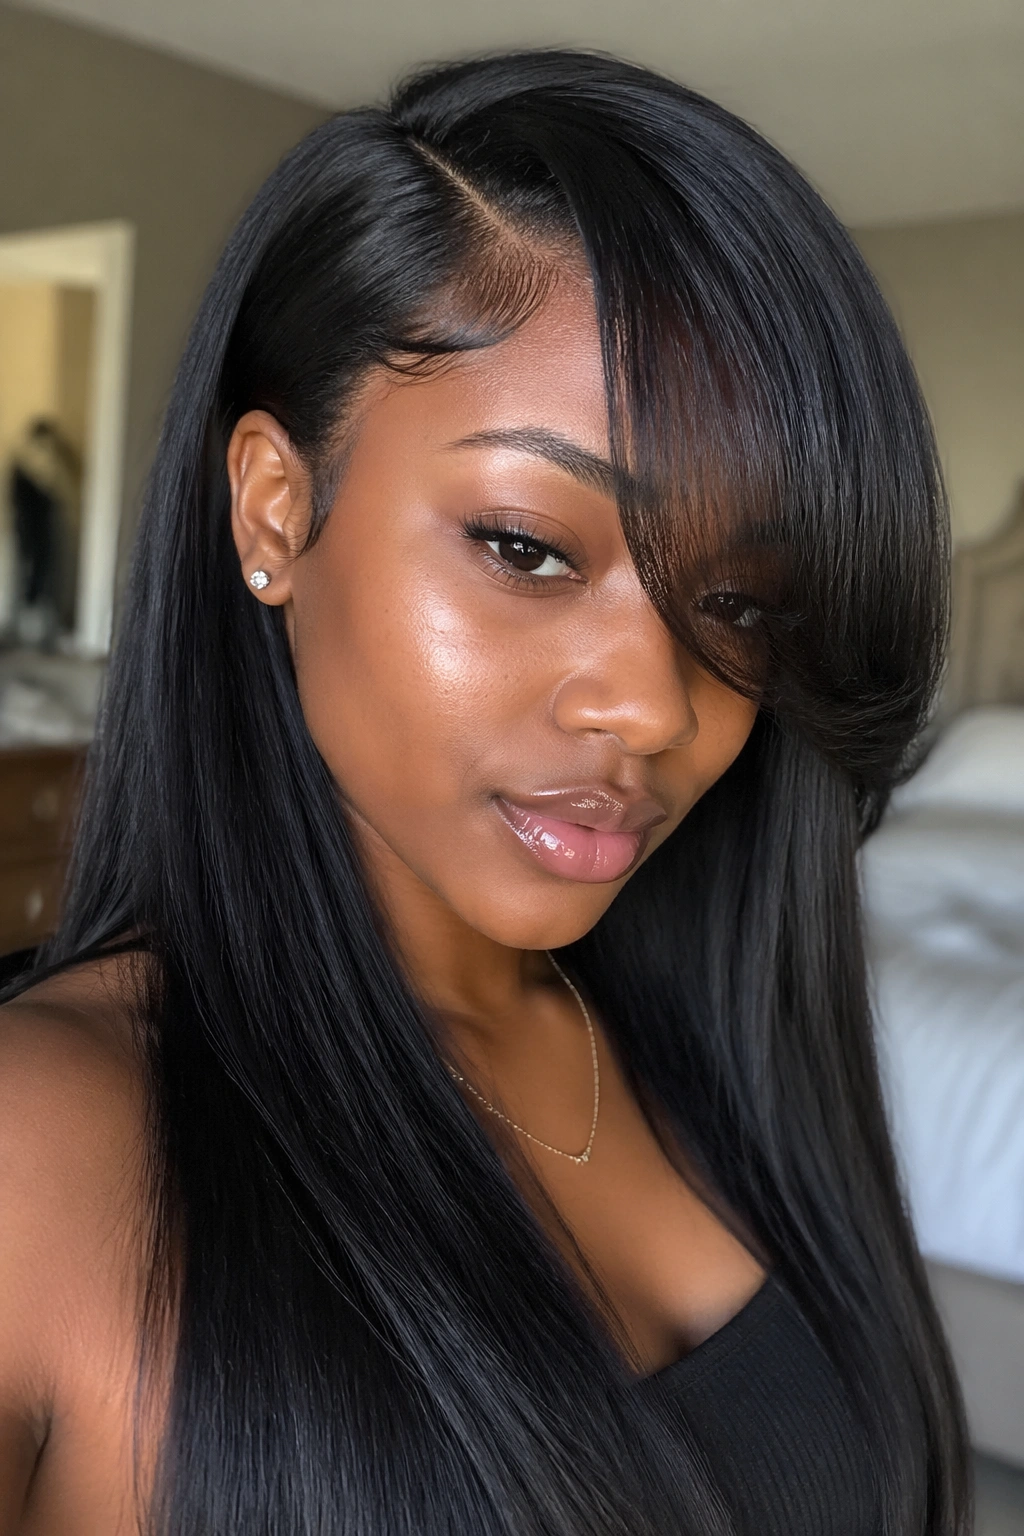
7. Long Layers With Curtain Bangs
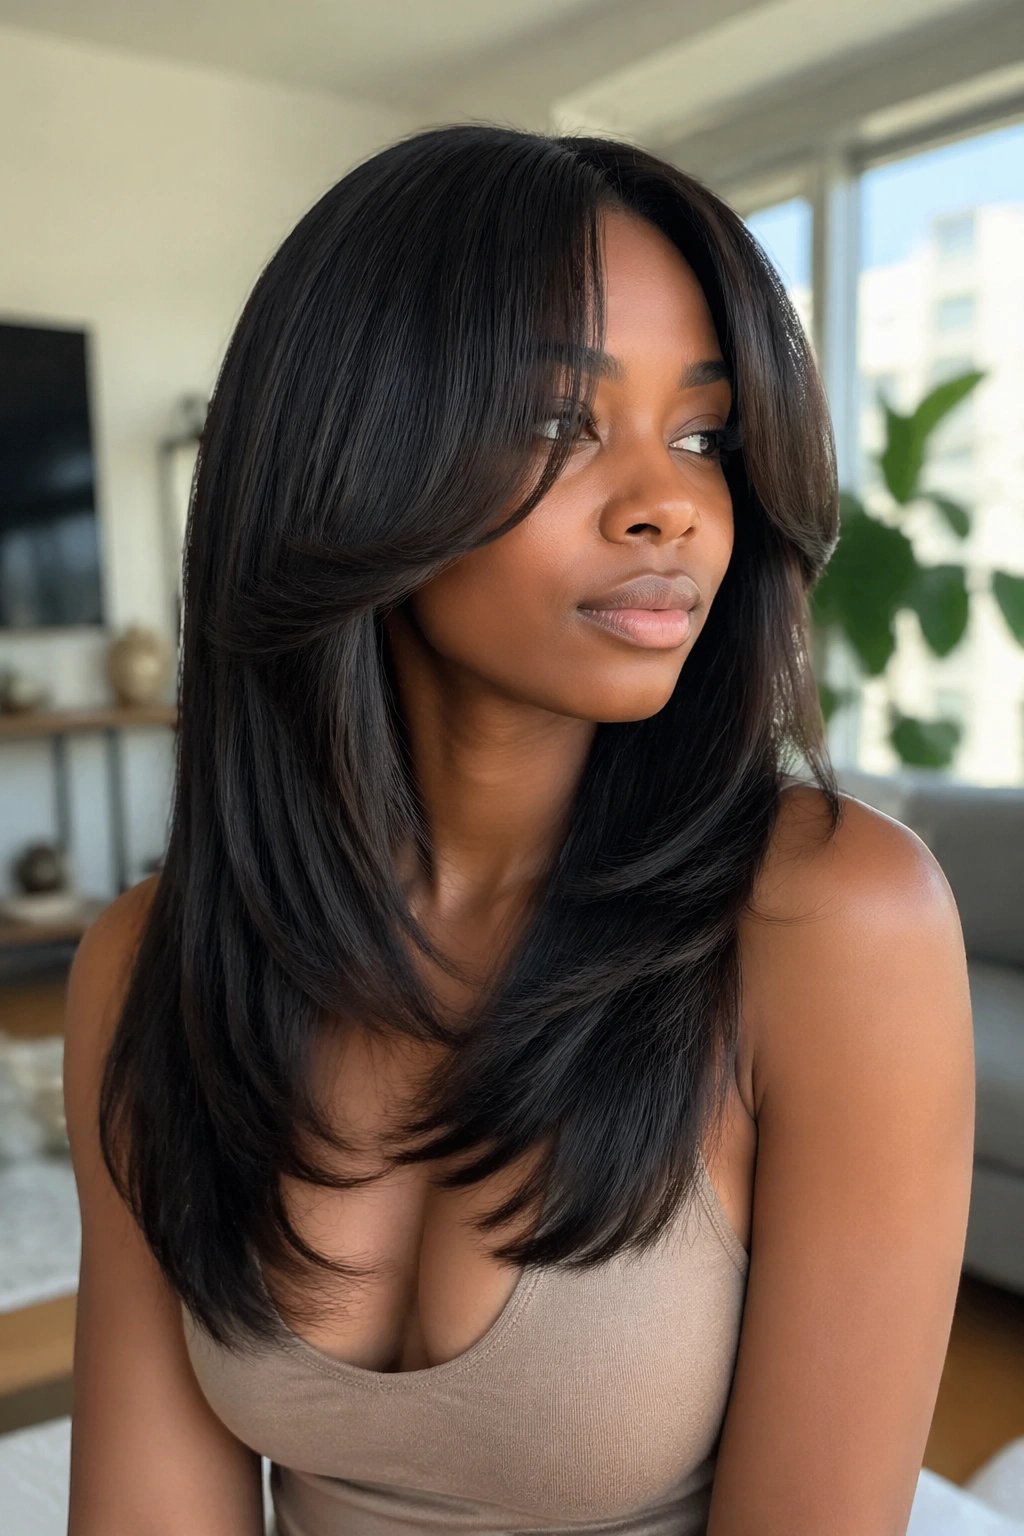
Curtain bangs can look awkward on Afro hair if they’re cut too thick. Done right, though, they frame the face in a way that feels soft and expensive—there, I said it—and they take a long straight style from plain to shaped.
What makes this cut different
The fringe opens from a center or near-center part and sweeps away from the eyes. On straightened Type 4 hair, that means the bang section needs to start narrow, then stretch longer into the sides. I prefer the shortest pieces around the bridge of the nose or cheekbone rather than a short bang sitting high on the forehead.
Good guardrails for this style
- Keep the bang section light. Too much hair makes the front bulky.
- Blend into face-framing layers. The sides should melt into the rest of the cut.
- Use Velcro or magnetic rollers. A quick set keeps the bend soft.
- Trim the fringe first. Bangs show growth fast.
Worth knowing: if your forehead frizzes first, curtain bangs will ask for extra maintenance. Some people enjoy that. Some do not.
8. Feathered Flip Ends
Feathered ends are old-school in the best way. They give straight Afro hair air and movement without forcing you into curls, waves, or a full layered cut. When the ends flick away from the face, the style looks lighter and a touch playful.
This works well on shoulder-length hair and longer lobs, where the flip has enough room to show. On hair that sits at the jaw, the style can kick outward too hard and widen the face. Length changes the whole effect.
Technique matters here. Use a 1-inch round brush or angle the flat iron out on the final inch of the hair. One controlled turn is enough. Keep going, and the style turns into a flip from another decade—fun if that’s your mood, less fun if you wanted polish.
I also like feathered ends for silk presses that start losing some body on day two. A light re-bump at the ends can revive the shape without re-ironing the whole head. That saves heat, and your strands will thank you for it later.
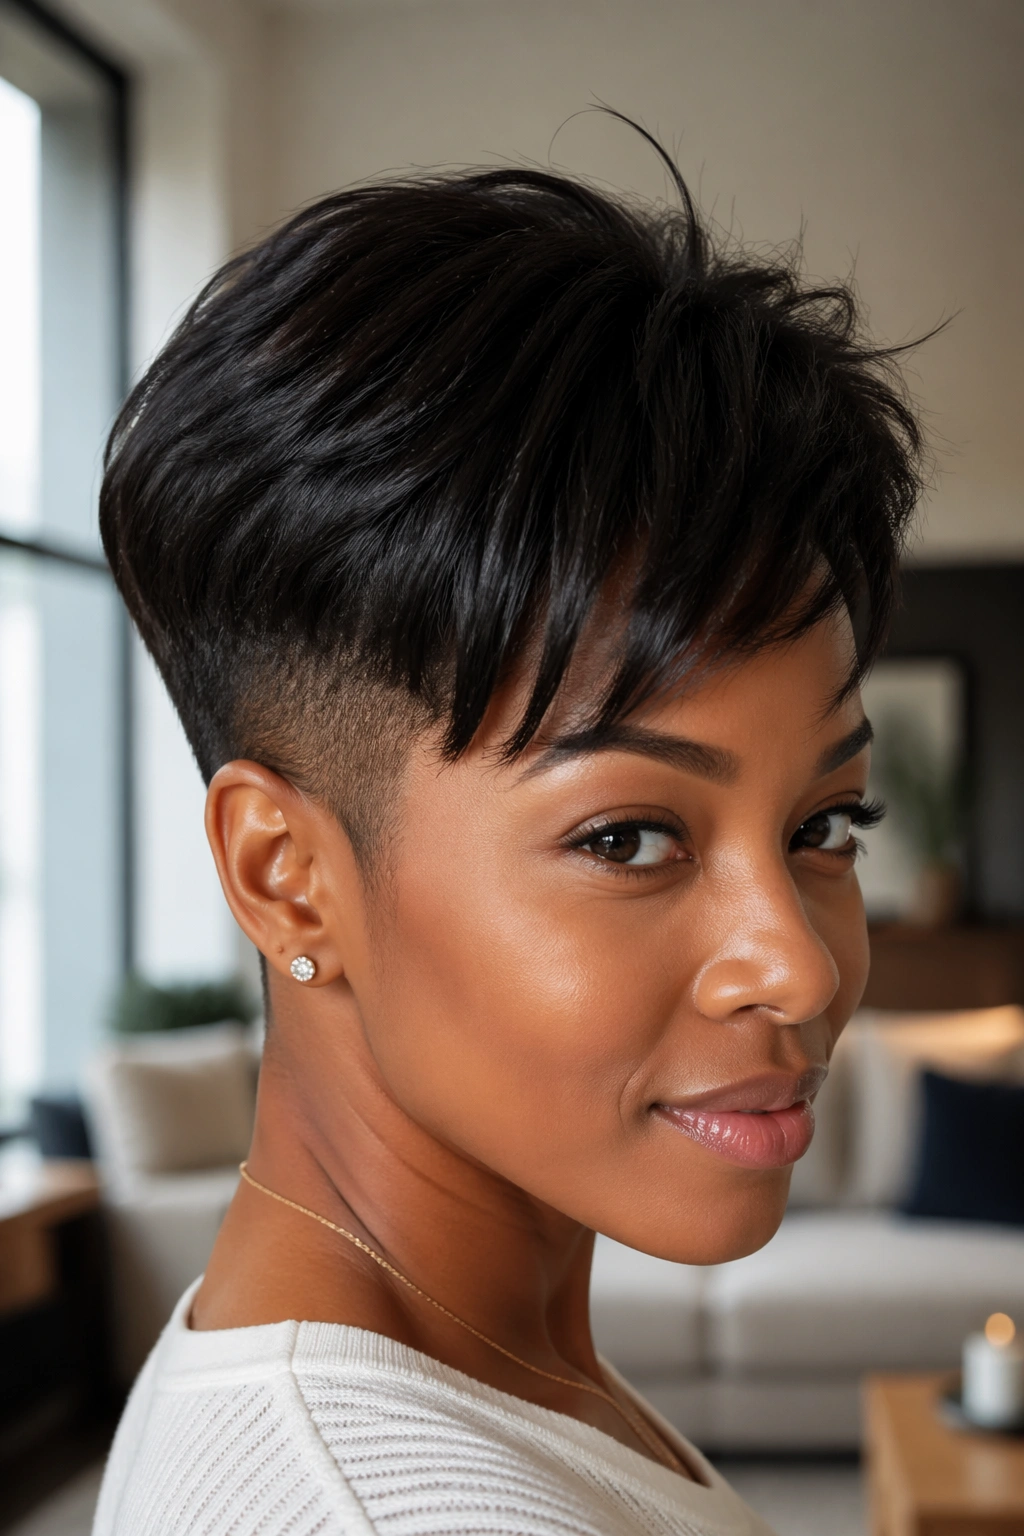
9. Straight Pixie With Side Sweep

Why chop your hair short if you want to wear it straight? Because a straight pixie on Afro hair has attitude, and it cuts your maintenance time in half once the shape is set.
The side-swept version is the one I’d choose first. A little weight across the forehead softens the look and gives you styling room. You can smooth it close for a sleek finish, lift the root a little for more edge, or pin one side back when you want the cut to show.
The upkeep is real
Pixies need trims sooner than longer cuts. Think 4 to 6 weeks, not “I’ll get to it when I can.” Growth at the nape ruins the line quickly, and straight hair makes that rough outline obvious.
A small flat iron, wrap lotion, and a vent brush do most of the work. The good news? You’re styling far less hair. The bad news? Every section matters. A pixie doesn’t hide lazy styling.
10. Pressed Taper With Length on Top
I’ve seen this cut rescue people from the awkward middle ground between short natural hair and a full bob. The sides stay close—scissored or clippered, depending on taste—while the top keeps enough length to press, mold, and sweep in different directions.
That contrast is the draw. Afro hair has natural density at the root, so when you straighten only the longer crown and leave the sides neat, the shape looks deliberate without needing extra length down the neck.
Here’s where I’d focus:
- Top length: around 3 to 5 inches gives you styling room
- Sides: tapered clean enough to hold shape as the top grows
- Styling tool: a slim flat iron handles short sections better than a wide plate
- Finish: a light pomade on fingertips, not a heavy grease layer
This cut does not ask for a full-head silk press every time, which makes it easier on the hair than longer straight looks worn week after week.
11. Asymmetrical Straight Lob
One side longer than the other by an inch or two can do more than a fresh color, and with far less risk. An asymmetrical lob gives straightened Afro hair tension and shape without chopping the whole style into something severe.
I like this cut most when the difference is visible but not theatrical. Think one side grazing the collarbone and the other skimming above it. Enough contrast to notice. Not enough to feel costume-like by day four.
This shape shines on thick hair because the longer side keeps body, while the shorter side creates lift and movement. Tuck the short side behind one ear and you get instant structure. Leave both sides down and the cut still reads.
The one warning: this style lives or dies on symmetry where it matters and imbalance where it’s meant to. If the part is sloppy or the perimeter is off, the whole point disappears. Find a stylist who cuts straight shapes with confidence, not someone guessing once the iron comes out.
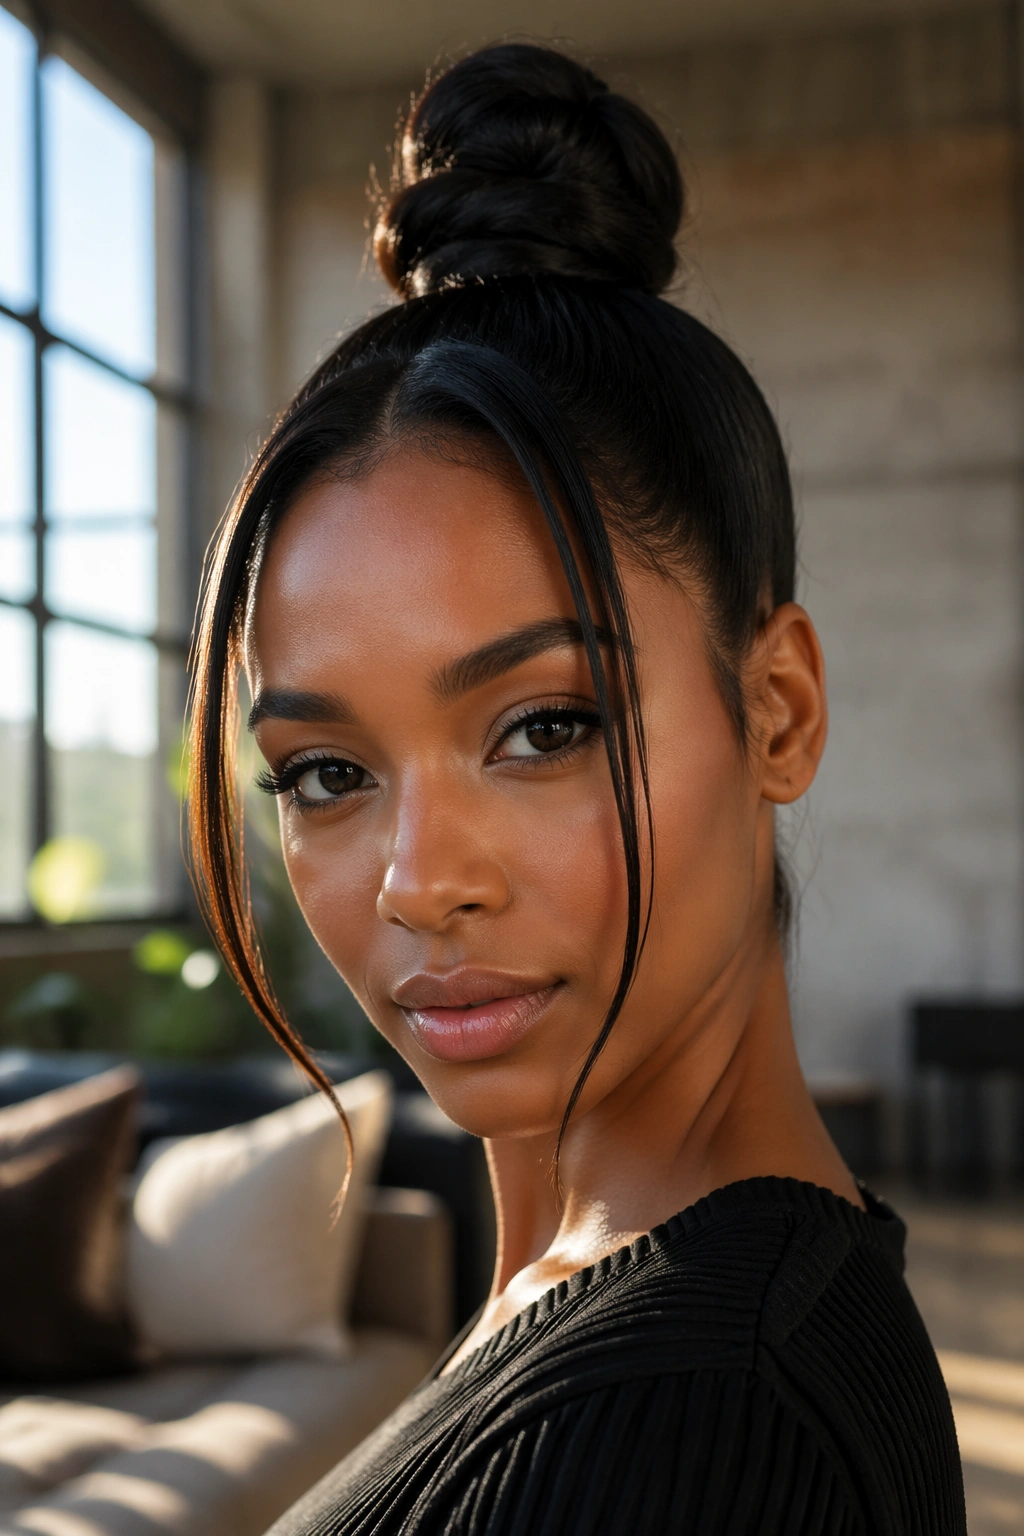
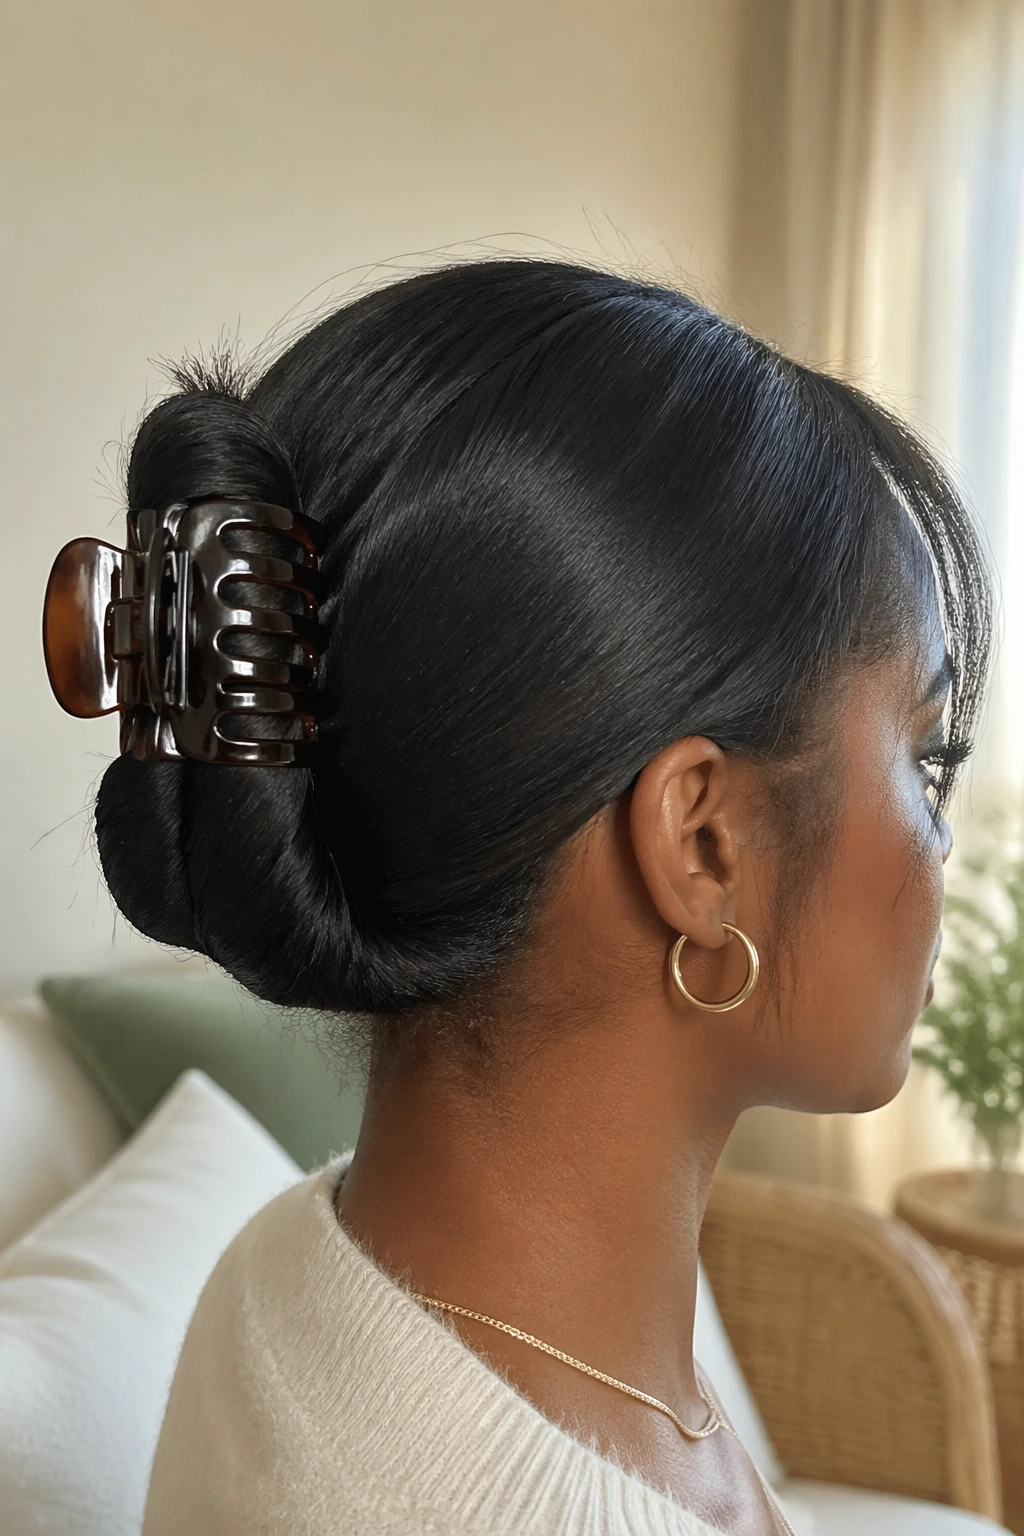
12. Low Sleek Bun on Straight Afro Hair
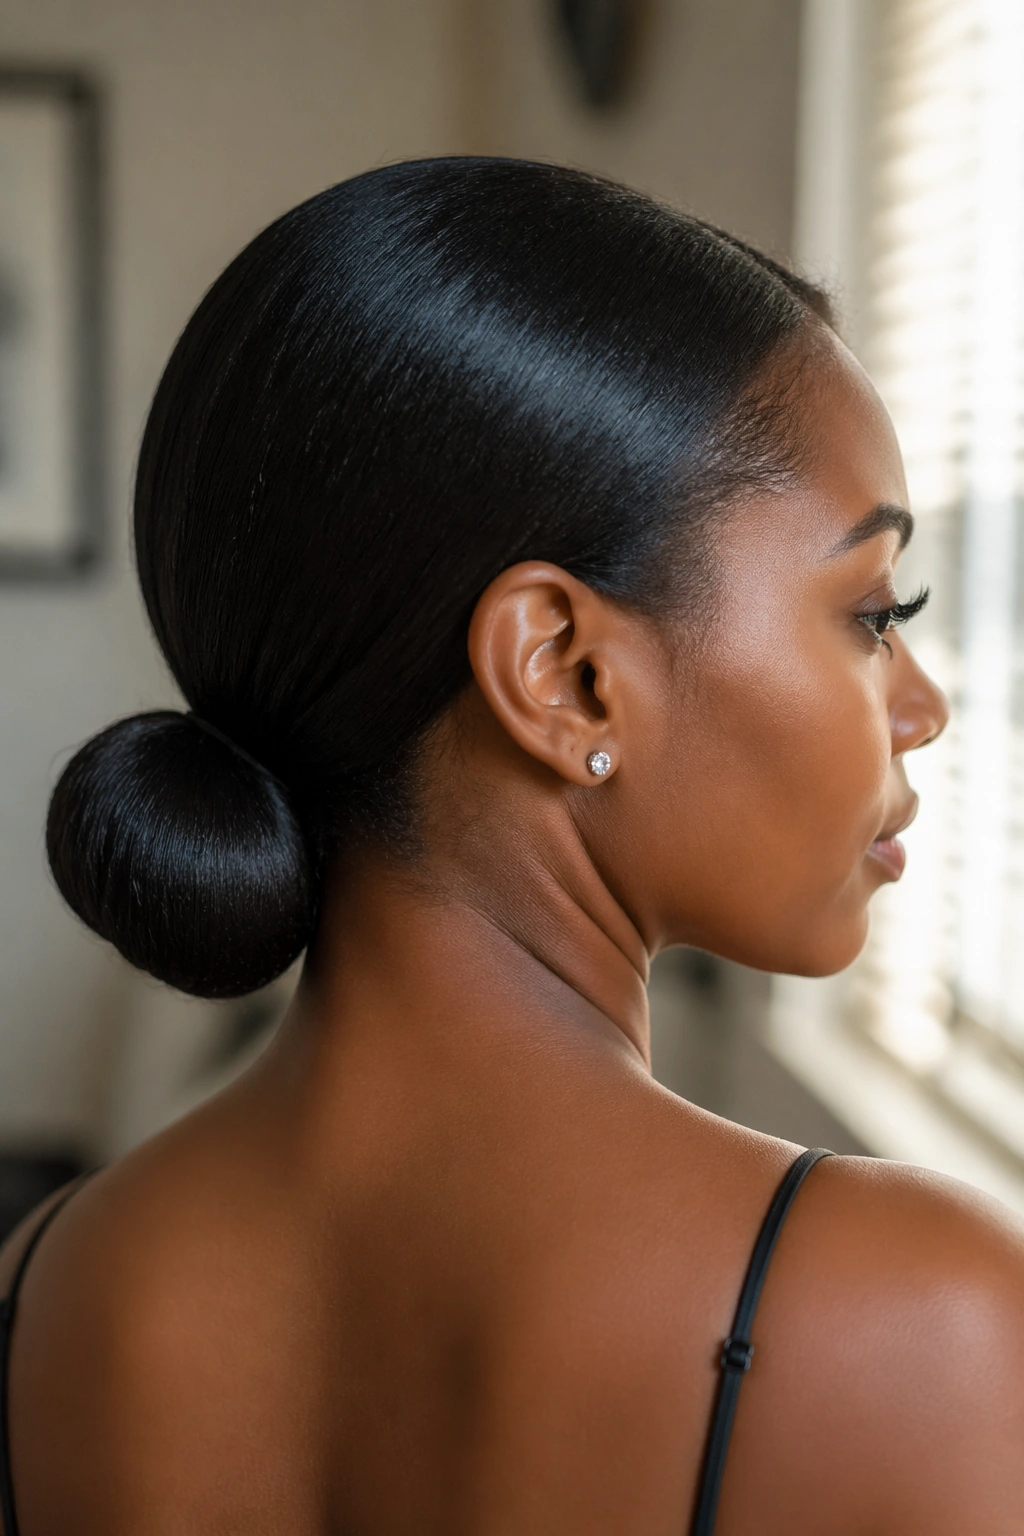
Unlike a high ponytail, a low bun lets you hide tired ends and stretch your style deeper into the week. That makes it one of the smartest straight hairstyles for Afro hair, not only one of the neatest.
The key is tension without strain. Smooth the hair low at the nape with a mixed-bristle brush, use a serum on the surface, and secure it with an elastic that won’t bite. Then twist the ponytail into a compact bun and pin the ends in. If your hair is long enough, wrap the tail around the base once before pinning. It looks cleaner.
This style earns extra points on humid days because the bun contains the length. If your roots puff a little at the crown, a clean middle or side part can make that softness look intentional rather than tired. Hair rarely behaves like glass for a full week. Styling around that truth is smarter than fighting it.
Wear this one for work, weddings, interviews, flights, late-week errands—any setting where polished matters more than swing.
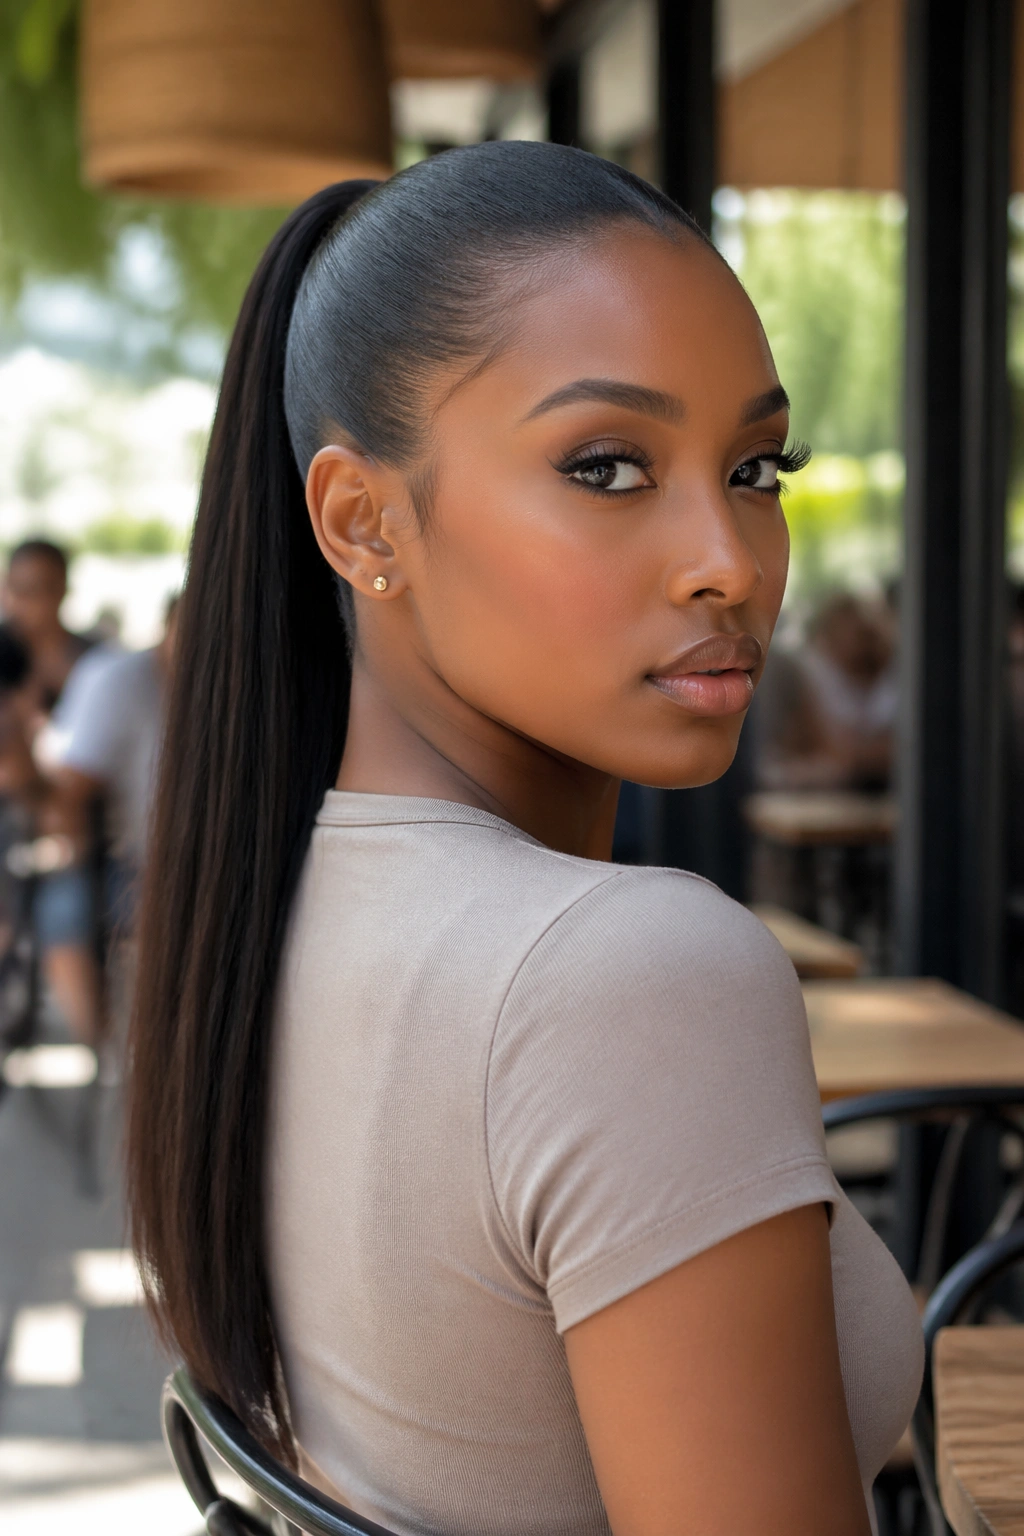
13. High Ponytail With Wrapped Base
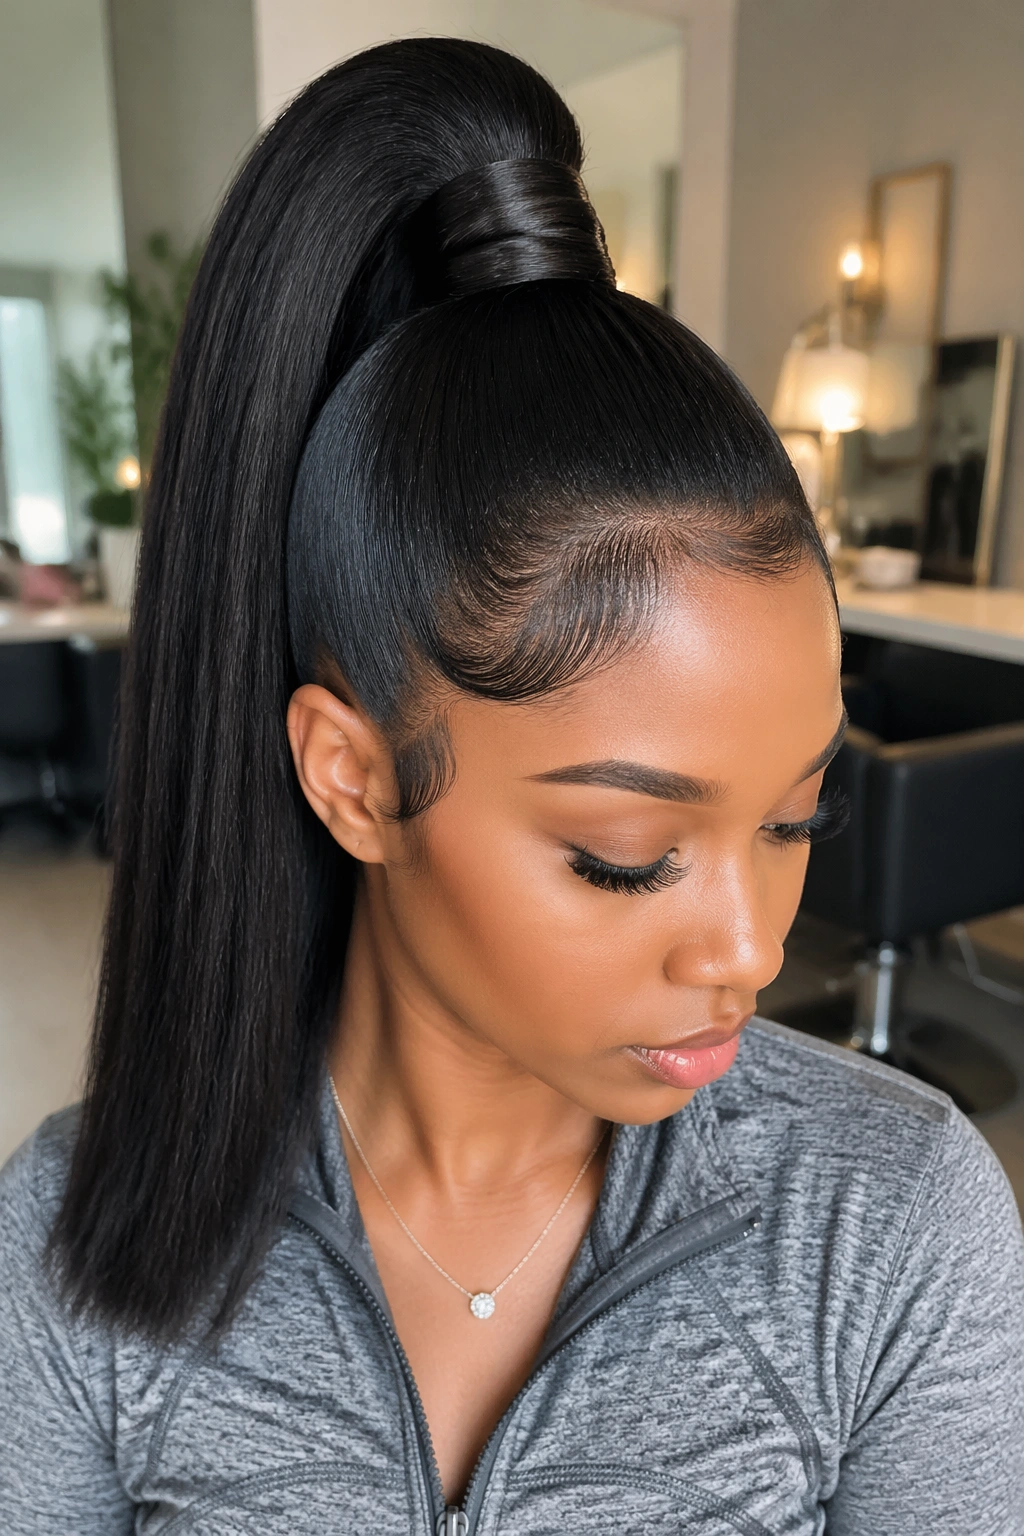
A high straight ponytail always looks sharper when the base is wrapped. That strip of hair around the elastic hides the hardware and makes the whole style look cleaner in ten seconds.
How to keep it polished
Start with hair that has already been straightened well. Brush it up to the crown, secure it with a strong elastic or bungee, then take a half-inch section from the ponytail and wrap it around the base. Pin it underneath so the pin disappears.
Details that make the difference
- Place it at the crown, not the hairline, unless you want extra tension
- Use edge control sparingly so the roots stay smooth, not wet-looking
- Flat-iron the tail in large sections only if needed
- Sleep with the ponytail loose or rewrapped to avoid dents
Best use: this is the style I reach for when straight hair has one polished day left and I want it to look like a choice.
14. Half-Up Half-Down Straight Style
Half-up half-down gives you lift around the face without losing the length you pressed your hair for. That balance is why the style keeps surviving every hair era. It works on silk presses, relaxed hair, clip-ins, wigs, and sew-ins with no fuss.
The top section should come from temple to temple or a touch farther back. Pull too little hair and the style looks accidental. Pull too much and the lower half starts feeling thin. I like the sweet spot where the lifted section gives a mild face lift and the bottom still looks full.
You can secure the top with a small ponytail, a clip, or a mini bun. A sleek little knot reads sharper. A soft ponytail feels younger and easier. Both work.
This look also hides root swelling near the crown better than wearing the hair fully down. If the nape is still smooth and the top has lost some flatness, half-up styling can buy you another day without more heat. That’s a win in my book.
15. Straight Topknot With Loose Front Pieces
Want your cheekbones to do some work? Pull the hair into a high topknot and leave out two narrow front pieces—one on each side, or only one if you like an off-balance look.
Those loose pieces matter more than people think. On straight Afro hair, they break up the strictness of a slick updo and soften the hairline. Keep them slim, though. Thick face-framing sections can make the style look unfinished rather than styled.
Where this look often goes wrong
People yank the bun too high, too tight, or both. That puts stress on the edges and makes the scalp sore before lunch. The bun should sit at the top-back area of the head, not teetering over the forehead unless you enjoy that tension.
The loose pieces need a clean flat-iron pass and maybe a light bend at the ends. Nothing heavy. A topknot is strongest when the lines stay sleek and the front stays airy.
16. Claw-Clip Twist on Silk-Pressed Hair
Some days you need a style in under a minute. A claw-clip twist is that style, and on silk-pressed Afro hair it can look far more polished than people give it credit for.
Twist the length upward from the nape, fold the ends down or let them spill out a little, then secure the twist with a 4- to 5-inch claw clip. The larger the clip, the cleaner the hold. Tiny clips on dense hair are a waste of time.
A few ways to wear it:
- leave the ends peeking out at the crown
- tuck all the ends in for a cleaner line
- pull out one slim side piece near the temple
- part the front first, then twist the back
I like this look on day three or four of a silk press when I want the hair up but do not want the hard grip of an elastic. It’s gentle, quick, and far kinder to the ends than another full restyle.
17. Silk Press With Wispy Bangs
Bangs on Afro hair are not for the indecisive. They need shaping, nightly care, and the willingness to trim the front before the rest of the style. Still, a wispy bang with a silk press can look so chic that people keep coming back to it anyway.
The word wispy matters here. Thick blunt bangs can sit heavy and block the face, especially on dense Type 4 hair that already has body. A wispy bang uses a smaller section, often starting about half an inch to an inch behind the hairline, then feathering into the sides.
This style suits straight bobs, collarbone cuts, and longer layers. It also draws attention to the eyes in a way center-part styles do not. If your forehead sweats first or frizzes first, you’ll be touching up that area more than the rest of the head, so go in with open eyes.
At night, I’d wrap the main hair and set the bangs with one or two small rollers so they keep shape without another flat-iron pass the next morning.
18. Side-Swept Bangs and Long Length
Unlike a straight-across fringe, a side-swept bang grows out gracefully. That alone makes it easier to live with. On long straight Afro hair, it also creates movement in the front while the rest of the hair stays sleek and elongated.
This style works on natural silk presses, relaxed hair, and extension installs. The bang section starts from a side part and cuts diagonally, often landing between the brow and cheekbone depending on how dramatic you want the sweep. A light bend keeps it from falling flat over the eye.
I’d pick this look if you want softness but not the daily demand of full bangs. You can pin it back, blend it into layers, or shift the part slightly once it grows. That flexibility has value.
Ask for the bang to blend into the side layers rather than stopping in a hard shelf. Afro-textured hair has enough natural fullness that abrupt lines can sit bulky in front. A smooth diagonal flow looks cleaner and moves better.
19. One-Length Mid-Back Blunt Cut
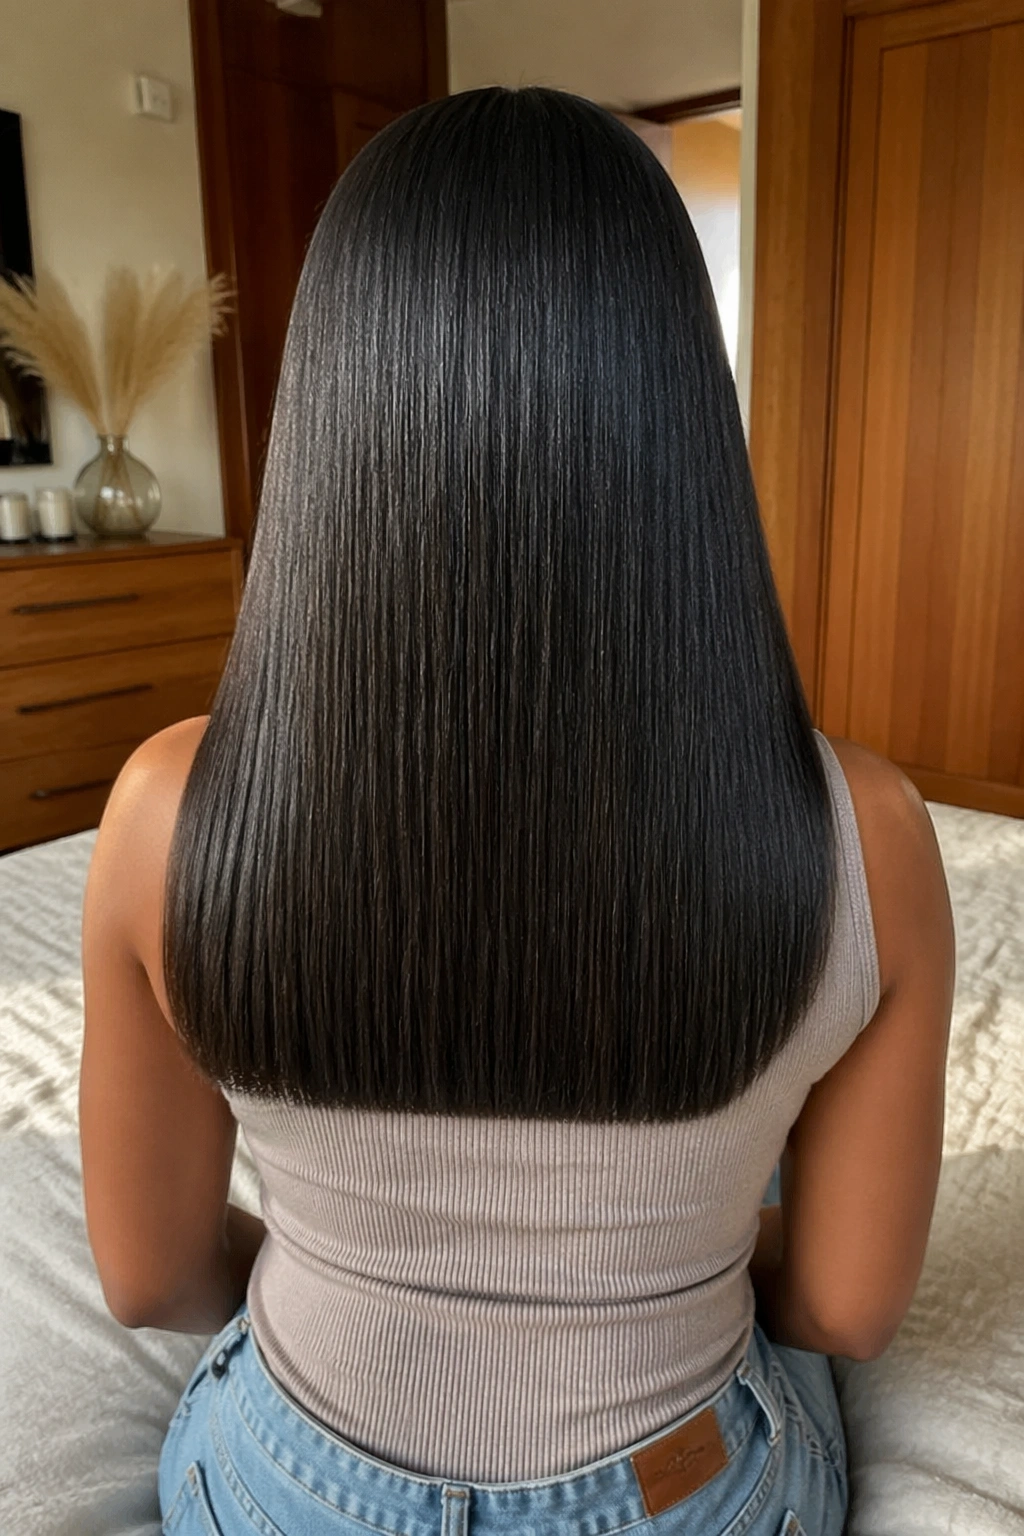
Long hair does not need layers to look good straight. Sometimes the strongest move is the opposite: keep it one length, trim it clean, and let the density do the talking.
Why this cut stands out
A mid-back blunt cut gives Afro hair weight, shine, and a strong line through the ends. That line makes the length look healthy. Once you add too many layers, the bottom can thin out fast—especially if your hair is recovering from color, old relaxer overlap, or past heat damage.
A few non-negotiables
- Trim dusty ends first, even if it means losing half an inch
- Use a heat protectant on every section, not one spray cloud over the whole head
- Wrap the hair nightly so the ends do not split apart from friction
- Skip heavy butters; they dull shine on straight hair
My bias: if your goal is length retention and a sleek finish, blunt beats overlayered almost every time.
20. U-Cut Straight Style With Soft Movement
A U-cut is the answer when blunt length feels too heavy but full layers feel risky. The back drops into a soft curve, keeping the longest point down the center while the sides sit a touch shorter. You still get long hair. You also get shape.
That curve matters on Afro hair because dense strands can form a thick wall when cut straight across at long lengths. A U-shape breaks that block, helps the hair fall closer to the body, and makes ponytails look fuller without sacrificing the front.
The cut needs restraint. Layers should stay low—think chest level and below—so the ends still look solid. If the stylist starts chopping short layers all through the crown, the style loses the clean, straight look that made you want it in the first place.
I like this cut on people who wear their hair straight only part of the time. When the hair returns to curls, the shape still translates well, which is not true of every straight-hair haircut.
21. Quick-Weave Sharp Bob

Need the look of a sharp straight bob without flat-ironing your own hair? A quick weave is one of the fastest ways to get there, and when it’s done cleanly it can look far more natural than its reputation suggests.
The trick is prep. Your natural hair should be wrapped or braided down neatly, covered well, and protected before glue enters the picture. A molded cap and precise track placement keep the bob sitting close to the head instead of bulky at the crown.
What makes a good quick weave
Use bundles or tracks that match the finish you want—silky straight for a glassy look, yaki straight if you want a finish closer to pressed Afro hair. Cut the bob after the install, not before, so the perimeter lands where it should around your jaw and nape.
I treat quick weaves as short-term style options. A few weeks is enough. Push them too long and buildup, tension, and adhesive residue start causing trouble. Worn with some discipline, though, they’re a handy break from direct heat.
22. Closure Sew-In With a Center Part
There’s a reason the center-part straight sew-in never disappears. It gives you a crisp part, steady smoothness, and almost no daily heat on your natural hair if the install is solid.
A closure sew-in works best when the braid base is flat and the closure matches the density of the bundles. Too thick up front and the hairline looks bulky. Too thin and the part looks sparse in a way that gives the game away.
A few details help:
- 4×4 closures suit people who keep the same part
- 5×5 closures give a touch more styling room
- a light tint or knot treatment can soften the lace line
- a satin wrap at night keeps the part lying flat
I prefer center-part sew-ins at lengths from collarbone to mid-back. Longer can look beautiful, though weight starts to matter. If the install feels like a helmet, the bundles are too heavy or the braid base is too bulky.
23. Layered V-Part Wig Blend
A V-part wig gives you the convenience of a wig with a bit of your own hair out at the top to hide the join. For straight styles on Afro hair, that means you can show only a slim leave-out section instead of flat-ironing the whole head.
That small leave-out is the selling point. Match the unit to your pressed texture—silky straight if your silk press gets glossy, light yaki if your hair holds more body—and the blend can look seamless in person, not only under ring-light conditions.
I’d go layered here rather than blunt. The V opening and leave-out area already create a break in the pattern; layers help the hair flow around that section more naturally. Keep the exposed strip narrow and protect it with heat protectant every single time you touch it up. Small sections can still take damage fast.
This is one of the easiest ways to wear long straight hair for a weekend, an event, or a work stretch without committing your whole head to daily heat.
24. Headband Wig for Straight Days
Unlike a closure wig or frontal, a headband wig asks almost nothing from you. Slip it on, secure the combs and band, smooth the front, and go. For straight looks, that low-fuss setup is hard to beat.
The style shines when you want sleek hair without lace, glue, plucking, or parting drama. You can leave your own edges out, cover them fully, or blend a scarf over the band for a softer finish. If your natural hair is in cornrows underneath, the whole thing takes minutes.
Headband wigs also make sense for gym days or weather that makes you side-eye your silk press before you even leave the house. Sweat and moisture hit the unit, not your own hair.
Pick a density that suits your frame. A straight wig that’s too thick can swallow the face and look stiff. Shoulder to chest length tends to move better for daily wear, though longer lengths can work if the fiber or hair quality is decent and the ends are kept trimmed.
25. Drawstring Straight Ponytail
A drawstring ponytail is one of those styles people forget about until they need a fast answer. Then it becomes the answer for a month. Wrap your own hair into a small bun or pony base, attach the straight ponytail, tighten the drawstring, and cover the base with the built-in strip or a small wrapped section.
The style works best when the base sits flat. If your bun is bulky, the ponytail perches on top instead of flowing out from the head. Blow-dried roots are often enough under this style; you do not need a full silk press to wear it.
Length changes the mood. A shoulder-length ponytail looks neat and easy. Mid-back feels polished. Waist length starts leaning glam, which can be fun if that’s the assignment.
Watch the weight, though. A heavy ponytail pulling on the crown all day is not a small thing. If your scalp feels sore, take it down. Hair gives warnings before it gives breakage.
Final Thoughts
The best straight style for Afro hair is rarely the one with the most length or the hardest shine. It’s the one that suits your density, respects your ends, and still looks good after salon day has passed. A sharp bob, a layered press, a low bun, a sew-in with a clean part—each one brings a different mood.
If I had to give one piece of advice, it would be this: choose the cut first, then chase the finish. Shine spray can fake gloss for a few hours. It cannot fake a clean perimeter, a balanced shape, or ends that were overdue for the scissors.
Fresh hair often starts with less than people think—a trim, a better part, one smart layer placement, a style that asks for fewer heat passes. Get those choices right and the whole look changes.