There’s something undeniably sharp about a slicked-back hairstyle. It’s polished, intentional, and works equally well for a casual coffee run or a black-tie event. But here’s what most people don’t realize: achieving a genuinely great slick-back look on straight hair is an entirely different game than working with curly or textured hair. Your strands already have the foundation for sleekness, but that’s exactly what makes getting the details right so crucial. Without the right technique, straight hair can look flat, greasy, or aggressively severe in a way that doesn’t photograph well.
The good news? Straight hair is incredibly forgiving when it comes to slicked styles. You don’t need to fight against your natural texture or spend hours with styling tools. What you do need is an understanding of which specific slick-back variations actually complement straight hair, what products deliver genuine hold without that heavy, wet appearance, and how to adapt the look to suit your face shape and personal style. The difference between a mediocre slick-back and one that turns heads comes down to knowing which style works for your hair and your lifestyle.
Whether you’re looking to add variety to your daily routine, prepare for a special event, or simply discover what works with your natural hair type, these ten styles prove that slicked-back hair is far more versatile than it first appears. Each style brings its own character and level of polish, from understated elegance to statement-making drama.
1. The Classic Sleek Back
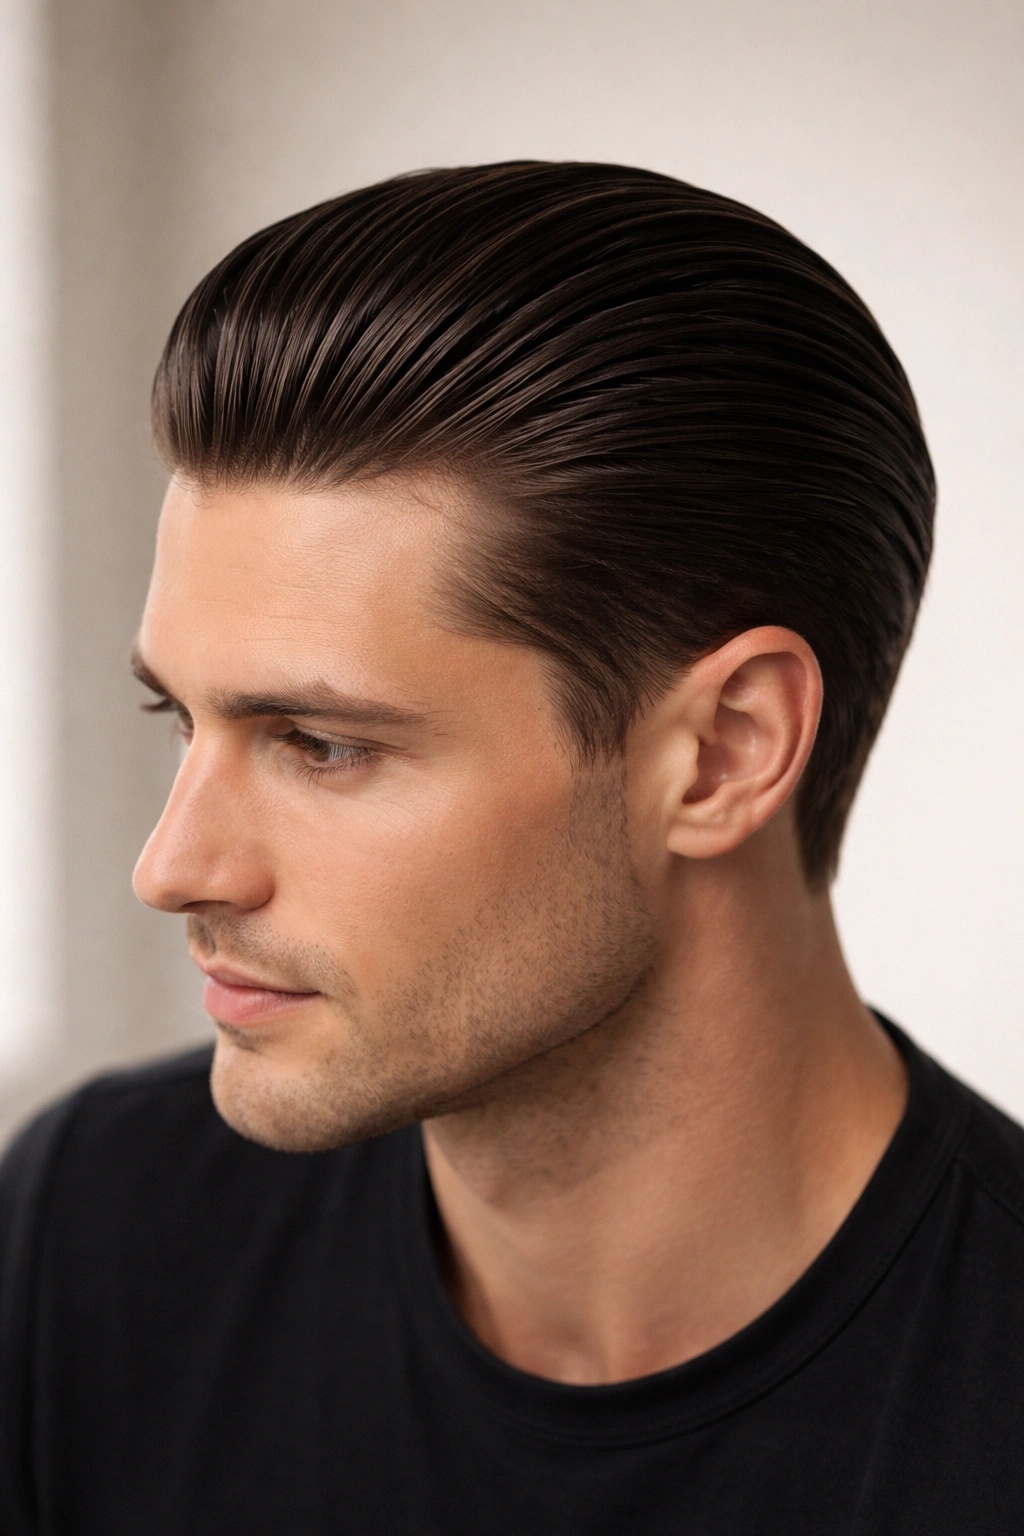
The classic sleek back is the foundation that all other slicked styles build from. It’s clean, minimal, and works for virtually every setting—from the office to a night out. With straight hair, this look has a natural advantage: your strands already want to lie flat, so the styling process becomes about perfecting that flatness rather than forcing it.
Why It’s Perfect for Straight Hair
Straight hair naturally has the smoothness this style demands. Unlike wavy or curly textures that require smoothing treatments or relaxers to achieve the same effect, your hair already moves in the direction you’re styling it. This means less product buildup and a look that feels intentional rather than overdone. The key is understanding that “sleek” doesn’t mean drenched—it means polished with control.
How to Create the Look
- Start with damp hair and apply a lightweight styling cream or gel to the roots and through the length
- Comb straight back from your forehead toward the crown, using smooth, steady strokes
- Once the overall direction is set, use a fine-tooth comb to smooth any flyaways and ensure every strand aligns
- Finish with a medium-hold hairspray for staying power without the crunch
Pro tip: Apply your product in sections rather than all at once—this gives you far better control and prevents that overly slicked, plastic appearance.
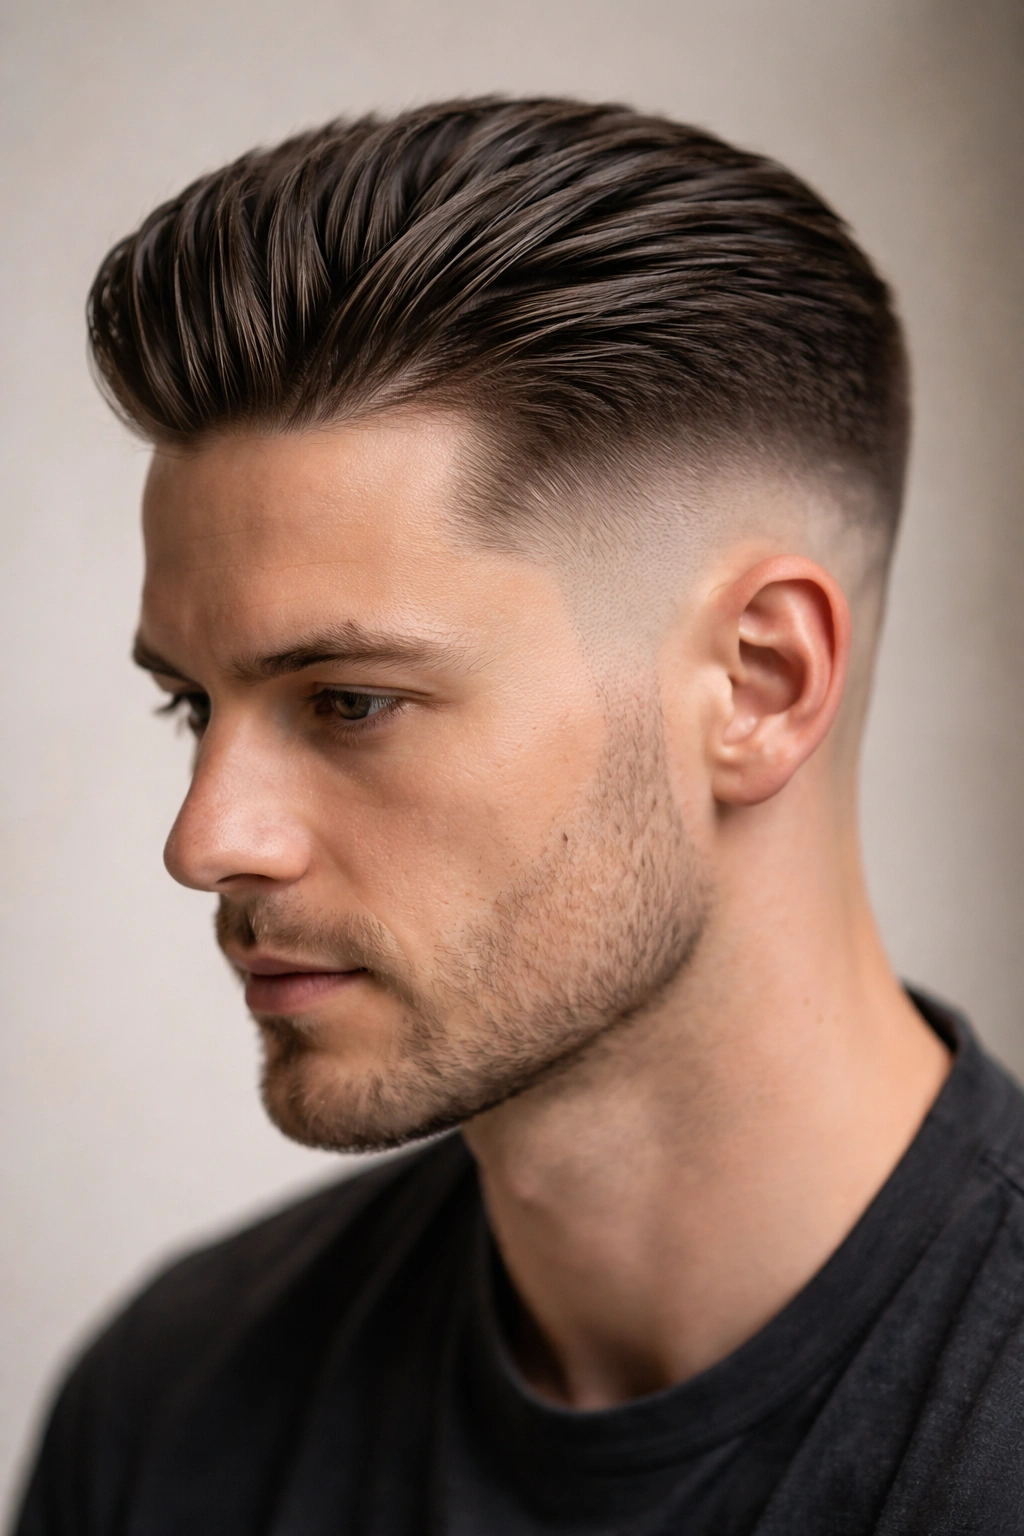
2. The Undercut Slick Back
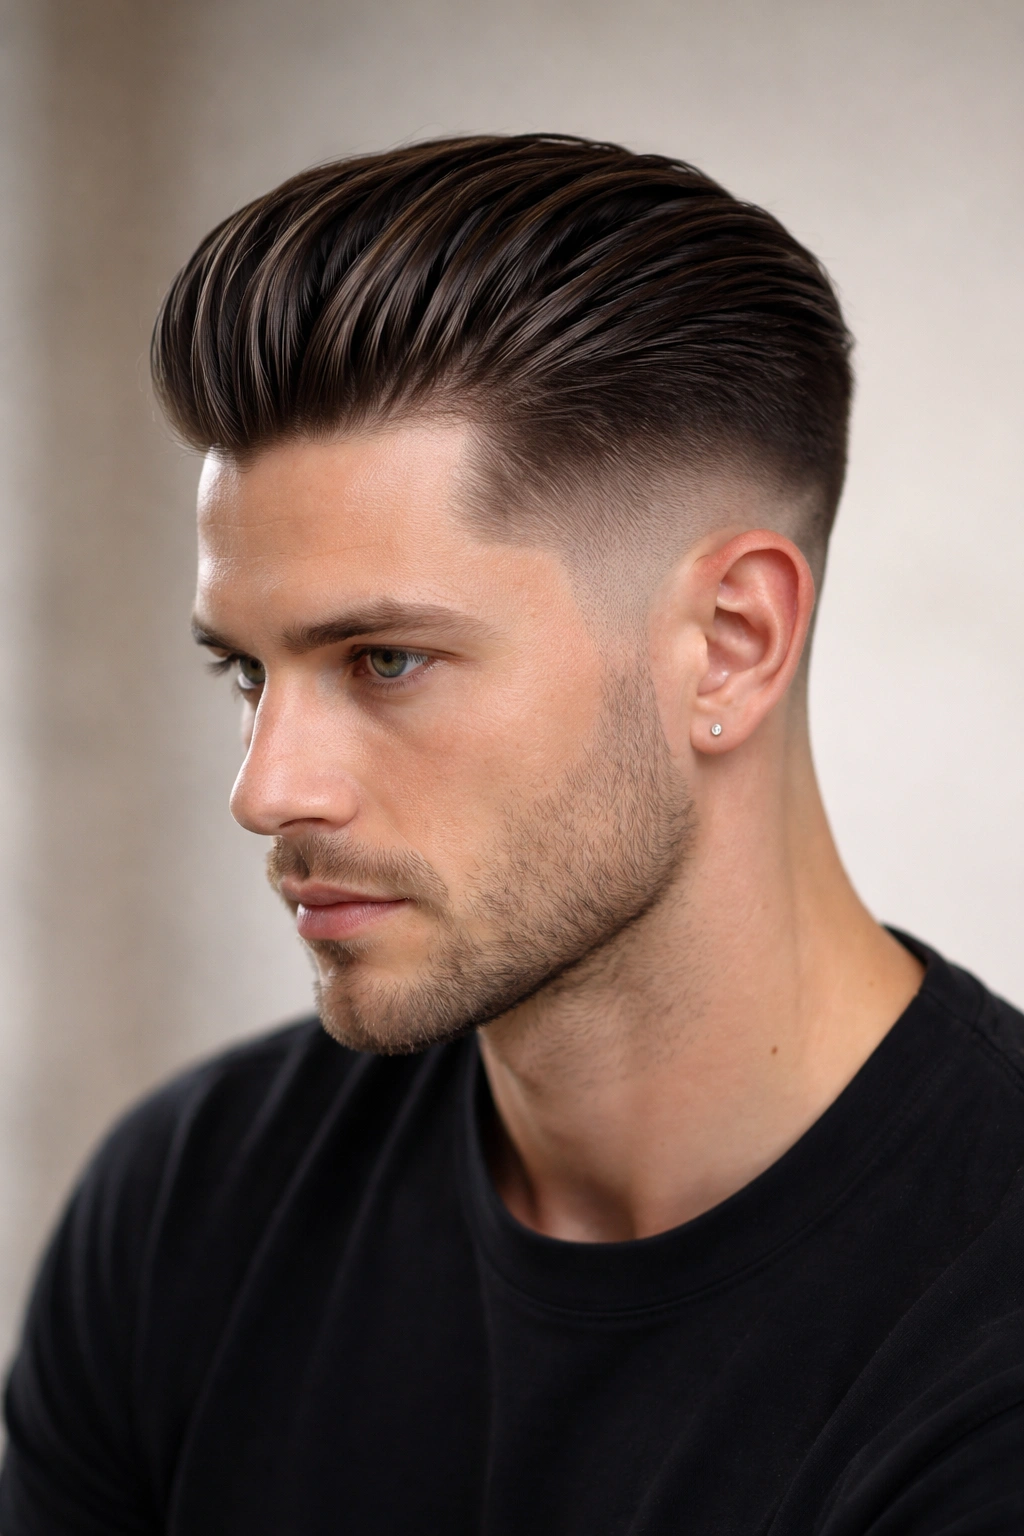
The undercut slick back combines short, faded sides with longer hair on top that’s swept backward. This style adds dimension and visual interest while maintaining that sharp, groomed aesthetic. For straight hair, the contrast between the short sides and the length on top becomes even more pronounced and striking.
What Makes This Style Stand Out
The undercut creates a natural frame for your face while the slicked-back top elongates your features. Because straight hair doesn’t have texture or curl to soften that elongation, you get a particularly clean, angular effect. This is the style to choose if you want something that photographs exceptionally well and photographs even better in person.
Tips for Maintaining the Look
- Visit your barber every 3-4 weeks to keep the fade crisp and the contrast sharp
- Use a texturizing pomade rather than a gel on top—straight hair can look too severe with high-shine products, and a matte or satin finish creates more sophistication
- The fade should be gradual; ask your barber for a “skin fade” if you prefer maximum contrast or a “low fade” if you want something subtler
- Blow-dry your hair backward before applying product for a fuller appearance on top
Worth knowing: The undercut requires regular maintenance, but it’s the style that makes the most dramatic transformation on straight hair precisely because of that contrast.
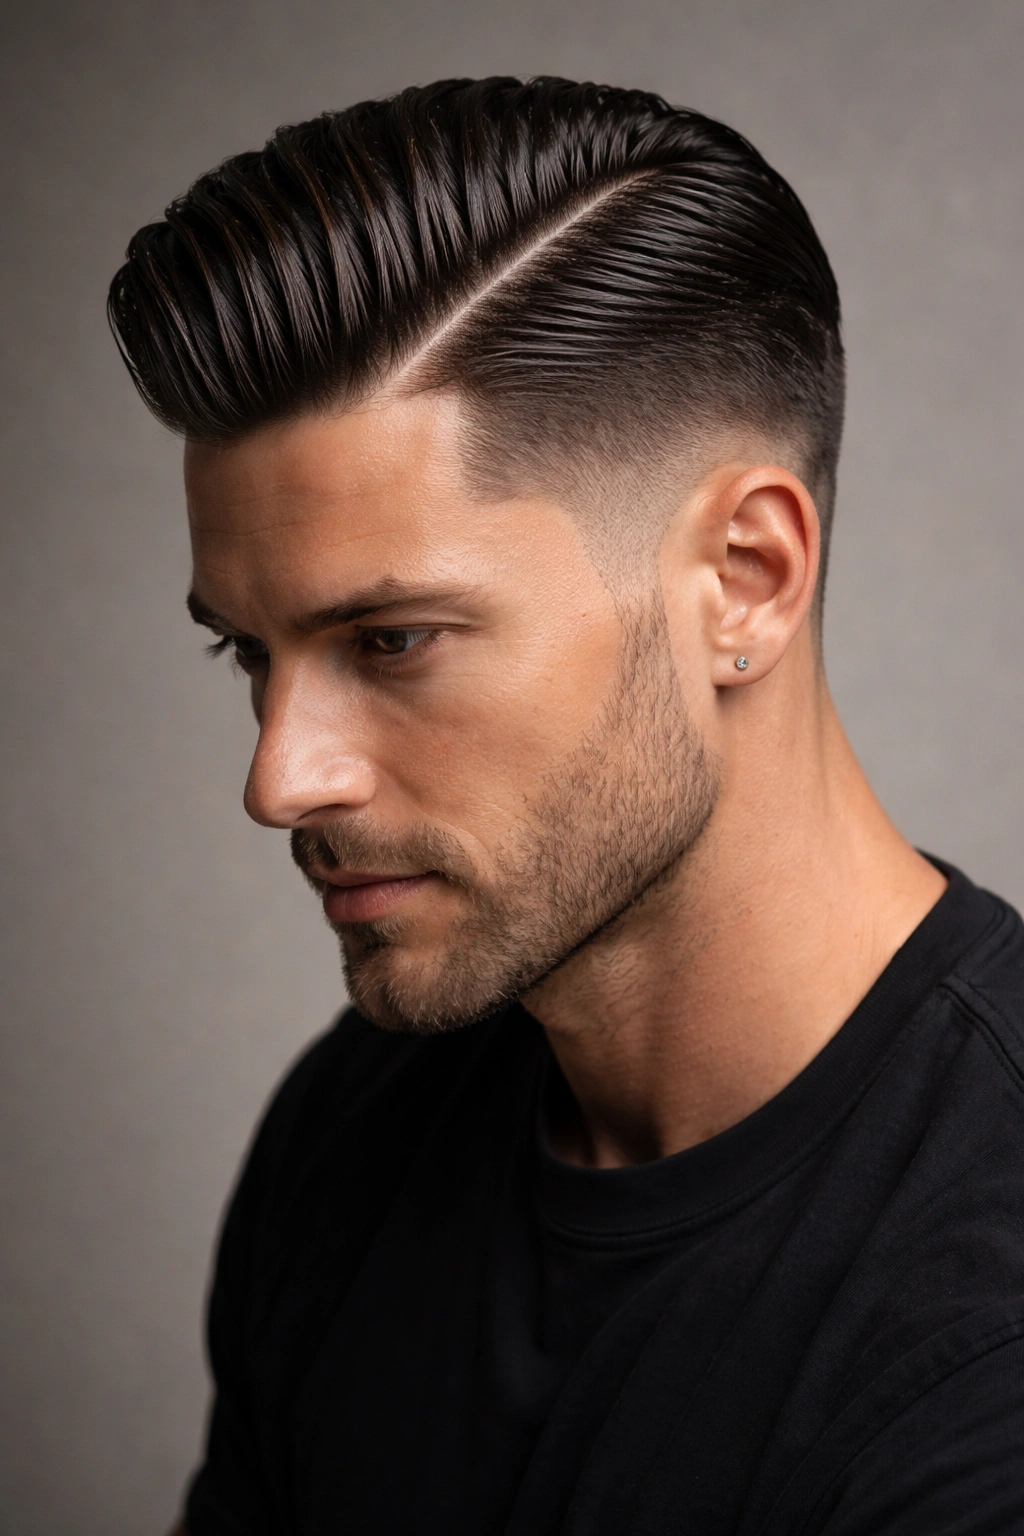
3. The Slicked Back with a Part
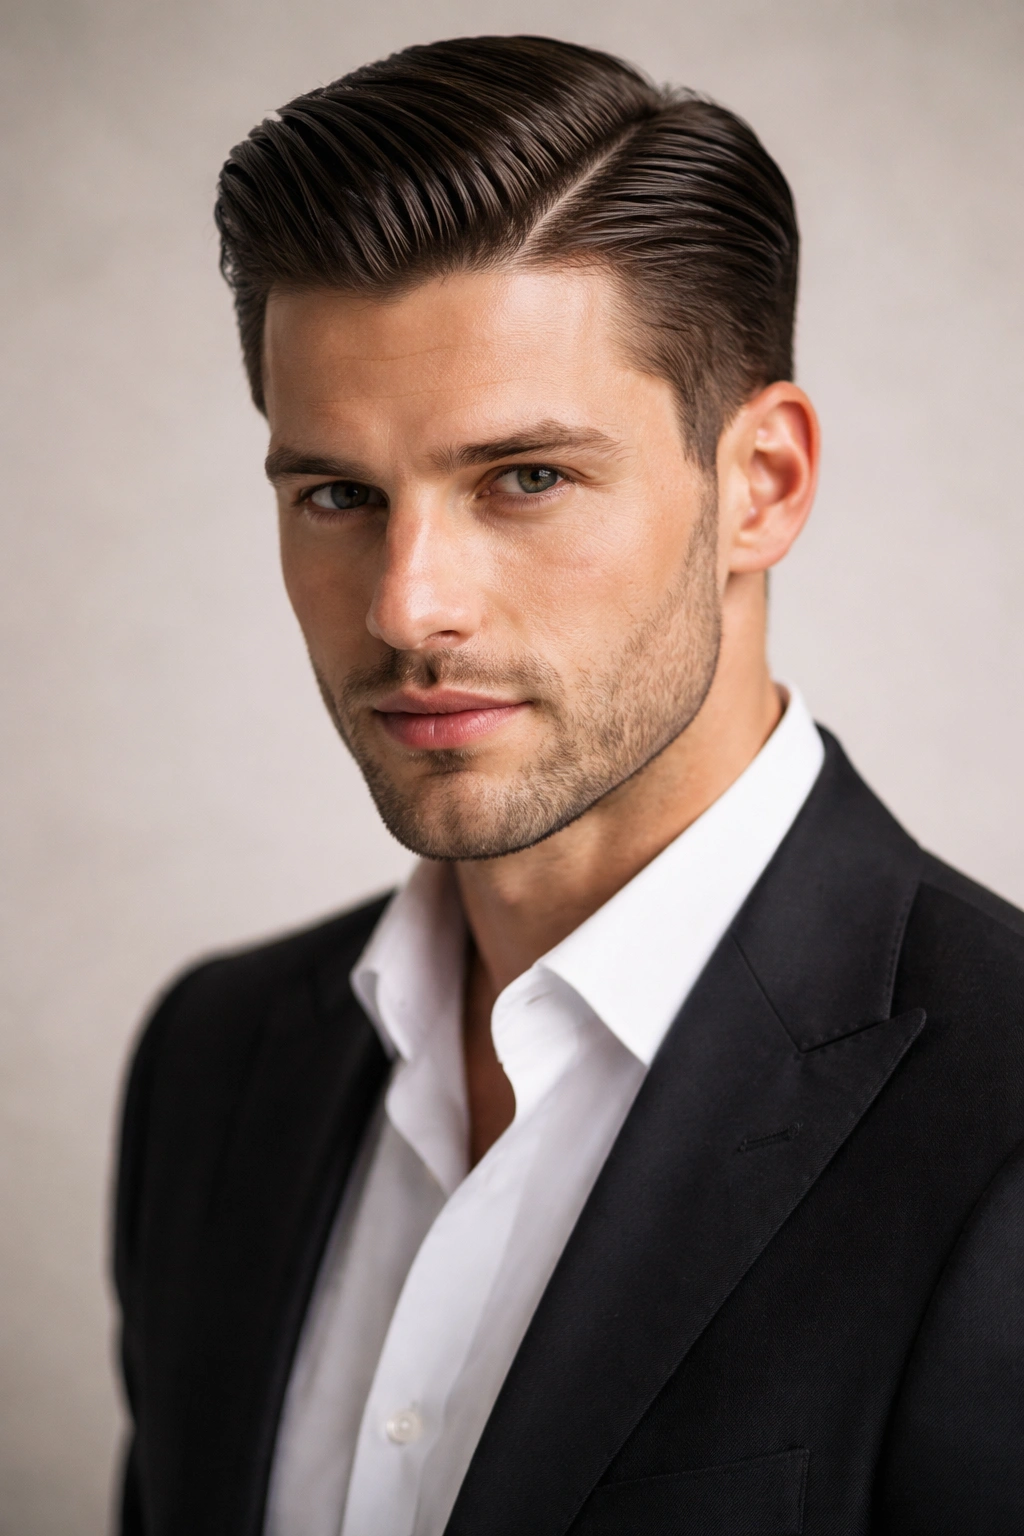
Adding a clean, deliberate part to your slicked-back style introduces asymmetry and personality. A deep side part creates the illusion of more volume on one side while maintaining the sleek control of the style. This variation feels less severe than a fully slicked back look while keeping all the polish.
Why a Part Changes Everything
The part acts as an anchor point for your eye, creating visual interest without adding texture or disrupting the smoothness of the look. On straight hair, this works beautifully because the line you create stays crisp and clean. You can adjust the angle of the part to suit your face shape—a deeper side part works best if you have a rounder face or want to draw focus to one side.
Creating a Sharp, Clean Part
- Use a fine-tooth comb or a part comb to score the line directly into damp hair before applying product
- Apply your styling product on either side of the part line separately, using different techniques for each side
- Slick one side fully back while combing the other side back at a slightly different angle
- The side with more volume can be left slightly less slicked for a natural, intentional contrast
Insider note: Score your part line deeper than you think you need to—it’ll settle and become more subtle once your hair dries.
4. The Gel-Heavy Glossy Look
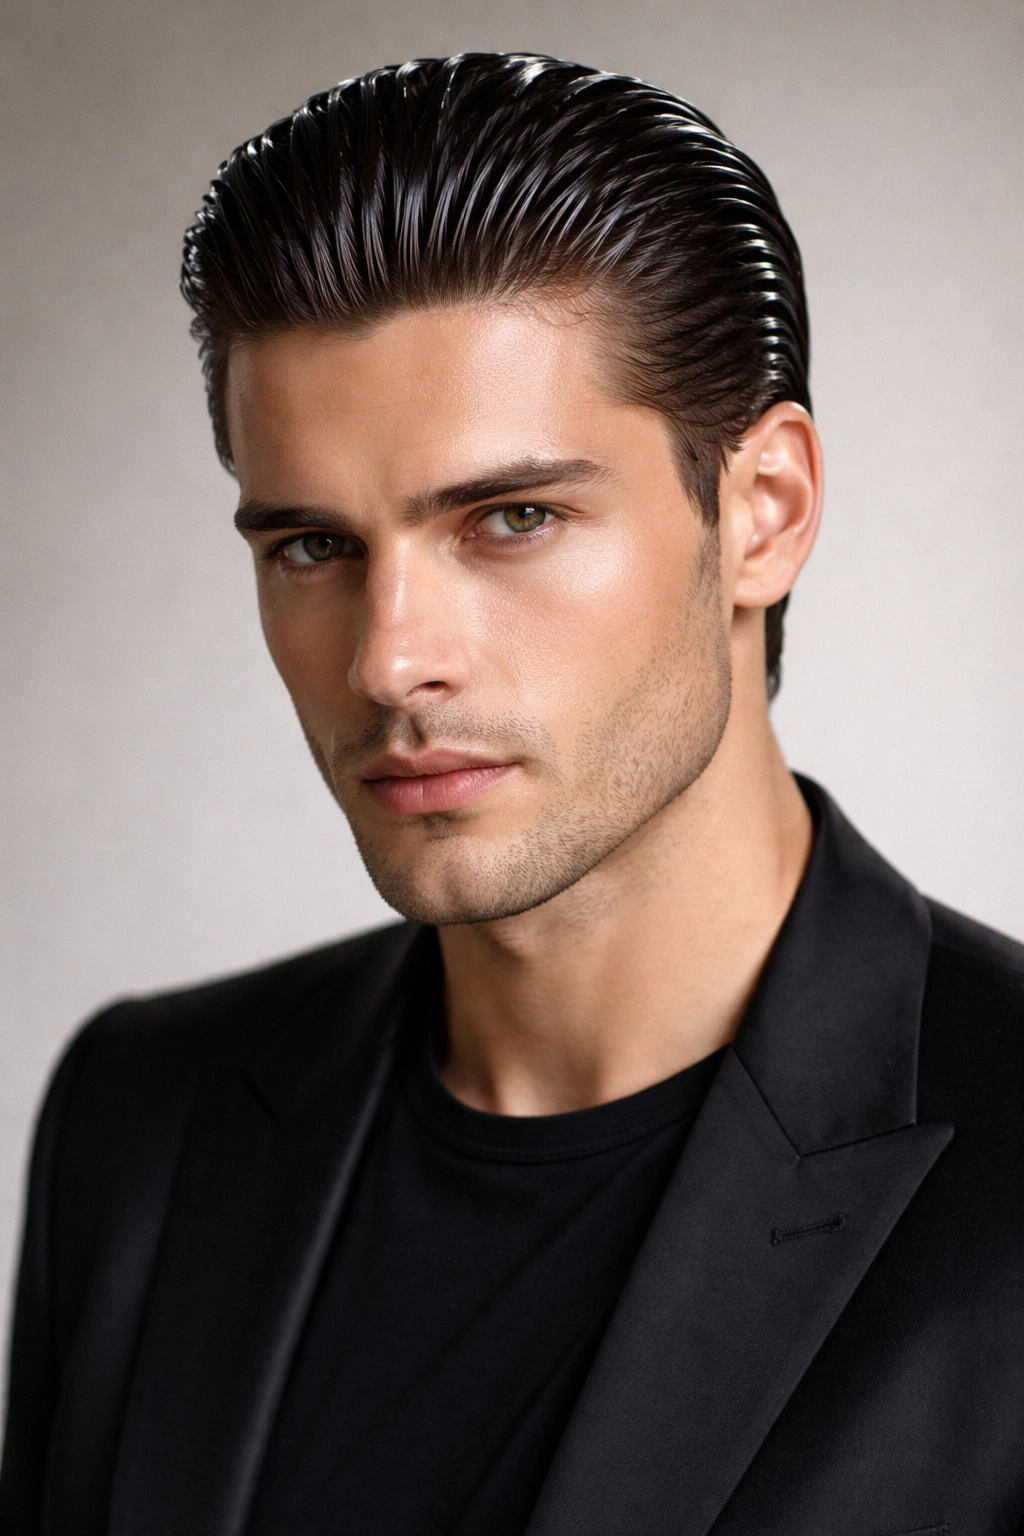
This is the high-impact version of the slicked-back style, featuring maximum shine and a wet-look appearance that commands attention. Despite its bold aesthetic, it’s surprisingly versatile—wear it to a nightclub, a special event, or just when you want to feel extra polished.
Achieving That Signature Shine
High-shine gels and pomades are specifically formulated to create that glossy, wet appearance. The key difference between this looking sharp versus greasy is the product choice and application method. Straight hair is ideal for this style because the smoothness of your texture maximizes the reflective quality of the shine.
Product Application for Maximum Impact
- Choose a gel or pomade with a high-gloss finish specifically labeled as offering shine or wet look
- Apply to completely damp hair, starting from the roots and working through to the ends
- Use a comb to distribute the product evenly and create that polished, uniform appearance
- The shine should appear intentional and luxurious, never dull or heavy
Real talk: This style requires commitment—you’ll need to reapply product if you touch your hair or run your hands through it, and rain or humidity can affect the appearance. Save this for occasions where you’re not moving around excessively.
5. The Slicked Back Bun
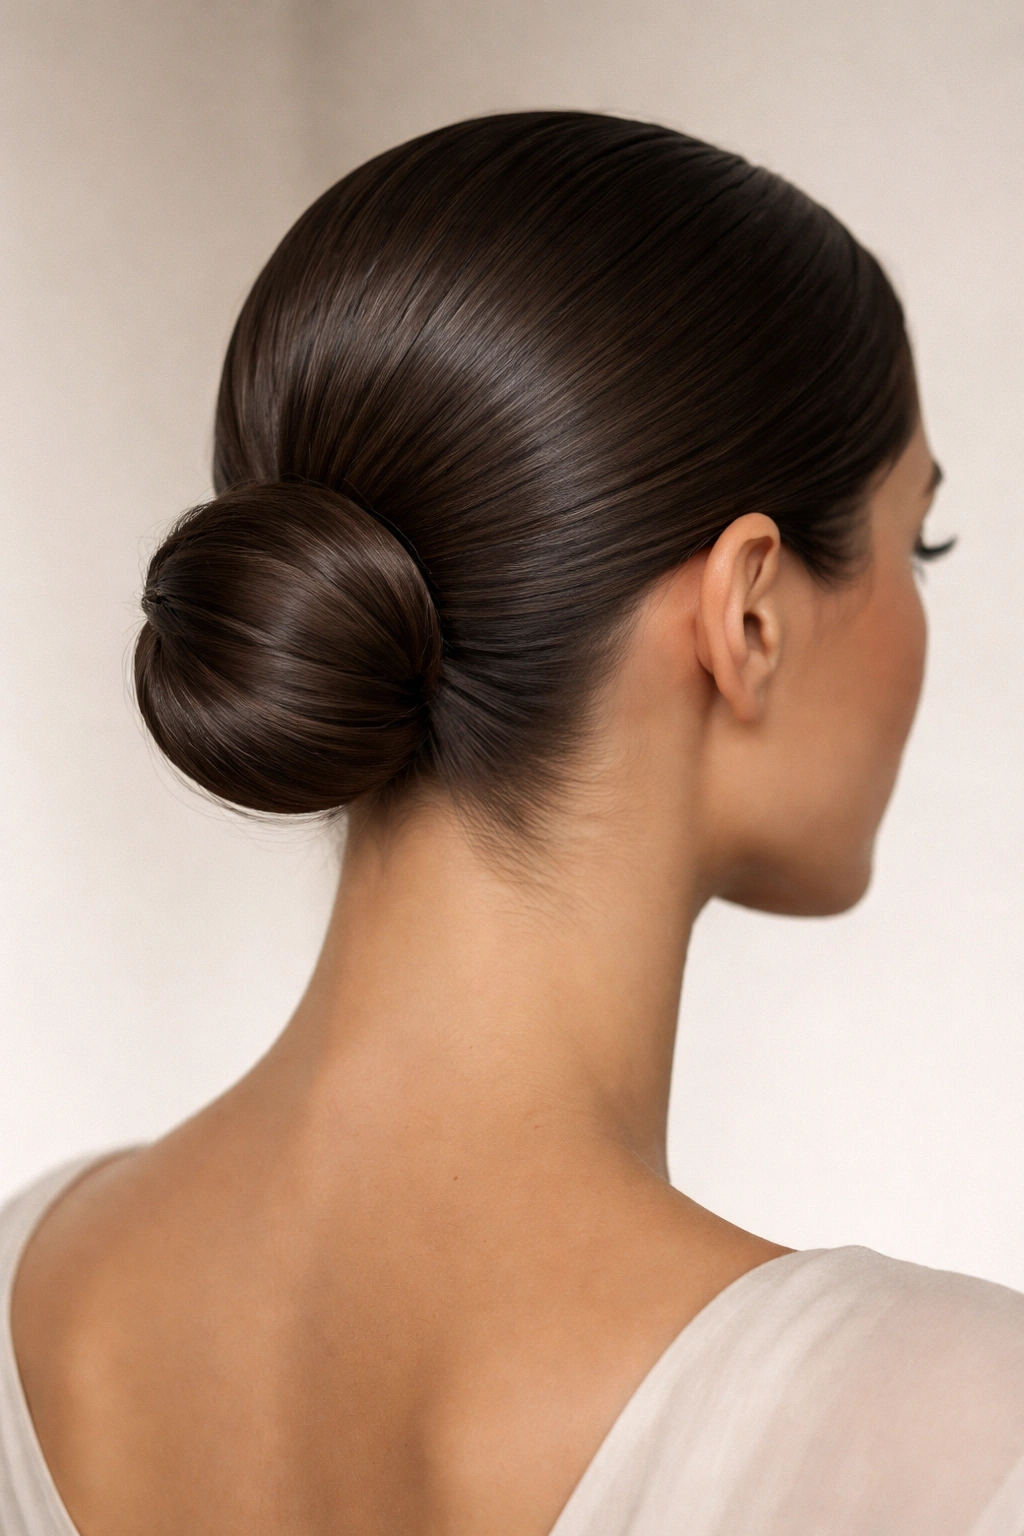
The slicked back bun takes the sleekness principle and creates a completely different aesthetic. It’s versatile enough for casual days but polished enough for professional settings or special occasions. On straight hair, the bun sits perfectly smooth without the flyaways that can plague curly or wavy textures.
When and Where to Wear This Style
This works brilliantly if you have shoulder-length hair or longer. It’s excellent for days when you want a neat, controlled style but don’t want hair in your face. Athletes, dancers, and anyone in a high-movement environment loves this style because it stays put all day. It’s also a fantastic protective style that keeps your hair contained without breakage-causing tightness.
Steps to Create a Sleek Bun
- Start with slightly damp hair and apply a smoothing serum or lightweight gel
- Comb everything straight back from your forehead toward the crown
- Once fully combed back, gather your hair into a low ponytail at the nape of your neck
- Twist the ponytail and wrap it around the base to form a bun, securing with bobby pins
- Smooth down any flyaways with extra product and a fine-tooth comb
- Finish with hairspray for hold and shine
Worth knowing: The lower your ponytail sits before creating the bun, the more elegant the final look. A bun at the very base of the skull reads as more sophisticated than one positioned higher.
6. The Mid-Length Slick Back
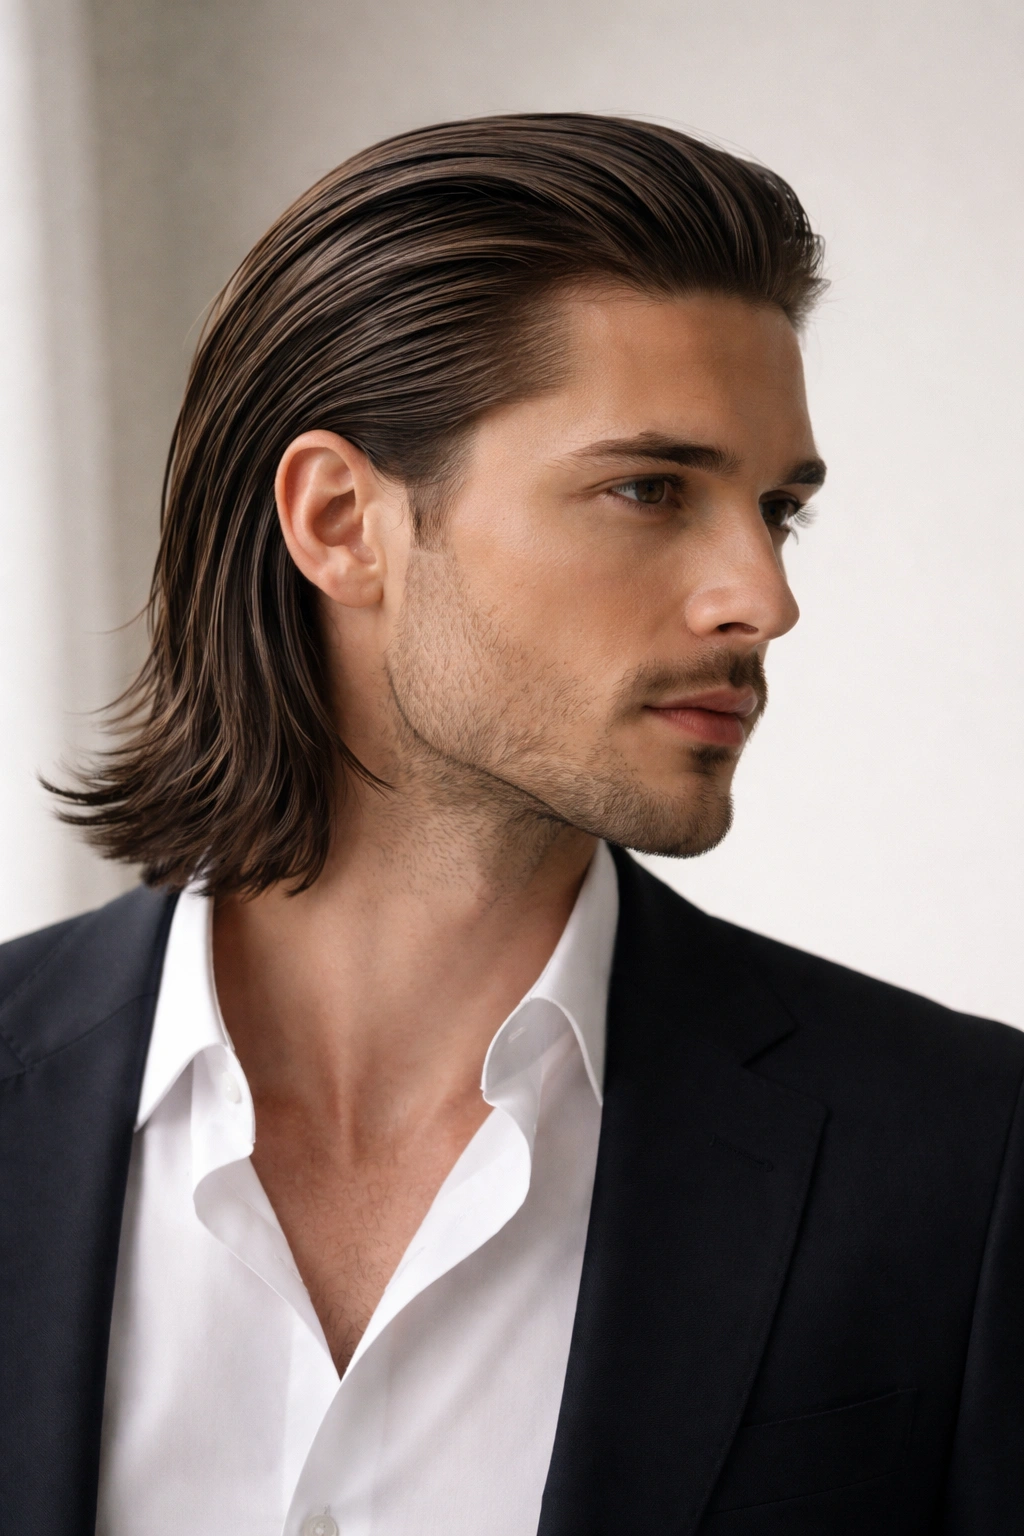
This style works specifically for people with hair between chin-length and shoulder-length. It’s longer than the classic crew cut length but shorter than styles that require the ability to tie your hair back. The length gives you enough substance to work with while maintaining the sleekness that makes this family of styles so appealing.
Why Length Matters for This Look
The mid-length slick back creates excellent proportions on most face shapes because it has enough volume to balance facial features without creating the severe elongation that longer, fully slicked hair can produce. For straight hair, this length shows off the smoothness of your texture perfectly—long enough to see the sleekness, short enough that you don’t need significant product volume.
Styling Approach for Mid-Length Hair
- Apply a lightweight pomade or cream to damp hair, focusing on distribution rather than quantity
- Comb straight back with consistent pressure to avoid creating ridges in your hair
- This length typically requires less product than longer styles—more can actually work against you
- Use your fingers to create slight texture and breaks in the slickness as the style dries, if you prefer a less formal appearance
Pro tip: At this length, you can experiment with how far back you slick your hair. Some days, you might prefer slightly more volume at the front for a casual vibe, while other days you’ll go full slick for maximum polish.
7. The Slicked Back Fade with Texture on Top
This style bridges the gap between the severe undercut slick back and a more textured, casual appearance. The sides are faded short while the top is long enough to create slight texture, but it’s still swept backward and controlled. This is the best option if you want the style without the extreme contrast of an undercut.
Creating Texture Without Losing Sleekness
The trick here is using product that adds separation and definition without creating volume or curl. A dry pomade, clay, or texturizing paste works better than a gel in this application. You’re creating a semi-slicked look—controlled and neat but with subtle movement and dimension that prevents the style from feeling too severe.
Achieving the Right Balance
- Keep the sides significantly shorter than the top, but not as extreme as a full undercut
- Apply a texturizing product to damp hair on top, using your fingers to create slight separation
- Push the hair backward but allow it to sit with a bit of natural fall rather than complete control
- The texture should be visible up close but the overall impression should still be neat and polished
Insider note: This style is more forgiving with maintenance than a true slick back—you can go longer between haircuts because the transition between lengths is more gradual.
8. The Slicked Back with a Volume Quiff
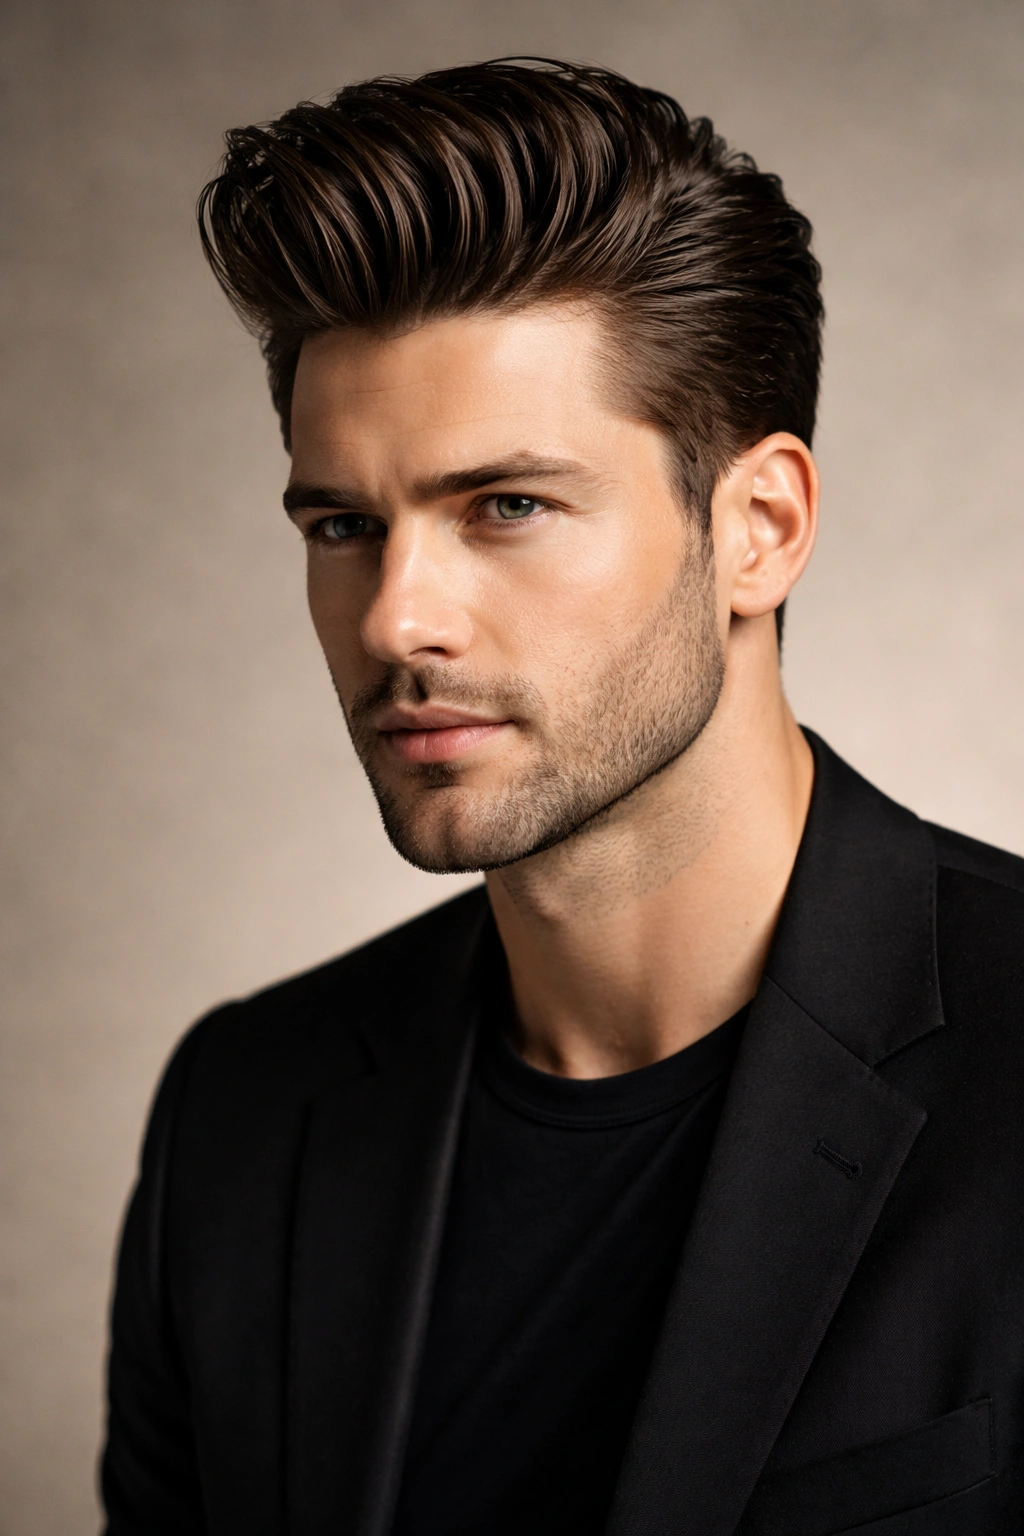
This variation creates height and volume at the front while maintaining the sleekness that defines the style at the sides and back. It’s a more dramatic, fashion-forward take on the traditional slick back that works particularly well if you enjoy standing out.
Balancing Height and Sleekness
The quiff element adds verticality to the look, which works beautifully on straight hair because the strands will stack and hold position without fighting against natural texture. The contrast between the volume at the front and the smoothness at the sides creates visual interest and makes the style feel intentional rather than accidental.
Creating the Volume and Maintaining Sleekness
- Use two different products—a volumizing cream or thickener at the roots on top, and a smoothing gel or pomade for the sides and back
- Blow-dry the top area backward and slightly upward to create the quiff shape
- Smooth the sides and back while the hair is still warm from the blow dryer
- Use a comb to refine the front section and create definition between the voluminous top and sleek sides
Worth knowing: This style requires more styling time each morning than a basic slick back, but it’s worth it if you love having a statement hairstyle.
9. The Slicked Back with a Hard Part
A hard part (also called a razor part) takes the side part concept and makes it even more dramatic. Created with a razor or clipper blade, this part cuts into the hair, creating a visible line of scalp. It’s an edgy, contemporary look that reads as intentional and fashion-aware.
When to Go for a Hard Part
This style works best if you’re comfortable with a bolder aesthetic and don’t mind the maintenance. The hard part needs to be recut regularly (typically every 2-3 weeks) to stay crisp. On straight hair, the sharp line of the hard part is absolutely stunning because your strands don’t have texture to obscure it.
Getting and Maintaining a Clean Hard Part
- Find a barber experienced with hard parts—this is not something to experiment with yourself
- The part should be thin and precise, creating a clear line of scalp without being overly wide
- Ask your barber to cut it at the angle you prefer—more vertical for a sharper look, slightly angled for something less extreme
- Keep the line sharp by having it cleaned up every few weeks; once it starts to grow out, it becomes less striking
Real talk: A hard part is a commitment. You’ll get attention, which can be good or require you to feel confident in your style choices. It’s not a “safe” hairstyle—it’s a statement.
10. The Slicked Back Pompadour
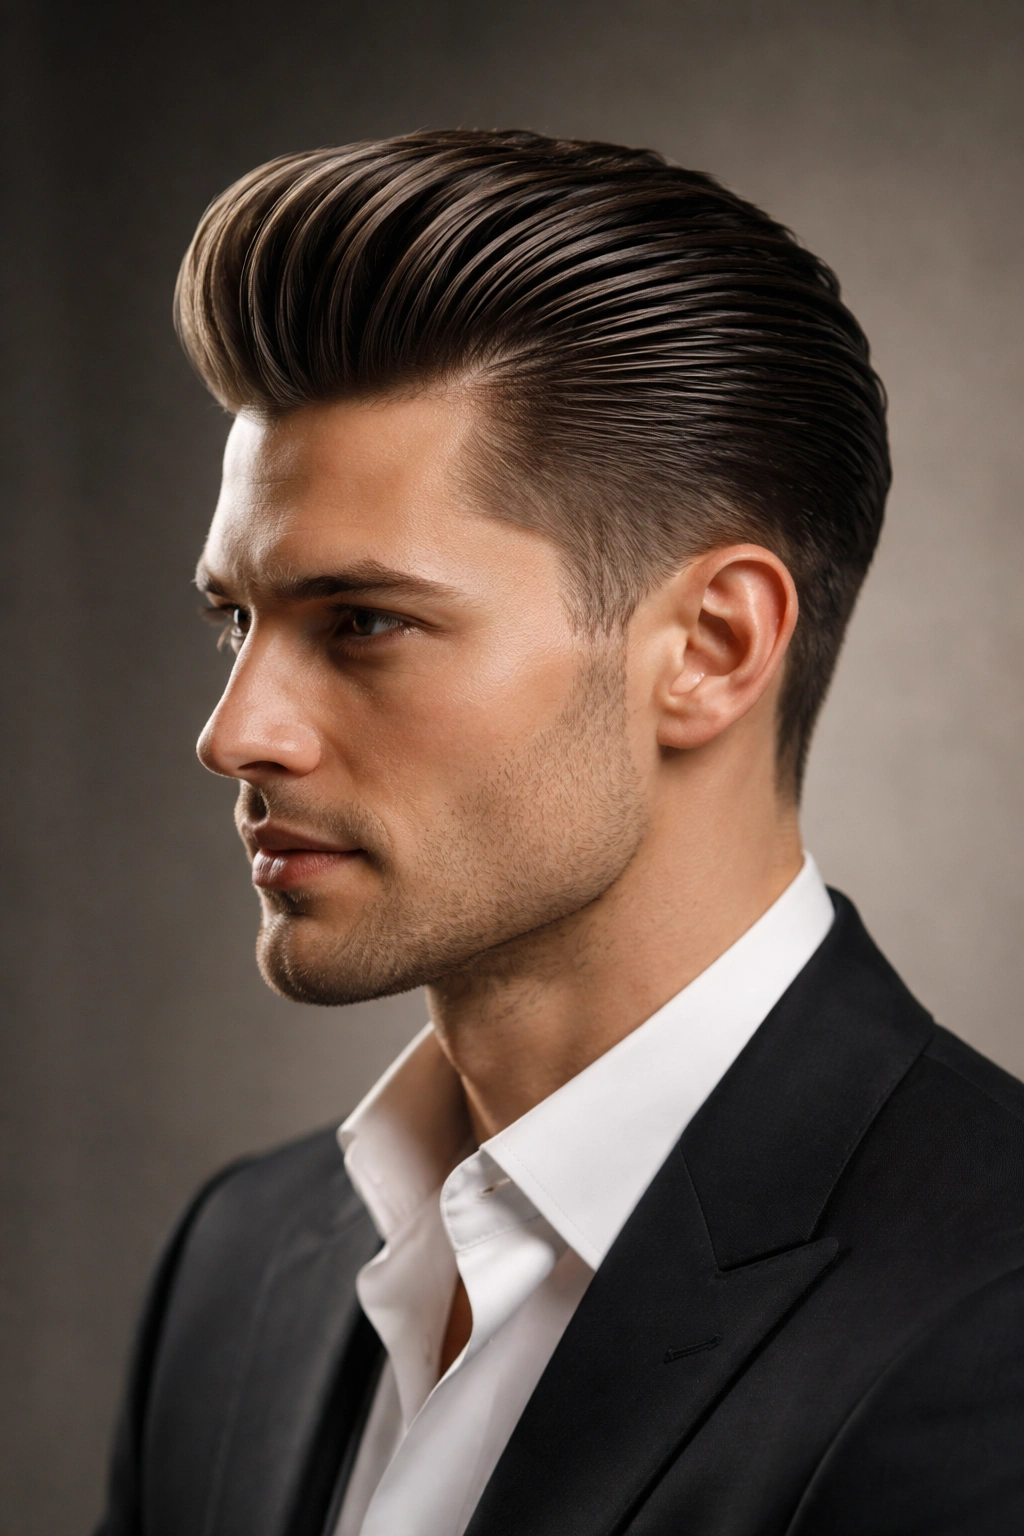
This final variation is for people with hair long enough to create height and volume on top while maintaining the sleekness of the style. The pompadour effect comes from sweeping the longer hair backward and upward, creating a dramatic silhouette. This is a vintage-inspired style with serious presence.
Why Straight Hair Makes This Easier
Straight hair is ideal for the pompadour because it naturally wants to sit in the direction you style it. You won’t fight against curl or wave—you’re simply directing your hair where you want it to go. The smoothness of straight hair also means the pompadour reads as polished rather than chaotic.
Building the Pompadour Shape
- Start with hair that’s at least 4-5 inches long on top for a proper pompadour effect
- Blow-dry the top area backward and slightly upward, using your fingers to guide the direction
- Once the hair is dry, apply a strong-hold pomade or gel to lock in the shape
- Comb the top section upward and back, creating height at the crown and a smooth curve down toward the sides and back
- The sleek quality comes from the smooth finish on the sides and back—the contrast with the volume on top is what makes this style sing
Pro tip: This style looks best with an undercut or very short sides—the contrast between the dramatic height on top and the cropped sides creates maximum impact.
Final Thoughts

Slicked-back styles work beautifully on straight hair because your texture already has the foundation these looks require. The key to looking sharp rather than overdone is understanding that “slicked” doesn’t mean drenched, and choosing the variation that matches your hair length and personal style. The classic sleek back serves you reliably for any occasion, the undercut offers contemporary edge, and the variations in between let you experiment with volume, texture, and contrast until you find your signature.
The other critical piece is product selection and application technique. Lightweight formulas, even distribution, and a comb as your primary styling tool all matter far more than the amount of product you use. Your straight hair is an asset—work with it, not against it, and these styles will become part of your confident daily routine.