There’s something undeniably powerful about perfectly straight hair. Whether you’re aiming for boardroom confidence or editorial polish, sleek straight looks offer a canvas of sophistication that works across face shapes, skin tones, and personal styles. The key isn’t just having straight hair—it’s about choosing a cut and styling approach that flatters your features and fits seamlessly into your actual life, not just your Pinterest board.
The straight hair trend has evolved beyond simple, one-dimensional styles. Today’s most coveted looks balance geometric precision with subtle movement, combine shine with texture, and play with proportions in ways that transform how you present yourself. Some emphasize bone structure with blunt cuts and sharp lines, while others create the illusion of volume and dimension through layering and styling technique. The best straight-hair looks aren’t about fighting your hair’s natural texture or spending hours at the salon—they’re about working with what you have to create something that feels authentic, low-maintenance, and genuinely flattering.
This guide walks you through ten distinct sleek straight hair looks worth considering. Each style comes with honest details about maintenance, styling effort, and who it suits best. You’ll learn not just what the look is, but how to ask your stylist for it, what products keep it pristine, and whether it’s realistic for your daily routine.
1. The Sleek Blunt Bob
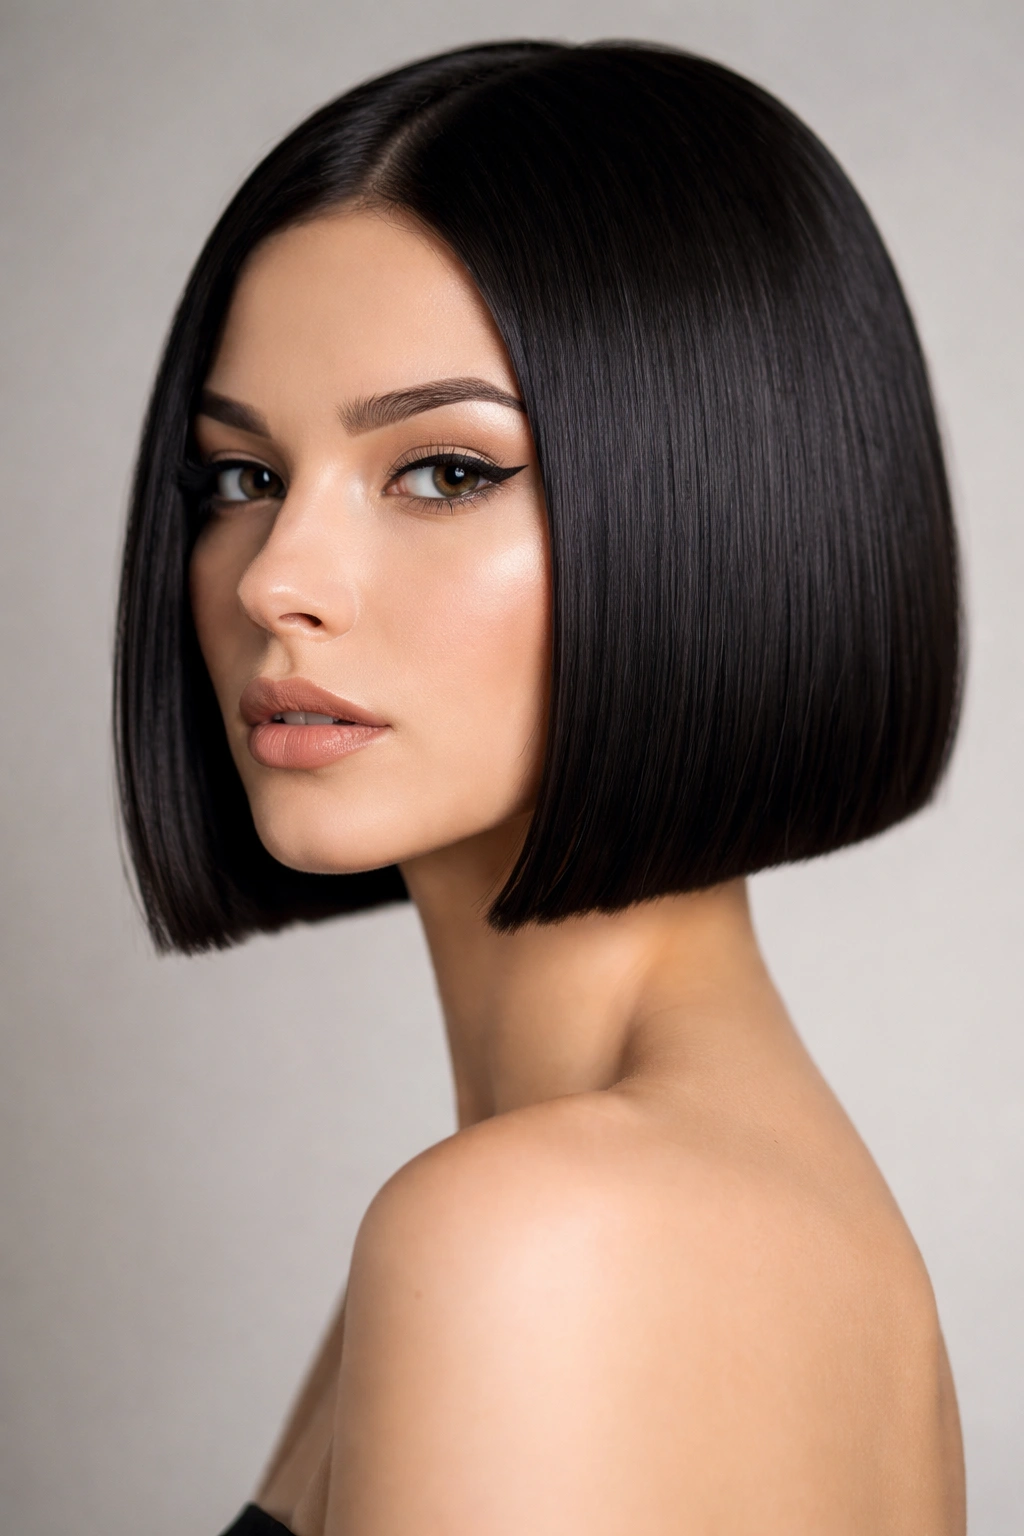
The blunt bob is the uniform of anyone who’s decided that polished simplicity is the ultimate statement. This cut sits right at the jawline with a perfectly straight hemline across the entire back, creating a graphic, architectural feel. No layers, no angles, no softness—just clean lines and intentional geometric shape. When done right, the blunt bob catches light across that sharp edge and immediately reads as intentional and refined.
Why This Look Commands Attention
A true blunt bob works because of its geometric precision and the immediate frame it creates around your face. The straight hemline draws a horizontal line that emphasizes cheekbones and jaw definition. There’s nowhere for the eye to wander—the simplicity is what makes it striking. This cut also photographs beautifully, which is partly why it’s become the go-to for everyone from fashion editors to CEOs. Unlike longer styles that blend into the background, a blunt bob announces its presence.
The maintenance advantage shouldn’t be overlooked either. Because there are no layers to blend or hide imperfections, you can actually see the shape clearly and know precisely when you need a trim. Most stylists recommend a touch-up every 4-6 weeks to maintain that razor-sharp edge.
How to Make It Work for You
- Length matters: The absolute best length for most face shapes sits at the jawline or just slightly below, hitting approximately where your jaw ends and your neck begins
- Density is critical: This cut shows every layer of hair, so it works better on medium to thick hair; fine hair can look thin and stringy with a blunt bob
- Styling is simple: A blow-dry with a paddle brush and light smoothing serum is truly all you need; no curling or complicated technique required
- Updos aren’t an option: Because of the precise length, you can’t easily tuck this into a bun or ponytail without breaking the line, so make sure you’re genuinely committed to wearing it down
Pro tip: Ask your stylist to cut it slightly shorter in the back and slightly longer toward the front (just a half-inch difference) to create an almost imperceptible movement that feels less severe than a true 100% blunt line.
2. The Razor-Sharp Lob
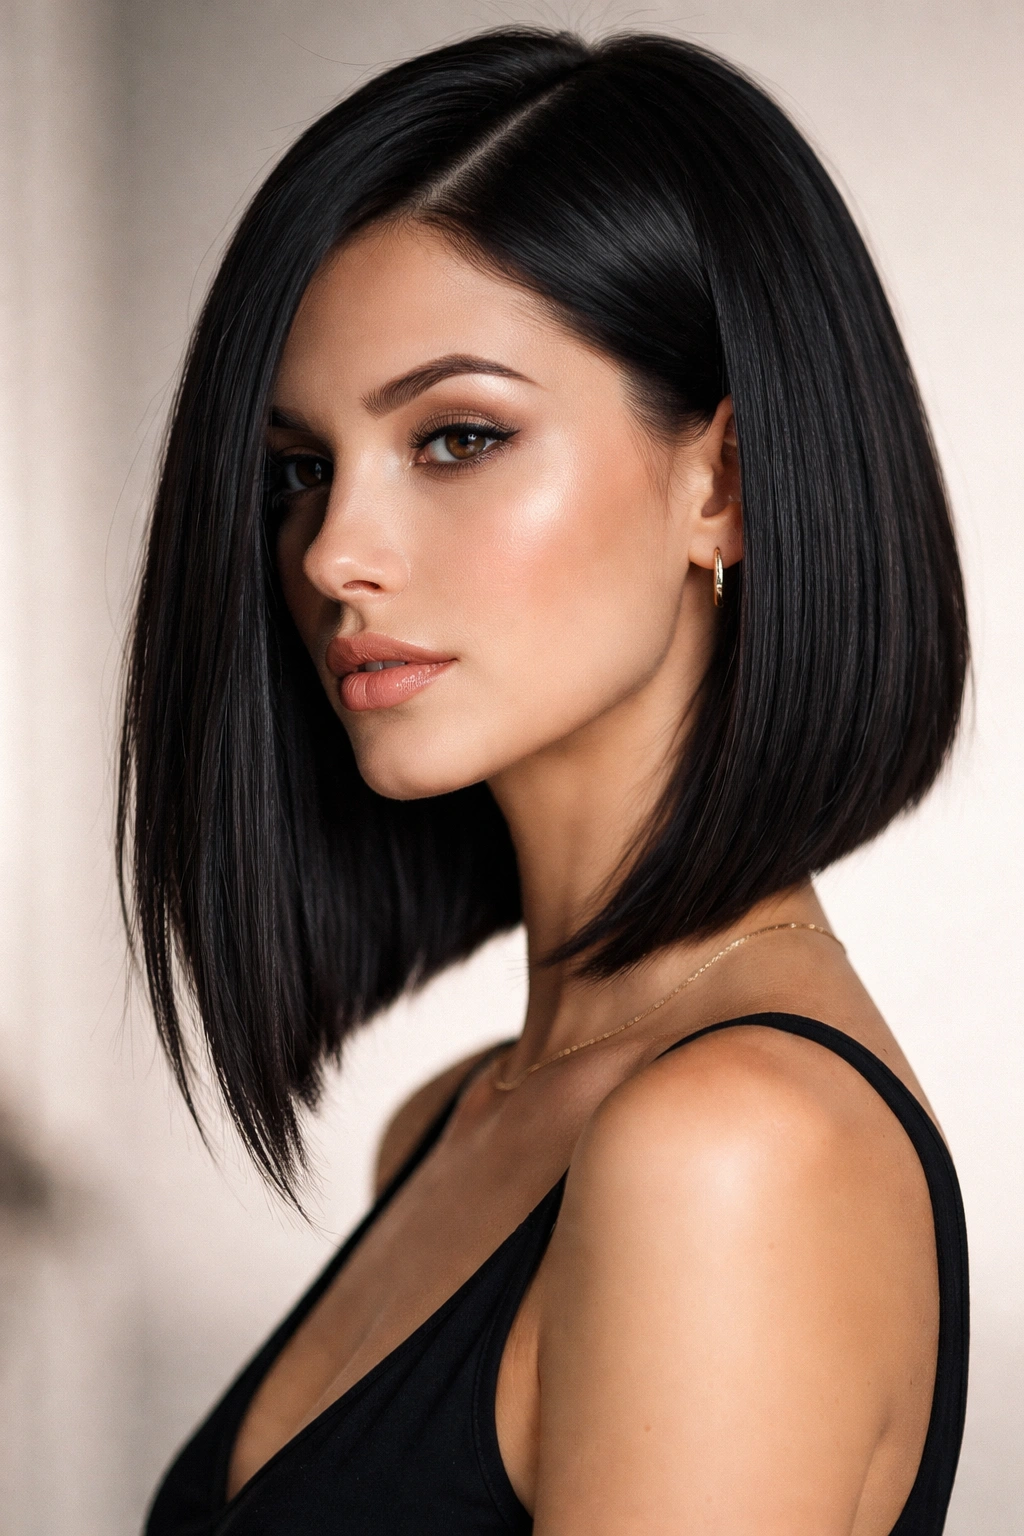
A lob—that’s a long bob landing between chin and collarbone—gets sharper and sleeker when cut with precision razoring. This isn’t the effortlessly choppy lob you see everywhere; this version has intentional angles and deliberate length changes that create movement without softness. The result is architectural but wearable, polished but not overly formal.
What Makes the Difference
The razor-sharp lob works through contrast between blunt sections and sharp angles. Your stylist uses razor cuts (not scissors) to create clean lines that literally catch light differently. You’ll typically have a blunt baseline length with strategic shorter sections that create dimension without the fluffy, textured feel of a heavily layered cut. This approach takes real skill—it’s the difference between a lob that looks intentional and one that just looks like your hair got choppy.
This cut suits shoulder-width or slightly narrower faces beautifully. The angles can enhance cheekbones and create proportion if your face is rounder or wider. Because of the layering, it also works better than a blunt bob on finer hair textures, as the movement means thinness at the ends is less noticeable.
The Practical Breakdown
- The baseline: Roughly collarbone length with a nearly blunt hemline across the back and sides
- The angles: Shorter, sharply cut pieces around the face that frame cheekbones and create movement
- The styling: Requires a blow-dry with a round or paddle brush, plus a smoothing product; can be worn completely straight or with the slightest bend at the ends
- The maintenance: Touch-ups every 6-8 weeks to keep the angles sharp; longer grow-out period than a true bob because the length is more forgiving
Worth knowing: This cut is surprisingly versatile for styling. You can wear it sleek and straight for work, add a slight wave with a flat iron for weekends, or even throw it into a small clip or claw at the back for a casual updone look.
3. The Polished Center Part
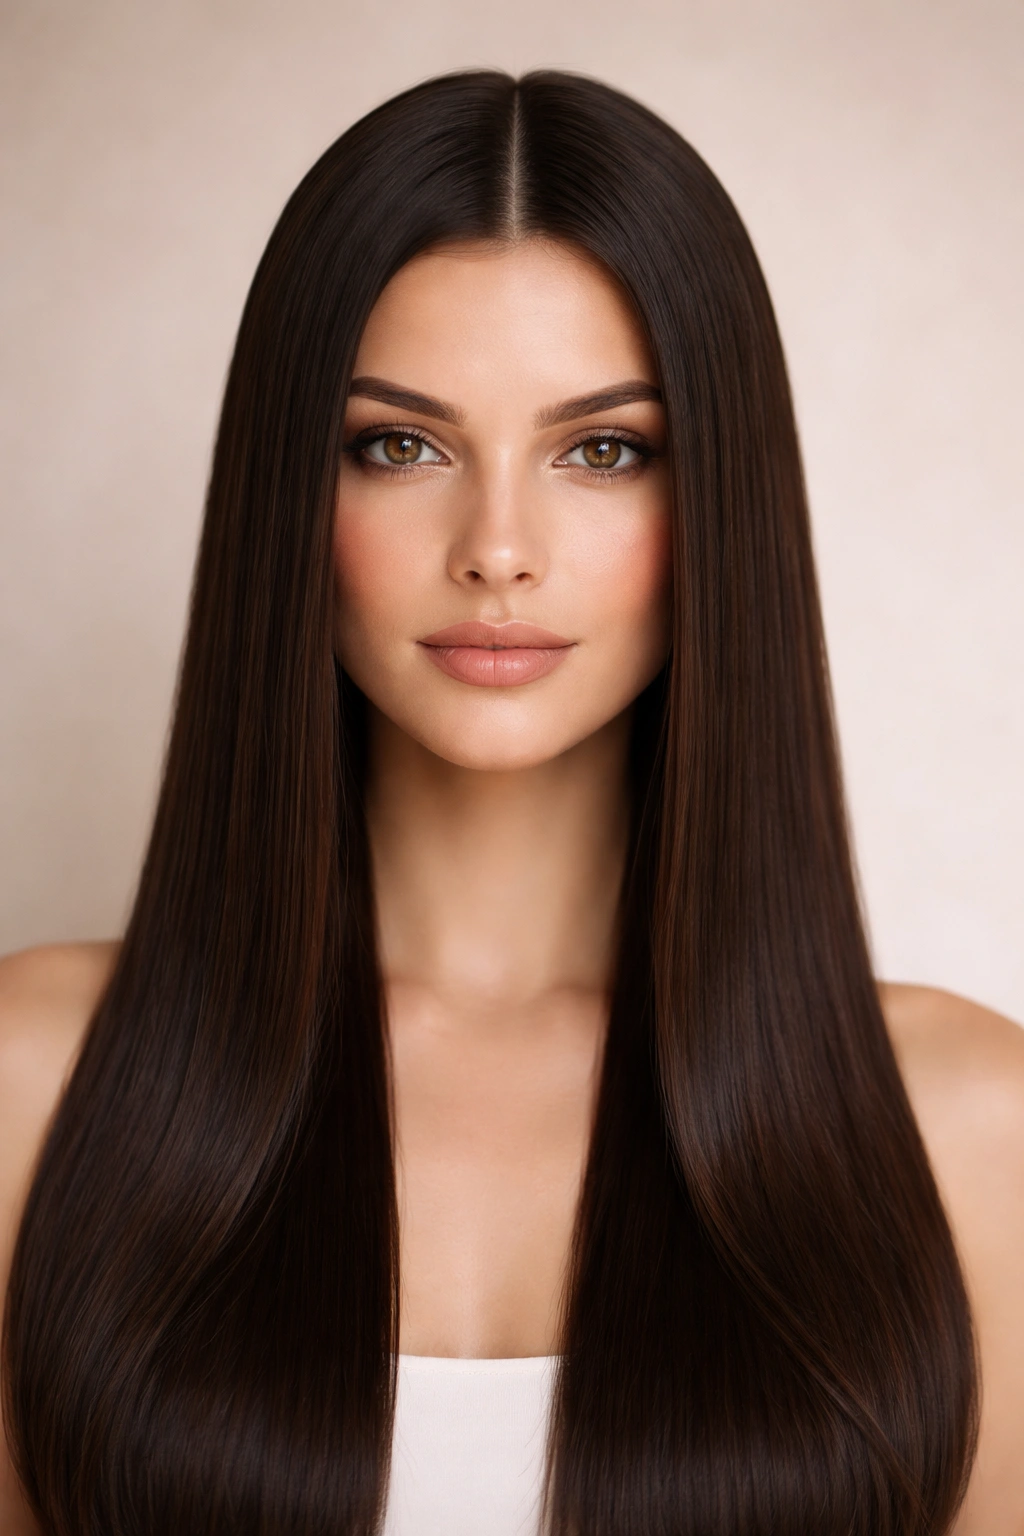
There’s a reason the center part became synonymous with “calm, collected, sophisticated.” When you split straight hair perfectly down the middle, you create bilateral symmetry that feels inherently balanced and intentional. Add a sleek straight style and you’ve got something that reads as both editorial and approachable—structured without feeling severe.
The Psychology of the Center Part
The center part draws a vertical line that elongates the face and creates symmetry that feels inherently calming and balanced. This is partly optical (the vertical line actually does elongate) and partly psychological (symmetry reads as “finished” to our brains). The center part also doesn’t require your hair to be a particular length—it works on bobs, lobs, shoulder-length cuts, and long hair equally well. What matters is that your hair is genuinely straight and that you commit to the precision of the part itself.
Getting the part exactly centered takes actual effort. A slightly off-center part immediately reads as accidental. Use a tail comb and take your time creating a clean, sharp line from your hairline straight back to your crown. Precision is the entire point.
Making It Genuinely Sleek
- The part itself: Use a fine-tooth comb and create a crisp line; re-wet the part line if necessary to get it sharp
- The smoothing: A smoothing serum applied to damp hair before blow-drying helps eliminate frizz at the roots and along the part line
- The styling tools: A paddle brush and a smooth blow-dry is the minimum; many prefer to finish with a flat iron on low heat to polish everything
- The finishing product: A lightweight smoothing cream or anti-frizz spray to tame any wisp or flyaway
Insider note: The center part can be slightly unflattering if you have a very wide forehead or a strong center-of-face feature you’d prefer not to emphasize. If that’s you, a deep side part often works better while still maintaining the sleek straight aesthetic.
4. The Deep Side-Swept Straight
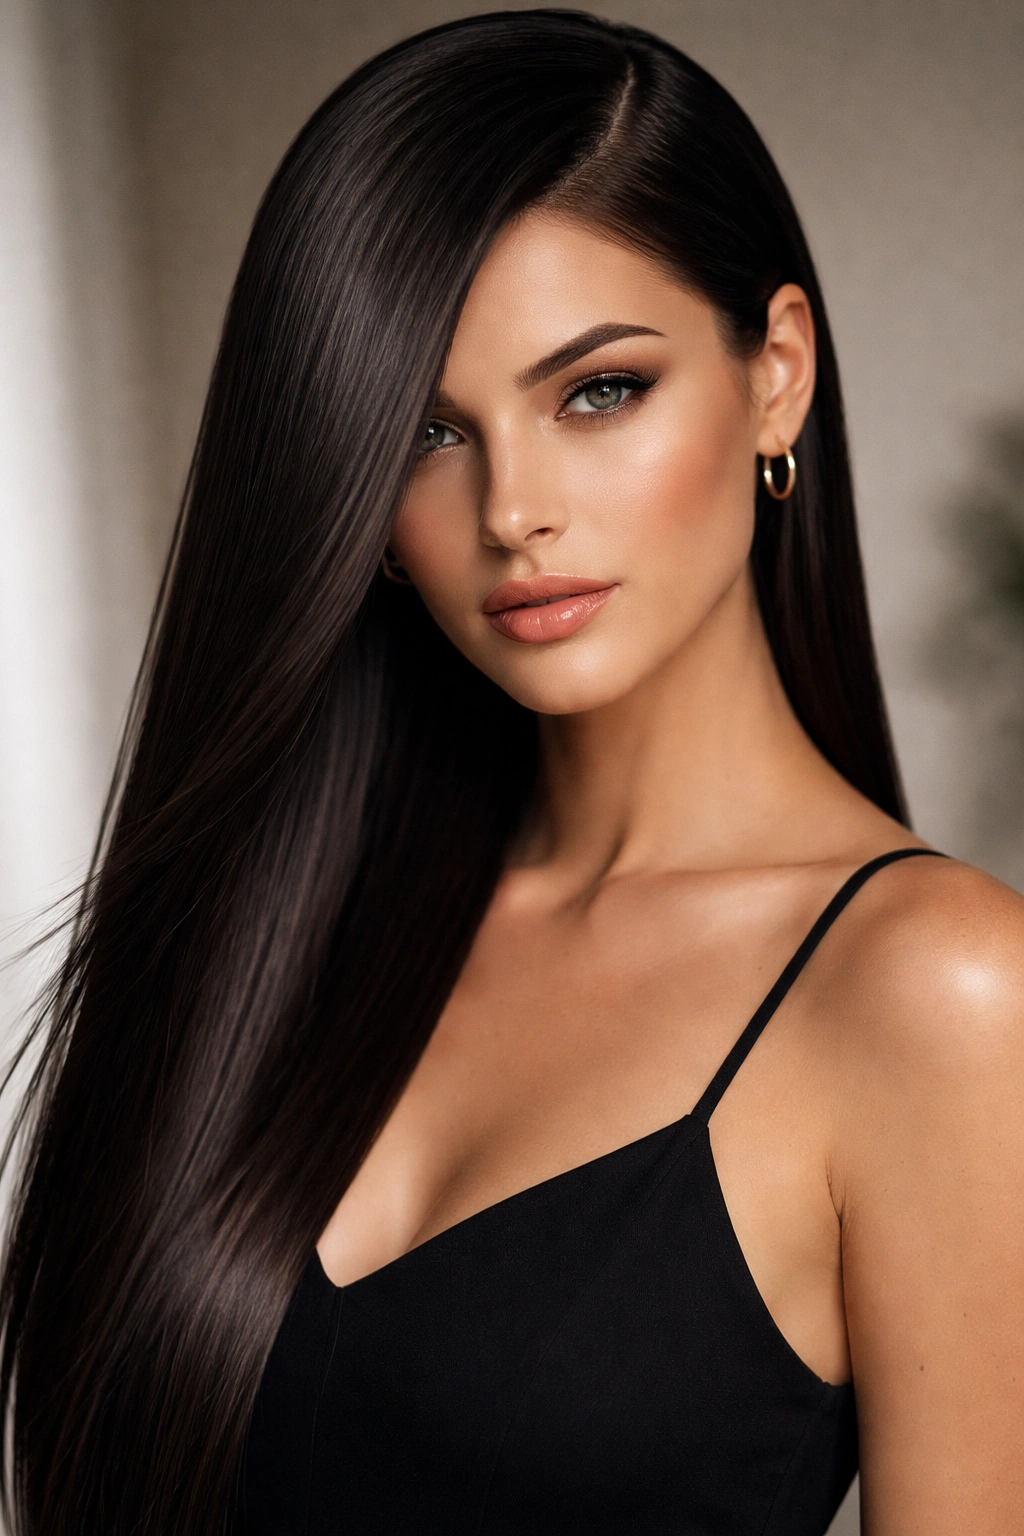
If a center part feels too formal or doesn’t suit your face shape, a deep side part offers sophistication with more visual softness. When you sweep most of your hair to one side while keeping everything arrow-straight, you create asymmetry that feels dynamic and modern. This look appears less structured than a center part but actually takes equal attention to get right.
Why Asymmetry Works Here
A deep side part works because asymmetry creates visual movement and interest while the straight texture keeps everything polished. The deeper the part—meaning the more of your head’s perimeter is visible on one side—the more dramatic the effect. Some hair falls across part of your face, which softens features and creates gentle framing without actually being textured or layered. This is a sophisticated look that doesn’t read as trying as hard as a center part does.
The side-swept straight also photographs extraordinarily well. The angle is flattering across a wider range of faces than a center part, and the asymmetry creates visual interest even in simple headshots.
How to Execute This
- Part placement: Position your part roughly 2-3 inches from the side of your head (not just slightly off-center; genuinely to the side)
- The sweep: Hair on the longer side should fall loosely across your face or behind your ear, depending on how dramatic you want it
- Texture maintenance: Everything stays straight, but you can use a smoothing serum to add shine and polish
- Styling time: 10-15 minutes with a blow-dryer and a round brush; straightening iron optional depending on your hair’s natural texture
- The part line: Just as important as a center part—it should be clean and sharp, not fuzzy or approximated
Quick facts:
- Works beautifully on oval, heart-shaped, and diamond-shaped faces
- Can be adjusted daily depending on mood (change which side you part for a completely different vibe)
- Easier to pin up or style casually than hair with a center part, since it already has directional sweep built in
- Requires the same maintenance as other sleek straight styles (frizz prevention, regular trims)
5. The Stick-Straight High Ponytail
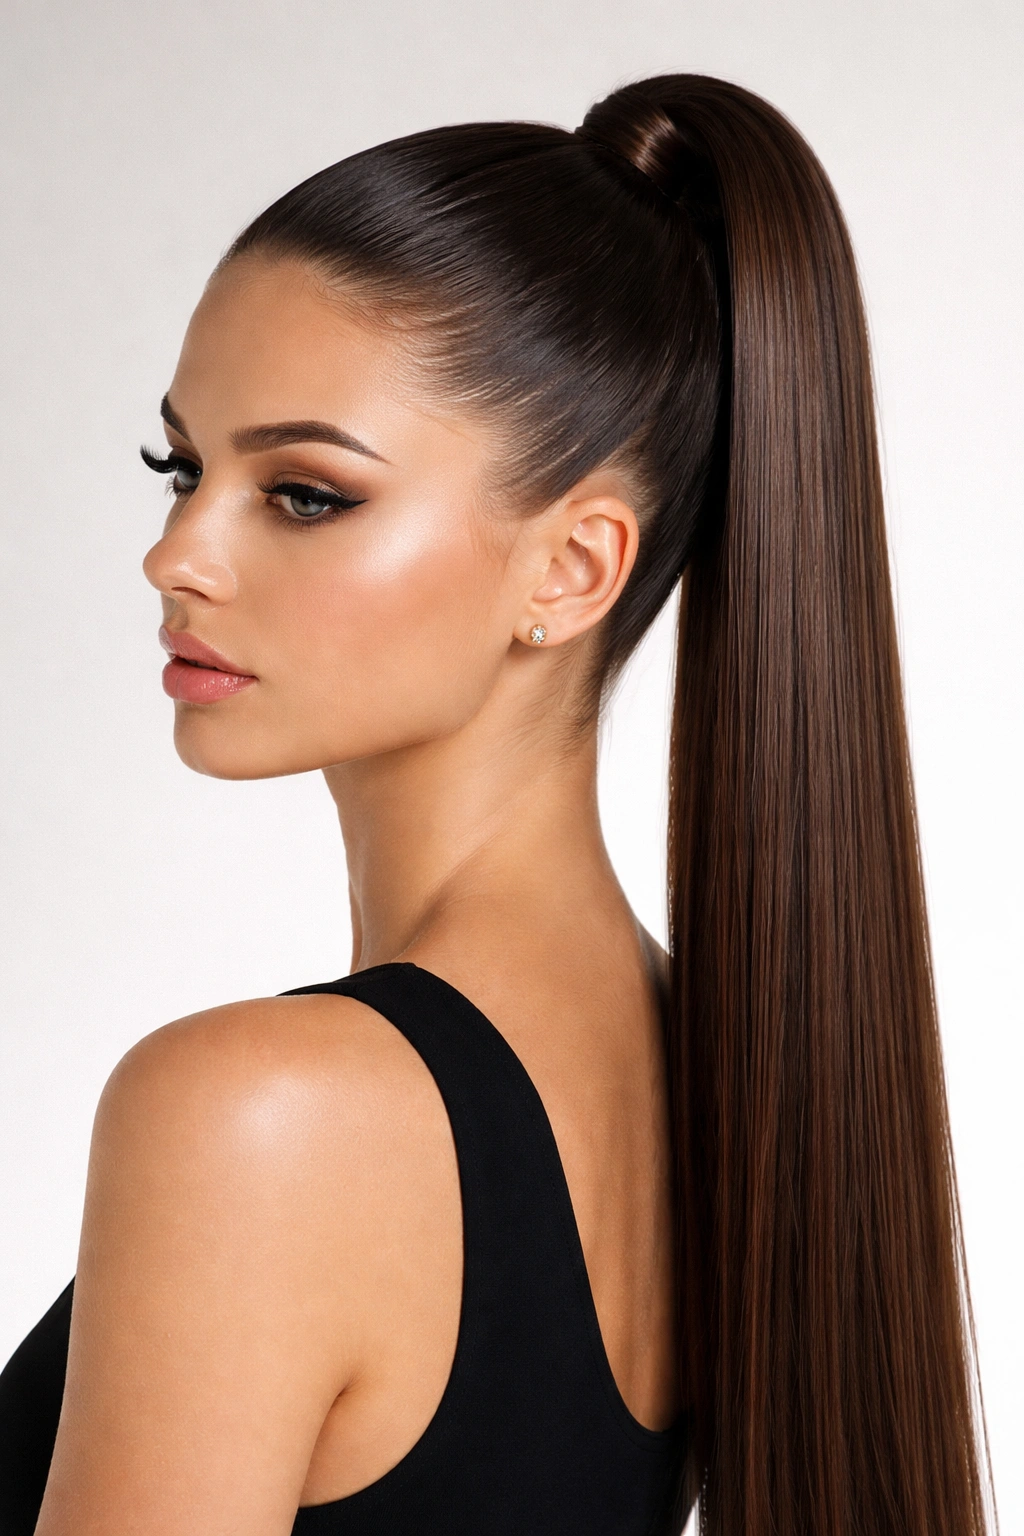
The high ponytail elevated to an art form is essentially the inverse of most straight-hair styling—all the polish and intention is applied to creating the perfect foundation, then your hair is pulled back to showcase face, cheekbones, and the absolute precision of the style. This look demands geometrically perfect hair and flawless application, which is exactly why it reads as refined and intentional.
The Technical Challenge
A stick-straight high ponytail only works if your hair is genuinely straight with zero frizz, zero wispy flyaways, and absolutely no texture. One stray hair completely breaks the effect. The elasticity and shine of your hair becomes 100% visible—there’s no layer or dimension to hide anything. This look also highlights your face and hairline completely, so it’s simultaneously the most flattering and most unforgiving of all straight-hair styles.
The styling effort is deceptive. While the final look appears simple, the execution requires smooth, prepped hair, careful blow-drying to create flatness at the roots, and strategic product placement to eliminate any frizz.
Creating the Perfect Execution
- Hair preparation: Use a smoothing treatment 1-2 times per week in the days leading up to styling; deep conditioning is essential
- Blow-dry method: Dry your hair smooth using a paddle brush and smoothing serum, making sure the crown area is completely flat and smooth
- The ponytail placement: Positioned at the crown (not the very top of your head, but where your head is widest) looks most flattering on most faces
- Securing it: Use a seamless elastic (never a standard elastic that creases) and position it so the elastic band sits on the smooth blow-dry, not on wispy layers
- Finishing details: A tiny bit of smoothing serum on your fingertips to tame any edge or flyaway; some people use a clear gel to define the hairline edges for an even more polished effect
- Longevity: This style actually holds beautifully for 2-3 days if your hair is genuinely straight; you can refresh with a quick brush and serum
Pro tip: The high ponytail photographs better and suits more face shapes if you pull it back almost tight, rather than skin-taut. You want clean lines without creating tension that pulls your face upward or emphasizes your hairline. The sweet spot is “intentionally styled” rather than “pulled to the maximum.”
6. The Layered Straight with Micro-Bangs
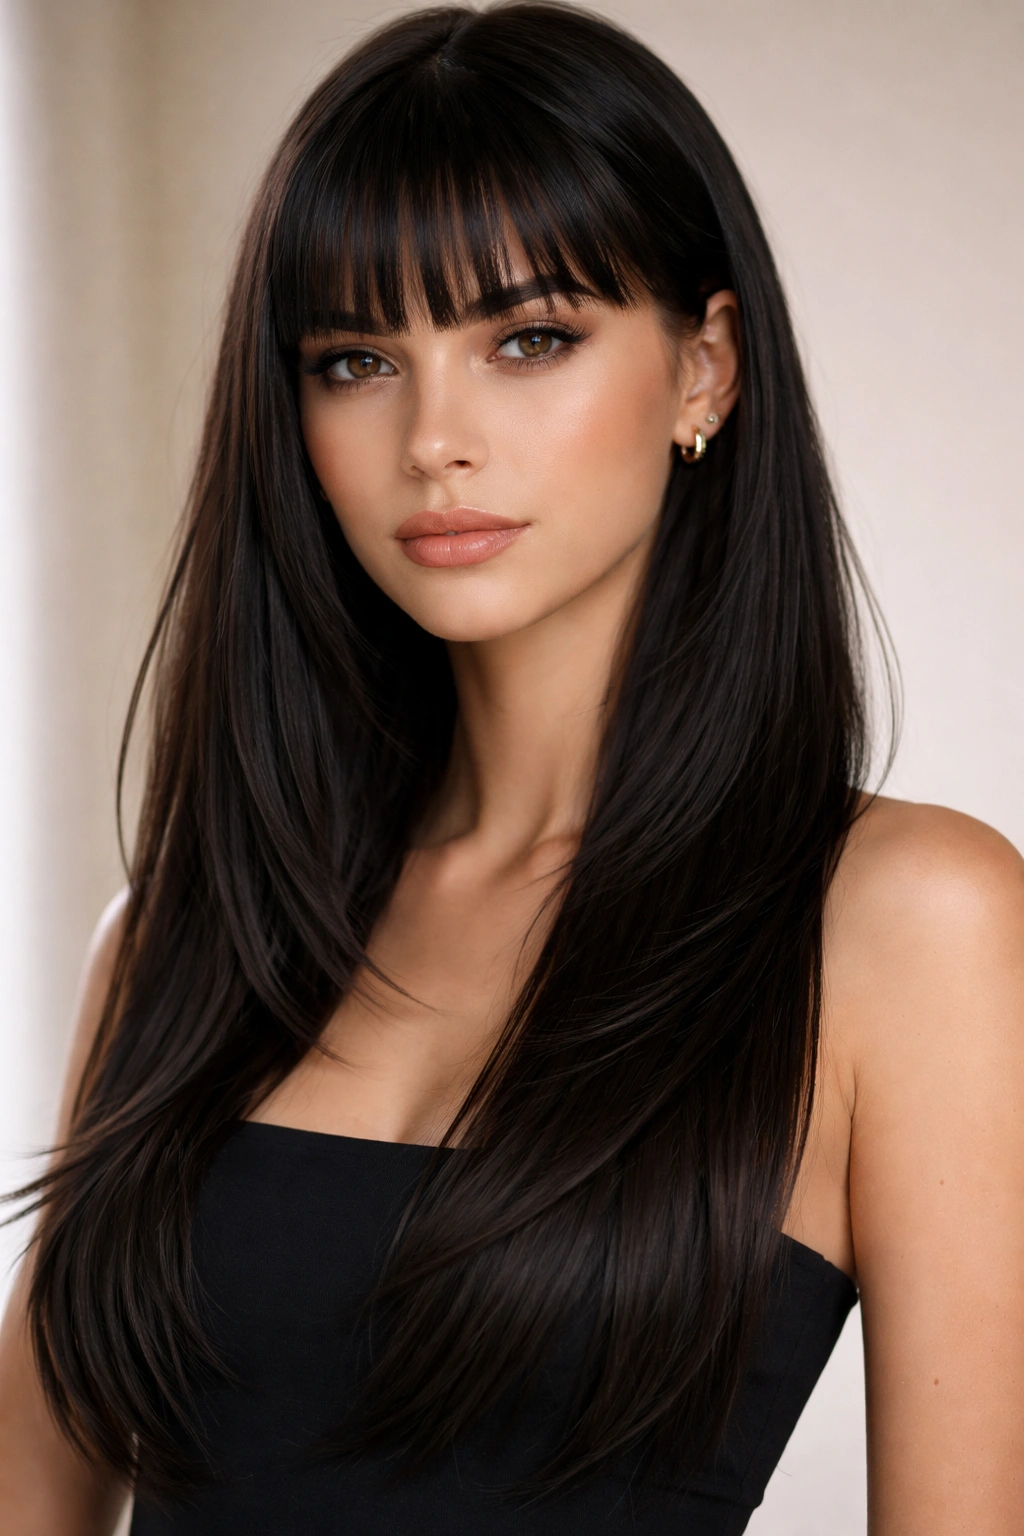
While most sleek straight looks are about blunt lines and precision, this style introduces gentle layering throughout the length and adds micro-bangs—short, straight-across bangs that sit just below the brow or right at the eyebrow line. The combination creates a youthful, editorial look that still reads as polished and intentional.
Why Layers Work With Straight Hair
Contrary to what you might think, layers on straight hair can create movement and dimension without sacrificing the sleek aesthetic if they’re cut correctly. Rather than choppy, textured layers that suggest a tousled or effortless vibe, these are precision layers—clean, intentional, and frequently styled completely straight. The layers create subtle shape without frizz or texture, and they actually help the hair appear fuller and less prone to looking limp.
Micro-bangs are a bold addition, but they absolutely anchor this look. They frame the eyes and forehead in a very graphic, intentional way. They’re not for everyone, but on the right face shape—particularly oval, heart, or oblong—they create visual interest and balance.
Making Layers and Bangs Work
- Layer placement: Longer layers (only slightly shorter than the baseline) create shape; avoid heavily choppy or heavily layered cuts that will look textured
- Bangs that work: Micro-bangs sit at the eyebrow or slightly above; they should be cut completely straight and blunt, not feathered or textured
- Styling the layers: Blow-dry completely straight with a paddle brush; the layers will create a subtle sense of movement without requiring curling or texture
- Styling the bangs: Dry them straight-on with a round brush, or use a small flat iron for absolute precision; they need to be 100% straight
- Maintenance: Trims every 4-6 weeks because bangs grow visibly and need to stay short; layer touch-ups every 6-8 weeks
- Styling time: 15-20 minutes including the bangs, which require intentional drying
What to know: This look requires genuine commitment to hair maintenance and daily styling. If you’re someone who washes their hair and air-dries it, micro-bangs specifically will become a constant source of frustration.
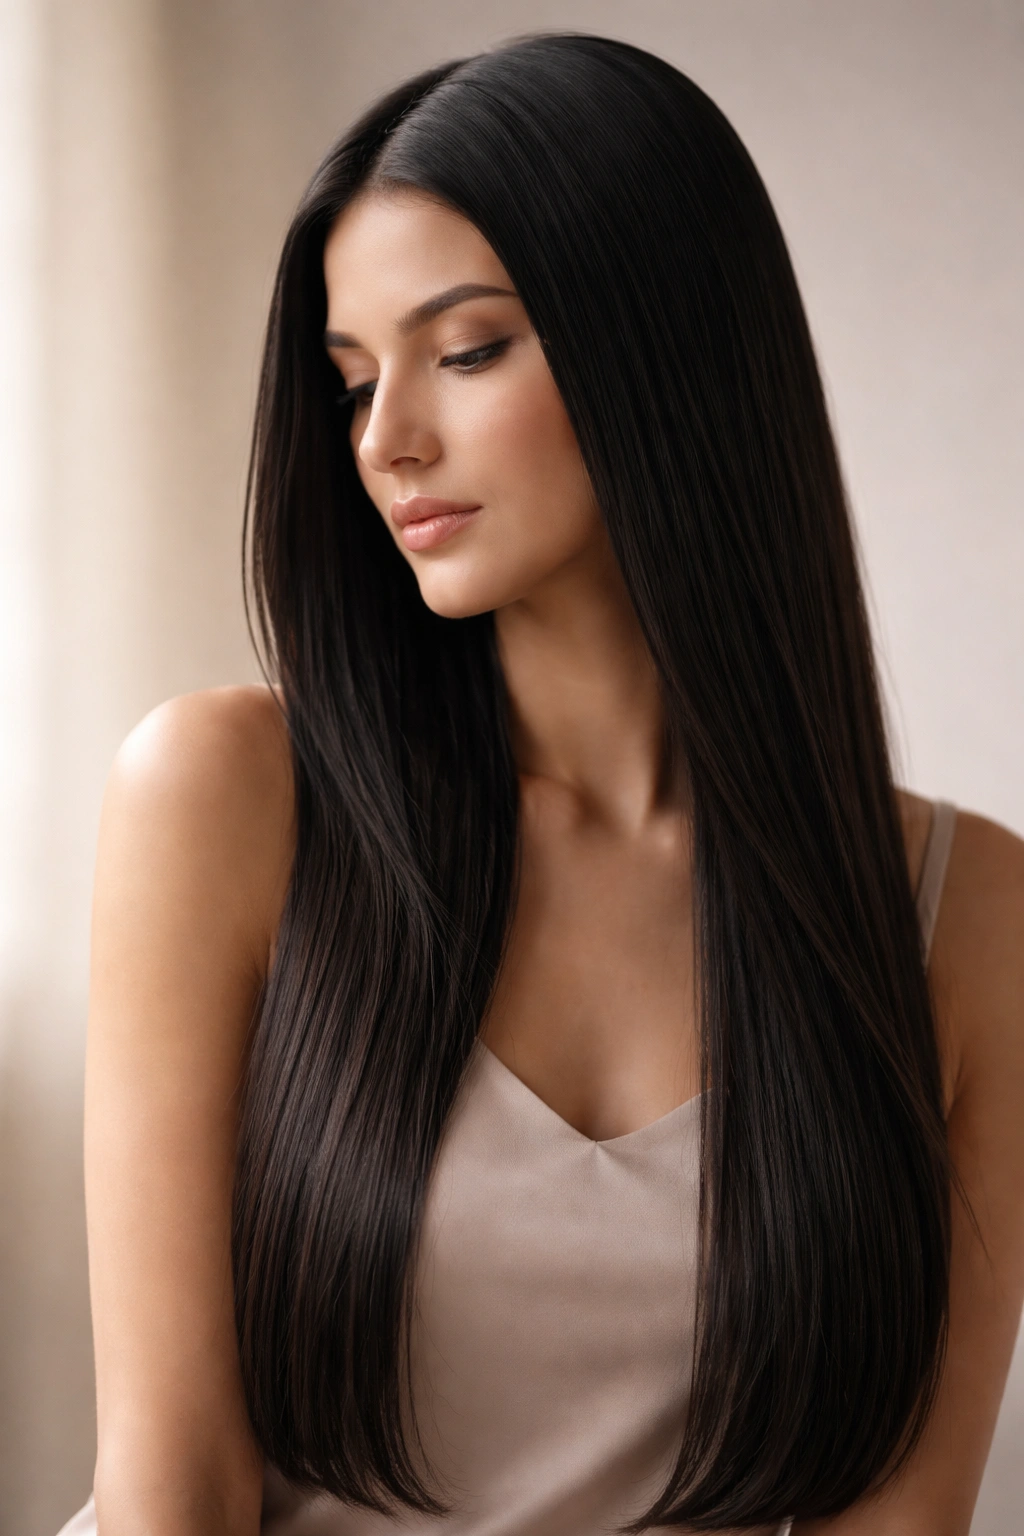
7. The Ruler-Straight Long Length
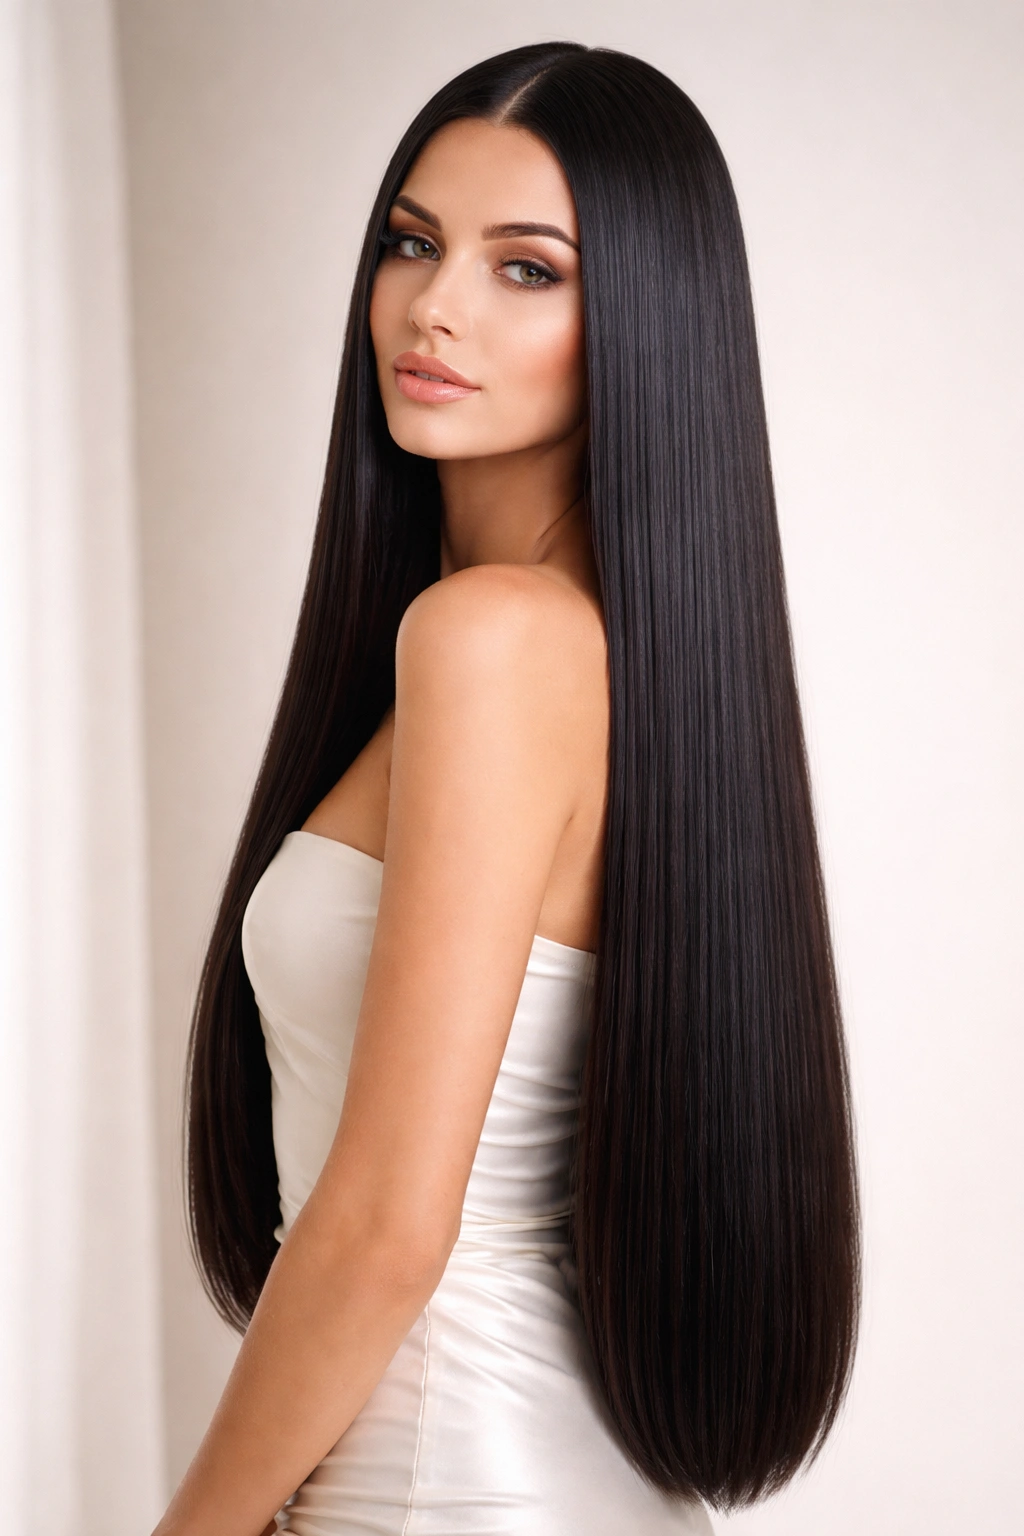
When hair is genuinely long and genuinely straight, it becomes a statement in itself. Long, sleek hair reads as polished, intentional, and effortlessly elevated—even though maintaining it is decidedly not effortless. This is the look of someone who has committed to hair health and maintenance, and that commitment shows.
The Appeal of Straight Length
There’s a reason long, straight hair appears in so much fashion and editorial photography. It creates a vertical line that elongates the entire body, it catches light beautifully, and it photographs with a luxury feel that shorter hair sometimes doesn’t. Very long straight hair also offers styling versatility—wear it down sleek, pull it into a high or low ponytail, create a side braid, or style it into an updo while maintaining that polished aesthetic.
Long, straight hair requires genuine health maintenance. Split ends become visible immediately on long straight hair (unlike on textured hair where they’re less noticeable), so regular trims are non-negotiable. The longer the hair, the more often you’re likely trimming—every 6-8 weeks at minimum.
Making Long Straight Hair Work
- Length: Typically waist-length or longer to create the full effect; anything shorter reads as medium length rather than genuinely long
- Density: Long, straight hair looks best on medium to thick hair; fine, thin hair can look sparse or stringy when very long
- The trim schedule: Every 6-8 weeks to maintain health and keep split ends minimal; this is the true maintenance cost of this look
- Styling products: A smoothing serum is essential; many people also use a heat-protectant spray before blow-drying
- Blow-dry method: Dry in sections from underneath upward to create smoothness and shine; a paddle brush works best
- Optional finishing: Many people use a flat iron on low heat for absolute shine and smoothness, though this is optional if you have naturally smooth hair
- Everyday styling: Honestly achievable in 15 minutes once you have a system, though the initial drying time may be longer than shorter styles
Real talk: Very long straight hair requires you to actually care about your hair’s health. Regular deep conditioning, occasional treatments, and consistent trims are the price of maintaining this look without it looking stringy or damaged.
8. The Minimalist Straight with Subtle Highlights
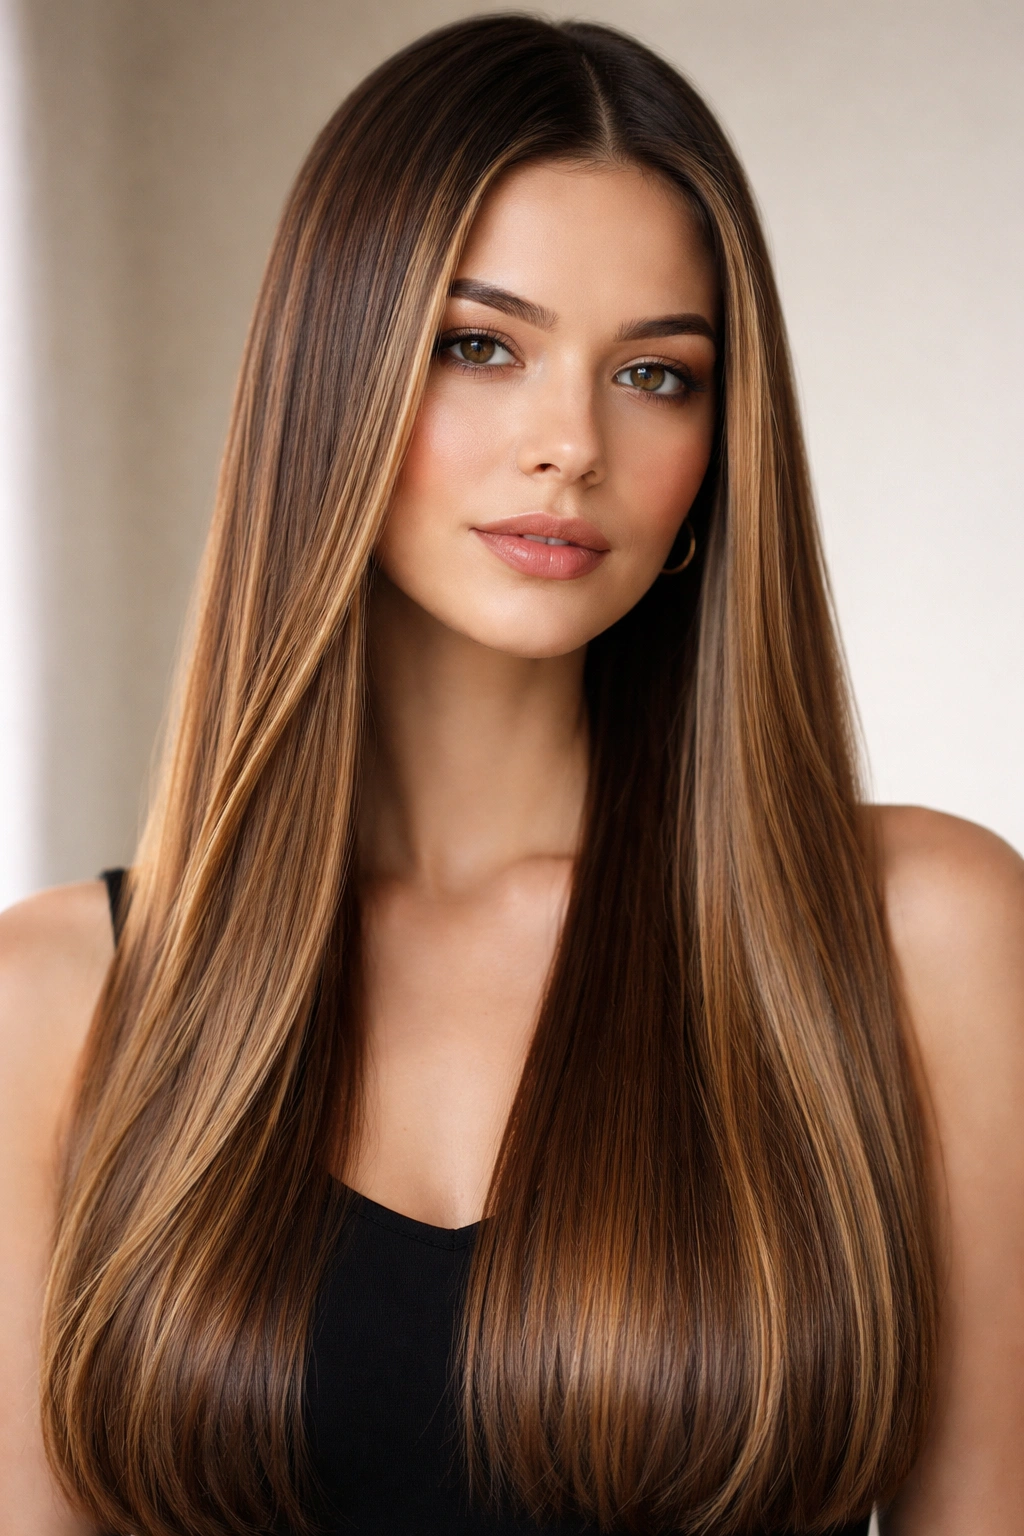
While many sleek straight looks rely on cut alone, this style introduces dimension through carefully placed highlights that create the illusion of movement without texture. Think of it as “implied dimension”—your hair is completely straight, but the color work creates visual interest that suggests depth and light-catching texture.
How Color Creates Dimension on Straight Hair
Strategic highlighting on straight hair works because light and shadow created by color can suggest movement and texture that doesn’t actually exist in the hair’s form. Rather than full, chunky highlights, this approach uses subtle, slightly darker lowlights near the roots and mid-tones throughout, with barely-there lighter pieces that catch light. The effect is sophisticated and modern, like your hair just happens to have natural dimension from sun exposure.
This look actually reads more effortless than pure solid-color straight hair, because color movement suggests you’re not trying too hard. It’s the visual equivalent of the “I woke up like this but I clearly didn’t” aesthetic.
Implementing Subtle Color Work
- Base color: Keep your natural color or choose something close to it; the contrast should be subtle, not dramatic
- Highlight placement: Finest highlights in the front-facing pieces around your face; denser placement throughout mid-lengths and ends
- Color range: Never more than 2-3 shades lighter than your base; the goal is subtle, not obvious
- Lowlights: Slightly deeper tones near the roots and scattered throughout create depth without appearing as separate “chunks” of color
- Maintenance: Touch-ups every 8-10 weeks, which is less frequent than heavier color work
- Styling: Same as solid-color straight hair—smoothing serum, blow-dry, optional flat iron
- The visual effect: Hair appears shinier, fuller, and more interesting without actually being textured or layered
Worth knowing: If you’ve never had highlights before, start subtle. You can always add more dimension later, but dialing back overly dramatic color work is much more difficult.
9. The Sleek Straight with Graphic Undercut
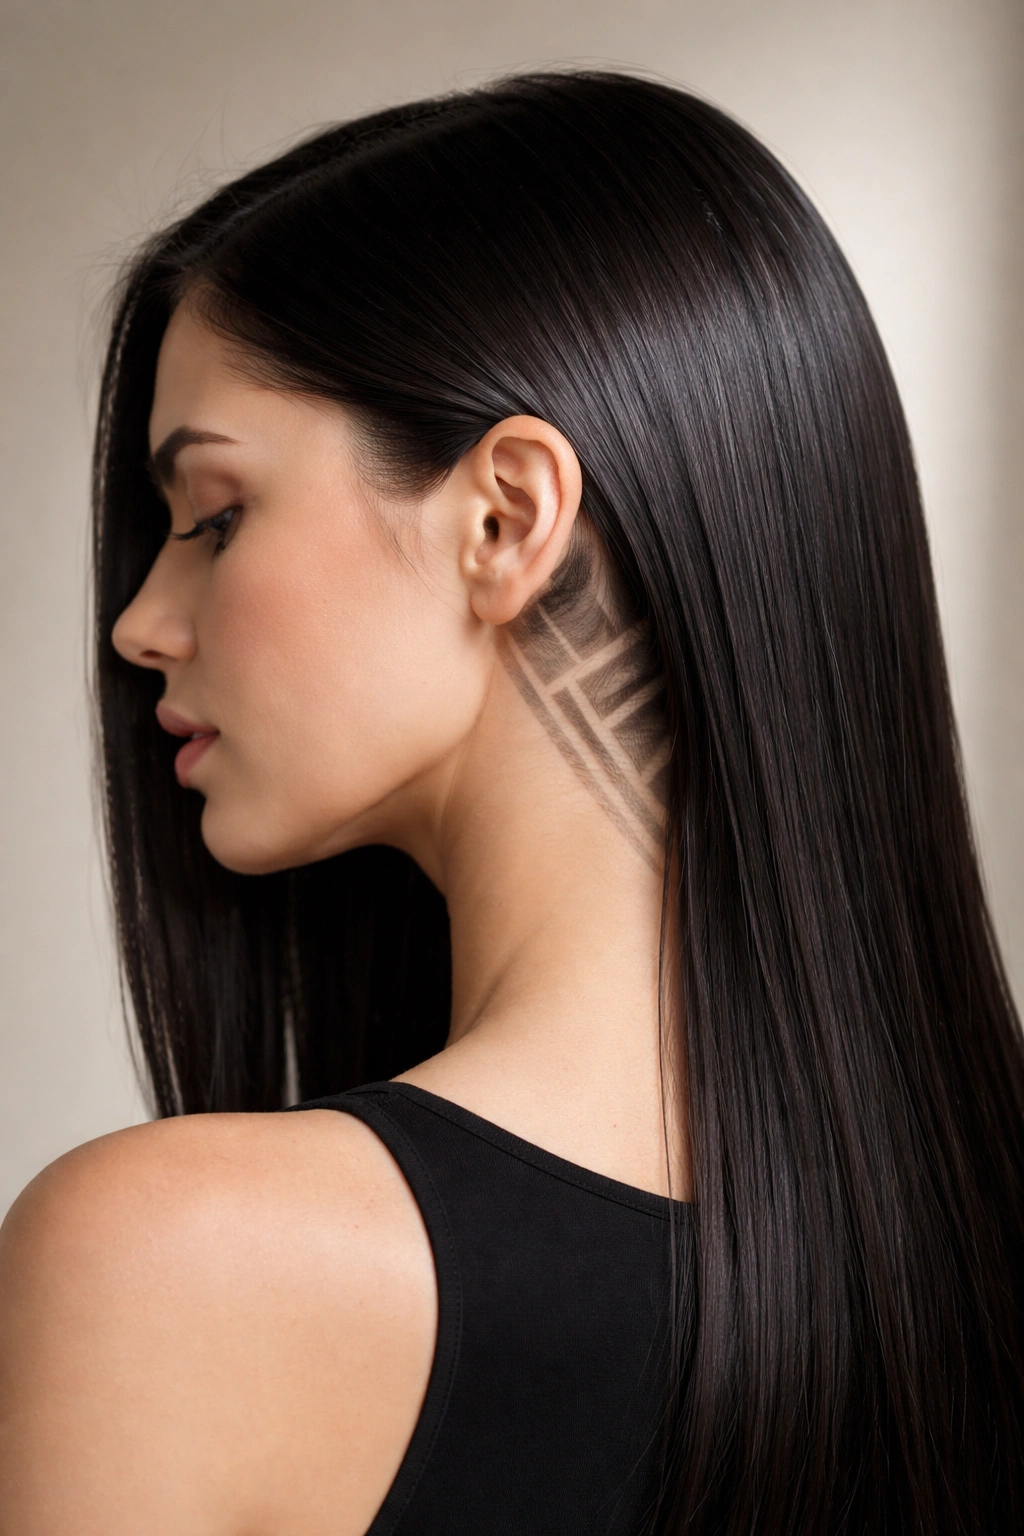
For those who want polish with an edge, a graphic undercut—shaved or very closely cropped sections hidden under the longer top layer—introduces an unexpected visual element. The undercut remains hidden until you move or style your hair differently, creating a secret detail that surprises and delights.
The Appeal of Hidden Texture
An undercut on straight hair works because it creates visual drama and personality while maintaining the sleek exterior. You get the polished presentation of perfectly straight hair from the front and sides, but the graphic element underneath speaks to someone with genuine personal style and confidence. This look is particularly striking when the undercut is covered but visible—like a section just behind your ear or at the nape of your neck.
The undercut also serves a practical purpose: it reduces bulk at the nape of the neck (where thick straight hair can feel heavy) and creates the illusion of more dimension when the longer top layer is styled over it.
The Practical Execution
- Undercut placement: Behind the ear, at the nape of the neck, or in a smaller section at the sides works best for everyday wearability
- Length of top layer: Must be long enough to cover the undercut when worn down; typically at least shoulder-length or longer
- Maintenance: The undercut requires touch-ups every 3-4 weeks as it grows in; plan for regular appointments
- Styling the reveal: The undercut becomes visible when you pull hair up or back, creating a styled element that’s completely different from your everyday look
- The top layer styling: Same as any other sleek straight style—smoothing products, blow-dry, optional straightening
- Best worn down: The graphic effect is lost if you’re always pulling hair back; this look works best for someone who wears it down regularly
Quick facts:
- Creates maximum visual impact for minimal daily styling effort
- Offers versatility (sleek professional by day, graphic edge by night, depending on how you style)
- Requires more frequent salon visits than most straight-hair styles
- Best suited to faces with enough width to handle the graphic element (less flattering on very narrow or angular faces)
10. The Ultra-Glossy Straight with Volume

This final look focuses on creating the illusion of volume and movement through shine and styling technique rather than through cut or texture. The hair is ruler-straight but appears full and dimensional because of how light reflects off the surface and how the style is blow-dried for texture at the roots.
The Difference That Shine Makes
Maximum shine and light reflection make even fine, straight hair appear fuller and more substantial. This is partly optical (reflective surfaces appear larger) and partly psychological (shine reads as health and intentional styling). Creating this effect requires excellent hair health, high-quality smoothing products, and a blow-dry technique that prioritizes creating volume at the roots while maintaining smoothness through the lengths.
This look works on any hair length or density, but particularly transforms fine or thin hair, making it appear significantly fuller than it actually is. It also reads as contemporary and editorial—the kind of shine you see on runway models and in high-fashion photography.
Creating Gloss and Volume
- Hair health foundation: Deep conditioning weekly; this look only works on genuinely healthy, shiny hair
- Product choice: Use a premium smoothing serum or lightweight hair oil that creates genuine shine without weighing hair down
- Blow-dry technique: Dry roots upward and outward for volume, then smooth the lengths and ends downward; this creates a shape with textured roots and sleek lengths
- Application method: Apply smoothing products to damp hair before blow-drying, not after (heat helps distribute product evenly)
- Finishing shine: A tiny bit more smoothing serum on the lengths and ends after blow-drying creates that extra polish
- Styling time: 15-20 minutes, depending on hair length
- Longevity: The look holds for 2-3 days before needing a refresh blow-dry
Insider note: This style is particularly flattering in natural light, where the shine is most visible. If you spend most of your time under fluorescent lighting, this look may not feel as impactful as it does in the photos that inspired you.
Final Thoughts
Choosing a sleek straight look ultimately comes down to three things: your face shape and personal style, your hair’s density and texture, and your genuine willingness to maintain it. Every single one of these ten looks is achievable and beautiful, but none of them require zero effort. Sleek straight hair—real sleek straight hair—is a choice you renew every time you blow-dry, every time you apply product, and every time you commit to regular trims.
The good news? Once you settle into a routine, maintaining a sleek straight look becomes genuinely easier than managing textured or curly hair. You’re not fighting your hair’s natural tendencies; you’re working with them and amplifying them. The key is finding the specific cut and styling approach that aligns with your lifestyle, your hair’s actual texture and density, and the kind of energy you want to project. Start with an honest conversation with your stylist about maintenance commitment, and choose the look that feels like the best version of yourself—not the version you see in someone else’s Instagram feed.