Prom night demands a hairstyle that makes you feel confident, beautiful, and absolutely camera-ready—and if you have straight hair, you’ve got a blank canvas that works beautifully with virtually any look. Straight hair holds intricate braids without frizz, moves gracefully when styled sleek, and accepts waves and texture exactly the way you want them. The challenge isn’t whether your hair can pull off a prom hairstyle; it’s choosing between the dozens of stunning options available to you.
Your hair is an incredible asset for prom. Unlike naturally curly or textured hair that requires different styling techniques, straight hair responds immediately to heat tools, keeps updos tight and polished, and photographs beautifully under the lighting of a dance floor or photo backdrop. Whether you’re going for elegance, romance, edge, or timeless glamour, straight hair is your secret weapon.
What follows are fifteen prom hairstyles specifically designed to showcase what straight hair does best—clean lines, dramatic movement, and styles that stay put all night. Each one works with your natural texture, looks sophisticated in photos, and won’t fall apart between the ceremony, dinner, and dancing. You’ll find sleek updos that exude maturity, flowing styles with texture that feel romantic, and bold statement looks that say you’re ready to own the room. Pick the one that matches your dress, your personality, and the vibe you want to project when you walk into prom.
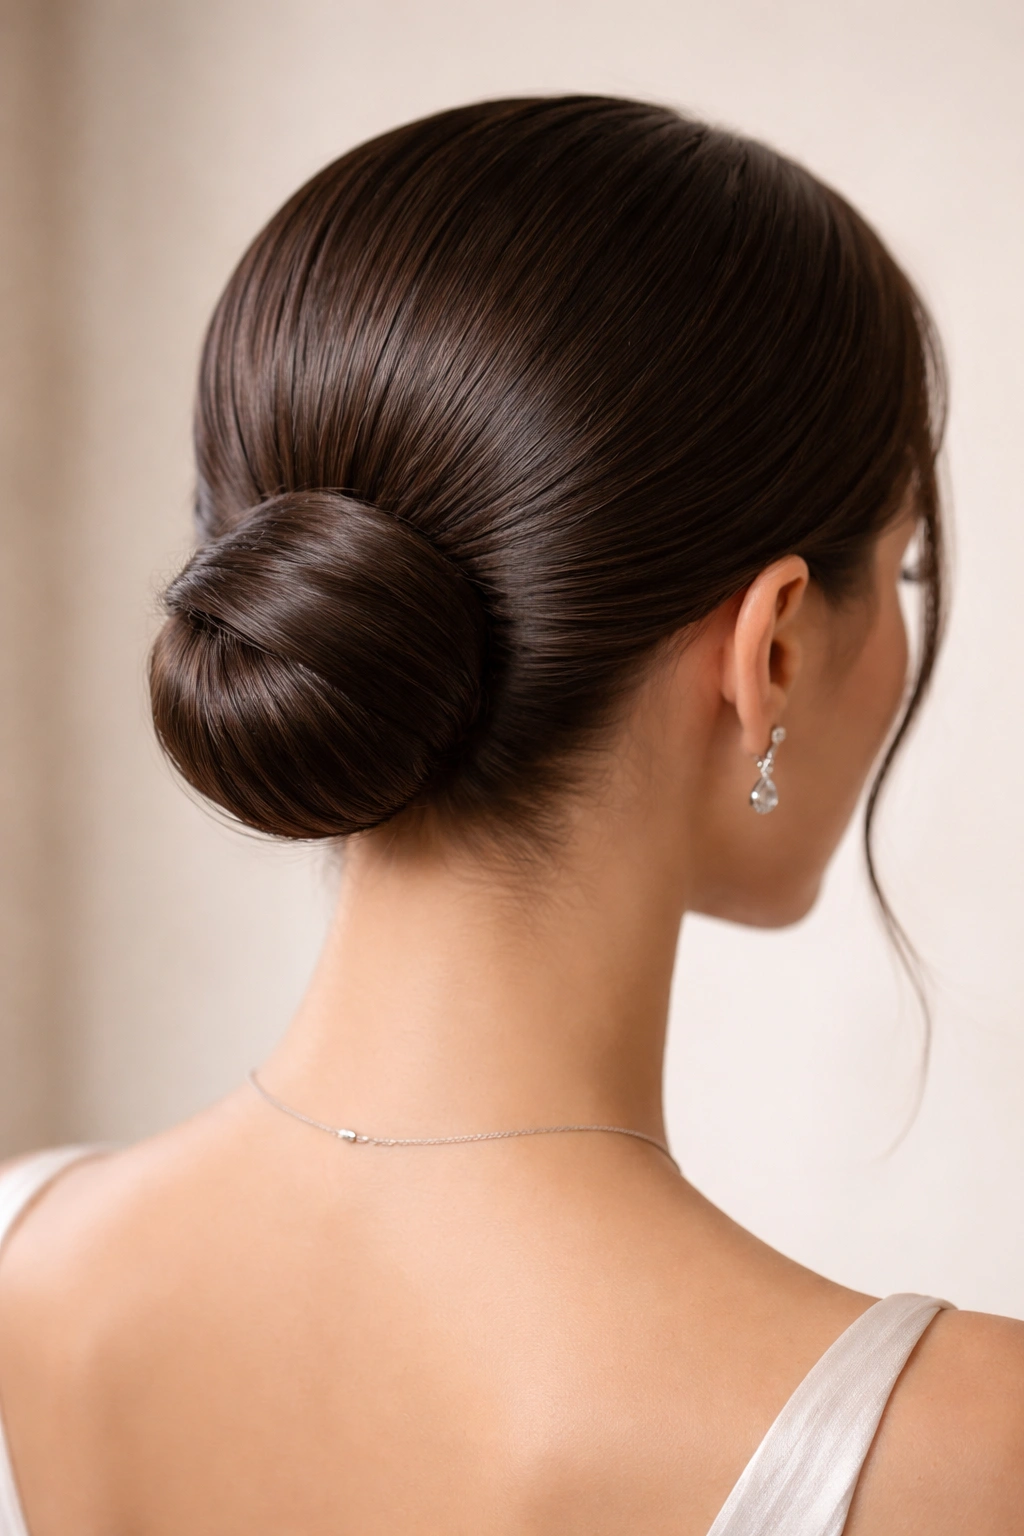
1. Sleek Low Bun with Hidden Bobby Pins
A polished low bun is the ultimate prom power move—it’s elegant enough for a black-tie event, keeps your hair completely out of your way for dancing, and looks stunning in every single photo angle. This isn’t just any bun; it’s a tight, smooth, intentional statement that shows you’ve thought about every detail of your look.
Why It’s Perfect for Prom
A low bun elongates your neck, shows off your shoulders and collarbone, and photographs beautifully from the front and side. If you’re wearing a dress with an open back or intricate shoulder detailing, this hairstyle lets your dress shine while keeping the focus on your face. The tightness also means you can move, dance, and hug friends without a single strand falling loose—it’s the most reliable prom hairstyle for longevity.
How to Create This Look
- Brush your hair back smoothly with a fine-tooth comb, using a smoothing serum or anti-frizz spray to eliminate flyaways
- Apply a light hairspray while brushing to catch any stray pieces
- Create a low ponytail at the base of your neck, securing it tightly with an elastic
- Twist the ponytail loosely and wrap it around the base, pinning each section with bobby pins
- Smooth down any bumps with the comb and finish with flexible hold hairspray
- Pro tip: Use 4-6 bobby pins of varying lengths for a secure hold; cross them underneath for added stability
Products You’ll Need
- Smoothing serum or cream
- Fine-tooth comb
- Clear elastics (use two stacked for extra security)
- Bobby pins in your hair color
- Flexible hold hairspray (not maximum hold, which looks stiff)
2. Half-Up Half-Down with Voluminous Crown
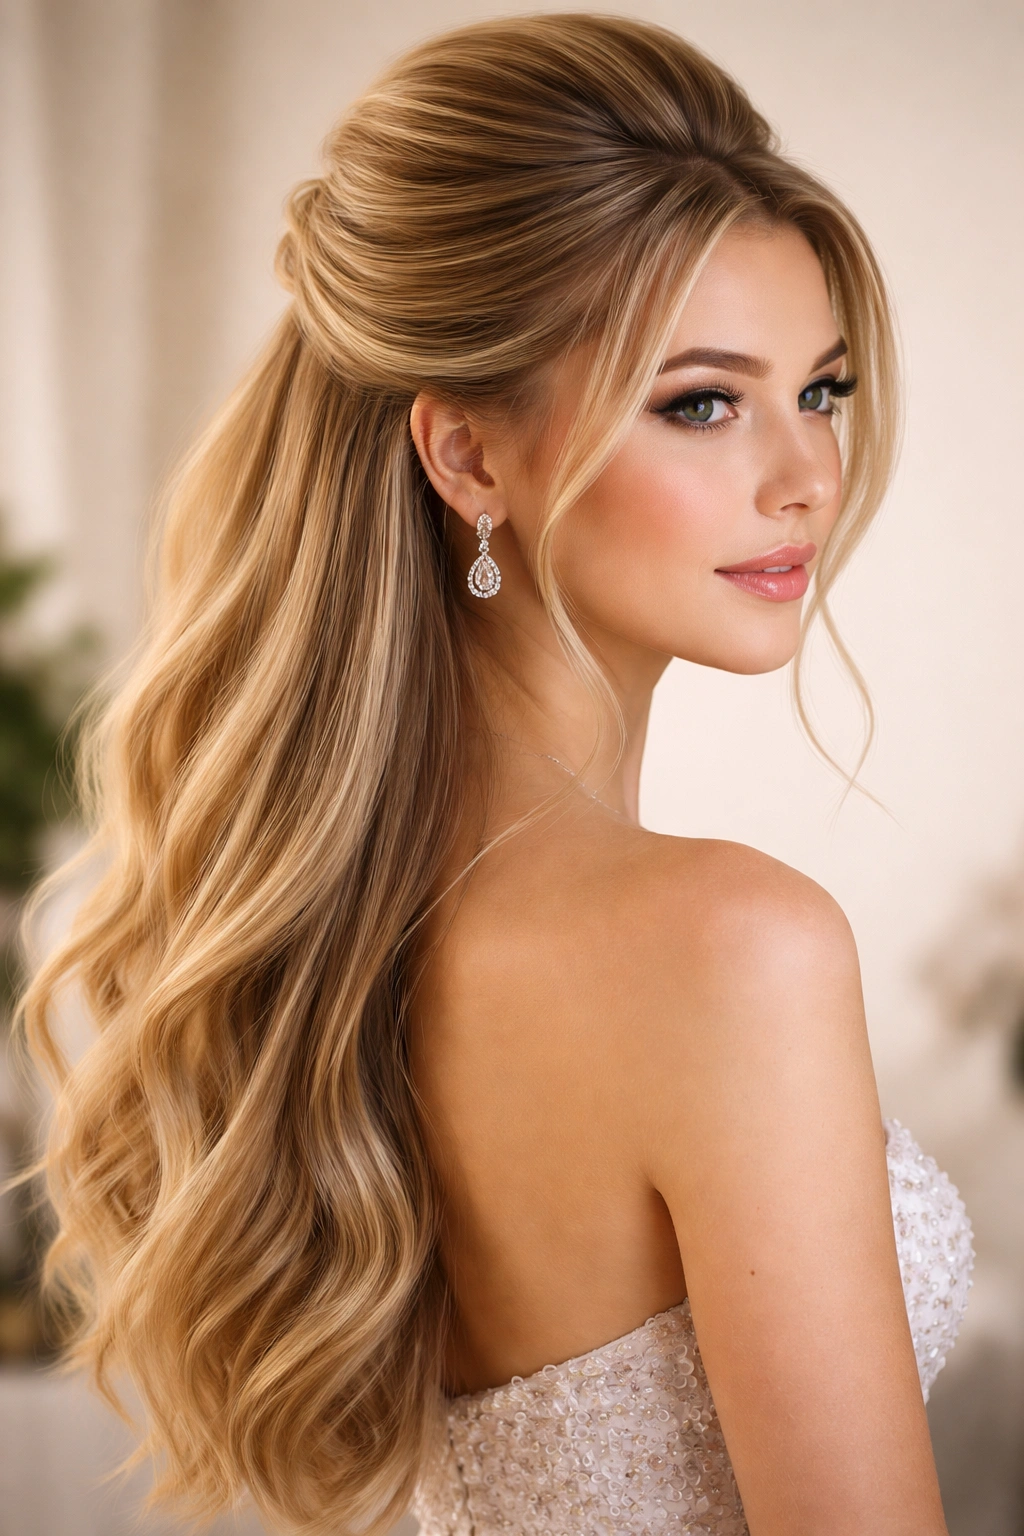
This is the hairstyle that says you want the best of both worlds—the freedom of down hair with the polished structure of an updo. It’s romantic without being overdone, sophisticated without feeling severe, and absolutely flattering on every face shape.
Why It Works So Well for Prom
Half-up styles show off length and movement while keeping hair off your face, which means your makeup shows beautifully and your face feels open and confident. The volume at the crown draws attention upward and creates a flattering frame, while the loose lower section moves when you dance. This look works equally well with a casual prom dress or a formal gown, and it’s forgiving enough that it still looks great if it loosens slightly throughout the night.
Building the Voluminous Crown
- Blow-dry your hair with a round brush, concentrating heat at the roots to build natural volume
- Curl the bottom half of your hair with a 1.5-inch curling iron, curling away from your face
- Section the top portion horizontally from temple to temple
- Gently tease the roots of this top section using a fine-tooth teasing brush
- Smooth the teased section slightly with your comb
- Gather the top section into a half-up ponytail and secure with a clear elastic
- Release a few face-framing pieces and curl them separately
- Finish with hairspray that holds without feeling crunchy
Styling Notes
- Use a smoothing serum on the ends only; avoid the crown area so you maintain texture for teasing
- Consider adding a decorative clip or thin barrette at the half-up elastic for extra elegance
- Keep one or two small curls loose around your face for a softer, more romantic feel
3. Deep Side Part with Cascading Waves
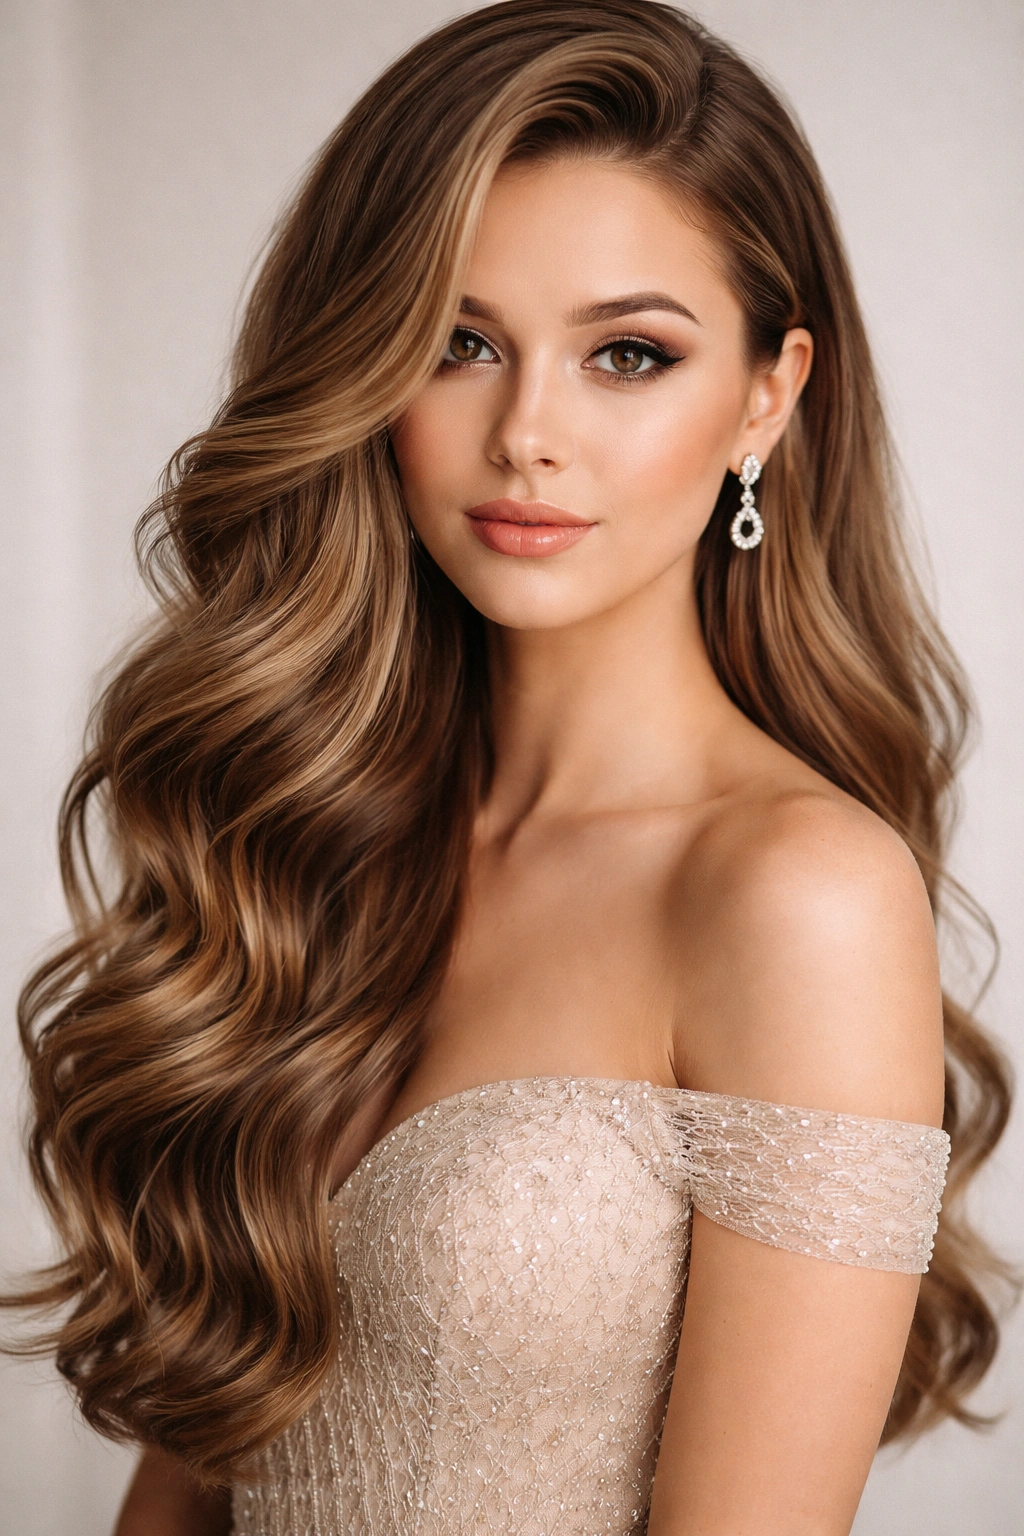
Sometimes the simplest styles are the most striking. A deep side part combined with loose, intentional waves is timelessly elegant and works with any dress style imaginable. This hairstyle feels effortless in the best possible way—like you naturally woke up looking flawless.
Why This Look Is Prom Gold
Waves flowing over one shoulder are inherently flattering and move beautifully whether you’re walking, sitting, or dancing. The deep side part creates an asymmetrical line that’s more interesting visually than a center part, and it elongates the face and flatters most face shapes. This hairstyle also photographs incredibly well—the movement and texture look dimensional in photos, and the side part creates lovely shadows and definition.
Creating the Perfect Waves
- Apply a heat protectant spray to damp hair
- Blow-dry your hair straight with a paddle brush, directing the roots upward
- Create a deep side part by combing hair from above your eyebrow through to behind your ear
- Section your hair into four to six sections, each about 2 inches wide
- Curl each section with a 1.5-inch barrel curling iron, wrapping the hair around the barrel away from your face
- Hold each curl for 8-10 seconds before releasing
- Once all curls are complete, gently run your fingers through them to break them up
- Finish with a flexible hold hairspray
Accessory Options
- Add a delicate hairpin or crystal clip near the side part for subtle sparkle
- Consider a metallic bobby pin worn visibly near the part for a modern touch
- If your dress is minimalist, a decorative comb tucked into the waves adds elegance
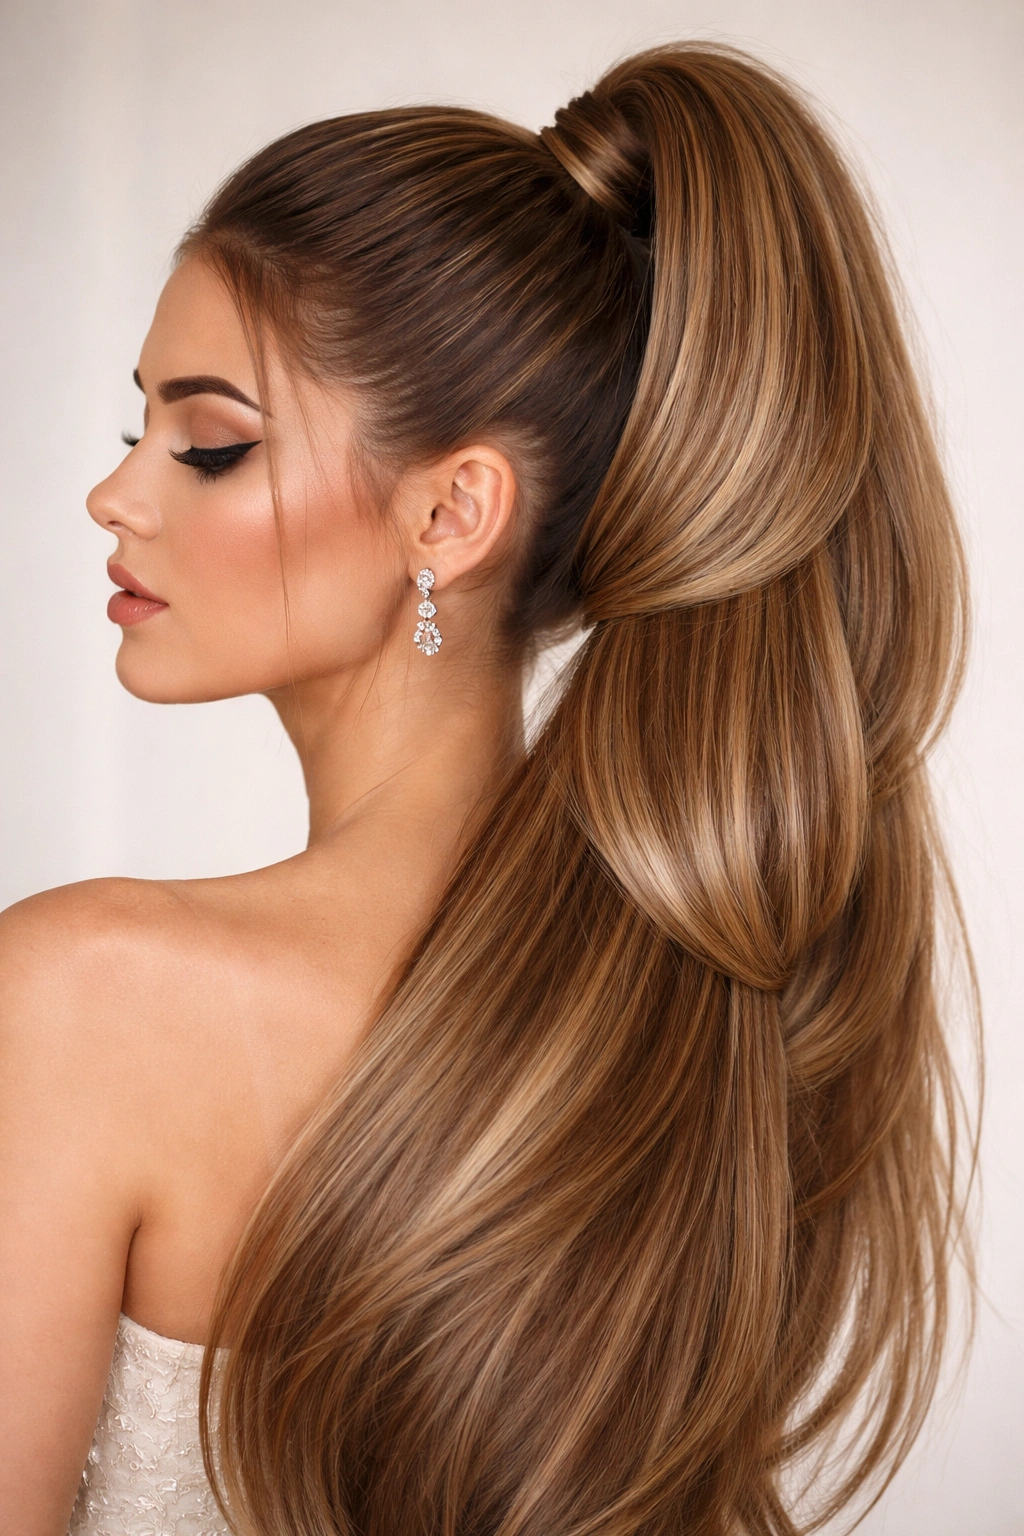
4. Sleek High Ponytail with a Twist
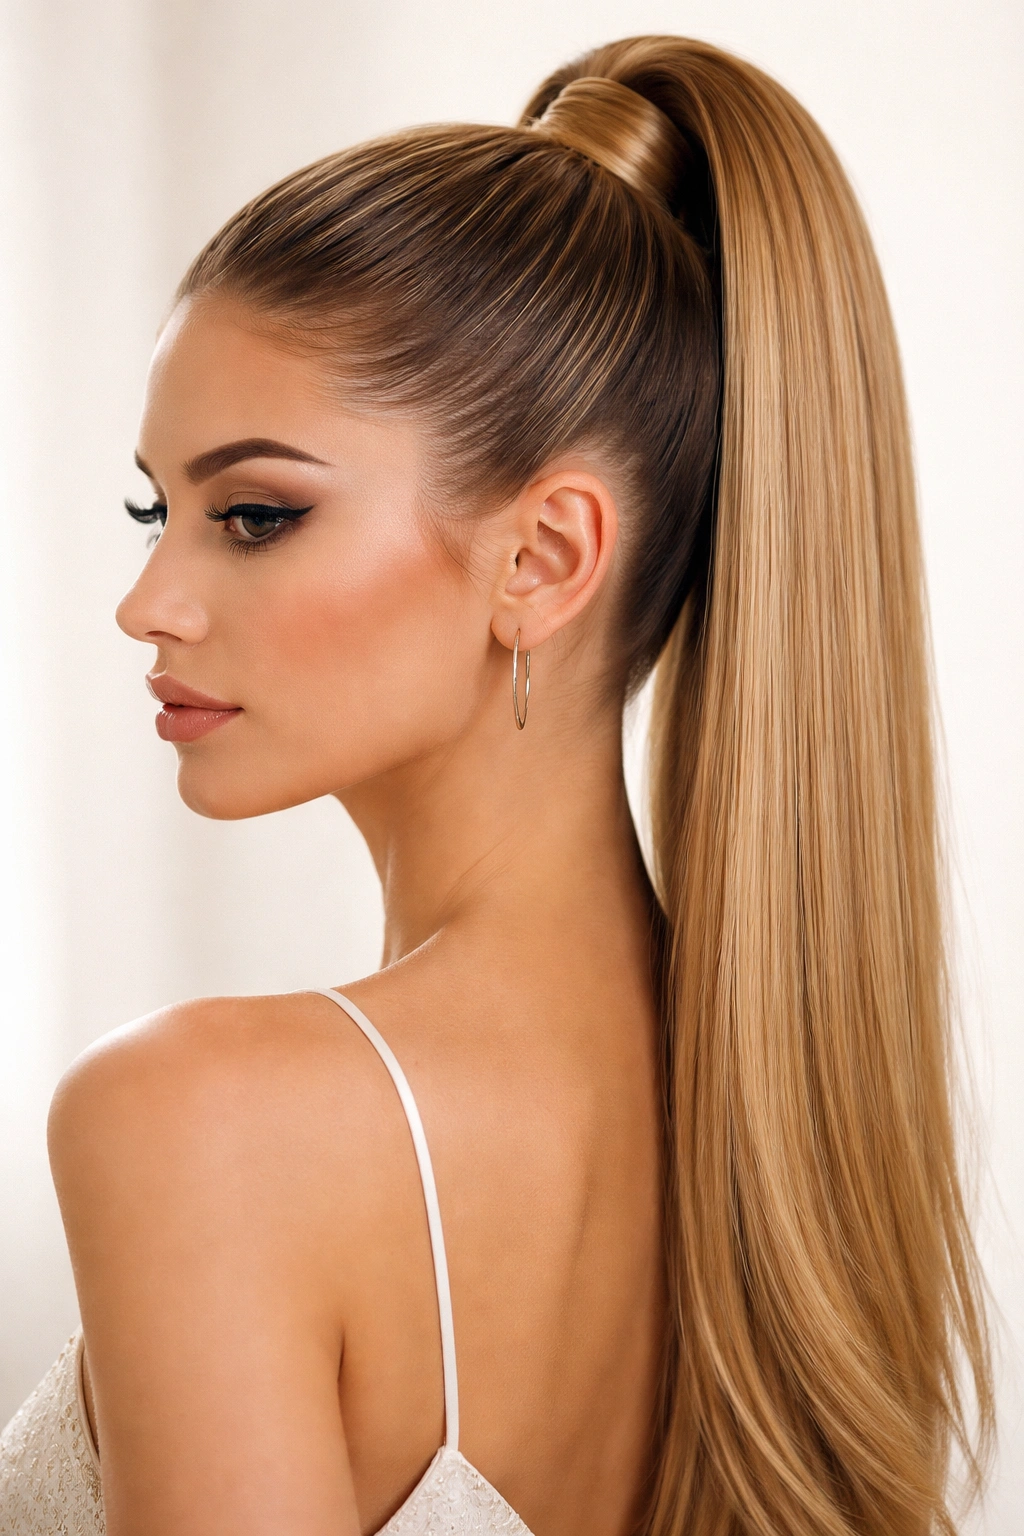
A high ponytail is bold, confident, and undeniably modern—it’s the hairstyle that says you’re ready to dance, laugh, and have the time of your life. When executed sleekly, it’s also surprisingly sophisticated and works with both casual and formal prom looks.
Why High Ponytails Rule for Prom
This hairstyle keeps hair completely off your face, shoulders, and neck, which means your full face is visible in photos and your makeup is the star. A high ponytail also photographs well from multiple angles, moves dramatically when you dance, and feels weightless compared to long hair down. It reads as intentional and polished rather than casual, especially when you make the ponytail sleek rather than messy.
Achieving the Sleek High Ponytail
- Apply smoothing serum to dry hair and brush thoroughly with a paddle brush
- Use a fine-tooth comb to gather hair into a very high ponytail at the crown
- Hold the ponytail taut with one hand while using the comb to smooth any bumps
- Secure with a thick elastic or two thin elastics stacked together for security
- Wrap a thin section of hair around the elastic base to hide it
- Secure the wrap with a bobby pin tucked underneath where it won’t show
- Smooth the wrap section with hairspray
- Finish the ponytail ends by curling them slightly outward with a curling iron or running your straightener down the length in a twist
Elevating the Look
- Use a pearl or metallic elastic that coordinates with your dress
- Add a delicate chain or beaded hair accessory wrapped around the elastic base
- Curl the ponytail ends into loose waves or leave them straight for maximum sleekness
- Wear a statement earring or hair accessory near the ponytail base to draw attention upward
5. Textured Twisted Updo with Soft Tendrils
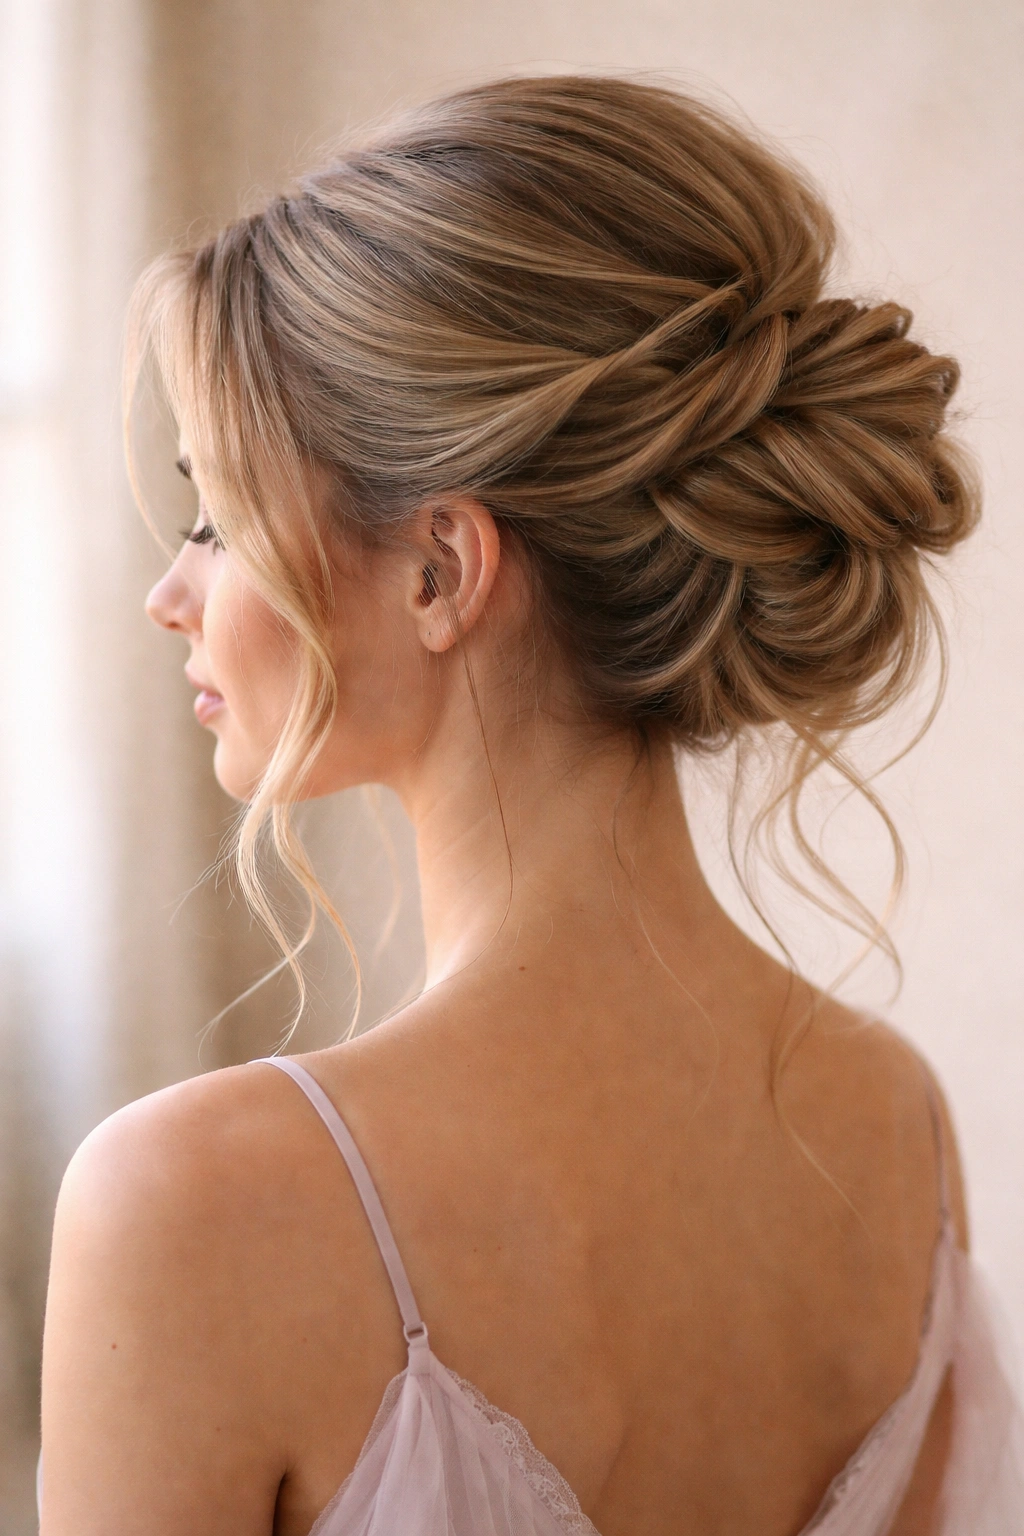
This is the hairstyle for when you want something that feels special and intricate without looking overdone. The combination of texture and carefully placed loose pieces creates a look that’s effortlessly romantic and photography-friendly.
The Appeal of Twisted Updos
Twisted updos are inherently more interesting visually than smooth buns—the twisted sections catch light differently and create texture that photographs beautifully. By adding a few loose tendrils around the face, you soften what could otherwise feel too formal, creating a balance between polished and romantic. This hairstyle is also more forgiving than a tight bun if a section works loose; it actually enhances the look.
Building the Textured Updo
- Blow-dry your hair with a round brush to create volume at the roots
- Apply a texturizing spray or dry shampoo to add grip to your strands
- Create a center or side part based on what flatters your face
- Take two sections from your front hairline and twist them loosely, bringing them back toward your low bun area
- Pin each twisted section with bobby pins, allowing the twists to sit slightly above where you’ll place your bun
- Gather the remaining hair into a low ponytail
- Twist the ponytail loosely and wrap it around the base, securing with bobby pins
- Pull out two small tendrils from near your face and curl them with a curling iron
- Use bobby pins to secure any sections that feel loose
- Finish with a flexible hold hairspray
Styling Variations
- Add delicate baby’s breath or small flowers between the twists for a romantic garden-party vibe
- Use clear bobby pins to keep everything secure while staying invisible
- Curl the tendrils more dramatically for a softer, more romantic look
- Keep the tendrils straight if you prefer a modern, minimalist aesthetic
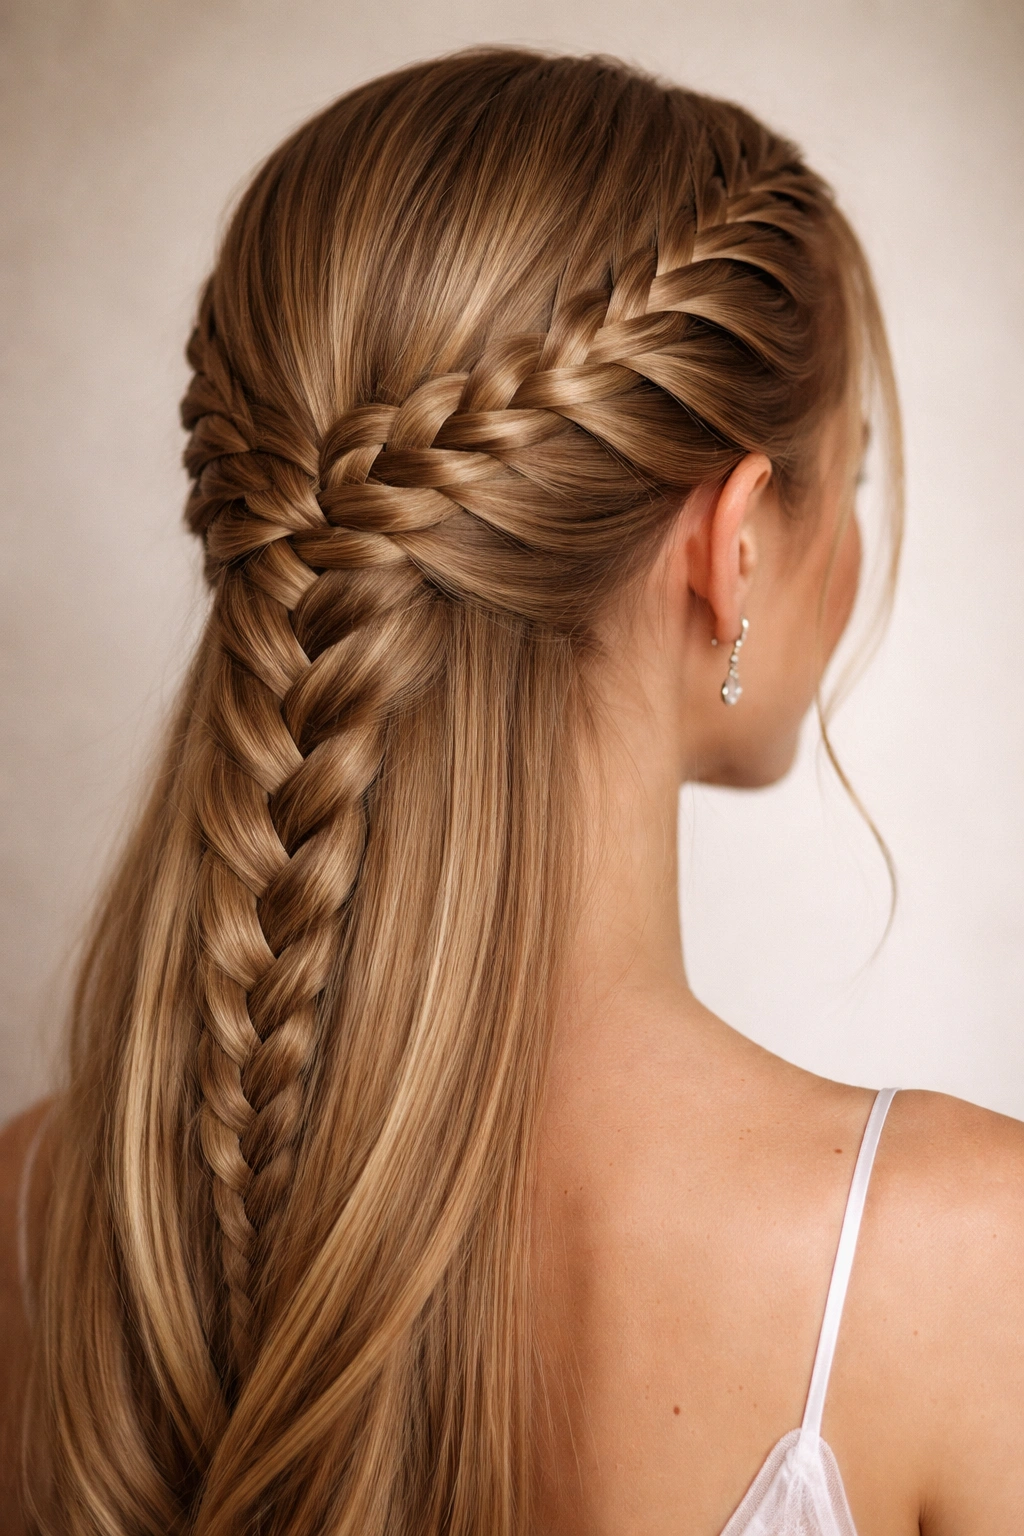
6. Soft Romantic Waves with Lace-Braid Accent
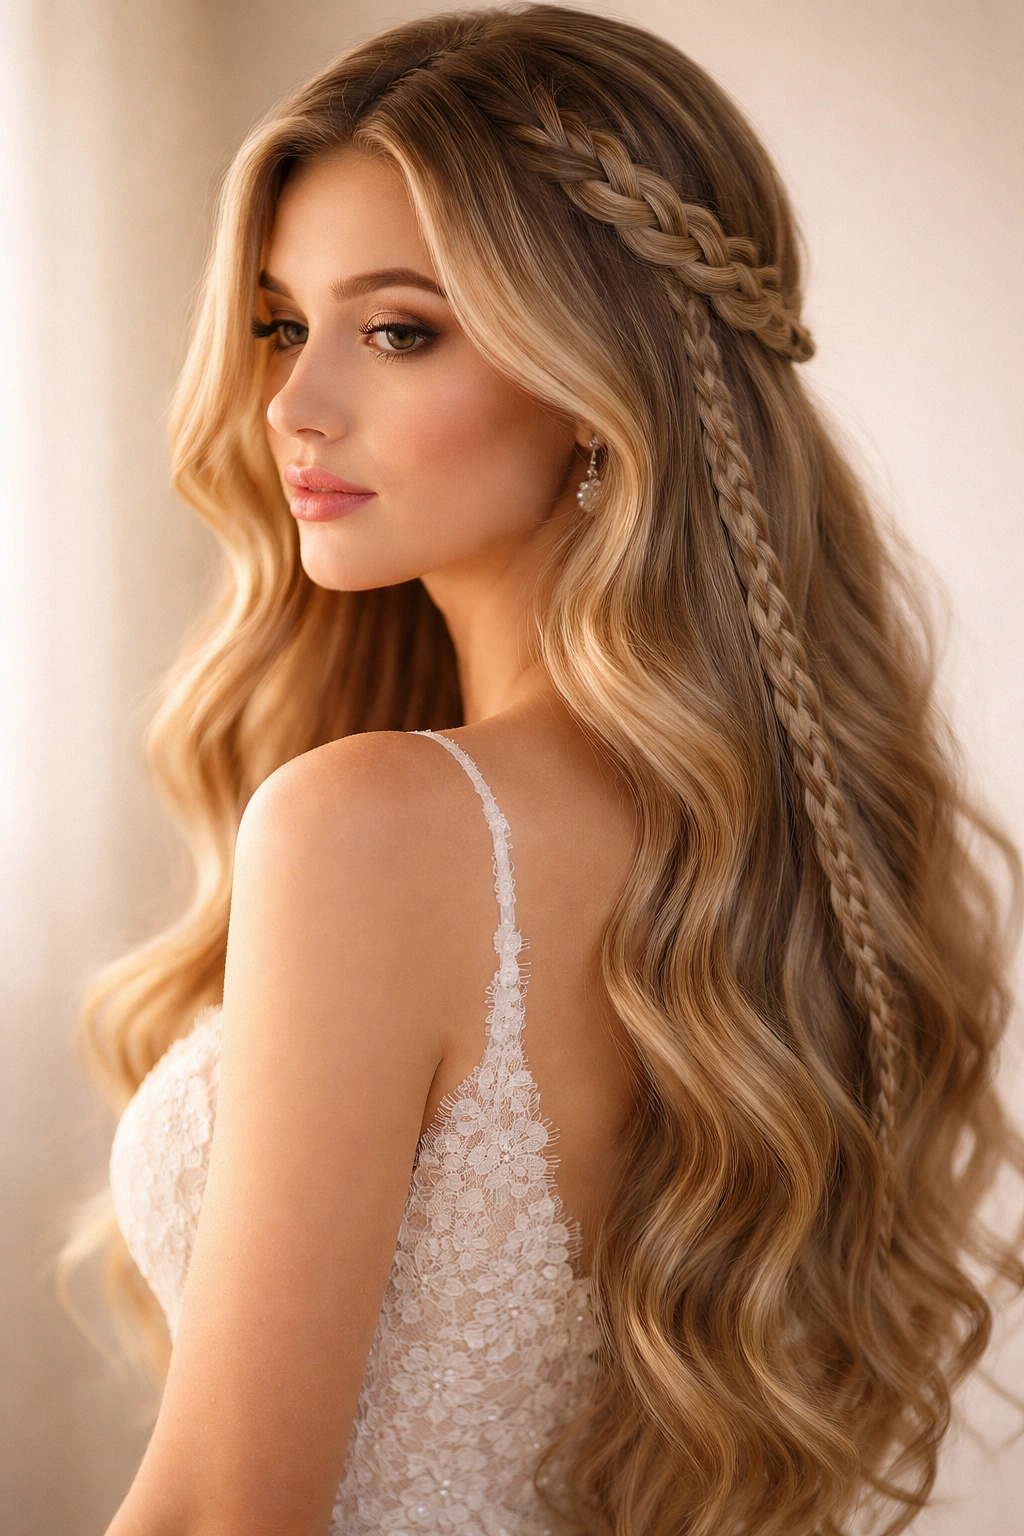
Sometimes you want all your hair down, flowing beautifully with gentle movement, and a lace braid running through the length adds just enough structure and sophistication to make it feel intentional rather than basic.
Why Waves Plus Braids Equal Prom Perfection
Waves alone can sometimes feel like “everyday hair,” but add a delicate braid woven through the waves and suddenly you have a hairstyle that feels special and thoughtfully styled. The braid provides a visual anchor and detail that photographs beautifully, while the waves maintain the romantic, flowing movement that makes down hair so pretty for prom. This combination works with virtually any dress, from casual to formal.
Creating Waves That Last All Night
- Apply heat protectant spray to slightly damp hair
- Blow-dry completely with a paddle brush for a smooth foundation
- Section your hair into four to six sections
- Curl each section with a 1.5-inch curling iron, alternating directions (away from face, toward face, away, toward, etc.)
- Let curls cool completely on the iron before releasing—cooling sets the wave
- Once all curls are done, gently separate them with your fingers to create softer, looser waves
- Apply a flexible hold hairspray
Adding the Lace Braid
- Take a thin section of hair from one side of your head near the temple
- Create a loose, three-strand braid, incorporating only a tiny amount of hair with each weave
- Braid down to about ear level, then secure the braid with a small clear elastic
- Tuck the end of the braid underneath the waves to hide the elastic
- Alternatively, create two delicate braids on each side and let them blend into the waves
Product Recommendations
- Lightweight curl cream for definition without crunch
- Flexible hold hairspray that moves with your hair
- Heat protectant spray for all heated styling tools
- Texturizing spray for grip if your hair is very straight and slippery
7. Geometric Braided Style with Sharp Lines
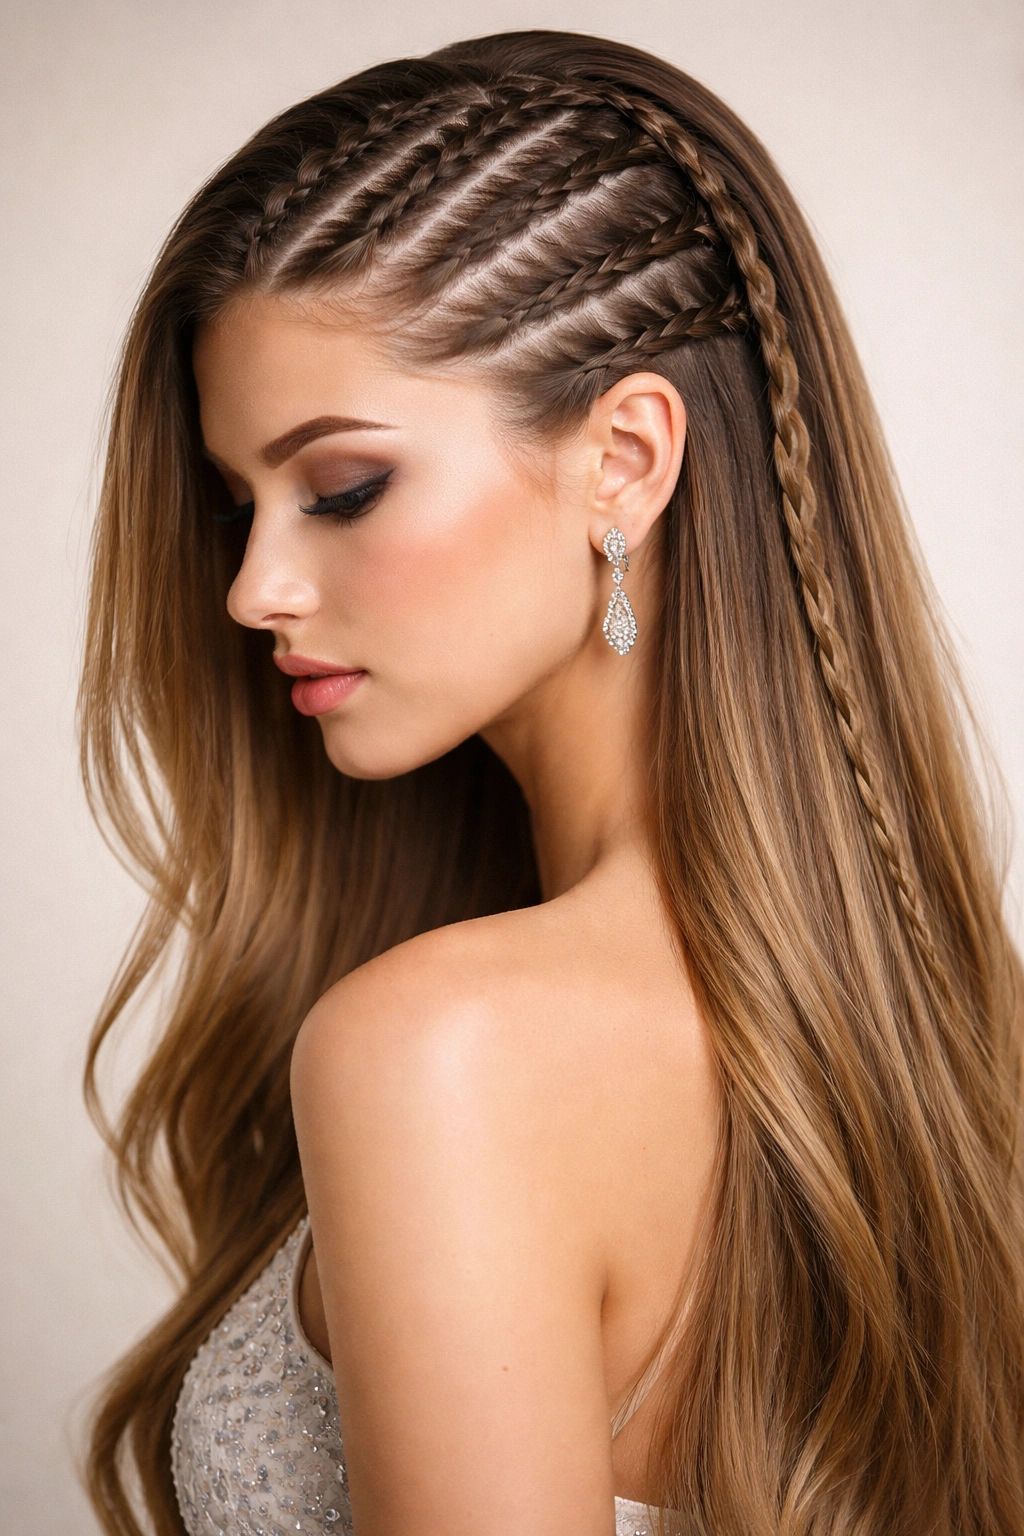
For anyone who wants to make a fashion statement with their hair, a geometric braid creates sharp, interesting lines that feel modern, architectural, and incredibly cool. This is the hairstyle that tells people you’re not following the traditional prom playbook.
The Art of Geometric Braiding
Geometric braids differ from traditional braids because they incorporate sharp angles and unexpected turns rather than flowing straight down the back of the head. You might create a Dutch braid that zigzags across the head, or two parallel braids that create visual interest through symmetry and line. This requires more skill than a basic braid, so it’s worth practicing a few times before prom night.
Executing a Geometric Dutch Braid
- Create a deep side part
- Begin a Dutch braid (braiding under rather than over) on one side of the head
- As you braid, gradually move the starting point backward, creating a diagonal line
- Incorporate hair as you move, keeping the braid tight and defined
- End the braid at the opposite side of your head (near the ear on the opposite side from where you started)
- Secure the braid end with a tiny elastic or bobby pins
- Leave the rest of the hair down and wavy for contrast
- Finish with strong-hold hairspray to keep the braid structure sharp
Styling the Remaining Hair
- The portion of hair not incorporated into the braid works beautifully as loose waves
- Curl this section with a 1.5-inch barrel for soft movement
- Let the curved waves provide softness that balances the geometric sharpness of the braid
- Add a metallic clip or decorative pin where the braid ends for emphasis
8. Slicked-Back Look with Statement Hair Accessory
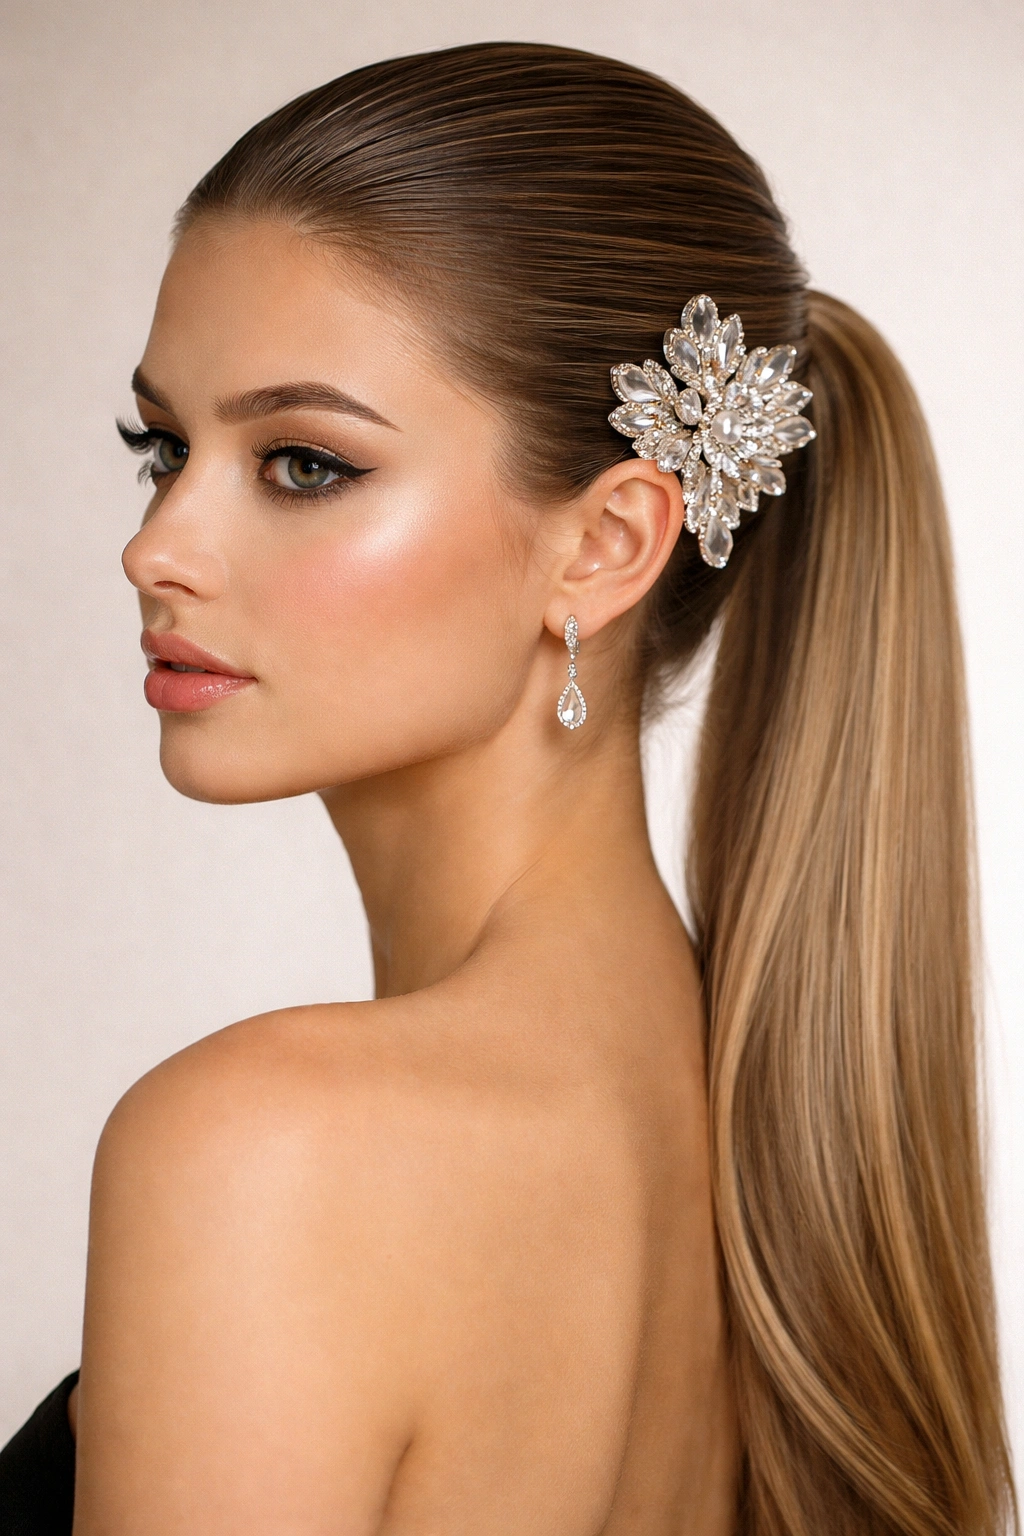
Sometimes boldness is the most elegant choice. A completely slicked-back, polished style with hair pulled tight to the head shows tremendous confidence and makes room for a striking hair accessory that becomes the focal point of your entire look.
Why Slicked-Back Works for Prom
This hairstyle completely changes your face shape and shows off your bone structure, cheekbones, and jawline in a way that longer hair doesn’t. It’s also incredibly elegant in a way that feels high-fashion—think runway shows and awards ceremonies. Slicked-back styles photograph beautifully and feel simultaneously bold and sophisticated.
Creating the Perfect Slicked-Back Base
- Begin with clean, slightly damp hair
- Apply a generous amount of gel or smoothing cream
- Use a fine-tooth comb to brush hair straight back from your face
- Direct the hair slightly to one side or straight back, depending on your face shape
- Smooth down any flyaways with the comb and additional gel
- Secure everything into a low ponytail at the nape of your neck
- Alternatively, slick the hair back and secure it into a tight, low bun
Choosing Your Statement Accessory
- A jeweled clip or large metallic barrette becomes the star of the show
- Consider a decorative comb studded with crystals or pearls
- A silk bow or ribbon woven through the ponytail adds romance to the edginess
- A delicate chain draped across the crown of the slicked-back hair adds glamour
- Pearl pins placed strategically create a sophisticated, almost royal look
9. Middle-Part Ribbon Braid with Flowing Hair
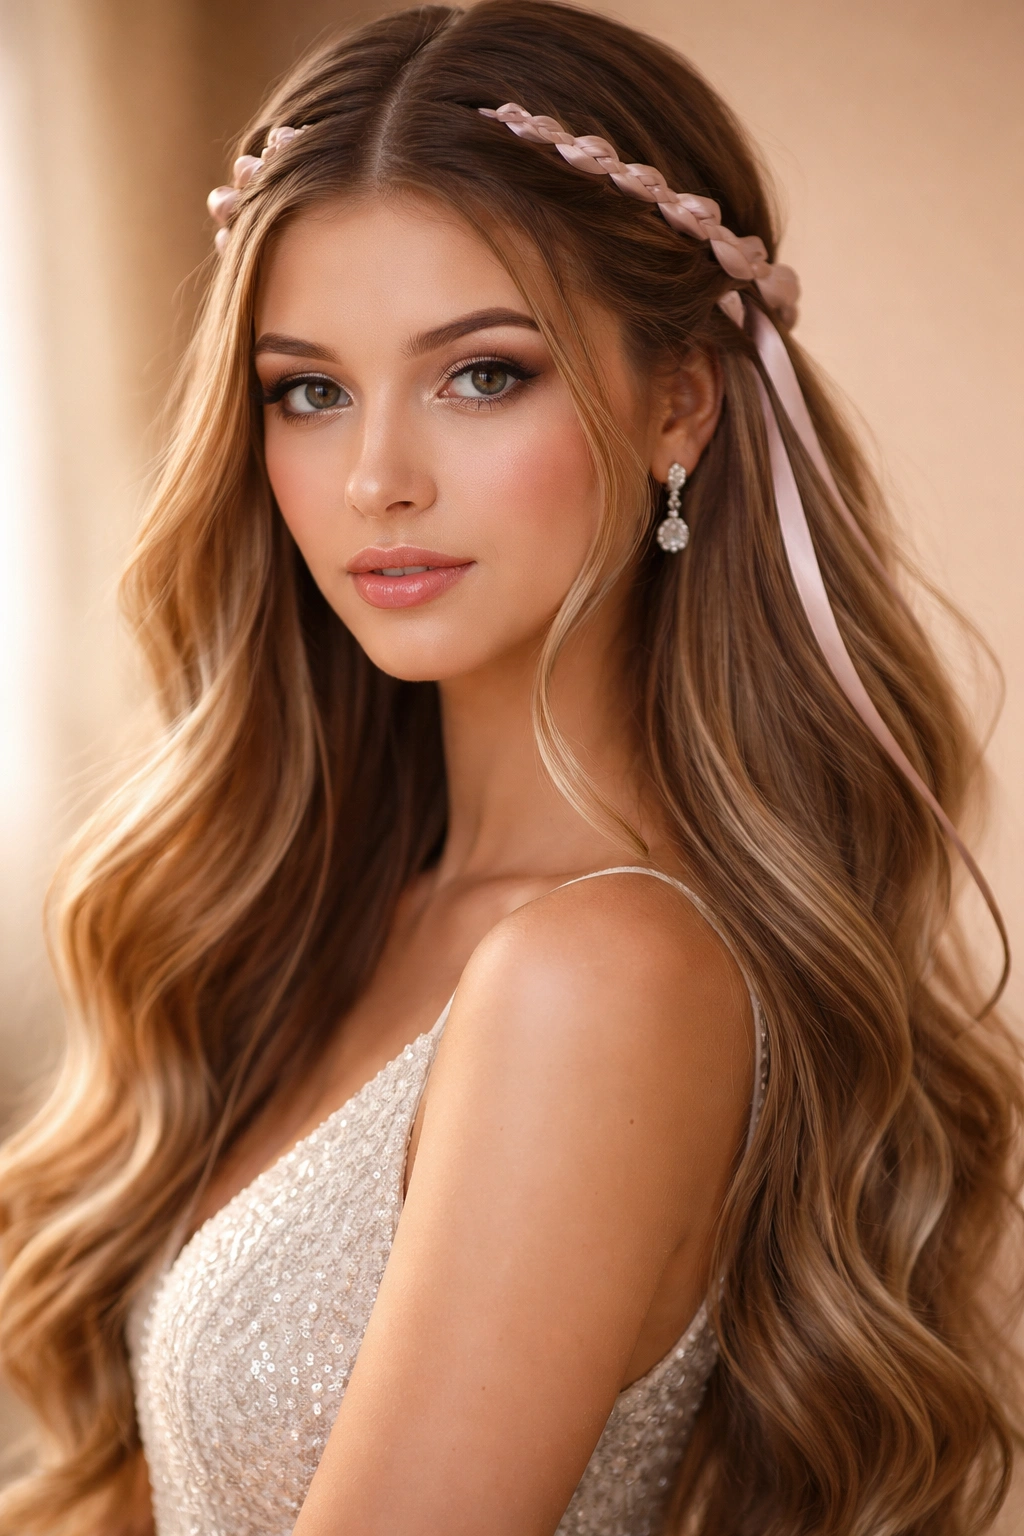
A ribbon threaded through a braid is the definition of romantic sophistication. This style works beautifully for anyone who wants that fairy-tale prom moment—it’s delicate enough to feel special but substantial enough to look intentional and carefully planned.
The Romance of Ribbon Braids
When you weave a satin ribbon through a braid, you’re adding color, texture, and a delicate detail that transforms a basic braid into something magical. The ribbon catches light beautifully in photos, adds movement and dimension, and works with almost any dress color if you choose your ribbon shade carefully.
Creating the Middle-Part Ribbon Braid
- Create a clean center part with a fine-tooth comb
- Clip one side of your hair out of the way
- Cut a length of ribbon—about 24 inches is a good starting point
- Begin a three-strand braid at the crown on the unclipped side
- As you create the braid, weave the ribbon through the three strands, treating it as if it were a fourth strand
- The ribbon should flow through the braid smoothly, creating a woven pattern
- Continue braiding down to about mid-back length
- Secure the braid end with a small elastic and tie the ribbon ends in a delicate bow
- Repeat on the other side of your head
- Leave the remaining hair down and slightly curled for movement
- Finish with hairspray
Ribbon Color Strategy
- Match the ribbon to your dress for a coordinated look
- Choose a metallic ribbon that works with your overall jewelry and accessories
- Consider a ribbon in a complementary rather than matching color for visual interest
- Blush pink, rose gold, champagne, and ivory ribbons work beautifully with most prom dresses
10. Asymmetrical Bob with Decorative Pin Placement
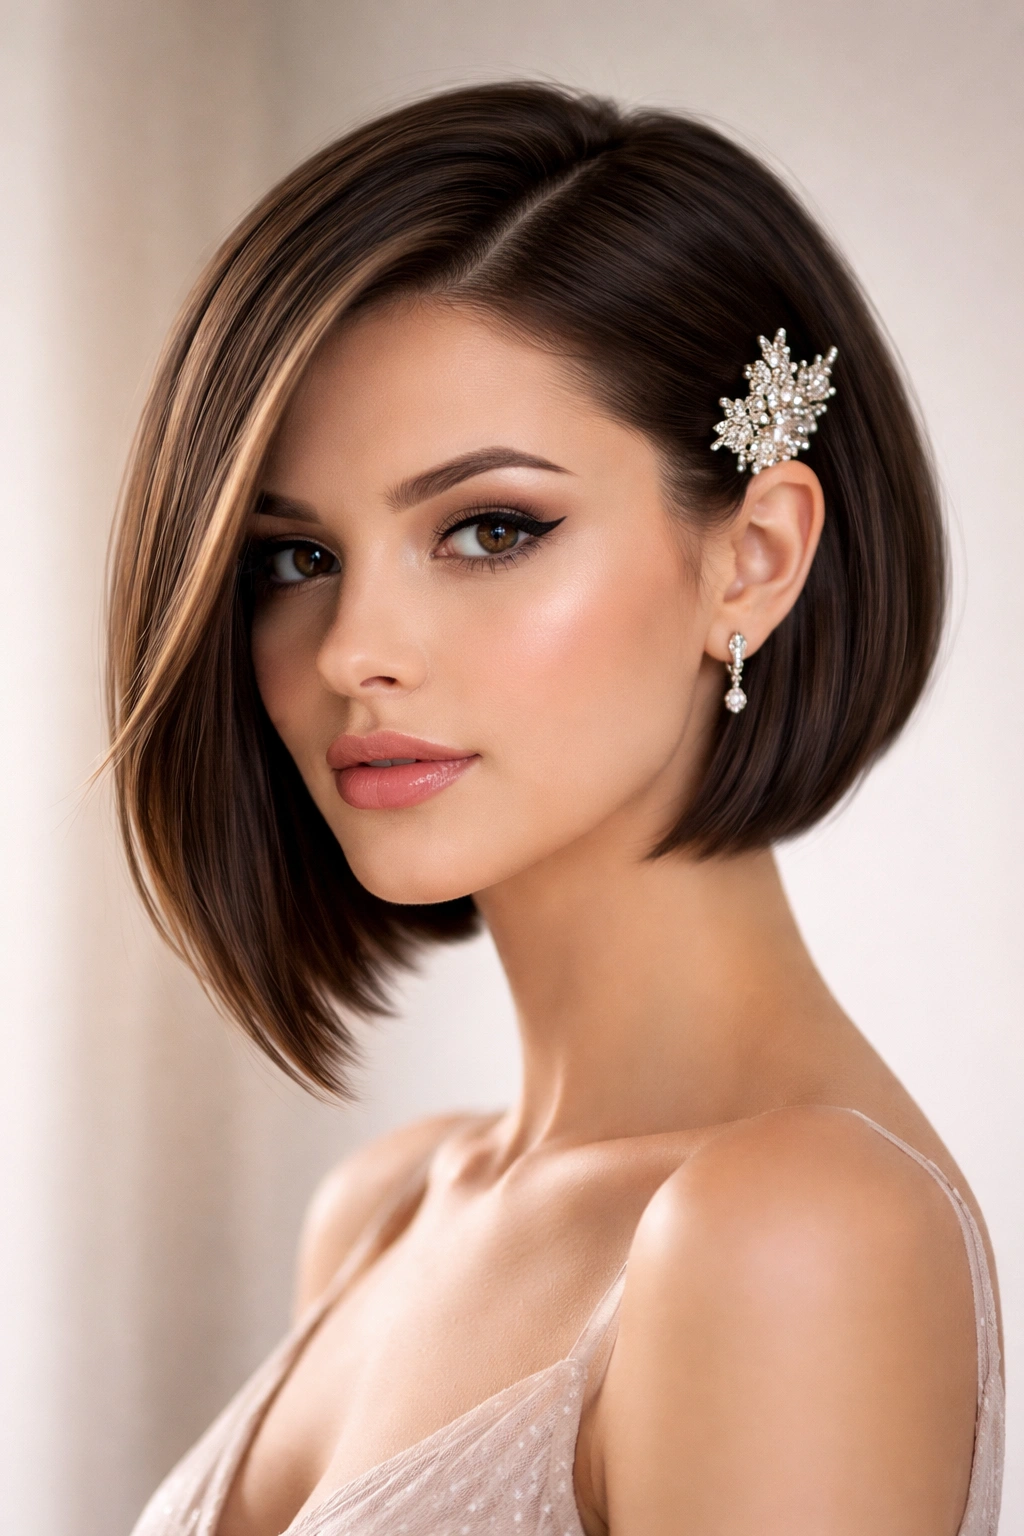
An asymmetrical bob—where one side is noticeably longer than the other—is inherently modern and chic. Adding a decorative pin at the shorter side creates a focal point and makes this bold cut feel intentional and high-fashion.
The Power of Asymmetry
Asymmetrical cuts feel fresh, contemporary, and interesting in a way that symmetrical styles sometimes don’t. This style is particularly flattering if you have a rectangular or oval face shape, as the asymmetry adds visual interest and breaks up lengthier features. For prom, this says you’re confident, fashion-forward, and willing to take risks.
Styling the Asymmetrical Bob
- Blow-dry your bob completely straight with a paddle brush
- Apply a smoothing serum to eliminate frizz and create shine
- You can leave it sleek and polished, or add subtle waves with a 1-inch curling iron
- If adding waves, curl the longer side away from your face and the shorter side back for definition
- Finish with a flexible hold hairspray that lets the cut move naturally
Accessory Placement for Maximum Impact
- Place a decorative clip or comb on the shorter side of your head, securing it near the ear
- Choose a clip that coordinates with your dress or jewelry
- A metallic clip adds glamour; a jeweled clip adds sparkle
- Alternatively, pin a small silk bow or ribbon on the shorter side
- Keep the pin secured with bobby pins so it stays in place all night
Face Shape Considerations
- Longer face? Style the shorter side fuller and closer to the face
- Round face? Keep the longer side sleeker to elongate the features
- Square face? Add softness with subtle waves rather than keeping it completely straight
11. Wrap-Around Dutch Braid from Nape to Crown
This is the hairstyle that looks far more complicated than it actually is—a Dutch braid that wraps around the back of your head creates an unexpected detail that photographs beautifully and feels special without requiring expert-level braiding skills.
Understanding the Wrap-Around Braid
Instead of braiding straight down the back of your head, you begin at the nape of your neck and braid upward and around, gradually incorporating the entire back section of your hair. This creates a crown-like effect that’s both romantic and structurally interesting. When you finish at the top of your head and secure the braid, you’ve created an updo that still allows some hair to flow freely.
Creating the Wrap-Around Dutch Braid
- Section your hair into two halves—a top half clipped away and a bottom half released
- Begin a Dutch braid at the base of your neck, starting with three small strands
- Braid upward while gradually incorporating surrounding hair
- As you move toward the back of your head, continue braiding in a curved path that follows the natural contour of your head
- Once you reach the crown area, release the clipped top section of hair
- Continue the braid across the top of your head, now incorporating some of the released hair
- Finish the braid at the opposite side of your crown
- Secure the braid end with bobby pins tucked underneath
- Let the remaining hair flow loose or loosely curled
Finishing Touches
- Curl the loose hair section with a 1.5-inch barrel for soft waves
- Add a decorative clip where the braid ends for extra detail
- Finish with flexible hold hairspray to keep the braid structure intact
12. Candlelit Waves with Champagne Highlights
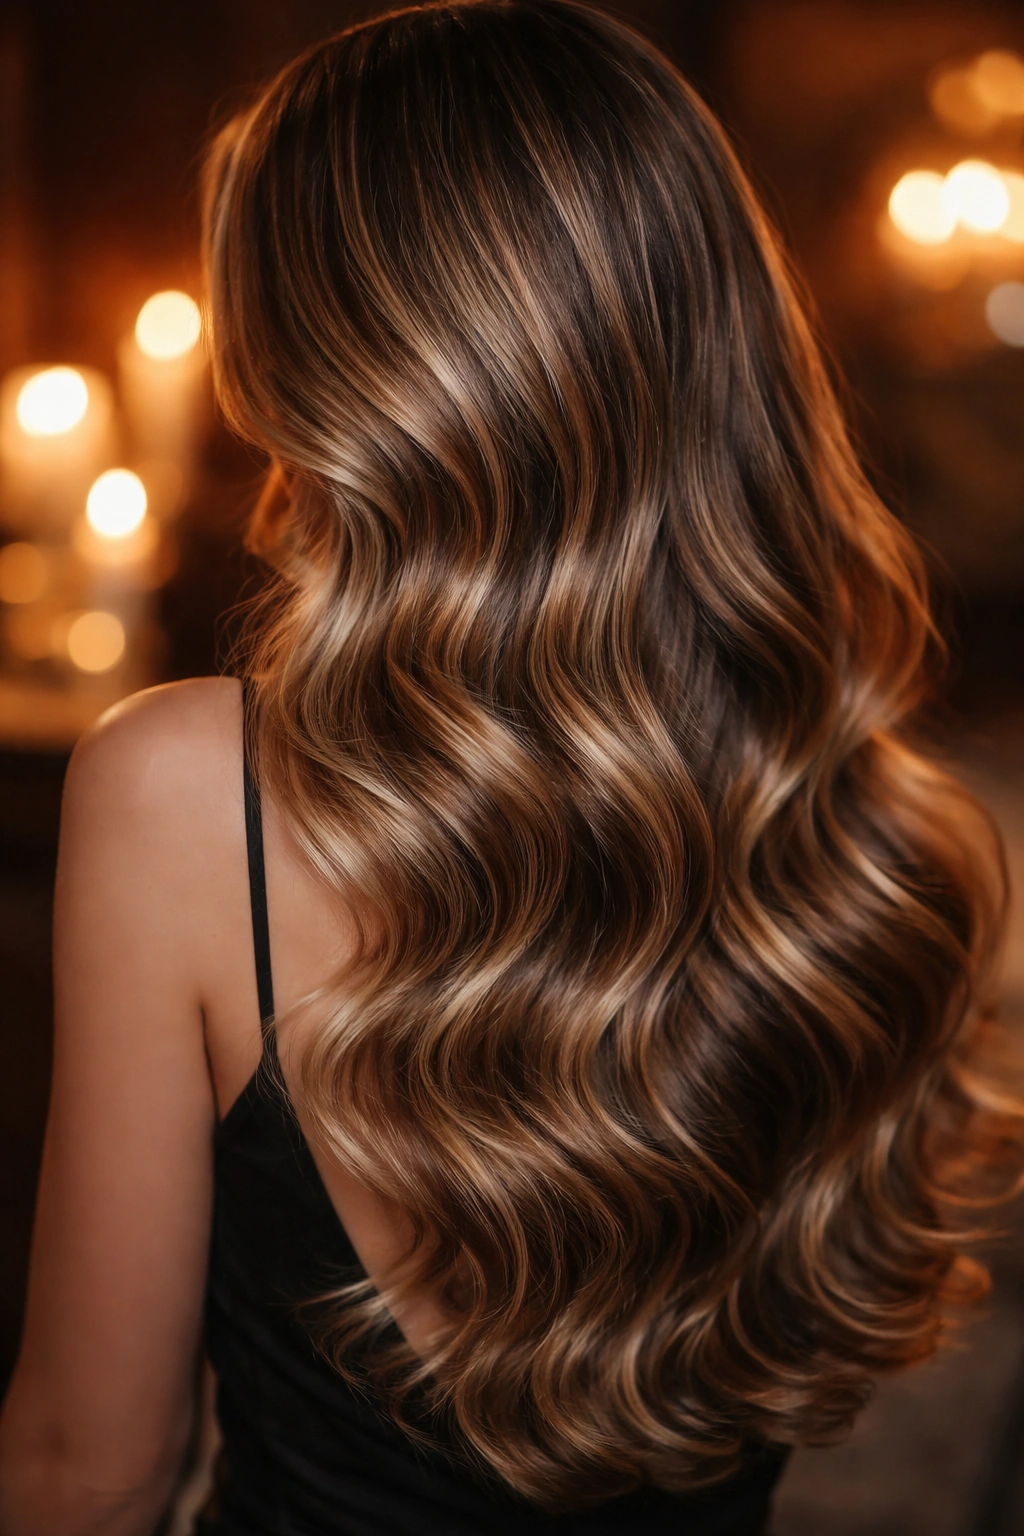
This hairstyle focuses on creating movement and light-catching waves that shift from honey to champagne tones. If you have natural dimension to your straight hair, this style showcases it beautifully and feels effortlessly glamorous.
What Makes Candlelit Waves Special
The term “candlelit waves” refers to waves that catch and reflect light like candlelight flickering across your hair—they’re not uniform curls but rather intentional, varied movement that photographs with dimension and depth. This style works beautifully with certain lighting conditions (particularly the warm lighting of prom venues) and creates an almost ethereal quality.
Creating Multidimensional Waves
- Apply heat protectant spray to clean, dry hair
- Section your hair into eight to ten sections
- Use a 1.5-inch curling iron, varying the direction of your curls—alternate between curling toward your face and away from it
- This variation in direction creates more natural-looking, less uniform waves
- Some sections can be curled tightly, while others are wrapped loosely around the barrel
- Allow curls to cool slightly before releasing for better hold
- Once all sections are curled, run your fingers through the waves gently to separate and distribute them
- Apply a flexible hold hairspray
Enhancing Natural Dimension
- If your hair has natural blonde, honey, or champagne tones, this style showcases them beautifully
- The movement of the waves creates shadows and light play that emphasize dimension
- Avoid heavy product that could dull shine; use lightweight, flexible products instead
- Consider a light-reflecting spray or shine serum on the lengths to maximize light-catching quality
13. Tiered Ponytail with Hair Extensions for Volume
If you want a ponytail with maximum impact and drama, a tiered ponytail created with clip-in extensions is the answer. This creates height, volume, and a sophisticated look that photographs like you have incredibly thick hair.
Why Extensions Elevate a Ponytail
Hair extensions add instant volume and thickness that’s difficult to achieve through styling alone, especially if your hair is fine or straight. A tiered ponytail uses extensions strategically to create a fuller, more visually interesting shape. This is particularly useful if you want a high ponytail that maintains volume rather than looking thin and scraggly.
Building the Tiered Ponytail
- Apply volumizing spray to your roots and blow-dry with a round brush for natural volume
- Clip in extensions throughout your hair, focusing on the crown and length
- Once extensions are secure, gather all hair into a high ponytail at the crown
- Secure with a thick elastic or two elastics stacked together
- Take a small section from underneath the ponytail and wrap it around the elastic base
- Secure the wrap with a bobby pin
- For the “tiered” effect, create a second, slightly lower ponytail using just the extended portion
- This creates a visual separation that looks intentional and dramatic
- Curl the ponytail lengths loosely with a 1.5-inch iron for soft waves
Extension Blending Tips
- Choose extensions that match your hair color exactly
- Blend the roots of extensions with your natural hair using a fine-tooth comb
- Consider having extensions applied professionally a day or two before prom for perfect blending
14. Sleek Curtain Bangs with Coordinated Accessories
This style plays with the concept of curtain bangs—hair parted in the middle and flowing to each side of your face—but executed sleekly rather than casually. Combined with coordinated accessories, this creates a put-together, intentional look that works beautifully for prom.
The Elegance of Curtain Bangs
Curtain bangs frame the face beautifully and are surprisingly flattering on most face shapes. By styling them sleekly rather than casually tousled, you maintain sophistication while getting the flattering face-framing benefits. This hairstyle also shows off your face and makeup beautifully for photos.
Creating Sleek Curtain Bangs
- Create a very deep center part using a fine-tooth comb
- Blow-dry your hair straight with a paddle brush, directing the roots upward
- The longer portions of hair flip to the sides naturally from the center part
- Using a 1-inch flat iron, straighten the face-framing sections, angling them slightly outward
- Smooth the entire length of your hair with the flat iron for a polished appearance
- Finish with a silky hairspray that provides hold without frizz
Strategic Accessory Placement
- Wear delicate earrings that dangle slightly, which you can now show off with curtain bangs
- Add a decorative clip on one side of your head near the temple
- Consider a thin metallic headband worn low on the head for modern elegance
- Hair jewelry threaded through the center part adds a luxury touch
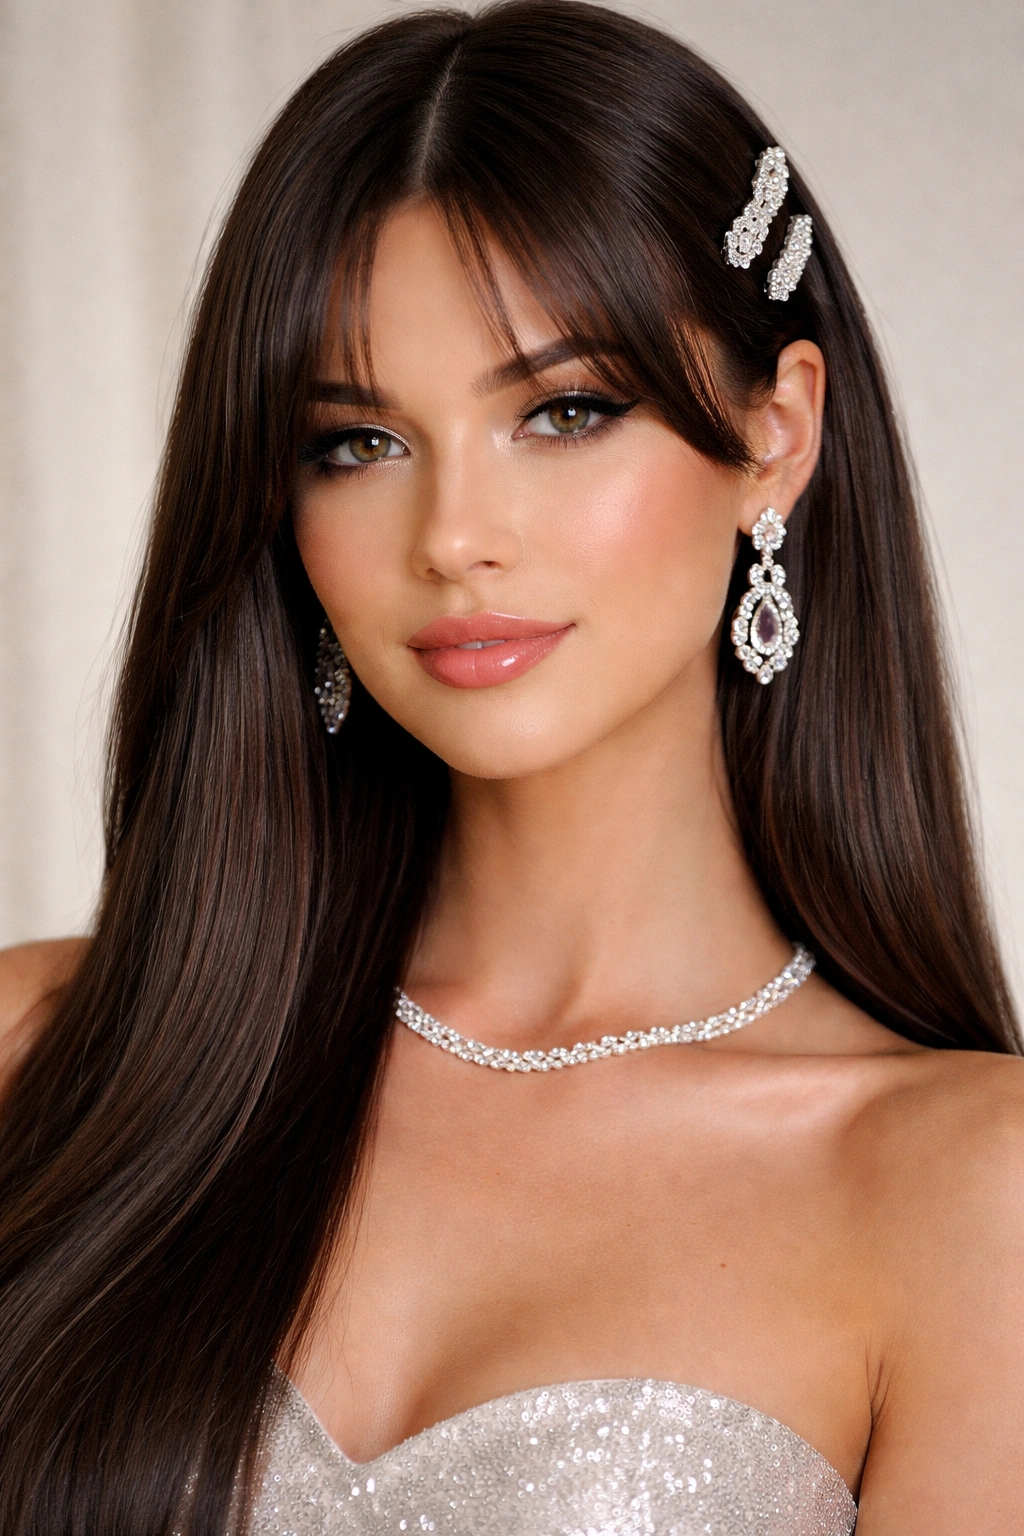
15. Minimalist Elegance with Pearl Hair Pins
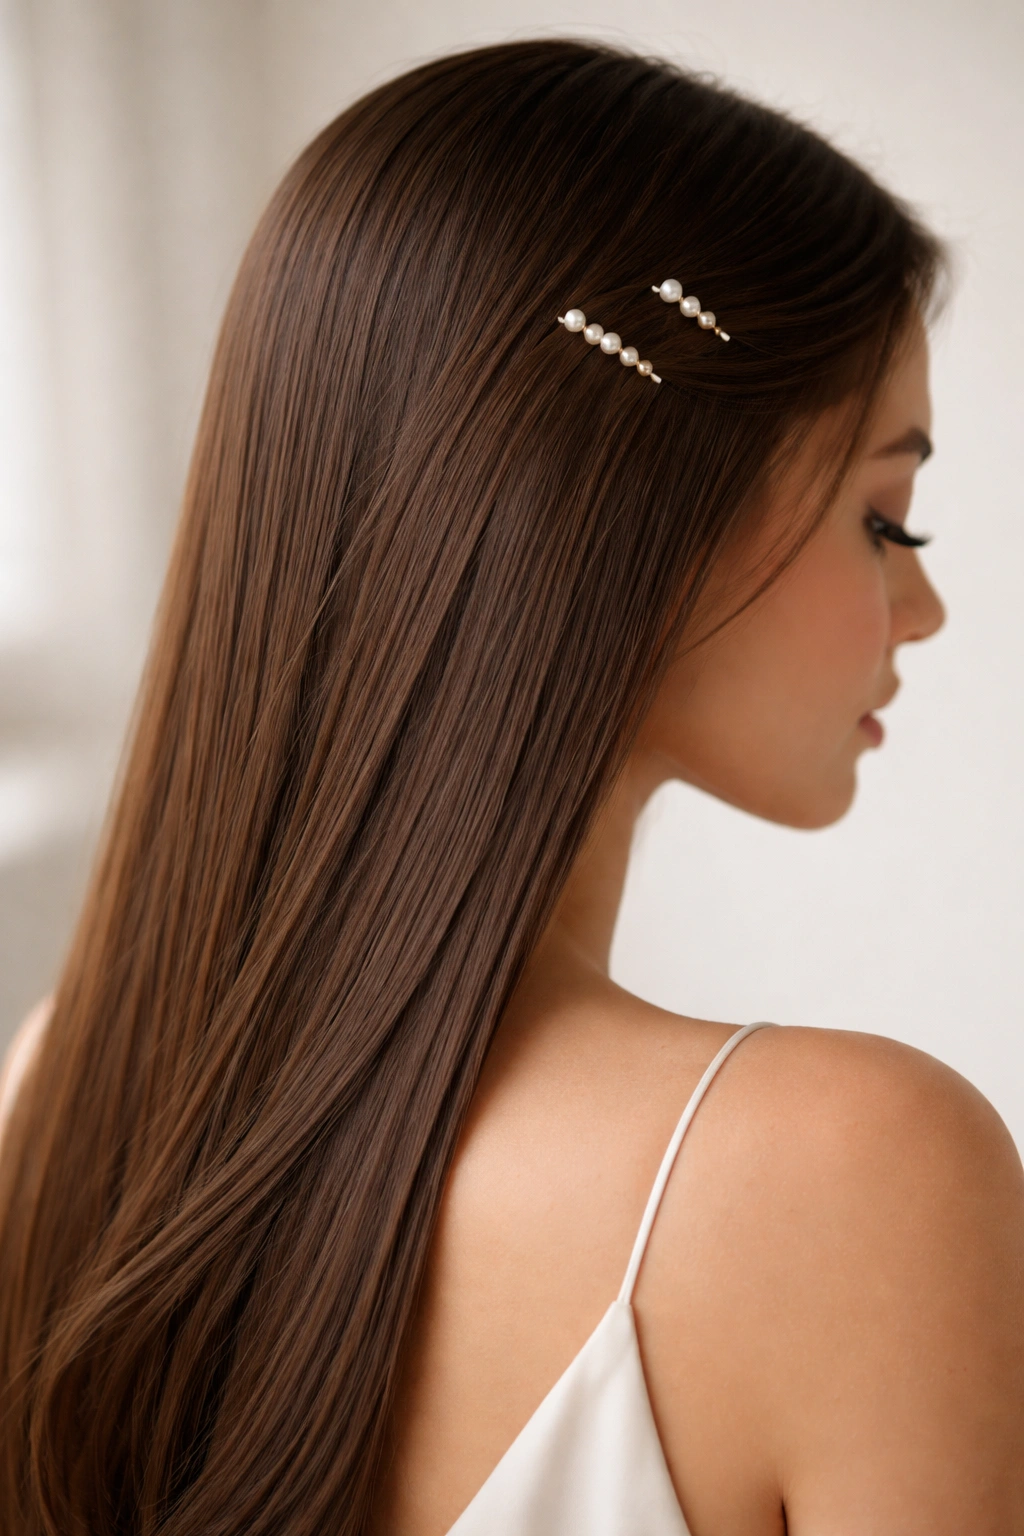
Sometimes less is more, and this hairstyle proves it. Straight hair worn down with just two or three strategically placed pearl pins creates an understated elegance that photographs beautifully and lets your dress and makeup be the stars.
The Power of Simplicity
In a world of elaborate updos and complex braids, sometimes the most striking choice is simplicity. This style works with any dress—casual to formal—and reads as effortlessly chic rather than trying too hard. Minimalist hairstyles are increasingly popular for prom because they feel modern and sophisticated.
Styling the Hair
- Apply a smoothing serum to dry hair
- Blow-dry with a paddle brush for shine and smoothness
- You can wear it completely straight, or add very subtle waves with a 1.5-inch curling iron
- If adding waves, keep them loose and soft—think gentle movement rather than defined curls
- Finish with a light hairspray that provides hold without visible product
Placing Pearl Pins for Maximum Effect
- Position one pearl pin near your part, securing it discreetly so it looks delicate
- Add a second pin about an inch away from the first, creating a subtle line
- Alternatively, place pins asymmetrically on one side of your head
- The pins should be visible enough to be noticed but subtle enough to feel like an accent rather than a focal point
- Pearl pins catch light beautifully in photos and add a jewelry-like quality to your hair
Why Pearl Specifically
- Pearl is universally flattering and photographs beautifully
- Pearl coordinates with any dress color imaginable
- Pearl has a vintage elegance that feels timeless rather than trendy
- The subtle shine of pearls complements makeup and jewelry without competing
Final Thoughts
Choosing a prom hairstyle with straight hair gives you remarkable freedom—any of these fifteen styles will photograph beautifully and hold up throughout the night. The right choice depends on your dress style, your personal confidence level, and the vibe you want to project. Do you want to feel bold and daring, or romantic and dreamy? Do you want maximum impact with an updo, or flowing movement with down hair?
The truth about prom hair is that the most beautiful hairstyle is always the one that makes you feel confident and comfortable. These styles all work with straight hair’s natural strengths—clean lines, dramatic movement, and the ability to hold complex styles. Practice your chosen style at least once before prom night so you understand the timing and know exactly how much product you’ll need. Bring backup bobby pins, hairspray, and a small comb with you on prom night because even the most carefully secured style might need a quick touch-up between the venue, dinner, and dancing.
Whatever you choose, you’re going to look absolutely stunning. Your straight hair is an incredible canvas, and any of these hairstyles will make you feel like the best version of yourself on your prom night.