
Straight hair is having a major moment in the baddie aesthetic—and for good reason. If you’re working with naturally straight, silky strands (or you’ve put in the work to achieve that glass-smooth texture), you’ve got the perfect canvas for hairstyles that read as confident, sharp, and unapologetically bold. The baddie aesthetic isn’t about looking effortless; it’s about looking deliberately put-together, intentional, and commanding. And straight hair delivers that vibe better than almost any other texture because it’s clean, geometric, and inherently striking.
The thing is, straight hair styling goes way deeper than just leaving it down. The real baddie hairstyles for straight hair play with edges, structure, volume, and details—they understand that the sharpness of a straight line is the most powerful styling tool you have. Whether you’re going for the polished corporate baddie, the glam-girl-going-out energy, or the effortlessly expensive look, there’s a straight-hair hairstyle that nails the assignment. These aren’t boring everyday styles; they’re the looks that make people notice you the moment you walk into a room.
What makes straight hair perfect for baddie styling is how it showcases technique and intention. A blowout isn’t just a blowout—it’s a statement about having your life together. Edges aren’t random; they’re proof you care about the details. Geometric cuts become mini sculptures. Even a simple ponytail becomes a power move when it’s sleek enough to reflect light and styled with the precision a baddie demands.
Let’s break down the ten hairstyles that absolutely own the baddie-with-straight-hair category. Each of these works across different settings, hair lengths, and personal styles—but they all share that signature baddie edge.
1. Sleek Straight Ponytail with Slicked Edges
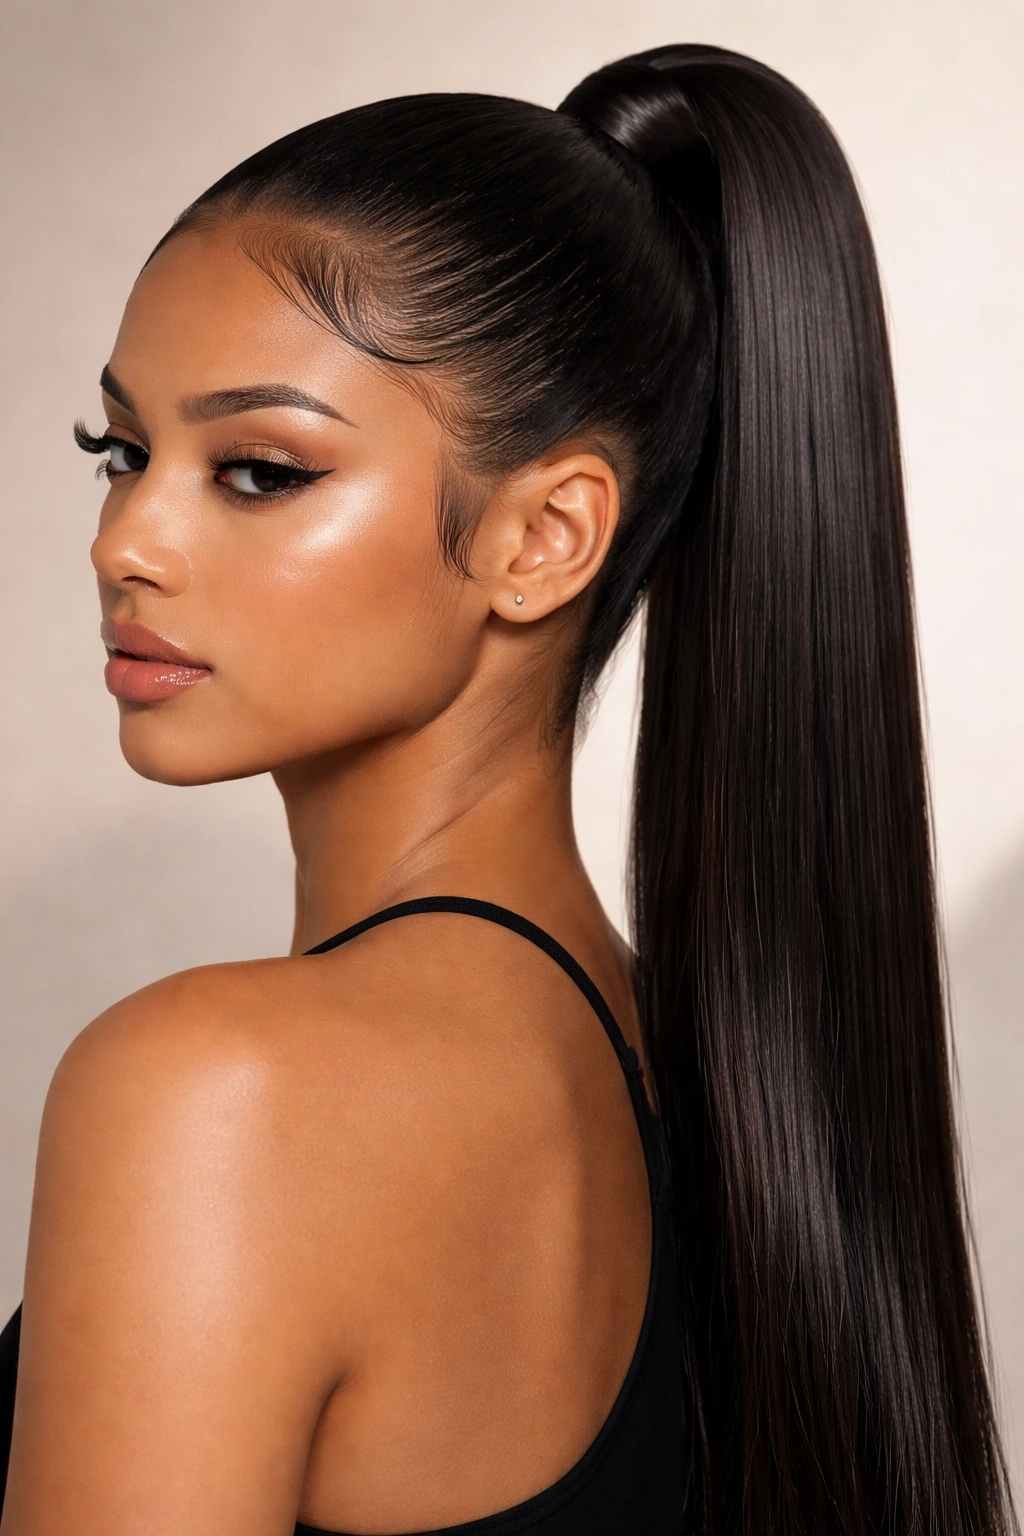
The sleek straight ponytail is the foundational baddie move, and there’s a reason it’s iconic. This isn’t your casual gym-class ponytail—we’re talking about a pulled-back style so smooth and shiny it practically reflects light, with baby hairs slicked back into perfect submission using edge control or gel. The ponytail sits at a mid-to-high position on the head, and the hair extends down the back in one smooth, unbroken line.
Why It’s the Ultimate Baddie Statement
The straight ponytail works because it’s a power move disguised as simplicity. When you pull your hair back this severely, you’re essentially saying you’re confident enough to show your entire face, your bone structure, and your scalp line. There’s nowhere to hide, and baddie energy is all about not needing to. The sleekness also suggests professional polish—think of the styling you see in high-fashion editorials or on people who’ve clearly invested in professional blowouts and styling.
The slicked edges are what elevate this from a regular ponytail into a baddie statement. When your baby hairs and flyaways are controlled with shine-enhancing gel, the whole look reads as intentional. You’re not fighting your hair texture; you’re commanding it. This works on all face shapes, all skin tones, and literally works whether your hair is shoulder-length or butt-length.
How to Get It Right
Start with a smooth blowout as your base—this is non-negotiable for the straight ponytail to work. Blow-dry your hair with a paddle brush to keep everything sleek and eliminate any wave or bend. Once you have that smooth foundation, apply a lightweight edge control product (or a dab of styling cream) to your baby hairs and hairline, smoothing them back with a fine-tooth comb or a toothbrush. Secure the ponytail with a strong, smooth hair tie—velvet elastics are baddie-approved because they don’t create creases or breakage.
Pro tip: Wrap a small section of hair around the base of the ponytail to hide the elastic. This finishing touch makes the difference between looking put-together and looking intentional.
2. Face-Framing Layers with Straight Ends
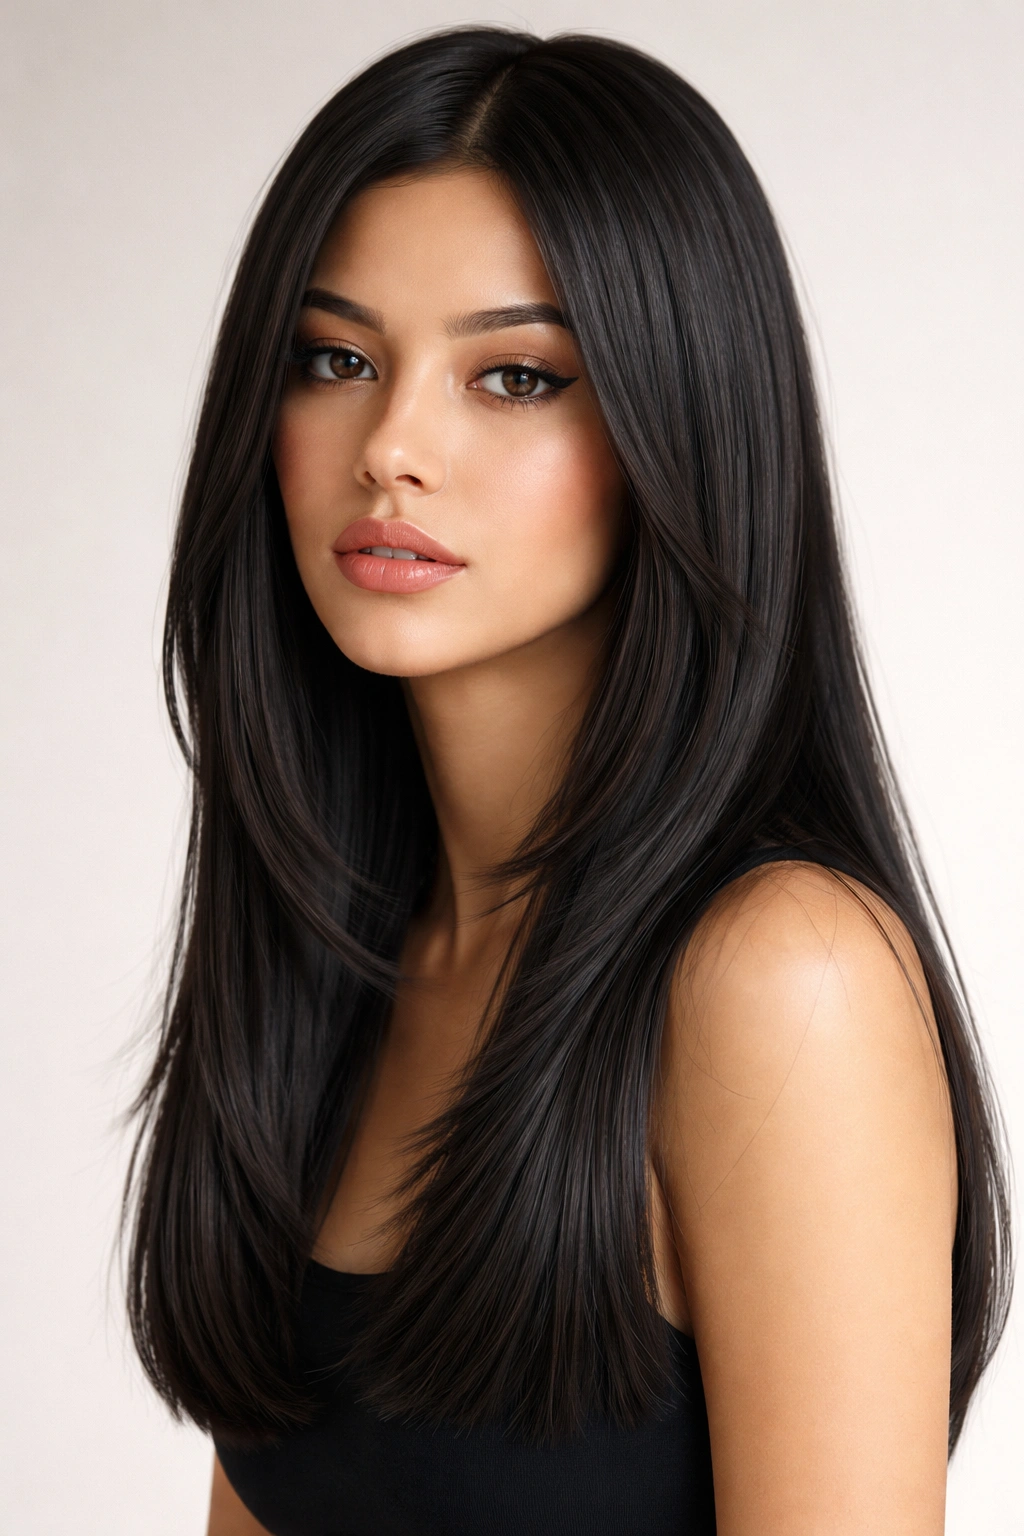
Face-framing layers on straight hair create movement and depth while maintaining that sleek, controlled baddie energy. Unlike choppy layers that can read as choppy or unrefined, strategic layers that start at cheekbone height and graze the jawline create dimension without sacrificing the clean lines that make straight hair look polished.
The Baddie Appeal of Layered Straight Hair
The magic of face-framing layers is that they keep straight hair from looking flat or one-dimensional while respecting the geometric precision that baddie styling demands. The layers catch light differently, they move slightly when you move, and they create the illusion of more volume and dimension without actually curling or waving your hair. The key is keeping the layers subtle and strategic rather than choppy and undone.
Face-framing layers also do something psychologically powerful—they draw attention to your face and your features. Your cheekbones, eyes, and jawline suddenly have definition because the hair isn’t hanging in a flat, uniform sheet. It’s a styling hack that reads as effortless but actually requires precision cutting.
Styling for Maximum Effect
For face-framing layers to read as baddie and not just “I need a haircut,” you need to style them intentionally. Blow-dry your straight hair with a round brush, angling the brush under the layers as you dry to give them a subtle bend that turns inward toward your face. This isn’t a curl—it’s just enough movement that the layers fall slightly differently than the rest of your hair.
Add shine serum or a smoothing cream to emphasize the straight texture and make the layers catch light. A side part complements face-framing layers beautifully because it automatically creates asymmetry and movement. The asymmetry is very baddie—it’s the opposite of a safe, centered part.
Worth knowing: Layers need regular trims (every 6-8 weeks) to maintain their shape. The moment they start growing out unevenly, the whole look can start to look less intentional.
3. High-Volume Blowout with Side Part
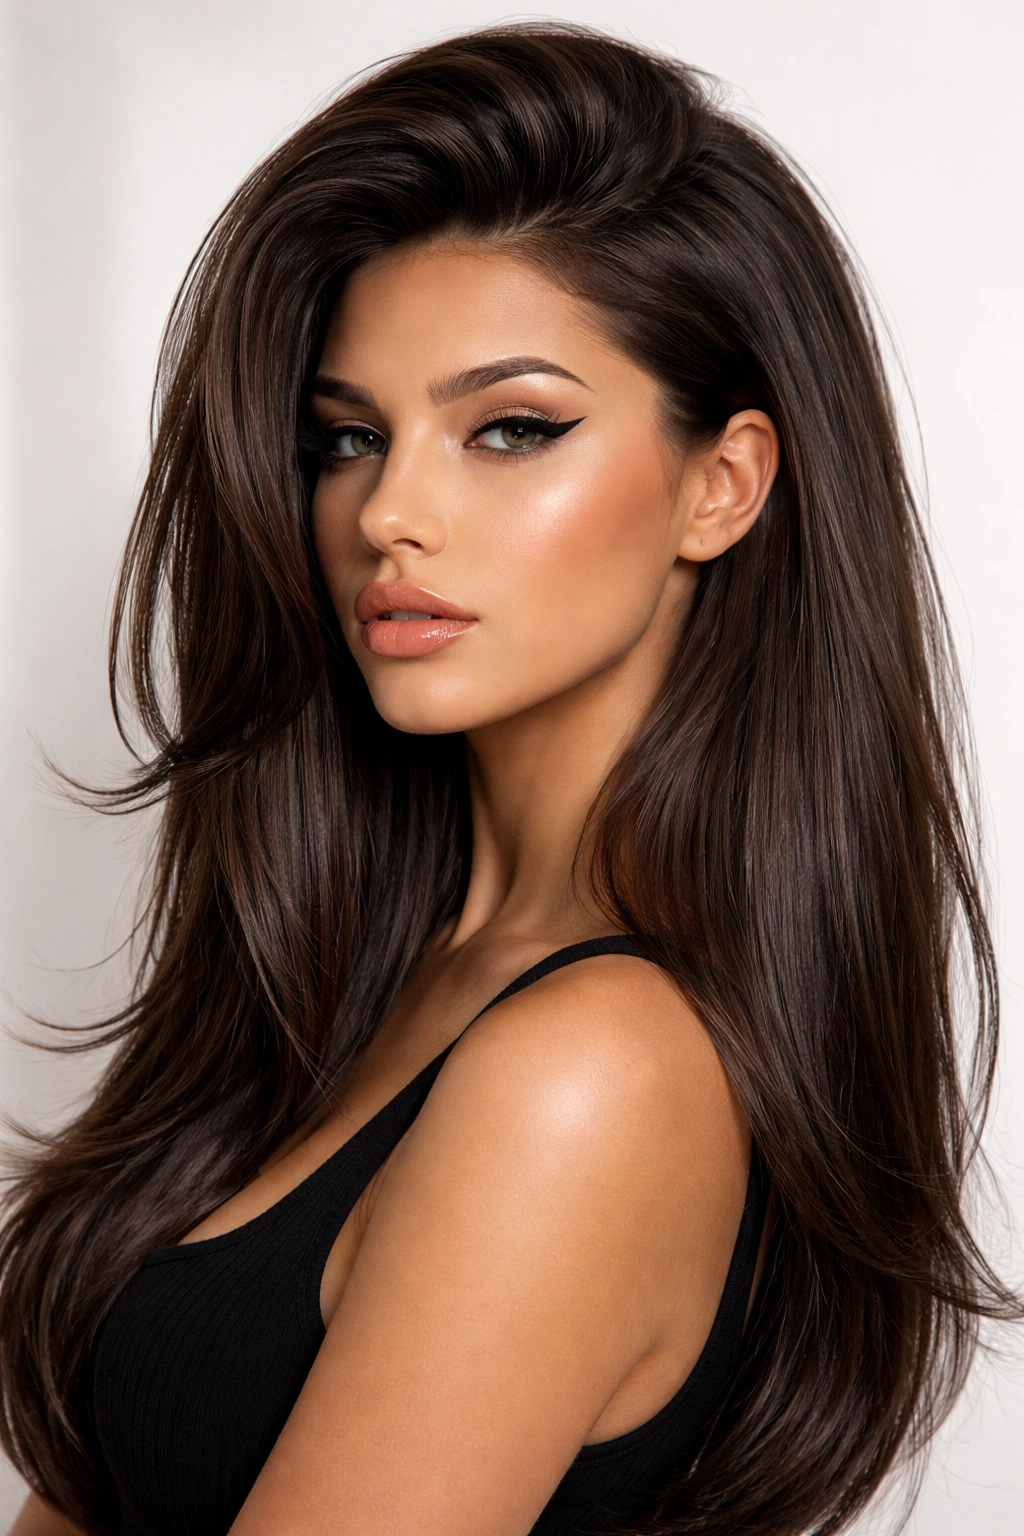
The high-volume blowout is the glam baddie move—think of the voluminous, sculptural hair you see in luxury fashion campaigns and red-carpet events. This style uses straight hair as the foundation but adds strategic volume at the roots and crown to create a look that’s both polished and undeniably luxe.
Why Volume Reads as Baddie
Volume suggests investment. It suggests you’ve either got naturally thick hair or you’ve put in the work to create volume through technique and product. High-volume styling also creates dimension and presence—your hair becomes a part of your overall silhouette, not just something attached to your head. When you walk into a room with a proper high-volume blowout, people notice you before you even open your mouth.
The side part is what keeps this from reading as pageant-y or overdone. The asymmetry of the side part adds edge and modernity while the volume adds luxury.
How to Create and Maintain It
Start by blow-drying your hair in sections, using a volumizing mousse or a light gel at the roots before you dry. This gives you a foundation for volume. As you blow-dry, flip your head upside down for the crown and use a paddle brush to direct hair away from your scalp—this creates lift at the roots that holds all day.
Once you’ve got your base volume, go back with a round brush and shape each section, paying special attention to creating a deep side part. The side part should be deep enough that the smaller side of your part sits right above your ear.
Use a light hairspray to hold everything in place without weighing it down. The goal is a blowout that looks intentional and polished, not stiff or immobile.
Pro tip: Volume is all about blow-drying technique, not just products. A blow dryer with ionic technology reduces frizz and adds shine, which makes volume look refined rather than big and poufy.
4. Sleek Bob with Minimalist Aesthetic
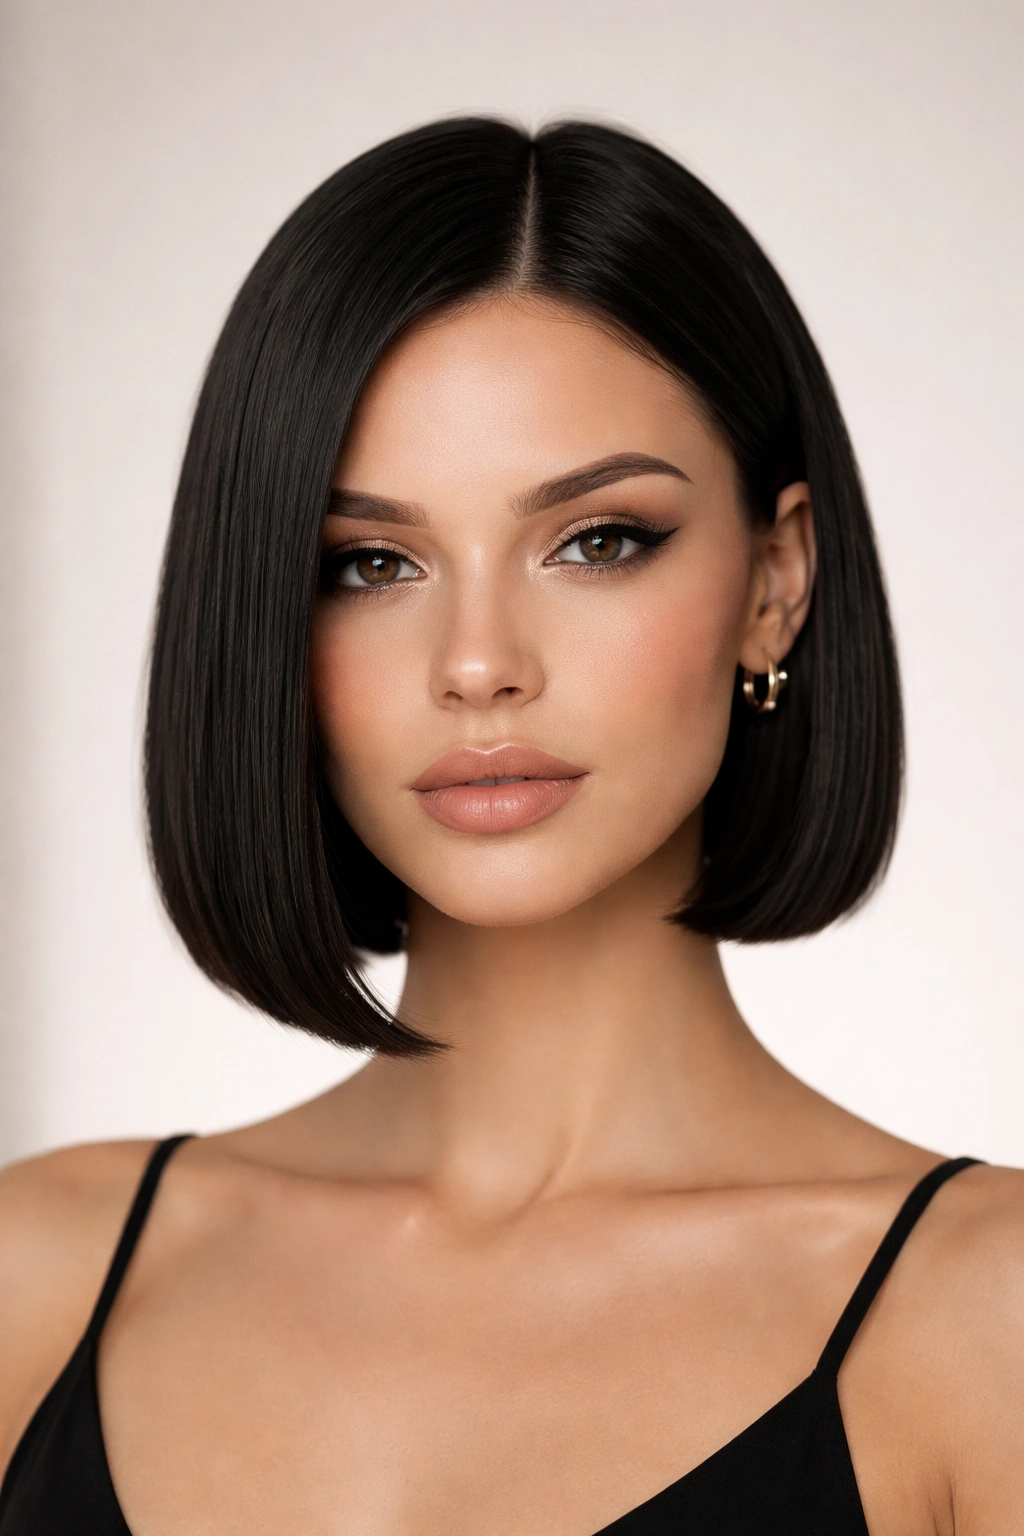
The straight, sleek bob is the quintessential baddie haircut—a geometric, perfectly blunt line that sits at the jawline or chin and reads as expensive, intentional, and undeniably chic. This isn’t a textured shag or a choppy pixie; it’s a clean, precise cut that demands technical skill from your stylist and intentional styling from you.
The Power of Minimalist Hair
A sleek bob works because of what it doesn’t do—it doesn’t apologize, it doesn’t hide, and it doesn’t try too hard. The blunt, straight cut creates an architectural quality that reads as confident and modern. A bob also creates an immediate frame for your face and your features, which is why it’s beloved by people who’ve invested in good skincare and bone structure.
The minimalist aspect is crucial. This isn’t a bob with a bunch of layers or texture—it’s a clean line. The simplicity is what makes it powerful.
Styling a Baddie Bob
A sleek bob needs a flawless blowout to look intentional rather than accidental. Use a paddle brush and a blow dryer to smooth your hair while directing it slightly inward at the ends. The slight inward bend at the ends (often called a “flip” or “flip-in”) is subtle but creates a polished finish.
Once your bob is blown out, use a smoothing serum or a light-hold hairspray to enhance shine and eliminate any flyaways. The goal is a bob that looks smooth enough that you could see your reflection in it.
A deep side part complements a bob beautifully and adds asymmetry without compromising the clean lines of the cut itself.
Worth knowing: A good bob needs professional maintenance every 4-6 weeks. The blunt line grows out quickly, and once it starts looking uneven, the whole look can feel less intentional.
5. Straight Hair with Crimped Texture Details
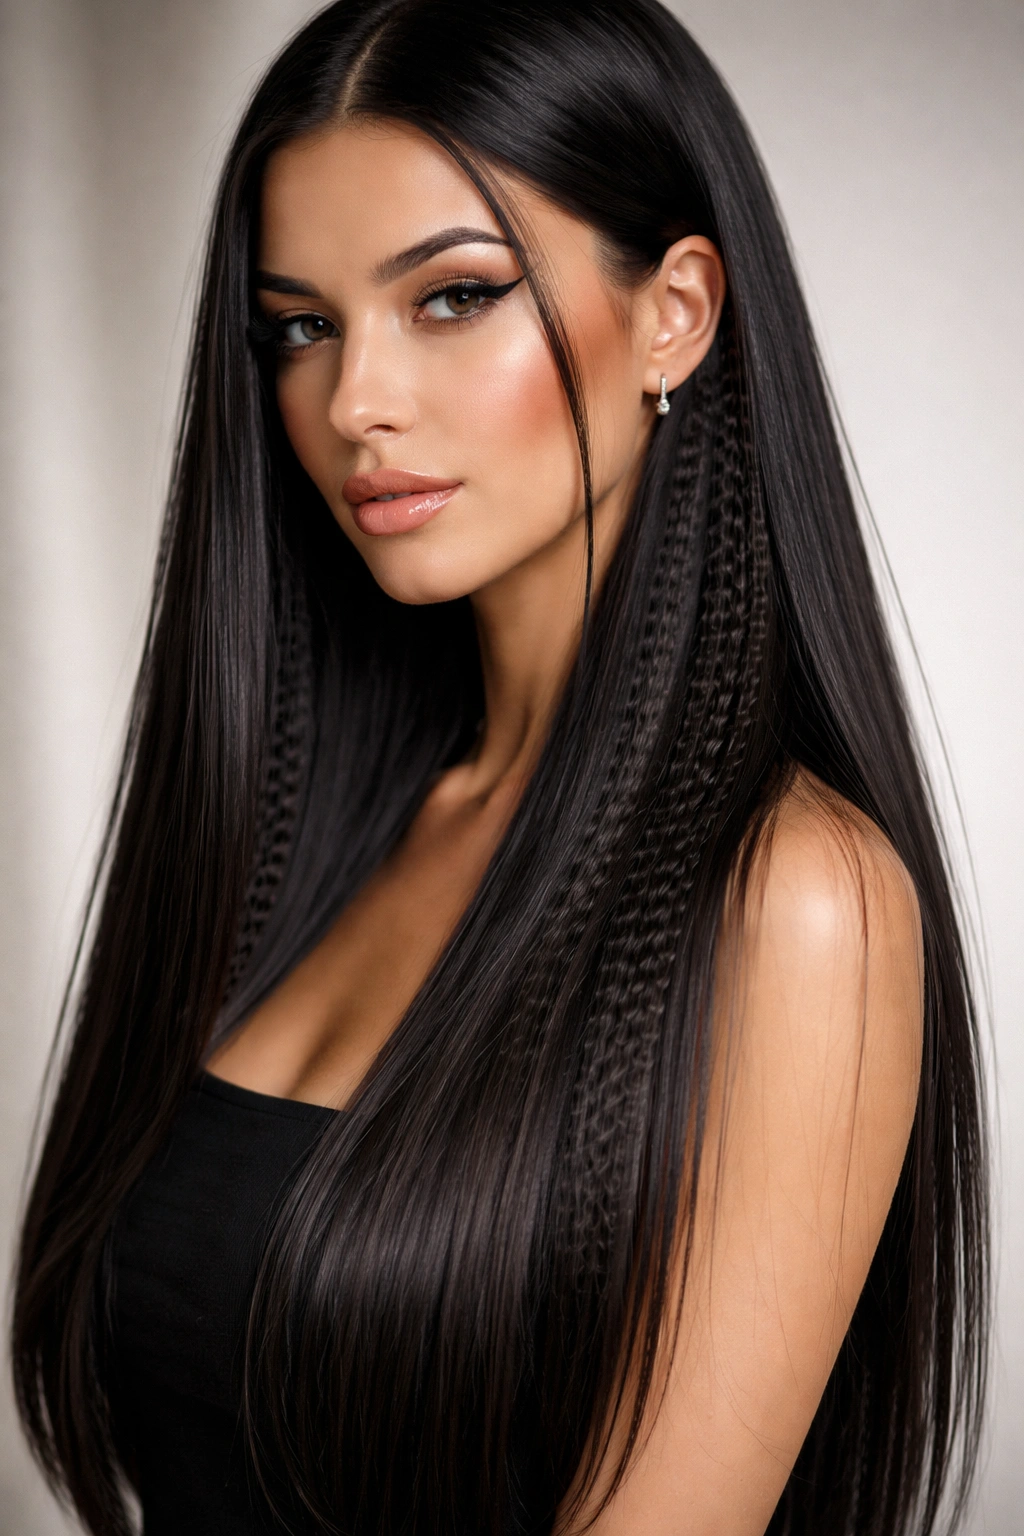
Crimped hair might sound like it contradicts the “straight hair” category, but hear me out—strategic crimping on straight hair creates texture contrast that reads as intentional and modern, not nostalgic or gimmicky. The key is using crimps as details, not as your entire hair texture.
Why Crimped Details Feel Baddie
Crimped details work on straight hair because they create visual interest and movement while maintaining the overall sleekness that baddie styling demands. You’re not fully curling or waving your hair; you’re adding pockets of texture that catch light and create dimension. It’s maximalist-minimalism—one statement detail that makes the rest of the look feel more considered.
Crimping also suggests you’re fashion-forward and not afraid to experiment. It reads as intentional because it’s clearly not accidental—no one accidentally gets perfectly crimped sections in their hair.
How to Style Crimped Details
Use a crimping iron on select sections of your hair—usually the underneath layers so the texture is partially hidden. Crimp horizontally (parallel to the ground) rather than vertically for a more refined effect. You can crimp your entire underlayer, or you can keep it more minimal with just a few strategic crimped sections.
Keep the top layer of your hair straight and smooth. This creates the contrast that makes crimping read as baddie rather than chaotic.
Apply a light hairspray and a shine serum to the straight sections so the texture contrast is even more pronounced. The straight sections should look glass-smooth while the crimped sections add subtle texture and movement.
Pro tip: Crimping works especially well on straight hair because the contrast is so clear. On textured hair, crimping can get lost. On straight hair, it pops.
6. Baddie Curtain Bangs on Straight Hair
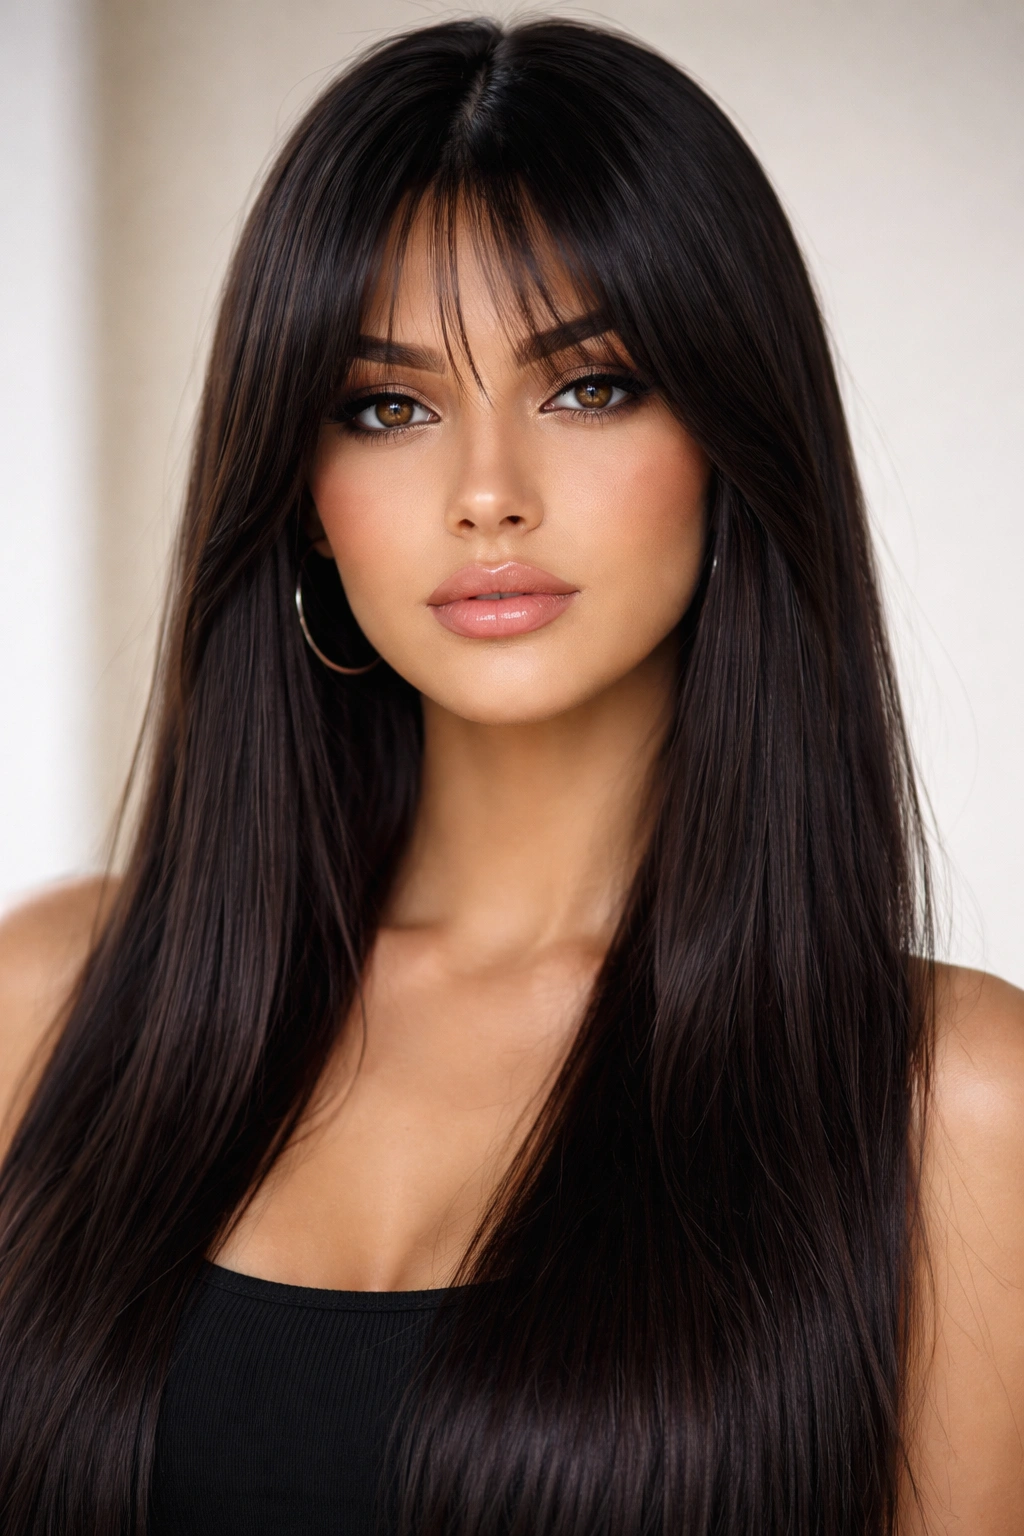
Curtain bangs are having a serious moment in baddie styling, and for good reason. When you get curtain bangs right on straight hair, they frame your face, add movement, and create an instantly chic look that feels both modern and timeless. The key is that curtain bangs on straight hair hit differently than curtain bangs on other textures—they’re cleaner, more geometric, and more obviously intentional.
The Baddie Case for Curtain Bangs
Curtain bangs work because they soften a face while maintaining the clean lines that make baddie styling read as polished. They also create movement without requiring you to curl your hair. The way bangs part down the middle and fall on either side of your face is inherently flattering and modern.
Baddie curtain bangs are longer than traditional bangs—they typically reach your cheekbones or longer, creating that “curtain” effect where they naturally fall away from the center part. This isn’t a blunt fringe; it’s a subtle, sophisticated frame.
Getting and Styling Curtain Bangs
Work with a skilled stylist who understands how to cut curtain bangs for straight hair. The angle of the cut is crucial—bangs need to be cut at a slight angle so they fall correctly when your hair dries.
To style your curtain bangs, blow-dry them with a round brush, directing each side slightly away from the center part. This is what creates the “curtain” effect. As your bangs dry, they should naturally fall with a slight bend that frames your face.
Once your bangs are dry, use a smoothing serum to add shine and emphasize the straight texture. A deep center part works beautifully with curtain bangs because it allows the bangs to fall symmetrically on both sides of your face.
Worth knowing: Curtain bangs grow out differently than regular bangs. Plan for trims every 3-4 weeks if you want them to maintain their shape.
7. Slicked-Back High Bun with Bubble Sections
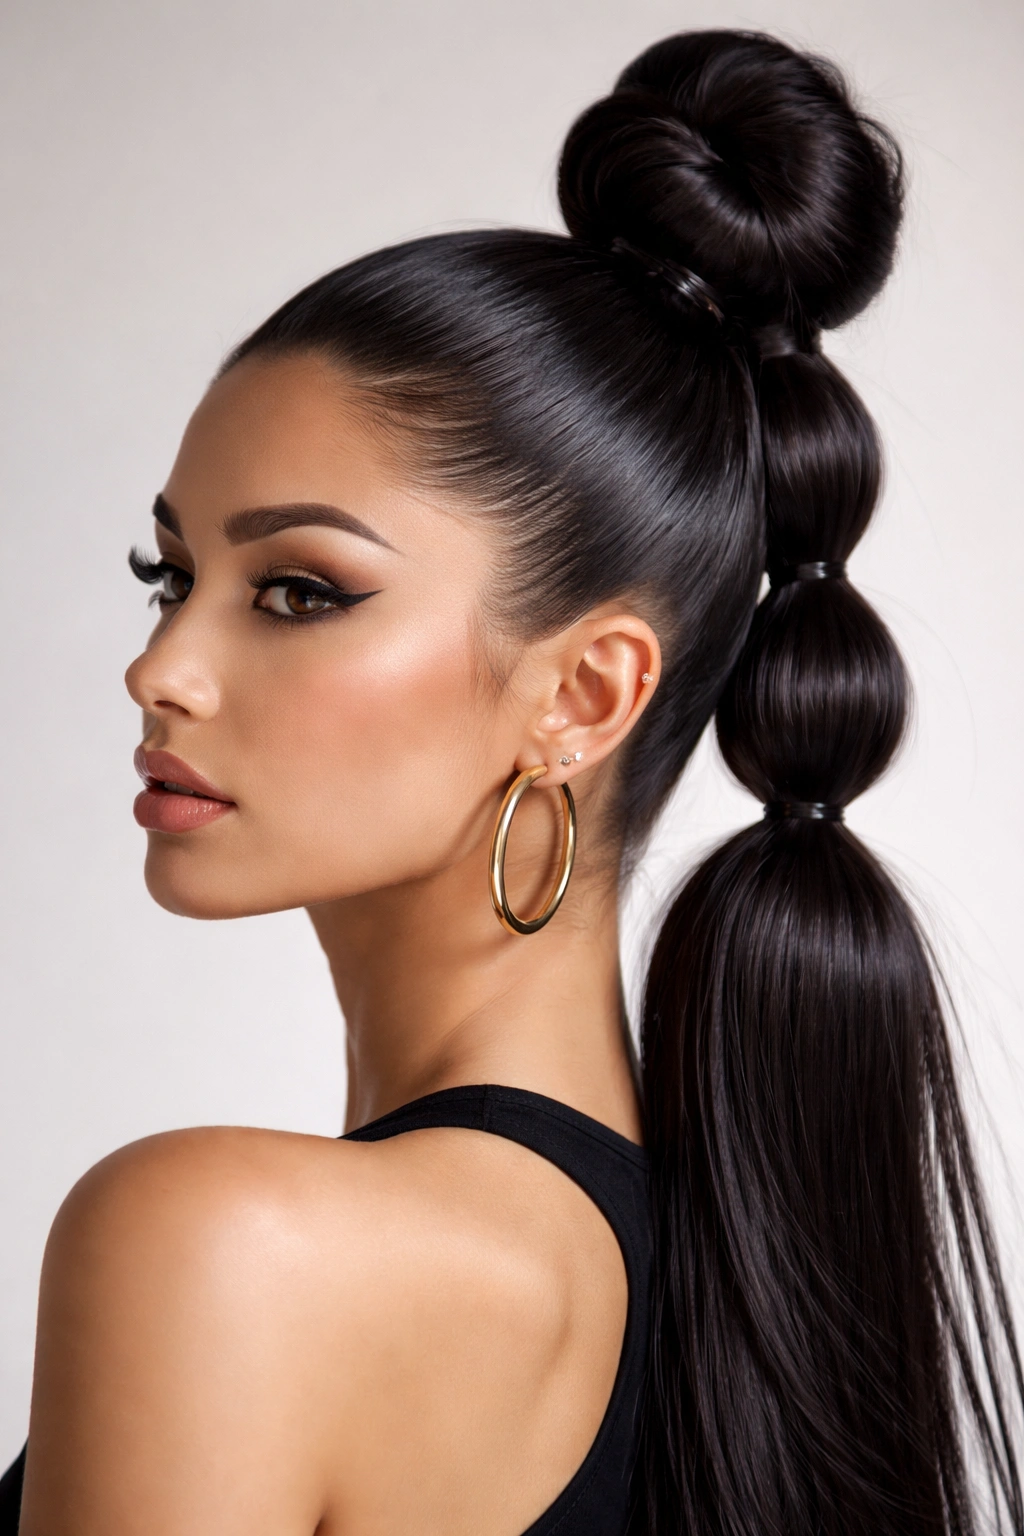
The slicked-back high bun with bubble sections is a fashion-forward baddie move that takes the sleek bun to the next level. You’re creating a bun at the crown with absolutely zero flyaways, then creating intentional “bubbles” or puffy sections in the hair between the base of your head and the bun to add volume and visual interest.
What Makes Bubble Buns Baddie
A regular sleek bun reads as polished and professional. A bubble bun reads as intentional and editorial. You’re not just pulling your hair back; you’re creating a sculptural shape that requires precision and planning. The bubbles catch light, they add dimension, and they make the overall look feel more high-fashion and less everyday.
Bubble buns also read as youthful and confident. You’re committing to a statement hair moment, not playing it safe.
How to Create a Bubble Bun
Start with a sleek high ponytail, slicking down all baby hairs with edge control or gel. Secure the ponytail with a strong elastic.
Now comes the bubble part: using small clear elastics (or bobby pins), divide your ponytail into 3-5 sections (depending on the length of your hair). Take the first section and secure it with an elastic about 1.5 inches down from the base of your ponytail. Gently pull this section upward and outward to create a “bubble,” then secure it tightly.
Repeat this process down the length of your ponytail, creating bubbles every 1.5 inches or so. At the very end, wrap the remaining hair around itself to create a bun, securing it with bobby pins.
Use edge control on the base and any flyaways. A light hairspray holds everything in place.
Pro tip: This look works best with longer hair that has some thickness. Shorter hair might not have enough length to create visible bubbles.
8. Straight Hair with Subtle Peek-a-Boo Highlights
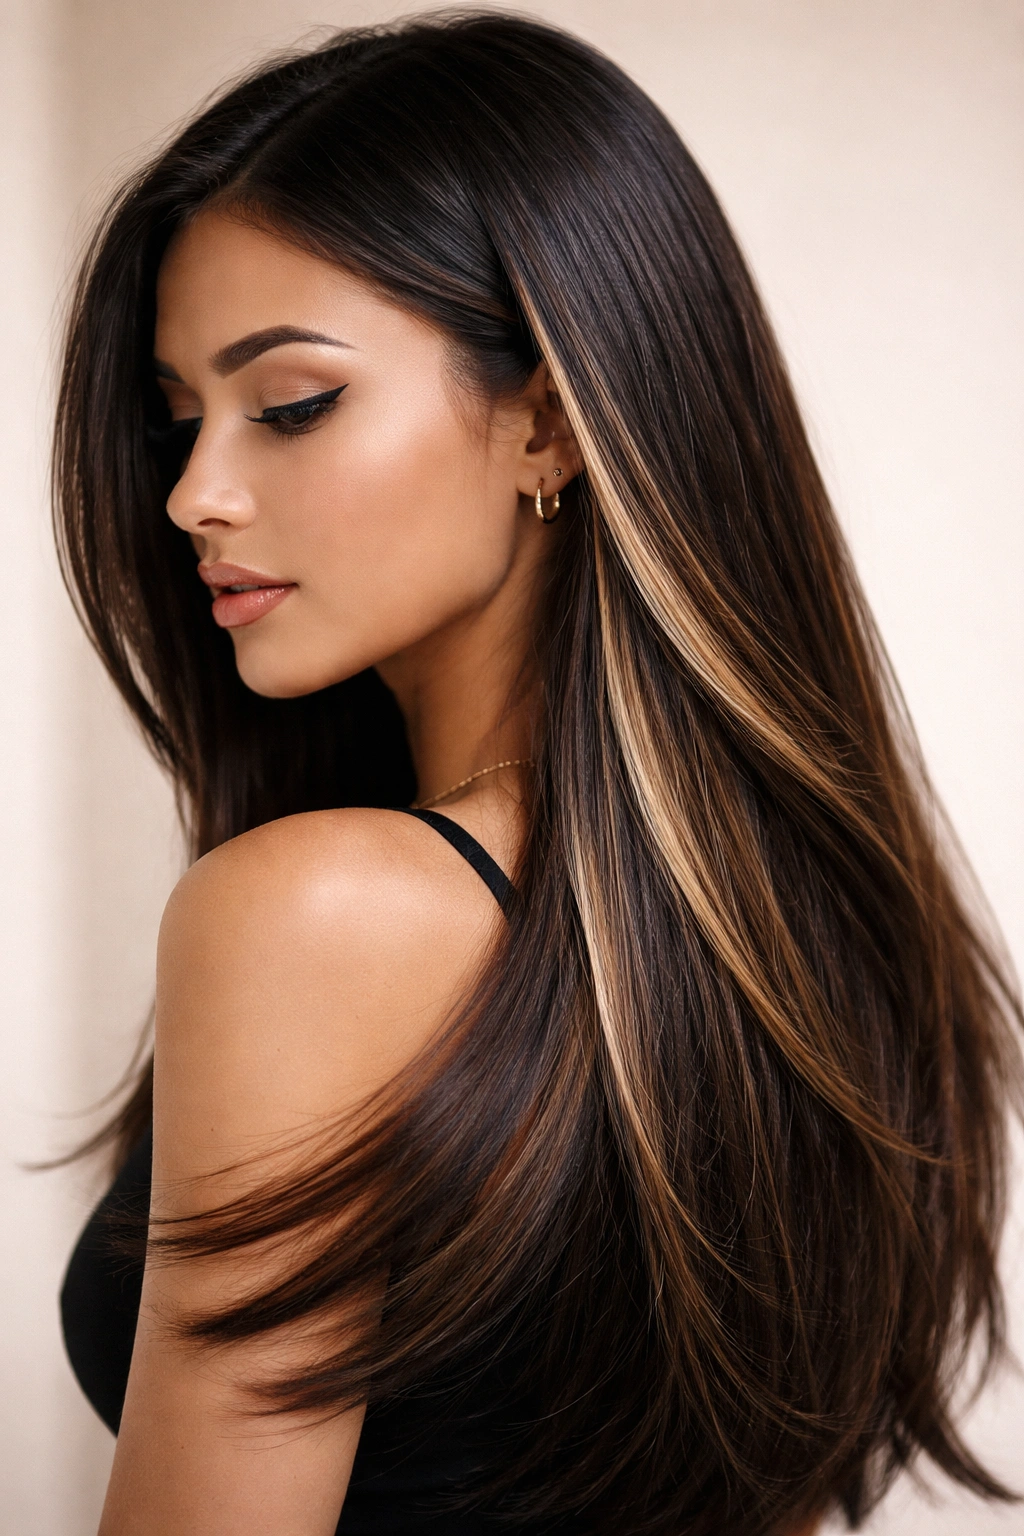
Peek-a-boo highlights are hidden color moments that reveal themselves as your hair moves—and on straight hair, they’re absolutely stunning. Strategic placement of highlights underneath and throughout your straight hair creates dimension and light-reflection without the commitment of fully highlighted hair. The “peek-a-boo” aspect means the highlights are subtle when you’re still, but dramatically visible when you move.
Why This Works for Baddie Styling
Peek-a-boo highlights feel modern and intentional in a way that full highlights can feel dated. You’re making a statement with color, but you’re doing it on your own terms—the color doesn’t dominate your look; it enhances it. It’s minimalist luxury styling.
On straight hair, peek-a-boo highlights are especially effective because straight hair is reflective. The light bounces off your straight strands and makes the highlights pop. Every time you move, these hidden pockets of color catch light and create visual interest.
Styling to Showcase Your Highlights
To make your peek-a-boo highlights work for you, style your hair with intention so the color moments are visible. Deep side parts move your hair and reveal highlights. Sleek ponytails with some sections pulled out show off hidden color beautifully. High buns with some face-framing pieces around the front reveal your highlights while keeping the overall look sleek.
Use a smoothing serum or a shine spray to add reflectivity to your hair. Straight hair already reflects light, but a little extra shine makes those peek-a-boo moments absolutely glow.
Make sure your highlights are glossy and dimensional, not flat or ashy. The goal is for them to add interest and light to your face and overall look, not to read as striped or obvious.
Worth knowing: Peek-a-boo highlights require maintenance every 6-8 weeks to keep them fresh. Also, ask your colorist to place highlights strategically rather than randomly—the placement determines how visible they are when you move.
9. Extended Straight Ends with Decorative Clips
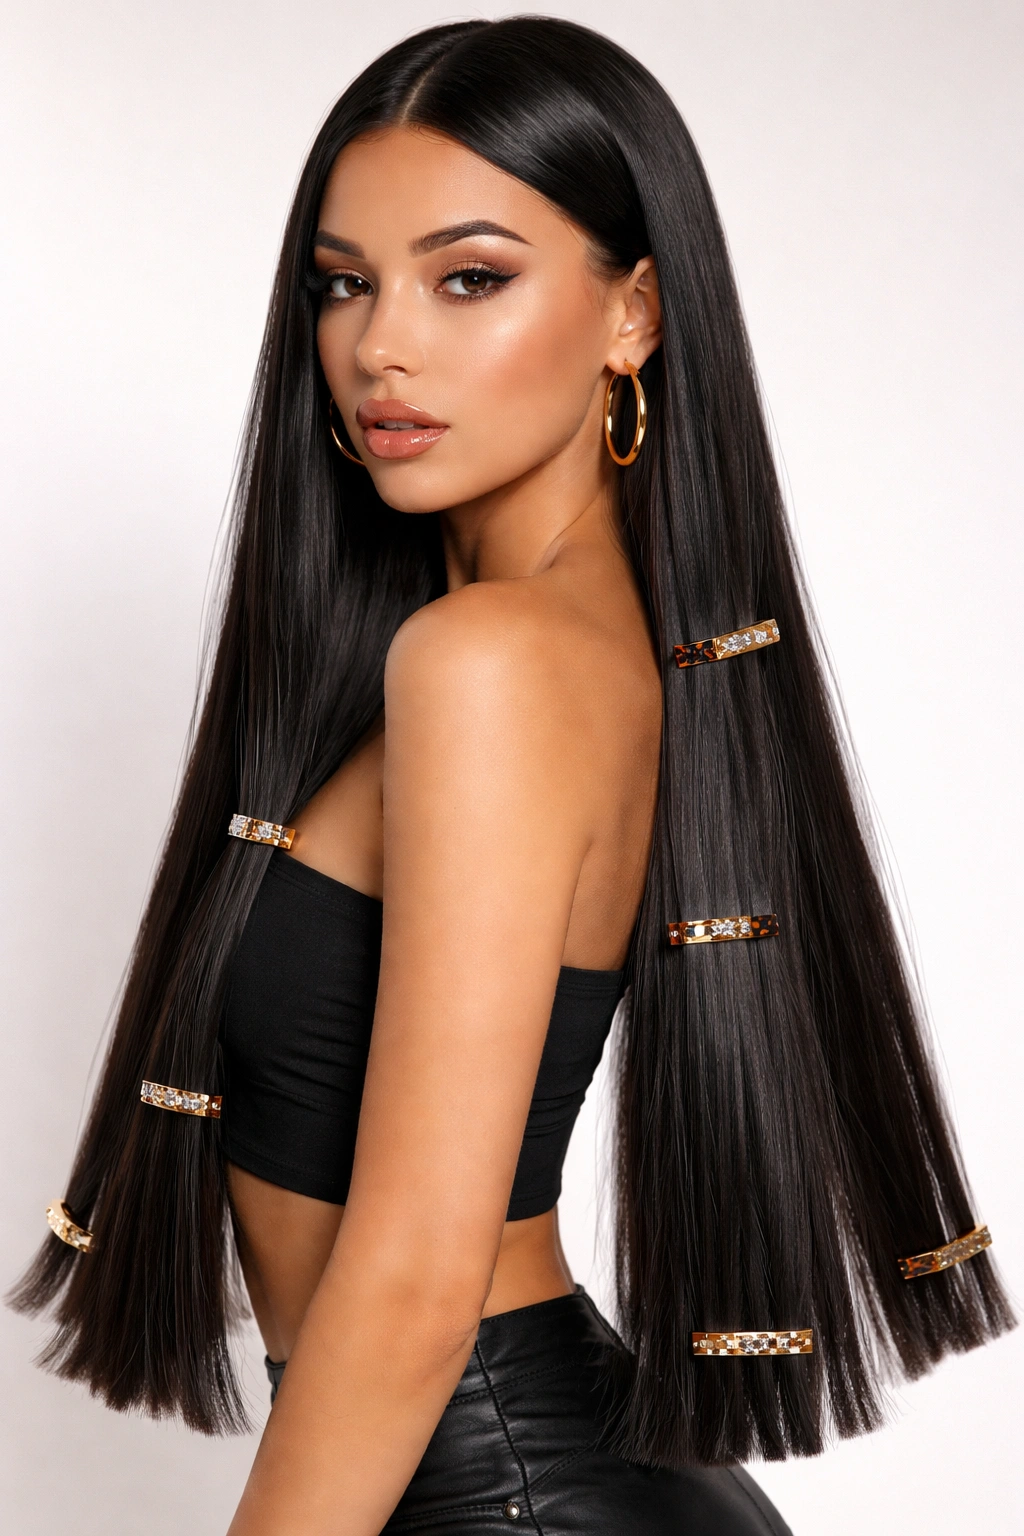
Decorative hair clips have become an essential part of baddie styling, and on straight hair, they’re absolutely transformative. Using sleek hair clips, claw clips, or statement barrettes to secure sections of your straight hair creates visual interest and allows you to transition your hairstyle from completely down to partially up without looking disheveled.
The Power of Intentional Hair Clips
A hair clip isn’t just functional; it’s a styling statement. Choosing a decorative clip and placing it strategically on your straight hair shows that you’ve thought about your look. You’re not just letting your hair hang down; you’re creating geometry and interest through placement and color.
Clips on straight hair are especially effective because they contrast with the sleekness of your strands. The clip becomes a focal point—especially if you choose a metallic clip, a tortoiseshell clip, or something with an interesting shape.
How to Style with Clips
There are several ways to use clips on straight hair. You can clip back a small section from each side of your face, creating a half-up style that shows your face and your length. You can clip up a section from the back while leaving the front down. You can even use a large claw clip to secure a subtle twist or French twist that sits on the side of your head.
The key is using clips intentionally, not haphazardly. A single clip in the right place reads as styling. Multiple clips scattered everywhere can read as chaotic.
Pair clips with sleek, straight hair that’s been blow-dried smooth for maximum impact. The smoothness of your hair makes the clip look more intentional and polished.
Pro tip: Tortoiseshell and metallic clips work on all hair colors and skin tones. Clear clips are nearly invisible, making them perfect if you want the styling effect without the visual statement of the clip itself.
10. Geometric Blunt Bob with Statement Styling
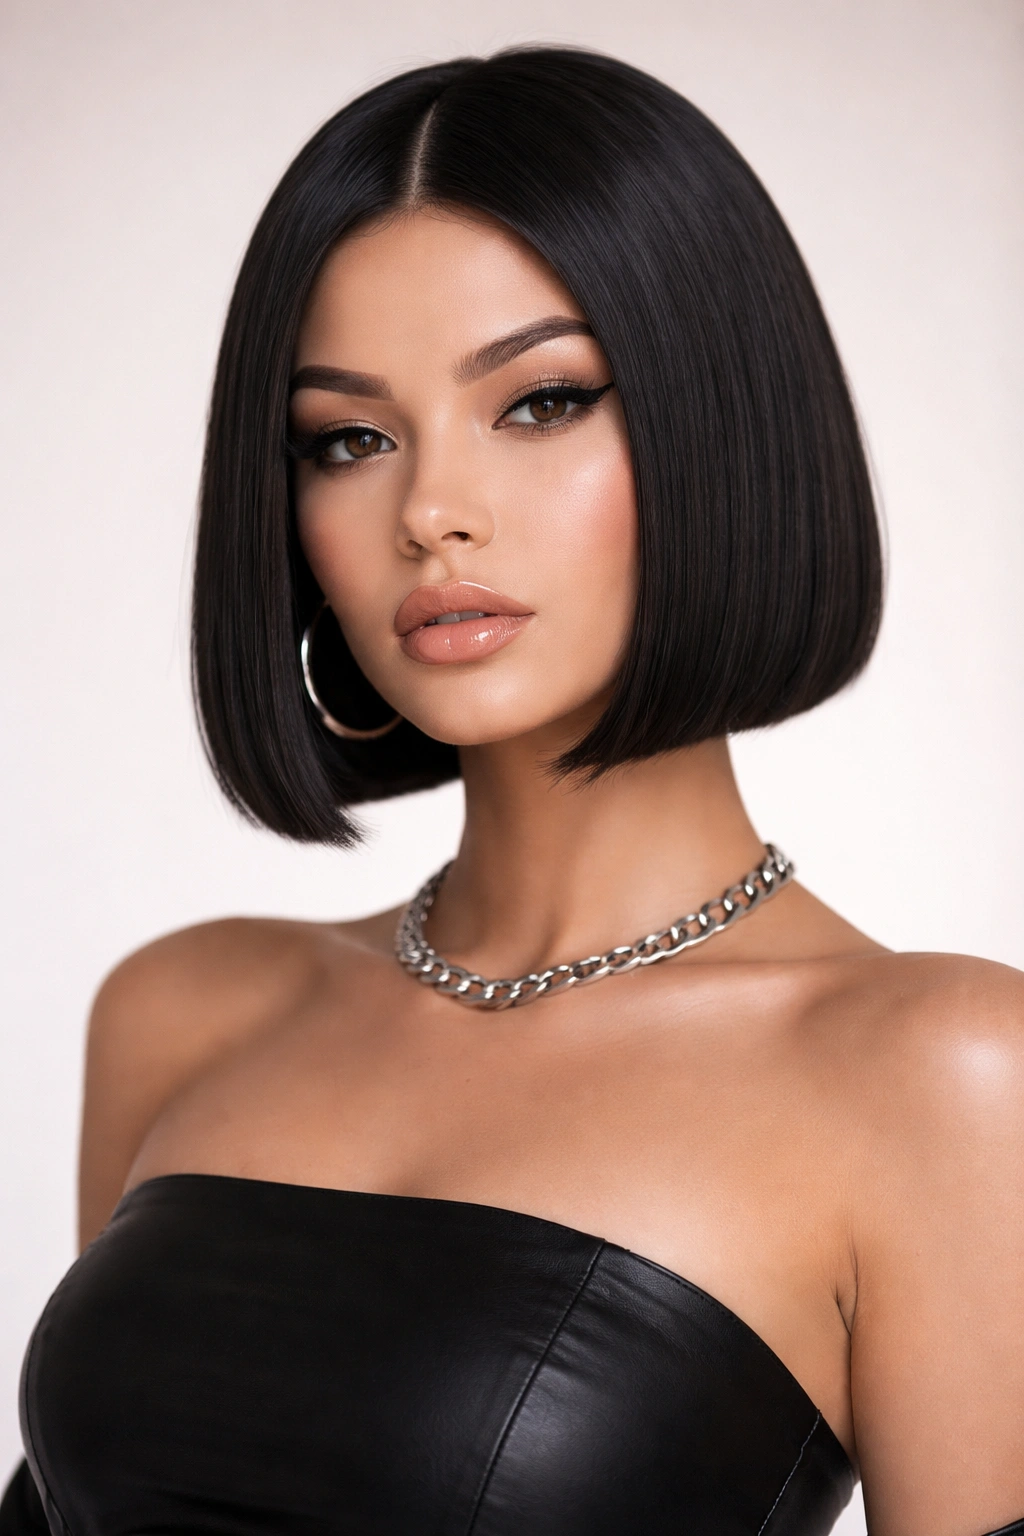
The geometric blunt bob taken to the extreme is a baddie statement—we’re talking about a perfectly precise, slightly shorter bob (around chin-length or shorter) with absolutely zero texture, zero layers, and a perfectly blunt line all the way around. This is the kind of cut that requires a really skilled stylist and regular maintenance, but the payoff is a look that reads as impossibly chic and intentional.
Why Extreme Geometric Cuts Are Peak Baddie
An extremely blunt, geometric bob is a power move. It’s not apologetic. It’s not trying to be cute or accessible; it’s just objectively well-executed and chic. This is the haircut you get when you’ve figured out what works for you and you’re committing to it completely.
A geometric bob also creates an immediate frame for your face. Everything from your jawline up becomes the focal point. This style demands that your skincare is good, your makeup is intentional, and your overall styling is considered.
Making It Baddie
The cut itself is the statement, so your styling should complement it rather than distract from it. Blow-dry your bob so it’s perfectly smooth with a subtle flip inward at the ends. Deep side parts add asymmetry without compromising the clean lines of the cut.
Accessorize deliberately—a decorative clip, a sleek headband, or simple jewelry complements the minimalist geometry of the cut. Don’t clutter the look.
Use products strategically. A light smoothing serum and a strong edge control for your baby hairs are all you need. The bob should look like it’s naturally that perfect, not like you’re drowning it in product.
Worth knowing: A geometric bob is a commitment. You’re looking at salon visits every 4-6 weeks to maintain the blunt line. This is a look for people who love getting their hair done and don’t mind the regular investment.
Final Thoughts
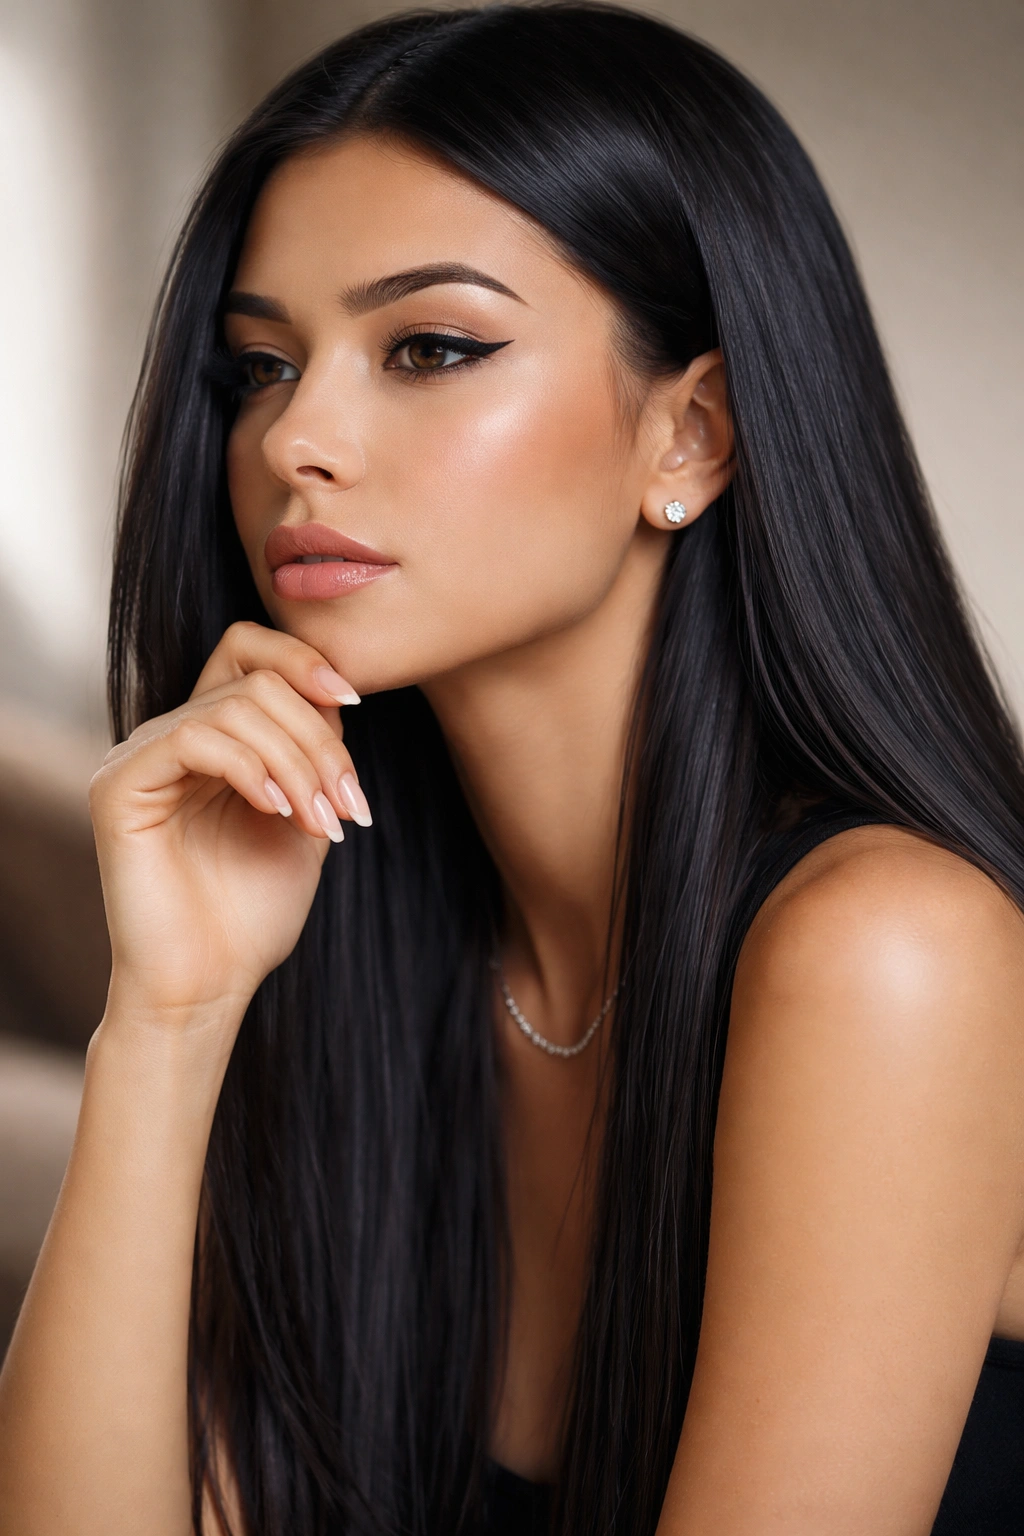
Straight hair is the ultimate baddie canvas because it’s naturally reflective, geometric, and inherently polished. Every hairstyle in this list works because it respects the power of sleek, straight texture while adding intention and detail. The commonality across all these styles is precision—whether you’re slicking edges, creating layers, adding crimps, or choosing a geometric cut, baddie styling on straight hair is about looking like you’ve made deliberate choices, not accidental ones.
The best baddie hairstyle for straight hair is the one that makes you feel confident and commanding. Some people thrive with the simplicity of a sleek bob; others prefer the versatility of a high ponytail. Some want to make a statement with highlights or a geometric cut; others feel most baddie with face-framing layers and a deep side part. The point is to choose a style that aligns with your life, your maintenance tolerance, and your aesthetic—and then commit to styling it with intention.
Invest in good tools: a quality blow dryer, a paddle brush, a round brush, and a smoothing iron matter. Invest in good products: a smoothing cream, edge control, and a light hairspray are your foundation. And most importantly, invest in a stylist who understands what you’re going for. A great cut is everything, especially with straight hair, where every line is visible and every imperfection shows. Once you’ve got the foundation right, the rest is just showing up with intention and confidence—which is peak baddie energy anyway.