Straight hair has a natural advantage when it comes to school hairstyles — it’s sleek, manageable, and requires far less effort to look polished than many other hair textures. But that doesn’t mean your options are limited to a basic ponytail. When you understand how to work with the smooth, flowing nature of straight hair, you can create looks that are professional enough for presentations, playful enough for lunch with friends, and simple enough to finish in minutes before the bell rings.
The key to finding the perfect school hairstyle for straight hair lies in understanding what makes straight hair special: it holds a crease well, creates sharp lines without extra styling effort, and resists frizz that might plague other hair types. This means you can rock sleek geometric styles, intricate braids, and polished updos without spending an hour with heat tools. Whether you’re rushing through morning prep or trying to look your best for photo day, there’s a straight-hair hairstyle that fits your needs and your schedule.
Finding the right school hairstyle is about more than just looking good — it’s about feeling confident while you focus on what actually matters: your classes, your friends, and your day. A hairstyle that stays put through lunch, PE, and the hallway chaos between periods is worth its weight in gold. The styles below are chosen specifically for straight hair because they work with your hair’s natural properties rather than against them, meaning less time styling and more time on everything else.
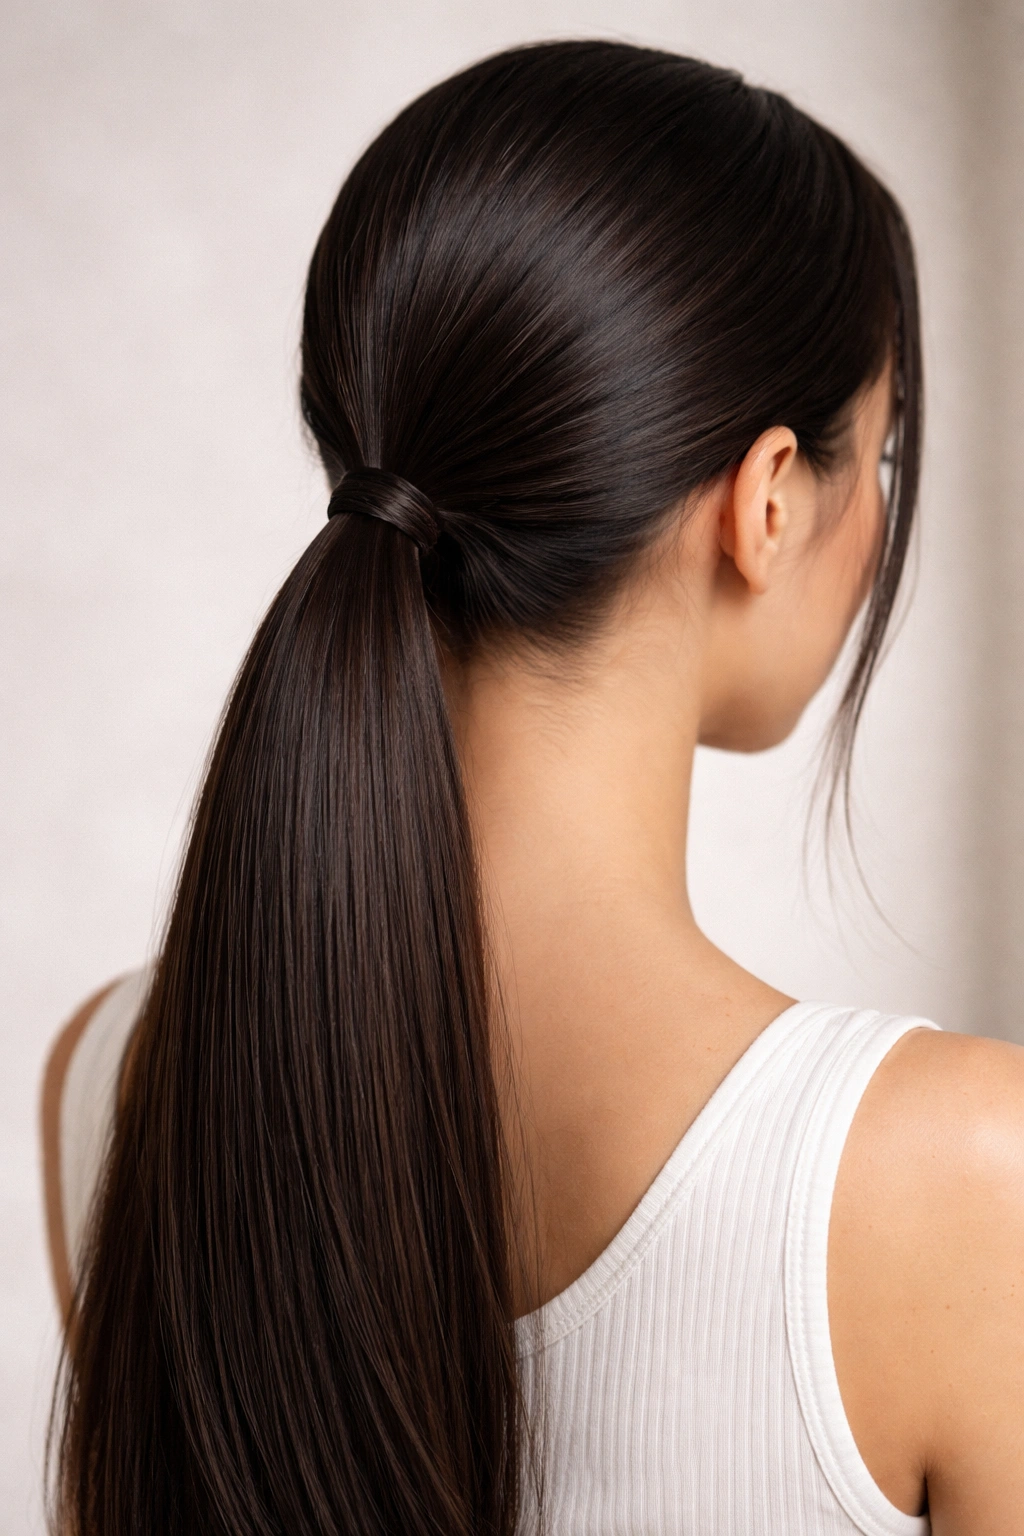
1. Sleek Low Ponytail
A low ponytail is the workhorse of school hairstyles — it’s polished enough for serious situations like tests or presentations, casual enough for everyday wear, and takes roughly ninety seconds to create. With straight hair, you can achieve a perfectly smooth finish without frizz-fighting serums, making this style feel effortlessly put-together even on mornings when sleep felt more important than preparation.
Why It Works for Straight Hair
Straight hair’s natural smoothness means you don’t need to rely on products or heat styling to make this look sleek. The line of your ponytail will be clean and sharp without any flyaways fighting against you, and the ponytail itself will hold its shape throughout the entire school day without gradually deflating or looking messy by afternoon.
How to Style It
- Brush your straight hair back smoothly into the nape of your neck, keeping your hands gentle so you don’t create static or breakage
- Gather it at a lower position on the back of your head — not directly at the crown, but roughly 2-3 inches above the nape
- Secure with an elastic that matches your hair color for a seamless look
- Smooth any flyaways with a tiny dab of smoothing serum or light hairspray if needed, but honestly, straight hair rarely needs this step
- Optional: Take a small 1-inch section from the ponytail, wrap it around the elastic to hide the hair tie, and pin the end underneath for a polished finish
Pro tip: A low ponytail actually helps your straight hair look thicker. When you position it lower, you create more volume and visual fullness than a high ponytail would on straight hair.
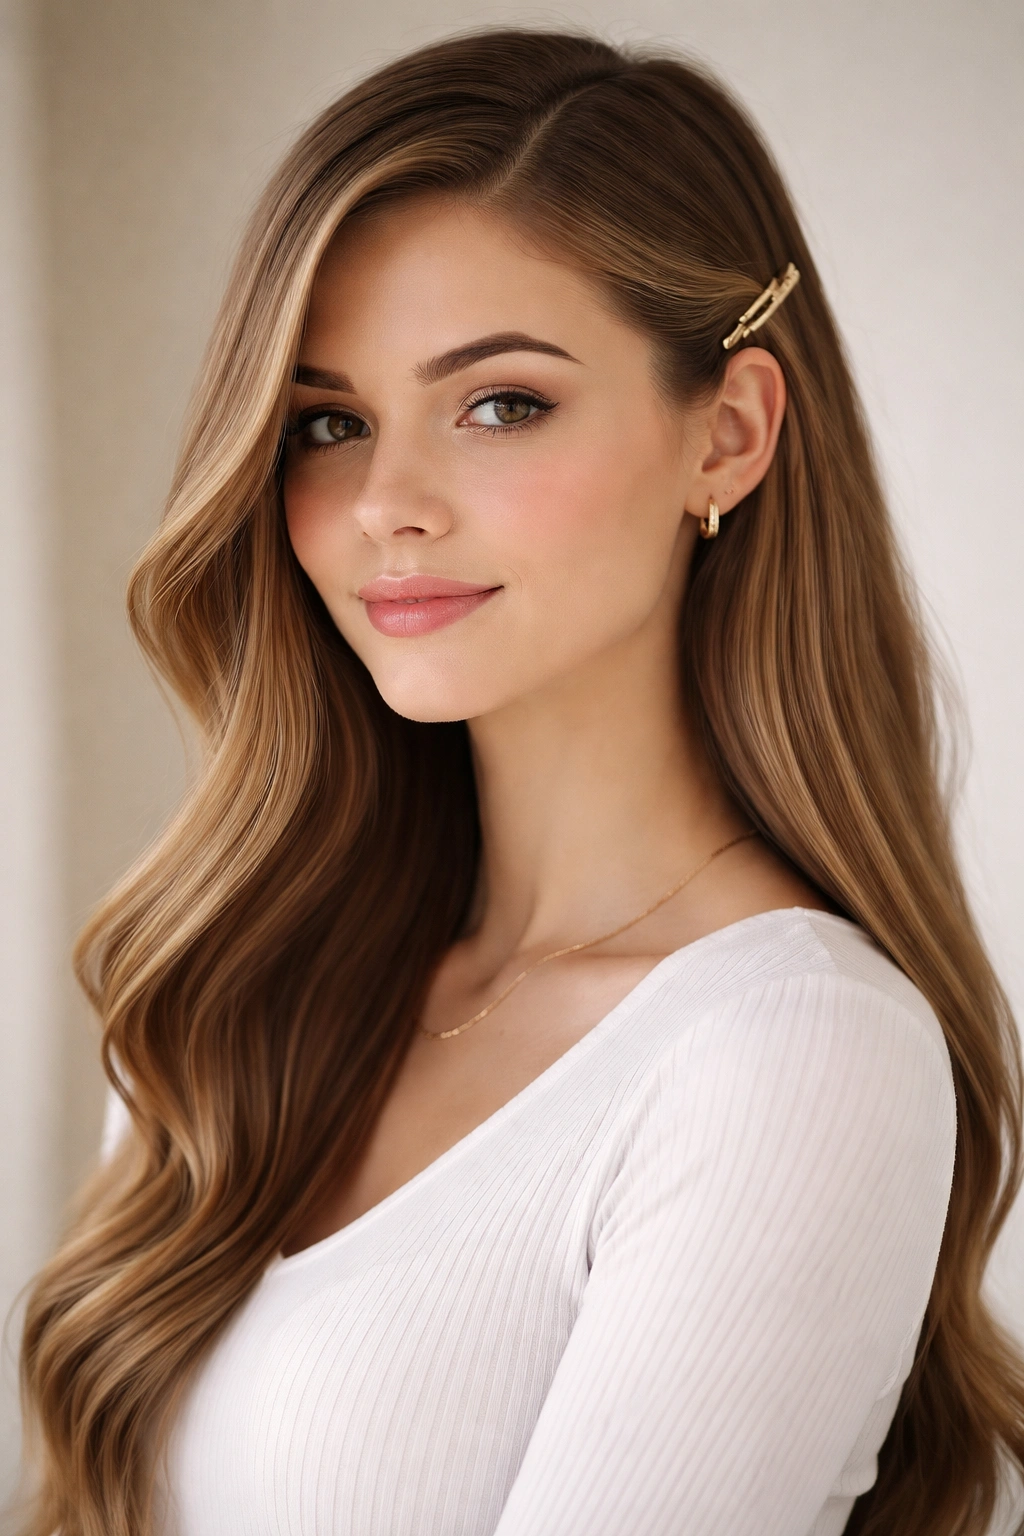
2. Sleek Center-Part Straight Hair
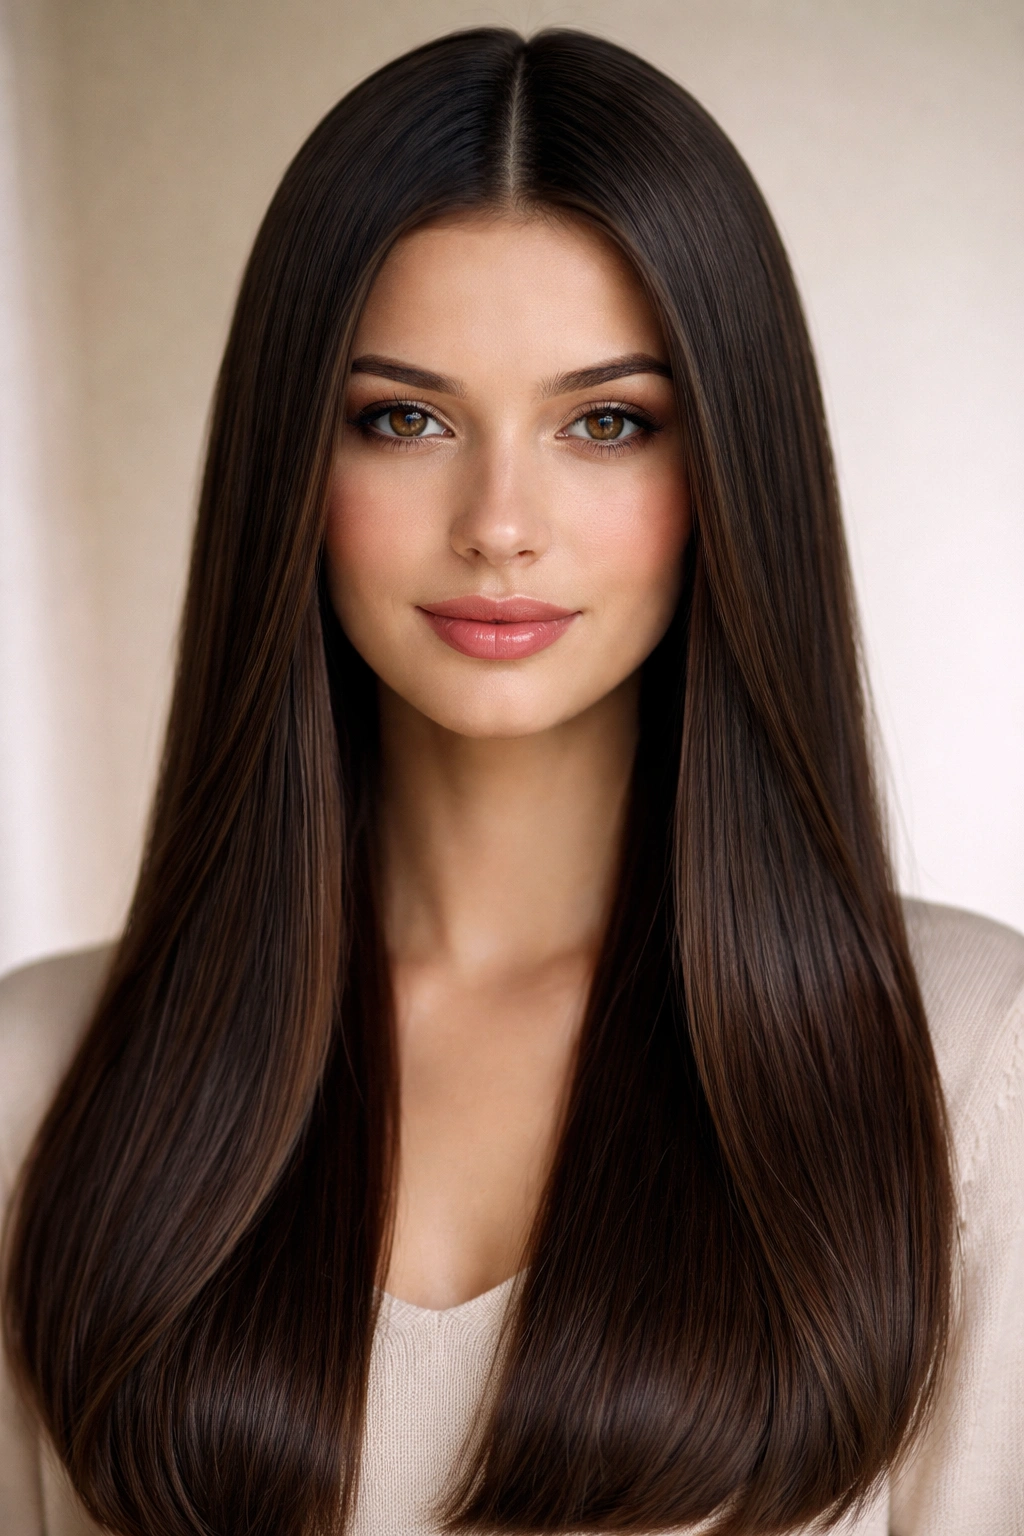
Sometimes the most impactful school hairstyle is simply letting your straight hair do what it does best — hang straight, shiny, and effortlessly polished. A deep center part divides your hair symmetrically and creates a framing effect that flatters most face shapes while keeping your hair completely off your face if you use a few bobby pins strategically.
The Psychology Behind a Center Part
Center parts are associated with a composed, balanced appearance — exactly the vibe you want when you’re sitting in class or presenting to the school. There’s something about symmetry that reads as “I have my life together,” even if you threw this hairstyle together in under five minutes.
How to Create the Perfect Center Part
- Start with clean, brushed straight hair
- Use a fine-tooth comb or the pointed end of a rattail comb to section your hair directly down the middle from your forehead to the nape of your neck
- Brush each side smoothly away from your face, directing your hair naturally down your back
- If you have a shorter face, slightly angle the part toward the back so it’s not perfectly center — this creates visual width
- Use a flat iron set to medium heat to touch up any slight waves, running it gently down each section just once
- Finish with a light smoothing serum for shine that catches light without looking greasy
Real talk: Straight hair with a center part actually requires zero products to look finished — the straight texture does all the work for you. If your hair is on the finer side, skip heavy products that might weigh it down.
3. Half-Up Half-Down with a Twist
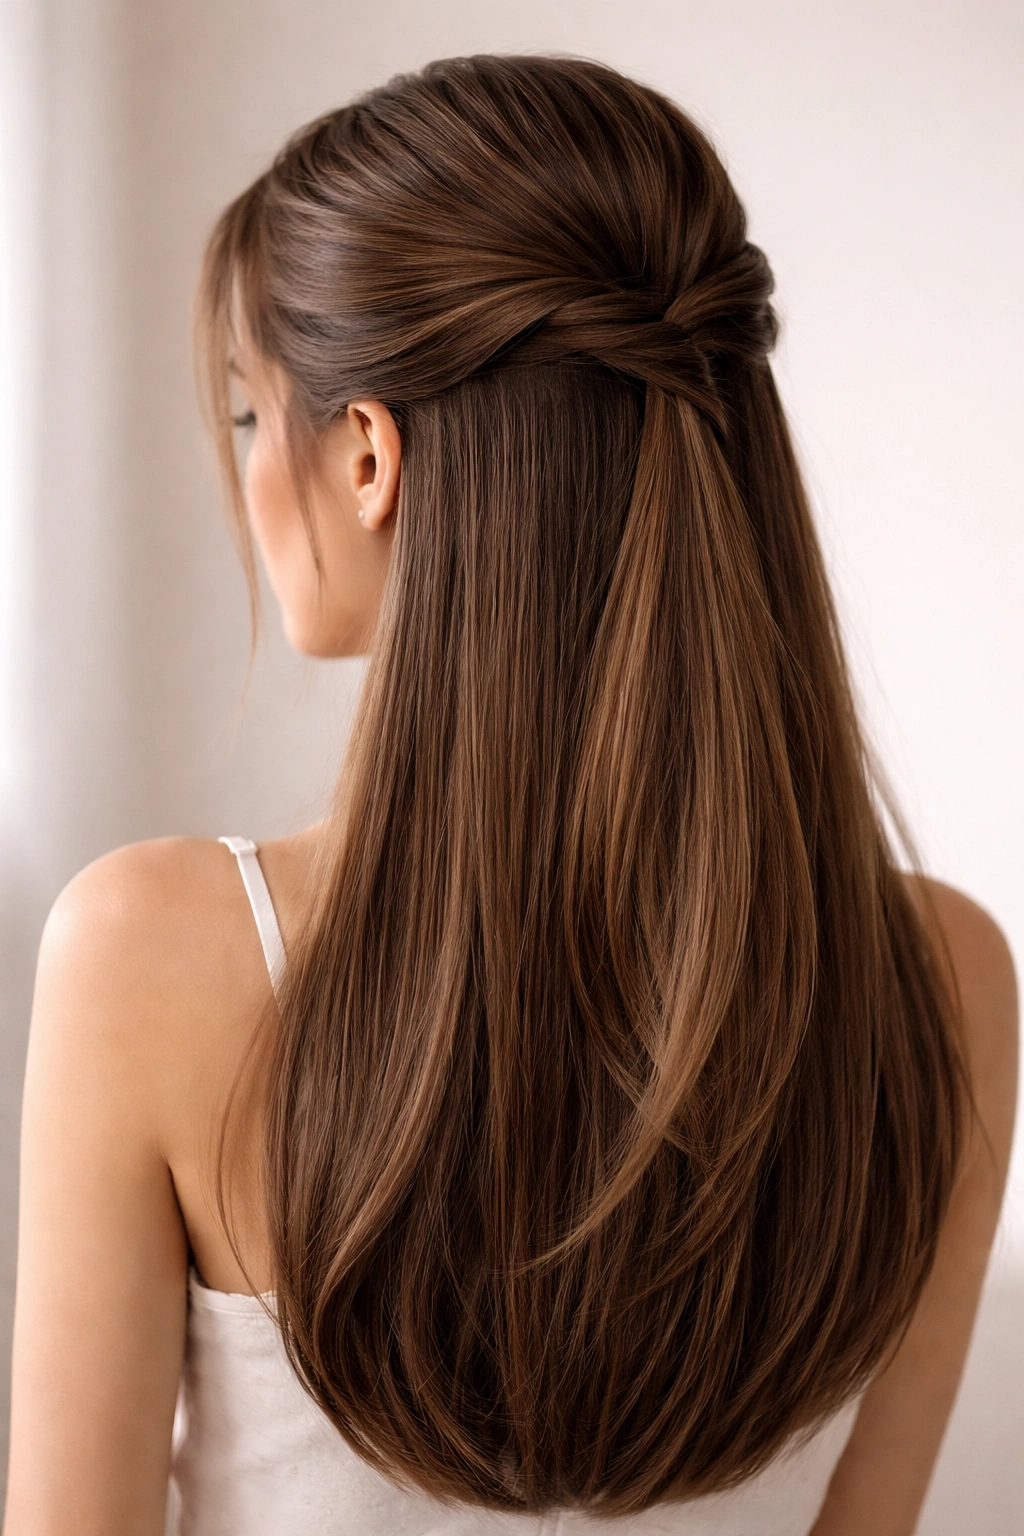
This style keeps hair partially off your face while maintaining the length and flow of wearing your hair down, making it ideal for days when you want some movement but also need to keep hair from getting in your way during class. The twist detail elevates it beyond a basic half-up style, transforming it into something that looks intentional and polished.
What Makes the Twist Detail Special
A twisted section rather than a simple gathered handful adds visual interest and texture even though your hair is perfectly straight. The twist catches the light differently and creates dimension that makes the style feel more sophisticated than its actual simplicity would suggest. For straight hair, the twist is also incredibly stable — it won’t unravel or come loose throughout your school day.
Step-by-Step Styling Instructions
- Part off a section from one side temple to the same spot on the other side, across the crown
- Gently twist this upper section away from your face — aim for a loose, relaxed twist rather than a tight one
- Secure at the back of your head with a bobby pin or small elastic
- Leave the bottom half of your hair completely down, flowing past your shoulders
- Smooth both the twisted section and the loose hair with a flat iron if there’s any texture
- Use a light hairspray mist to hold the twist in place without making hair stiff
Worth knowing: If you have fine straight hair, use a clear elastic rather than an opaque one — it virtually disappears against your hair and creates a more polished finished look.
4. Dutch Braids
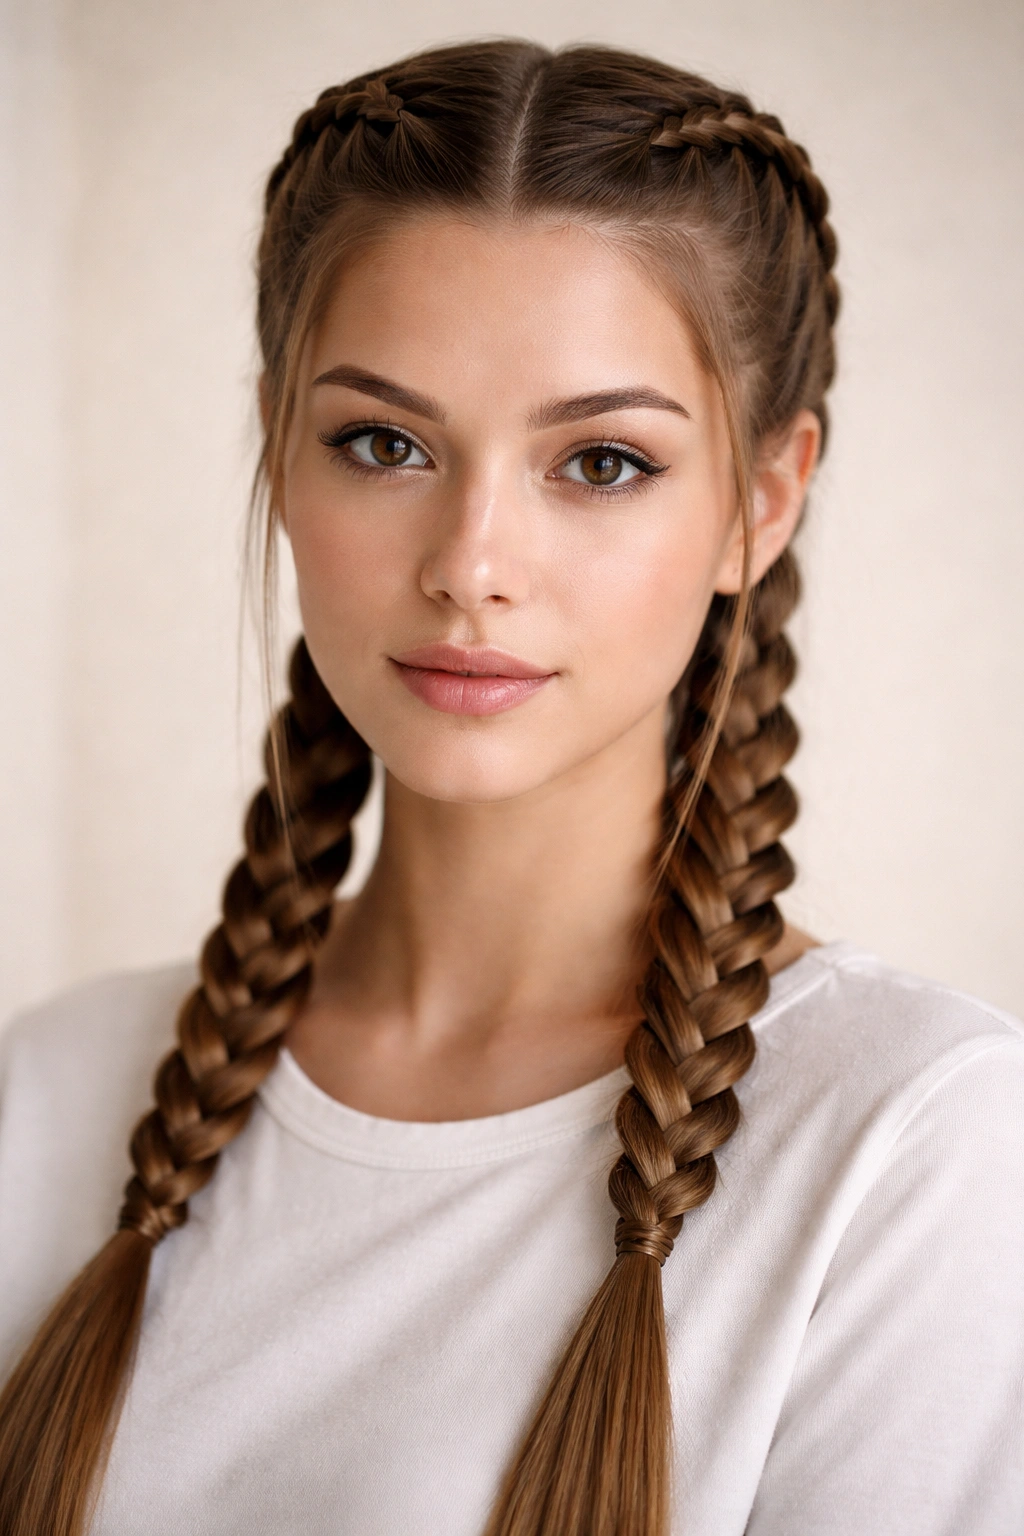
Dutch braids (where you braid under instead of over) are a classic school hairstyle that actually looks more impressive than the time investment they require. On straight hair, Dutch braids are crisp and clean-looking, with each section distinctly visible, making them perfect for days when you want your hairstyle to show you’re putting in effort.
Why Dutch Braids Suit Straight Hair
Braids on straight hair have clean, defined lines that wouldn’t be as sharp on wavy or curly textures. Each strand stays in place, the pattern is easily visible, and the braids maintain their shape for the entire school day without needing to be redone or tightened. Straight hair braids also don’t have the frizz issues that complicate braiding on other textures.
Two Braiding Options
Single Dutch Braid Down the Center:
- Brush hair back from your forehead
- Start a Dutch braid at your crown, braiding backward and downward
- Braid all the way to the nape of your neck, then continue braiding the remaining loose hair
- Secure with an elastic and gently tug the outer loops of the braid slightly to add fullness
Two Dutch Braids (Pigtail Style):
- Create a center part from forehead to nape
- Start one Dutch braid above each ear, working backward
- Braid both sides down to the ends and secure each with a small elastic
- This style works beautifully for younger grades and also looks great paired with a school uniform
Pro tip: Dutch braids show off straight hair better than regular braids because the texture is more visible. If you want your braid work to be noticed and appreciated, straight hair is your advantage.
5. Curved Ponytail with Volume
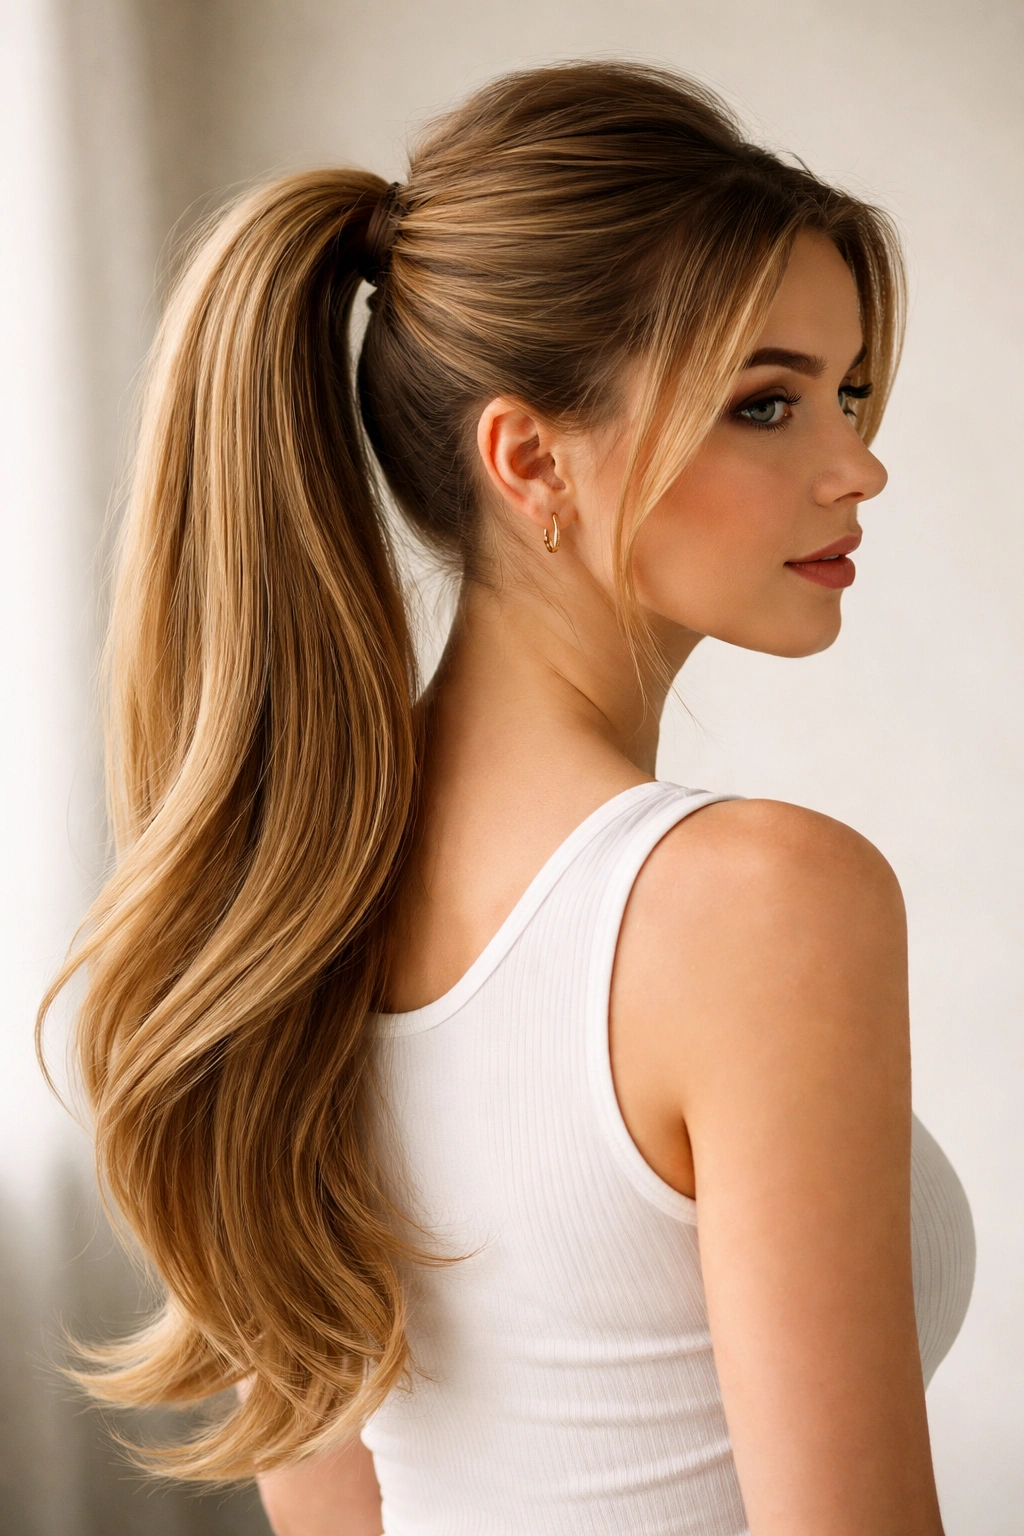
This isn’t a perfectly slicked ponytail — it’s a softer, slightly curved version where you tease the crown for volume, then gather hair into a ponytail that sits at a slight angle rather than directly center. The curve makes it feel more modern and polished than a traditional ponytail, while the crown volume adds dimension that makes straight hair look thicker.
Creating the Curved Effect
The secret is teasing at the crown and then positioning your ponytail slightly off-center, creating a gentle curve from the back of your head down to the ponytail. This works beautifully on straight hair because the teasing stays put, and the straight texture of the ponytail itself provides the smooth contrast that makes the volume look intentional rather than messy.
Styling Steps
- Blow-dry your hair straight if it’s not already
- Take a section of hair at your crown (about 2-3 inches wide) and tease it gently at the roots using a fine-tooth comb
- Smooth the top layer of your teased section so it looks polished, not ratted
- Brush the rest of your hair back and gather into a ponytail, positioning it slightly to one side and lower than center
- Secure with an elastic that matches your hair color
- Use a smoothing serum on the length of the ponytail to emphasize the shine and contrast between the voluminous crown and sleek ponytail
Insider note: This style actually works better on straight hair than on wavy hair because the contrast between the teased texture and the smooth ponytail is more pronounced and more flattering.
6. Sleek Bun with a Minimalist Approach

A neat bun is appropriate for school dances, presentations, or any day when you want to look especially polished. The minimalist approach means a tight bun without decorative pins or extra styling, keeping it appropriate for any school environment while looking genuinely put-together.
Why a Simple Bun Works
A bun on straight hair looks refined with zero effort. There are no flyaways, no frizz, no texture fighting against you. When your hair is straight, a simple elastic can create a bun that looks intentionally sleek and professional rather than carelessly thrown together.
Creating a Tight Bun
- Brush your straight hair back into a high or low ponytail, depending on the vibe you want
- Twist the ponytail tightly, then wrap it around the base to form a circle
- Secure with bobby pins inserted directly into the bun structure
- Smooth your hairline with a fine-tooth comb and tiny bit of smoothing serum
- Use a light hairspray to set any flyaways in place
- If you want extra security for an active day, you can use a small second elastic to hold the bun shape
Quick facts:
- High buns look more playful and youthful
- Low buns look more serious and polished
- Straight hair buns hold their shape for 8+ hours without needing adjustment
- You can create a bun in under 2 minutes once you practice it a couple of times
7. Braided Crown Halo
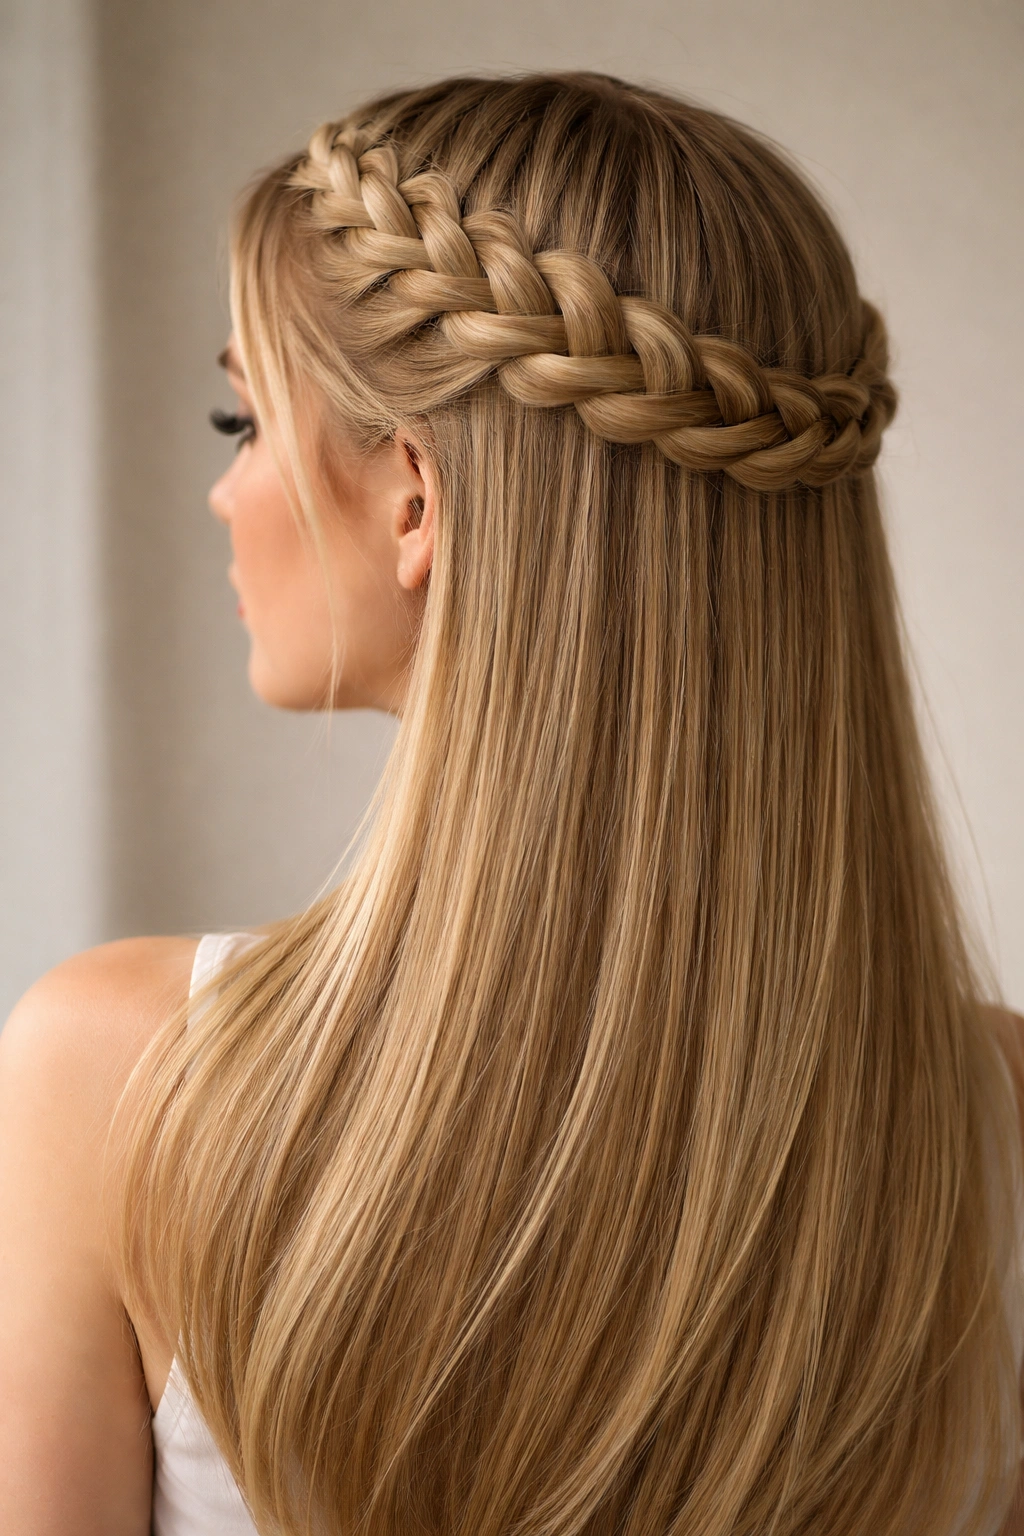
A braided crown halo wraps a braid around your head like a crown, with the rest of your hair flowing down your back. It’s the school hairstyle that earns the most compliments because it looks dramatically more complicated than it actually is, especially on straight hair where braids stay crisp and defined.
The Visual Impact
A braided halo draws attention upward to your face and creates a romantic, intentional look that feels special — perfect for special school events or simply a day when you want to feel confident in how you look. The halo shape is also flattering on virtually every face shape.
How to Create a Braided Crown
- Blow-dry your straight hair completely straight
- Start a French or Dutch braid above one ear, working horizontally around the back of your head
- The braid should angle slightly upward as it reaches the opposite side
- Once you’ve braided around to above your other ear, secure the end with a small elastic
- Leave all remaining hair down and flowing
- Gently tug the outer loops of the braid to add fullness and softness
- Smooth the loose hair down your back with a flat iron if needed
Pro tip: This style works best when you do the braid on one side, then braid from the other side, meeting the first braid in the middle. You can secure them with bobby pins instead of elastics for a seamless look.
8. Slicked-Back Sleek Look with Face-Framing Layers
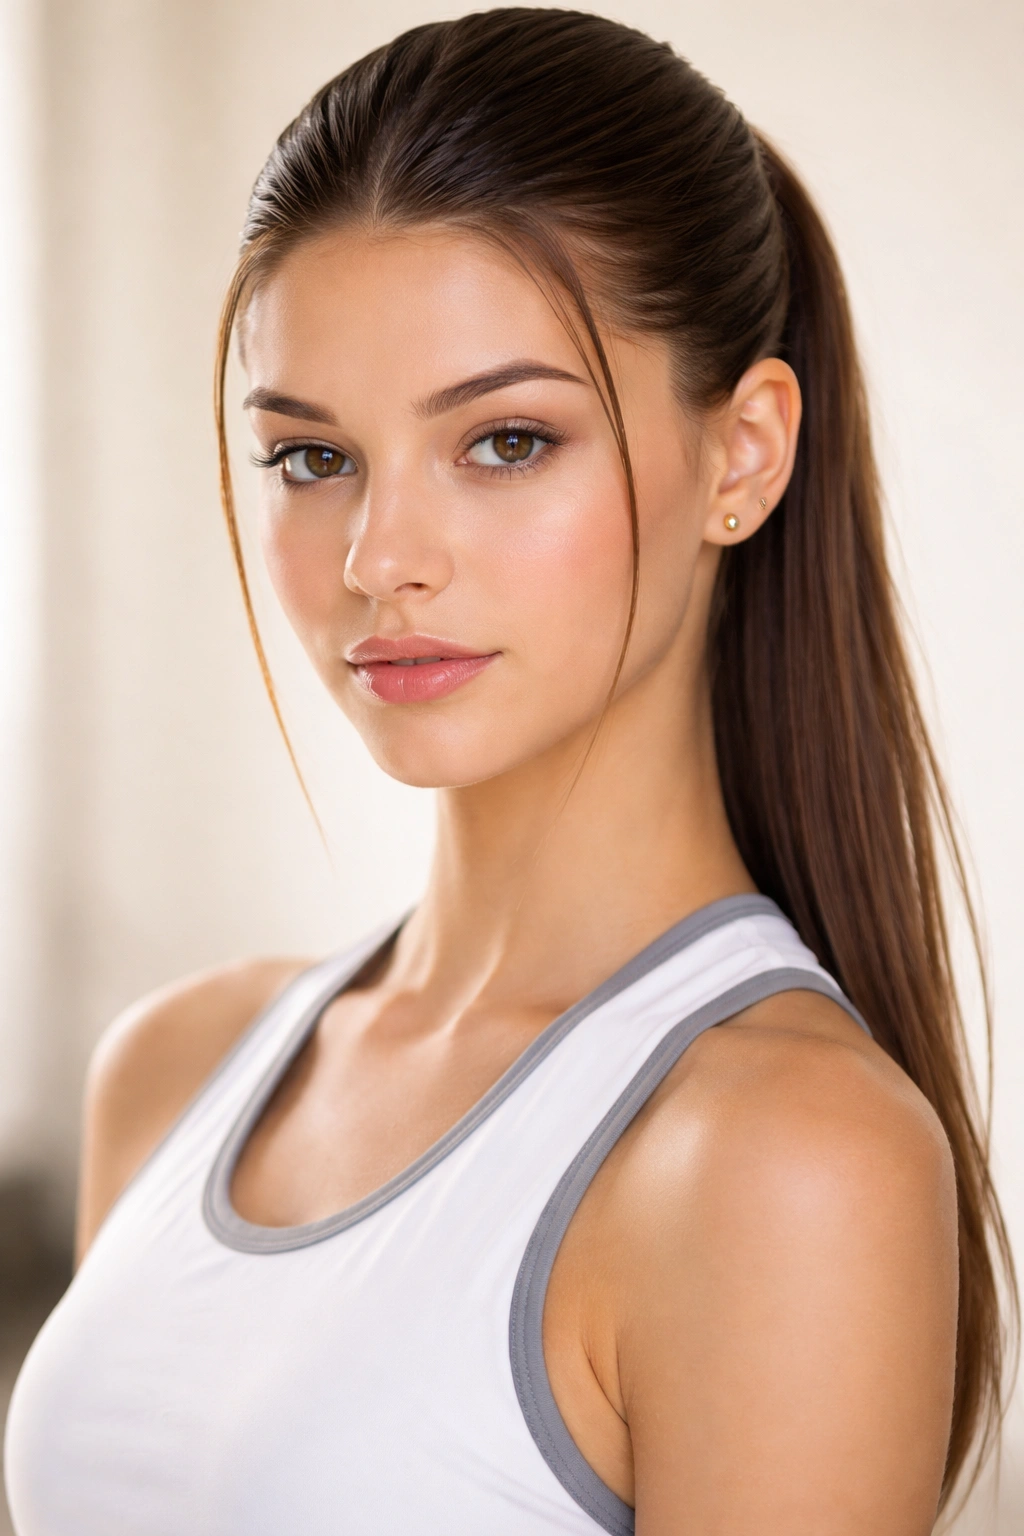
This style pulls your hair back severely away from your face, creating a clean, athletic appearance perfect for school when paired with a confident attitude. With straight hair, the slicked-back look actually looks polished rather than harsh, and you can add just-enough texture to keep it from feeling too severe.
Creating the Sleek Slicked Effect
Use a smoothing gel or a light pomade designed for straight hair — apply it to damp hair, comb everything back, and let it air-dry for a natural finish. The key is using a very light hand so it doesn’t look greasy or heavy. Straight hair pulls off the slicked look better than any other texture because the sleekness looks intentional rather than like you’re fighting against natural texture.
Styling Details
- Wash your hair or dampen it with a spray bottle
- Apply a light smoothing gel throughout, focusing on the top and sides
- Comb your hair straight back from your hairline, creating a smooth line
- For a less severe version, leave a few tendrils loose around your face (one on each side, framing your cheekbones)
- Secure the back into a low ponytail or bun if you want, or leave it loose if your hair reaches past your shoulders
- Allow to air-dry completely for the sleekest finish
Real talk: This look requires relatively clean, straight hair to work well. It’s not forgiving, which also means when it looks good, it looks really good and takes almost no time to maintain throughout the day.
9. Side-Swept Waves Pinned Back
Even though your hair is naturally straight, you can create soft waves that give you a more relaxed, casual vibe while still keeping hair partially off your face. This works beautifully for school because the waves add movement and softness while the side pin keeps everything manageable and intentional-looking.
Why Waves on Straight Hair Look Different
Waves on straight hair look different than waves on naturally wavy hair — they’re more distinct and geometric because they contrast with your hair’s natural texture. They also hold the wave shape much longer on straight hair, meaning you can create them in the morning and they’ll look the same all day.
How to Create Soft Waves
- Blow-dry your straight hair completely
- Take sections of your hair and run a curling iron (set to medium-high, around 350°F) away from your face, holding for 2-3 seconds
- Work through all of your hair, alternating directions for a more natural appearance
- Before the curls cool completely, gently brush through them with a paddle brush to break them into softer waves
- Sweep your hair to one side and use a bobby pin to secure it behind your ear
- Finish with a light hairspray to hold the waves and the side position
Worth knowing: Waves on straight hair are actually easier to maintain than waves on wavy hair because they don’t fight against your natural texture — they’re stable all day without frizz.
10. Straight Hair Half-Up with a Hair Clip
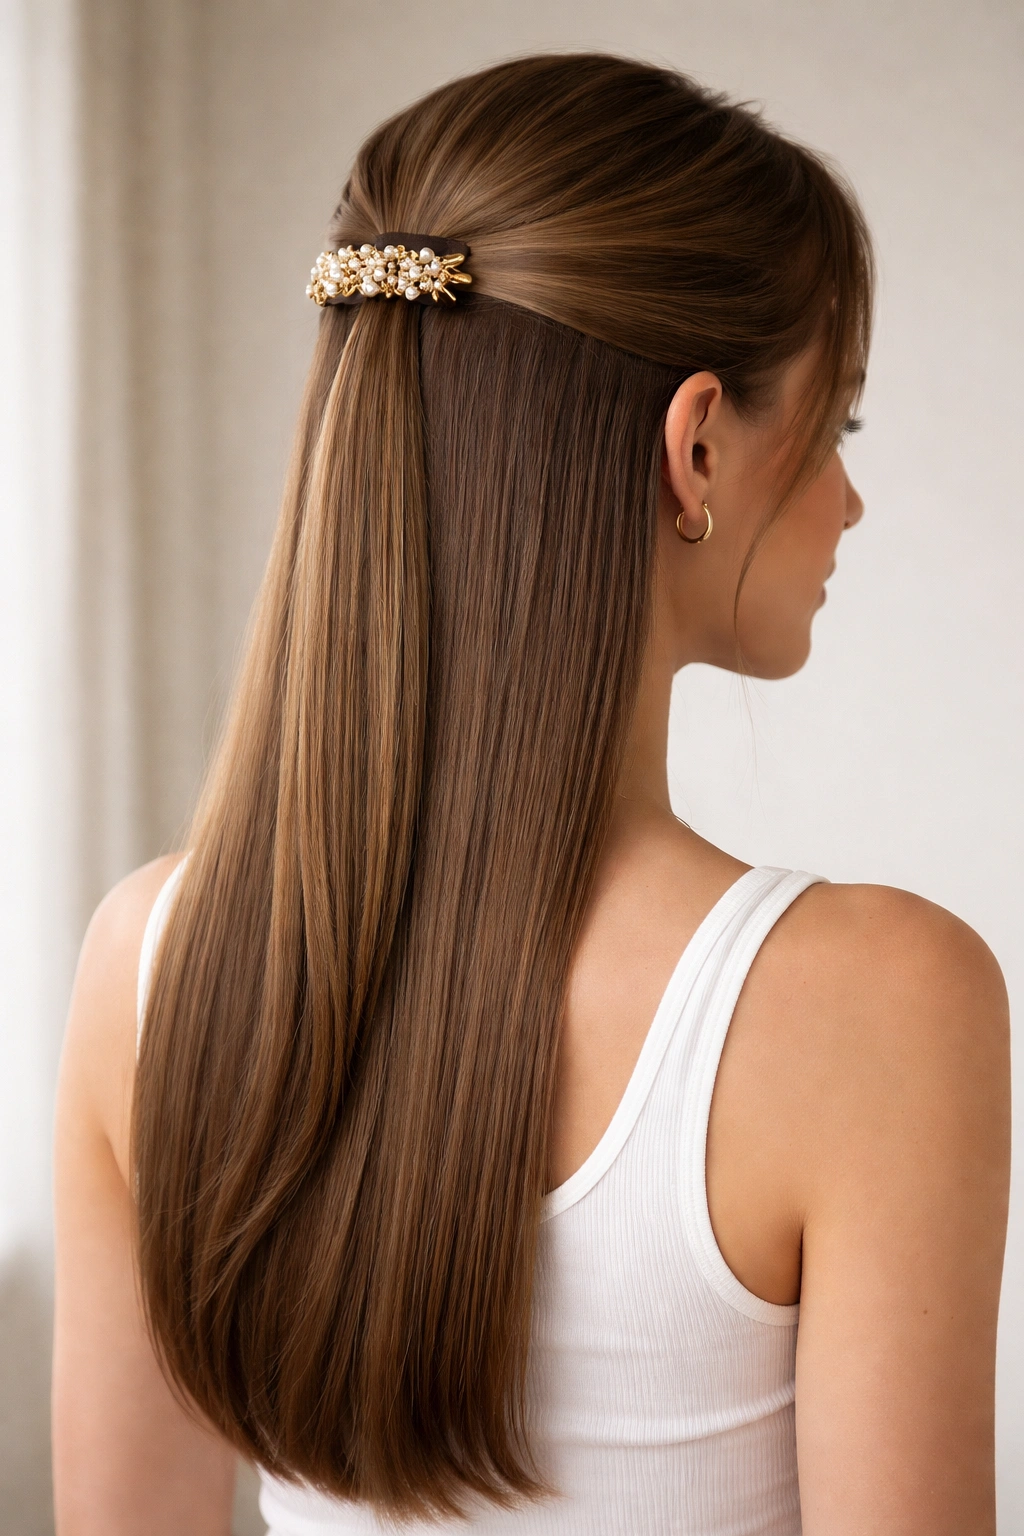
This style lets you keep the polished look of partially pinned hair while using a decorative hair clip instead of an elastic. It’s trendy, quick, and works wonderfully with straight hair because clips look sleek against the smooth texture. The style walks a perfect line between casual and put-together.
Why Hair Clips Look Great on Straight Hair
Hair clips sit smoothly and securely on straight hair, creating a clean look without the bumps or looseness they might have on other textures. The clip also becomes part of the design of the hairstyle rather than just a functional accessory, making this a more intentional-looking choice than a basic elastic.
Styling with a Hair Clip
- Brush your straight hair back smoothly from your face
- Take a section from the temples on both sides (the width of the clip you’re using) and gather them at the back of your head, approximately at the crown
- Secure with your decorative hair clip, positioning it so it’s centered and slightly visible
- Leave all hair below the clip down and flowing
- For a softer look, gently pull a few face-framing pieces loose around your temples
- Smooth everything with a flat iron if needed, using minimal product for a clean finish
Pro tip: Tortoiseshell clips, metal clips, and colorful clips all look polished on straight hair. The smoothness of your hair shows off the texture and color of the clip, making it look intentional rather than purely functional.
Final Thoughts
Straight hair is genuinely one of the most versatile hair textures for school hairstyles, even though it might not always feel that way if you’re comparing yourself to the elaborate styles you see on other hair types. The truth is, straight hair’s natural smoothness, shine, and ability to hold clean lines gives you a significant advantage — you can create polished, professional looks in minutes without the product arsenal or styling tools that other hair textures require.
The hairstyles above work because they respect what straight hair does naturally: it lies flat, it stays in place, it reflects light beautifully, and it resists frizz. Instead of fighting against your hair’s nature or wishing you had a different texture, these styles leverage exactly what makes straight hair special. A five-minute smooth bun on straight hair looks more intentional than the same bun would on wavy hair. A Dutch braid on straight hair shows off the pattern more clearly. A sleek ponytail looks polished without any products.
Pick one of these styles to master first, then branch out. Once you find your go-to hairstyle that makes you feel confident and takes just minutes to execute, you’ve won half the battle. The other half is remembering that any hairstyle — no matter how simple — looks better when you wear it with confidence. Your straight hair is an asset, not a limitation.