Straight hair presents a unique challenge when it comes to bun styles. While curly and textured hair naturally grip and hold volume, straight strands can slip, slide, and refuse to cooperate with even the most carefully constructed updo. The good news? Low buns are actually one of your best options for creating a polished, secure style that lasts all day without constant readjustments. The lower placement means gravity works with you instead of against you, the weight of your hair naturally anchors everything in place, and you have plenty of room to experiment with texture, grip techniques, and styling methods that genuinely hold.
The real secret to keeping a low bun together on straight hair isn’t fighting your hair’s natural texture—it’s working with it strategically. This means choosing bun styles that inherently benefit from smooth, sleek strands, using the right tools and products to create grip without damage, and understanding which techniques actually provide lasting hold versus those that sound good in theory but fail by noon. A well-executed low bun on straight hair can look effortlessly elegant for formal occasions, professional enough for the office, and casual enough for running errands—all without unraveling.
What makes the following ten styles worth your time is that each one has been tested specifically on straight hair and refined to address the legitimate hold challenges that come with it. You’ll find everything from classic understated options to more textured interpretations that add visual interest without sacrificing security. Whether you’re looking for something you can create in five minutes or a more polished style worth the extra effort, there’s a low bun here that works for your lifestyle and hair type.
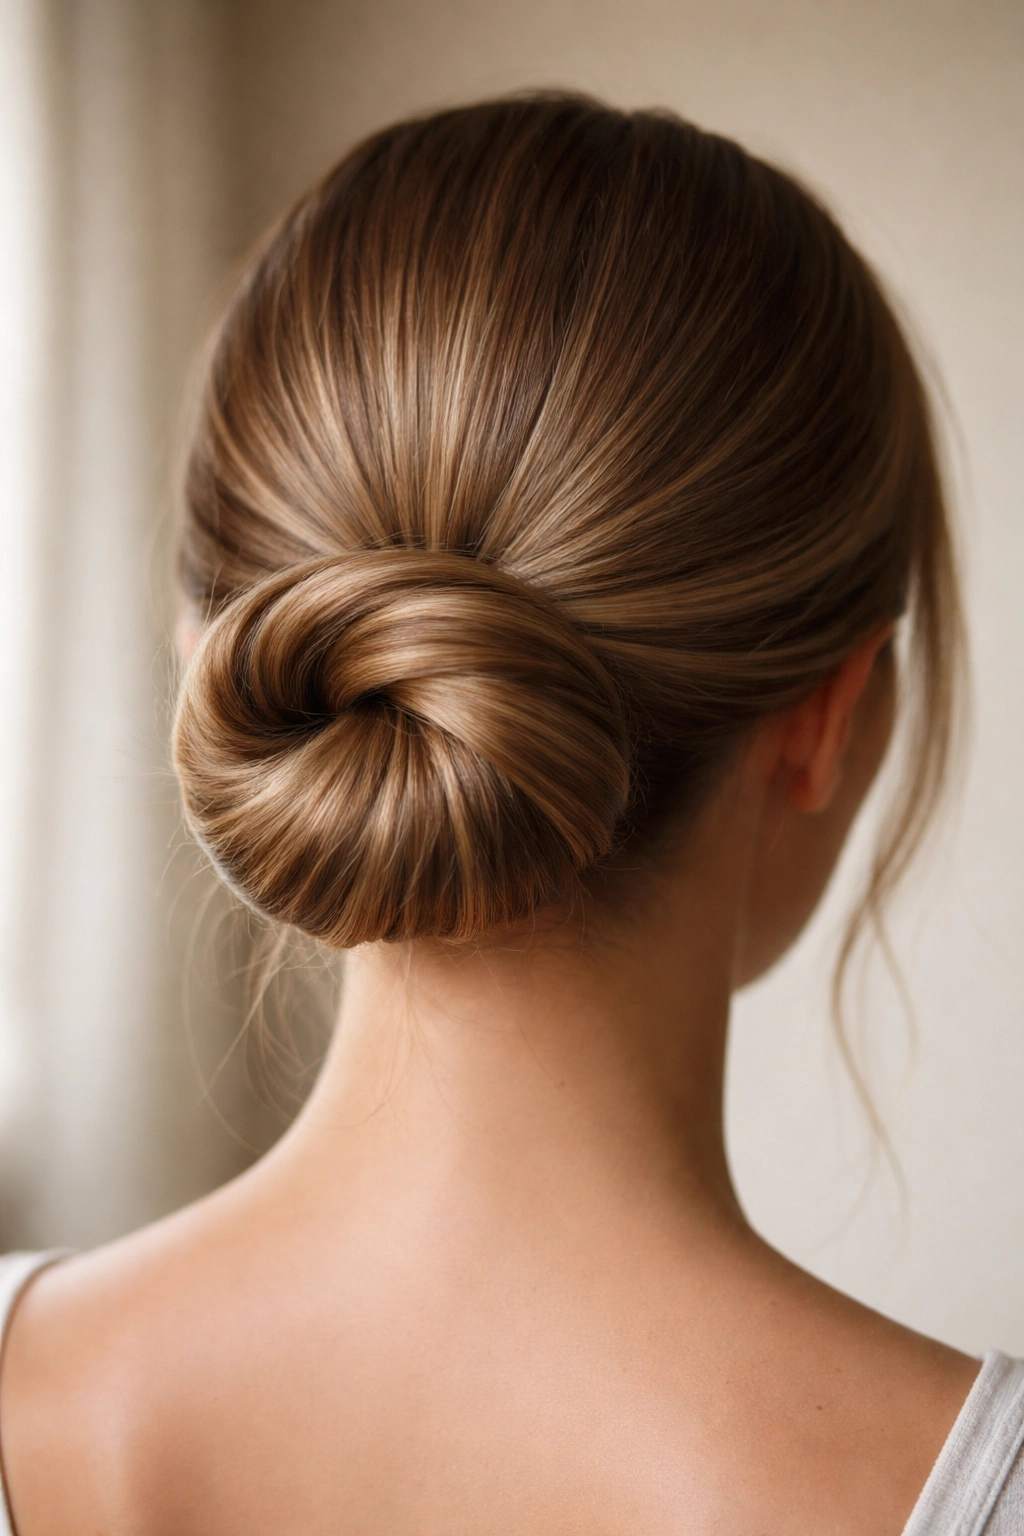
1. The Twisted Wrap Low Bun
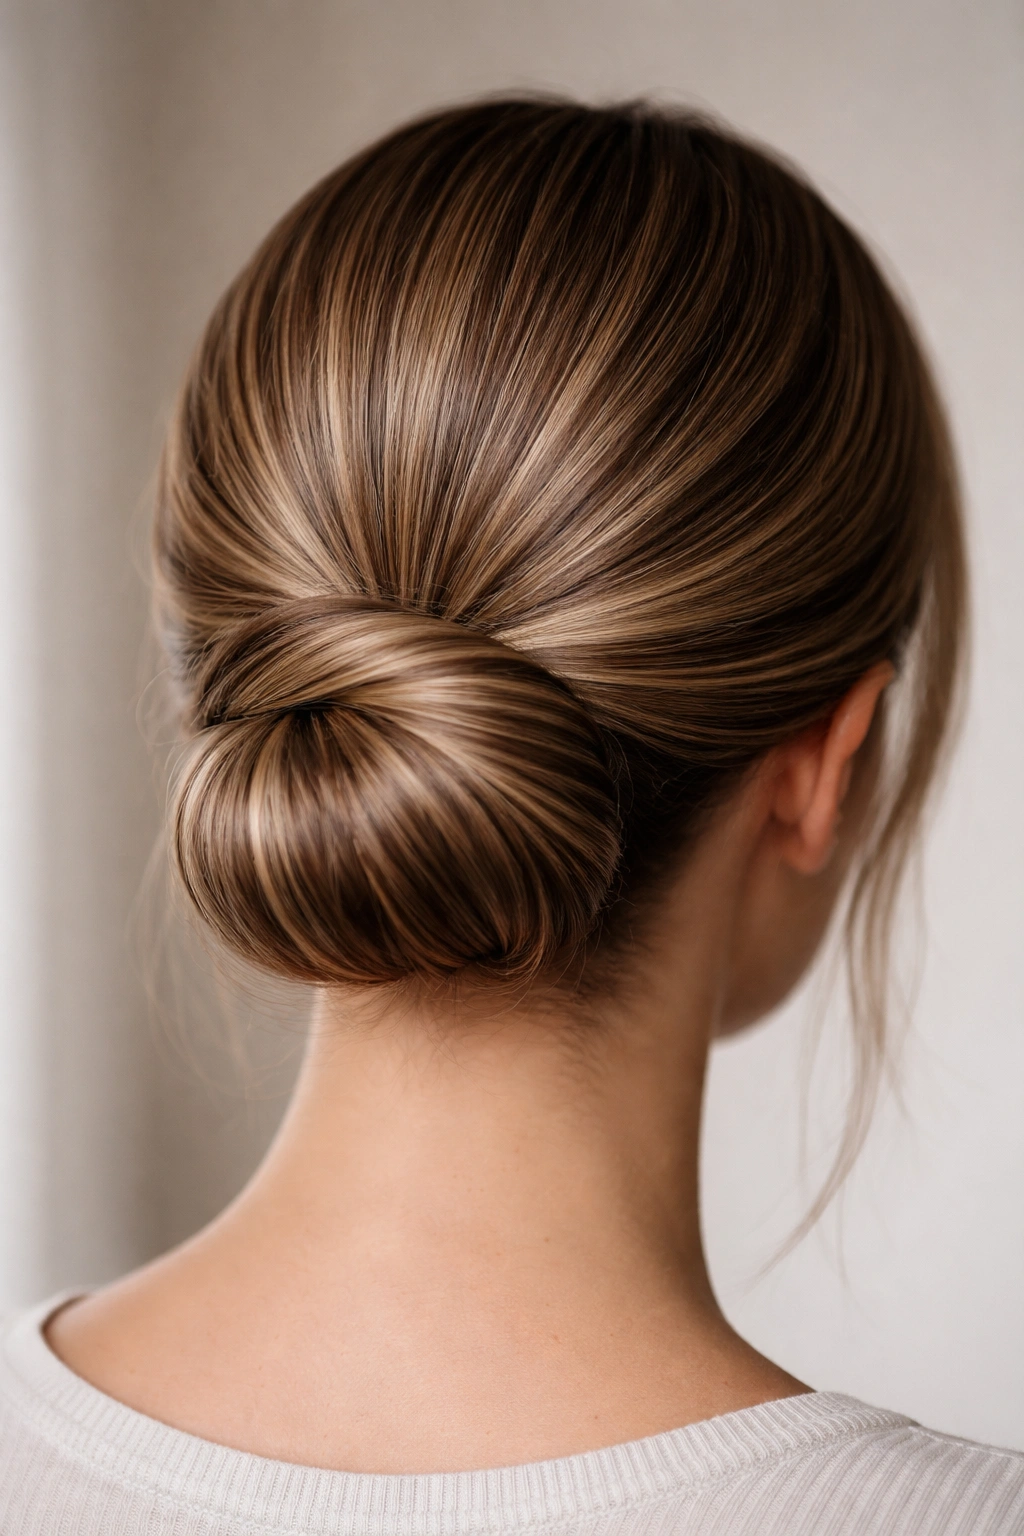
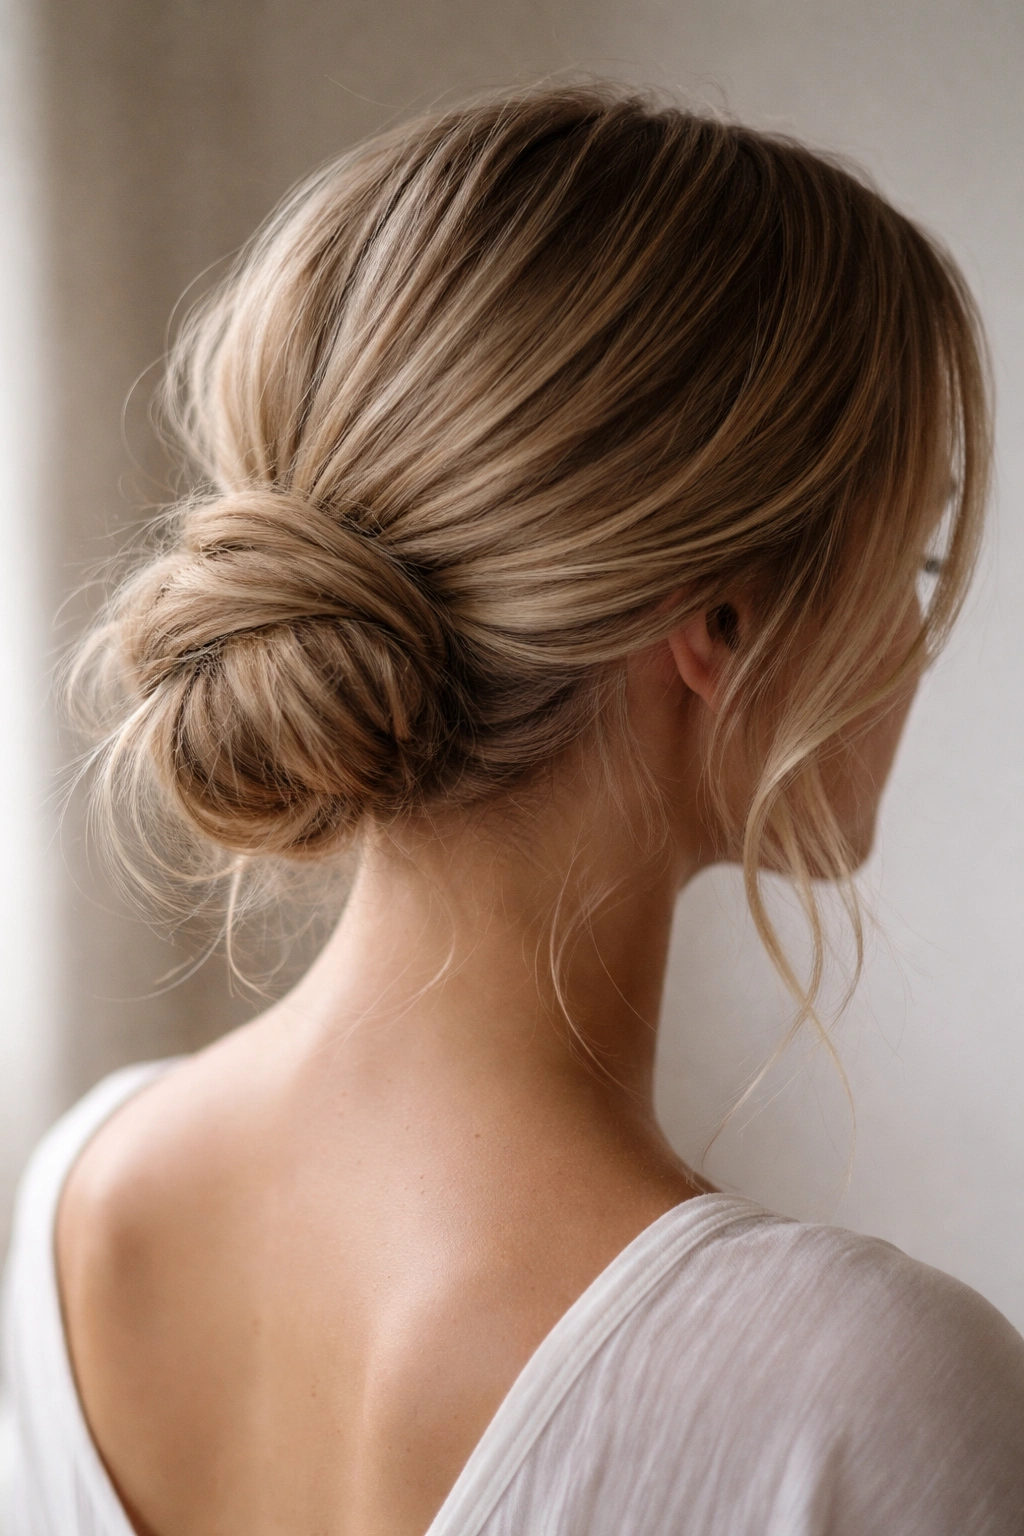
The twisted wrap low bun is the workhorse of straight-hair updos—simple, dependable, and genuinely secure. This style works by creating two twists on either side of your head and wrapping them around the base of a low ponytail, which locks everything together without relying on the grip that curly hair naturally provides.
Why This Style Holds So Well
The beauty of this technique is that the twists themselves create texture and friction along their length, and when you wrap them around the base of the bun, that texture grips the ponytail hair and holds pins much more securely than smooth, untwisted strands would. The mechanical tension from the wrapping process also distributes the weight more evenly, preventing the strain that makes buns slip off straight hair. Real talk: this is the bun style that can survive a full day of movement without any loose pieces escaping.
How to Create Maximum Hold
- Divide your low ponytail in half and create a two-inch-thick twist from each section
- Wrap one twist tightly around the base of the ponytail, then secure with bobby pins
- Wrap the second twist in the opposite direction, locking the first twist in place
- Insert at least three bobby pins through each wrapped section for secure anchoring
- Finish with a light hairspray to settle any flyaways
Pro tip: Blow-dry your hair straight first, then create the ponytail while your hair is still warm—this sets the direction and makes the twists hold tighter as everything cools.
2. The Braided Low Bun
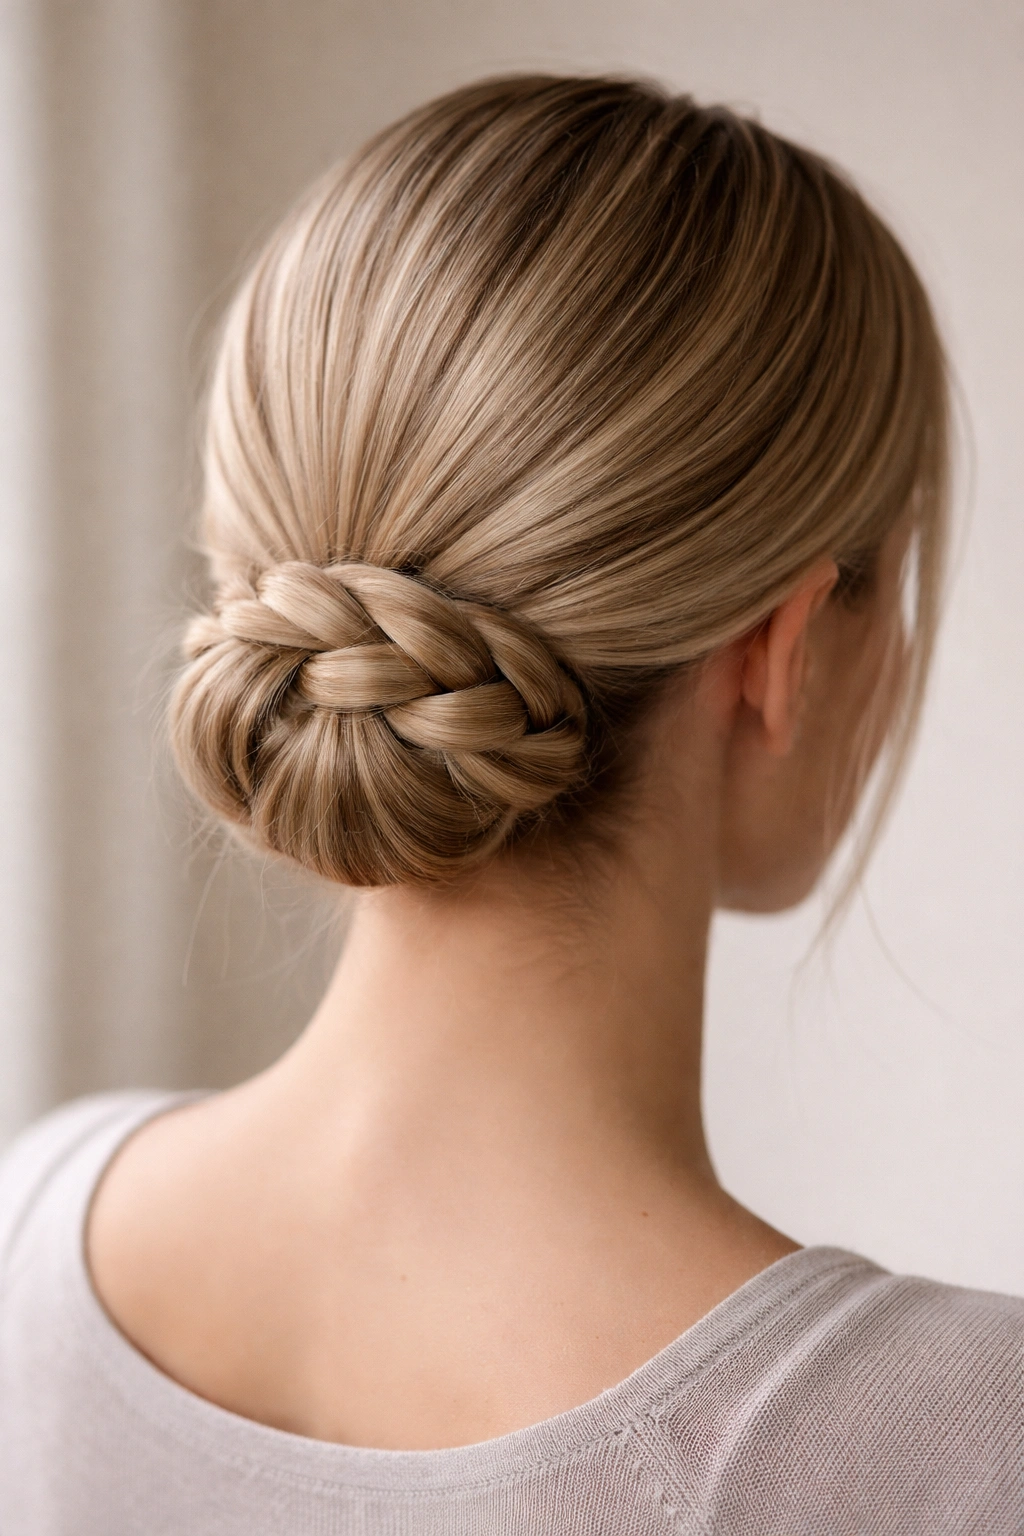
Braiding is one of the most underrated techniques for creating grip on straight hair. A single braid wrapped around the base of a low ponytail creates exponentially more texture than a simple twist, giving you a genuinely secure hold that can survive vigorous activity.
The Texture Advantage
A braid naturally creates multiple interlocking sections that grip both the ponytail hair and bobby pins much more effectively than smooth strands. The three-part construction means more surface area for friction, more opportunities for pins to anchor, and more visual interest than a simple wrap. This style works equally well for a polished office setting and a casual weekend outing because the braid adds intentional style rather than looking like a desperate attempt to keep hair contained.
Building a Braid That Holds
- Create a low, tight ponytail and divide it into three equal sections
- Braid loosely from the bottom of the ponytail base—counterintuitively, a slightly loose braid wraps more securely around the base than a super-tight one
- Wrap the finished braid in a circle around the ponytail base, tucking the end underneath
- Use bobby pins to secure both the wrapped braid and any loose ends
- Gently pull the edges of the braid to create a fuller appearance
Worth knowing: If your braid looks too uniform and tight, take 30 seconds to gently pull the sides of each braid section outward—this creates a softer texture that photographs beautifully and still holds perfectly.
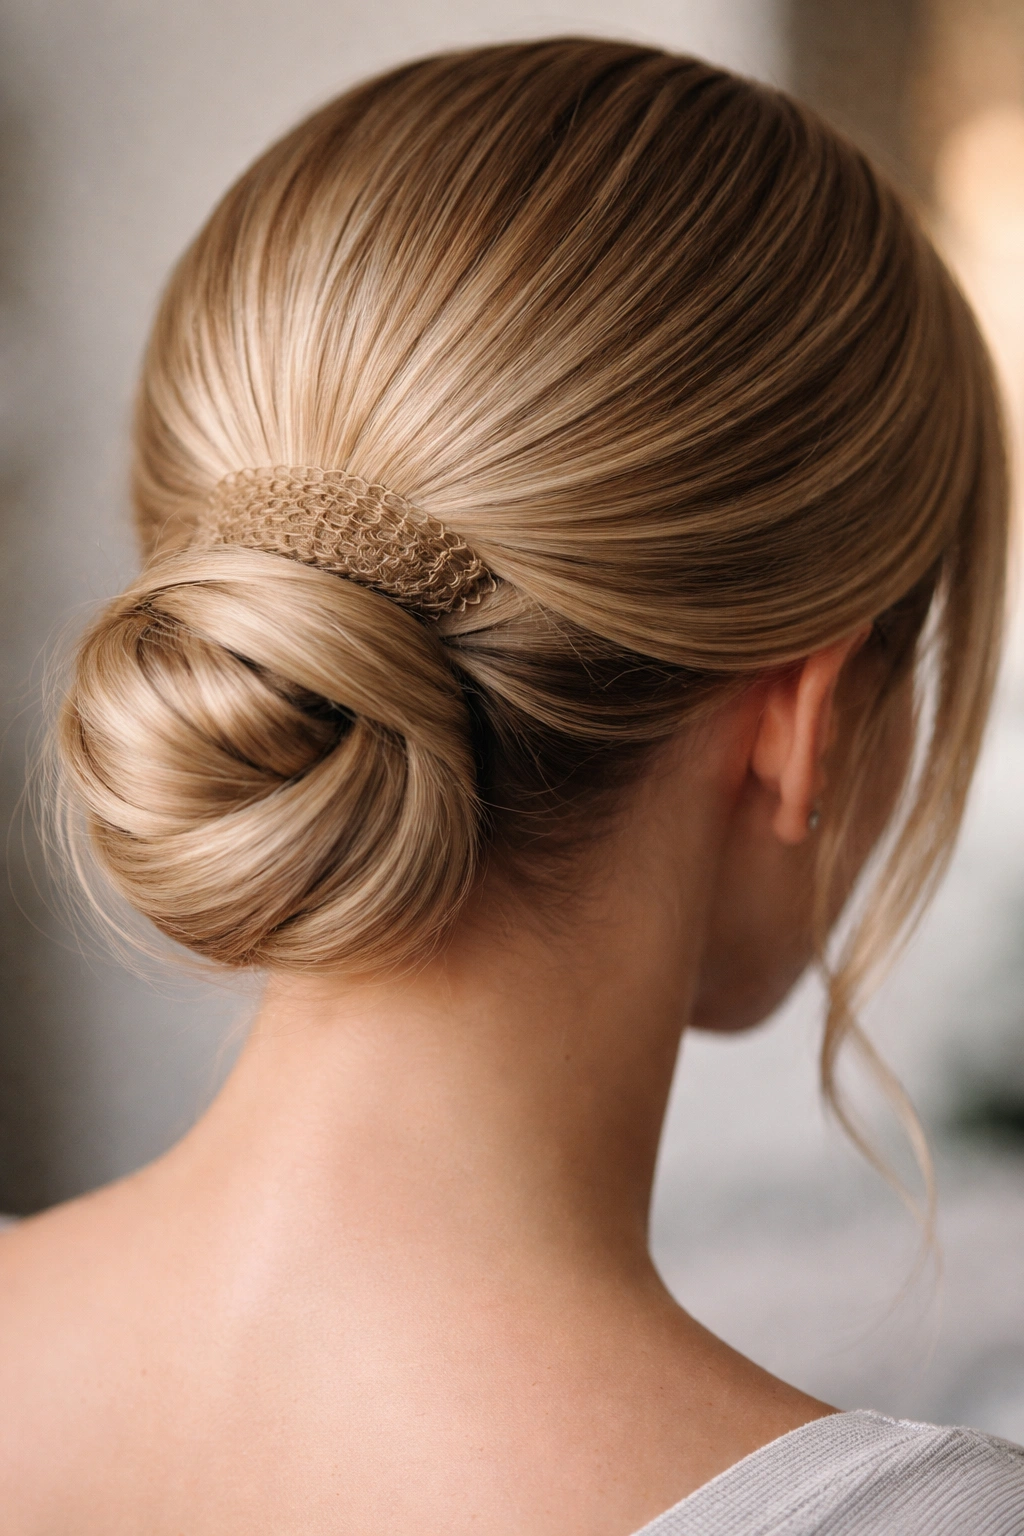
3. The Sleek Donut Bun
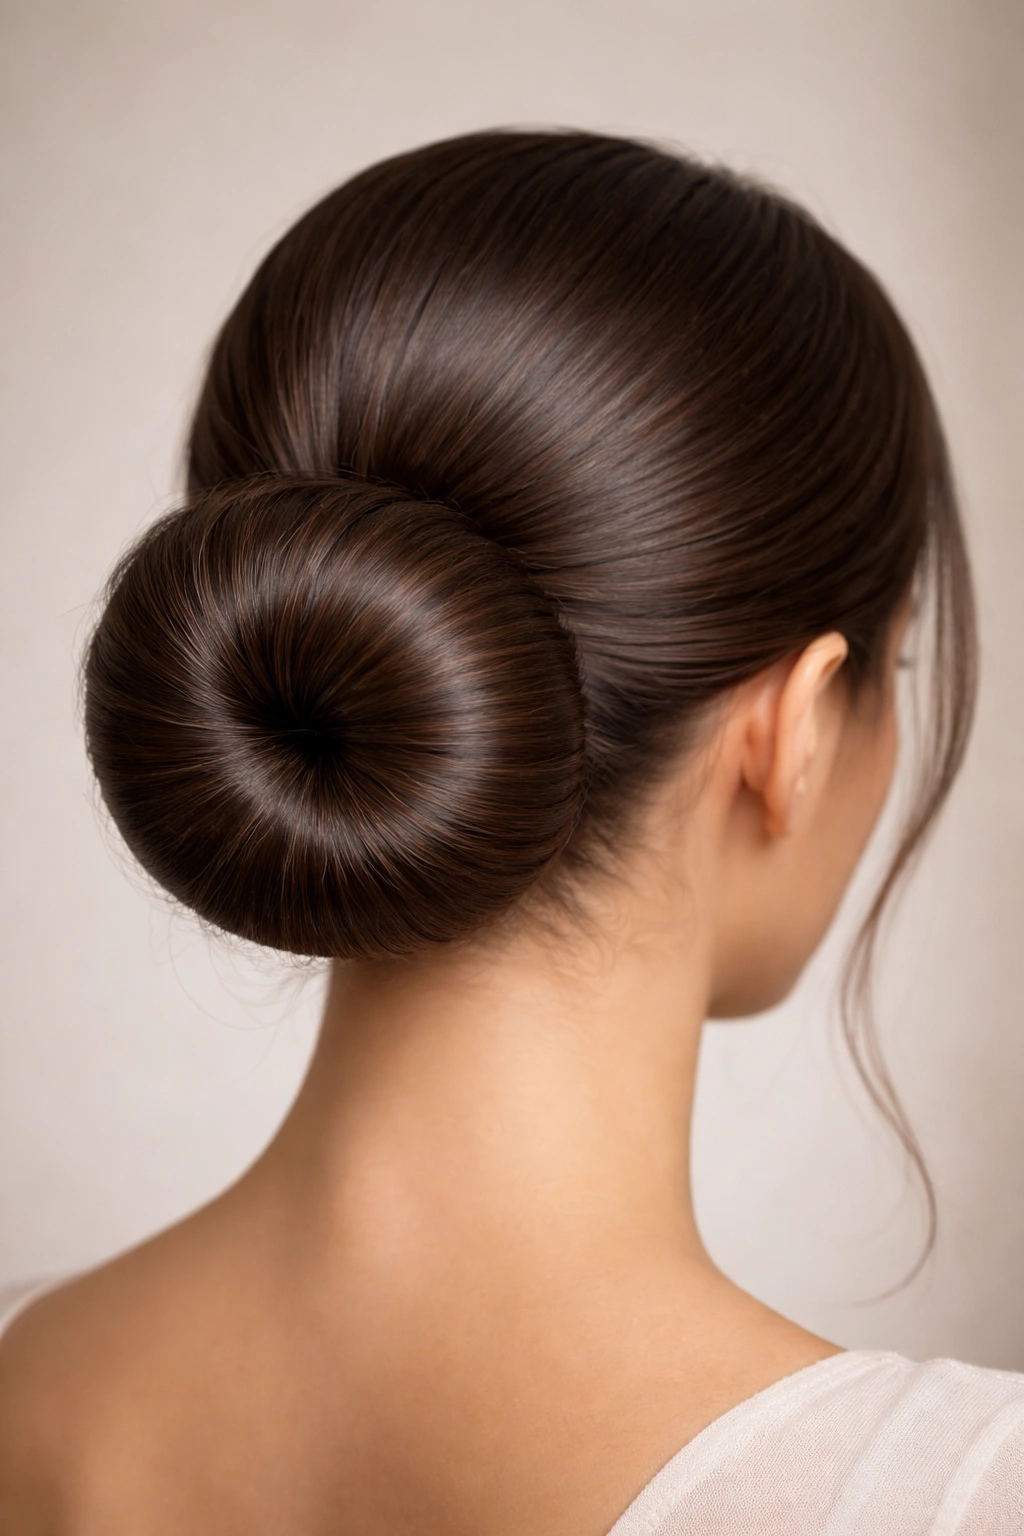
The donut bun (also called a hair donut or doughnut bun) uses an actual donut-shaped hairpiece as the core structure, around which you wrap your ponytail. For straight hair, this is a game-changer because the donut creates guaranteed volume and grip without relying on your hair’s natural texture.
Why Straight Hair Loves the Donut Bun
Many people think donut buns only work on curly or textured hair, but the opposite is true for creating hold. The donut piece itself provides the structural foundation, meaning your straight hair doesn’t have to do all the work of creating and maintaining volume. Your hair simply wraps around the donut core and anchors itself, which is genuinely easier and more secure than trying to create a full, round bun from straight strands alone. This style also automatically looks polished and intentional rather than “I threw my hair up.”
Application for Maximum Security
- Create a low ponytail and thread the donut piece over the elasticated base
- Divide your ponytail into sections—typically four to six depending on hair thickness
- Wrap each section around the donut, tucking and pinning as you go
- Make sure no donut material peeks through the wrapped hair
- Use bobby pins to anchor wrapped sections, not just to cover the donut
Insider note: Choose a donut piece that’s slightly smaller in diameter than your ponytail thickness—this creates tension that grips your hair more securely than a loose-fitting piece.
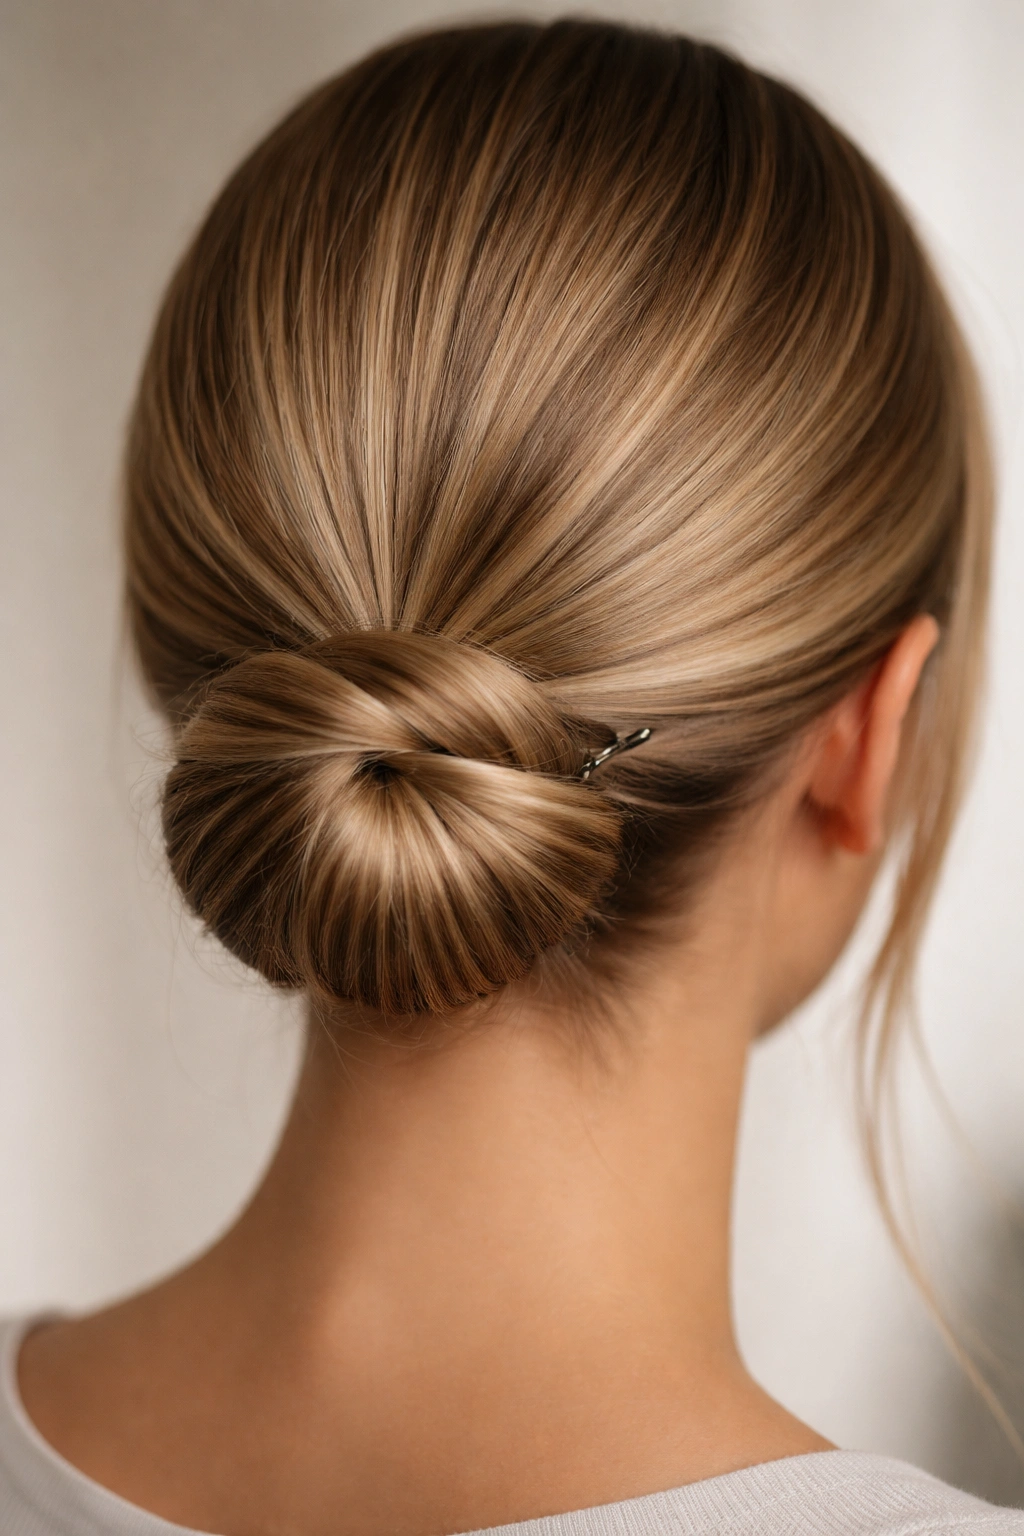
4. The Smooth and Glossy Low Bun
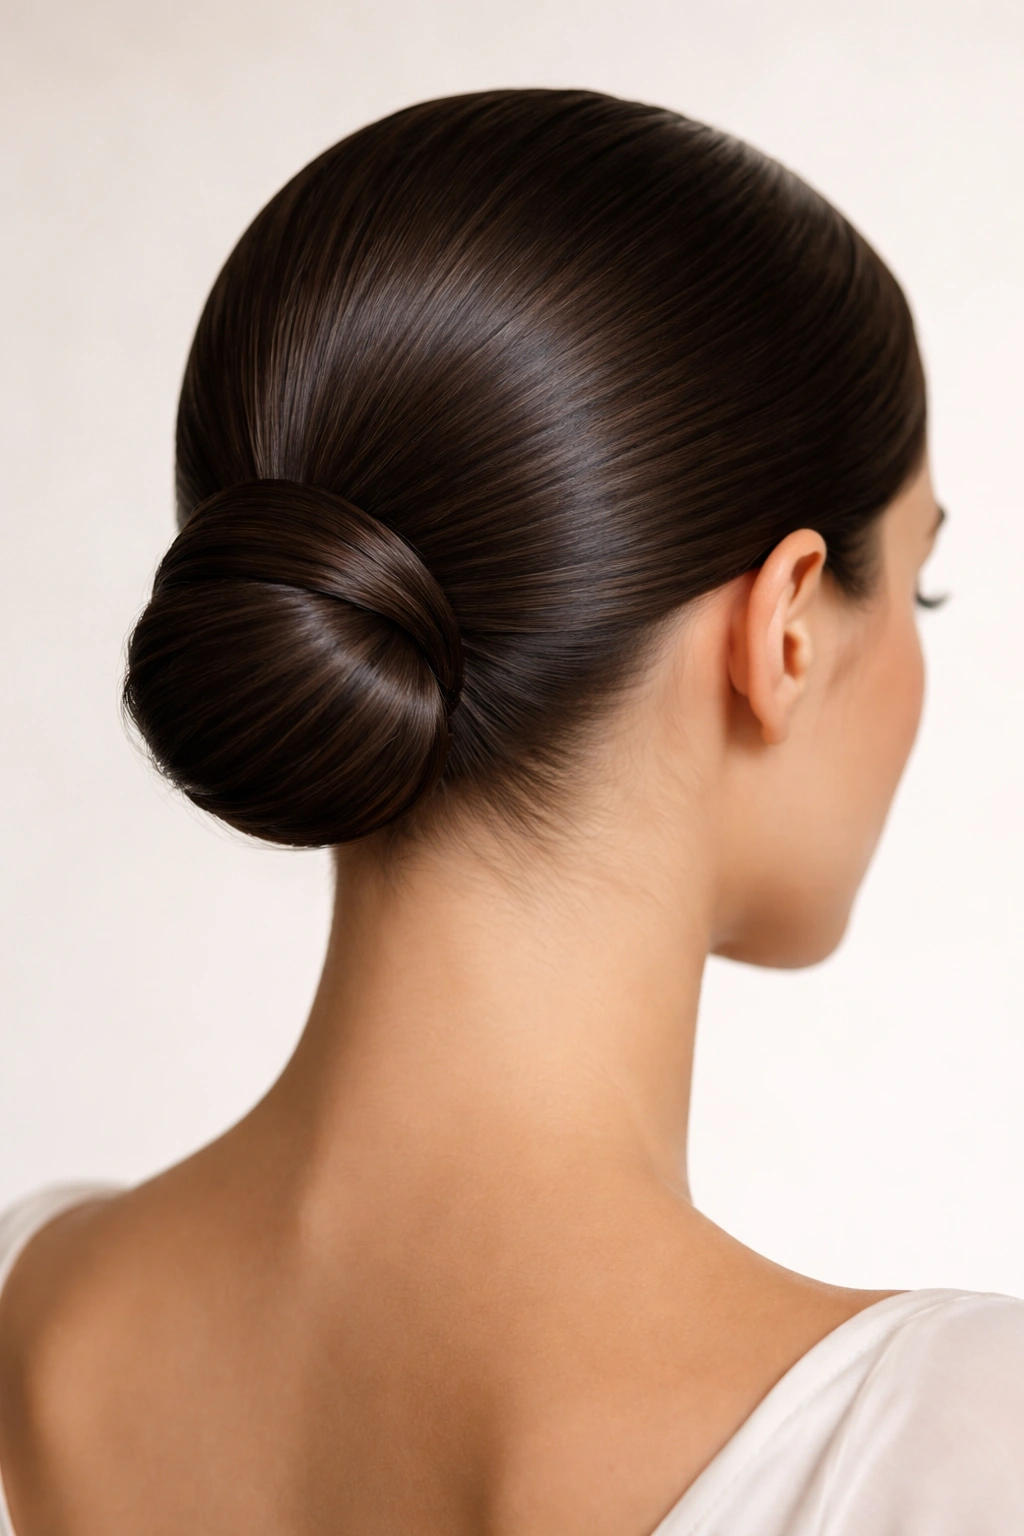
This is the minimalist’s low bun—just hair, sleekness, and a commitment to creating grip through technique rather than texture. It’s the bun style you see on ballet dancers, in formal settings, and on anyone who wants a polished, intentional look rather than a “thrown together” one.
Creating Grip Without Texture
The secret to holding a completely smooth, sleek low bun on straight hair is threefold: extreme tightness in the initial ponytail, extremely secure pinning at the base, and strategic use of hold products applied before styling. This bun style proves that you don’t need texture to achieve security—you just need precision and the right foundation. The payoff is a bun that looks refined and intentional rather than like your hair simply couldn’t hold any volume.
The Technique That Actually Works
- Blow-dry your hair completely straight and smooth
- Apply a light pomade or gel to your hairline and the ponytail area before creating the ponytail
- Create a low ponytail that’s noticeably tighter than feels comfortable—this is intentional and necessary for hold
- Coil the ponytail around its base, tucking and pinning every quarter-turn
- Insert bobby pins horizontally directly into the base of the bun, not just around the outside
- Finish with a flexible hold hairspray that won’t make your hair crunchy
Pro tip: Flat bobby pins hold better than wavy ones on smooth hair—the larger surface area creates more grip.
5. The Textured Undone Low Bun
This style looks effortless and relaxed, but straight-haired people know that true undone texture requires intentional creation. The beauty of this approach is that adding texture before bun construction solves half your hold problems automatically.
Texture as a Hold Solution
Creating intentional texture throughout your hair before creating the bun means your base already has grip built in. Undone waves, loose braids, or air-dried texture all provide friction that helps pins stay in place and the final bun stay secure throughout the day. This style works especially well if you naturally have fine or slippery straight hair, because the texture compensates for your hair’s natural sleekness without requiring a super-tight painful ponytail.
Building in Texture First
- Create loose waves using a curling iron, wand, or braiding method the night before or morning of styling
- Rough-dry your hair with your head flipped upside down to add volume
- Tousle your hair with your fingers to break up the wave pattern slightly
- Create a low ponytail that’s snug but not uncomfortably tight, because texture provides some of the grip
- Coil the textured ponytail loosely around its base, allowing pieces to escape slightly for an undone look
- Use bobby pins to anchor structural points, but don’t over-pin—the texture means you need fewer pins than a smooth bun
Worth knowing: Matte finish products like texturizing sprays or dry shampoo applied before creating waves will make your texture last longer throughout the day and create better grip for your bun pins.
6. The Low Bun with Face-Framing Pieces
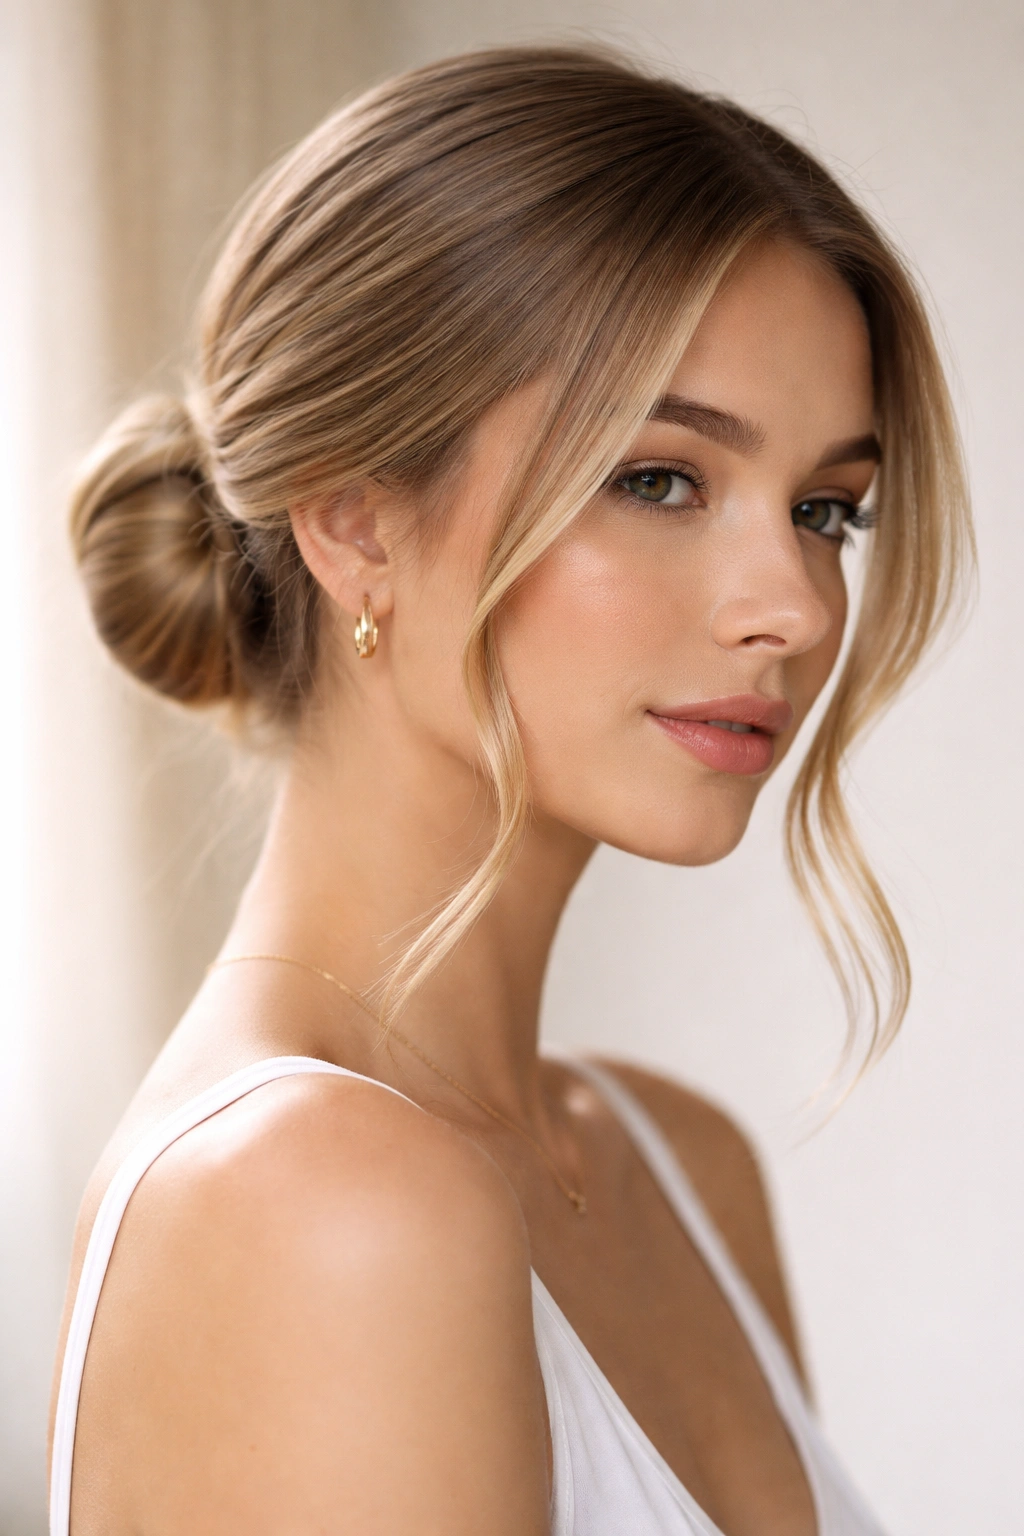
Sometimes the best solution for a straight-haired bun that won’t stay put is to intentionally leave pieces out—strategically chosen face-framing pieces that actually improve the bun’s hold by reducing overall ponytail weight and bulk.
How Intentional Escapes Improve Hold
By releasing small sections around the front hairline before creating your ponytail, you reduce the circumference and weight of the bun base, which paradoxically makes it easier to secure. The face-framing pieces also soften the overall look and create a finished, intentional appearance rather than looking like your bun is falling apart. This is the bun style that looks good in photos, feels comfortable all day, and actually improves your confidence because it was designed to look exactly like this.
Creating Intentional Face-Framing
- Before creating your ponytail, separate two small sections at your temples and ear areas—roughly one inch thick each
- Create a low ponytail with the remaining hair
- Lightly wave or curl the face-framing pieces using a small curling iron or wand
- Create your bun with the ponytail, then arrange the framing pieces to fall naturally against your cheeks and neck
- Use bobby pins to tuck the framing pieces behind your ears or secure them to the side of the bun where they won’t interfere with hold
- Apply a flexible hold product to keep the framing pieces in place throughout the day
Pro tip: Velcro rollers on the face-framing pieces for five minutes after curling will help them hold their wave and stay in position better.
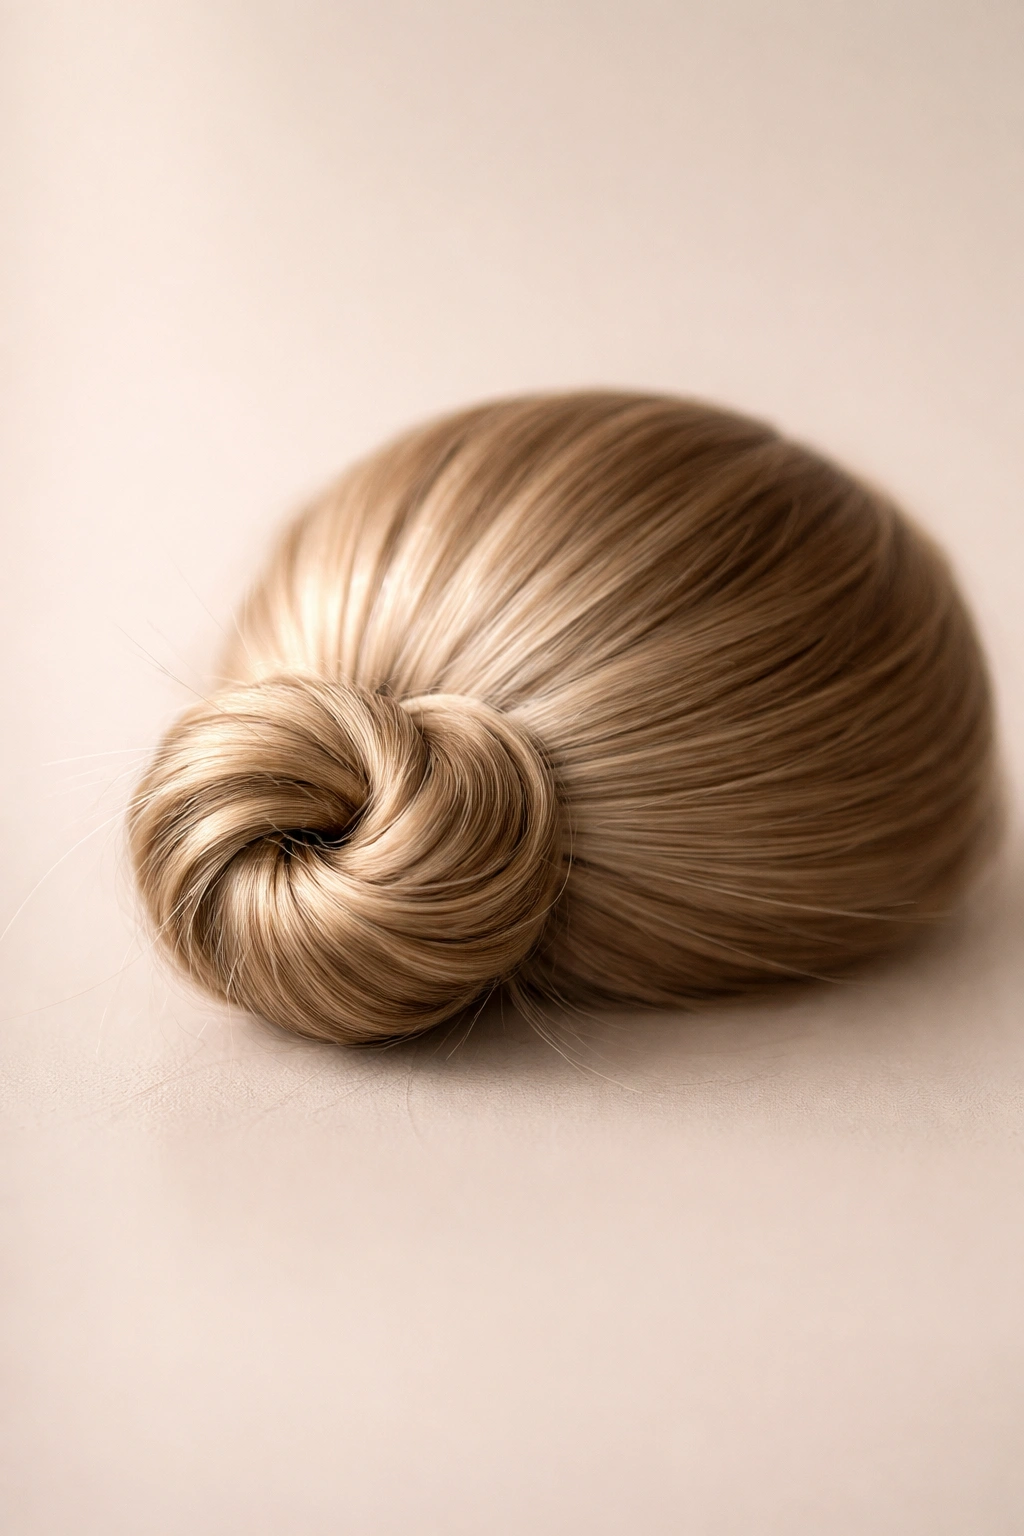
7. The Wrapped Rope Bun
This style uses the rope technique—where you wrap two sections of hair around each other to create a twisted, rope-like texture—as the primary hold mechanism. It’s a step up in complexity from a simple twist but significantly more secure and visually interesting.
Why Rope Wrapping Creates Superior Hold
A rope is essentially a super-tight double twist that creates maximum friction and texture along its entire length. When you wrap a rope around the base of your ponytail, you’re creating multiple anchor points for bobby pins and maximum mechanical grip from the twisted texture. This style looks more intentional and designed than a simple wrap, yet takes only slightly longer to create.
Executing the Rope Wrap Perfectly
- Create a low, tight ponytail using a clear elastic to minimize slipping
- Divide the ponytail into two even sections
- Tightly wrap one section around the other (rather than twisting them together) to create a rope-like texture
- Coil this rope around the base of the ponytail, tucking the end underneath
- Secure with at least three bobby pins, inserting them through the rope texture into the ponytail base
- Tuck any loose ends underneath using additional bobby pins
- Use a flexible hold hairspray to set everything in place
Insider note: If your rope feels too loose and slippery, hold tension on both sections as you wrap and the friction will naturally tighten the rope structure.
8. The Low Braided Crown Bun
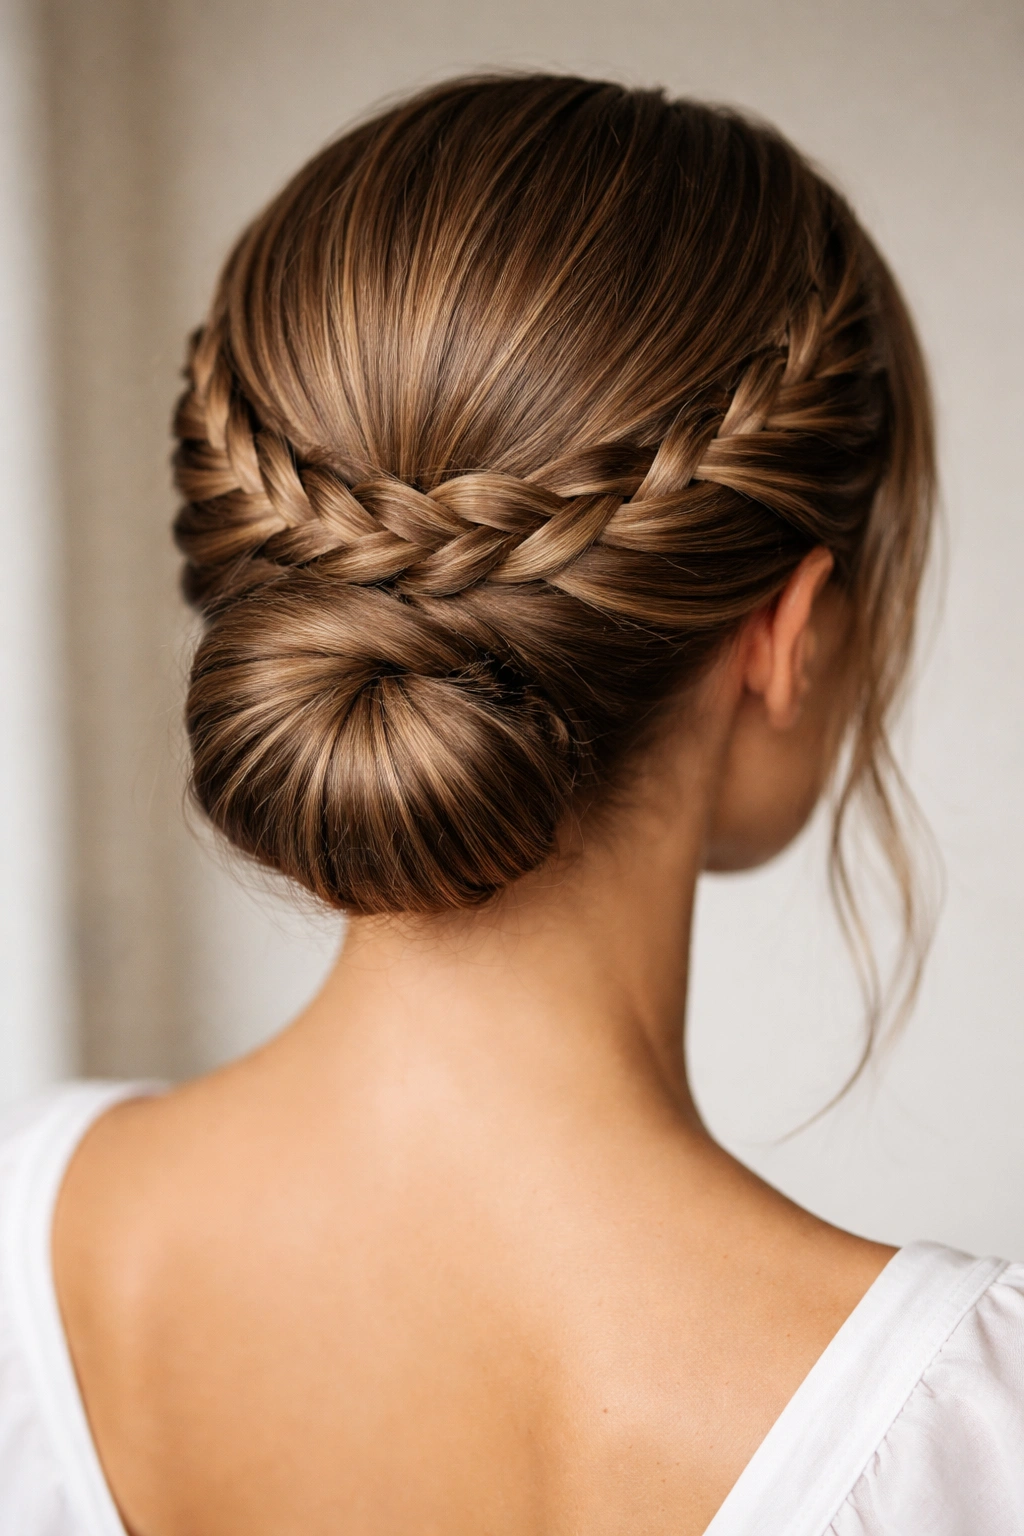
This style combines the best of both worlds—you create a braid that actually wraps around your entire head (like a crown), and the end of that braid becomes your low bun. The structural support from the braid means your bun has both anchor points and texture working to keep it secure.
The Architectural Advantage
Rather than relying solely on pins at the bun base, a braided crown distributes the hold throughout the entire length of the braid. The weight of your hair is distributed more evenly, and the braid texture provides multiple anchor points instead of just the base. This style is genuinely more secure than most low bun methods and looks considerably more elaborate and special—even though it uses the same basic techniques as simpler styles.
Creating a Crown Braid Bun
- Take a one-inch section from one side of your head at ear level and begin a Dutch braid (a braid that sits on top of the scalp)
- Continue braiding toward the back of your head, incorporating small sections of hair as you go
- Finish the braid at the back of your head at about ear level on the opposite side
- Secure the braid end with a clear elastic
- Coil the braided tail into a bun and pin securely
- Gently pull the braid sections outward to create a fuller, more textured appearance
Worth knowing: A Dutch braid (which braids under rather than over) sits flatter and more securely on straight hair than a French braid, and the underneath-braiding technique creates better grip on your scalp.
9. The Looped Low Bun
This style creates a bun by making a large loop with your ponytail, pinning the loop at the base, and leaving the end piece to wrap around the base for added texture and security. It’s faster than most bun methods and creates a fuller appearance than simple coiling.
Why Loops Hold Better Than Coils
A looped structure naturally creates tension at the anchor point (the base), whereas coiling can sometimes allow slight shifting if not pinned perfectly. By creating one large loop and securing it well, then using the tail to wrap and anchor, you’re using two distinct hold mechanisms rather than one. This style also tends to look fuller and more visually interesting than a standard coil bun, which is a bonus.
Building the Loop Bun
- Create a low ponytail and secure it very tightly with an elastic
- Make a loop by folding the ponytail up and securing the fold point with two bobby pins at the base
- You should now have a loop of hair and a tail hanging below it
- Wrap the tail around the base of the loop, tucking it underneath
- Secure the wrapped tail with additional bobby pins, making sure to anchor through both the wrap and the base loop
- Fluff the loop slightly for a fuller appearance
Pro tip: If you have very thick hair, create two smaller loops instead of one large loop—this distributes the weight better and is easier to pin securely.
10. The Low Bun with a Textured Base
This final style approaches the hold problem from the foundation up—you create intentional texture in a small section at the base of your ponytail before coiling, which creates grip for pins right where you need it most.
Targeting Texture Where It Matters
Rather than trying to add texture to your entire head or relying on smooth hair, this method creates texture precisely where your bun pins need to anchor. A small corrugated or crimped section at the ponytail base creates enough grip to hold pins securely without making your entire style look elaborately textured. This is a sophisticated approach that solves the hold problem elegantly.
Creating Strategic Base Texture
- Create a low ponytail and secure it tightly
- Separate a one-inch-thick section from the top of your ponytail (closest to your scalp)
- Using a crimping iron or textured styling tool, crimp this section to create maximum texture and grip
- Coil the rest of your ponytail around the crimped base section
- Use bobby pins to anchor through the crimped texture into the base, where they’ll grip securely
- Cover the crimped section by coiling your hair around it, so the texture is hidden but provides internal support
Insider note: This technique is particularly useful if you have very fine or slippery hair, because you’re creating grip exactly where you need it without having to crimp your entire bun.
Final Thoughts
The best low bun for your straight hair depends on your lifestyle, how much styling time you’re willing to invest, and what level of polish you’re going for that day. A twisted wrap bun might be perfect for a rushed weekday morning, while a braided crown bun is worth the extra time investment for a special occasion. The real game-changer in making any of these styles work is understanding that straight hair needs texture, tension, or strategic grip—not just pins in the right places.
All ten of these styles have been designed specifically to address the legitimate challenges that come with styling straight hair into buns. They all incorporate at least one technique that creates friction, grip, or structural support beyond simple coiling. Start with whichever style appeals to you, test it a few times to nail the technique, and don’t be discouraged if the first attempt feels loose or shaky—every style in this list holds beautifully once you’ve practiced it twice. Your straight hair isn’t a limitation for bun styling; it’s actually an advantage once you understand which techniques work with your hair’s natural properties rather than fighting them.