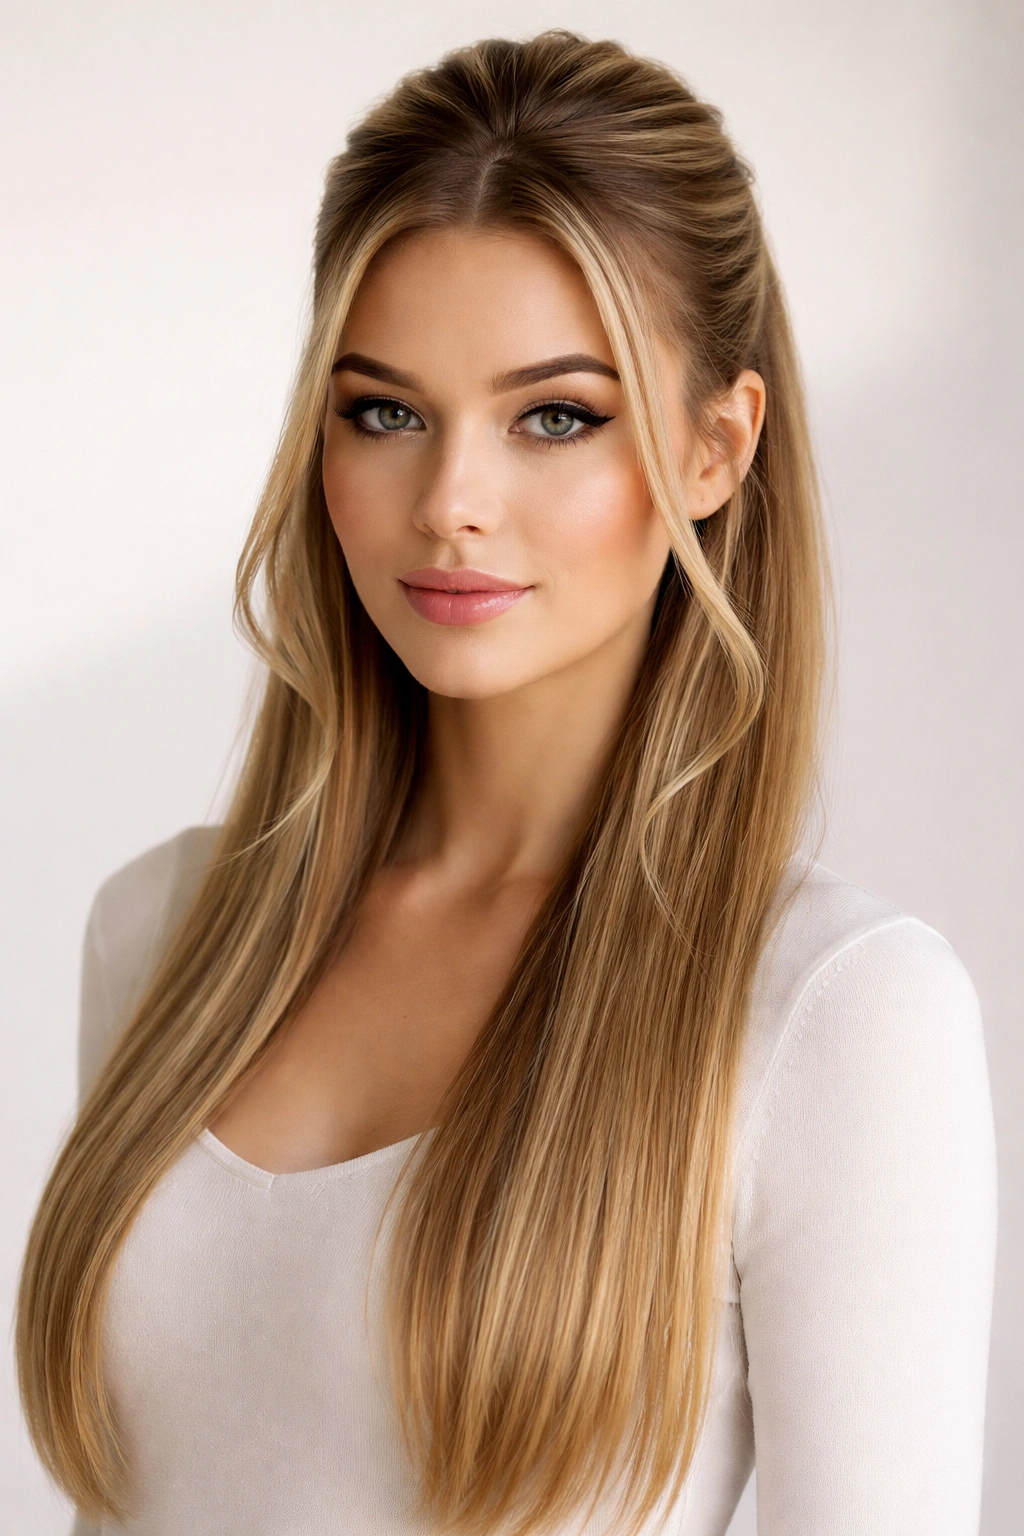
Half-up, half-down hairstyles are often called the “goldilocks zone” of hair styling—they’re polished enough for professional settings, casual enough for everyday wear, and versatile enough to work with nearly any occasion. But if you have straight hair, you already know that this texture presents both a gift and a challenge. The beauty of straight hair is its natural shine, clean lines, and ability to hold a style without fighting against your curl pattern. The catch? Straight hair can sometimes look flat if you’re not intentional about creating dimension, and styles that rely on texture or grip to stay put require a different approach than they would for wavy or curly hair.
The good news is that half-up, half-down styles are absolutely perfect for straight hair. This cut-and-style combination lets you leverage your hair’s natural smoothness while adding visual interest and movement through strategic styling, strategic face-framing, and the clever use of texture-building techniques. Whether you’re heading to work, a casual dinner, or just want to get your hair off your face while keeping the length visible, there’s a half-up style that’ll work for your straight locks.
What makes these styles work so well on straight hair is that you’re not fighting your texture—you’re working with it. You can create clean, defined lines that actually look intentional on straight hair. You can add subtle waves or curls just where you need them for dimension without committing to a full-head style change. And because straight hair tends to be sleeker, half-up styles have a naturally polished, refined look that takes minimal effort to pull off.
The 10 styles below are ordered from simplest to most elaborate, so whether you’re just learning how to style your straight hair or you’re already comfortable with more complex techniques, you’ll find something that fits your skill level and lifestyle. Each style includes specific tips for keeping it looking fresh throughout the day on straight hair, because maintenance matters.
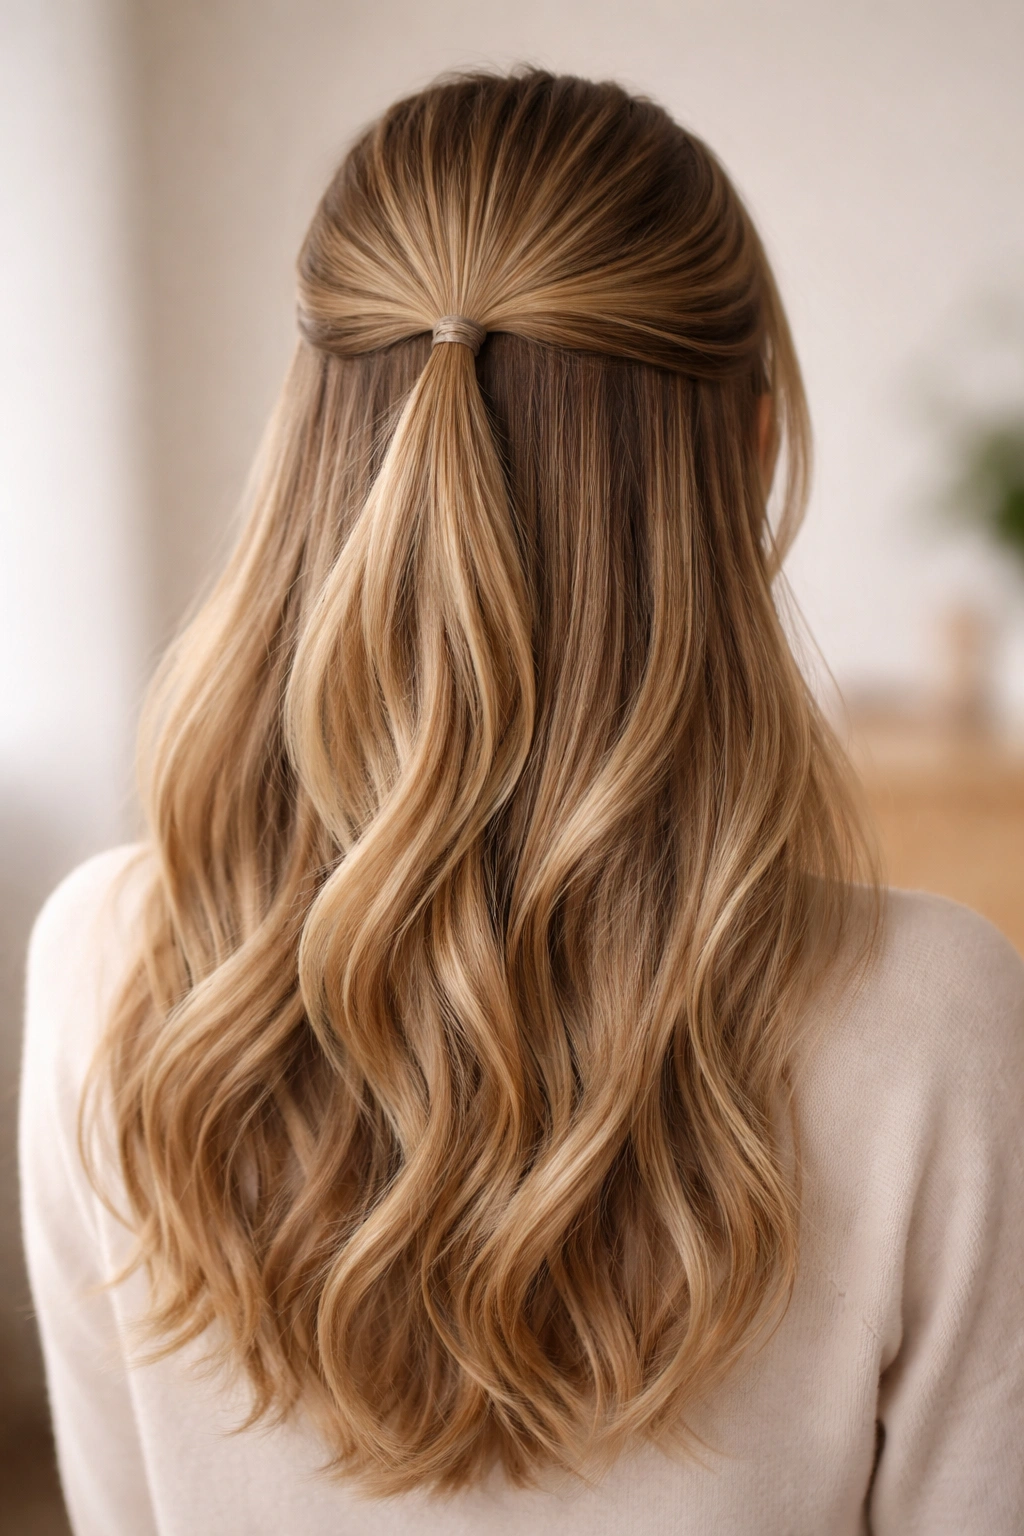
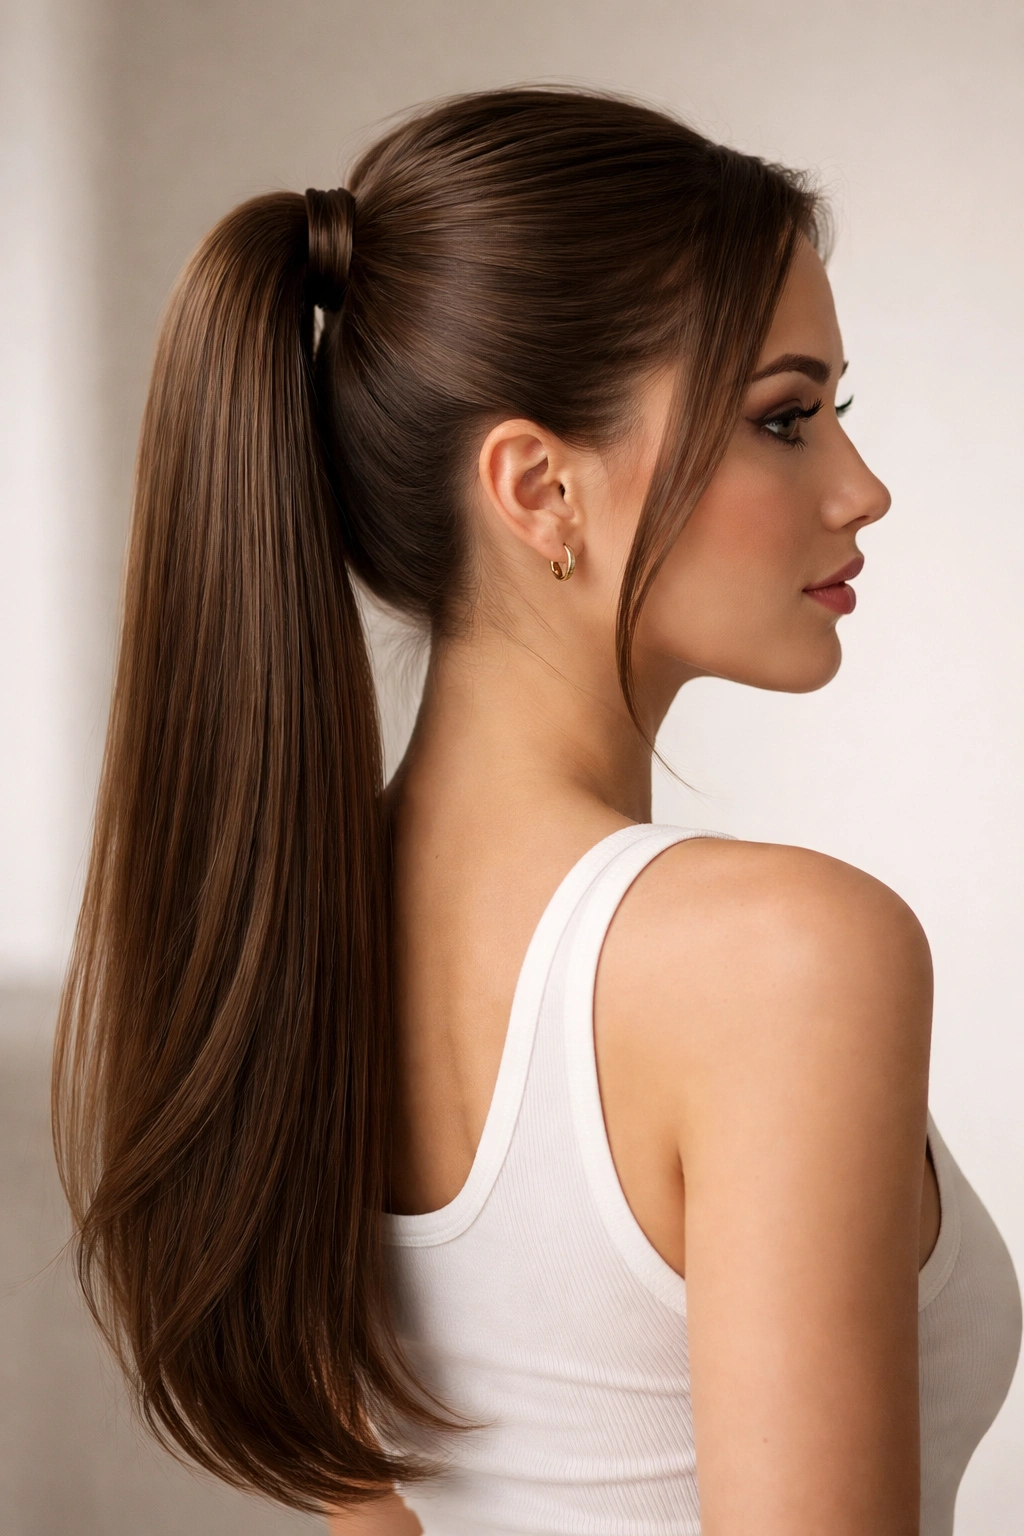
1. Classic Half-Up Ponytail
The classic half-up ponytail is the foundation that everything else builds on—it’s the style you return to when you’re short on time but still want to look put-together. On straight hair, this style has a distinctly sleek, modern elegance that you just can’t get with other textures. The clean lines of your straight strands make the structured shape of a half-up ponytail look intentional and sharp.
Why Straight Hair Makes This Style Shine
The reason this works so beautifully on straight hair is that there’s no frizz or flyaways softening the lines (unless you want there to be). Your hair will create a smooth, defined silhouette that says “I have my life together” without looking overdone. Straight hair also won’t slip out of the elastic as easily as some other textures, which means your ponytail will stay exactly where you put it throughout the day.
How to Create the Perfect Half-Up Ponytail
Start by taking a horizontal section from just above your ears, going all the way across the back of your head. Clip the bottom half of your hair out of the way so it doesn’t get tangled in your work section. Gently backcomb the section you’re keeping down just a tiny bit—this creates grip for your elastic and prevents slipping. Gather your top half smoothly into an elastic at the crown, then release your bottom section and smooth any flyaways with a fine-tooth comb or a small brush. If your ponytail looks too severe or tight against your scalp (which can happen with straight hair if you pull too tightly), gently tug a few small pieces loose around your face and at the nape of your neck to soften it.
Variations That Extend the Look
Try wrapping a small section of hair around the base of your ponytail to hide the elastic—take a thin piece from the ponytail itself, wrap it around the base, and pin it underneath with a bobby pin. Or create two thinner ponytails instead of one thick one for a Y-shaped effect that’s more modern. You can also curl just the ponytail portion with a curling iron for contrast, leaving the face-framing pieces and pulled-back section completely straight.
Pro tip: Use a velvet elastic or silk scrunchie instead of a regular rubber band—it grips straight hair better and won’t create a crease or dent that takes forever to brush out.
2. Half-Up Bun with Face-Framing Layers
The half-up bun is where things get a bit more intentional. This style works because it combines the polished, sophisticated look of an updo with the softness and movement of down hair. On straight hair, you can make this style look either modern and sleek or romantic and undone, depending on whether you keep everything smooth or leave some pieces loose.
What Makes This Style Work on Straight Hair
Straight hair buns have a naturally elegant, ballet-inspired quality that immediately reads as refined. Because your hair is straight, the bun will be smooth and defined rather than puffy or textured. This clean aesthetic is perfect for professional settings, but you can make it feel more relaxed by letting some face-framing pieces escape and adding subtle waves.
Creating a Polished Half-Up Bun
Section your hair the same way you would for a half-up ponytail—gather the top half from above the ears across the back of your head. Instead of securing it with just an elastic, create a low ponytail first, then twist that ponytail loosely and wrap it around its base to form a bun, securing it with bobby pins. For a sleeker look, smooth everything down with a light hairspray or pomade before twisting. For a more romantic version, backcomb the ponytail slightly before twisting and wrapping, which creates a fuller, messier texture.
The face-framing pieces are what really make this style work on straight hair. Don’t pull everything tight—instead, take a small piece on each side of your face at about cheekbone height and leave it down. You can curl just those pieces with a curling iron for a soft contrast, or leave them straight for a minimalist look.
Quick Facts About Bun Stability
- Straight hair requires good tension to keep the bun from loosening throughout the day—don’t skip the elastic step before you create the bun itself
- Bobby pins inserted horizontally (parallel to the bun, not perpendicular) grip straight hair more securely
- A light spritz of hairspray before pinning makes a significant difference in longevity
- Bun bumps (foam inserts) can make a thinner bun look fuller on straight hair, which sometimes can look a bit flat otherwise
3. Twisted Half-Up Style
The twisted half-up is where straight hair really gets to show off. This style involves taking sections of hair from the crown area, twisting them, and pinning them together at the back—creating both visual interest and a sense of movement that straight hair sometimes needs. The beauty of twists is that they add dimension and texture without actually curling your hair, so you get the softness and complexity without heat damage.
Why Twists Transform Straight Hair
When you twist sections of straight hair, the flat plane of each strand catches light differently, creating the illusion of wave and texture without actually changing your hair’s curl pattern. It’s like a visual trick that plays on light and shadow. Plus, twists work beautifully on straight hair because each section stays defined and doesn’t blur into the surrounding hair the way it might with wavy or curly hair.
How to Create Two-Strand Twists
Starting at one side of your head (above the temple), take a section about the thickness of your index finger. Divide that section in half and twist one strand around the other, working from root to tip. Pin that twisted section to the back of your head with a bobby pin. Repeat on the other side, then pull the two twists together with another elastic or pin, creating a twisted crown effect across the top of your head.
For a fuller look, take multiple smaller sections and create several thinner twists rather than just two thick ones. This creates movement and interest across the entire crown.
Tips for Twist Longevity
- Slightly damp or dampened hair twists easier than completely dry hair and holds longer
- Backcomb the twists gently before pinning them for extra grip
- Spray with a light hairspray as you go to help sections stay in place
- Bobby pins inserted at an angle (rather than straight in) grip straight hair more securely
Worth knowing: You can create pre-twisted sections the night before and sleep on them loosely, then re-pin them in the morning for waves that hold all day without heat styling.
4. Half-Up French Braid
The French braid is a structured style that immediately reads as polished, and when you do just a half-up version on straight hair, you get that refined look without the full, “I spent an hour on this” appearance. A half-up French braid adds architectural interest to straight hair while keeping it wearable for daily life.
Why French Braids Suit Straight Hair
French braids rely on clean sections and defined lines to look intentional, which is exactly what straight hair does naturally. You won’t have the frizz or texture issues that can make braids look messy—instead, your French braid will look crisp, structured, and intentionally styled. Straight hair also shows off the intricacy of a braid beautifully because there’s no texture competing with the braided pattern.
Technique for a Half-Up French Braid
Start at the crown of your head and take a small section (about the size of a quarter). Divide it into three strands and begin a traditional French braid—crossing the outer strands over the center strand while gradually incorporating new sections of hair from the sides. Unlike a full French braid that goes all the way down, stop when you’ve incorporated hair up to about ear level. At that point, switch to a regular three-strand braid for just a few inches, then secure the entire thing with an elastic, creating your half-up ponytail anchor point. The bottom half of your hair flows freely, and the braid sits like a crown on top.
Variations for Visual Interest
Create two smaller French braids—one on each side of your head starting above your ears—and pin them together at the back of the crown for a symmetrical, more delicate look. Or do one thick French braid to one side, starting at the center part and working toward one ear, then pin it at the side-back of your head for an asymmetrical, romantic feel.
How to Keep Your Braid Looking Fresh
- Spray the braid lightly as you create it—this helps strands stay exactly where you want them
- Gently tug on sections of the braid after you’ve finished to make it look fuller and more relaxed (a tight, tiny braid looks less polished than one with intentional texture)
- Bobby pins inserted horizontally under the braid secure it better than pins inserted from above
5. Half-Up Bow Style
This is the style for when you want to feel a little extra without actually doing that much work. A half-up bow—created by turning your ponytail into a bow shape—feels playful, polished, and distinctly intentional on straight hair. The clean lines of your straight strands actually showcase the bow shape more clearly than other textures would.
Creating the Illusion of a Hair Bow
Start with a standard half-up ponytail, but before you secure it completely, leave a loop of hair at the top while the tail hangs down. Split that loop in half (creating two “wings” of the bow), and pin each wing down to the sides, securing them with bobby pins. Take the hanging tail and wrap it around the center of the bow, then pin it to the back to hide the elastic and create the “knot” of the bow. The result is a perfectly formed bow made entirely of your own hair.
Why This Works on Straight Hair
Because your hair is straight, the bow shape will be clean and defined without any frizz or flyaways disrupting the lines. The symmetry is beautiful and graphic—it’s a style that photographs well and reads as intentional without looking costume-y.
Styling Options for the Bow Hairdo
Try a small, tight bow at the crown for an almost sporty, youthful feel. Or create a large, loose bow with more volume for something more dramatic. You can also slightly wave just the bow portion with a curling iron while keeping the rest of your hair straight for tonal contrast. Some people add a small clip or ribbon over the “knot” for extra polish, but it’s not necessary—the bow shape itself is statement enough.
Pro tip: Straight hair can look slick in this style if you pull everything too tightly. Gently backcomb the ponytail section before forming the bow to add subtle texture and prevent a too-severe appearance.
6. Sleek Half-Up with Straight Pieces
This is the style for when you want something modern and deliberately minimal. It’s essentially a half-up ponytail, but with the face-framing pieces curled while everything else stays arrow-straight. The contrast between the sleek ponytail and the soft curls at your face creates visual interest and softness without looking fussy.
Why Contrast Works on Straight Hair
One of the best things about straight hair is how dramatically you can control different sections. When you keep most of your hair sleek and straight while adding intentional curves just to the pieces framing your face, the contrast is striking and modern. This selective styling approach looks way more intentional and high-effort than it actually is.
Creating This Contrast Style
After securing your half-up ponytail, take the two face-framing pieces and curl them away from your face with a curling iron. Use a 1.5-inch barrel and curl from about mid-length to the ends, leaving the roots straight for a more relaxed look. As the curls cool, they’ll set. Keep the rest of your hair, including the ponytail and the pulled-back sections, completely straight for maximum impact.
Variations on the Contrast Concept
Try waves just on the bottom half of the ponytail while keeping the top sleek. Or reverse it entirely—add subtle waves to the bottom half of your hair while keeping the top-pulled-back section completely straight. You could also add a simple accessory like a minimalist clip or thin metal barrette where the ponytail starts, which enhances the modern feel.
Maintaining the Straight Sections
- Use a straightening iron on the sections you want to keep sleek, not just your regular blow dryer, for the cleanest, most refined look
- Apply a light smoothing serum or anti-frizz spray to the straight sections to keep them looking fresh
- Straight hair can develop a slight bend or crease where you’re holding the ponytail elastic—smooth this out with the straightening iron if it bothers you
7. Half-Up Knot (Topknot Variation)

The half-up knot is basically a two-knot style where you’re tying sections of hair in simple knots and pinning them to create an updo effect while leaving the bottom half down. It’s surprisingly sculptural and modern-looking, and it works beautifully on straight hair because the knots create clean, defined shapes.
How to Create a Simple Hair Knot
Take your half-up section (from ear to ear across the back) and divide it into two equal parts. Tie one knot loosely, just like you’d tie a shoelace. Secure it with a bobby pin at the base of the knot. Repeat with the second section, positioning it just below the first knot. You now have two neat knots sitting on top of your head. If you want a fuller look, gently tug on each knot to slightly loosen and expand it.
Why Knots Look So Good on Straight Hair
Knots are geometric and structured, which means they look incredibly clean and intentional on straight hair. There’s no texture softening the lines or making the knots look accidental—instead, they appear deliberately styled and modern. It’s a style that reads as both casual (it’s literally just tying your hair in knots) and polished (it looks surprisingly sophisticated).
Variations and Customization
Create a single large knot at the crown instead of two. Or make three smaller knots stacked vertically down the back of your head for a more dramatic effect. You can also tie the knots, then spiral the ends around the knots for a more elaborate, romantic look.
Worth knowing: Slightly damp hair holds knots better than completely dry hair, and backcombing the section before tying the knot adds grip and helps it stay put all day.
8. Half-Up with Loose Waves
This style keeps the top half secured with a simple elastic or clip, but deliberately adds waves throughout the bottom half of your hair. For straight hair, this creates a beautiful contrast—the pulled-back section emphasizes your bone structure, while the waves add movement and softness that straight hair sometimes lacks on its own.
Why Waves Transform Straight Hair
Waves add dimension and texture to straight hair without committing to a full head of curls. They catch light differently, they move when you move, and they add a romantic, undone quality that pure straight hair sometimes can’t achieve on its own. The best part? You’re only curling the bottom half, so you’re not damaging all of your hair, and the style still looks effortless.
Creating Waves on Straight Hair
Use a 1.5-inch curling iron to curl sections of your bottom half. Take sections about the width of your index finger, wrap them around the iron, and hold for 10-15 seconds. Release the curl and let it cool completely before touching it (cool curls hold much longer than warm ones). Once all sections are curled, gently finger-comb through the curls to break them up and create soft waves rather than tight ringlets.
Alternatively, use a curling wand and wrap sections around the barrel, leaving the ends out for a more relaxed, less-defined wave pattern. This creates a softer, more natural-looking texture that complements the sleekness of the pulled-back section.
Maintaining Your Waves Throughout the Day
- Use a curl-holding spray or light hairspray to extend wave longevity
- Sleep with the waves in a loose braid to keep them intact overnight
- Gently reactivate them with a curling iron in the morning if needed
- Avoid touching or running your fingers through the waves too much, which breaks them apart
9. Half-Up Fishtail Braid
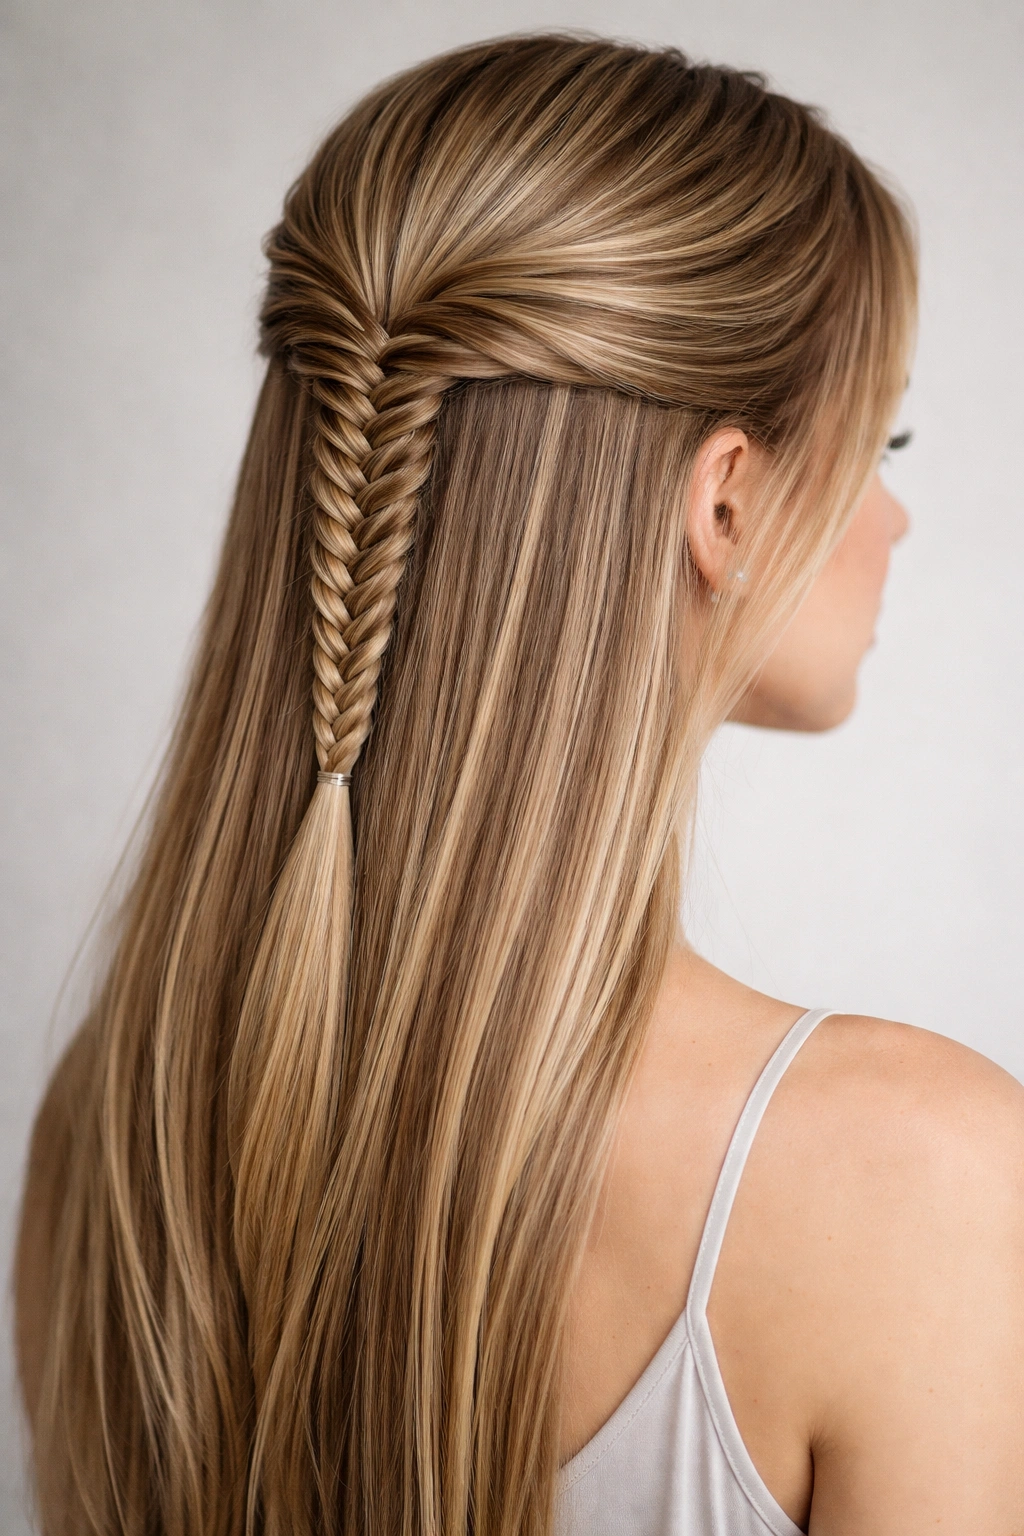
The fishtail braid is one of those styles that looks extremely intricate but is actually easier than a French braid once you get the hang of it. On straight hair, a fishtail braid has a delicate, intricate appearance that feels special without looking overdone or costume-like.
Understanding the Fishtail Technique
Instead of three strands like a regular braid, a fishtail uses two thick sections. Take your half-up section and divide it roughly in half. Pull a tiny piece from the outer edge of one section and cross it over to the other section. Repeat on the opposite side, alternating back and forth. It sounds confusing, but the pattern becomes natural quickly. The result is a braid that looks far more complex than it actually is, with a beautiful interlocking pattern that’s especially visible on straight hair.
Why Fishtails Look Stunning on Straight Hair
Because your hair is straight, each tiny piece in the fishtail remains distinct and visible. The interlocking pattern shows clearly, creating an intricate, detailed look that’s absolutely worth the minimal extra effort. On wavy or curly hair, the texture can blur the pattern, but on straight hair, every detail of the braid stands out.
How to Make Your Fishtail Look Fuller
Straight hair fishtails can sometimes look thin or delicate (which can be intentional and beautiful, but sometimes you want more volume). To add fullness, backcomb the section gently before you start braiding, and after you’ve finished, gently tug on the outer edges of each braid section to make it look fuller and more relaxed. This transforms a tight, intricate braid into something softer and more forgiving.
Practical Tips for Fishtail Longevity
- Slightly damp hair fishtails more easily and holds the pattern longer
- Take smaller pieces for a more delicate look, or larger pieces for a bolder braid
- Spray lightly as you braid to keep sections exactly where you want them
- You can fishtail braid your hair, then slightly waves the bottom half for a mixed-texture look
10. Half-Up Half-Down Waterfall Braid
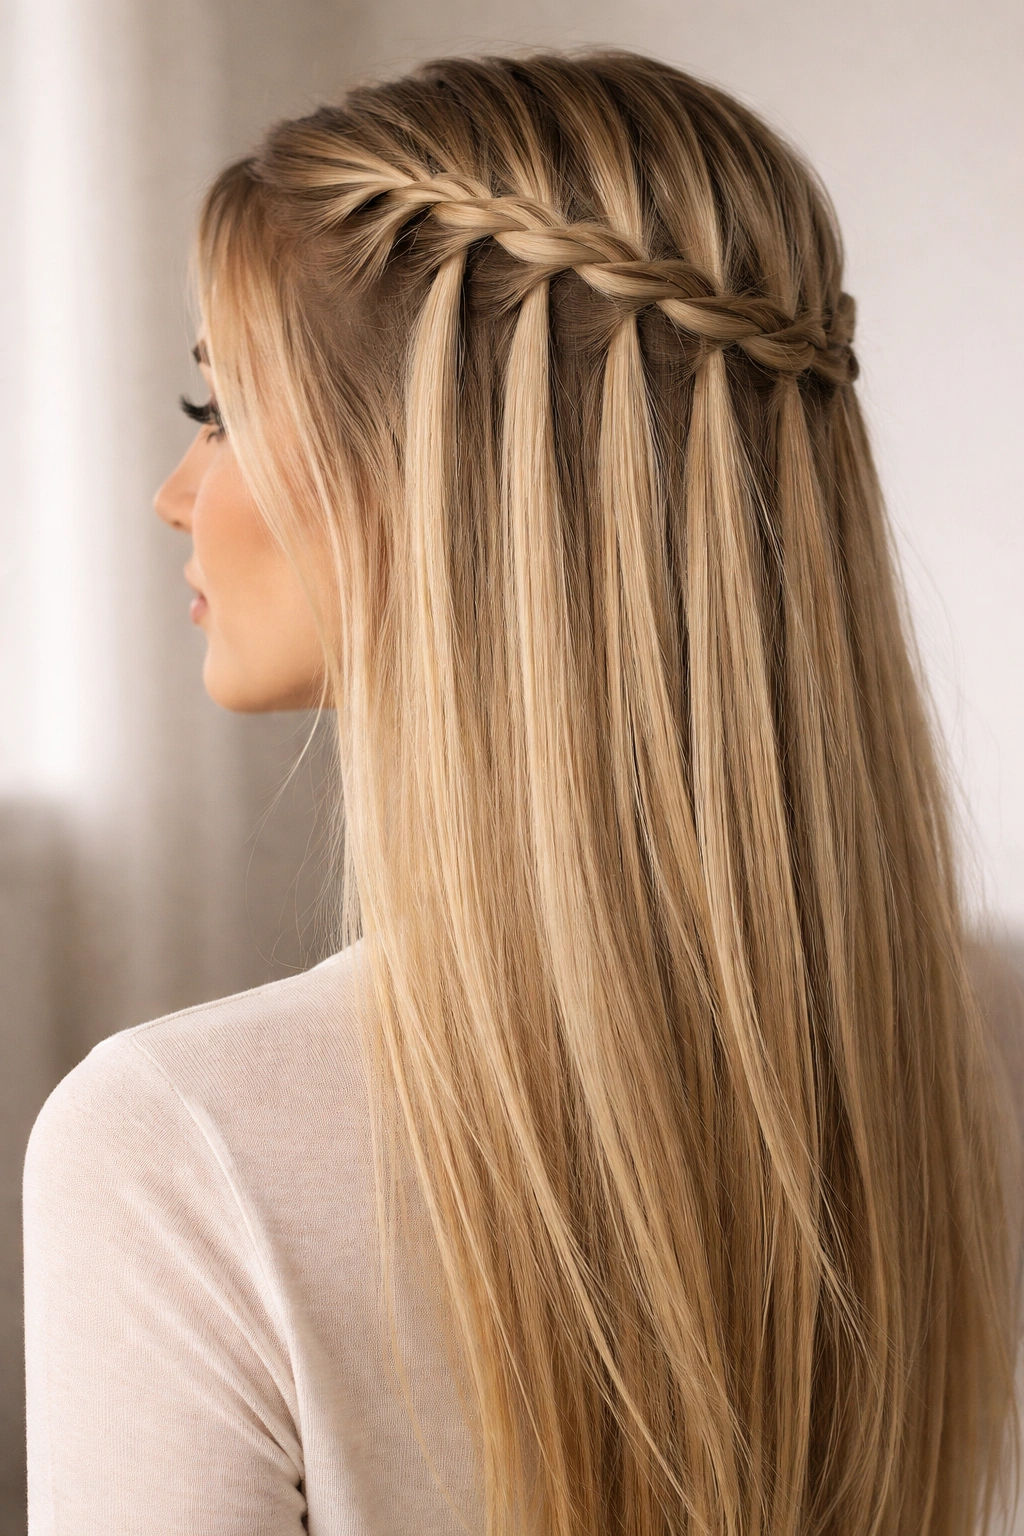
The waterfall braid is the most elaborate of these styles, but it’s absolutely worth learning because it looks like you spent an hour getting ready when you actually spent 10 minutes. It combines braiding with strategic pieces left down, creating a cascading effect that’s both romantic and intentional on straight hair.
How a Waterfall Braid Works
Start at one side of your head (above your temple) and begin a regular three-strand braid. Instead of incorporating all hair into the braid like a French braid would, you drop one strand with each new section, letting it fall down while replacing it with a fresh piece of hair from above. The result looks like a waterfall of hair cascading down the side of your head, hence the name. When you reach the opposite side of your head, secure the braid with an elastic or pin it to the back.
Why This Style Shines on Straight Hair
The waterfall braid creates a sense of movement and flow that’s especially striking on straight hair because the dropped pieces hang cleanly without frizz or curl disrupting the lines. The braid itself creates texture and interest, while the waterfall pieces frame your face softly. It’s a style that reads as elegant and effortless at the same time.
Creating Your Waterfall Braid Step by Step
Start your braid at one temple and work diagonally toward the back of your head (or toward the opposite temple, depending on which direction you want the waterfall to flow). As you braid, drop every third strand, replacing it with a fresh piece from above. The dropped strands become your waterfall. When you reach the back or the opposite side, secure everything with a bobby pin. Gently tug on the braid sections to make it look fuller and more relaxed.
Variations and Styling Options
Create a full waterfall braid that goes all the way around your head like a crown, with dropped pieces cascading all the way down. Or do a simpler version with just a few pieces dropped for a more subtle effect. You can also curl just the waterfall pieces for soft contrast against the straight braid, or add subtle waves to the bottom half of your hair for a more textured overall look.
Pro tip: Waterfall braids look even more impressive if you slightly curl or wave the dropped pieces before you start braiding, or if you add waves to them afterward. The straight braid combined with soft waves in the waterfall section creates a beautiful textural contrast.
Final Thoughts
Half-up, half-down styles are genuinely perfect for straight hair because they let you play with your natural texture while adding dimension and interest without fighting your hair’s inherent straightness. Each of these 10 styles works with your hair’s strengths—the smoothness, the shine, the clean lines—rather than against them. The beauty of having straight hair is that you can be incredibly intentional with styling. You can create sharp, defined lines when you want sophistication, or you can add selective waves and texture for a softer feel. You’re in control.
The easiest way to find your favorite style is to start simple. Master the classic half-up ponytail, then build from there. Once that feels natural, try adding twists or a simple braid. As your confidence grows, move toward the more elaborate styles like waterfall braids or fishtail braids. None of these require special products or tools you don’t already have, and most take under 15 minutes once you’ve practiced once or twice.
The real secret to making any of these styles look polished on straight hair is intention. Whether you’re creating clean, sharp lines or deliberately loosening things up for a softer feel, do it on purpose. Backcomb sections that need grip. Spray as you style. Gently tug on braids and buns to add volume. These small actions transform a hairstyle from “I threw this together” to “I intentionally styled this.” Your straight hair is already your greatest asset in achieving that polished look—you just have to lean into it.