Indian weddings celebrate elaborate beauty, ornate jewelry, and hairstyles that frame the bride’s face while complementing traditional attire. If you have naturally straight hair, you’re already working with one of the most versatile bases for creating stunning wedding looks. Unlike curly or textured hair that requires specific styling techniques to maintain definition, straight hair holds shapes crisply, reflects light beautifully, and allows jewelry to sit perfectly against your locks. This isn’t a limitation — it’s an advantage that opens up dozens of elegant styling possibilities that look polished, regal, and camera-ready from every angle.
The key to elevating straight hair for an Indian wedding is understanding how to add visual dimension, texture, and movement where it doesn’t naturally exist, while still honoring the clean lines and glossy finish that straight hair does best. You’re not fighting your hair texture; you’re working strategically to create depth, volume, and that sense of movement that photographs brilliantly and keeps you feeling like the radiant centerpiece of your celebration.
This guide walks you through ten wedding styles specifically designed to showcase straight hair beautifully, from traditional braided arrangements to modern sleek interpretations. Each style accounts for the specific strengths of straight hair — its reflectivity, the way it holds a shape when set, and how it frames your face and jewelry. Whether your wedding is a grand multi-day celebration or an intimate ceremony, you’ll find a style that feels authentically you while honoring the aesthetic traditions you’re celebrating.
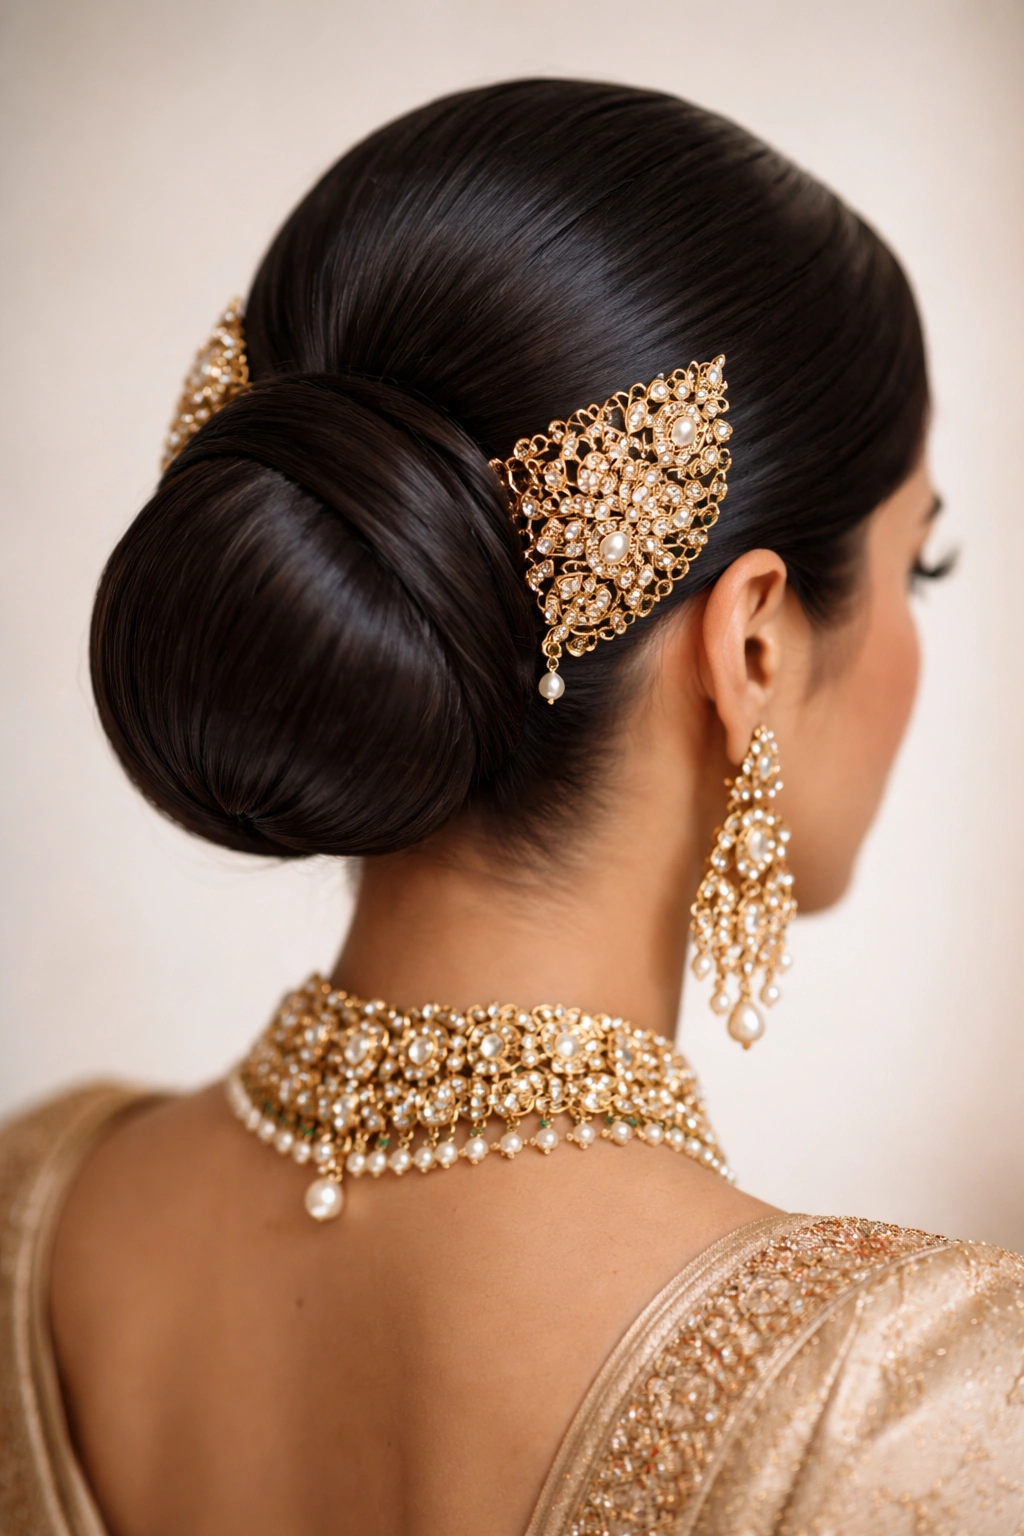
1. The Classic Bridal Bun with Pearl Accents
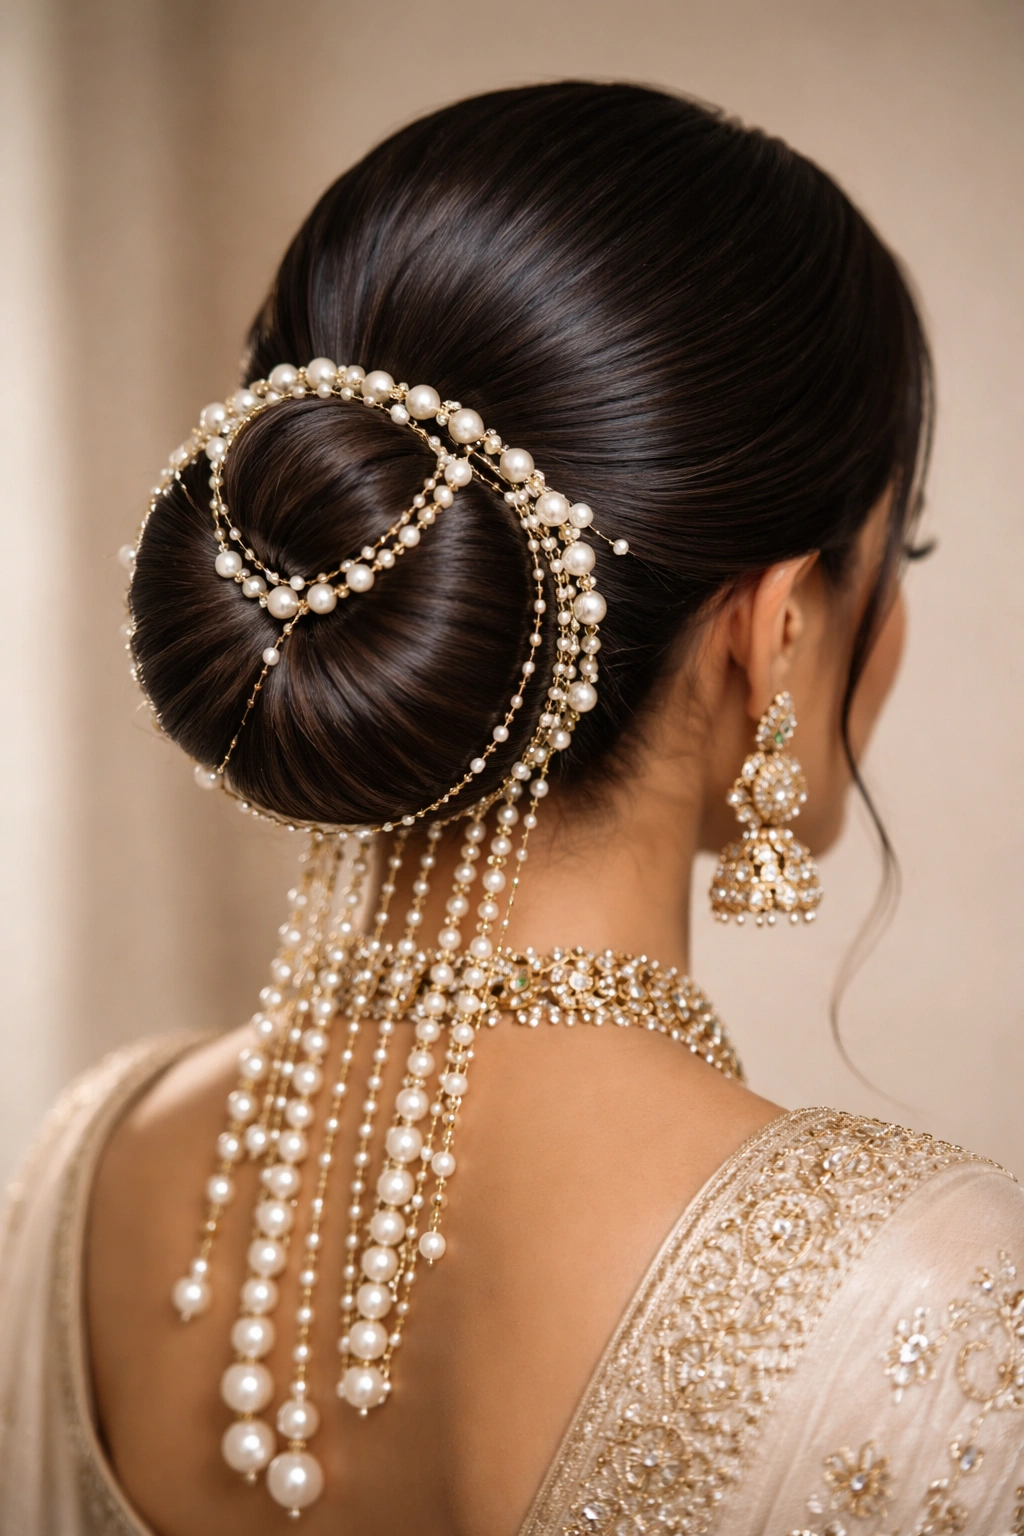
This is the wedding hairstyle that photographs like a dream and feels unmistakably bridal. A low, perfectly shaped bun sits at the nape of your neck, creating an elongated, elegant line from crown to shoulders. What makes this style work so beautifully with straight hair is that the clean lines create an almost sculptural effect — the bun appears three-dimensional and polished rather than flat, especially when light catches the glossy surface of your hair.
The magic happens when you layer pearl strings, gold chains, or beaded ornaments through and around the bun. Because straight hair is smooth and naturally reflective, these embellishments sit exactly where you place them, creating a cascading waterfall effect down your back. The style works perfectly with a heavily embroidered blouse or saree because the focus remains on your face and the intricate details of the bun rather than competing with an overly elaborate updo.
How to Build This Style
Start with your hair completely dry and apply a light smoothing serum to add shine without creating greasiness. Create a deep side parting (roughly 60-40 ratio) and brush your hair straight back into a low ponytail at the nape of your neck, keeping a few loose wisps of hair near your face to soften the severity. Twist the ponytail and coil it into a compact bun, securing it tightly with bobby pins and silk thread in a matching color. Once the structure is locked in place, begin threading pearl strings or delicate chains through the bun from the base upward, pinning them securely with invisible pins.
Why This Works for Straight Hair
- The smooth texture of straight hair makes the bun appear more defined and architectural
- Light reflects off the surface, creating depth and shine that costume jewelry and pearls catch beautifully
- No flyaways or frizz to distract from the jewelry work — your bun remains pristine throughout the entire ceremony and reception
- The straight parting line appears sharp and intentional, framing your face with precision
Styling Tips to Perfect It
The bun should be tight enough to last all day but not so tight that it causes discomfort or pulls your hairline. Use a pomade or edge control on your baby hairs and any wisps around your face to keep everything in place — this prevents the softness from reading as messiness. The key to making this look bridal rather than everyday is the ornament placement; layer multiple strings of pearls or chains so they overlap and catch light from different angles. Test the weight distribution before the wedding day to ensure your neck and hairline can comfortably handle the ornaments for 12+ hours.
2. The Sleek Side Parting with Temple Flowers
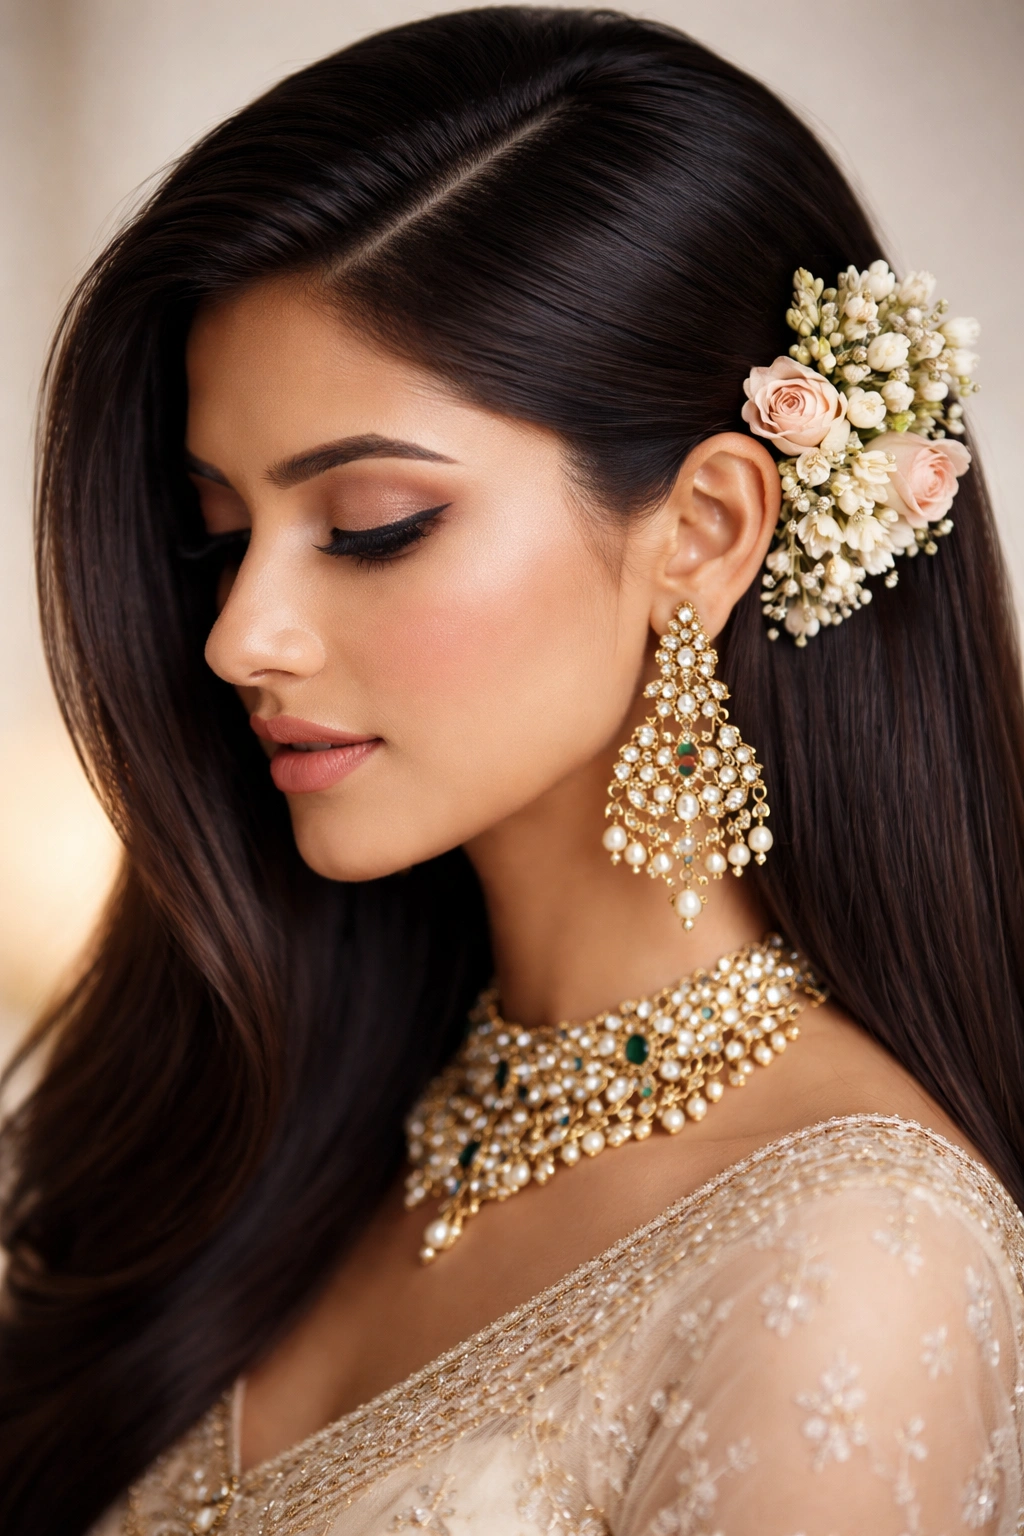
This style captures that effortless-elegance feeling while remaining completely intentional and wedding-appropriate. Your hair flows from a deep, precise side parting, swept entirely to one side and tucked behind your ear on one side, revealing your face and jewelry. Fresh flowers — jasmine, roses, or marigold strands — anchor the style at the temple and behind your ear, creating a natural, romantic quality that feels less formal than heavy ornamentation but just as striking.
For straight hair, this style is transformative because the sleekness reads as sophisticated rather than plain. The smooth surface catches light differently depending on how the flowers catch it, creating movement and interest without curls or texture. Your face becomes the focal point, framed by the curve of hair and adorned by the flowers rather than obscured by volume.
The Precise Execution
Begin with hair that’s been treated with a strengthening mask the night before — this adds subtle shine and makes the hair more pliable. Create a deep side parting by combing your hair directly backward from the part line, then redirect it to one side. Use a fine-tooth comb and a lightweight smoothing cream to eliminate any bumps or ridges in the parting itself. Smooth the larger section of hair completely to the side, then tuck it behind your ear and secure with bobby pins placed so they’re invisible from the front view.
The flowers should be woven in right at the temple where the hair curves behind the ear, creating a cascading effect. Fresh flowers wilt, so consider having your stylist apply them as close to the event as possible — ideally just an hour or two before you’re ready to be photographed. Alternatively, faux flowers that perfectly mimic fresh blooms are a practical choice that lasts all day without wilting.
What Makes This Work
- The severity of the side parting is softened by the romantic quality of flowers
- Straight hair’s natural shine complements the delicate petals rather than competing with them
- Your profile becomes a meaningful part of your visual composition — you can be photographed from the side and look equally stunning
- The style works beautifully with statement earrings, allowing them to show clearly without hair interference
Real-World Practicality
This style does require a light touch-up midway through a long day — the smoothing serum can separate under the weight of the flowers and dancing. Keep bobby pins and a small comb with you, and ask your stylist to show you exactly where the pins are placed so you can resecure them if needed. The flowers are the star here, so choose blooms that complement your skin tone and the color palette of your outfit rather than flowers that clash with your overall aesthetic.
3. The Layered Half-Up Look with Jewelry
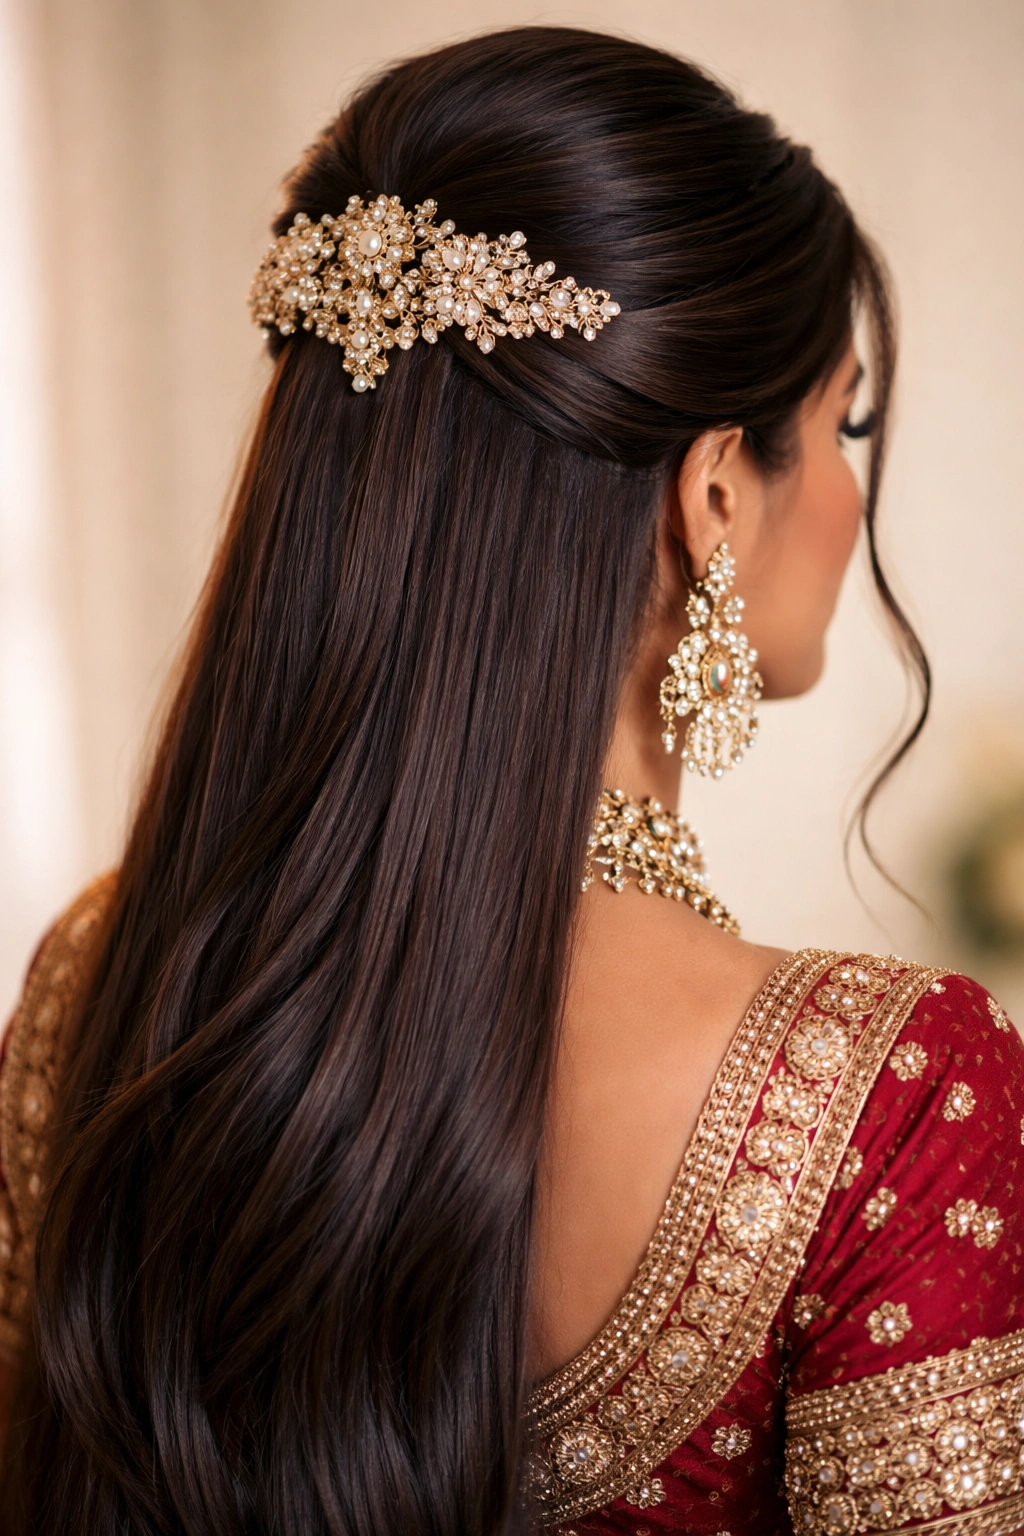
This modern interpretation of traditional styling gives you the best of both worlds: the elegance of an updo with the freedom and movement of wearing your hair down. The top half of your hair is swept up and secured with ornamental combs or clips, while the bottom half flows freely down your back, sometimes curled for texture but more often left straight to showcase length.
Straight hair makes this style look more intentional because the contrast between the controlled upper section and the flowing lower section is visually striking. The clean lines of the pulled-back portion frame your face, while the straight length creates an unbroken line that elongates your silhouette — perfect for photographing in your full wedding attire.
Building the Half-Up Structure
Section your hair horizontally across the crown, from temple to temple. Use a velvet-covered elasticated band or decorative hair tie to secure this upper section loosely — the goal is an elegant gathered effect, not a tight ponytail. Once the upper section is secured, use ornamental combs on both sides to anchor the style and add visual interest. These combs should catch light and coordinate with your jewelry; gold, silver, or jeweled combs all work depending on your overall aesthetic.
The lower section of hair should be absolutely smooth, combed downward and away from the gathered upper section. If you want subtle texture, use a large-barrel curling iron to create soft waves, but allow them to fall straight so they drape smoothly rather than creating bulk. The waves add dimension without sacrificing the streamlined effect straight hair naturally provides.
Specific Advantages for Straight Hair
- The contrast between the gathered and flowing sections reads as intentional and elegant rather than haphazard
- Straight hair in the lower section drapes smoothly, creating an unbroken line that looks longer and more luxurious
- The ornamental combs sit precisely where you place them without shifting throughout the day
- Your face is clearly visible and framed, allowing makeup and jewelry to take center stage
Customization Options
You can amplify this style by adding delicate hair jewelry along the gathered section — thin chains, pearl strands, or beaded ornaments that cascade from where the hair is gathered. The straight texture of your lower hair allows these ornaments to drape cleanly rather than getting tangled or lost in curls. You can also experiment with the height of the gathering; pulling it higher creates a more dramatic effect, while a looser gathering closer to the crown feels more relaxed and modern.
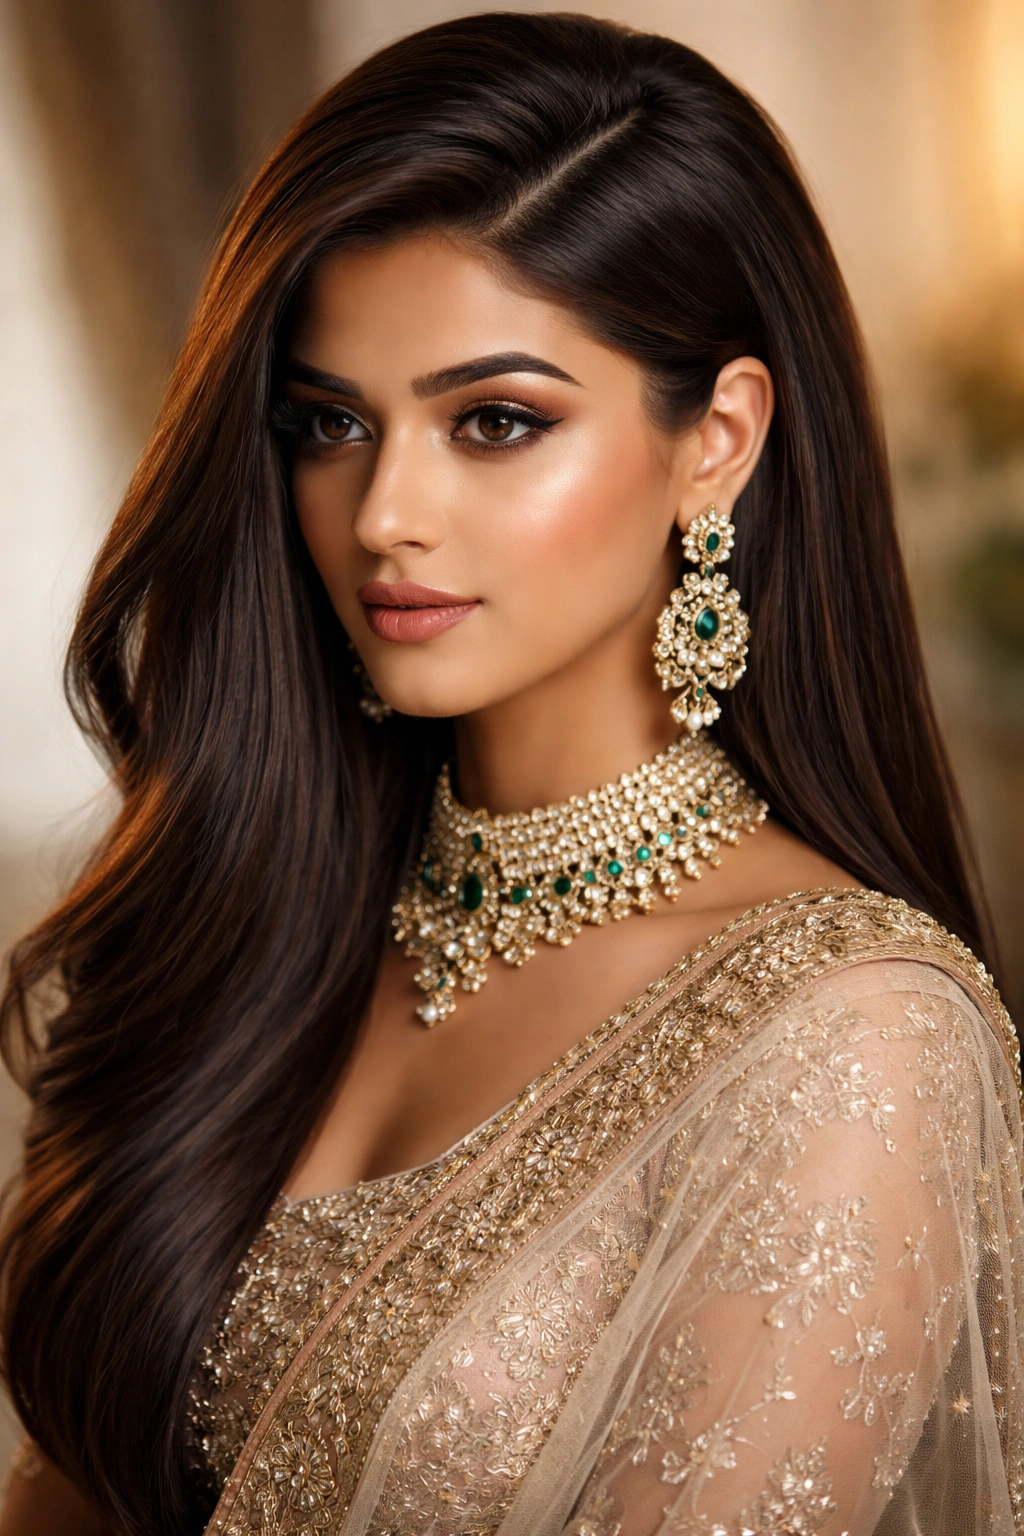
4. The Center-Parted Cascade with Hair Accessories
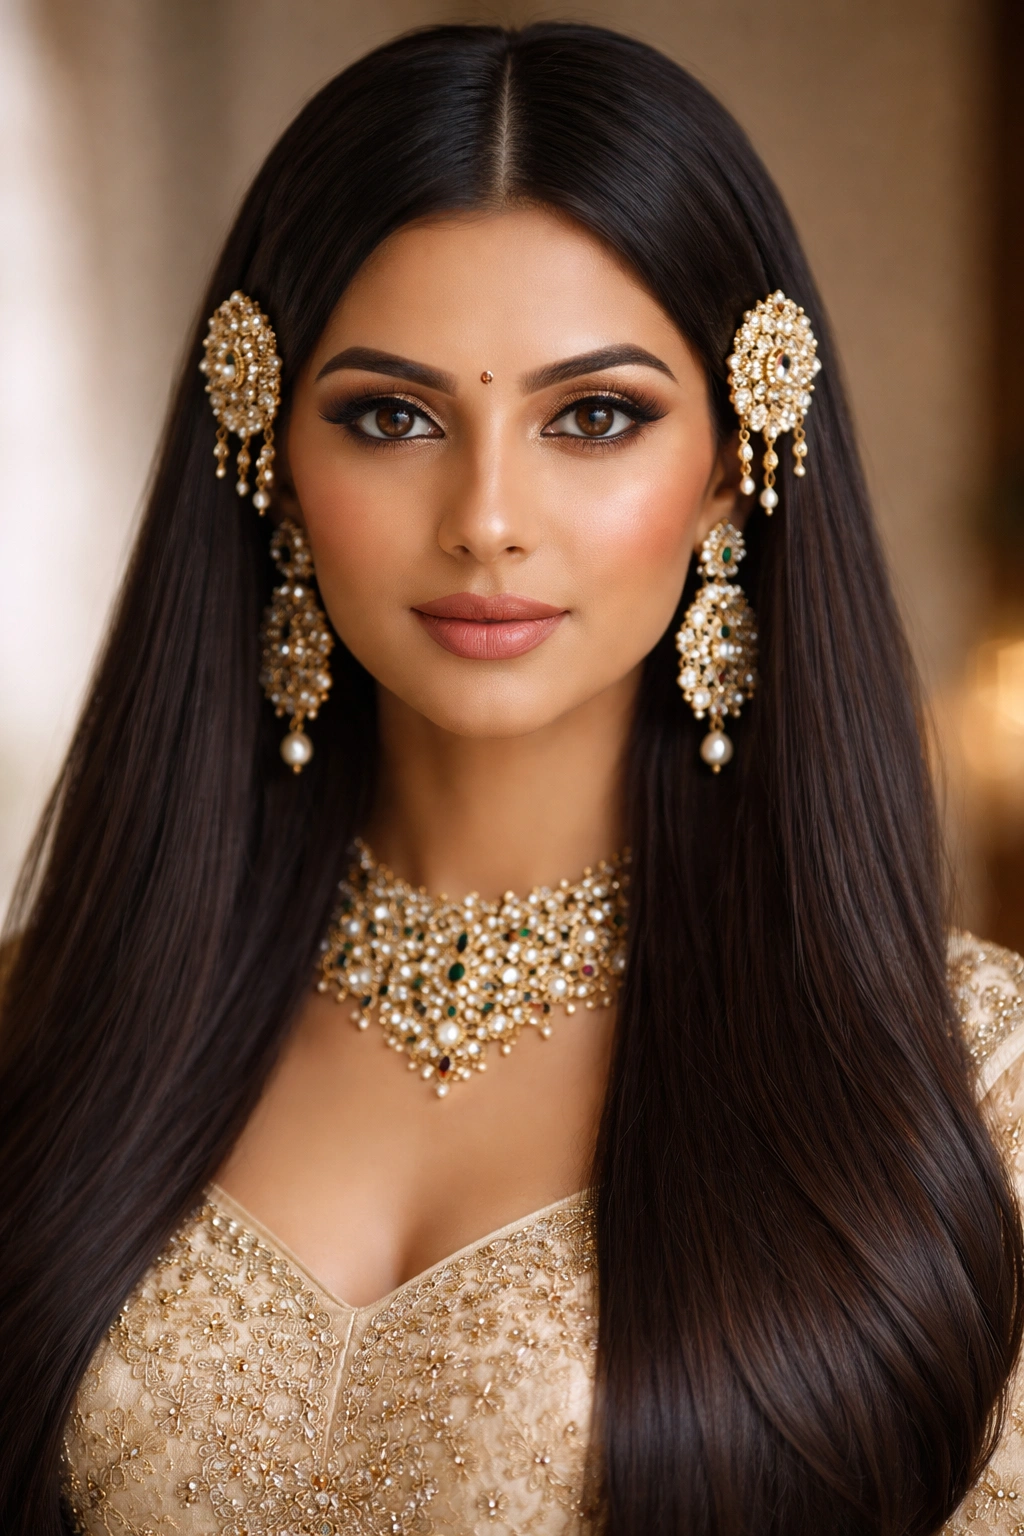
This style channels understated elegance and works beautifully for straight hair because the precision of a center parting and the flow of straight lengths create a balanced, symmetrical look that feels intentionally styled. Your hair is parted straight down the center from forehead to crown, then left to flow freely down both sides and back, anchored with ornamental accessories placed strategically around the sides.
The beauty of this approach is that it works with your hair’s natural texture rather than against it. Straight hair holds a center parting distinctly, and the symmetry reads as regal and composed rather than boring. Hair accessories placed at the temples, ears, or sides add cultural richness and visual interest without requiring the hair itself to be curled, braided, or heavily manipulated.
Creating the Perfect Center Part
Use a rattail comb or fine-tooth sectioning comb to create a perfectly straight center parting. Comb your hair completely away from your face on both sides, creating a clean line from the forehead back toward the crown. The parting should be sharp and visible — this precision is part of what makes the style look polished. Once the parting is established, apply a lightweight smoothing cream to the surface of your hair to add shine and control any potential frizz, though with straight hair this is usually minimal.
Hair should cascade down the back in its full length, creating an unbroken vertical line. If you want subtle movement, use a large-barrel curling iron on the very ends to create soft C-curves, but keep the bulk of the hair straight. The curves at the ends add a touch of femininity without compromising the straight aesthetic.
Accessorizing This Style
The accessories are where this style becomes unmistakably bridal. Gold or jeweled hair ornaments placed on both sides of your head (at the temples or ears) create symmetry and frame your face. Some brides choose a single large ornament in the center back where the hair cascades, creating a focal point. Others prefer a delicate hair chain that runs from one side of the head to the other, sitting on top of the head like a modified crown.
Because straight hair is smooth and sits close to your scalp, accessories remain visible and well-positioned rather than disappearing into curls. This means you can choose more delicate ornaments and be confident they’ll show up beautifully in photographs and appear exactly as intended throughout the day.
Why This Works
- A center parting with straight hair creates perfect symmetry that photographs beautifully from the front
- The flowing length emphasizes how long and healthy your hair is
- Hair accessories are the only embellishment needed; the style is clean enough not to compete with heavy jewelry
- Your entire face is visible and framed without any sections pulled back, creating openness and approachability
5. The Slicked-Back Bun with Ornamental Combs
For a more formal, architectural interpretation of the wedding bun, this style pulls all your hair straight back without a parting, creating a unified, sculpted effect. Your hair is smoothed tightly away from your face and gathered into a bun at the crown or base of the skull, then anchored with ornamental combs on both sides. This style feels distinctly traditional while remaining modern enough to suit contemporary wedding aesthetics.
The “slicked-back” description might sound severe, but with straight hair, the effect is actually quite elegant. The smooth, sculpted quality reads as intentional and powerful rather than harsh, especially when you soften the look slightly with a few wisps of hair released at the hairline. Ornamental combs become architectural elements, not just functional clips.
The Technical Approach
Begin with completely dry hair and apply a pomade or edge control to tame your hairline and prepare the hair for smooth styling. Using a fine-tooth comb, brush your hair straight back from your forehead, directing all length toward a central point at the crown or nape. The goal is a smooth, ridge-free surface with no bumps or uneven sections. Work in small sections, combing thoroughly, until your entire head feels sleek.
Gather the hair at your chosen point and secure it with a fine elastic band, then coil the length into a compact bun. This bun should be perfectly smooth — no loops, twists, or visible texture. Pin it securely with multiple bobby pins, ensuring it’s tight enough to last the entire day. Once the structure is locked, place an ornamental comb on each side of your head, positioning them to sit against the smooth surface of your hair and be clearly visible from the front view.
Why Straight Hair Excels Here
- The smooth texture creates an almost porcelain quality that looks polished and intentional
- Without texture or curl, your hair appears shinier because light reflects evenly off the surface
- Ornamental combs sit precisely where placed and don’t shift or get lost in the hair
- The architectural quality of the style is enhanced by the clean lines straight hair provides
Styling Variations
You can adjust the formality and feel of this style by changing where you create the bun (crown for dramatic height, nape for understated elegance) and by varying the size and complexity of the ornamental combs. Larger, more jeweled combs read as more formal and traditional. Smaller, simpler combs feel more contemporary. Some brides add delicate chains or pearl strands wrapped around the bun itself, allowing them to drape down the back and create movement in photographs.
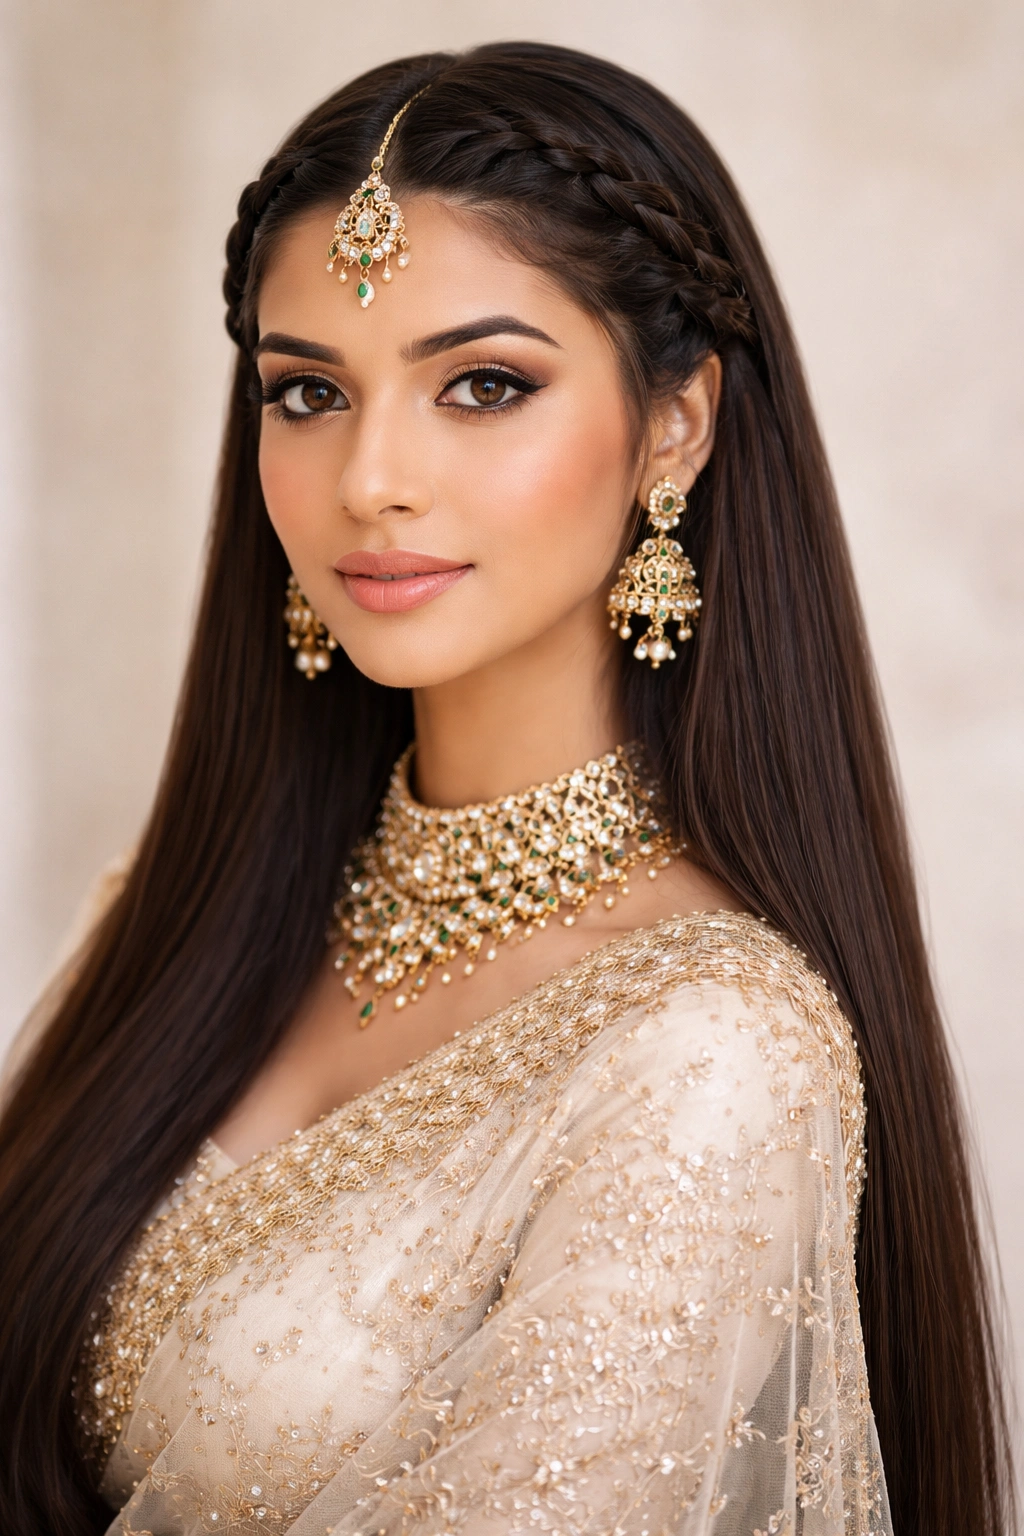
6. The Straight Long Length with Head Jewelry
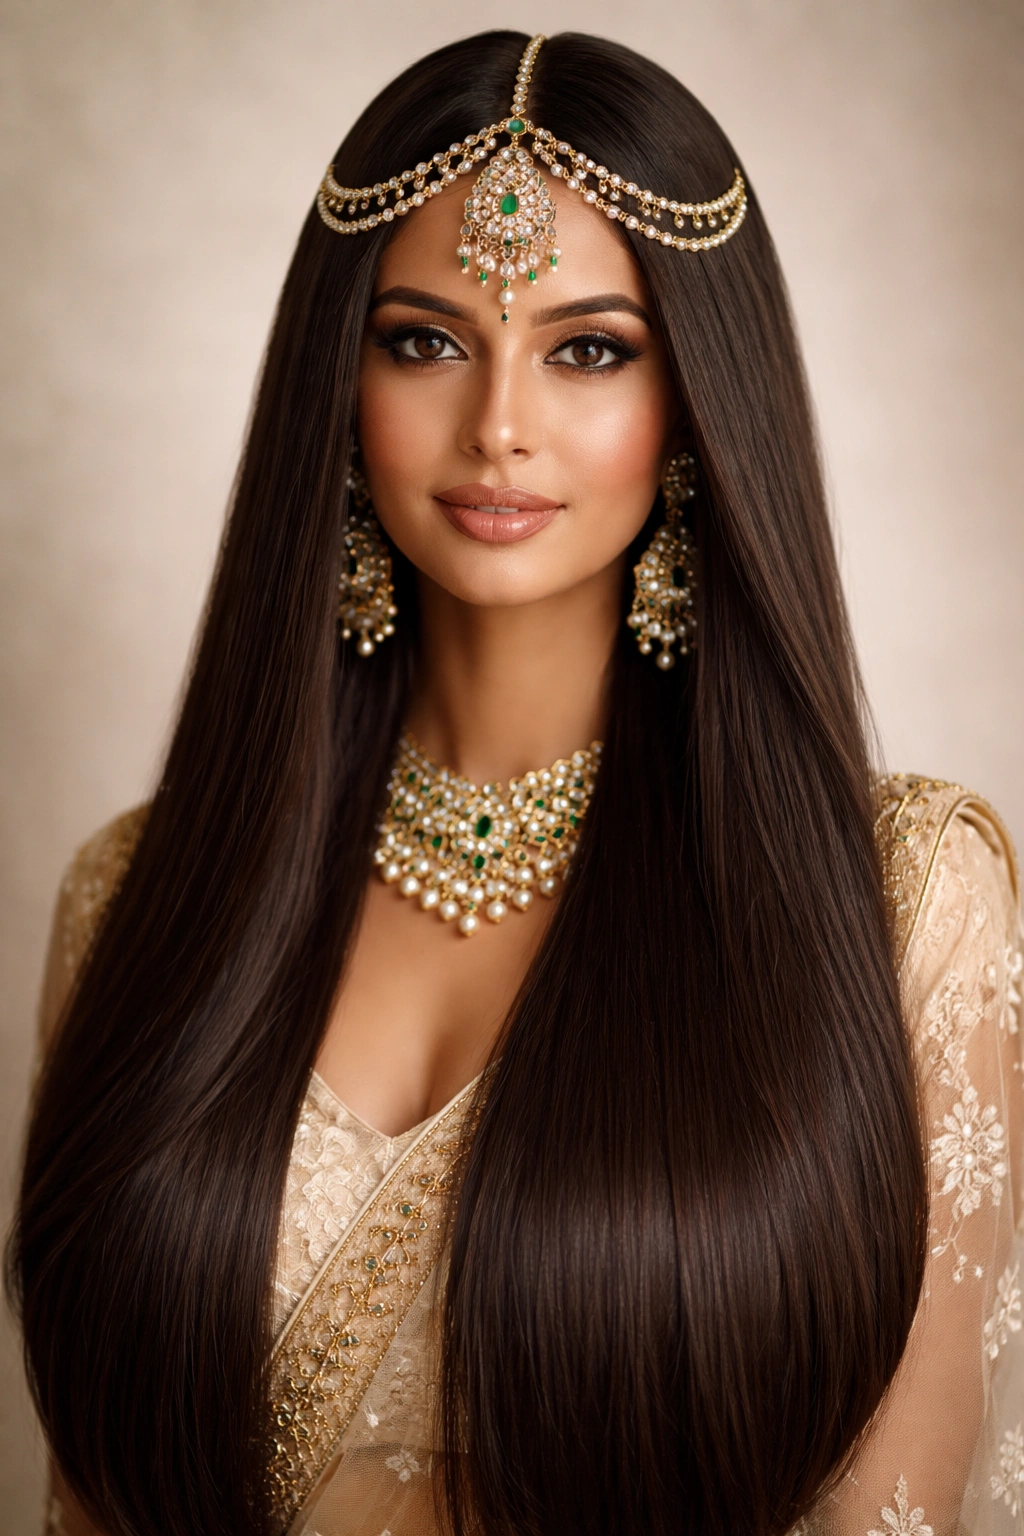
Sometimes the most elegant choice is no updo at all. If your hair is long and thick, wearing it completely down with strategic head jewelry can be a stunning, modern wedding choice that feels confident and celebrates the beauty of your straight lengths. Your hair flows freely down your back, optionally with subtle waves or texture added only to the ends, while a decorative tikka, maang tika, or chain headpiece anchors the style and adds cultural significance.
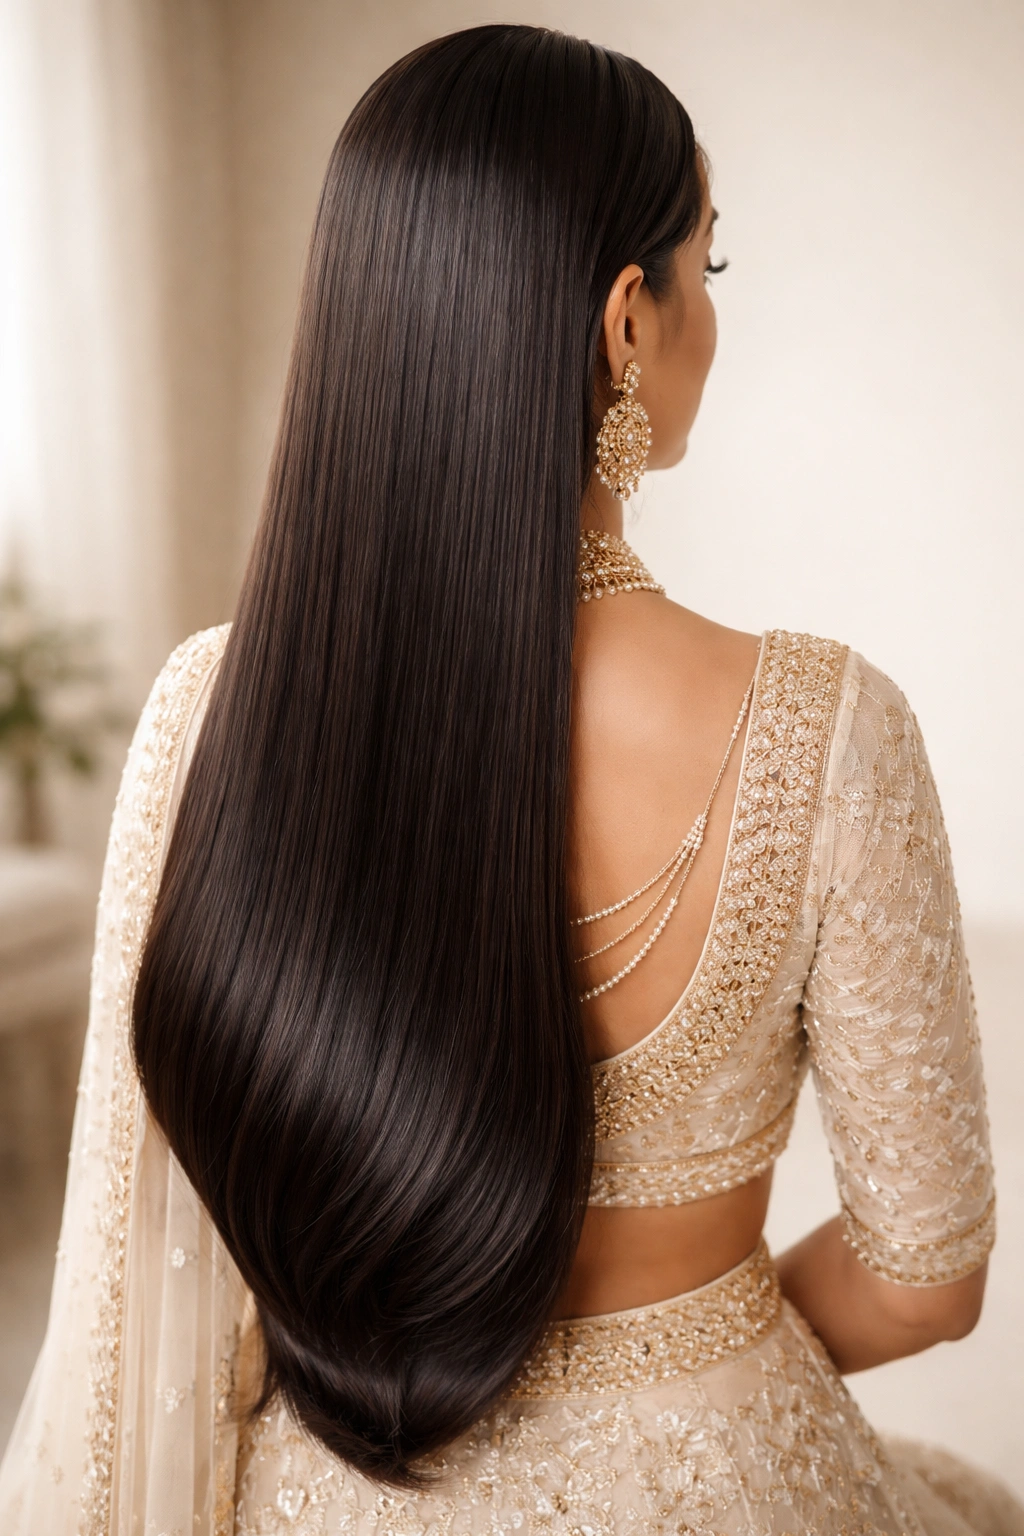
This works particularly well with straight hair because the length is visible and uninterrupted. There’s no hair piled on top of your head competing for visual attention — instead, your straight lengths become part of your overall silhouette, creating a longer, more elongated line. Combined with a draped saree or a lehenga with a long train, the effect is graceful and visually cohesive.
Making This Look Intentionally Styled
The key to making this work is ensuring it reads as a chosen, intentionally styled wedding look rather than “just hair down.” This usually means applying a smoothing treatment or serum the night before to add shine, and possibly using a flat iron to eliminate any waves that developed from washing. The goal is glass-straight, glossy hair that catches light and shimmers.
Hair jewelry becomes non-negotiable here. A maang tika running down the center parting from crown to between your eyebrows, a tikka hanging from the parting onto your forehead, or delicate chains pinned throughout your hair all ensure that the style reads as deliberately curated rather than casual. The jewelry is what elevates this from everyday to wedding-appropriate.
Customizing the Length Style
If your hair naturally falls completely straight without any wave, you can wear it exactly as is — the sleekness and shine are the entire point. If you prefer a touch more femininity, use a large-barrel curling iron to create soft, loose waves that fall very straightly from your crown downward. The difference between “waves” in straight hair versus curly hair is that straight hair waves should look almost like a gentle undulation rather than defined curls. They add movement in photographs but maintain the overall straight aesthetic.
The Practical Side
Long hair down can be heavy and warm, especially if you’re wearing a heavily embroidered bridal outfit. You can mitigate this by having your stylist apply lightweight hairspray and edge control rather than heavy pomades, which weigh hair down further. Some brides choose to partially pin back one side of their hair even with this “down” style, creating a half-swept look that feels more intentional and keeps hair from your face during the ceremony and meal.
Why This Works Beautifully
- Straight hair down shows length and health that curled styles sometimes obscure
- The shine of healthy straight hair is a feature, not a flaw, and becomes more visible without hair piled on top
- Head jewelry has room to drape and move, creating visual interest and catching light throughout the day
- Your movement and dancing is enhanced because hair moves with you, creating beautiful visual flow in photographs
7. The Deep-Side Parted Volume Style
This style begins with a deep side parting — roughly 70-30 ratio — that dramatically shapes how light falls on your face. The larger section of hair is swept to one side and swept upward, creating fullness and volume at the crown that straight hair doesn’t naturally produce. The smaller section stays smoothly to the other side, creating asymmetrical visual balance.
What makes this work for straight hair is that you’re creating the illusion of texture and movement without actually curling your hair. The swept-up and back direction mimics what curly hair might naturally do, but you’re achieving it through skillful styling. The result is a look that feels contemporary, a bit edgy, and distinctly different from traditional heavy updos.
Building the Volume Strategically
Start with your hair slightly damp and apply a volumizing mousse to the roots, focusing on the crown and top sections. Blow-dry with your head tilted forward to encourage lift at the roots — this is where your volume comes from. Once dry, create your deep side parting with precision using a fine-tooth comb.
The smaller section of the parting (the side with less hair) should be smoothed completely to the side and tucked behind your ear or pinned loosely. The larger section is where the magic happens. Brush this section upward and back, creating a soft, rounded lift at the crown. This shouldn’t look like you’ve teased the hair (which reads as dated) but rather like the hair naturally wants to sit higher and fuller at the crown due to the direction you’re sweeping it.
Pin the lifted section loosely using bobby pins hidden beneath the surface of the hair. These pins should follow the contour of your head, creating a smooth, supported shape. The goal is height at the crown that’s visible from the side but doesn’t look like there’s texture or teasing happening — it’s simply the volume created by the direction and the way the hair sits.
Customization for Your Hair
If your hair is fine or thin, the volumizing mousse becomes essential, and you might need to tease very lightly under the surface to create the lift you need. If your hair is thick and dense, you may only need the blow-drying and directional pinning to achieve the volume. The key is that it should look effortless rather than overdone.
You can add a decorative hairclip, comb, or flowers in the lifted section to add visual interest and ensure the style reads as intentionally formal. Some brides choose to release a few soft wisps of hair at the hairline to soften the severity of the deep parting.
Why This Works
- Creates visual drama and movement using straight hair’s natural properties rather than fighting them
- The asymmetrical volume reads as modern and intentional
- Deep side partings flatter most face shapes by directing attention to your best features
- The lifted crown adds height to your overall silhouette, which photographs beautifully
8. The Textured Waves Faux Effect
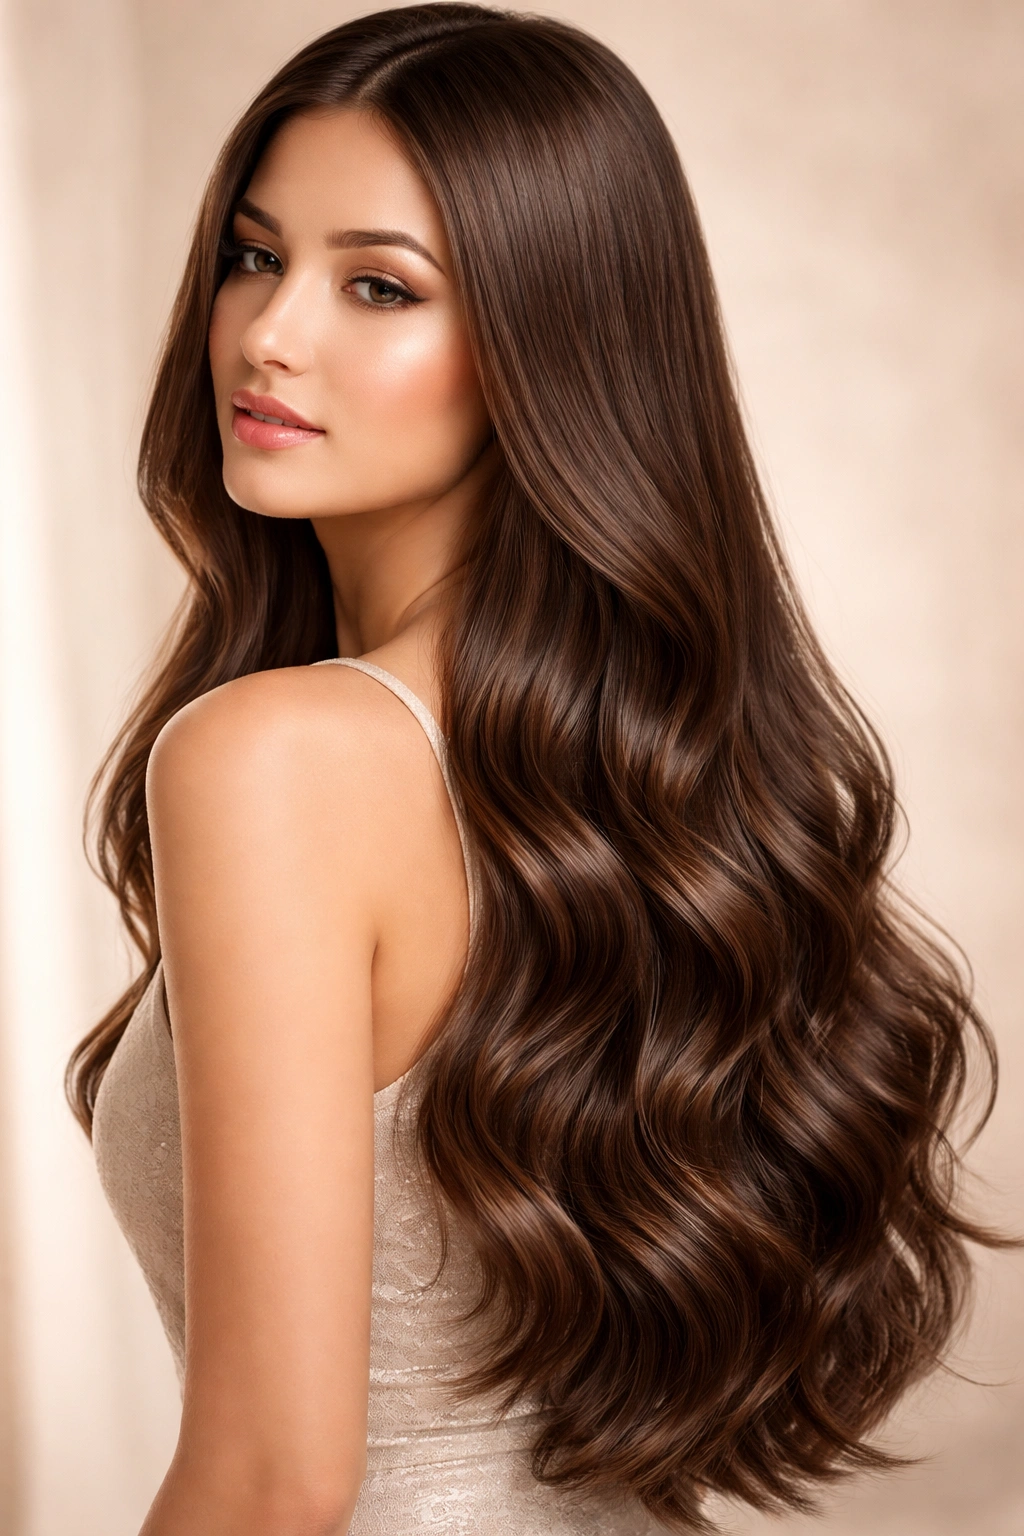
If you love the idea of waves and movement but want to keep your styling gentle and your wedding day timeline reasonable, creating faux texture on straight hair is a beautiful alternative. You’re not applying heat to your entire head of hair — instead, you’re using strategic heat or braiding techniques to create defined waves specifically in the lengths, then releasing them into soft, straight sections.
This style maintains the glossy, healthy appearance of straight hair while adding movement that photographs beautifully. It’s neither a full curl nor completely straight, but rather an intentional textured wave that reads as effortlessly romantic.
Creating Faux Waves
One method is to create several loose braids in your damp hair, sleep on them, and then release them in the morning. The braids create a gentle wave pattern that lasts all day. Another approach is to use a large-barrel curling iron (at least 1.5 inches) to curl sections of damp hair, then brush them out immediately. This creates waves rather than curls because you’re not allowing the curl to set; you’re just using the heat to encourage movement.
A third method is to apply a sea salt spray or wave-creating mousse to damp hair and allow it to air-dry naturally or blow-dry with your fingers running through your hair to encourage waves rather than directing the hair in a specific way. With straight hair, this method produces subtle texture rather than defined waves, which often reads as more elegant and intentional than obvious curling.
Styling and Anchoring the Waves
Once you’ve created your waves, they’ll need anchoring so they don’t fall flat during the day. This usually means creating a partial updo — perhaps a half-up style with ornamental combs, or a low bun at the nape with waves flowing from above. The waves themselves become the visual interest, so the updo should be relatively simple and clean.
Apply a light-to-medium hold hairspray to the waves once they’re set and the updo is in place. Avoid heavy products that weigh the waves down, which defeats the purpose of creating texture in the first place.
Why This Works
- You maintain the glossy appearance of straight hair while adding movement
- Waves in straight hair read as intentional and styled rather than naturally curly
- The texture adds visual interest and photographs beautifully without requiring complex or time-consuming styling
- Your wedding day timeline is simplified because you’re not curling your entire head with a curling iron
9. The Braided Front with Straight Back Section
This style beautifully combines two different textures: a delicate braid or series of braids framing the front of your head, with the remaining hair left completely straight and flowing down your back. It’s a style that feels traditional — braids are central to many Indian wedding aesthetics — while remaining modern and flattering for straight hair.
The braids serve both a functional and aesthetic purpose: they keep hair off your face during the ceremony while adding decorative detail that coordinates with your jewelry and outfit. The straight back section maintains the sleek, glossy quality of straight hair, creating visual contrast with the braided portions.
Building the Braided Framework
Begin by creating your parting (center, side, or off-center — your choice). Section a thin piece of hair near one temple and begin a Dutch braid or French braid moving toward the back of your head. This first braid should be thin and delicate, following the curve of your head from temple toward the back. Secure the braid end loosely with a fine elastic band.
Repeat on the other side, creating a matching braid that frames the other temple. You now have two braids framing your face, with your back hair remaining completely straight and flowing downward. Some brides choose to create additional delicate braids throughout the crown area, but the two temple braids usually provide enough visual interest without overwhelming the style.
The braids should be tight enough to feel secure but not so tight that they pull uncomfortably on your scalp. After the wedding day, you should not have deep indentations where the braids were placed. If you do, you’ve braided too tightly.
Adding Adornment to the Braids
This is where the braids become distinctly bridal. Weave delicate flowers, gold thread, or pearl strands through the braids as you create them, or add them afterward by gently tucking them under the braid structure. The ornaments should look intentionally placed, catching light and creating visual interest. Because the back of your hair is completely straight, the braided ornaments pop visually rather than disappearing into texture.
Customization and Flexibility
If you have thinner hair or don’t want very visible braids, create French braids that are fuller and less defined. If you want more drama, create thinner, tighter braids that look more delicate. Some brides choose to create a single thicker braid across the crown instead of two temple braids, or combine one thick crown braid with temple braids for more coverage.
Why Straight Hair is Ideal Here
- The contrast between braided and straight sections is visually striking
- The straight back section remains glossy and beautiful without competing with the braids for attention
- Ornaments woven into braids stay in place throughout the day because the braid structure holds them
- The style works beautifully with various saree and jewelry styles without feeling like it’s fighting your outfit
10. The Asymmetrical Styled Straight Look

For brides who want something unconventional while remaining wedding-appropriate, an asymmetrical style offers drama and modern flair. One side of your hair is styled (either pulled back, braided, or adorned) while the other side flows freely. This creates inherent visual interest and movement, and straight hair executes this style beautifully because the contrast between styled and unstyled sides is crystal clear.
This might mean pinning one entire side of your hair back and tucking it behind your ear while the other side flows freely down your back. Or it might mean creating a side-swept arrangement where most of your hair moves toward one shoulder, creating an elegant diagonal line across your body. The asymmetry reads as intentional and artistic rather than accidental.
Building Asymmetrical Drama
Start by deciding which side of your head will be your “styled” side. Create a deep side parting toward that side, and brush the larger section completely to that side, pinning it back with decorative clips or combs. The smaller section of hair from the parting stays on the other side, flowing freely down that shoulder.
Alternatively, create a center parting and sweep the entirety of one side back (creating a deep side sweep), pinning it at the back of your head with ornamental combs. The other side of your hair flows freely down that opposite shoulder. This creates a graceful diagonal line that photographs beautifully and feels dynamic and alive.
Adornment and Balance
Because one side of your head is very visible (the styled side with your ear and hairline exposed), this side should be impeccably finished. Make sure your hairline is clean, any baby hairs are controlled, and any pins or combs placed on this side are beautiful enough to be visible. Many brides choose to wear a larger earring or hair ornament on the styled side to balance the fact that it’s more exposed.
The flowing side becomes almost a living, moving part of your visual design — hair flowing across your shoulder and down your back creates elegant lines in photographs and has beautiful movement as you walk and dance.
Why This Works
- Straight hair’s smooth quality makes the asymmetry look intentional rather than careless
- The contrast between styled and unstyled sections creates visual interest and fashion-forward appeal
- Your face and one ear are completely visible, allowing jewelry and makeup to show beautifully
- The style photographs differently from every angle, creating varied and interesting shots
Final Thoughts
Straight hair at an Indian wedding is far from a limitation — it’s a canvas for styles that prioritize elegance, shine, and clean lines. Each of these ten styles works beautifully because it honors what straight hair does naturally while adding the cultural richness, formality, and visual interest that wedding occasions demand.
The most important thing is choosing a style that makes you feel confident and beautiful. You’ll be photographed hundreds of times, and you’ll be moving, eating, and celebrating in this style for hours. Try it with your stylist beforehand if possible, or at minimum, look at multiple reference photos and discuss your comfort level with complexity, weight in your hair, and how much you want your face visible.
Your straight hair is an asset to be celebrated, not worked around. When styled with intention, knowledge, and the right ornaments and details, it creates a bridal look that’s timeless, regal, and unmistakably you.