A good Bantu knot mohawk changes the whole mood of a look. The shape gives height through the center, keeps the sides neat, and makes natural texture look intentional instead of like an afterthought.
Bantu knot mohawk styles are one of those looks that can feel edgy, polished, soft, or festive without changing the basic structure much. That’s the part I like most. A few section changes, a different knot size, or a shift in parting can take the style from a work-friendly updo to something that looks ready for a party.
The style also has a practical side people forget. A well-made mohawk layout keeps the hair off the face, protects the ends when the knots are set properly, and can stretch a wash day if you leave it in for a few days. The catch is tension. Too tight, and the hairline will complain. Too loose, and the whole ridge falls flat by lunch.
These 10 styles lean into different hair lengths, densities, and moods, because a mohawk shape is only useful if it fits the hair sitting on your head.
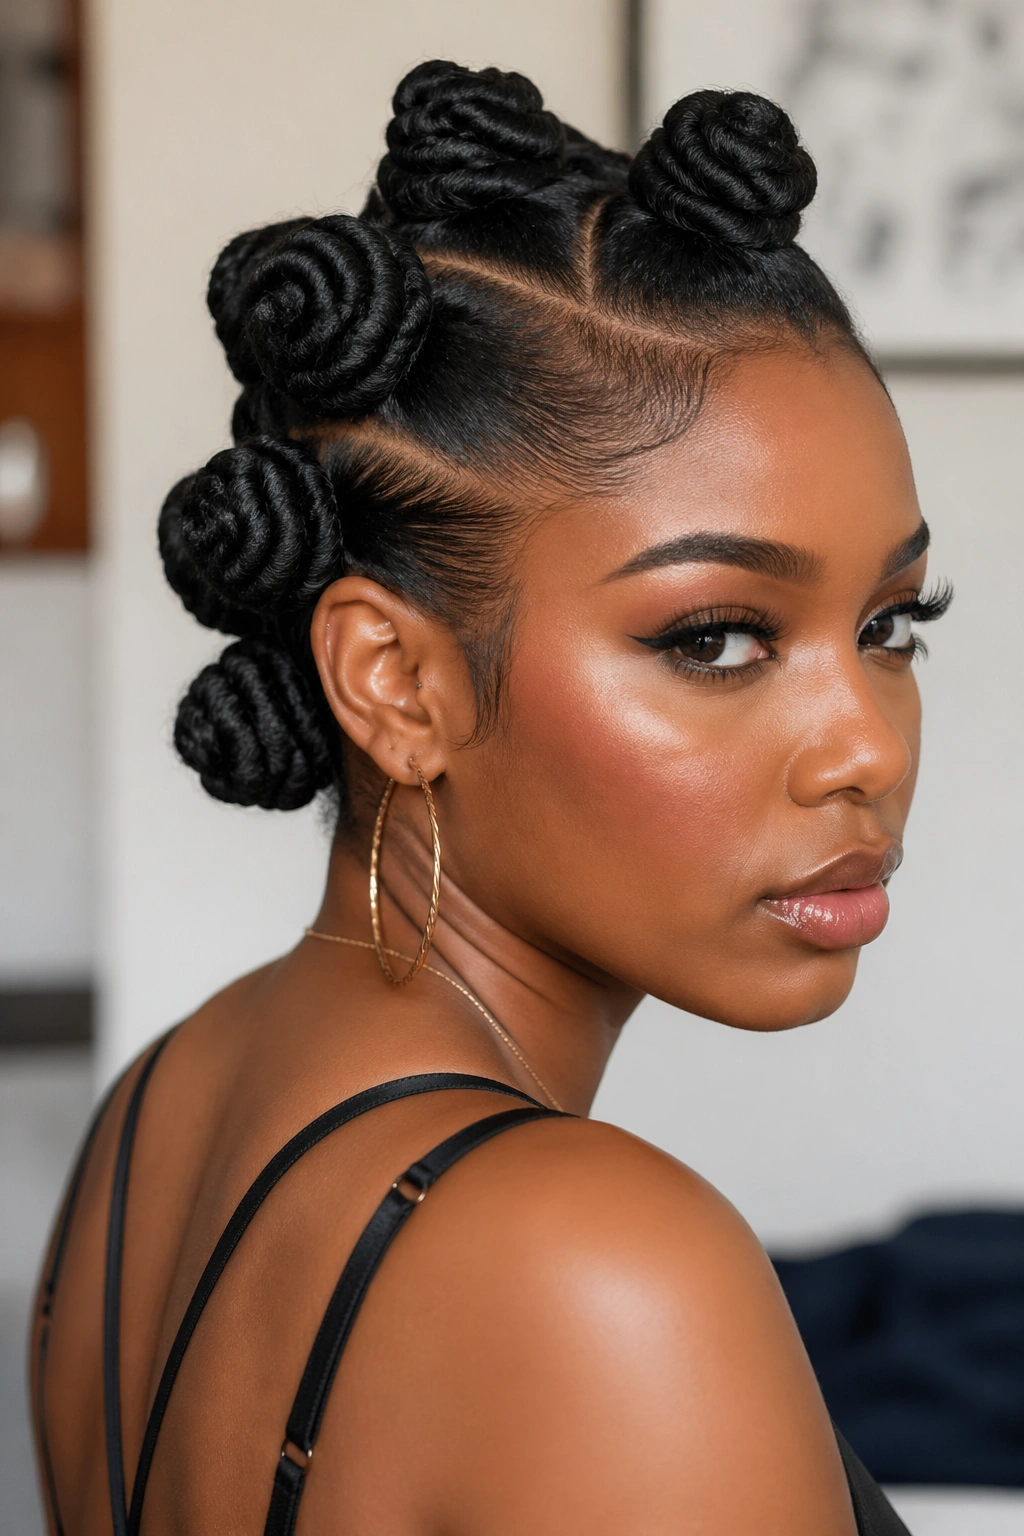
1. Sleek High Bantu Knot Mohawk

Picture a sharp center ridge that rises a little higher than you expect, with the sides pressed close enough to show off the shape. That’s the appeal here. It looks clean, deliberate, and a little dramatic without needing a ton of extra decoration.
This version works best when you want the mohawk line to be the first thing people notice. Keep the knots compact — about 1.5 to 2 inches across — and place them in a straight center row from the hairline to the nape. The sides can be braided down, slicked back, or tucked under with flat twists, but they should stay tight and smooth so the profile stays crisp.
Why the height matters
A high center ridge lengthens the face and gives the style a strong silhouette. On round or heart-shaped faces, that lift can be flattering because it pulls the eye upward instead of outward. On longer faces, you can soften the height a bit by spacing the knots closer together rather than making them tower over the head.
The best part is that this style reads clean even when the hair texture is dense or a little frizzy at the edges. You do not need every strand to behave perfectly. You need a solid shape and a neat base.
What to keep in mind
- Use a light gel or edge control only where the parting needs it.
- Make the center sections even so the knots look balanced from front to back.
- Let the sides stay flat; puffiness there steals the whole effect.
- Set the knots with mousse if your hair likes to spring open.
My favorite trick: leave the very first knot slightly smaller than the rest. It sharpens the forehead area and makes the style look more tailored.
2. Chunky Side-Swept Bantu Knot Mohawk
Big knots can look elegant when they’re placed with care. That surprises people, because chunky often gets mistaken for messy. It isn’t. A side-swept mohawk with larger Bantu knots has a softer, almost sculpted feel, and it works especially well on thick hair that needs room to breathe.
Instead of lining the knots dead center, angle the parting from one temple toward the opposite side of the nape. That diagonal line gives the style motion. The knots themselves can be fewer in number — sometimes 3 to 5 larger knots do the job better than 8 tiny ones — because the asymmetry carries the look.
There’s a nice side effect here. The angle makes the face feel less boxed in. If you’ve ever tried a straight-up center mohawk and felt like it was too severe, this is the softer version that still has enough edge. It also hides uneven growth a little better, which is useful if you’re stretching between trims or dealing with different curl patterns across the head.
I’d choose this style for a night out, a dinner, or any moment when you want shape without stiffness. It looks expensive in the old-fashioned sense of the word: not because it’s fussy, but because the structure is doing real work.
The one thing to avoid is overloading the top with product. Heavy buildup flattens the sweep and makes the roots look dull. A small amount goes a long way. Always has.
3. Half-Up Bantu Knot Mohawk with Loose Back Curls
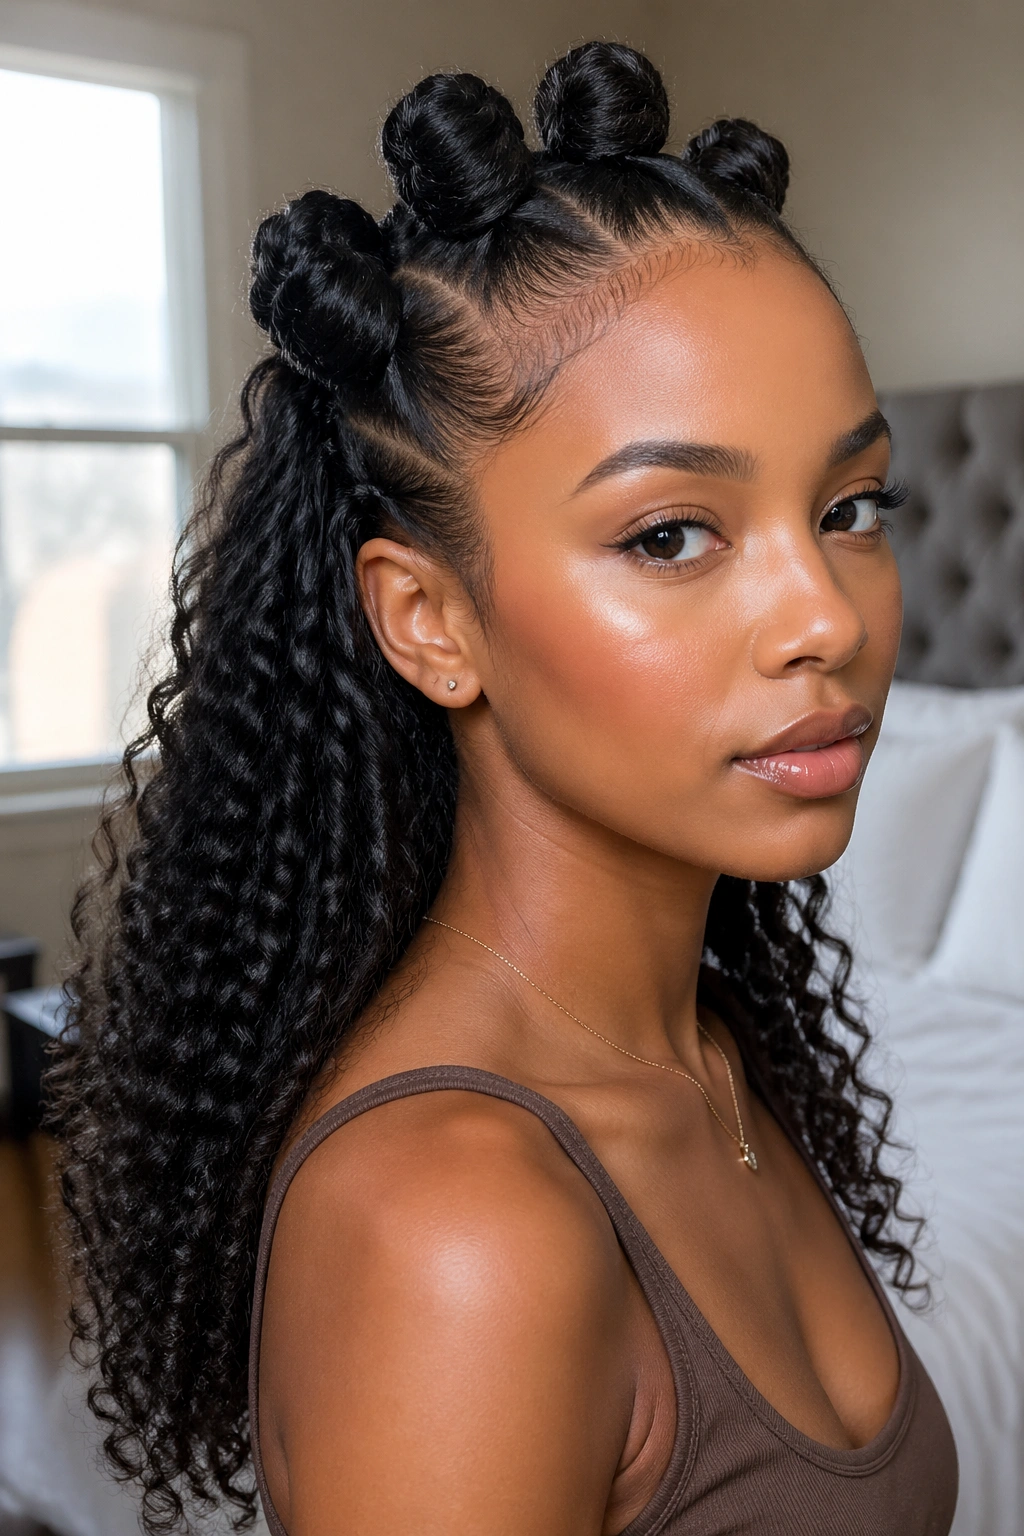
Why choose between a mohawk and wearing your length down? You don’t have to. This version keeps the front and crown in a row of Bantu knots while the back stays loose, curly, or stretched into a twist-out. It gives you shape at the top and movement at the bottom, which is a smart combination when you want height without a full updo.
The balance matters here. If the back section is too polished, the style starts feeling formal. If it’s too fluffy, the mohawk disappears. I like this look best when the loose hair is defined enough to show texture but soft enough to swing when you move. A twist-out, braid-out, or rod set all work, depending on how much curl definition you want.
Why this style works
The knots pull the eye upward. The loose ends keep the style from looking boxy. That contrast is the whole point. It also gives you more room to play with length, which is useful if your hair is long enough to feel heavy when everything is pinned up.
How to wear it
If your hair is shoulder length, keep the back section slightly stretched so it doesn’t shrink too far. If it’s longer, pin the loose length a little lower at the crown so the mohawk shape stays visible. Either way, the transition from knots to loose hair should feel smooth, not chopped.
A silk scarf at night is non-negotiable if you want the curls to survive. The back will frizz faster than the knots, and that’s normal. You can refresh it with a little water and a cream-based leave-in, but don’t soak the roots or the whole style starts to puff.
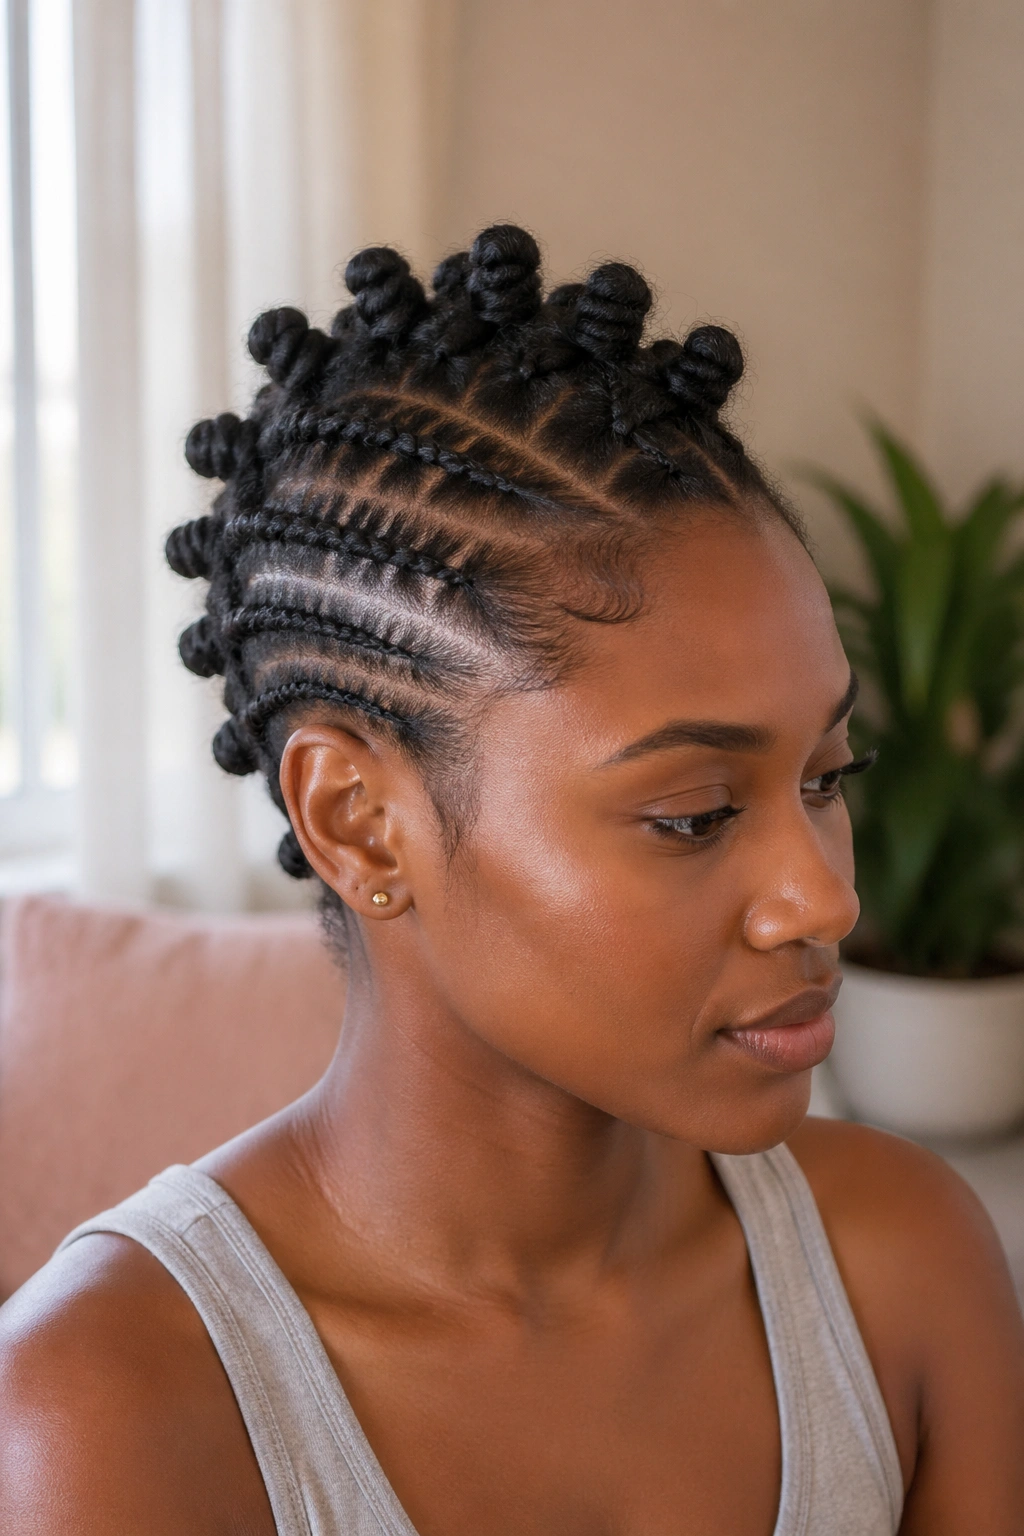
4. Jumbo Bantu Knot Mohawk for Thick Coils
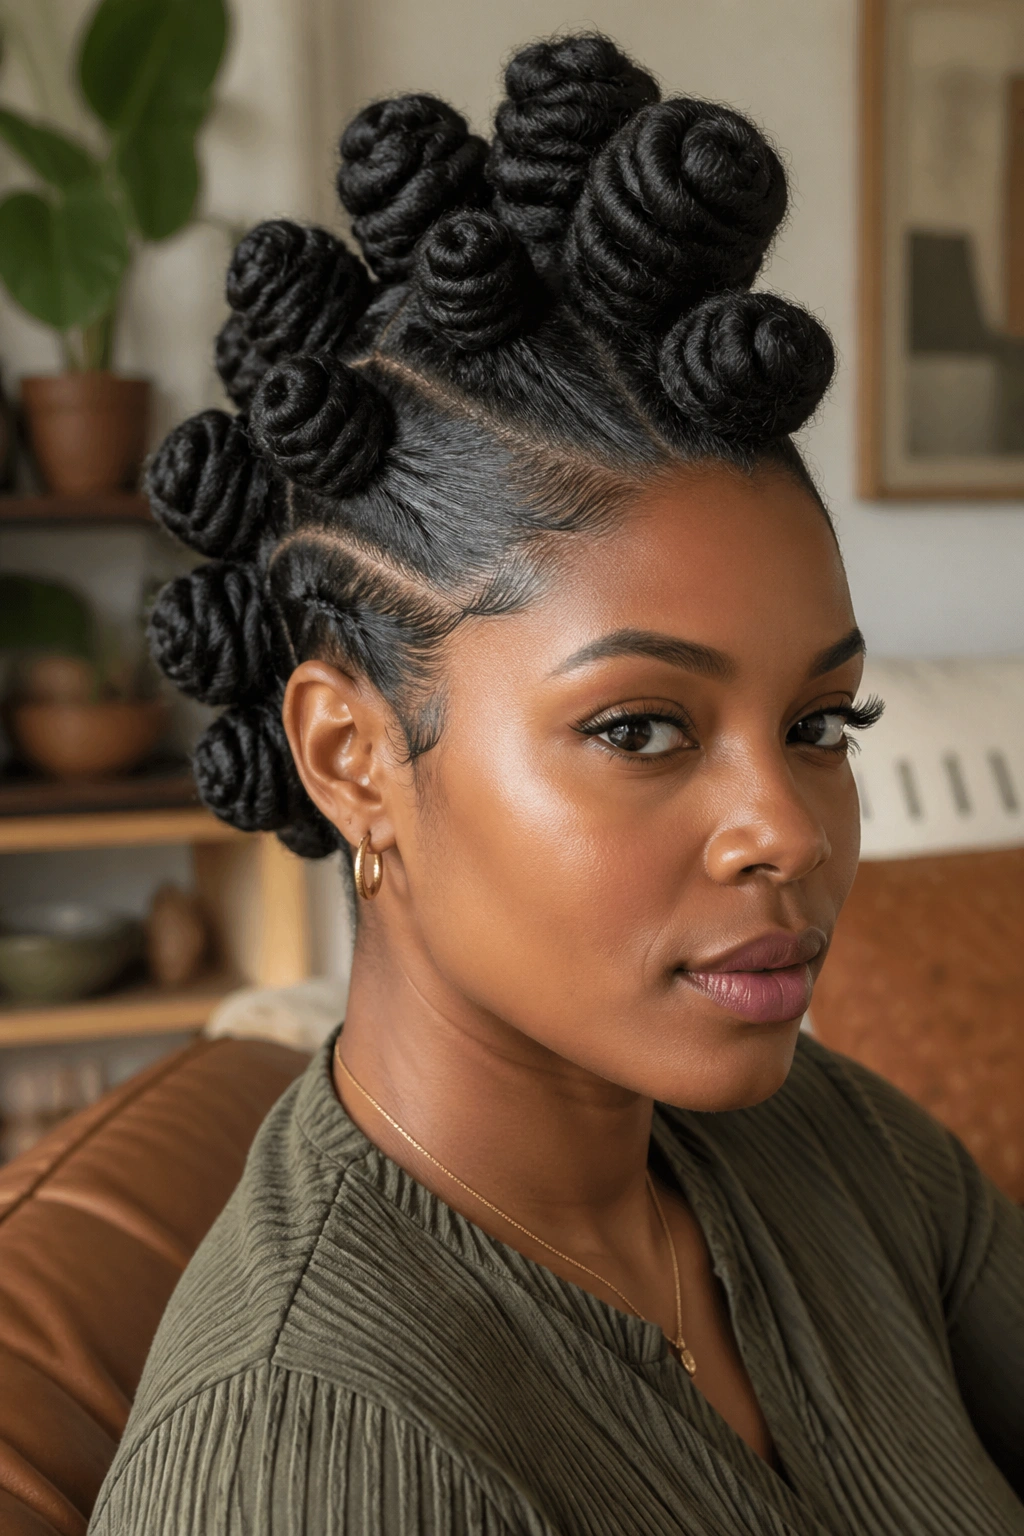
Jumbo knots are honest. They don’t pretend to be delicate, and that is part of their charm. On thick coils, this style saves time, respects the hair’s density, and gives you a bold ridge that looks full even before any accessories go in.
If you’ve got dense 4C hair or a lot of natural volume, trying to create too many tiny sections can turn into a frustrating afternoon. Bigger parts, on the other hand, let the curl pattern work with you. A row of 6 to 8 jumbo knots often gives enough height without making the style feel crowded. The knots should be large enough to show shape, but not so big that the base becomes lumpy.
The drying time is where people get caught. Jumbo knots hold more moisture, so they need patience. If the hair is damp when you set them, plan for overnight drying or use a hooded dryer until the roots feel firm and the centers no longer feel cool to the touch. That cool feeling usually means there’s still moisture hiding inside.
One thing I appreciate about this version is how forgiving it is. Coils that shrink unevenly, parts that are not perfect, a knot that sits a little lower than the others — none of that ruins the look. The style already has presence, so it doesn’t need perfection to read well.
Skip the heavy creams right at the roots. They can make the knots sag. Use moisture on the lengths, seal lightly, and keep the foundation as light as you can manage.
5. Braided Feed-In Bantu Knot Mohawk
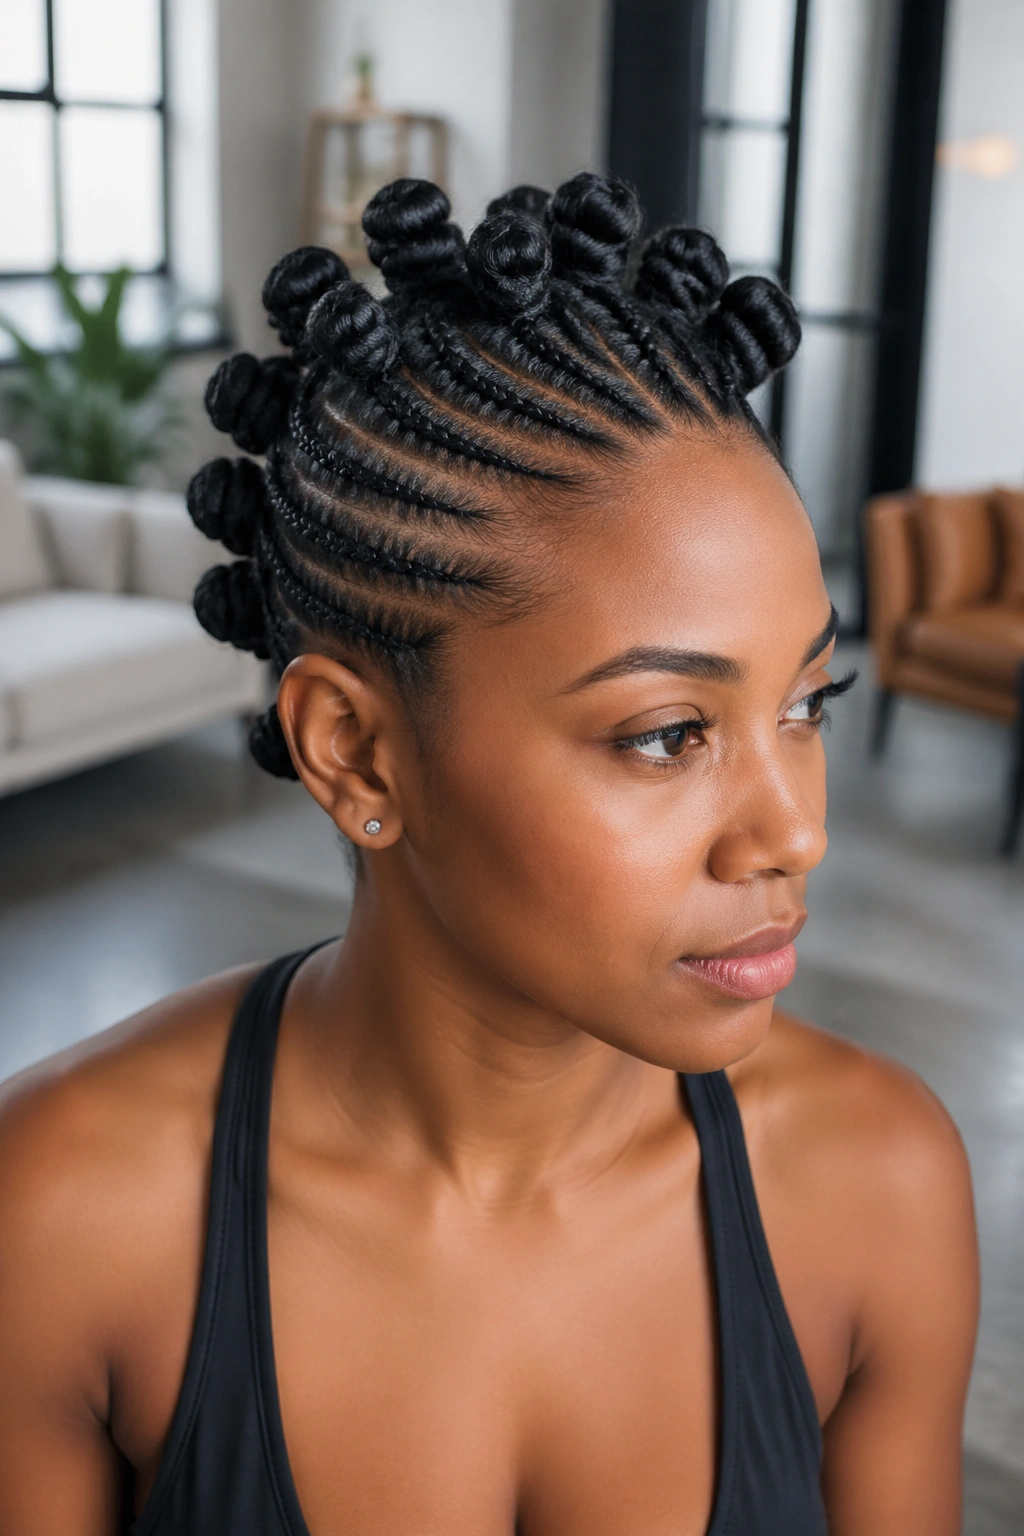
Unlike a simple twist-up, this one starts with braid lines, and that makes the whole style feel sharper from the scalp out. Feed-in braids guide the eye into the mohawk shape before you even reach the knots, which is why this version stays neat longer than many softer updos.
The braid pattern matters more here than the knot size. You want the rows to feed cleanly toward the center, usually with 4 to 6 slim braids on each side or a similar layout that leaves enough room for the middle ridge. Once the braids reach the mohawk line, they can fold into knots, tuck into buns, or disappear under the Bantu knots depending on how polished you want the finish.
This style is a good pick if you like structure. It handles busy days well because the braid base keeps the sides controlled, and that means less fluff at the hairline. It also gives you a neat spot for accessories later — cuffs, thread, or a single barrette can sit on the braids without fighting the rest of the style.
I’d choose this one for medium to long natural hair, especially if you want the style to last several days. It’s a bit more work up front, but the shape holds. That matters.
A tiny caution: don’t overload the feed-ins with thick product. Braid work already creates tension, and too much gel can make the scalp feel tight and sticky. Clean parts and moderate tension do more for this style than a jar full of anything.
6. Flat Twist Mohawk with Mini Knots
This one looks tidy from every angle. The flat twists keep the sides low and smooth, while the mini knots across the center give the style texture without making it bulky. It’s a smart choice when you want something neat enough for everyday wear but still interesting enough to feel styled.
What makes it different
The twists sit close to the scalp, so the mohawk shape reads as streamlined rather than puffy. The center knots are usually smaller — think 8 to 12 mini knots, depending on hair density — which gives the style a finer, more detailed look. That smaller scale is useful on shorter hair because it keeps the shape from overwhelming your head.
How to keep it soft
Set the twists on damp hair with mousse, not a heavy cream. Heavy products can make the twists swell and blur the parting. Once the style is dry, you can mist the lengths lightly with water and smooth the knots with a tiny bit of oil on your fingertips. Tiny amount. Not a pour.
Quick styling facts
- Best on short to medium natural hair
- Good if you want a neat profile without much height
- Works with side parts or a straight center line
- Holds up well under a scarf or bonnet
Best tip: twist the side sections in the same direction on both sides. When the pattern matches, the whole mohawk looks intentional instead of improvised.
7. Colored-Tip Bantu Knot Mohawk
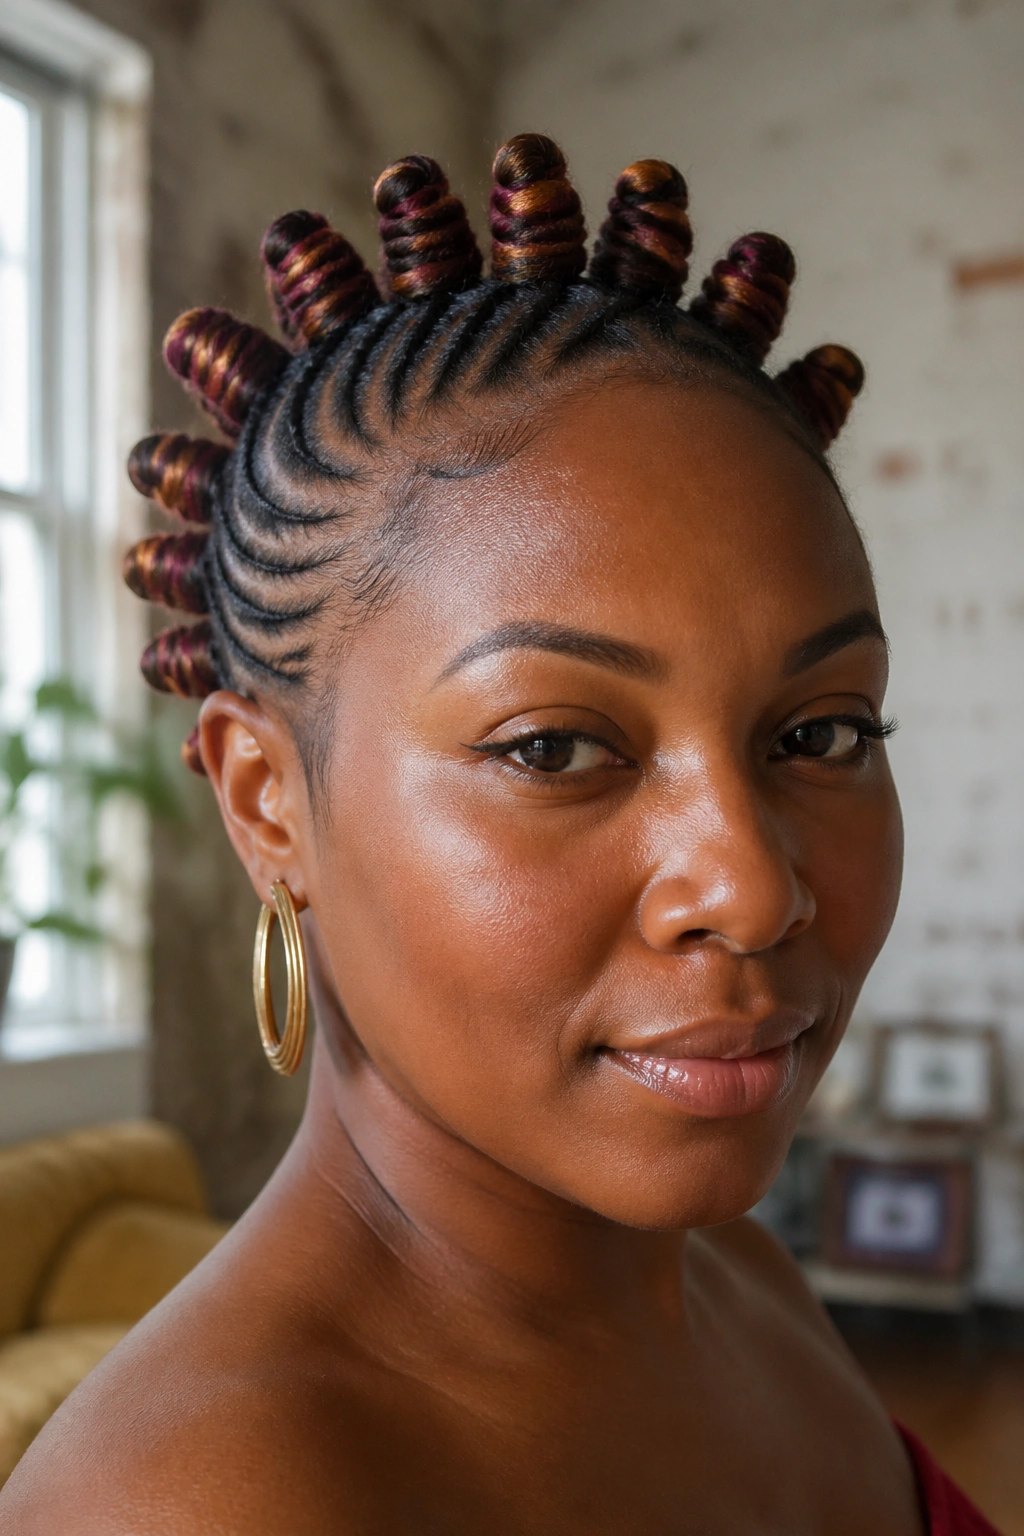
If you want the style to read from across a room, color does half the work. A Bantu knot mohawk with colored tips — copper, burgundy, blonde, blue-black, even wrapped thread in a bright shade — turns the knots into shape-and-color blocks instead of just texture.
The color doesn’t need to cover the whole head to matter. Sometimes a few tinted tips are enough. That’s especially true when the knots sit in a clean ridge, because the eye naturally follows the line from front to back. Color at the ends catches attention right where the style moves the most. It’s a simple trick, but it works.
Temporary color wax, colored extensions, or pre-dyed braiding hair all make sense here. I’d be careful with permanent dye if the goal is just a styling accent. You don’t need to commit your whole head to the idea. A few panels of warm red or gold can change the mood fast.
This style looks especially strong on dark hair because the contrast shows up in sharp little bursts. On lighter hair, the effect is softer and more blended. Either way, it makes the mohawk feel less severe.
A practical note: place the color where the knots bend, not only at the tips. That way the shade shows when the style is viewed from the side. Hair that only looks interesting from one angle is a bit of a cheat. Hair that shifts when you turn your head is better.
8. Defined Mohawk with Loose Curly Ends

Loose ends change everything. This version keeps the center mohawk structure through the crown, then lets the ends fall into defined curls, coils, or a stretched twist-out. The result feels lighter than a fully pinned style and more relaxed than a rigid bun-and-knot setup.
A lot of people like this because it keeps movement in the silhouette. The hair does not sit there like a helmet. It lifts at the top, then softens near the shoulders or upper back, which gives the style a little swing. If you like seeing texture move when you walk, this is the one that delivers that.
The trick is definition. If the loose section is too fuzzy, the style loses its shape. If it’s too stiff, it starts looking overdone. Flexi rods, braid-outs, or a quick finger-coil routine on the leave-out section can give you enough control without turning the hair into a hard shell.
This also works well for people who get bored with fully tucked styles. I’m one of those people. I like the contrast between the sculpted top and the free bottom half because it feels less fussy and more alive.
If your hair is very short, the loose end section may not hang enough to matter, and that’s fine. On longer hair, keep the curls separated with a little oil on your hands so they don’t clump into one heavy block. One block ruins the shape fast.
9. Low-Profile Bantu Knot Mohawk for Busy Days
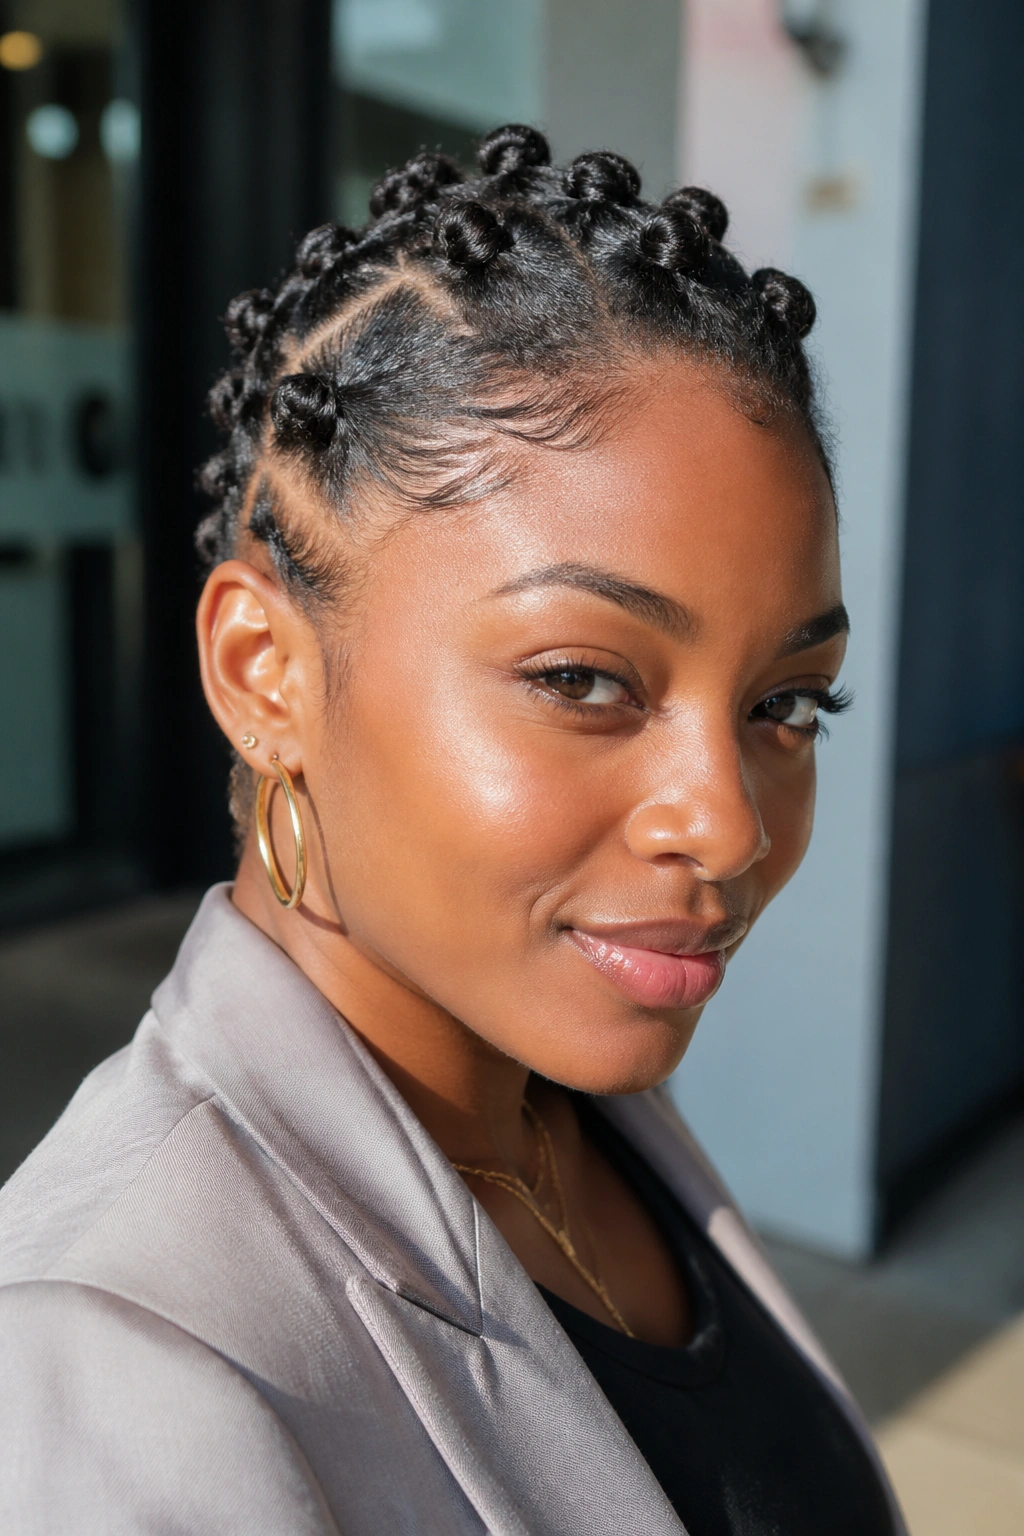
Do you want the mohawk shape without the big height? This is the answer. The low-profile version stays close to the head, uses smaller sections, and keeps the sides calm, which makes it one of the easiest Bantu knot mohawk styles to wear on a normal day.
Why this stays wearable
A lower ridge puts less stress on the roots and makes the style easier to sleep in. It also fits under hats and scarves better than a tall mohawk, which matters more than people admit. Not every good hairstyle needs to fight your coat, your seat headrest, or your office chair.
How to keep it from looking flat
Use a center row of evenly sized knots, but don’t press them down so hard that they disappear. The goal is compact, not crushed. If the hair is short, letting the knots sit a little forward helps the shape show. If the hair is longer, tuck the ends under more tightly so the ridge stays smooth.
A few small habits make this version last:
- Refresh the hairline with a damp brush and a rice-grain amount of edge control
- Sleep on a satin pillowcase if you hate headwraps
- Re-pin any loose side sections before they start puffing out
This is the version I’d hand to someone who wants the style but does not want the maintenance headache. It is practical. It still looks styled. And it gets out of your way, which is rare enough to be worth appreciating.
10. Accessorized Bantu Knot Mohawk with Gold Cuffs and Pins
Accessories can rescue a plain Bantu knot mohawk, but they can also ruin it if you go wild. One or two metallic cuffs, a few pins, or a single wrapped strand of thread is enough. More than that, and the hair starts looking crowded.
Gold cuffs work especially well on the braids or flat twists feeding into the mohawk line. They break up the dark line of the hair and give the eye little rest points along the shape. Pins do a different job. They can pin back a side section, hold a loose curl in place, or mark the start of the ridge near the front. Thread gives the whole style a handmade feel that I still think looks better than overdecorated sparkle in a lot of cases.
The best thing about this style is how easy it is to change. You can wear it plain during the day and clip in one or two accents later without redoing the whole head. That flexibility makes it useful for weddings, photo days, or any event where the same hairstyle needs to do more than one job.
Keep the accessories consistent with the knot size. Small knots usually look better with smaller cuffs or slimmer pins. Large knots can handle bigger pieces, but even then, the hair should stay the main event.
And that’s the part people sometimes miss. The accessorizing should sharpen the mohawk, not bury it. If you can still see the ridge line, the knots, and the texture, you’ve done enough. If the embellishments are all you notice, pull one off and stop there.