Half up, half down hairstyles are the perfect balance when you’re trying to look polished without committing to a full updo, and they’re especially flattering on curly hair because they let your texture shine while keeping things off your face. The challenge, though, is that standard half up styles can sometimes look too casual or feel slippery on textured hair—that’s where Dutch braids change the game. Unlike regular three-strand braids that sit on top of the hair, Dutch braids are woven underneath the sections, creating an interlocked, dimensional look that photographs beautifully and actually grips curly hair better than you’d expect.
The thing about pairing Dutch braids with curly hair is that your natural texture becomes part of the style’s architecture. The spirals and curves of your curls interact with the braid’s structure in ways that looser waves can’t replicate—the braid defines them, while the braided pattern itself looks more interesting against a curly background. You’re not fighting your hair’s texture; you’re working with it to create something that feels intentional and textured, not just practical.
Whether you’re getting ready for a casual day out, a special event, or you just want your curls to cooperate while looking intentional, Dutch braid half up styles offer enough variety that you can find something that matches your hair type, face shape, and the vibe you’re going for. Let’s walk through eight different ways to style Dutch braids half up with curly hair, with the specific techniques and tips that actually work on textured hair—not theories, but what makes the difference between a braid that looks amazing and one that falls flat after two hours.
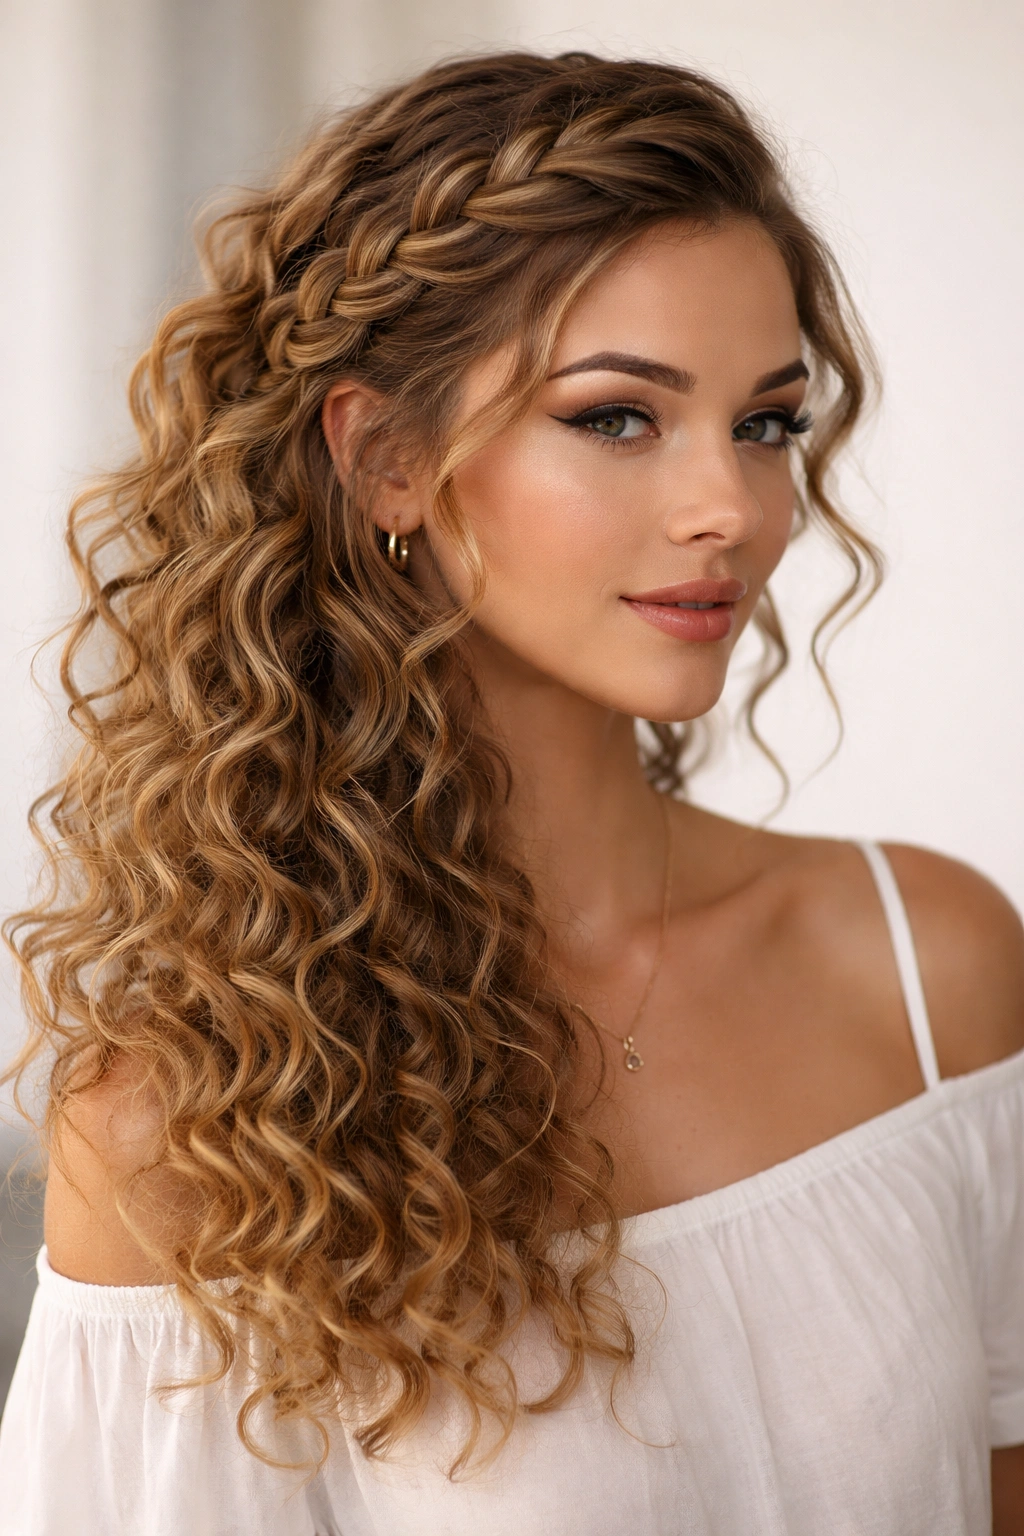
1. The Classic Dutch Braid Half Up
This is the foundation style that every other variation builds from, and it’s deceptively harder to execute perfectly on curly hair than on straight hair—but when you nail it, it’s stunning. The idea is simple: take a Dutch braid section from one temple, braid it back toward the crown, and secure it with the rest of your curls flowing freely below. What makes it work on curls is that you’re braiding at a slight angle that catches and lifts the curl pattern rather than trying to flatten it.
Why This Works on Curly Hair
The Dutch braid sits on top of your curls in a way that actually enhances their texture instead of weighing them down. Because the braid is interlocked rather than overlapped, it creates visual definition that plays beautifully with curl definition. The pattern of the braid itself becomes a design element—it’s not just functional, it’s decorative.
How to Achieve This Look
Start with hair that’s been curled or is naturally textured and has been refreshed or re-moisturized if needed. Spray a curl-activating spray or light styling cream through damp curls the night before or morning of styling—this helps with grip and definition. Section off a triangle from one temple at the hairline, making sure your starting section is roughly the width of three fingers. Begin your Dutch braid by taking the front subsection and braiding it under (not over) the middle section, which is the defining move that makes a Dutch braid. Braid firmly but not so tight that you’re stretching your hairline—tension that pulls is tension that causes breakage, and curly hair at the hairline is precious real estate.
Braid back toward the crown, following the natural curve of your head. As you braid, gently incorporate small sections of hair from the loose side, maintaining consistent tension and making sure your braid sits at a slight lift away from the scalp. This creates a lifted, dimensional look rather than a flat braid. Secure the braid at the crown area with a small elastic and a bobby pin. Leave the back half of your hair down—this is your statement. To finish, gently tug at the braid edges to loosen and expand it slightly; this is called pancaking, and it makes the braid look fuller and more intentional against your curl texture.
Pro Tip
If your braid feels slippery, a tiny amount of dry texture spray or sea salt spray on your hands before braiding will give you better grip and make the braid hold shape throughout the day. Avoid heavy products that weigh curls down.
2. Double Dutch Braids Half Up Style
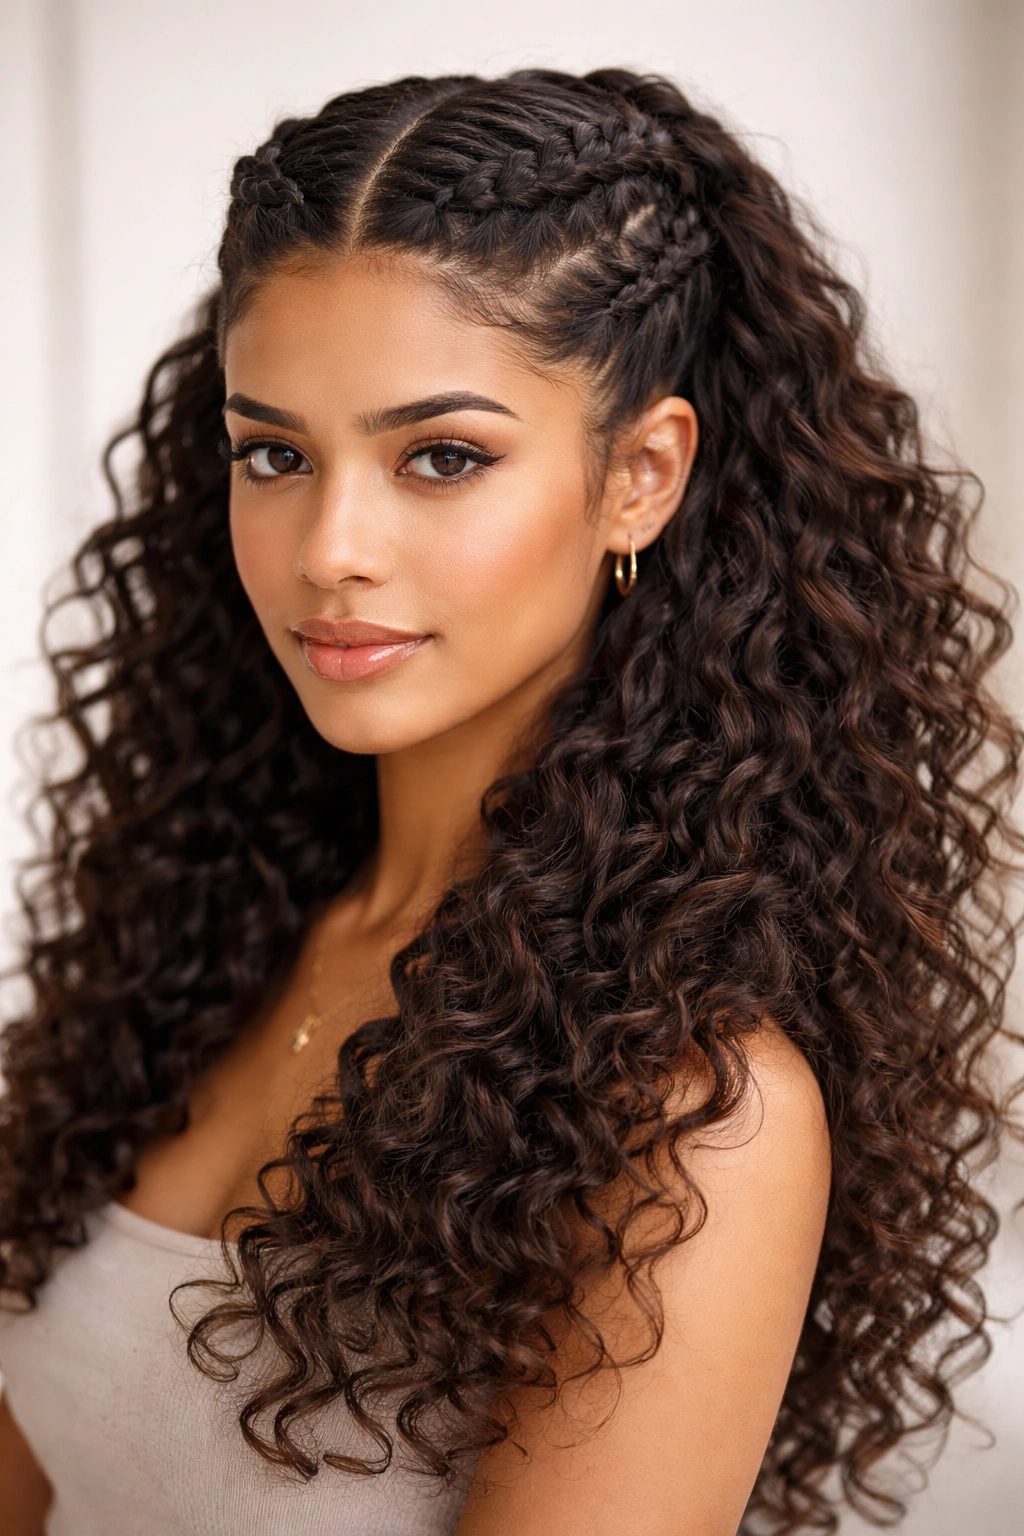
Instead of one braid, you’re creating two Dutch braids that start on either side of your head and meet at the crown before flowing down—this style is more visually interesting and creates an incredible frame for your face. It’s also more forgiving on really thick, densely curled hair because splitting the weight between two braids means neither one has to hold as much volume. This style reads as more intentional and polished than a single braid, which makes it perfect for events where you want to look like you put in serious effort.
The Visual Impact on Curls
Two braids create balance and symmetry that flatters face shapes across the board. On curly hair specifically, the two lines of interlocked texture draw the eye upward and create definition that makes your curl pattern look intentional rather than accidental. The double braid setup also means you get more braid visibility—more of that beautiful woven texture showing against your curls.
Step-by-Step Technique
Section your hair down the middle from your forehead to the nape of your neck—use a rat-tail comb and really commit to a straight line, because it’ll show. Start the first Dutch braid on the right side: begin at the temple just in front of your right ear, taking a small three-strand section. Braid down and under using the Dutch braid technique, incorporating pieces as you work back toward the crown. Repeat on the left side so that both braids are moving toward the center.
Your two braids should meet at or very close to the crown. Secure both with one elastic at the meeting point, or overlap them slightly and secure with bobby pins for a more fused look. The key on curly hair is making sure both braids are equally tight and follow the same angle—if one is tighter than the other, the imbalance will be visible and the style will look uneven.
Styling the Lower Half
After securing your braids, take the loose curls below and scrunch them upward to refresh their shape and boost definition. Spritz with a lightweight curl refresher spray and let them set. You want the curls to look full and defined, not flat and separated.
3. Dutch Braid with Loose Waves Half Up
This variation combines a braided top with intentionally looser, wavier curls on the bottom—it’s less “done up” than other half up styles, which makes it perfect for everyday styling or when your curls are having a flatter day. The contrast between the structured braid and the softer curls creates visual interest and looks deliberately styled rather than like you couldn’t decide what to do with your hair.
When to Use This Style
If your curls are naturally tighter and springier, adding a braid creates enough visual structure that you can wear looser waves on the bottom without the overall look feeling flat. If your curl pattern varies (tighter at the crown, looser at the ends), this style celebrates that natural variation instead of trying to fight it.
Creating the Contrast
Start your Dutch braid as you would for a classic half up, but this time, don’t pancake the braid as aggressively—keep it tighter and more refined. Once you’ve secured the braid at the crown, take the loose curls and gently separate them with your fingers, stretching them slightly to relax the curl pattern. You want softness and movement on the bottom, which creates a visual contrast with the tight, defined structure of the braid above.
Apply a lightweight curl-relaxing serum or anti-frizz oil to the ends of your loose waves to encourage them to hold a slightly looser shape. This isn’t about making your curls straight; it’s about letting them be less tightly coiled while maintaining their wave pattern.
The Overall Effect
The braided section looks neat and structured, while the waves below have an effortless, undone quality. It’s the kind of style that looks polished enough for a date or event, but casual enough that nobody would question it if you wore it to run errands.
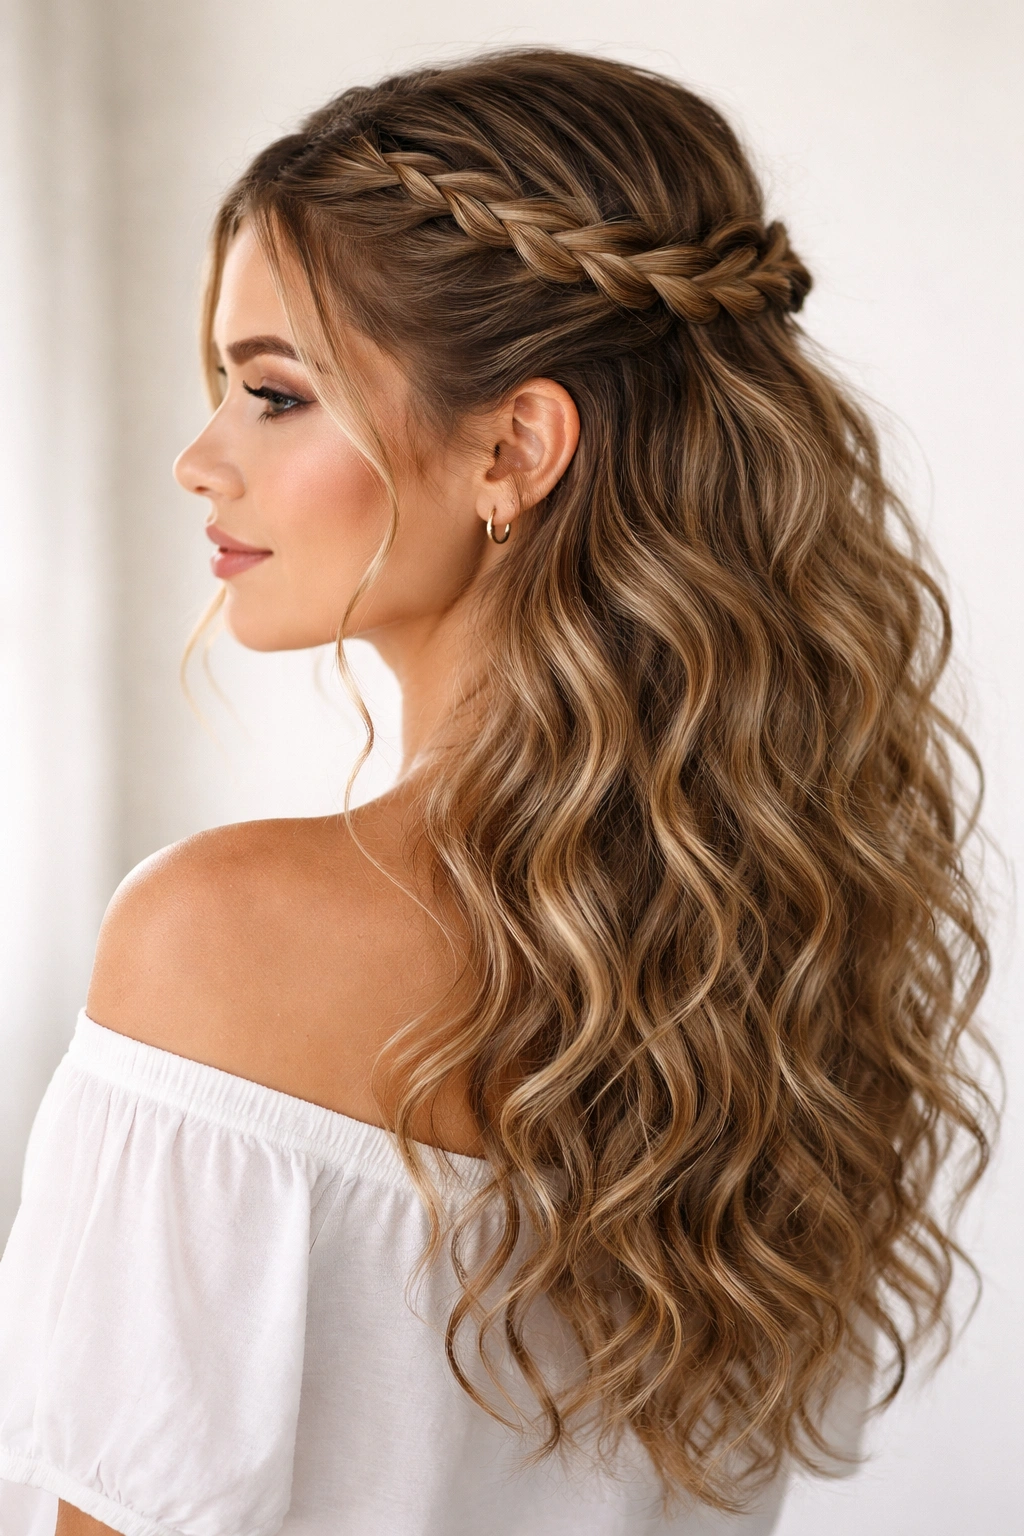
4. Reverse Dutch Braid Half Up Statement Look
A reverse Dutch braid is technically a French braid (braided on top, with hair going over instead of under), but styling it in the half up half down format creates a very different look than a standard Dutch braid. It sits flatter against the head and creates a more elegant, formal appearance—the lines of the braid are more visible and refined, which can be stunning on curly hair if you want that texture to be secondary to the braid pattern itself.
Why Reverse Matters on Curly Hair
With a reverse braid, you’re not relying on the braid to enhance your curl pattern; instead, the braid becomes a sleek accent against your curls. This works especially well if you have curls that are tightly coiled and you want to create a more polished, formal look. The braid reads as intentional and elegant, and your curls get to be the supporting texture rather than the star.
How to Execute a Reverse Dutch Braid
Begin with curly hair that’s been set and refreshed but not ultra-voluminous; you want definition without wild flyaways. Start at the temple and take a three-strand section. This time, instead of braiding under, you’re braiding over—take the front strand and cross it over the middle, then take the back strand and cross it over the new middle. That’s the reverse pattern.
As you braid back toward the crown, incorporate small sections from either side by bringing hair from the loose section and crossing it over the middle strand. The braid should sit smoothly against your head, and it will look flatter and more elegant than a Dutch braid because it’s not raised away from the scalp.
Securing and Finishing
Secure at the crown with a bobby pin and an elastic, then lightly mist the braid with hairspray to lock it in place without creating crunch. Leave your curls down and full, letting them create a soft contrast with the structured, elegant braid.
5. Dutch Braid Half Up with Curly Crown
This style takes the half up concept and intentionally creates a statement crown of curl at the top of your head, with a Dutch braid running through or framing it. It’s playful, textured, and incredibly flattering on naturally curly hair because you’re leaning into volume and texture instead of trying to tame it. This style is confidence on a hair level—it says you’re celebrating your curls, not managing them.
Building Volume at the Crown
Before you even braid, you need to create the volume that makes this style work. Blow-dry your roots with a blow-dryer using a diffuser attachment, focusing on upward motion to build height and encourage spring in your curl pattern. You want the curls at the crown to be especially defined and full. If you’re styling dry curls, use a volumizing mousse applied to the roots while damp, then diffuse-dry, to create lasting lift.
Braiding Through the Volume
Take a Dutch braid section and braid from your temple toward the crown, but instead of securing it flat against the top of your head, let it sit slightly lifted. You might even create a half-braid that weaves through the curly crown rather than securing it fully—this creates a more integrated look where the braid is part of the crown texture, not sitting on top of it.
Alternatively, create two smaller Dutch braids that sit on either side of a full, textured crown, leaving most of your curl volume loose and untouched in the center.
The Overall Silhouette
You’re creating height and width at the crown with a strong vertical visual line. This style is incredibly flattering on round or heart-shaped face because it elongates the face. On all face shapes, it looks playful and intentional.
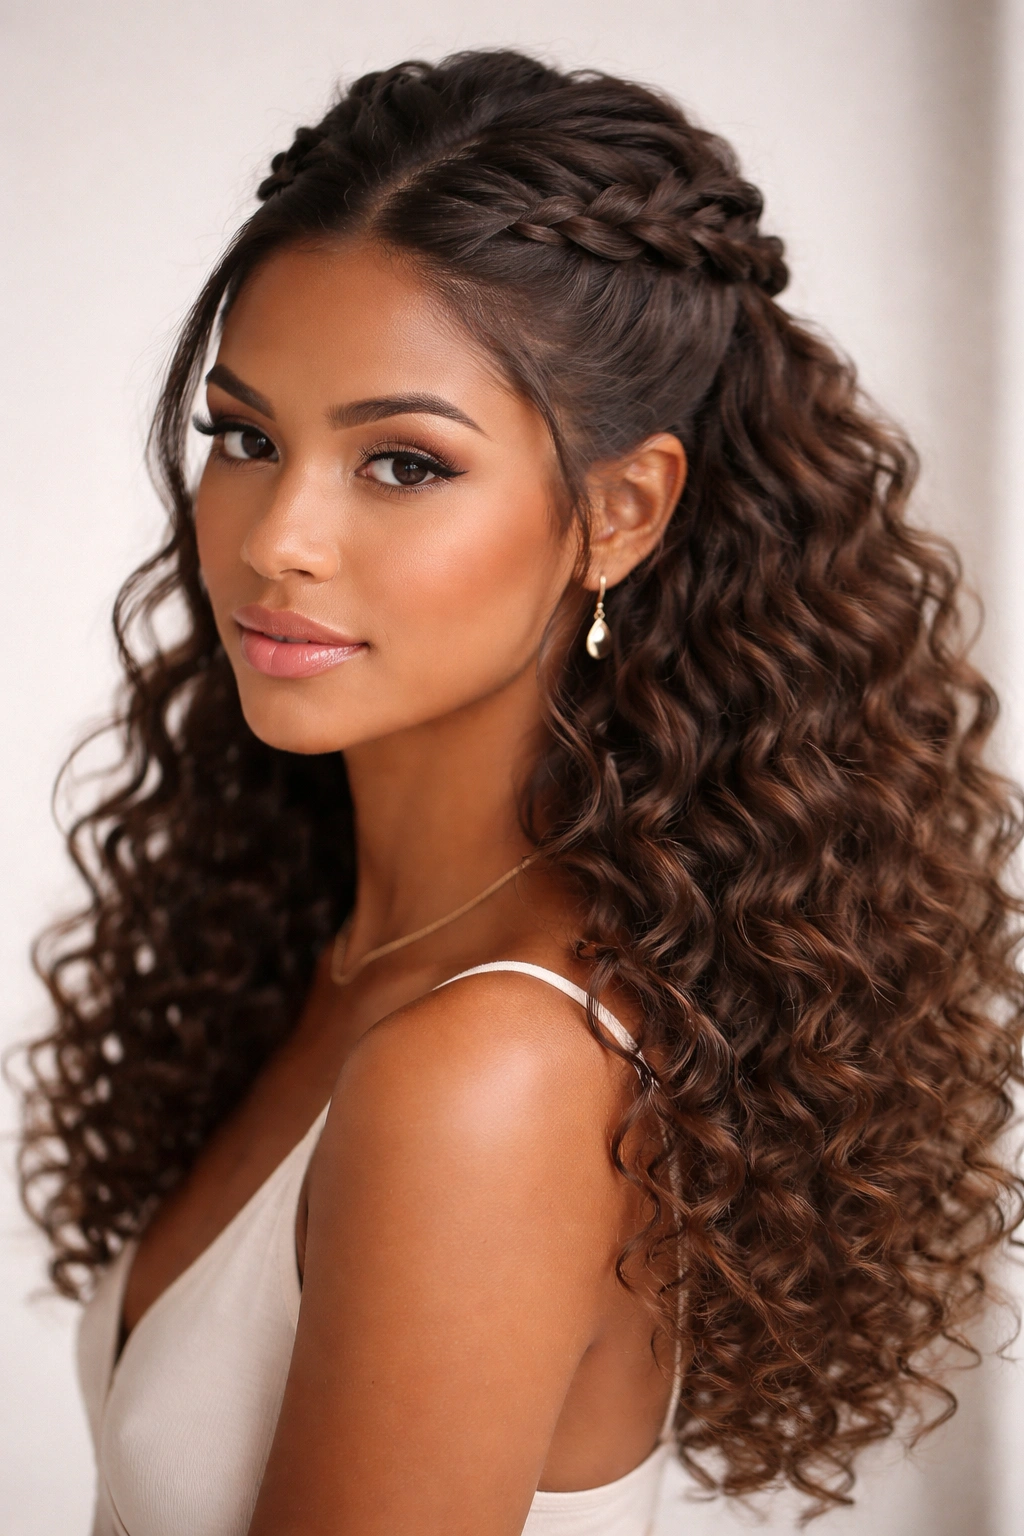
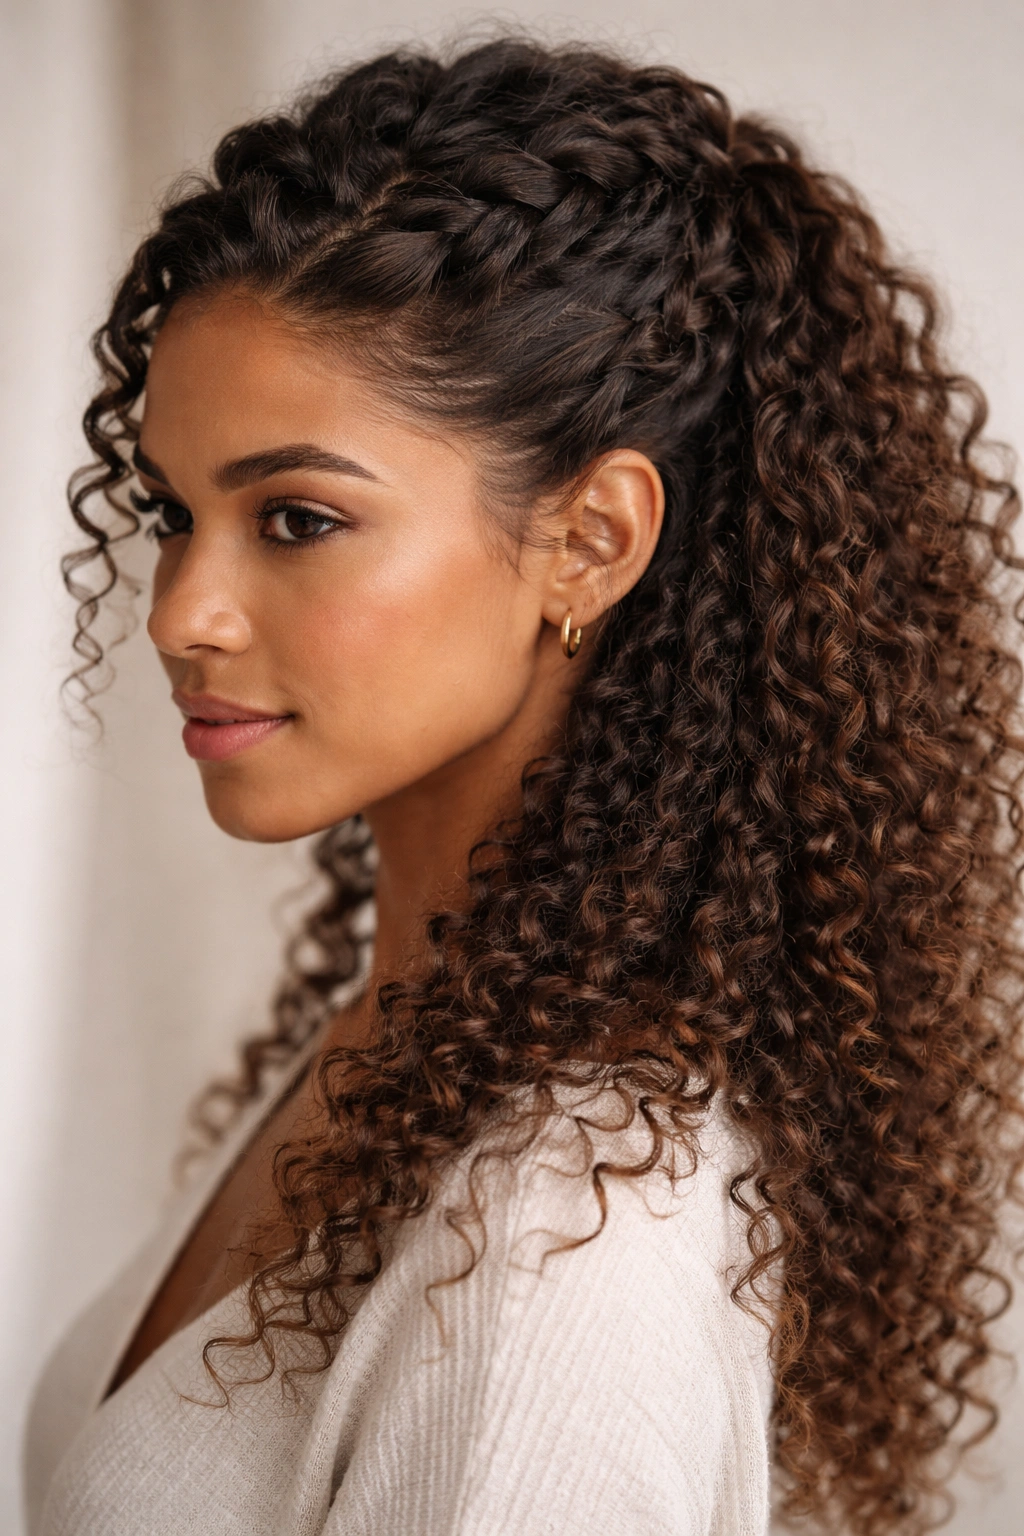
6. Side-Swept Dutch Braid Half Up
Instead of a braid running straight back from your temple toward the crown, a side-swept braid travels diagonally across the back of your head. This creates asymmetry and visual interest, and it’s one of the best variations if you have curly hair on one side that behaves differently than the other—you can style around it.
Asymmetrical Appeal on Curly Hair
Asymmetrical styles are incredibly flattering on textured hair because they break up the visual weight of volume and create dynamic line and movement. A side-swept braid gives the illusion of intentional styling; it looks like you know exactly what you’re doing rather than just pulling your hair back.
Technique for the Side Sweep
Start your Dutch braid at one temple (let’s say the right), but instead of braiding straight back toward the center crown, angle your braid diagonally across the back of your head toward the opposite side. Braid all the way to the back-left area and secure with a bobby pin and an elastic.
The loose curls on the other side (right side in this case) will fall forward and frame your face, while the braided side is neatly off your face. This asymmetry is genuinely flattering and looks effortlessly styled.
Styling the Framing Curls
Use a curl-defining spray or mousse on the face-framing pieces to encourage them to coil and define rather than frizz. You want those pieces to be bouncy, shiny, and intentional-looking.
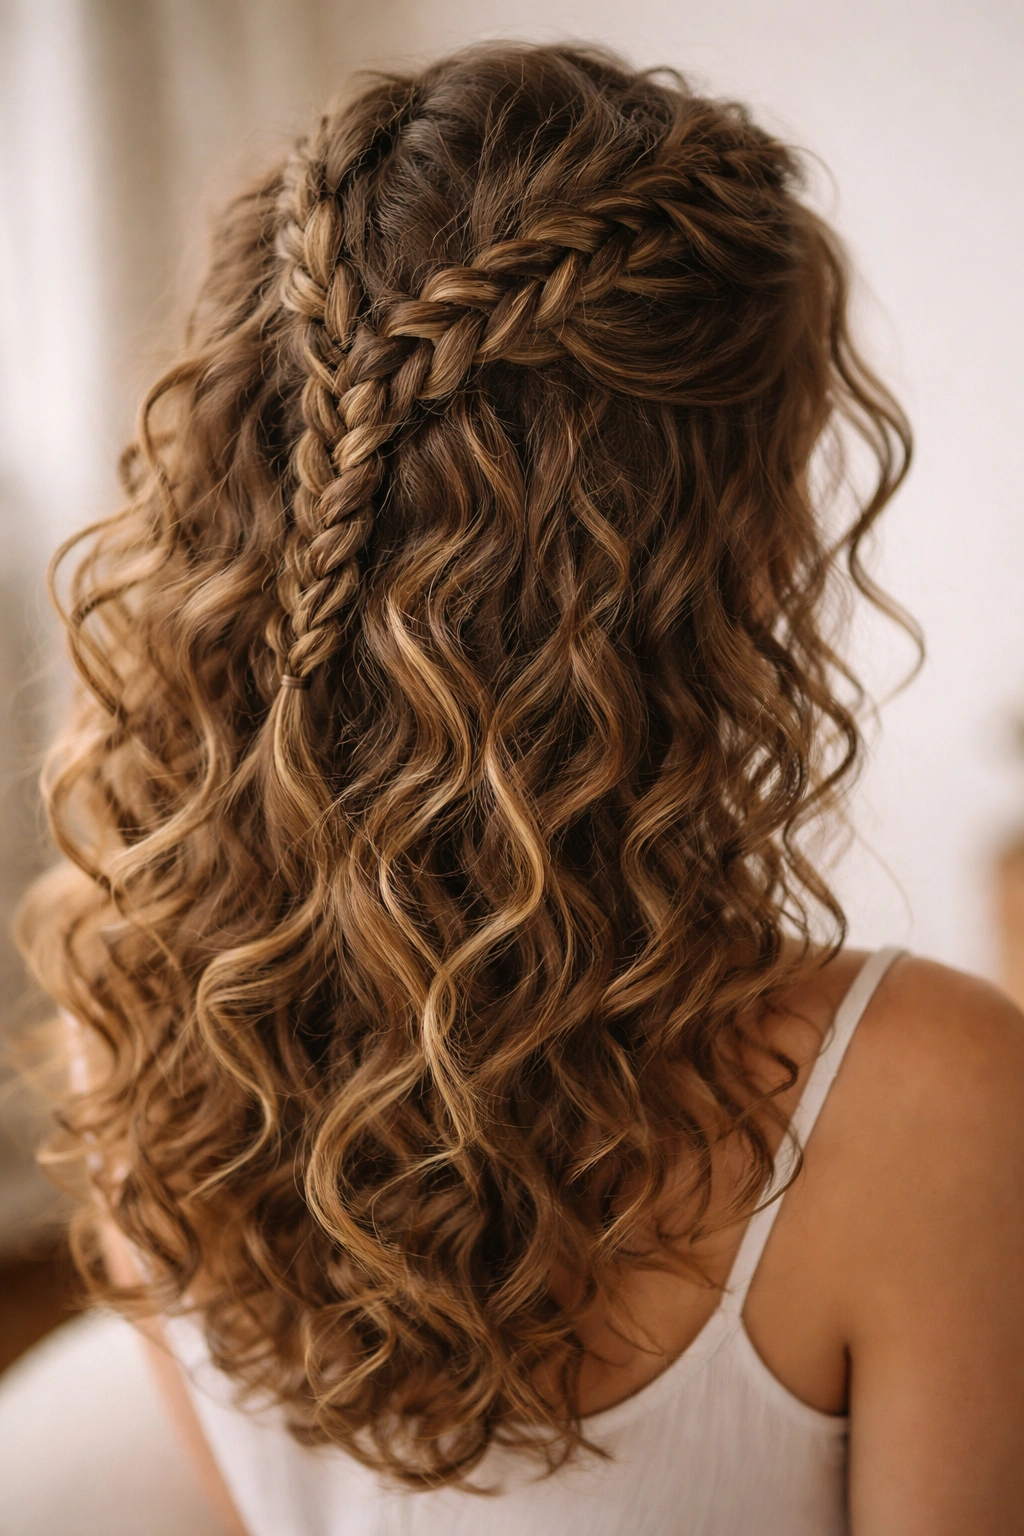
7. Layered Dutch Braids Half Up Half Down
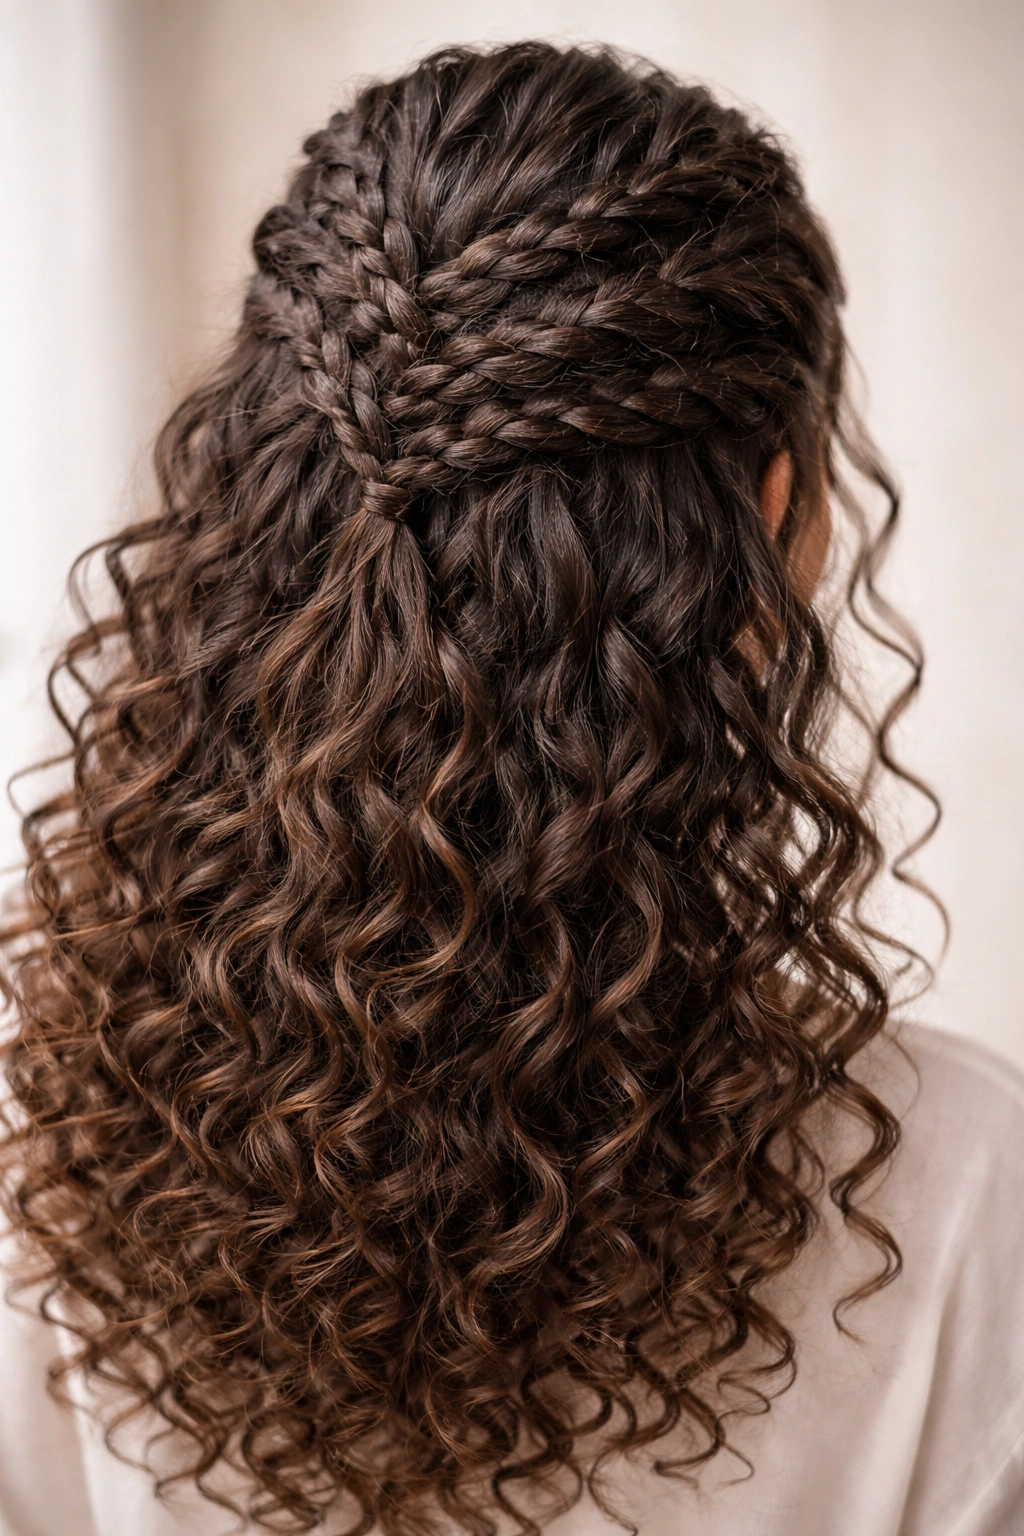
Instead of one braid or two independent braids, create multiple braids that layer on top of each other, weaving slightly into one another. This creates depth and texture that’s absolutely stunning on curly hair because the braids interact with the curl pattern at different levels, creating a multi-dimensional effect that reads as incredibly polished and intentional.
The Complexity Factor
This style requires confidence and practice—it’s not beginner-level. But if you’re comfortable braiding and you have the patience to section and plan, the payoff is a hairstyle that looks like you paid a professional to do it. Layered braids are conversation-starters.
How to Create Layers
Start with your first Dutch braid at the top, beginning at one temple and braiding back toward the crown. Secure it loosely at the crown area, but don’t clip it down yet. Then, create a second braid starting just below the first one, parallel to it, also moving toward the crown. This second braid will slightly overlap or weave near the first one. Create a third braid if you have thick hair and the space for it.
Secure all three braids together at a central point, or secure them individually with bobby pins very close together to create the layered effect. The result is a woven, textured arrangement that sits like a halo on the crown of your head.
Pancaking for Maximum Impact
Gently pancake each braid individually to expand and loosen it, which creates dimension and fullness. The layered braids should look soft and expansive, not tight and controlled. This is where they truly shine against curly hair—the braids become part of the curl texture rather than sitting rigidly on top of it.
8. Dutch Braid Half Up with Bead Accents
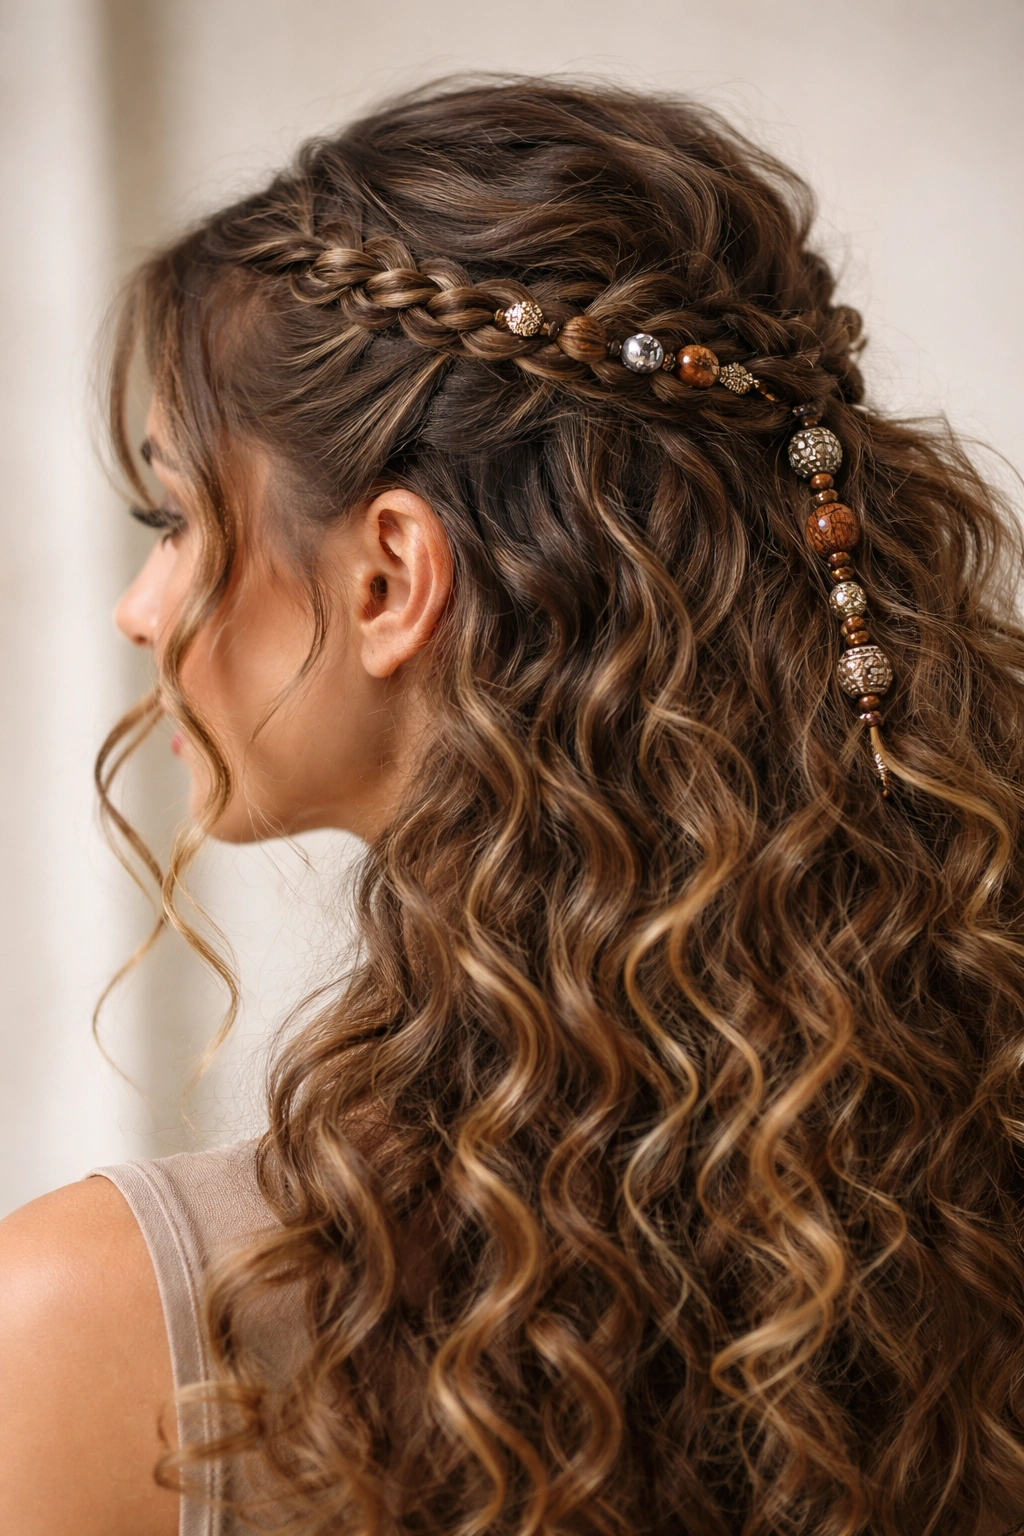
This style is the decorated version—you’re threading beads, pearls, or metallic accents directly into your Dutch braid as you create it. It’s perfect for events, celebrations, or when you want your style to be extra. Beads add visual interest and catch light in ways that make your curls and braids look even more dimensional.
Choosing Beads for Curly Hair
Look for beads with larger holes that slide easily over sections of hair without catching. Wooden beads, acrylic beads, or metal cuffs all work beautifully. Avoid tiny seed beads that require hair threading techniques—they’re tedious and can snag on curls. Pearl beads or metallic accents create a more formal, elegant look, while colorful or wooden beads feel bohemian and playful.
How to Thread Beads Into Your Braid
There are two approaches: thread beads onto individual strands of hair before you start braiding (more time-intensive but creates beads threaded throughout), or slide beads onto the completed braid afterward by opening the braid slightly and threading them through. The second method is easier and frankly looks better on curly hair because you have more control over bead placement and can work with the braid’s existing structure.
Braid your Dutch braid as normal, secure it, then use a small crochet hook or threading needle to weave beads into the braid from the crown down toward the secured end.
Finishing the Look
Leave your curls loose and full—the beads will catch light and draw attention to your hair, so you want your curl definition to be at its best. Use a light-hold styling spray that creates shine without crunch, so the beads actually catch light rather than disappearing into matte, frizzy hair.
This style works for weddings, formal events, date nights, or any occasion where you want your hair to be noticed and admired. It’s the kind of hairstyle that makes people ask, “Did you do that yourself, or did you get it done?”
Final Thoughts
Dutch braid half up styles on curly hair are about working with your texture, not against it. The braid structure actually enhances curl definition when you understand how to angle it, tighten it appropriately, and pancake it to create dimension. The key to making any of these styles work is recognizing that curly hair isn’t a limitation—it’s an asset that makes braids look more interesting, dimensional, and intentional.
The best style for you depends on your curl type, hair thickness, and the occasion. If your curls are tighter and springier, go for the layered braids or the curly crown style to lean into volume. If your curls are loose and wavy, the reverse Dutch braid or the side-swept version will look polished and elegant. Start with whichever style speaks to you, practice it a few times, and give yourself grace—Dutch braiding is a skill that improves with repetition.
Most importantly, prep your curls properly before styling. Moisturized, defined curls grip better, hold braid shape longer, and photograph beautifully. Invest in good curl-defining sprays and lightweight styling creams that work with your specific curl pattern, and your braids will thank you. You’ve got this.