French braids have become a go-to styling choice for Black women looking to blend protective styling with the elegance and versatility of a half up half down look. What makes this particular combination so powerful is how it works with your natural hair texture, complements different face shapes, and adapts easily to any occasion—from the workplace to formal events to casual everyday wear. The half up half down format gives you the best of both worlds: you’re keeping hair off your face and neck while maintaining length and fullness down your back, which means less manipulation of your entire crown while still achieving a polished, intentional style.
The beauty of French braid half up half down styles lies in their flexibility. You can keep things simple with a single braid, create dimension with double braids, add texture with twists and layers, or incorporate accessories for extra flair. Whether you’re working with shoulder-length hair, waist-length locks, or anything in between, there’s a French braid half up variation that will work for your specific hair type, lifestyle, and aesthetic. The key is understanding how to adapt the technique to your hair’s natural texture and choosing the right styling approach for how long you want your style to last.
These styles work beautifully as protective styles because they reduce daily handling of your hair while keeping everything neat and intentional. They’re also great for transitioning between wash days, refreshing older braids, or simply mixing up your look without starting from scratch. Let’s explore twelve of the most flattering French braid half up half down variations that work exceptionally well for Black women.
1. Classic French Braid Half Up Half Down
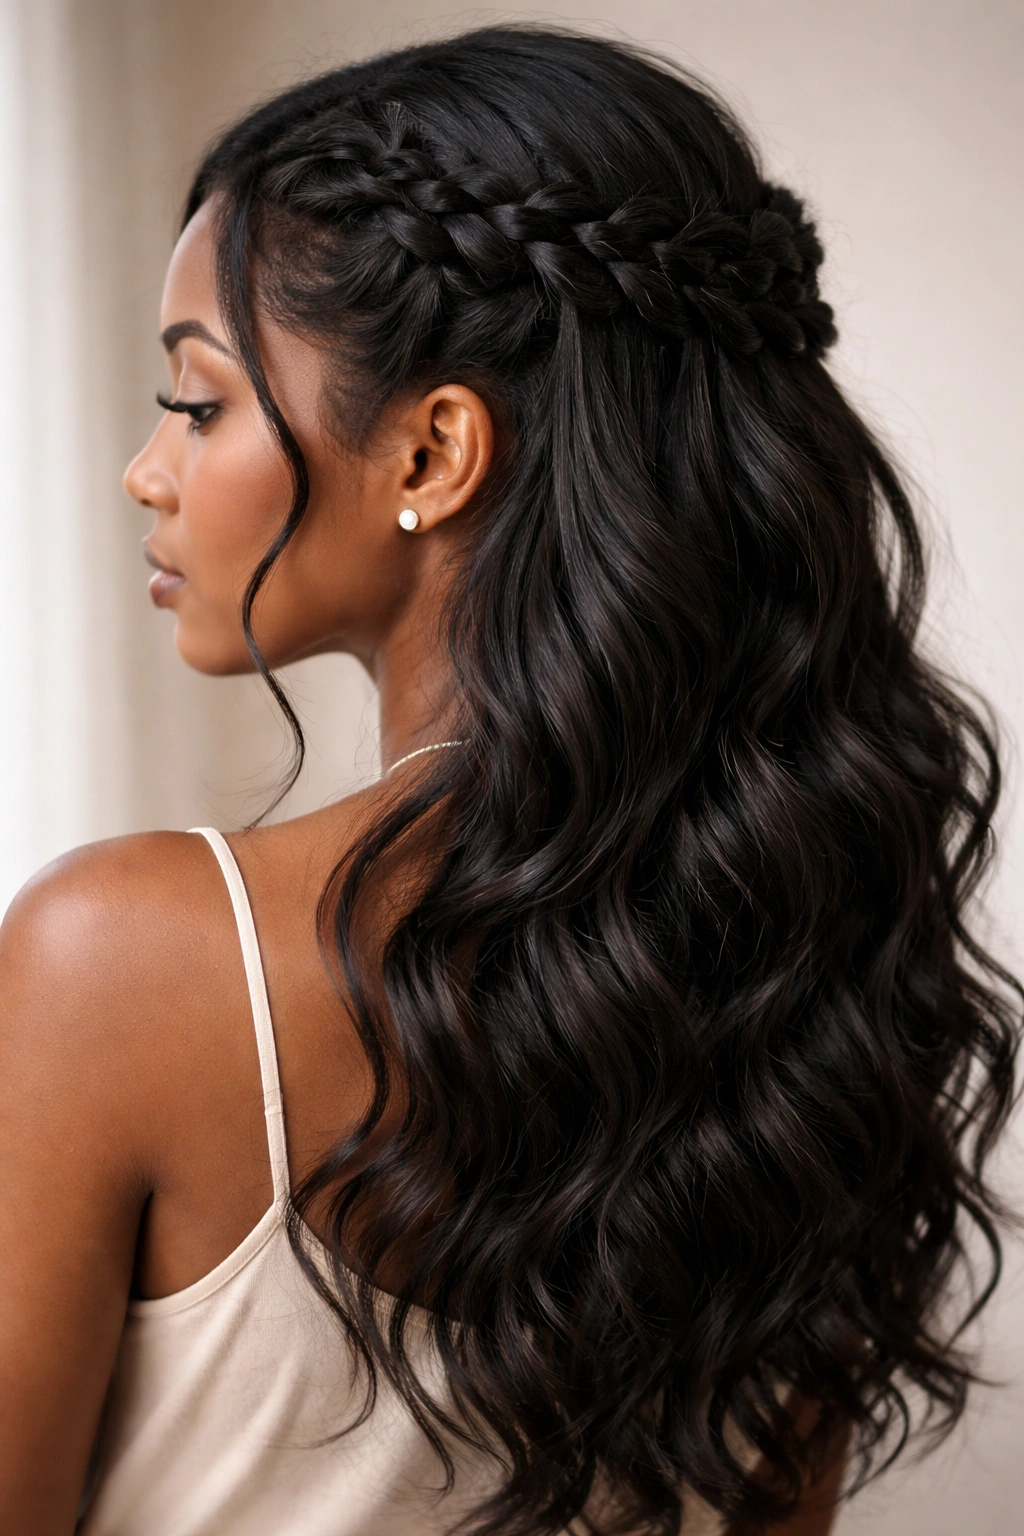
The classic French braid half up half down is the foundation style that works for almost every hair type, texture, and length. You start by sectioning off the top portion of your hair—roughly from temple to temple across the crown—and French braiding that section straight back. The three-strand braid incorporates hair from the top of your head as you move backward, and once you reach the nape of your neck or wherever you want the braid to end, you secure it with a small elastic. The remaining hair flows freely down your back, creating that signature half-up look.
Why This Style Works for Every Occasion
The classic version is timeless precisely because it’s elegant without being overdone. It keeps hair off your face and neck, which is especially valuable if you’re doing a workout, working at a desk, or spending time outside. The style looks professional enough for office settings and polished enough for dinners out, yet casual enough for everyday wear. It works on straight-textured hair, coily hair, wavy hair, and everything in between because the French braid naturally accommodates different hair densities.
How to Style and Maintain It
- Start with either fresh braids or hair that’s at least one or two days post-wash for better grip
- Section off hair from one temple, across the crown, to the other temple
- Begin the French braid at the crown and braid straight back or slightly to one side
- Use a small elastic to secure once you reach your desired endpoint
- Gently pull sections of the braid slightly outward to create fullness and texture
- Refresh by spritzing with water and a light styling product every 2-3 days
Pro tip: If your braids feel slippery after a few days, try spritzing just the braid section with a lightweight gel or mousse to help it hold its shape while keeping the loose hair soft.
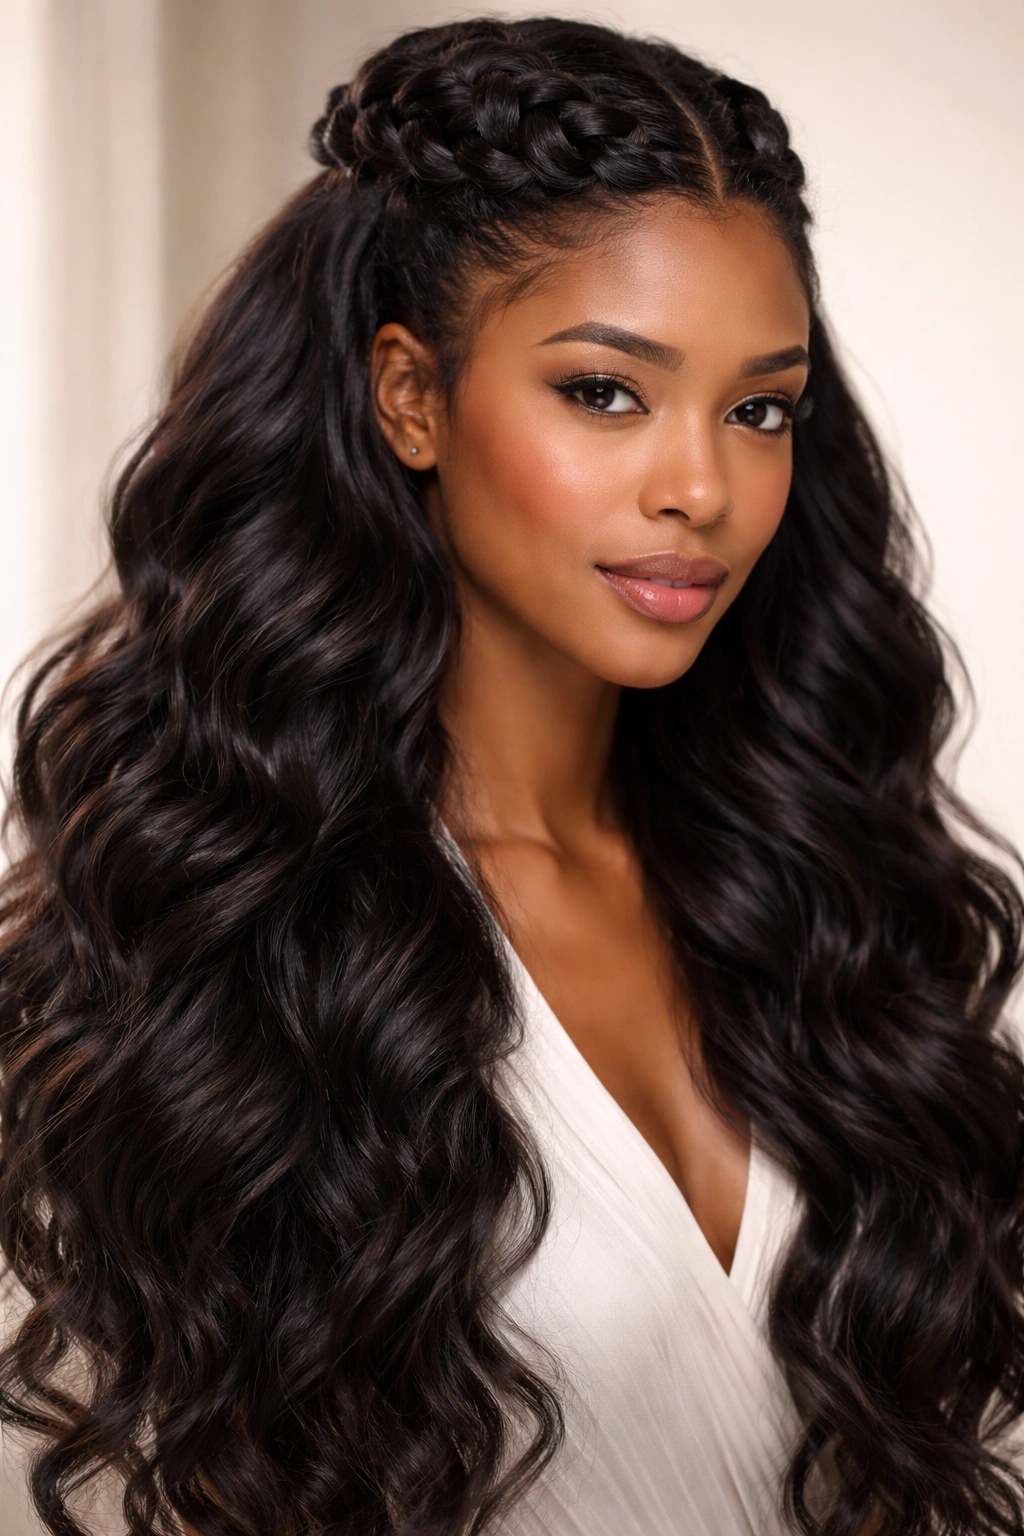
2. Double French Braids Half Up Half Down
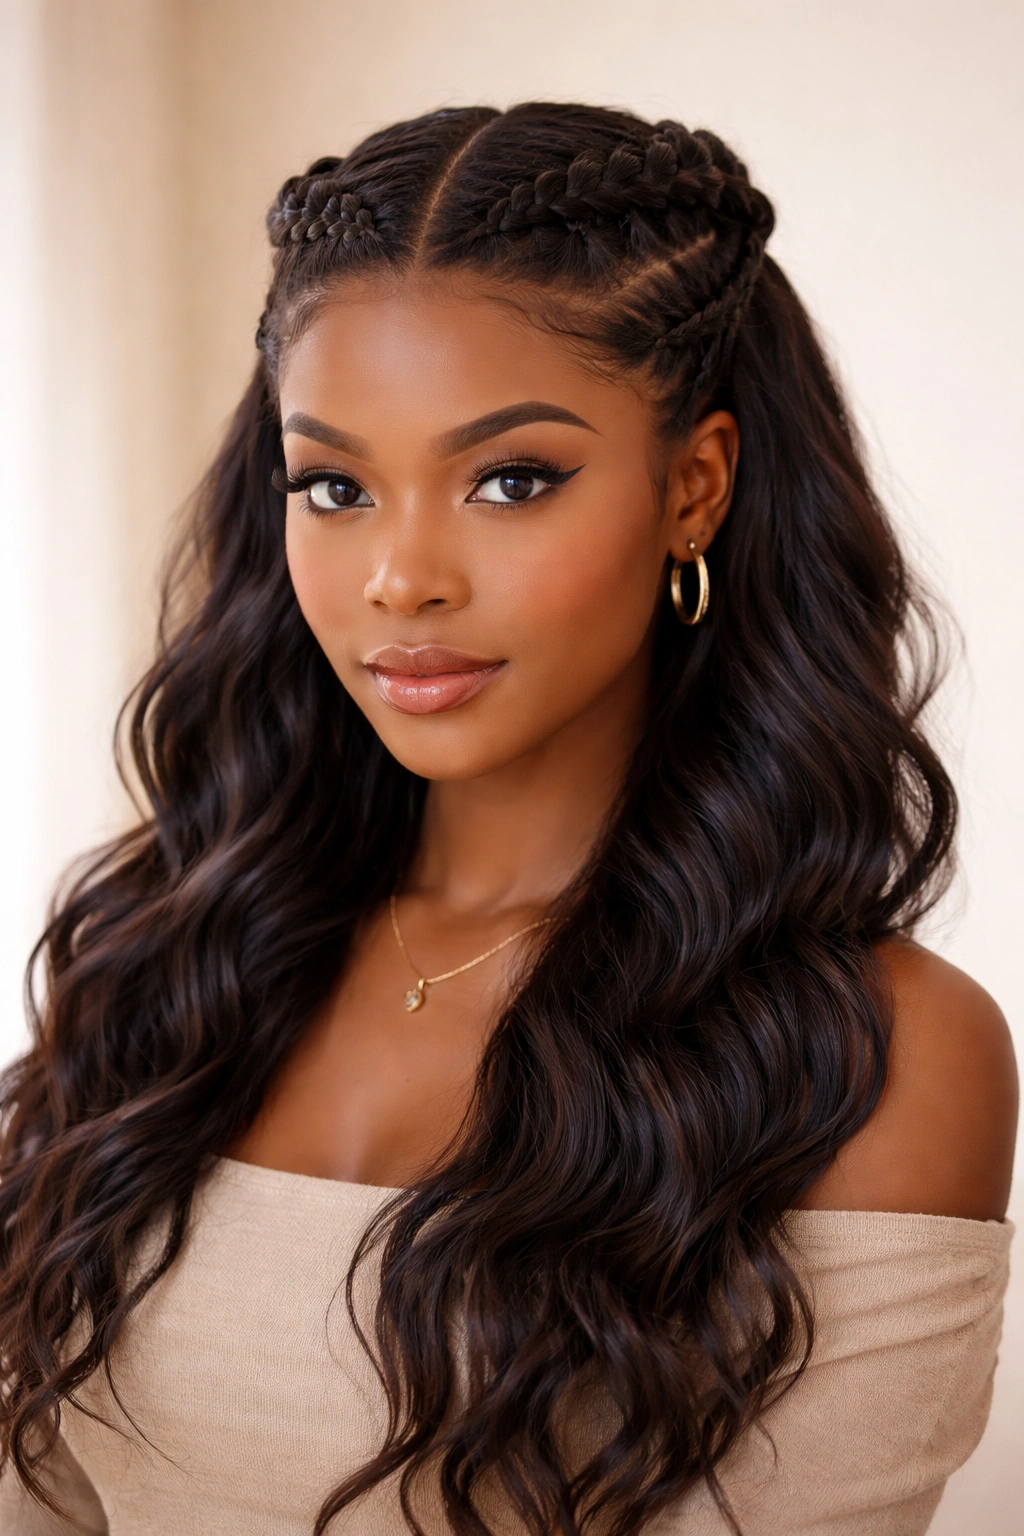
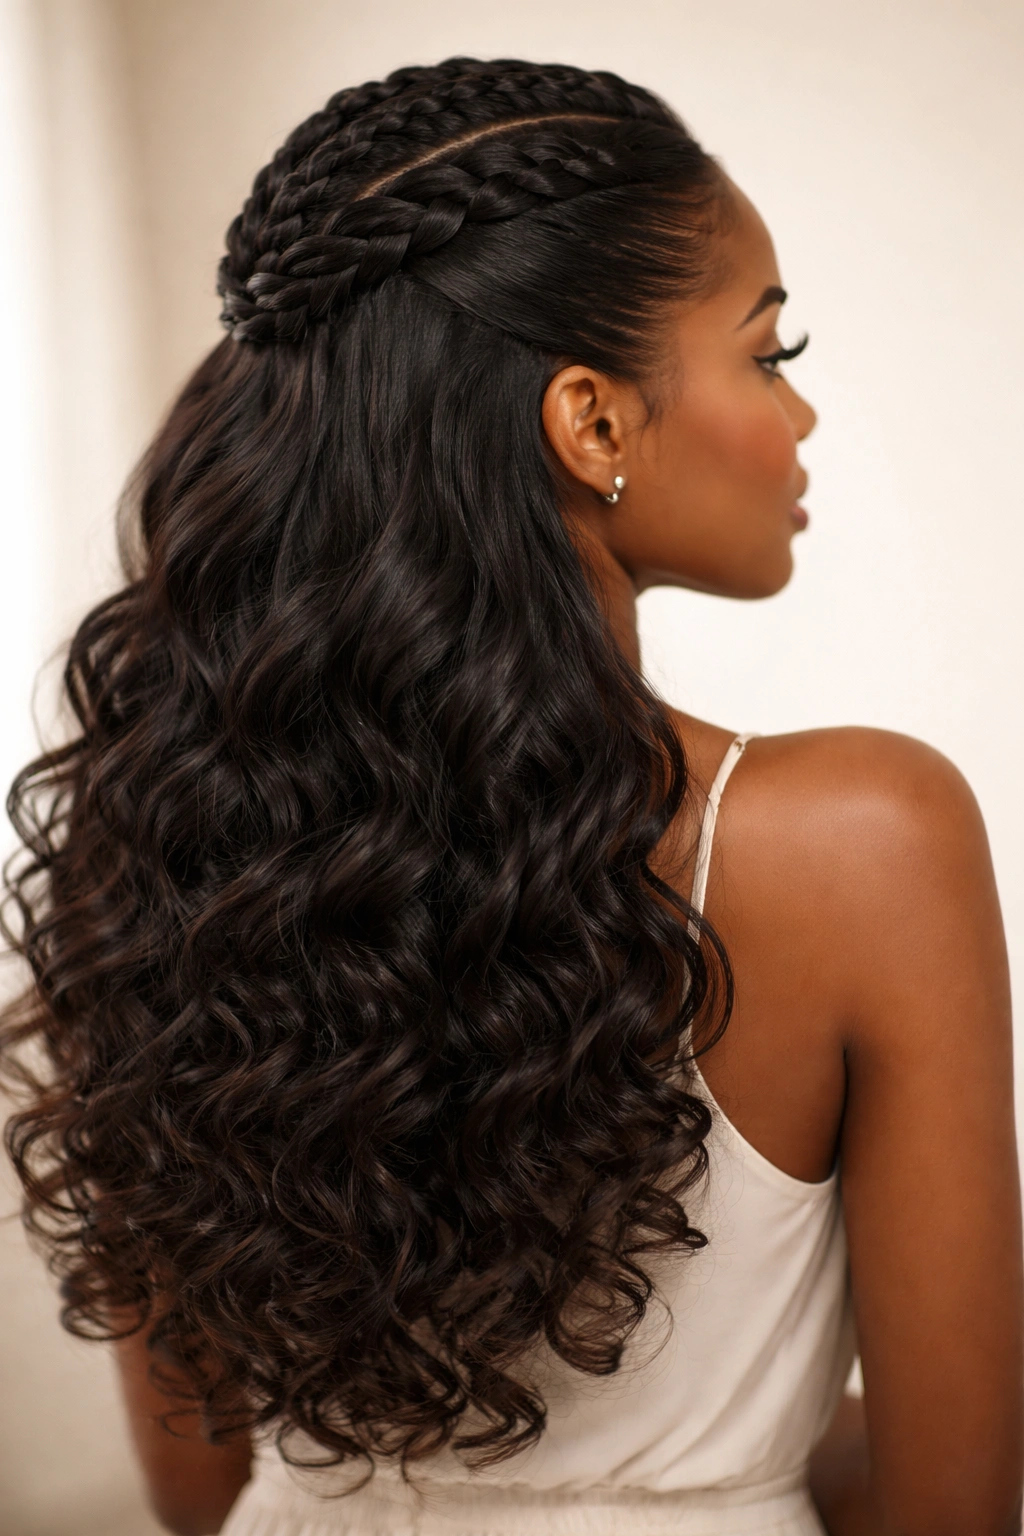
Double French braids take the classic concept and split it into two symmetrical braids running down the sides of your head. You’ll create a center part from your forehead to the nape of your neck, then French braid from one temple backward on each side of your head. Both braids secure at roughly the same point in the back, usually with either a single hair elastic connecting them or two separate elastics positioned close together for a coordinated look. This creates a more intricate, detailed appearance while maintaining the half-up, half-down structure.
Why Double Braids Add Visual Interest
The symmetry of double braids creates balance and draws attention to your face in a flattering way. This style has more visual complexity than the single braid, so it reads as more intentional and polished. The two braids frame your face naturally and can make your face appear more sculpted. Because you’re distributing the hair into two sections rather than one, each braid is slightly smaller, which often means they lay flatter against the head and feel lighter if you’re wearing them for an extended period.
Styling Details to Master
- Create a clean center part using a rattail comb or edge brush for precision
- Braid from each temple straight back, keeping both braids at the same angle
- Match the thickness of both braids so they appear intentional and balanced
- Secure both at the nape with either a single elastic (connecting both ends) or two elastics positioned together
- Pull out each braid gently to create dimension and prevent a too-tight appearance
- Style the loose hair with curls, waves, or keep it straight depending on the occasion
Worth knowing: Double braids often photograph beautifully and read very polished, but they do require a bit more precision during the braiding process. Taking your time with the initial section and braid placement pays off in a more refined final look.
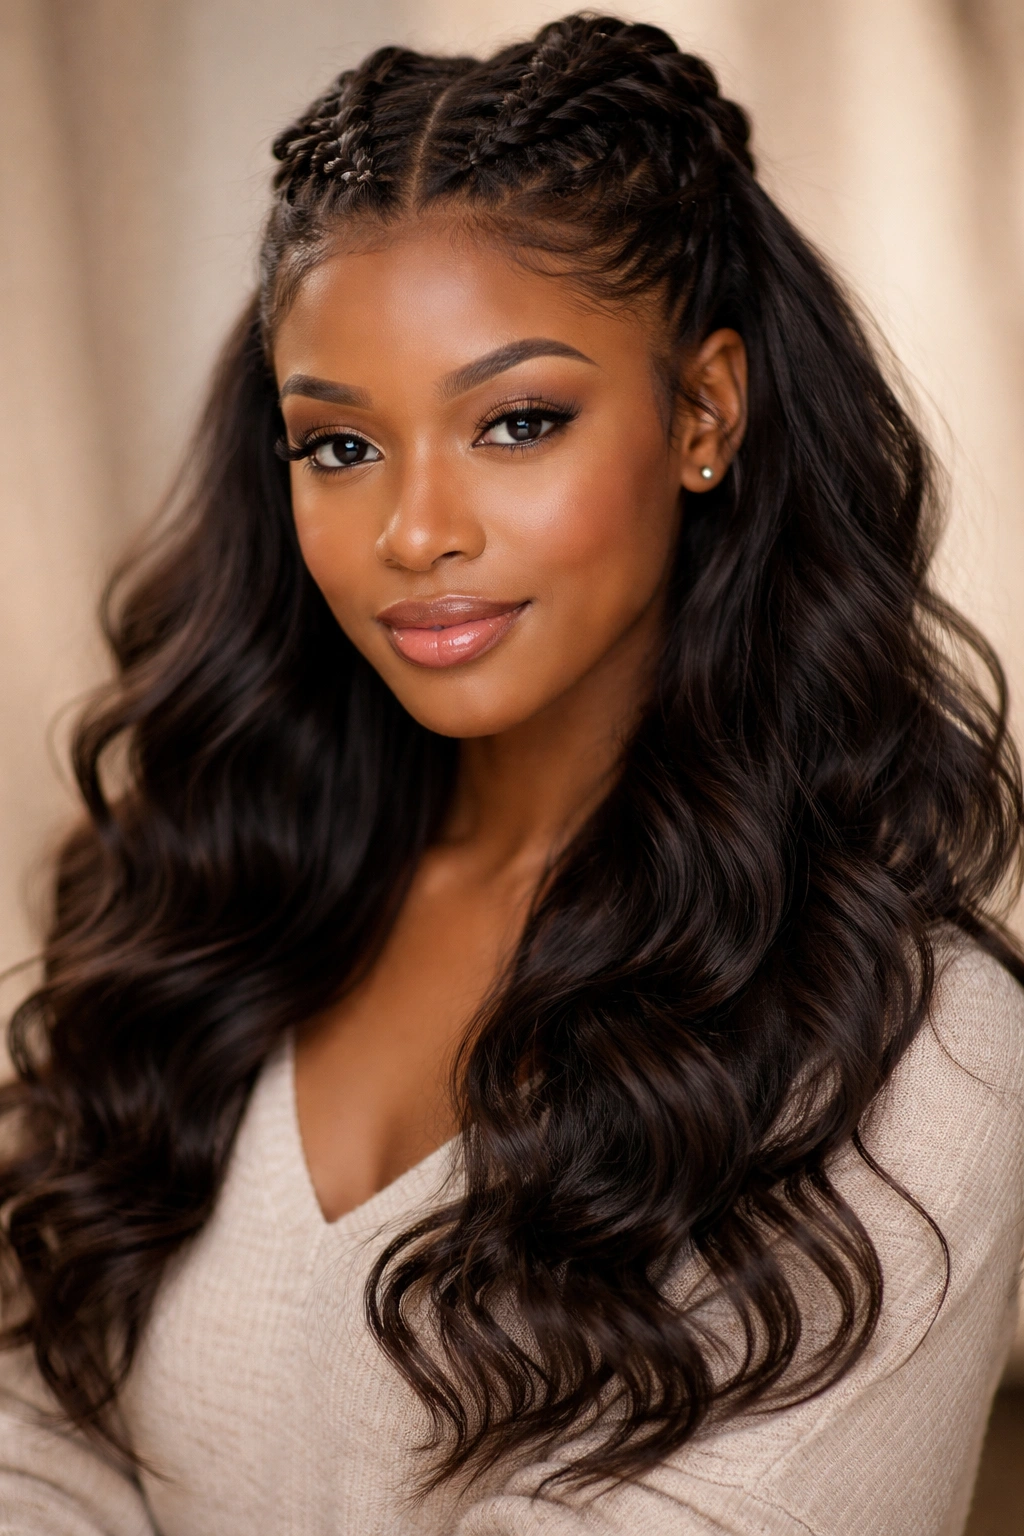
3. Stacked French Braid Half Updo
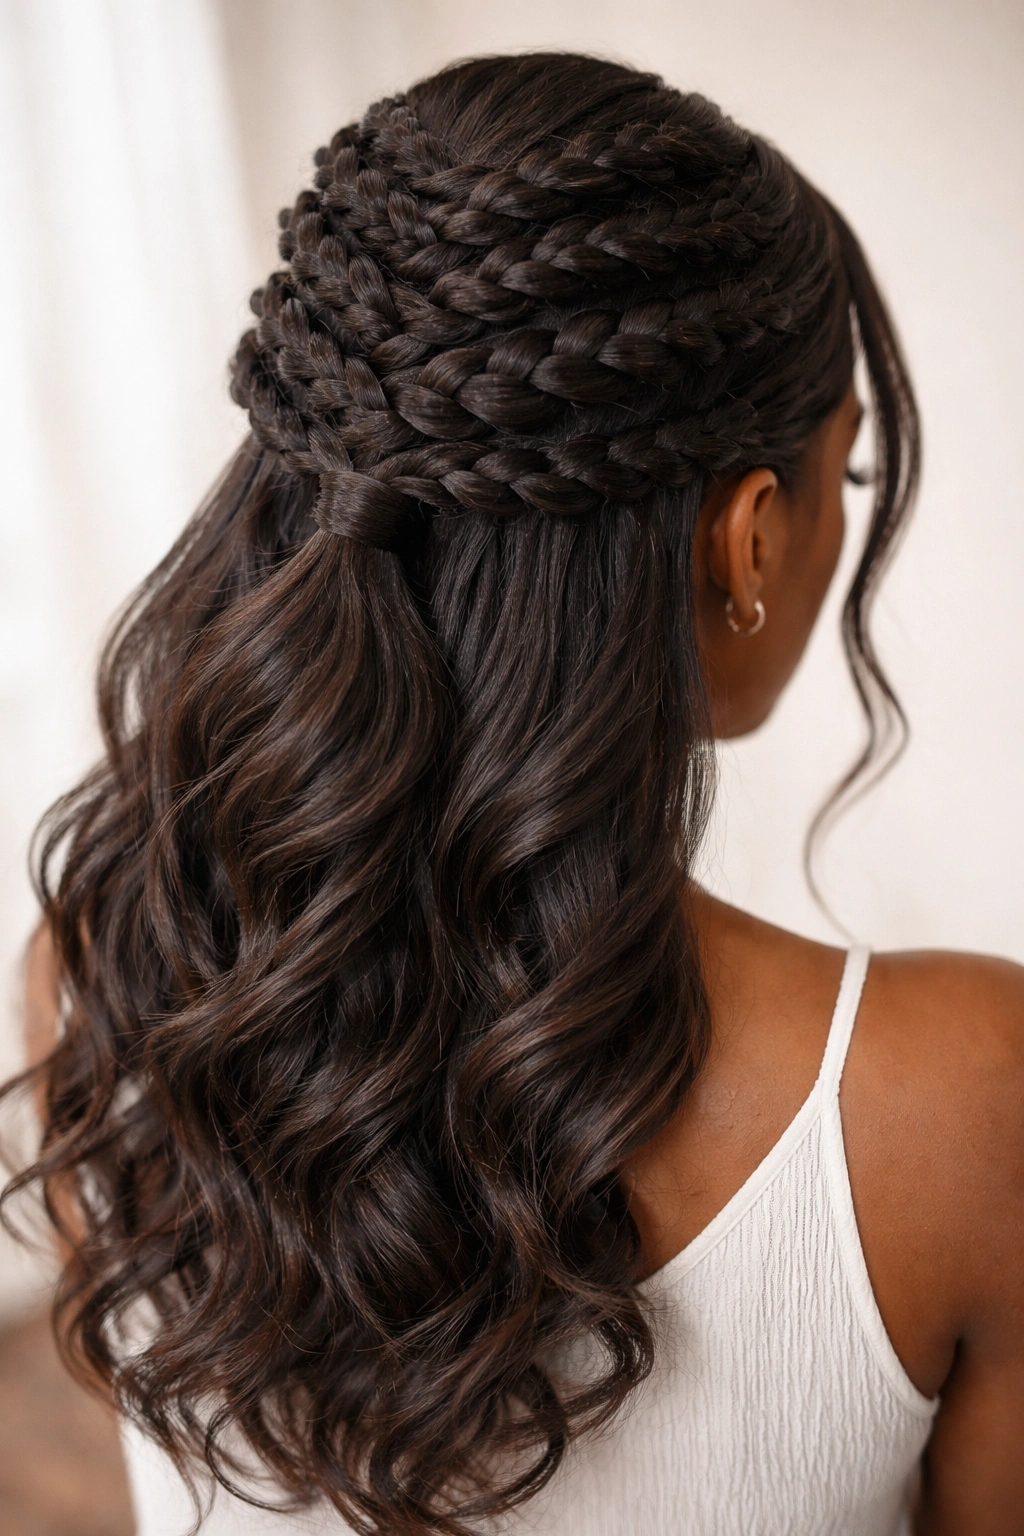
The stacked French braid involves creating multiple French braids positioned vertically or in layers on the crown, then pulling all the braided sections into a single ponytail or bun at the back of your head. You might do two or three horizontal French braids stacked on top of each other, from the nape working upward, then gather everything together. Alternatively, you can do multiple braids side by side and collect them into a central point. The result is more texture and dimension than a single braid, with everything still contained in a half-up structure.
The Dimensional Appeal of Stacking
Stacked braids create depth and visual fullness on the crown, which is especially flattering if you have a longer face or want to add volume to your crown area. Because you’re creating multiple braids rather than one thick braid, the style feels less heavy and more intricate. The stacking technique also allows you to play with different braid patterns—you could do traditional French braids in some sections and Dutch braids or twist braids in others for even more texture variation.
How to Execute This Elevated Look
- Divide the upper portion of your hair into 2-3 horizontal sections using clips
- Starting from the bottom section, French braid straight back
- Move to the next section up and repeat, keeping all braids at similar angles
- Once all braids are complete, gather them together at the back and secure with an elastic
- You can leave them as a ponytail or wrap one braid around the base to create a half bun
- Gently pull out all braids to create fullness and prevent a too-tight look
Insider note: This style works especially well if you’re braiding a friend’s hair or getting a professional style because the stacking is easier to control when you’re working on someone else’s head and can see the back clearly.
4. Dutch Braid Half Up Half Down
A Dutch braid is essentially the reverse of a French braid—instead of incorporating new hair on top of your braid, you weave new sections underneath. This creates a braid that appears more raised and textured, almost like it’s sitting on top of your hair rather than embedded within it. When you do a Dutch braid half up half down, the visual effect is more prominent and bold than a French braid, and it photographs beautifully. The technique is the same structural approach—you’re still creating a half-up, half-down silhouette, just with a different braid style.
Why Dutch Braids Create More Impact
Dutch braids have a higher contrast and more dramatic visual presence than French braids, especially on darker hair where the texture and dimension really stand out. If you want a style that reads as intentional and a bit more editorial, a Dutch braid delivers that immediately. The raised nature of the braid also means it photographs well from all angles, making it a great choice if you like to document your styles or wear your hair for events where you might be photographed.
Executing a Perfect Dutch Braid
- Start at the crown or along your hairline where you want the braid to begin
- Take a three-strand section and begin the Dutch braid by weaving underneath rather than over
- Continue adding new hair sections by weaving underneath as you move backward
- The resulting braid will sit more visibly on your hair surface compared to a French braid
- Secure at your desired endpoint with a small elastic
- Gently pull sections outward to create fullness and emphasize the raised texture
Pro tip: Dutch braids can sometimes feel tighter than French braids if you’re not careful with your tension, so practice with a looser hand and prioritize keeping the braid comfortable rather than perfectly tight.
5. Waterfall French Braid Half Updo
A waterfall braid creates the effect of strands cascading down your head like water, which is why it’s called by that name. You start with a French braid, but instead of incorporating every section of hair as you move backward, you let some strands drop free while you pick up new ones. This creates sections of loose hair that flow through your braid, giving the appearance of movement and softness. When styled as a half up half down, the waterfall braid looks romantic and flowing while keeping some hair off your face.
The Romantic Appeal of Waterfall Braids
Waterfall braids work beautifully for events where you want to look polished but soft—think date nights, romantic occasions, or anytime you want a style that feels less structured than a traditional braid. The falling strands create vertical lines that can elongate your face, and the movement of the style adds dimension and interest. On textured hair, waterfall braids look particularly stunning because the natural curl or coil pattern in the cascading strands adds even more texture.
Creating the Waterfall Effect
- Begin a French braid from one side of your head, typically near the temple
- After incorporating a section, instead of picking up a new section from the top, let the bottom strand drop free
- Incorporate a new strand from the top to replace the one you dropped
- Continue this pattern—pick up from the top, drop from the bottom—as you move backward
- The released strands create the “waterfall” effect flowing down
- Secure the completed braid at the back and arrange the loose sections
- Add light curls to the waterfall strands for extra softness
Worth knowing: Waterfall braids are slightly more complex than traditional French braids and take practice to get the pattern smooth and consistent, but once you master the technique, they become second nature.
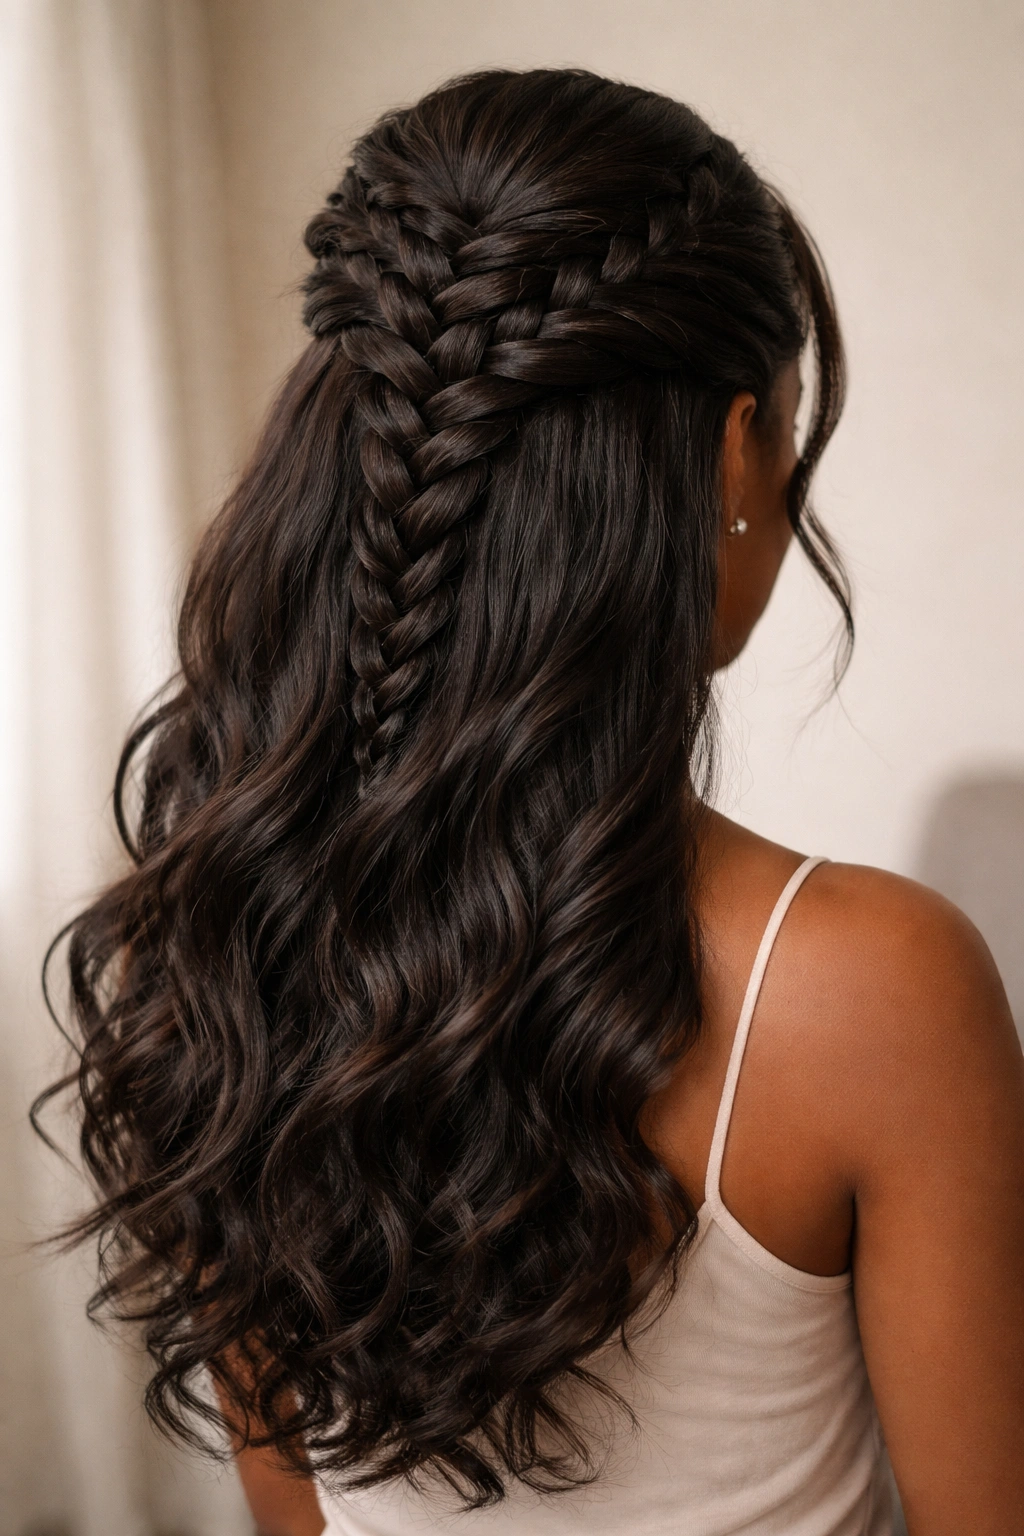
6. Sleek French Braid Half Up With Curls
This style combines a polished, sleek French braid on top with beautifully textured curls flowing down the bottom half. The contrast between the smooth, controlled braid and the full, voluminous curls creates a stunning visual balance. You create the French braid as you normally would, keeping it neat and sleek using a gel or smoothing product to tame baby hairs and flyaways. The remaining hair is then curled with a curling iron, wand, or braiding method to create defined, bouncy curls that contrast with the sleekness of the braid.
Why This Combination Works
The sleek braid keeps everything polished and intentional while the curls add romance and fullness. This pairing is incredibly versatile—you can wear it casually with your normal makeup and clothes, or dress it up for a special event. The style is particularly flattering on longer hair where you can really showcase the curls, but it works beautifully at any length. The sleek-to-textured transition also photographs exceptionally well and looks polished from every angle.
Executing Sleek Braids With Textured Curls
- Prep your hair with a smoothing product or lightweight gel before braiding
- Braid tightly and smoothly from your crown backward, using the gel to keep edge hair in place
- Once secured, use a fine-tooth comb to smooth any flyaways along the braid
- On the remaining half-down hair, apply a curl cream or mousse
- Section the hair and curl with a 1.25-inch to 1.5-inch curling iron, curling away from your face
- Gently finger-comb or use a wide-tooth comb through the curls to slightly loosen them
- Finish with a light hairspray to keep everything in place without crunch
Pro tip: If you want the sleek braid to last several days, braid your hair the night before using braids and sleeping on them, then in the morning you can recreate the sleek look with minimal effort.
7. French Braid Half Up With Accessory
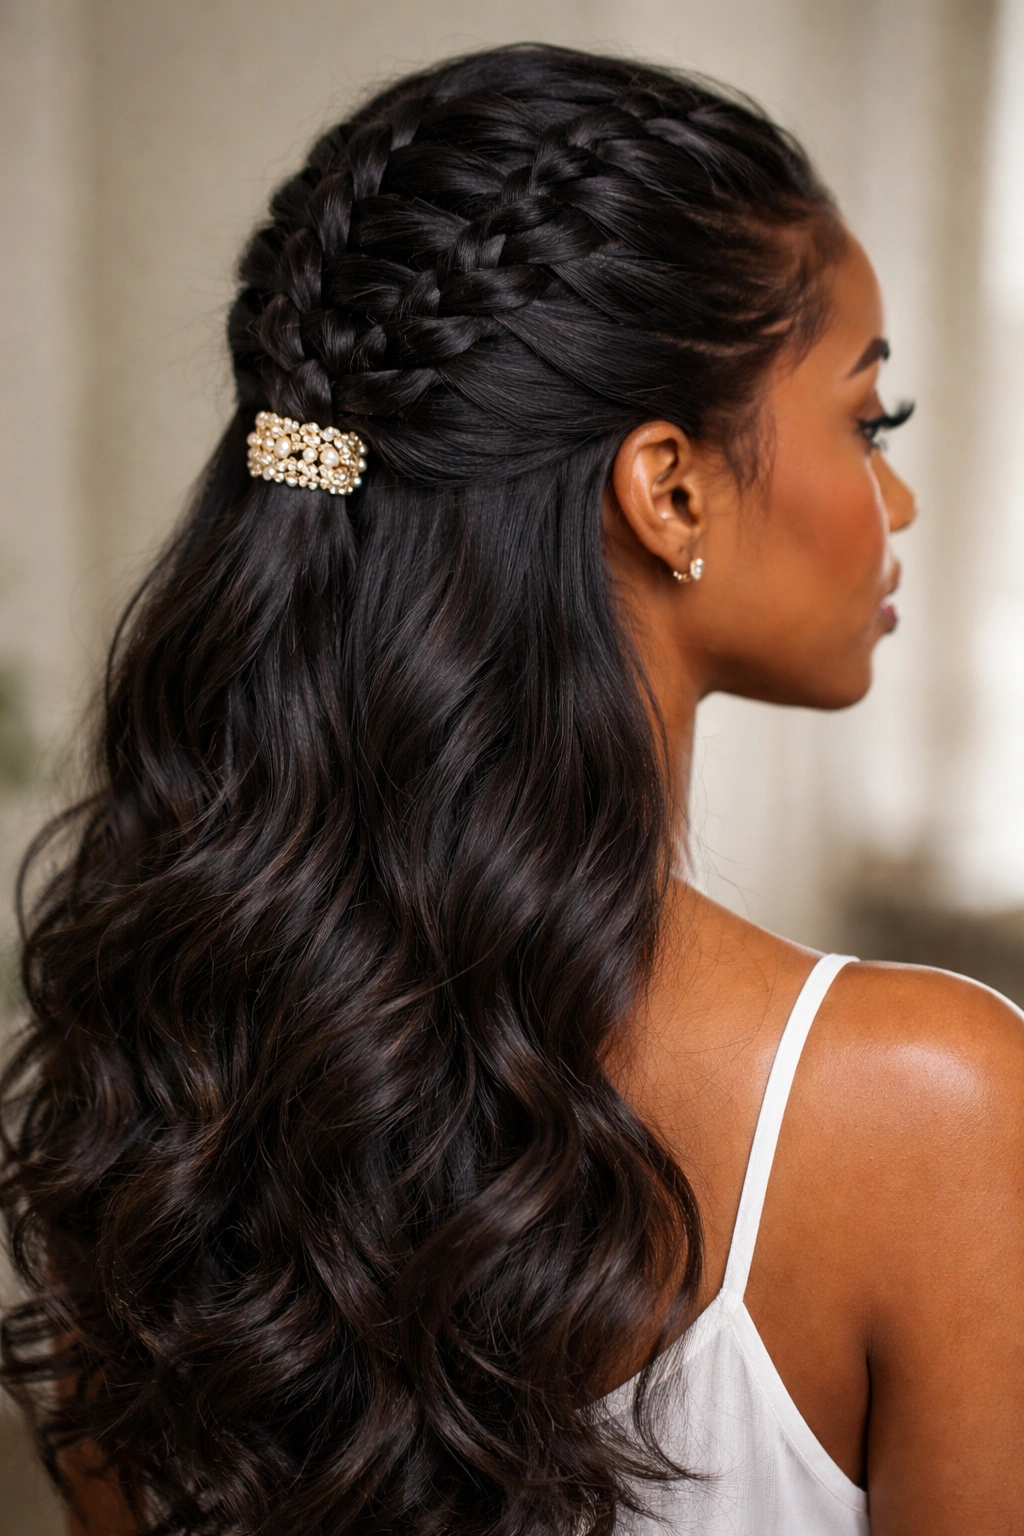
This style takes the classic French braid half up half down and elevates it with an accessory—clips, cuffs, beads, jewelry, or a decorative band. You braid exactly as you would for a classic half up style, then add your chosen accessory at the point where the braid is secured or woven into the braid itself. Accessories can be tucked underneath the braid for a subtle look or placed prominently on top for a statement effect. This gives you endless customization options and transforms the style based on your mood or occasion.
The Styling Power of Accessories
Accessories completely change the vibe of a style without requiring any technique changes. A sleek gold cuff makes the look refined and elegant. A colorful clip makes it playful and fun. Beads or shells woven directly into the braid add cultural significance and visual interest. This single variation concept means you can create multiple looks from one basic braiding technique, making it incredibly efficient and practical. Accessories also help secure your braid without a visible elastic, creating a more finished appearance.
Options for Accessory Placement
- Clip-style accessories: Attach to the base of the braid at the nape of your neck
- Hair cuffs or rings: Slide onto the braid itself, either at the base or throughout the length
- Beads: Thread them directly into the braid as you braid, or add them afterward by threading them onto individual strands
- Decorative bands: Wrap around the base where the braid meets the loose hair for a polished finish
- Gold or silver jewelry: Weave through the braid or clip at the base for an elegant look
- Scarves: Tie around the base of the braid or weave throughout for color and texture
Insider note: If you’re using beads or cuffs, pre-select them before you start braiding so you know exactly how many you need and where they’ll go, making the process smoother and more intentional.
8. Twisted French Braid Half Updo
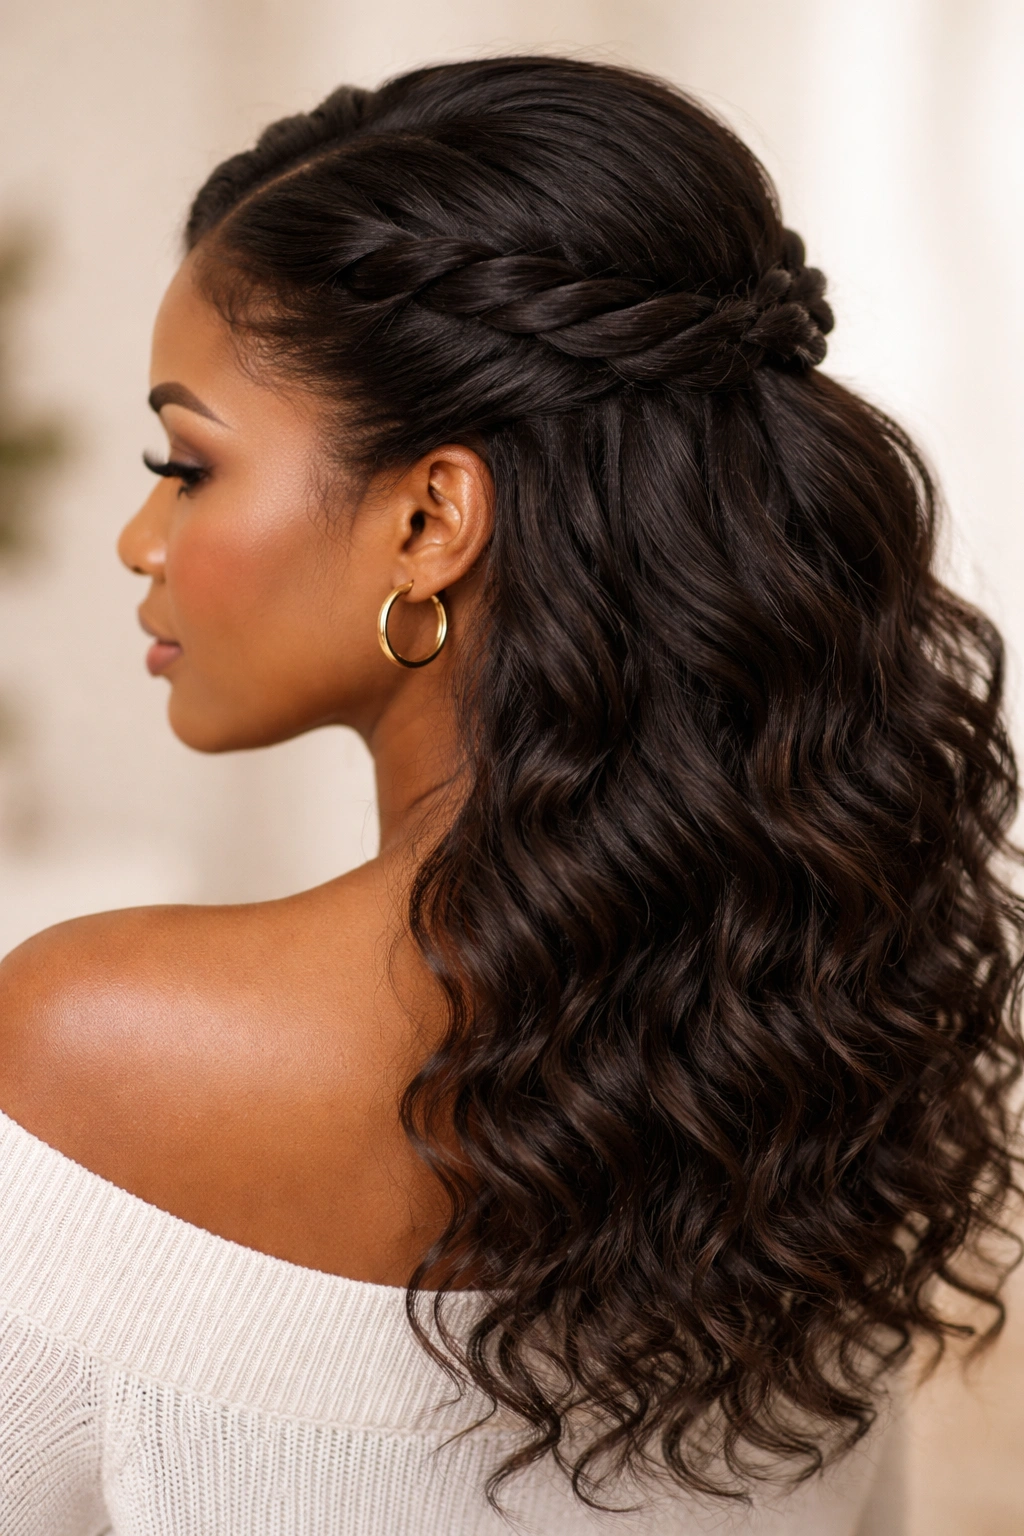
Instead of creating a traditional three-strand braid, you can create a twisted effect by taking two sections and twisting them around each other while incorporating new hair as you move backward, similar to a French braid technique but with only two strands being twisted. This creates a different texture than a traditional braid—it looks more fluid and can feel lighter. You can do a single twist or double twists on each side, and everything still secures at the back in the half-up configuration. Twists work beautifully on all hair textures and often feel more comfortable than braids if you have a sensitive scalp.
The Comfort and Texture of Twists
Twists are often more comfortable than braids for extended wear because they don’t pull quite as tightly on your scalp, making them a good option if you experience tension headaches from braiding. Visually, twists create a softer, more organic look compared to the geometric precision of braids. On natural, textured hair, twists integrate beautifully with your hair’s natural pattern and often look like they were created by your hair’s own texture. The overall appearance is polished without feeling overly done.
Technique for Perfect Twists
- Section off the top portion of your hair as you would for a French braid
- Divide that section into two subsections
- Twist those two sections around each other, incorporating new hair into each subsection as you twist backward
- Keep tension even so both strands twist smoothly together
- Secure at your desired endpoint with an elastic
- Pull out the twist gently to create fullness and soften the lines
- You can do a single center twist or double twists from each side—both work beautifully
Worth knowing: Twists often last longer than braids before needing refreshing because they don’t unravel quite as easily, making them practical for wearing for several days between styling sessions.
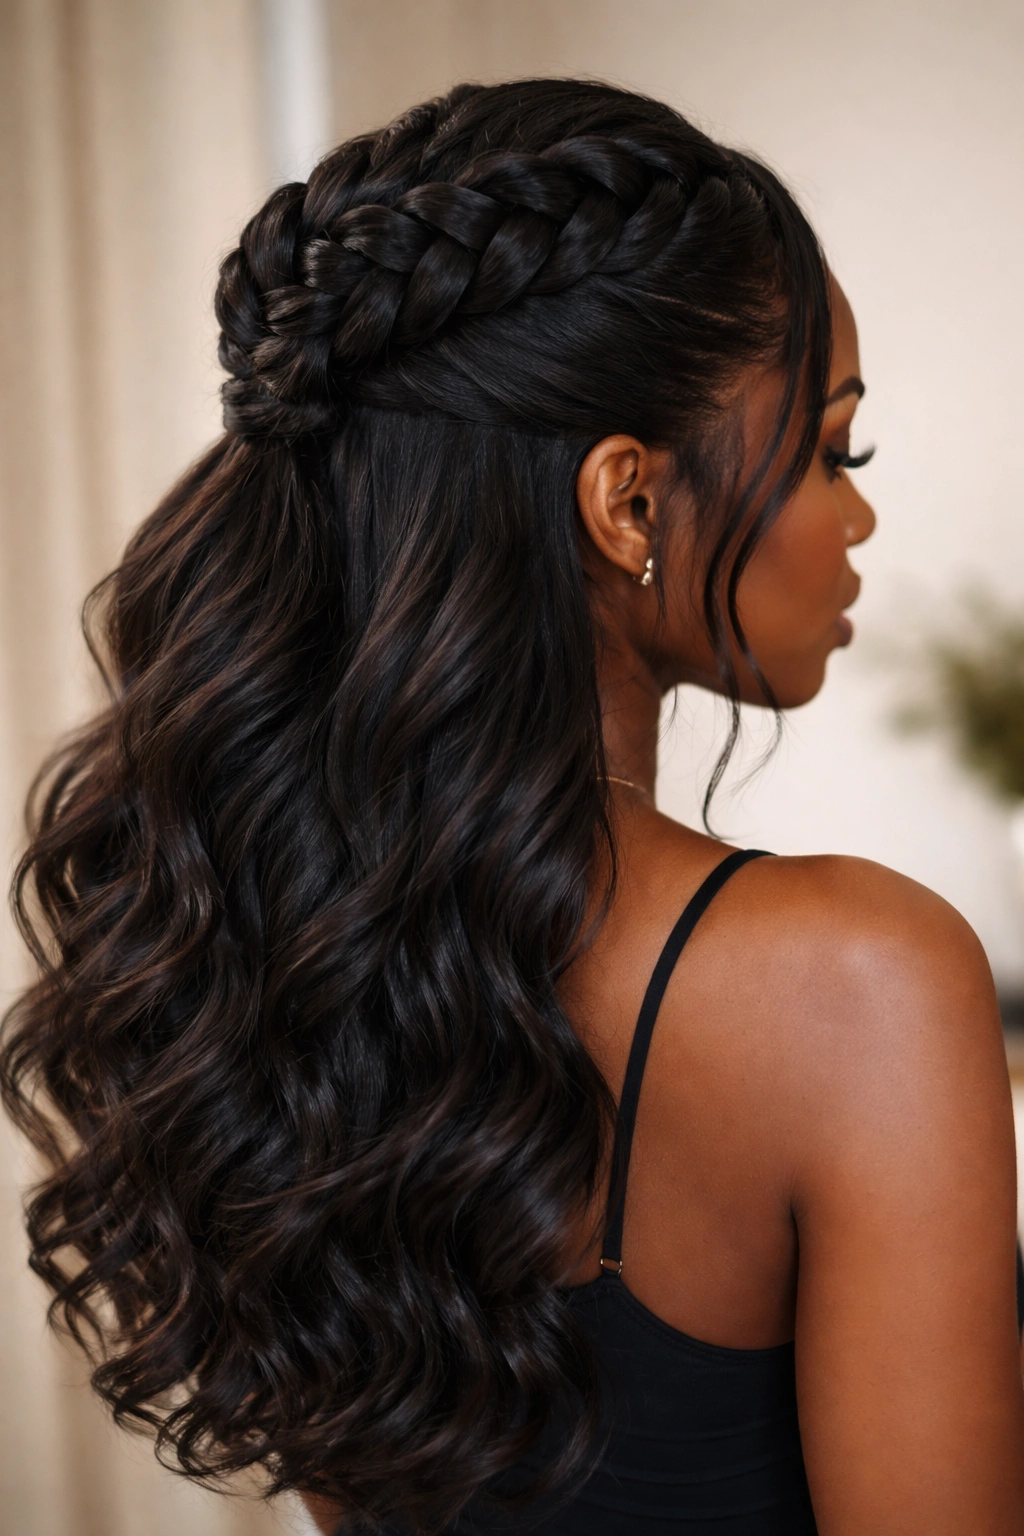
9. Thick Braided Half Up Half Down
This style focuses on creating an intentionally thick, chunky braid that makes a bold statement. Rather than incorporating small, neat sections, you use thicker portions of hair to create a braid that’s visually substantial and striking. You can achieve this by either sectioning off a larger portion of your crown for a single thick braid, or by using thicker subsections within the braid itself. The result is dramatic, modern, and reads as very intentional. This style works beautifully on longer hair and shows off your hair’s fullness and health.
The Bold Impact of Thick Braids
Thick braids have a modern, editorial quality that feels confident and intentional. They’re perfect if you want your style to make a clear statement rather than blend subtly into the background. Thick braids also tend to be faster to create because you’re working with larger sections, making them practical for busy mornings. The boldness of the braid can also help balance certain face shapes and can make fine or thinner hair appear fuller than it actually is due to the visual weight of the braid.
Creating Intentionally Thick Braids
- Section off a larger portion of your crown—you might take from ear to ear or use even larger temple sections
- Divide that section into three chunky subsections
- Braid these thick sections together, adding new hair in large sections as you move backward
- The resulting braid will be noticeably thicker and bolder than a traditional braid
- Secure at the base with an elastic that matches your hair color to blend in
- You can pull this braid even more dramatically by gently tugging sections outward
- Keep the loose hair full and voluminous to complement the substantial braid
Pro tip: Thick braids photograph beautifully and often look more impressive on camera than they feel in person, making them a great choice if you like styling your hair for photos or content.
10. Textured French Braid Half Updo
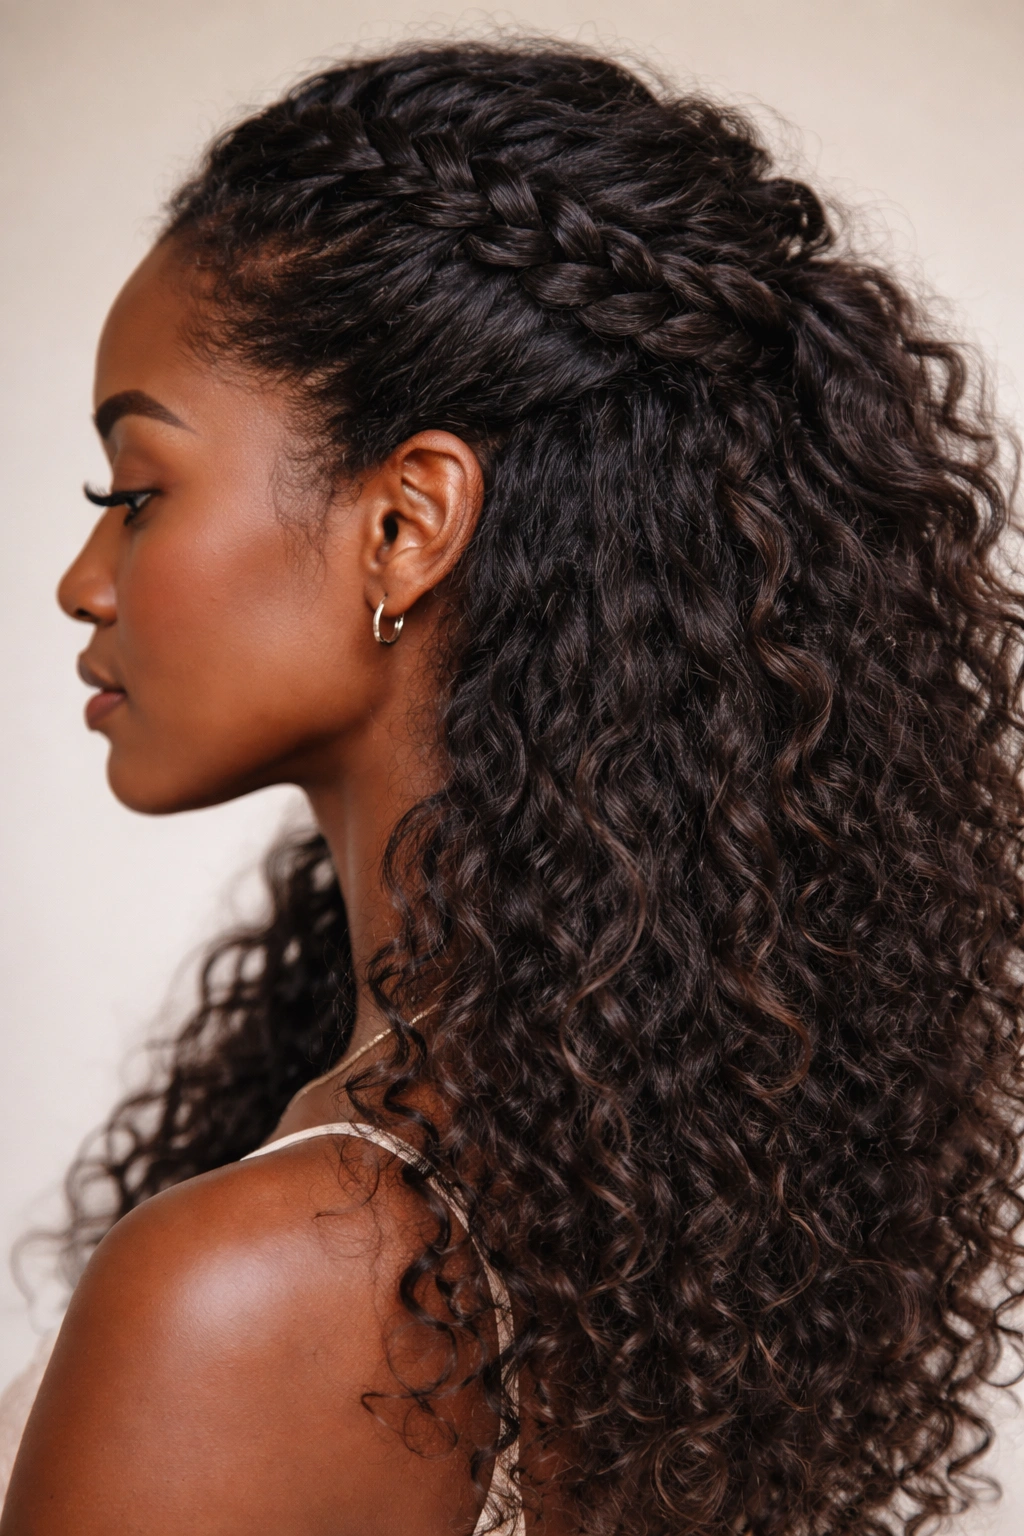
This style starts with textured or pre-braided hair—hair that already has pattern, waves, coils, or previous braids—and creates a French braid directly into that textured base. The texture shows through the braid, creating a visually rich, multidimensional look that celebrates your natural hair pattern. You can start with hair that’s been stretched or twisted the night before, hair with natural curls, or even hair that’s been flat-twisted. The French braiding technique remains the same, but the base texture adds depth and visual interest that a smooth braid alone couldn’t create.
The Richness of Braiding Textured Hair
When you braid textured hair, the natural pattern and variation in your hair shows through, creating a braid that looks lived-in, intentional, and beautiful in its complexity. This approach celebrates natural texture rather than trying to override it with sleekness. The style feels more organically part of your hair rather than something imposed on top of it. On Black women’s hair specifically, this approach creates styles that feel culturally connected and authentic while still being polished and intentional.
Technique for Textured Braiding
- Start with hair that has texture—you can create this with previous braids, twists, or by styling textured hair the night before
- Spray your hair lightly with water or a leave-in conditioner to refresh texture and make braiding easier
- Section and French braid as you normally would, but work with the texture rather than against it
- The texture will naturally create fullness and dimension in your braid
- Secure at the back and gently pull sections outward to enhance the textured effect
- You can add lightweight oils or edge control as needed, but generally, textured braids hold their shape well
- Refresh by spritzing with water on days 2-4 as the style matures
Worth knowing: Textured braids often look better and hold better after a day or two as the style settles, so don’t judge them too harshly on day one—they improve with age.
11. French Braid Half Up With Wrap
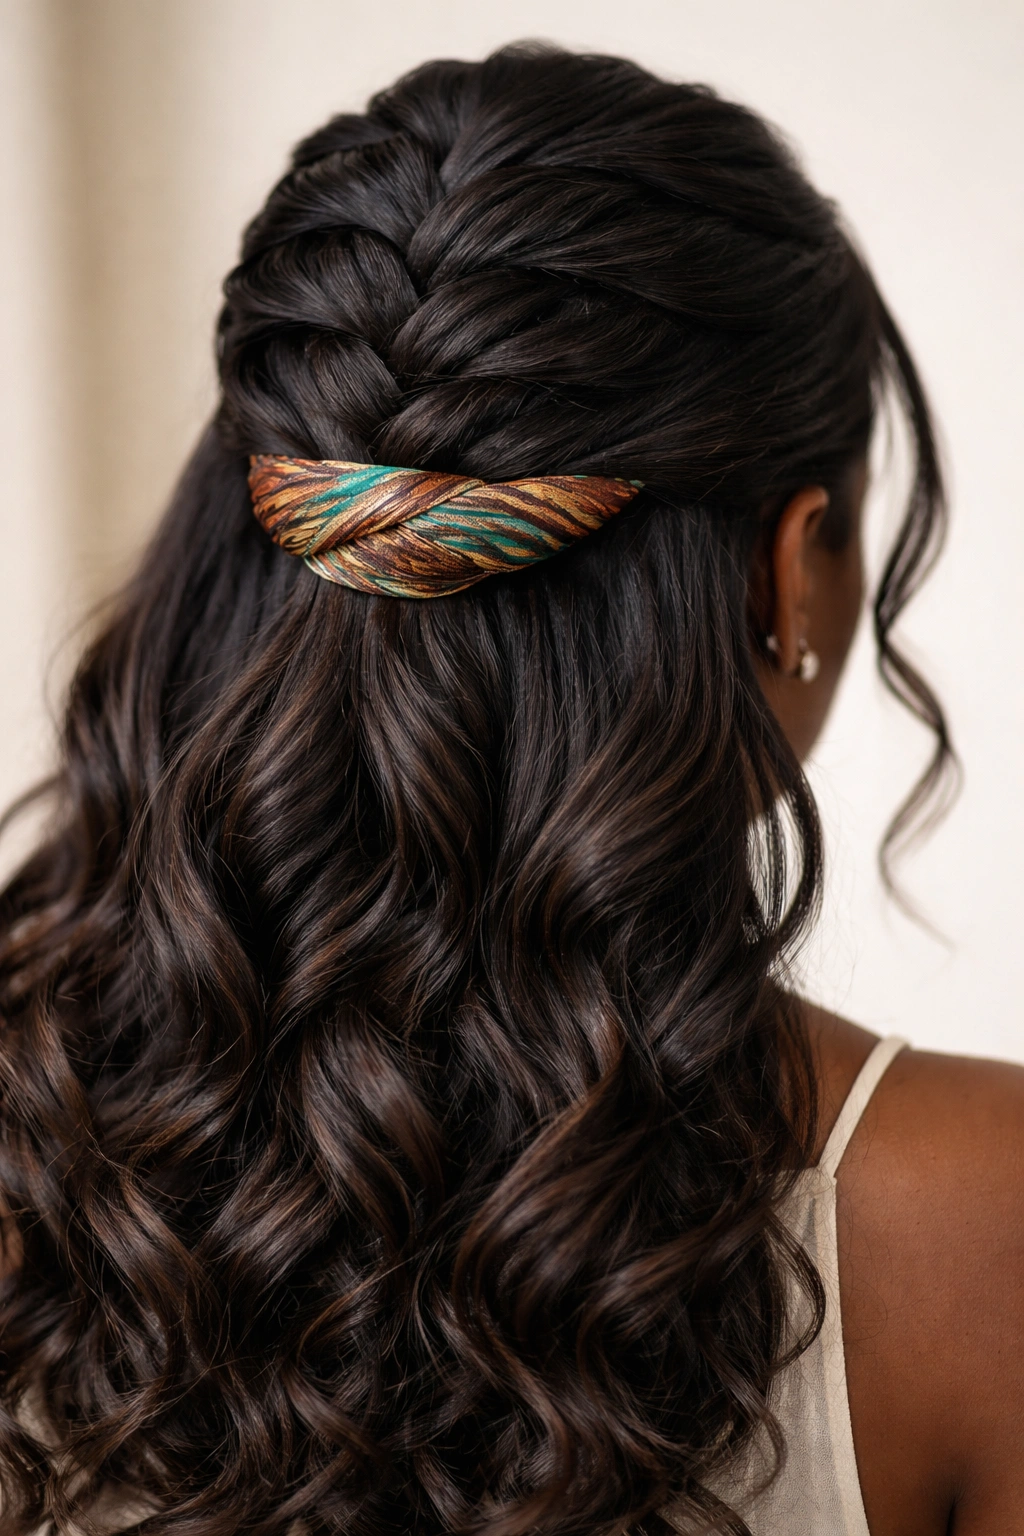
This style creates a French braid but adds a decorative wrap—typically a thin braid, a ribbon, a piece of fabric, or a length of yarn—that wraps around the base of the braid or weaves throughout its length. The wrap adds color, texture, and visual interest while also helping to secure the braid without showing a visible elastic. You can match the wrap to your outfit, use it to introduce a pop of color, or go for something metallic for shine and glamour. The wrap transforms the simple braid into something more fashion-forward and personalized.
The Versatility of Wrapped Braids
Wraps give you endless customization options and allow you to create completely different looks depending on what you wrap with. You can wrap with complementary colors, contrasting colors, metallic threads, yarn, ribbon, or even thin scarves. This makes the style adaptable to different outfits, occasions, and moods. Wraps also add security to your braid—they help hold everything in place and reduce the need for a visible elastic, creating a more polished, finished appearance. It’s a styling technique that adds significant visual impact with minimal technical complexity.
How to Add and Secure Wraps
- Complete your French braid as usual, securing loosely with an elastic
- Cut or prepare your wrap material—ribbon, yarn, thin fabric, or even a thin braid works beautifully
- Wrap the material around the base of the braid, tucking the ends underneath to hide them
- Alternatively, thread the wrap through the braid starting at the top and weaving down
- You can create a single wrap around the base or multiple wraps throughout the braid’s length
- Secure the wrap ends by tying them together, tucking them into the braid, or using a small elastic
- Adjust the braid tension and fullness once the wrap is in place
Pro tip: If you’re wrapping with ribbon or fabric, curl or wet it slightly before wrapping so it lies smoothly and conforms to the braid’s shape rather than sticking out awkwardly.
12. Longthair French Braid Half Down
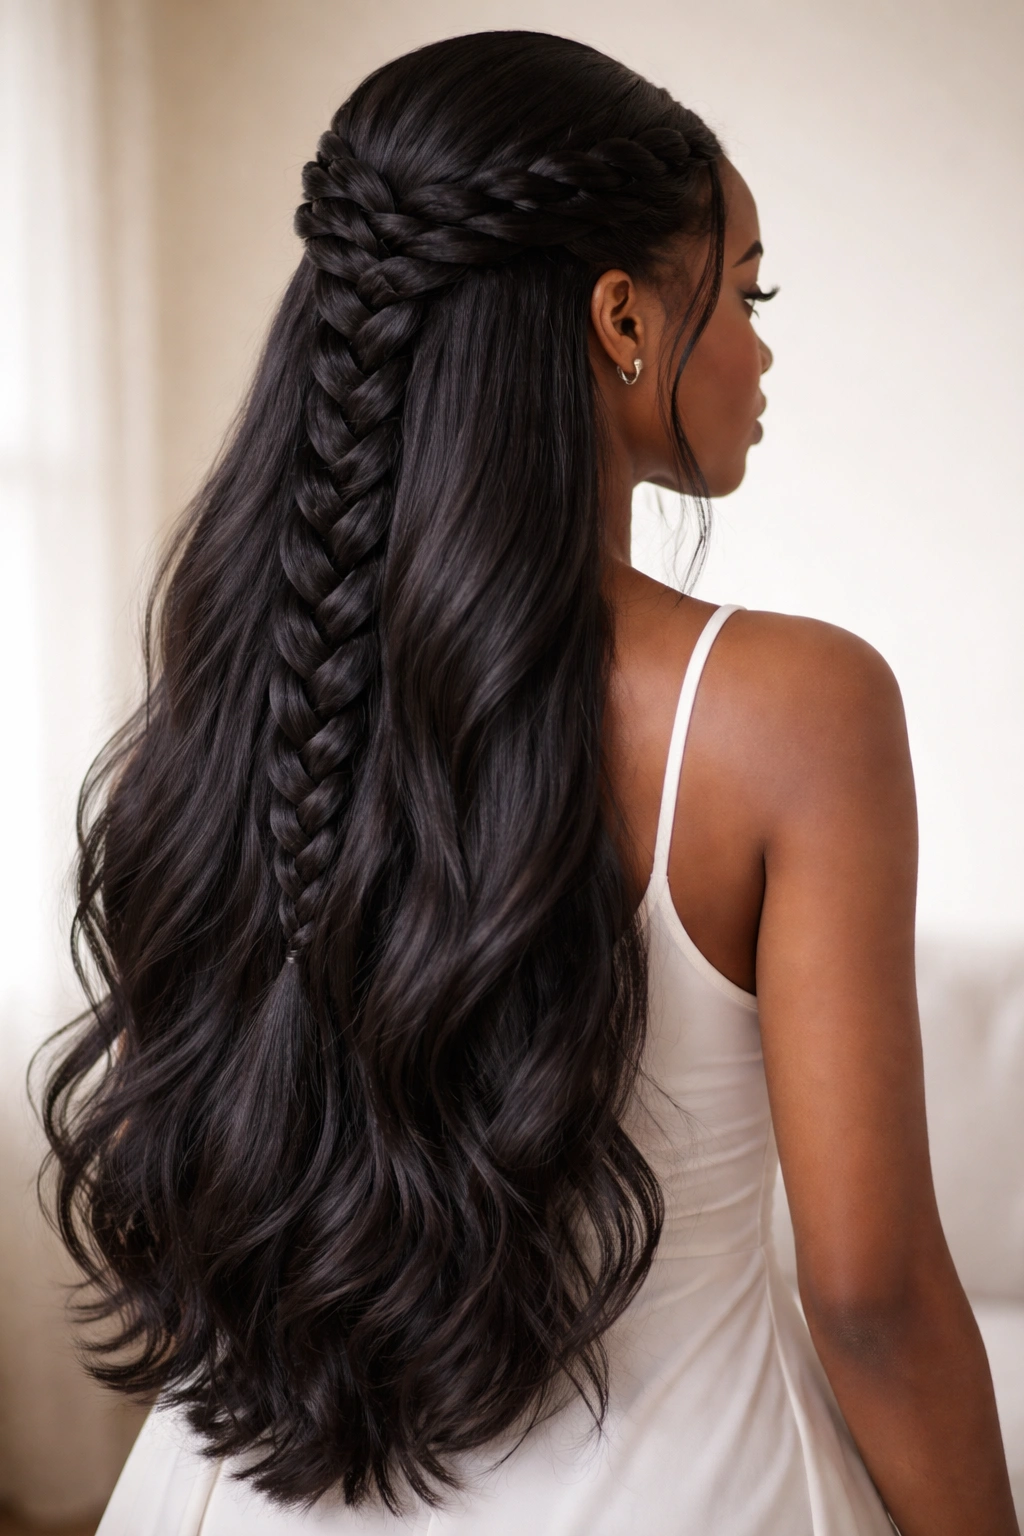
This style is specifically designed for longer hair lengths—typically waist-length or longer—and maximizes the visual impact of length. You create a French braid from your crown, but because your hair is quite long, the braid extends significantly down your back before you secure it, creating a dramatic, flowing look. The remaining loose hair below the braid is equally long and substantial. This style showcases length and fullness while maintaining the practical benefits of the half-up structure. It’s a stunning option if you’ve been growing your hair out or love showing off your length.
The Drama and Beauty of Long Hair Braids
On longer hair, French braids have more visual presence and impact. The braid itself becomes a design element that travels down a significant portion of your back, and the loose hair below creates volume and movement. This combination creates one of the most visually striking half-up, half-down styles available. The style is particularly beautiful when photographed in natural light or in motion, as the length and flow become a key part of the visual story. Long hair also makes even simple braids look more polished and intentional.
Executing This Statement Style
- You’ll need at least shoulder-length hair, but the style is most striking on waist-length or longer hair
- Section off your top portion as you normally would for a French braid
- Braid from your crown straight back, continuing the braid for a significant length down your back
- Instead of securing at the nape, continue braiding until you reach roughly the middle of your back or your desired length
- Secure with an elastic that matches your hair color
- The remaining hair below the braid will be substantial and loose
- You can wear the loose hair straight, curled, or in its natural textured state
- Gently pull the braid to create fullness and prevent it from looking too tight or thin
Worth knowing: If your hair is very long and fine, make sure your braid is thick enough that it doesn’t look wispy or delicate—thicker sections create more visual impact and look more intentional.
Final Thoughts
French braid half up half down styles offer the perfect combination of practicality and elegance for Black women looking to style their hair with intention. Whether you choose the timeless simplicity of a single braid, the symmetry of double braids, or the creative flair of textured, wrapped, or accessorized variations, each style works beautifully across different hair types, lengths, and textures. The real magic of these styles is their adaptability—you can take one basic technique and create dozens of different looks depending on your braid thickness, hair texture, accessories, and finishing touches.
What matters most is choosing the variation that makes you feel confident and comfortable. If you have sensitive scalp days, reach for a twisted style or textured braid. If you want maximum impact, go for thick braids or double braids. If you’re looking for a style that will transition beautifully throughout the week, textured or waterfall braids tend to improve with age and refreshing. Don’t be afraid to experiment with multiple variations until you find the ones that become your go-to styles.
The beauty of mastering French braid techniques is that you’re building a skill set that gives you endless styling flexibility. Once you understand the basic structure, you can adapt it to work with whatever your hair is doing on any given day, whatever occasion you’re dressing for, and whatever mood you’re in. These twelve variations provide a framework to explore, but they’re really just the beginning of what’s possible when you combine technical braiding skills with creativity and confidence in your own style.