Half up half down hairstyles have become the go-to choice for prom—and for good reason. This style hits the perfect balance between romantic and practical, keeping your hair off your face while still showing off length and volume. Whether you’re going for vintage glamour, modern edge, or soft femininity, there’s a half up half down variation that’ll make you feel absolutely confident walking into that gymnasium or banquet hall.
The beauty of this style lies in its versatility. You can dress it up with intricate braids, sleek twists, or delicate accessories. You can keep it loose and effortless or go full glam with curls and jeweled pins. And if you’re worried about your updo lasting all night—whether you’re dancing, taking photos, or moving around constantly—half up half down gives you that security. The top section is anchored, but you’re not committed to a full updo that can feel heavy or restrict movement.
What makes these styles so prom-perfect is how they work with virtually any dress, makeup, or vibe you’re going for. Wearing a structured, dramatic gown? A sleek half up style with a jeweled clip looks absolutely stunning. Going for something softer and more romantic? Braided sections with loose waves below feel effortless and dreamy. The versatility is why this style has remained a prom favorite year after year—it’s timeless but never feels boring when you add your own twist.
1. The Classic Twisted Half Up
This is the foundational style that works for literally everyone, and it’s easier to achieve than you might think. Grab a section of hair from each side of your head at about ear level, then twist each section tightly as you work your way back toward the crown. Cross the two twisted sections at the back of your head and secure them together with bobby pins or an elegant hair clip.
Why This Style Works
The twisted half up is timeless because it instantly looks polished and intentional without requiring extensive styling skills. The twists add texture and visual interest that makes your hair look fuller, even if you have finer strands. This style works beautifully with both straight and wavy hair, and the twists help keep flyaways contained if humidity is a concern during your prom.
How to Make It Prom-Worthy
- Use a crystallized or metallic hair clip to elevate the style from casual to formal
- Tease the crown slightly before twisting for added volume and height
- Leave face-framing pieces loose around your face for softness
- Finish with a strong-hold spray to ensure the twists stay secure through dancing and photos
- Consider using matching bobby pins that blend with your hair color for seamless anchoring
Pro tip: Do a quick test run a few days before prom to see how long the twists hold and whether you need to secure them more firmly.
2. Braided Crown Half Up
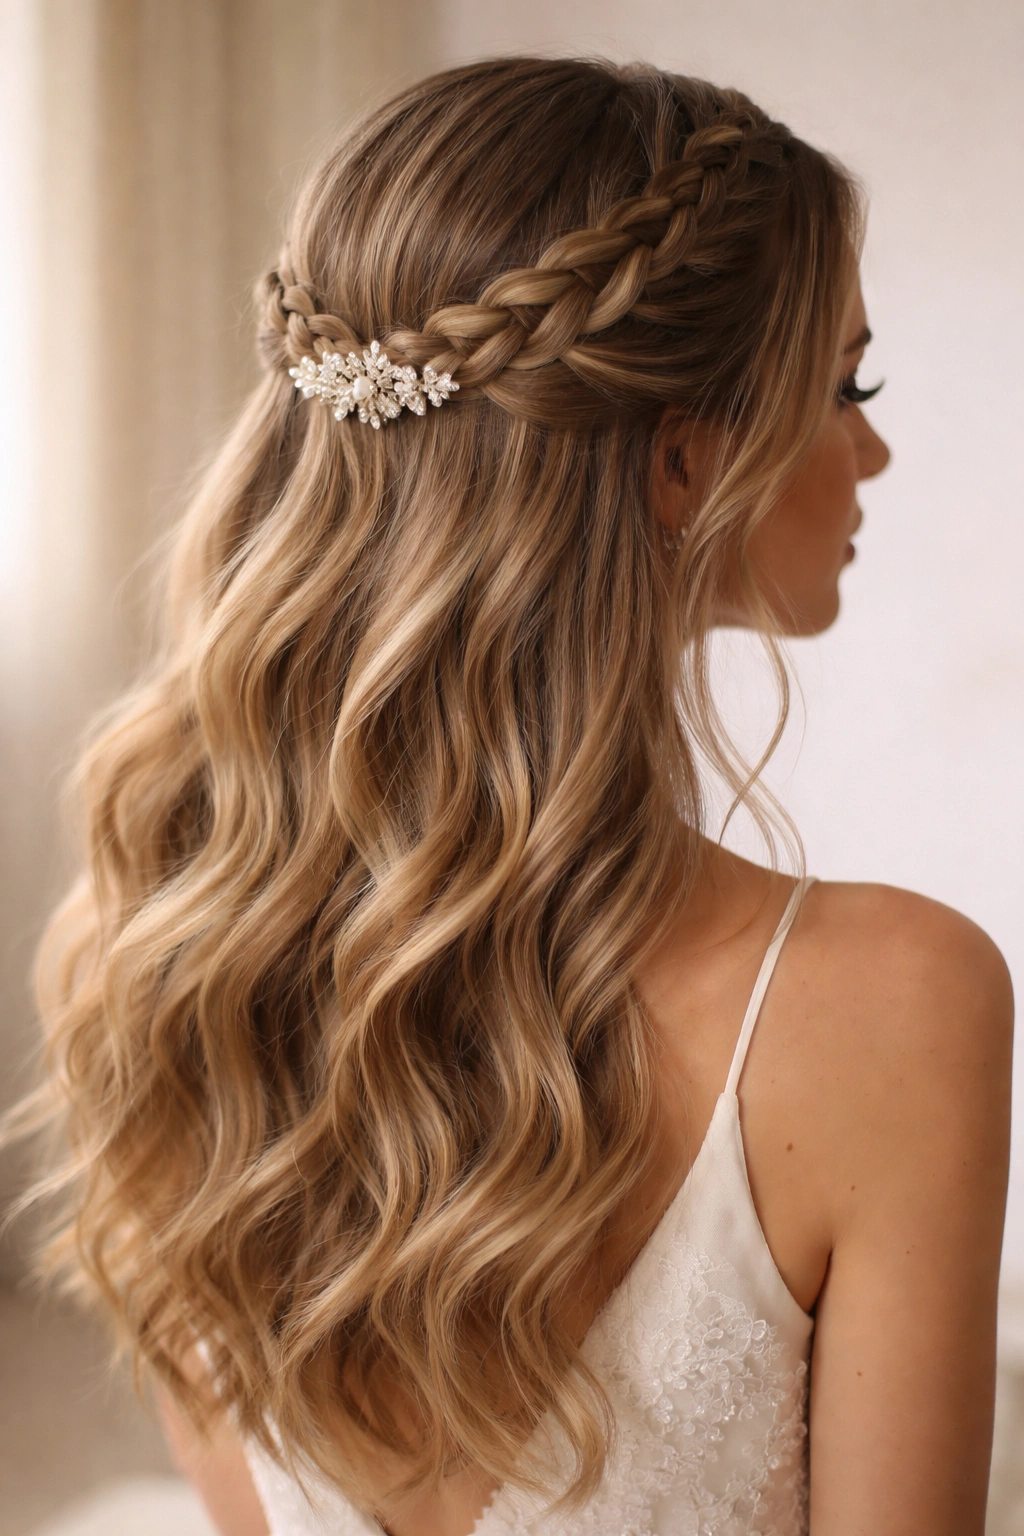
This style creates a sophisticated halo effect that photographs beautifully and works especially well if you have thick, healthy hair. Start with a Dutch braid (braid that goes under instead of over) on one side of your head, beginning near your temple and braiding back toward the crown. Do the same on the other side, then secure both braids together at the back with a decorative clip or elastic band.
What Makes This Style Special
The braided crown half up reads as intricate and special—it looks like you spent hours at the salon, when really it just takes practice and a few bobby pins. The Dutch braids frame your face beautifully and the style is incredibly secure, meaning you won’t need to worry about your hair falling apart mid-night. This style pairs gorgeously with up-dos or loose waves below.
Tips for a Flawless Braided Crown
- Start your braids higher on your head if you want them more visible, lower if you prefer them subtle
- Gently pull sections of the braid outward slightly after braiding for a fuller, more romantic look
- Use a braid spray or texturizing spray before braiding—it gives you grip and makes the braid hold better
- Secure the braids with clear elastics first, then cover with a decorative clip
- Practice the braiding pattern at least twice before prom night
Insider note: If your hair is slippery or fine, blow-dry a texturizing spray through it before you start braiding—it makes everything hold better without damaging your hair.
3. The Sleek Low Half Up Ponytail
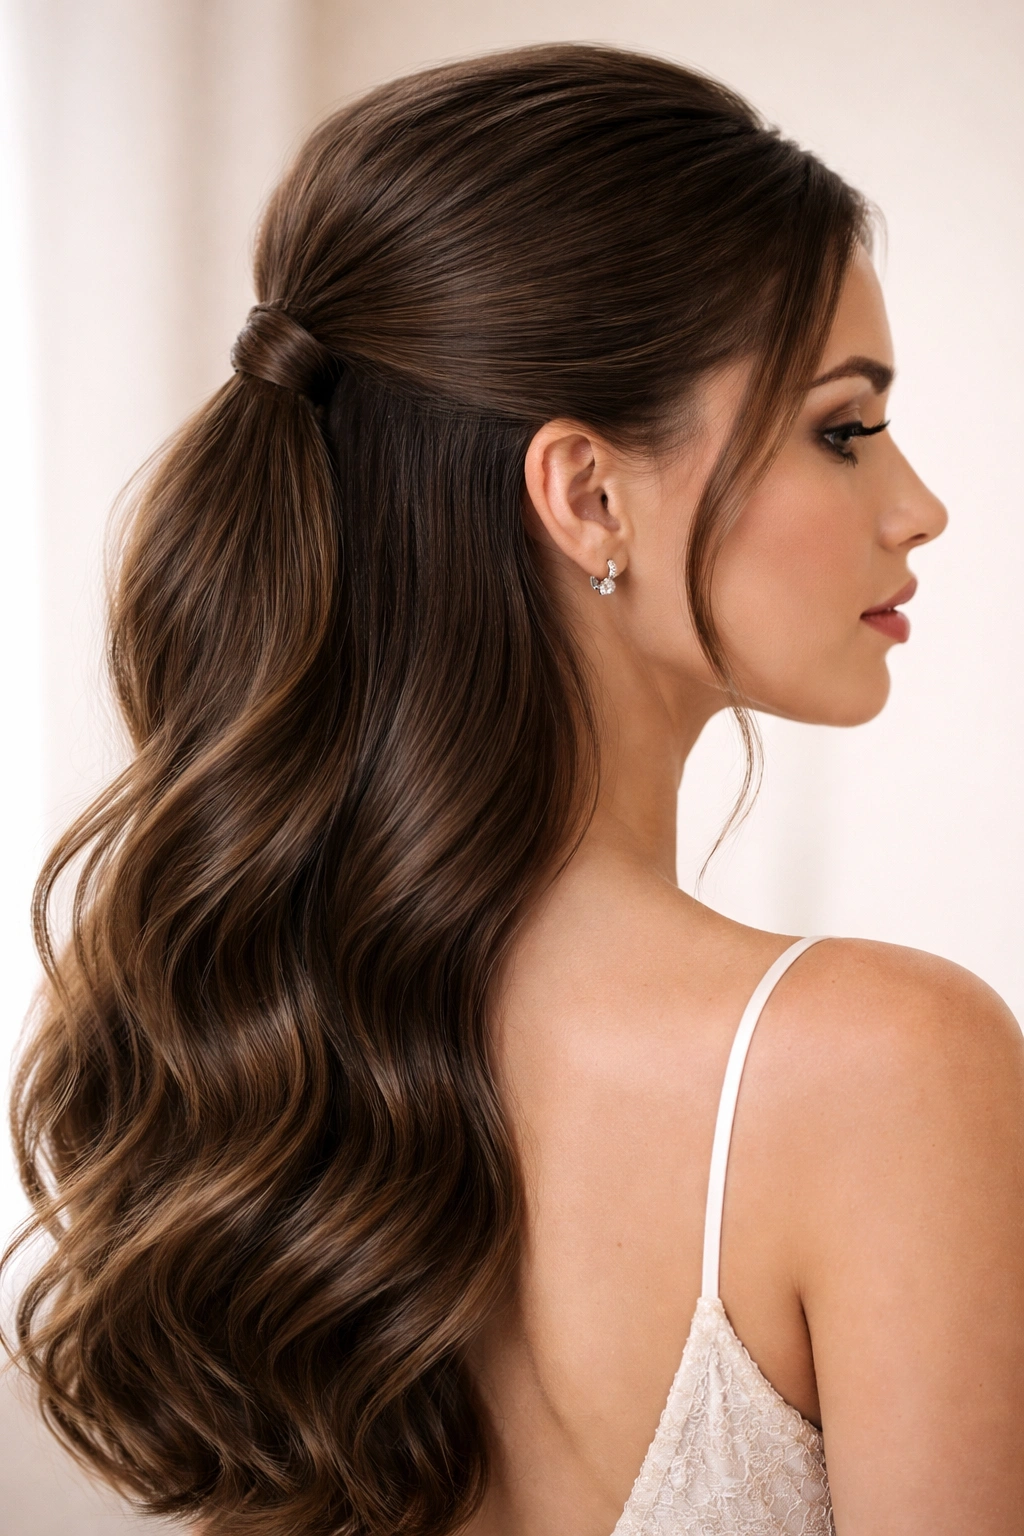
For a modern, minimalist vibe, try gathering a section of hair from the crown area and securing it into a low ponytail at the nape of your neck, leaving the majority of your hair down. The key is keeping everything smooth and polished on top with loose waves cascading below. Use a boar bristle brush to smooth any flyaways and finish with hairspray for that glass-like shine.
Why Less Is Sometimes More
This style appeals to anyone who wants formal elegance without the fuss of elaborate braiding or twisting. The low placement keeps the focus on your face and makeup, and the smoothness of the top section contrasts beautifully with textured waves below. It’s also exceptionally comfortable—there’s minimal tension on your scalp, which matters when you’re wearing this style for six or eight hours straight.
Execution Details
- Use a fine-tooth comb to smooth the crown section completely before securing
- Place the ponytail base very low—at or just below the nape—for that modern vibe
- Wrap a small section of hair around the elastic to hide it and create polish
- Consider adding a delicate metal cuff or piece of jewelry around the ponytail base
- Pair with soft waves or beachy curls below for maximum contrast and romance
Worth knowing: This style looks especially striking if you have hair length that reaches past your shoulders, as it shows off the volume and length of your waves.
4. Romantic Roses Half Up
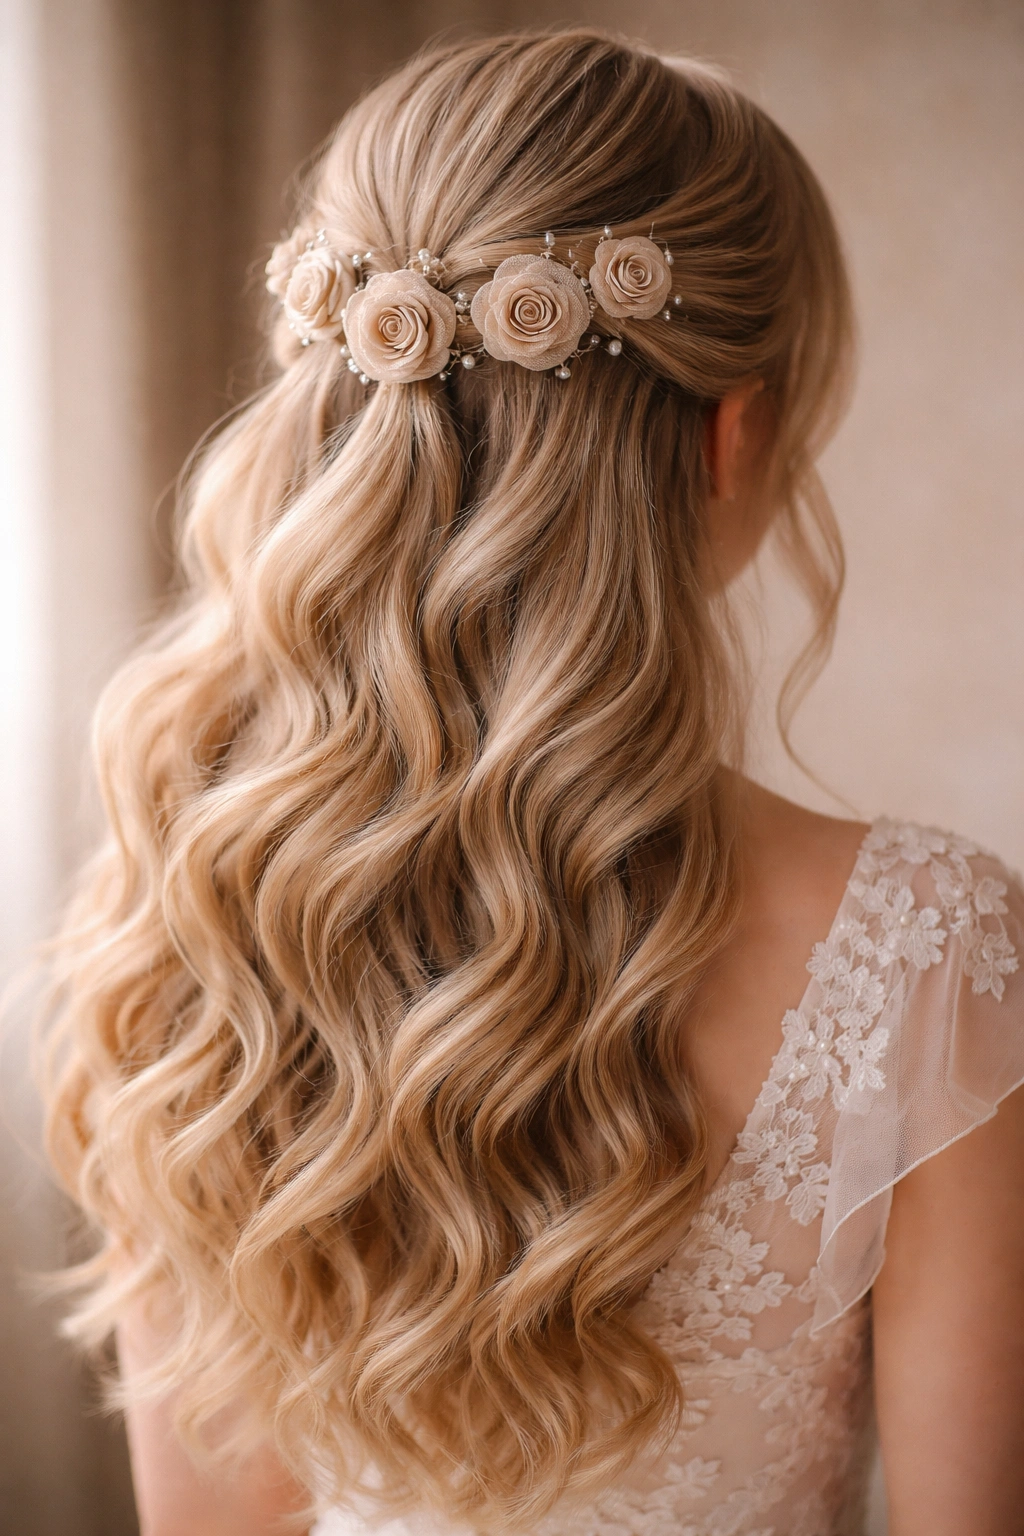
This style involves creating small, delicate loops or “roses” from sections of your hair and pinning them along the back of your head. Start by taking a small section of hair, curling it into a loop, and securing it with bobby pins. Repeat this across the back section of the half-up portion, creating a garden of roses that looks intricate and utterly romantic.
The Instagram-Worthy Effect
Floral hair roses transform a simple half up style into something that feels bridal or red-carpet worthy. Each rose catches light differently, creating dimension and movement even when you’re standing still. This style is a showstopper in photos and feels absolutely magical when you catch your reflection during the night.
Creating Perfect Hair Roses
- Use sections about the thickness of a pencil for roses that look defined but natural
- Curl each section lightly with a curling iron before looping and pinning for better hold
- Stagger the roses at different heights along the back for visual interest
- Secure each rose with two bobby pins for security—you want them staying put through dancing
- Fill in any gaps between roses with small accent pins or subtle baby’s breath clips
Pro tip: If you’re nervous about creating roses, practice on a wig head first—it takes the pressure off and lets you get the technique perfect before prom night arrives.
5. Sleek Ponytail with Face-Framing Layers
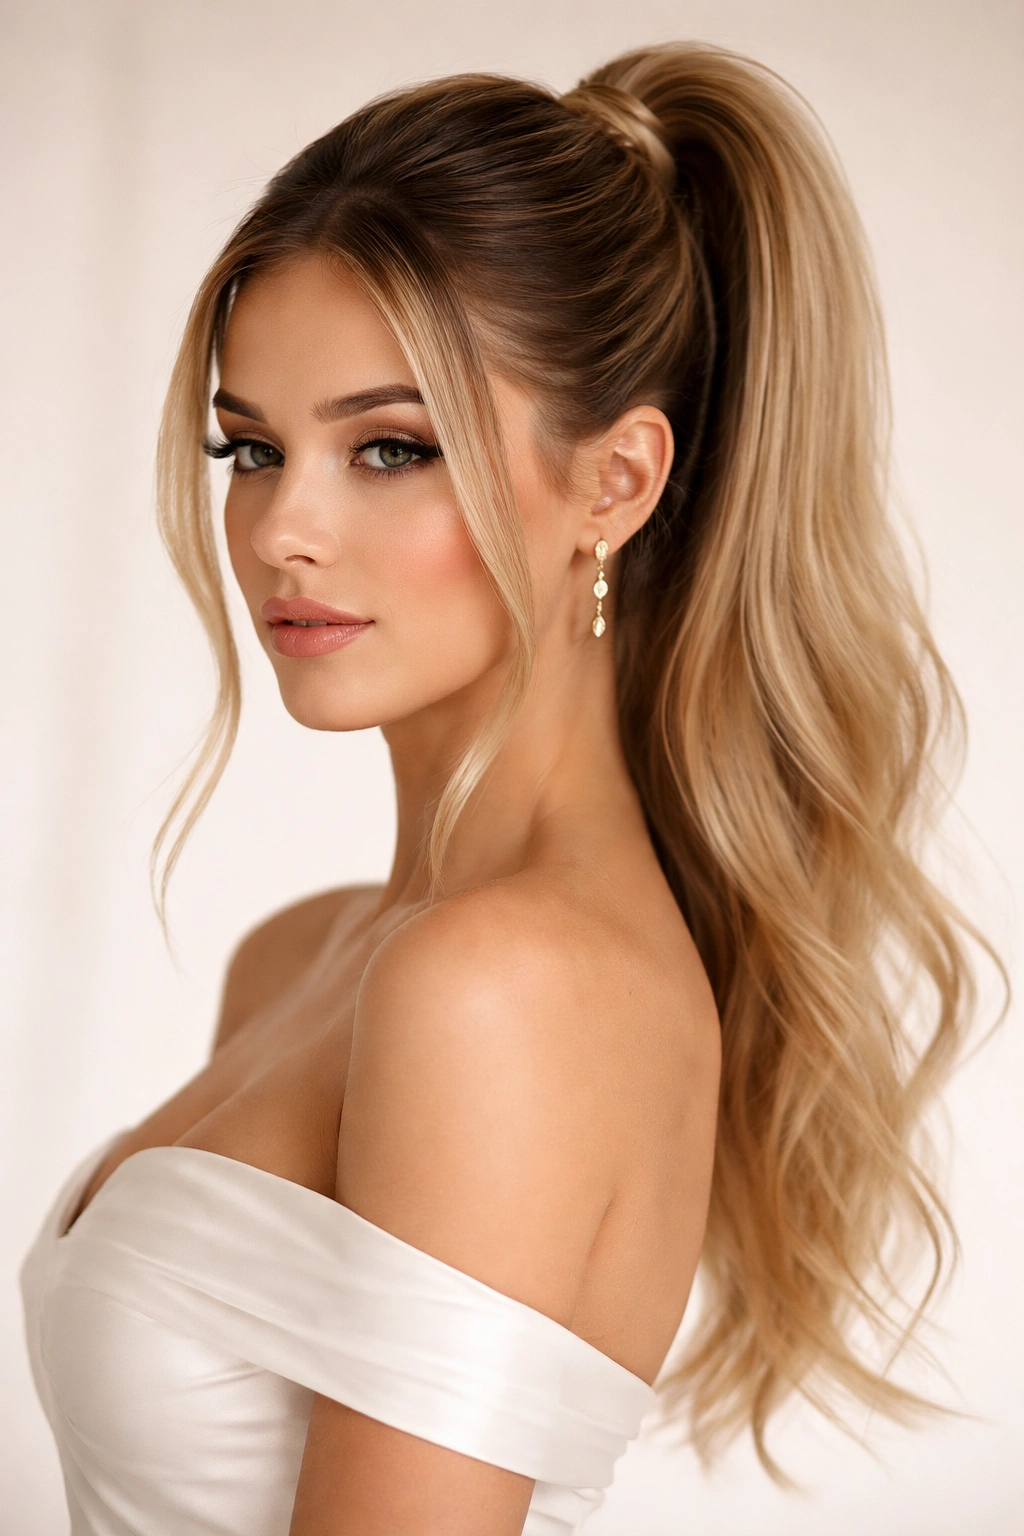
This style keeps things modern and chic by creating a tight, polished ponytail at the crown while leaving two thin pieces of hair loose on either side of your face. The face-framing pieces soften the overall look and add a touch of femininity to an otherwise structured style. Smooth everything back with a gel or edge control product for that clean, intentional appearance.
Why This Modern Take Works
The loose face-framing pieces prevent the style from feeling too severe or drag-queen-ish, which can sometimes happen with pulled-back styles. You get the neat, controlled look that photographs beautifully while maintaining softness around your face. This style is also incredibly practical—your hair is secure and won’t fall in your face while you’re dancing or eating dinner.
Perfecting the Details
- Use a smoothing cream on the face-framing pieces and smooth them back slightly for a soft curve
- Create a high, rounded ponytail at the crown for maximum polish
- Wrap a thin section of hair around the base of the ponytail to conceal the elastic
- Finish the face-framing pieces with light waves using a small curling iron for softness
- Use edge control along your hairline and around the face-framing pieces for that sleek, salon-finished look
Insider note: The key to this style looking expensive is making sure the crown section is completely smooth with zero bumps or flyaways. Take your time smoothing it back.
6. Double Dutch Braid Half Up
Channel boho elegance with two Dutch braids that start at your temples and travel back toward the crown, where they’re secured together. Unlike the braided crown style, these braids can sit slightly lower or higher depending on your preference. The two braids frame your face symmetrically and create a stunning focal point.
The Boho-Glam Effect
Double Dutch braids instantly elevate any style to festival-ready or cottage-core chic. They photograph beautifully from every angle and work especially well if you’re wearing your hair in waves or curls below. The symmetry of two matching braids feels intentional and put-together, even if the braids are slightly imperfect.
Styling Instructions
- Section off a piece of hair from each temple area approximately two inches back from your face
- Dutch braid each section (braiding under rather than over) moving backward toward the crown
- Gently pull the outer loops of each braid outward for a fuller, more romantic appearance
- Secure both braids together at the crown with bobby pins and a decorative clip
- Tease the crown area gently before braiding for added height and volume
- Leave the rest of your hair down in loose waves or curls
Pro tip: The fuller and puffier you can make the braids, the more romantic and special they’ll look. Don’t worry about perfection—slight imperfections actually add to the charm.
7. Half Up with Delicate Gold Wires
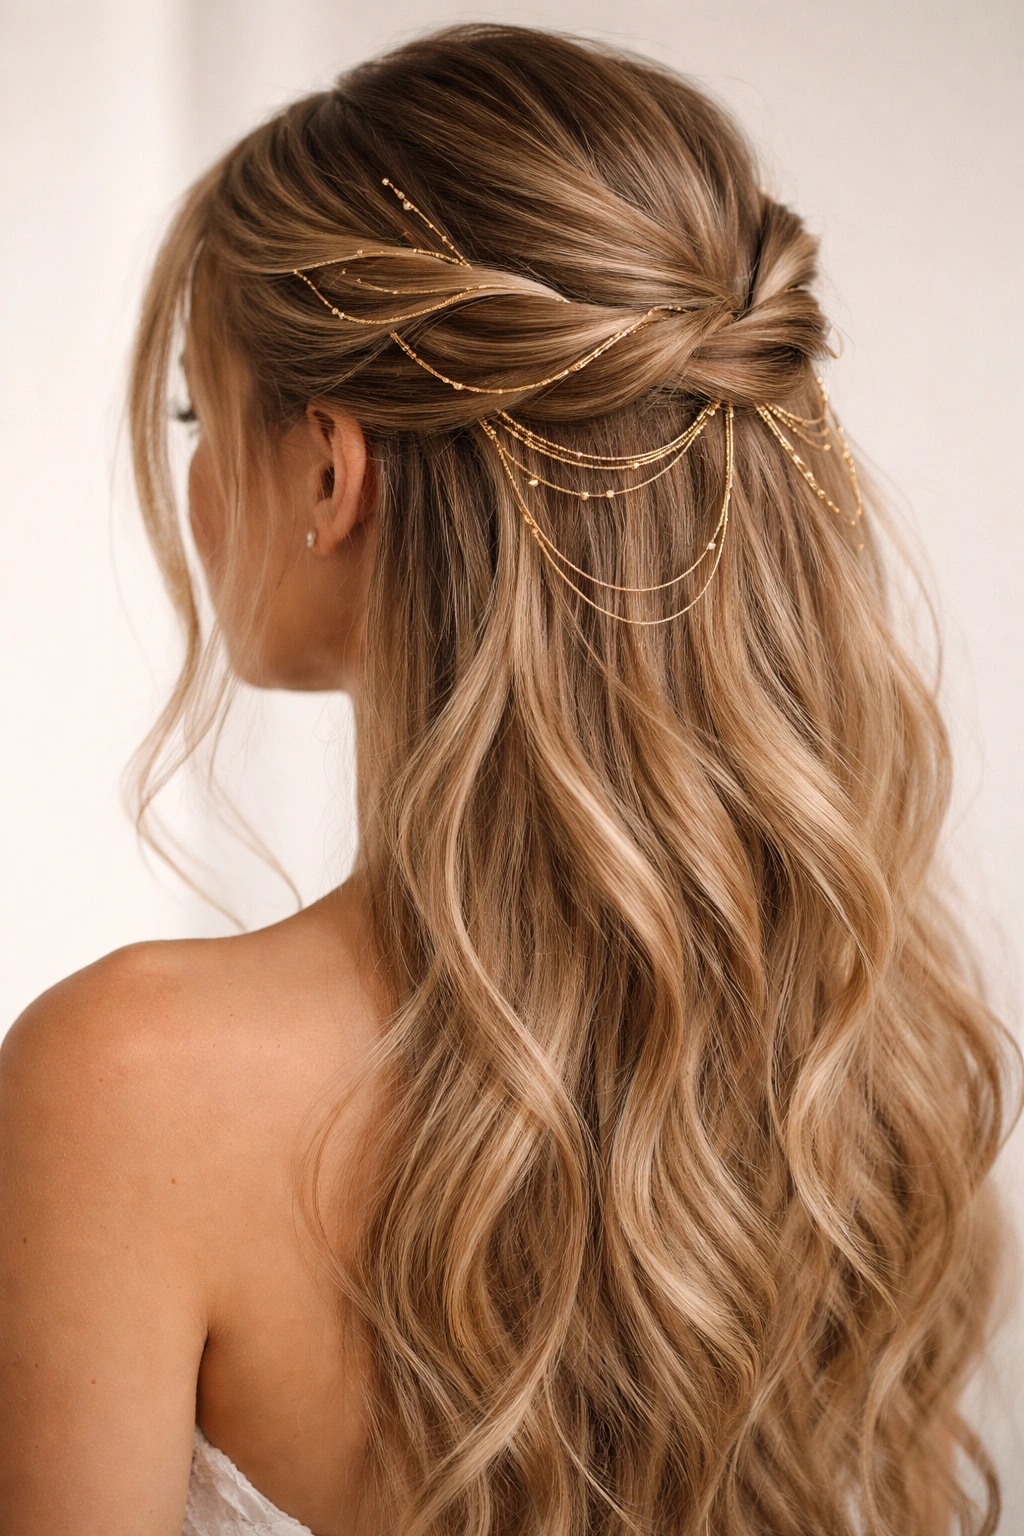
This contemporary style involves weaving thin gold (or silver) wire through sections of your half-up hair, creating a modern, almost ethereal effect. The wires catch light and add a futuristic touch that feels fresh and unexpected. You can weave them through twisted sections, braids, or simply through the top layer of your hair for subtle sparkle.
Why Metallic Details Matter
Hair wires have become increasingly popular because they add dimension and light-catching detail that photographs beautifully without feeling costume-y. Unlike heavy clips or combs, wires integrate into your hair seamlessly and create movement and shimmer. This style works especially well if you’re wearing a dress with metallic accents or if you want your hair to have an editorial, fashion-forward vibe.
Incorporating Wires Beautifully
- Choose wires that match your hair color (gold for warmer tones, silver for cooler tones)
- Weave wires through pre-twisted or pre-braided sections for better integration
- Space wires about an inch apart for visible sparkle without looking overdone
- Curl the bottom sections of your hair in waves so the wires move and catch light
- Secure wires gently with bobby pins so they don’t slip or feel uncomfortable
- Test wires in advance to make sure they don’t snag or pull at your scalp
Insider note: If wires feel uncomfortable or make you nervous, skip them—the half-up style is beautiful on its own, and comfort matters more than any accessory.
8. The Messy Bun Half Up
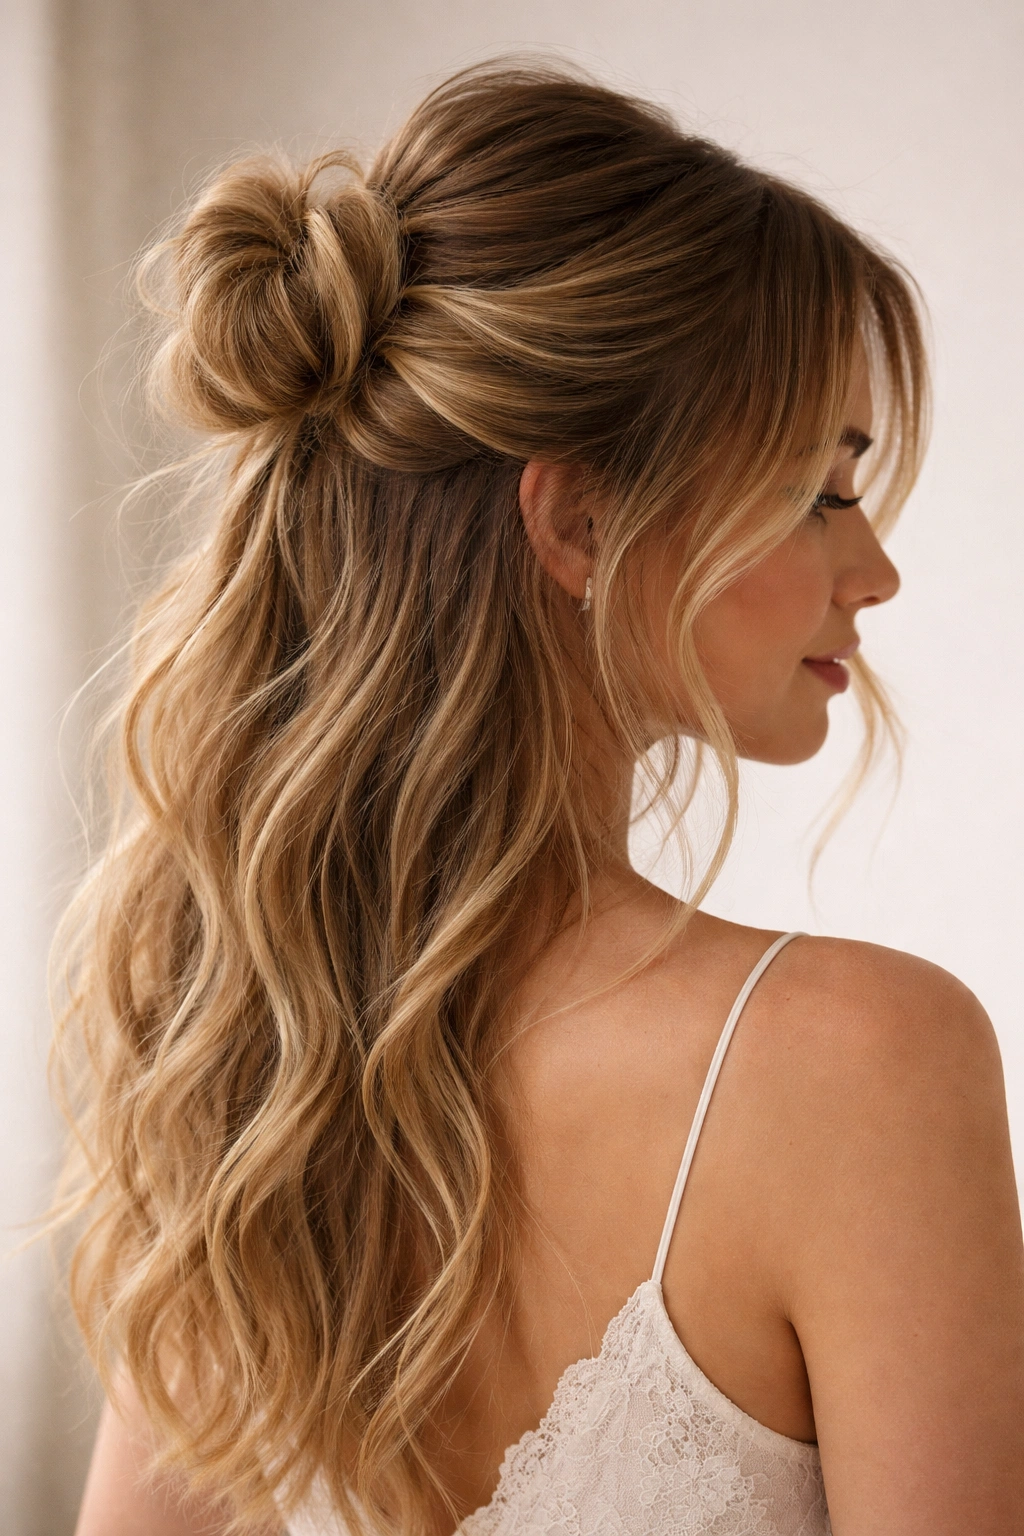
For a deliberately relaxed, effortless vibe, create a half-up style where the secured section is fashioned into a soft, intentionally messy bun rather than hanging straight down. Pull a section from the crown, twist or braid it loosely, then loop and secure it into a bun that has pieces falling out and flyaways visible. This style says “I’m confident enough not to be perfect,” and it’s incredibly chic.
Embracing Controlled Imperfection
The messy bun half up works beautifully if you want to feel relaxed and comfortable while still looking intentional and styled. It’s forgiving (imperfections are built in), it’s secure (the bun won’t fall out even if you dance hard), and it photographs like you just rolled out of a five-star hotel. This style pairs perfectly with minimal makeup or bold, statement makeup—it adapts to whatever vibe you’re going for.
Creating the Perfect Messy Look
- Start with slightly textured or second-day hair—it holds the messy look better than freshly washed, smooth hair
- Loosen your ponytail slightly after securing so pieces fall around your face naturally
- Pull small sections out from the bun deliberately, leaving some pieces longer than others
- Use bobby pins to secure flyaways and loose pieces rather than trying to smooth everything down
- Tease the base of the bun for volume and dimension before securing it fully
- Finish with a light hairspray (not heavy, or it’ll crunch and ruin the soft effect)
Worth knowing: The best messy buns actually take time and intention to create—the “I just threw this together” look requires planning and several bobby pins.
9. Scarf-Wrapped Half Up
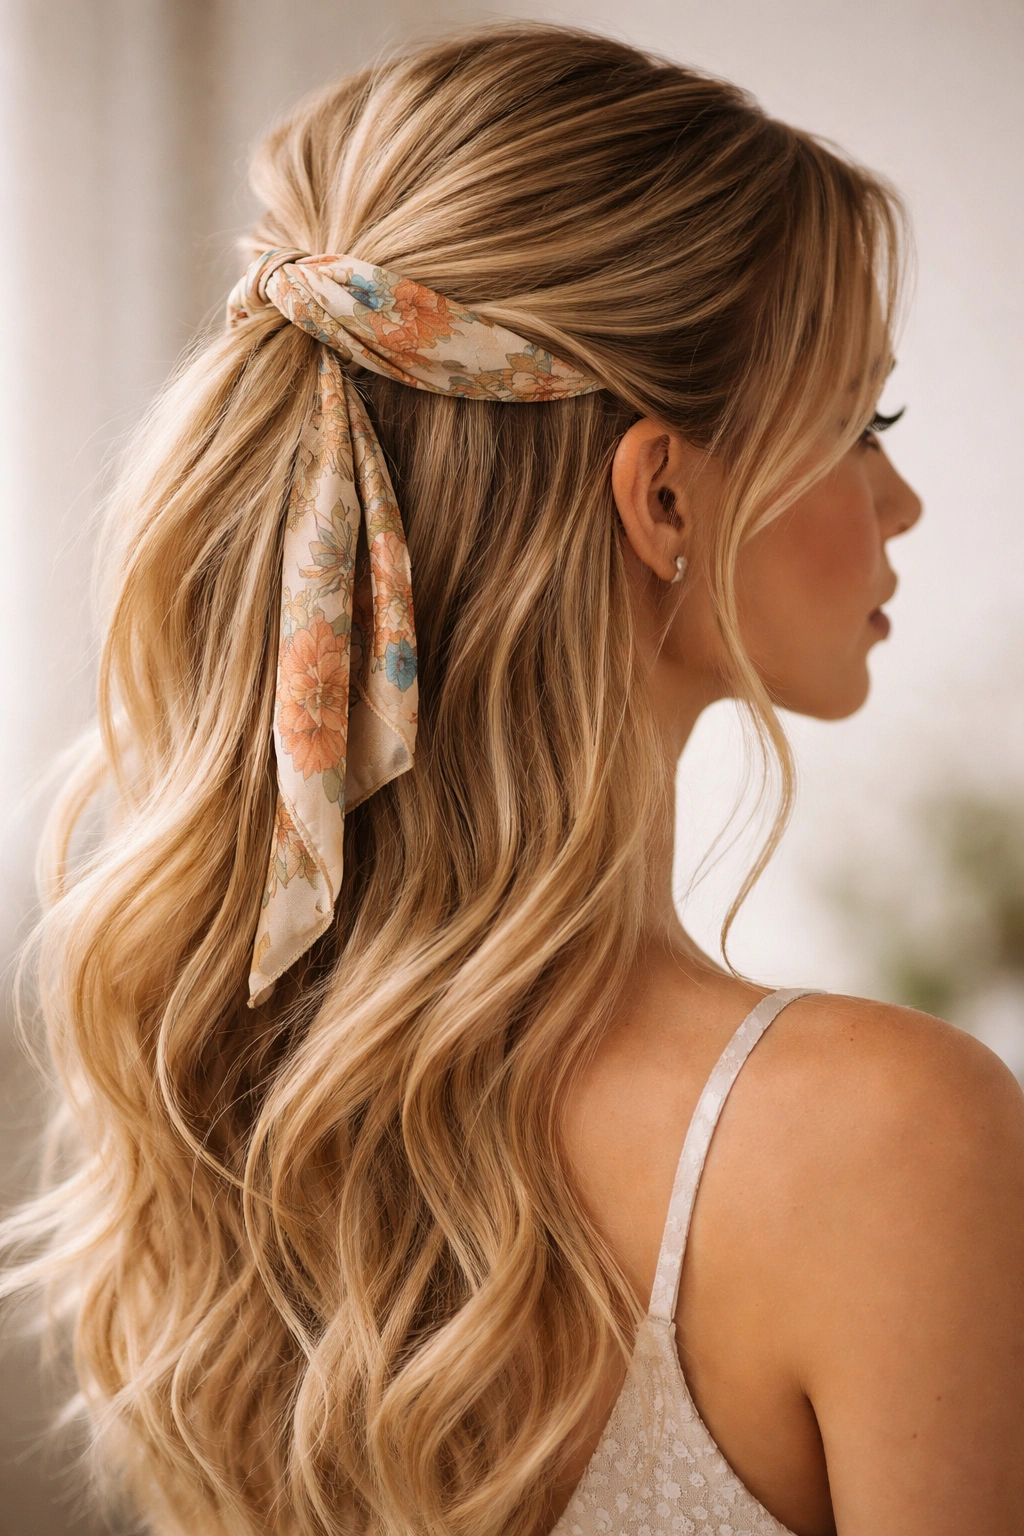
Add unexpected color and texture by securing your half-up section with a decorative scarf instead of a traditional hair clip or elastic. You can wrap the scarf around the base of your half-up ponytail, tie it through a twisted section, or even incorporate it into a braid. Choose a scarf that complements your dress or pick a contrasting color for maximum drama.
Why Scarves Elevate the Whole Look
Scarf-wrapped hair instantly feels more fashion-forward and personalized than a standard look. It adds color coordination opportunities and texture that makes your style feel intentional and put-together. Scarves also double as a tool—they can help you control texture, add volume, and tie sections together while looking intentionally styled rather than merely functional.
Working with Scarves
- Choose a scarf that’s approximately 2-3 inches wide for easy manipulation
- Fold the scarf lengthwise to create a band about 1-1.5 inches wide
- Use it to tie your half-up section, wrapping it around the ponytail base or through braids
- Tie the scarf ends together at the base of the half-up section, leaving them visible for a pop of color
- Consider using a silk or satin scarf—it prevents friction and looks more luxurious than cotton
- Pair with simple, loose waves below to let the scarf detail be the star
Pro tip: Practice tying your scarf a few days before prom to make sure you like the finished effect and that the scarf doesn’t slip throughout the night.
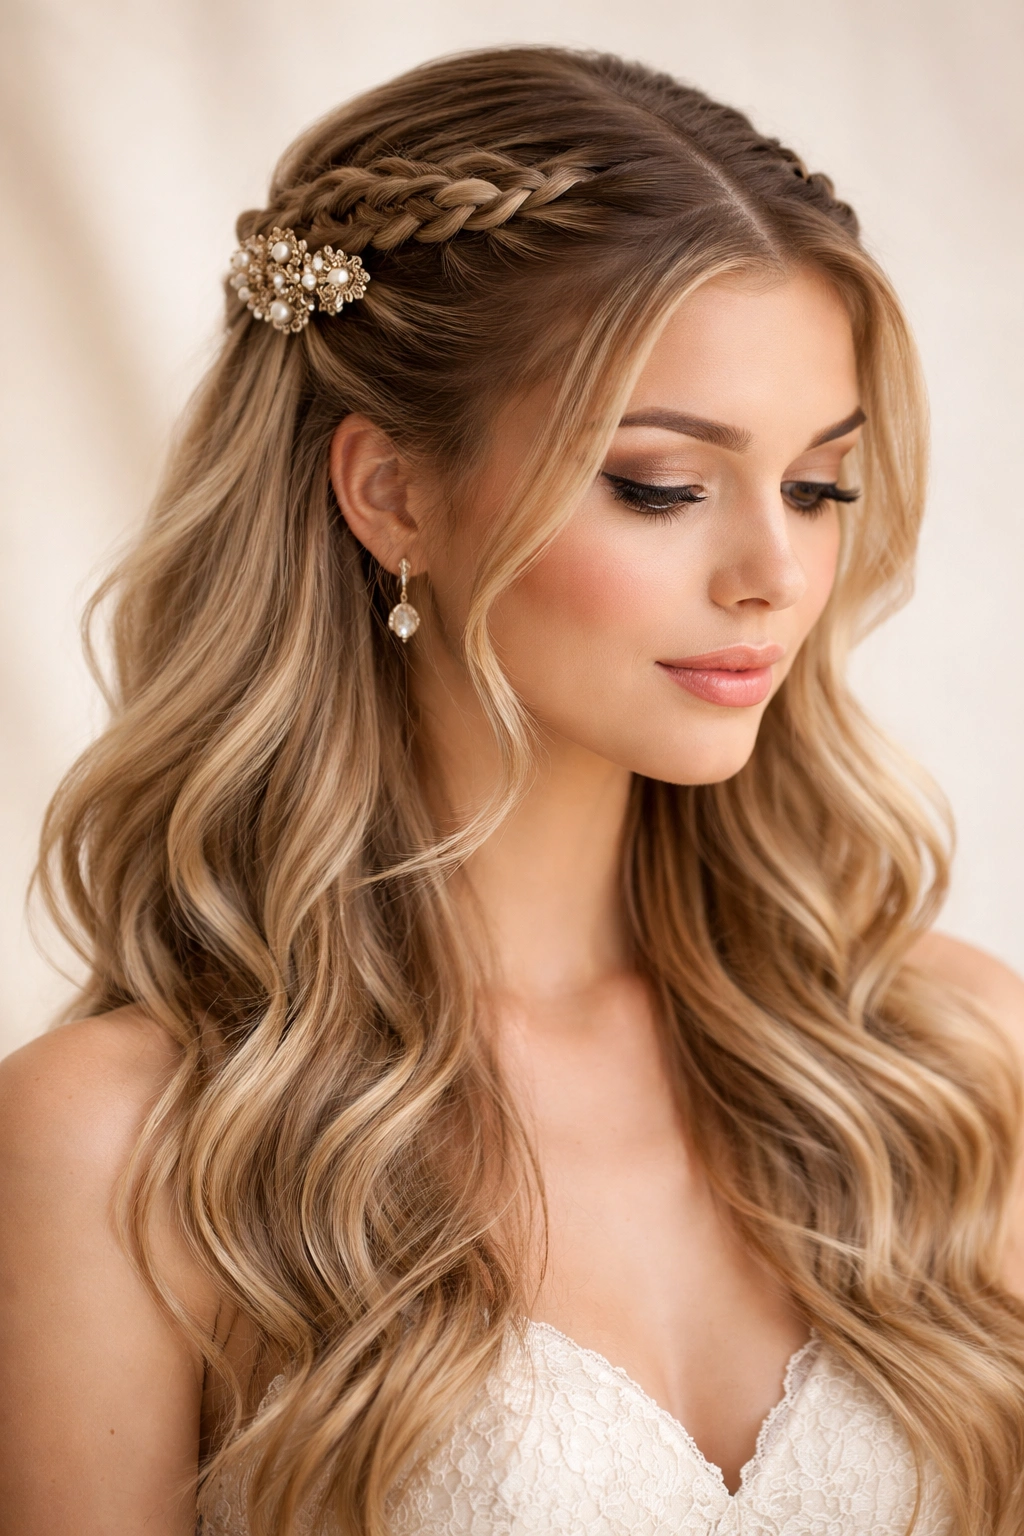
10. Pearl Pins and Half Up Elegance
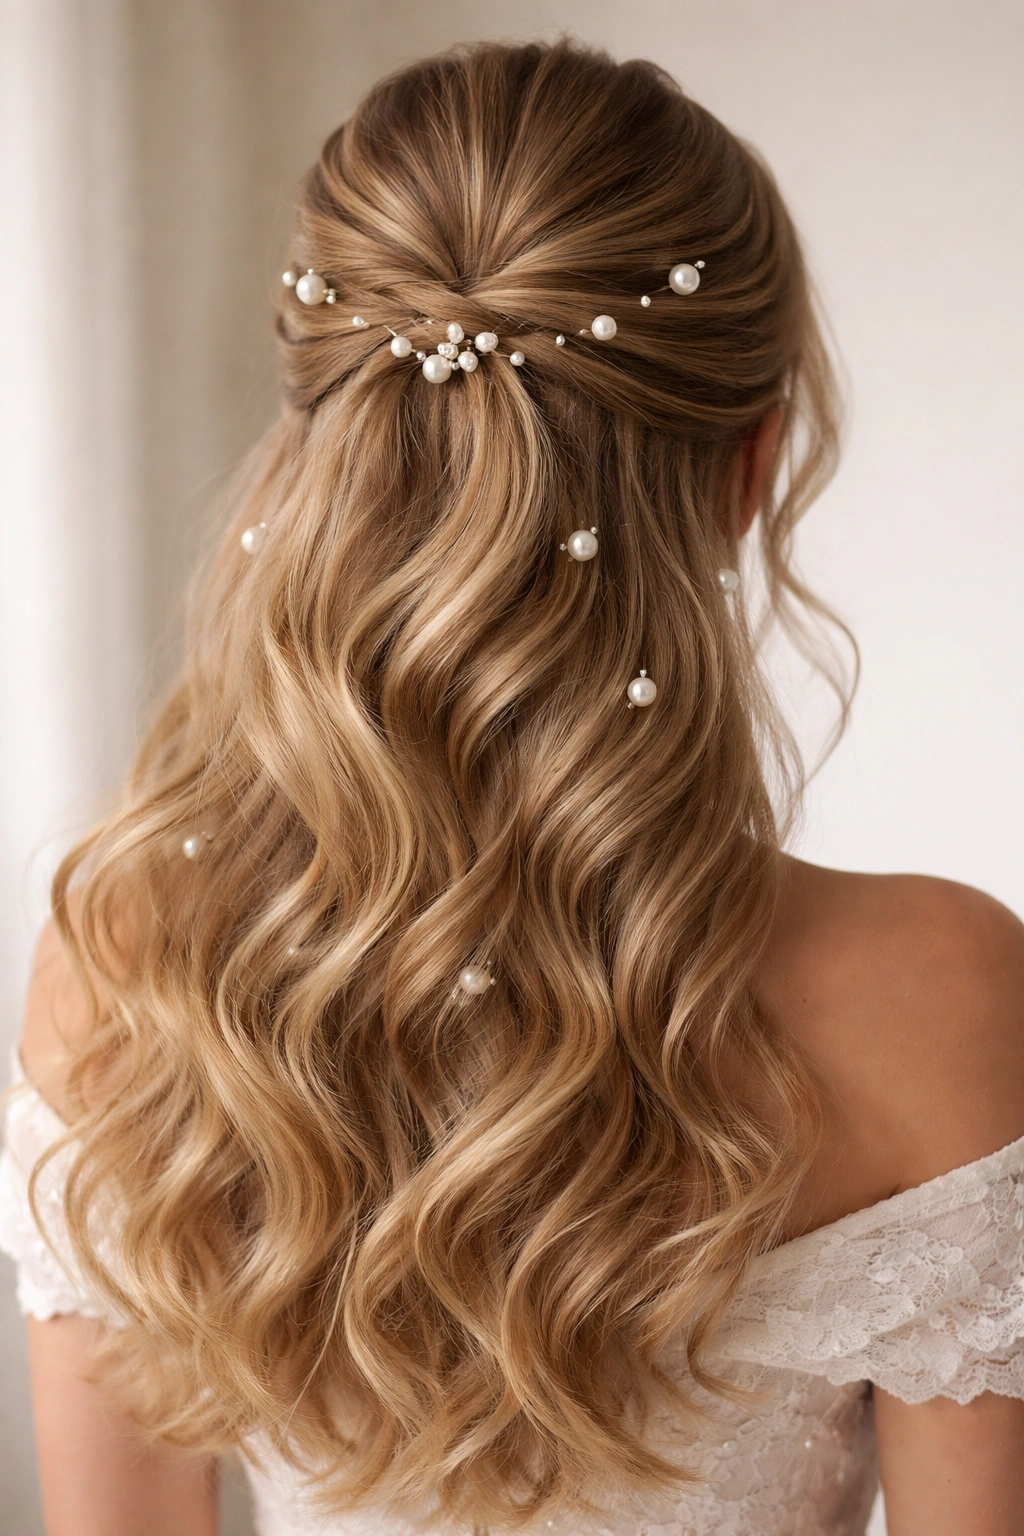
Create an ultra-feminine, vintage-inspired look by taking a simple half-up section and securing it with multiple delicate pearl pins rather than a single clip. Scatter the pins throughout the back section—some securing the ponytail, others placed purely for decoration among your waves. Pearl pins add a touch of old-world glamour that feels timeless and romantic.
The Vintage Luxury Factor
Pearl pins feel inherently elegant and expensive, instantly elevating even a simple half-up style to look like you had your hair done at a high-end salon. They work beautifully with formal dresses, romantic makeup, and classic styling. The scattered placement of pins (both functional and decorative) creates visual interest and catches light as you move.
Placing Pearl Pins Effectively
- Start with a traditional half-up ponytail as your base
- Use 3-4 functional pearl pins to secure the ponytail and anchor it firmly
- Add 2-3 additional decorative pins placed among the waves below or around the ponytail base
- Vary the size of pins—a mix of larger and smaller pins looks more intentional than all the same size
- Choose pearl pins in a finish that matches your jewelry (white pearls, rose gold, champagne)
- Distribute pins asymmetrically—it looks more modern than lining them up in a perfectly straight line
Insider note: If you can’t find enough pearl pins that match, mix pearl pins with delicate crystal pins or diamond-shaped pins for a coordinated but not matchy-matchy effect.
11. The Twisted Wrap-Around Half Up
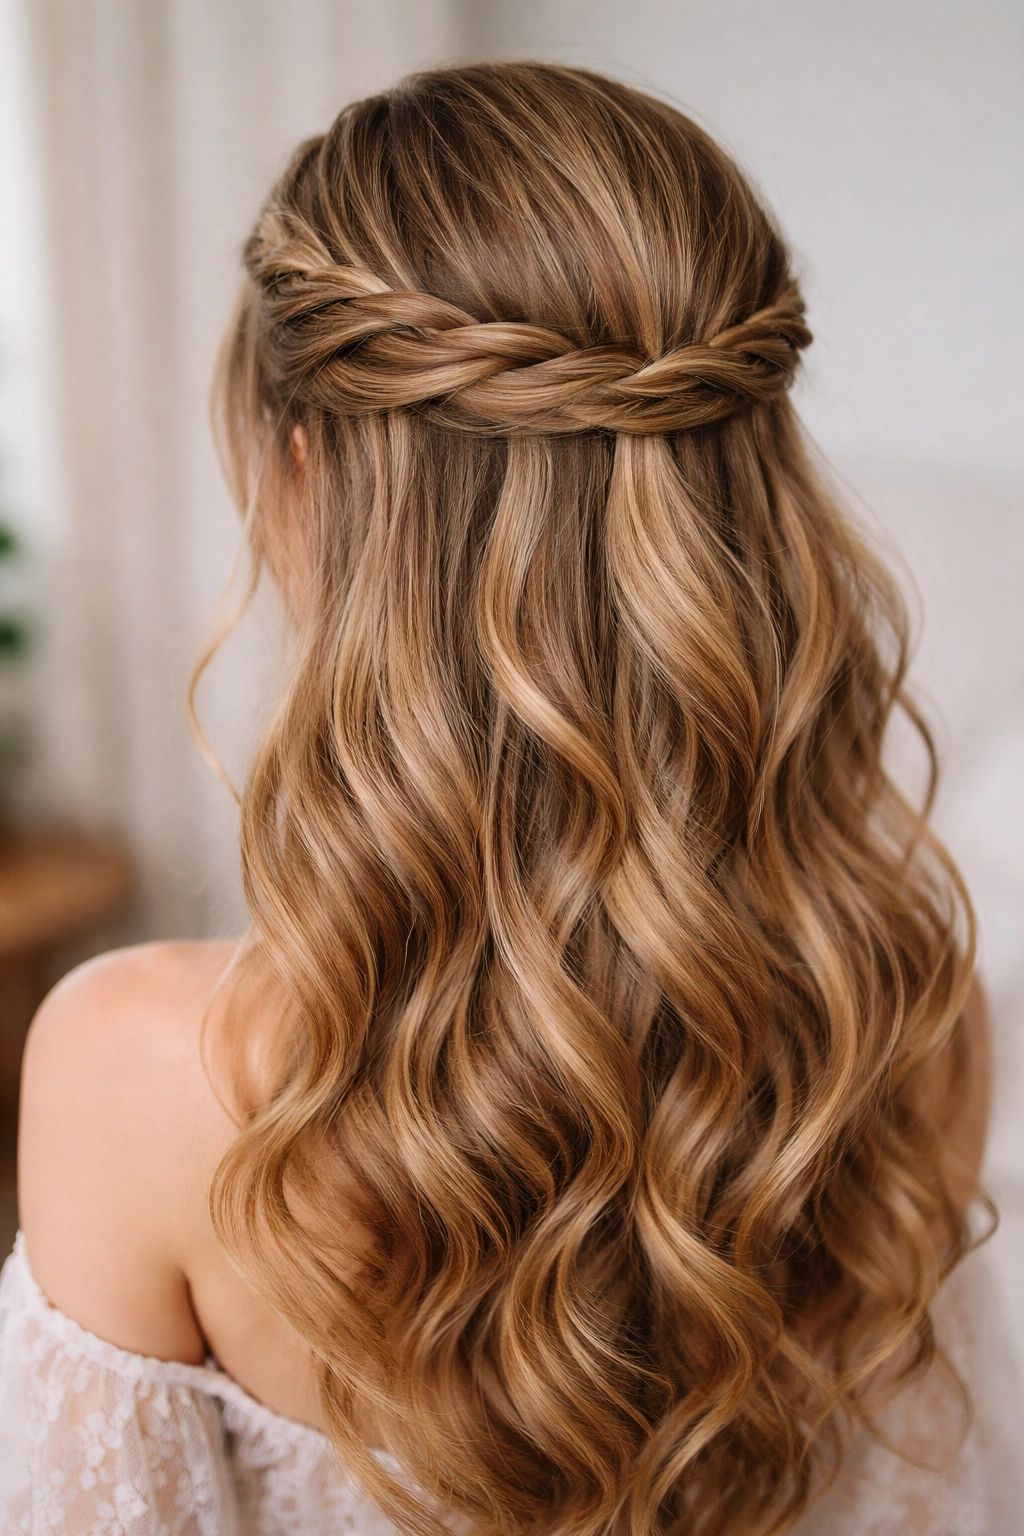
Take your half-up style up a notch by twisting the sections around the crown and wrapping them entirely around the head in a crown-like formation before securing. This style creates a halo effect and makes it look like you have way more hair volume than you do. It’s intricate-looking but surprisingly achievable with practice.
Creating a Crowning Effect
The wrapped half-up style photographs like an ornate crown and feels absolutely regal and special. It works beautifully if you’re wearing a dress without an elaborate neckline—the focus stays on your stunning crown of twisted hair. This style is also incredibly secure; all those twisted sections wrapped around your head won’t come loose even during vigorous dancing.
Executing the Wrap-Around Technique
- Section off a generous portion of hair from the crown area
- Divide that section into two or three parts and twist each part tightly
- Wrap the first twisted section around the back of your head like a headband, securing with bobby pins as you go
- Wrap the second section above or below the first, layering the twisted sections
- Continue until you’ve created a wrapped crown effect that makes your head look bigger and more voluminous
- Gently pull sections of each twist outward for a fuller appearance
- Tease the crown area before starting for maximum volume
Worth knowing: This style requires good bobby-pinning skills and patience, so practice it multiple times before prom night to build confidence.
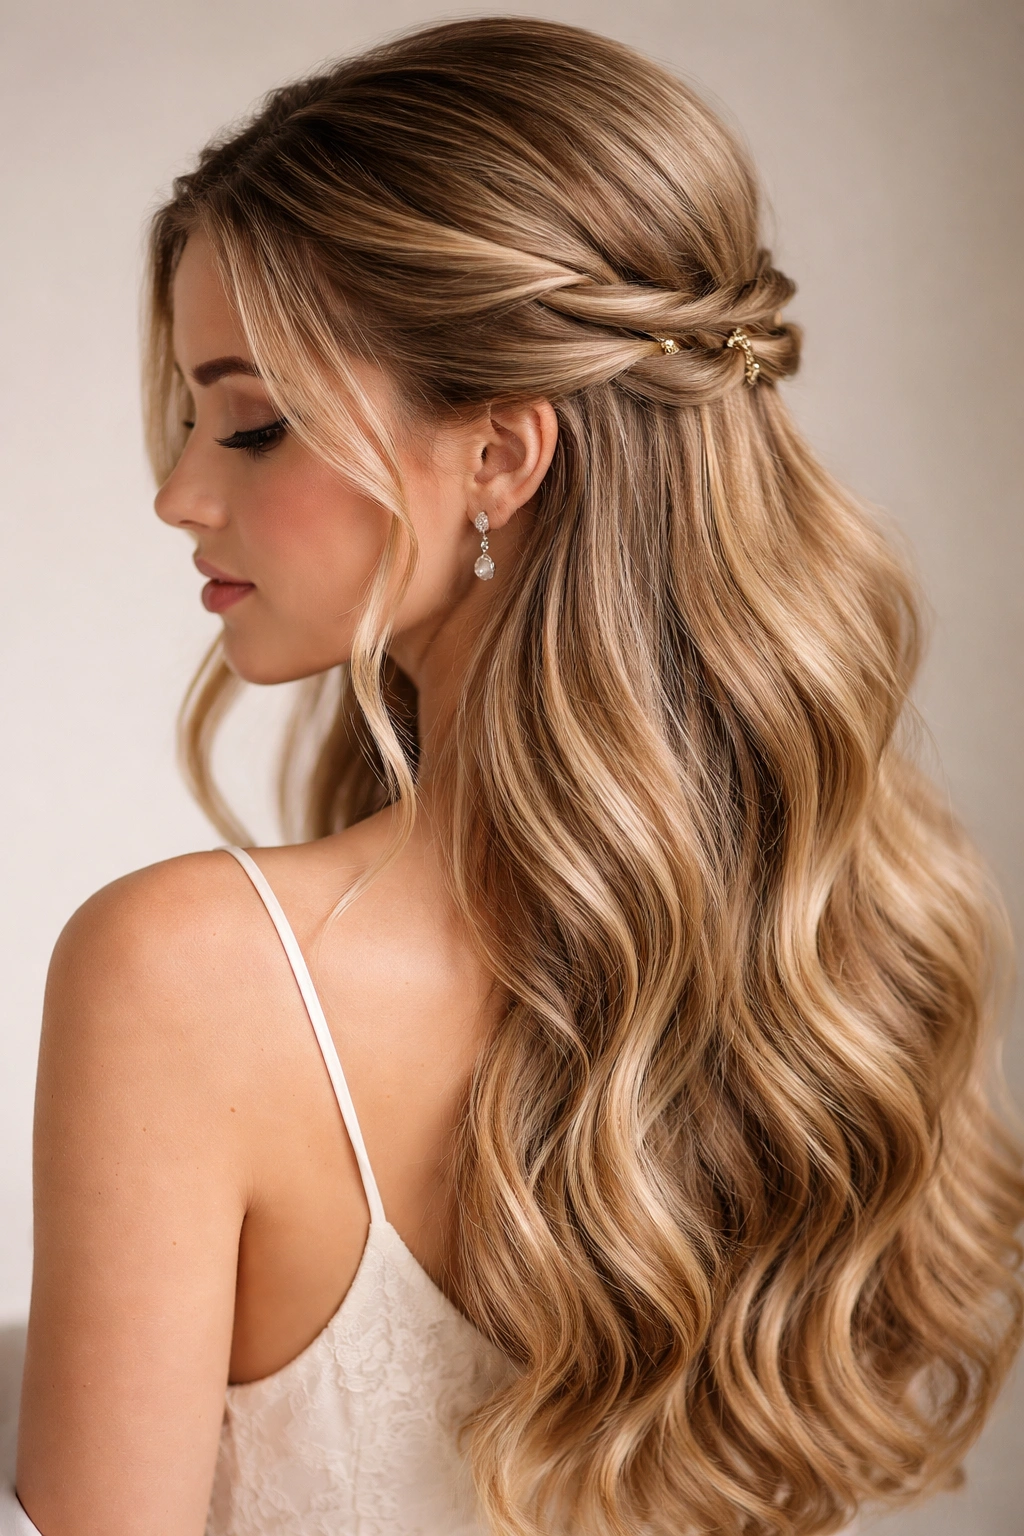
12. Sleek Side Part Half Up
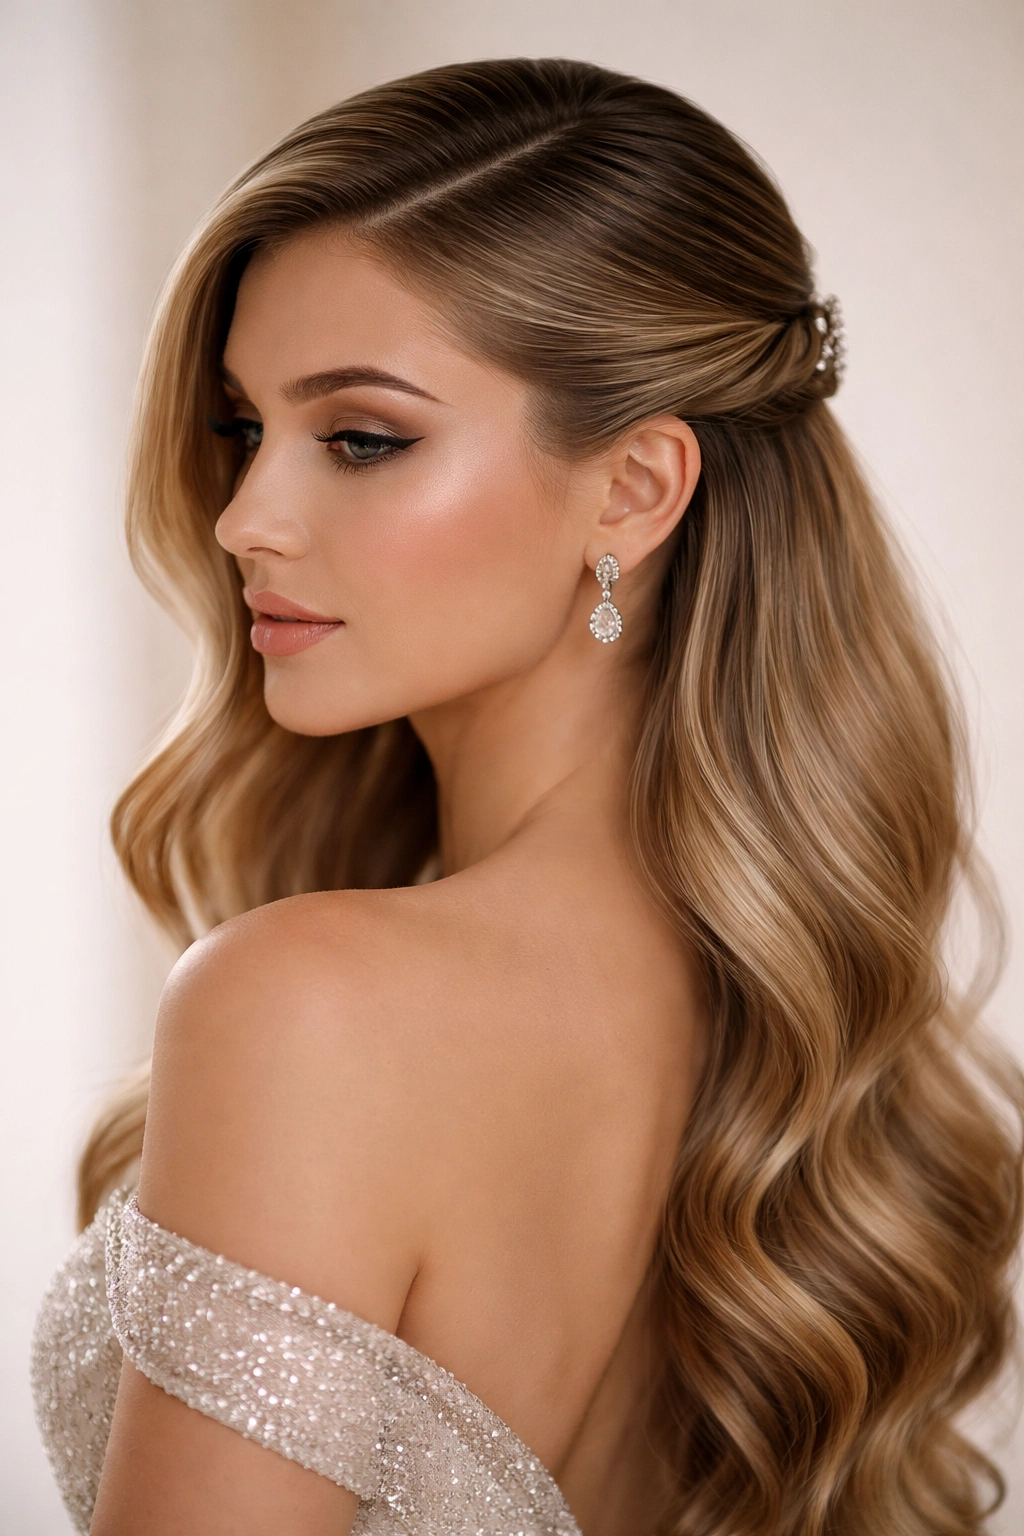
Create a half-up style with dramatic asymmetry by using a deep side part and securing your half-up section slightly off-center. Sweep one side of your hair smoothly across to the back while twisting or braiding a section from the other side, then secure both together at the back. This asymmetrical approach feels modern and directional.
The Drama of Asymmetry
Asymmetrical hairstyles photograph beautifully and convey confidence and style. The side-part half-up feels directional and fashion-forward while remaining romantic and wearable. It works especially well if you have features you want to highlight—the deeper side part draws attention to one side of your face, so you can style makeup and hair to enhance your best angles.
Creating Dramatic Asymmetry
- Create a deep side part, making sure one side has significantly more hair than the other
- Smooth the smaller side back smoothly using a fine-tooth comb and smoothing cream
- Take a twisted or braided section from the larger side
- Secure both sections together at the back with a decorative clip or elastic
- Leave more length in the waves on the fuller side for dramatic contrast
- Use edge control to keep the smoothed side sleek and polished throughout the night
Insider note: Asymmetrical styles work best if you have balance in your face shape. If you have a very round or very long face, keeping things more symmetrical might be more flattering.
13. Half Up with Soft Tendrils
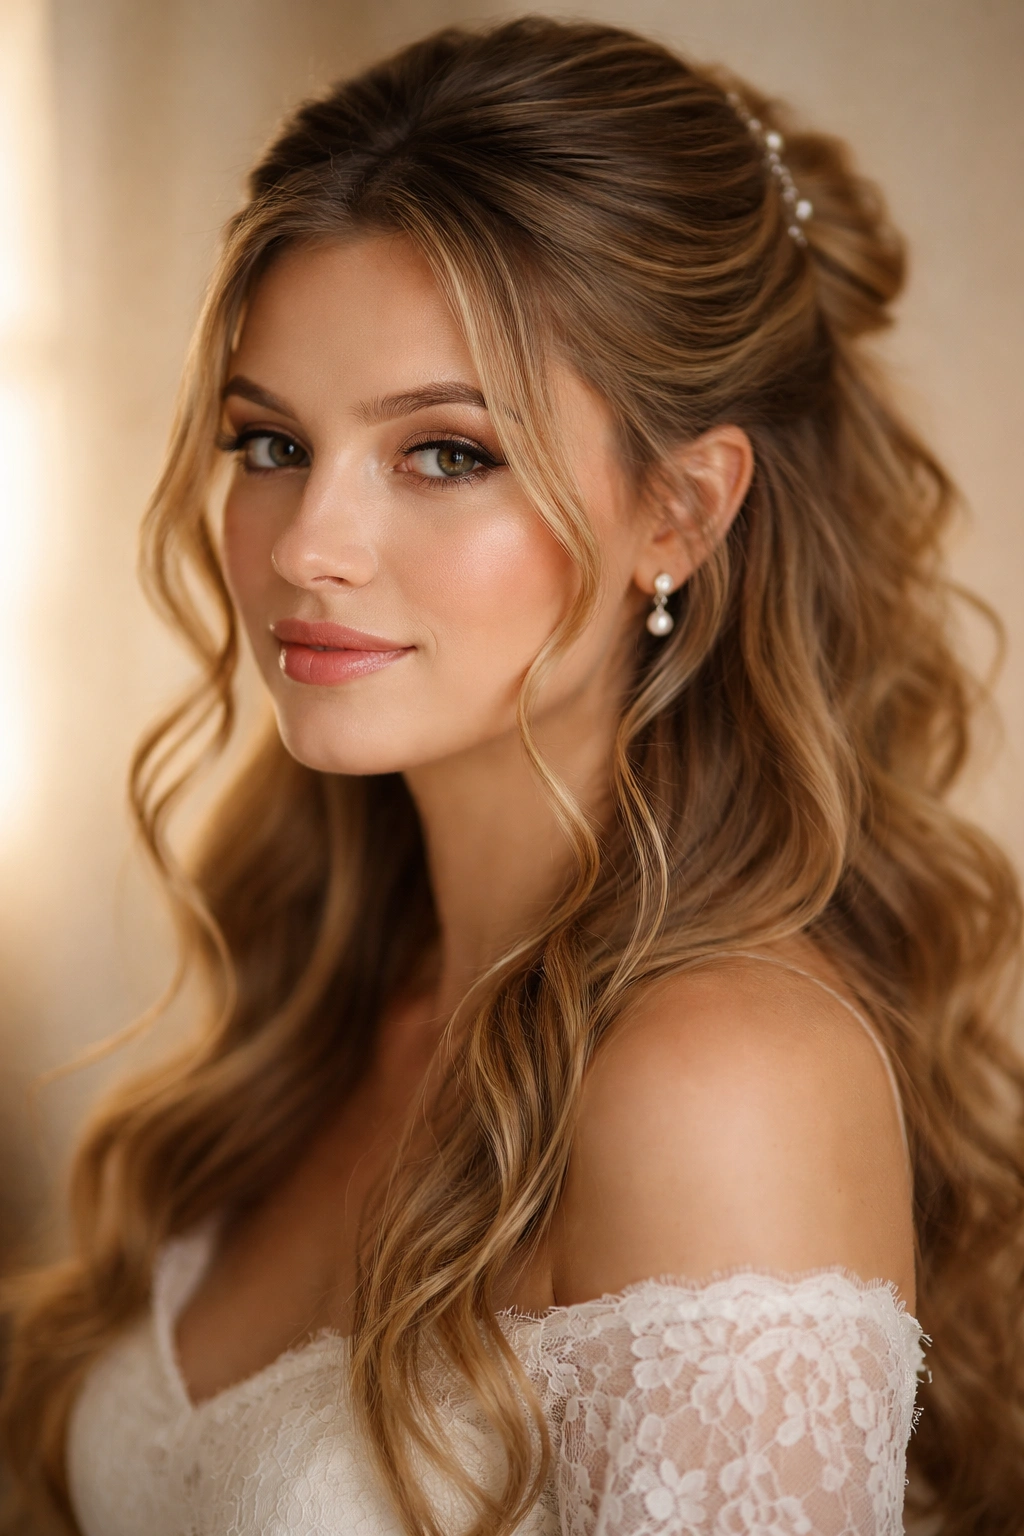
Keep the style romantic and effortless by creating a half-up section and leaving delicate, wispy tendrils loose around your face. Curl these face-framing pieces into soft spirals rather than leaving them completely straight. The combination of a secured half-up with loose, curly tendrils feels undone and romantic—like you’re a heroine in a period drama.
Softness Through Contrast
Tendrils work because they soften the lines of a half-up style. They frame your face beautifully, draw attention to your features, and create movement. Unlike chunky face-framing pieces, tendrils are delicate and subtle—they add romance without overwhelming your overall look. They also have a practical benefit: they help disguise any flyaways or imperfections around your face.
Creating Perfect Tendrils
- Start with one or two very thin sections on each side of your face—about the thickness of a pencil
- Leave these sections out when creating your half-up
- Curl the tendrils individually using a small-barrel curling iron
- Wrap the curl loosely around the barrel and hold for 5-10 seconds, then release
- Let the curls set for a moment before running your fingers through them to relax them slightly
- Use a light hairspray to hold the waves without crunching them
Pro tip: The longer you leave the curled tendrils alone after curling, the longer they’ll last. Give them at least 10 minutes to fully set before you start moving around.
14. Glittery Twist Half Up
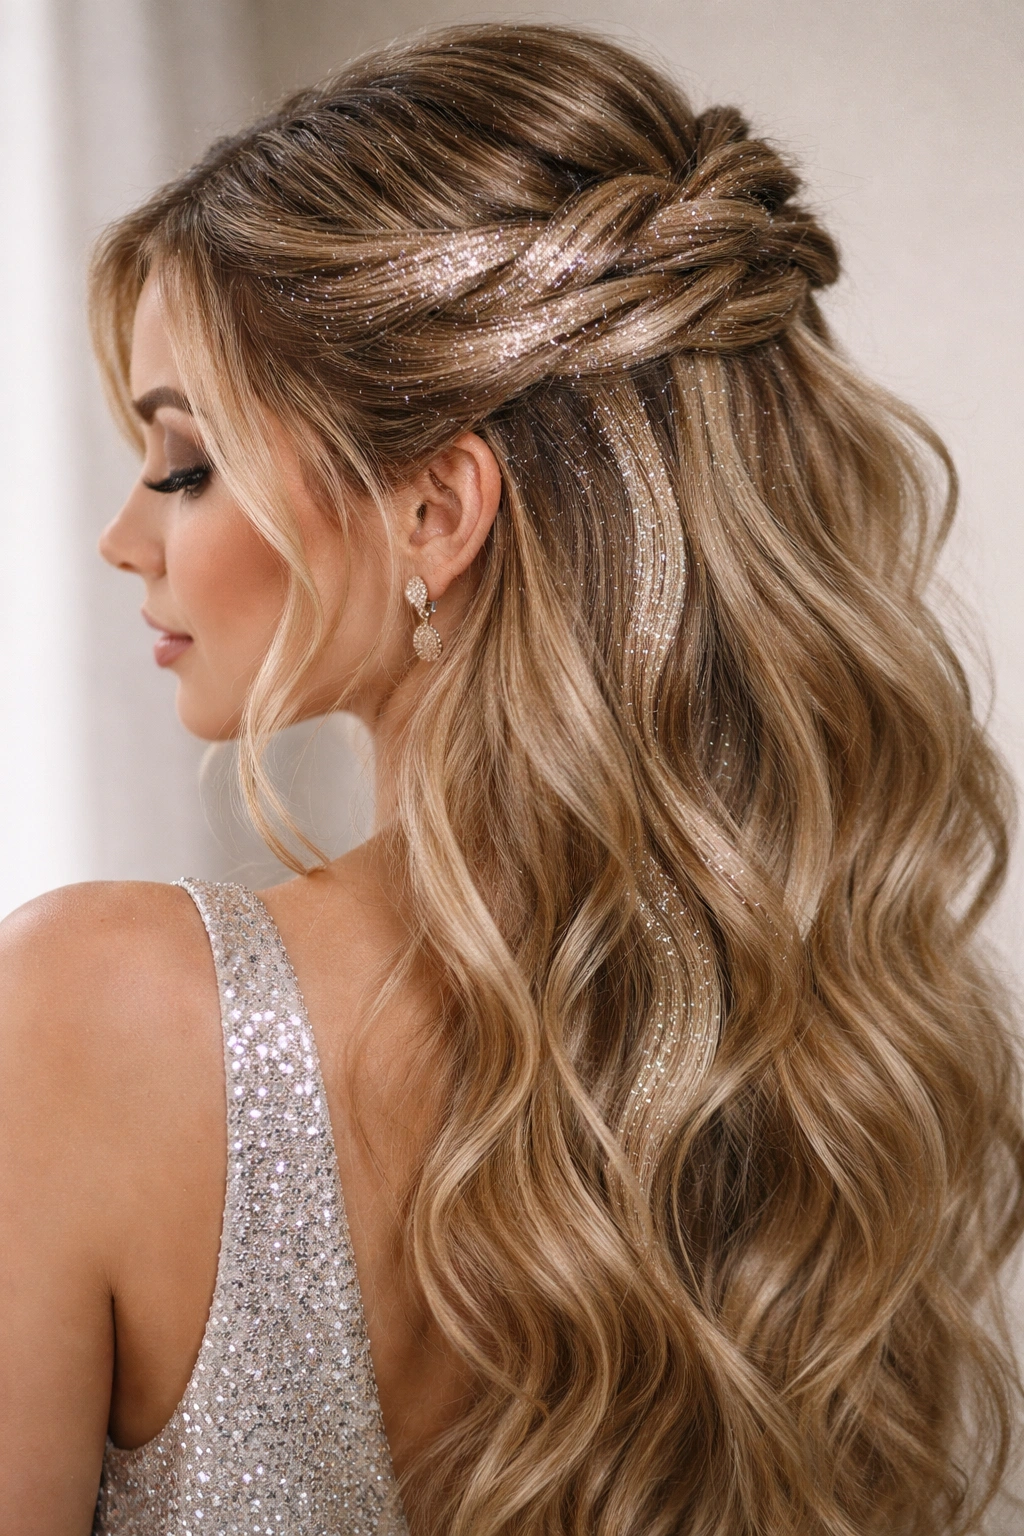
For maximum sparkle and drama, incorporate temporary glitter or shimmer into twisted sections of your half-up style. You can use glitter spray on the twisted sections, apply glitter gel directly, or pin in thin strands of temporary glitter (the kind used for festival hair). This works especially well if you’re wearing a sparkly or metallic dress.
Making a Sparkly Statement
Glitter in your hair is prom-perfect. It catches light beautifully in photos, creates a magical effect in low lighting, and shows that you’re willing to have fun and be bold. The key is balance—too much glitter feels costume-y, but the right amount feels glamorous and intentional. This style works beautifully if your dress is understated, as the glitter becomes your statement piece.
Incorporating Glitter Safely
- Use cosmetic-grade glitter or festival-specific glitter products—not craft glitter, which can be scratchy
- Apply glitter to already-twisted sections so you have more control over placement
- Use a glitter spray product for easy, even application, or apply glitter gel with a brush
- Press the glitter onto the gel or spray while it’s still wet so it adheres properly
- If using temporary glitter strands, weave them through twisted sections rather than attaching them to individual hairs
- Avoid getting glitter on your scalp or hairline—it can feel uncomfortable and look messy
- Use a light hairspray to seal everything in place once the glitter is dry
Worth knowing: Check your venue’s policies before heavily glittering your hair—some formal venues ask guests not to wear excessive glitter. But most proms are totally glitter-friendly.
15. The Half-Up Space Bun
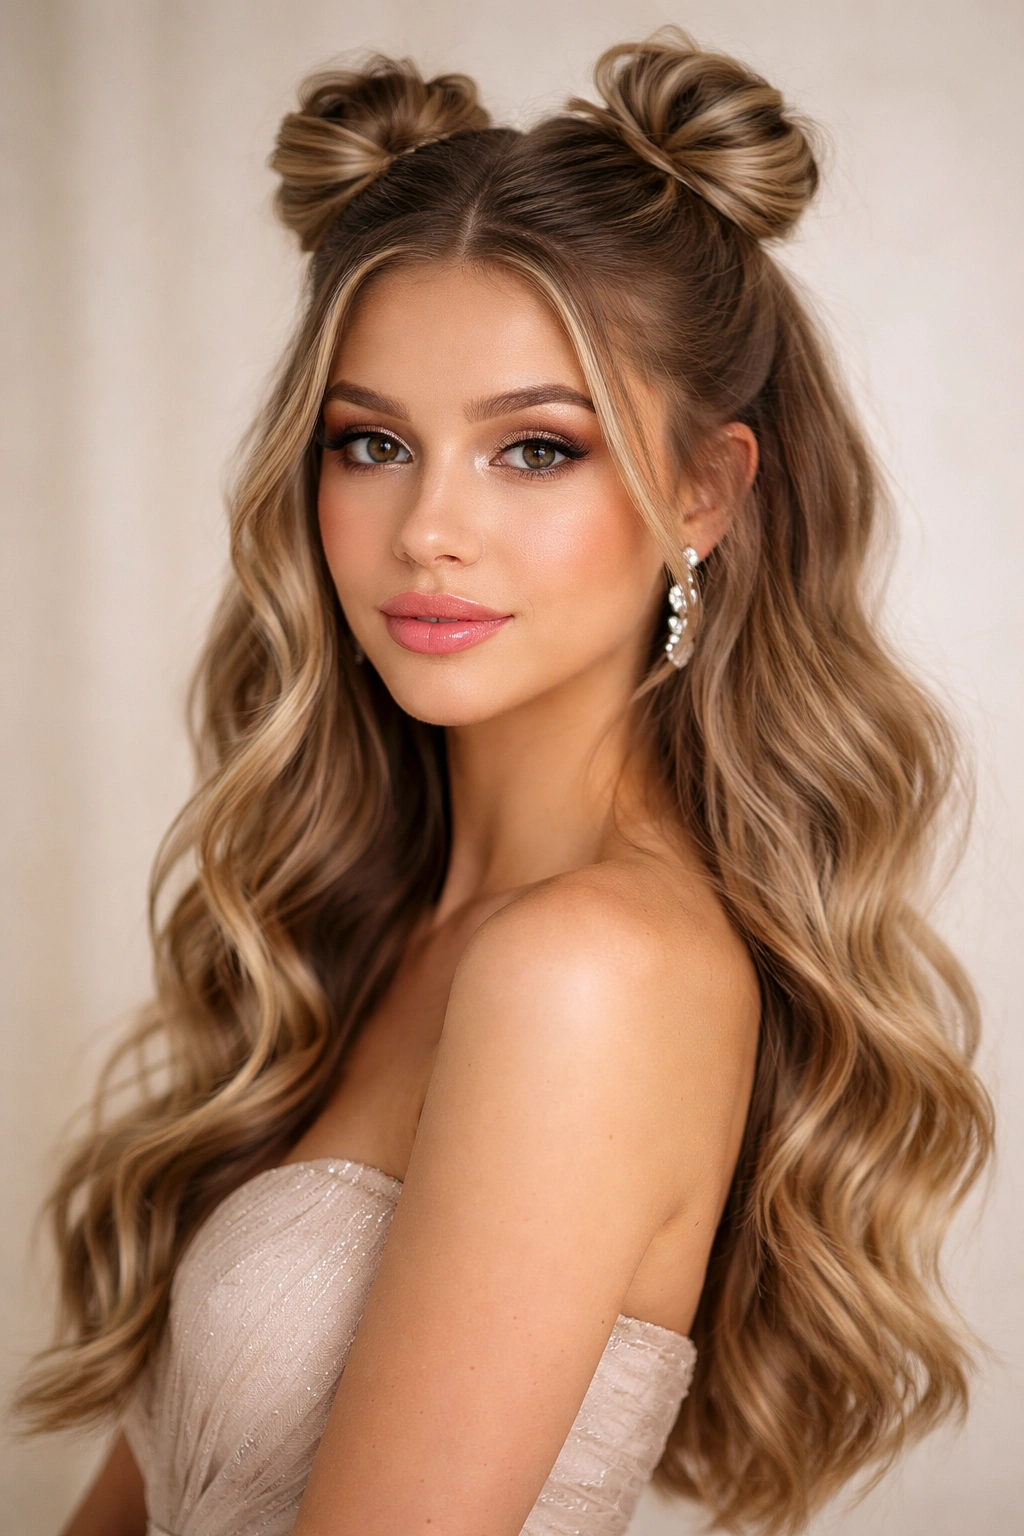
Create a fun, unexpected look by securing your half-up section into not one but two small buns positioned on either side of the crown. This style feels youthful, playful, and surprisingly formal-appropriate if styled elegantly. It’s part half-up, part double bun—the best of both worlds for someone who wants something different.
Combining Playful and Formal
Space buns feel inherently fun and modern, yet when you style them with an elegant dress and glamorous makeup, they read as fashionable and intentional rather than costume-y. This style works beautifully if you want to stand out and feel like yourself rather than conforming to traditional prom hair expectations. It’s also incredibly photogenic and unique enough that you’ll look distinctive in photos.
Creating Half-Up Space Buns
- Create your basic half-up ponytail or twisted section at the crown
- Divide this secured section in half, creating two sections
- Twist or curl each section into a small, tight bun positioned on either side of the crown
- You can make them neat and structured, or deliberately messy and relaxed depending on your vibe
- Leave the bottom half of your hair down in waves or curls
- Secure each bun with bobby pins and smooth any flyaways
Insider note: This style is surprisingly flattering and works well if you want to showcase your makeup without heavy hair around your face.
16. Vintage Waves Half Up
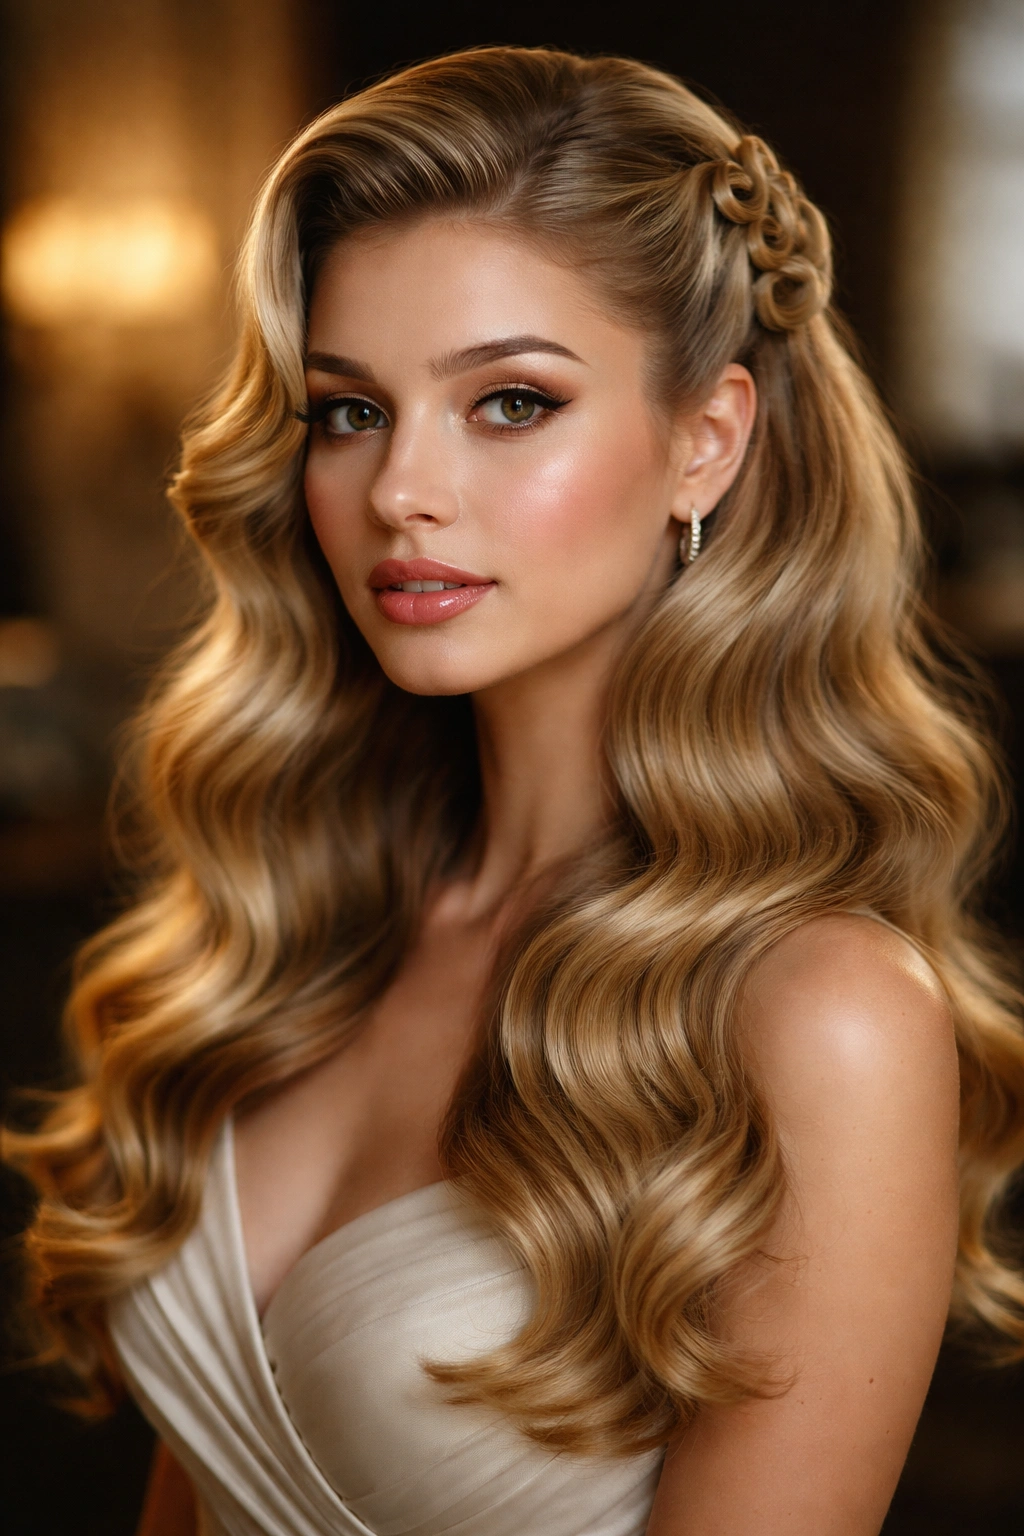
Combine the romance of 1940s victory rolls or soft, sculptured waves with a simple half-up section for a vintage-inspired prom look. Create perfectly rounded, pin-curl waves throughout your hair, then secure a simple section at the crown. The waves should be symmetrical and full-bodied—think old Hollywood glamour merged with a contemporary half-up style.
Old Hollywood Meets Modern
Vintage wave patterns are experiencing renewed popularity because they look undeniably elegant and romantic. They photograph beautifully and convey an understated confidence. When combined with a half-up section, vintage waves feel special and intentional—like you didn’t just roll out of bed looking this good; you actually took time to achieve it.
Creating Sculptured Waves
- Blow-dry your hair smooth, then section it into vertical sections approximately 2-3 inches wide
- Create a shallow S-curve wave in each section using either a hot tool or pin curls
- Pin or clip each wave in place and let it cool and set completely (at least 30 minutes, or overnight if using pin curls)
- Once cooled, gently release the clips and run your fingers through the waves to relax them slightly
- Create your half-up section by twisting or securing hair from the crown
- Finish with a flexible hairspray that holds the waves without making them crunchy
Pro tip: The key to beautiful vintage waves is patience and proper setting. Rushing through the cooling process means the waves won’t hold, especially not through an evening of dancing and movement.
17. The Half-Up High Pony with Texture
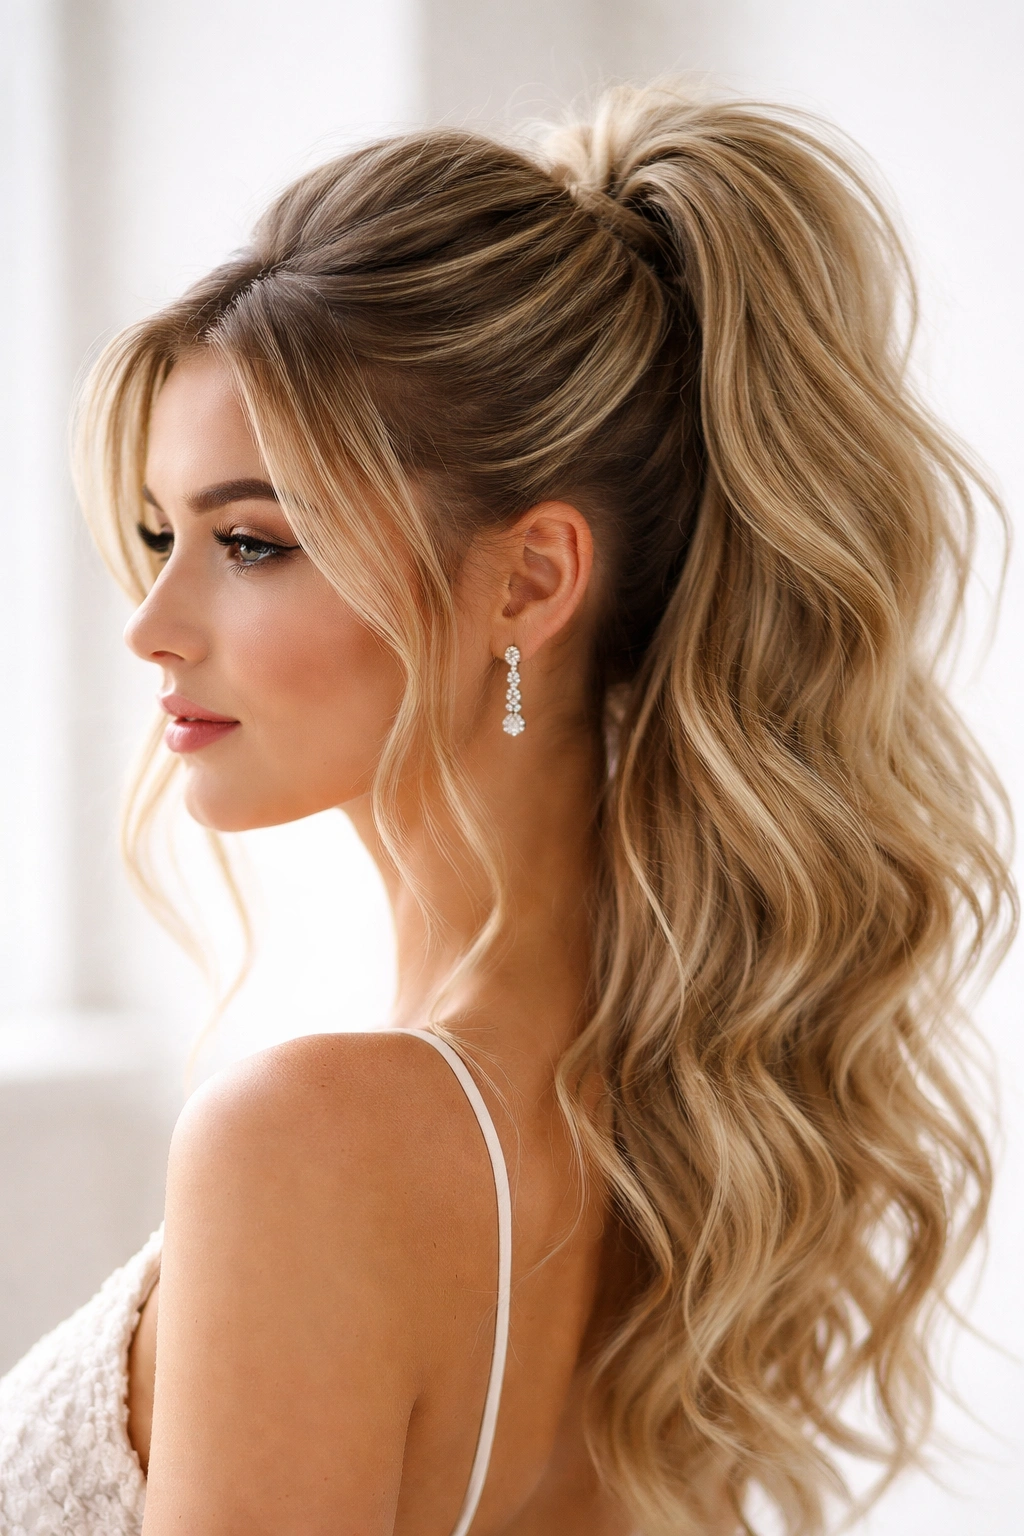
Elevate a classic high ponytail into half-up territory by securing only the top portion of your hair into a high pony, then teasing and texturizing the crown area for maximum volume and drama. The secured pony should feel solid and anchored, while the crown has lived-in, textured volume. This combines the structure of a high pony with the romance of a half-up style.
Balancing Structure and Romance
A high ponytail can sometimes read as too sleek or athletic, but adding texture and volume to the crown softens it and adds femininity. This style is actually quite practical—your hair is off your face and secured, but you don’t sacrifice the romantic, voluminous effect of longer hair down. It’s also surprisingly comfortable because the weight of your hair is distributed across a larger area rather than pulling from a single point.
Building Volume at the Crown
- Start with second-day hair or texturized hair—freshly washed, smooth hair won’t hold volume well
- Gently tease the crown and upper sections of your hair with a fine-tooth comb or teasing brush
- Smooth the very top layer to disguise the teasing while keeping the volume underneath
- Secure your high ponytail—it should sit at the absolute top of your head
- Spray the crown and teased areas lightly to set the texture
- Leave the ponytail tail loose and long, and curl it into waves or ringlets
Insider note: The secret to this style is keeping the volume at the crown from looking like you have a rat’s nest—tease strategically, not chaotically.
18. The Braided Ribbon Half Up
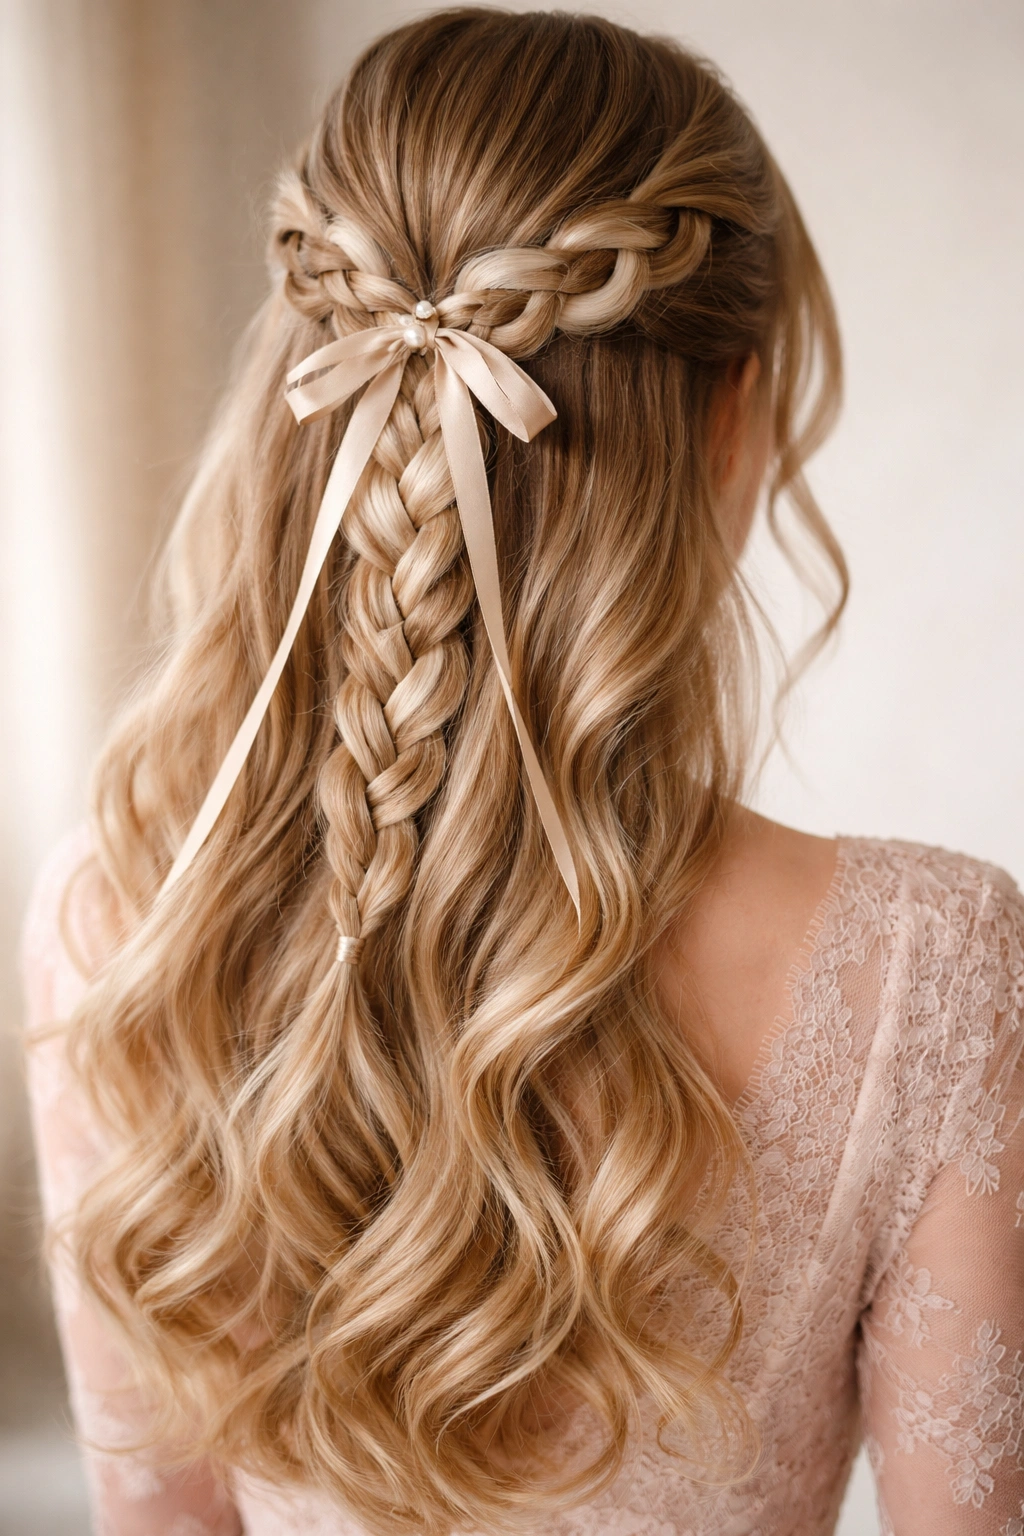
Finish your list of stunning options with a style that weaves a delicate ribbon through a half-up braid, creating an elegant, vintage-inspired detail. Braid a section of hair with a ribbon woven throughout (you can start the ribbon midway through the braid), then secure the braided section at the crown with a matching clip. The ribbon becomes a design element that coordinates with your overall prom aesthetic.
Ribbon as a Design Element
Ribbons in hair instantly feel special and intentional. They add color, texture, and a handmade quality that feels romantic and thoughtful. Unlike bulky accessories, ribbon weaved through a braid integrates beautifully and moves with your hair. It works whether your dress is simple or elaborate—the ribbon ties your entire look together.
Weaving Ribbon Through a Braid
- Choose a ribbon color that complements your dress (matching, contrasting, or metallic all work beautifully)
- Begin braiding a section of hair at approximately ear level
- About a third of the way through the braid, introduce the ribbon by laying it against one of the three hair sections
- Continue braiding, ensuring the ribbon stays integrated throughout
- The ribbon will naturally weave in and out, creating a beautiful pattern
- Secure the braid at the crown with a clip that matches or complements the ribbon color
- Leave the bottom length of the braid loose so the ribbon detail is visible
Worth knowing: Satin or silk ribbons work best—they’re smooth, they won’t tangle your hair, and they look more luxurious than cotton ribbon.
Final Thoughts
Choosing a half up half down style for prom is actually choosing confidence and versatility. You get the security of an updo without sacrificing the romance of your beautiful length. Whether you go for something classic like the twisted half up, romantic like the braided crown, or bold like the glittery twist, this style adapts to your personality and makes you feel amazing.
The best part about half up half down is that none of these styles require you to be a professional stylist. With a few bobby pins, some practice, and confidence in yourself, you can absolutely achieve any of these looks. The night before prom, do a full trial run—actually style your hair the way you plan to wear it. You’ll feel more prepared, you’ll know exactly how long it takes, and you’ll spot any adjustments you need to make before the actual event.
Most importantly, choose a style that makes you feel like yourself. Whether you’re glittery and bold, romantic and soft, modern and sleek, or playfully fun, your half up half down should reflect who you are. Prom is about celebrating, and you’ll have infinitely more fun when you’re wearing a hairstyle that makes you feel confident, comfortable, and absolutely beautiful.