When you’ve got gorgeous red hair, finding the perfect prom hairstyle is about so much more than just looking pretty—it’s about celebrating the stunning color you already have while creating a style that feels authentically you. The half up half down trend is pure magic for red hair because it strikes that perfect balance between romantic elegance and modern sophistication. You get the drama of an updo, the flowing softness of loose waves, and a canvas to show off your vibrant color from every angle. Whether you’re working with deep auburn, bright copper, strawberry blonde, or rich burgundy tones, a half up half down style can make your red hair absolutely glow under prom night lighting.
The beauty of this particular style category is its incredible versatility. You can dress it up with braids, add shine and dimension with waves, incorporate sparkly accessories, or keep it clean and classic—there’s truly a half up half down look for every personality and dress style. Red hair already makes a statement, so your prom hairstyle should complement that confidence while working harmoniously with your features and dress color. Let’s explore fifteen stunning half up half down options that’ll have you feeling stunning on your big night.
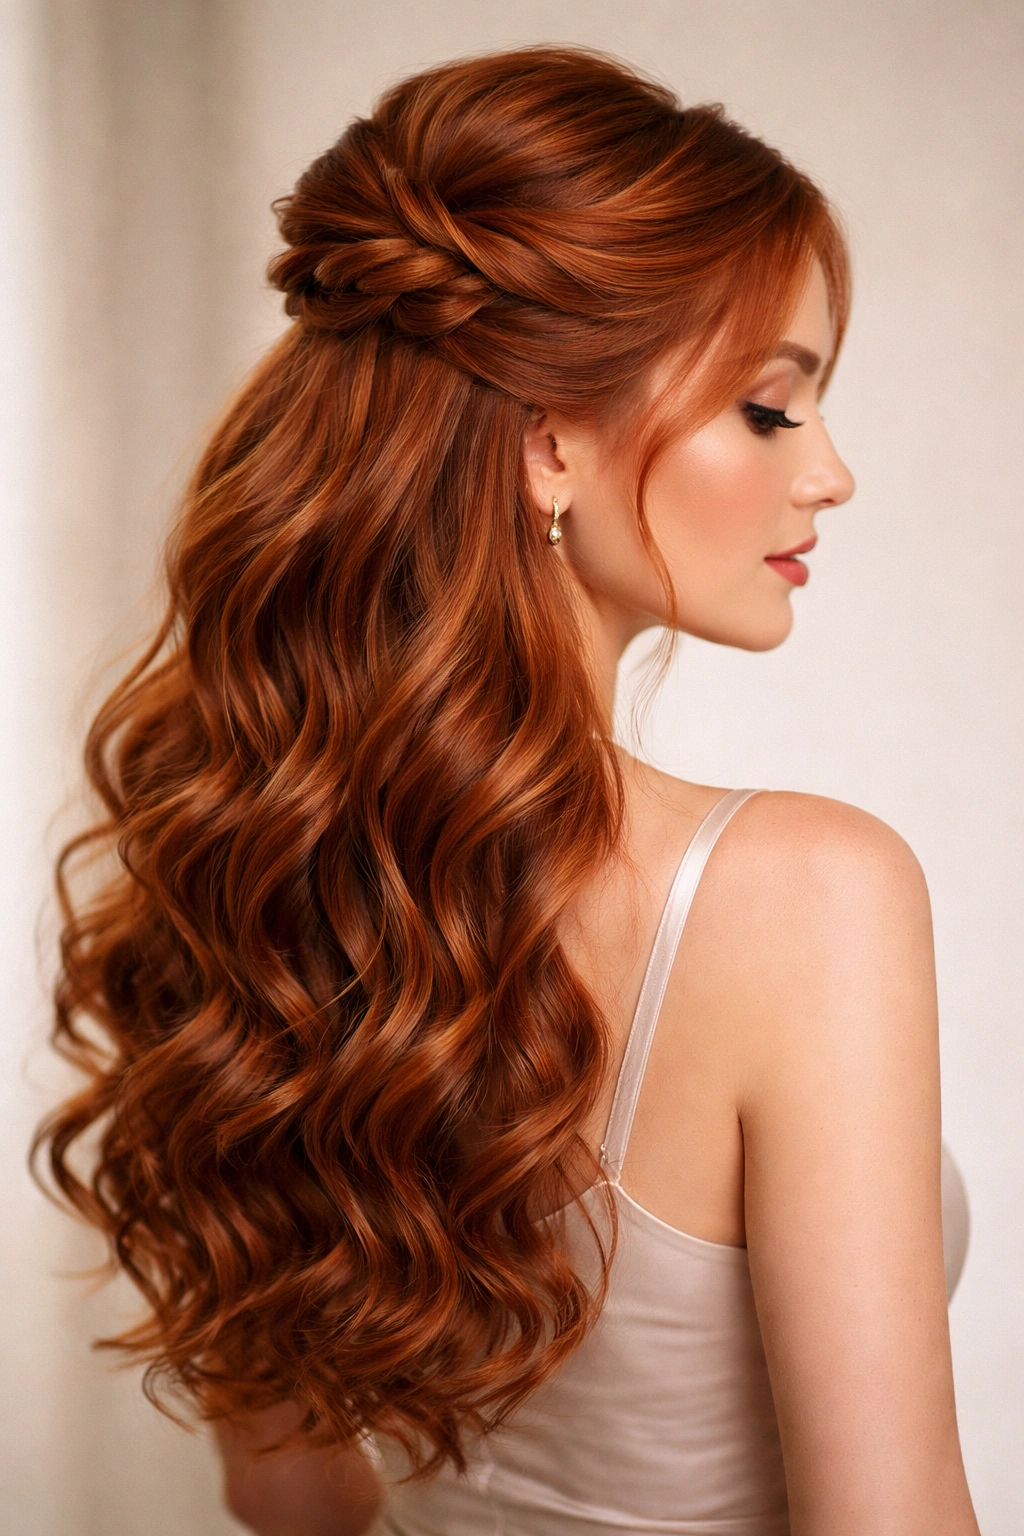
1. Classic Twisted Crown with Loose Waves
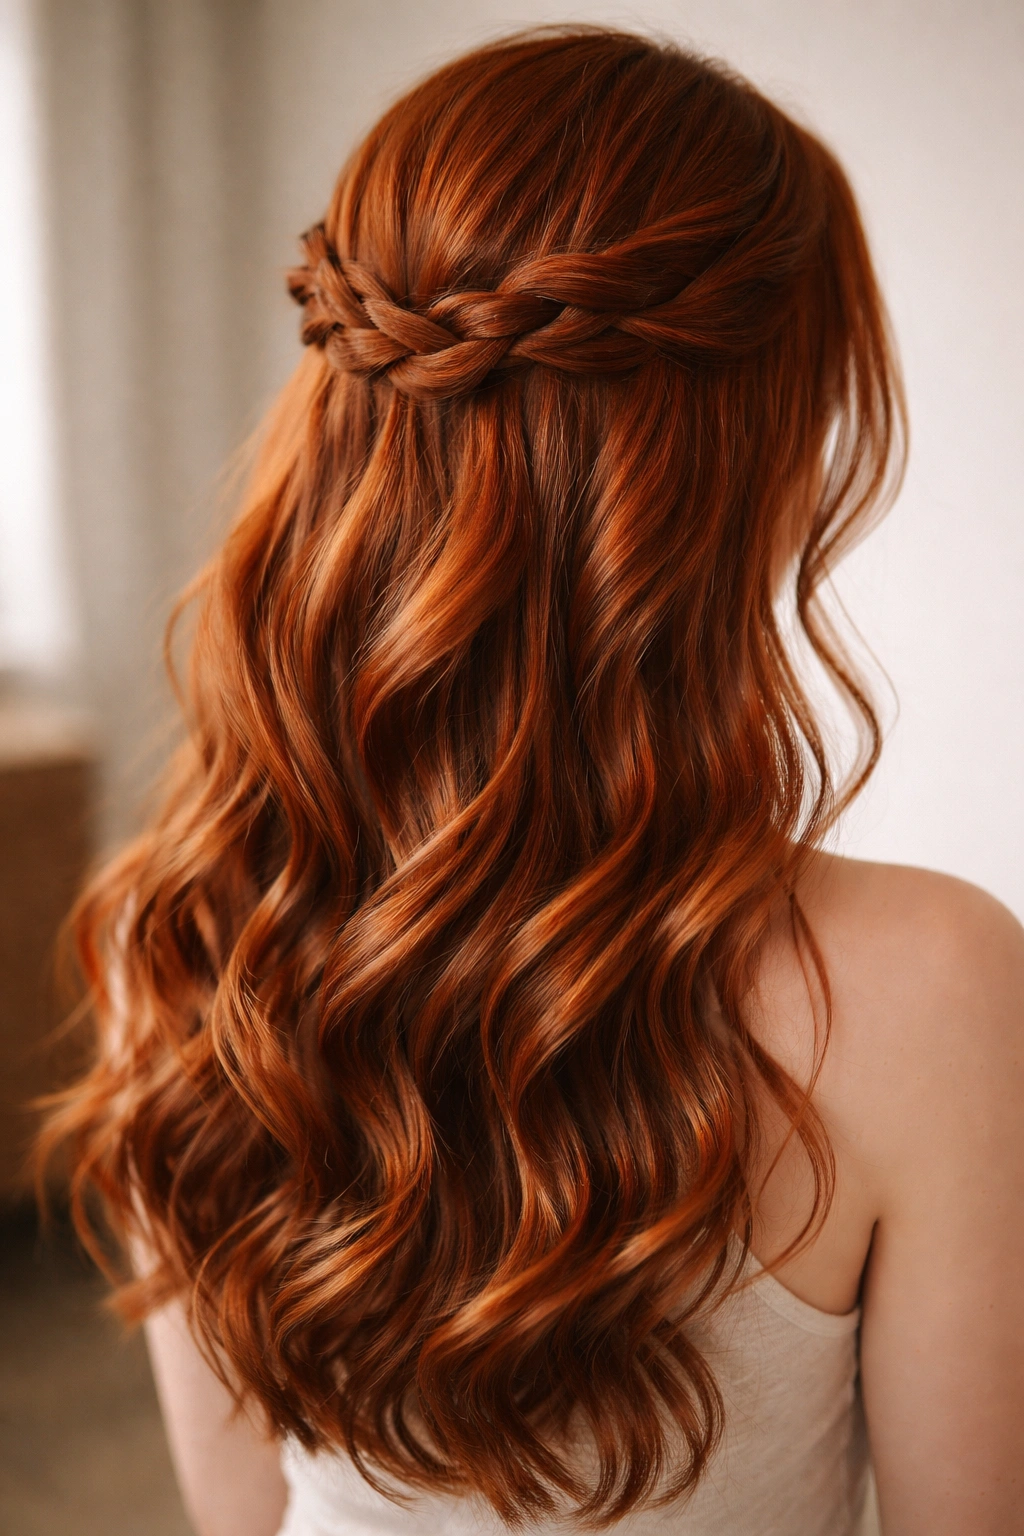
This timeless approach pairs a soft twisted section pulled up and secured at the back with completely loose, flowing waves cascading below. The twist sits like a crown at the top of your head, creating an elegant frame for your face while allowing your red tones to shine through the movement of the waves. It’s the kind of hairstyle that photographs beautifully and works with virtually any prom dress—whether you’re going classic, modern, or dramatic.
Why This Works So Well
The twisted crown creates an unexpected focal point that feels intentional and polished without screaming “high maintenance.” Red hair has natural warmth that plays beautifully with the texture of loose waves; the light hits those waves and bounces differently throughout the style, making your color look even richer and more dimensional. This look also works regardless of your hair texture—slightly wavy, naturally curly, or stick-straight hair can all pull this off successfully.
How to Style It Perfectly
- Start with your second-day or texturized hair for the best hold (don’t wash it the night before)
- Create loose, romantic waves throughout all of your hair using a 1.5-inch curling iron or wand, working in sections from underneath
- Take a section of hair from one side (about 2 inches wide) and twist it gently, pulling it back to the nape of your neck
- Secure it with bobby pins that match your red shade, then gently tug the twist to make it fuller and more textured
- Use a light hairspray to set everything without making it look stiff or crunchy
Pro tip: Curl your hair away from your face on both sides—this naturally creates a pretty frame and makes your features look more open and glowing.
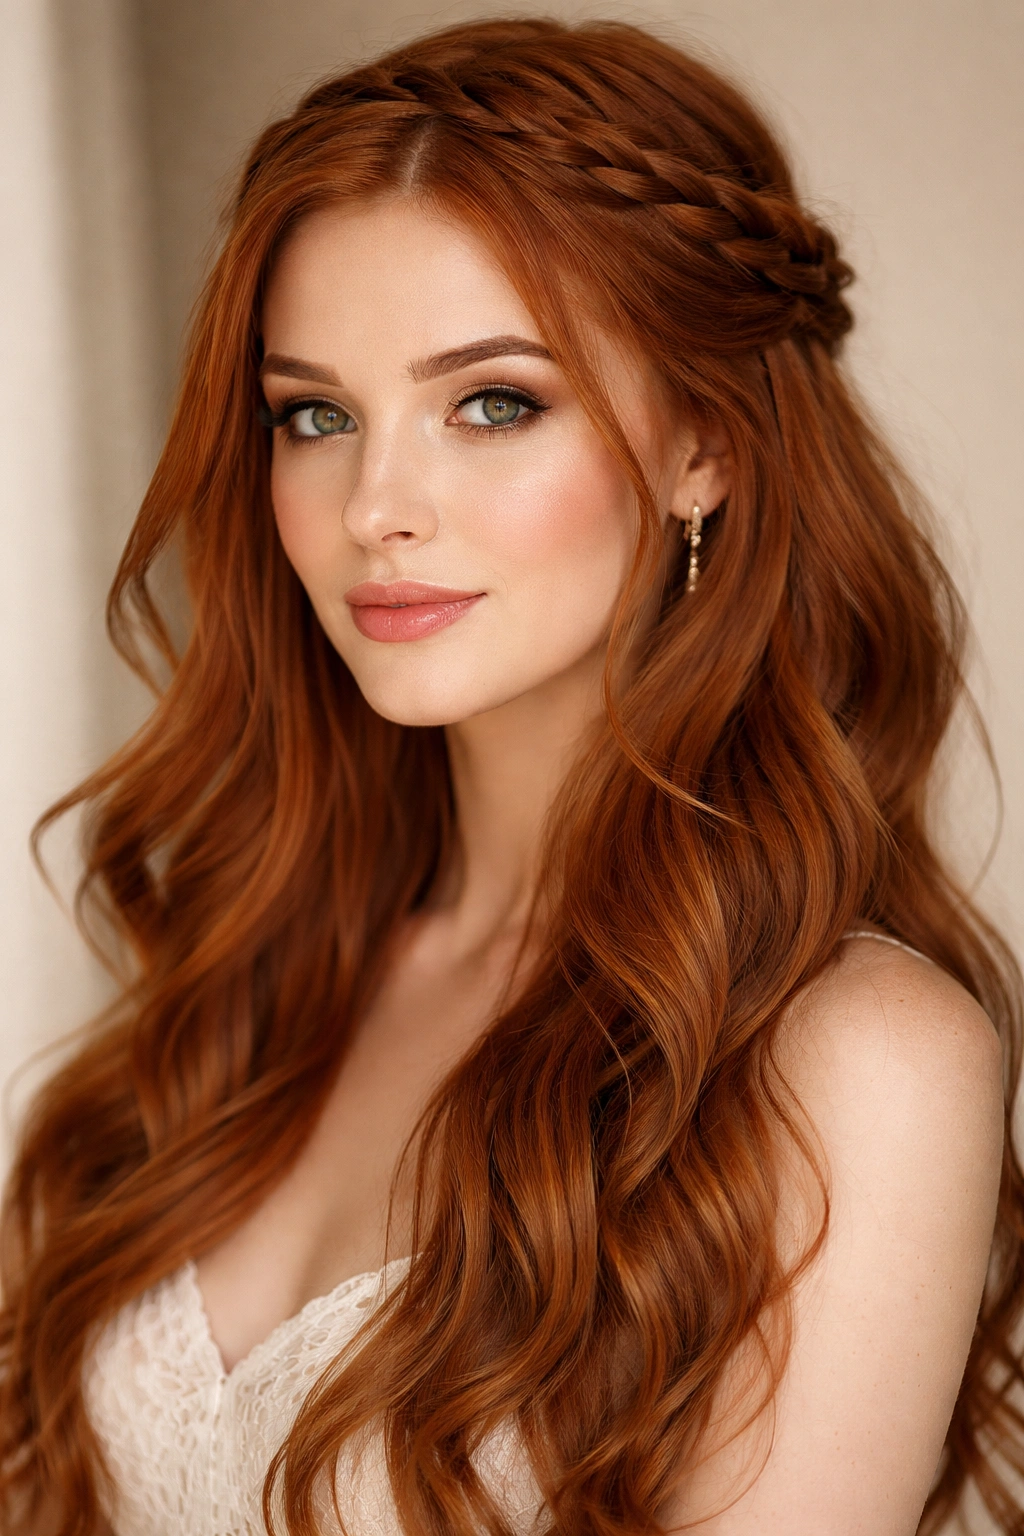
2. Braided Half Up with Delicate Tendrils
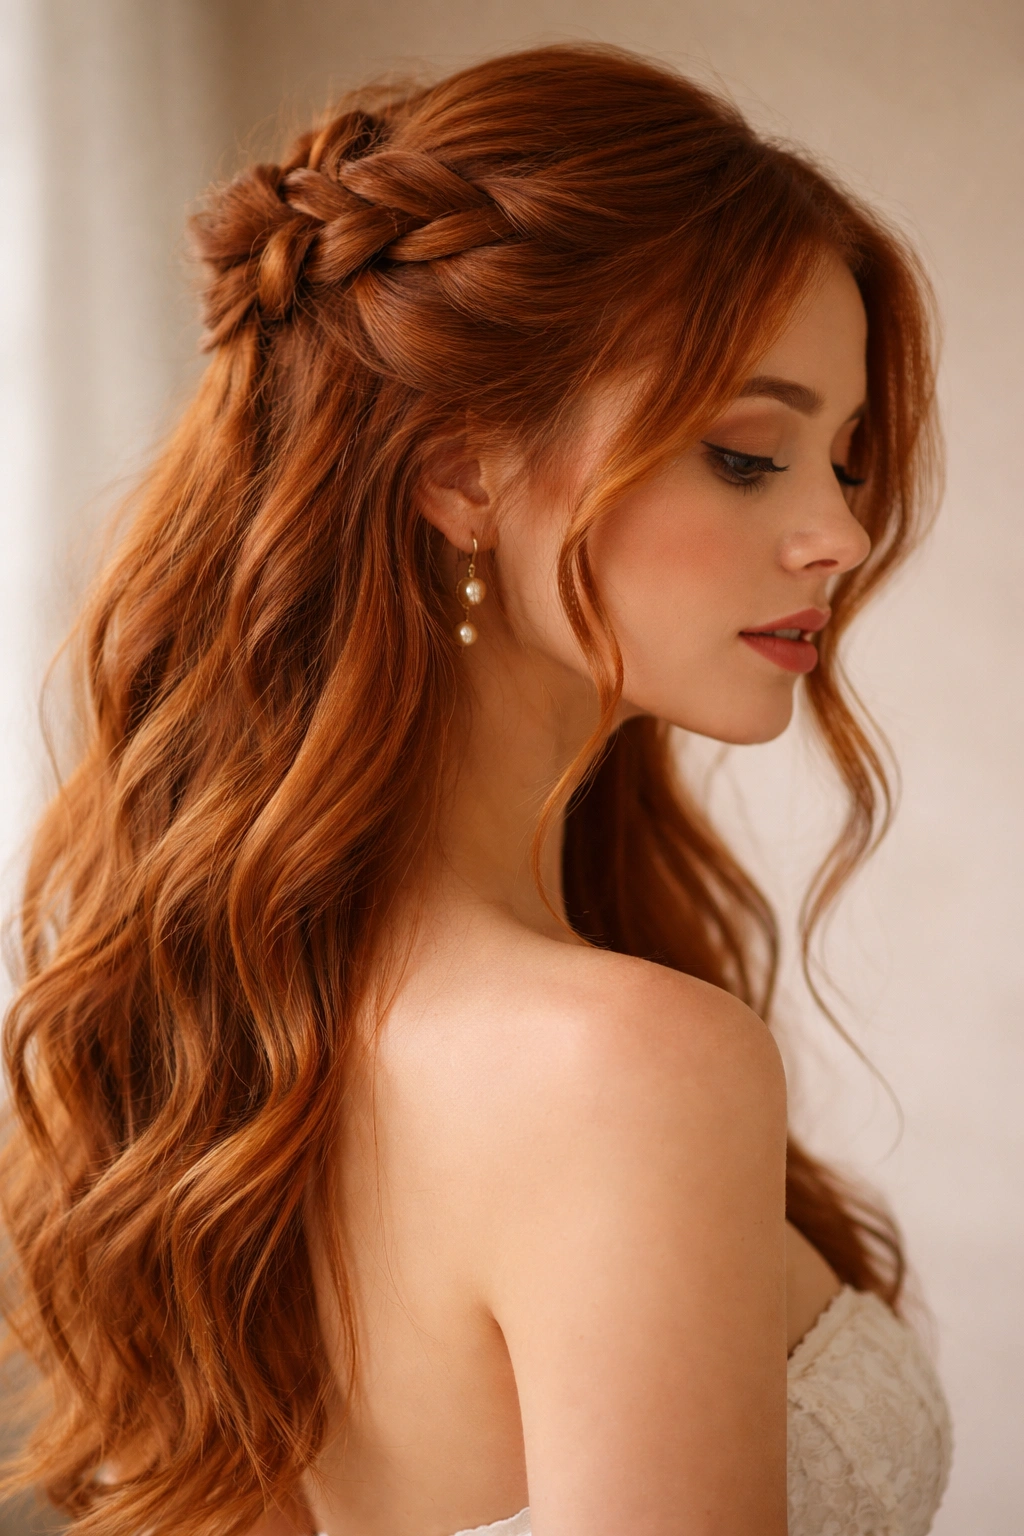
A soft Dutch or French braid pulled up from the back and secured at crown level creates sophistication and movement simultaneously, especially when you frame your face with a few intentional tendrils. This style lets your red hair shine through the dimension of the braid while showing off the gorgeous color running through the entire style. The loose tendrils softly frame your features, making this particularly flattering for longer face shapes.
What Makes This Unique
Unlike tight, structured braids that feel dated for prom, a loose, slightly undone braid feels romantic and effortlessly elegant. Red hair actually shows the texture and dimension of a braid more beautifully than many other colors—you’ll see how the braid twists and turns, and the way light plays through the sections. This style also stays put beautifully throughout a long prom night without feeling uncomfortable or causing headaches.
Creating the Perfect Loose Braid
- Tease gently at the roots for texture and added hold before you start braiding
- Begin the braid at the nape of your neck, using three sections and keeping it intentionally loose from the start
- As you braid, gently pull small sections out from between the braid strands to create a fuller, softer appearance (this is what makes it look romantic rather than severe)
- Secure at the top with a clear elastic, then pull the braid apart more with your fingers to increase volume
- Let 2-3 small face-framing pieces fall free on each side
Insider note: Use a light texturizing spray before braiding—it gives you way better grip without making hair feel sticky.
3. Sleek High Pony with Softened Sides
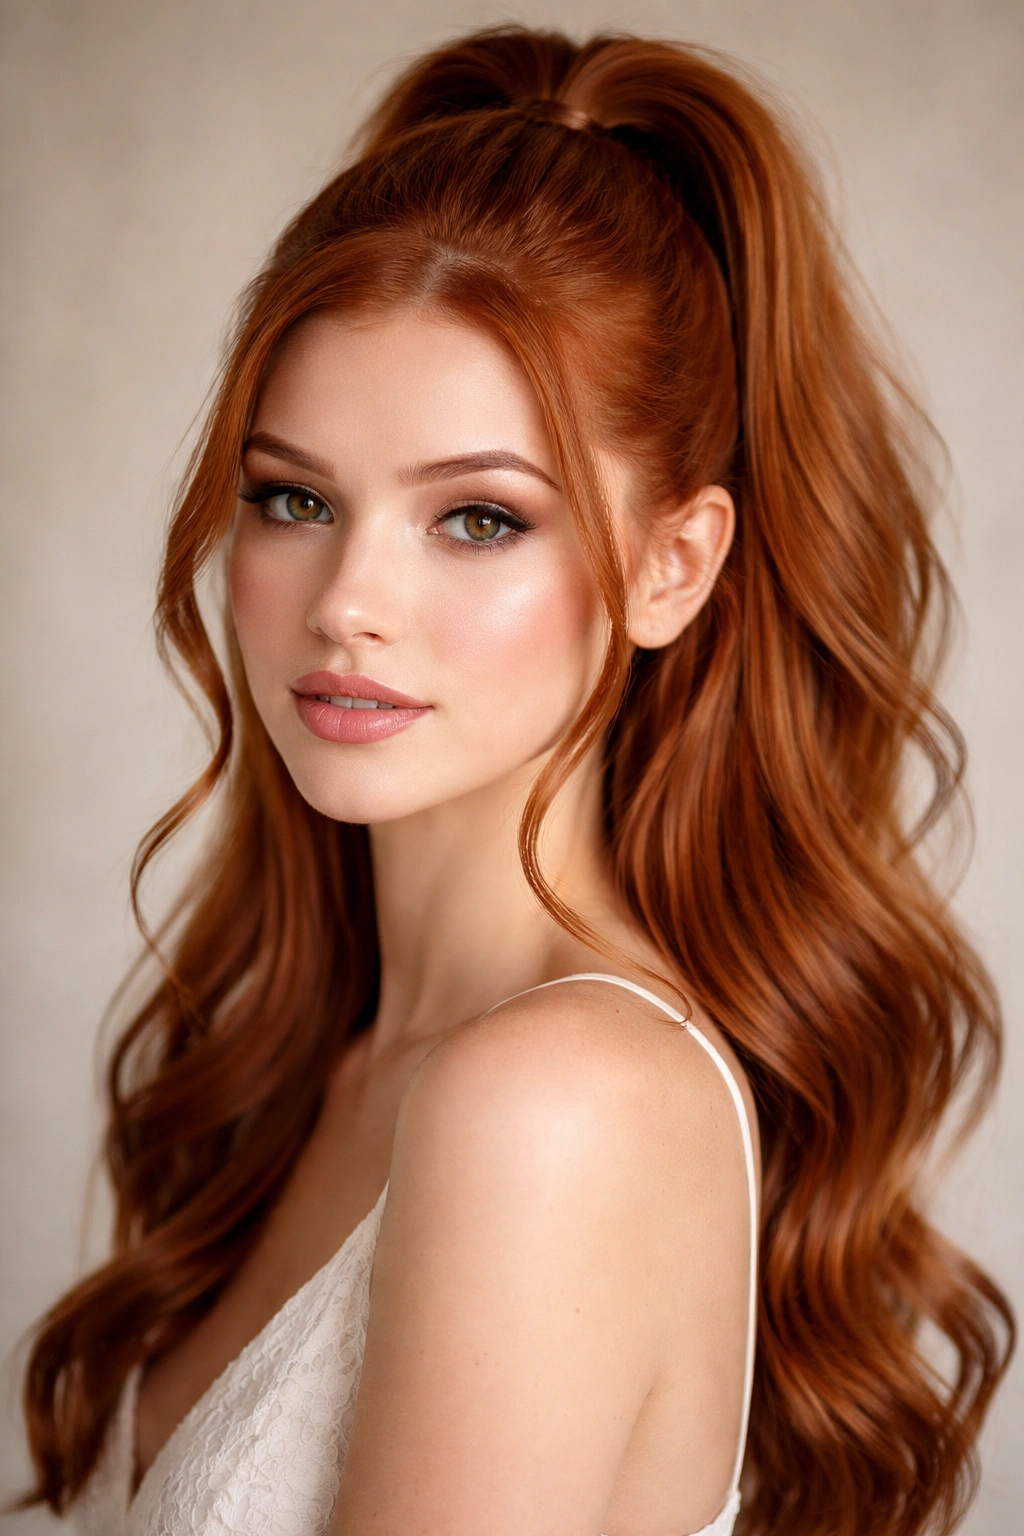
Gather your red hair into a sleek half-up ponytail positioned high on your head, then leave the sides loose and gently wave them for a hybrid look that’s both polished and romantic. This works beautifully because red hair has natural shine that looks absolutely stunning when you create contrast between the sleek secured section and the softer loose waves. It’s modern, clean, and incredibly flattering for prom photos.
Why This Style Shines With Red Hair
The sleekness of the ponytail section makes your color look extra rich and glossy, while the soft waves below add texture and movement. For red hair specifically, this contrast between sleek and soft creates visual interest that a single-texture style might not achieve. The high positioning also makes your features look more lifted, which translates beautifully in photographs.
Achieving the Perfect Sleek-to-Soft Transition
- Start with blow-dried hair and smooth it down with a flat iron for the sleek section
- Using a fine-tooth comb, brush the top section smoothly back, securing tightly with a small elastic
- Take the gathered ponytail section and wrap a small piece of hair around the elastic to hide it, securing with a bobby pin
- Use a 1.5-inch curling iron to create soft, loose waves in all the remaining hair, curling away from the face
- Smooth the top section with smoothing serum to enhance shine
Worth knowing: This style looks especially stunning with a sleek side part or a deep part at the temple—it adds dimension to your face and shows off your red tones beautifully.
4. Romantic Waterfall Braid Half Up
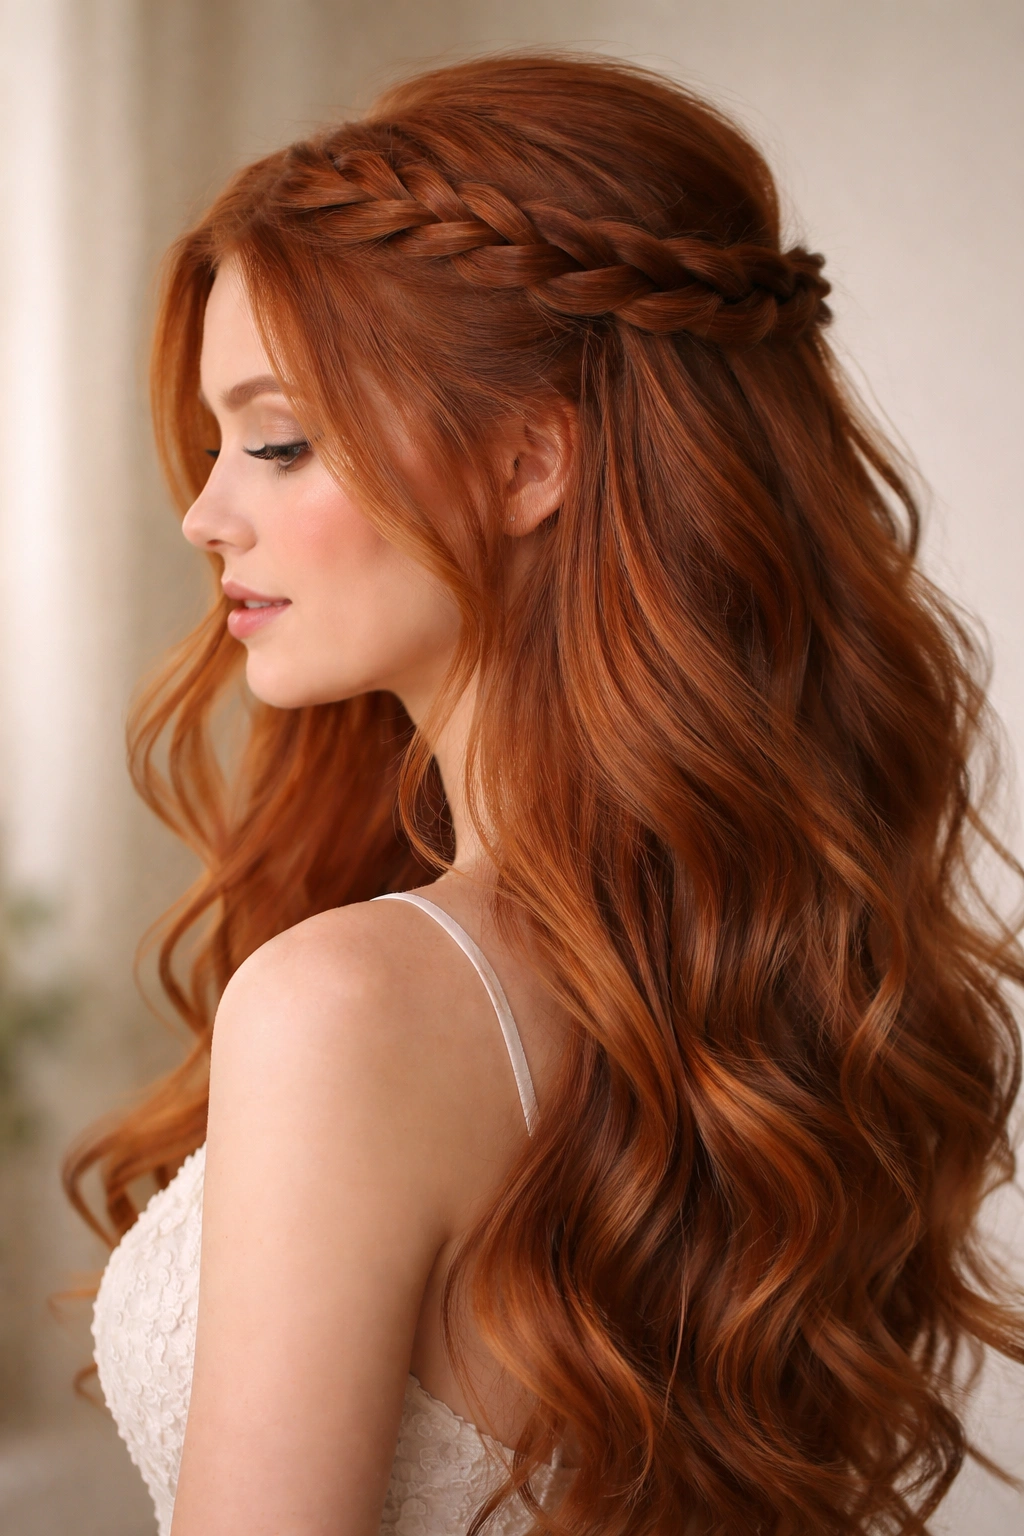
A waterfall braid swept gently to one side and secured at the back creates the most romantic, fairy-tale vibe, especially with loose waves flowing below and face-framing pieces. This particular braid style is named for how sections of hair flow freely down the side, creating an open, soft, almost ethereal effect. For red hair, this creates a beautiful visual where color flows both in the braid pattern and through the loose waves below.
The Romance Factor
There’s something about a waterfall braid that immediately reads “prom” in the best possible way—it’s elegant without being overdone, classic without feeling old-fashioned, and genuinely flattering on virtually every face shape. Red hair amplifies this romantic quality because the color itself is eye-catching; you don’t need heavy embellishment to make this style feel special. The braid pattern naturally draws the eye along your head and face in the most flattering way.
How to Braid This Technique
- Part your hair to the side (whichever side feels more natural for you)
- Start the waterfall braid at your temple, taking a small three-strand section
- As you braid, let one strand drop freely, then pick up a new strand from beneath to replace it—this is what creates the waterfall effect
- Continue braiding back toward the nape of your neck
- Secure the remaining hair with bobby pins at the back, letting the braid sit slightly loose for softness
- Create soft waves in all the remaining loose hair with a large barrel curling iron
- Pull out a few face-framing pieces to soften your features further
Pro tip: If waterfall braiding feels complicated during styling, practice it at least twice beforehand—it becomes much easier once you understand the pattern.
5. Textured Knot with Cascading Curls
Create a soft, textured knot or twist at the crown by wrapping two sections of hair around each other, then let the rest of your hair fall in gorgeous, bouncy curls. This combines the definition of an updo element with the romance of fully loose hair below, and it’s surprisingly forgiving if your hair isn’t perfectly straight or smooth. Red hair curls beautifully, so using the full texture of curls below the knot creates incredible dimension.
Why Texture Matters Here
A textured knot feels more modern and less formal than a sleek knot, which means it suits the energy of prom perfectly. You’re not aiming for a wedding-level structured updo; you’re creating something that feels personal and intentional but still relaxed. The cascading curls below show off the full beauty of your red hair’s color and movement, and the textured knot at the top adds polish without requiring high precision.
Building the Perfect Textured Knot
- Blow-dry your hair with texture—use a texturizing product or sea salt spray for grip and body
- Take two sections of hair from the crown (each about the width of your fingers) and loosely twist them around each other
- Secure the twisted knot at the back with bobby pins that match your hair color
- Tug the knot gently to make it fuller and less polished-looking
- Create bouncy curls in all the remaining hair using a curling iron or wand, curling away from the face
- Let some of these curls fall around the sides of the knot for softness
- Use a curl-defining spray rather than heavy hairspray to maintain movement
Insider note: The key to this style is “intentional undone”—it should feel like you grabbed your hair and made it pretty, not like you spent three hours perfecting a structured style.
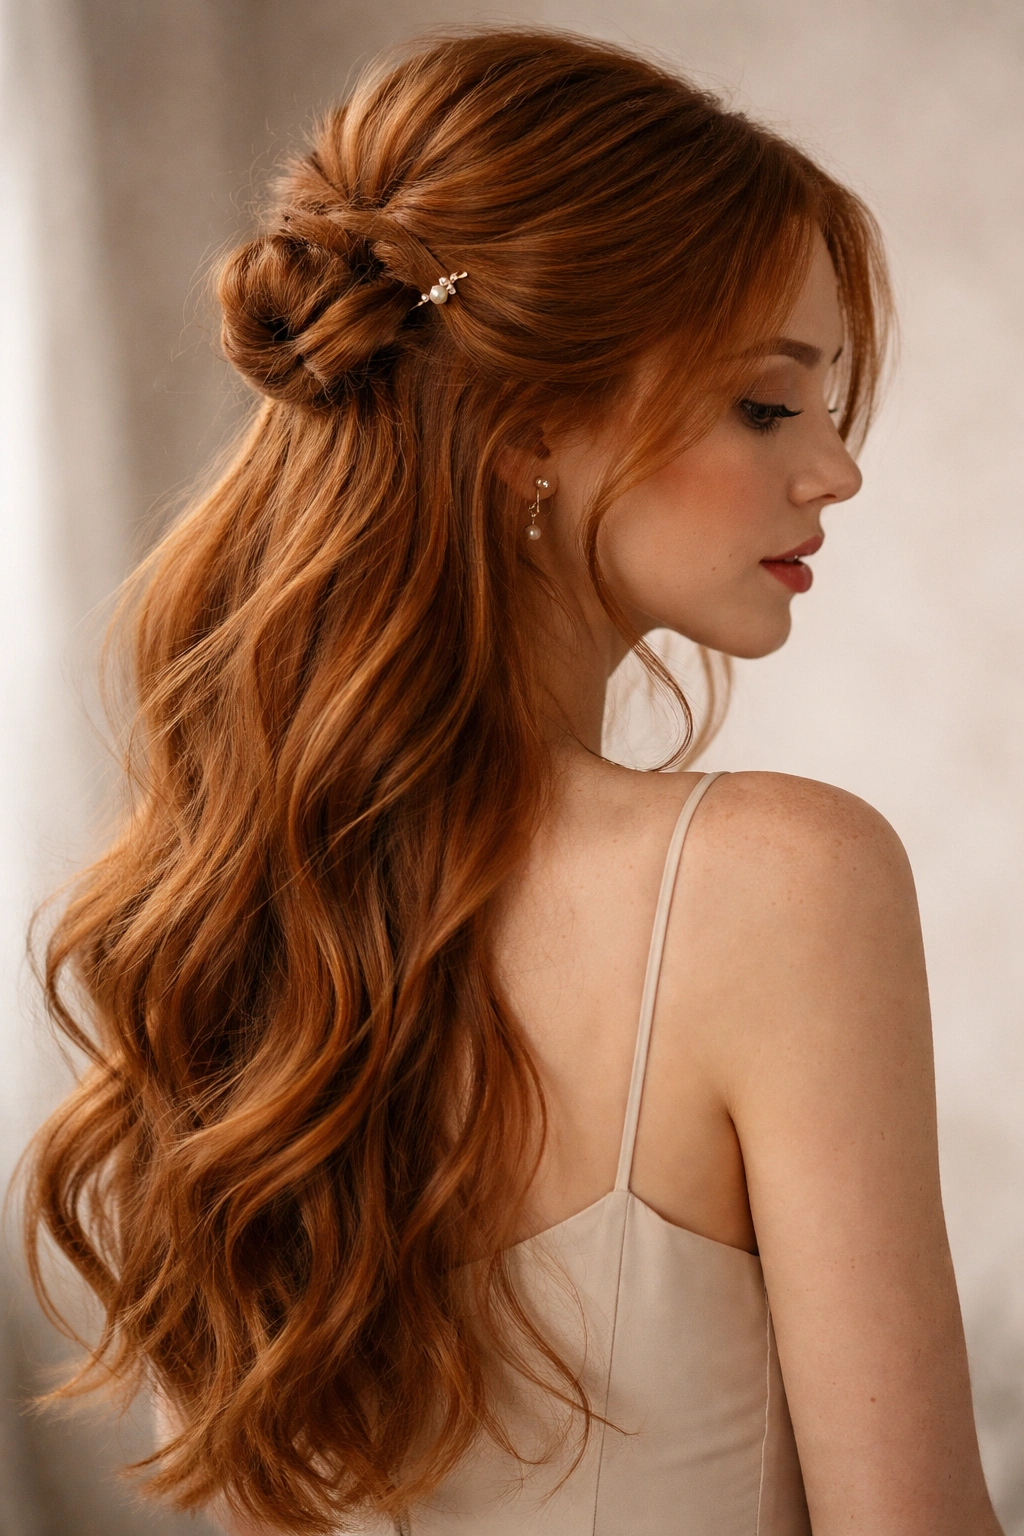
6. Sleek Bun Half Up with Face-Framing Waves
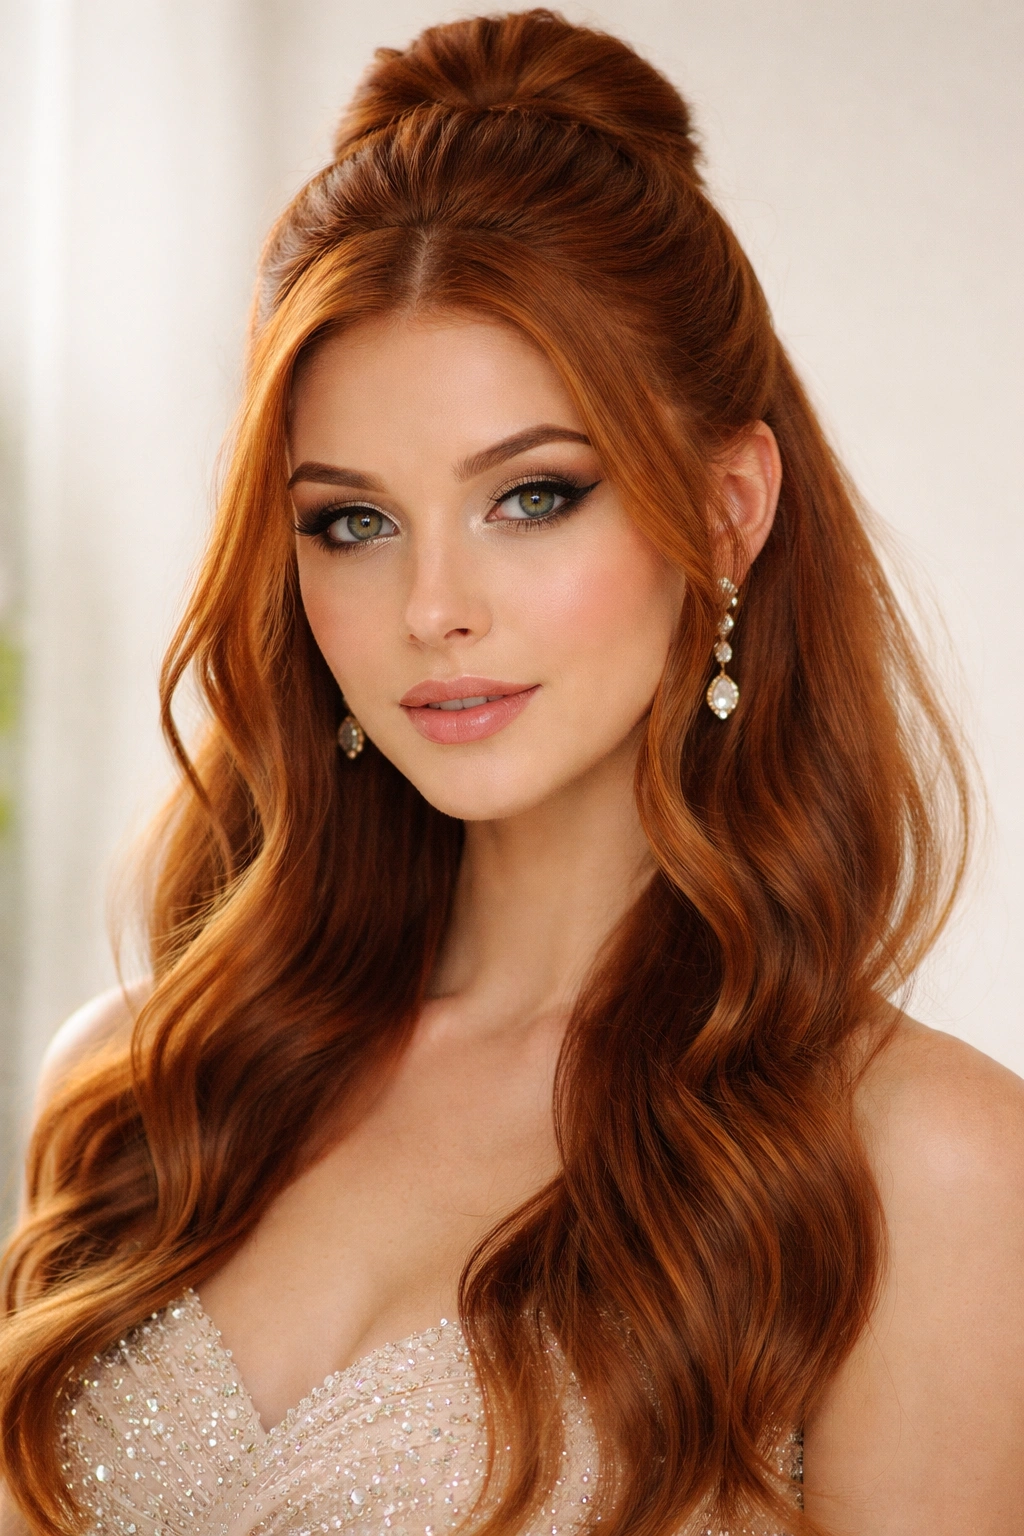
Create a small, smooth half-up bun at the crown or slightly lower, keeping the bun tight and polished while framing your face with soft, romantic waves. This is one of the most versatile options because it works with any dress style, any face shape, and any vibe you’re going for. The bun can feel modern or classic depending on how smooth you make it and where you position it. For red hair, the contrast between the sleek bun and the softness of the waves is absolutely striking.
The Versatility Factor
A half-up bun is the kind of style that works whether you’re going for princess prom or modern minimalist prom. You can add sparkly pins to the bun for glam, keep it completely clean and bare for sophistication, or add flowers for garden-party vibes. Red hair doesn’t need much extra embellishment to look special, so often a simple, perfectly executed bun with beautiful waves below is all you need.
Creating That Polished Bun
- Smooth all your hair thoroughly with a flat iron or blow dryer brush
- Take a section from the crown that’s about 3-4 inches wide across
- Brush this section straight back and secure at the top with a small elastic
- Wrap the ponytail around the base of the elastic to create a bun shape
- Secure the bun tightly with bobby pins, using as many as needed for security through a long evening
- Smooth down any flyaways with a tiny bit of gel or smoothing serum on a brush
- Create loose, romantic waves in all the hair below the bun, starting curls at various depths for a natural appearance
- Let some shorter pieces frame your face on both sides
Worth knowing: A slightly lower bun (positioned just at or below the crown) tends to look more modern and less “traditional updo” than a high bun.
7. Double Twisted Crown with Loose Curls
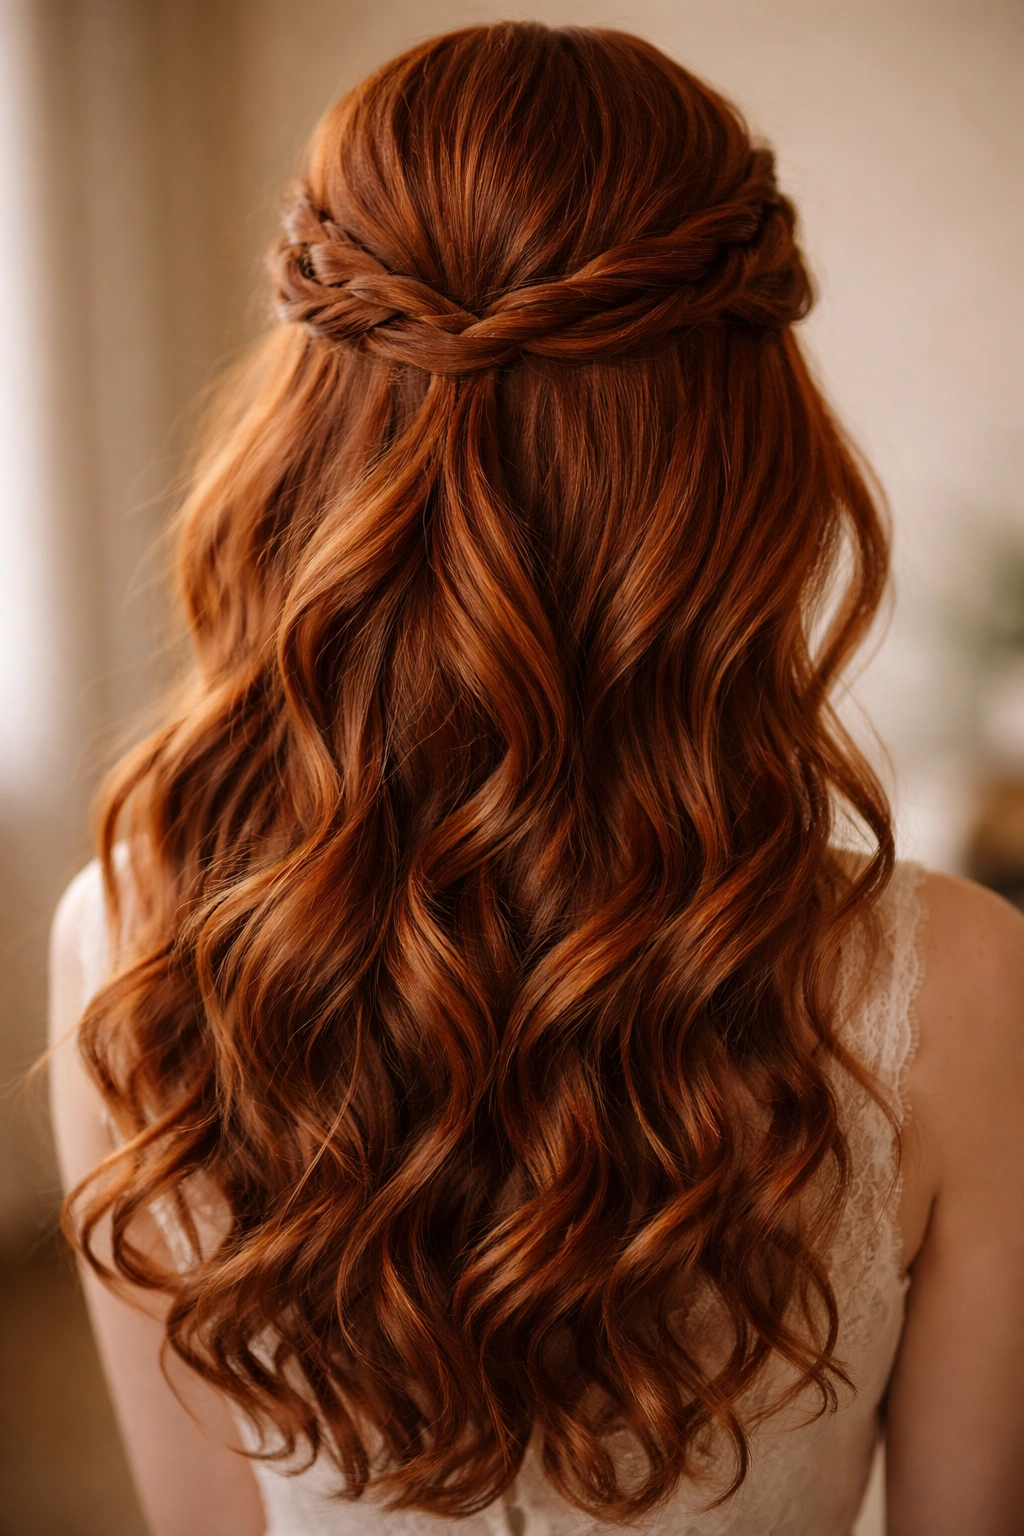
Take two twisted sections of hair from either side of your head, cross them at the back, and secure them together, letting everything below flow in soft curls. This creates a crown-like effect that feels incredibly romantic and works beautifully with red hair because you’re creating a frame at the top while showing off the full length and color below. It’s more interesting than a single twist but still elegantly simple enough for prom.
The Crown Effect
There’s something inherently beautiful about a style that creates a crown—it immediately makes you feel special and celebrated, which is exactly the energy you want for prom. The double twist also allows each twist to be slightly looser and more forgiving than if you were doing a single intricate braid or twist. This means less chance of it loosening throughout the evening and more room for that romantic, undone aesthetic.
Building Your Twisted Crown
- Start with hair that has some texture or waves already in it (curl it first if your hair is straight)
- Take a 2-inch section from above your ear on one side and twist it gently all the way back
- Do the same on the other side, twisting in the same direction
- Meet both twists at the back of your head and secure them together with bobby pins
- Leave everything below completely loose and full
- Create loose, bouncy curls throughout the remaining hair using a 1.25-inch to 1.5-inch curling iron
- Gently pull at the twists to make them fuller and more textured
- Use a light texture spray rather than tight hairspray to maintain the soft, romantic feel
Pro tip: If you want extra security, run a small clear elastic through both twists at the back before pinning them—this keeps them from shifting throughout the night.
8. Side-Swept Half Up with Glamorous Waves
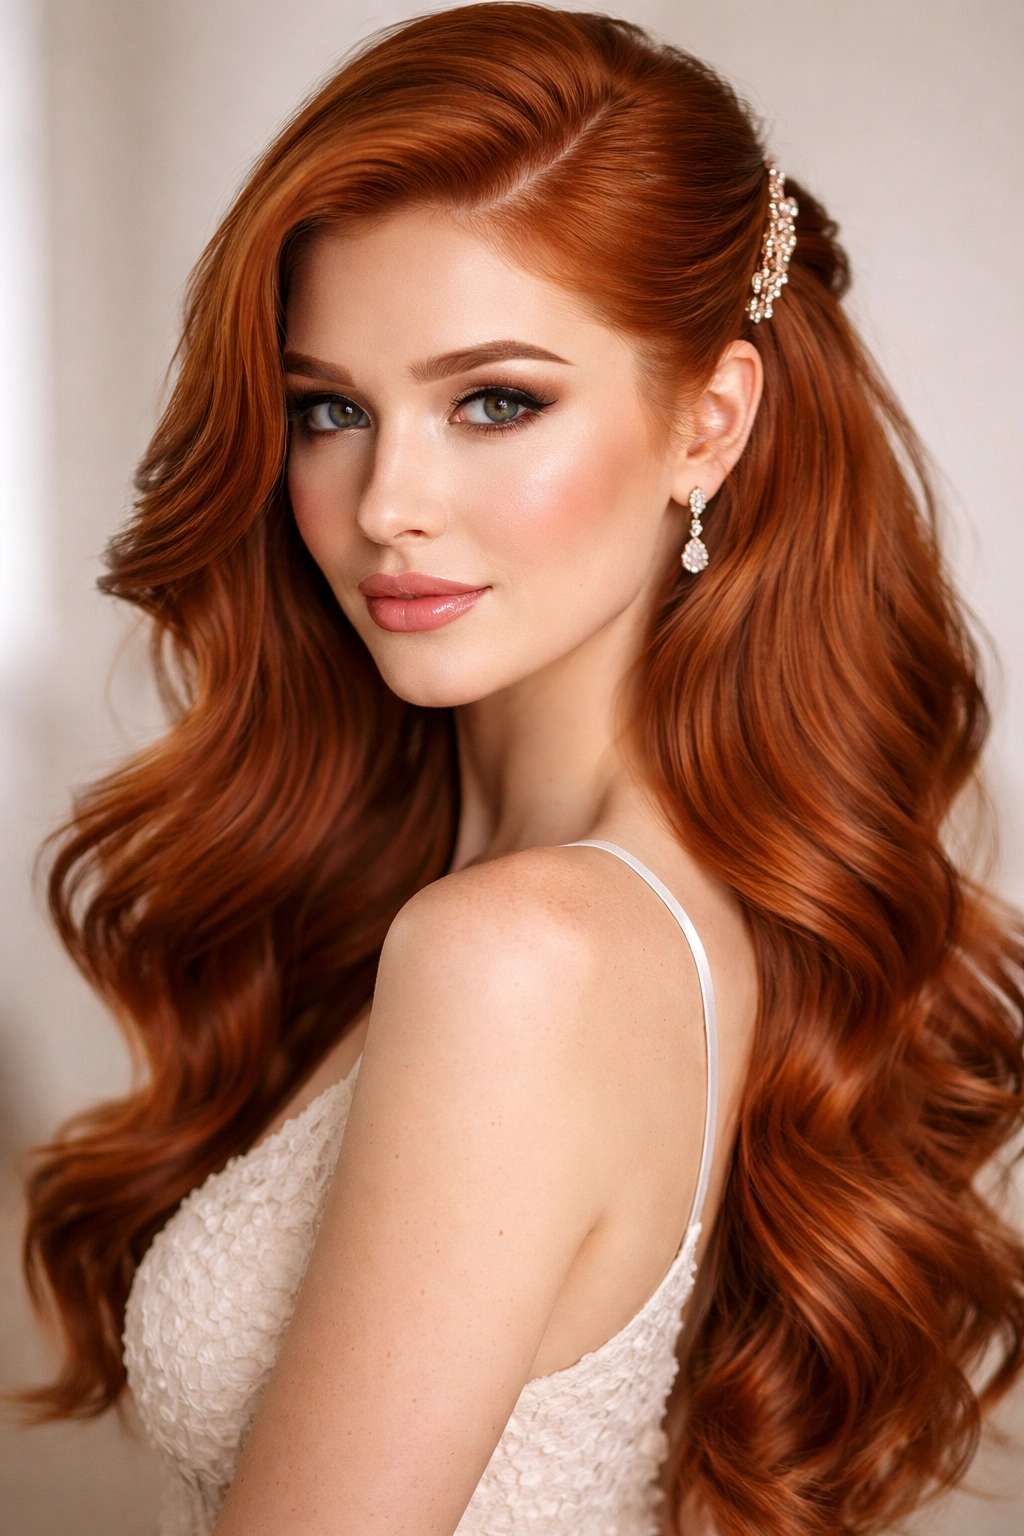
Sweep most of your hair to one side, secure a portion at the back with a clip or pins, and let everything flow in voluminous, glamorous waves. This asymmetrical approach is incredibly flattering, especially for showcasing red hair—you’re literally directing the viewer’s eye along one side of your face and body, which creates a slimming, elegant effect. The side sweep also creates a more modern, fashion-forward feeling than symmetrical styles.
Why the Side Sweep Works
A side-swept half-up is the kind of style that photographs incredibly well from multiple angles. It’s sophisticated without being stiff, romantic without being overly elaborate, and it gives you that “effortless glamour” vibe that feels exactly right for prom. For red hair, the side sweep means your color gets displayed beautifully on one side, creating visual interest and movement.
Creating the Swept Effect
- Blow-dry your hair with volume at the roots
- Use your fingers or a large round brush to create a deep side part (go deeper than you’d normally part)
- Sweep the larger side of your hair dramatically across the back of your head
- Secure this swept section at the nape of your neck with bobby pins or a small clip, creating a half-up effect rather than pulling all hair up
- Let the smaller section fall forward naturally along the side of your face
- Create loose, deep waves throughout all your hair using a large barrel curling iron (at least 1.5 inches)
- Lean into the asymmetry by making the waves on the back slightly larger than the waves in the front
- Use a shine spray on the side-swept section to make it look extra glossy
Insider note: The smaller section of hair in front (which falls forward) should frame your face beautifully—aim for it to hit around your cheekbones rather than your chin for the most flattering proportions.
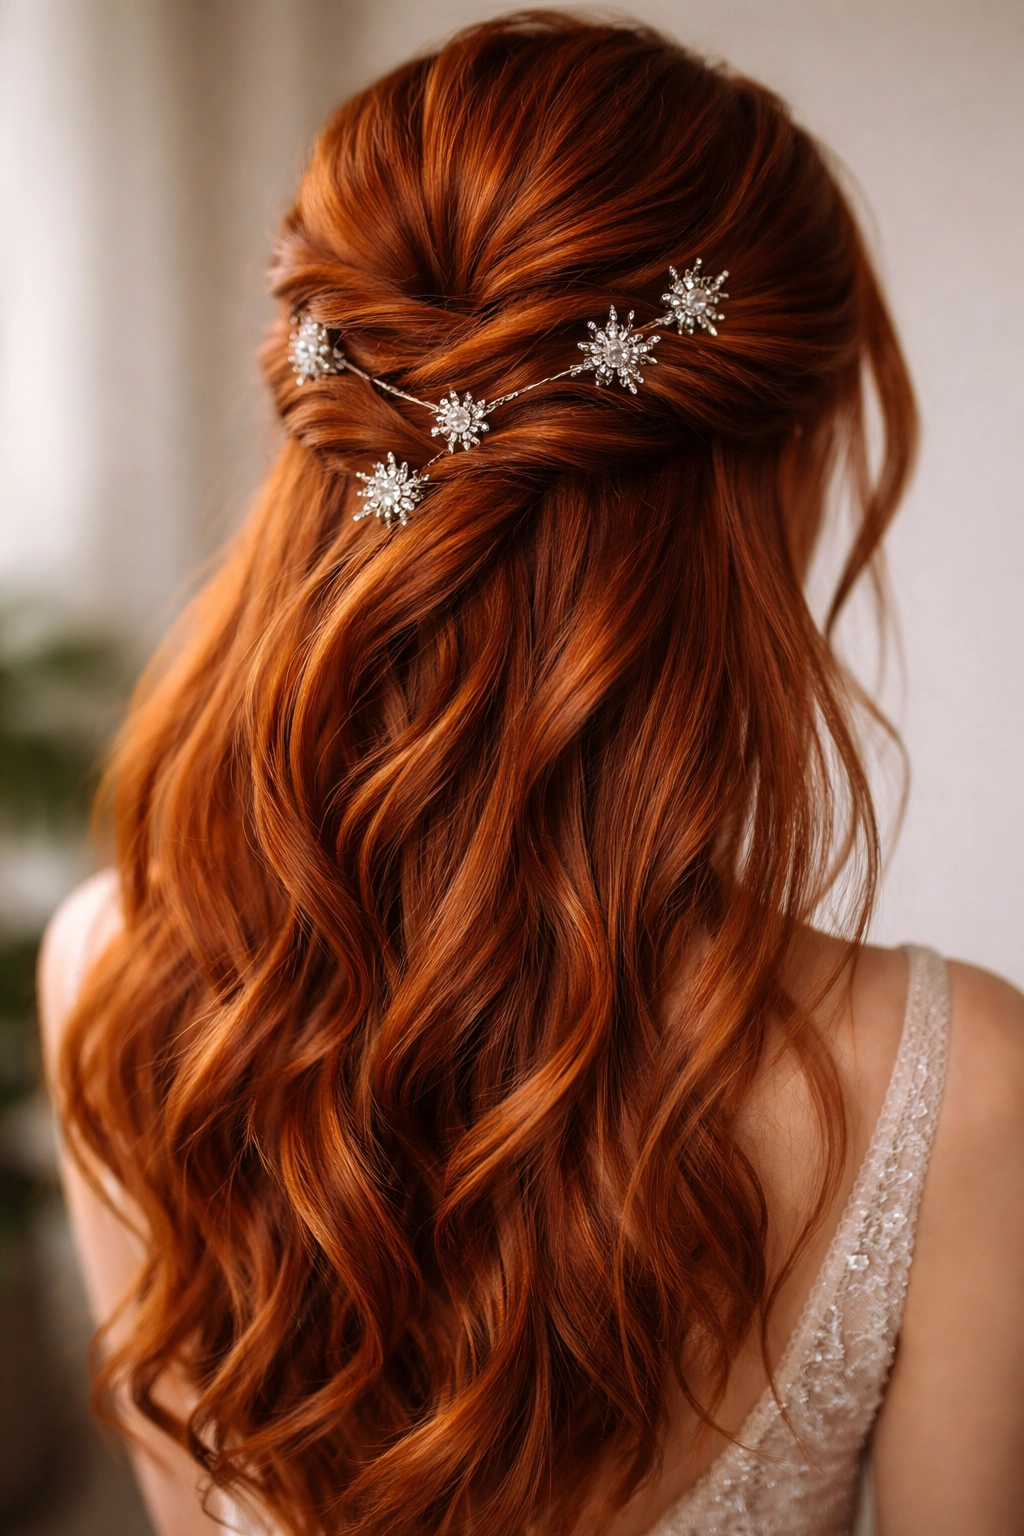
9. Pearl or Crystal Pinned Half Up
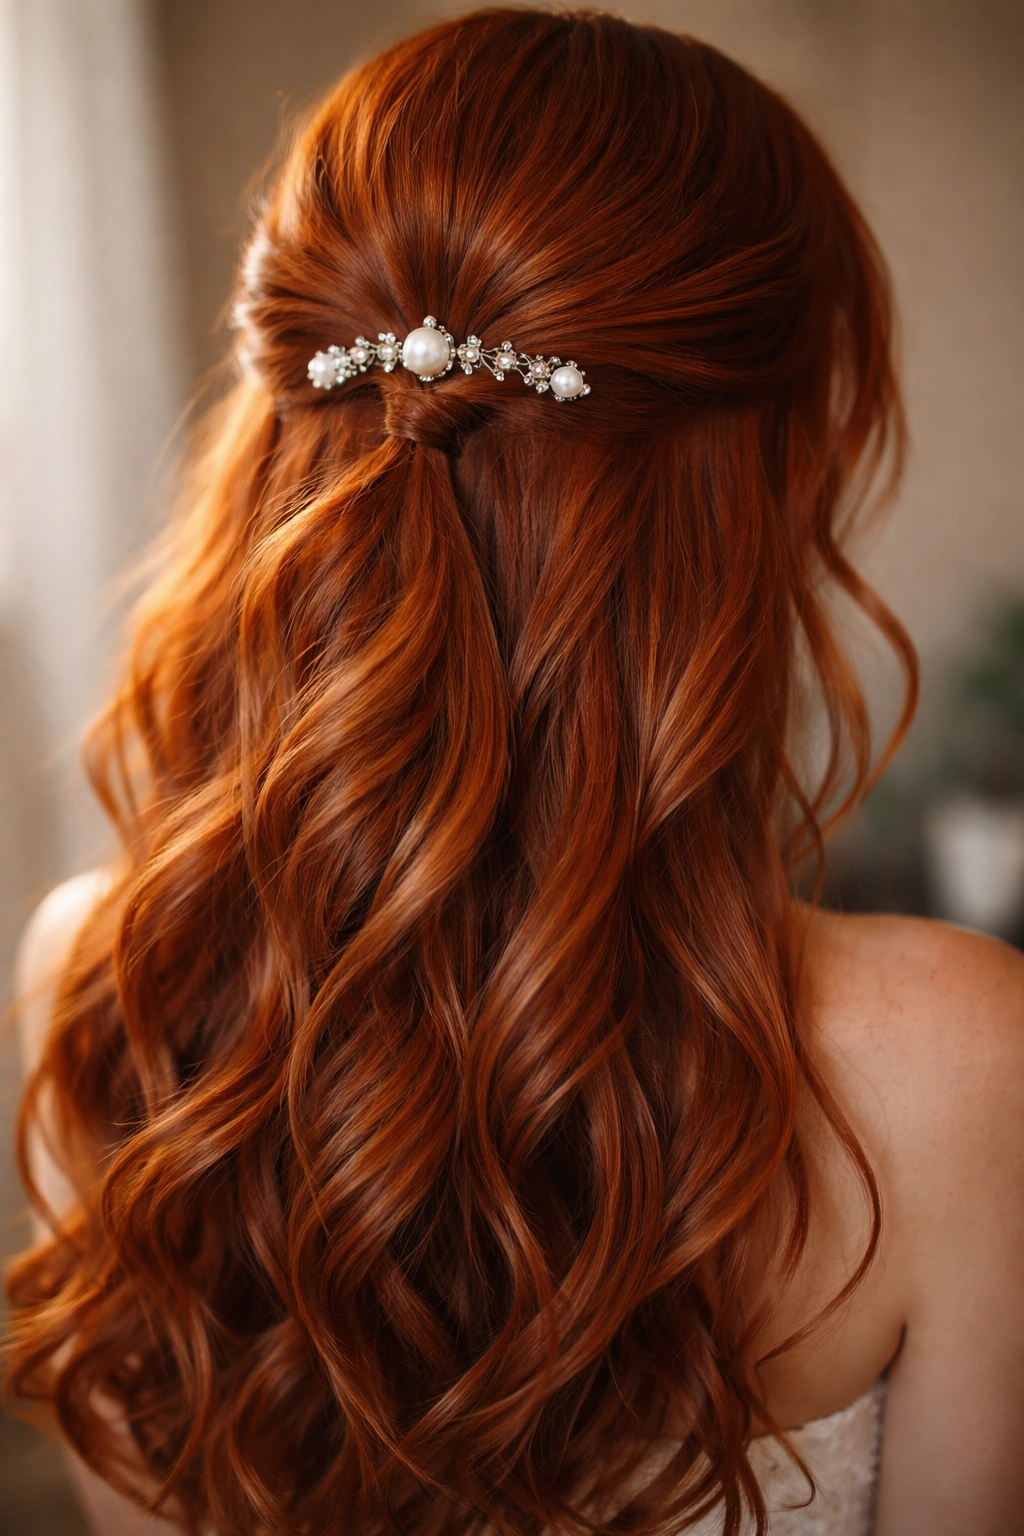
Create a simple half-up style—twist, braid, or just a clean gathered section—and secure it with decorative pearl or crystal clips and bobby pins that catch the light beautifully. Sometimes the magic is in the details rather than the complexity of the style itself. With red hair, adding sparkly or pearled elements gives you an excuse to complement your color with something cool-toned or warm-toned depending on your specific red shade and dress color.
The Power of Details
When you have naturally stunning hair color like red, you don’t need to over-complicate your hairstyle. A really beautiful detail—like pearl or crystal pins—can elevate a simple style into something that feels completely prom-worthy and special. The added element catches light in your photos and creates visual interest without requiring you to master complicated braiding techniques. This also means you can focus more of your styling time and energy on makeup and dress, if you prefer.
Styling With Sparkle
- Create whichever half-up base feels right to you—a simple twisted section, a loose braid, or even just a gathered ponytail section all work beautifully
- Secure this section loosely with one small clear elastic
- Insert crystal or pearl bobby pins into the base of this gathered section, allowing them to show and create sparkle
- Use at least 3-5 pins depending on how much detail you want
- Leave the rest of your hair completely loose and wavy
- Create soft waves in all the loose hair below, making sure waves complement rather than fight with the detail of the pins
- Keep the overall look fairly clean and simple to let the pins be the star
Worth knowing: Warm-toned crystals (champagne, gold, rose gold) beautifully complement warm red tones, while cool-toned pearls and silver crystals work well with cooler red shades like burgundy.
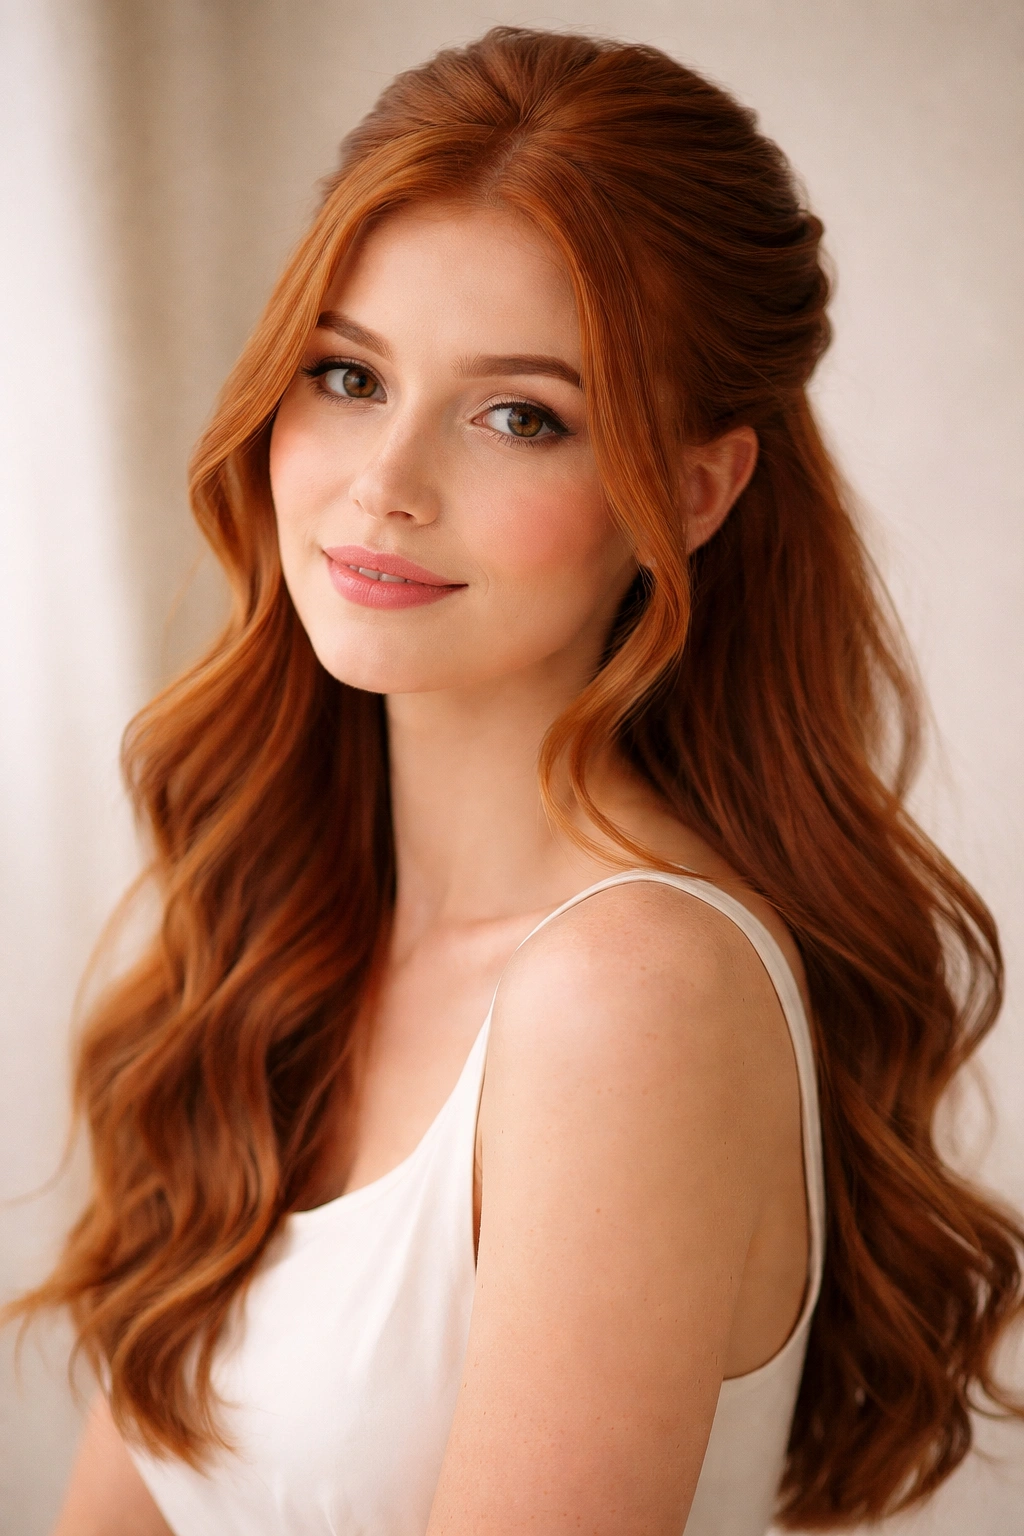
10. Bouffant Crown Half Up with Loose Tendrils
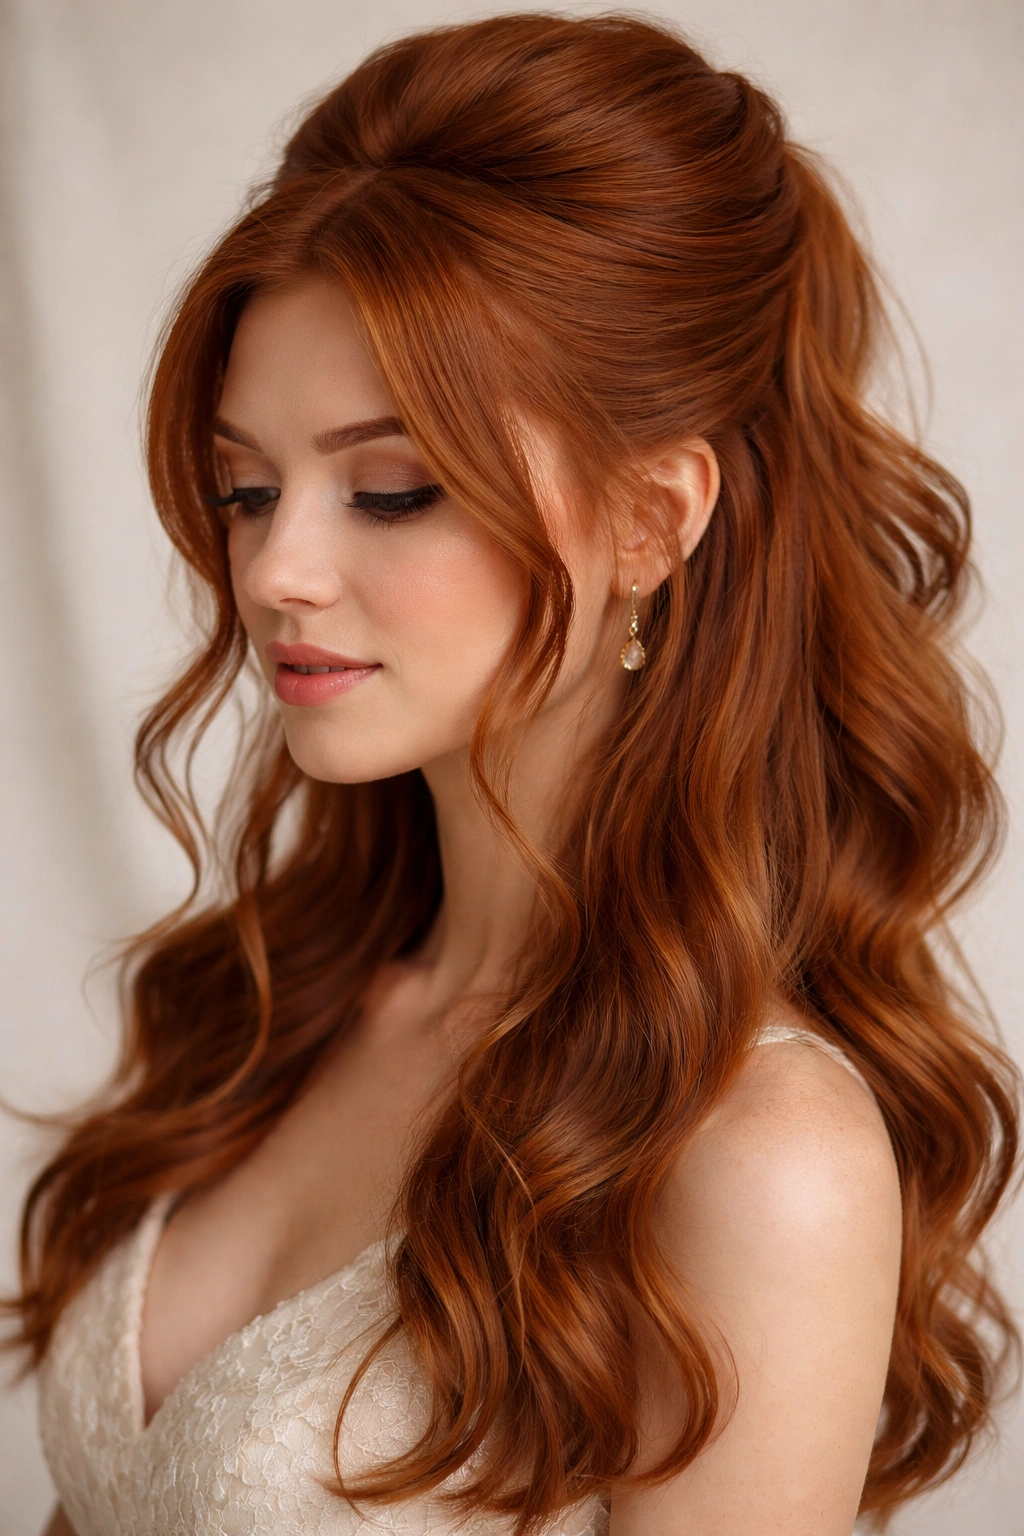
Create height at the crown by teasing gently and smoothing the top layer, then secure a section into a half-up ponytail, and frame everything with soft, loose tendrils falling around your face. This style has a distinctly romantic, slightly vintage feel that’s incredibly flattering and works gorgeously with red hair. The bouffant crown adds elegance and makes you feel like royalty, while the loose tendrils keep it from feeling overdone or stuffy.
The Bouffant Advantage
Bouffant styling has come back around in recent years because it’s so incredibly flattering—it creates height, it draws attention upward to your face, and it photographs beautifully. For prom, when you want to feel your absolute most beautiful and special, adding that element of bouffant styling makes a real difference in how the entire style reads. Red hair actually shows volume and texture more dramatically than some other colors, so a bouffant crown can look especially impressive without requiring tons of teasing.
Creating Crown Volume
- Start with second-day hair or apply a light texturizing spray to provide grip
- Tease gently at the crown in 2-3 small sections, building height without creating matted knots
- Smooth the top layer down carefully with a fine-tooth comb, keeping all the volume underneath
- Take a section about 2-3 inches back from the teased crown and gather it into a half-up ponytail
- Secure with a small elastic, then wrap a piece of hair around to hide the elastic
- Leave several small sections of hair completely loose around your face—these tendrils should fall at your temples and along your cheekbones
- Create soft waves in all the loose hair, making sure not to flatten the bouffant crown
- Use a volumizing spray at the roots to maintain height throughout the evening
Pro tip: Don’t tease too aggressively—you want it to look beautiful and voluminous, not like you’ve crimped your hair. Gentle, methodical teasing with a fine brush creates the best results.
11. Sleek Ponytail Half Up with Embellished Ties
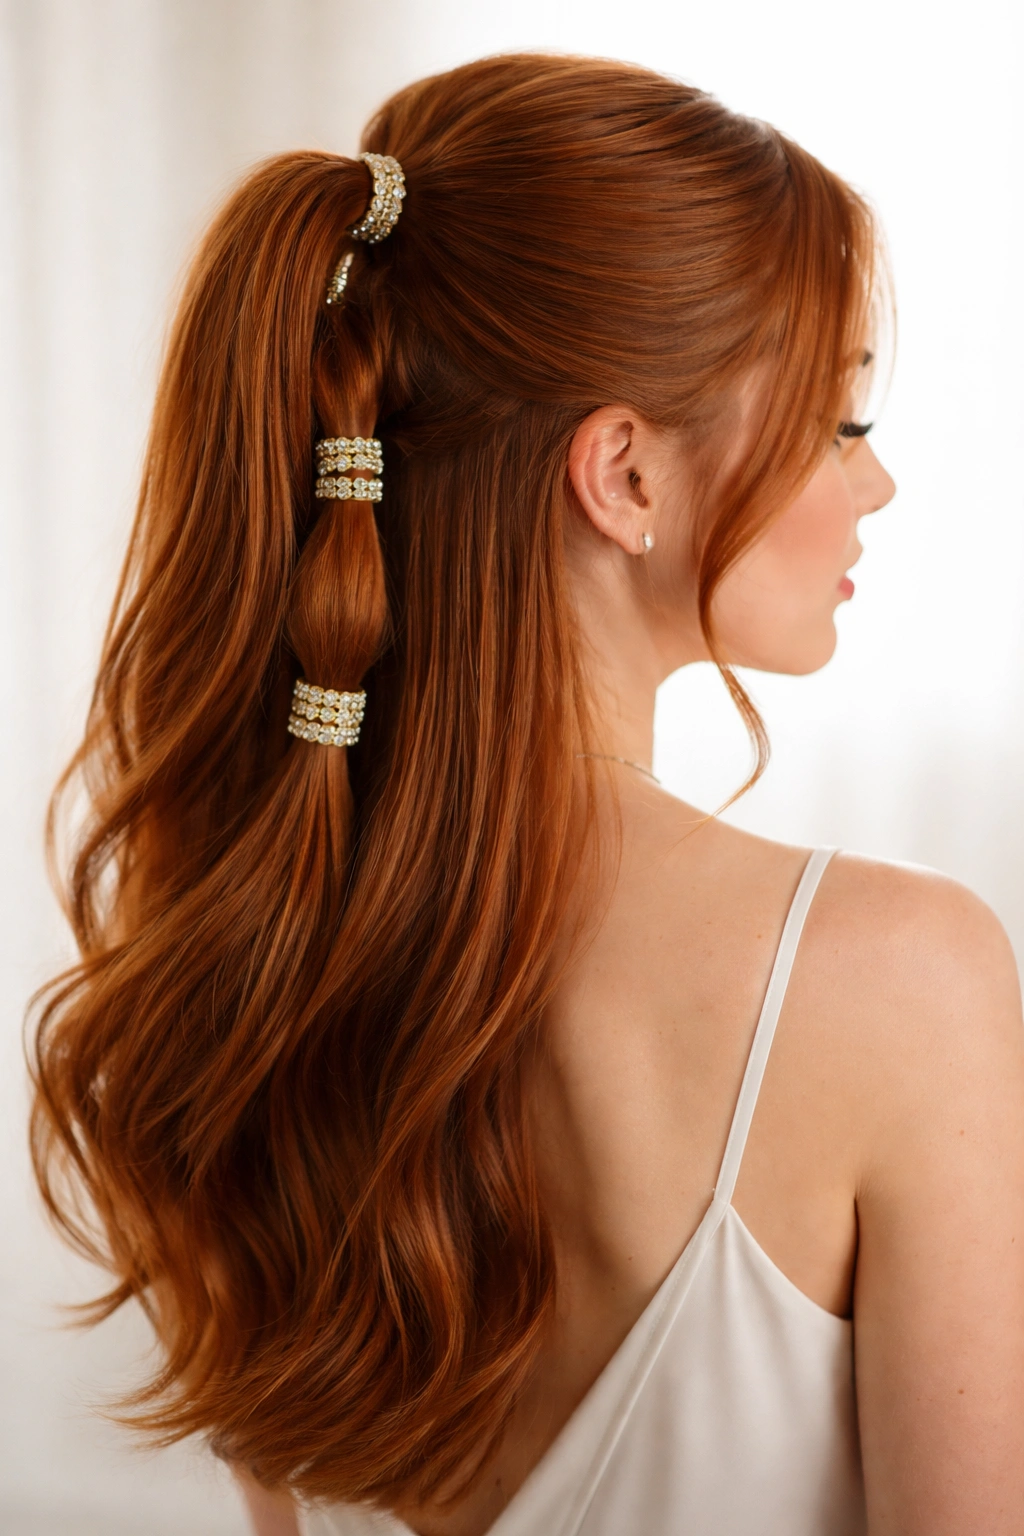
Create a sleek, smooth half-up ponytail secured with a decorative elastic band, hair cuff, or wrapped piece of fabric, keeping everything polished and modern. This is the kind of style that reads incredibly contemporary and editorial—it’s what you see in fashion magazines and on runways. Red hair paired with this clean, modern silhouette looks absolutely stunning, especially if you add an interesting detail to the ponytail tie itself.
The Modern Appeal
A half-up ponytail with an interesting detail feels different from classic prom hairstyles in exactly the right way. It’s elegant without being fussy, modern without being trendy, and genuinely flattering on most face shapes. The sleekness allows your red hair color to absolutely shine without any texture competing for visual attention. This is also a great option if you’re wearing a very modern dress rather than a traditional gown, because the hairstyle will complement rather than clash.
Executing the Sleek Look
- Blow-dry your hair smooth and straight
- Use a flat iron to smooth down the entire crown and sides
- Take a section from the crown that’s about 3 inches wide across
- Brush this section straight back very smoothly, pulling it tight
- Secure with a small elastic that matches your hair
- Wrap a decorative hair cuff, metallic elastic, or a thin piece of fabric around the base to cover the elastic and add detail
- Leave the remaining hair completely straight and glossy below the ponytail
- Use a shine spray on the ponytail section to enhance the sleekness
- Consider adding one or two face-framing tendrils that you’ve left out of the ponytail, softening the overall look just slightly
Insider note: A sleek half-up ponytail looks even more striking if you have some length to your red hair—aim for hair that’s at least to your shoulders for the most flattering proportions.
12. Soft Halo Braid Half Up with Waves
Create a soft braid that starts at one side and wraps partway around the back of your head like a halo or crown, securing at the other side, with loose waves cascading below and around the braid. This style combines the romance of a braid with the flattering effect of a halo shape that frames your entire face beautifully. Red hair shows the dimension of a braid gorgeously, and the loose waves below create soft movement that complements the delicacy of the braided element.
The Halo Effect
A braid that creates a halo or crown shape is inherently the most flattering hairstyle approach because it frames your face from above and around, drawing attention to your features. This is especially true for red hair, where the warm color naturally draws the eye. The combination of a structured braid element with soft, loose waves below gives you sophistication and romance in equal measure.
Building Your Halo Braid
- Start with hair that has some texture in it (curl or wave it first if needed)
- Begin your braid at one temple, taking a small three-strand section
- Loosely braid horizontally along the back of your head, aiming to create a braid that sits roughly at ear level
- Stop braiding about 2-3 inches before you reach the opposite side
- Secure the braid on one side with bobby pins that match your hair color
- Leave the last few inches of the braid somewhat loose and pull at it to make it fuller and more textured
- Create gorgeous, bouncy waves in all the remaining hair using a 1.25-inch curling iron
- Ensure that hair falls forward slightly on the side where the braid ends, softening the line
- Leave small face-framing pieces free on both sides
Worth knowing: This braid doesn’t need to sit perfectly along your head—it can dip lower in some spots and sit higher in others, which actually makes it look more romantic and less like a structured style.
13. Twisted Half Up with Sparkly Hairpins Scattered Throughout
Create a twisted or lightly braided half-up section, then strategically scatter 3-5 sparkly, jeweled bobby pins throughout the top section of your hair for a glamorous, editorial touch. This approach gives you the best of both worlds: an updo element that’s secured and polished, but also a feeling of modern sophistication through the scattered detail rather than a single heavy piece. Red hair absolutely glows when you add sparkly elements because the warmth of your color complements metallic details beautifully.
The Scattered Detail Advantage
Using multiple small pins scattered throughout rather than clustering them all together creates a more sophisticated, designed-looking effect. It also means no single piece is bearing all the visual weight of the embellishment, which prevents your style from looking costume-y or overdone. This is especially important for prom, where you want to look beautiful and special but not like you’ve tried too hard.
Placing Your Details
- Create your half-up twist or loose braid as your base style
- Secure it with a small clear elastic at the back
- Identify 3-5 spots around the top section where you’d like sparkle to show
- Insert jeweled bobby pins into the secured section at these spots, spacing them out rather than clustering them
- Make sure you can see the sparkly parts of each pin, not just the metallic backing
- Consider the placement on your overall head—you want visual balance, with pins distributed somewhat evenly across the crown
- Create soft waves in all the remaining loose hair below
- Use a light texture spray that won’t make everything look stiff or overly controlled
Pro tip: Clear bobby pins with small crystals glued on, or actual jeweled bobby pins designed for hair, work beautifully—just make sure they’re actually secure enough for prom night and won’t slip out.
14. Romantic Half Up with Soft Face-Framing Pieces and Flowers
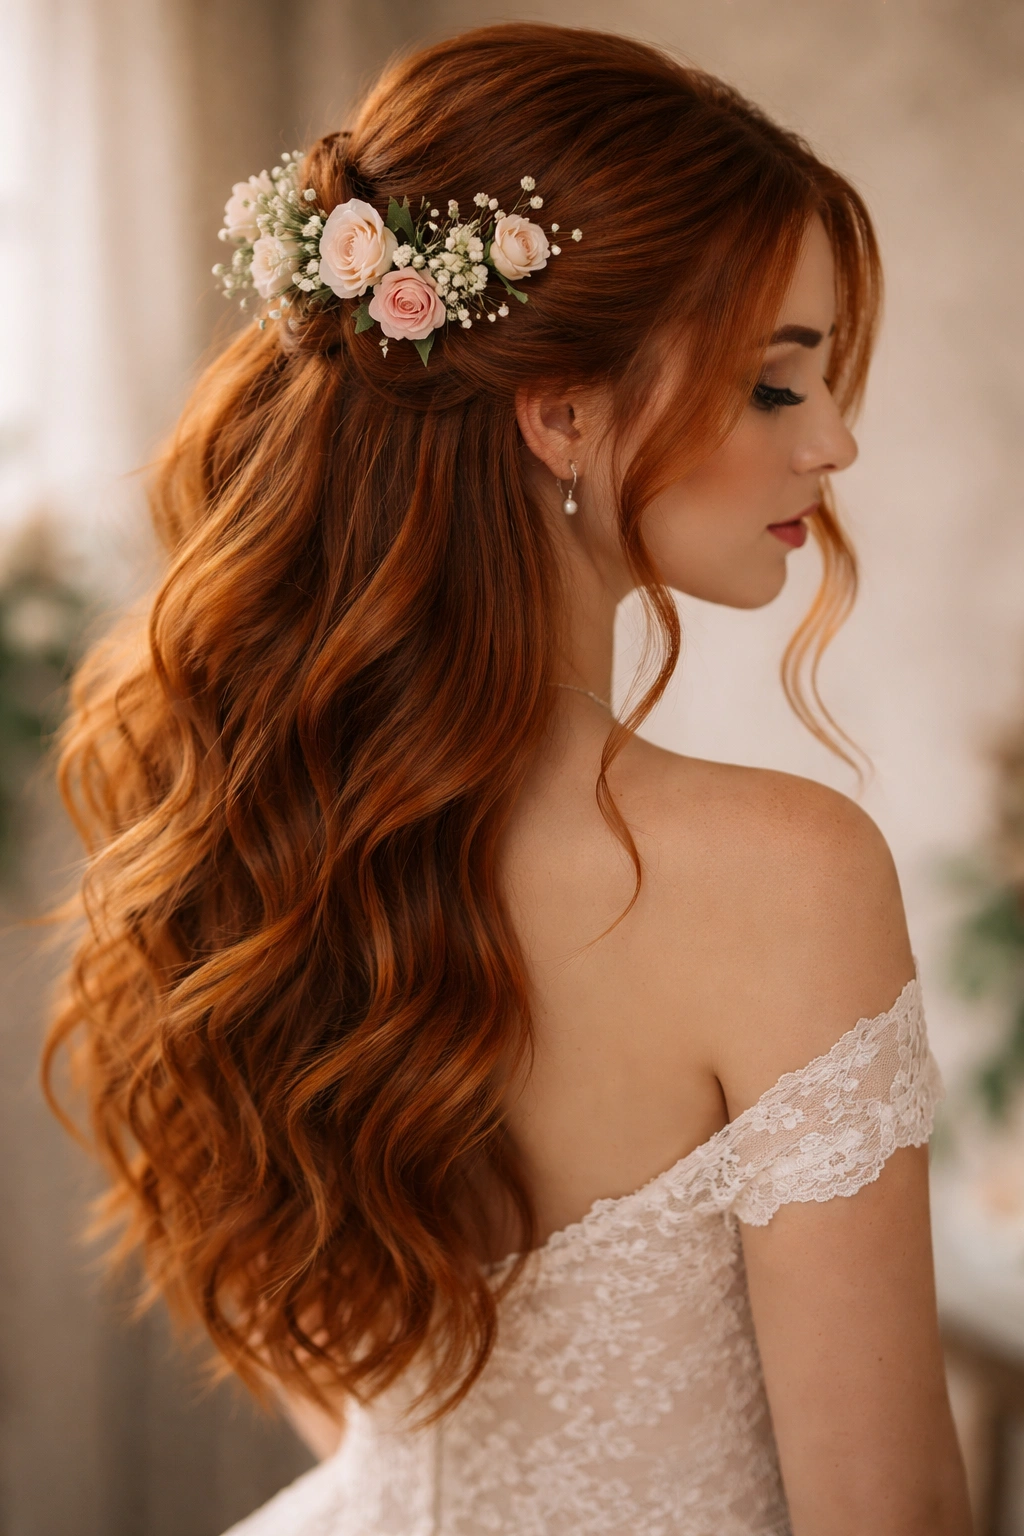
Create a soft, loose half-up style—whether that’s a gentle twist, a loose braid, or simply a gathered section—and enhance it with real or high-quality silk flowers pinned delicately around the crown or throughout the style. This is the kind of approach that feels incredibly romantic and wedding-inspired, which means it’s perfect for prom if that’s the vibe you’re going for. Red hair paired with flowers (especially in colors like ivory, blush, white, or deep jewel tones) looks absolutely stunning and creates a truly special moment.
The Flower Effect
There’s something inherently special and momentous about incorporating flowers into your prom hairstyle. It makes the evening feel like a celebration, and it adds a romantic, fairytale quality that simple waves alone can’t quite achieve. Real flowers look more luxurious and intentional than fake ones, but high-quality silk flowers can work beautifully too, especially if you need your flowers to last all night without wilting. Red hair creates a gorgeous contrast with flowers in virtually any color.
Incorporating Flowers Gracefully
- Create your chosen half-up base (a twisted section, loose braid, or gathered ponytail all work well)
- Secure it gently but firmly with bobby pins
- If using real flowers, have them prepared by a florist just a few hours before your event for optimal freshness
- Tuck flower stems into the gathered section, securing them with extra bobby pins as needed
- For a more distributed look, place individual flowers throughout rather than creating one large cluster
- Leave several soft, loose pieces of red hair falling around your face and neck to frame the flowers beautifully
- Create soft waves in all the remaining loose hair below
- Keep makeup fresh and natural-looking (or dewy with a pretty flush) to let the flowers and hair be the stars
- Refresh flowers with a light mist of water if possible to keep them fresh through the evening
Insider note: Pink, blush, cream, and white flowers look ethereal with red hair, while deep burgundy or jewel-toned flowers create a more dramatic, moody feel.
15. Textured Knot with Side Waves and Minimal Accessories
Create a soft, textured knot at the crown by loosely twisting and wrapping your hair, secure it minimally, then let waves cascade down one side in a modern, effortlessly glamorous arrangement. This final style celebrates your red hair without lots of extra embellishment—it’s about texture, movement, and the natural beauty of your color. It works perfectly if you’re wearing a stunning dress that doesn’t need hair competing for attention, or if you simply prefer a more understated, modern approach to prom beauty.
The Power of Simplicity
Sometimes the most sophisticated approach is the simplest one. A textured knot with beautiful waves is inherently flattering, requires less ongoing maintenance throughout prom night, and photographs beautifully without looking overdone. Red hair doesn’t need much embellishment to look special, so a clean style with good texture and movement can be far more impactful than something complicated with lots of accessories. This style also pairs perfectly with a bold lip or statement makeup if you want that to be your focal point.
Creating the Effortless Knot
- Start with hair that has natural texture or curl in it already
- Gently tease at the crown for grip and hold
- Take two sections of hair from the very top and twist them around each other loosely
- Wrap the twisted sections into a loose knot shape at the crown
- Secure with bobby pins that match your hair, keeping it slightly undone and textured
- Tug gently at the knot to increase volume and that intentional-but-relaxed appearance
- Create beautiful, flowing waves throughout all the remaining hair, using a large barrel curling iron
- Let these waves cascade primarily toward one side for modern asymmetry
- Leave small pieces of hair framing your face and neck
- Use a texture spray rather than hairspray to maintain natural movement
Worth knowing: This style looks especially beautiful with just a small detail—maybe a single pearl pin or a delicate hair comb—rather than lots of embellishments, which keeps the focus on your gorgeous red color and the texture of the style itself.
Final Thoughts
Your red hair is already the statement—the right half up half down prom style amplifies that beauty while creating a look that feels completely authentically you. Whether you choose something romantic and braided, modern and sleek, or textured and soft, the goal is a hairstyle that makes you feel confident, comfortable, and absolutely stunning for one of the most important nights of your high school experience. The best part about half up half down styles is that they’re forgiving; they work with your natural hair texture rather than against it, and they hold up beautifully through dancing, photos, and a whole evening of celebration.
Remember that the most important element is choosing a style that feels true to your personality. If you’re naturally classic and traditional, lean into the braids and romantic elements. If you’re more modern and minimalist, the sleek ponytails and textured knots will feel more authentically you. Don’t feel pressured to choose something overly complicated just because prom feels like it deserves a dramatic style—red hair is dramatic enough on its own. Add a style that you genuinely love, pair it with makeup and a dress that make you feel like yourself, and you’ll walk into prom looking like the best version of yourself.
One final tip: get a trial run of your chosen style at least a week before prom if possible. This gives you a chance to see how it looks in natural light and photographs, how long it actually takes you or your stylist to create, and whether any adjustments need to be made. It also removes the stress from prom day itself, allowing you to show up and simply enjoy being celebrated. Your red hair deserves nothing less.