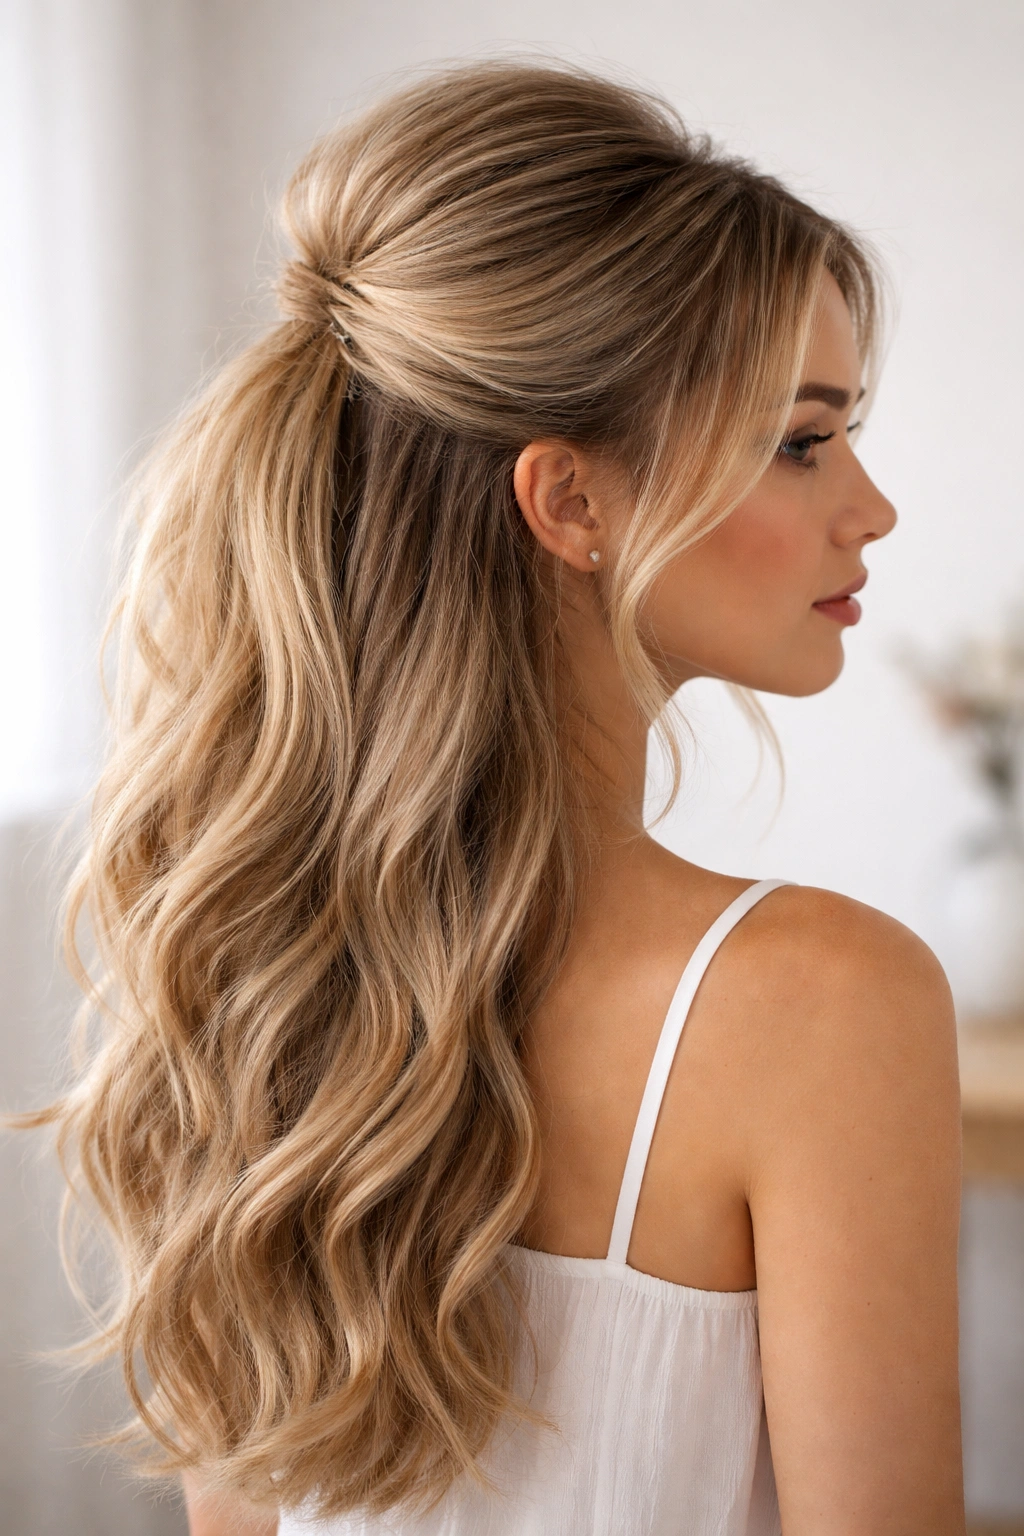
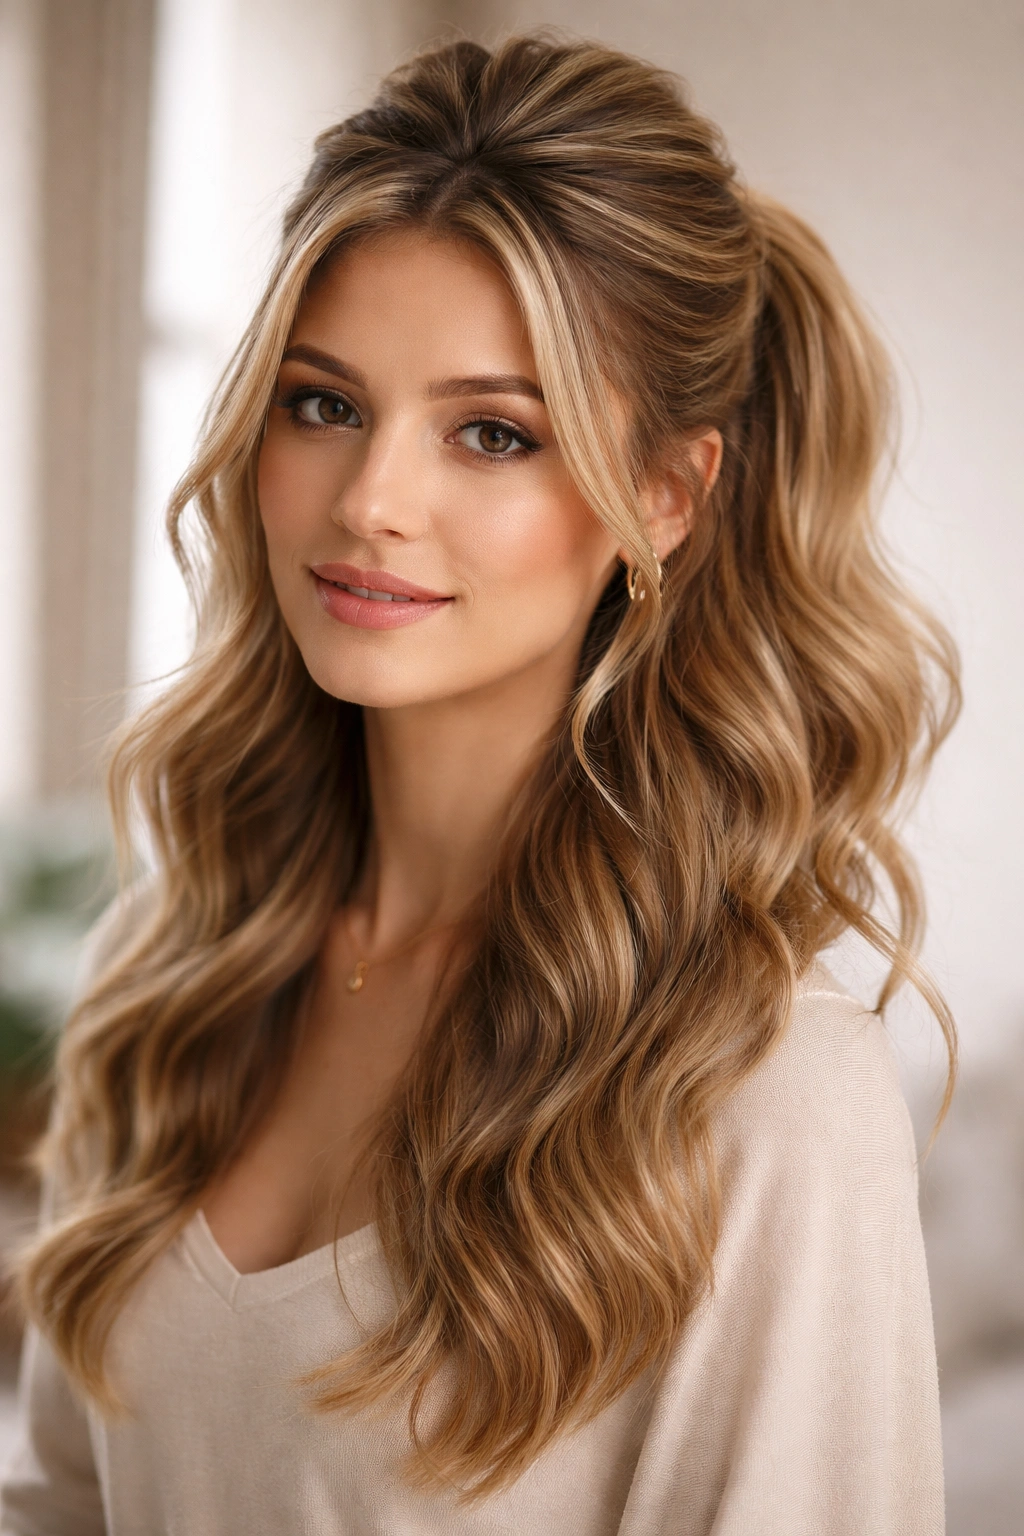
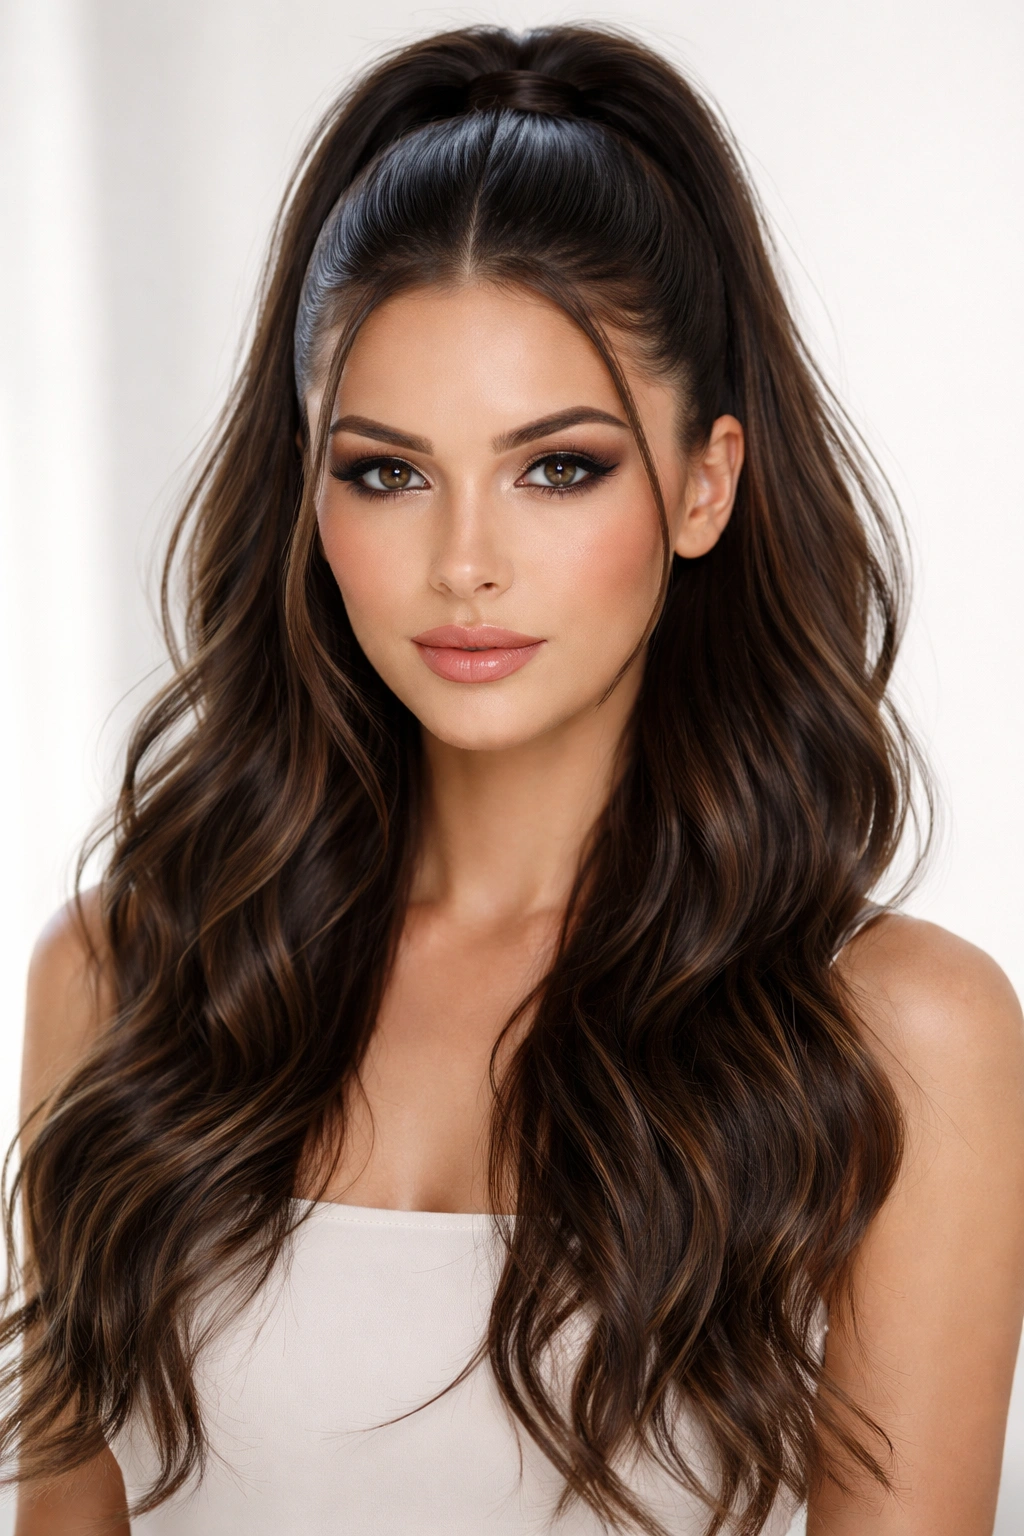
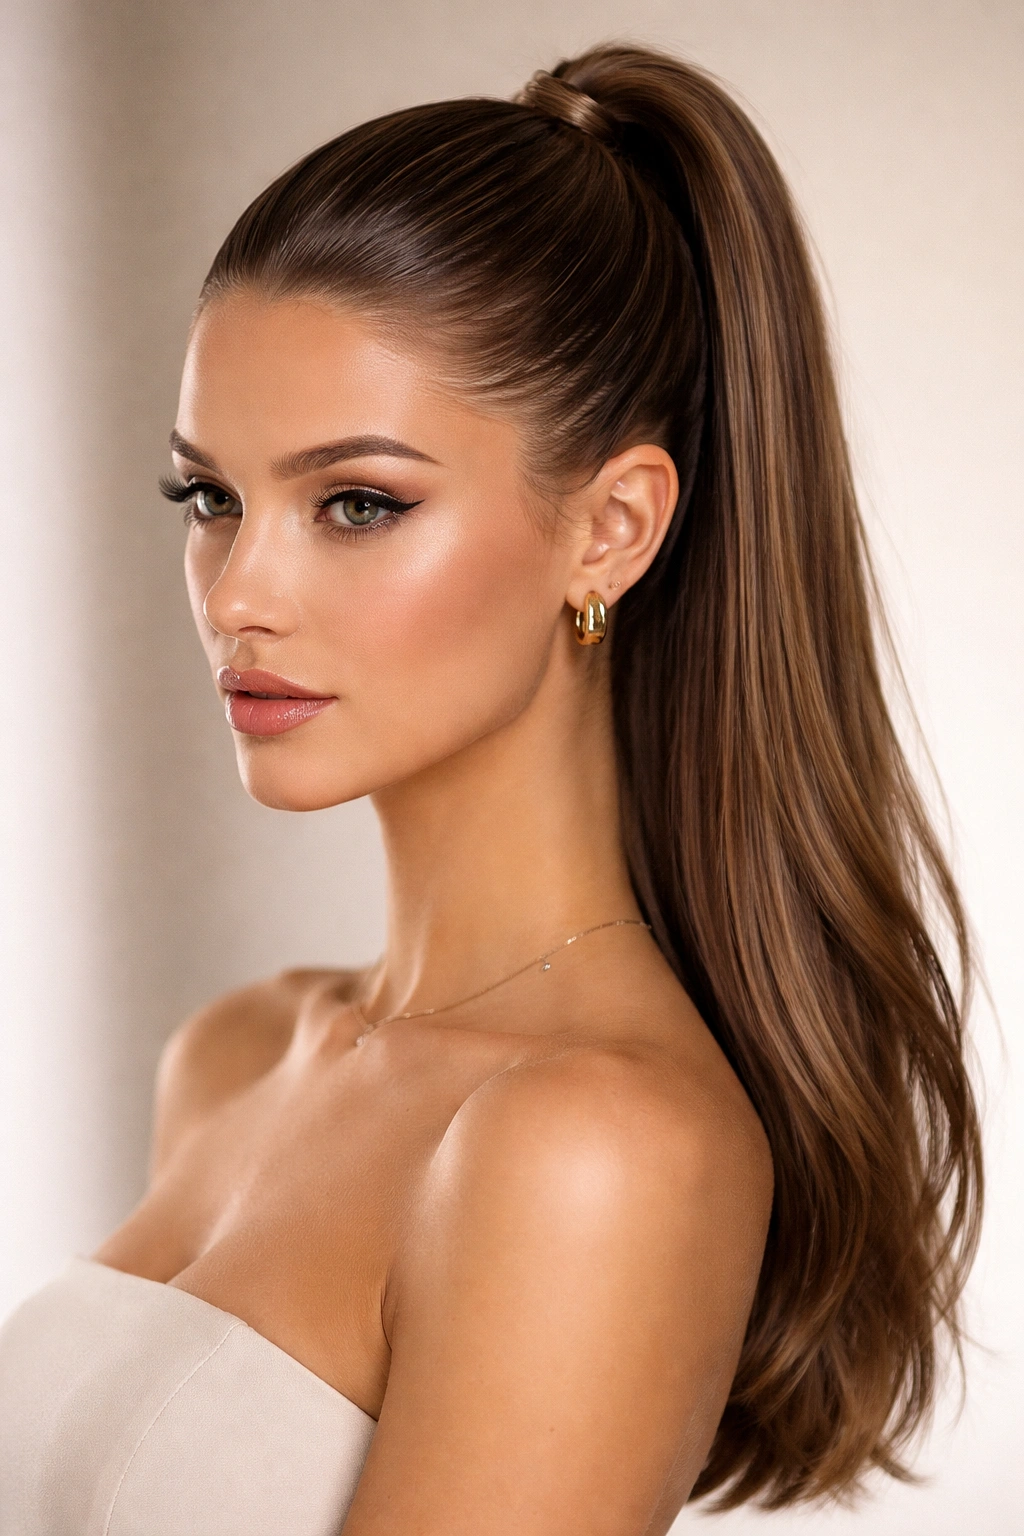
The half up, half down hairstyle sits in that perfect sweet spot between casual and polished—it’s effortlessly pretty without requiring hours in front of a mirror. Whether you’re heading to work, getting ready for a date, or just trying something fresh with your everyday look, this style manages to feel special while keeping your hair partly off your face. The beauty of half up, half down ponytails is their incredible versatility. You can dress them up or down, add texture and dimension, weave in braids, or keep things simple and sleek. They work on straight hair, waves, curls, and everything in between. The style flatters most face shapes and hair types, which is probably why it’s remained such a go-to option for people who want something that looks intentional without being overdone.
What makes these styles so appealing is how they balance practicality with aesthetic appeal. You get the hair-off-your-face benefit that keeps you looking polished, but you’re still showing off length and movement. There’s also something about a good half up ponytail that makes you feel more put-together instantly, even on days when you’re not really trying that hard. From romantic and soft to sleek and modern, the options are genuinely endless once you understand the basic technique and start playing with variations.
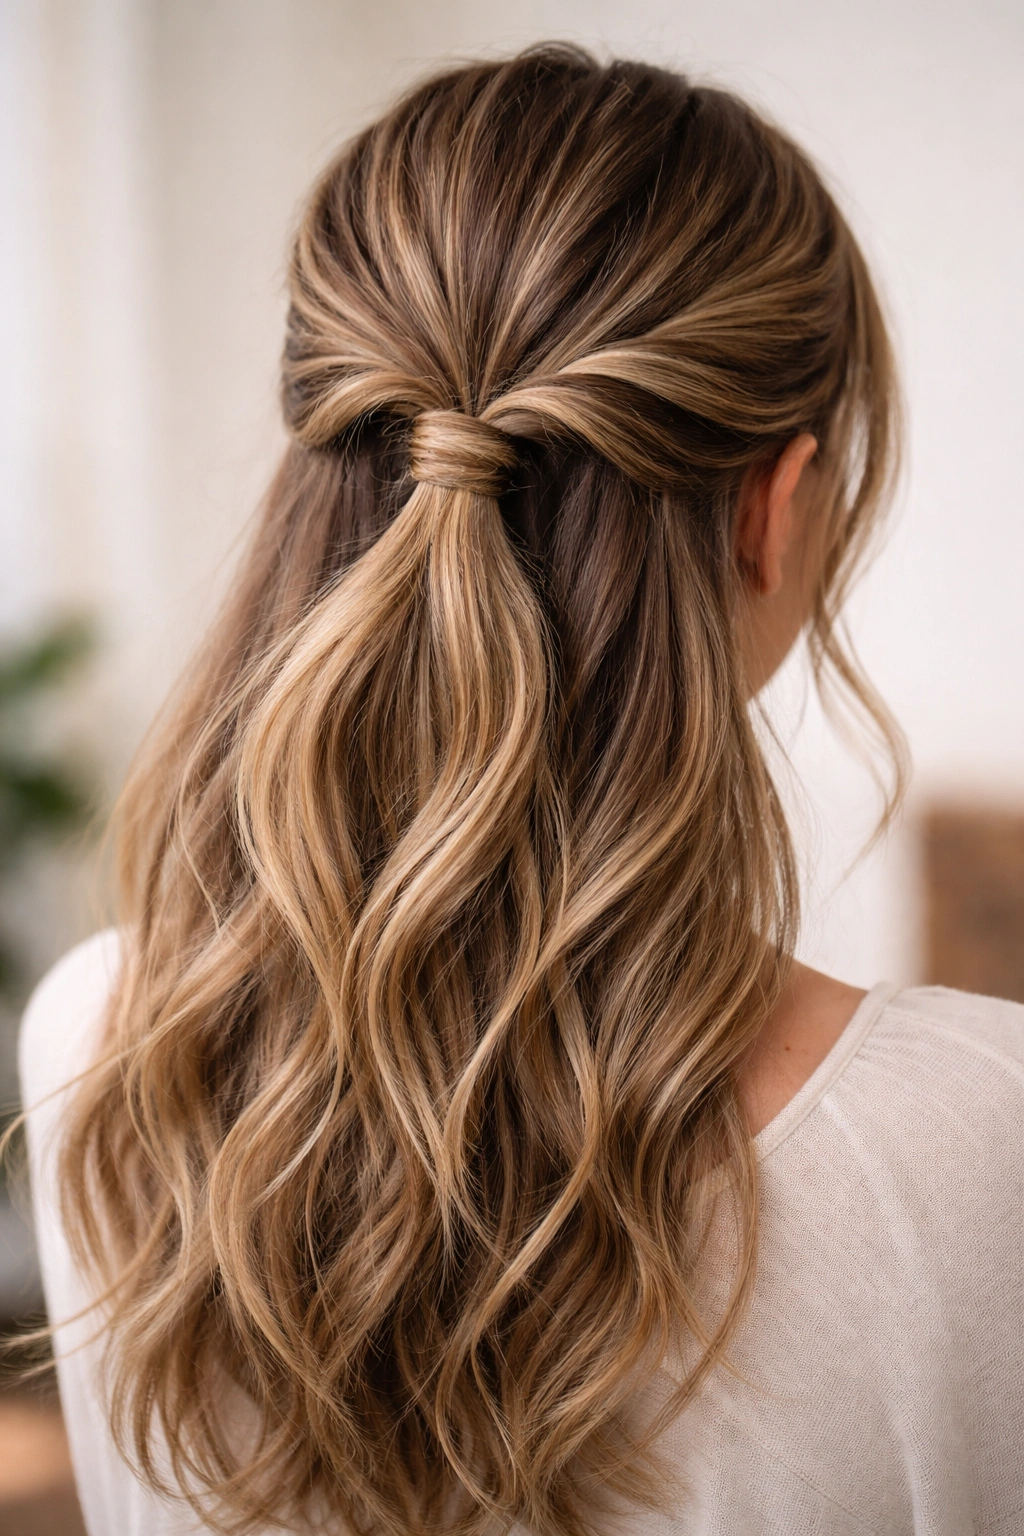
1. Classic Twisted Half Up with Texture
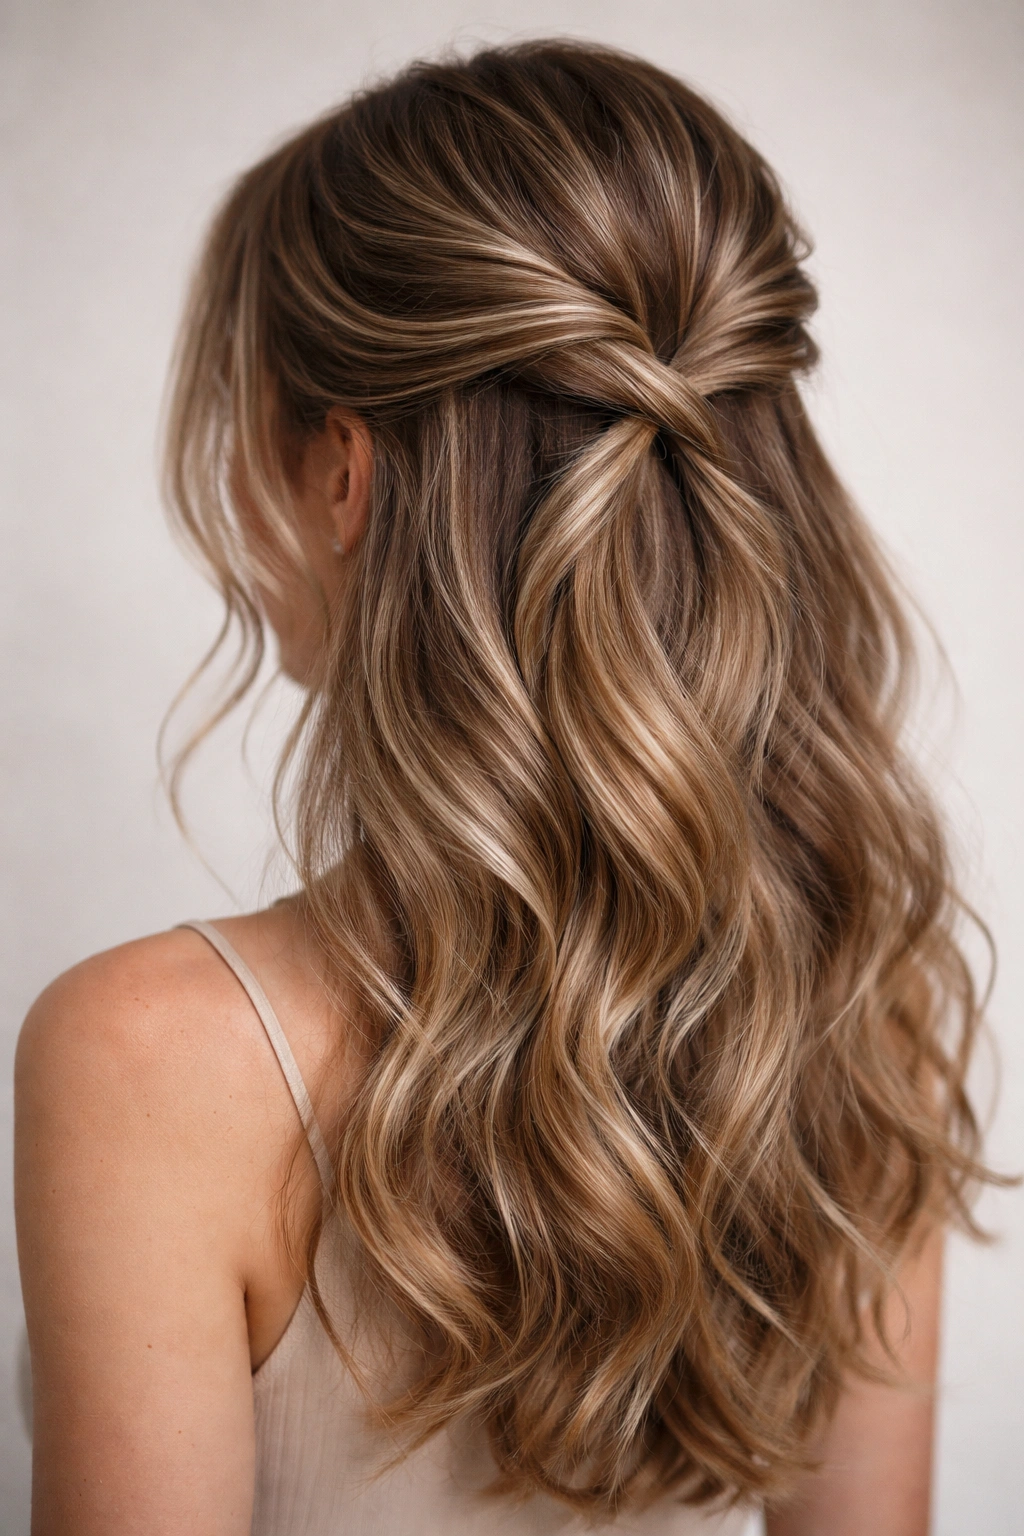
This is the foundational half up style that works as a base for so many other variations. Start by taking a section of hair from each side of your head at about temple height, then twist each section loosely toward the back of your head. Cross one twisted section over the other to create a gentle X pattern at the crown, then secure everything with a clear or matching elastic band. The key to making this look intentional rather than accidental is to gently pull and tease the twisted sections so they have visible texture and dimension rather than looking slick and tight.
Why This Works for Nearly Everyone
The twisted halves distribute volume evenly and create a soft, romantic feel that suits different face shapes. Unlike tighter styles that can emphasize angles, the loose twist creates a flattering frame that softens features while still being secure enough for all-day wear. The slight tousled quality reads as effortlessly chic rather than trying too hard.
How to Get the Perfect Texture
- Tease gently at the roots before twisting to build volume and texture
- Don’t twist too tightly—loose, relaxed twists look more modern and polished than tense spirals
- After securing, pull the twisted sections slightly to make them puffier and less defined
- For extra hold, mist lightly with texture spray before starting so the twists grip better
- Leave a few face-framing pieces loose if your hair allows for softer, more romantic movement
Pro tip: Do this style on second-day hair rather than freshly washed hair—the texture and grit make twists hold better and look fuller automatically.
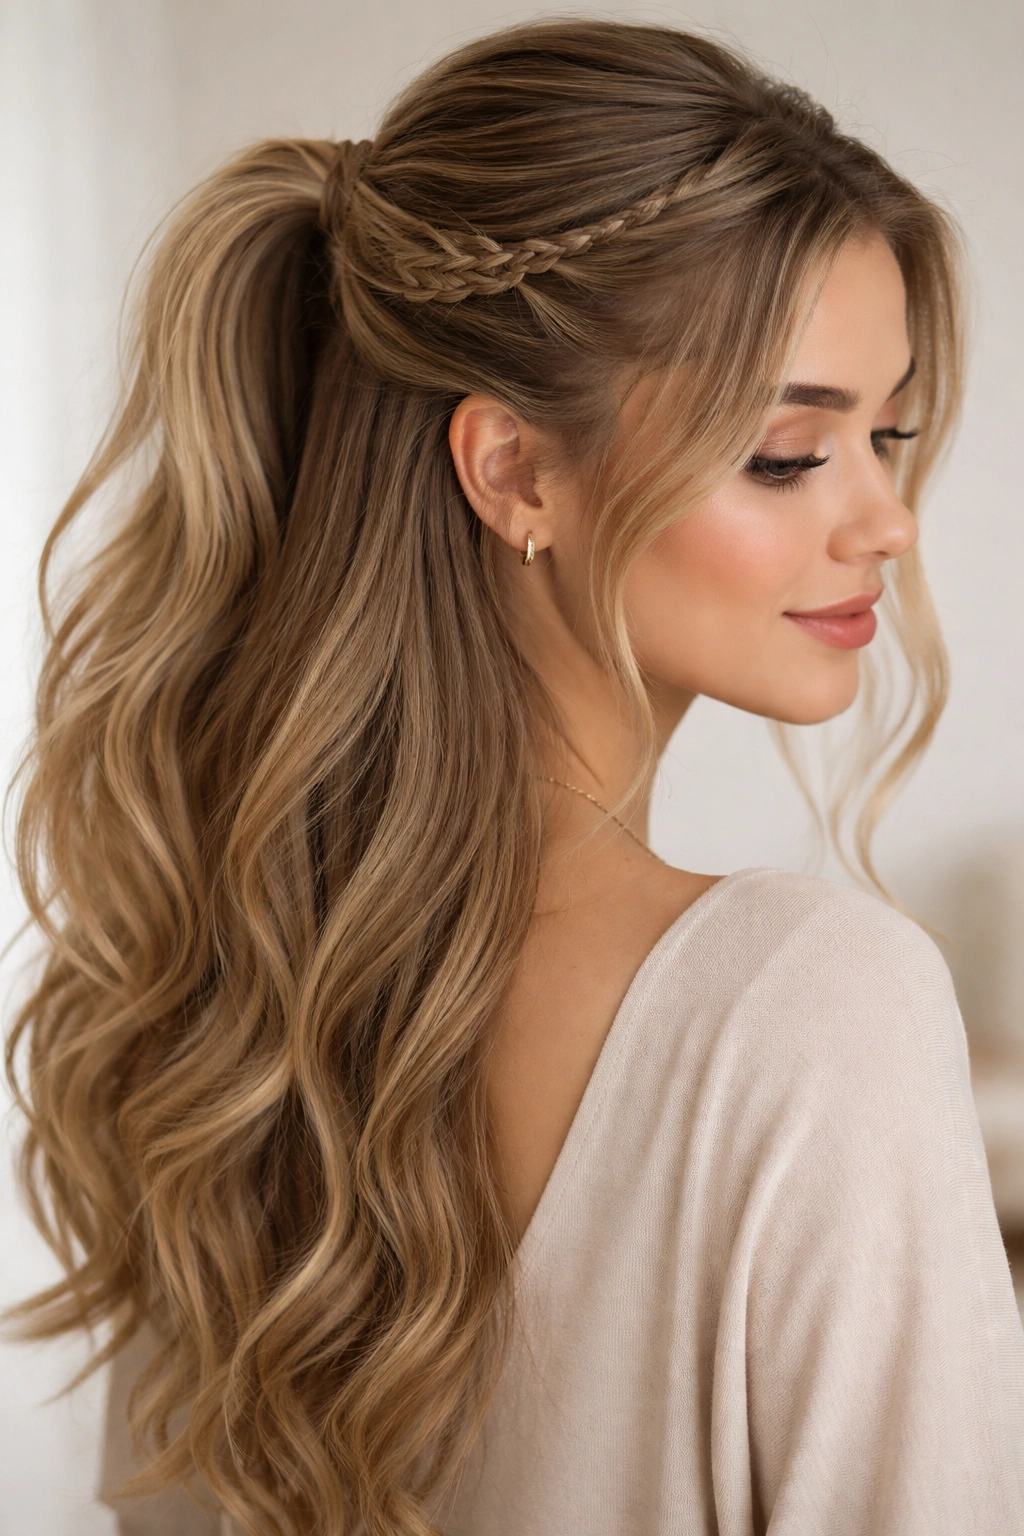
2. Sleek and Polished Braided Half Up
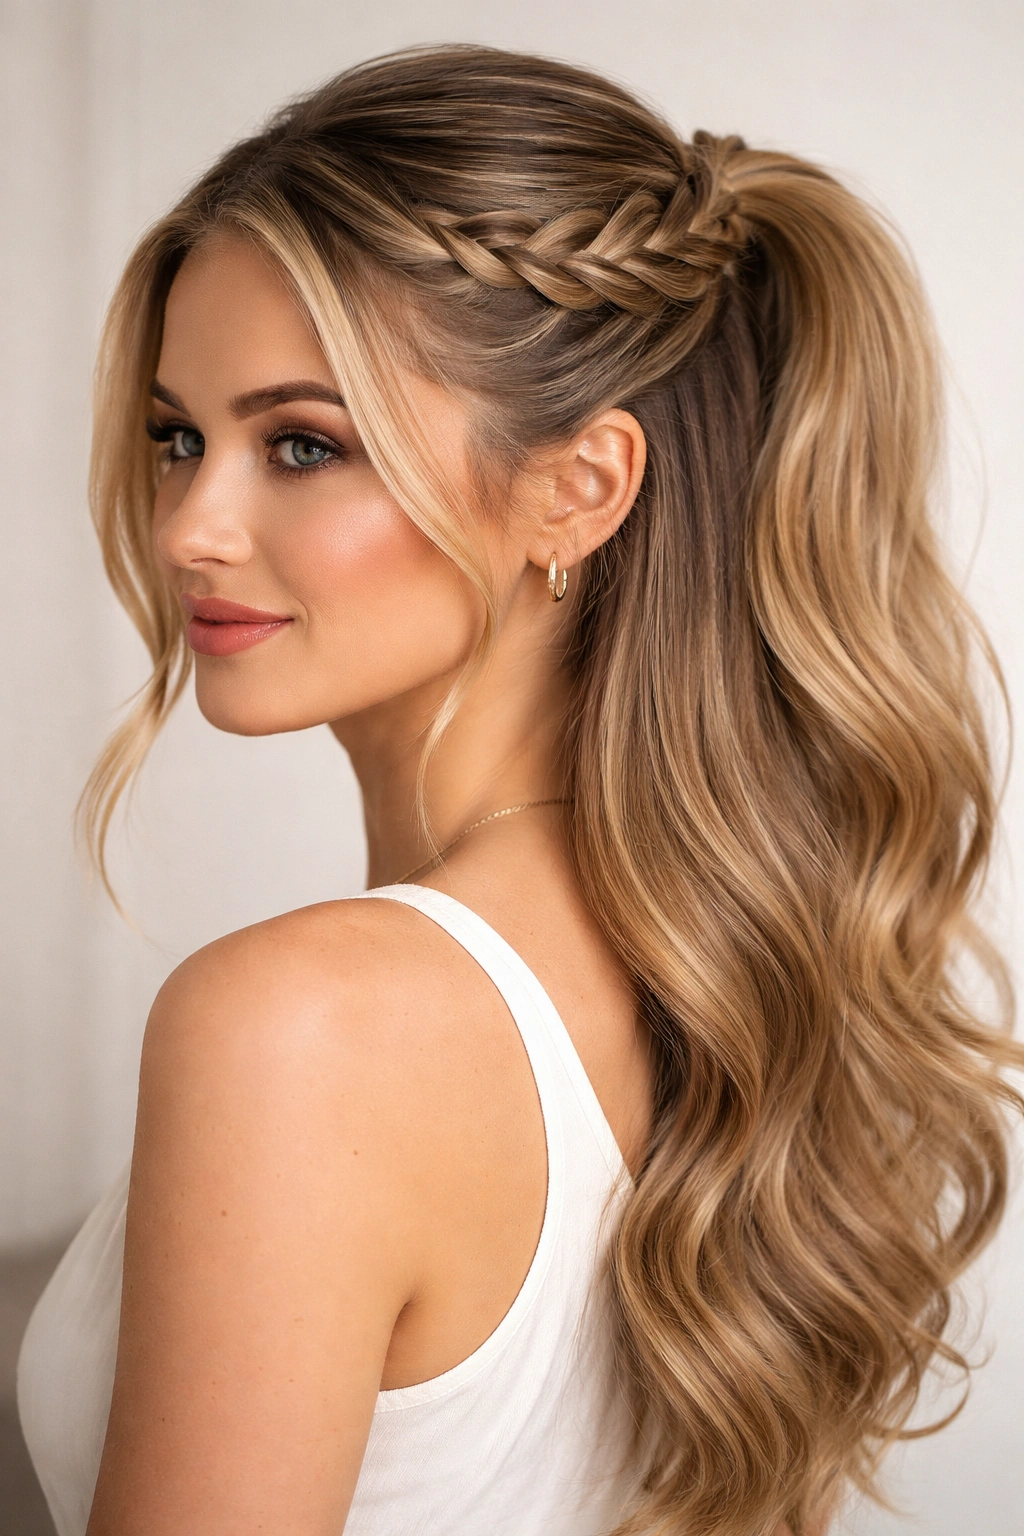
For a more refined version, replace the twist with a single braid running from one side of your head to the other. Take a section from just above your ear on one side, create a three-strand braid that travels across the back of your head, and finish it on the opposite side. The braid acts as an anchor for your half up section and adds visual interest that a simple elastic can’t deliver. Pull the braid slightly to make it look fuller, then gather everything into your elastic at the back of your head. This style reads as more formal and intentional than a basic twist, making it perfect for events where you want to look genuinely polished.
The Appeal of Braided Structure
A braid immediately elevates the entire look because it shows intentionality and skill, even though it’s surprisingly easy once you practice it a few times. The woven texture catches light differently than straight or twisted hair, creating dimension that photographs beautifully and looks refined in person. The braid also provides a natural anchor point that makes your half up section feel more structured and secure throughout the day.
Making Your Braid the Star of the Show
- Pull the braid gently outward on each side to create visible texture and fuller appearance
- Make sure the braid is positioned so it’s clearly visible—not hidden under other hair
- Secure with a small elastic that matches your hair color to keep focus on the braid itself
- For a more romantic version, loosen the braid slightly more and leave wispy pieces around the face
- Pin a small decorative clip or metallic hair pin at the point where the braid meets your half up section for added detail
Worth knowing: This style works beautifully whether your hair is straight, wavy, or curly—the braid looks good on every texture.
3. Volume-Heavy Half Up with Teased Crown
Some days you want maximum volume and drama. Create your half up section by taking a generous amount of hair from the crown area, tease it thoroughly to build height and fullness, then smooth the top layer gently so it looks intentional rather than messy. Secure the teased section with bobby pins first for stability, then add your elastic band so everything stays put no matter what you do throughout the day. The teased crown creates a lifted, glamorous effect that instantly makes your hairstyle look more special.
Why Teasing Creates Instant Elevation
Backcombing the roots creates texture that anchors hair in place while also creating the visual effect of fuller, thicker hair. This technique works on fine or thin hair especially well because it creates the illusion of volume without requiring you to actually have extremely thick hair. The lifted crown also flatters round faces by creating vertical dimension and elongating the face shape.
Techniques for Polished Teasing
- Use a fine-tooth teasing brush or comb specifically designed for backcombing—regular brushes create too much friction and breakage
- Tease only at the roots, not throughout the entire section, so you have something smooth to brush over the top
- Smooth the top layer with a soft brush and a light hand—you want to see the texture underneath, not hide it completely
- Mist with hairspray before teasing for better grip and hold throughout the day
- Pin the teased section with bobby pins before adding your elastic for double security
Pro tip: The fluffier and less perfect your teased section looks, the more modern and intentional it reads—smooth, uniform teasing looks dated.
4. Romantic Soft Waves Half Up Ponytail
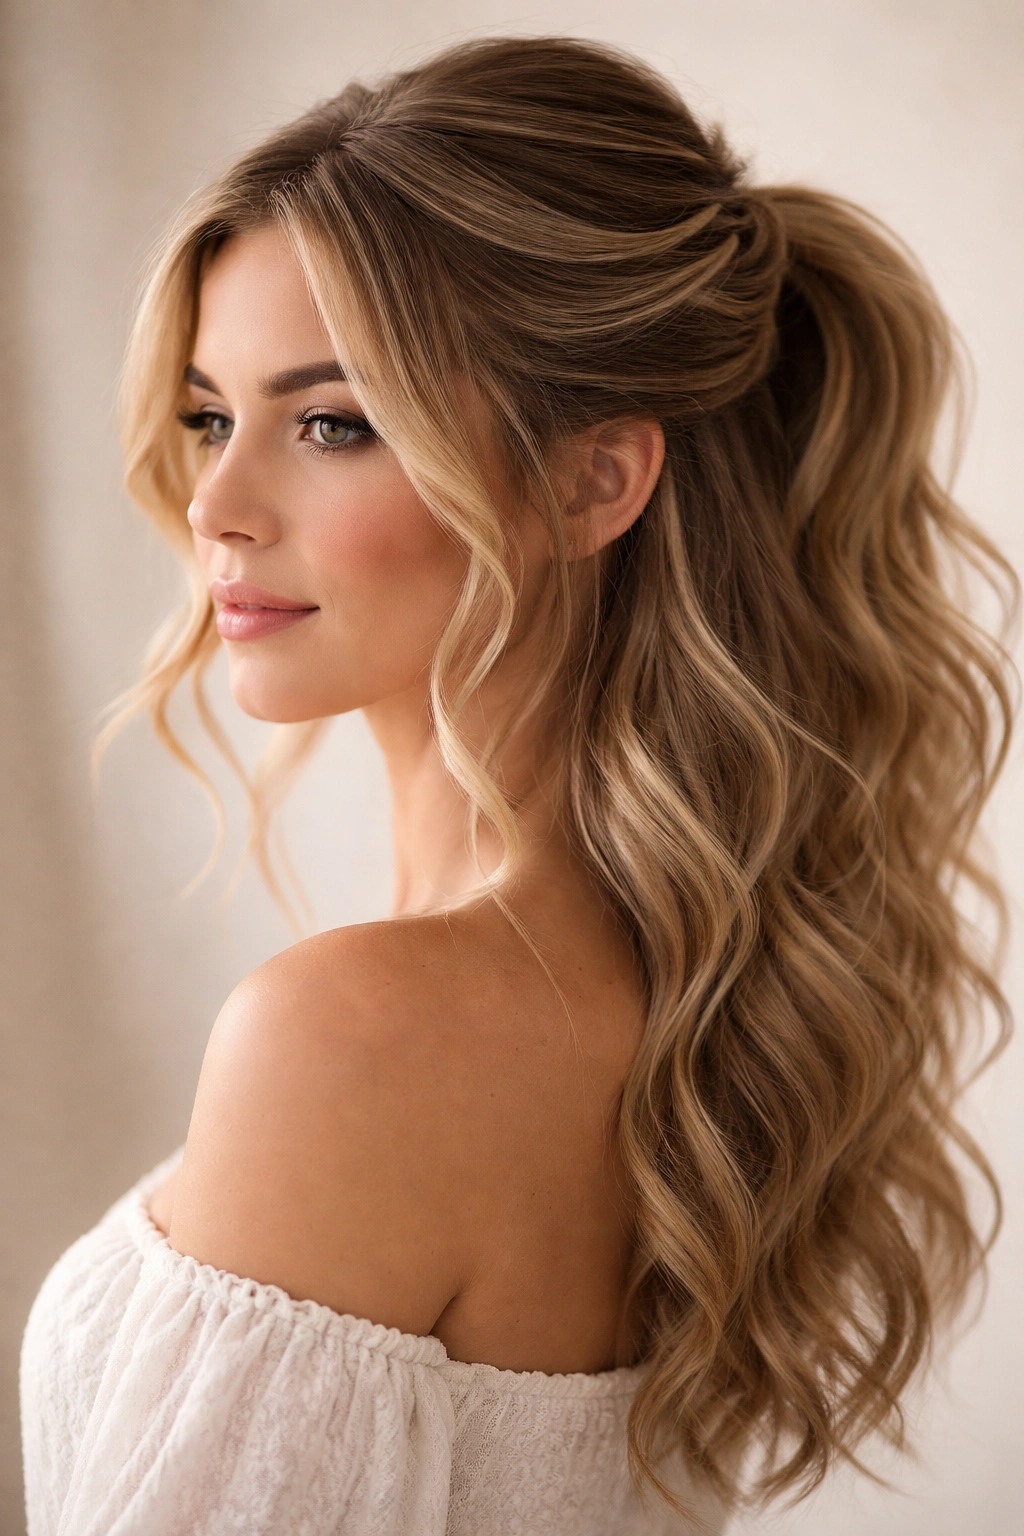
Create loose, romantic waves throughout your entire head using a curling iron or by braiding damp hair overnight, then create your half up section with a relaxed, imperfect twist or loose braid. The key to this style is leaving plenty of wispy pieces around your face and not pulling anything too tight. Secure with a soft elastic, then gently pull pieces of the half up section to make it look lived-in rather than fresh from the salon. This style feels effortlessly pretty and works beautifully for dates, casual events, or when you want to feel romantic without being overdone.
The Magic of Textured Softness
Waves and curves soften the entire look and create movement that reads as feminine and intentional. The texture also means you don’t need to be as precise with your sectioning and placement—imperfection actually adds to the charm. The loose pieces around your face also help blend the style so nothing looks too separated or constructed.
Building the Perfect Soft Wave Foundation
- Create waves with a 1.25-inch to 1.5-inch curling iron for loose, romantic curls—smaller barrels create tighter curls
- Curl away from your face on the front sections and away from the scalp on the back for natural-looking movement
- Let curls cool completely before touching them so they hold their shape longer
- Use a texture spray or sea salt spray to enhance movement and prevent curls from falling flat
- For lasting waves, braid damp hair in 2-3 large braids and sleep on them overnight—the waves last much longer and look more natural
Quick facts about soft waves:
- They work on every hair length from chin-length to very long
- Waves actually look fuller and more voluminous than straight hair
- Soft waves pair beautifully with both casual and formal events
- The style photographs incredibly well because light catches the curves
5. The Curled Half Down Ponytail

If your hair is naturally curly or you’ve styled curls throughout, a half up ponytail showcases them beautifully. Create your half up section using a twist or loose braid, leaving all your curls down to frame your face and shoulders. The curls provide natural volume and texture that makes the style feel fuller and more interesting than a half up style with straight hair. This works especially well if you have tight, coiled curls because the texture and dimension are already built in. The contrast between the gathered half up section and the flowing curls below creates visual interest and movement.
Why Curls Elevate the Half Up Style
Curls automatically add volume, texture, and visual interest without requiring any additional styling steps. The natural pattern and movement of curls make a simple half up section look far more polished and intentional. Curls also hide any imperfection in your sectioning because the texture naturally blends everything together. For people with curly hair, a half up style is often easier than trying to wear hair completely down because it keeps curls controlled while still showing off their beauty.
Styling Curls for a Half Up Look
- Define your curls the night before using a curl-enhancing product like a curl cream or gel
- Allow curls to dry completely—either air dry or use a diffuser on your blow dryer on low heat
- Don’t touch curls while they’re drying, as this disrupts the pattern and creates frizz
- Use a curl-refreshing spray the morning of to reactivate your curl pattern if they’ve fallen flat
- When creating your half up section, focus on the roots and crown rather than trying to gather individual curls
- Avoid using regular elastic bands that tug and create breakage—use silk or cloth-covered elastics designed for curly hair
Worth knowing: Your curl pattern is your best friend for a half up style—the more defined and bouncy your curls are, the more effortless and intentional your half up style will look.
6. Half Up with Face-Framing Layers
Take your time creating this style by deliberately leaving face-framing pieces on both sides of your face before gathering your half up section. These pieces should be at least an inch or two in width so they’re visible and purposeful rather than accidental. You can leave them straight, curl them, or wave them depending on your overall hair texture and the vibe you’re going for. The face-framing layers soften the style and create a more flattering silhouette around your features. This works especially well if you have a longer face or want to soften strong facial features.
The Art of Strategic Face-Framing
Intentional face-framing pieces create softness and dimension that a blunt half up section can’t achieve. They also help blend your half up section so it doesn’t look too separated from the rest of your hair. The pieces break up the line between your gathered section and your down section, creating a more cohesive overall look. Face-framing pieces also allow you to show off layers in your hair if you have them, which adds movement and visual interest.
Techniques for Styled Face-Framing Pieces
- Pull out pieces before you create your half up section so they’re not caught in your elastic
- Make sure pieces are thick enough to be visible—too-thin pieces look accidental rather than intentional
- Curl face-framing pieces away from your face so they frame rather than obscure your features
- Pin back any pieces that keep falling in your face with small bobby pins that match your hair color
- Use a smoothing serum or anti-frizz cream on face-framing pieces so they look polished rather than wispy
- Consider the shape of your face when determining how much to frame—rounder faces benefit from longer pieces, while narrower faces work with less dramatic framing
Pro tip: If you have layers cut into your hair already, a half up style is the perfect opportunity to let them shine—don’t gather them into your elastic so they stay loose and create movement.
7. Double Twisted Half Up Ponytail
For extra texture and visual interest, create two separate twists instead of one. Take a small section from just above one ear, twist it loosely, then take a second section from just above the other ear and twist it the same way. Bring both twists to the back of your head and secure them together with one elastic. You can create an X shape with the twists, lay them parallel to each other, or angle them slightly—experiment to see what looks best on your face shape. The double twist creates more movement and visual complexity than a single twist while remaining easy enough to create on a regular basis.
Why Double Details Look More Intentional
Two distinct elements—even if they’re the same technique—read as more carefully styled than a single element. The double twist draws the eye and creates symmetry that feels polished and intentional. The extra texture from two twists also means your half up section looks fuller and more voluminous. Double elements also photograph beautifully because they show detail and complexity that a single twist doesn’t.
Styling Two Twists Perfectly
- Start your twists slightly higher than you would with a single twist to give them room to travel
- Twist loosely and evenly on both sides so they look balanced and intentional
- After securing, pull both twists gently to create texture and fullness
- For a more romantic look, loosen the twists even more after securing them
- Position the elastic so it sits directly at the point where both twists meet—don’t try to hide the elastic
- For extra hold, pin the twists with bobby pins before adding your elastic
Quick facts about double twists:
- They work on all hair lengths from medium to very long
- Double twists create the illusion of thicker hair
- The technique takes only slightly longer than a single twist once you practice
- They hold better than single twists because there are more anchor points
8. Half Up with Metallic Hair Accessories
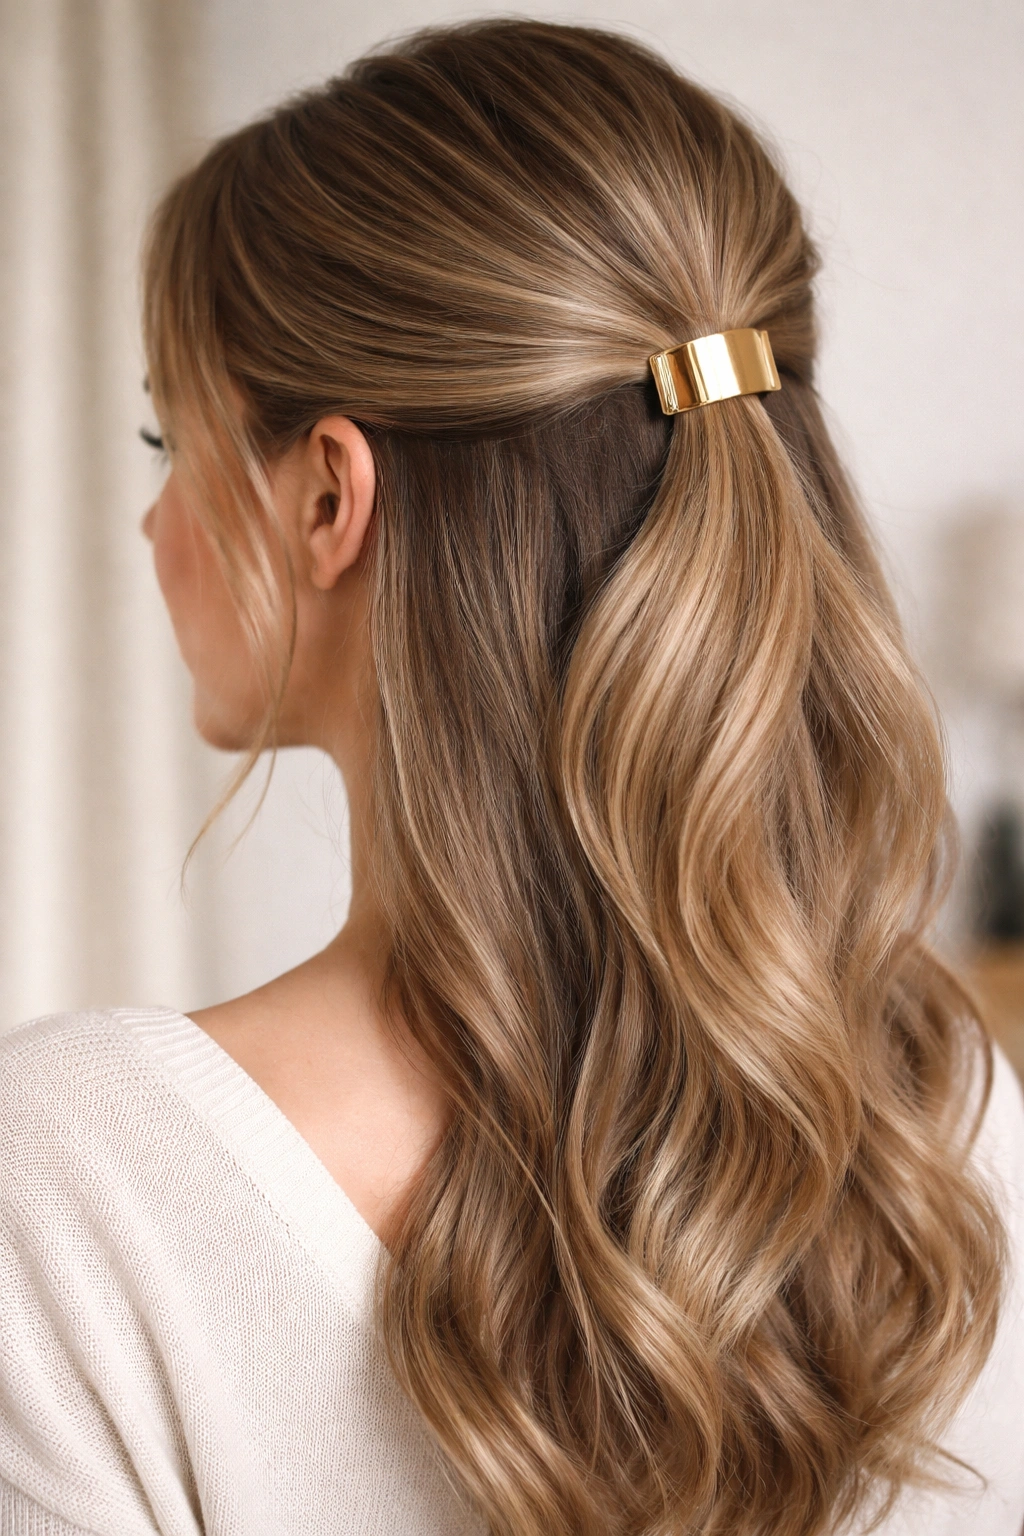
Elevate a basic half up style instantly by adding a metallic hair clip, claw clip, or decorative hair pin. Gather your half up section as normal using a simple twist or braid, then slide a gold, silver, or rose gold clip over your elastic or secure it across the base of your half up section. Metallic accessories add glamour and intentionality to even the simplest styling. This is also a genius way to hide an elastic if yours is old or worn—a nice clip immediately makes your style look more polished and pulled together.
How Accessories Transform Simple Styles
A single accessory can elevate a basic half up style from everyday to special occasion in seconds. Metallic accessories especially add luxury and visual interest without requiring any additional styling work. Accessories also give your hands something to do while styling, which can actually make the process feel easier and more intentional. An expensive-looking clip makes even a lazy half up style look like you tried, which is a major win for busy mornings.
Choosing and Styling with Accessories
- Metallic finishes complement every skin tone—experiment with warm golds, cool silvers, or rose gold to see what you prefer
- Size matters—a claw clip or jaw clip adds more visual impact than a tiny hair pin, but make sure it matches your hair volume
- Slide the clip onto your elastic or position it so the clip is visible and frames your half up section nicely
- For a more dramatic look, use a larger clip or add multiple smaller clips across the back
- Consider the finish of your clip—matte finishes look more modern, while shiny finishes read as more glamorous
- Clip placement matters—higher on your head reads as more formal, while lower on your head feels more casual
Pro tip: Keep a few clip options in different metals and sizes in your bag so you can switch up your style throughout the week without needing to restyle your hair.
9. Bubble Ponytail Half Up Version
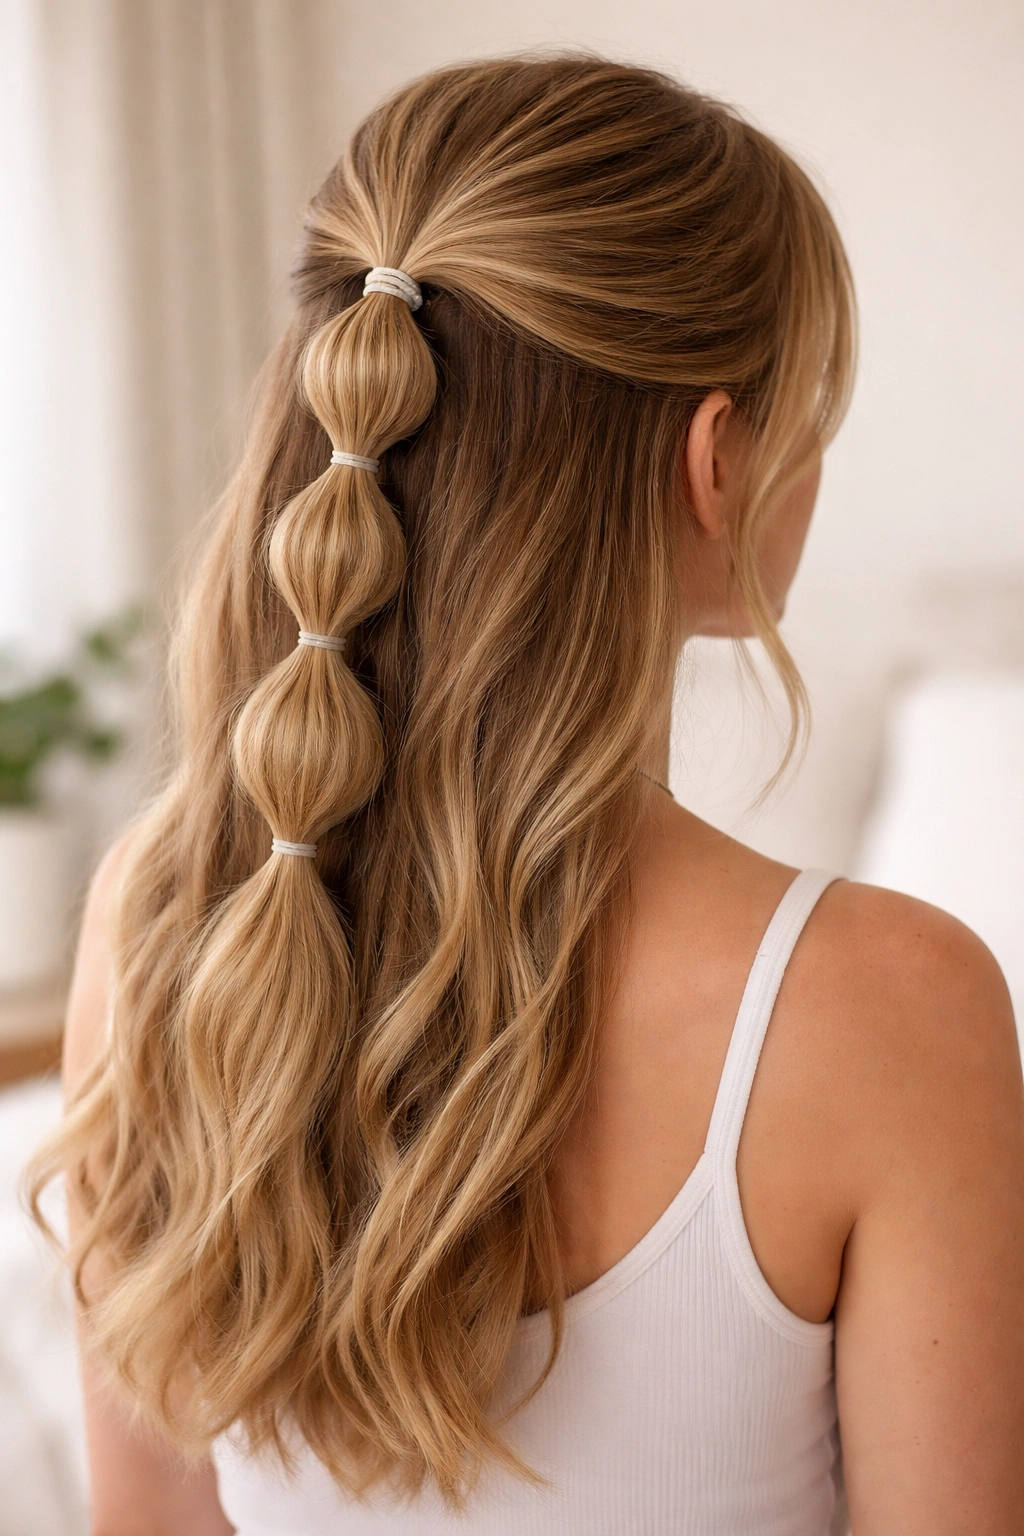
Create a playful, dimensional effect by securing your half up section with multiple small elastics spaced about an inch apart instead of one large elastic. After securing with the first elastic, gently pull each section between elastics outward to create small “bubbles” of puffed-up hair. Continue this down your half up ponytail, creating 3-5 bubbles depending on how long your hair is. This style feels fun and youthful while remaining polished enough for casual outings. The multiple bubbles create visual interest and dimension that a simple elastic can’t achieve.
The Visual Impact of Bubble Details
Multiple small sections create more surface area and visual complexity, which reads as more intentional and styled. The puffed sections catch light differently and create shadows that add dimension. Bubbles also make thin or fine hair look fuller because the sectioning creates the illusion of more volume. The playful nature of bubbles makes the style feel fun and creative without being unprofessional.
Creating Perfect Bubbles
- Use clear elastics so they blend with your hair rather than standing out visually
- Space elastics about 1 to 1.5 inches apart—closer spacing creates smaller, tighter bubbles, while wider spacing creates larger, looser bubbles
- Pull each section between elastics gently but deliberately—you want visible puffiness, not just loose hair
- Work your way down, making sure each bubble looks similar in size and fullness for an intentional appearance
- Use a gentle hand to avoid creating frizz or breakage while pulling the bubbles
- For extra hold, mist with texture spray before starting so your hair has grip
Worth knowing: This style photographs beautifully from the back, so it’s perfect if you’re going to be photographed or want Instagram-worthy hair.
10. Half Up Crown Braid Ponytail
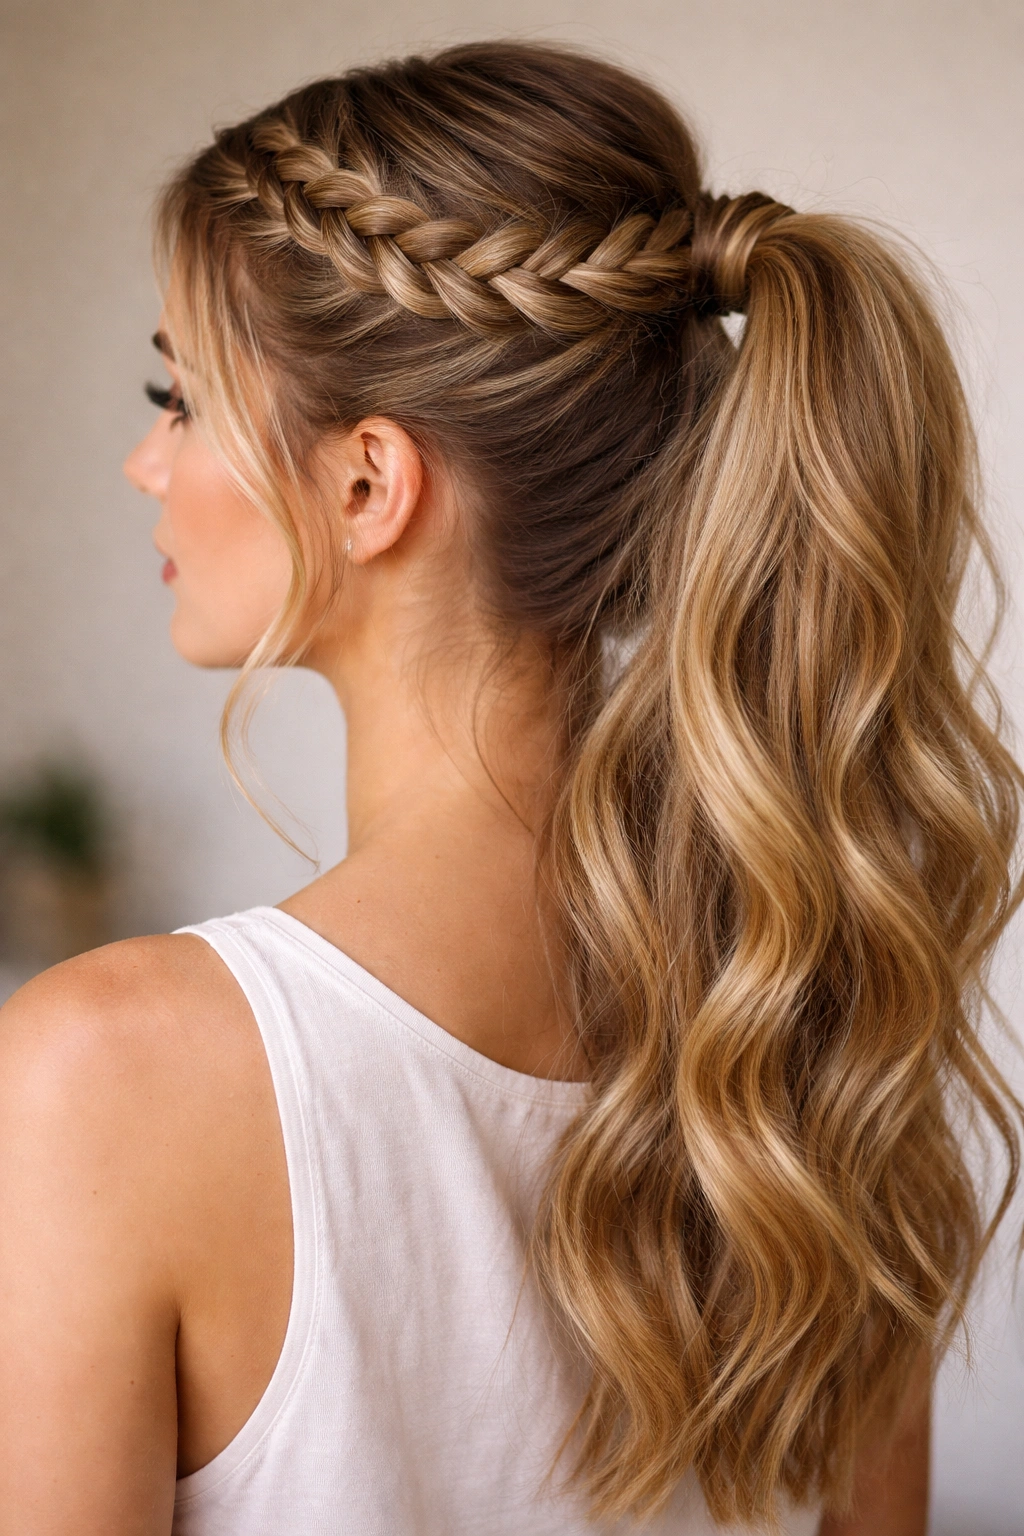
Create a more elaborate and special-occasion-ready version by running a braid along the top of your head like a crown, incorporating it into your half up section, and securing everything together. Start by creating a braid from one side of your head to the other across the crown area, then gather this braid along with additional hair into your half up ponytail. This style feels more dressy and intentional than a simple half up while remaining wearable for everyday situations. The crown braid draws attention upward and creates a frame for your face that’s both flattering and beautiful.
Why Crown Braids Elevate the Half Up Look
A braid running along the crown creates structure and visual interest that simple twists can’t match. The technique shows more styling skill while remaining achievable for people with moderate braiding ability. Crown braids also create the illusion of lifted, more voluminous hair because they travel along the top of your head. The elevated positioning of a crown braid is naturally flattering to most face shapes because it creates upward movement and draws the eye to your features.
Executing a Crown Braid Perfectly
- Start your braid above one ear and travel toward the crown, adding pieces as you go
- Keep your braid sections even and consistent in size so the final braid looks polished
- You don’t need to braid all the way to the opposite ear—stopping at the crown and gathering into your half up works beautifully
- After braiding, gently pull the braid outward to create texture and fullness
- Secure your half up ponytail so it incorporates the base of your crown braid seamlessly
- Use bobby pins to secure the crown braid if needed—you want it to feel stable and secure throughout the day
Pro tip: Practice this braid on a day you’re staying home so you can get the technique down before trying it on a day you’ll be out and about.
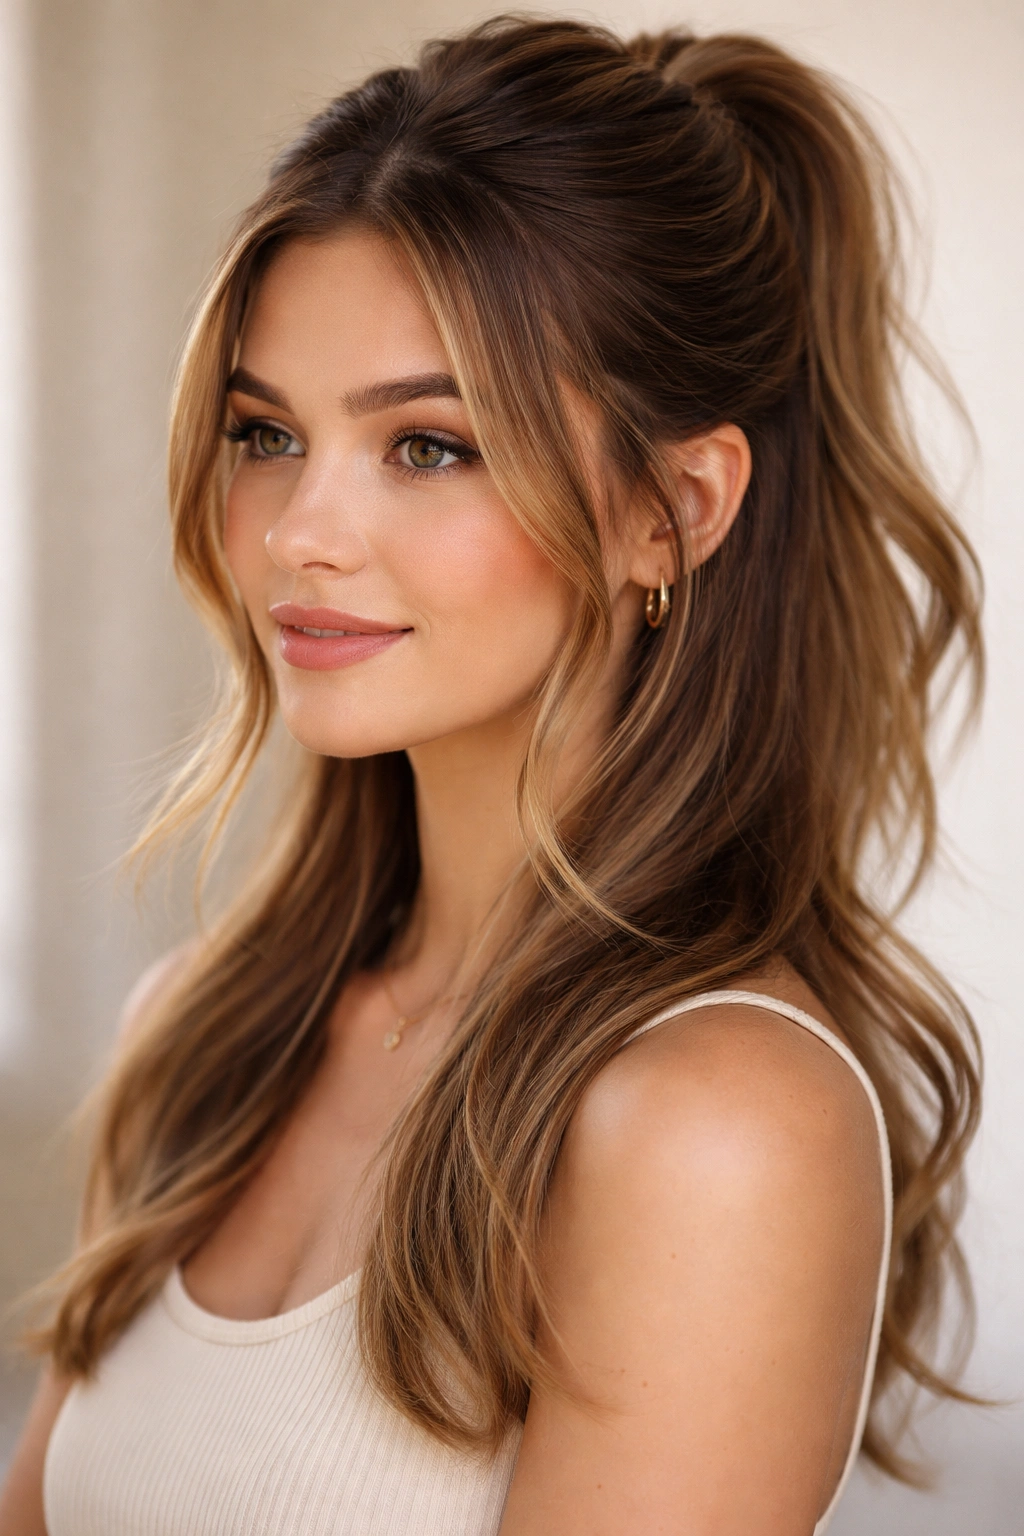
11. Wavy Half Up with Volume and Movement
Start by creating soft, loose waves throughout your entire head, then create your half up section by twisting or braiding a generous amount of hair from the crown. The waves provide texture and movement while your half up section provides the polished, pulled-together element. Pull everything gently after securing to create maximum fullness and dimension. This style walks the line between casual and dressy perfectly—it’s polished enough for work or events but feels relaxed and intentional enough for casual outings. The combination of waves and a structured half up section is genuinely one of the most flattering styles available.
The Power of Combining Texture and Structure
Waves provide organic, natural-looking texture that makes any style feel more interesting and intentional. A structured half up section keeps waves under control while showing them off beautifully. The combination balances movement with polish in a way that makes you look effortlessly put-together. Waves also work with any face shape because the soft curves are universally flattering.
Creating Waves That Last All Day
- Use a 1.25-inch curling iron to create loose waves—this size is large enough to look modern but small enough to hold
- Curl sections away from your face on the front and down toward your back on the back sections for natural movement
- Allow curls to cool completely before releasing them from the barrel—heat-set curls hold much longer
- Spray lightly with hairspray before creating your half up section so waves stay in place
- After securing your half up, go back and pull any waves gently to make sure they’re still visible
- Use a smoothing serum on your down sections so waves look polished rather than frizzy
Quick facts about wave-half-up combinations:
- This style works on every hair type and texture
- Waves are very forgiving—slight imperfection actually adds to the charm
- The style looks good whether your waves are tight and defined or soft and loose
- Waves hold better and look fuller on second-day hair
12. Sleek and Straight Half Up with Contrast
For a modern, minimalist approach, create a half up section that’s very sleek and polished while keeping the lower section loose and wavy or curly for dramatic contrast. Use a smoothing serum and your blow dryer to create a sleek, almost wet-looking half up section, leaving the rest of your hair textured and full. This style creates visual interest through contrast—the slickness of the upper section emphasizes the texture of the lower section. The modern, slightly edgy aesthetic works for people who want something that feels current and intentional without being too romantic or soft.
The Modern Appeal of Contrast
Contrast creates visual interest and sophistication that matching textures throughout can’t achieve. A sleek upper section reads as polished and intentional while textured waves below feel current and editorial. This style shows intention and styling skill without looking overdone. The contrast also flatters people with different face shapes because the sleek section lifts and defines features while the textured section provides softness.
Achieving a Sleek, Polished Section
- Use a smoothing serum or anti-frizz cream on your half up section before blow drying
- Blow dry with a paddle brush or flat brush to smooth hair and seal the cuticle
- Use a flat iron on low heat to smooth the section further if needed—don’t skip this if you have naturally curly or wavy hair
- Keep your elastic clear or nude-toned so it blends rather than creating a visible break
- For maximum sleekness, use a tiny amount of smoothing serum at your elastic to tame any flyaways
- Make sure your contrast is clear and intentional—don’t have a half up section that’s sort of sleek and sort of wavy, commit to one or the other
Pro tip: This style feels especially modern and editorial when paired with a matte lipstick and minimal eye makeup.
13. Slicked-Back Half Up Ponytail
Create a sleek, high-fashion aesthetic by combing your hair straight back very smoothly before gathering your half up section. Use a strong-hold gel or pomade to smooth every flyaway and create an almost wet-looking appearance. This style is more dramatic and fashion-forward than a soft half up, making it perfect for people who want something that feels editorial and intentional. The slicked-back approach also works well if you’re having a bad hair day because it actually looks intentional rather than trying to hide texture.
Why Slicked-Back Reads as High-Fashion
Smooth, controlled lines read as sophisticated and intentional in a way that soft, loose styles don’t. This style immediately reads as styled and intentional because it’s not a style people wear accidentally. The sleekness also makes your facial features more visible and defined, which is flattering for most people. Slicked-back styles photograph incredibly well because the lines are clean and there’s nothing competing with your face.
Creating That High-Fashion Slick
- Start with clean or mostly-dry hair—damp hair will slick back better than dry hair
- Apply a smoothing gel or pomade to your hands and run them through your hair, starting at the roots
- Use a fine-tooth comb to smooth every section and tame flyaways
- Focus on smoothing your half up section very carefully—this is what will show most
- Secure with a clear elastic positioned where you want your half up section to sit
- For extra hold, use a firm-hold hairspray after securing your elastic
- Smooth any flyaways around your elastic with a tiny dab of gel on a toothbrush
Worth knowing: This style feels very current and modern when paired with sleek makeup and minimal jewelry—let your hair be the statement.
14. Half Up Topknot Ponytail
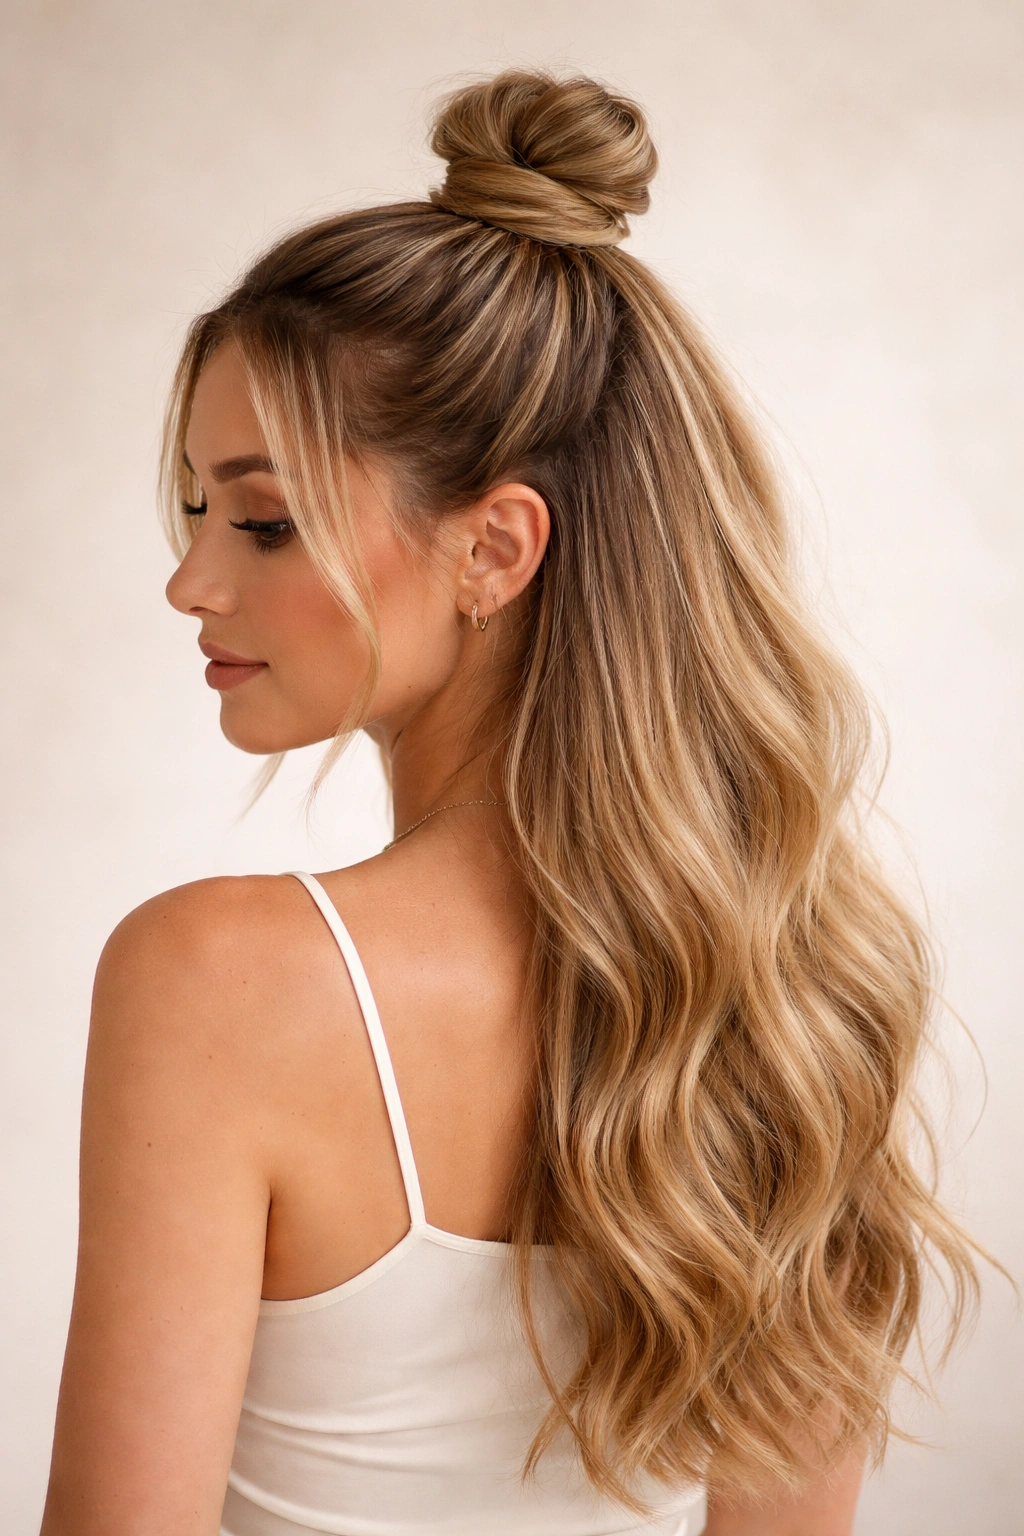
Take your half up concept one step further by twisting or braiding your gathered half up section into a small, tight topknot at the crown of your head. This style works best on people with at least medium-length hair and provides a playful, youthful look that’s still polished enough for work or casual events. The topknot sits high and creates the illusion of a lifted, more voluminous crown. This style also works well if you’re trying to get all your hair off your neck while still showing off length in your down section.
The Charm of Topknot Height
A topknot positioned at the crown instantly makes you look taller and lifts your entire face. The height also creates the illusion of more voluminous hair at the crown, which is flattering to nearly all face shapes. Topknots feel young and playful while remaining polished and put-together. The style also allows you to show off texture in your down section while keeping the top controlled and defined.
Securing a Tight, Long-Lasting Topknot
- Gather your half up section and twist it tightly, then wrap it around the base to form a knot shape
- Secure with bobby pins positioned horizontally through the knot for maximum hold
- Don’t make your topknot so large that it looks lumpy—small and tight looks more intentional
- For a fuller-looking knot, backcomb the section before twisting to create texture
- Use a firm-hold hairspray after securing so the knot stays put throughout the day
- Pin any flyaways with small bobby pins that match your hair color
- Make sure your topknot sits directly at the crown—too far forward or back looks off-balance
Pro tip: This style feels especially cute with small hoop earrings and pulled-back, minimal makeup—it shows off your face completely.
15. Half Up with Decorative Braid Detail
For the ultimate special-occasion look, create a simple half up section and add a delicate braid detail woven through or around it. You might create a thin three-strand braid and weave it through your elastic or create a decorative braid that sits next to your half up section. This style feels romantic, intentional, and special—it’s perfect for dates, events, or any time you want your hair to feel particularly beautiful. The braid detail adds visual interest and shows styling intention without being overly complicated.
Why Braid Details Feel Special
A braid immediately communicates that you’ve taken care with your appearance and want to look lovely. Braid details also add texture, movement, and visual interest that a simple elastic can’t provide. Decorative braids photograph beautifully and show up in photos in a way that simple styles don’t. The detail also allows you to incorporate smaller braiding elements that would be too delicate to wear as a main style but work beautifully as an accent.
Adding Braids to Your Half Up Style
- Create your half up section first, then add your braid detail
- A thin three-strand braid woven through your elastic creates a delicate, romantic look
- You can also create a braid that travels down one side of your head and incorporates into your half up section
- For a more dramatic effect, create multiple thin braids woven through your half up
- After adding your braid, gently pull it to create texture and make the detail more visible
- Use small clips or bobby pins to secure the braid if it keeps slipping from your half up section
- Curl the braid gently with a thin curling iron for extra texture and movement
Quick facts about braided details:
- They work on all hair types and textures
- Thin braids feel more delicate and romantic than thick braids
- Braid details hold better on second-day hair because it has more grip
- The detail photographs beautifully and shows your styling intention clearly
Key Takeaways
The beauty of half up, half down ponytails is how many different directions you can take them depending on your mood, the occasion, and how much time you have to style. A basic twist takes two minutes but looks intentional and polished, while a crown braid or topknot variation takes a bit longer but feels genuinely special. The best approach is to master the basic technique of gathering a half up section, then experiment with different variations—twists, braids, texture, accessories, and placement—until you find versions that feel natural and flattering on you.
Start by practicing one or two styles until they feel easy, then branch out to others. Your hair is going to forgive imperfection when you’re learning, especially if you use texture spray and backcomb slightly. The more you practice a particular style, the faster and easier it becomes, until eventually you can do it without thinking. That’s when half up ponytails become your secret weapon for looking polished on busy mornings or last-minute occasions.
The versatility of these styles means you can wear half up ponytails literally everywhere—to work, to casual events, on dates, while traveling, or just when you want to feel a little prettier on an ordinary day. Once you find your favorite versions, you’ll probably find yourself reaching for them constantly because they hit that sweet spot between easy and intentional that most people are actually looking for in their everyday hairstyles.