Homecoming night calls for a hairstyle that’s equal parts romantic and party-ready, one that says you put effort in without looking like you tried too hard. The braided half-up half-down look hits that sweet spot perfectly — it keeps hair off your face and neck so you can actually enjoy dancing and mingling, while the flowing waves below give you that undeniably gorgeous vibe that photographs beautifully. The best part? Braids automatically elevate any hairstyle from everyday to special-occasion, and they’re way more versatile than most people realize.
What makes braided half-up styles so ideal for homecoming is that they work with nearly every dress style, hair type, and hair length. Whether you’re wearing a sleek sheath dress, a full tulle gown, or casual separator separates, a braided half-up style complements everything. They also last through the entire night — braids won’t flatten or lose their shape during all that dancing and celebrating like a simple half-up ponytail might. You can even start with braids and finish with loose waves by the end of the night, which honestly just adds to the romantic, effortless aesthetic.
The real magic is in the variety available. From delicate single strands to bold statement braids, from crown-worthy patterns to playfully messy interpretations, there’s a braided half-up half-down style for every homecoming look and personality. Let’s walk through eighteen stunning options you can recreate yourself or bring to your stylist as inspiration.
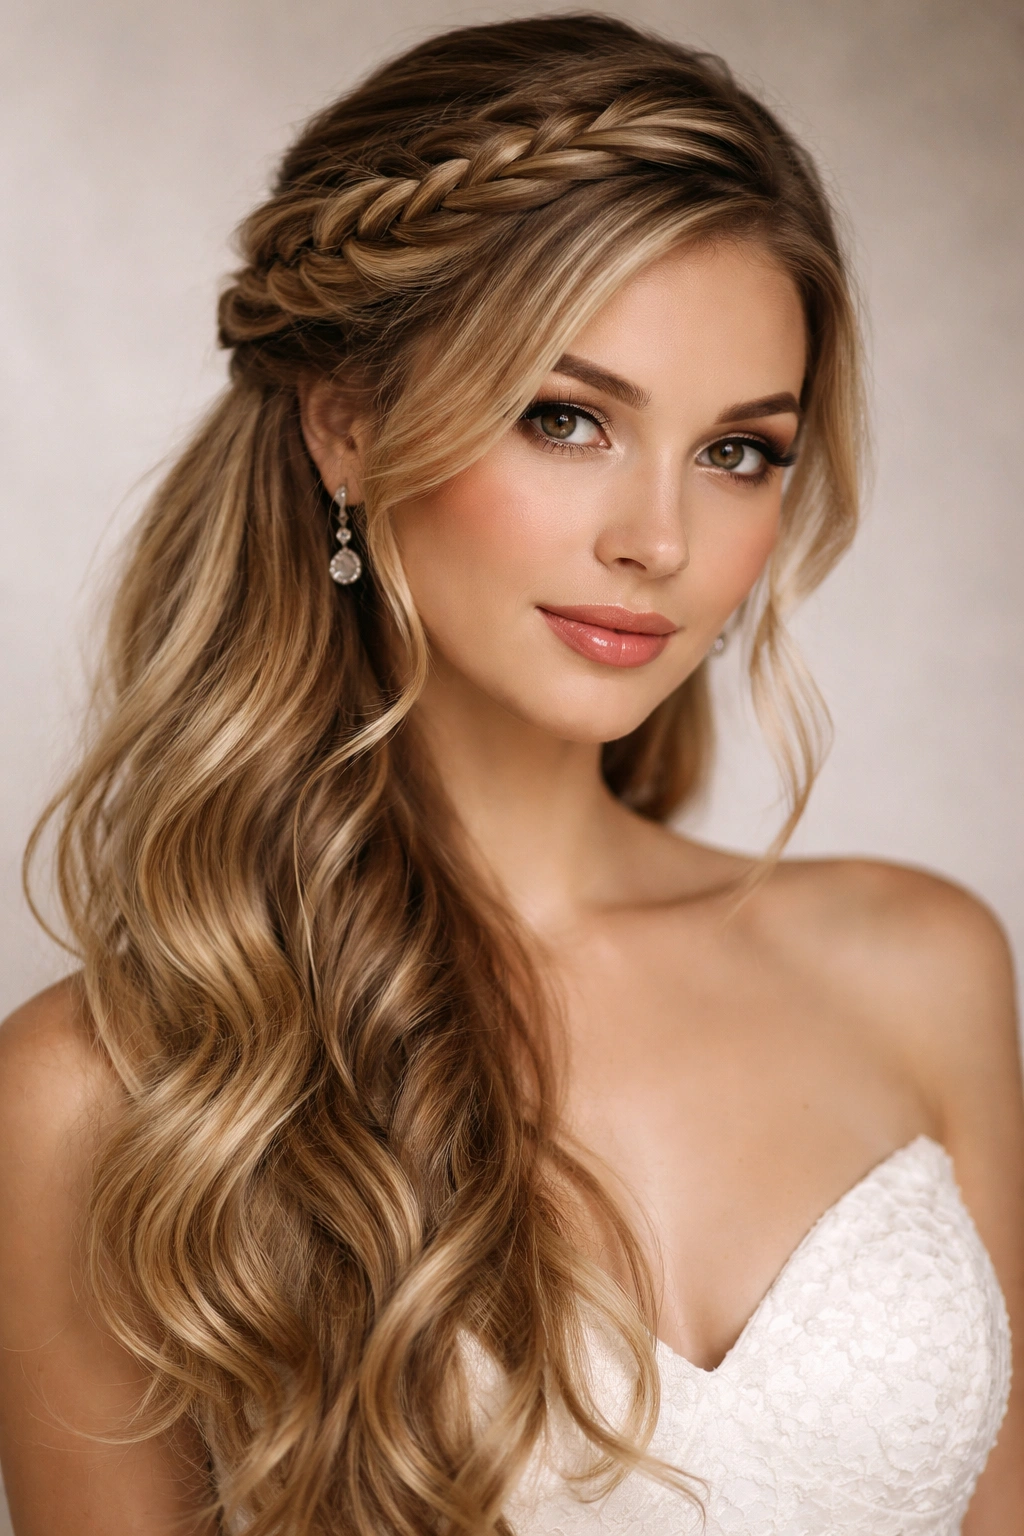
1. Classic Dutch Braid Half Up
The Dutch braid—basically a French braid’s cooler, bolder sibling—creates immediate dimension and texture that photographs absolutely beautifully. Start by sectioning out hair from one temple, pulling back to approximately the crown area, then Dutch braid that section (braiding under rather than over, which makes the braid sit on top of the hair and look thicker). Secure this braid at the back with a small elastic, then release the rest of your hair into flowing waves below.
Why It Stands Out
A Dutch braid reads as more polished and intentional than a basic three-strand braid, yet it’s not so complicated that you need professional skills to pull it off. The under-braiding technique makes even thin hair look fuller and creates gorgeous texture that catches light beautifully. It’s the perfect balance between “I definitely got ready” and “this is effortless.”
How to Nail It
- Start the braid at least two inches from your hairline so you have room to secure it neatly at the back
- Keep tension consistent—too loose and it falls apart, too tight and it tugs painfully by the end of the night
- After braiding, gently pull the braid edges outward to create that fuller, more textured look (this technique is called “pancaking”)
- Use a boar bristle brush on loose waves below to create shine and smoothness
Pro tip: Braid damp hair about 80% dry, not soaking wet. Damp hair holds the braid shape better and waves set more effectively than braiding bone-dry hair.
2. Fishtail Braid Half Up
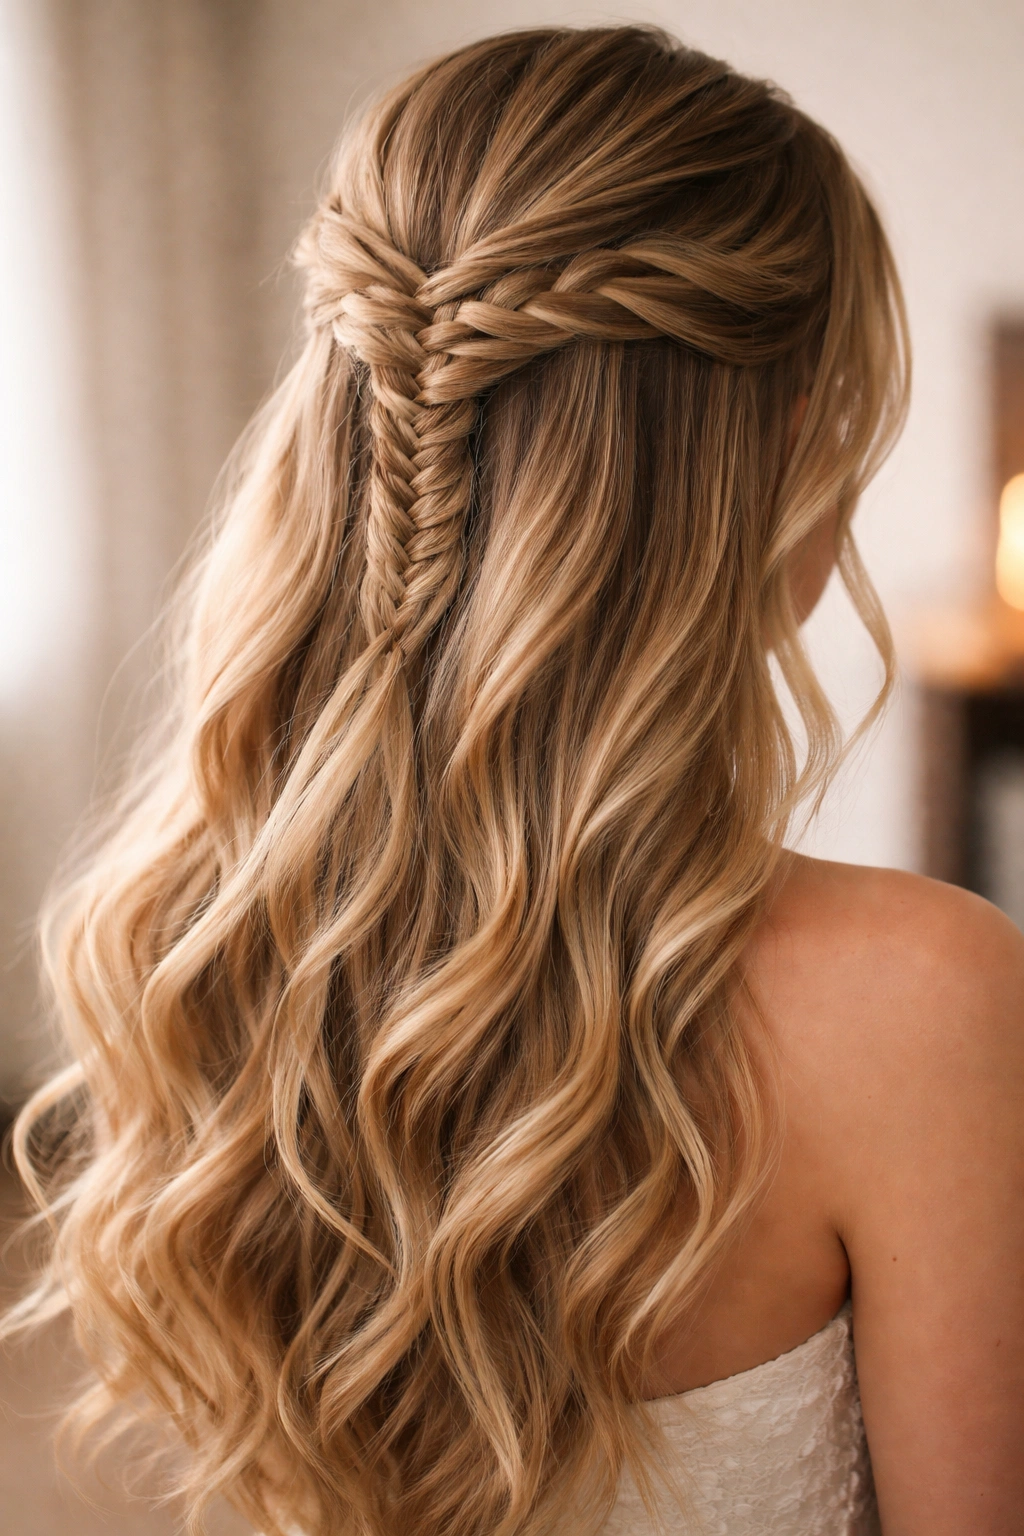
If you want something that looks intricate and impressive but is actually forgiving to execute, the fishtail braid is your friend. This braid uses only two sections of hair instead of three, which paradoxically makes it easier to keep even and prevents that lopsided look some people struggle with. Section hair from ear to ear across the top of your head, divide that section into two parts, then weave thin strands from the outer edge of each side toward the center, creating that distinctive interlocking fishtail pattern.
What Makes It Different
The fishtail braid has an almost delicate, intricate appearance—it genuinely looks like you spent thirty minutes perfecting it, even if you pulled it together in ten. The tighter the strands you pull from each side, the more defined and elegant the braid appears. It pairs beautifully with loose, romantic waves and creates an ethereal, fashion-forward aesthetic that’s perfect for homecoming.
Making It Work
- Smaller sections create a more detailed, intricate braid; thicker sections give a more casual, undone vibe—choose based on your dress style
- The fishtail’s interlocking pattern naturally creates movement, so don’t over-pancake it like you would a Dutch braid
- Loose fishtails look intentionally romantic; tight fishtails read as more polished
- The beauty of a fishtail is it actually looks better slightly undone, so don’t stress about perfection
Insider note: Fishtail braids hold their shape longer than most braids because the weaving pattern naturally locks the strands in place—wear this style if you want something that’ll look fresh all night long.
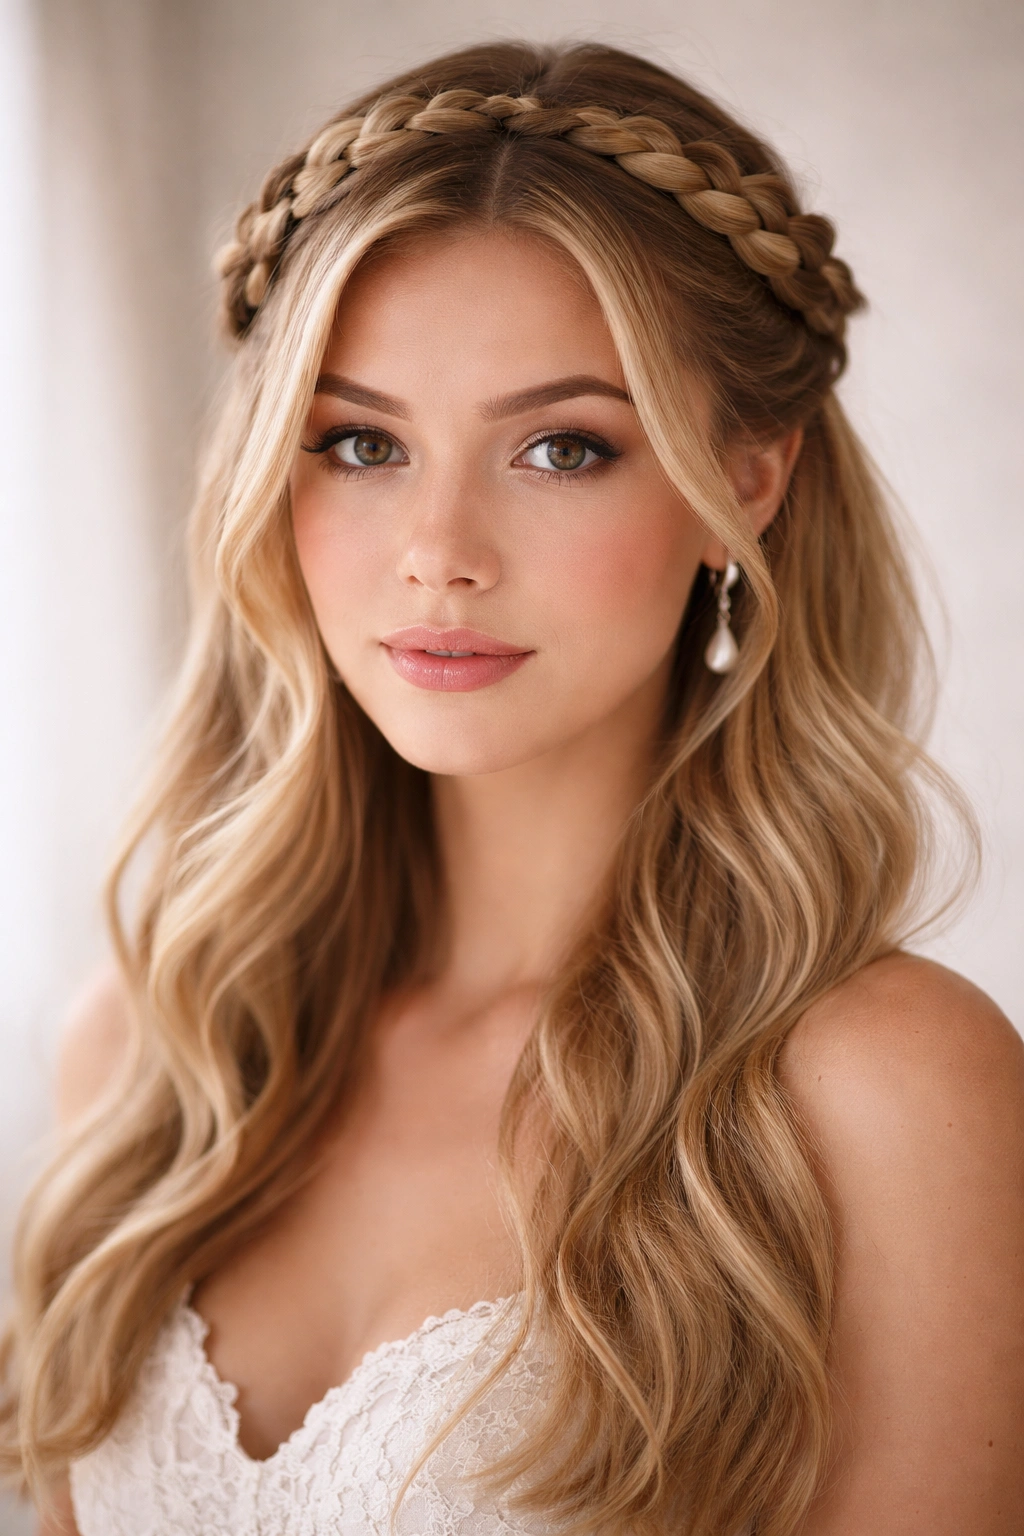
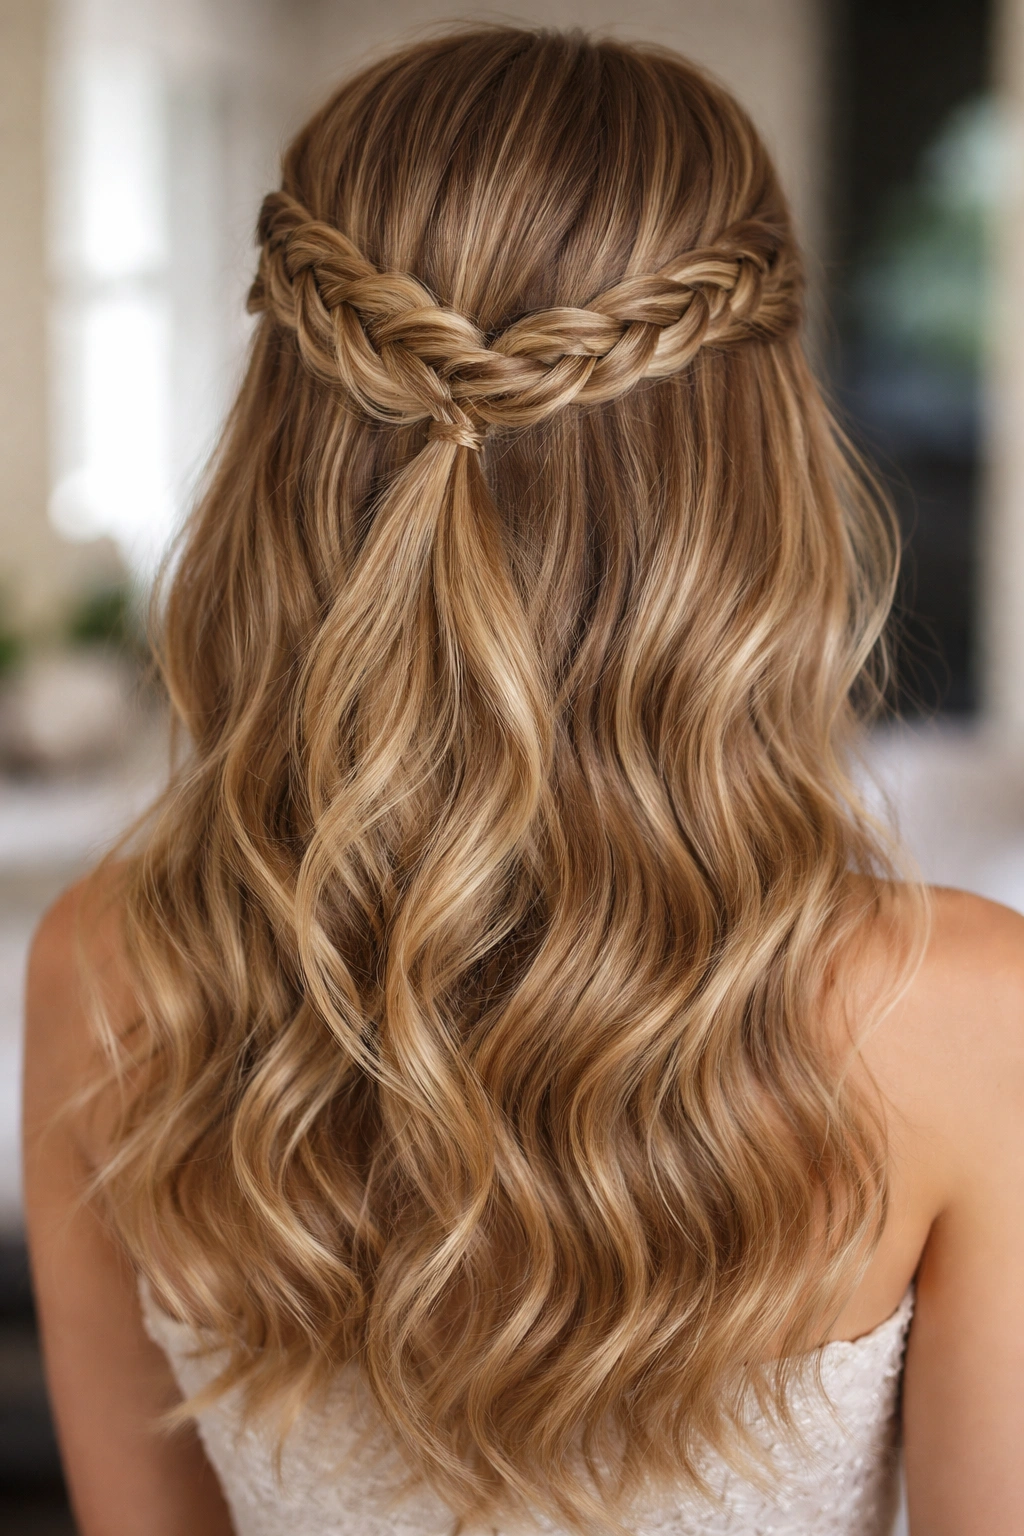
3. French Braid with Twisted Crown
This style combines the classic sophistication of a French braid with a romantic crown element. Start with a traditional French braid from one side of your head, incorporating hair as you braid across toward the opposite side, creating a diagonal line from temple to the back of your crown. Instead of a traditional three-strand braid, twist two sections together (still incorporating new hair as you go) to create that softer, twisted effect. Secure at the crown and let the rest cascade down.
The Science Behind It
A French braid that travels across the crown naturally lifts your features and frames your face beautifully—it’s a technique makeup artists and photographers have used for decades because it’s genuinely flattering on every face shape. The twisted variation softens the look compared to a traditional braid, giving you that balance between structured and romantic.
Execution Details
- Map out your braid path before you start—mentally draw a line from where you want to begin to where you want to end
- Use clips to section hair neatly; messy sections create uneven braids
- Add small velvet or pearl hair clips along the twisted section for extra elegance if your dress is formal
- The lower you position your securing clip at the crown, the more hair will flow down—adjust based on your dress’s neckline
Worth knowing: This style works even better on second-day hair or hair with some texture, so if you’re planning ahead, dry shampoo the night before is your secret weapon.
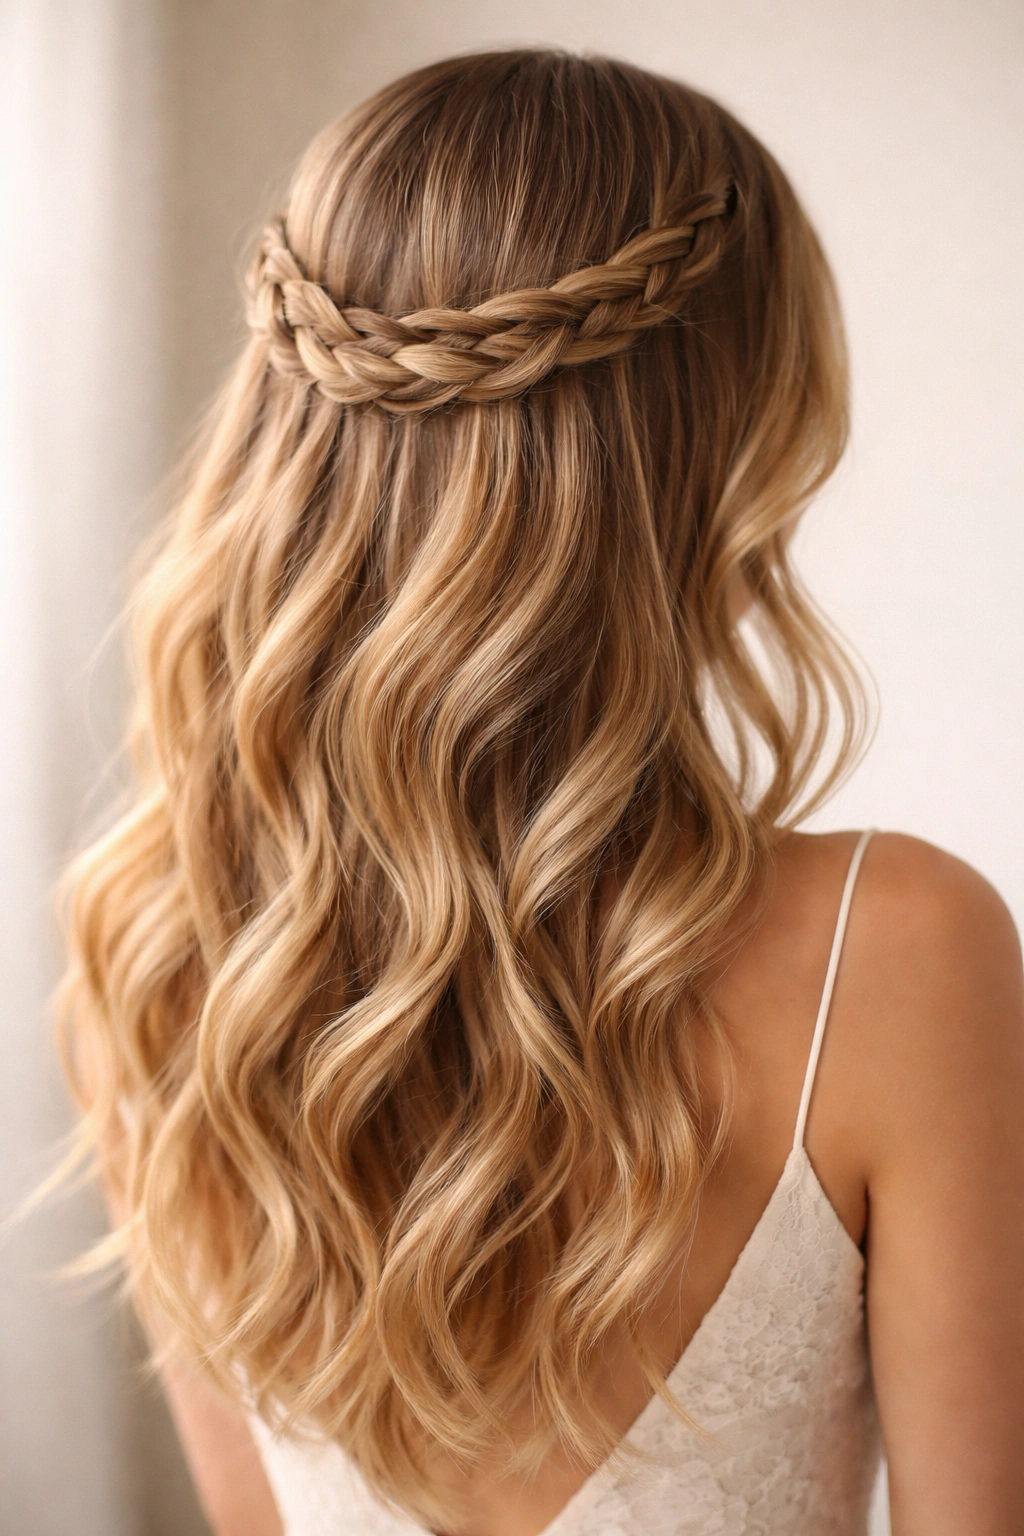
4. Waterfall Braid Half Up
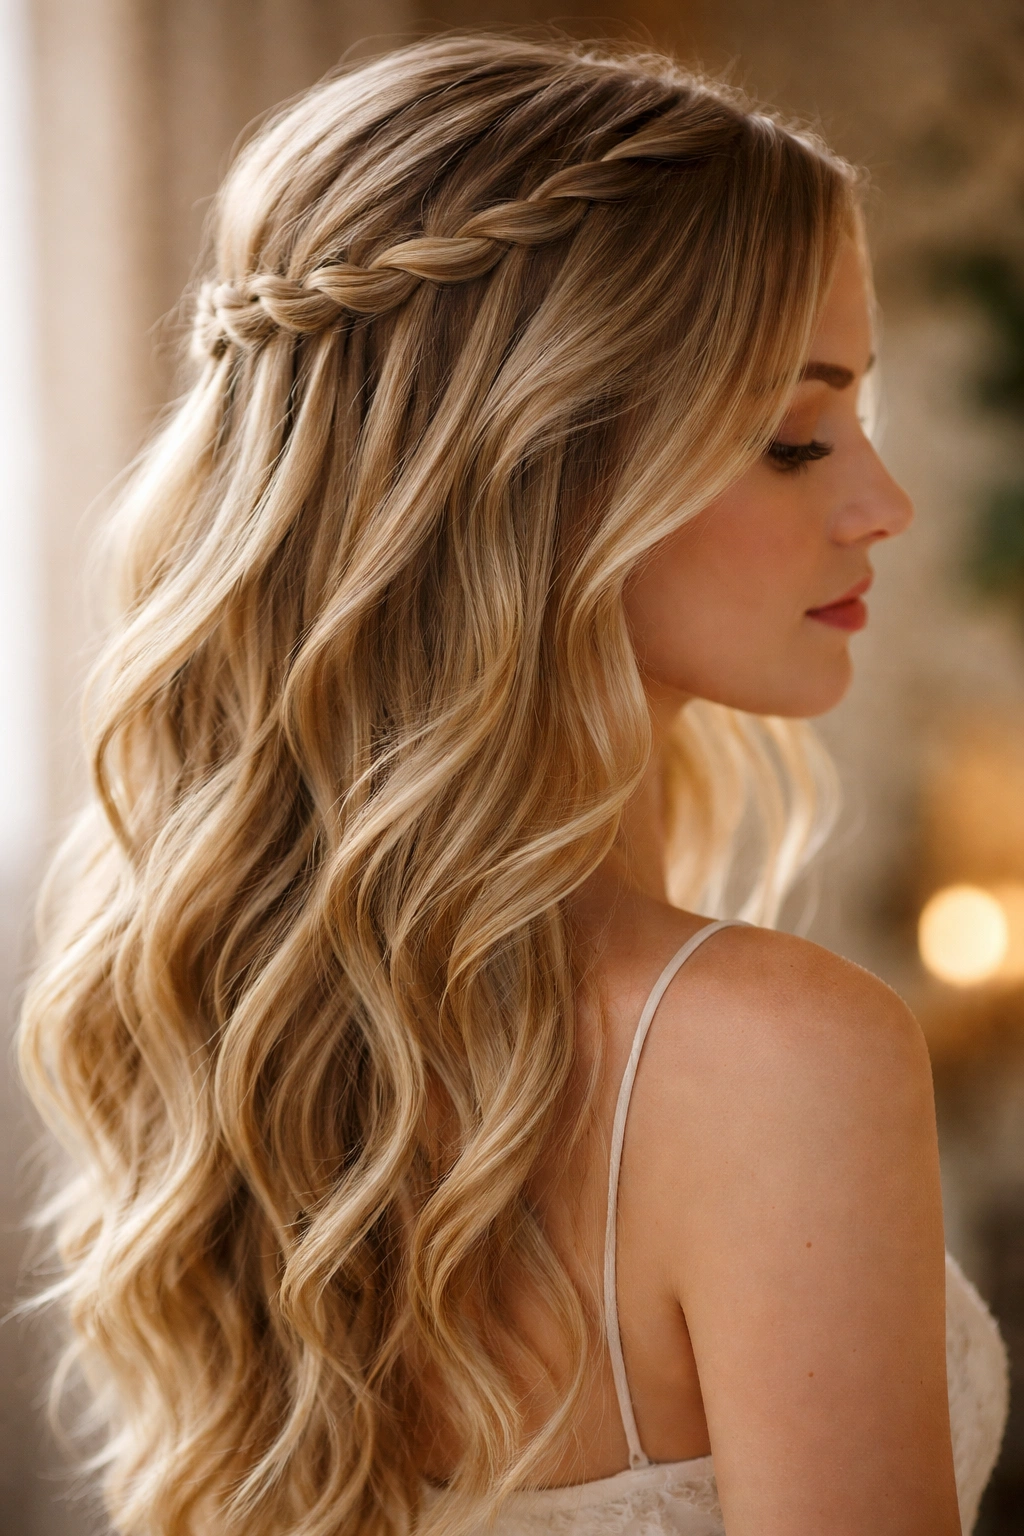
The waterfall braid creates an almost liquid, cascading effect where sections of hair are released as you braid, creating vertical streams of loose hair interspersed with braided sections. Start at one temple with a three-strand braid, but as you braid, drop one strand and pick up a new one from above, creating that waterfall effect. Continue across the back of your head toward the opposite side, then secure where you end.
Why It Works for Homecoming
This braid is genuinely one of the most flattering and romantic options available—it frames your face delicately while the cascading loose sections create dimension and movement. It’s the kind of hairstyle that makes people ask who does your hair professionally, even if you did it yourself. The visual interest is incredible, and the combination of braided and loose sections creates that effortless-elegance vibe that homecoming is all about.
Technical Tips
- Practice this one at least once before homecoming night—the motion of dropping and picking up strands takes coordination
- Work with slightly damp hair so the dropped sections don’t immediately frizz away
- The cascading sections should be roughly the same width for visual balance
- Use bobby pins that match your hair color to anchor the braid invisibly as you work
Pro tip: If your waterfall sections feel too loose, use a fine-tooth comb to gently smooth each dropped section downward—this creates cleaner lines without damaging hair.
5. Double Dutch Braid Half Up
Double Dutch braids running parallel down the back of your head create a striking, almost symmetrical look that’s somehow both edgy and refined. Section your hair down the middle, then create a Dutch braid on each side from approximately temple-level, braiding backward and slightly inward toward the center of your head. Secure both braids at the crown with a single elastic or clip, letting the remaining hair flow freely.
What Makes It Stand Out
Double braids automatically read as more intentional and stylized than a single braid, and the Dutch technique makes them look bold and dimensional. This style works particularly well if you have a center part or prefer balanced, symmetrical styling. It’s also incredibly practical—it keeps hair off both sides of your face, perfect if you’re planning to dance all night.
Getting It Right
- Part your hair precisely down the middle for visual balance
- Angle your braids so they naturally converge at the crown rather than fighting against each other
- Keep both braids the same thickness and tightness for a polished appearance
- You can wear double Dutch braids messy and textured, or sleek and tight—both work beautifully for homecoming
Worth knowing: Double braids naturally showcase your hair’s texture and shine, so deep conditioning the week before is absolutely worth the effort.
6. Milkmaid Braid Half Up
The milkmaid braid wraps loosely around your head like a halo, which creates an incredibly romantic, princess-like effect perfect for a special occasion. Create two Dutch braids, one on each side starting from behind your ear, braiding backward and slightly upward toward the crown. Rather than securing them at the back, wrap each braid around the opposite side of your head and pin them in place, creating a wrapped or crown effect that frames your entire face.
Why It’s Perfect for Homecoming
This style is undeniably romantic and photo-ready—it has that dreamy, Pinterest-aesthetic quality that makes you feel special without being over-the-top. The wrapped braids create a natural crown that frames your face and showcases your features beautifully. It pairs gorgeously with delicate jewelry since your neck and shoulders are fully visible, and it works with any hair length from shoulder-length upward.
Making It Happen
- Milkmaid braids work best with slightly textured hair, so consider curling your hair the night before or using a texture spray
- Don’t braid too tightly—the braids should sit softly around your head, not pull painfully
- Use bobby pins that match your hair color, placed underneath the braids where they won’t show
- The beauty of this style is the soft, romantic look, so embrace loose, pancaked braids rather than sleek ones
Insider note: If your hair is shorter or finer, you can create the milkmaid effect with just one braid wrapped around, or with two thinner braids—it’s equally stunning and works for every hair type.
7. Rope Braid with Flowers
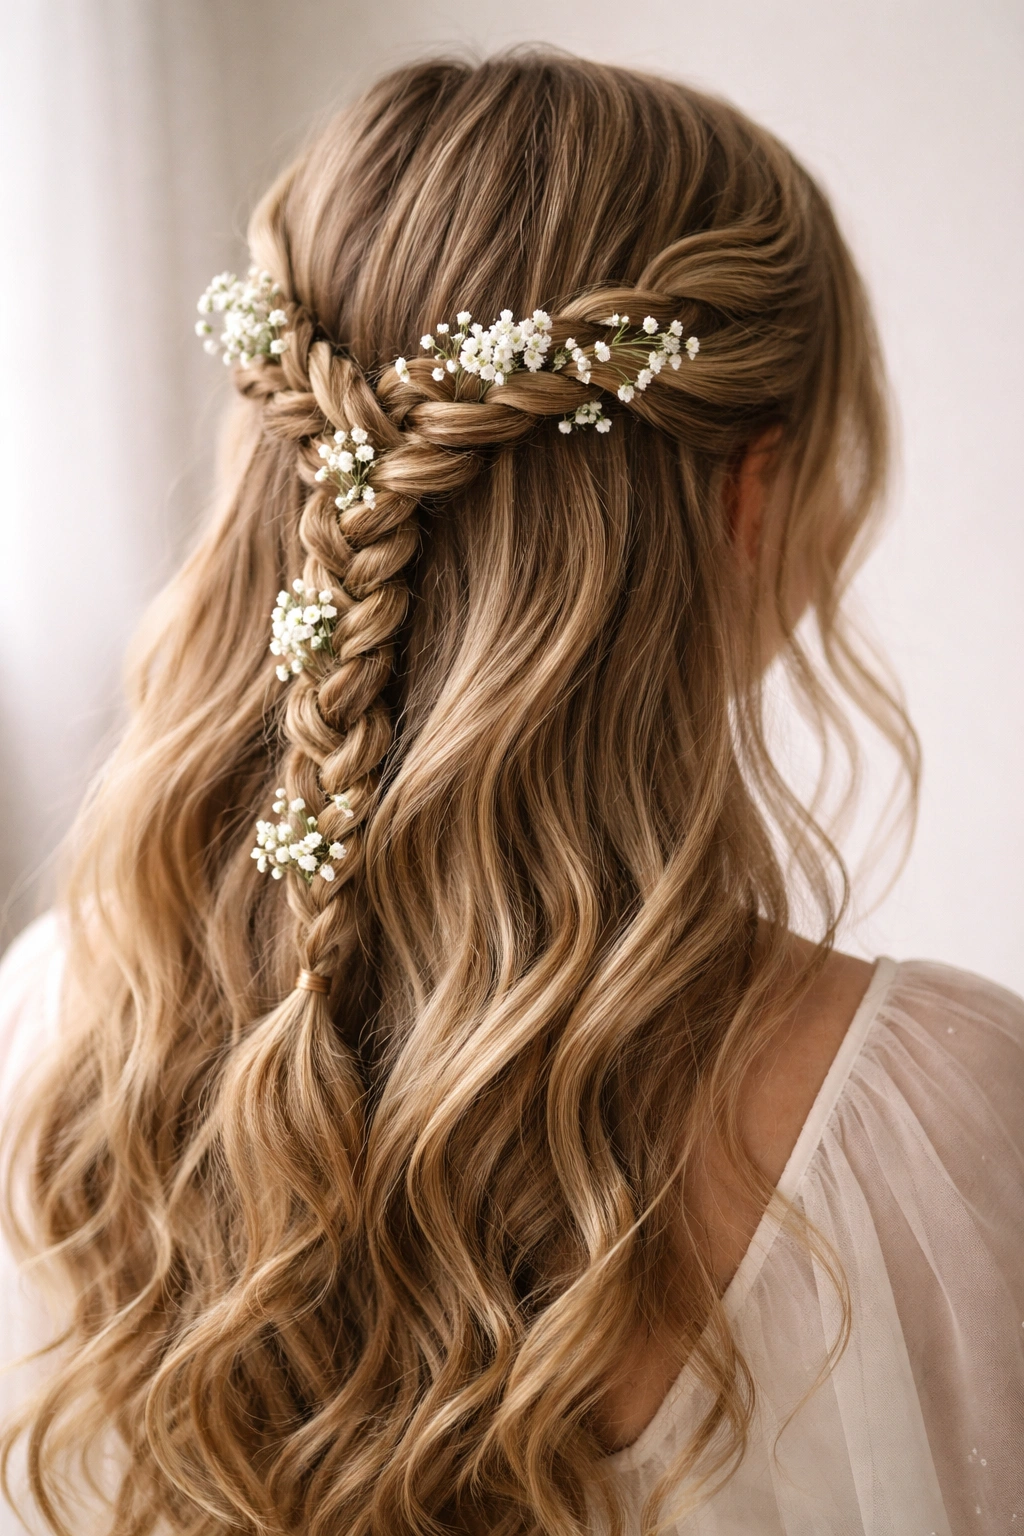
A rope braid (which is created by twisting two sections of hair around each other rather than weaving three strands) creates an elegant, linear look that’s perfect for adding decorative elements. Create a rope braid from one side of your head toward the center back, securing it at the crown, then weave small flowers, baby’s breath, or delicate floral sprays directly into the braid as you secure it. The flowers naturally nestle into the twisted texture and create an enchanting, garden-party aesthetic.
What Makes It Different
Rope braids are inherently more delicate and refined-looking than three-strand braids, and they provide the perfect canvas for floral additions. The twisted texture creates pockets where flowers naturally sit, making them look intentional and styled rather than randomly placed. This is the hairstyle choice if you want something that feels special, elevated, and distinctly homecoming-appropriate.
Technical Details
- Use real or high-quality silk flowers—cheap artificial flowers read as costume-y, not elegant
- Secure flowers with small bobby pins or floral wire, placed where they won’t be visible
- Rope braids work better with longer hair (at least to the shoulders) because shorter strands don’t twist as neatly
- Pancake the rope braid gently to create dimension that showcases the flowers
Pro tip: If you’re using real flowers, add them just before the event so they stay fresh, and ask your florist for blooms that won’t wilt quickly under indoor lighting and body heat.
8. Bohemian Twisted Braid Half Up
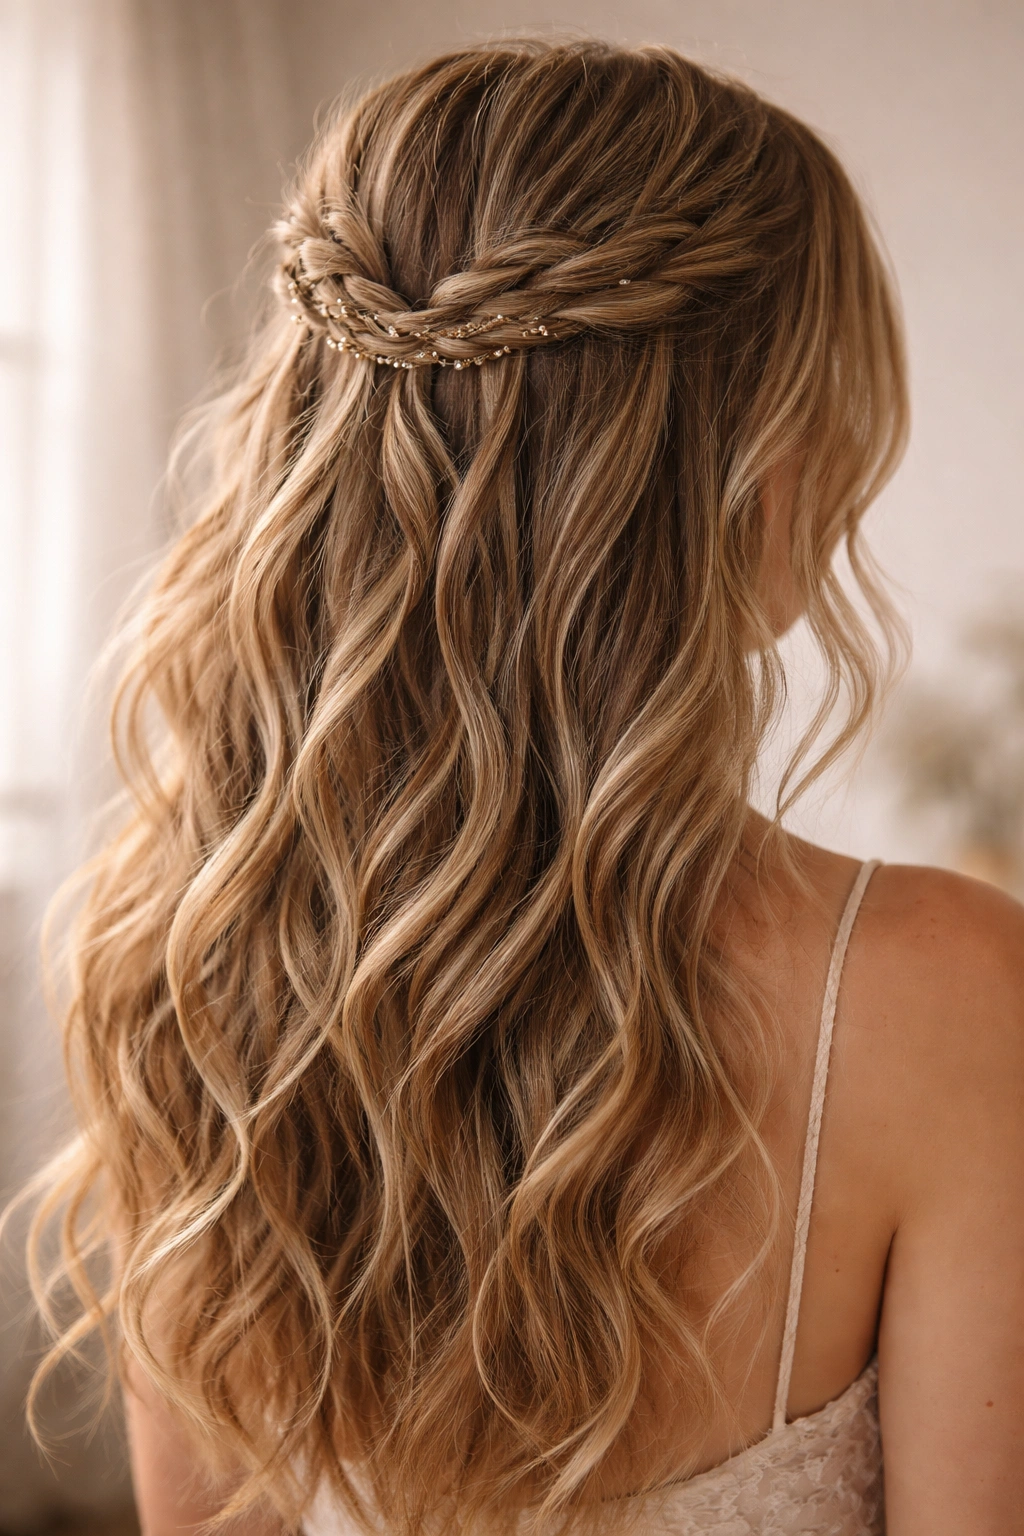
This style combines multiple thin twisted sections that wind around each other, creating an intricate, bohemian-inspired aesthetic that’s romantic without being overly formal. Rather than one thick braid, create 3-4 thin rope braids from the crown area, twisting them together loosely and securing them at the back of your head. The result is a textured, dimensional look that has serious visual interest without feeling stiff or overly structured.
Why It Stands Out
The bohemian aesthetic is inherently romantic and flattering, and multiple thin braids create more texture and dimension than a single thick braid. This style celebrates hair movement and has that effortlessly-styled quality that reads as genuinely cool. It’s perfect if you want something that feels artsy, individual, and distinctly you rather than cookie-cutter formal.
How to Execute It
- Thin braids are easier to work with than thick ones, so don’t stress about precision—slight imperfections actually add to the bohemian vibe
- Twist thin sections loosely rather than tightly; tight twists read as more formal, loose twists read as more relaxed
- You can create the thin braids yourself and twist them together, or ask your stylist to create multiple thin rope braids that you then style together
- Add delicate hair jewelry, small beads, or thin metallic hair cuffs threaded onto the braids for an extra bohemian touch
Worth knowing: This style benefits from textured, wavy hair, so if you have straight hair, consider applying a sea salt spray before styling to create more grip and texture.
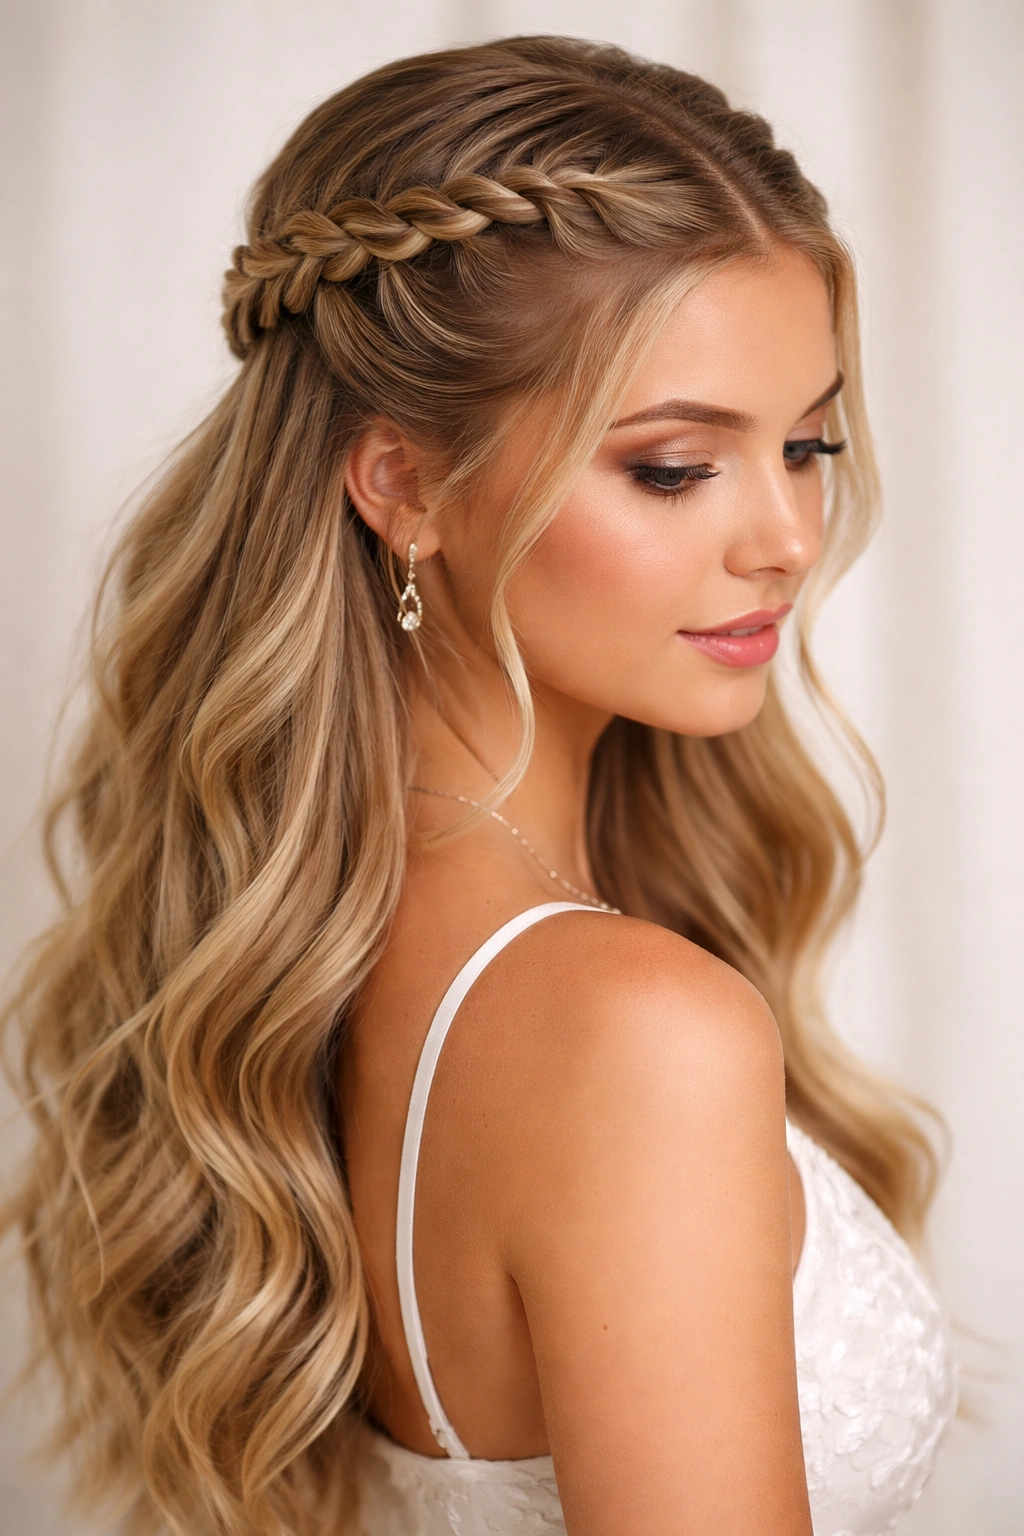
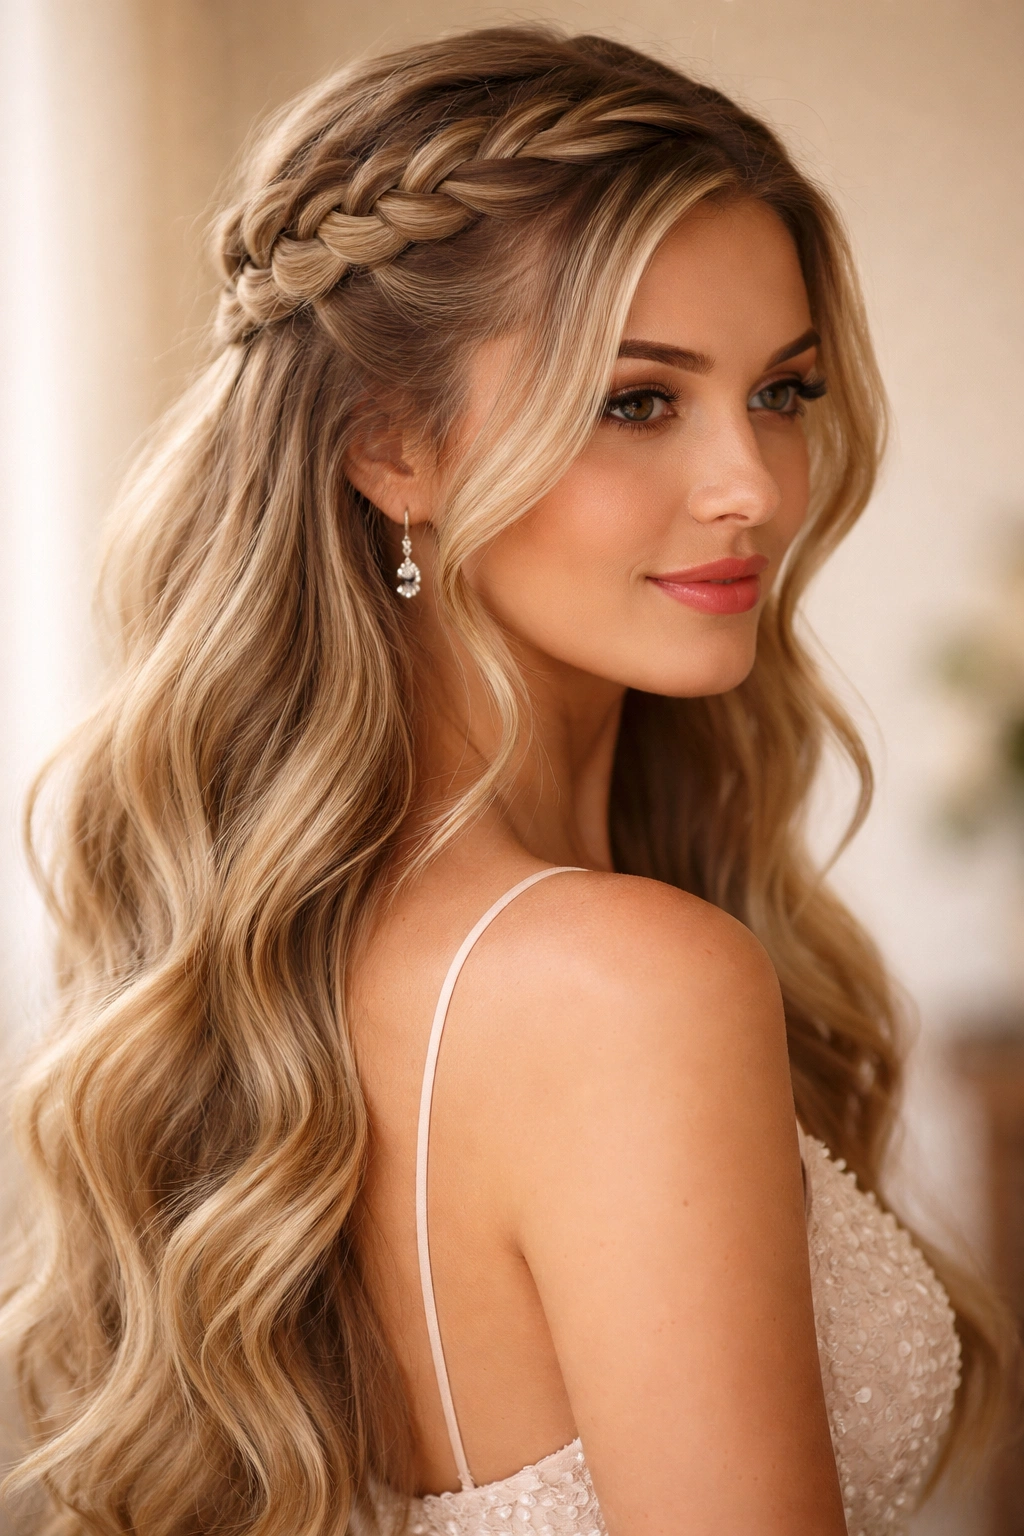
9. Crown Braid Half Up
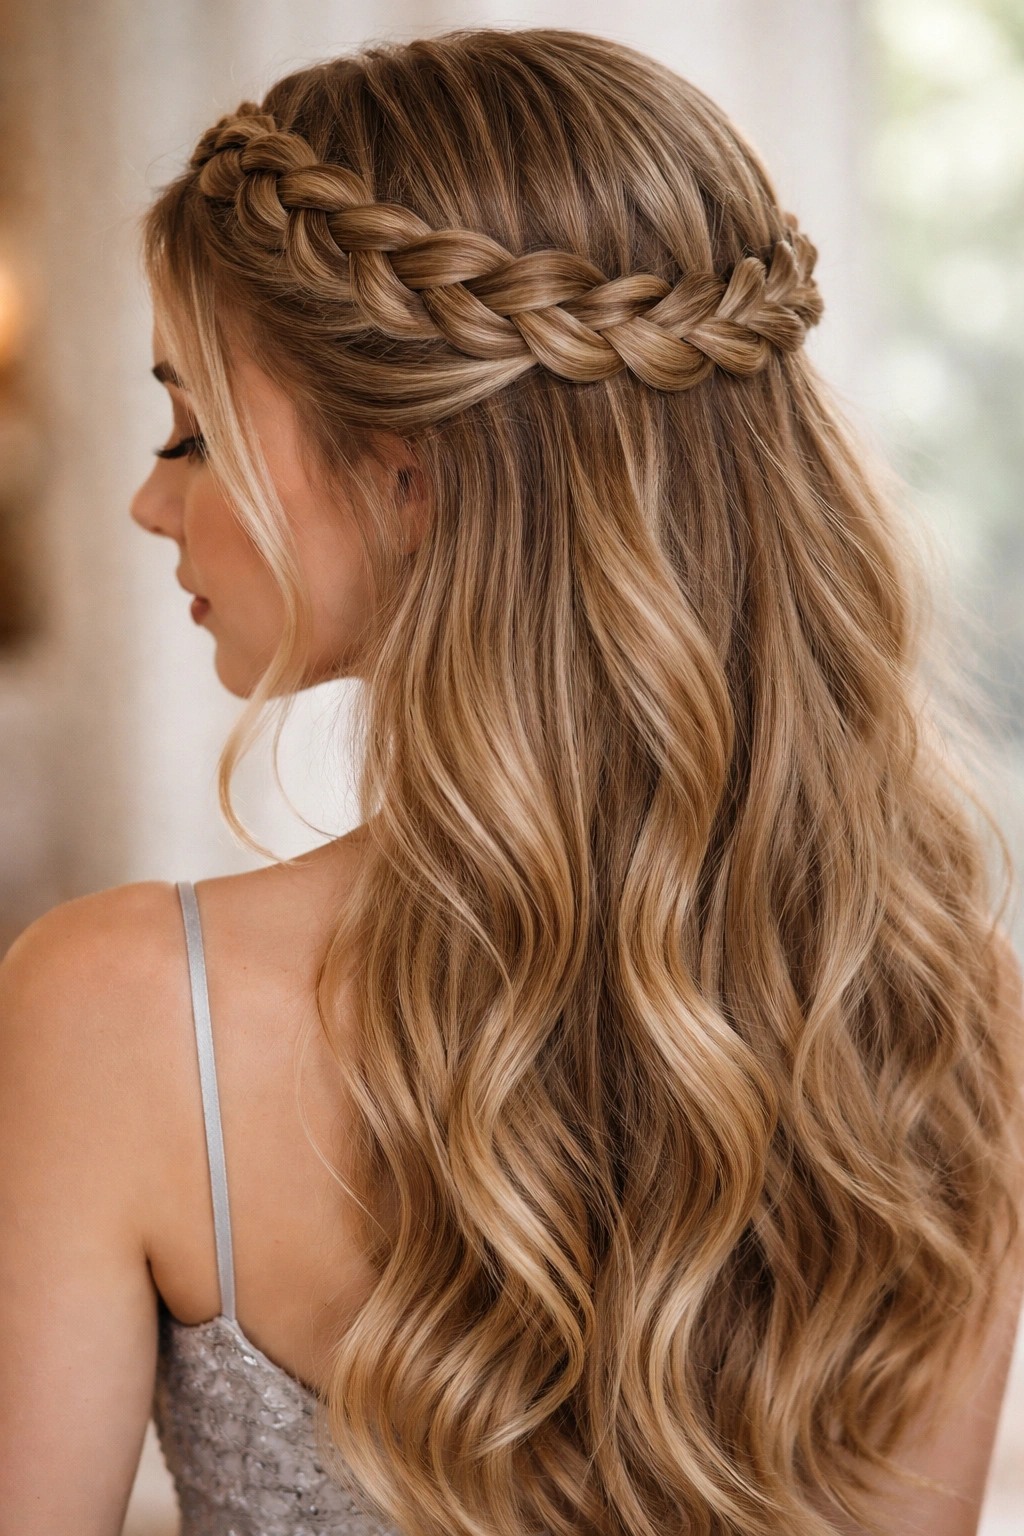
A crown braid literally crowns the top of your head, creating a regal, elegant effect that’s perfect for homecoming. Start at one temple with a Dutch or French braid, angle the braid upward and across the crown of your head following your hairline, then continue to the opposite temple, creating a crown shape. Secure the end of the braid and let the rest of your hair flow freely below, with the braid creating a stunning frame around the top of your head.
The Science Behind It
Crown braids are inherently flattering because they lift the face, draw attention upward, and create a naturally balanced silhouette. The braid follows your hairline, which means it frames your face and features beautifully. This is a technique used in both bridal and editorial styling because it’s genuinely one of the most universally flattering approaches available.
Execution Essentials
- Start the braid above one ear and angle it across the crown, not straight back—this creates that crown effect
- Keep the braid slightly loose; a too-tight crown braid looks uncomfortable and pulls your features
- Pancake the braid after securing it to create dimension and softness
- This style works beautifully with updos or half-ups, since the braid itself doesn’t require securing at the back
Pro tip: Do a crown braid on damp hair when you wake up, let your hair dry throughout the day, and by evening you’ll have gorgeous texture and the braid will be perfectly set—zero last-minute styling stress.
10. Lace Braid Half Up
A lace braid is created by doing a traditional three-strand braid but only incorporating hair on one side, creating an openwork effect that looks delicate and intricate. Start at your temple and braid across the back of your head, picking up new hair only from one side (usually the top side as you braid backward), which creates that lacy, openwork appearance. Secure at the crown and release the rest of your hair into waves or curls.
What Makes It Different
Lace braids read as more delicate and refined than standard braids—they have an ethereal quality that’s perfect for romantic occasions. The openwork pattern is visually interesting without being heavy or overly structured, and it pairs beautifully with flowing waves. This is the choice if you want something sophisticated and a little unexpected.
Technical Tips
- Lace braids require slightly damp hair to stay neat, so braid within an hour of washing
- Keep tension consistent—lace braids look messy if the tension varies throughout
- Pancake a lace braid more gently than you would a full braid, since the openwork pattern is already delicate
- This style shows off the pattern beautifully in photos, so it’s worth the extra attention to detail
Insider note: Lace braids are easier to execute than most people think because you’re only managing two sections (the active braid and the section you’re pulling from), not three like a traditional braid.
11. Side Braided Half Up
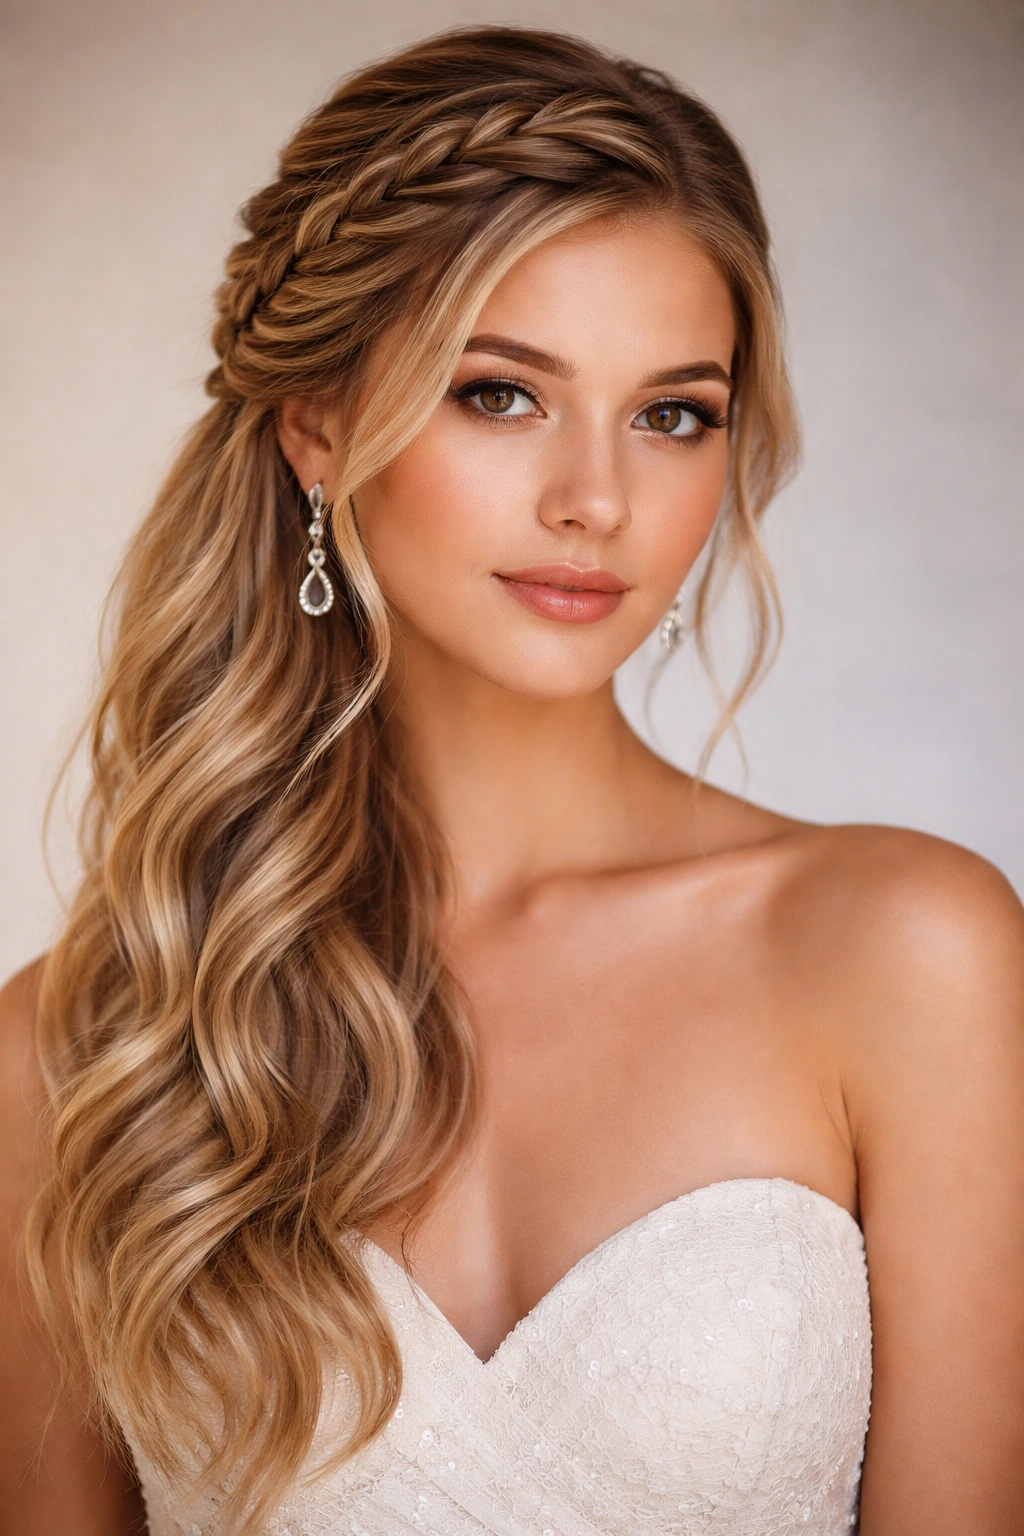
Rather than centering your braid, sweep it dramatically to one side for an asymmetrical, modern look that’s romantic but also distinctly current. Create your braid from the crown and angle it toward one side of your head as you secure it, letting the waves on the opposite side flow freely. This creates a beautiful visual asymmetry that’s flattering and interesting without being overly complicated.
Why It Works
Side-swept styling is inherently romantic and flattering—it draws attention to one side of your face and creates a visual line that’s graceful and elegant. The asymmetry makes the style feel less formal and more accessible than perfectly centered styling. It pairs beautifully with delicate drop earrings and side-swept bangs or face-framing layers if you have them.
Making It Happen
- Your braid can be any style (Dutch, French, fishtail, rope)—the key is the asymmetrical placement
- Secure your braid slightly off-center, toward whichever side you prefer
- You can curl the loose waves on the opposite side for extra volume and romance
- Add delicate bobby pins or small clips on the side with the braid for extra visual interest
Pro tip: If you have a side part naturally, lean into it—style your braid toward your part side for a cohesive, intentional look.
12. Messy Braided Half Up
Sometimes the most stunning homecoming hairstyles are the ones that look deliberately undone. Create your braid using any technique you prefer, but intentionally keep it loose and relaxed rather than tight and precise. Pancake the braid generously to create dimension, pull a few face-framing pieces loose, and pair it with tousled waves below for an effortlessly romantic aesthetic.
Why It Stands Out
There’s something genuinely beautiful about styling that looks easy and unrehearsed—it reads as confident and cool. A messy braid says you’re comfortable with yourself and don’t need to overdress your appearance. This approach also has the practical advantage of being forgiving—small imperfections in the braid actually look intentional rather than like mistakes.
Getting the Right Kind of Messy
- “Messy” is different from “sloppy”—your braid should still be recognizable and structured, just relaxed
- Pancake your braid in uneven sections to create texture and dimension
- Use texturizing spray or dry shampoo to create grip and help the braid hold its shape
- Tousled waves are essential for this style; smooth, sleek waves make it look unfinished rather than intentional
Worth knowing: This style is actually perfect if you’re braiding your own hair, because it’s harder to create perfectly tight, symmetrical braids on yourself anyway—lean into that and own the textured look.
13. Braided Ponytail Base
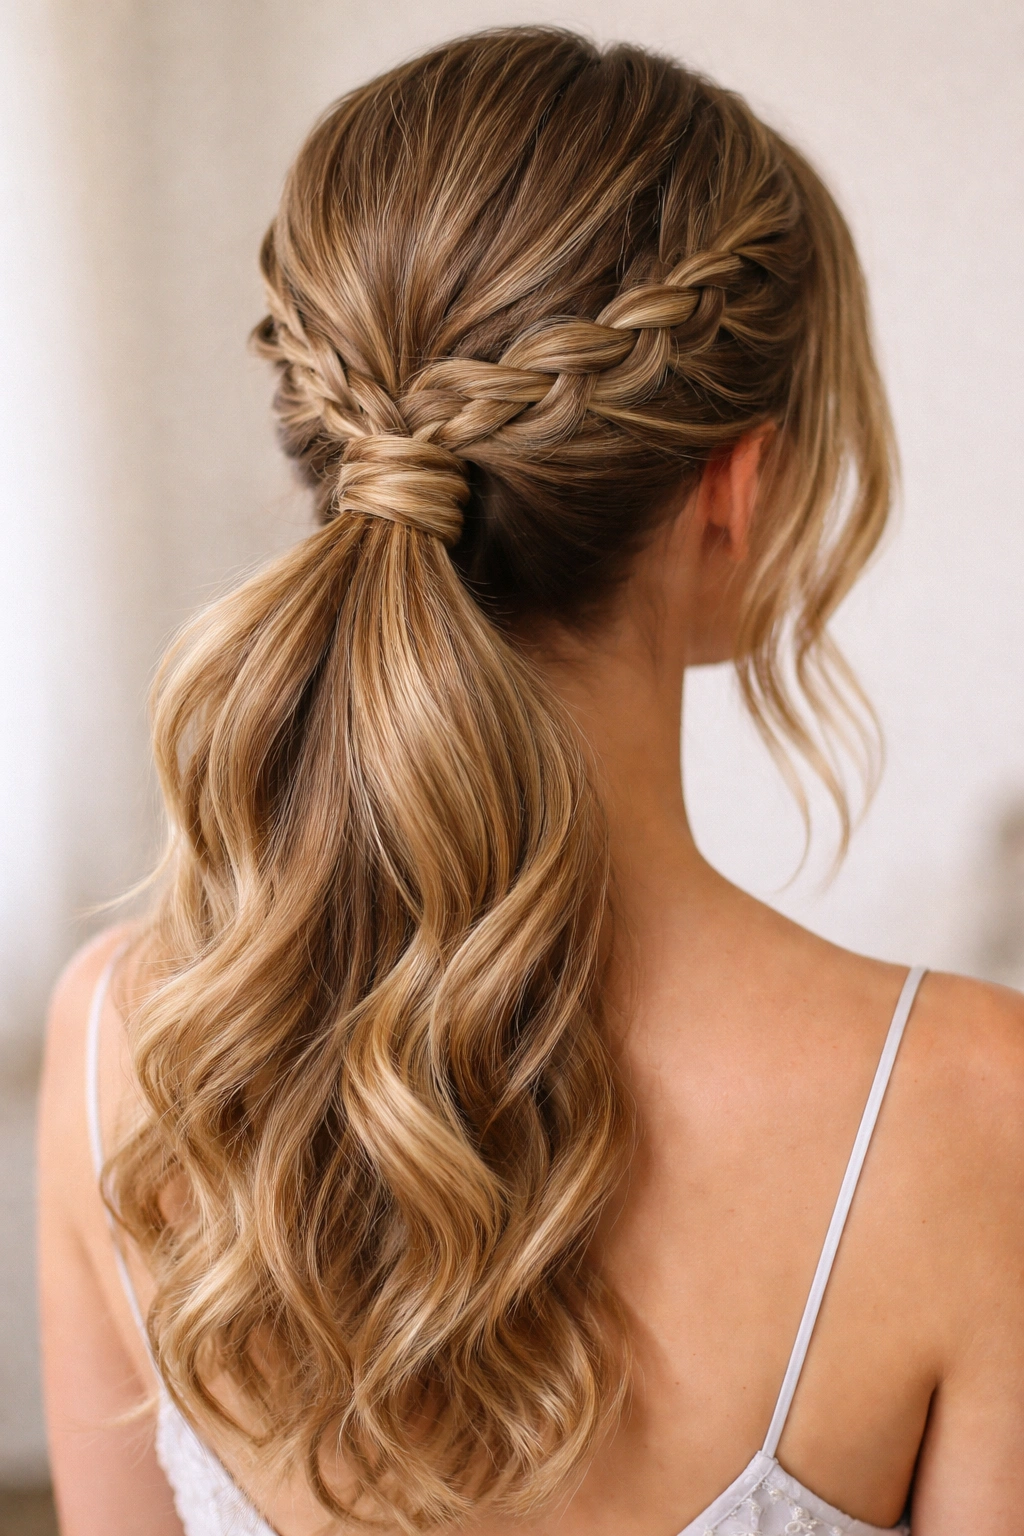
Turn your half-up style into a half-up ponytail by creating a braid and then gathering it with the bottom section of hair into a low ponytail. Create your braid from the crown area as you normally would, but instead of leaving it loose, incorporate it as the base of a low ponytail secured at the nape of your neck. This creates a style that’s still romantic and braided, but also structured and polished—perfect if you want something that’ll stay in place through dancing.
What Makes It Different
A braided ponytail base combines the romantic, detailed appeal of braids with the security and polish of a structured updo. The braid provides visual interest at the top of your head while the ponytail provides stability and security. This is the perfect choice if you want something that looks intentional and polished without being a full updo.
Technical Execution
- Create your braid as you normally would, but trace it back further than you would for a loose half-up style
- Secure the braid loosely at the nape of your neck, then gather it with the remaining hair into a ponytail
- You can curl the ponytail, tease it for volume, or leave it smooth depending on your dress style
- Delicate hair clips or decorative elastics at the base of the ponytail add a special touch
Pro tip: Tease the ponytail gently before curling it—the texture helps curls hold better and creates that romantic, voluminous effect.
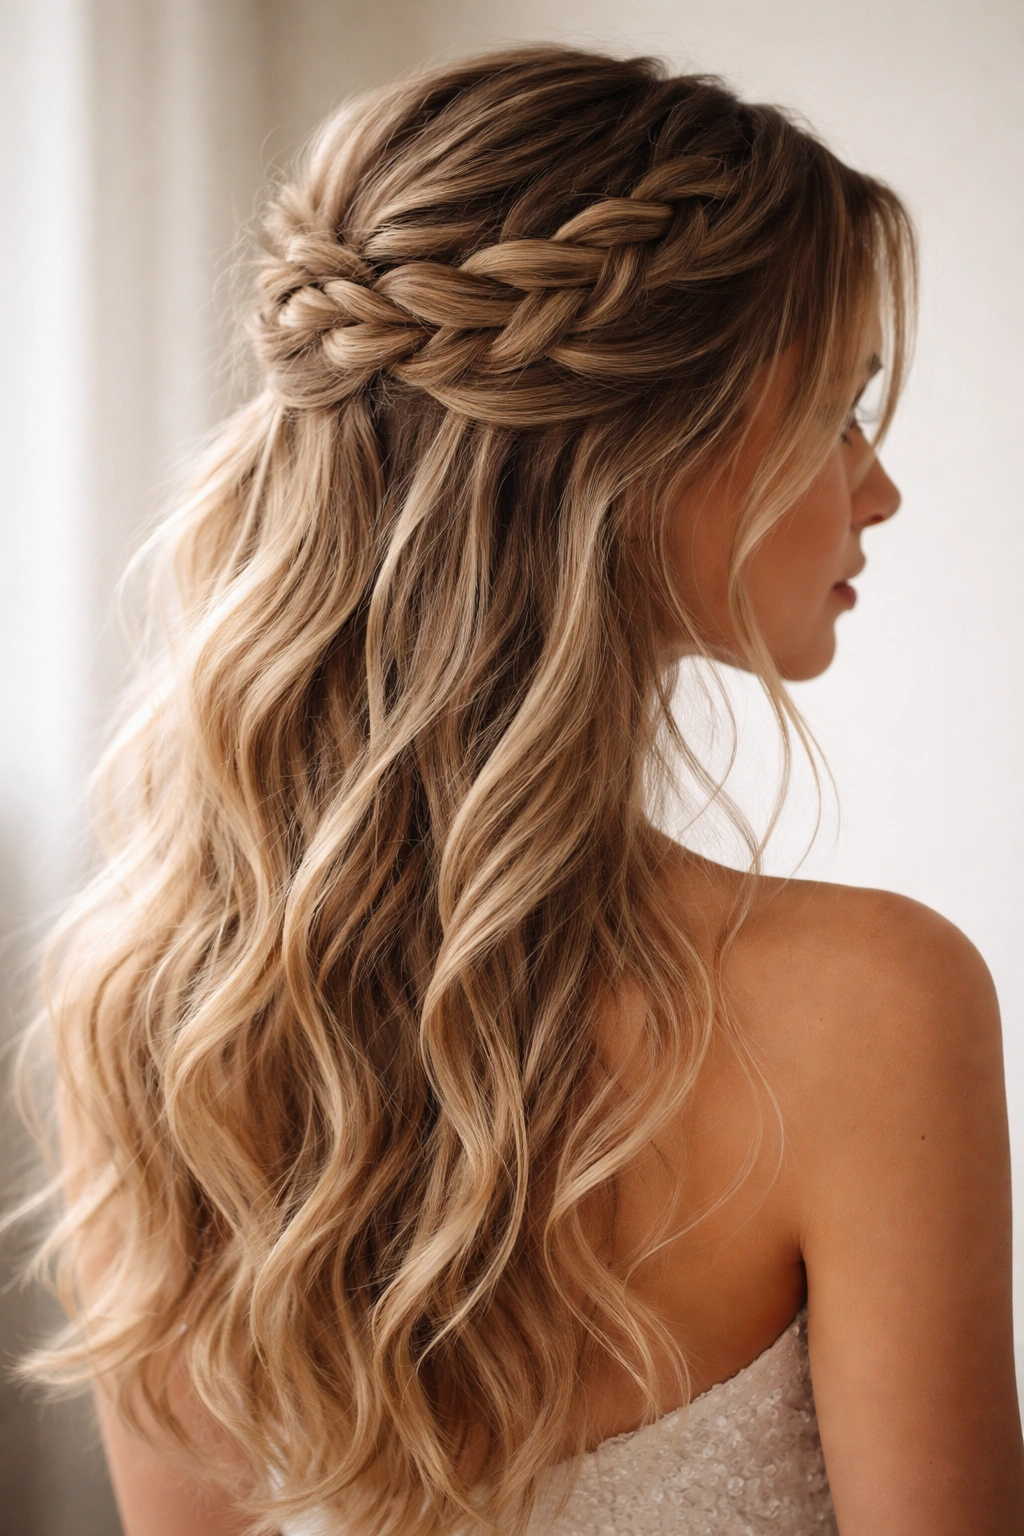
14. Braid with Halo Effect
Create a braid that travels around the back of your head in a U-shape or oval, creating a halo effect while still leaving the front of your hair loose and flowing. Start at one temple and braid backward and across the back of your head, angling slightly downward, then continue to the opposite temple. Secure the end and let face-framing pieces and waves frame your features, with the braid creating a subtle crown or halo effect around the back.
Why It’s Perfect for Homecoming
A halo braid creates an incredibly romantic, ethereal aesthetic—it has that dreamy, Pinterest-worthy quality that photographs beautifully. The braid is visible but not overwhelming, and it frames your face while still showcasing your hair’s length and waves. This style is perfect if you want something that feels special and intentional without being too costume-like.
Making It Work
- The key to a halo effect is angle—your braid should follow the shape of the back of your head, not pull straight back
- This style works beautifully with longer hair (at least shoulder-length) because you need length for the halo to have impact
- You can use any braid technique, but Dutch and French braids create the most defined halo effect
- Loose, romantic waves below the braid are essential for this style to feel ethereal rather than structured
Insider note: Halo braids photograph beautifully from behind, so if you’re worried about how you’ll look in photos, this is your style—you’ll look absolutely stunning.
15. Twisted Braid Half Up
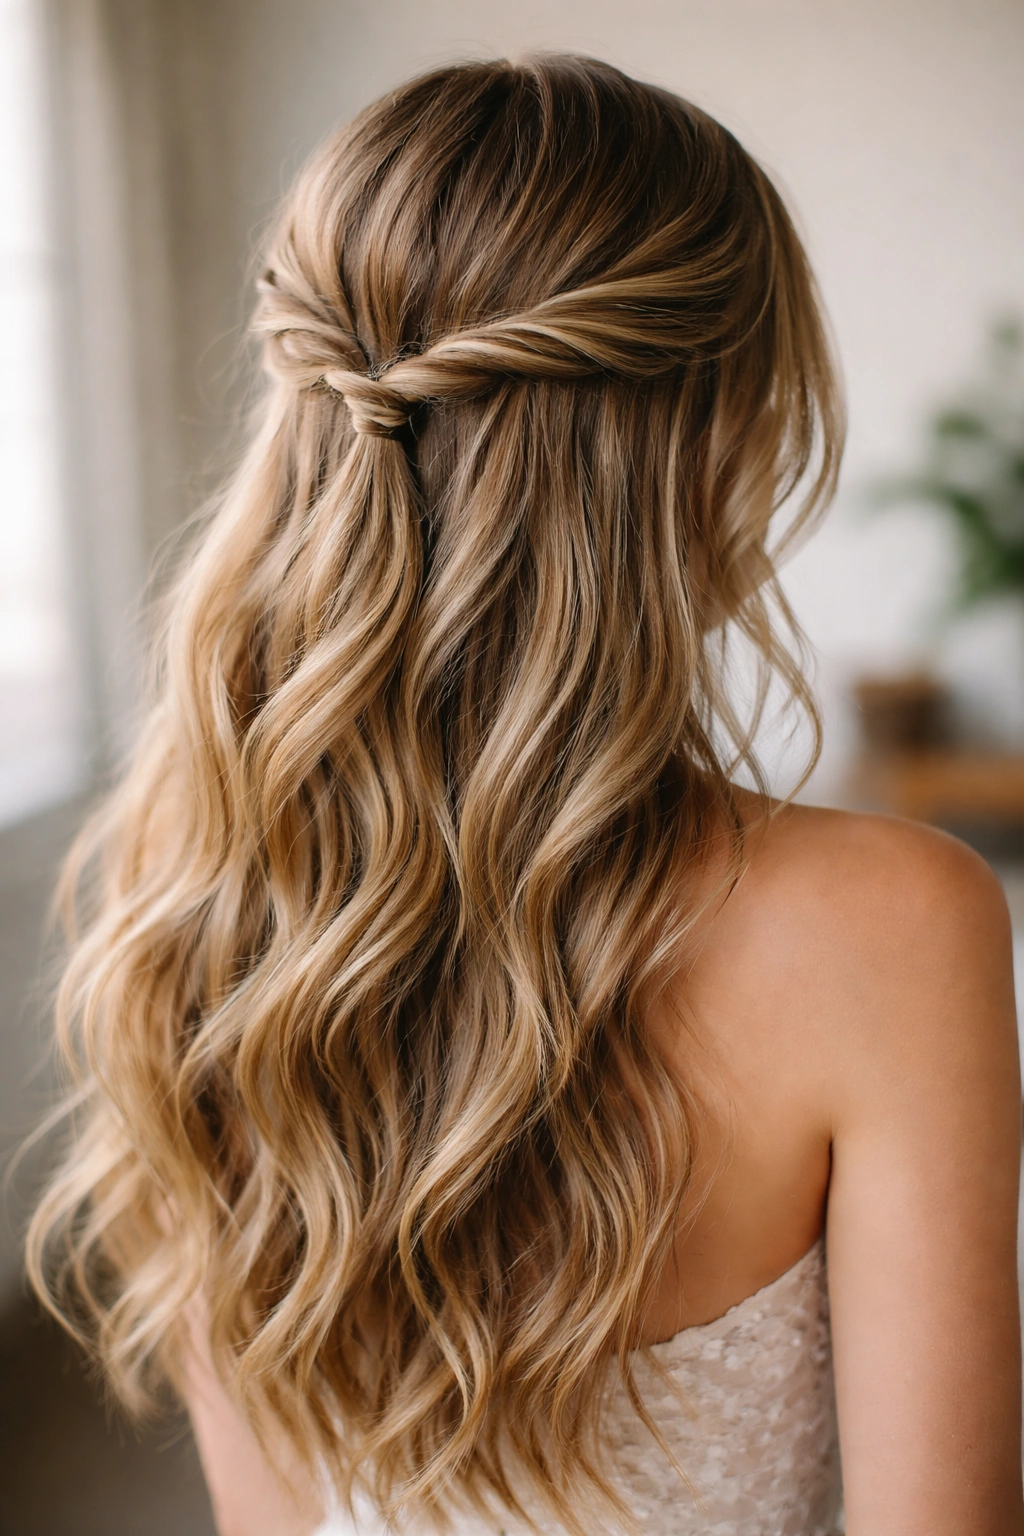
Swap traditional braiding for an entirely twisted approach by taking two thick sections from the crown area and twisting them around each other, creating a thick, ropelike texture. Continue twisting as you incorporate new hair from the sides, creating a twisted effect rather than a woven braid. Secure at the back and let the remaining hair flow into waves—this creates a distinctly different visual from a traditional braid while still maintaining that romantic, intentional aesthetic.
What Makes It Different
Twisted styles read as softer and more romantic than woven braids because the twisting motion naturally creates a more organic, less structured appearance. Twists are also surprisingly forgiving to execute, since you’re only managing two sections rather than three, making this a great choice if you’re braiding your own hair. The twisted texture photographs beautifully and creates genuine visual interest.
Technical Details
- Two-strand twists are easier to keep even than three-strand braids, so this is perfect if you struggle with braiding
- Keep the twist slightly loose for that romantic, soft effect; tight twists read as more severe
- You can incorporate hair as you twist (like a French twist) or braid plain twists and add them on top of the base section
- Pancake the twist gently to create dimension without making it look overly textured
Pro tip: Twists actually hold better on slightly damp hair than braids do, so consider misting your hair lightly with water before starting.
16. Braid with Hair Accessories

Elevate any braided half-up style by incorporating intentional hair accessories—delicate clips, hair cuffs, pearl bobby pins, or decorative elastics that complement your homecoming dress. Thread small metallic hair cuffs along your braid, weave thin ribbon or silk thread through the braid as you style it, or secure your braid with a decorative clip that echoes the color or theme of your dress. The accessories should feel intentional and coordinated, not random.
Why It Works
Hair accessories transform a basic braid into something distinctly special and coordinated with your overall look. They provide visual interest and a finishing touch that reads as intentional and polished. Accessories are also the perfect way to incorporate your dress’s color palette or a theme without changing your hairstyle entirely.
Selection and Placement
- Choose accessories that complement your dress—if your dress is sparkly, go for metallic or rhinestone clips; if it’s romantic, choose delicate or vintage-inspired pieces
- Less is more—one or two statement pieces is more elegant than multiple competing accessories
- Thread metallic cuffs through your braid, weave ribbon through as you braid, or secure everything with coordinating bobby pins
- Consider your hair color when choosing pins and clips; matching metal tones creates a more cohesive look than contrasting ones
Worth knowing: If you’re using ribbon or silk thread, braid it in as you create your braid rather than trying to thread it through afterward—it’s infinitely easier and looks more intentional.
17. Half Up with Multiple Thin Braids
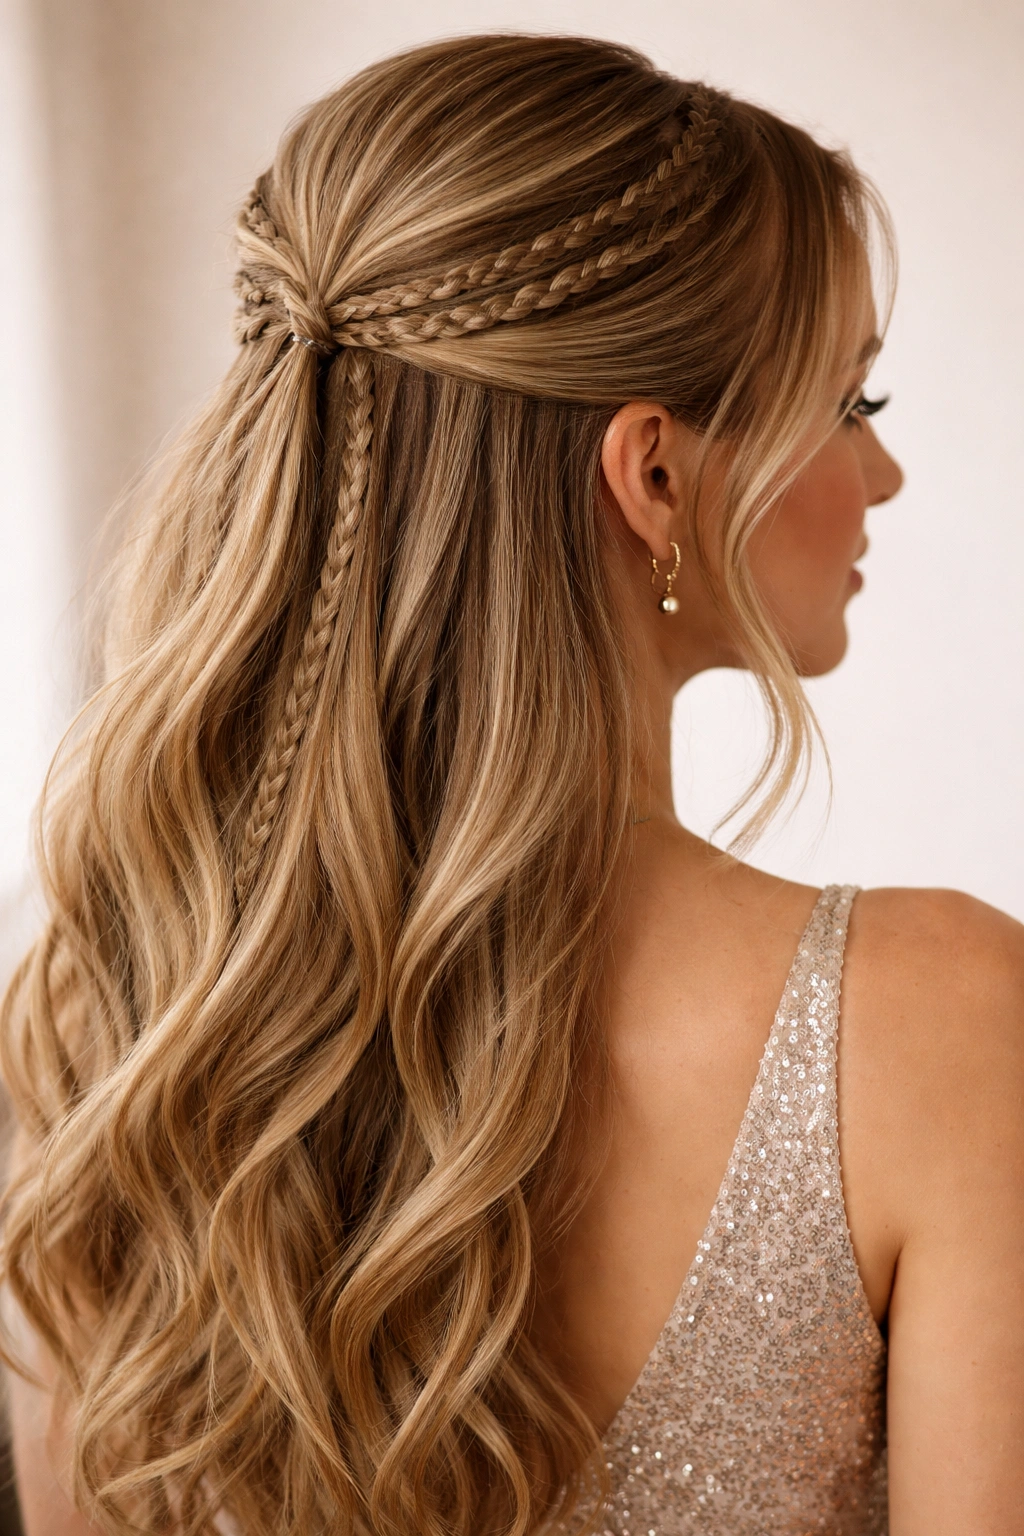
Instead of one thick braid, create 3-5 thin braids from the crown area and secure them together at the back, creating a multi-braided effect that’s visually interesting and textured. Each braid should be relatively thin (about the width of a marker), and they should follow roughly parallel paths from crown to the securing point. This creates a distinctly dimensional, modern aesthetic while still feeling romantic.
What Makes It Stand Out
Multiple thin braids create more texture and visual interest than a single braid, and they have a contemporary, fashion-forward feel. The multi-braided approach also distributes weight more evenly, making the style more comfortable to wear for extended periods. This is the perfect choice if you want something that feels current, individual, and distinctly you.
Execution Essentials
- Thin braids are actually easier to execute than thick ones because they require less precision
- Space your braids evenly across the crown for visual balance
- You can use the same braid technique for all of them or mix techniques (some French, some Dutch, some rope)
- Secure all the braids together with a single elastic at the back for a cohesive look
Pro tip: If you’re creating your own multiple braids, use small clips to section out each braid before you start—it keeps everything organized and prevents accidentally grabbing hair from the wrong section.
18. Braided Bun Half Up
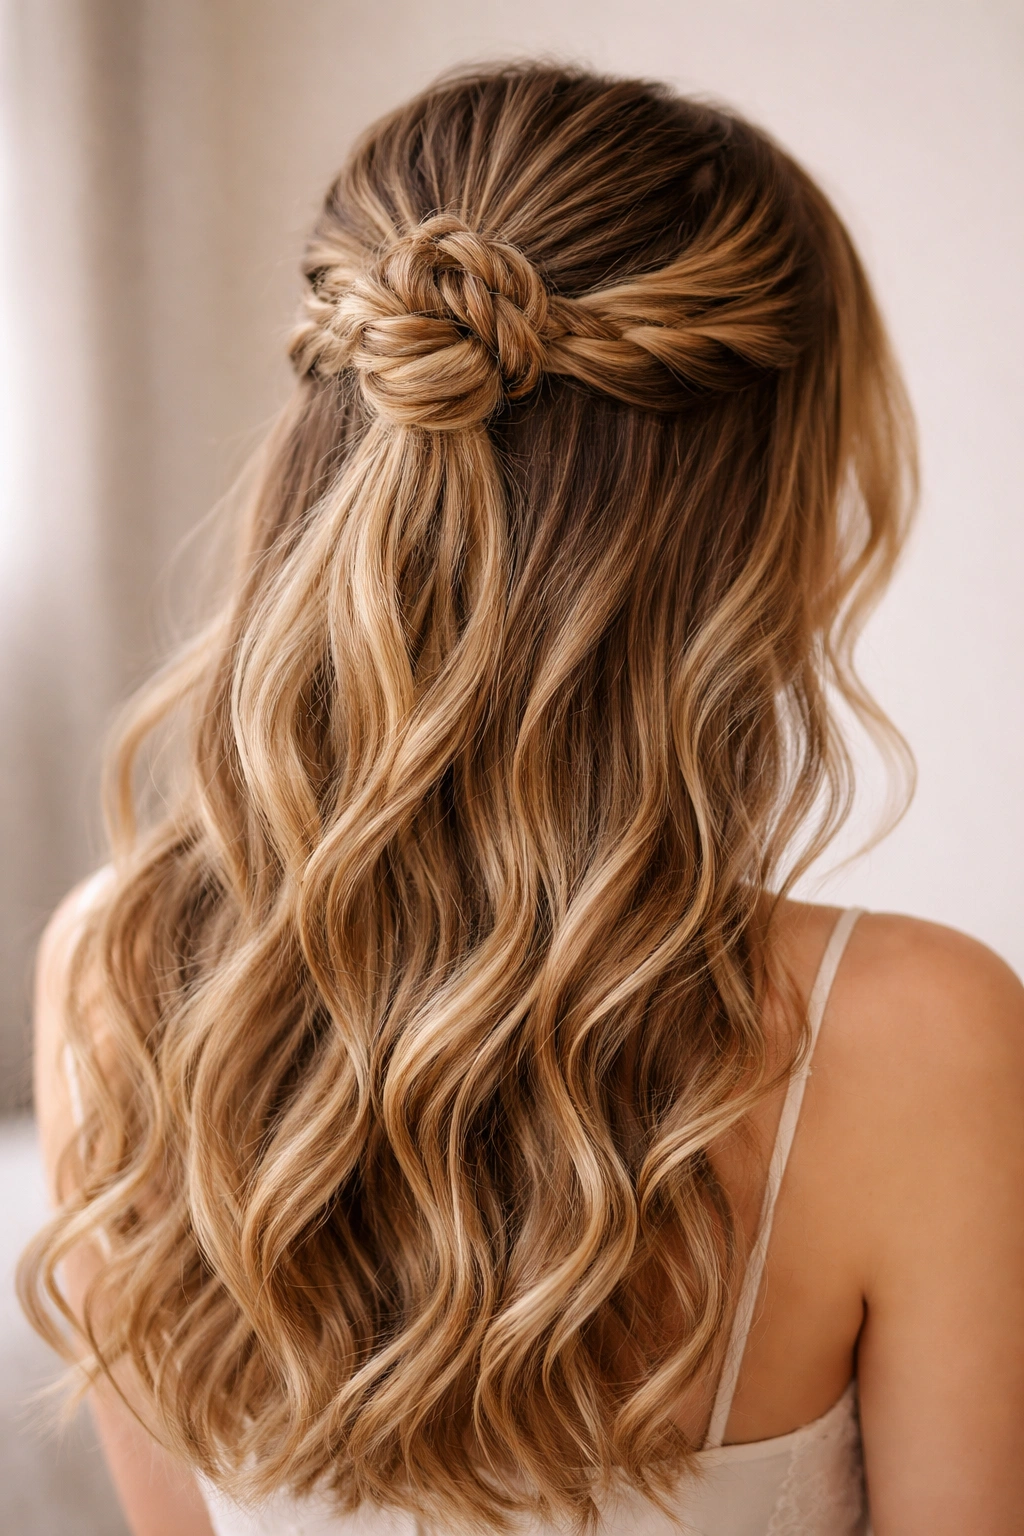
Create a half-up style where the top section is braided and then gathered into a small, elegant bun at the back of your crown. Create your braid as you normally would from the temple area back toward the crown, but instead of leaving it loose, twist or wrap the end into a small bun that sits at the crown. This creates a style that’s romantic and braided while also being polished, structured, and perfect for active dancing.
Why It’s Perfect for Homecoming
A braided bun combines all the romance of a braided style with the practicality and polish of an updo. The bun is secure enough that it’ll stay in place through hours of dancing, while the braid on top provides that special, intentional aesthetic you want for homecoming. The exposed waves below create that balance between polished and romantic that’s perfect for a special event.
Making It Work
- Your braid can be any style—Dutch, French, fishtail—they all work beautifully coiled into a bun
- The bun should be relatively small and neat, not massive and overstuffed
- Coil the end of your braid around the base of the bun and secure everything with bobby pins that match your hair color
- Loose, romantic waves or soft curls below the bun create the perfect contrast to the structured bun
Insider note: Bobby pins inserted at an angle (rather than straight in) hold much better, especially if you have slippery hair. Angle the pins so they’re pushing upward into the bun’s base.
Final Thoughts
The beauty of braided half-up half-down styles for homecoming is that they offer the perfect balance between special and wearable. You get all the romance, intentionality, and photo-ready perfection of a formal updo, but with the comfort, movement, and approachability of hair worn down. Whether you choose an intricate waterfall braid, a bold double Dutch, or a soft, messy rope twist, you’re choosing a style that’ll make you feel confident and beautiful all night long.
The eighteen options here represent a range of skill levels, hair textures, and aesthetic preferences—there’s genuinely something for everyone. If you’re nervous about executing a braided style yourself, remember that practice makes all the difference. Run through your chosen style once or twice before homecoming night, and you’ll be shocked how much easier and more confident it becomes. And if braiding really isn’t your thing, any stylist can recreate these looks from a simple photo reference. The key is choosing a style that feels authentically you and that makes you feel like the best version of yourself when you see your reflection.