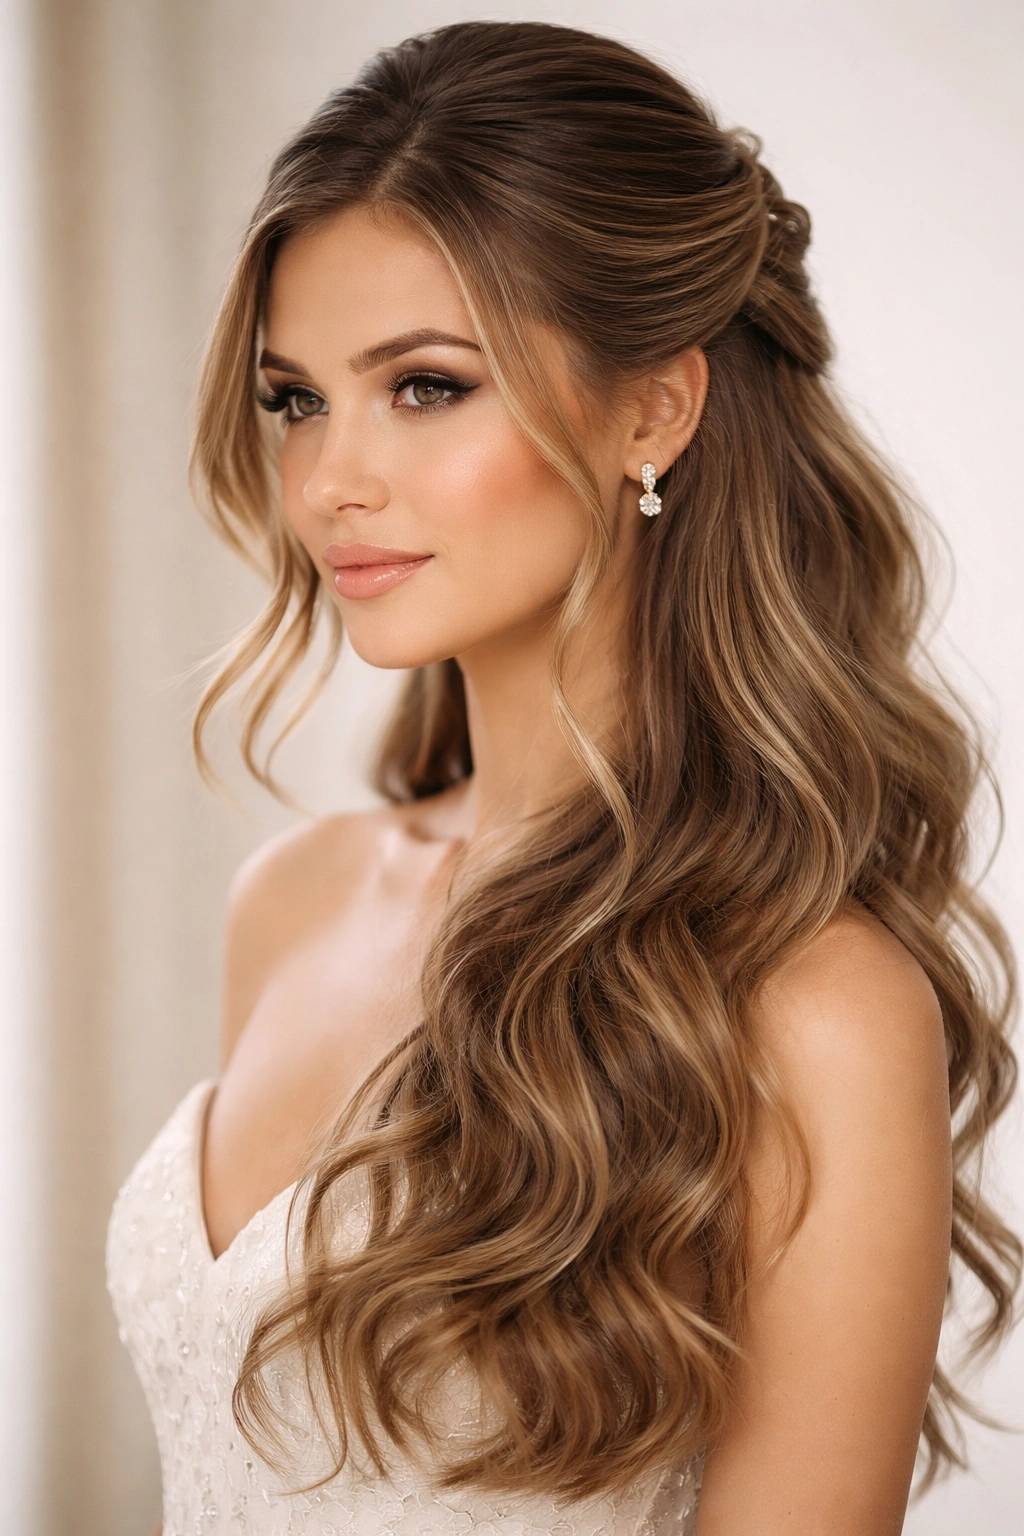
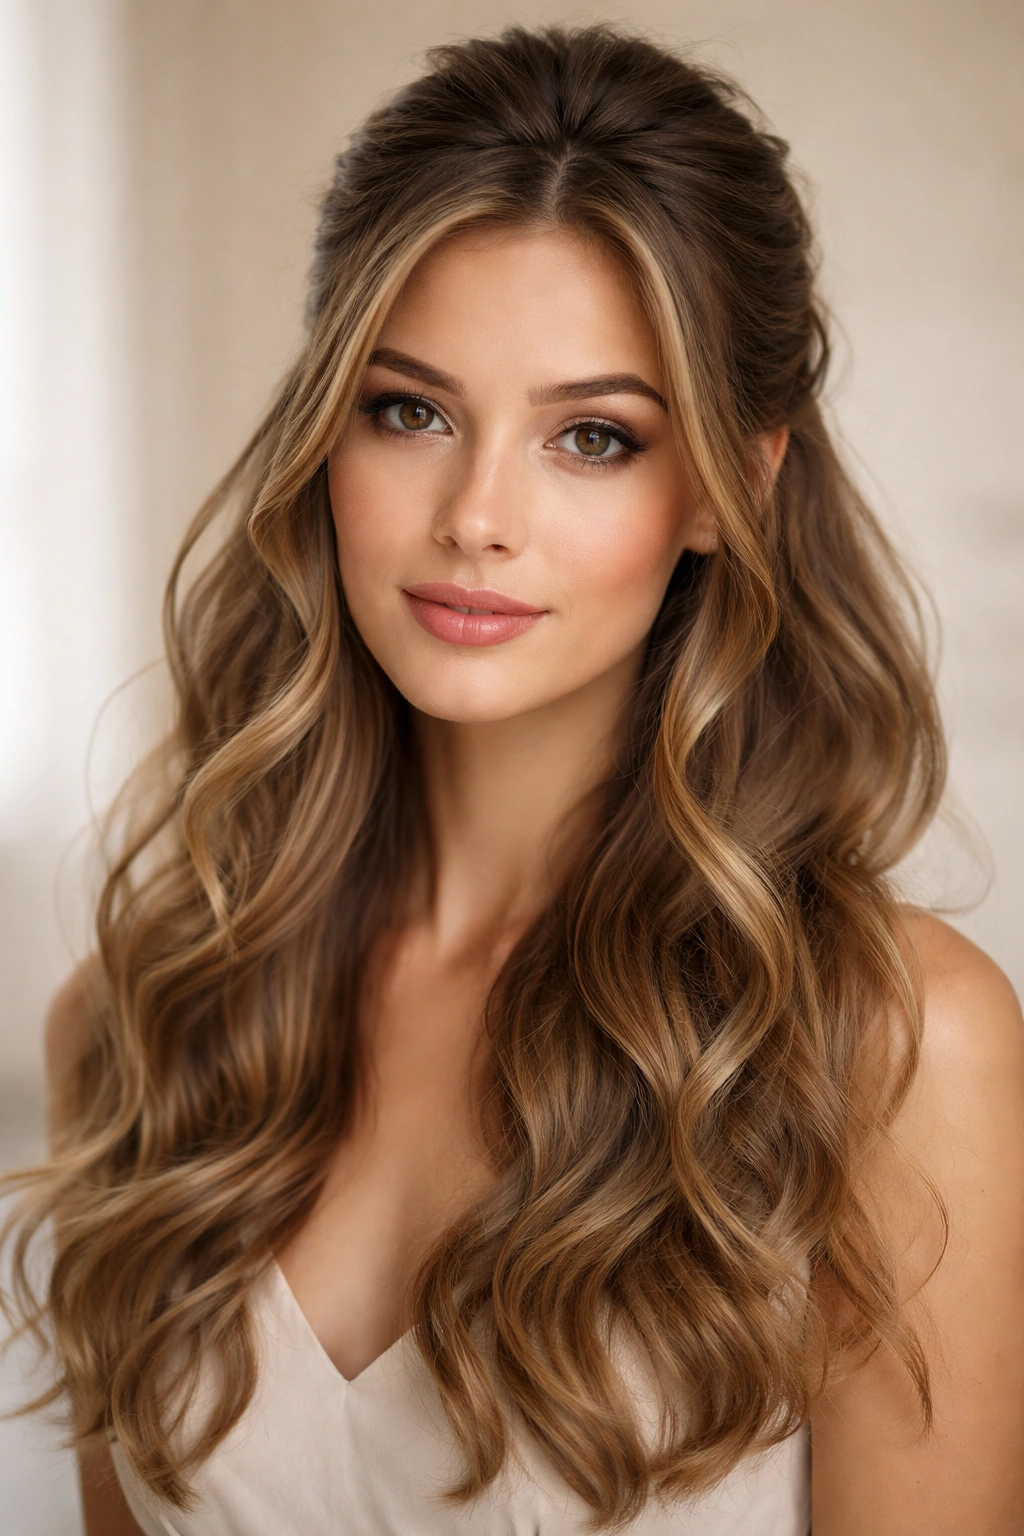
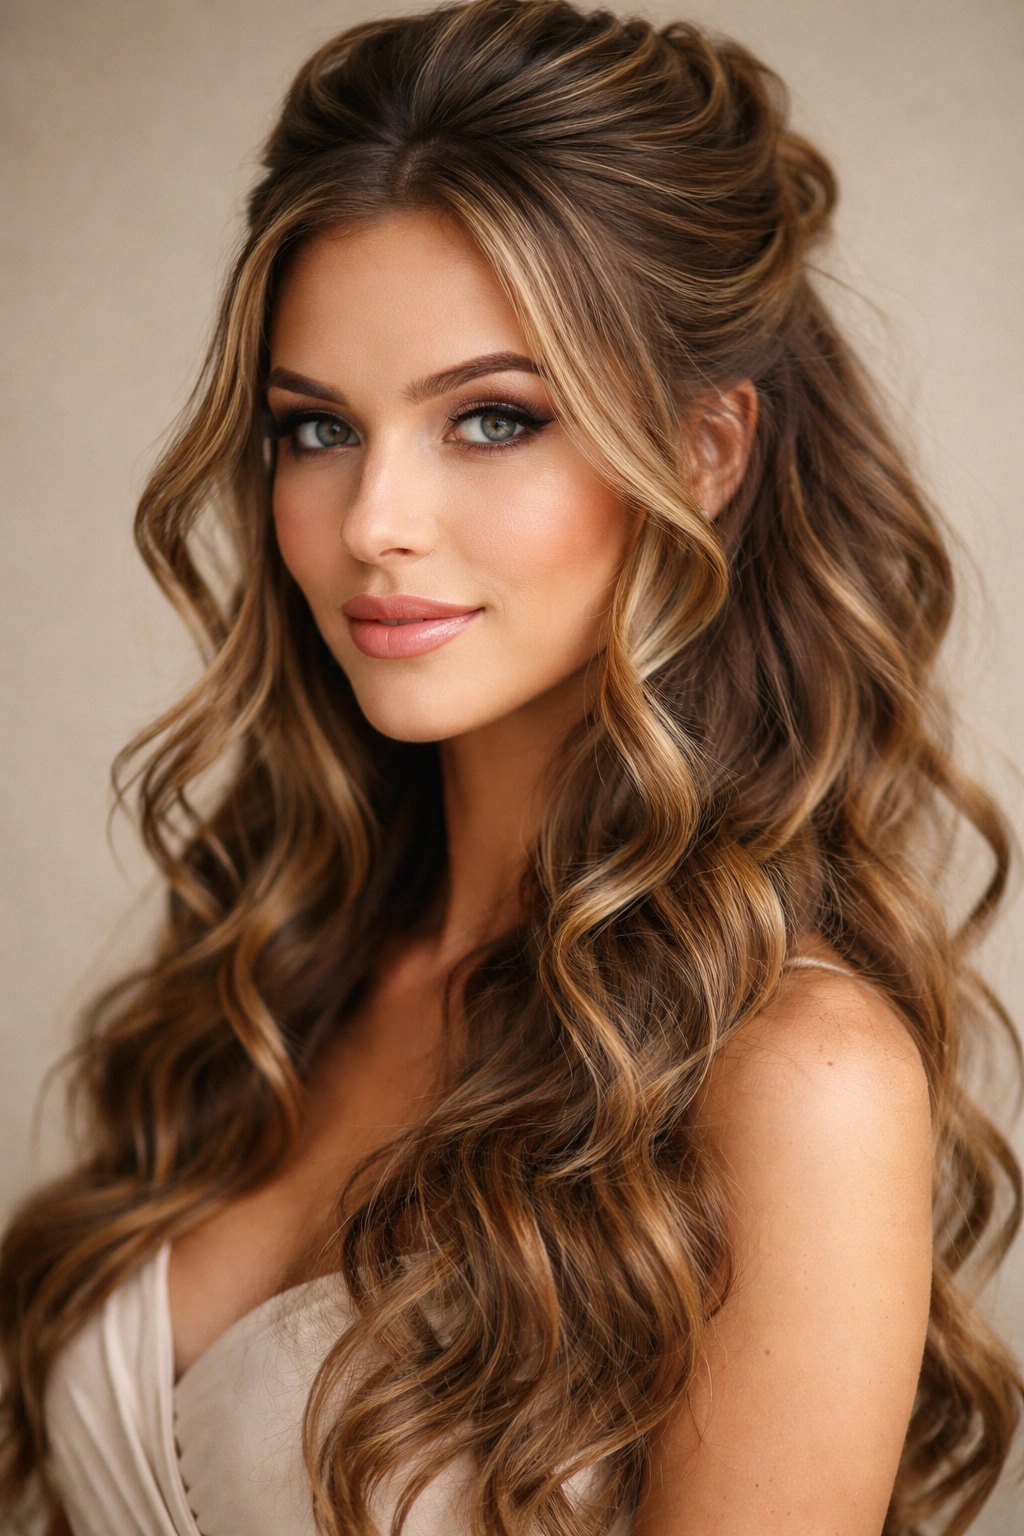
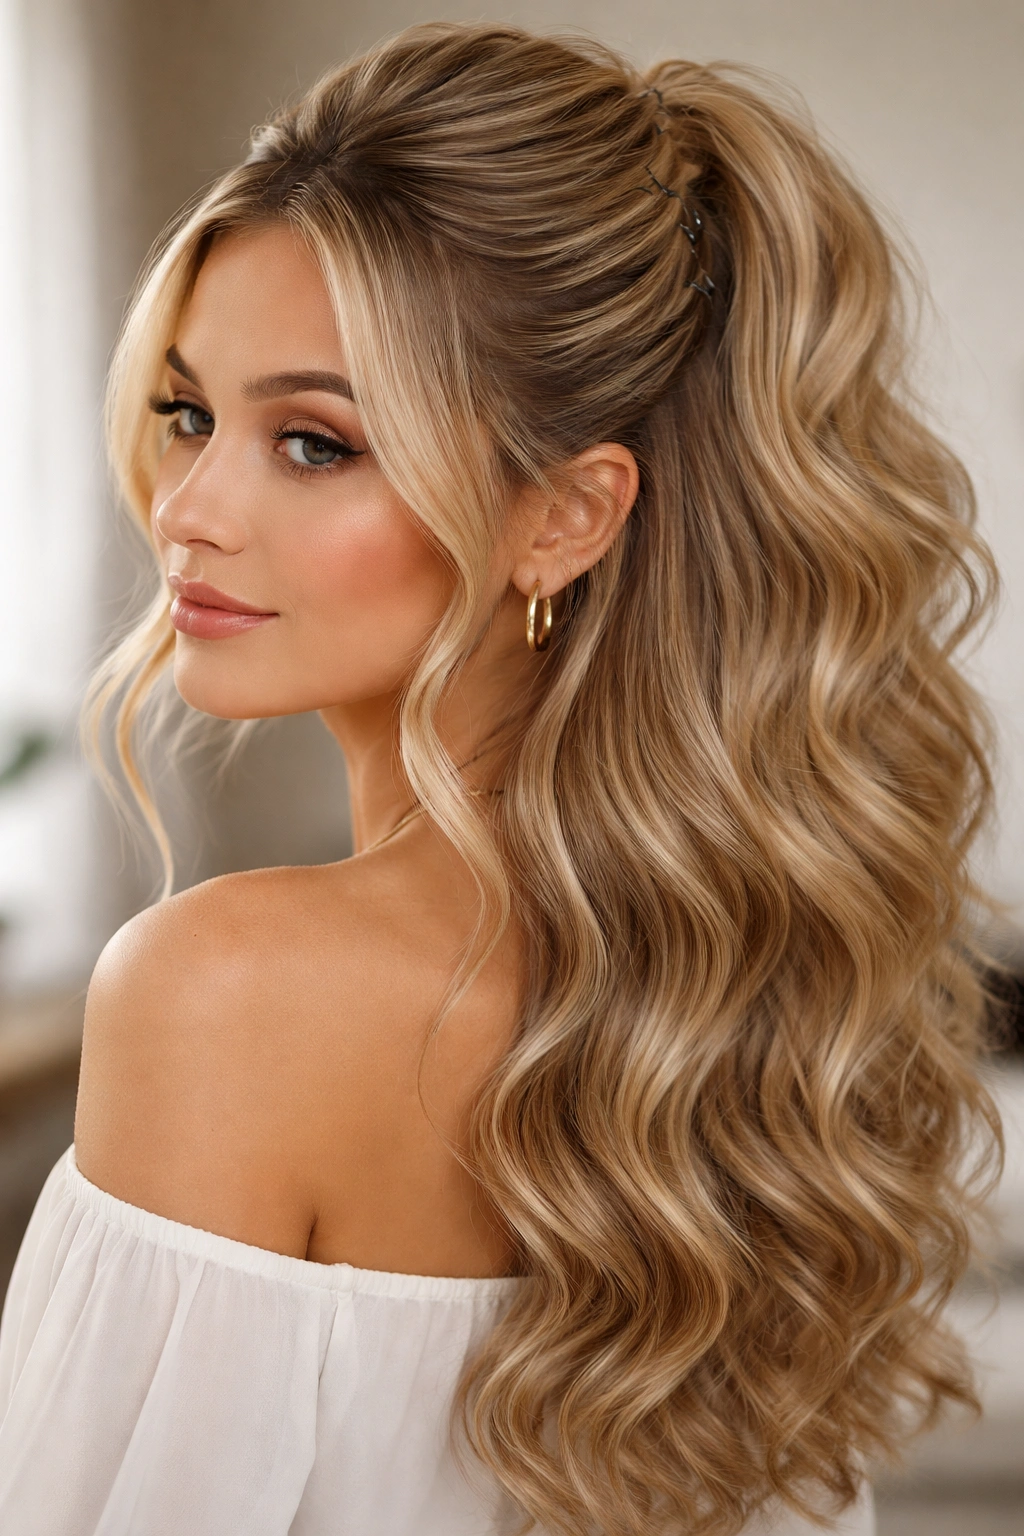
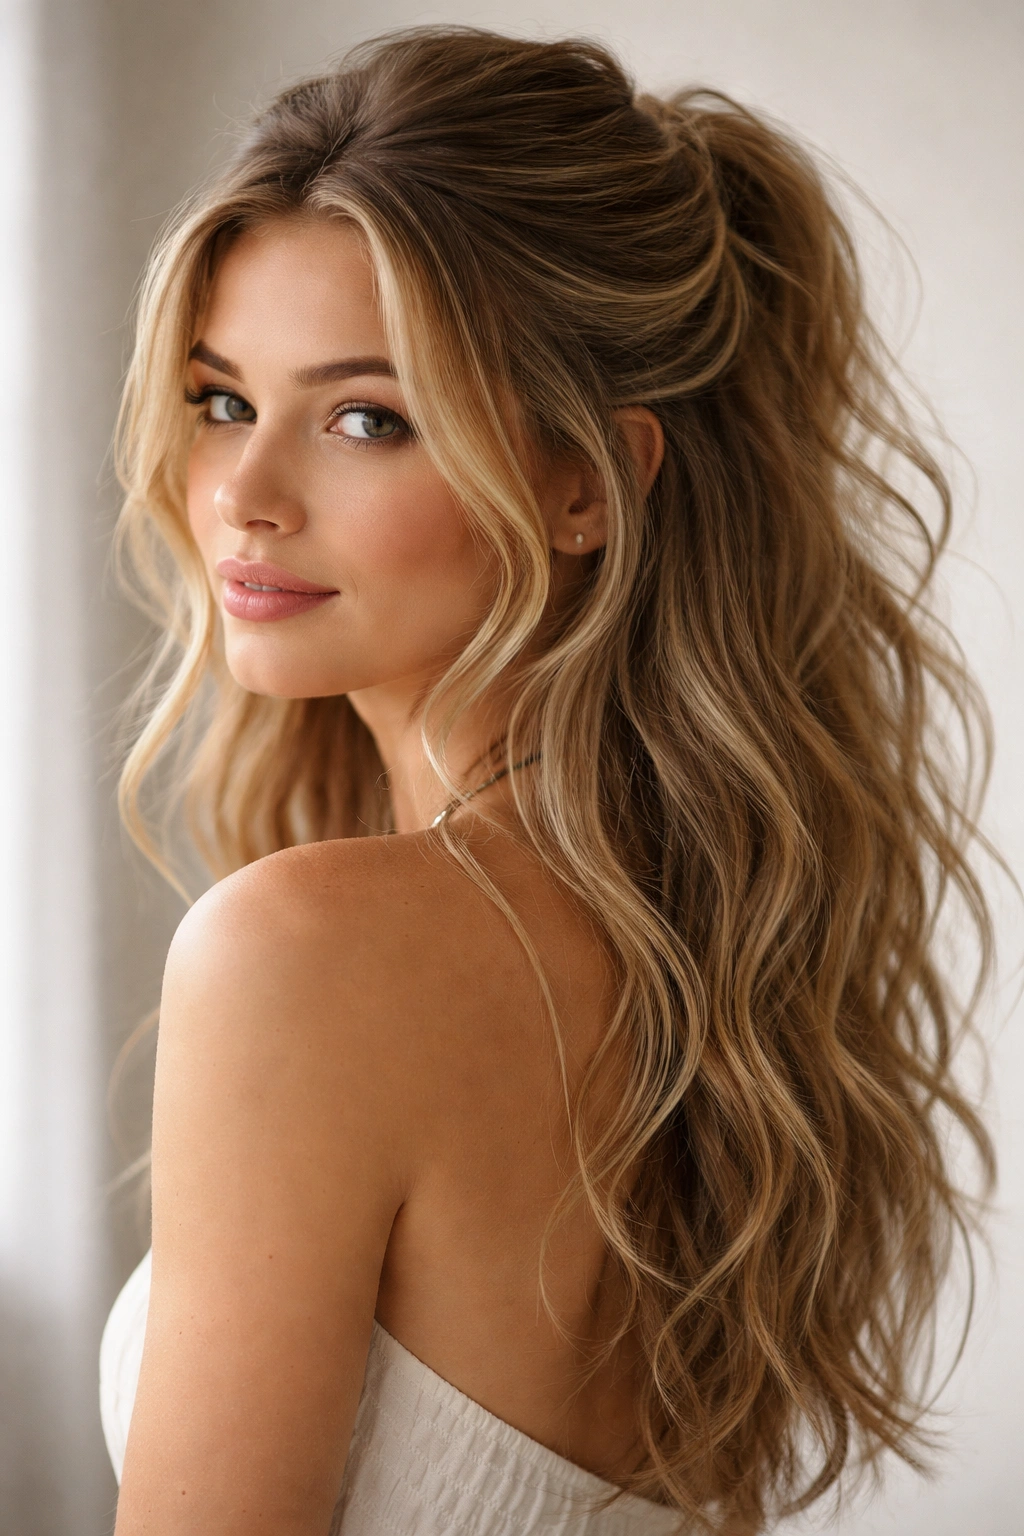
Wavy hair is like the gift that keeps on giving — it has natural movement, dimension, and texture that’s genuinely hard to achieve any other way. But when you want to look polished and glam without feeling stiff or overdone, the half up half down style is absolutely perfect. You get the best of both worlds: enough styling to show you’ve put in effort, while keeping plenty of length and movement down for that effortlessly beautiful vibe.
The thing about half up half down looks is that they work on almost every occasion. A casual coffee date? Absolutely. A night out with friends? Yes. A wedding where you’re not the bride but want to look exceptional anyway? This is your moment. And here’s what makes them especially magical on wavy hair: the waves do half the work for you. You’re not fighting against your hair’s natural texture — you’re celebrating it, enhancing it, and giving it some structure that makes it look intentional rather than just “I rolled out of bed.”
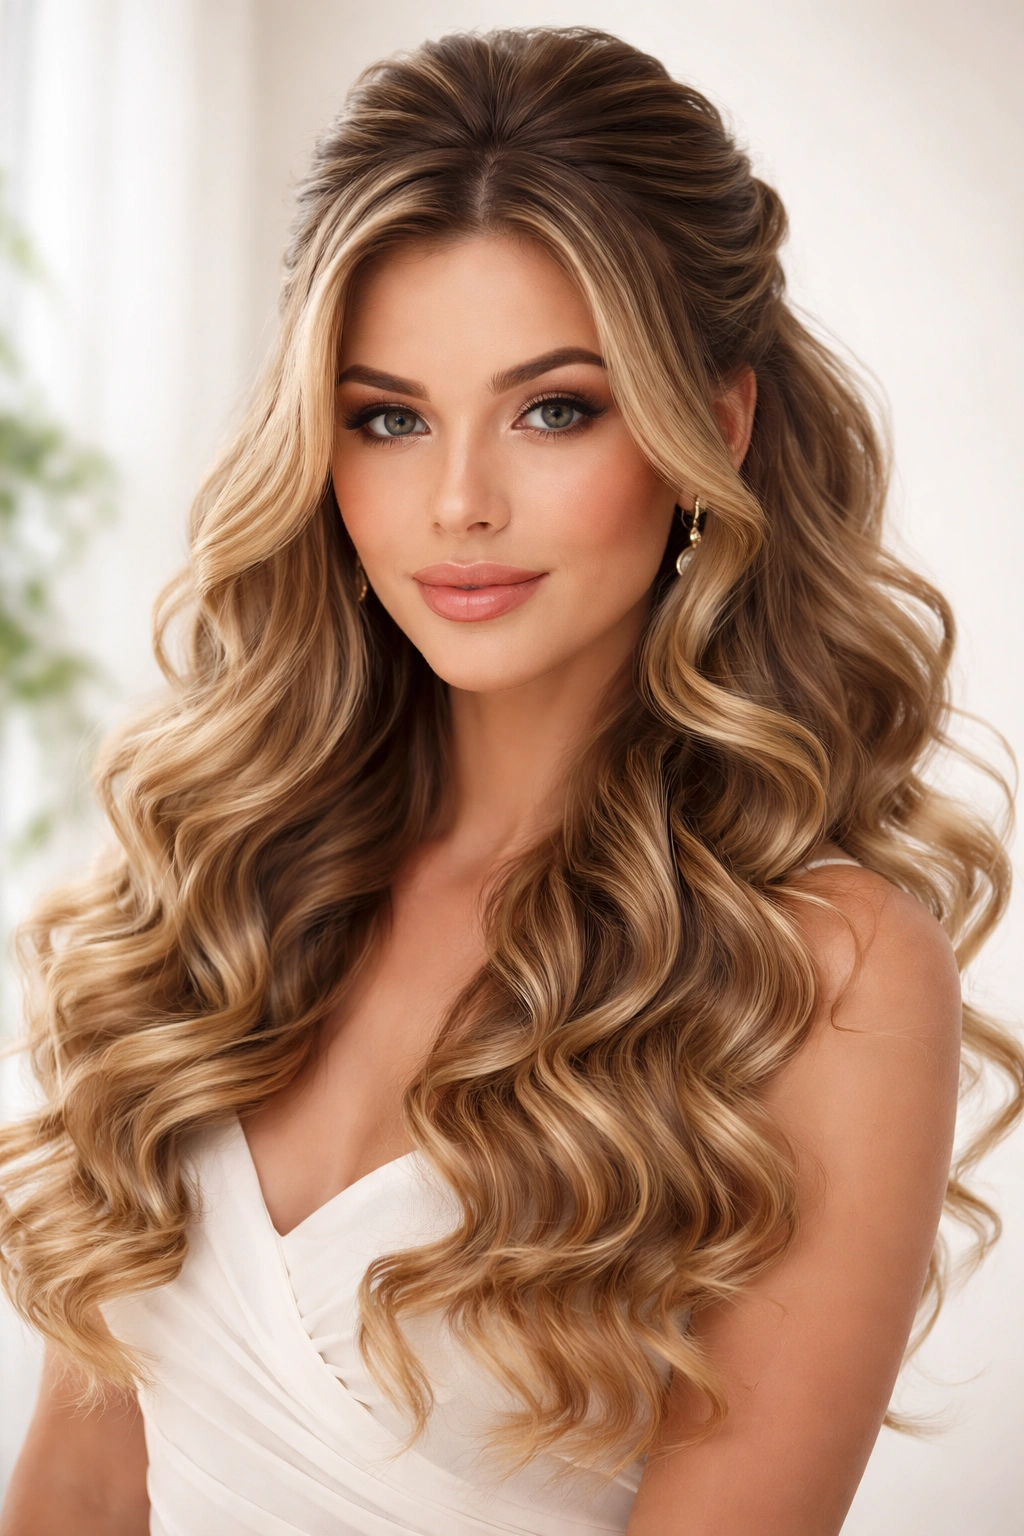
The trick to nailing glam half up half down styles on wavy hair is understanding how to work with your waves rather than against them. It’s about sectioning strategically, adding texture where it matters, and using the right styling products to keep everything exactly where you want it without stiffness or that crunchy feeling. Whether you’re working with natural waves, enhanced with a curling iron, or enhanced with styling techniques, there’s absolutely a half up half down look that’s going to feel like it was made for you.
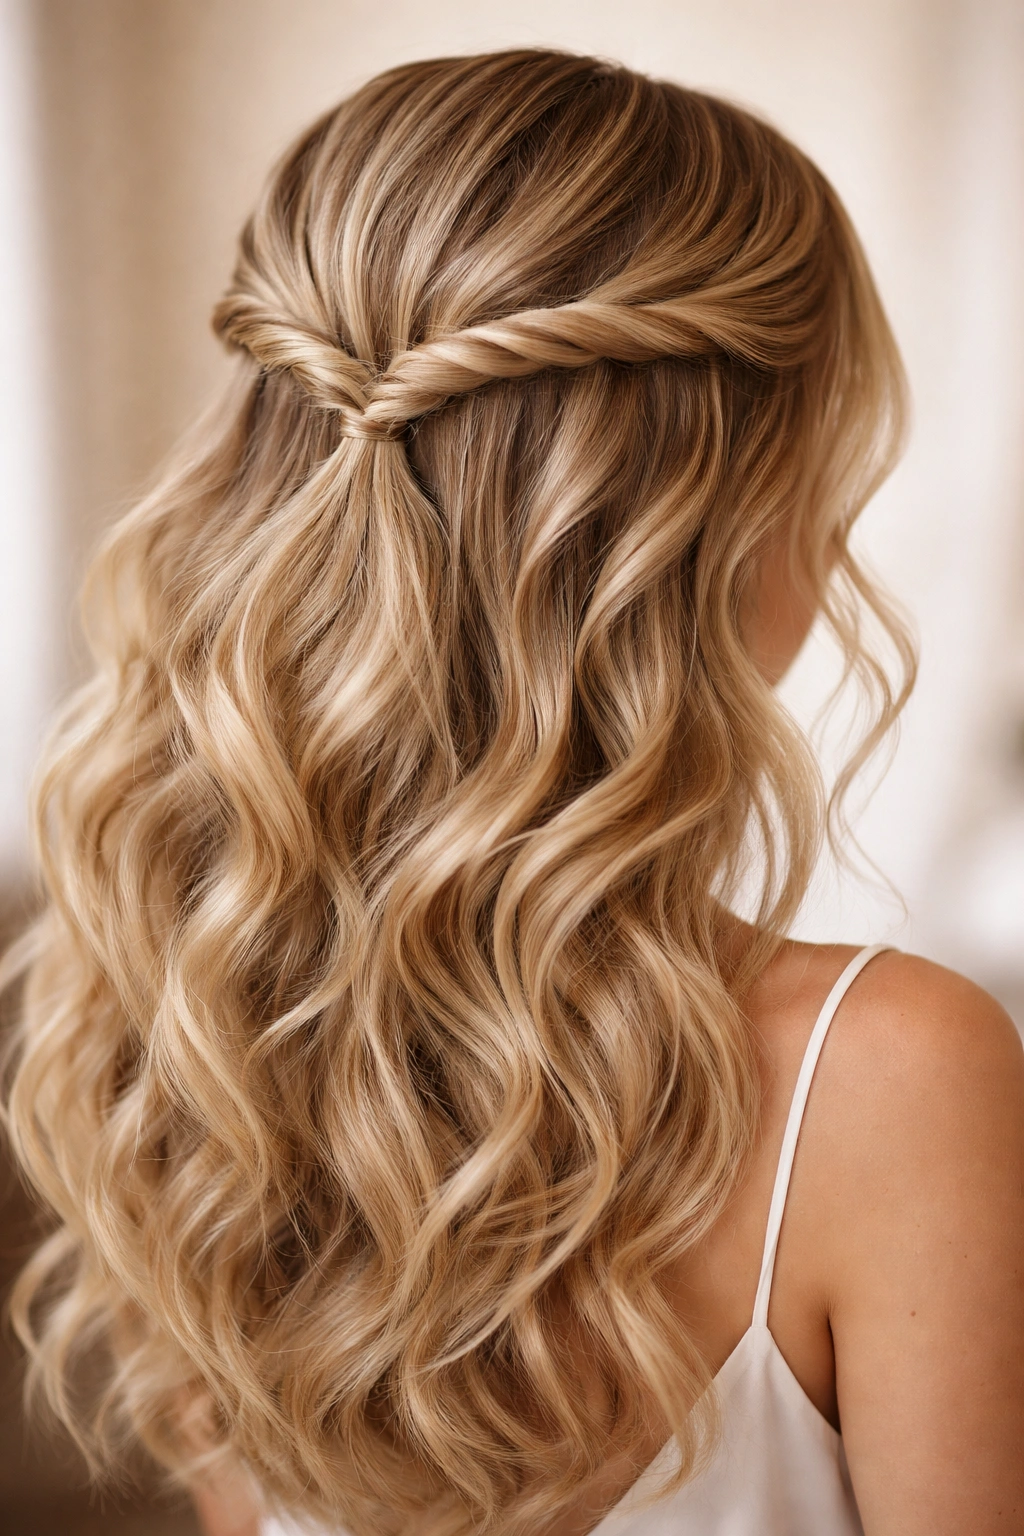
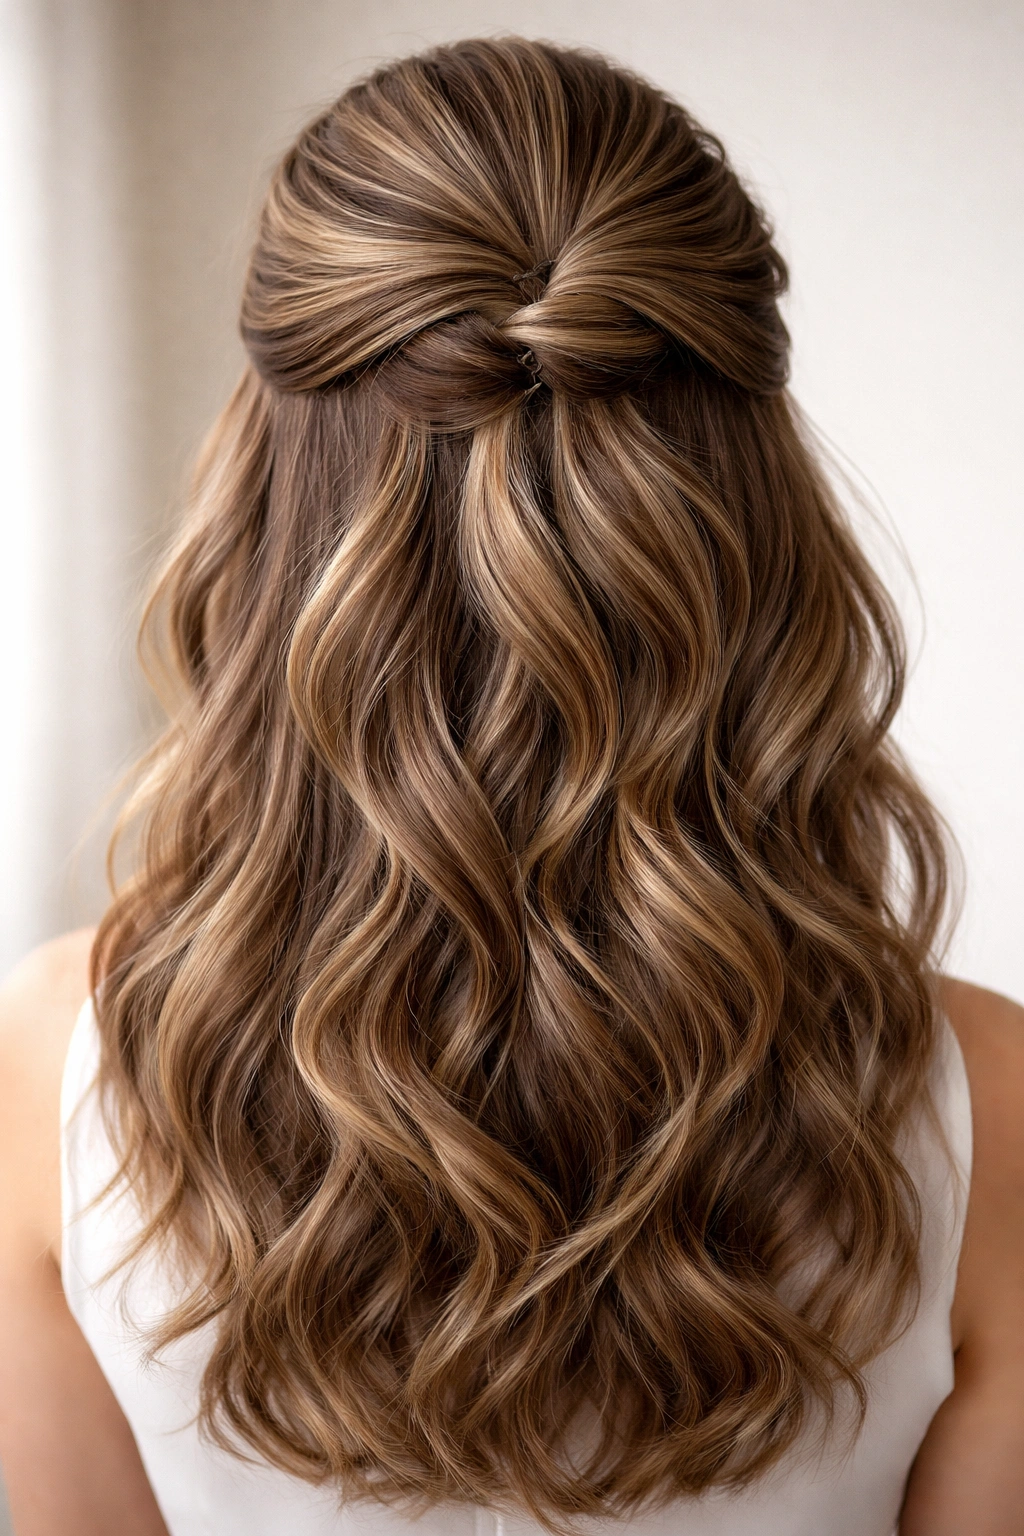
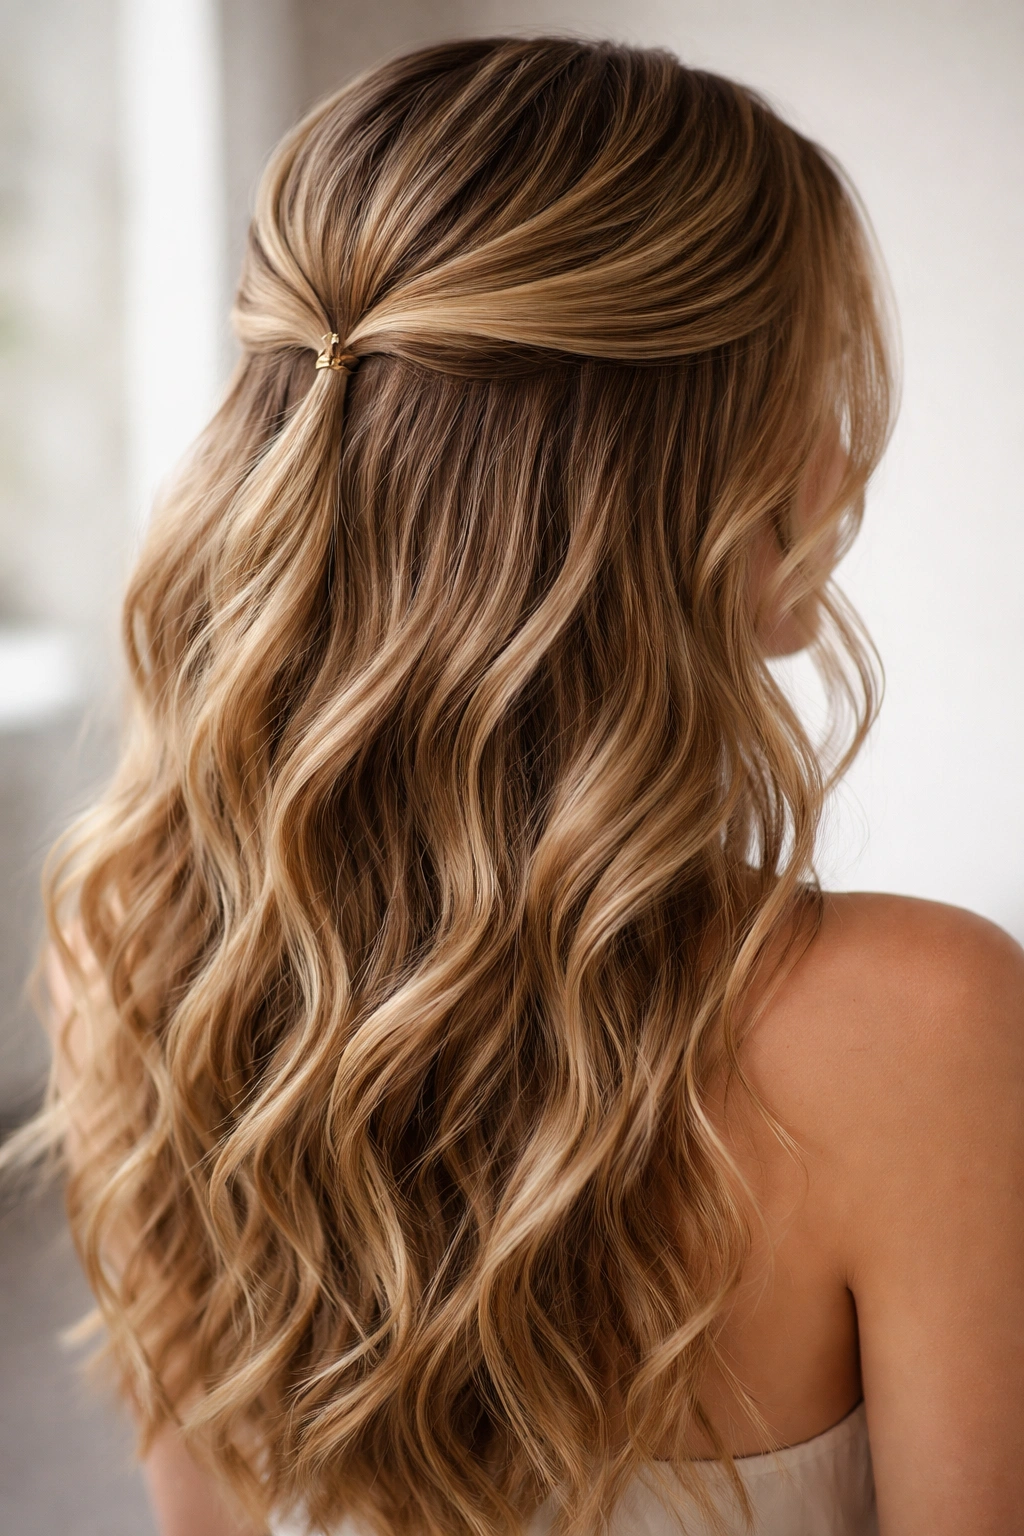
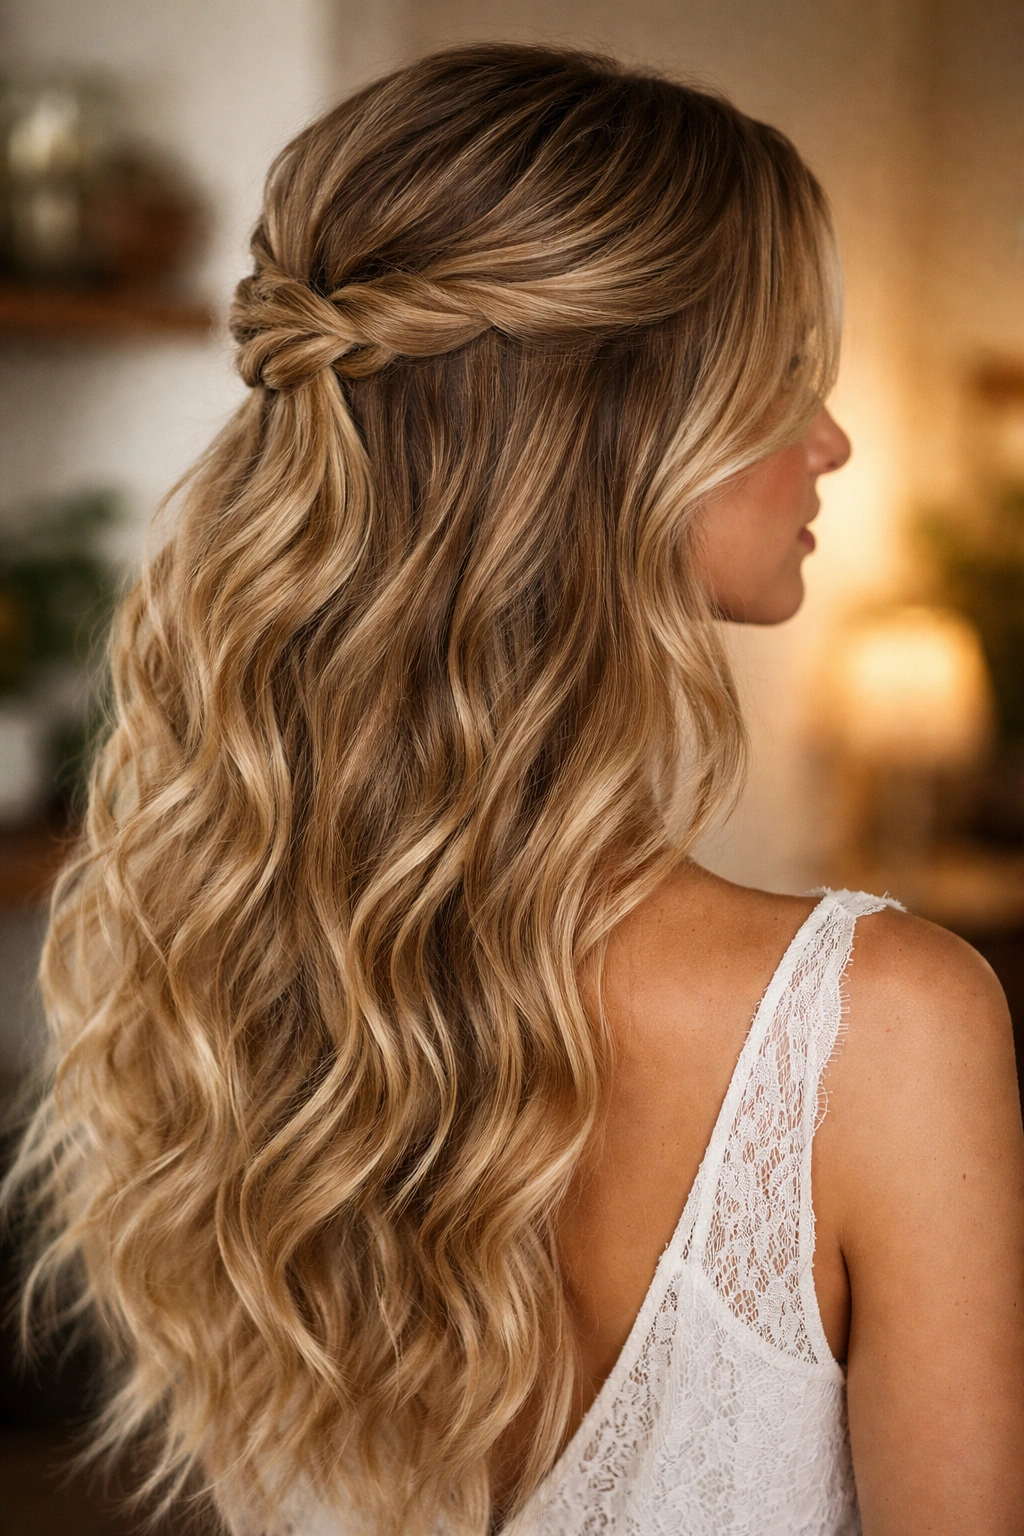
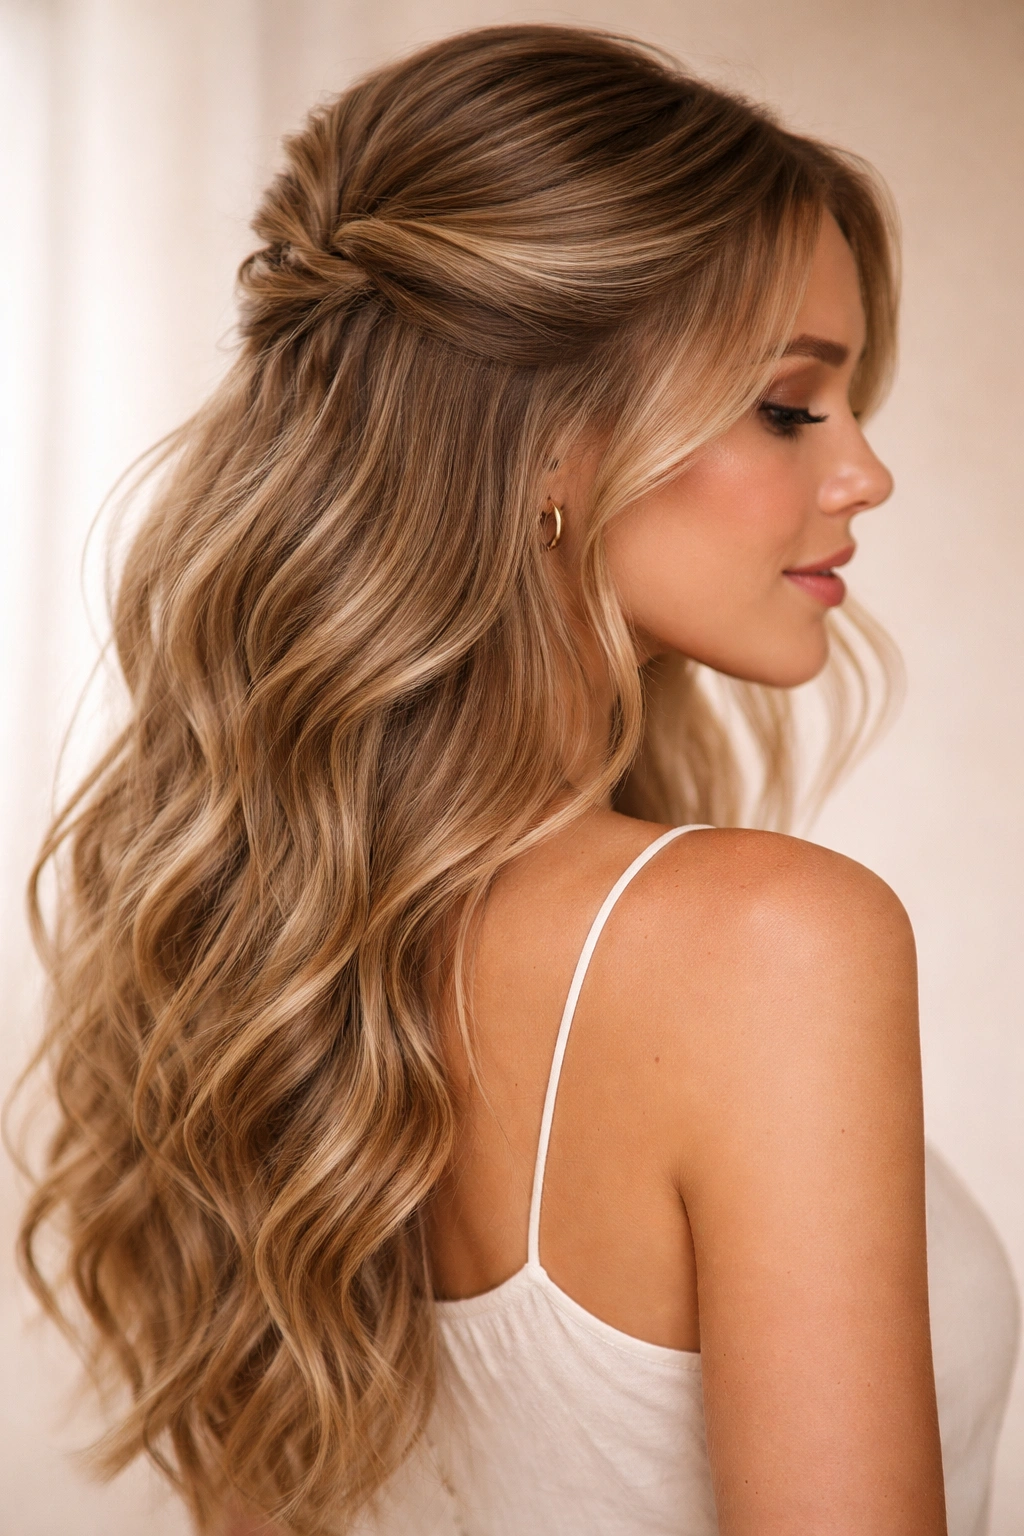
1. Classic Half Up With Loose Waves
This is the timeless look that works literally everywhere — your everyday casual style elevated just enough to feel intentional. Take your top half of hair from ear to ear across the crown, twist it gently, and secure it at the back of your head with a clear elastic or a subtle metallic clip. Let the bottom half flow freely in natural waves, and pull out a few face-framing pieces to soften the overall look.
Why It Works on Wavy Hair
The beauty of this style is that it relies entirely on your hair’s natural texture for impact. You’re not creating an overly structured or tight look — instead, you’re working with the wave pattern you already have and just giving it gentle organization at the crown. The twisting motion actually enhances the dimension in your hair because it creates subtle texture shifts that catch light beautifully.
Key Details to Get It Right
- Start with hair that’s been texturized (either naturally wavy or enhanced with a curling iron 20-30 minutes before styling)
- Twist the top section loosely — tight twists read as formal, but a relaxed twist feels effortlessly glam
- Pull out 3-4 pieces from around your face before you secure the twist for a modern, undone feel
- Use a texturizing spray in the bottom half to enhance wave definition and create separation between curls
- Secure with an elastic or clip at the nape of your neck, positioned slightly off-center for a less symmetrical, more interesting look
Pro tip: If your waves start to fall flat during the day, spritz the bottom half lightly with sea salt spray — it refreshes the texture and adds grip without weighing anything down.
2. Twisted Crown Detail
This style is about taking the half up concept and making it feel more intricate through deliberate sectioning and subtle twisting. Instead of one simple twist, you’re creating a crown effect by twisting two smaller sections from either side of your head and joining them at the back. The result feels way more styled and interesting than a single twist, but it’s honestly not much more work.
The Architecture That Makes It Glam
What elevates this from casual to genuinely polished is the way the twin twists create visual interest and frame your face beautifully. Each twist pulls the eye sideways and back, which is naturally flattering. Plus, when you combine two twists at the center back of your head, you create a lovely visual anchor that makes the whole style feel intentional and planned.
How to Execute It Perfectly
- Take a 2-inch section from your temple on one side and twist it back toward the crown, securing with a bobby pin at the back
- Repeat on the opposite side with an equally sized section
- Bring both twists together at the center back and secure with one clip or elastic for a unified look
- Gently pull at the twists to create texture and volume — this is crucial for a glam appearance rather than a tight, sleek one
- Let the back half hang in loose waves, and refresh the waves in your bottom section with a light mist of texturizing spray
Worth knowing: This style looks exceptional when you slightly offset where the twists meet — bring them together about 2 inches to one side rather than directly center. It’s a subtle shift that adds sophistication without being obvious.
3. Half Up Bubble Ponytail
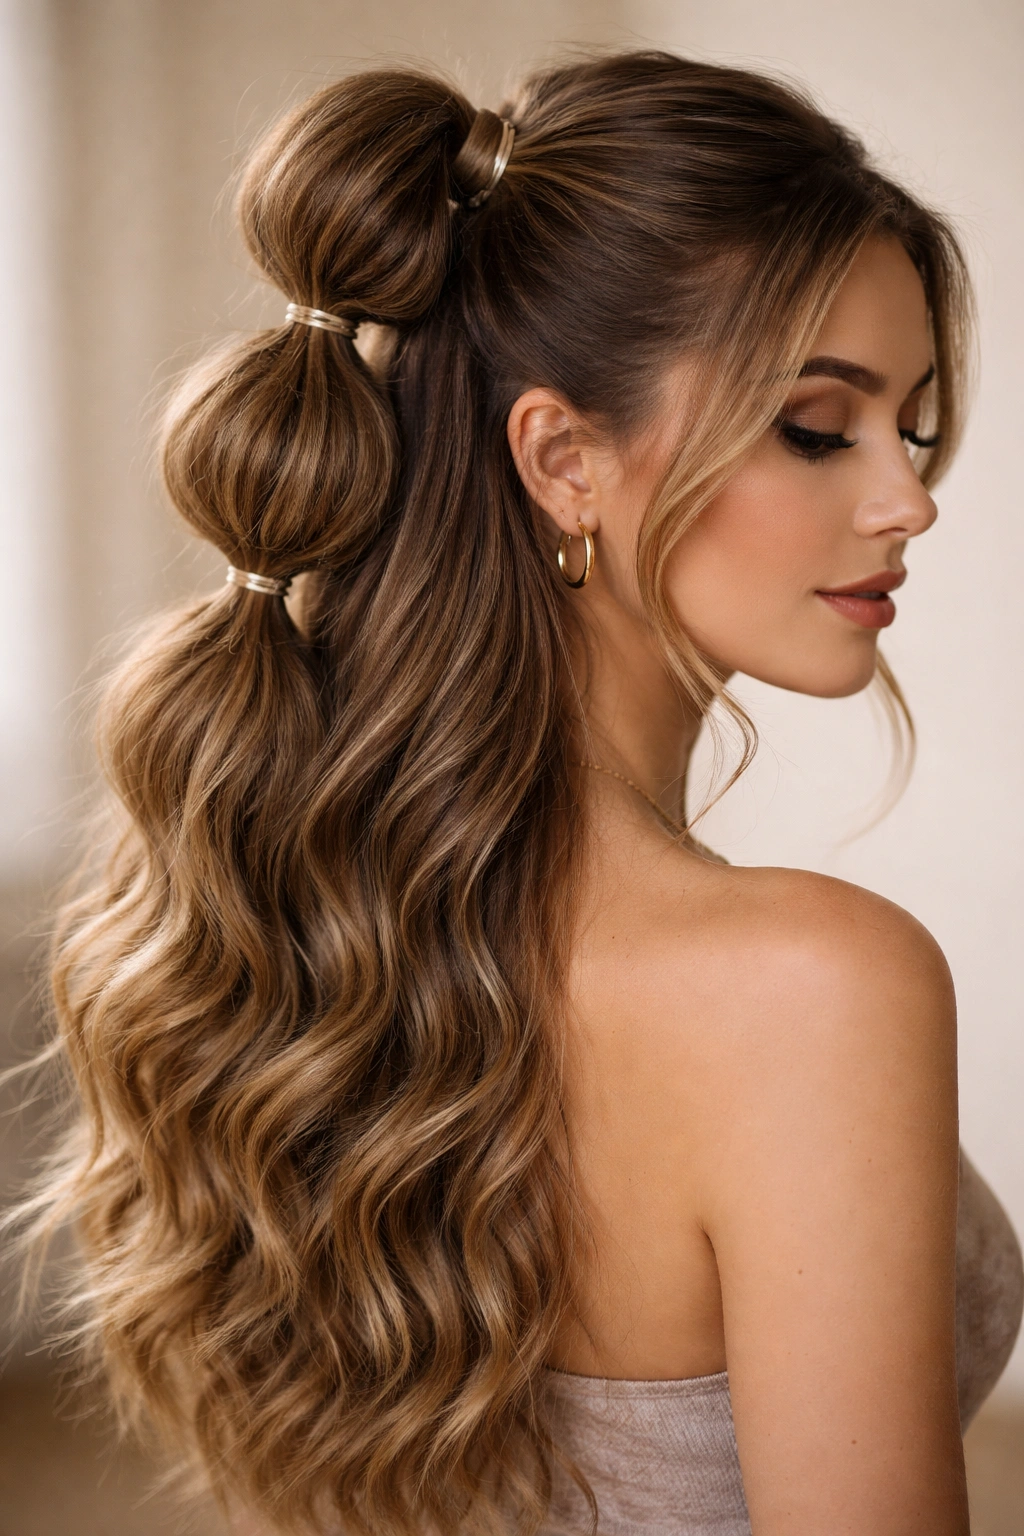
This style takes the half up concept and adds playful volume through strategic sectioning and securing. After you’ve pulled the top half up, you divide it into 2-3 smaller sections using bobby pins or elastics spaced about an inch apart down the length of the ponytail. It creates a “bubbled” effect that’s both textured and undeniably glam.
Why It Looks So Sophisticated on Waves
The bubble ponytail works particularly beautifully on wavy hair because the texture already exists in your strands — you’re just organizing it into segments that emphasize the dimension. Each “bubble” catches light differently, and the overall effect is way more interesting than a simple ponytail. It reads as intentional and styled without feeling stiff or overdone.
Steps to Create the Bubble Effect
- Gather your top half of hair and secure with an elastic at the back of your head
- Starting about an inch below that first elastic, add a second elastic — but before you do, gently tug upward on the ponytail between the two elastics to create a slight bulge or “bubble”
- Repeat this pattern 2-3 more times down the length of the ponytail, creating equal-sized bubbles with about an inch between each elastic
- Once you’ve created all your bubbles, gently pull at each section to fluff it out and create that voluminous, textured appearance
- Leave the bottom half of your hair in loose waves, and consider using a curl-defining cream in the bottom section to enhance separation
Insider note: The key to making bubbles look luxe rather than juvenile is to keep them slightly looser and less uniform. Real volume and gentle imperfection read as sophistication.
4. Braided Half Up With Volume
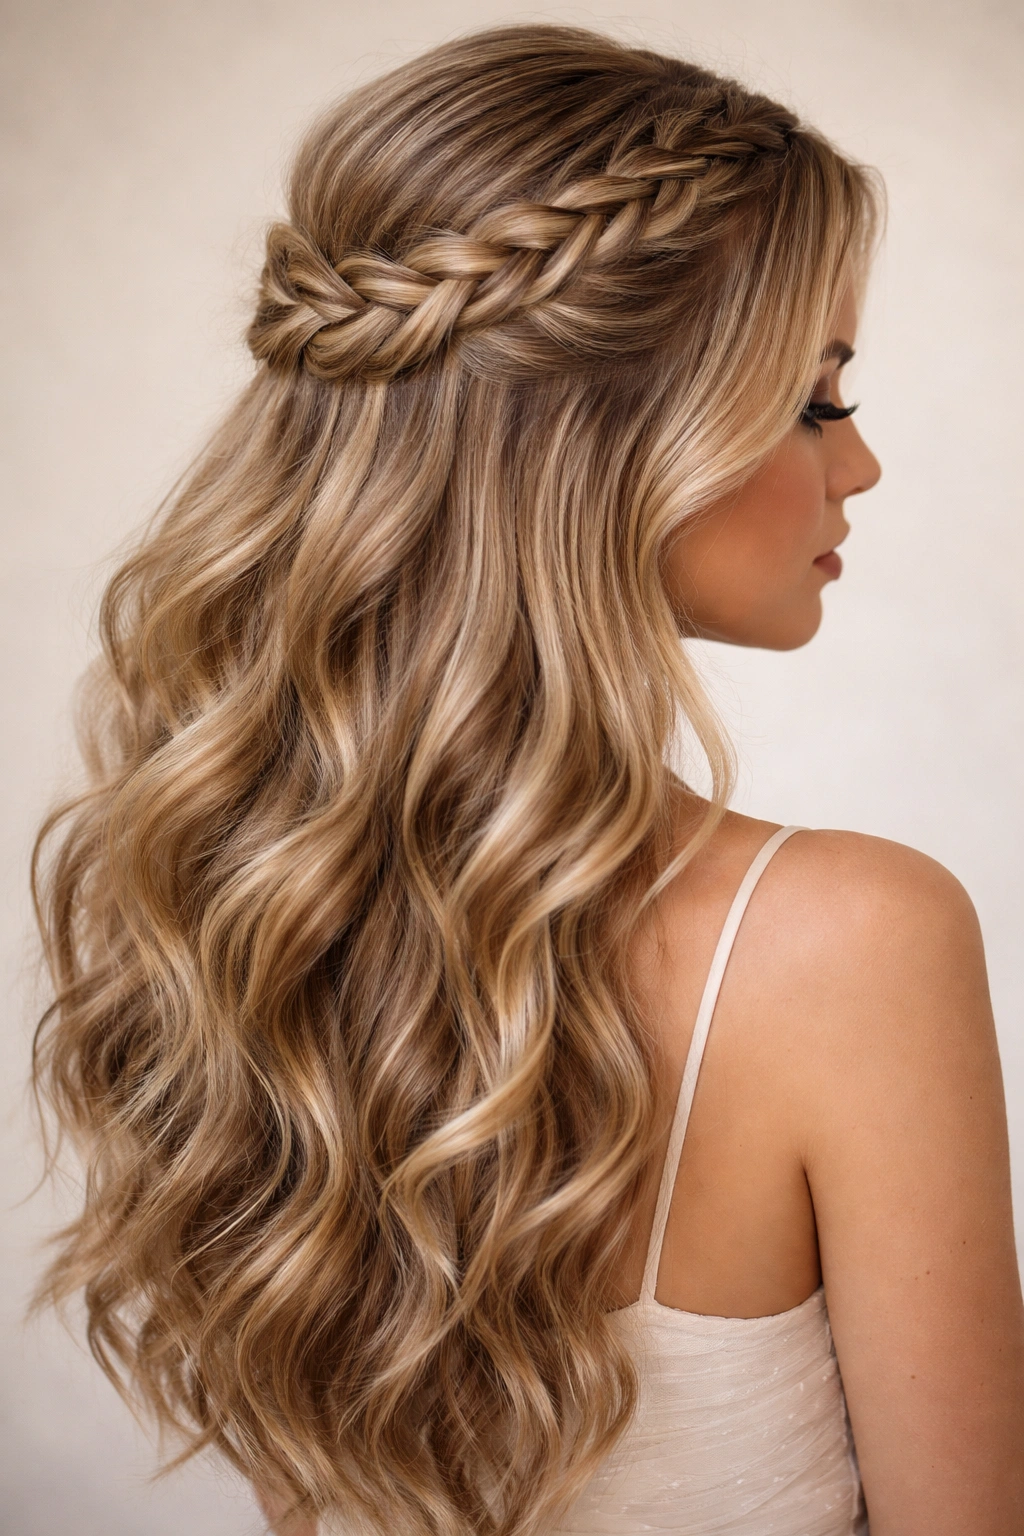
This is where you’re combining the structure of a braid with the movement of half-down waves. You create a single braid (or double braids) from one side of your head, beginning near your temple and braiding back toward the crown. Then you secure it with the other half of your hair, creating a style that’s intricate enough for a special occasion but wearable enough for a regular day.
How Braids Enhance Wavy Texture
The structure of a braid actually magnifies the texture of wavy hair — as the braid travels down, it creates a defined pattern that shows off the natural curve and movement in each strand. Unlike straightening your hair for a braid (which can make it look flat and one-dimensional), braiding wavy hair celebrates that texture and uses it as a design element.
Techniques for Maximum Impact
- Start your braid slightly off-center — at your temple rather than the very top of your head — for a more interesting visual line
- Braid loosely and deliberately pull at the braid as you go to create texture and width. This is called “pancaking” and it’s what transforms a sleek braid into a voluminous, romantic one
- Bring the braid back to meet your half-up section at the crown, and secure them together with a claw clip or metallic barrette
- Leave 2-3 face-framing waves loose on the opposite side from where your braid begins
- Define the bottom half waves with a light cream or mousse, keeping the texture soft rather than crunchy
Pro tip: When you pancake a braid in wavy hair, do it gently and gradually as you braid. It’s easier to create texture on the go than to go back and try to fluff a finished braid.
5. Side-Swept Half Up
This style plays with proportion and asymmetry in a way that’s deeply flattering. Instead of pulling your hair straight back, you’re sweeping the top half over to one side before securing it. The result is a diagonal line that elongates your face and gives you an elegant, almost old-Hollywood feeling without the stiffness.
The Flattering Power of Asymmetry
When you sweep your hair to one side rather than straight back, you’re creating a visual diagonal that’s inherently more interesting and sophisticated than a centered style. This diagonal also frames one side of your face differently than the other, which creates dimension and prevents that “face surrounded by hair” feeling that can sometimes happen with centered styles.
How to Perfect the Side Sweep
- Section your top half of hair and brush it gently toward one side of your head — let’s say the right side
- Secure it with a clip or elastic positioned toward that same side, not centered
- Leave 3-4 face-framing pieces loose on the left side (the opposite side from where you’re sweeping)
- Gently tease or backcomb at the crown to create volume before you secure the side sweep — this prevents the style from looking flat or slicked
- In the bottom half, enhance the waves on the side that’s fully exposed (your left side if you swept right) so they get maximum definition and visibility
Worth knowing: The most flattering side-swept half ups have the secured section positioned about 2 inches to one side of center, not fully to the back. This keeps it from looking too severe or one-dimensional.
6. Half Up With Face-Framing Pieces
This style is all about intentional softness. You pull the top half of your hair up and secure it, but you very deliberately leave pieces around your face that are designed to move and catch light. It’s less about technical complexity and more about understanding which pieces frame your specific face shape beautifully.
Why This Works for Every Face Shape
Face-framing pieces work because they soften hard lines and draw attention to your best features. The waves in these pieces catch light and create movement around your face, which is inherently more flattering than a completely pulled-back style. The key is choosing which pieces based on your face shape and the look you’re going for.
Selecting and Styling Your Frame Pieces
- For an oval face, pull 2-3 pieces from around your temples and cheekbones — these naturally frame the face beautifully
- For a rounder face, pull slightly longer pieces from further back (closer to your ears) to create length and height
- For a square face, let pieces fall in front of and slightly behind your ears to soften the jawline
- Curl these frame pieces separately with a curling iron, directing the curl away from your face for an open, romantic feel
- Apply a lightweight curl-cream to the frame pieces so they maintain their shape and definition without looking stiff
Pro tip: If you have very thick or heavy hair, you might need to secure those face-framing pieces slightly with a tiny bobby pin clipped to the inside, hidden under the style. It keeps them from slipping back as the day goes on.
7. Textured Half Up With Strategic Curl Placement
This style is about using your waves intentionally, placing tighter curls exactly where you want them for maximum dimension. You create more defined curls (using a curling iron or wand) throughout your hair, focusing especially on the section that will be pulled half-up and the face-framing pieces. Then you secure the top half, and the result is a style with dramatic texture and movement.
Building Dimension Through Intentional Texture
The magic here is that you’re not trying to have uniform waves throughout — instead, you’re creating variation. Some tighter spiral curls, some looser waves, some pieces with less definition. This variation is what creates depth and makes hair look thicker, shinier, and more intentionally styled. It reads as glam because the texture itself is doing the work.
Steps for Strategic Curl Placement
- Use a 1.25-inch curling iron on sections you want tighter, more defined curls
- Use a 1.5-inch or larger iron on sections where you want looser, more relaxed waves
- Focus tighter curls around your face and in the top section that will be pulled up — they catch light beautifully and frame your face
- Curl the underside of the bottom-half waves slightly looser so they feel soft and romantic rather than uniform and rigid
- After securing the top half, use a lightweight texturizing spray to enhance separation and definition throughout
Worth knowing: Let your curls cool completely before you touch them — this sets them and makes them last longer throughout the day.
8. Half Up With Metallic Hairpin Accents
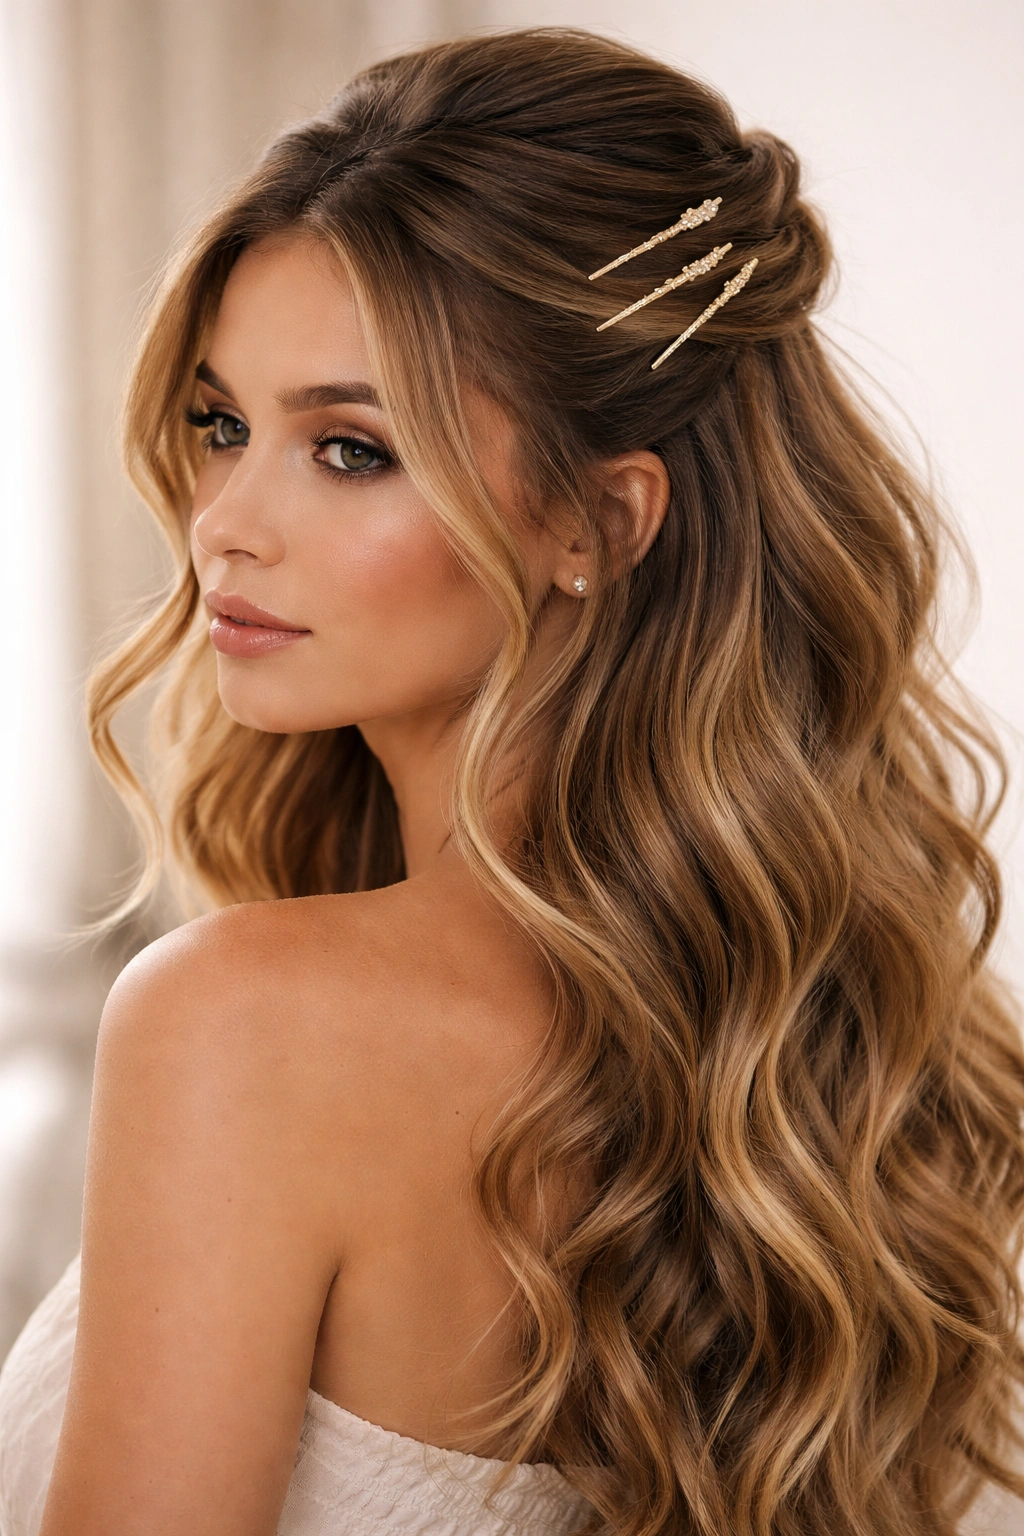
This style takes a basic half up structure and elevates it with intentional accessory placement. You pull the top half up as usual, but instead of hiding your bobby pins or securing everything with one clip, you use 3-4 decorative metallic bobby pins or hair clips positioned visibly to secure the style. The result is chic, glam, and interesting.
How Accessories Transform the Look
Visible hairpins and clips aren’t hiding the mechanics of your style — they’re celebrating them. When you use metallic, colored, or decorative pins, you’re turning functional elements into design elements. This is genuinely sophisticated and works especially well on wavy hair because the texture creates visual interest around where the pins sit.
Styling With Accessories in Mind
- Secure your top half with a clear elastic first, positioned slightly lower than you normally would
- Then use 3-4 metallic bobby pins or decorative clips to secure additional sections around that central elastic, positioning them visibly on top of your hair rather than hidden underneath
- Space the pins evenly around the style — think front-left, back-left, front-right, back-right — for balanced, intentional-looking placement
- Match your pins to your jewelry or outfit for a coordinated, pulled-together appearance
- Keep the bottom half in loose waves, ensuring the texture is defined so your overall look feels balanced between the structured top and relaxed bottom
Pro tip: Gold hairpins feel warmer and more romantic, while silver or rose gold pins feel more modern and sleek. Choose based on the vibe you’re going for.
9. Curved Half Up With Defined S-Waves

This style leverages the natural wave pattern of your hair to create something that looks effortlessly elegant. Instead of pulling your hair straight back, you section it so that it follows the natural S-curve of your waves, then secure it in a way that enhances rather than fights that pattern. The result is a style that looks like your waves were just naturally cooperating with your vision.
Understanding the S-Wave Pattern
Most wavy hair naturally falls into an S pattern — the crown has one direction of curve, the mid-length has another, and the ends have yet another. When you style a half up by following this pattern rather than fighting it, you’re working with your hair’s natural inclinations. This makes the style easier to create and much easier to maintain throughout the day.
Creating and Securing the Curved Half Up
- Identify where the natural curve changes in your hair — this is usually somewhere between your crown and your ears
- Instead of sectioning straight across from ear to ear, angle your parting slightly to follow that natural curve
- Pull the top section up gently, letting the curve of your hair guide how you position it
- Secure with a clip or elastic that sits at the natural pivot point of your hair’s curve, not forced to a specific location
- Use a root-lifting spray at the crown to enhance volume in that curved section
- Define the waves in your bottom section with a sea salt spray, allowing the S-pattern to create natural separation
Worth knowing: This style is especially beautiful if you allow it to be slightly asymmetrical — don’t force perfect symmetry. The asymmetry is actually what makes it look naturally graceful.
10. Half Up With Clip-In Extensions for Fullness
If your natural hair is fine or doesn’t have as much volume as you’d like, strategic clip-in extensions can completely transform your half up half down style. You can add volume at the crown, create fullness in the section that will be pulled up, or even add length to the bottom half. The key is choosing extension pieces that match your hair texture and placement.
How Extensions Enhance Your Natural Waves
Good-quality clip-in extensions (ones that match your hair texture, not ones with a completely different wave pattern) don’t detract from your natural waves — they amplify them. When you have more hair working together, the wave pattern becomes more visible and defined. Plus, the added volume changes how light reflects off your hair, making it look shinier and more dimensional.
Strategic Placement for Maximum Impact
- Add a volume-boosting clip-in piece at your crown (under your top section) to create the illusion of thicker, fuller hair overall
- Add a piece to the section you’ll be pulling up to increase the impact of the secured style
- Make sure extension pieces match your hair’s texture and wave pattern as closely as possible
- Secure your clips before you style — this way you’re styling with your extensions already in place
- Define both your natural waves and your extension waves with the same product so they blend seamlessly
- Match your extension length to your natural length, or go slightly longer if you want to add drama to the bottom half
Pro tip: The best-looking extensions are ones people can’t immediately spot. If someone asks, “Is that all your hair?” rather than “Are you wearing extensions?” you’ve succeeded.
11. Tousled Half Up With Undone Elegance
This is the style for when you want to look glam without looking like you’ve tried too hard. Everything about it is deliberately relaxed — the waves are soft and undefined, the half-up section is loosely secured, and there’s an intentional lack of precision that somehow reads as incredibly sophisticated. It’s the “I woke up like this, but better” aesthetic.
The Art of Looking Effortlessly Put Together
The tousled half up works because it combines structure (the secured top section) with movement and softness (the waves, the loose pieces, the lack of harsh definition). Your brain recognizes the intent (you’ve pulled your hair up) but also reads the relaxation, creating a balanced, confident vibe. This is genuinely more interesting than either a completely unstyled look or a very polished, structured one.
Creating the Tousled Effect
- Wave your hair with a curling iron, but be very gentle and create varied, irregular waves rather than uniform curls
- Allow your waves to cool completely, then run your fingers through them to break up any defined spiral curls — you want soft undulation, not structured ringlets
- Apply a texturizing spray or dry shampoo lightly throughout to create separation and matte texture (avoid heavy, shiny products that would make it feel too formal)
- Secure your top half with a claw clip rather than an elastic — claws feel more modern and casual than traditional hair ties
- Pull a few pieces loose around your face and tousle them with your fingers to enhance that intentional undone vibe
- Keep the overall look slightly askew — don’t worry if your half-up section isn’t perfectly centered
Worth knowing: This style actually looks better the next day, when your waves have settled and become softer. Don’t expect it to look perfect right when you style it.
12. Half Up With Cascading Curled Sections
This style is about directing attention to specific curled sections that you want to highlight. You create very defined curls (using a curling iron or wand) on strategic sections of your hair, particularly in the bottom half and around your face. Then you secure the top half, and those defined curls cascade down and frame your face, creating a romantic, high-impact look.
How Cascading Curls Create Drama
When you intentionally curl specific sections and let them cascade down your back and around your face, you’re creating visual movement and interest. The viewer’s eye follows the curl pattern, which creates a natural frame for your face and adds dimension to the overall style. This is genuinely more impactful than waves that are uniform throughout.
Techniques for Dramatic Cascading Curls
- Use a 1-inch curling iron to create tight, defined curls in face-framing pieces — direct the curl outward and slightly upward for the most flattering angle
- Create 2-3 defined curls in the bottom-left and bottom-right sections of your hair, leaving slightly looser waves in the back for balance
- Secure your top half with a clip that matches your overall aesthetic — either very noticeable (metallic, decorative) or very subtle (clear, small)
- Allow your cascade curls to cool completely before you move around, which helps them hold their shape longer
- Use a lightweight curl cream on the defined curls to enhance shine and definition, but skip heavy products that would weigh them down
- Leave face-framing pieces loose and slightly define them separately from the cascade sections for dimension
Pro tip: When you create cascade curls, curl them away from your face (if the curl is on your right side, curve it to the right). This opens up your face and creates a more flattering frame.
13. Multi-Layered Half Up Style
This style is about creating visual interest through multiple levels of securing and texture. You’re not just pulling the top half up once — you’re creating layers. The very top section is secured closest to your crown, then you add another section just below it, perhaps slightly offset. The result is a style that’s textured, interesting, and definitely glam.
Why Layering Creates Sophistication
When you layer your half-up sections, you’re creating depth and complexity that reads as intentional and styled. Each layer catches light slightly differently, and the overall effect is way more interesting than a simple single half-up. It also allows you to show off more of your hair’s texture and movement because you have multiple sections working together rather than just one.
Building Your Layered Half Up
- Section your top layer approximately from ear to ear across your crown and secure with a claw clip
- Create a second section just below the first (approximately from mid-ear to mid-ear) and secure that separately with a second clip, slightly offset from the first
- You can optionally create a third layer, but two is usually the sweet spot
- Ensure each layer is slightly loose and slightly pulled at the edges to create texture — tight, sleek layers don’t read as glam
- Let the bottom half flow in waves, and enhance the wave definition with a texturizing product
- Make sure your clips complement each other in color and style — they don’t have to match exactly, but they should feel coordinated
Worth knowing: The offset is crucial — if your clips are directly on top of each other, the layering effect gets lost. Position each one slightly to the side of the previous one.
14. Half Up With Half-Moon Sectioning
This style is visually distinctive because of how you section the top half. Instead of sectioning straight across from ear to ear, you create a curved, half-moon shaped section that follows the crown of your head. This creates a more interesting visual line and works beautifully with the natural curve of wavy hair.
The Visual Interest of Curved Sections
Straight lines are clean and classic, but curved lines are more sophisticated and flow-oriented. When you section your hair in a half-moon shape, you’re creating a line that follows your head’s natural architecture rather than fighting it. This makes the style look more intentional and allows your waves to work within that curved framework rather than against it.
Creating the Half-Moon Section
- Using your comb, create a parting line that starts at one temple and curves back over your crown to the other temple — think of it as following the curve of a half-moon
- This curved line naturally encompasses slightly less hair than a straight ear-to-ear section would, but it creates more visual interest
- Pull this curved section back and secure it with a claw clip positioned at the back of your head where the curve naturally ends
- Leave the front portion loose for face-framing, and let the back half down completely in waves
- Use dry shampoo or texturizing spray at the roots of the secured section to create volume and prevent it from looking slicked down
- Define the waves in your bottom section with a light sea salt spray or wave-enhancing cream
Pro tip: This style works especially well if you have some height or texture at your crown already — the curved section enhances and supports that existing volume rather than flattening it.
15. Boho Wavy Half Up With Texture Paste
This style leans into bohemian aesthetics while maintaining a glam edge. You’re creating very soft, undulating waves throughout your hair using product rather than heat tools — specifically a texture paste or styling cream. Then you secure a half-up section that feels romantic and loose. The overall vibe is romantic, effortless, and genuinely luxurious.
How Texture Paste Creates Effortless Waves
A good texture paste (sometimes called a defining cream or wave cream) works with your natural wave pattern to enhance and shape waves without heat. This is much gentler on your hair than curling irons, and it often creates a more natural-looking wave pattern because it’s working with your hair’s existing texture rather than imposing a curl pattern on it. The result feels soft and romantic rather than structured.
Building the Boho Half Up With Paste
- Apply texture paste to damp hair, scrunching it in section by section from roots to ends
- Let your hair air-dry with the paste in place — this develops natural waves without any heat
- Once dry, use your fingers to run through your hair and break up any clumps of product, creating soft, separate waves
- Pull the top half up gently, without trying to create clean lines or definition — boho is about softness and flow
- Secure with a claw clip or a decorative elastic, positioned slightly off-center
- Allow pieces to fall naturally around your face — don’t be too intentional about positioning them
- You can add delicate hair accessories (like thin gold chains woven through your hair, or small clips) for extra boho glam
Worth knowing: The key to boho styling is embracing imperfection. If your half-up section looks a tiny bit messy or asymmetrical, that’s actually working in your favor.
16. Half Up With Pearl Bobby Pin Details
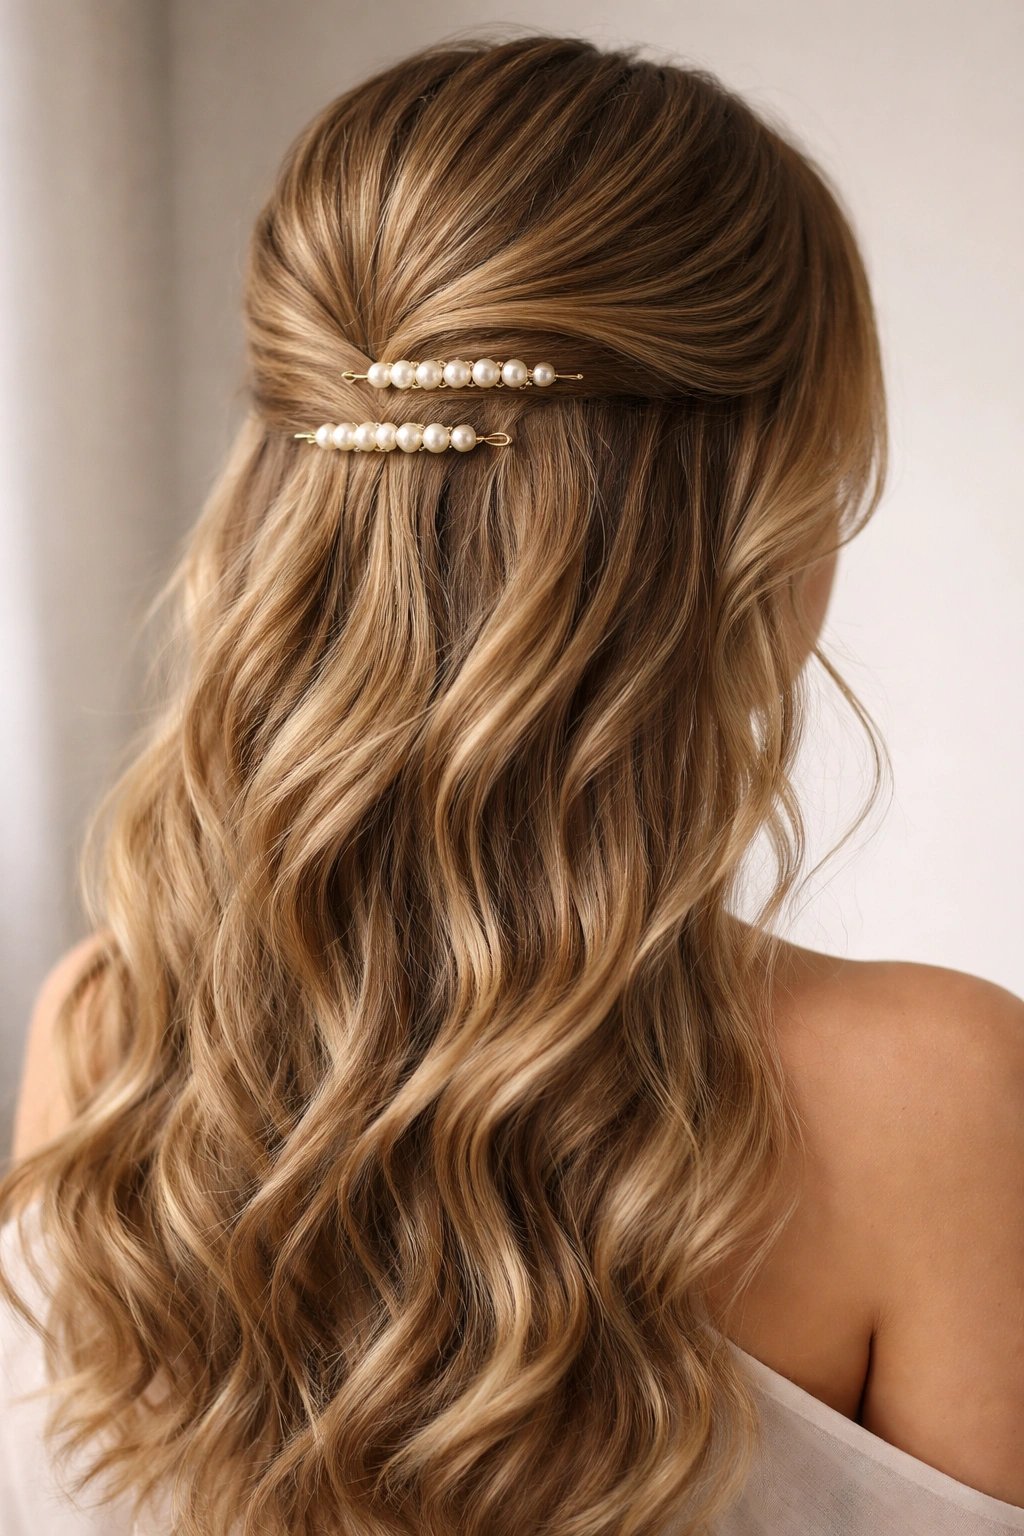
This style transforms basic bobby pins into intentional design elements by using pearls, delicate clips, or ornate bobby pins. You style a standard half up but use multiple decorative pins to secure it, positioning them visibly on top of your waves. The result is refined, glam, and distinctly more elevated than a hidden-elastic approach.
How Pearl Details Elevate Any Style
Pearl details automatically read as refined and sophisticated — they’re associated with classic elegance and timeless beauty. When you use pearl-topped bobby pins or delicate pearl clips in your half-up style, you’re instantly elevating the overall look. It’s a small detail that creates a significant impact, and it works especially well on wavy hair because the texture provides a beautiful backdrop for delicate accessories.
Styling With Pearl Pins for Maximum Impact
- Secure your top half with a clear or metallic elastic first, creating the basic half-up structure
- Use 3-4 pearl-topped bobby pins to secure additional sections around that central elastic, positioning them visibly across the back and sides of your head
- Space the pins evenly and symmetrically for a balanced, intentional appearance
- Make sure your pins sit on top of the hair where they’re visible — don’t try to hide them underneath
- Keep the bottom-half waves very defined and separated so the delicate details of your pins stand out against the texture
- Consider matching your pin style to other jewelry you’re wearing for a coordinated, polished look
Pro tip: Pearl pins work best when your hair has volume and texture — the pins need something interesting to sit on top of. If your hair is very flat, they might look out of place.
17. Curled and Clipped Half Up for Date Night
This is the style for when you want to look genuinely glam and intentionally styled. You create defined curls throughout your hair using a curling iron (focus on tighter curls for high impact), then secure a polished half-up section with a statement clip or claw. The result is undeniably dressy and romantic.
Why Defined Curls Read as Extra Glam
Defined curls automatically read as more intentionally styled than waves. When someone sees defined curls, they know you’ve spent time on your hair — there’s visible evidence of effort. This is perfect for a date night when you want to show that you care about the occasion. The structural integrity of curls also creates visual impact and catches light beautifully.
Creating Your Date-Night Half Up
- Use a 1.25-inch curling iron to create defined curls throughout your hair, working in small sections and directing the curl in alternating directions (one curl spirals right, the next left) for dimension
- Focus tighter, more defined curls around your face and in the top section that will be pulled up
- Use slightly looser curls in the bottom-back section to prevent the overall look from feeling too uniform
- Allow all curls to cool completely before you touch them — this sets them and extends their lifespan
- Secure your top half with a statement clip (tortoiseshell, metal, or decorative) positioned at the back of your head
- Use a curl-defining spray or light hairspray to set your curls and maintain definition throughout the evening
- Leave 1-2 face-framing curls very deliberately loose and loose them around your face with your fingers — these curls should move and catch light as you move
Worth knowing: Defined curls look best when you combine them with a clean face and simple jewelry — let your hair be the statement rather than competing with other elements.
18. Half Up With Volume Boost at the Crown
This is the final-look style that works for any occasion where you want your hair to look thick, voluminous, and genuinely healthy. You create volume specifically at the crown using teasing, root-lifting spray, or strategic clip-in pieces, then secure your half-up section right at or just below that volume. The result is a style that looks fuller and more luxurious overall.
Why Crown Volume Changes Everything
Hair with volume at the crown automatically looks thicker, healthier, and more youthful. This is one of the reasons salon blowouts look so good — they always focus on creating lift and volume at the root. When you apply this principle to your half-up style, you’re instantly elevating how the entire look reads. Plus, that volume acts as a foundation for the secured section, making it look fuller and more intentional.
Techniques for Maximum Crown Boost
- Use a root-lifting spray at the crown before you style anything else, focusing on the area where you’ll be pulling your hair up
- Backcomb or tease gently at the crown to create volume — a tiny bit goes a long way with wavy hair, which already has some natural lift
- Blow-dry the teased section upward with your fingers, supporting that volume as you dry
- Create your half-up section right at or just below that teased volume, so the secured section shows off the volume rather than flattening it
- Use a small claw clip or secure your elastic slightly looser than you normally would — tight securing can flatten your volume
- Once your half-up is secured, gently pull and fluff at the crown area to maintain that lifted appearance
- Enhance your bottom-half waves with a texturizing spray that adds grip without weight, supporting that overall voluminous appearance
Pro tip: The best time to create crown volume is on second-day hair — hair that’s been worn down and has natural texture from the previous day. Your teasing will hold much better, and you won’t end up with too much volume (which can look unbalanced).
Final Thoughts
Half up half down styling on wavy hair is genuinely one of the most versatile, flattering, and actually-achievable ways to look polished. The beauty is that you’re not trying to create an entirely new texture or fight your hair’s natural pattern. Instead, you’re working with what you have, emphasizing it, and organizing it in a way that reads as intentional and glam.
The styles in this guide range from understated and casual to genuinely dressy and romantic, which means you can find something that fits whatever occasion you’re preparing for. The key to success is understanding your specific wave pattern, choosing a styling approach that complements it rather than fights it, and using the right products to enhance your natural texture. A lightweight texturizing spray, a good curl cream, and dry shampoo are genuinely all you need.
Your wavy hair is actually an asset for half-up styling — it gives you texture and movement that straight-haired people have to create with tools. Embrace that texture, play with sectioning and placement, and don’t be afraid to try an approach that feels slightly outside your comfort zone. You might discover that a side-swept half up or a multi-layered style becomes your signature look.