Wavy hair sits in this magical sweet spot between straight and curly — it has natural texture, volume, and movement, but let’s be honest, it can be frustratingly unpredictable. Some days your waves look like effortless beachy perfection, and other days they’re more of a frizzy experiment gone wrong. The half up half down style is basically the cheat code for wavy hair because it works with your texture instead of fighting it.
What makes half up half down so perfect for waves? It eliminates the decision of “do I wear my hair up or down today” while keeping hair off your face without fully committing to an updo. Your waves get to do their thing in the bottom half while the top half stays controlled and intentional. You get dimension, style, and that “I didn’t try too hard” vibe that wavy hair does best. Plus, there’s literally an endless number of ways to style it — you can go minimal and casual, romantic and textured, or edgy and pulled-back, all with the same basic concept.
The styles that work best for wavy hair are the ones that embrace the wave rather than smooth it straight or try to curl it tighter. You’re working with your natural texture here, not against it. That’s what makes these styles so genuinely easy — they’re not fighting your hair’s nature. A boho-inspired half-up section, a twisted crown, a sleek pulled-back style with undone waves below — they all look intentional and polished without requiring you to blow dry everything or spend an hour styling.
If you’ve ever felt like your wavy hair doesn’t have enough “style” options, or you’re tired of the same flat ponytail, these eighteen styles are going to feel like a mini revolution. Let’s dive in.
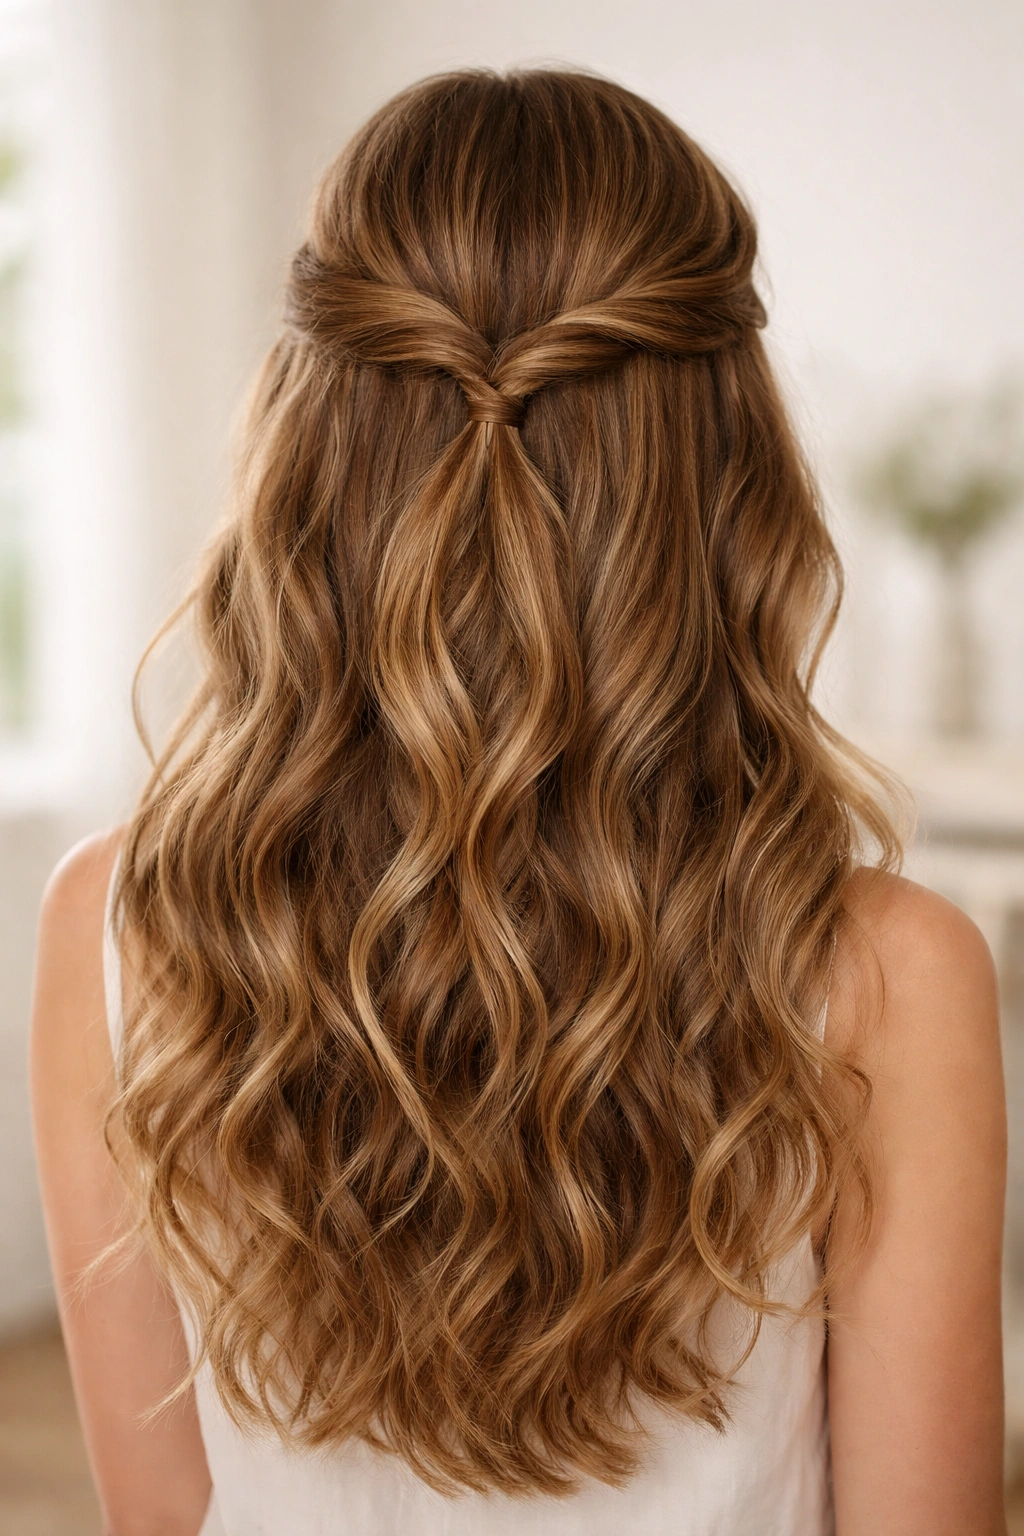
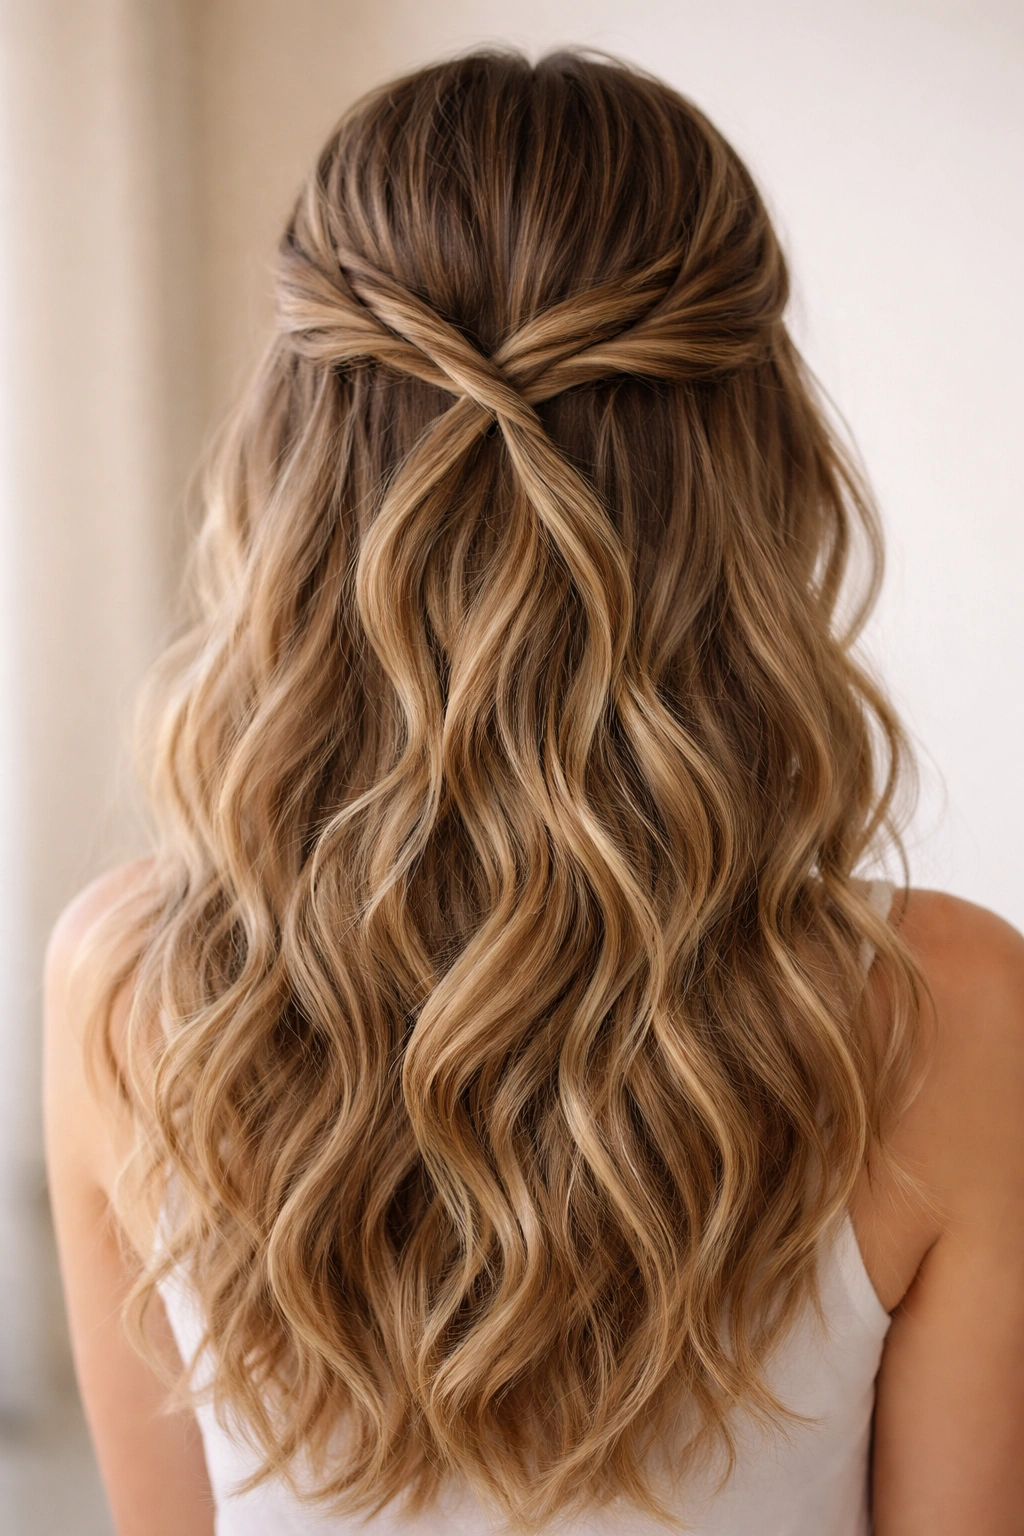
1. The Twisted Ribbon Half-Up
This style looks way more complex than it actually is, which is exactly what we want. The twist creates texture and movement while keeping the sides and back of your hair free to show off your natural waves. Start with dry or slightly damp wavy hair — you want some natural texture already present before you begin styling.
How to Create This Look
Take a section of hair from one side of your part, about 2 to 3 inches wide, and twist it loosely away from your face. As you twist, gradually pick up small sections of hair from the outer edge of the twist, like you’re creating a braid but with just a single twisted strand instead of three sections. Keep the twist loose and slightly undone — this is key for wavy hair because tight, perfect twists look out of place against your natural waves.
What Works Best
- Use a light texture spray or dry shampoo before twisting to give your hair grip and hold without weighing it down
- Pin the twist at the back of your head with bobby pins that match your hair color
- The twist should feel organic and soft, not geometric or perfect
- Don’t tuck every strand — let some pieces fall loose around your face
Pro tip: If your twist feels too neat, gently pull and tease it with your fingers after pinning to add texture and make it look intentionally undone.
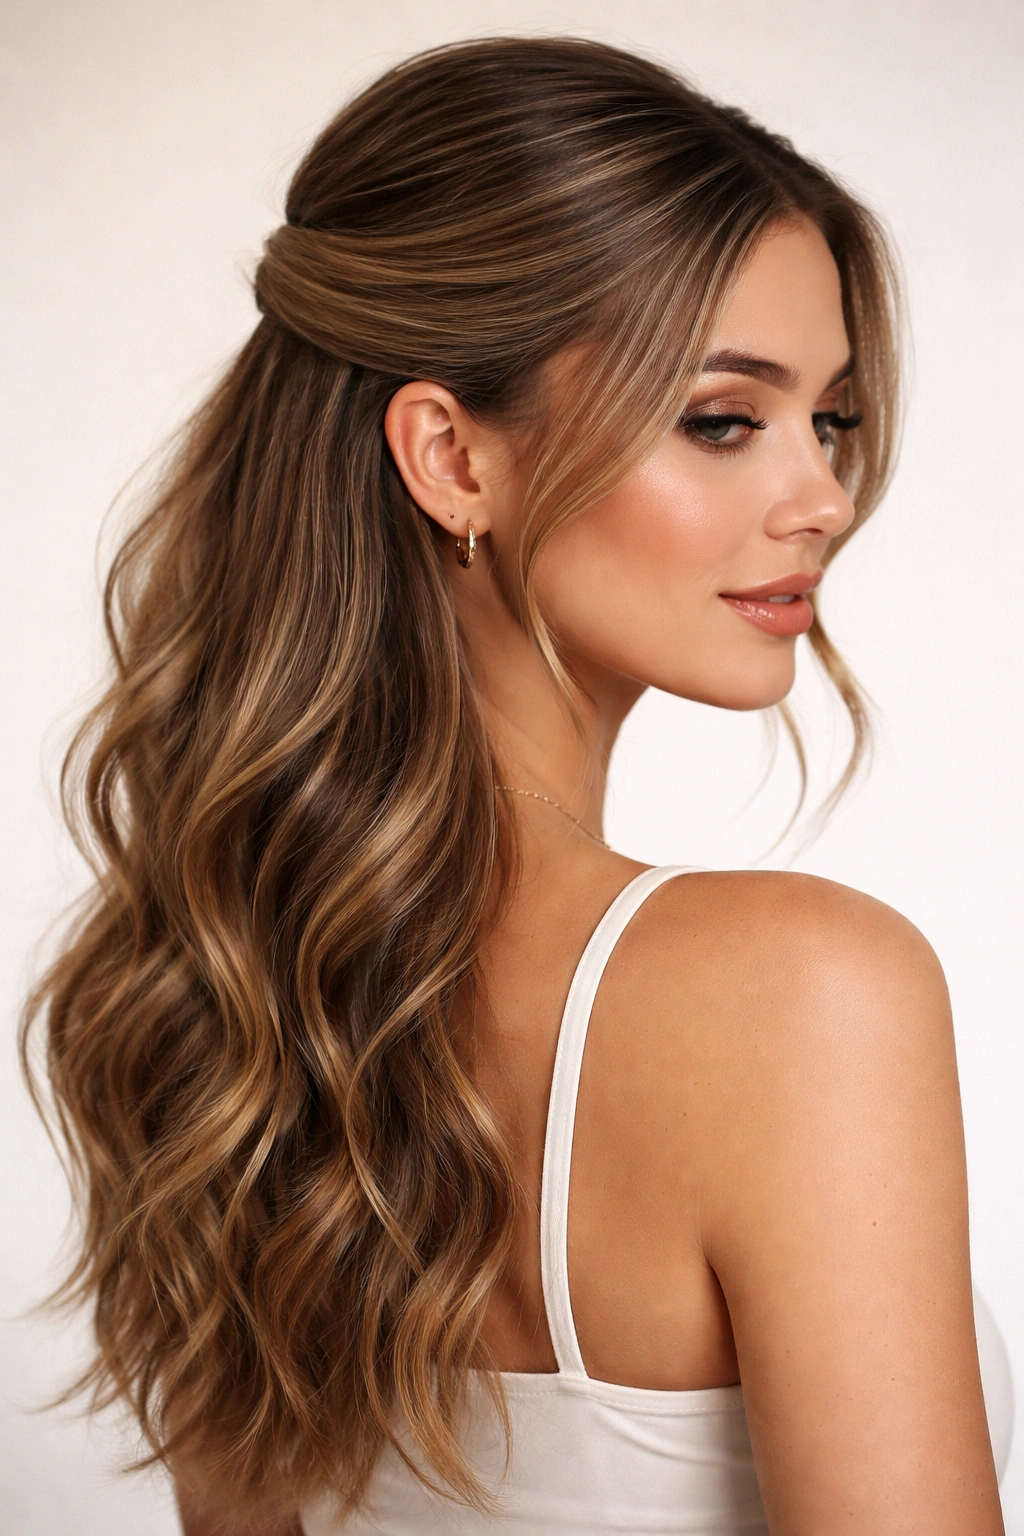
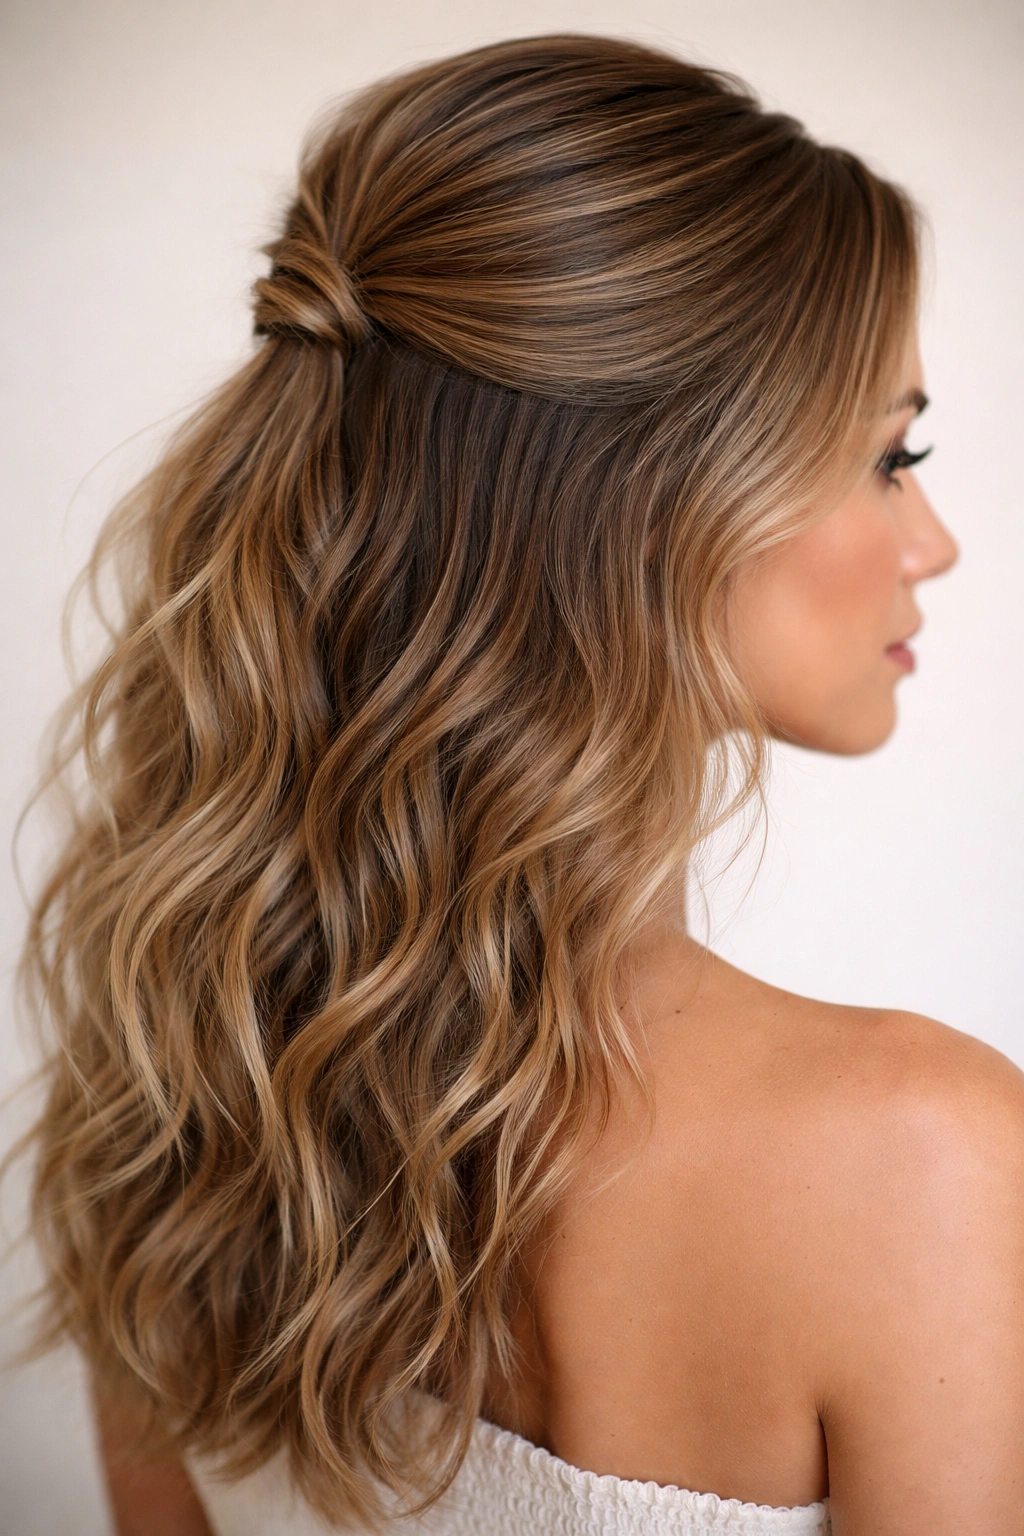
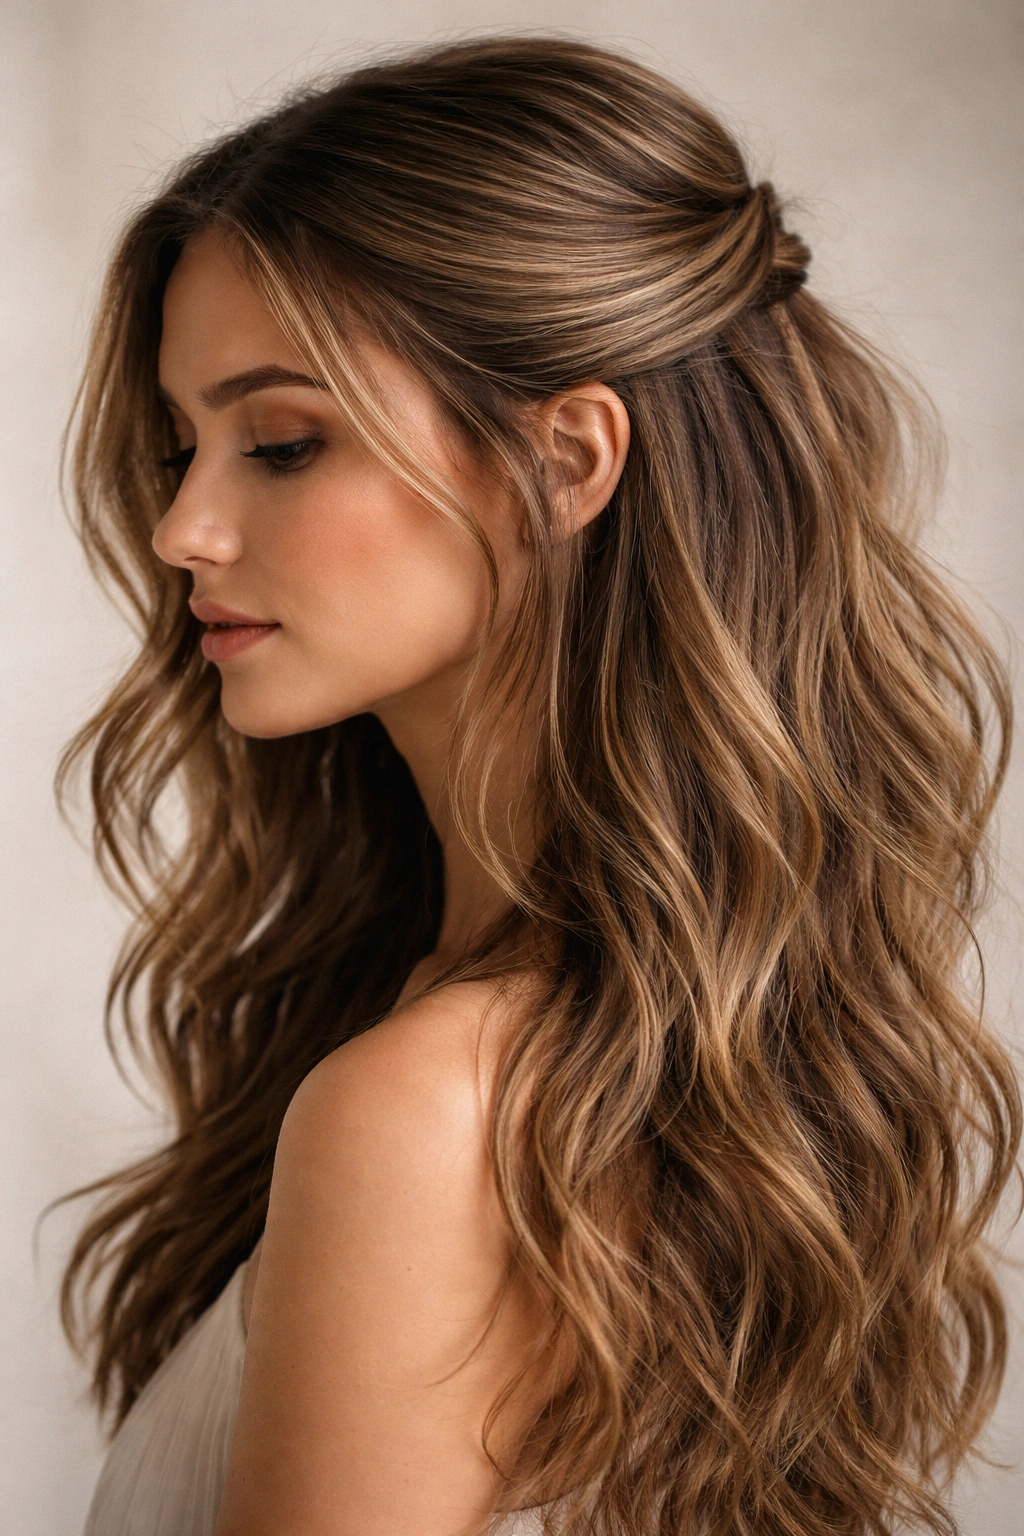
2. The Sleek Rounded Crown
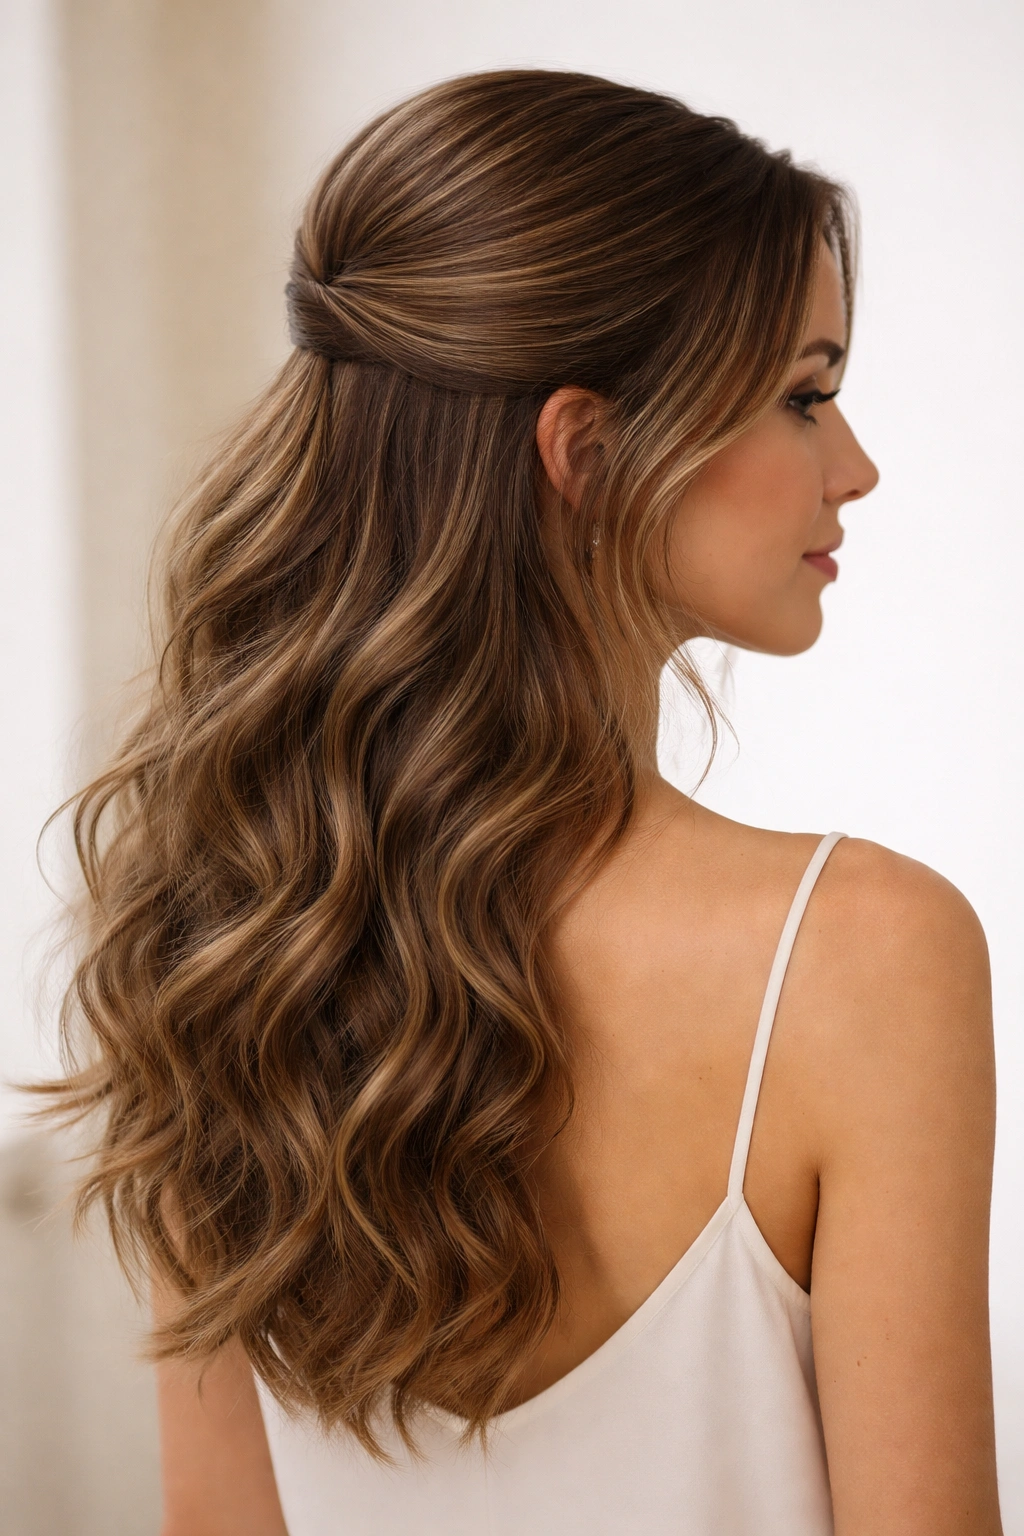
This style gives you that polished, intentional look while your waves remain completely natural below. It’s perfect for when you want to look put-together but not overdone — think effortless elegance. The rounded crown shape works beautifully with wavy hair because it creates a frame that actually showcases your texture instead of flattening it.
How to Create This Look
Starting at one ear, take a section of hair and smooth it gently back and around the back of your head, like you’re creating a smooth, curved line from ear to ear across the crown. Use a lightweight smoothing cream or serum to keep flyaways in place without making hair shiny or heavy. Pin the section on the opposite side once you’ve brought it around.
What Works Best
- A velvet or fabric bobby pin will grip smoother hair better than a metal pin
- Keep the front-face sections slightly fuller and less slicked for a modern, softer look
- Your waves in the back should stay completely down and natural
- This style works best when your wavy hair has some length — shoulder-length or longer
Worth knowing: This style is genuinely a five-minute morning style if your waves cooperate. On days when they’re a bit frizzy, the smoothed crown actually looks even better because it contrasts with the undone texture below.
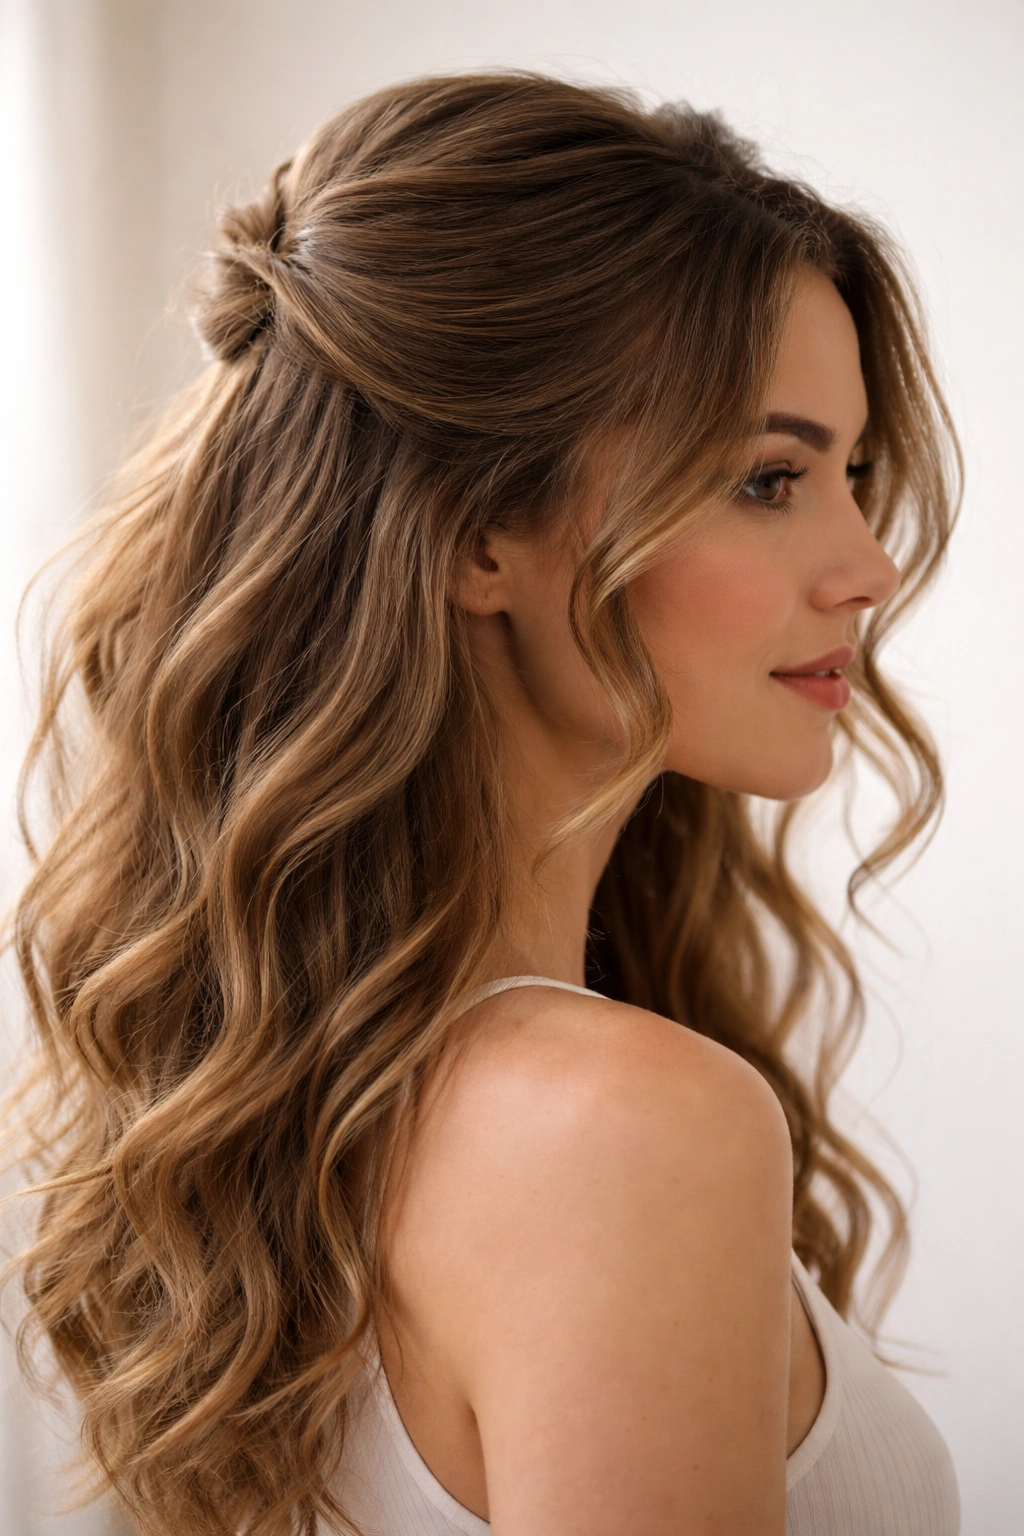
3. The Messy Elevated Ponytail
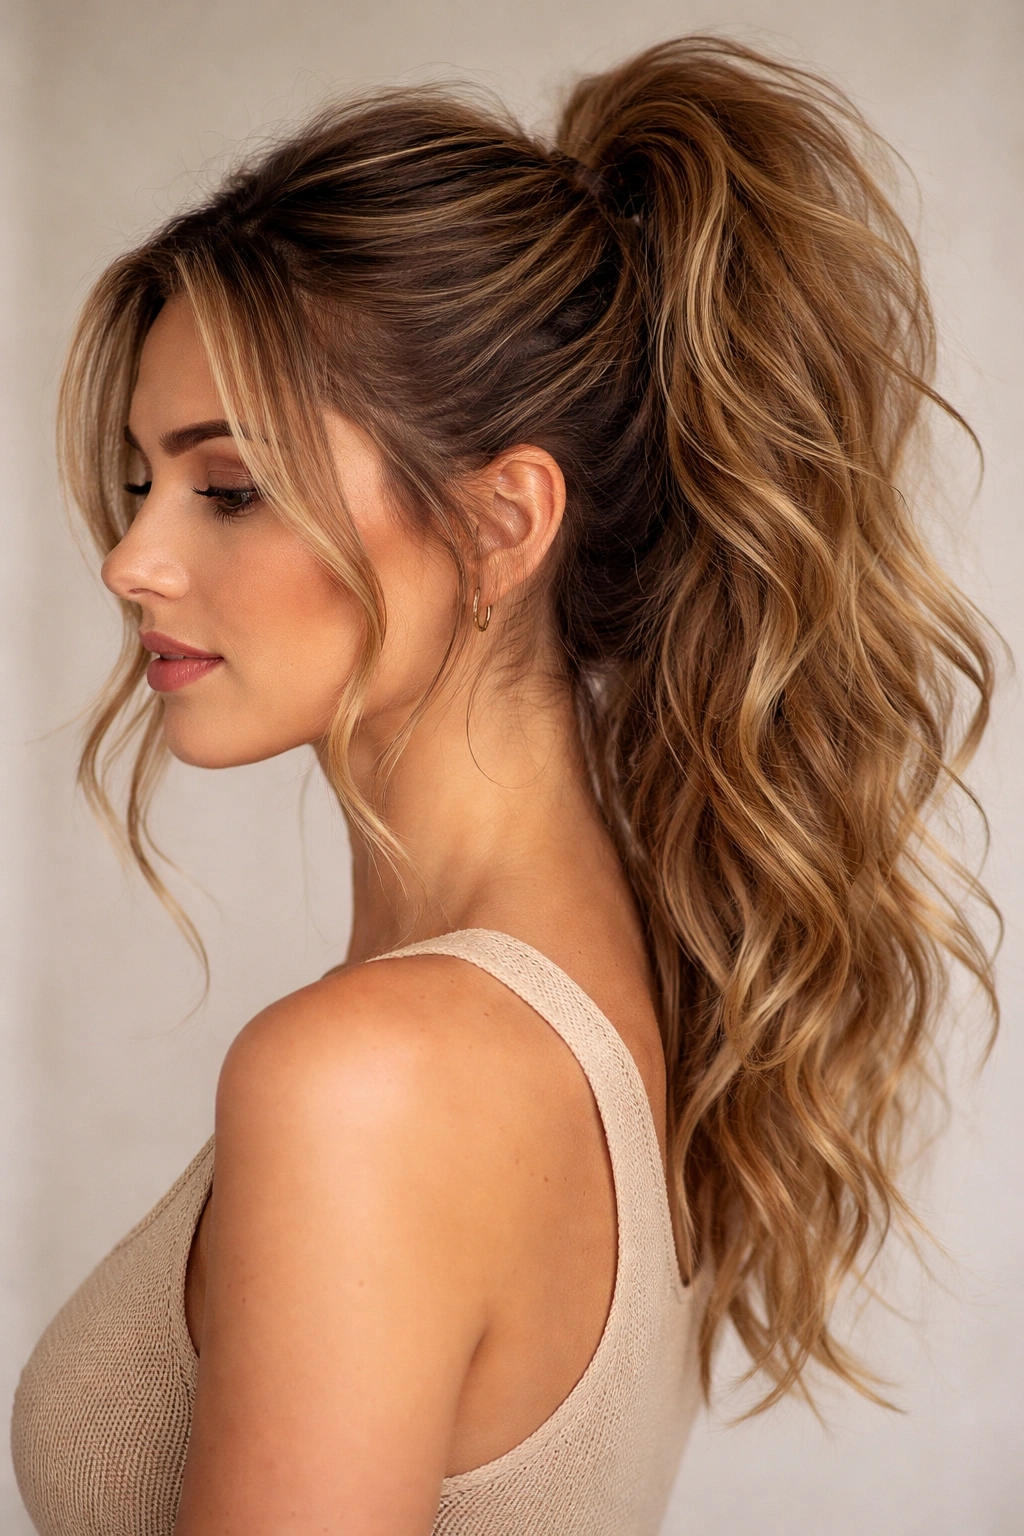
The elevated ponytail is basically a half-up style that’s intentionally messy and undone. It’s perfect for wavy hair because the texture makes it look effortlessly tousled even when you’re actively styling it. This is your go-to for a Saturday-morning, running-errands, or casual-date vibe.
How to Create This Look
Gather the top section of your hair (roughly from your temples back to your crown) into your hands and loosely tie it with a clear elastic or fabric tie. Don’t bother smoothing or perfecting it — the less you fuss with it, the better it looks. Gently pull and twist the secured section to add volume and texture. Take a few face-framing pieces and tease them loose.
What Works Best
- A fabric or velvet scrunchie will grip better and look less harsh in your waves than a thin elastic
- Don’t create a perfectly round ponytail — let it sit higher and messier for that intentional-undone look
- The tighter your hair, the messier it should look
- This style works with second-day hair too, which makes it incredibly practical
Pro tip: Tease the underside of the ponytail with a fine-tooth comb before tying it off. This creates invisible texture and volume that makes the ponytail look fuller and more intentional.
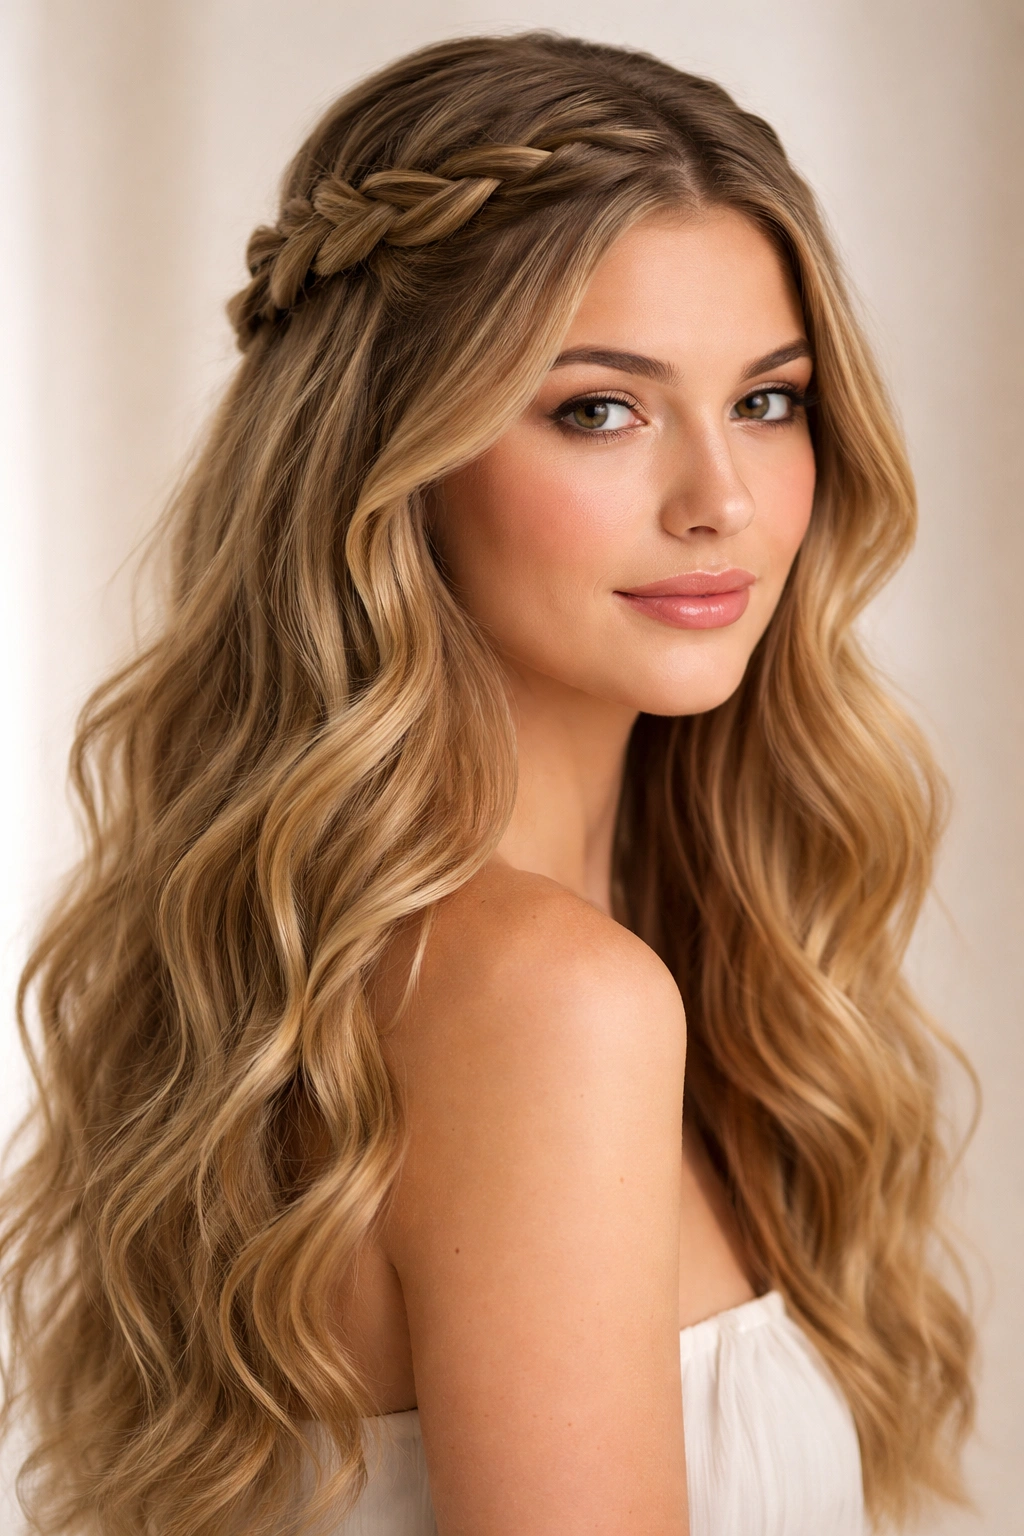
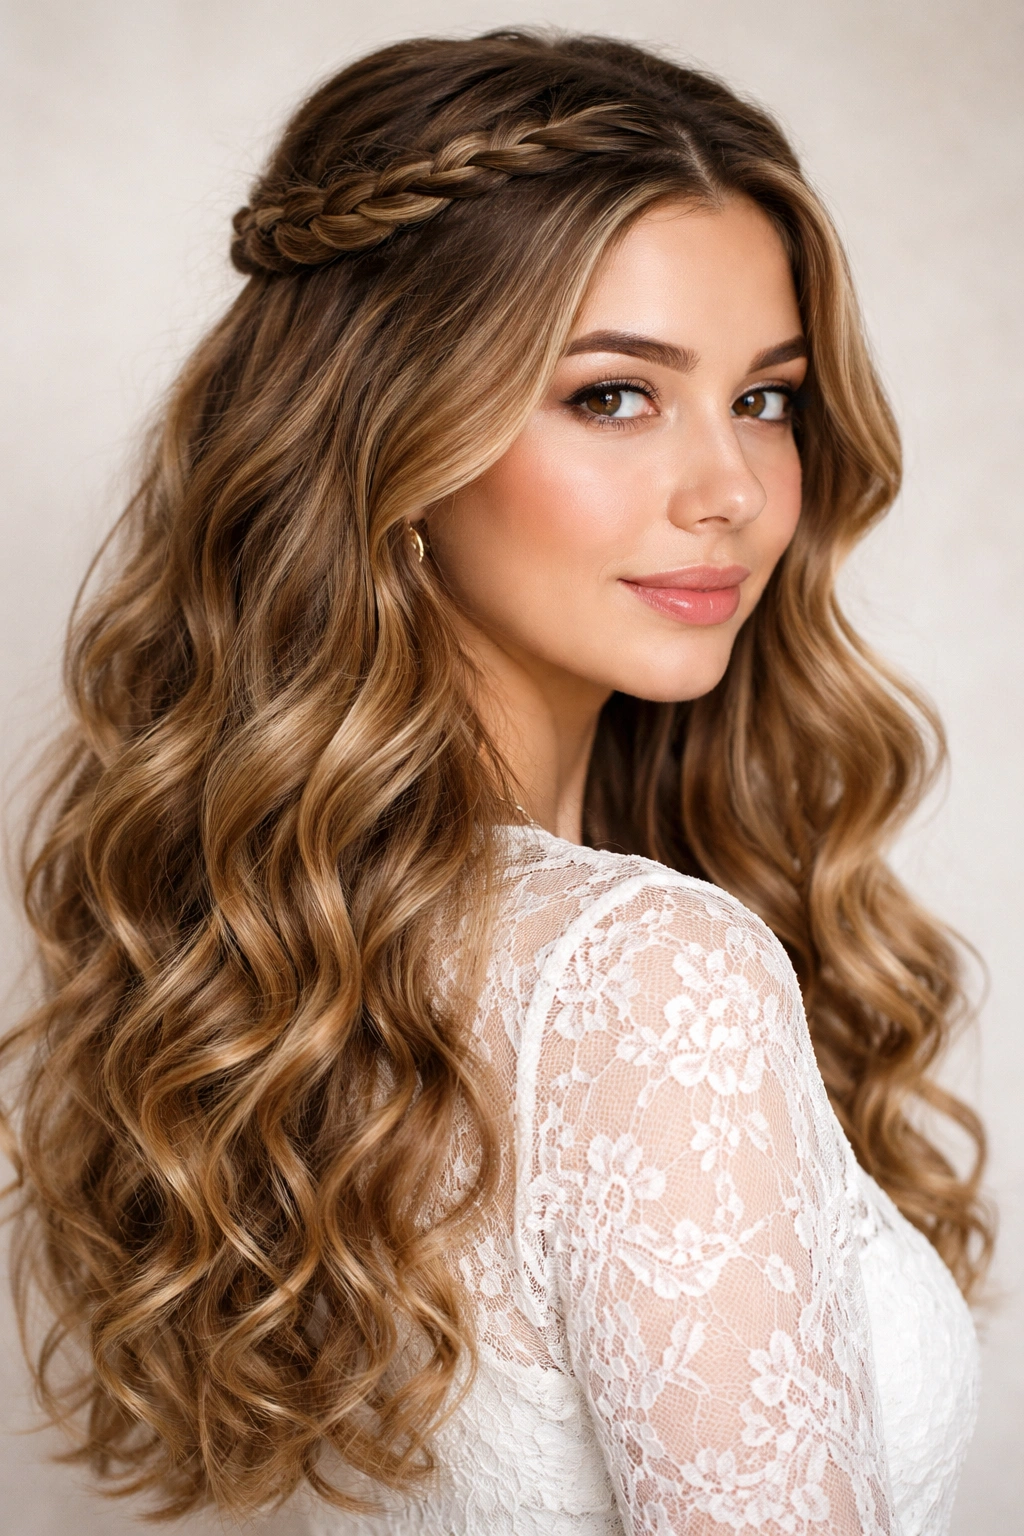
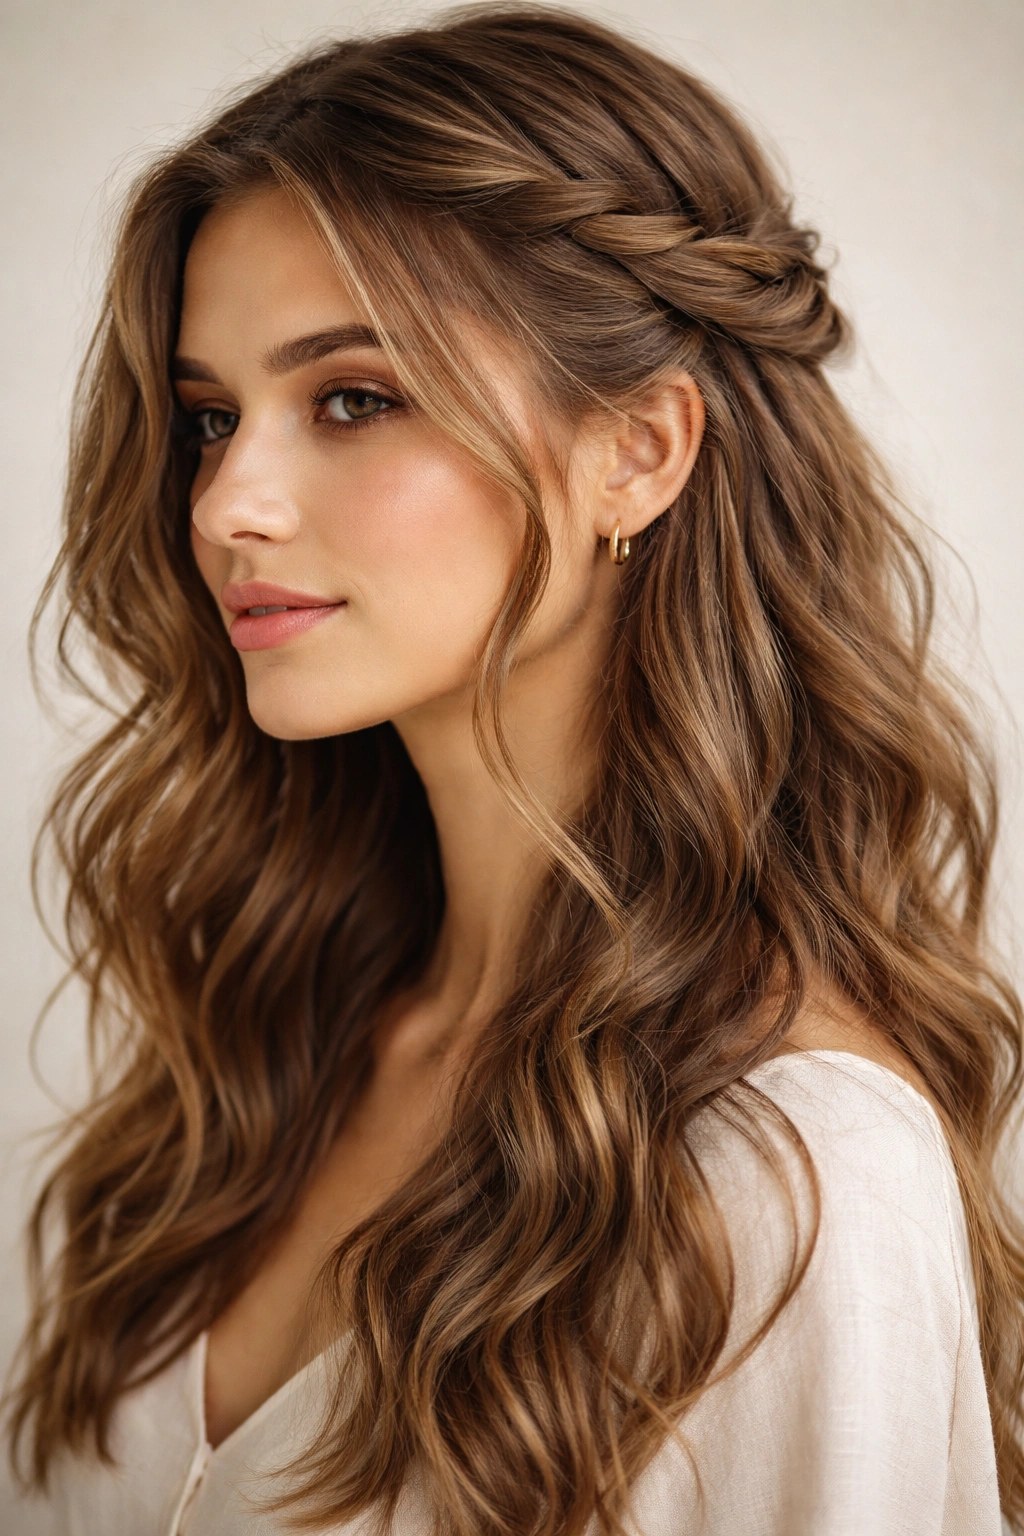
4. The Side-Swept Crown Braid
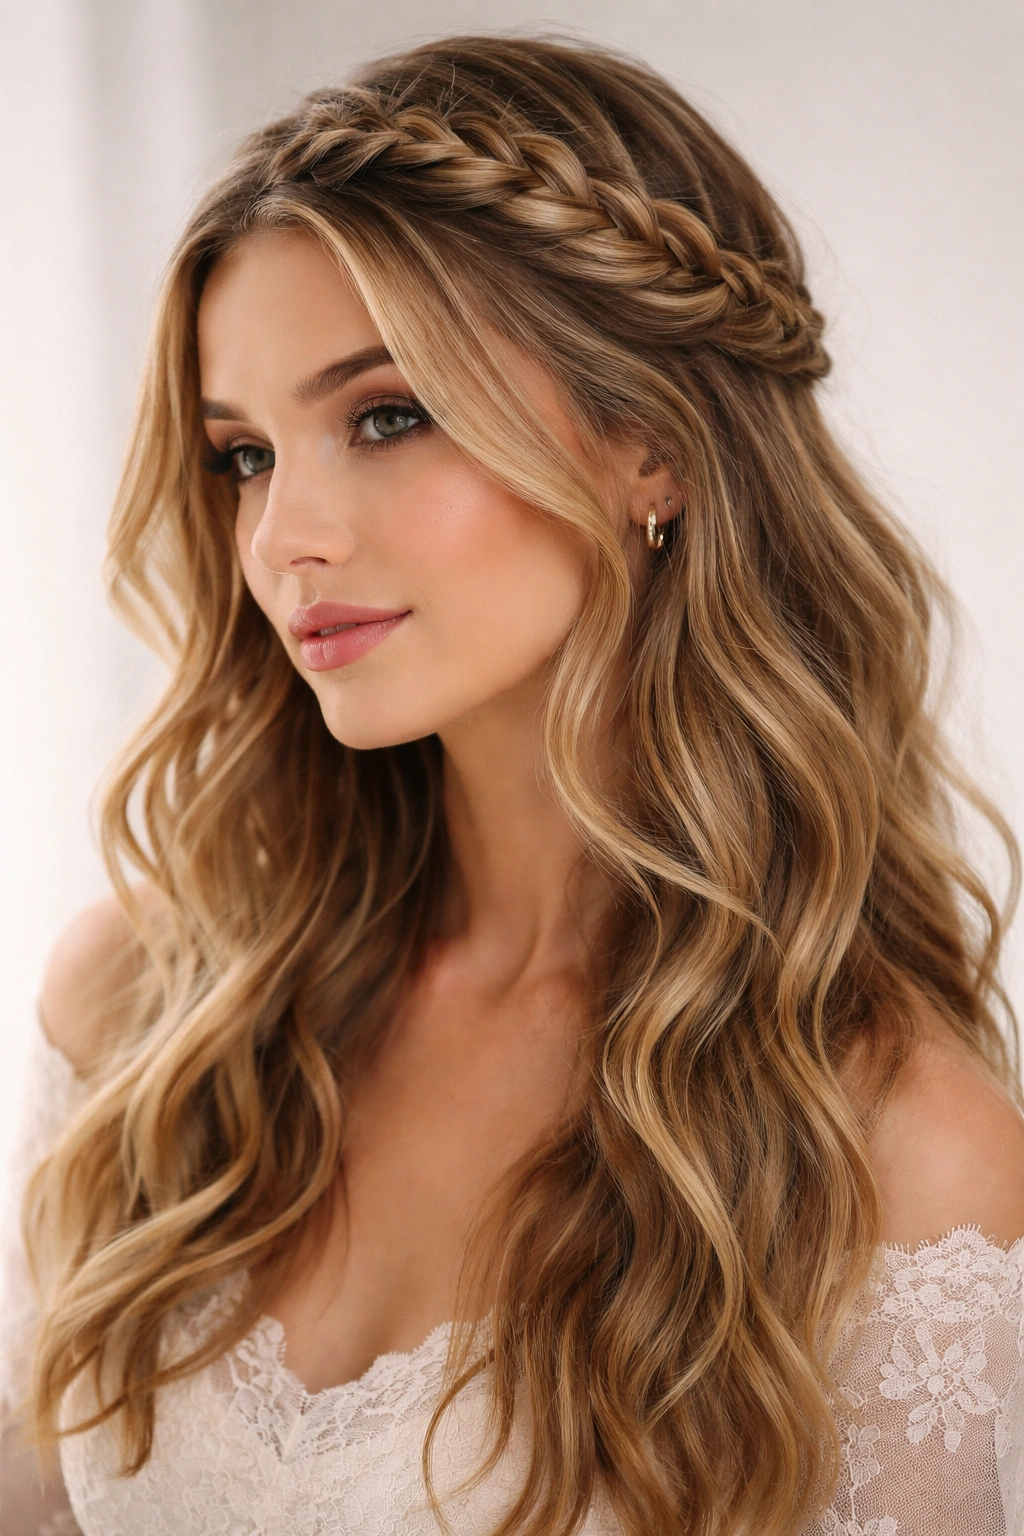
This style combines the best parts of braiding with the ease of a half-up look. The braid sweeps across the crown and anchors on the opposite side, creating an asymmetrical, romantic shape that pairs beautifully with wavy hair. It looks complicated but genuinely takes ten minutes, even for beginners.
How to Create This Look
Start at the ear on one side of your head and begin a loose three-strand braid. As you braid, gradually pick up small sections of hair from your hairline, creating a Dutch braid effect that curves across the crown of your head. Continue braiding toward the opposite ear, adding hair as you go. Secure the braid at the back with bobby pins or a small elastic.
What Works Best
- This works best with hair that’s been textured with a wave cream or salt spray the day before
- Don’t make the braid tight — loose, slightly undone braids look infinitely better against natural waves
- Let some face-framing pieces fall loose and frame your face
- The braid should feel organic, like it’s following the natural curve of your head
Insider note: If your braid starts to feel too neat as you’re braiding, gently pull on the outer edges of each strand to loosen it. This creates that perfect messy-romantic look without actually having to unstyle it after you’re done.
5. The Double Half-Up Twist
Instead of a single half-up section, you’re creating two smaller twisted sections, one from each side, that meet at the back. This style has serious visual interest and actually holds really well for wavy hair. It’s more striking than a single half-up but still feels casual and wearable.
How to Create This Look
Take a section of hair from just above your right ear, about two inches wide, and twist it gently back toward the center of the back of your head. Repeat on the left side with a matching section. Bring both twists together at the back and secure them with bobby pins or a small elastic. Smooth over any bumps with your fingers, then gently tease the twists to add texture.
What Works Best
- Make sure both twists are equally loose — if one is tighter than the other, the whole look feels off balance
- The twists should meet right at the crown or slightly below, creating a balanced frame for your face
- Use bobby pins in the same color as your hair to make the base invisible
- Your waves below should look completely natural and untouched
Worth knowing: This style is incredibly forgiving because any looseness or flyaways actually add to the charm. If a piece falls down, you’re not fighting it — you’re just letting it soften the style.
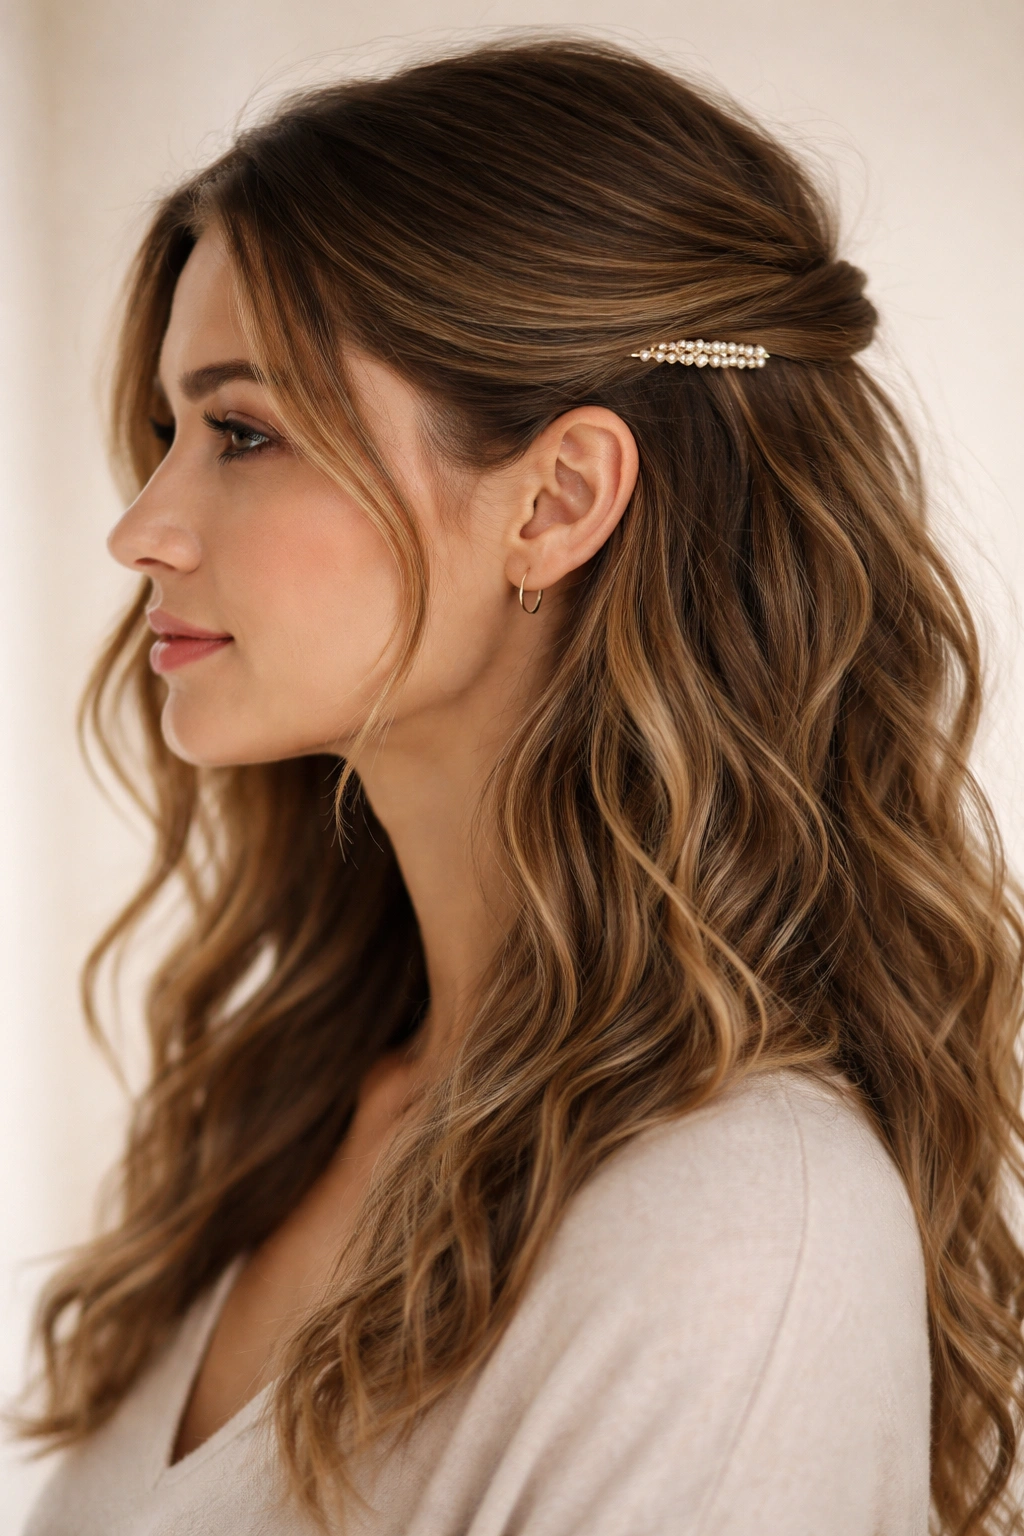
6. The Curved Bobby Pin Clip
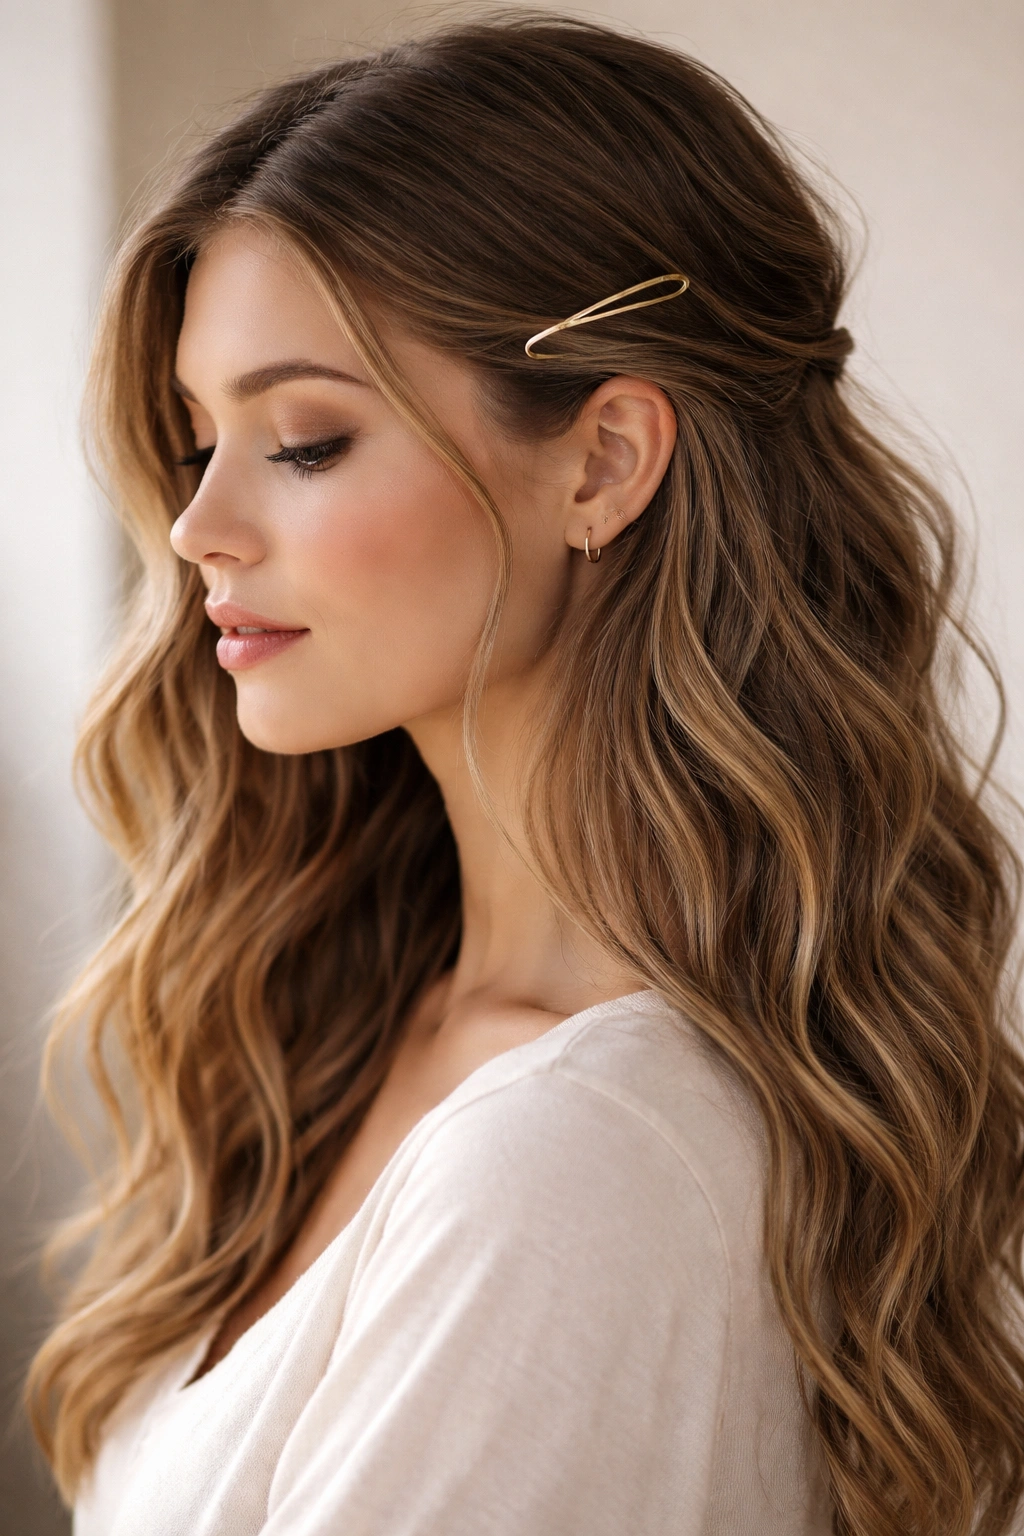
This is the minimalist half-up — it uses curved bobby pins or small decorative clips to hold back just enough hair to frame your face while keeping the rest completely down. It’s perfect for when you want a style that feels more intentional than just washing your hair, but you’re not trying to create an elaborate updo.
How to Create This Look
Take a small section of hair from one side (about one inch wide) and gently curve it back toward your ear. Secure it with a curved bobby pin that matches your hair color. Repeat on the other side if you want symmetry, or just do one side for an asymmetrical vibe. Use smooth, light movements — you’re not twisting or braiding, just gently tucking.
What Works Best
- Curved bobby pins are the MVP here — they’re designed specifically to follow the natural curve of your head
- If you want more grip, lightly mist the section with texture spray before pinning
- The pin should be nearly invisible — it’s the shape and movement of your hair that’s the style, not the hardware
- This works beautifully with longer wavy hair because the length gives you natural movement
Pro tip: If you want the style to last longer, secure the pinned section with a second bobby pin crossing in the opposite direction, creating an X that holds everything in place.
7. The Undone Waterfall Braid
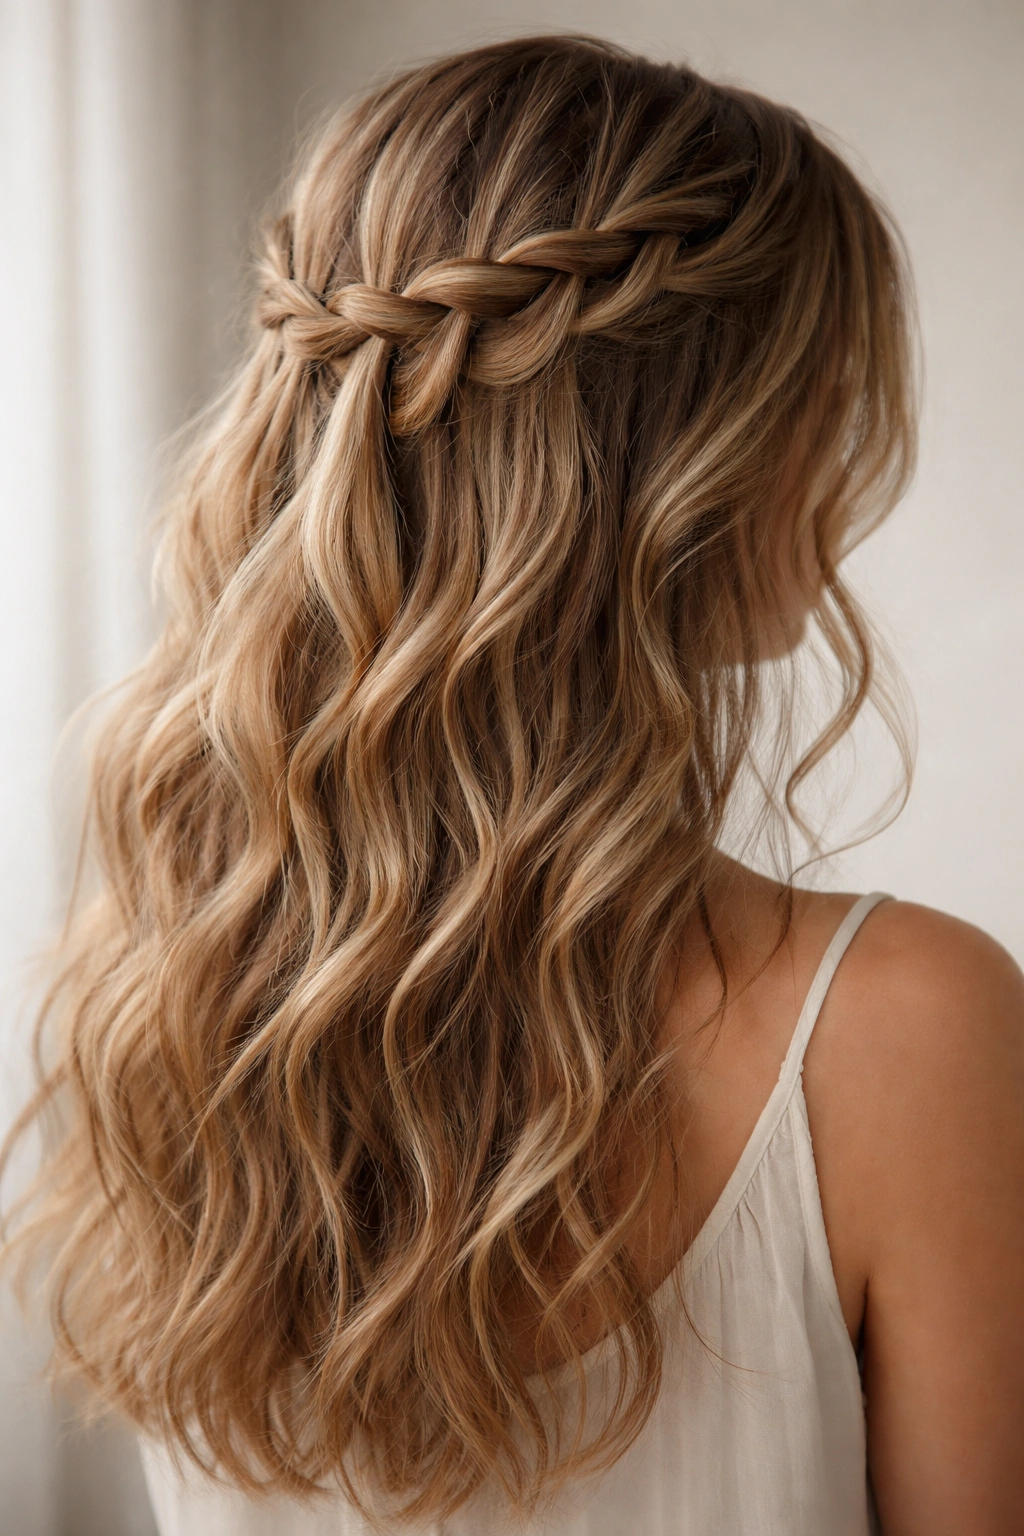
This isn’t a classic waterfall braid — it’s softer, messier, and specifically designed for wavy hair. You’re creating the idea of a waterfall braid with minimal precision, letting your waves create the texture while the braid provides the structure. The result is romantic, effortless, and genuinely simple.
How to Create This Look
Start a Dutch braid at one ear, adding small sections of hair as you braid toward the back. Instead of catching all the hair, intentionally let some sections drop out of the braid as you go — these “waterfall” sections blend with your waves and create the dreamy, flowing effect. Secure the braid at the opposite ear with a bobby pin.
What Works Best
- The more imperfect your braid, the better this style looks
- Let bigger sections drop than you would in a traditional waterfall braid — this isn’t about precision
- Your wavy texture does a lot of the work here, so don’t feel like you need to be a braiding expert
- Use a light styling cream to enhance your natural waves before braiding
Insider note: If you mess up the braid pattern, it literally doesn’t matter. Your waves are going to add so much texture that any imperfections just look intentional.
8. The Half-Up With Face-Frame Curls
This style keeps the top half contained while you enhance and define the waves in the bottom half with some strategic curling. You’re creating intentional curls below while keeping the crown smooth and pulled back. This works beautifully for wavy hair that needs a bit more curl definition.
How to Create This Look
First, create your half-up section however you prefer — twisted, straight, braided, whatever works for you. Pin it securely at the back. Then, take your curling wand or iron and lightly curl the bottom sections, focusing on the pieces framing your face and the ends of your hair. Don’t curl everything — selectively enhance the waves you want to emphasize.
What Works Best
- A 1-inch barrel curling wand gives you flexible curls that blend beautifully with your natural waves
- Use low to medium heat — your goal is enhancing your waves, not creating tight ringlets
- Wrap each section loosely around the barrel for a second or two, then release
- The curls will cool and set as they relax, so don’t expect them to be perfect immediately after curling
Worth knowing: This style is perfect for hair that’s slightly less wavy on some days. You’re adding intentional texture where your waves might be falling flat, creating overall balance.
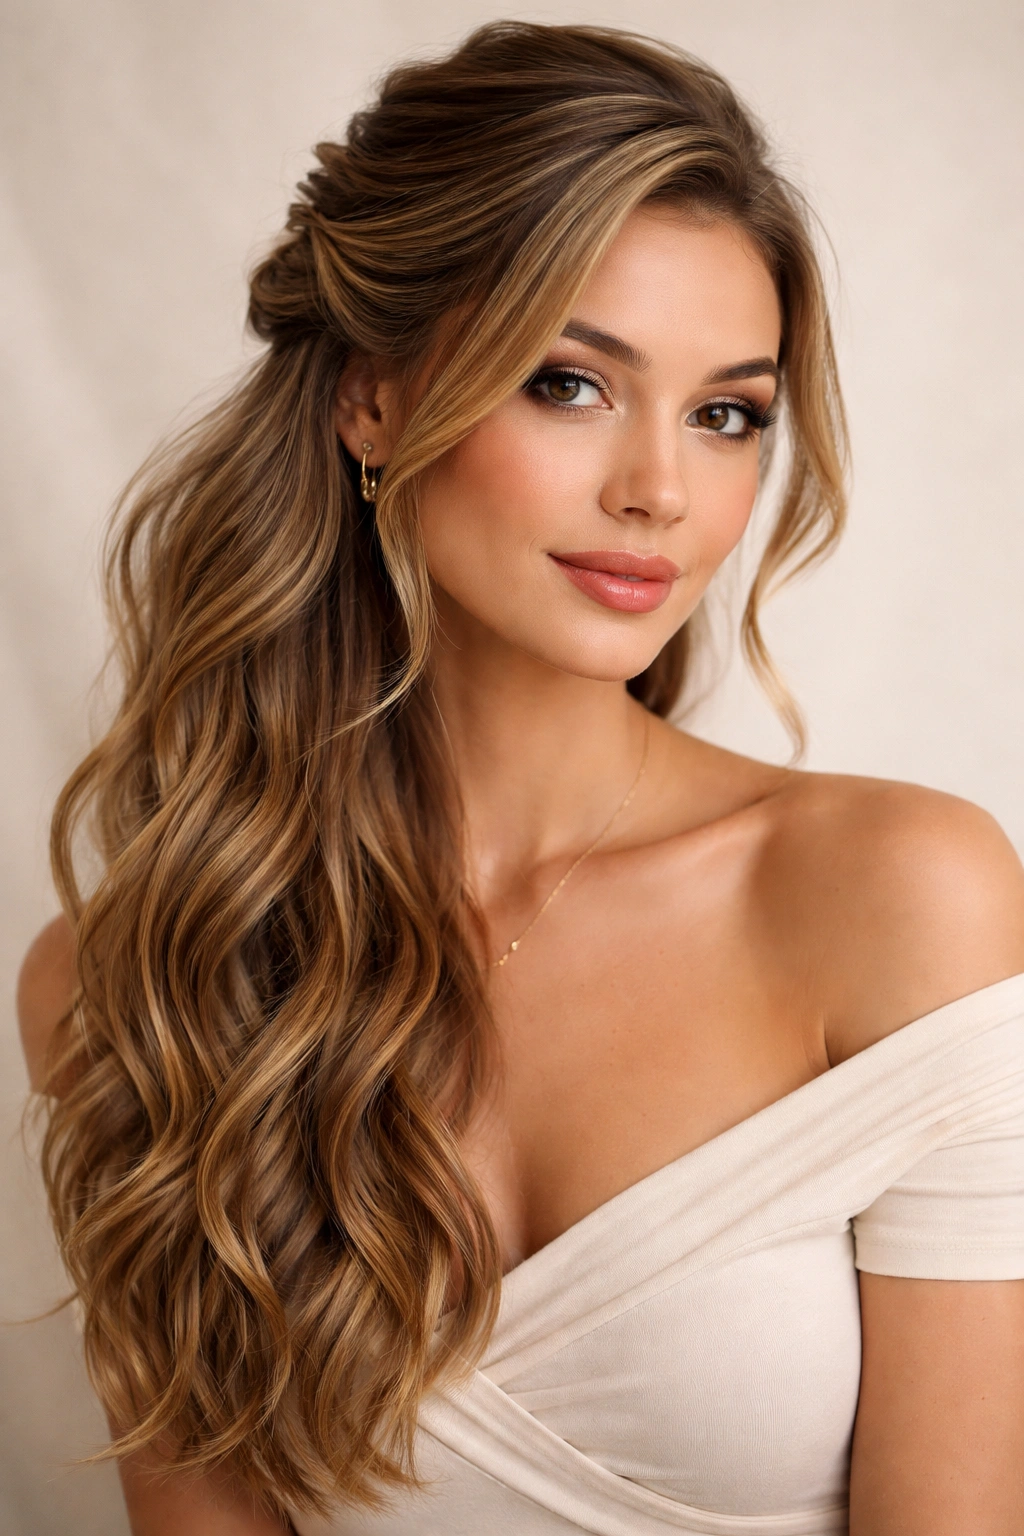
9. The Sleek Low Half-Up
Instead of a crown-height half-up, you’re creating a half-up section that sits much lower on the head, at the nape or base of your skull. This is a more sophisticated, modern take on the half-up style that works beautifully when your wavy hair is cooperating and you want a polished, intentional look.
How to Create This Look
Smooth back the top section of your hair using a lightweight smoothing cream. Gather hair from about ear-level back, creating a wide but shallow section that you’ll pin low at the base of your skull. The rest of your hair falls completely loose below, showing off your waves in full. Use bobby pins that match your hair color, and smooth down any flyaways with a light mist of hairspray.
What Works Best
- This style requires your waves to look good when fully down, so save it for days when your texture is cooperating
- A clear elastic under a strand of hair wrapped around it makes this style look custom and intentional
- Your top section should be completely smooth — this contrast with the waves below is what makes the style work
- Keep the gathered section at the very base of your skull, not higher
Pro tip: Use a fine-tooth comb to smooth the top section rather than your fingers. This creates a sleeker finish without flattening or breaking your hair.
10. The Braided Crown Half-Up
This is a true braided crown that extends only halfway around your head, anchored at the back with the rest of your hair falling free below. It’s elegant, romantic, and surprisingly easy even though it looks like something from a fairy tale. Your natural waves peek through and soften the braid, creating a perfect balance between structured and organic.
How to Create This Look
Start a Dutch braid at one ear, working toward the back of your head. Braid only halfway around (not all the way across to the other ear), then anchor it at the back with bobby pins. Let your waves below the braid flow completely naturally. You can leave the opposite side of your face completely unstyled, or mirror the braid on the other side if you want full symmetry.
What Works Best
- Loose, slightly undone braids look infinitely better with wavy hair than tight, perfect ones
- Use a texture spray on your hair before braiding to give it grip and hold
- Let some face-framing pieces fall loose on the non-braided side for balance
- The braid should feel organic, following the natural curve of your head
Worth knowing: This is actually the perfect style for second or third-day hair because older waves hold shape better than freshly washed ones, and the braid adds structure on days when your texture needs a little help.
11. The Twisted Halo Half-Up

Instead of a traditional full halo braid that goes all the way around, you’re creating a twisted halo that covers just the crown area. This creates a delicate frame for your face while keeping most of your wavy hair down. It’s romantic and gentle, perfect for when you want something special but still wearable.
How to Create This Look
Start on one side of your head just above the ear and create a loose twist, gradually picking up small sections of hair as you twist toward the back. Bring the twist across the back of your crown and down toward the opposite ear. Pin the end of the twist at the other side of your head, creating a curved frame around the back.
What Works Best
- A salt spray or texture spray before twisting gives grip without weight
- The twist should feel soft and undone, not geometric or perfect
- Let small pieces fall loose around the twist — these soften the whole look
- This works beautifully with medium to long wavy hair
Pro tip: If the twist feels too tight, gently pull on the outer edge of each twisted section with your fingers to loosen it and add texture.
12. The Clip-and-Pin Minimalist
This ultra-simple style uses just one small clip or barrette to hold back a small section of hair from one side. It’s barely a “style” in the traditional sense — more like a tiny accent that keeps hair off your face while looking intentionally placed. This is perfect for days when you want your wavy hair to be the star with just a tiny bit of structure.
How to Create This Look
Take a small section of hair from one side of your face (about one inch wide) and gently smooth it back. Clip it with a small decorative barrette or clip, positioned just behind the ear or slightly toward the back. That’s it. The rest of your hair falls completely naturally around it.
What Works Best
- A decorative clip can actually be your style statement here — choose something that matches your vibe
- The clip should feel like an accessory, not a functional hair hold
- This works best with wavy hair that already has nice natural texture
- Metal or jeweled clips look effortlessly stylish, while fabric clips feel more casual
Insider note: This style works beautifully as a way to style your hair on mornings when you’re running late but want to look intentional. It takes thirty seconds and looks like you put thought into it.
13. The Side-Gathered Half-Up
Instead of centering your half-up section, you’re gathering all your top hair to one side of your head, creating an asymmetrical look that’s modern and interesting. Your waves flow dramatically down the opposite side, creating movement and visual interest. This style is perfect for when you want something more dramatic than a traditional centered half-up.
How to Create This Look
Create your half-up section (twist, braid, or simple gathered ponytail) but gather it to one side rather than the center back. Secure it with bobby pins on the side of your head. The opposite side of your hair falls completely free, showing off your waves in full. You can let face-framing pieces fall on the gathered side or keep it clean and sleek — either works.
What Works Best
- Gather your half-up section to the side where your waves look best
- The asymmetry of this style actually makes imperfect waves look intentional
- This works particularly well for people with a deeper side part
- Your gathered section should feel solid and secure — this isn’t the time for loose, delicate styling
Worth knowing: This style photographs beautifully because the asymmetry creates dynamic, interesting angles. If you’re styling for photos, this is a great choice.
14. The Half-Up With Ribbon Weave
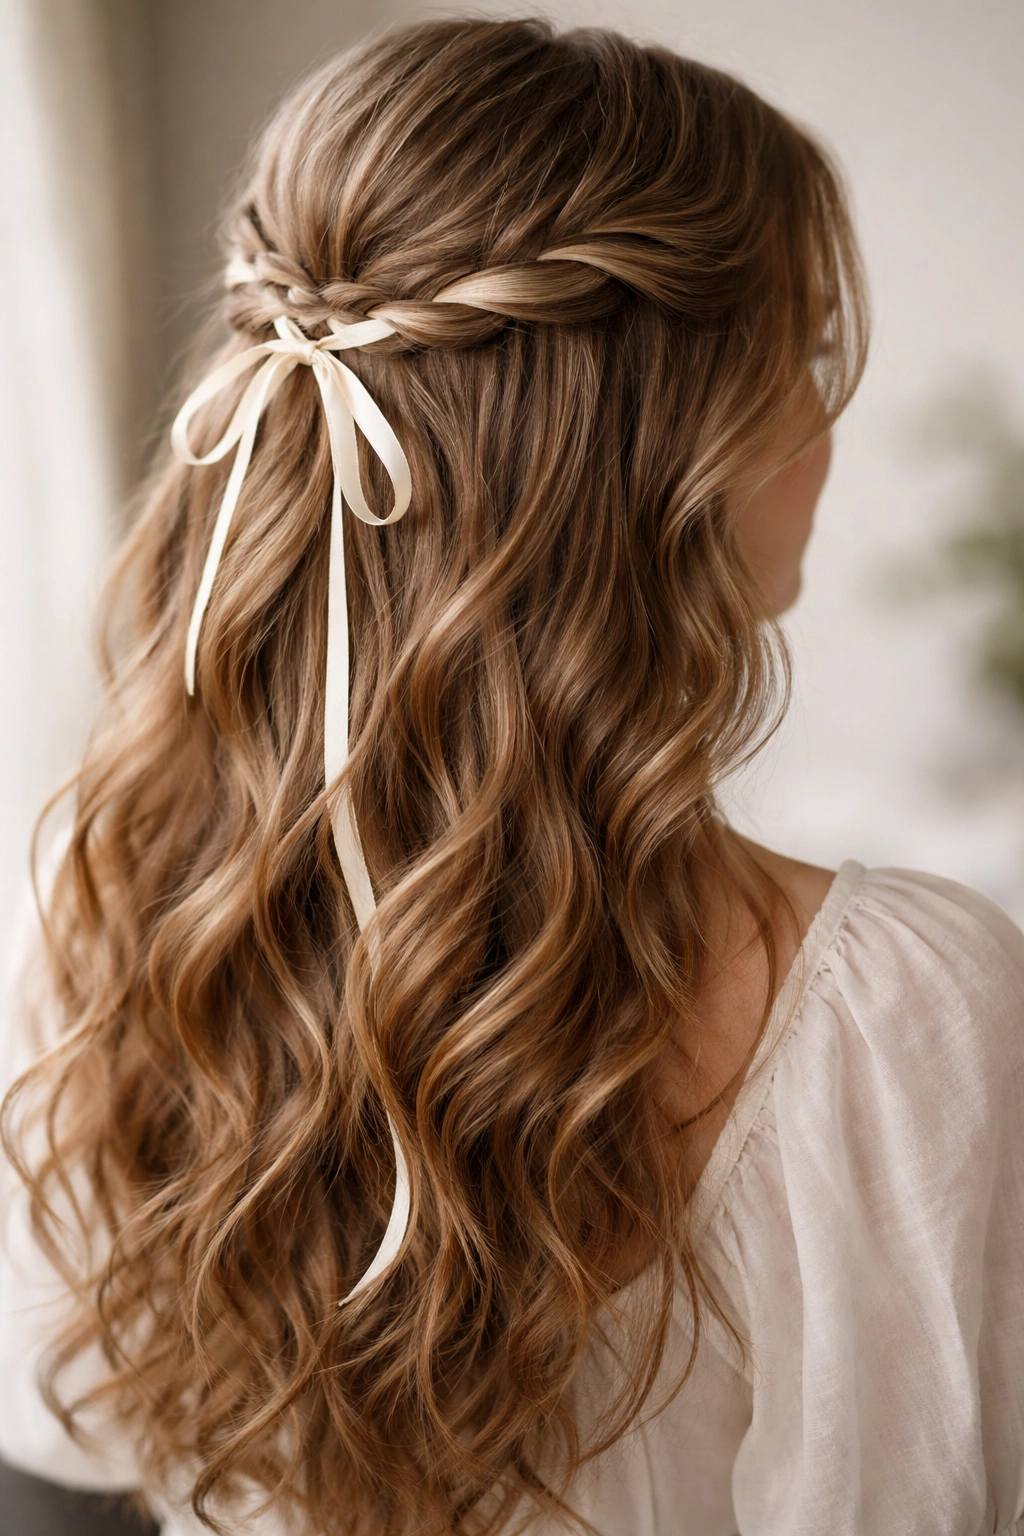
Instead of twisting or braiding, you’re weaving a thin ribbon or thin strip of fabric through a section of your half-up hair. The ribbon adds a delicate detail and a pop of color or texture while keeping your styling simple. This is a feminine, romantic style that feels special without being overdone.
How to Create This Look
Create a simple half-up section or very loose braid at the top of your head. Then, take a thin ribbon (about ½ inch wide) and weave it through the section, following the lines of your twist or braid. Secure both ends of the ribbon with bobby pins, using the pins to tuck the ribbon ends into your hair so they’re hidden.
What Works Best
- Use a soft, lightweight ribbon that won’t pull or add weight to your hair
- Satin or silk ribbons are easier to work with than stiff ones
- The ribbon should peek through and accent your style, not completely cover it
- Match your ribbon color to your outfit, an accessory, or go neutral with cream, gold, or silver
Pro tip: If you can’t find thin ribbon, cut a narrow strip from a soft scarf or fabric and use that instead. It has the same effect and gives you way more color options.
15. The Double-Twisted Crown
This style creates two small twisted sections that cross over each other at the back of your head, creating a geometric, intentional-looking shape that’s still soft and romantic with wavy hair. It’s more visual interest than a single twist without the complexity of a full crown braid.
How to Create This Look
Create your first twist on one side (same as the Double Half-Up Twist) and secure it loosely with a bobby pin. Create a second twist on the opposite side and secure it. Position the second twist so it crosses over the first twist before anchoring at the back, creating an X shape when viewed from behind. Gently tease both twists for texture.
What Works Best
- Make sure both twists are equally loose for visual balance
- The crossing point should be roughly at the center back of your head
- Use bobby pins that match your hair color so they disappear
- Your wavy hair below the twists should look completely natural and undisturbed
Worth knowing: This style is incredibly secure because the twists are pinned separately and cross each other. Even if your hair is fine or tends to slip out of styles, this one holds.
16. The Pulled-Back Crown With Undone Texture
This style smooths back a generous section at the crown and secures it at the back, then intentionally creates undone, piecey texture in the bottom section with your hands rather than a curling tool. You’re creating the look of structured waves without actually curling anything — your natural waves do the work.
How to Create This Look
Smooth back a deep section from your forehead to the crown, gathering it at the base of your skull. Secure it with bobby pins or a clear elastic. Then, use a texture spray and your fingers to enhance and separate the waves in the bottom section. Squeeze, scrunch, and tease your hair to create more dimension and movement.
What Works Best
- A lightweight texture spray or salt spray is essential for this look
- Use your fingers rather than a brush — this creates natural separation rather than smooth waves
- Work the spray through the entire bottom section, scrunching as you go
- Let some pieces fall completely loose around your face
Pro tip: Do this styling after you’ve put on your outfit. That way, you can adjust the texture to match your vibe for the day — more undone on casual days, more separated and intentional on dressier days.
17. The Sleek Curved Section With Undone Waves
This is another minimal-effort style that relies on the contrast between smoothness and texture. You’re creating one smooth, curved section that frames your face while your waves remain completely undone and natural below. It’s the style for days when your waves are looking good and you just want a tiny bit of intentional styling.
How to Create This Look
Take a medium section of hair from one temple and smooth it back and around the back of your head, creating a gentle curved line. Secure it with a bobby pin or a few small pins that match your hair color. Leave the opposite side of your face completely unstyled. Your bottom section stays completely natural, no styling or enhancement.
What Works Best
- Use a smoothing cream to keep flyaways down without flattening your hair
- The curved section should feel graceful and organic, not rigid or geometric
- This style works best when your waves naturally cooperate
- The contrast between the smooth section and the wavy section below is what makes this work
Insider note: This is genuinely a five-minute style that looks like you put effort in. Perfect for when you want to look polished without spending time on your hair.
18. The Braided and Curled Combination
This is your most intentional, coordinated style — you’re braiding a section of your hair for structure at the top, then curling sections of the bottom to create intentional, defined waves that pair with the braid. You’re bringing all the elements together to create a cohesive, finished look.
How to Create This Look
Create a braid or twisted braid at the crown, securing it at the back. Then, use a 1-inch curling iron to create loose, intentional curls throughout the bottom section. Don’t aim for ringlets — you’re enhancing and defining your natural waves. Focus especially on the pieces framing your face and the ends of your hair.
What Works Best
- Loose braids look better than tight ones, especially when paired with enhanced waves below
- Curl in the direction your natural waves want to go, not against them
- Use medium heat and wrap sections loosely for curls that blend with your waves
- A light hairspray at the end helps everything hold without looking stiff
Worth knowing: This is the style to go for when you want something special — it looks more intentional and coordinated than your everyday half-ups while still being achievable in about fifteen minutes.
Final Thoughts
The beautiful thing about half-up half-down styles for wavy hair is that they actually work because your hair is wavy, not in spite of it. You’re not fighting your texture, correcting it, or pretending your hair is something it’s not. Instead, you’re building styles on top of what your hair already wants to do naturally. That twist? It looks romantic and soft because your waves add texture. That braid? It looks effortlessly undone because your waves make everything feel intentional rather than geometric.
The eighteen styles above are just starting points. Once you understand the basic principles — that loose is better than tight, that your waves are your asset, and that a tiny bit of intentional styling makes your hair look like you tried without looking overdone — you can mix and match elements from these styles to create your own versions. Use a twist from one style with the curling from another. Combine the ribbon weave with the side-gathered technique. The possibilities are genuinely endless.
The best half-up half-down style is the one that works with your hair type and your lifestyle. If your waves are tighter and more textured, embrace the mess and go for loose, undone styles. If your waves are looser and more flowing, lean into the elegant, romantic options. Pay attention to how your hair behaves on different days and build a mental toolkit of styles you can grab depending on what’s happening with your texture that morning. That’s not having a bad hair day — that’s having options.