If you’re working with medium-length wavy hair, you’ve probably discovered that the half-up half-down style is basically the Swiss Army knife of hairstyles. It gives you enough length to show off your waves while keeping hair off your face, and it somehow works for everything from casual weekends to more polished occasions. The beauty of this style lies in its flexibility—you can dress it up with decorative elements, keep it relaxed and tousled, or go for something that feels effortlessly put-together without actually requiring much effort at all.
What makes half-up styles particularly special for wavy hair is that they work with your texture rather than against it. Your waves have natural movement and dimension that longer, straighter styles sometimes flatten or hide. When you pull the top section up, you create visual interest, add shape to your face, and let those waves do what they do best—flow and catch the light. The key to making these styles look intentional (not like you just grabbed the top layer and ran out the door) is understanding how to anchor them, what products create definition without weighing things down, and which variations complement different face shapes and hair densities.
Over the next sections, you’ll discover 20 distinct takes on the half-up half-down style, each with its own personality and technique. Some lean romantic, some are sporty and practical, and others hit that sweet spot between polished and effortless. Whether you’re looking for something you can do in ninety seconds before work or a more intricate style for a special event, there’s a version here that’ll become your go-to.
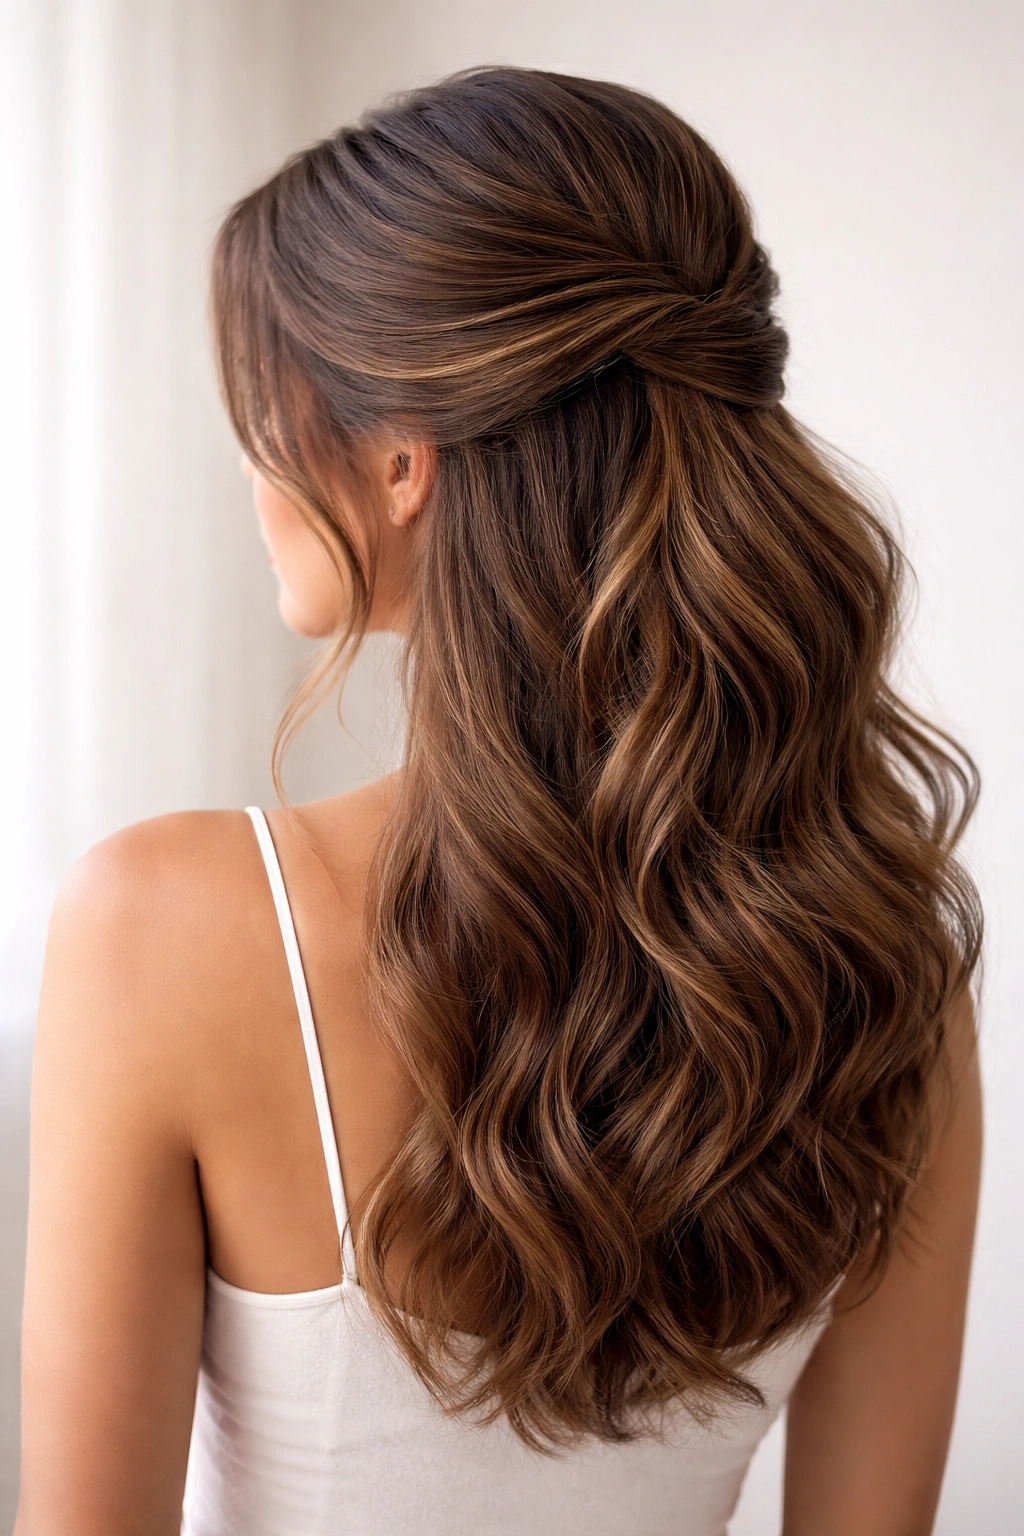
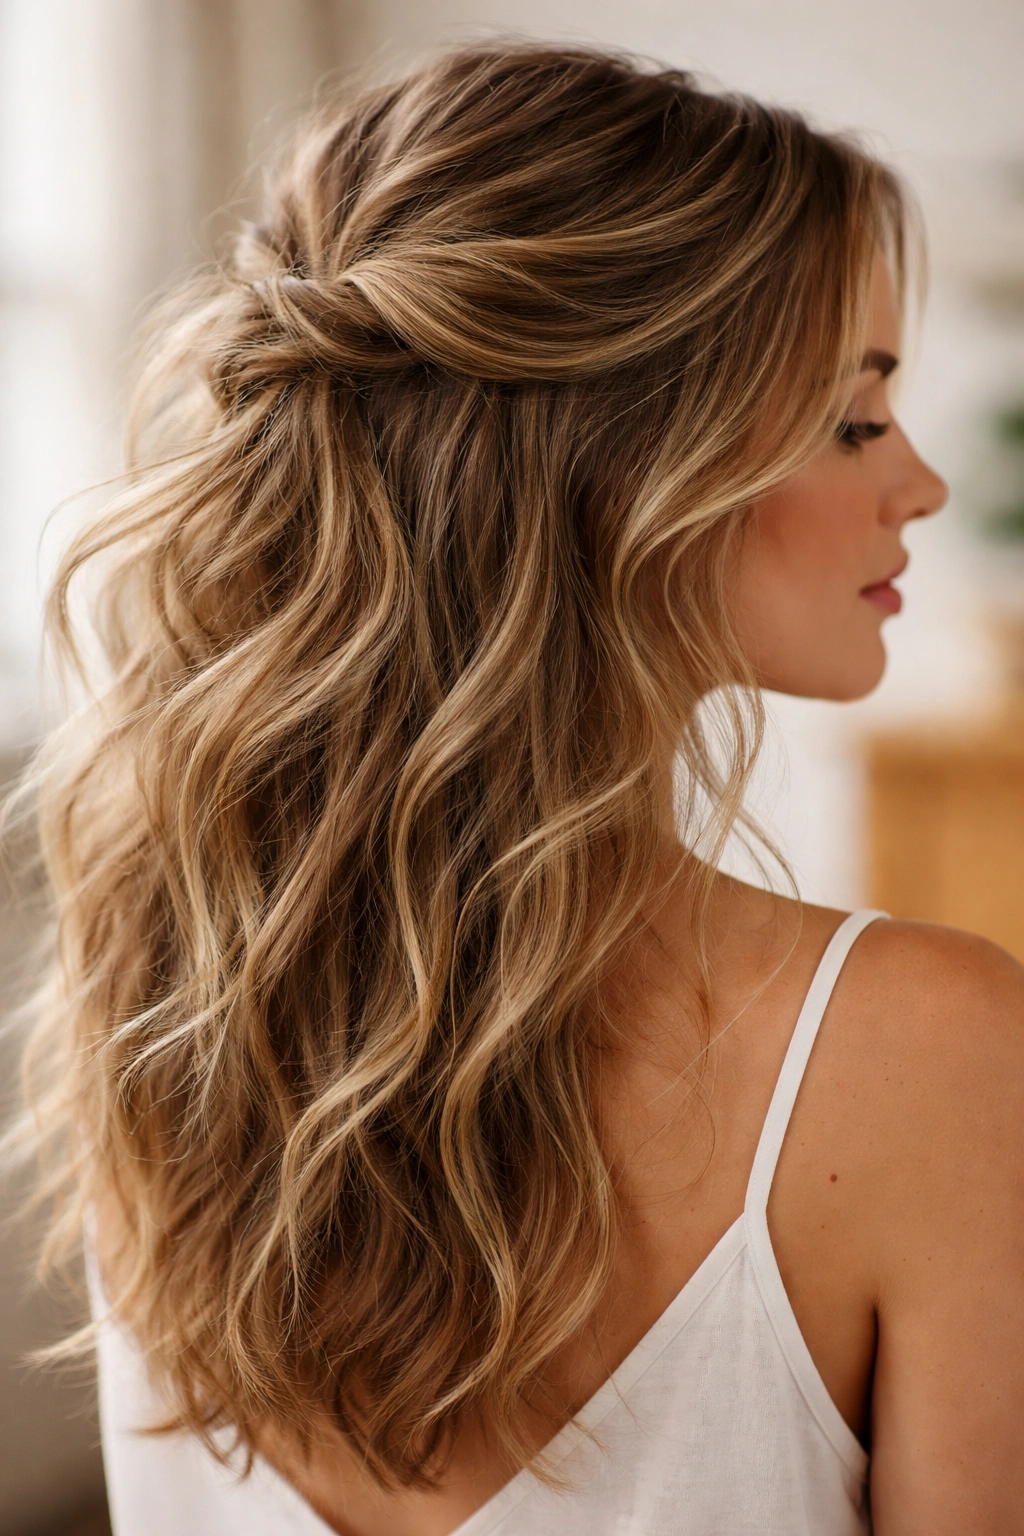
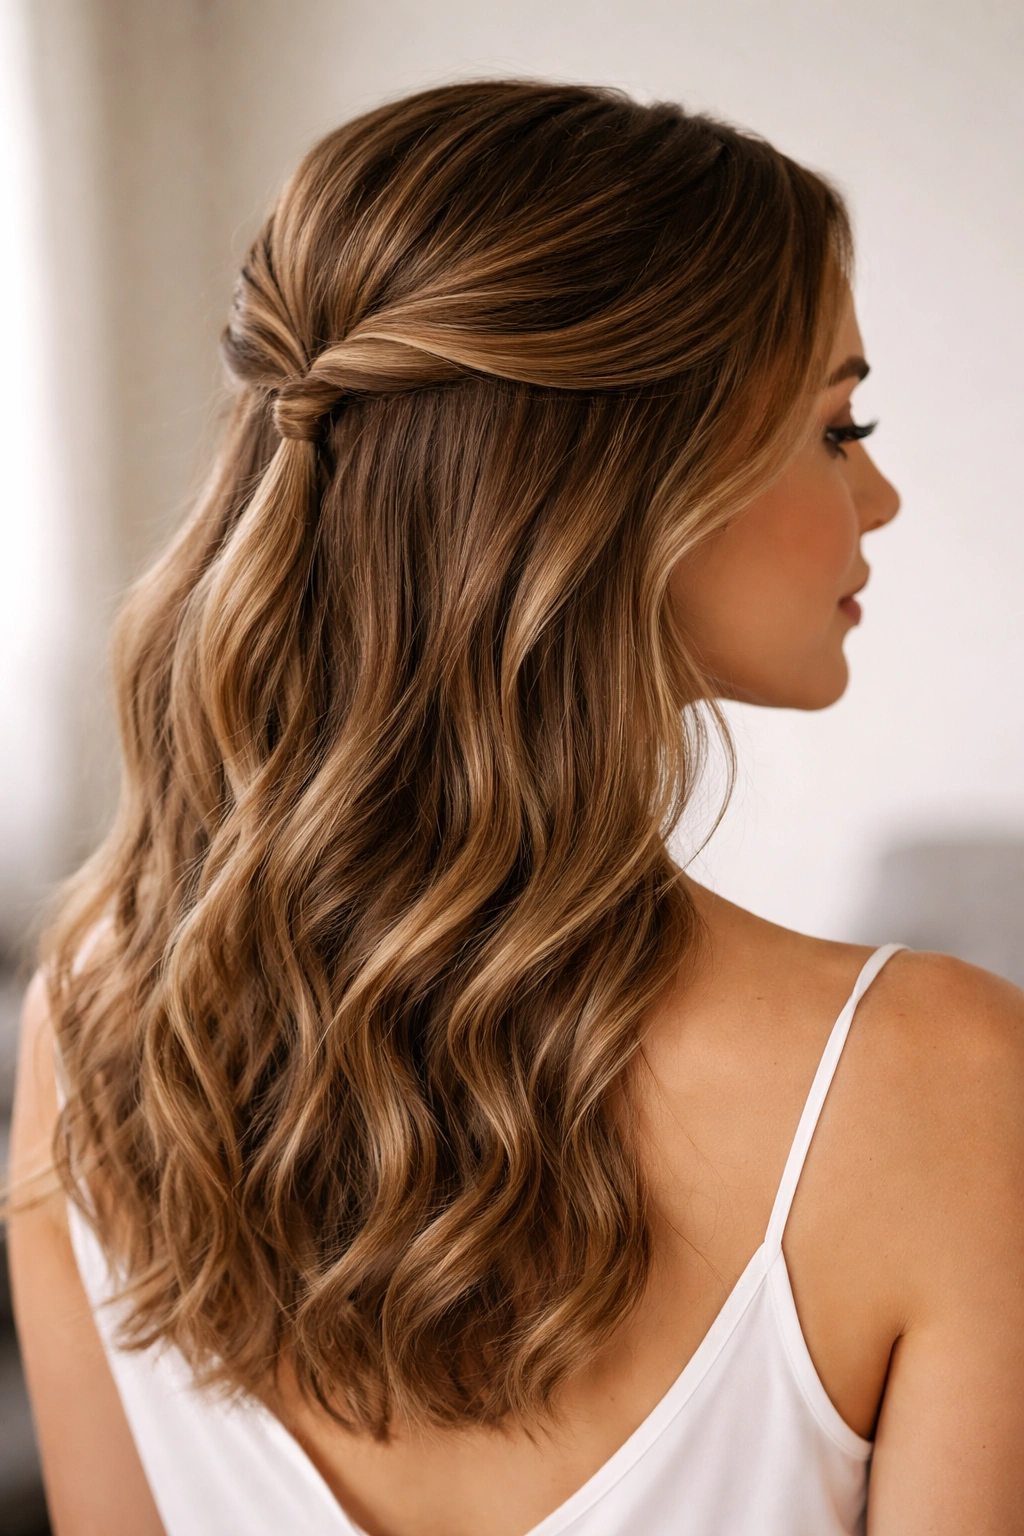
1. The Sleek Twisted Half-Up
This style takes two sections from the front and twists them smoothly before securing at the back of your crown. It’s cleaner and more refined than a casual half-up, making it perfect for work or events where you want your waves to look intentional rather than undone. The twist adds an extra layer of detail that reads as more finished without requiring complicated techniques.
Why It Works for Wavy Hair
Twisting sections of wavy hair creates a controlled, polished line while the waves below remain loose and full. The twist itself frames your face beautifully and catches light in a way that emphasizes texture without frizz. This style particularly suits wavy hair because the texture holds the twist shape naturally—you don’t need heavy product or heat styling to make it stay put.
How to Create It
Start with dry or slightly damp waves that have some texture from styling or overnight curling. Section out a piece from each side of your head at about temple height. Twist each section away from your face with steady, even tension until both twists meet at the back of your crown. Use a clear elastic or bobby pins to secure both twists together, then gently pull a few face-framing pieces loose for softness.
Pro tip: Lightly spray each twisted section with texture spray before securing it—this gives the twist extra grip and prevents flyaways without feeling stiff or crunchy.
2. The Textured Ponytail Hybrid
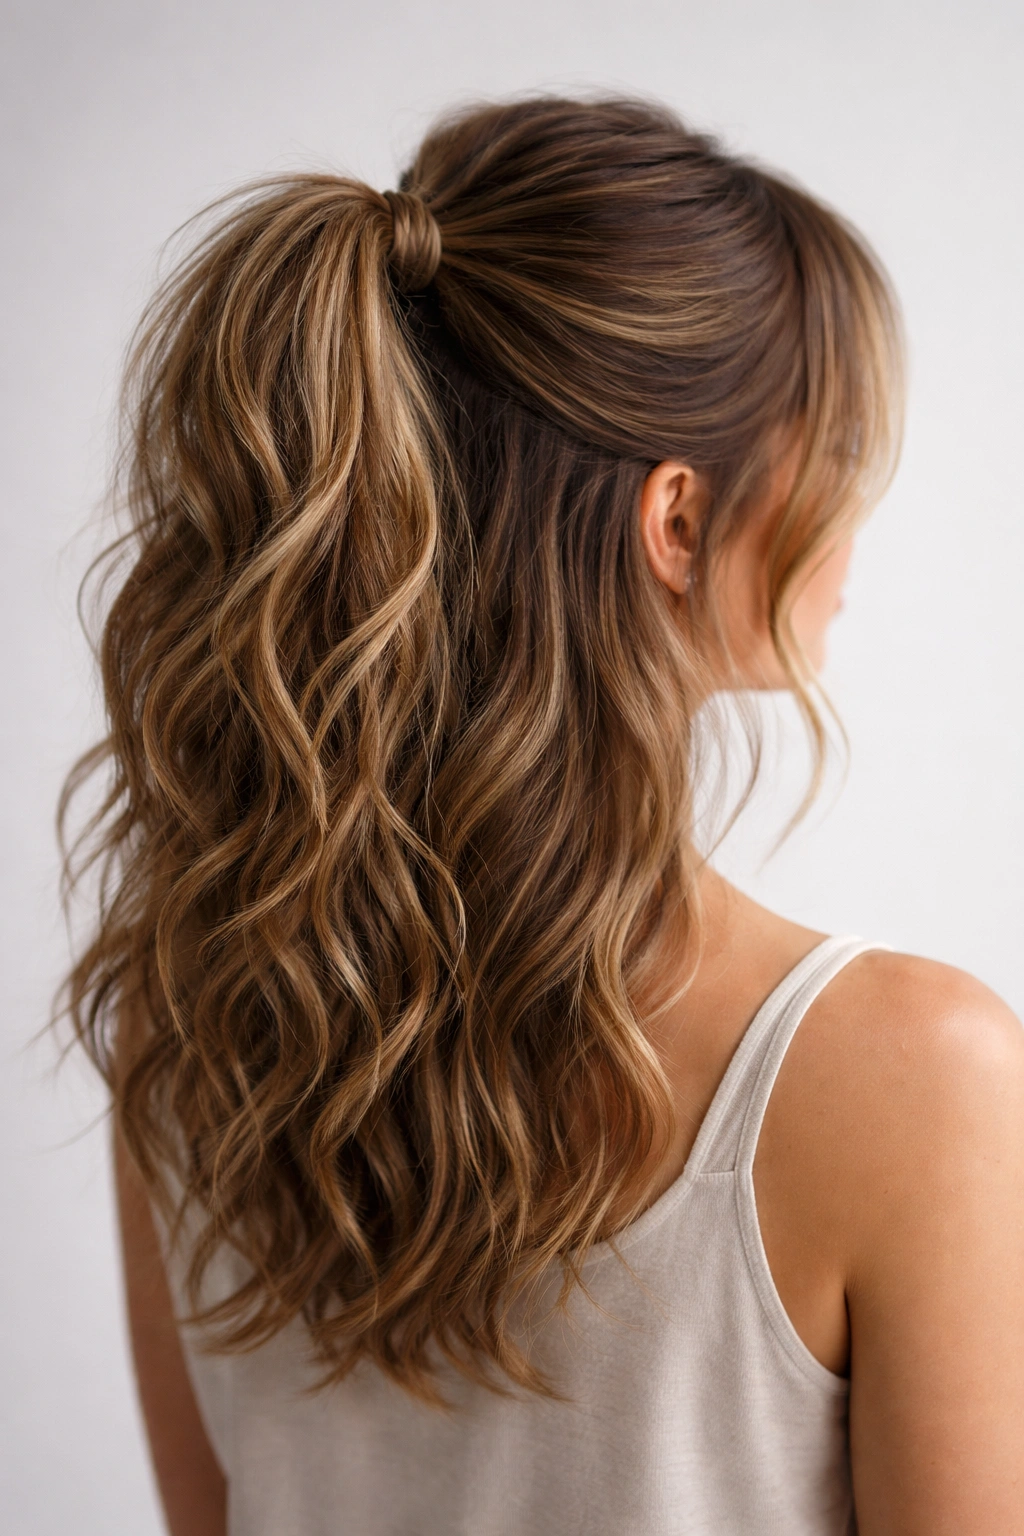
This version creates a half-up style that looks more like a ponytail pulled up from the crown rather than loose waves below. You’re sectioning off the top third of your hair, pulling it into a loose, high ponytail at the back of your crown, and letting the remaining hair cascade down. The result is polished on top but still shows off your wave texture throughout.
What Makes It Different
Unlike a traditional half-up where the division between up and down is obvious, this style blurs that line. The ponytail sits higher and feels more secure, while still technically being a half-up because a significant portion of hair remains down. It’s perfect when you want your waves visible but worry about them falling flat or getting in your face throughout the day.
Styling Steps
Flip your head upside down and gently backcomb or tease the crown area to create grip. Flip back over and smooth down the teased section just slightly—you want texture and volume, not a ratty mess. Gather the top section into a loose ponytail and secure with an elastic. Use bobby pins to anchor the ponytail base to the teased crown area, creating extra security.
Insider note: Adding a light texturizing spray to damp hair before air-drying makes this style significantly easier to execute, because the waves hold better and you have more grip when pulling the ponytail up.
3. The Wrapped Half-Up with Ribbon
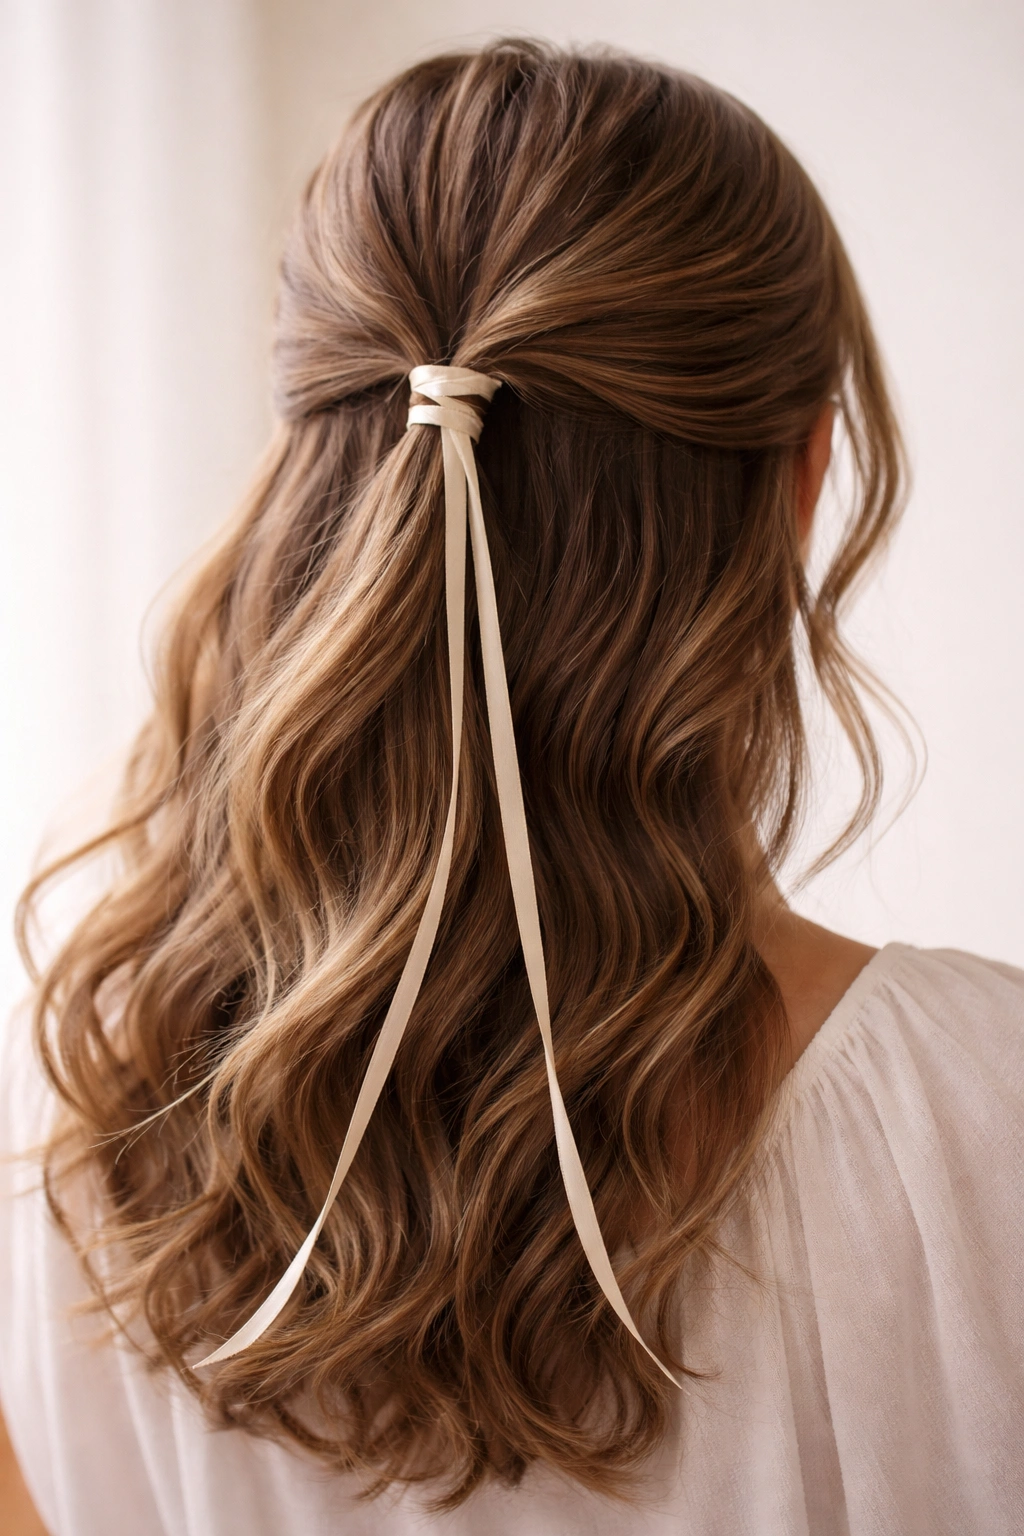
Take a classic half-up, secure it with an elastic, then wrap a thin ribbon or silk strand around the base of the ponytail to hide the elastic and add visual interest. This version feels instantly more intentional and works for everything from casual outings to semi-formal events depending on your ribbon choice. Satin ribbons add elegance, while cotton or twine creates a more playful vibe.
Creating the Wrapped Look
Section the hair at the crown as you would for a standard half-up. Create a low ponytail at the base of that section and secure with a small elastic. Take your chosen ribbon and wrap it around the elastic base at least twice, tucking the end through the loops or securing it with a small bobby pin. The ribbon should hide the elastic completely and drape down slightly along the ponytail.
Ribbon Options That Work Best
Silk ribbons glide over hair without catching and won’t tug on waves when you adjust them throughout the day. Velvet ribbons add texture and a luxe feel. Thin scarves work beautifully too, especially patterned ones that add a pop of color. Avoid thick, stiff ribbons that create bulk and overpower medium-length hair.
Worth knowing: If your ribbon keeps slipping, tie it off with a small bow at the base of the ponytail. This keeps everything in place while adding another decorative element.
4. The Face-Framing Half-Up with Loose Pieces
This is the most flattering version for showing off your face shape. You’re creating a half-up, but instead of a tight section, you’re intentionally leaving wispy pieces down on either side of your face. These pieces get gently curled away from your face to create a soft frame that works with your natural waves rather than against them.
Why Face-Framing Pieces Matter
Loose pieces around your face soften the overall look and create dimension. They also give you somewhere to tuck hair when you want it away from your face without pulling everything back severely. For wavy hair specifically, these pieces echo your wave pattern and make the entire style feel more cohesive and intentional.
The Technique
Pull the hair back from your crown as usual for a half-up, but leave a section from each temple unclipped. Secure the main half-up with an elastic. Now take each face-framing piece and gently curl it away from your face using a curling iron or by wrapping it around a hot tool. The curl should be loose and add texture, not create tight ringlets.
Quick tip: Use a light hairspray on the face-framing pieces so they hold their shape and don’t fall completely flat by mid-day, but not so much that they look stiff or feel crispy.
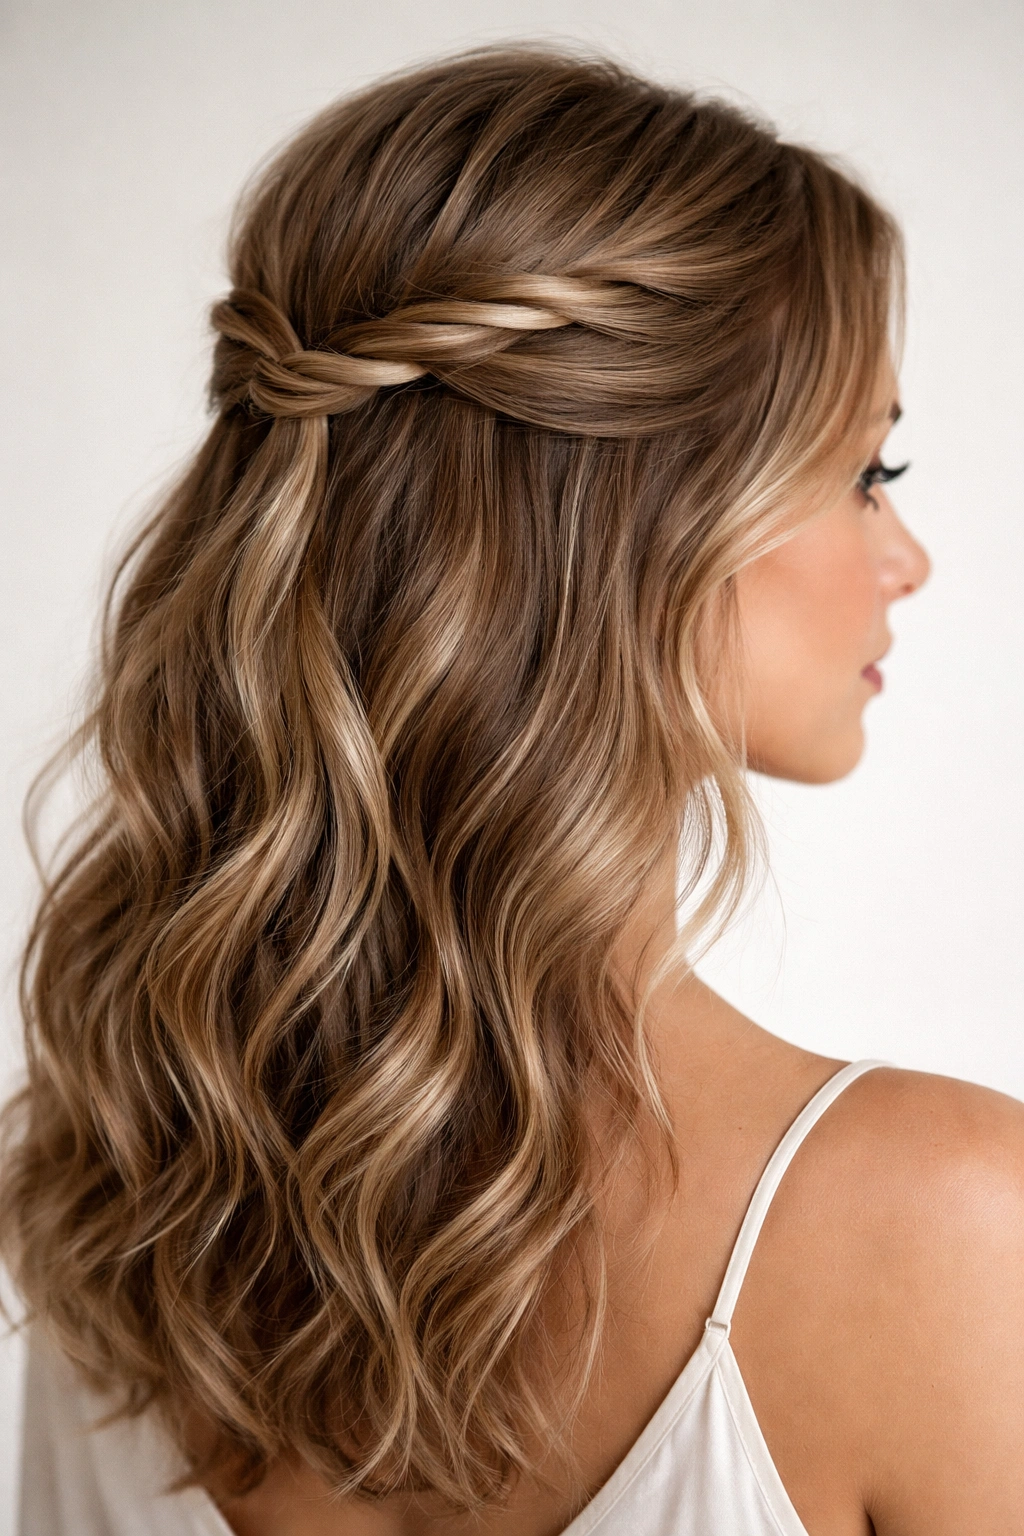
5. The Braided Half-Up Crown
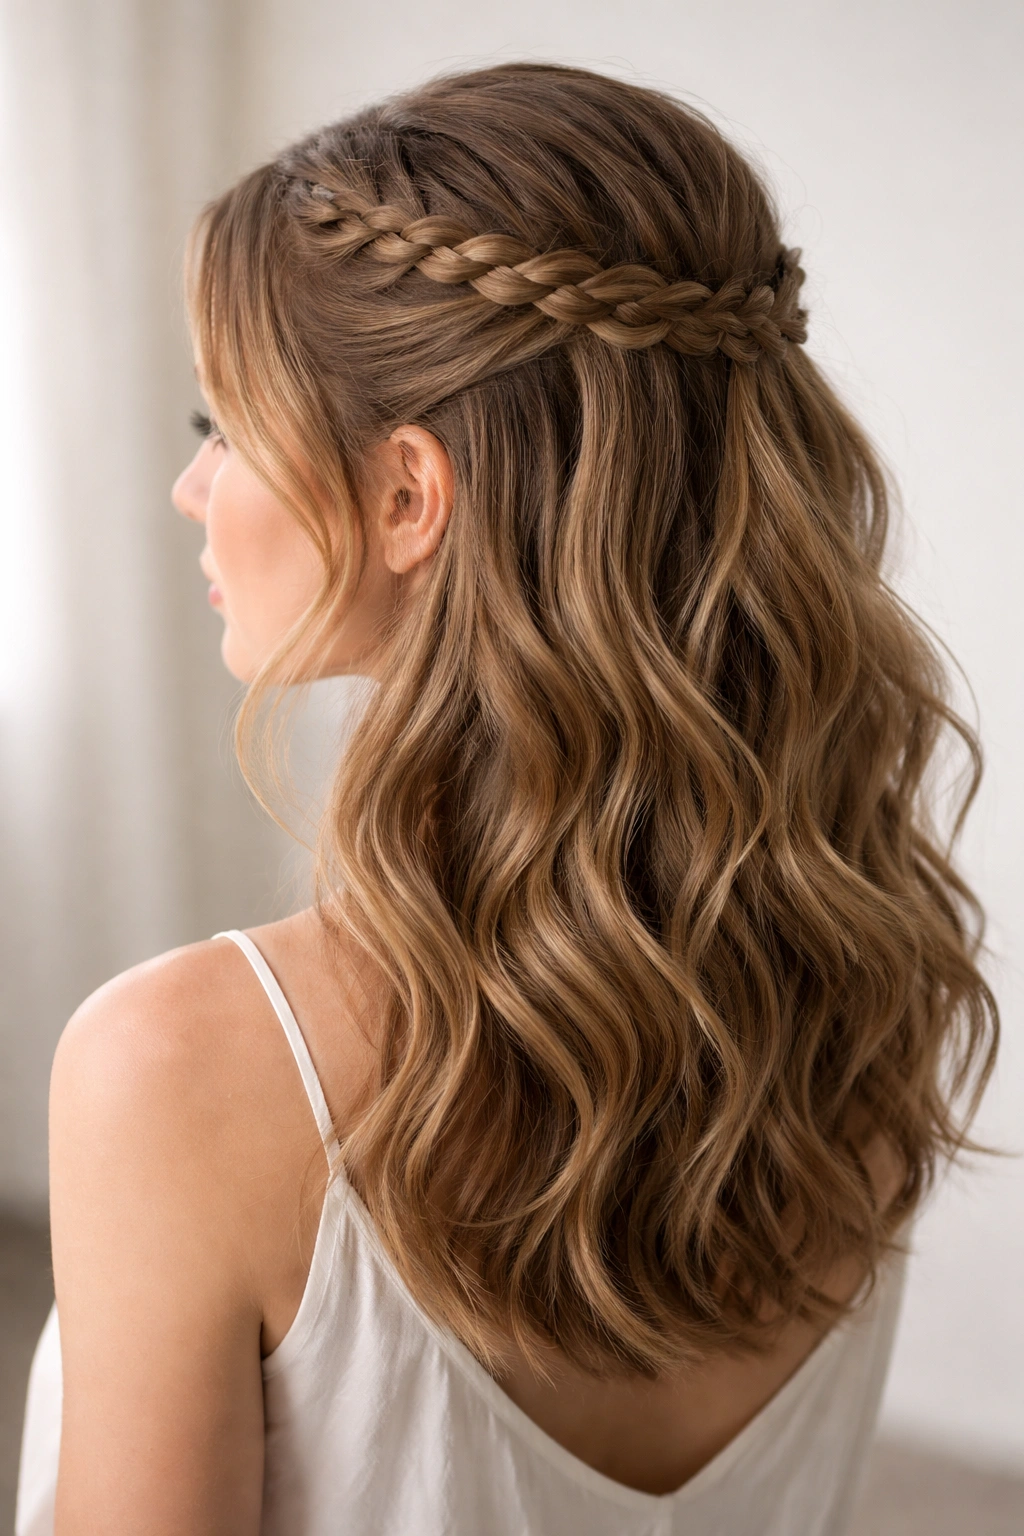
Instead of twisting or simply pulling the top section back, create a thin Dutch or French braid on each side of your head and tie them together at the back. This style has an ethereal, romantic quality that pairs beautifully with wavy texture. The braid adds visual interest while still letting your waves be the star.
Braiding for Wavy Hair
Wavy hair can be tricky to braid because the texture doesn’t grip as smoothly as straight hair. The trick is to dampen your waves slightly with a texturizing spray before braiding—this gives the sections grip without weighing hair down. You don’t need perfect braids; slightly loose, textured braids actually look better with wavy hair and feel less formal.
Step-by-Step
Section a piece of hair from each temple. Create a thin braid (three-strand or Dutch braid) starting at your temple and working back toward your crown. Once both braids reach the back of your head, secure them together with bobby pins or a small elastic. Leave the bulk of your hair down and wavy, allowing the braids to create a crown-like effect across the back of your head.
Real talk: If you’re not confident in your braiding skills, loose braids are actually more flattering with wavy hair than perfectly executed tight ones. Gently pull the braid slightly looser after securing it to add texture and dimension.
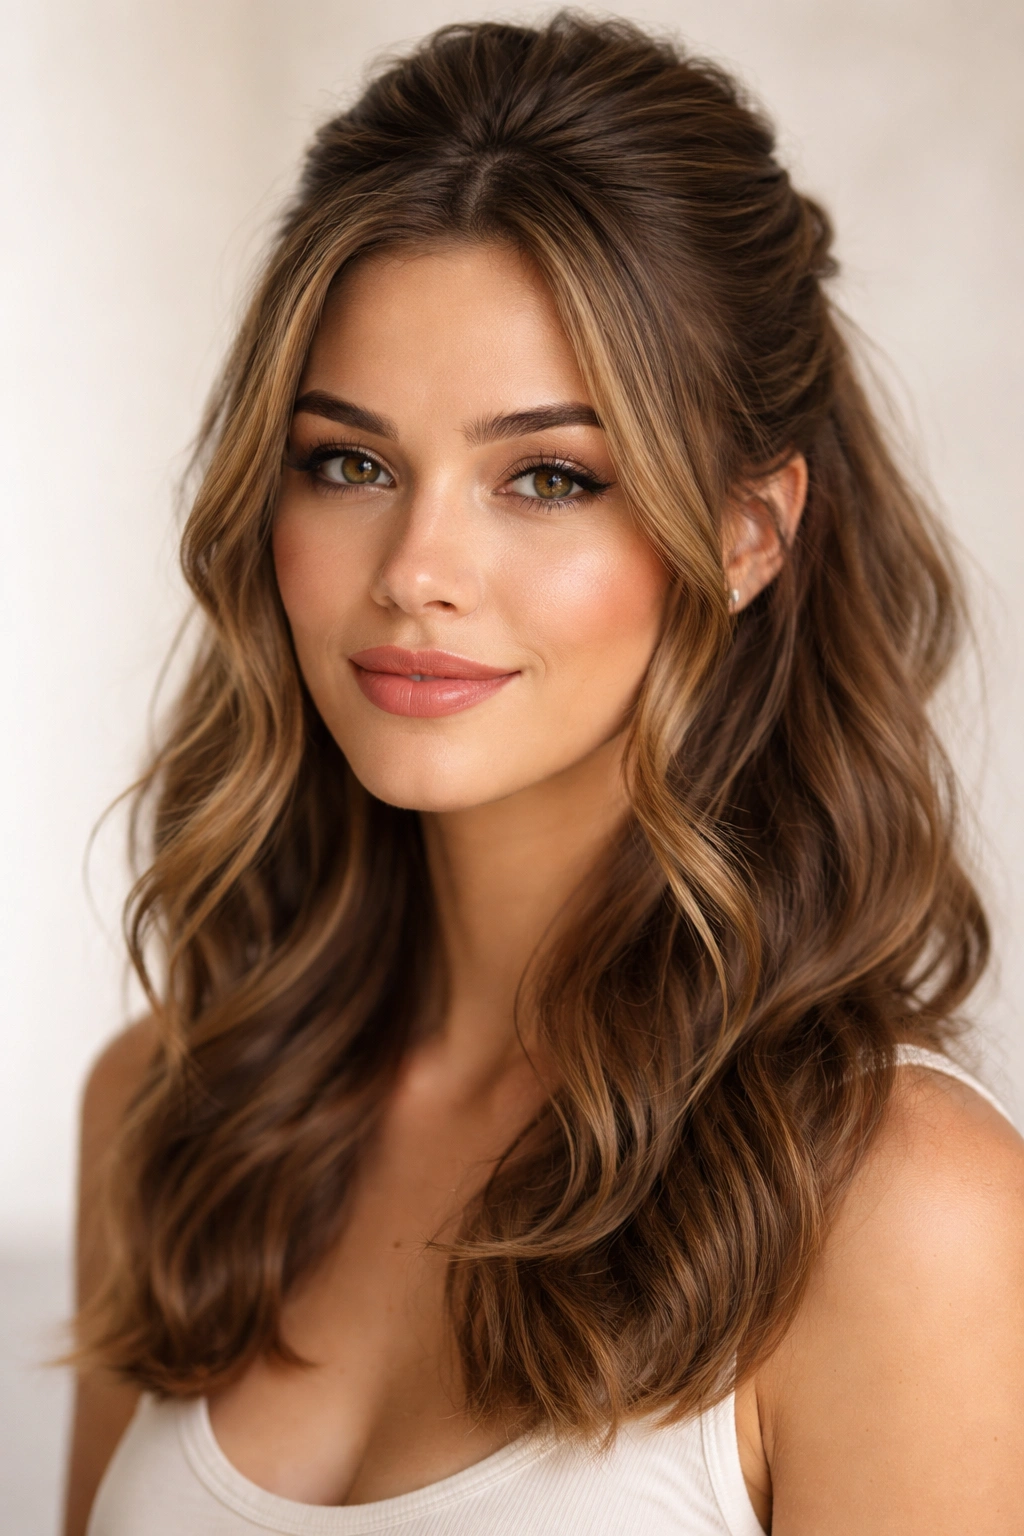
6. The High Half-Up with Volume
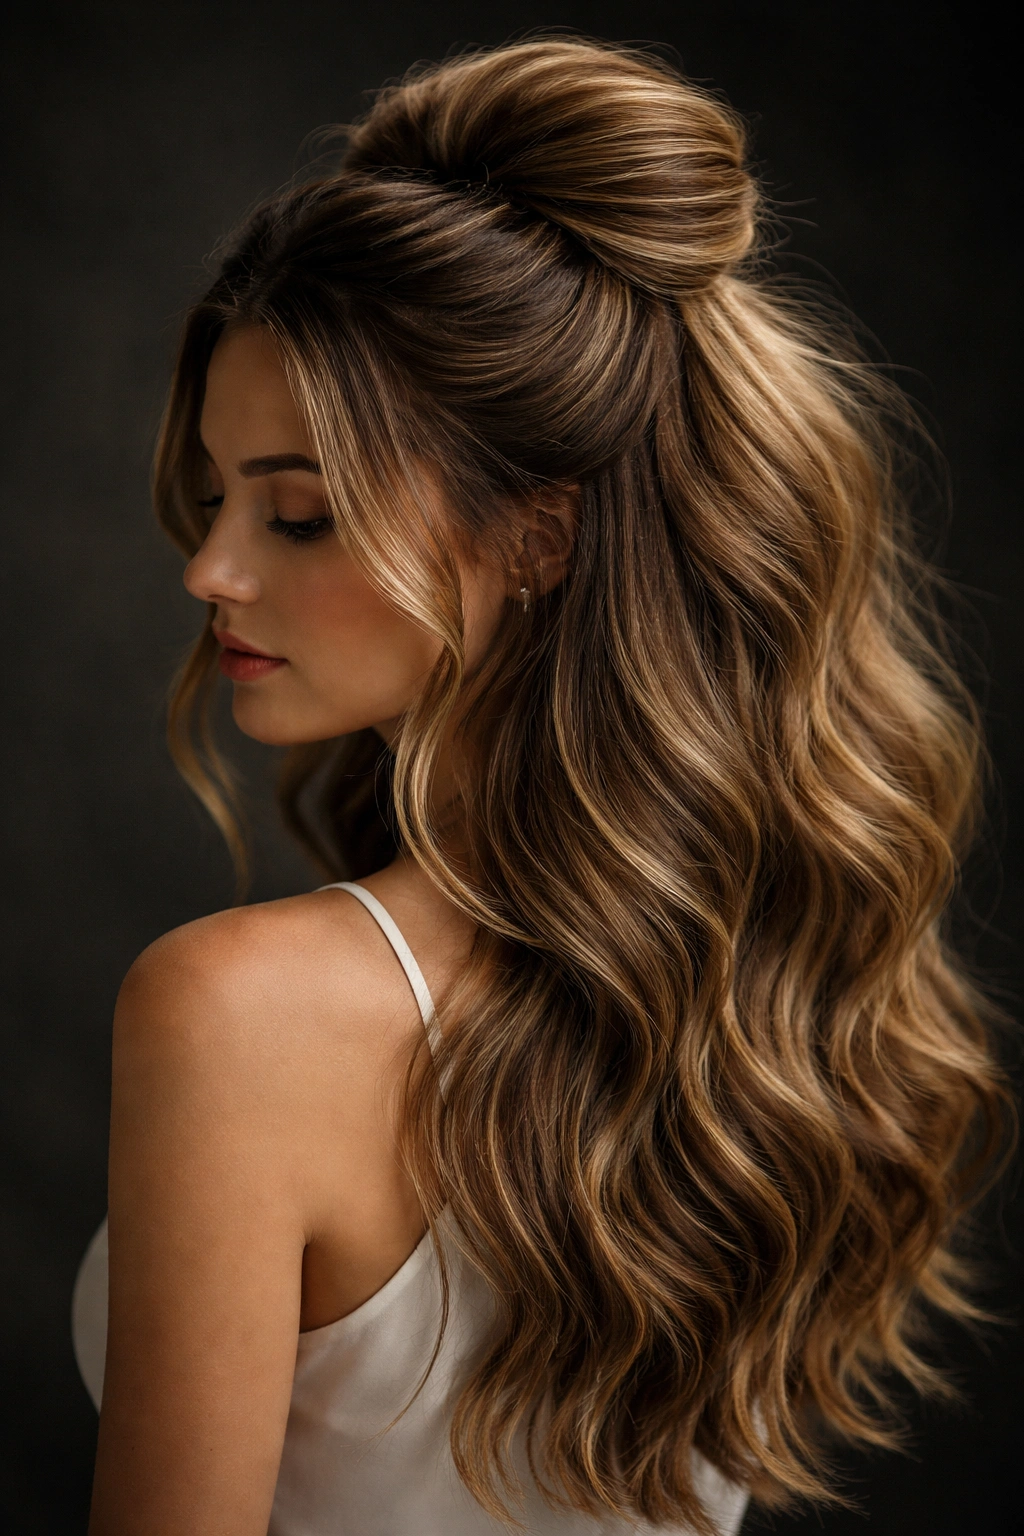
This version prioritizes volume at the crown, making it ideal if you’re trying to add fullness or create a more dramatic look. You’re using teasing and product to create serious height where the half-up is secured, then letting waves flow dramatically below. It’s perfect for events or days when you want your hair to make a statement.
Building Volume Without Damage
Start with textured waves (air-dried or styled the night before). At your crown, gently backcomb small sections using a fine-tooth comb or teasing brush. Don’t go overboard—you want texture and grip, not matted, damaged-looking hair. Smooth the outer layer slightly so the texture underneath shows through without looking messy.
Securing the Look
Gather the teased section and pull it into a half-up, securing with bobby pins inserted horizontally into the teased area for extra grip. You can use an elastic as well, but bobby pins often hold better when you’ve created volume. Gently flip your head forward and back to check that the volume sits naturally and doesn’t look top-heavy.
Practical note: Volume at the crown only works if the waves below are in good shape. Make sure your lower waves have bounce and aren’t flat or limp, or the proportion will look off.
7. The Sleek Low Half-Up with Softness
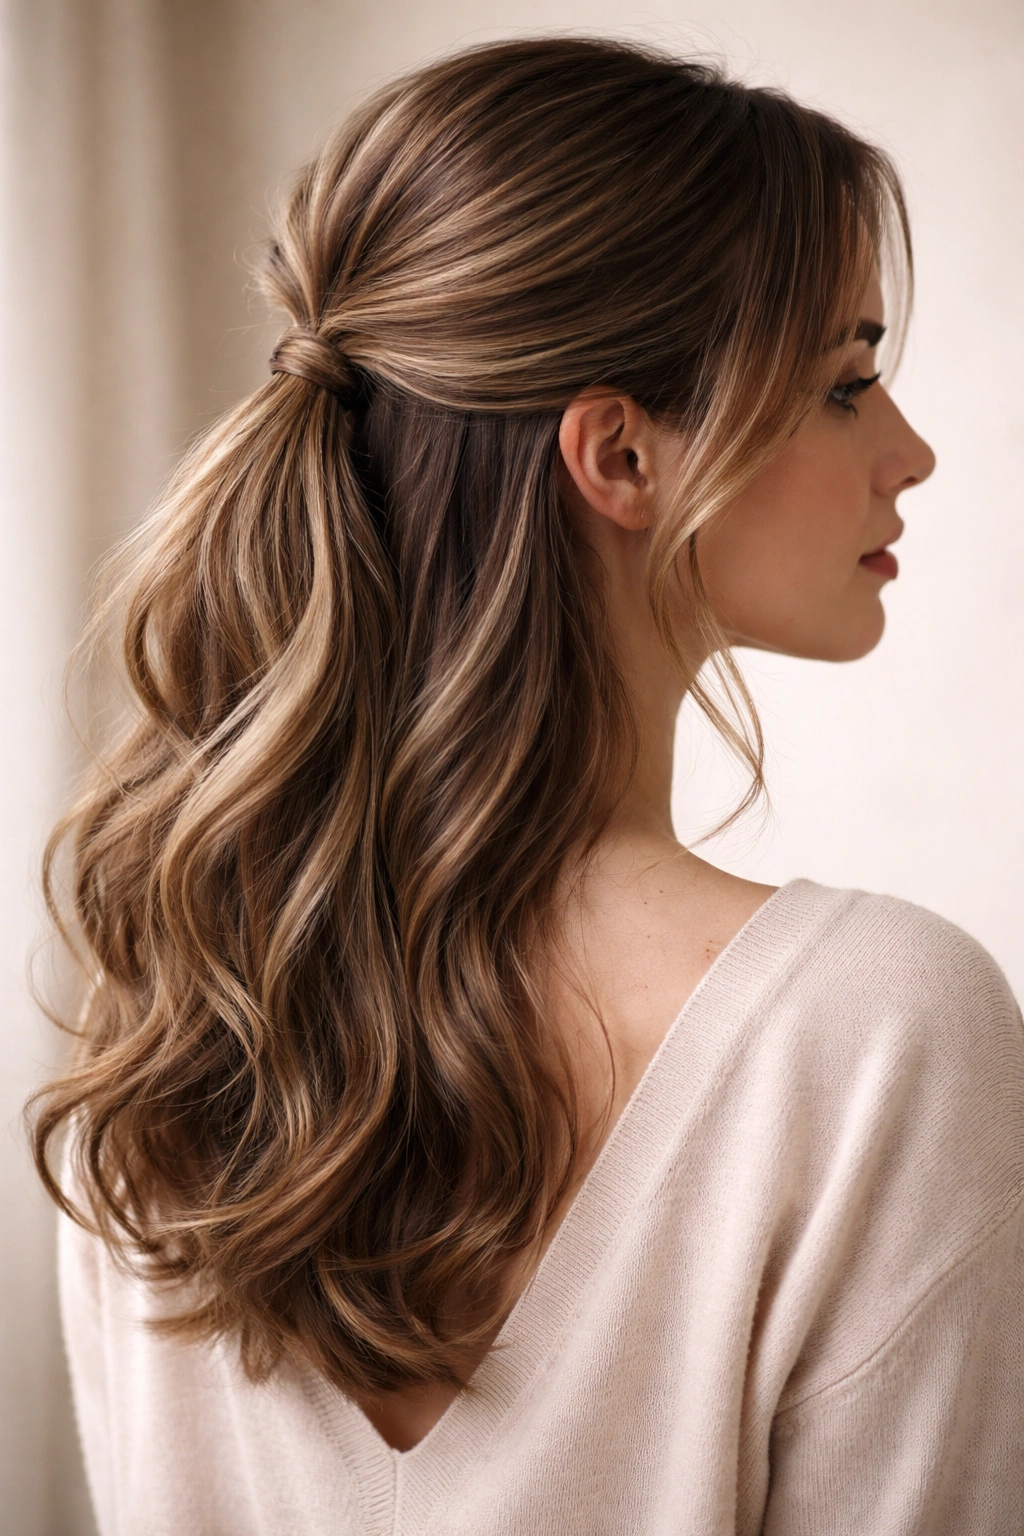
Opposite of the high volume version, this style pulls the half-up down lower toward the base of your head, creating a more relaxed, almost undone feel. It’s particularly flattering if you have a longer face or prefer the half-up to sit lower rather than at your crown.
Where the Division Happens
Instead of pulling from your crown, you’re gathering hair from about ear-level back. This creates a lower division line and makes the “half” feel more generous. The waves on top of the division sit closer to your head, while everything below flows freely. It’s a subtle shift that changes the entire vibe from polished-and-put-together to effortlessly cool.
The Execution
Section hair from about ear level and pull it into a low ponytail at the nape of your neck or just below. Keep the ponytail loose—this isn’t meant to be tight or structured. Leave face-framing pieces loose on purpose, and gently tousle everything slightly so it looks relaxed rather than formal. The contrast between the smooth gathered section and the wave texture below is what makes this style work.
Worth knowing: This style looks particularly good on days when your waves are a bit undone or textured rather than perfectly defined. It reads as intentionally relaxed rather than like you skipped styling.
8. The Twisted Ribbon Half-Up
Similar to the wrapped ribbon version, but this time you’re twisting the ribbon into your hair as you pull the half-up back, rather than wrapping it around the base after securing. This creates an integrated look where the ribbon feels like it’s part of the style itself.
How to Integrate Ribbon While Pulling Back
Gather a section from your crown. Before securing it, take a thin ribbon and hold it alongside the gathered hair. As you create your half-up, the ribbon twists through the section, creating a mixed texture. Secure everything together with the ribbon tucked in, so it’s not visible as a separate element.
Ribbon Placement Options
Thinner ribbons work better for this technique than thick ones—they need to integrate without creating bulk. Metallic ribbons add a contemporary touch, while printed or patterned ribbons create a playful vibe. Silk ribbons are easier to work with than stiff materials because they move naturally with the hair.
Pro tip: Do a practice run before trying this for an event. The technique is straightforward once you’ve done it once, but it takes a few tries to figure out the exact amount of tension and ribbon placement that looks intentional rather than accidental.
9. The Half-Up Flip-Through Ponytail
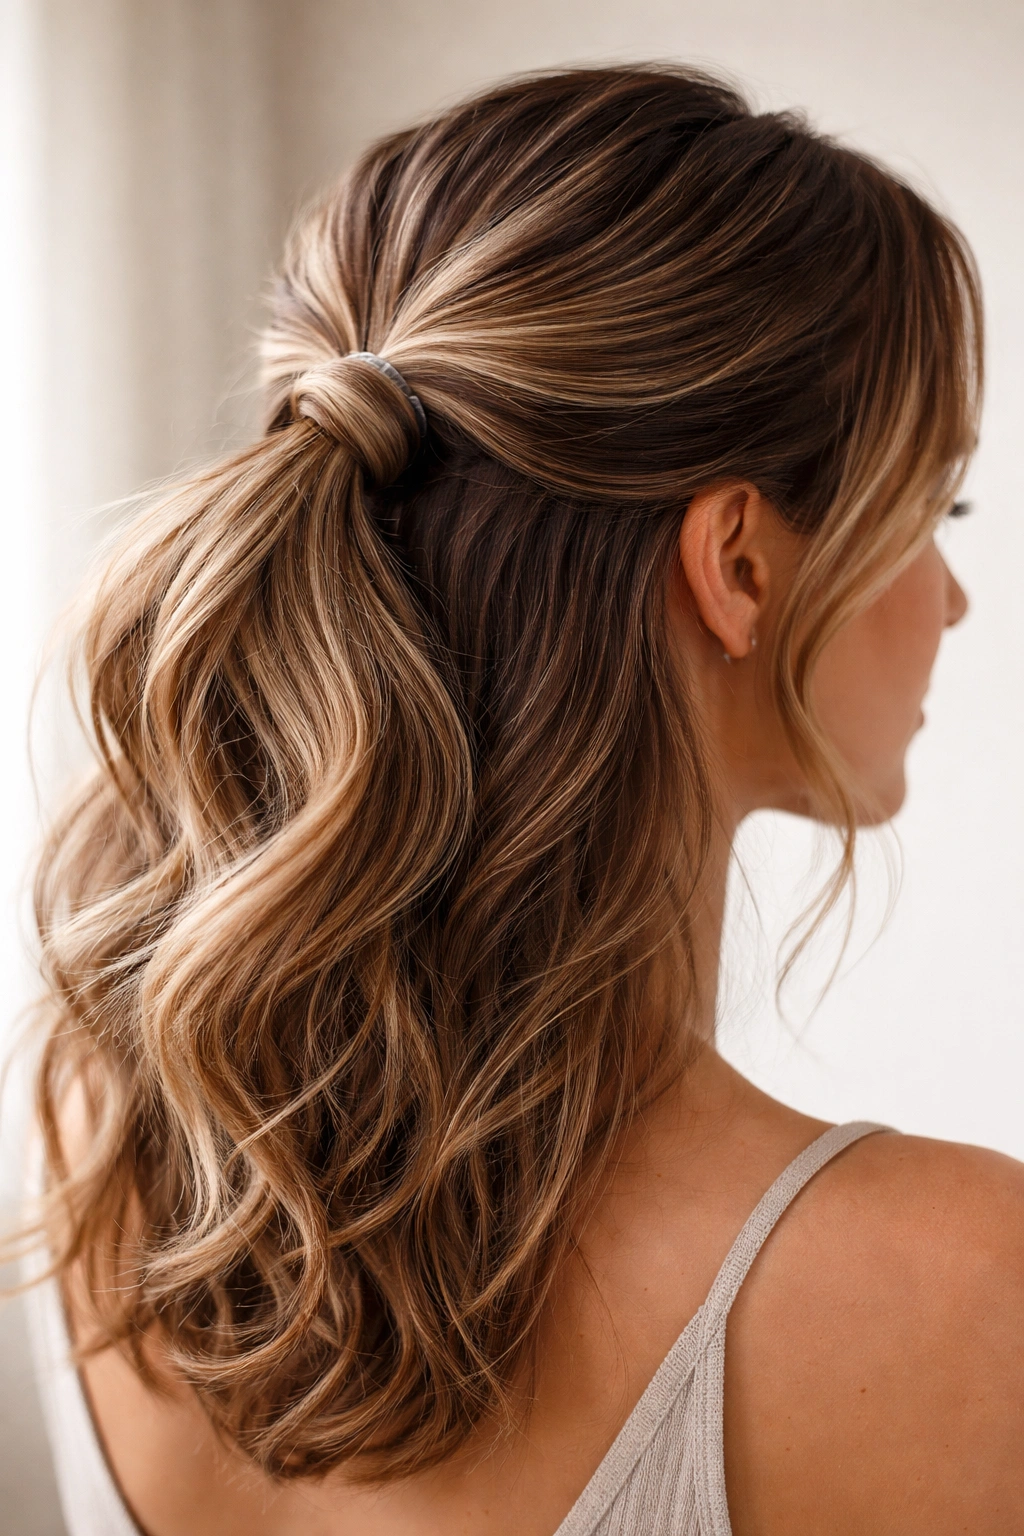
Create a low half-up ponytail, then flip the ponytail up through the space between the elastic and your head, creating a looped, slightly flipped effect. This adds visual interest and dimension without requiring complicated technique. It’s also surprisingly flattering and adds height without backcombing or teasing.
The Flip-Through Technique
Pull your hair back into a low half-up ponytail and secure with an elastic. Leave the ponytail relatively loose. Now take the secured ponytail and flip it upward through the gap between the elastic and your scalp. Adjust the loop so it sits at the angle you prefer. You can make it a subtle flip or a more dramatic one depending on how much ponytail you pull through.
Why It Works for Waves
This technique actually shows off wave texture beautifully because the flipped section creates movement and dimension. The waves catch light differently at the angle created by the flip, making the style feel dimensional and textured rather than flat.
Worth knowing: This style holds better if you use bobby pins to secure the flipped section in addition to the main elastic. It takes thirty seconds extra but prevents the flip from collapsing as you move throughout your day.
10. The Side-Swept Half-Up
Instead of pulling hair straight back from your crown, you’re pulling it to one side before securing. This asymmetrical approach creates a different silhouette and is particularly flattering for certain face shapes. The side-swept version works beautifully for wavy hair because the waves flow with the asymmetrical line rather than fighting it.
Creating the Side Sweep
Don’t start at the exact center of your crown. Begin your section slightly off to one side (whichever side you prefer), and sweep the hair toward that side as you gather it. Secure it slightly to the side of center at the back of your head rather than directly in the middle. The face-framing piece on the opposite side can be left slightly looser, creating additional asymmetry.
Face Shape Considerations
This style flatters most face shapes, but it’s particularly good if you’re trying to add width to a narrower face or create a softer line along a rounder one. The asymmetry breaks up symmetrical features and creates visual interest that feels less formal than a centered half-up.
Styling tip: Tousle the waves on the side where you’ve swept the hair back—this adds fullness and prevents that side from looking too flat or thin.
11. The Double-Twisted Half-Up
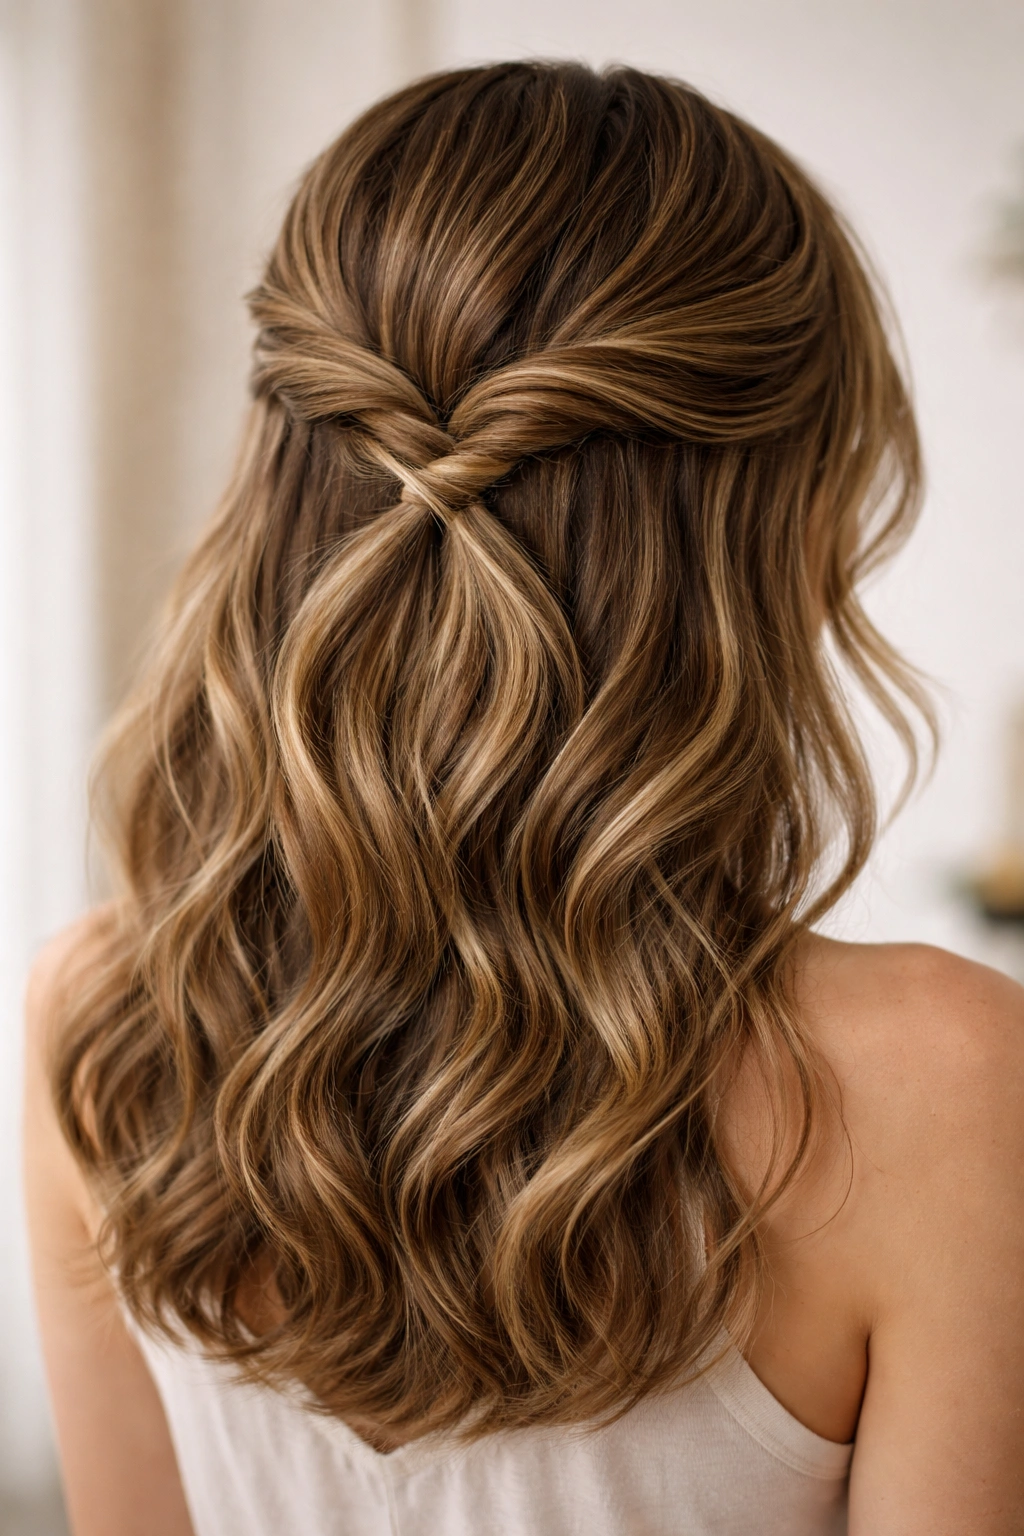
Create two separate twists from either side of your head and secure them together at the back, rather than one twist from each side meeting in the middle. This version creates more visual interest and texture, and it’s particularly flattering if you have thicker hair or want a more intricate look.
The Double-Twist Setup
Section hair from your temple on one side and create a thin twist that wraps around the back of your head, but don’t secure it yet. Do the same on the other side. Once both twists reach the back of your head, cross them over each other (so they create an X pattern) before securing both with bobby pins. The crossing adds complexity and keeps the style from looking too symmetrical.
Creating Definition
Use a light texturizing spray or dry shampoo on your twists before you secure them—this keeps the twists from looking slick or overly smooth, which reads as less intentional with wavy hair. You want the twists to show texture, not disappear into sleekness.
Real talk: This style is slightly more complicated than a simple two-twist half-up, but the extra minute it takes is worth it because the result looks significantly more deliberate and polished.
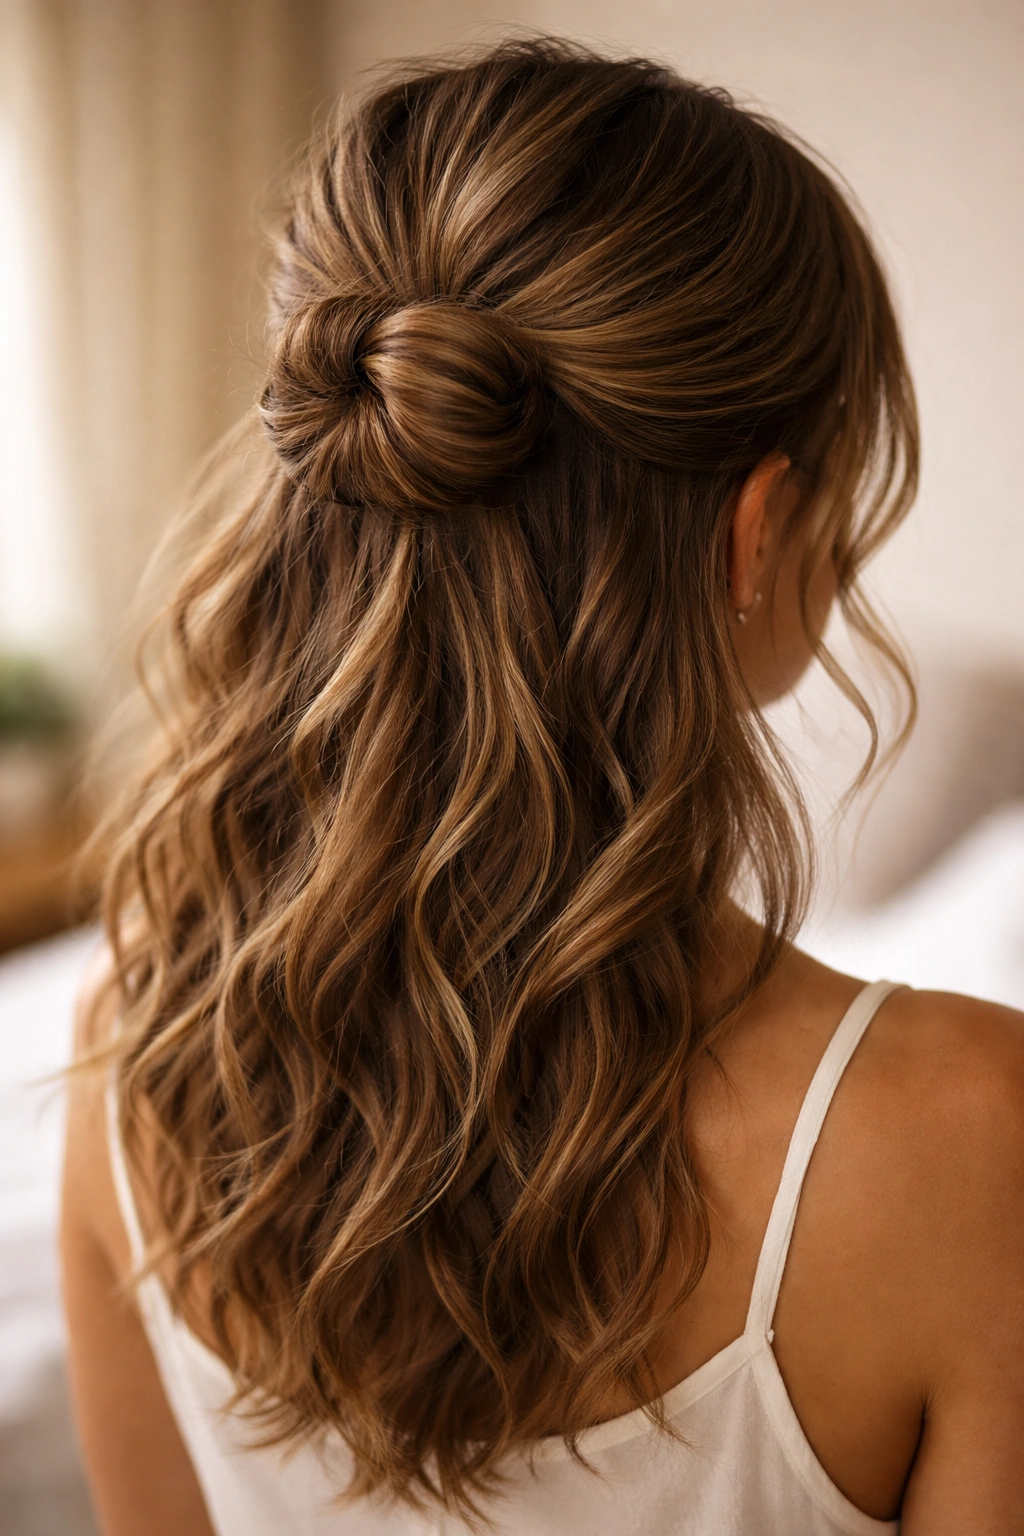
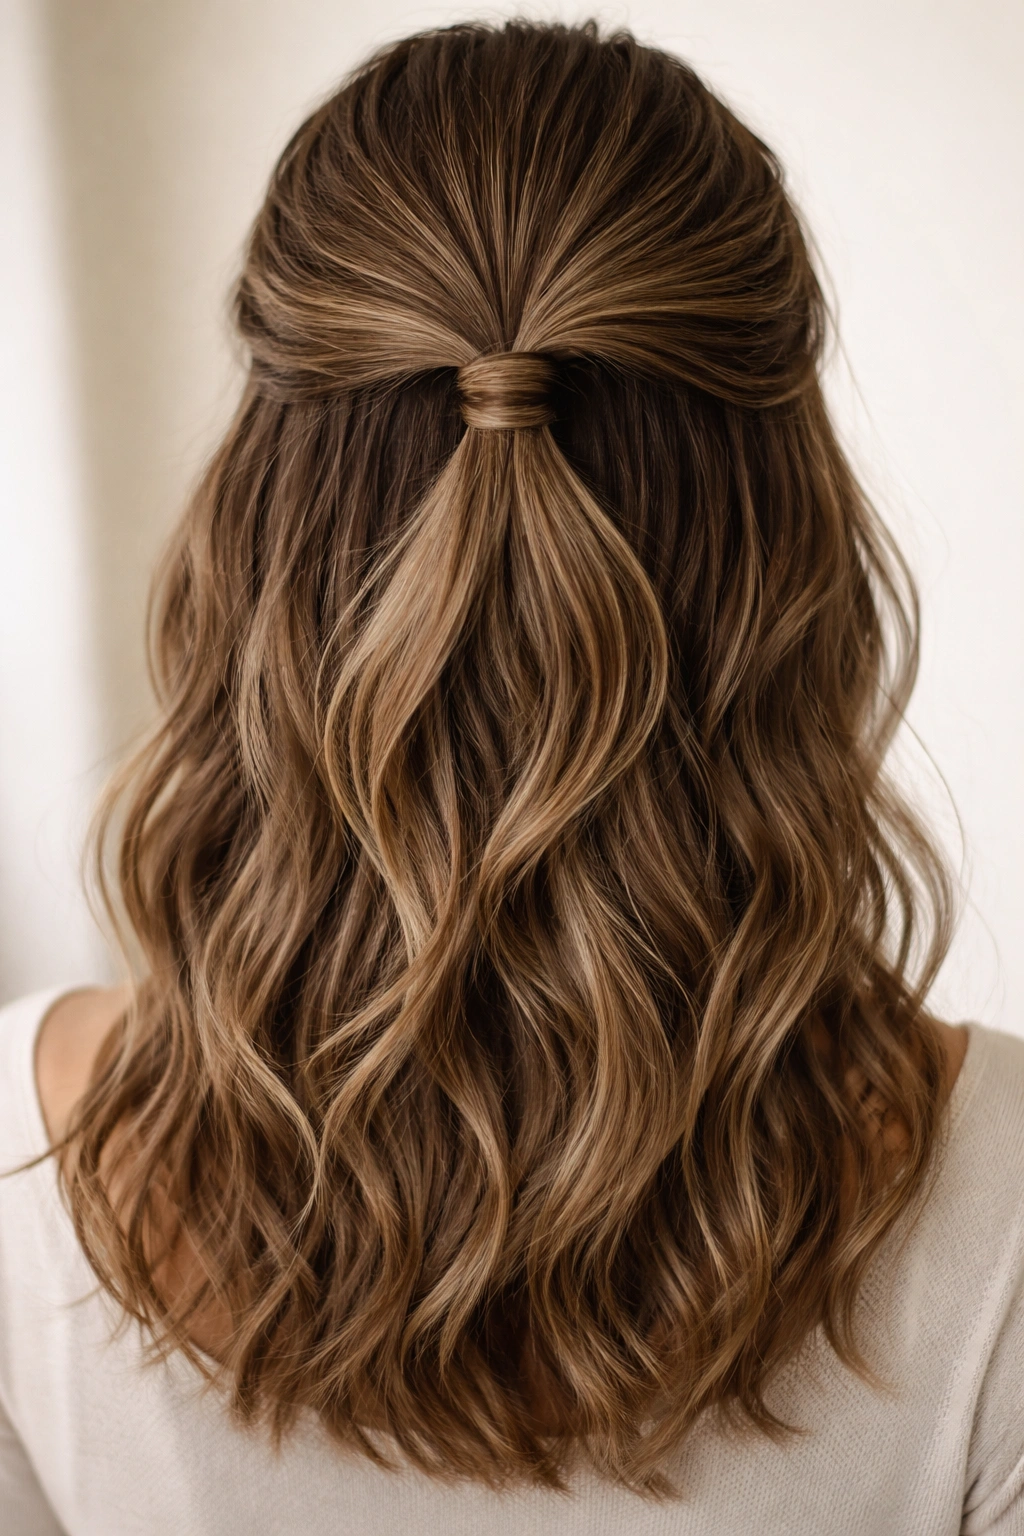
12. The Textured Knot Half-Up
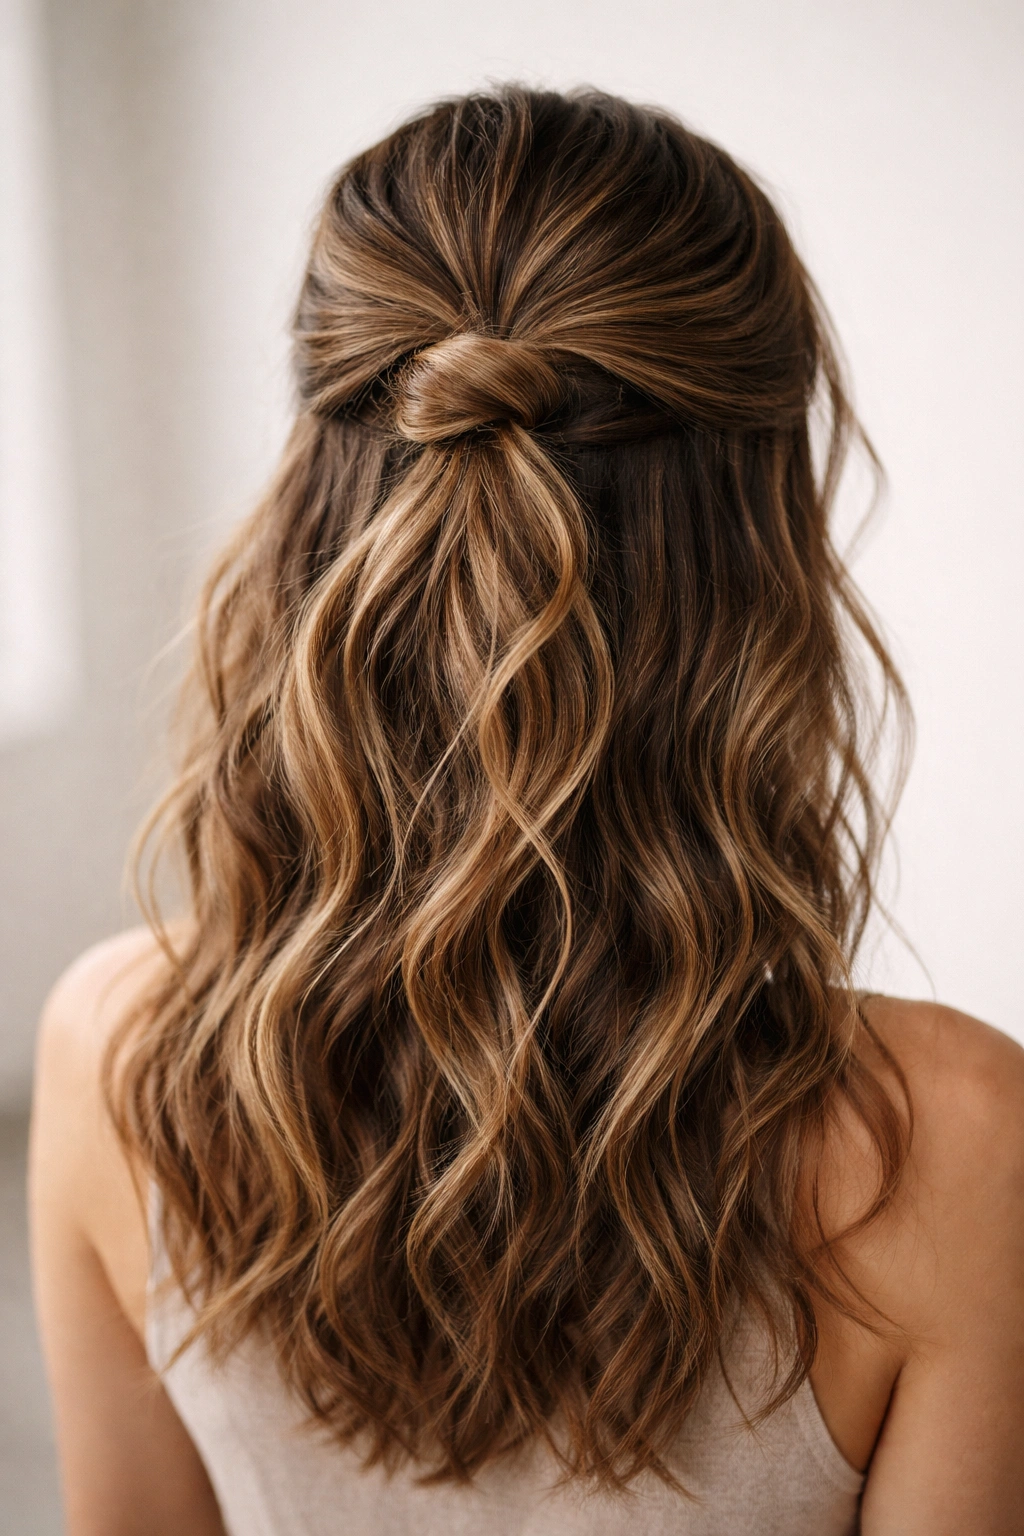
Instead of twisting or braiding, you’re literally tying your hair in a knot at the crown, then securing that knot with bobby pins. It sounds simplistic, but when executed well, it’s surprisingly chic and works beautifully with wavy texture.
Executing the Knot
Section the top portion of your hair as usual. Divide that section into two halves. Tie them in a simple knot at your crown, pulling the knot snug but not painfully tight. Secure the knot with bobby pins inserted around it, and gently loosen the knot slightly so it’s not as tight and looks more relaxed.
Why Knots Work for Waves
A knot creates an irregular texture that matches the irregularity of waves. Unlike sleek ponytails or perfectly executed braids, knots have an inherently relaxed, organic quality that pairs beautifully with wavy hair. The texture of the knot isn’t fighting against your wave texture—it’s echoing it.
Practical tip: Make sure your hair has some grip (not freshly washed and slippery) before attempting this. Slightly textured or day-old waves work better than super smooth hair.
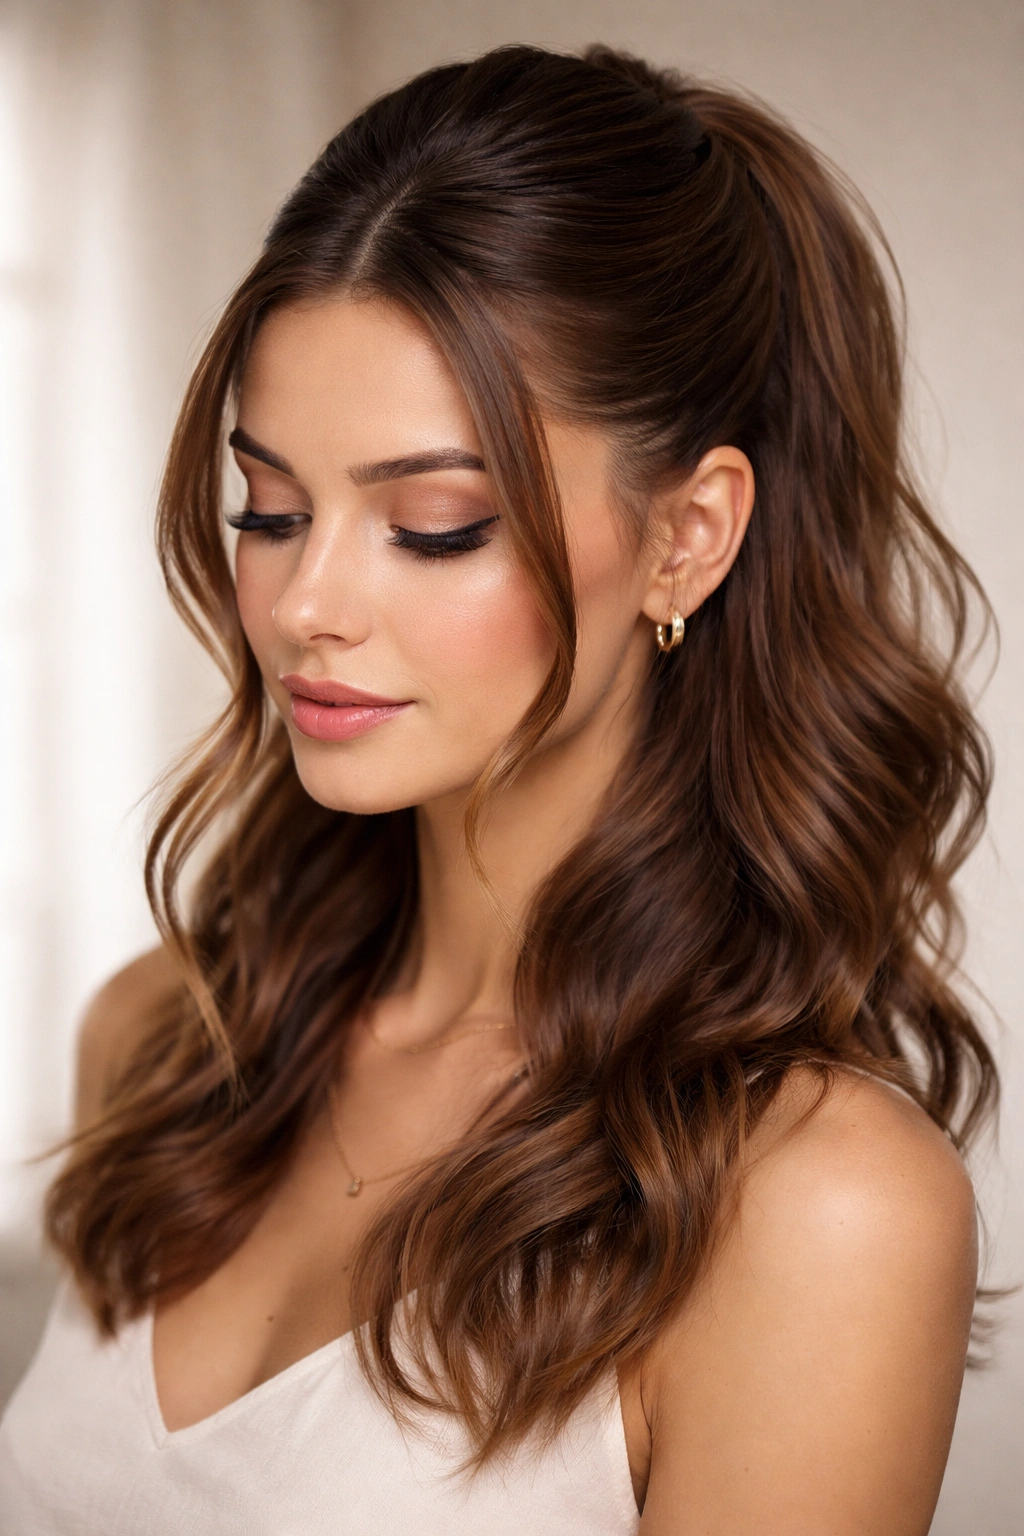
13. The Curled Half-Up with Vintage Waves
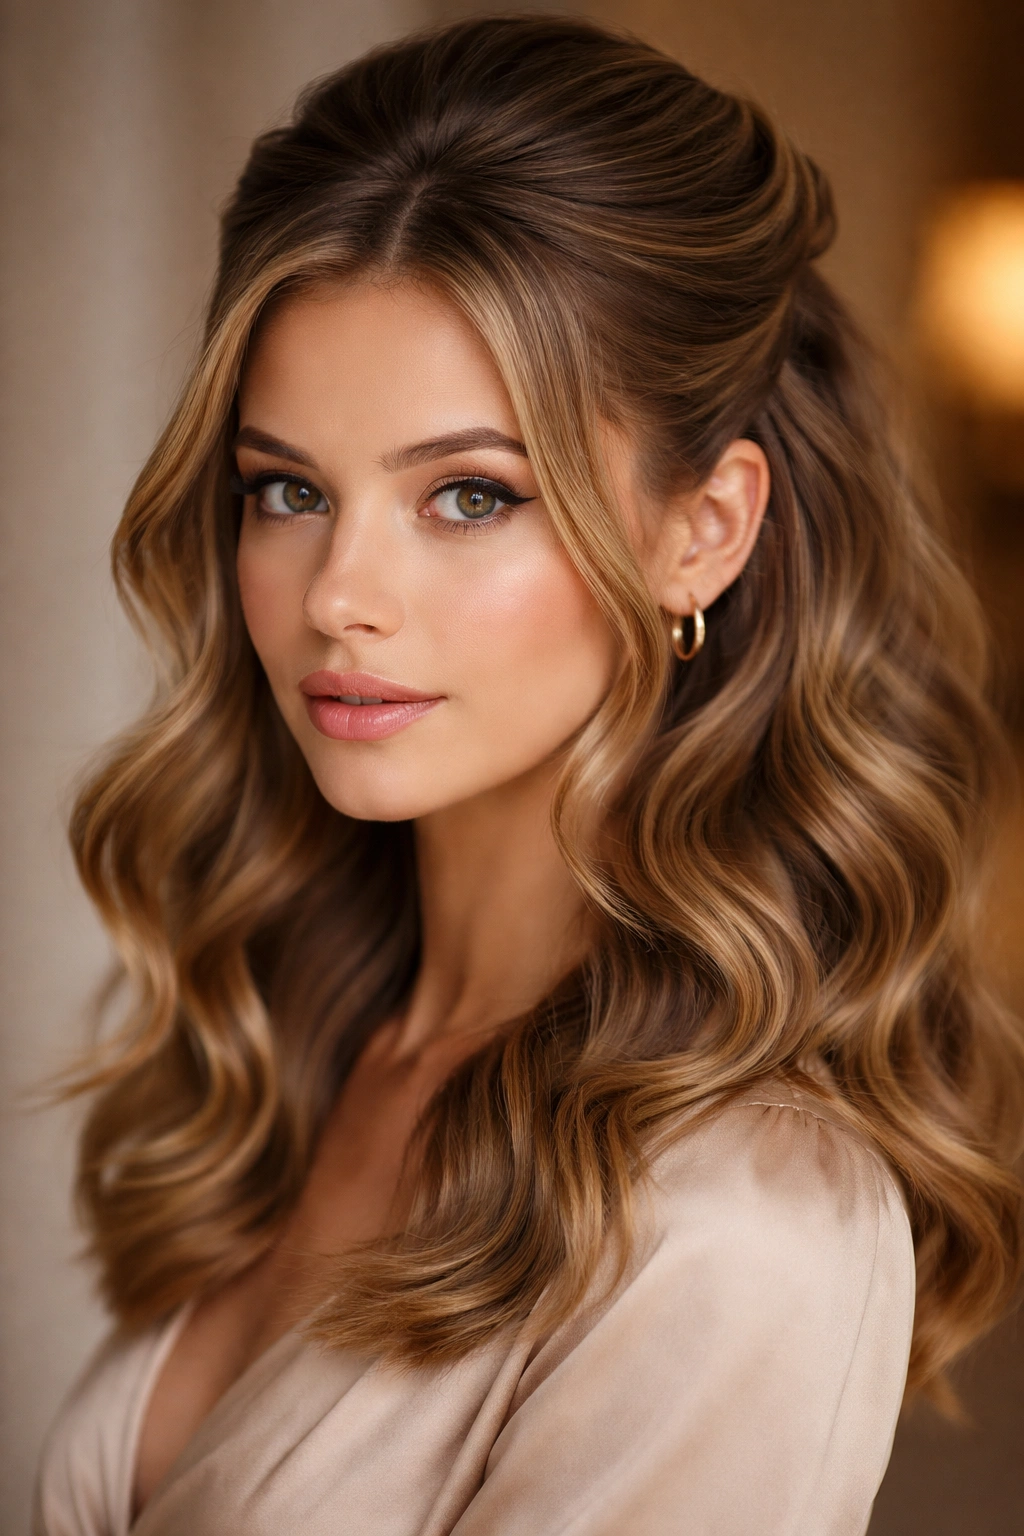
Pull your hair into a half-up, then use a curling iron or hot tool to add defined waves to the section that’s pinned up, creating a vintage-inspired, polished look. This style bridges casual and dressy, making it perfect for events or when you want to elevate your everyday waves into something more intentional.
Curling the Pinned Section
After securing your half-up, take a 1-inch curling iron and curl sections of the pulled-up hair away from your face. Work methodically so every section gets curled, not just the outer pieces. Hold each curl for about five seconds before releasing. The result should be romantic, defined waves rather than tight ringlets.
Setting the Waves
Lightly spray the curled section with hold spray once it’s cooled. You want the waves to last throughout your event, but not feel stiff or hairspray-heavy. One light layer is usually sufficient for medium-length hair.
Worth knowing: This technique works best if the pulled-up section has some texture to begin with. Smooth, freshly washed hair won’t hold the curls as well as textured or day-old waves.
14. The Half-Up with Pearl Clips
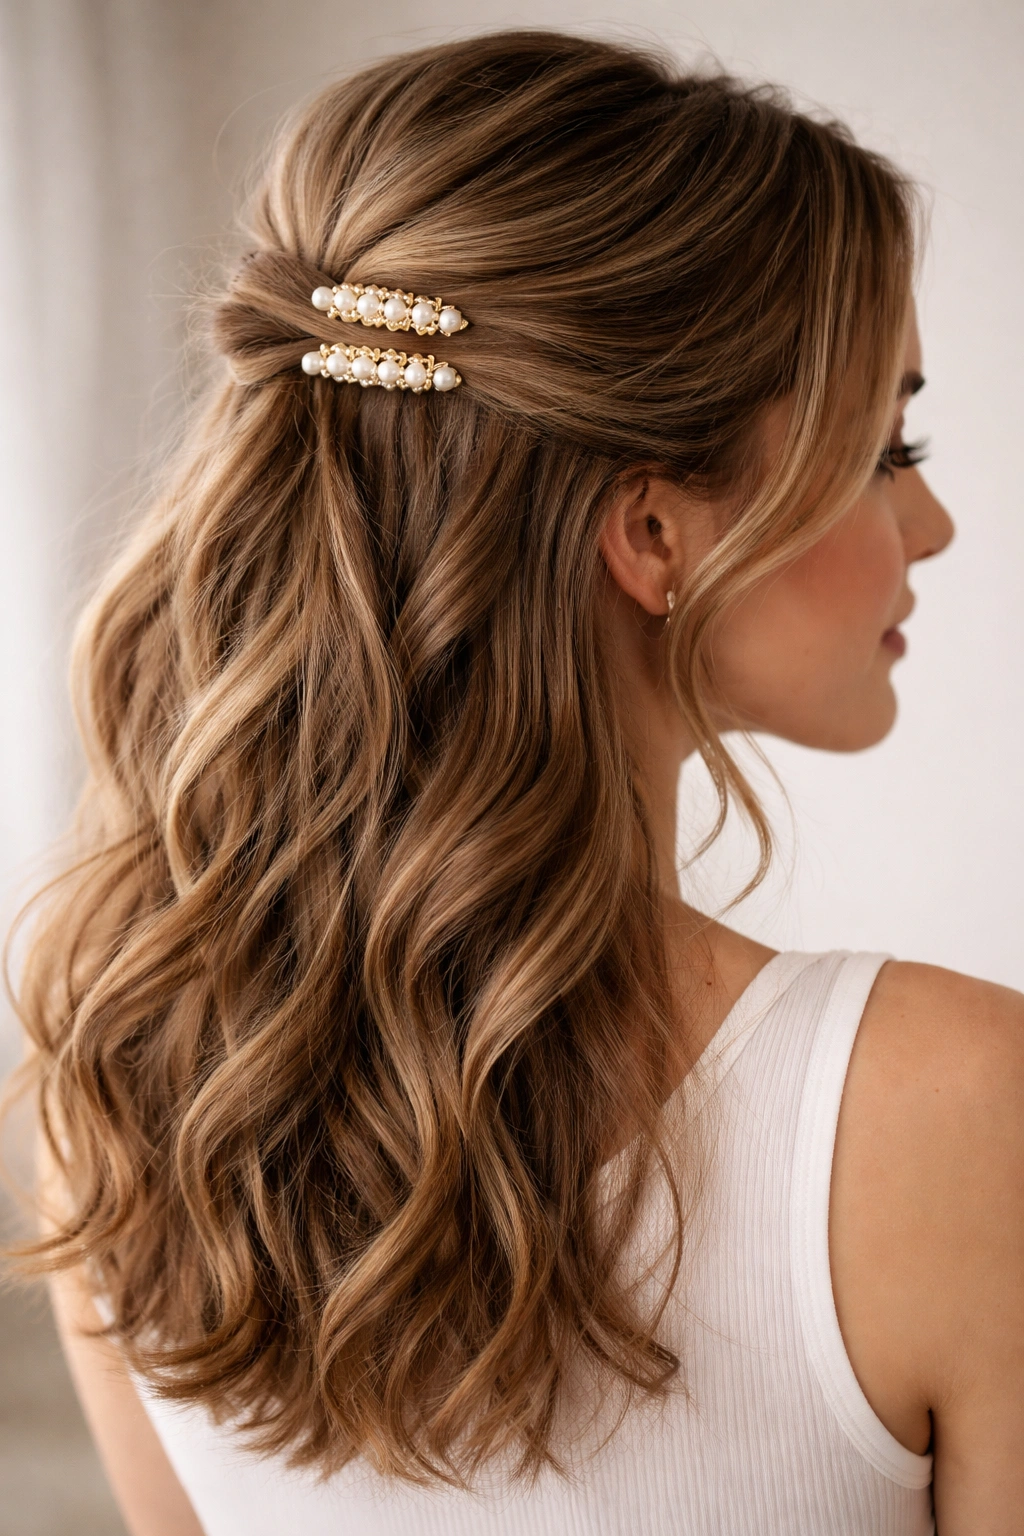
Create a simple half-up, then secure it with decorative pearl clips or metallic barrettes instead of a standard elastic. The decorative element instantly elevates the style and makes it feel more intentional and polished. This works for everything from casual dates to special events depending on your clip choice.
Choosing Your Clips
Pearl or beaded clips add elegance and work for more formal occasions. Metallic clips (gold, silver, rose gold) feel contemporary and work for everything from brunch to evening events. Tortoiseshell or colorful clips add personality and work well for casual settings. Two to three smaller clips often look better than one large one on medium-length hair.
Securing the Half-Up
Gather your hair into a half-up as usual, then use bobby pins to create a secure base. Place your decorative clips over the bobby pins so they hide the practical hardware while keeping everything in place. Make sure the clips are truly securing the hair, not just sitting on top of it—you want this to be functional as well as beautiful.
Quick tip: Avoid clips that are too heavy for your hair weight, or they’ll drag the half-up down throughout the day. Test the clip on the secured section before committing to wearing it out.
15. The Soft Bun Half-Up Hybrid
Create a half-up, then twist the secured ponytail loosely and wrap it around itself to form a soft, low bun. This blurs the line between a half-up and a half-bun, creating something that’s more elegant than a traditional half-up but less formal than a full updo.
Building the Soft Bun
Secure your half-up with an elastic. Take the ponytail and twist it loosely—you want a soft, undone twist, not a tight one. Wrap the twisted ponytail around itself in a circular shape at the base where the elastic is. Use bobby pins to secure the bun shape, tucking the ends underneath. Leave the bun slightly loose and textured rather than smooth and polished.
The Soft Bun Look
Gently pull pieces of the bun slightly loose so it looks romantic and undone rather than formal. Leave a few face-framing pieces completely out of the bun for softness. The overall effect should be polished but still obviously made from your waves rather than look like a structured, formal updo.
Pro tip: This style works best when your waves have some texture and aren’t perfectly smooth. Day-old or textured waves create the effortless aesthetic that makes this style work.
16. The Sleek Half-Up with Gloss
Create a smooth, polished half-up using a smoothing cream or serum before securing, then keep the rest of your waves textured and voluminous. This creates a two-toned effect where the pinned section reads as sleek and controlled while the down section remains wavy and full. It’s a sophisticated take on the half-up that works for work or events.
Creating the Sleek Section
Apply a smoothing cream or lightweight serum to the section you’ll be pulling up while your hair is slightly damp. Use a paddle brush or blow-dry brush to smooth this section as you direct-dry it or use a flat iron to polish it further. This section should be noticeably smoother than your wave texture. Secure the smooth section into a half-up with an elastic.
Maintaining the Contrast
Your lower waves should remain textured and full—don’t apply product to them or style them the same way as the upper section. This contrast between the sleek pulled-up section and the textured waves below is what makes the style visually interesting.
Styling note: This technique works best with a two-product approach—smoothing product on the upper section, texturizing product on the lower waves. This intentional contrast is more flattering than a gradient between sleek and textured.
17. The Windswept Half-Up
Create a half-up, then use your fingers to deliberately tousle and separate the waves, making the style look romantically windswept rather than neatly executed. This works beautifully for casual settings and gives you permission to embrace the “undone” aesthetic rather than fighting it.
Creating the Windswept Effect
After securing your half-up, use your fingers (not a brush) to gently pull apart the waves and create separation. You’re not trying to create curls—you’re enhancing the natural wave texture so it looks loose and flowing rather than polished. Tousle slightly more than you would normally be comfortable with; the windswept look requires visible texture and separation.
Product for Windswept Waves
Use a lightweight salt spray or texturizing spray to enhance the separated texture. Avoid heavy products that clump waves together. You want individual strands to be visible and distinct, creating that wind-blown effect.
Worth knowing: This style is most successful on days when your waves are already in good shape. Flat, limp waves won’t read as windswept—they’ll just look messy.
18. The Half-Up with Accessories at the Base
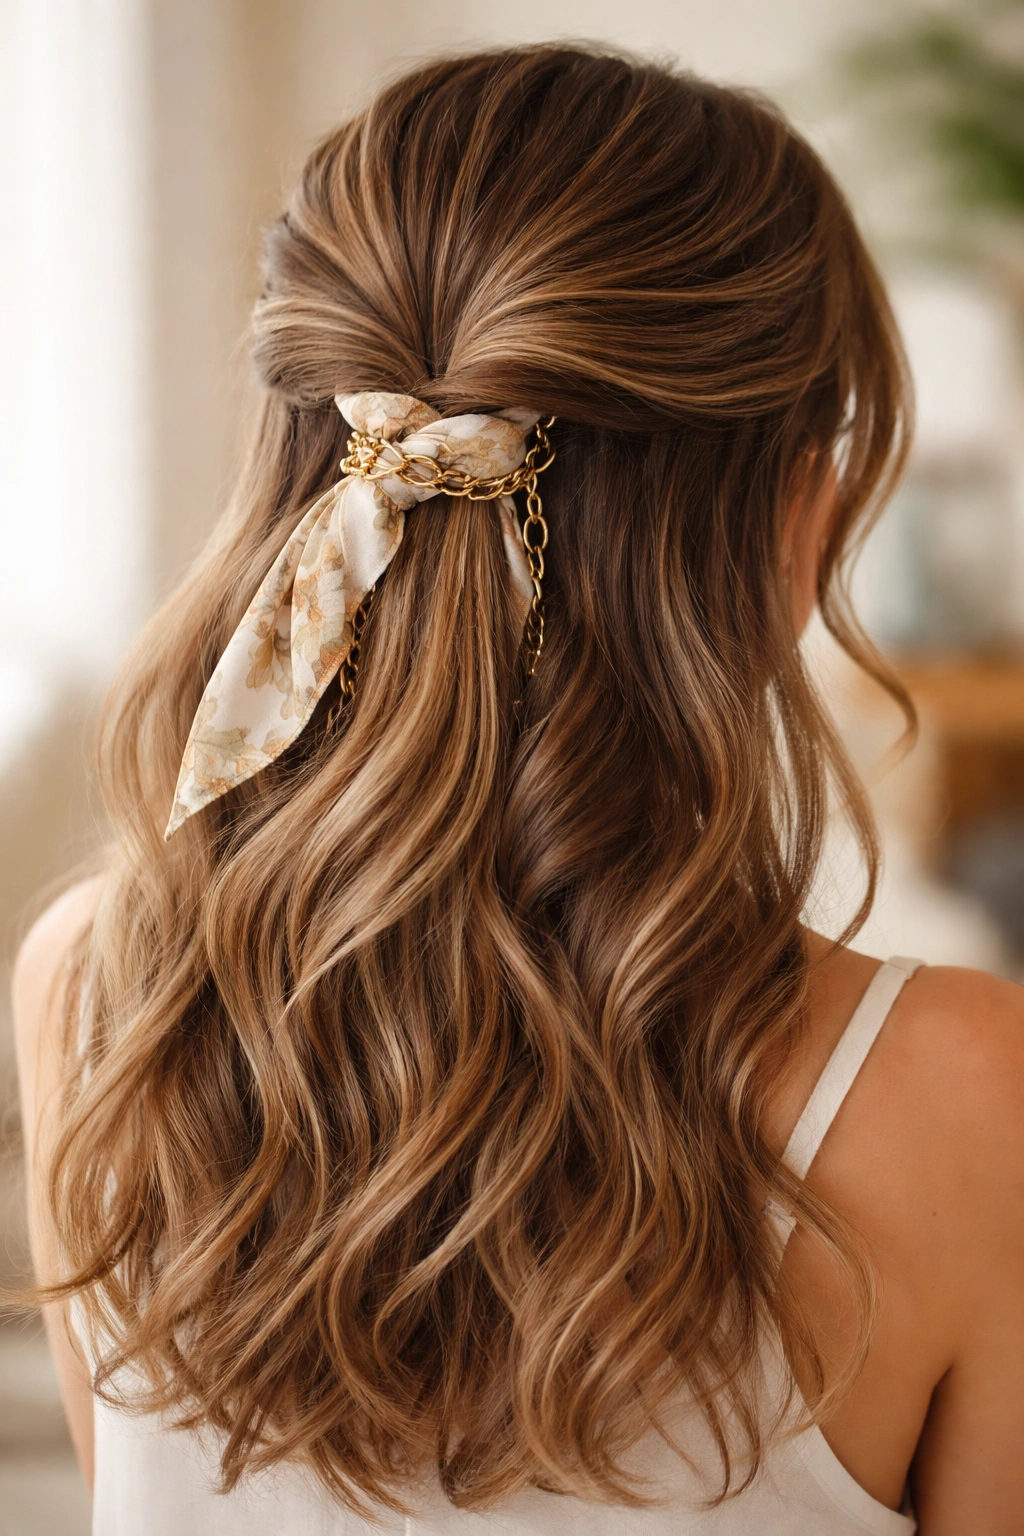
Create a simple half-up, then add a decorative scarf, chain, or beaded hair cuff around the base of the secured ponytail. This adds visual interest and allows you to coordinate with your outfit without requiring a complicated technique.
Accessory Options That Work
Delicate chains wrapped once or twice around the base add edge and sophistication. Silk scarves tied in a bow or woven through the elastic add color and texture. Beaded hair cuffs create a bohemian vibe. Metal hair cuffs feel contemporary and minimal. The key is choosing something that doesn’t add significant weight.
Securing Your Accessory
If you’re using a chain or cuff, make sure it’s secure enough that it won’t slip down throughout your day. If you’re using a scarf, tie it securely or weave it through the elastic multiple times. Test the security before wearing it out—the last thing you want is your accessory falling during the day.
Practical tip: Choose accessories that coordinate with your outfit or jewelry rather than trying to match your hair color. This creates intentional styling rather than looking like you randomly grabbed something.
19. The Half-Up with Hidden Second Elastic
Create a half-up and secure it with an elastic. Then, about 1-2 inches below the first elastic, place a second elastic in the same ponytail. This creates visual interest and a slightly sculpted look while still technically being a half-up. It’s particularly flattering if you want to add dimension without complicated technique.
Placing Your Elastics
Secure your main half-up with a clear or matching elastic. Gather the same ponytail about 1-2 inches below and secure it with another elastic. You can leave the section between the elastics smooth or gently tease it to create fullness and texture. Some people prefer the elastics to be clearly visible (using decorative elastics), while others prefer them hidden.
The Visual Effect
Placing two elastics in the same ponytail creates visual interest and breaks up the length of the down section. It also creates a subtle structure that reads as more intentional than a single half-up without being as formal as a full updo. The style works particularly well if you’re going for polished-but-relaxed.
Quick tip: Make sure both elastics are tight enough to hold throughout your day, or the section between them will collapse and look messy rather than intentional.
20. The Half-Up with Spiky Bobby Pins
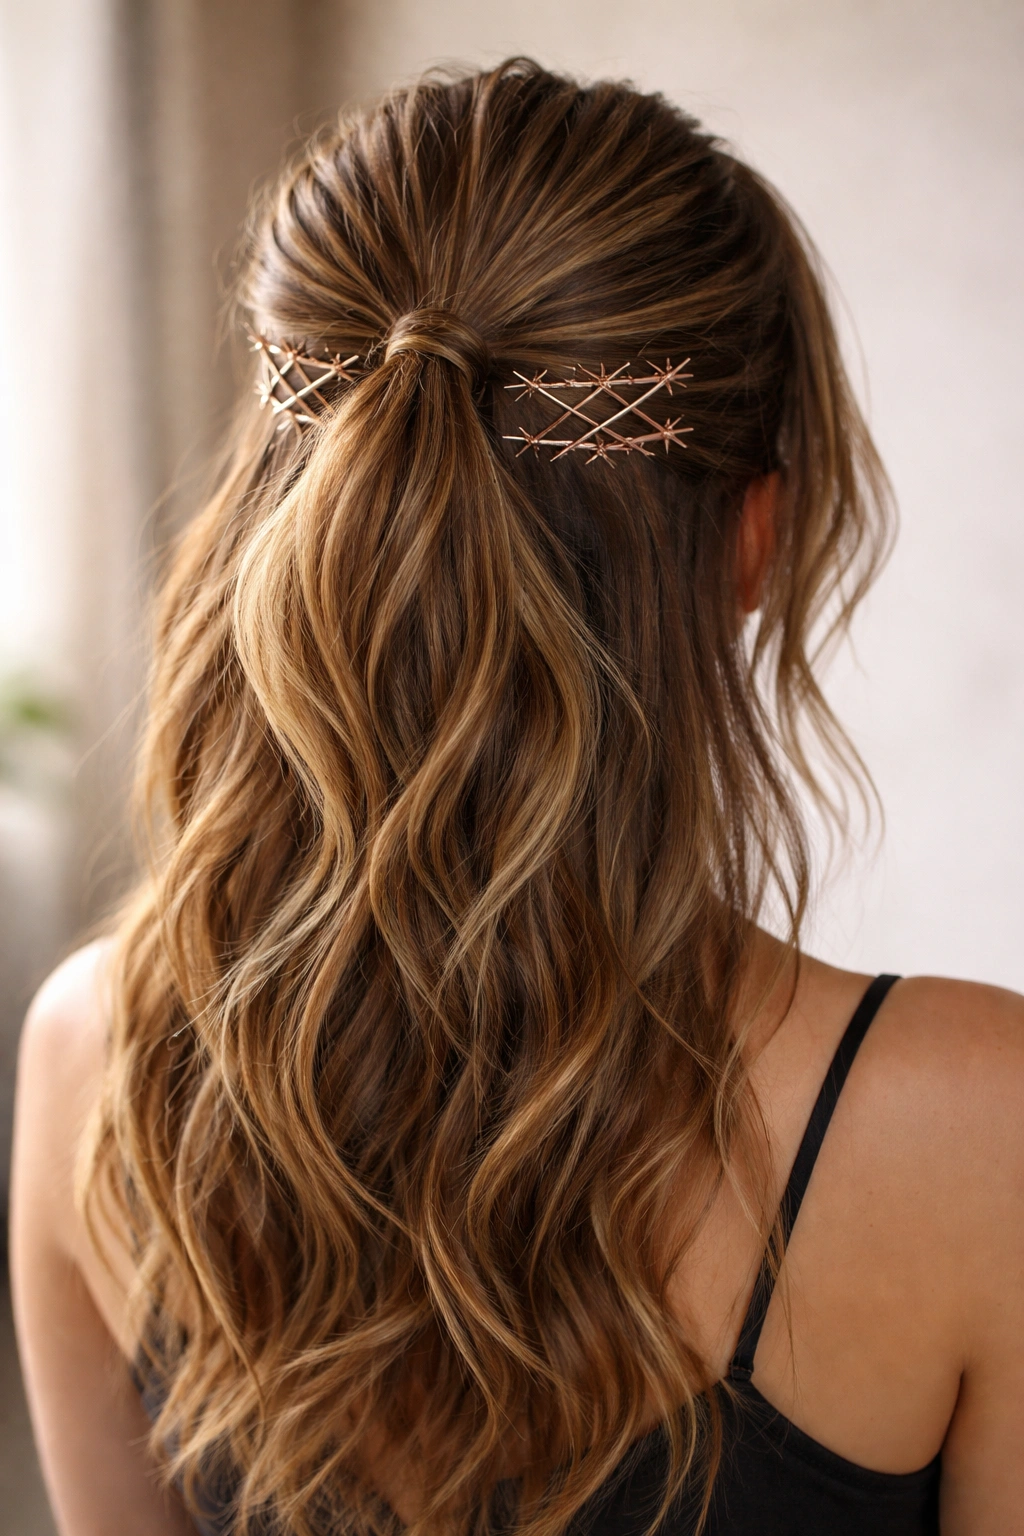
Create a half-up, but instead of hiding your bobby pins, use metallic or decorative spiky bobby pins placed visibly in a pattern around where you’ve secured the ponytail. This adds edge and makes the utilitarian part of the style into a design element. It’s perfect for creative, fashion-forward looks.
Styling with Decorative Bobby Pins
Secure your half-up first. Then take spiky or decorative bobby pins and place them in a pattern across the back of your head where the ponytail is secured. You might create a horizontal line, a scattered pattern, or a geometric arrangement—it depends on your style and how many pins you want to use. Make sure each pin is actually securing hair, not just sitting on top.
Bobby Pin Options
Rose gold spiky bobby pins feel contemporary and feminine. Silver or black metallic pins feel edgy and cool. Pearl-studded bobby pins add vintage glamour. Even colorful bobby pins can look intentional if you match them to your outfit. The key is choosing pins that feel intentional, not like you’ve just forgotten to take them out.
Real talk: This style works best if you’re comfortable with visible hair accessories and aren’t afraid of a slightly bolder look. It’s not for everyone, but when it works, it reads as effortlessly cool.
Final Thoughts
The beauty of the half-up half-down style is that it adapts to whatever your waves are doing on any given day. Some versions lean romantic and soft, others feel sporty and practical, and several walk the line between casual and dressy, making them perfect for transitions between work and evening plans. Your medium wavy hair is doing half the work already—the texture and movement are built in. These styles just give you ways to shape and direct that texture in different directions.
The best version for you depends partly on your face shape, your hair thickness, and how much time you want to spend styling. But honestly, the best version is whichever one makes you feel confident and comfortable. If you’re drawn to intricate styles, lean into the braided and twisted versions. If you prefer minimal effort, the simpler pulled-back versions require maybe sixty seconds and work on any day. Most of these styles also work beautifully with a second-day or third-day wave pattern, so you don’t need perfectly fresh styling every time you want to wear a half-up.
Start with whichever style speaks to you, practice it a couple of times so your hands learn the motion, and then let it become second nature. Once you have one or two go-to versions, adding another style to your rotation becomes much easier because you understand the basic mechanics. Your waves are your best asset here—work with them, emphasize them, and let them be the actual star of whatever version you choose.