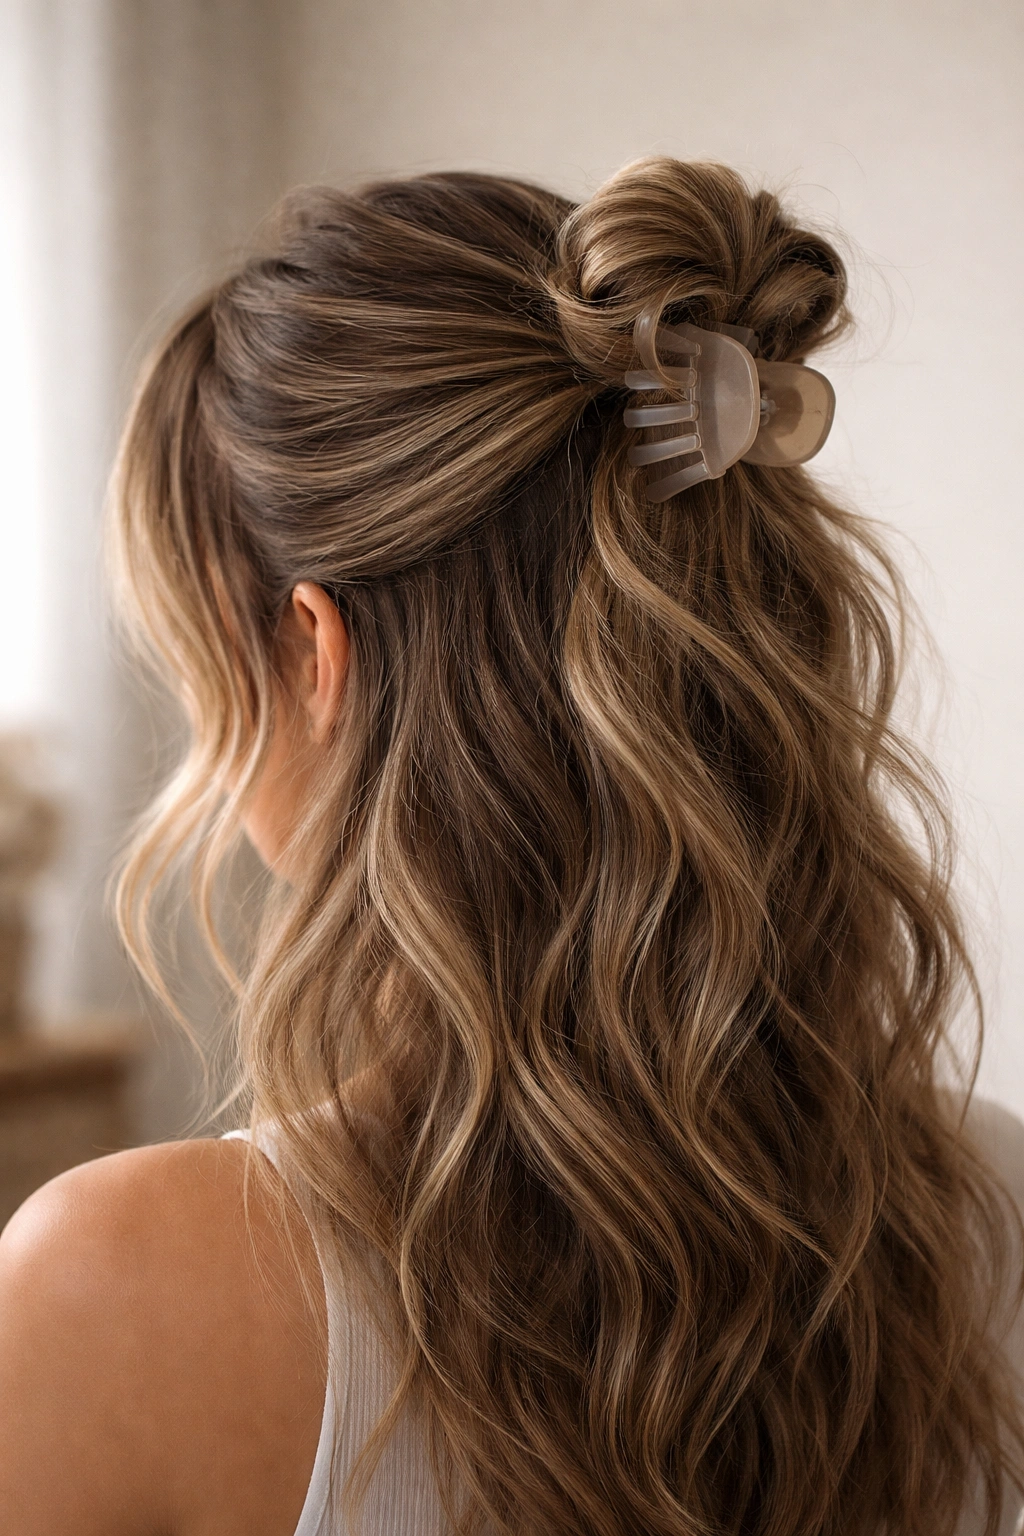
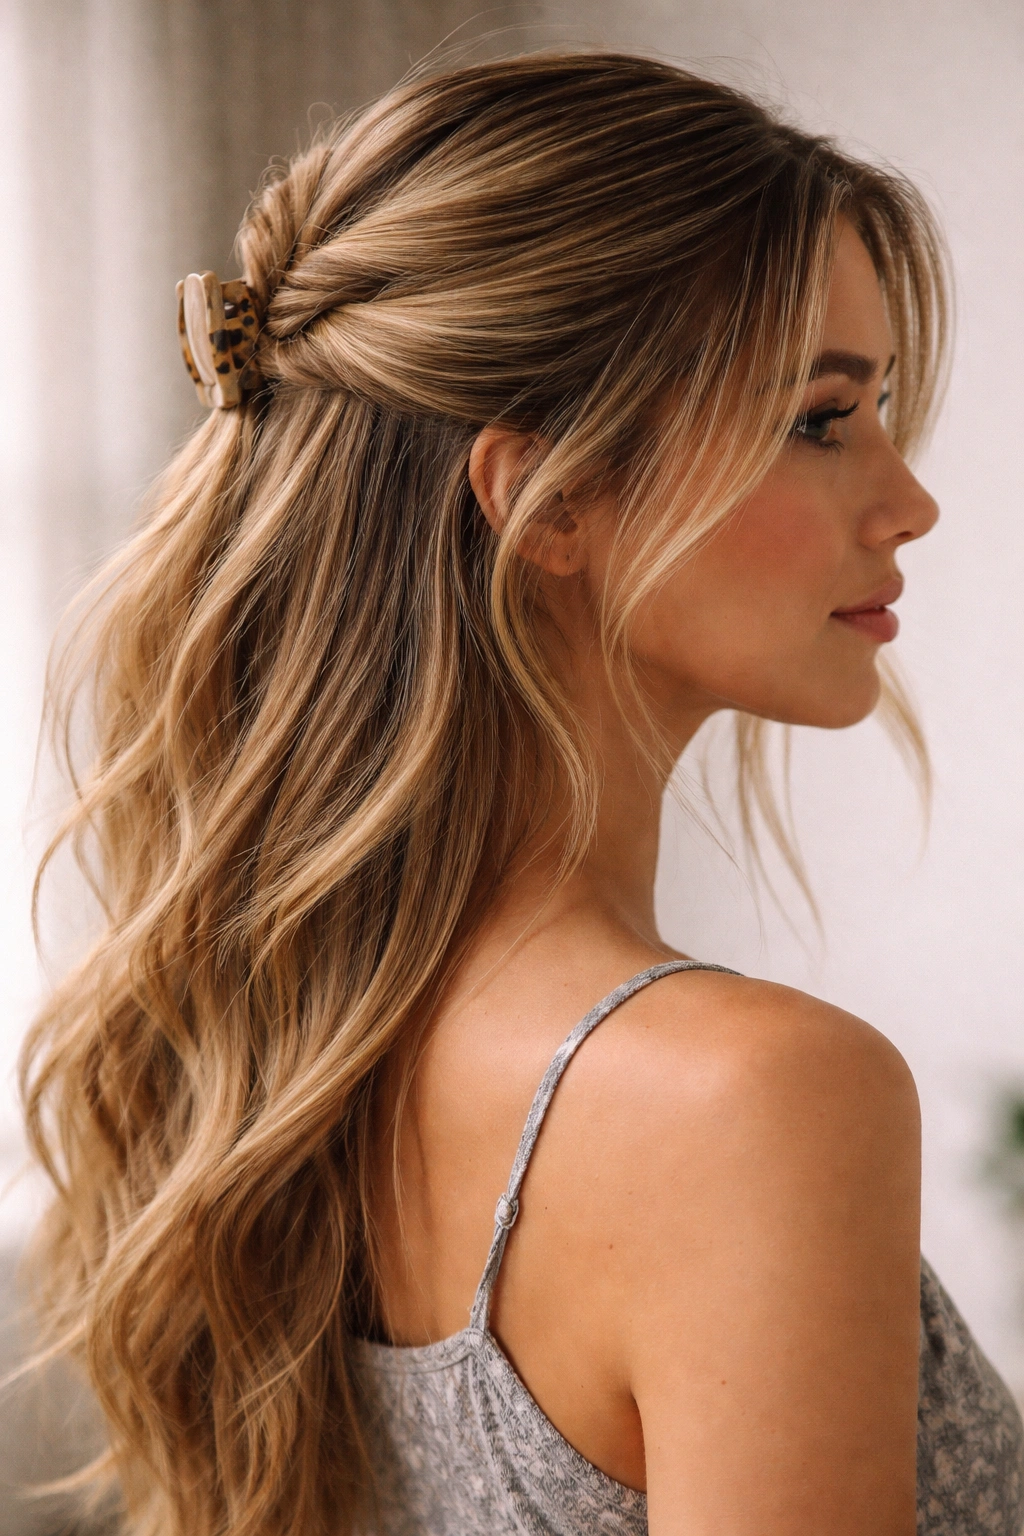
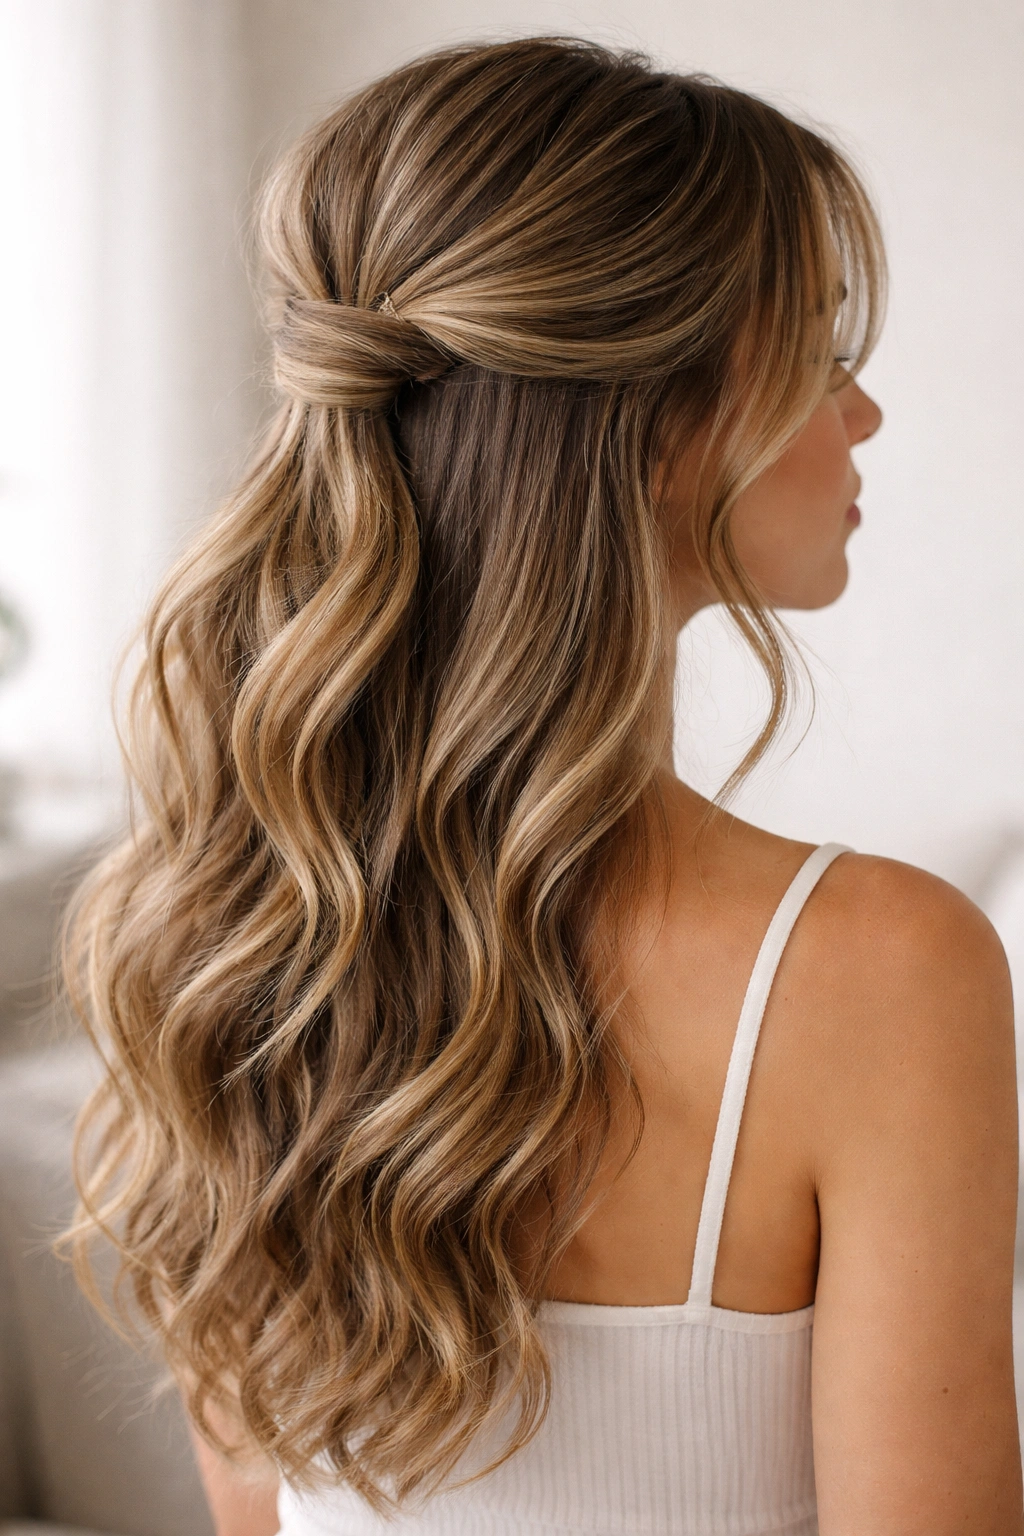
There’s something effortlessly chic about the messy claw clip half up half down hairstyle—it’s that perfect blend of put-together and undone that works whether you’re heading to the office, running errands, or meeting friends for brunch. The claw clip has become the go-to tool for this look because it’s genuinely forgiving: it holds without damaging your hair, it looks intentionally tousled rather than requiring mirror-perfect precision, and you can style it in about two minutes flat. But while the basic concept is simple, the possibilities for variation are surprisingly endless—and when you lean into the “messy” aesthetic rather than fighting it, you unlock a whole collection of styles that feel fresh and modern.
What makes these styles so appealing is that they suit nearly every hair type and length. Whether you’re working with fine, straight hair or thick, curly strands, a claw clip can create a half up half down effect that actually stays put and flatters your face. The key is understanding which clip size works for your hair volume, how to section strategically, and which styling techniques create that deliberately undone texture that reads as intentional rather than neglected. The best part? These styles genuinely improve throughout the day—a bit of movement and texture settling in actually makes them look better by evening than they did that morning.
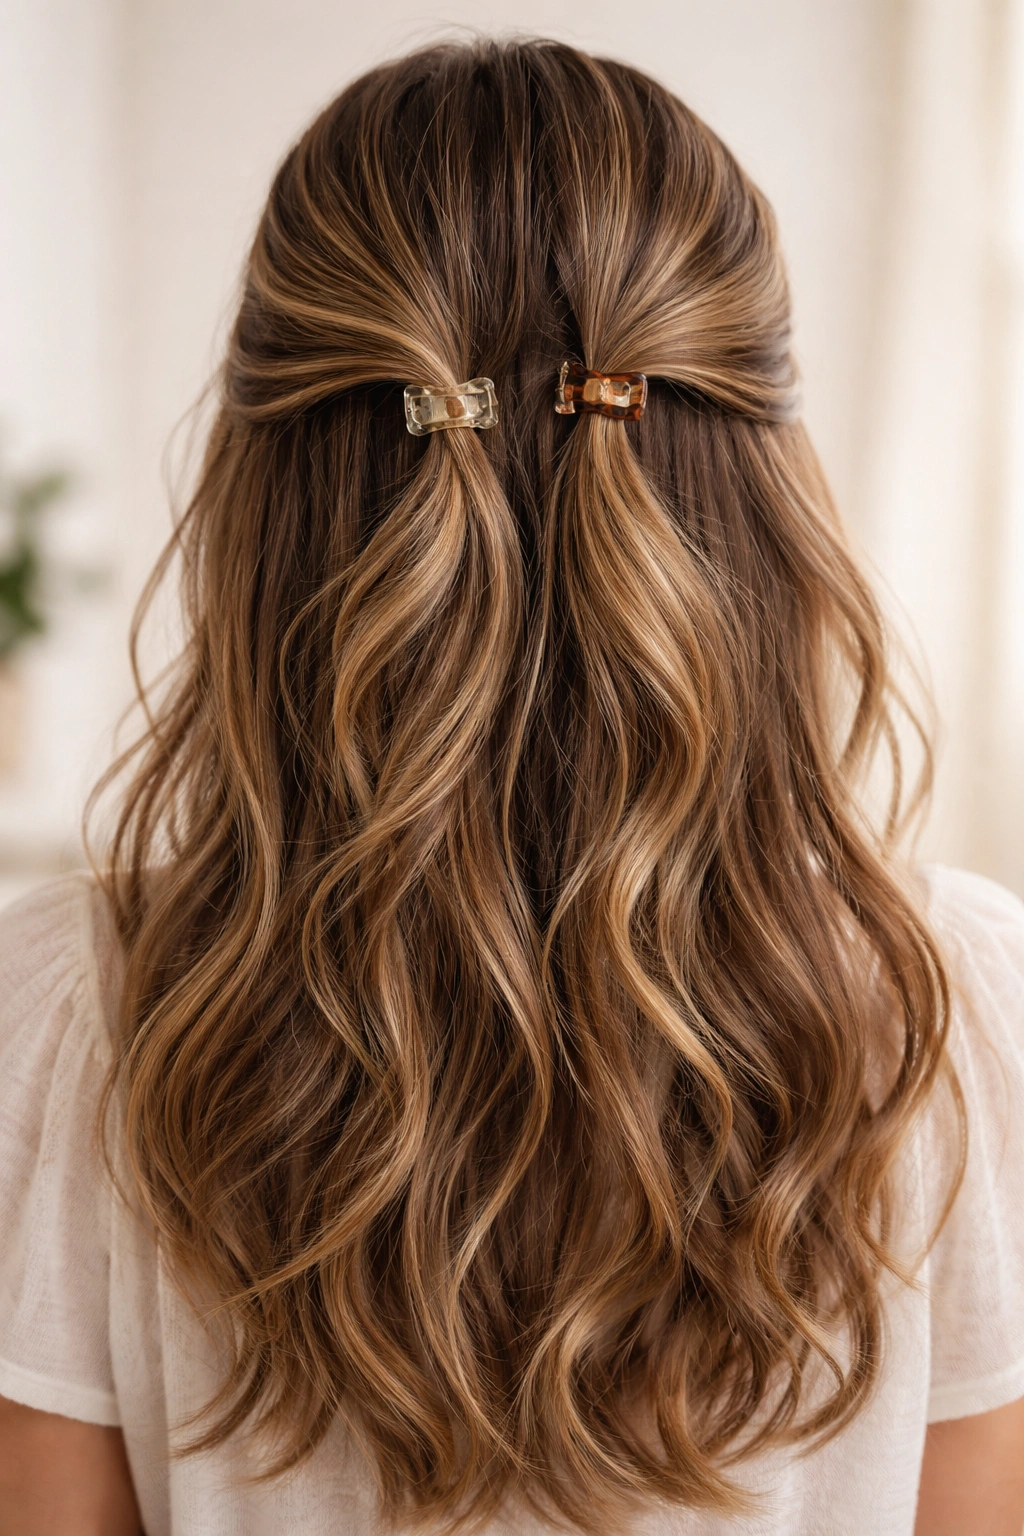
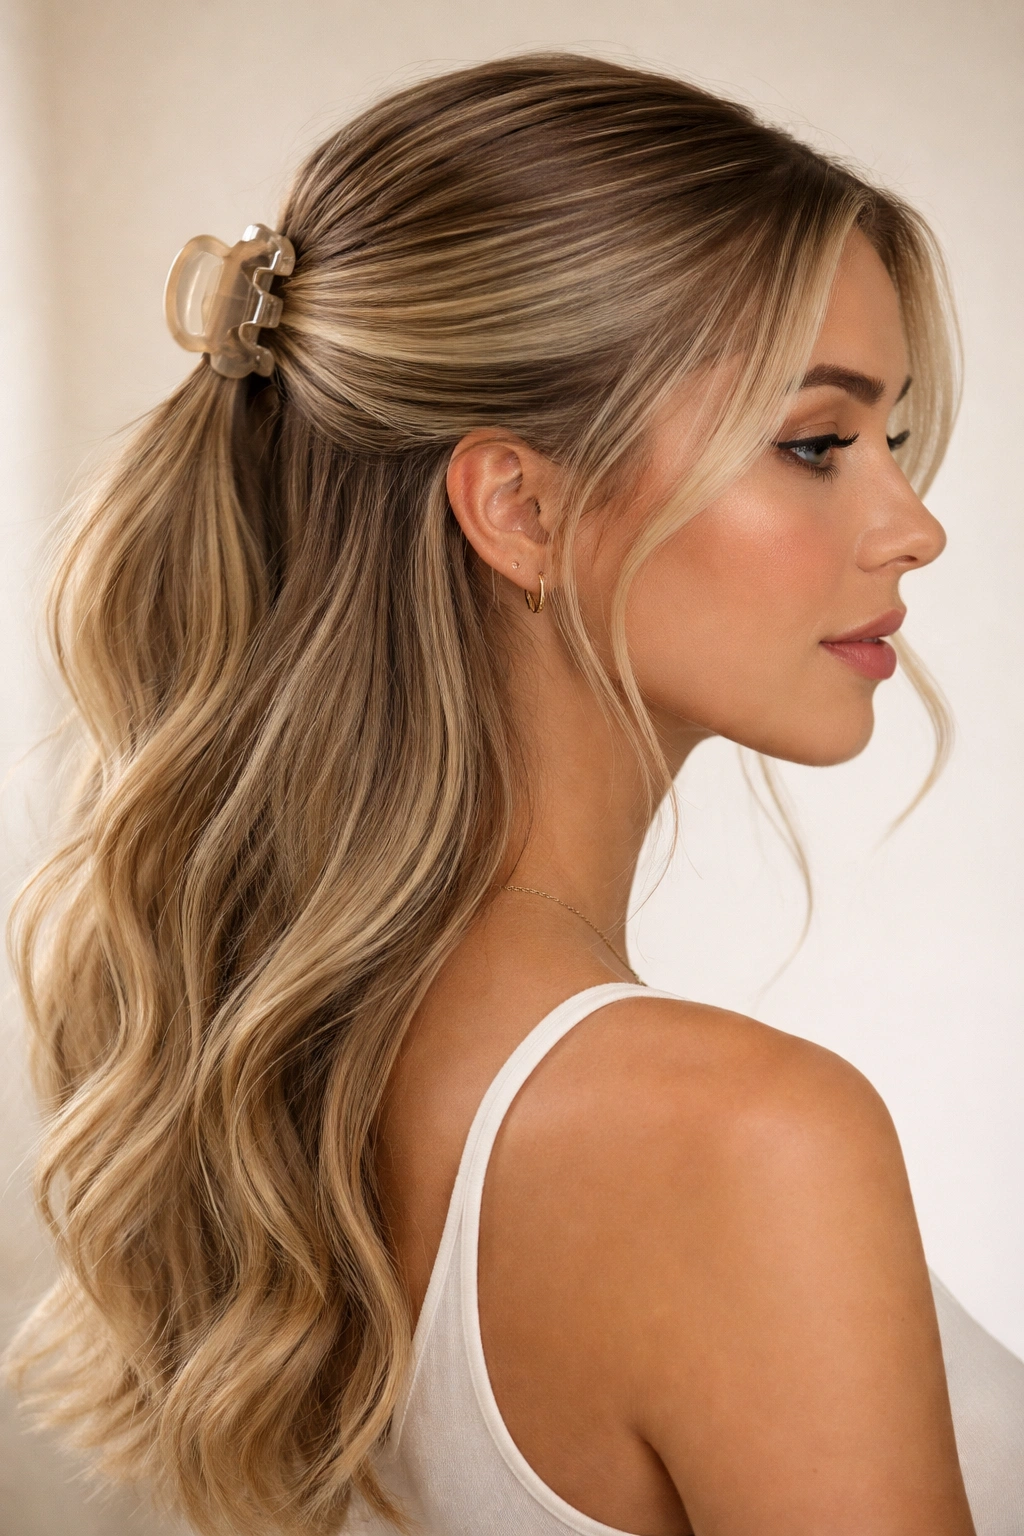
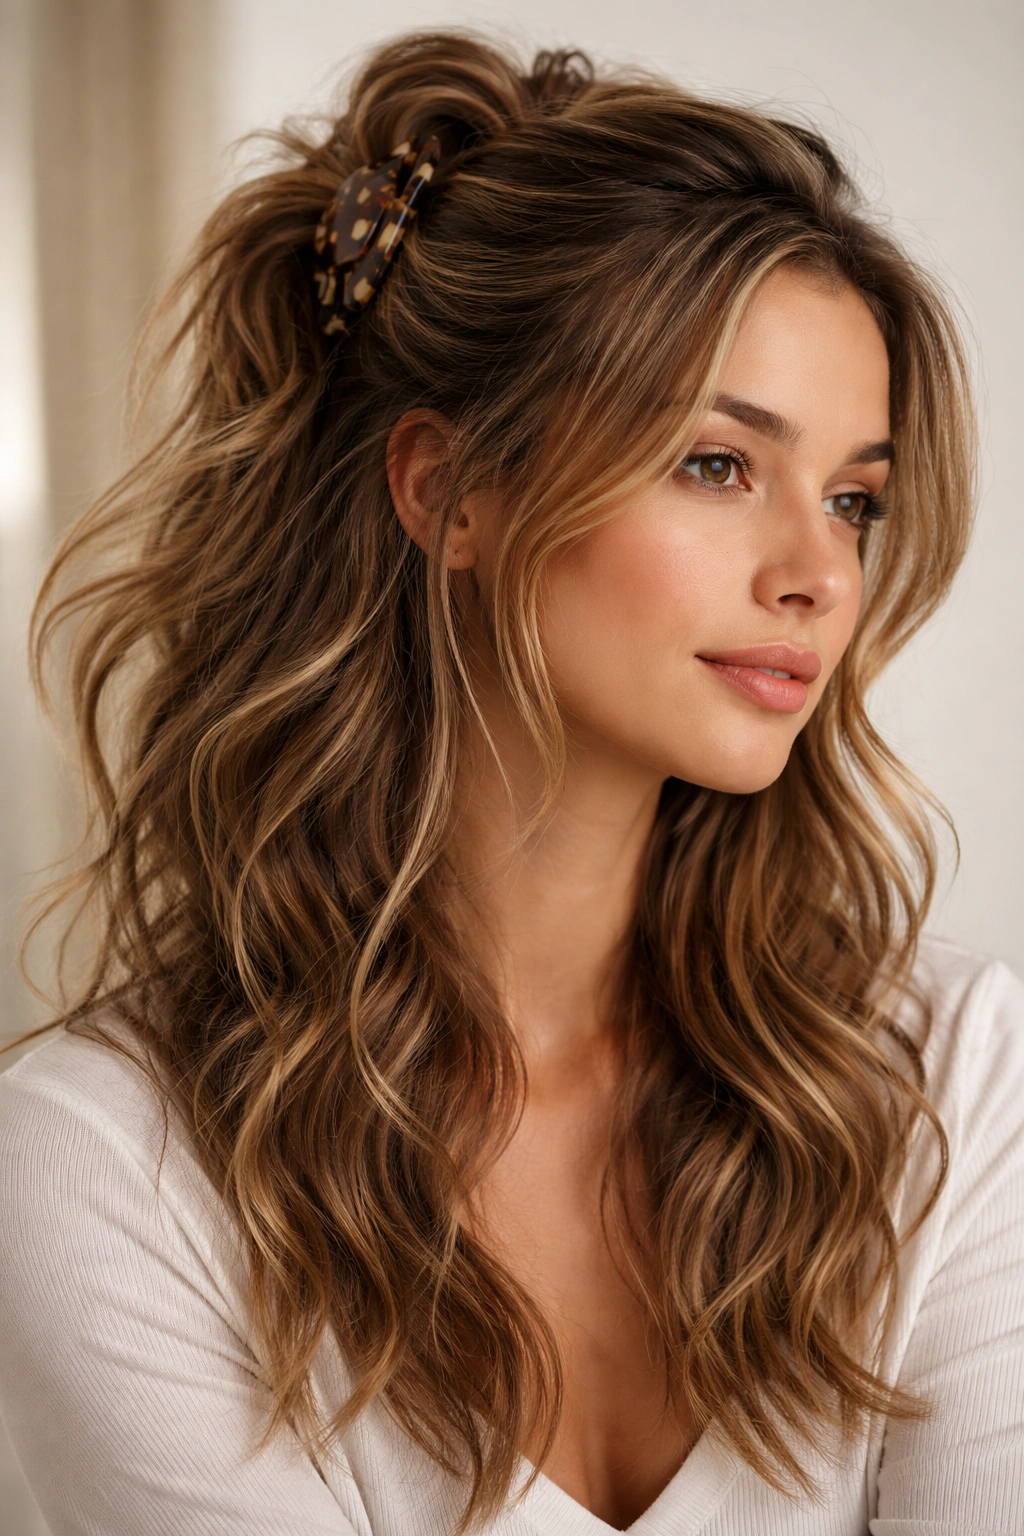
1. The Tousled Crown with Face-Framing Pieces
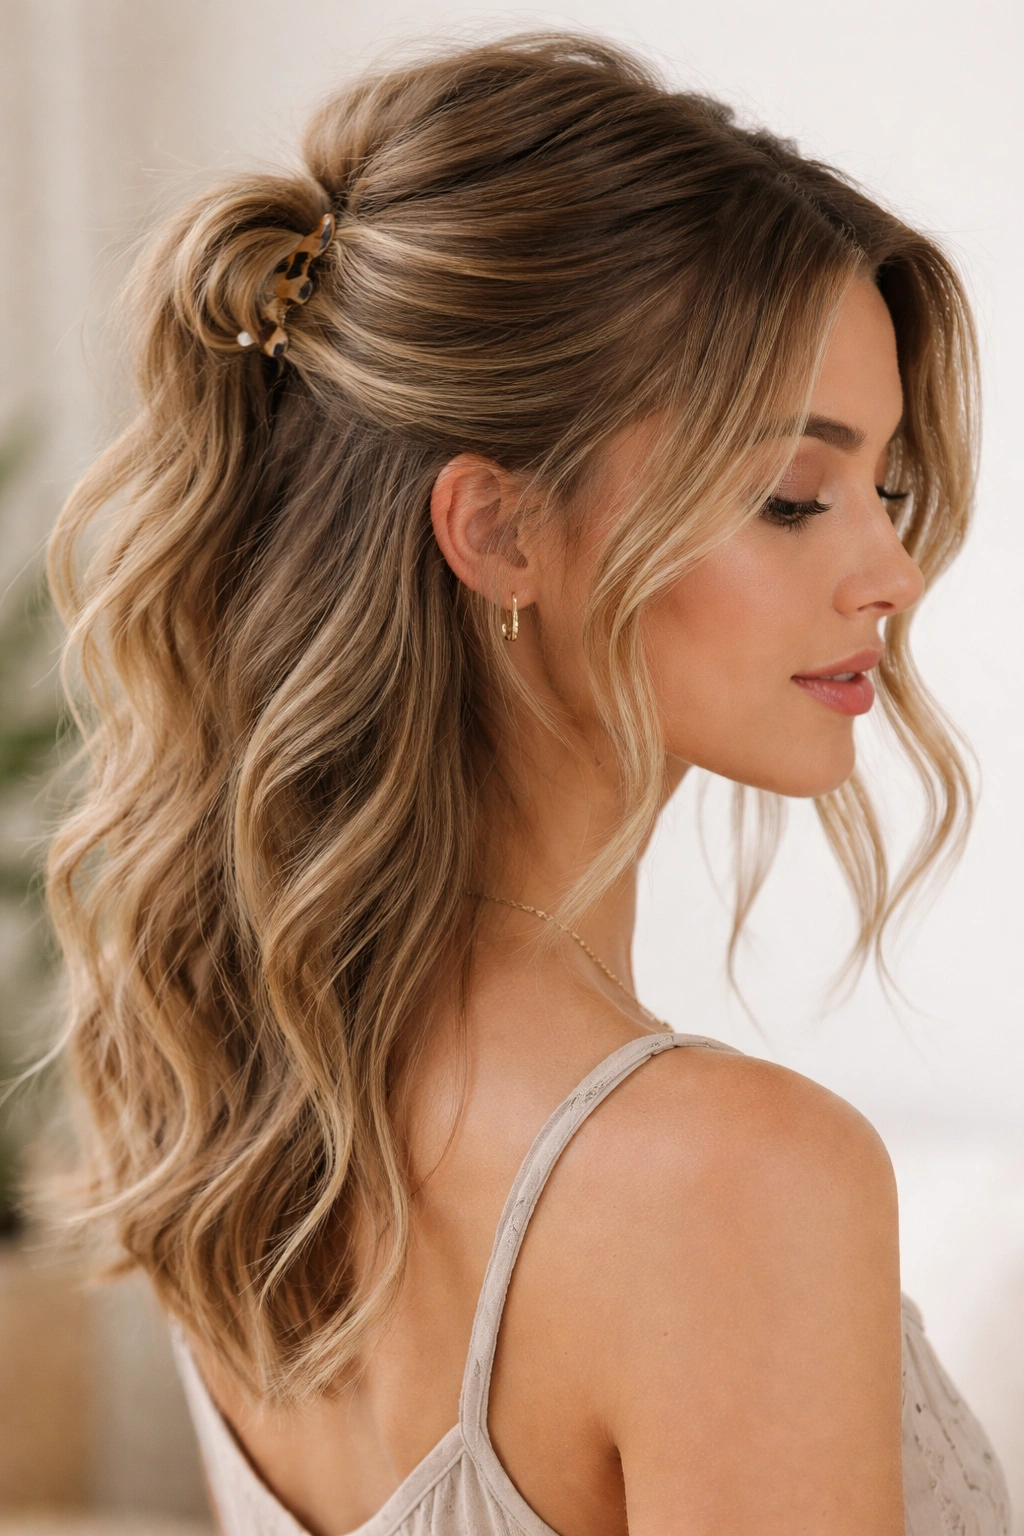
This is the foundation style that kicks off most messy claw clip looks—and it’s tousled in the best way. You’re clipping up the crown section of your hair while intentionally leaving face-framing pieces loose and slightly wavy. The messiness comes from the pieces you don’t clip and the texture you deliberately create throughout the entire look.
How to Master the Face-Framing Technique
Start by curling or waving your entire head of hair gently, even if it’s naturally straight. This gives you a base texture to work with that photographs beautifully and feels polished rather than bedraggled. Once your waves have cooled and set, separate a small triangle section at the front of each ear—these are your intentional face-framers that stay down. Take a larger, loosely-gathered section from your crown and twist it gently (not too tightly, you want it to look effortless) before clipping it up at the back of your head with a claw clip that’s proportional to your hair volume.
Styling Tips for Maximum Dimension
The secret to making this read as intentionally messy rather than accidentally sloppy is texture. Gently tease the roots where you’re clipping to give your hair grip and volume, then smooth the surface lightly with your fingers so it doesn’t look matted. As you twist that crown section, let a few wispy pieces escape—this creates that “I didn’t try too hard” vibe that’s actually very intentional. Once you’ve clipped, pull out a few more pieces around your face and along the clip for softness.
Pro tip: Use a light texturizing spray on your hair before you start—it gives you better grip and makes your waves hold the intentional-messiness look throughout the day without needing actual messiness.
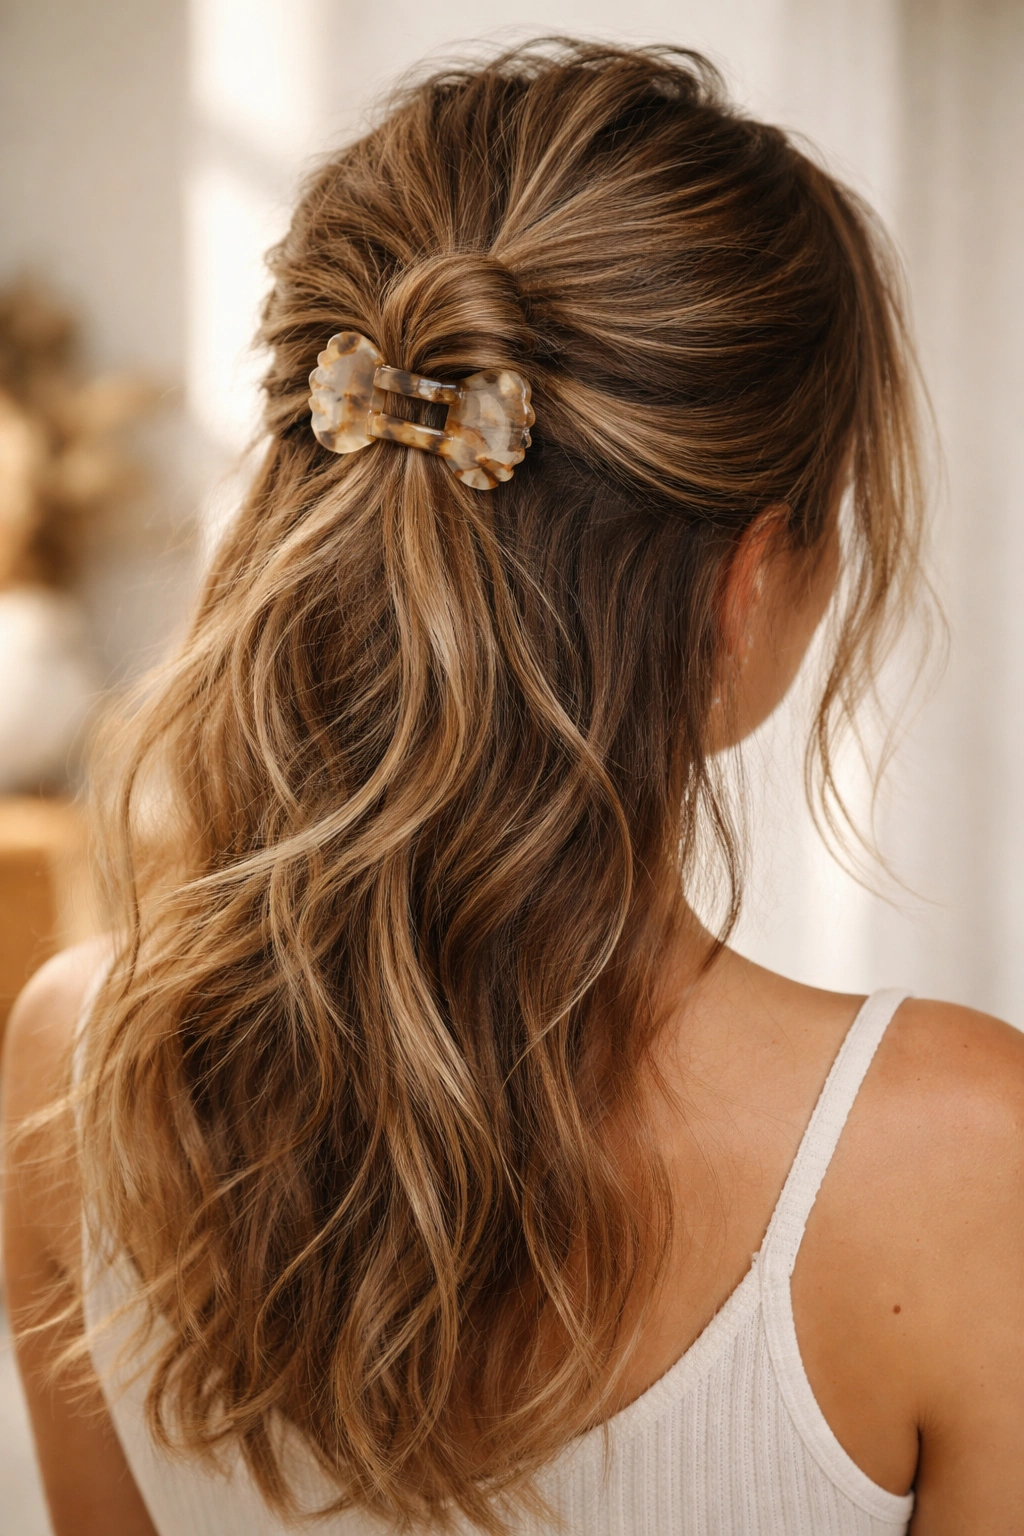
2. The Undone Topknot Half-Up Hybrid
This style straddles the line between half up half down and a low topknot, creating a silhouette that’s flattering and feels deliberately artistic. Instead of a sleek clip, you’re creating a loose, bunched-up texture at the top that you secure with your claw clip, letting the weight and softness of your hair create natural volume and movement.
Building Texture Into the Clip Itself
Gather your hair at the crown as if you were going to clip it all up, but before clipping, twist it loosely and then bunch it up so there’s intentional texture visible above and within the clip itself. Secure this with a medium or large claw clip depending on hair thickness. The clip should sit where the captured hair creates a small, soft mound—almost like a very relaxed, undone topknot that hasn’t fully committed.
Making It Last Without Looking Tight
The mistake most people make is clipping too tightly, which flattens everything and defeats the purpose. Your claw clip should hold firmly enough that your hair doesn’t slip, but not so tight that it crushes the texture you’re creating. If your hair is slippery, try backcombing gently just at the base where the clip grips, then smoothing the surface. Pull out 2-3 longer pieces to frame your face and shoulders.
Worth knowing: This style actually gets better as your waves relax throughout the day—by afternoon, it looks even more intentionally disheveled in the most flattering way.
3. The Braided Crown into Claw Clip
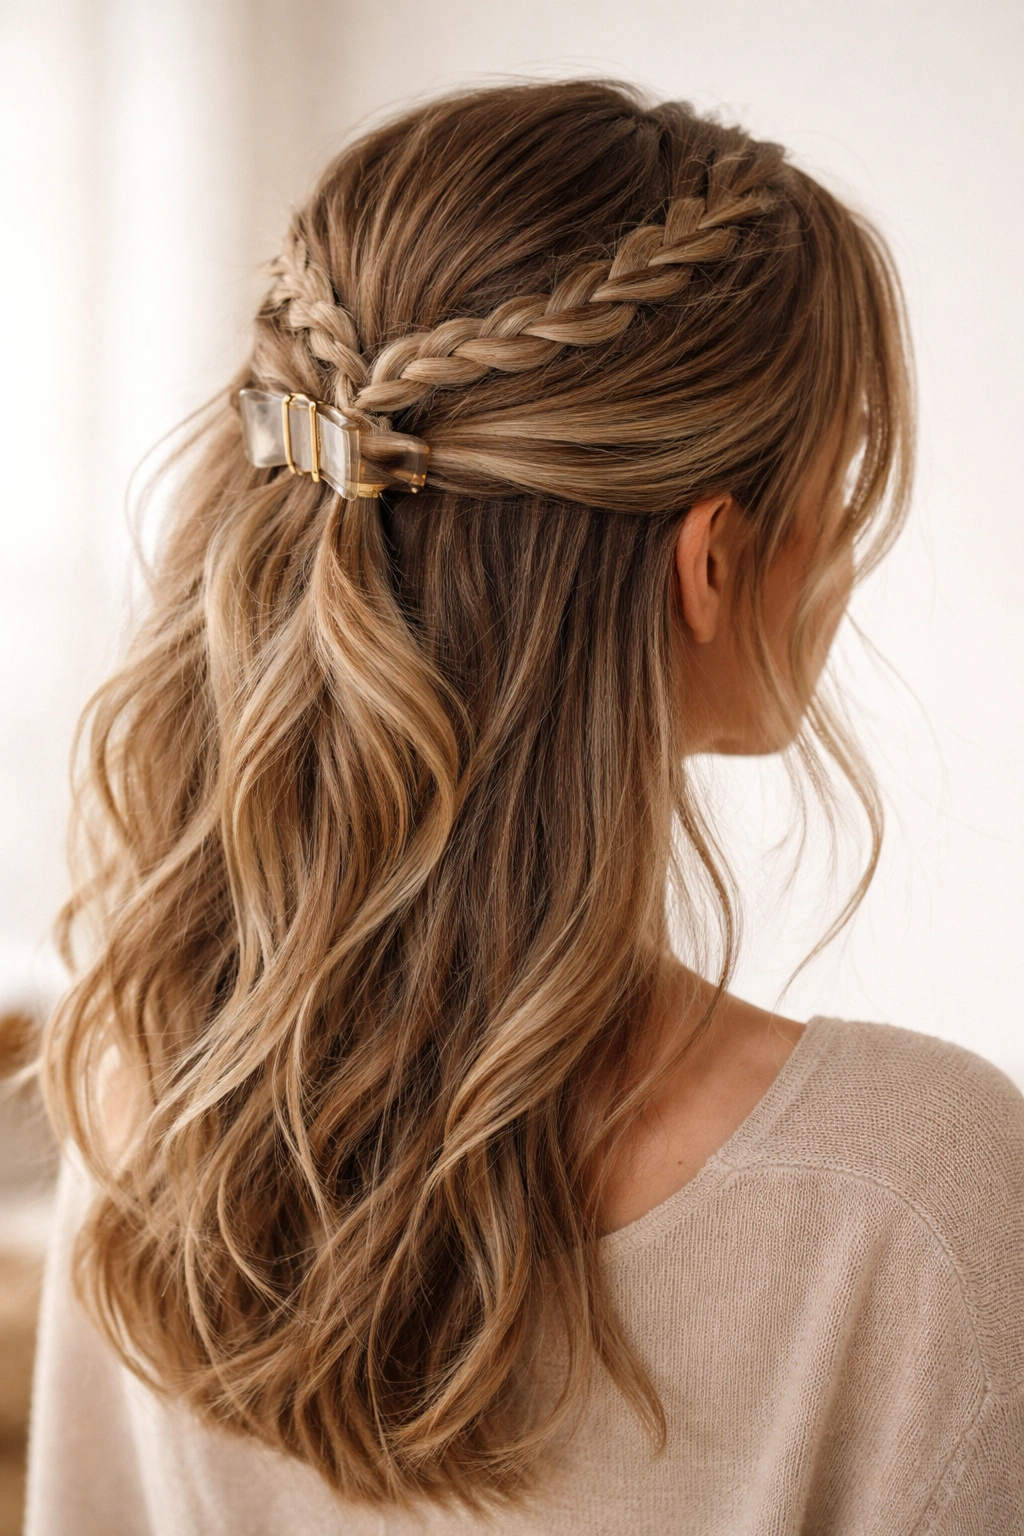
This adds polish and structure to the messy look without making it feel overly formal. You’re creating a braid along your crown and clipping the end at the back, so you get the visual interest of a braid plus the convenience and hold of a claw clip. It’s genuinely one of the easiest ways to elevate a half up half down style.
Creating a Crown Braid That Looks Intentional
Start with textured or wavy hair so your braid has something to grip and won’t slip. Take a section from one side of your head and begin a loose three-strand braid, pulling it along your crown toward the back. This braid should be deliberately loose and a bit undone—let some smaller strands escape as you go, and even slightly pucker the braid here and there to create dimension. As you reach the back of your head, clip the braid tail up at the crown using your claw clip, positioning it so you can see the braid woven through your hair.
Texturizing Your Braid for Maximum Effect
After braiding, gently pull on the edges of each braid loop to make it wider and fluffier. This transforms a tight, perfect braid into something that reads as relaxed and artistic. Spritz lightly with texture spray while you’re loosening it for lasting hold. Pull out a few face-framing pieces that weren’t part of the braid—these can be straight, slightly curled, or wavy depending on your hair texture.
Pro tip: Use a dark-colored claw clip if your hair is dark, and a tortoiseshell or blonde clip if you have lighter hair—matching the clip to your hair color makes it blend seamlessly rather than calling attention to the mechanical hold.
4. The Twisted Side-Sweep Half-Up
This style moves the focus slightly off-center, creating an asymmetrical look that feels modern and deliberately styled. You’re twisting sections of hair from one side and clipping them up at the back, creating dimension and movement that reads as effortlessly cool rather than messy in a careless way.
Perfecting the Side-Sweep Technique
Start by curling or waving your hair gently, focusing on creating movement from mid-length down. Take a deeper section from one side of your head (roughly from your temple area), and gently twist it toward the back of your head. Don’t aim for a tight spiral—a loose, slightly lumpy twist is exactly what you want. As you twist, maintain some slight texture and let wisps escape. At the back of your head, clip this twisted section up, positioning the clip slightly off-center toward the side you started from.
Adding Layers of Movement
The depth in this style comes from pulling out face-framing pieces that have different textures and lengths. If your hair is permed or naturally curly, these pieces will look distinctly textured and create wonderful movement. If your hair is straight, encourage some wave into these pieces using a straightening iron angled slightly or finger-waves created while your hair is damp. The asymmetrical clipping creates inherent movement—don’t fight it by trying to make everything perfectly even.
Worth knowing: This style actually photographs better from the side where you’ve swept the twist from, which is worth knowing if you’re planning outfit photos or have a preferred side for photos anyway.
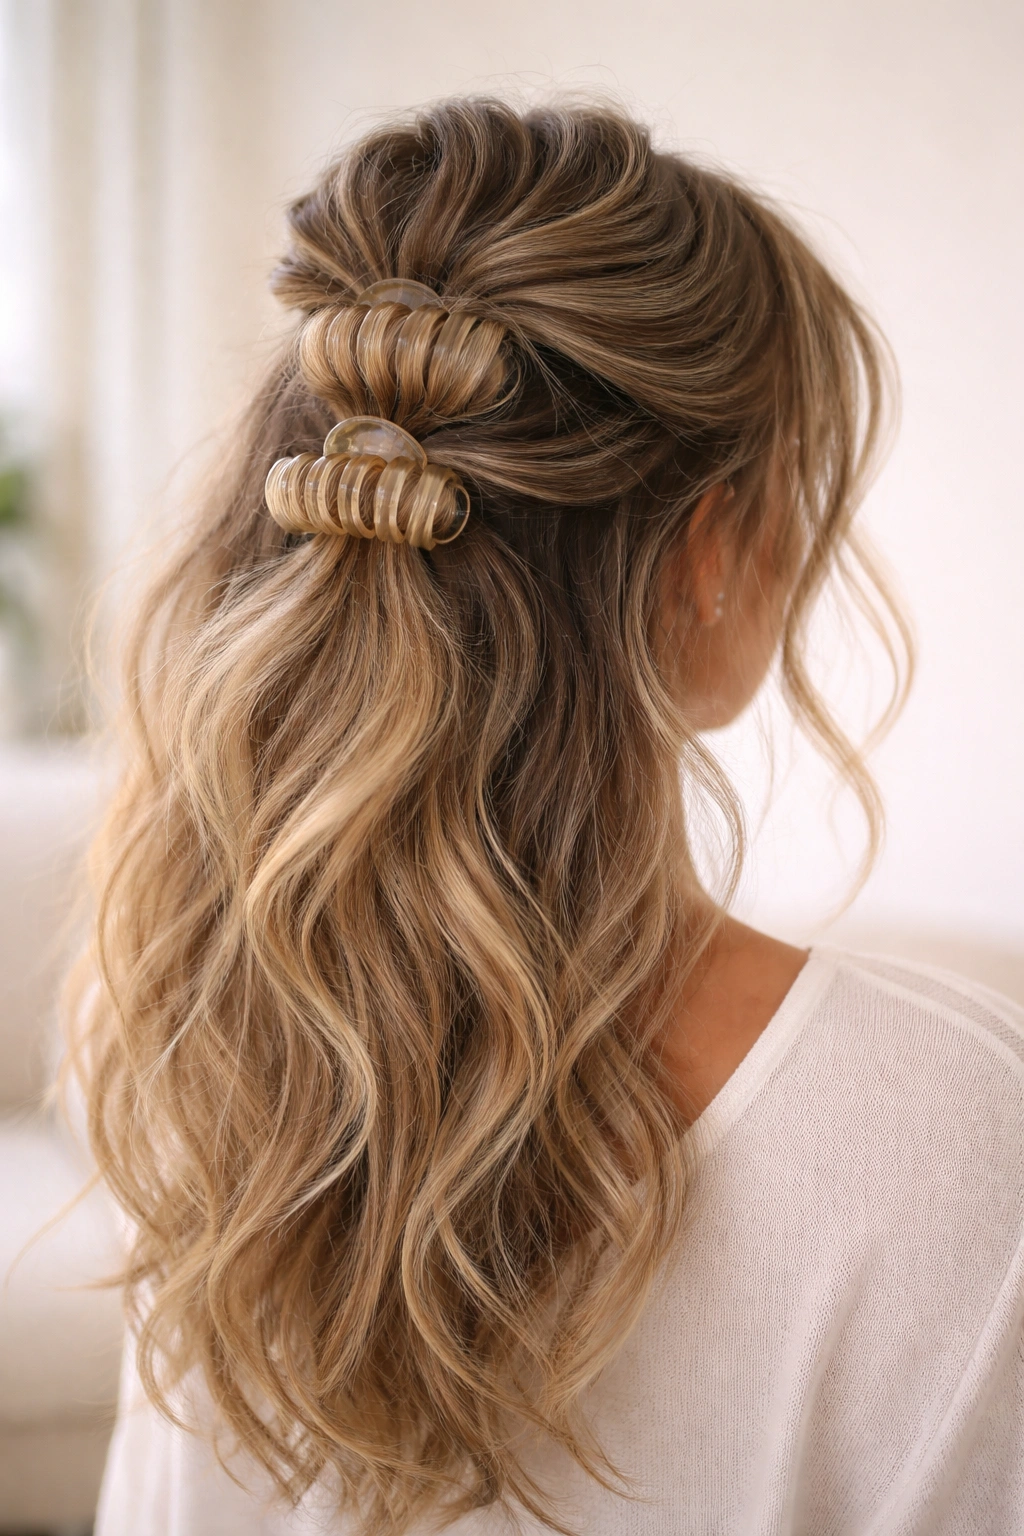
5. The Double-Clip Floating Section
This creates visual interest by using two smaller claw clips instead of one, creating the illusion of dimension and a more complex style than it actually is. It’s perfect if you have medium to thick hair and want a look that feels more constructed while still maintaining that relaxed aesthetic.
Strategic Clip Placement for Maximum Impact
Divide your upper-back section into two distinct zones—left side and right side. From each side, gather a twisted or gently braided section and clip each one separately with medium-sized claw clips. Position these clips so they’re roughly in line horizontally across the back of your head, or offset them slightly for a more asymmetrical feel. The visual effect is that there are two separate held sections framing the loose hair in the center and falling below.
Creating Intentional Gaps and Flow
The beauty of the double-clip approach is that it creates intentional negative space—gaps of loose hair flowing between and below your clipped sections. Pull out face-framing pieces generously, including some slightly longer pieces that fall past your shoulders. The loose sections should feel like they’re flowing around and through the clipped areas, not just hanging separately.
Pro tip: If you find that clipped sections slide down individually, try connecting them subtly—not with a rubber band, but by tucking one clipped section slightly into or across the other, so they provide mutual grip and support without looking obviously connected.
6. The Textured Knot with Claw Clip Anchor
This style creates the illusion of a mini bun while keeping most of your hair down—you’re literally tying a loose knot in your hair, then clipping it in place. It’s sophisticated and different from typical half-up styles while remaining completely accessible.
Tying the Perfect Loose Knot
Gather your hair at the crown as if you were going to do a high ponytail, but instead of securing it with an elastic, take the gathered section and tie it in a simple overhand knot—literally the way you’d knot a rope. Tighten this knot gently (not snug, you want it to maintain softness), and then use your claw clip to anchor it at the base where the knot forms. The knot creates natural, beautiful texture that no amount of teasing could replicate.
Making the Knot Look Deliberately Undone
Pull on the knot gently to loosen and expand it, creating a soft, organic shape rather than a tight, structured knot. Let wisps escape from the knot itself—these should be visible and intentional, not something you’re trying to hide. The fall of hair below the knot should have movement and texture; if your hair is straight, create waves before you start. The entire effect should look like you casually tied a knot in your hair and then clipped it, which is exactly what you did.
Worth knowing: This style works on second-day hair beautifully because a bit of texture and grip actually makes the knot hold better and look more interesting visually.
7. The Messy Bubble Half-Up
This playful style uses your claw clip as part of a bubble-inspired shape—you’re creating a gathered, slightly pouffy section at the crown that’s clipped, then pulling out wisps to create a loose, bubbly texture. It’s fun and modern without reading as too casual.
Creating the Bubble Effect with Texture
Start with textured hair. Take a section from your crown and gather it, clipping it up at about two inches in. Before you clip, gently tease this section at the roots to give it height and grip. Clip firmly enough that the teased section creates a small mound or bubble above the clip. Below the clip, the hair should continue down as your loose fall, but you want to see a clear gathered bubble above the clip line.
Making Multiple Bubbles for Extra Drama
For a more pronounced bubbly effect, you can create this gathered, teased section and then add another claw clip lower down, creating two bubbles stacked vertically. The space between clips should show that same bubbly, textured quality. Pull out face-framing pieces that have different textures and angles to add movement around the structured bubbles.
Pro tip: If you’re using two clips, use matching tortoiseshell or patterned clips rather than metal ones—it softens the look and makes the clips feel like intentional accessory choices rather than just functional hair holds.
8. The Wavy Wrap-Around Half-Up
This style uses a thin section of hair that wraps around your gathered crown section like a decorative detail, creating visual interest and a more finished look. It’s elegant and surprisingly easy to execute, and it works beautifully with wavy or curly hair.
Gathering and Securing Your Base Section
Create your basic half-up by gathering a section from your crown and clipping it up with a claw clip. Once this is secured, take a thin section of loose hair from below the clip (roughly one inch wide) and wrap it around the base of your clipped section, covering the clip itself. This wrapped section should wind around the clip once or twice, creating the visual effect of a decorative band holding everything in place.
Securing the Wrap Without Extra Clips
As you wrap this thin section around your clipped base, tuck the end of it back into the clip itself, or secure it with a tiny bobby pin that blends with your hair color. The wrap should look like it’s just woven around and through, not like there’s any visible fastening. Pull out face-framing pieces and let the wrapped section have some gentle texture—this isn’t about sleek precision, it’s about making the wrap look like it belongs there organically.
Worth knowing: This technique works especially well if your loose section has a slightly different texture than your clipped section—wavy below and straight above, or curly framing straight, for example—because the contrast makes the wrap visually distinct and intentional.
9. The Slicked Back with Soft Clip
This creates contrast between a sleek, controlled back section and soft, loose hair everywhere else. You’re using pomade or gel to slick back the gathered section before clipping it, creating a polished-meets-casual vibe that’s very current.
Achieving Sleek Without Severe
Apply a smoothing pomade or edge control to the section you’re gathering, working it through gently so your hair looks smooth and shiny rather than greasy or stiff. Use something with a light hold rather than a maximum-hold product—you want the slicked effect, not a helmet. Gather this slicked section back and clip it with your claw clip, which should sit where this smooth, controlled section begins.
Balancing Slick with Softness
While the back and crown section is slicked, intentionally encourage texture and wave in the pieces you leave down, especially around your face and shoulders. The contrast between the controlled, shiny clipped section and the soft, textured loose hair is what makes this look work. Use a lightweight texture spray on your loose pieces to encourage movement and definition.
Pro tip: This style works better on slightly dirty hair (day two or three of wear) because product builds up gently over time, and your hair naturally has more grip and texture, making the slicked section even more striking by contrast.
10. The Zigzag Sectioning Pattern
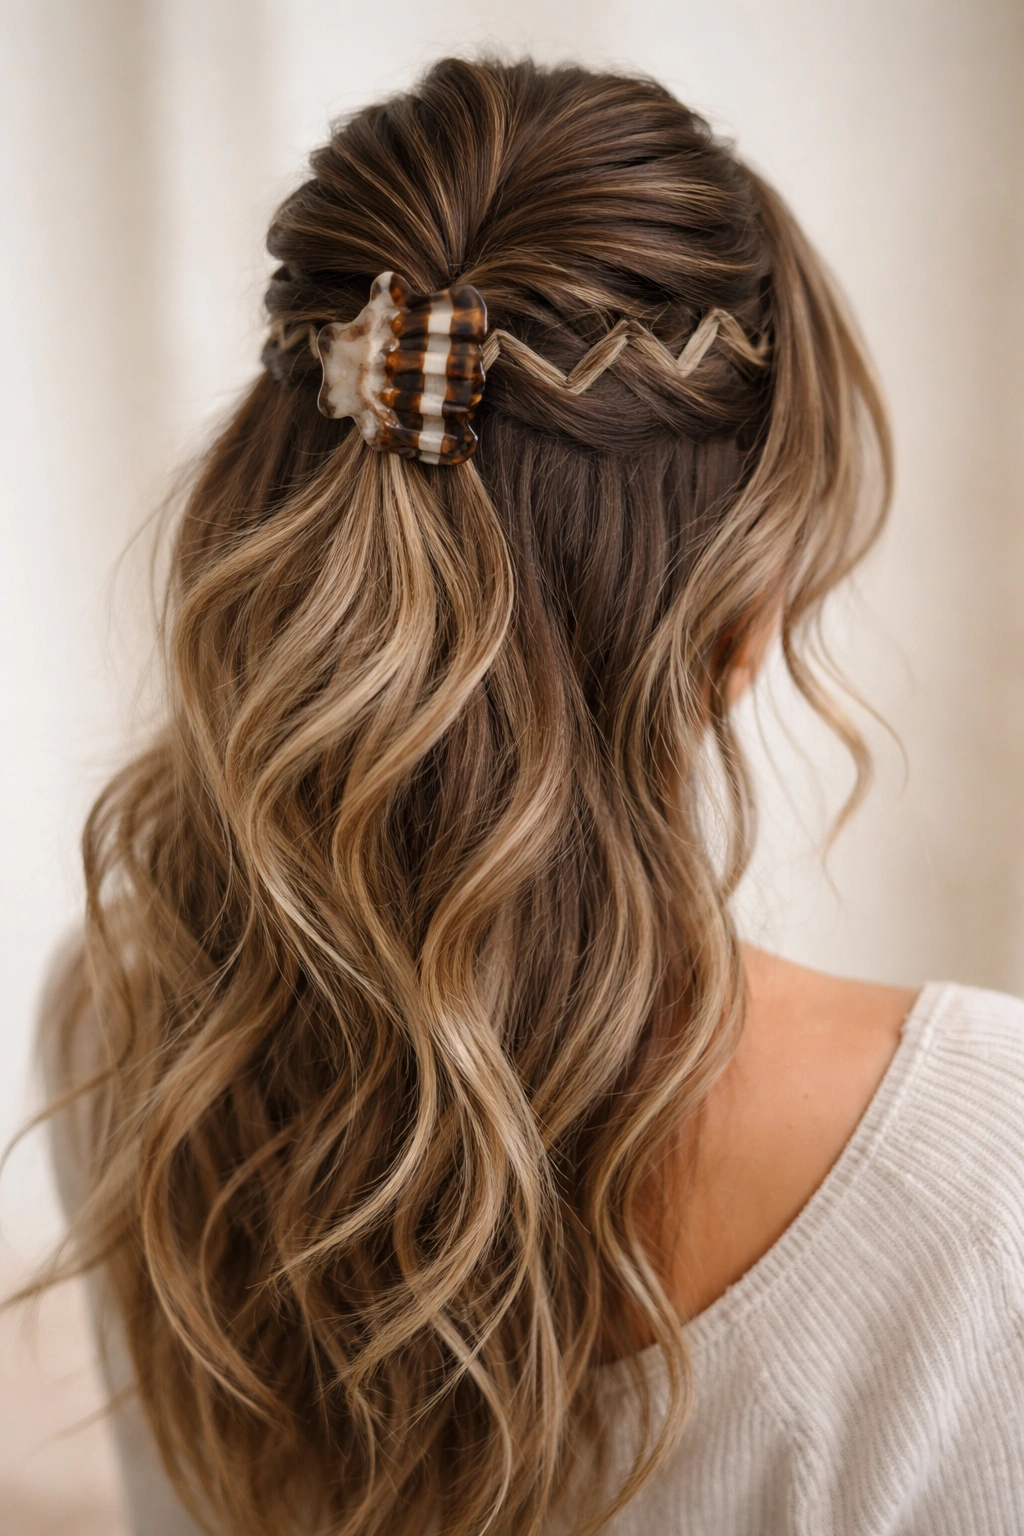
Instead of gathering one smooth section, this style uses deliberate zigzag or angular sectioning that creates visual interest and a more graphic appearance. You’re essentially creating a puzzle-piece pattern at the crown that you clip, so multiple sections of hair feed into the clip area.
Creating Your Zigzag Pattern
Use a rat-tail comb or the tip of a fine-tooth comb to create zigzag or jagged horizontal lines across your crown. These lines should be exaggerated and visible—this is intentional geometry. Gather the sections above your zigzag line, gently teasing them at the roots, and clip them up. The zigzag pattern remains visible because your sectioning line is uneven, creating visual interest and a playful vibe.
Emphasizing the Geometric Effect
Pull out some pieces from your gathered section and from the areas around it to add softness that contrasts with the geometric precision of your zigzag line. The style should feel like you’re balancing structured intentionality with relaxed messiness. Texture spray helps define the zigzag line throughout the day as your hair moves.
Worth knowing: This style photographs incredibly well because the geometric pattern is visually distinctive and interesting from every angle—it’s worth trying if you enjoy creating or sharing styled-hair photos.
11. The Pinned and Clipped Hybrid
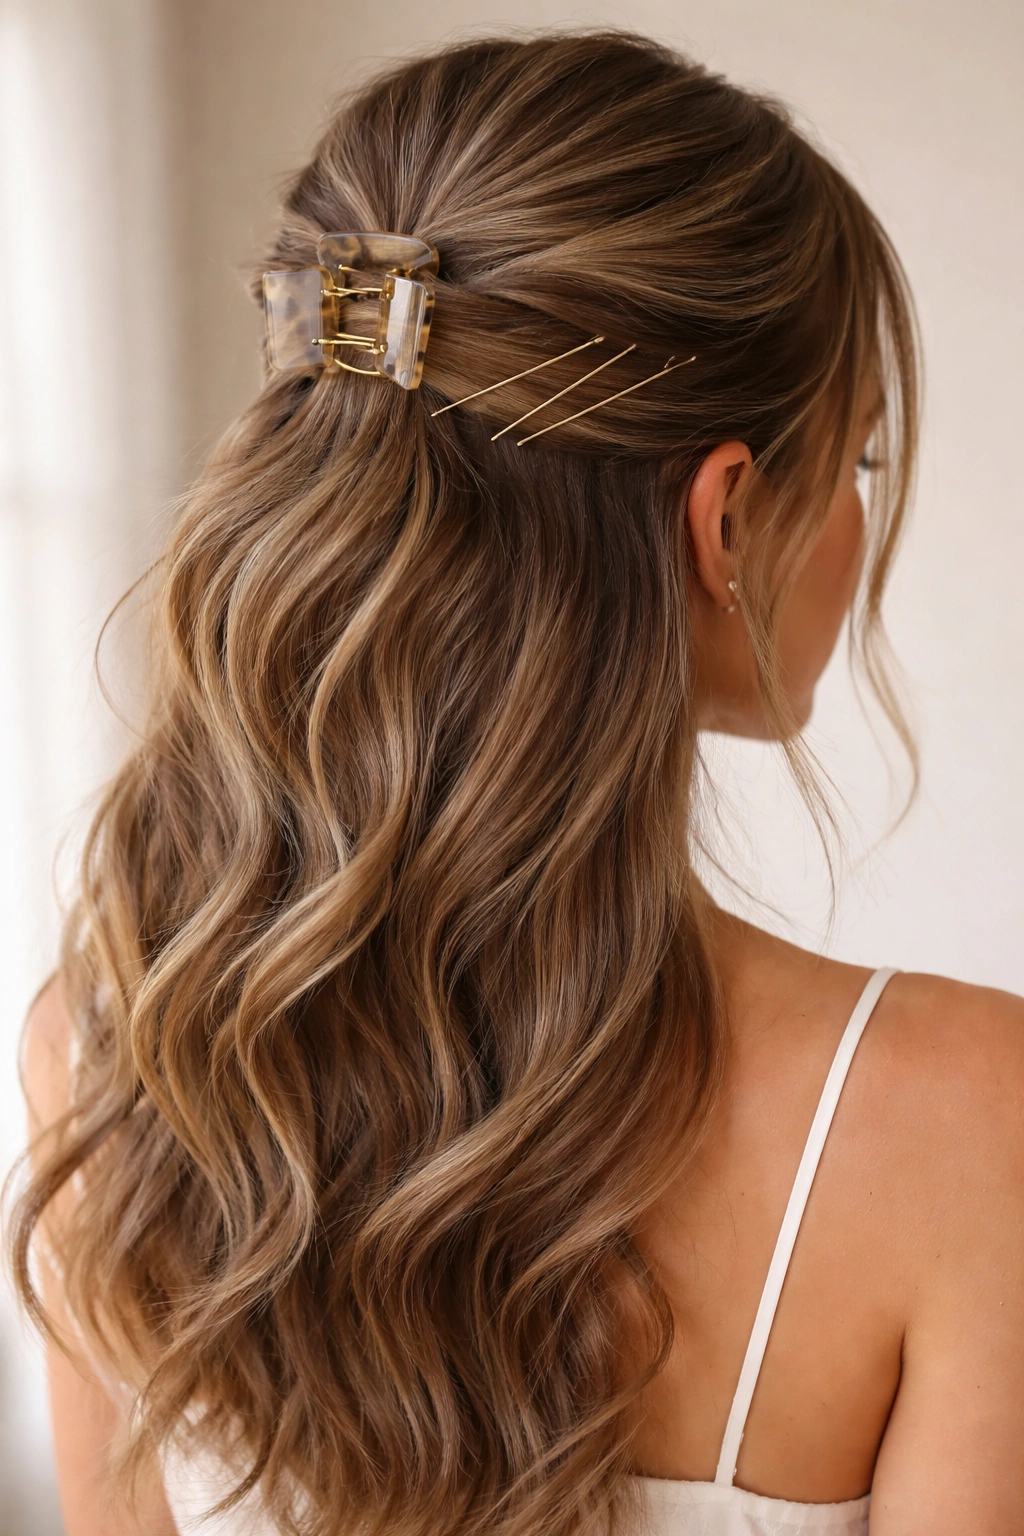
This combines your claw clip with bobby pins to create more stability and a more complex-looking style. You’re using bobby pins to create subtle folds or loops within your clipped section, creating dimension that a single clip alone wouldn’t achieve.
Layering Pins and Clips for Texture
Create your basic half-up clipped section, then use bobby pins (matched to your hair color) to create small diagonal folds or loops within the clipped area itself. These pins hold the hair in the folded position, creating visual texture and complexity. The claw clip is the primary hold, and the bobby pins are adding subtle sculptural detail within that held section.
Keeping the Hybrid Look Balanced
While your clipped and pinned section is relatively controlled, make sure the loose hair below and framing your face is notably softer and messier by contrast. This ensures the hybrid approach doesn’t read as overly complicated or fussy. Pull out plenty of wisps and face-framing pieces that move freely.
Pro tip: This hybrid approach is genuinely useful if you have very fine or slippery hair—the bobby pins provide additional grip points that help your claw clip hold better throughout the day without you needing to clip tightly enough to damage your hair.
12. The Curled and Clipped Statement Look
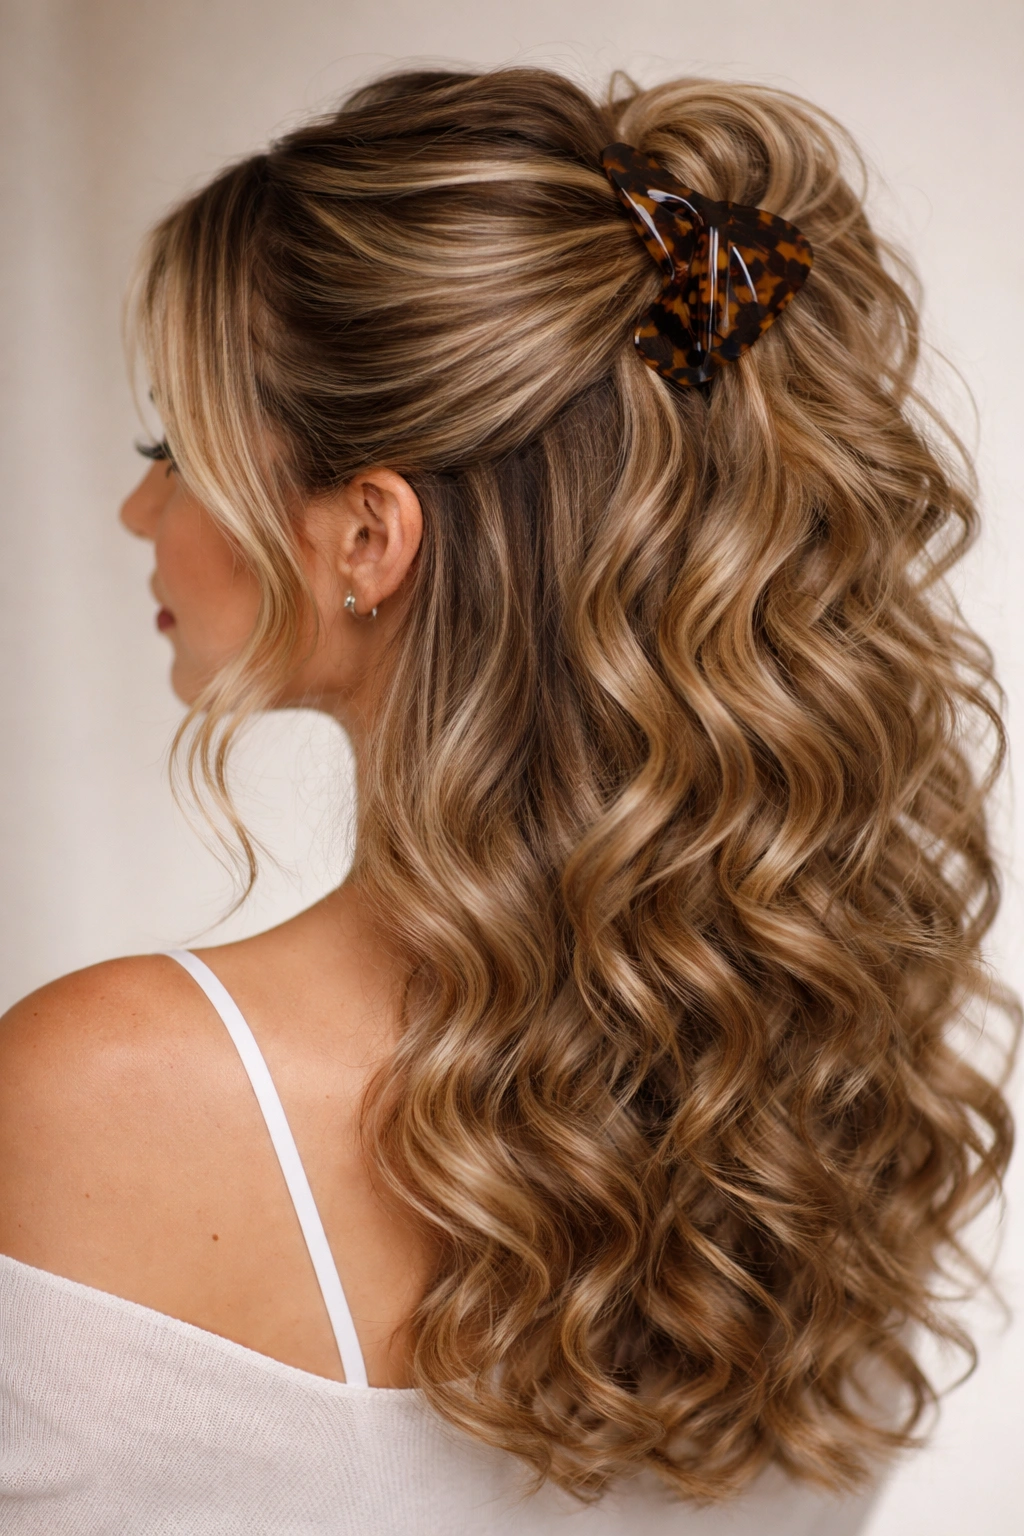
This final style emphasizes curl pattern and texture as the main visual, using your claw clip simply as the functional anchor for what is otherwise a texture-focused design. It’s perfect if you have naturally curly hair or if you’ve spent time creating defined curls.
Enhancing Your Natural or Created Curls
Whether you’re working with natural curls or you’ve created them with a curling iron or wand, the goal is maximum definition and bounce. Clip up your curls in their natural bunched state—don’t smooth or flatten them. Use a clip that’s sized appropriately for your curl volume; too small and you’re crushing them, too large and they’re not secure.
Creating Visual Drama with Curl Pattern
Let your curl pattern be the star of the show. Pull out curls from your clipped section so they’re visible and frame your face with distinct, bouncy texture. Use a curl-enhancing cream or gel before clipping to help maintain definition throughout the day. The messiness here isn’t about undone hair—it’s about celebrating the natural texture and dimension your curls create.
Worth knowing: If you have curly hair, you can create this look even on days when you haven’t specifically styled your curls—your natural curl pattern provides all the visual interest and intentional texture you need, and the claw clip simply creates the half-up structure.
Final Thoughts
The beauty of the messy claw clip half-up half-down style is that it’s endlessly adaptable to your hair type, face shape, and personal aesthetic. What makes each of these twelve styles work is understanding that “messy” doesn’t mean careless—it means deliberately creating texture, pulling out strategic pieces, and choosing techniques that emphasize movement and dimension over precision and polish. The claw clip itself is just the tool; the real magic is in how you section, tease, twist, or braid before clipping, and which wisps you intentionally leave loose.
The styling that lasts all day and actually gets compliments is the kind where you’ve paid attention to texture, layering, and the contrast between held and loose sections. A claw clip that’s slightly too tight, holding overly smooth hair, and keeping everything locked in place perfectly reads as dated and restrictive. But that same clip, gripping hair that has movement and texture and dimension, with pieces escaping and framing your face? That’s the look that feels modern, intentional, and authentically effortless.
Experiment with different clip sizes, placements, and texturizing techniques to find which versions feel most natural and comfortable for your hair and style. You might discover that you prefer the structured sophistication of the braided crown, or the playful vibe of the bubble effect, or the elegant simplicity of the tousled crown. The point is that you now have a full toolkit of approaches, and each one can be adjusted and adapted to work with your hair’s unique qualities.