There’s something undeniably sharp about a slicked-back half up half down style. The combination of sleekness and dimension creates a look that feels both polished and effortlessly cool — perfect for everything from casual outings to formal events. For Black women, slicked-back hairstyles offer incredible versatility because they work beautifully with natural texture, locs, braids, and virtually every hair type and length. The beauty of a half up half down variation is that you get the best of both worlds: the put-together feel of an updo with the freedom and movement of hair down.
What makes these styles so popular is their practicality paired with undeniable style. A slick back halts flyaways and frizz while keeping hair off your face, yet the bottom half flowing down prevents that severe, pulled-back feeling. You can dress them up with accessories, experiment with different hair textures in the secured section, or keep them minimal and clean for everyday wear. Whether you’re working with 4c coils, silky-straight lengths, thick locs, or everything in between, there’s a slicked-back half up configuration that’ll work for you.
The real magic happens when you understand the techniques and products that make these styles pop. A good edge control cream, the right brush for smoothing, and strategic sectioning transform a basic half up into something that looks expensive and intentional. Whether you’re aiming for a sharp, geometric vibe or something softer and more romantic, the styling foundation stays the same — but the details change everything.
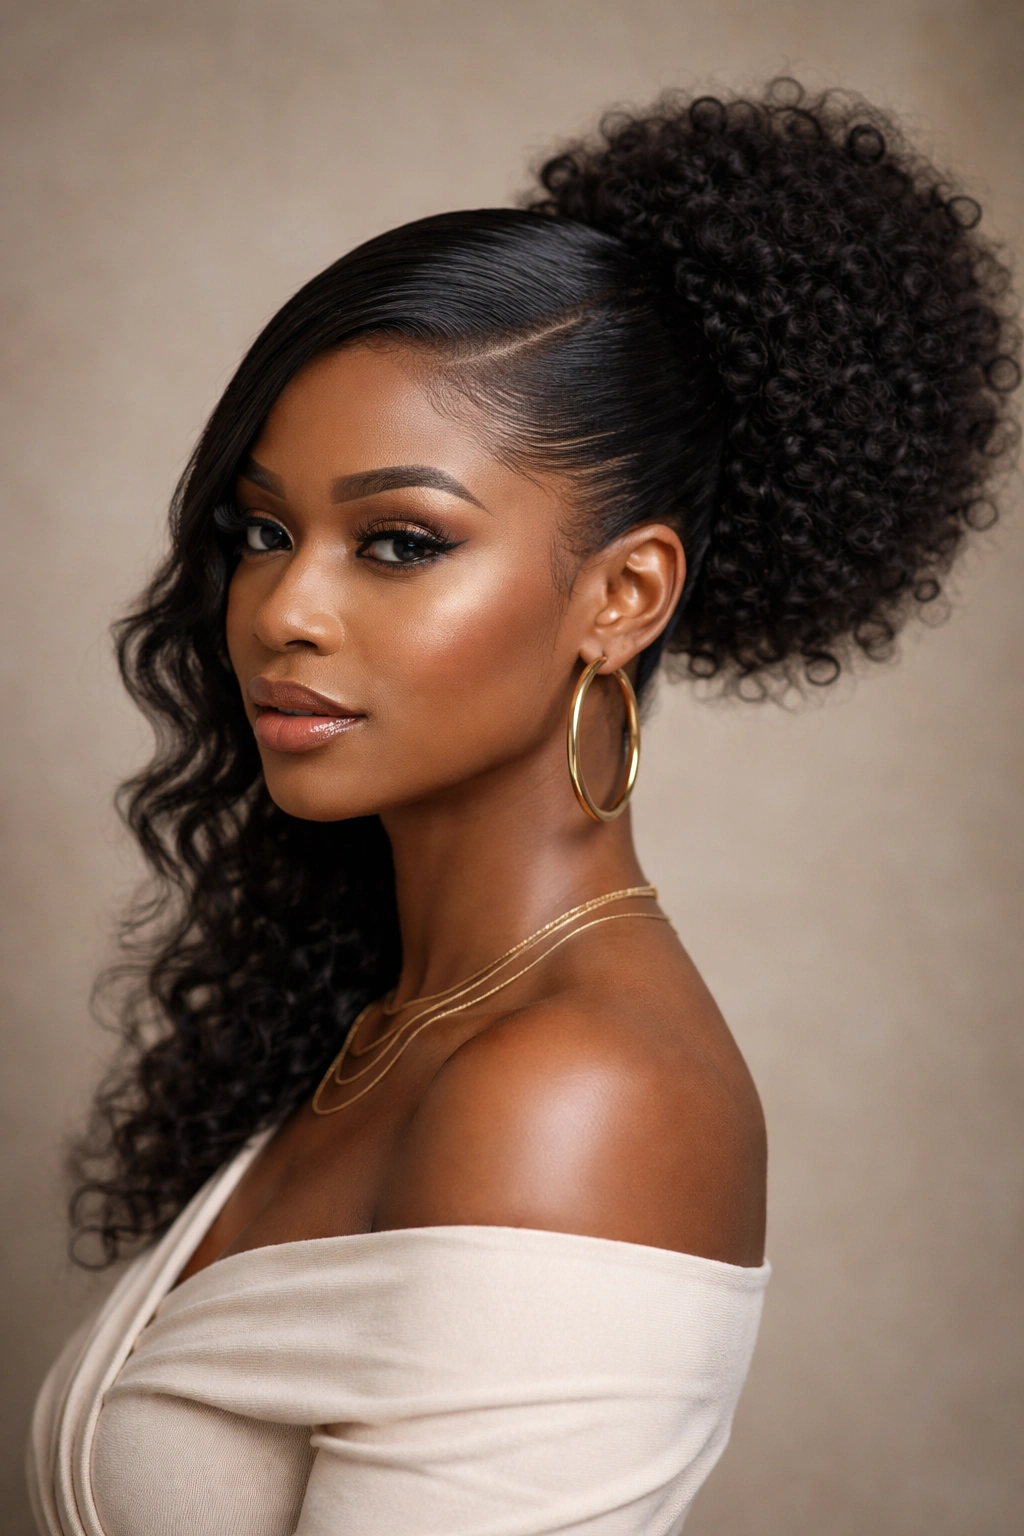
1. Sleek Ponytail with Curved Edges
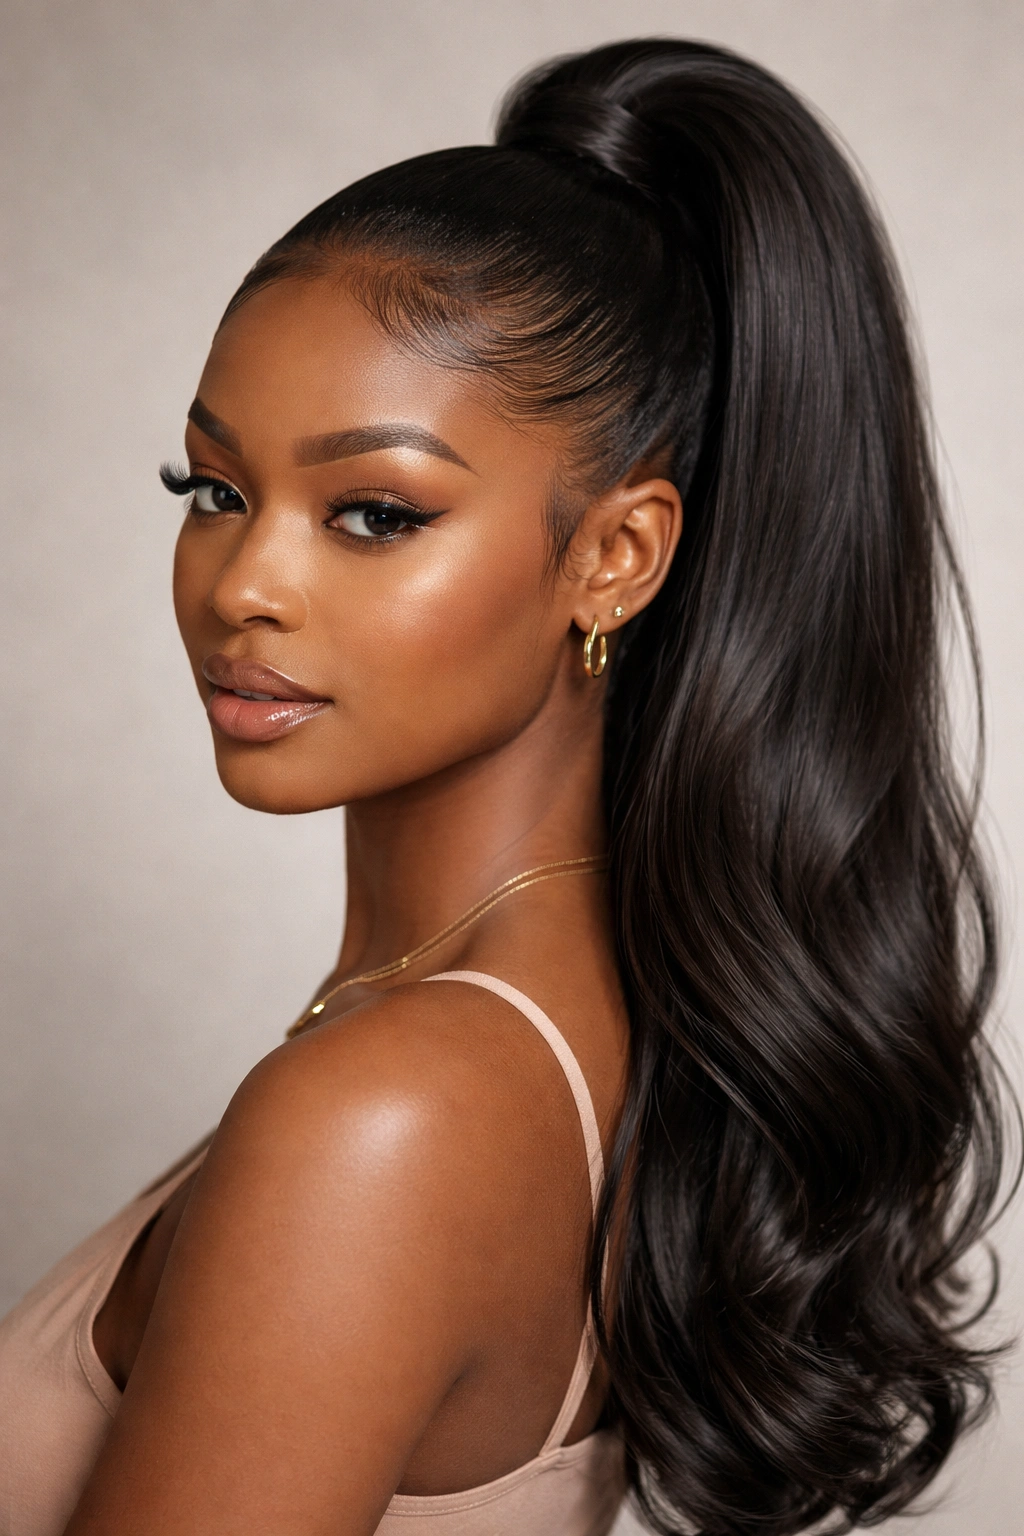
This style takes the classic half up and elevates it by smoothing the back edges into a gentle curve rather than leaving them blunt. The top section gets slicked back tightly against your scalp, often with a deep side part, before gathering into a high ponytail that sits at the crown. The curved edges are what set this apart — instead of straight lines, your edges follow the natural contour of your head and hairline, creating a softer, more sophisticated look.
How to Create the Perfect Shape
Start with a clean scalp and lightly moisturized hair. Apply your edge control product — something with hold but flexibility works best — and use a fine-tooth comb or toothbrush to smooth the top section of hair back against your head. The key is applying consistent pressure as you smooth, moving in one direction. Once you reach the crown, clip the back section out of the way and focus on your edges. Using a small brush and more edge control, define the sides of your face and nape with curved, intentional lines that follow your natural hairline rather than fighting it.
Styling Steps
- Section off the front and crown area, leaving the back down for now
- Apply moisturizer to damp hair and let it settle for 2-3 minutes
- Use a medium-hold edge control and fine-tooth brush to smooth the slicked section back
- Curve the edges gently along your hairline with a smaller brush — don’t make them too thin or sharp
- Gather the back section into a ponytail at the crown, securing with a covered elastic
- Smooth any surface hairs with a light hand and more edge control for a polished finish
Pro tip: Use a damp toothbrush rather than a regular brush for edges — the bristles are finer and give you more control, especially for smaller, more delicate curved lines.
2. Feed-In Braids Half Up
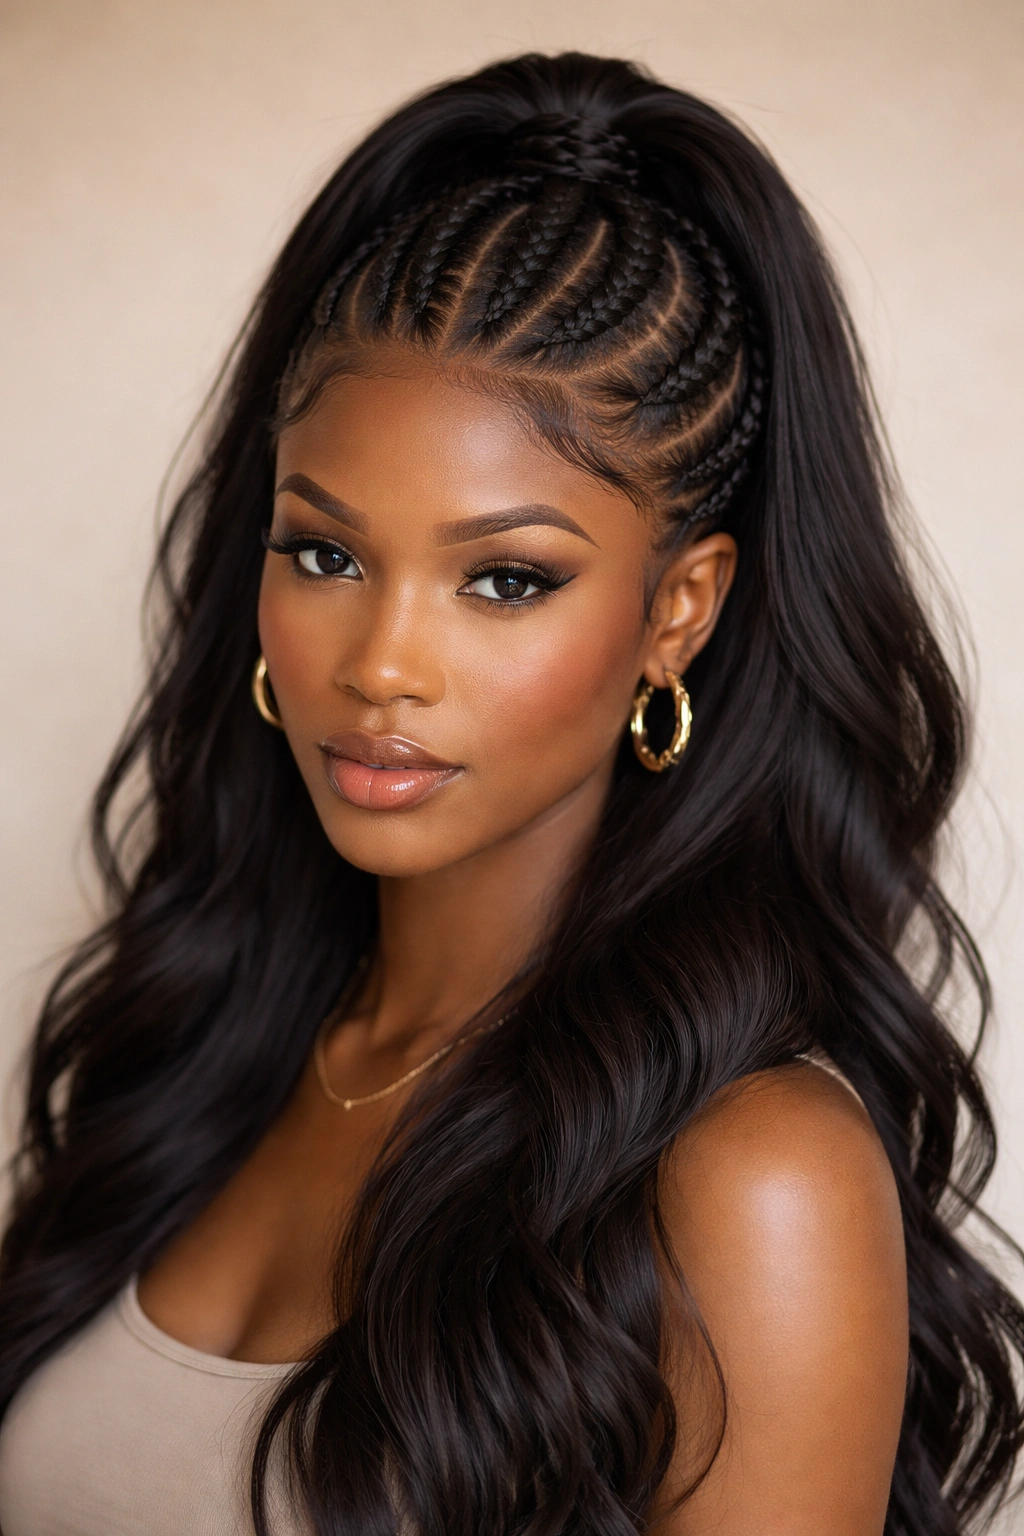
This modern take uses two or three feed-in braids that travel from your edges back toward the crown, where they merge into a single braid or are secured together in a half up position. The magic is in how the braids start: they’re fed with small sections of loose hair as you braid, creating a thicker braid that looks sculptural and intentional. The bottom half of your hair stays free, creating beautiful contrast between the structured braids and loose texture below.
Why This Style Stands Out
Feed-in braids offer texture and visual interest that a simple slick and ponytail can’t match. They’re also more comfortable to wear for longer periods because they don’t pull as hard against your entire scalp — the tension is distributed along the braid path. This style works beautifully on natural hair, coils, waves, and even straighter textures, and it’s protective enough to be a legitimate protective style while still looking intentional and current.
Installation and Maintenance
- Section the front and crown area into 2-3 parts, depending on thickness and your preference
- Start each braid at the hairline, feeding in small sections of loose hair as you braid backward
- Braid back toward the crown, continuing to feed in new hair every 2-3 stitches
- Secure all braids together at the crown with a covered elastic, or let each one fall and clip individually
- Leave the back section completely down and unbraided for dramatic contrast
- Braid should feel snug but not painfully tight — you should be able to fit one finger under the tension
Worth knowing: This style actually keeps your edges safer than some slicked styles because the tension is distributed through the braid rather than concentrated in one pulled-back section.
3. Slicked Crown with Twisted Bun
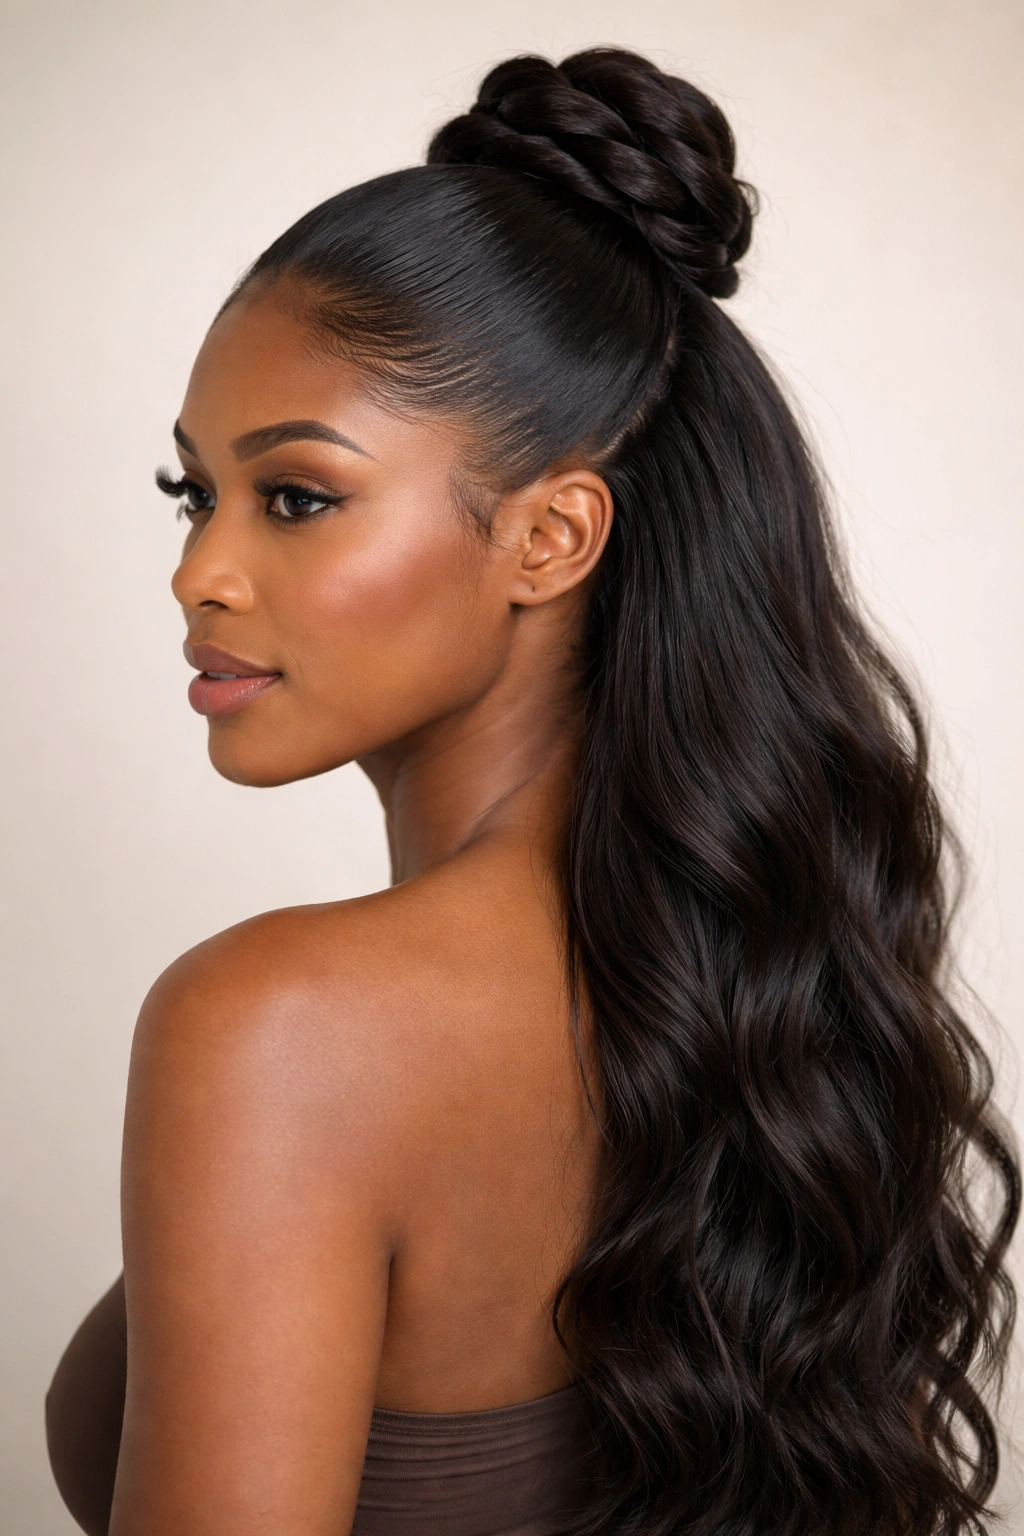
Here’s an unexpected twist on the half up: instead of a ponytail at the crown, you create a twisted bun using only the top section. The hair gets slicked back smoothly, then divided into two thick strands that you twist around each other before wrapping into a small, compact bun. The bottom half hangs freely, creating that sought-after half up half down silhouette while the bun adds height and dimension.
Creating Definition Through Twists
This style shines because twists add texture and visual weight even when using just a small amount of hair. Start by slicking back the top section as usual, but instead of immediately putting it into a standard ponytail, divide it into two even parts. Twist each part tightly (this takes practice, but the tension matters), then twist those two twisted sections around each other — this creates a rope-like texture. Wrap this twisted rope around itself at the crown and secure with bobby pins and edge control.
Step-by-Step Technique
- Apply moisturizer and edge control to the top section while it’s still damp
- Smooth back firmly against your scalp using a fine brush, creating an even surface
- At the crown, divide the section into two thick, even parts
- Twist each part tightly and independently — keep tension consistent throughout
- Bring the two twisted sections together and twist them around each other
- Wrap this double-twisted rope around the base, creating a bun shape
- Secure with bobby pins and smooth the surface with a tiny bit more edge control
- Leave the back section completely down and arrange it how you prefer
Insider note: If your twisted bun feels loose after an hour, it’s usually because you didn’t twist tightly enough initially. Tighter twists equal longer-lasting buns — but never so tight that it creates tension or discomfort.
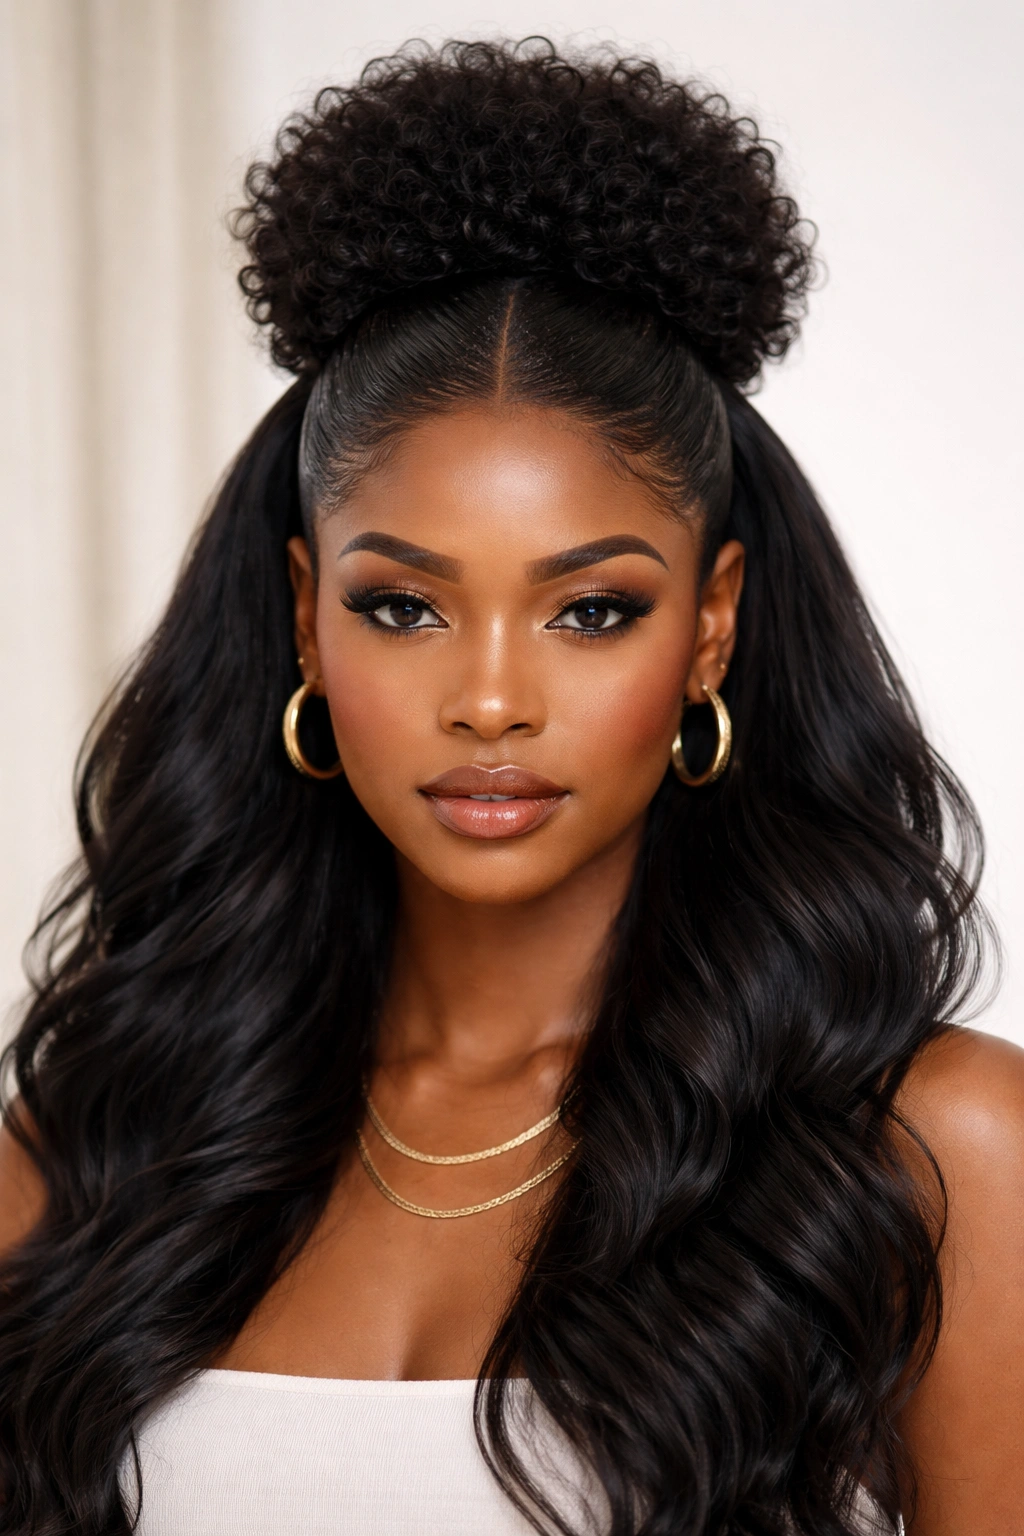
4. Curved Part with Sleek High Puff
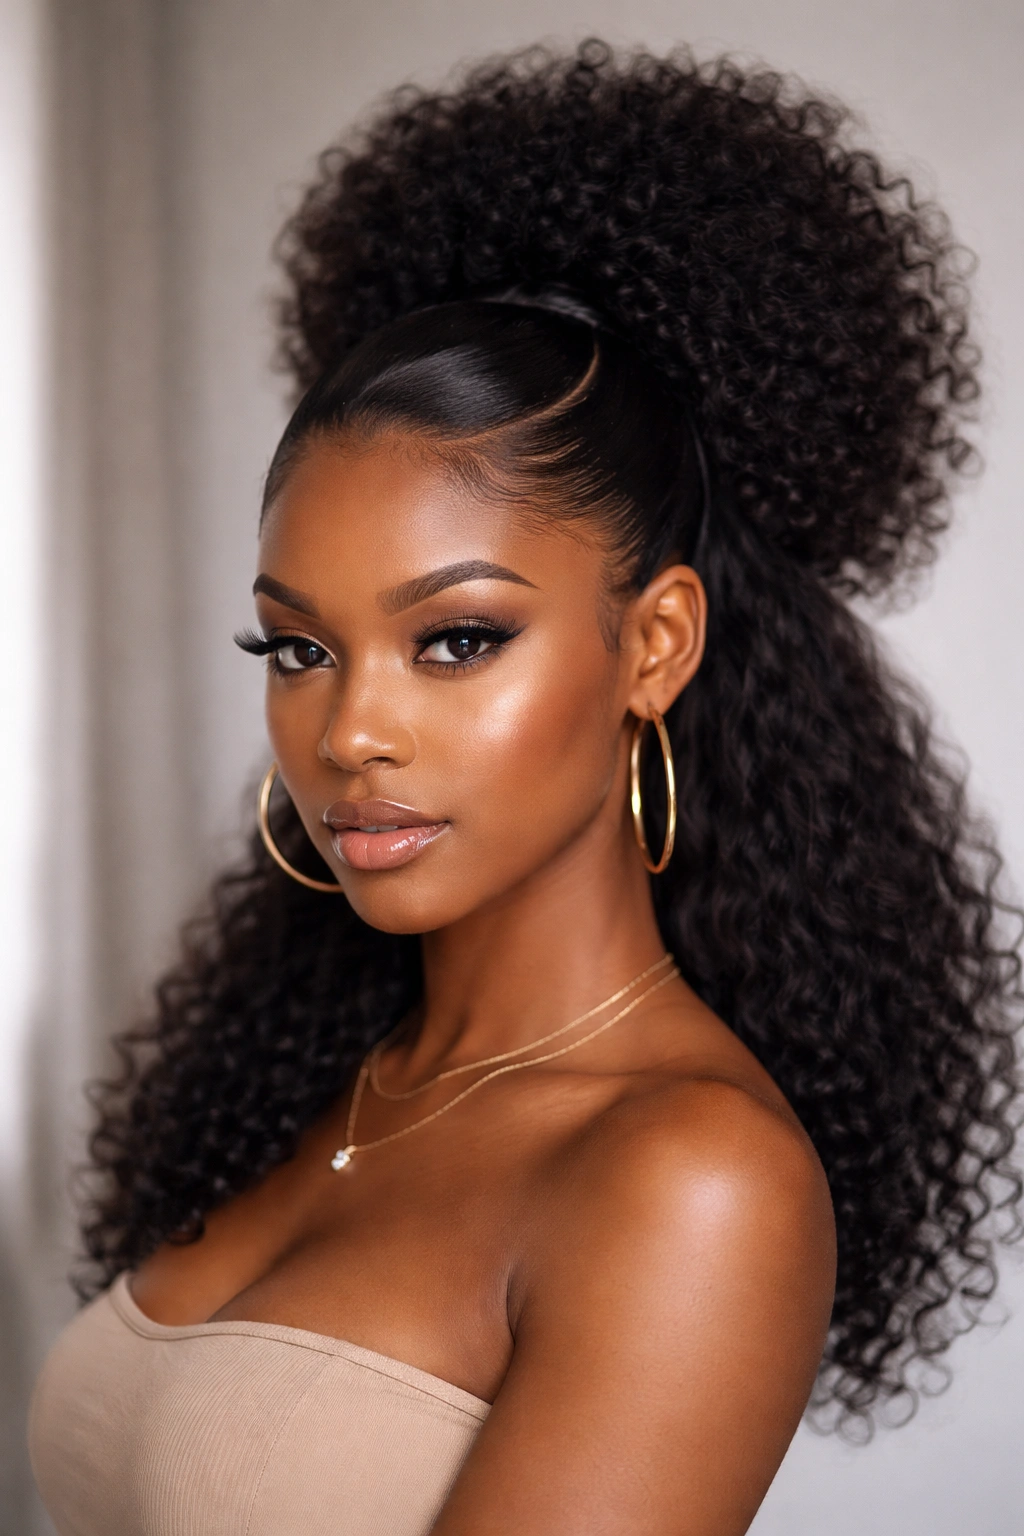
This style combines geometric precision with soft volume, using a sharply curved or angled part to separate the top and back sections, then slicking the top section back while the bottom gets gathered into a high, full puff. The contrast between the sleek top and the voluminous bottom section is what makes this visually striking. The curved part becomes almost as important as the styling itself — it’s the frame for the whole look.
Mastering the Curved Part
A truly impressive curved part requires a good rattail comb and steady hand, but it’s absolutely learnable. The part line should start at one temple, curve smoothly across the crown following a natural arc, then descend to the opposite ear or nape area. Some people prefer a more dramatic curve — almost like a question mark — while others keep it subtle. The curve should look intentional but not forced, following the natural contours of your head somewhat.
Styling for Maximum Impact
- Section your hair while damp, creating your curved part with precision
- Apply moisturizer to both sections and let it absorb for a few minutes
- Slick the top section back smoothly with a medium-hold edge control and fine brush
- Gather the bottom section into a high puff at the crown, using a covered elastic
- Fluff and pick out the puff to create volume and texture — don’t leave it sleek
- Define your part line with edge control and a fine brush, making sure the curve is visible and clean
- Optional: smooth the surface of the slicked section with a light hand of gel for extra polish
Pro tip: Use a gel with flexible hold rather than a hard-hold paste for the curved part line — this lets the part stay defined while still allowing some movement so it doesn’t look painted on.
5. Double Slicked Sides with Center Puff
This style creates visual balance by slicking back both sides of your hair smoothly, leaving a thick center section that gets gathered into a puff at the crown. The slicked sides frame your face and create clean lines, while the center puff provides all the volume and texture. It’s a modern, geometric look that reads as intentional and sculpted.
Why Symmetry Works
Double slicked sides are incredibly flattering because they create a frame for your face without the severity of an all-over slicked look. The slicked sides draw attention inward, while the center puff adds dimension and prevents the style from feeling too flat or harsh. This works exceptionally well for round, square, or heart-shaped faces because the side smoothness elongates while the center volume at the crown draws the eye up.
Sectioning and Application
- Identify your natural part or create a clean center part from forehead to nape
- Section out the sides — roughly from temple to ear on each side
- Apply moisturizer and medium-hold edge control to the side sections
- Smooth each side back firmly with a fine-tooth comb, following the curve of your head
- Gather the entire center section into a puff at the crown using a covered elastic
- Fluff and shape the puff to your preferred volume level
- Use edge control to define clean side edges where they meet the puff
Worth knowing: This style actually shows off your puff’s texture beautifully because it’s not competing with other textured sections — all the attention goes to that center volume.
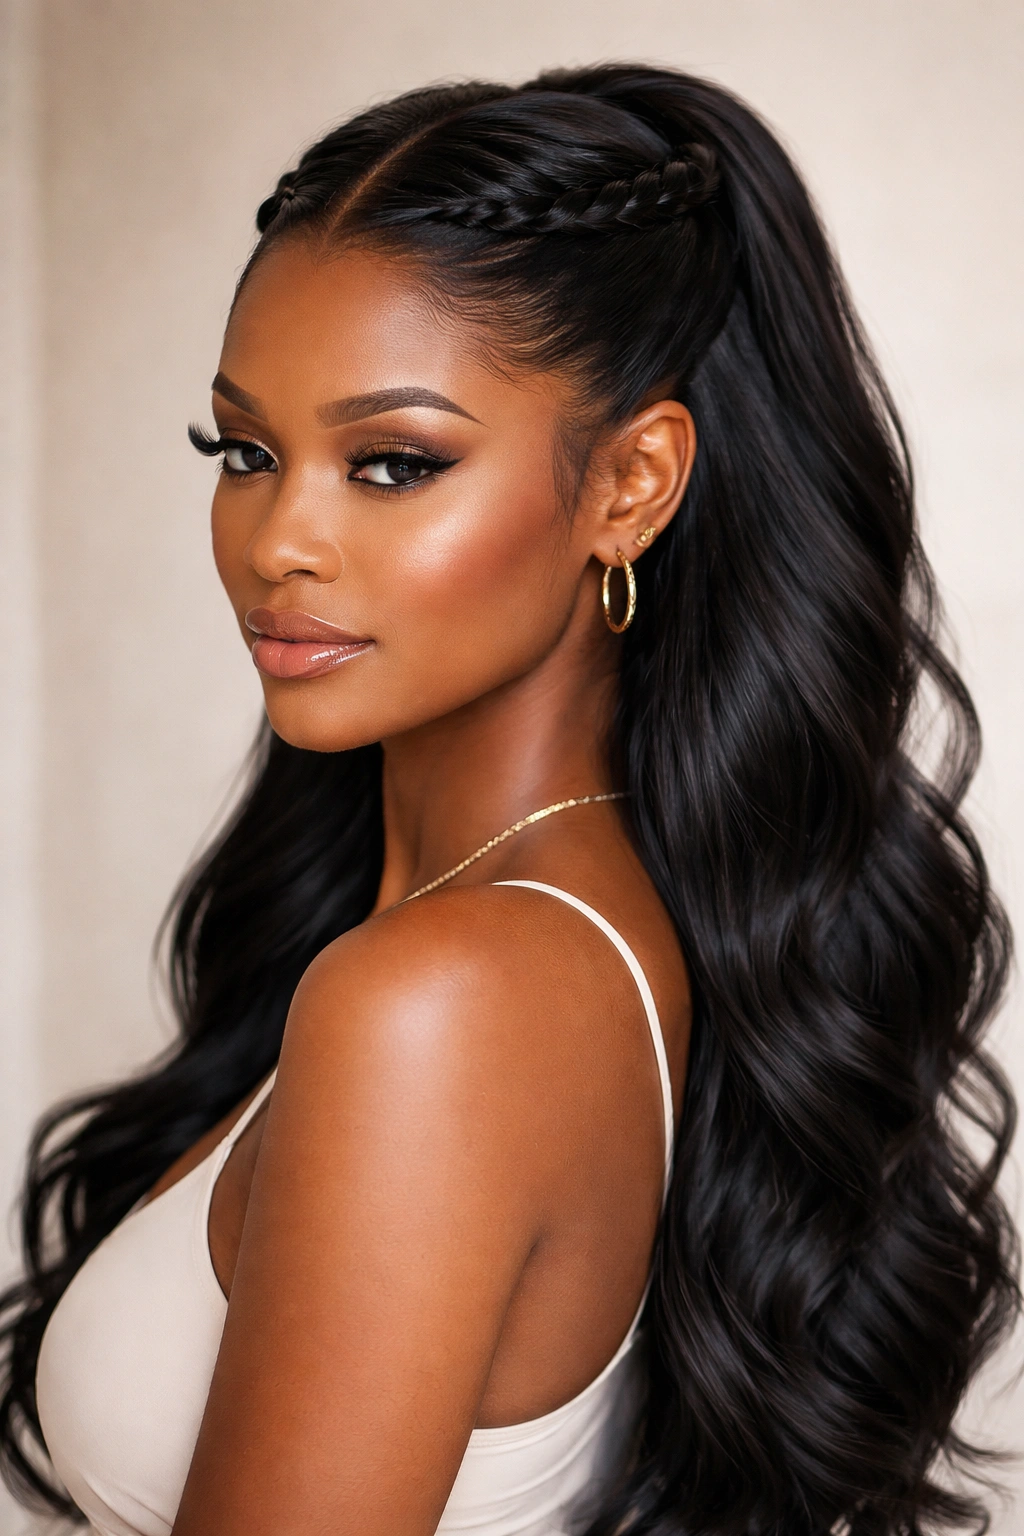
6. Braided Crown Half Up
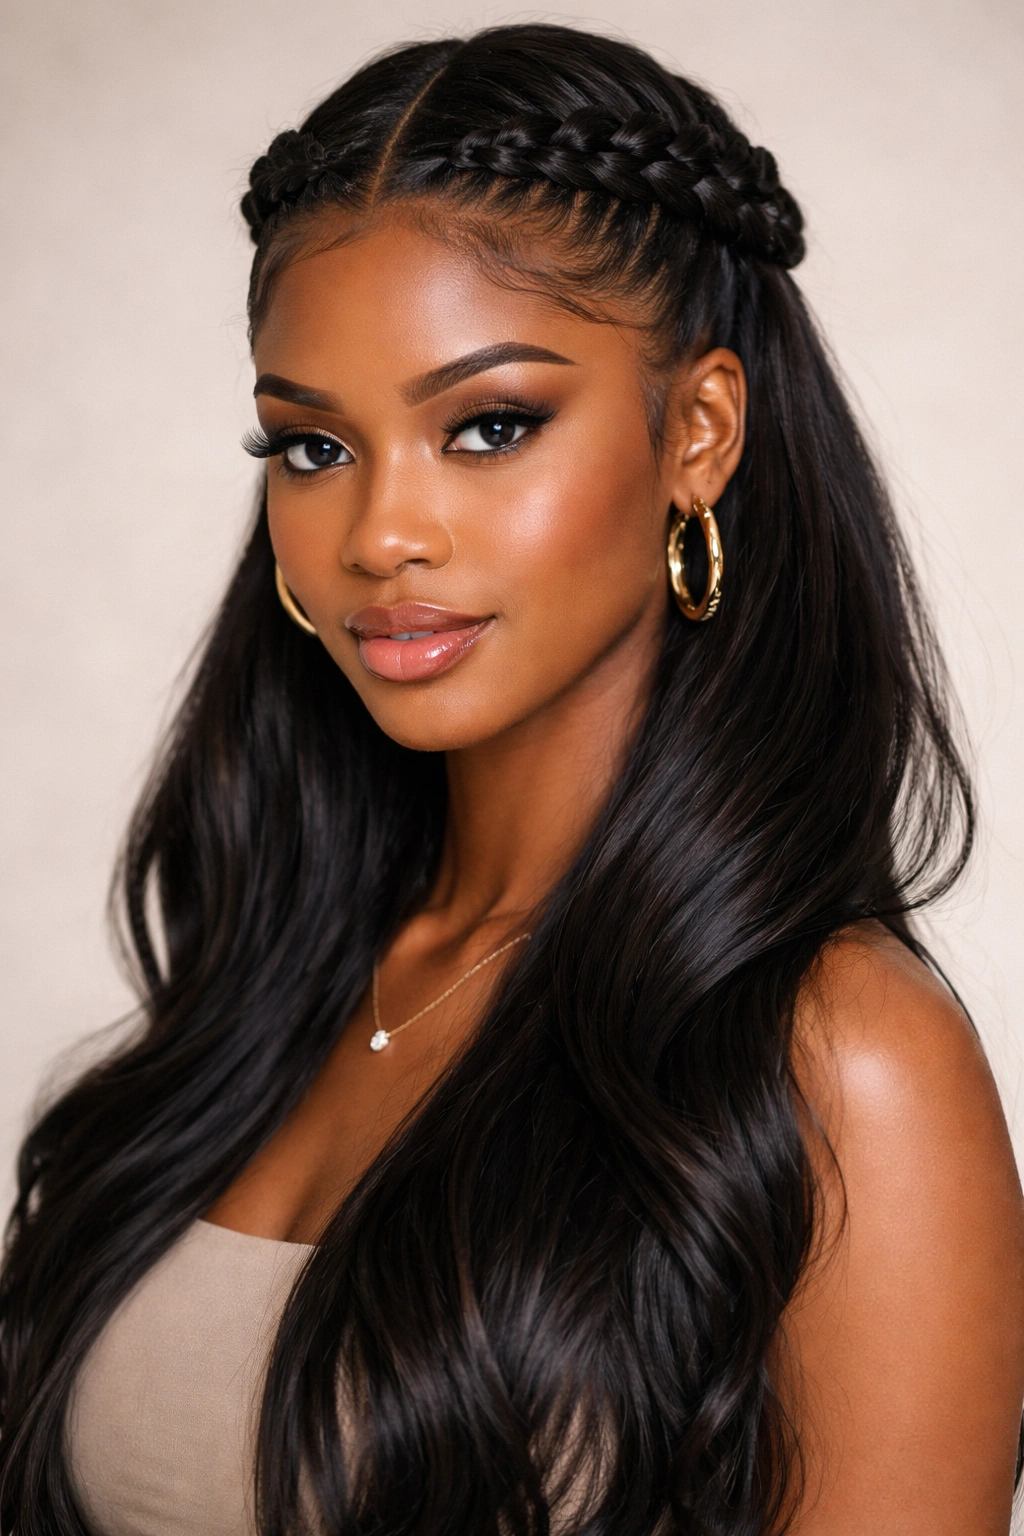
Instead of slicking the top section smooth, you create a thick, intricate braid that travels from one ear to the other, creating a crown-like effect. This braid then anchors the half up section, with the rest of your hair flowing below. The braided crown adds texture and visual interest while keeping the front neat and controlled.
Braid Selection and Placement
You can use a simple three-strand braid, a more intricate Dutch braid, or even a cornrow-style braid — it depends on your hair texture and the vibe you want. The braid should start near one ear, travel across the crown (loosely following where a crown would sit), and end near the opposite ear. Once the braid reaches the back, you can either secure it into a ponytail with the rest of your hair, or leave it as-is and gather the remaining hair into a separate puff or ponytail.
Installation Method
- Section out the portion of hair you’ll braid — typically the front and crown area
- Moisturize this section and apply a light cream or oil for slip
- Start the braid near one temple, weaving back toward the crown
- Make the braid as thick or thin as you prefer — thicker braids look more dramatic
- Continue braiding across the crown and down toward the opposite ear
- Secure the end of the braid with a bobby pin and cover with the surrounding hair
- Gather all remaining hair (the hair below the braid line) into a ponytail or puff
- Leave the braid visible across the back, or tuck it under the puff for a more integrated look
Insider note: If your braid feels loose by the end of the day, do it tighter next time — but not painfully tight. Practice makes perfect with braid tension.
7. Geometric Triangle with Sleek Back
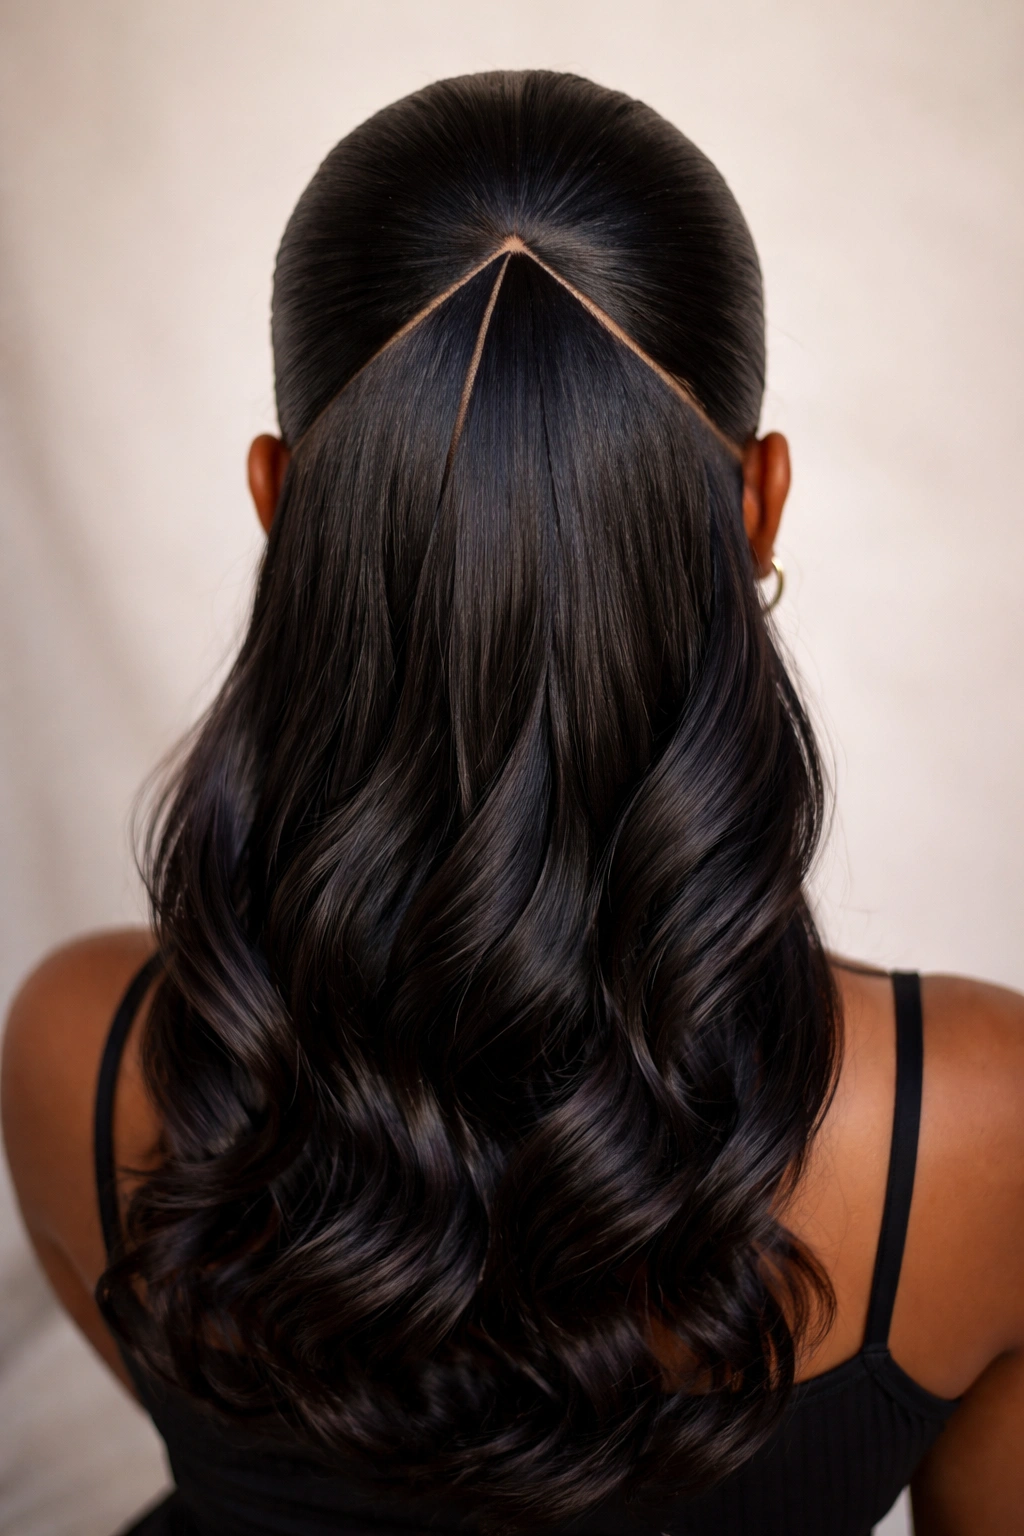
This sculptural style uses sharp, angular lines to create a geometric triangle shape on the crown, with the hair inside that triangle slicked back and the bottom section left down. The triangle is created with precision parting and edge control, making clean lines from the crown down to the nape. It’s a bold, modern look that screams intentionality.
Mastering Angular Geometry
This style requires confidence with parting and edge control, but the impact is worth the practice. You’re creating a triangle with the point at the crown and the base at the nape. Some versions make this triangle very pronounced and obvious, while others keep it subtle — it depends on your preference. The edges of the triangle should be sharp and defined, created with a fine-tooth comb and strong-hold edge control.
Parting and Styling Steps
- Identify where you want your triangle to point (usually the crown or slightly back from it)
- Use a rattail comb to create two diagonal lines from the point down to your nape, forming the triangle sides
- This triangle section gets slicked back firmly against your scalp with edge control
- The hair outside the triangle stays free and unslicked
- Define the edges of your triangle with a fine brush and edge control, making them as sharp as you prefer
- Smooth the top section within the triangle with a light hand
- Leave the bottom and side sections down — you can wear them straight, textured, or curled
Pro tip: Take a photo of your triangle after you’ve slicked it, so you can recreate the exact same shape next time — muscle memory helps, but visual reference is golden.
8. High Sleek Topknot with Curved Baby Hairs
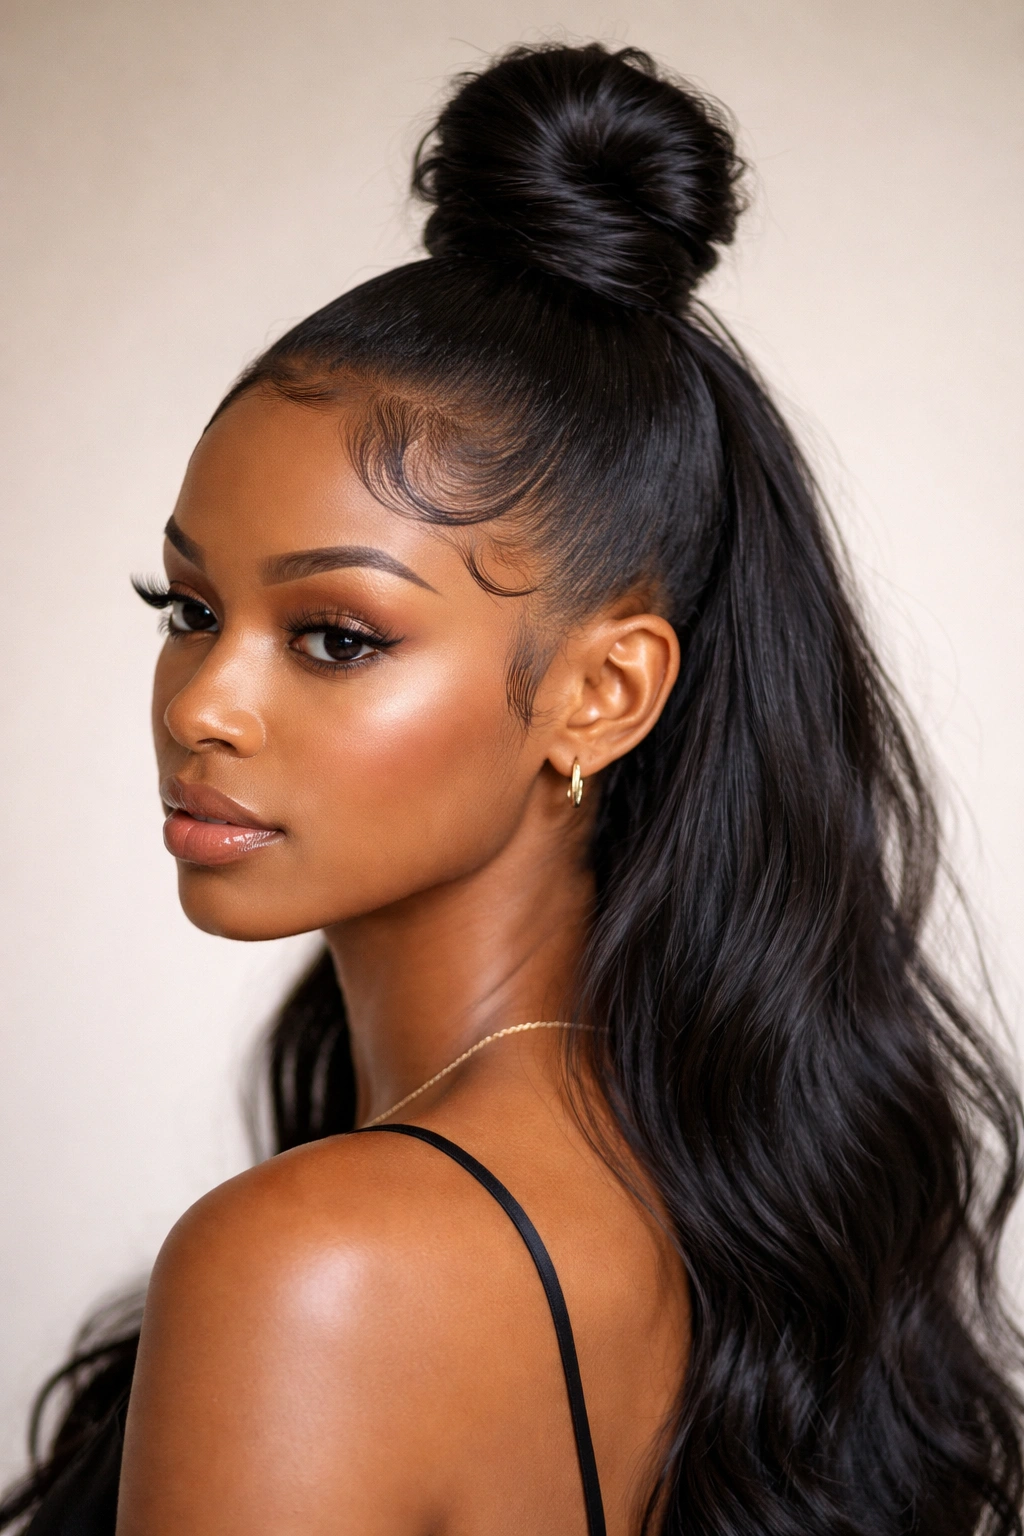
This style takes the half up concept and brings it to an elevated extreme: everything from mid-crown upward gets slicked back into a tight, high topknot, while all the hair below stays completely down. The topknot is compact and sits high on the head, and the real artistry happens with your baby hairs — they get smoothed into deliberately curved, intentional shapes around your hairline.
Styling the Perfect Topknot
The topknot should sit directly on top of your head, not tilted to one side. Slick all the hair in that top section back toward the crown with a fine brush and strong-hold edge control, gathering it into the highest possible ponytail position. Then twist or braid this gathered section and wrap it around itself into a compact bun, securing with bobby pins as needed. The bun should feel solid and neat, not loose or wispy.
Baby Hair Artistry
- After creating the topknot, focus on the hair around your entire hairline
- Apply edge control and use a small, precise brush to create curved lines
- Some people do S-curves, some do spirals, some do simple swooshes — choose your preferred pattern
- The curves should feel intentional and match on both sides of your face for balance
- Use a light hand — baby hair styling is about definition, not severity
- Let the edge control set for a few minutes before moving your head around
- This frame of curved hair contrasts beautifully with the loose hair below
Worth knowing: A flexible-hold edge control works better than a rock-hard gel for baby hairs — it lets them move slightly while still staying defined.
9. Side-Swept Slick with Asymmetrical Puff
This style breaks the symmetry rules by slicking everything back at an angle — typically toward one side — and then gathering the hair into an asymmetrical puff that sits off-center. The side-swept slick creates movement and visual interest, preventing the style from feeling too geometric or stiff. It’s perfect for people who want the polish of a slicked style but also want something with a bit of edge.
Creating the Sweep
The entire top and crown section gets slicked back, but instead of going straight back, you’re directing it toward one side. This means your brush strokes should follow the direction of the sweep, and your edge control application should be heavier on the side you’re sweeping away from. Once you reach the gathering point, the puff sits off to the side where you’ve swept the hair, creating an asymmetrical silhouette.
Asymmetrical Assembly
- Apply moisturizer and edge control to the top section while damp
- Use a fine brush to smooth everything back toward your chosen side — let’s say the right
- The smoothing should follow a diagonal path, not straight back
- Gather the hair into a puff on the right side of the crown area
- The puff naturally sits asymmetrically because of how you’ve smoothed the hair
- Leave the left side of your face more exposed, which is actually very flattering
- Define your edges with intentional lines that follow the direction of your sweep
- Fluff the puff and arrange it to your preferred volume
Insider note: Asymmetrical styles are incredibly flattering on most face shapes because they create visual movement and break up the center line of your face.
10. Twisted Elegance Half Up
This style uses two thick, elegant twists that travel from the temples back toward the crown, where they meet and are secured together in a half up arrangement. The twists are intentionally visible and meant to look sculptural, not hidden. The bottom half flows freely, and the twists themselves become the focal point of the style.
Twist Techniques for Visual Impact
For this style to work, your twists need to be neat, even, and visually interesting. Start each twist near your temple with a section of hair about an inch thick. Twist it tightly and consistently as you travel back toward the crown, adding small sections of hair along the way if you want the twist to get thicker. Once both twists reach the crown, secure them together with a bobby pin or covered elastic, letting the ends of the twists either fall into the loose hair below or wrap around the base.
Step-by-Step Technique
- Section two equal parts at your temples, about an inch thick each
- Apply moisturizer and a light cream to the hair you’re twisting
- Twist the first section tightly, starting at the temple and traveling back toward the crown
- As you twist, you can add small sections of hair along the path for a fuller twist
- Repeat with the second twist on the other side, making sure it mirrors the first
- Bring both twists together at the crown and secure with a covered elastic or bobby pins
- Tuck any loose ends from the twists into the hair below, or leave them flowing
- Smooth the face-framing area around the twists with a light hand
- Leave the bottom section completely down and arrange as preferred
Pro tip: Practice doing these twists on damp hair first — the moisture makes them easier to control, and once they dry, they’ll hold the shape beautifully.
11. Sculptural Slick with Statement Hair Cuff
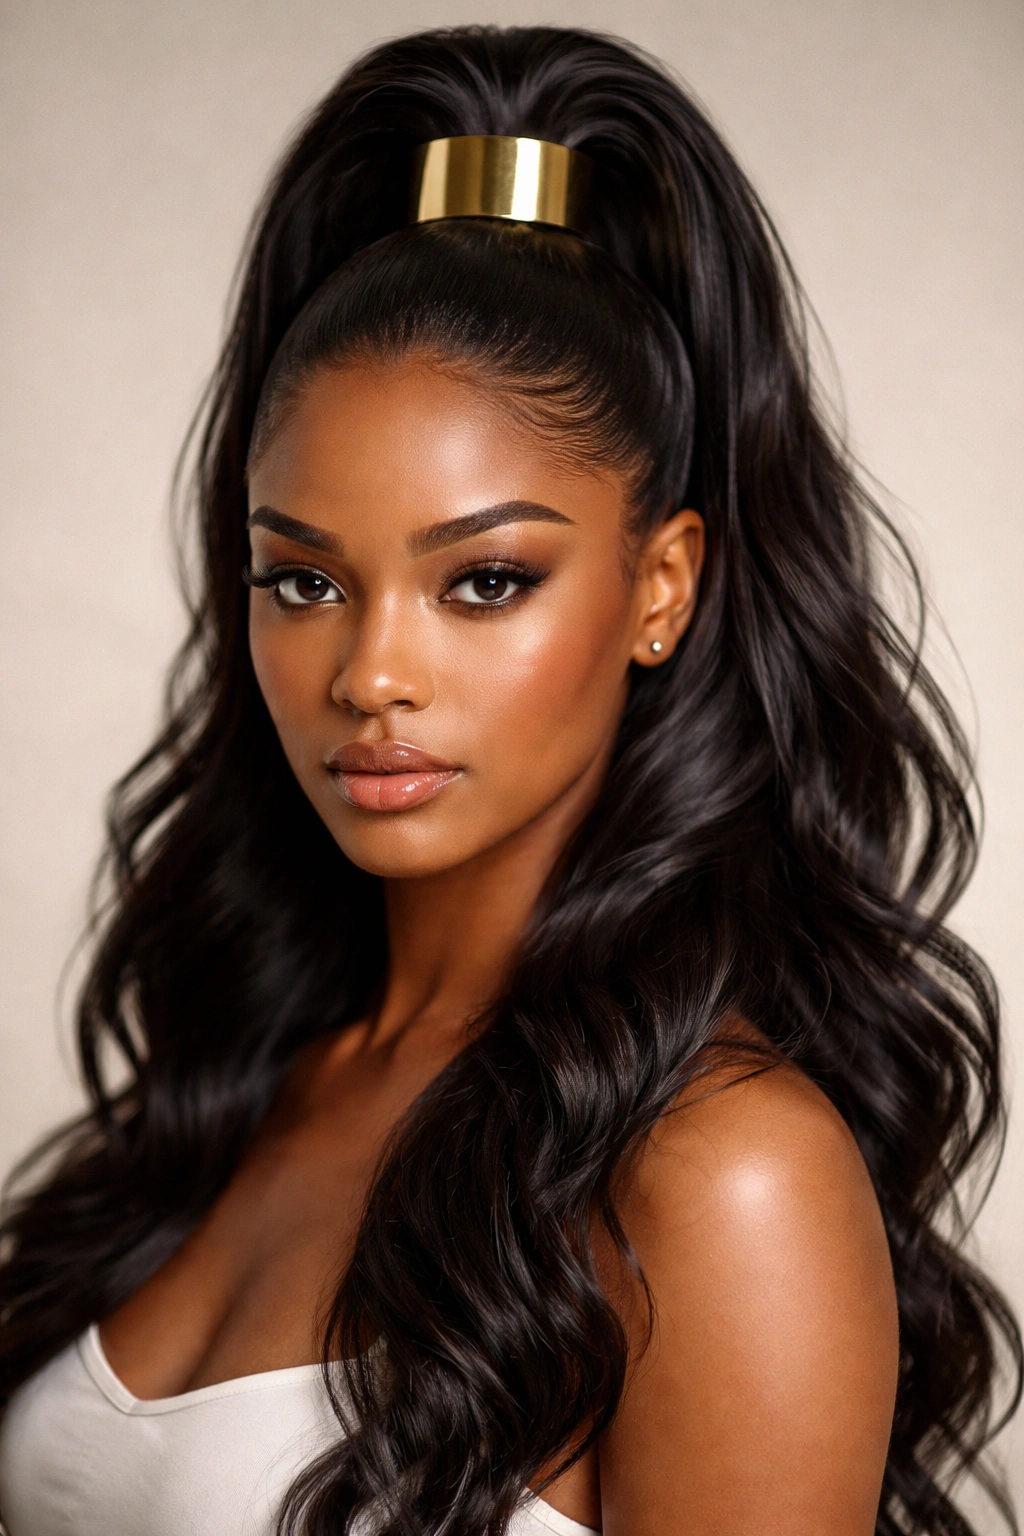
This style combines smooth slicking with a fashion-forward accessory: a metal hair cuff, decorative clip, or statement barrette placed exactly where your half up gathers. The hair gets slicked back cleanly to the crown, gathers into a ponytail or puff, and the cuff slides onto the ponytail base or wraps around the secured section. The cuff becomes the focal point, so choose something with visual weight — thick metal, stones, bold color, or intricate detail.
Choosing and Positioning Your Cuff
The cuff should feel substantial enough to anchor the style visually, but not so heavy that it pulls your hair down. Position it right at the base of your ponytail or puff, or slide it further down the ponytail length for a different vibe. Some cuffs sit at the base and wrap fully around the elastic, while others sit more loosely and rest partially on the hair. Experiment with placement to see what feels right for your hair thickness and the cuff’s weight.
Styling Steps
- Slick the top and crown section back smoothly toward your chosen gathering point
- Secure the section into a ponytail or puff using a covered elastic
- Position your statement cuff right at the base, wrapping it around the gathered hair
- Make sure the cuff sits straight and centered — adjust as needed
- Smooth any flyaways around the cuff with a tiny bit of edge control
- Leave the bottom section down and arrange however you prefer
- You can make the ponytail below the cuff hang straight, curl it, braid it, or keep it natural
Worth knowing: A cuff adds instant polish to an otherwise simple style — sometimes the accessory is what transforms good into great.
12. Gradient Smooth to Texture
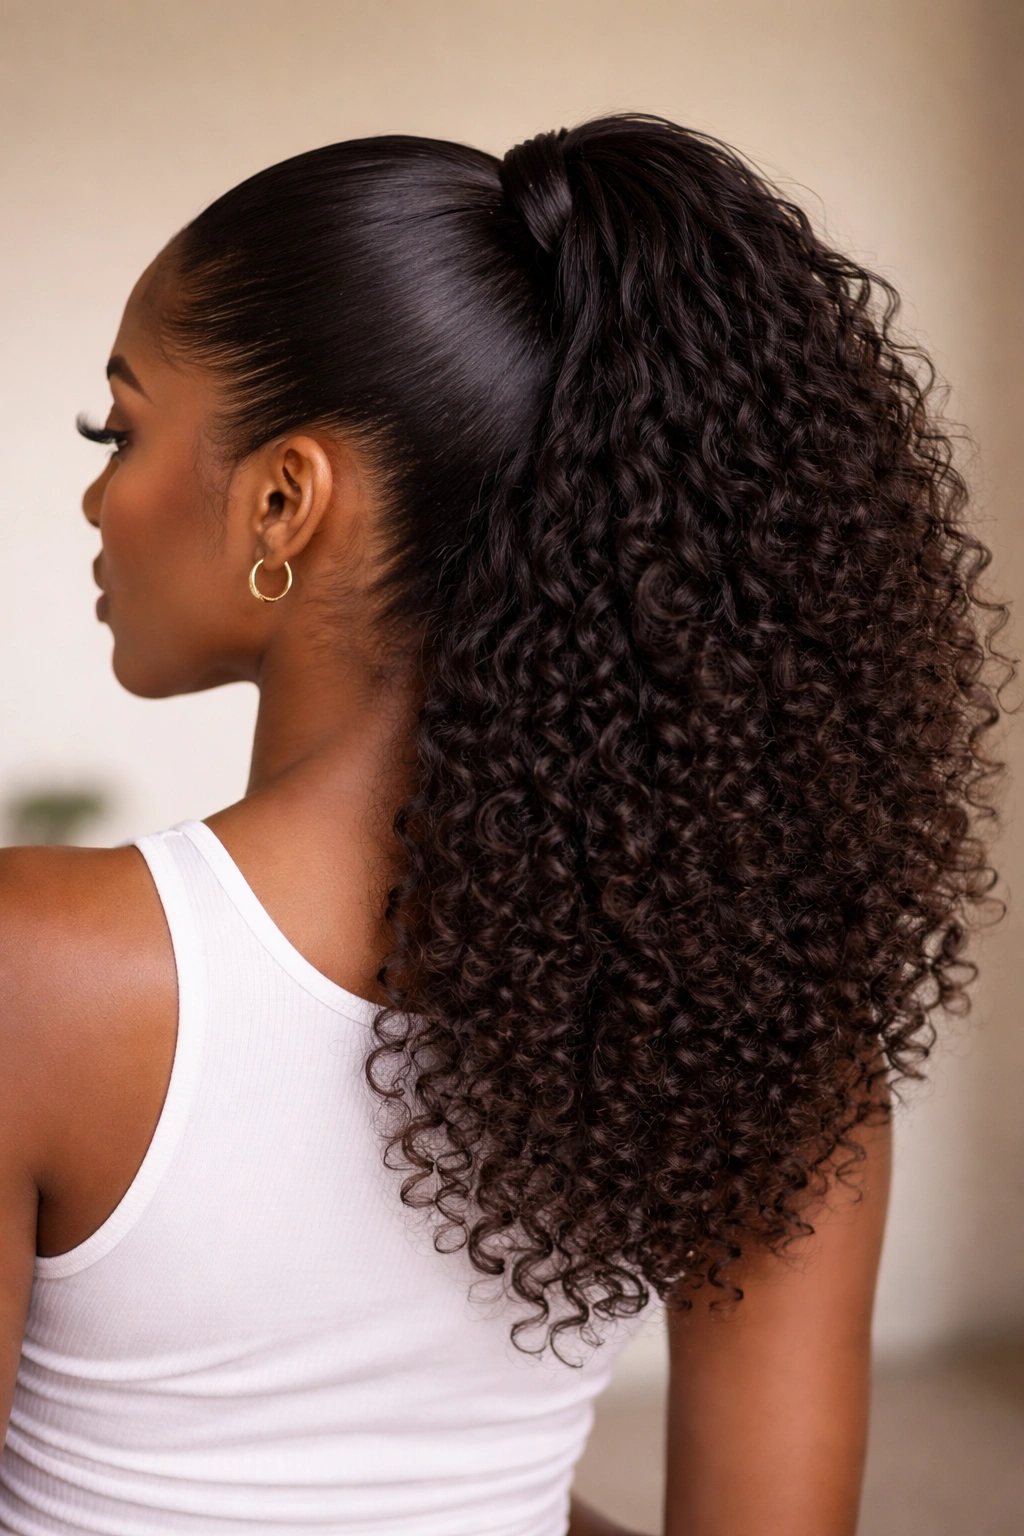
This final style plays with texture contrast by keeping the top and crown section slicked smooth, then gradually transitioning into textured, unslicked hair as you move back and down. The transition is gradual and intentional — not a sharp line, but a fade from smooth to textured. The bottom section might be fully natural curls, coils, or waves, creating visual dimension and depth.
Creating the Gradient Effect
The magic of this style is in how the transition happens. The top stays slicked and controlled, the middle section gets partial smoothing or looser twists, and the back fully embraces your natural texture. This requires strategic sectioning and varying amounts of product application — heavier product and more smoothing in the front, lighter product and less manipulation in the back.
Layered Styling Approach
- Apply moisturizer to your entire head while damp
- Slick the front and crown section back smoothly with medium-hold edge control and a fine brush
- In the middle section, apply lighter smoothing — maybe define it with light twists or a partial slick
- Leave the back section completely unmanipulated, showing off your natural texture
- Gather all sections together at the crown with a covered elastic
- The resulting half up shows this beautiful gradient from sleek to textured
- Leave the bottom half completely down to showcase the natural texture
- This style celebrates your natural hair while keeping the front polished and controlled
Insider note: This is actually the most versatile half up style because it works on every hair type and texture — the key is embracing your natural hair, not fighting it.
Final Thoughts
Slicked-back half up half down styles represent a beautiful intersection of control and freedom. They give you the satisfaction of a put-together look without the commitment of a full updo, and they work across every hair texture, length, and pattern that Black women might have. What ties all these styles together isn’t a single product or technique, but rather the principle of intentionality — each one requires you to make deliberate choices about where hair goes, how defined your lines are, and what texture you want to showcase.
The real skill isn’t in any one style, but in understanding your hair’s unique needs and personality. Some of these styles will feel effortless the first time you try them, while others might take a few attempts to nail. That’s completely normal. The more you practice, the faster you’ll develop the muscle memory to create clean lines, smooth slicks, and balanced proportions. Start with the styles that feel most natural to you, then branch out as your confidence grows.
The other overlooked truth is that product quality genuinely matters for slicked styles. A cheap edge control that flakes or a brush that snags your hair will make any of these styles harder than it needs to be. Investing in good tools and products — a fine-tooth comb, a small precision brush, a flexible-hold edge control, and covered elastics — transforms the experience and the results. You’ll also notice that these styles look better on days when your hair is moisturized and healthy, so building a solid hair care routine underneath supports better styling outcomes.
Most importantly, wear these styles with confidence. A slicked-back half up half down that’s done with intention — whether it’s geometric and sharp or soft and textured — is inherently powerful. You’re not just styling your hair; you’re making a statement about how you want to present yourself to the world.