Curly hair and braids have a complicated relationship, but when you nail the right style, the combination is absolutely stunning. The half-up half-down format is particularly forgiving for textured hair because it tames the crown area while letting your curls flow freely below—you get the best of both worlds without the commitment of a full updo. French braids are the perfect vehicle for this, offering structure where you need it and natural dimension that plays beautifully with curl patterns.
The real challenge with curly hair and French braids isn’t the technique itself—it’s understanding how to adapt traditional braiding methods to work with your texture instead of against it. Curls don’t slip and slide the same way straight hair does. They grip, they volume, they move differently as you’re pulling sections through the braid. That’s not a weakness; it’s actually an advantage once you know how to use it.
What makes French braids special for curly hair specifically is their architectural quality. A well-executed French braid creates a defined pathway that actually enhances the visual impact of your curls below, rather than competing with them. The braid becomes a frame, and your natural texture becomes the star. Whether you go tight and polished or loose and romantic, you’re working with your hair’s natural tendencies, not against them.
Over the following sections, you’ll find twelve distinct approaches to the French braid half-up half-down style, each adapted specifically for curly hair. Some are classic and structured; others lean into undone, romantic energy. Some use a single braid, while others employ multiple strands. The point is flexibility—finding the version that fits your curl pattern, your lifestyle, and your aesthetic.
1. The Classic French Braid Half Up
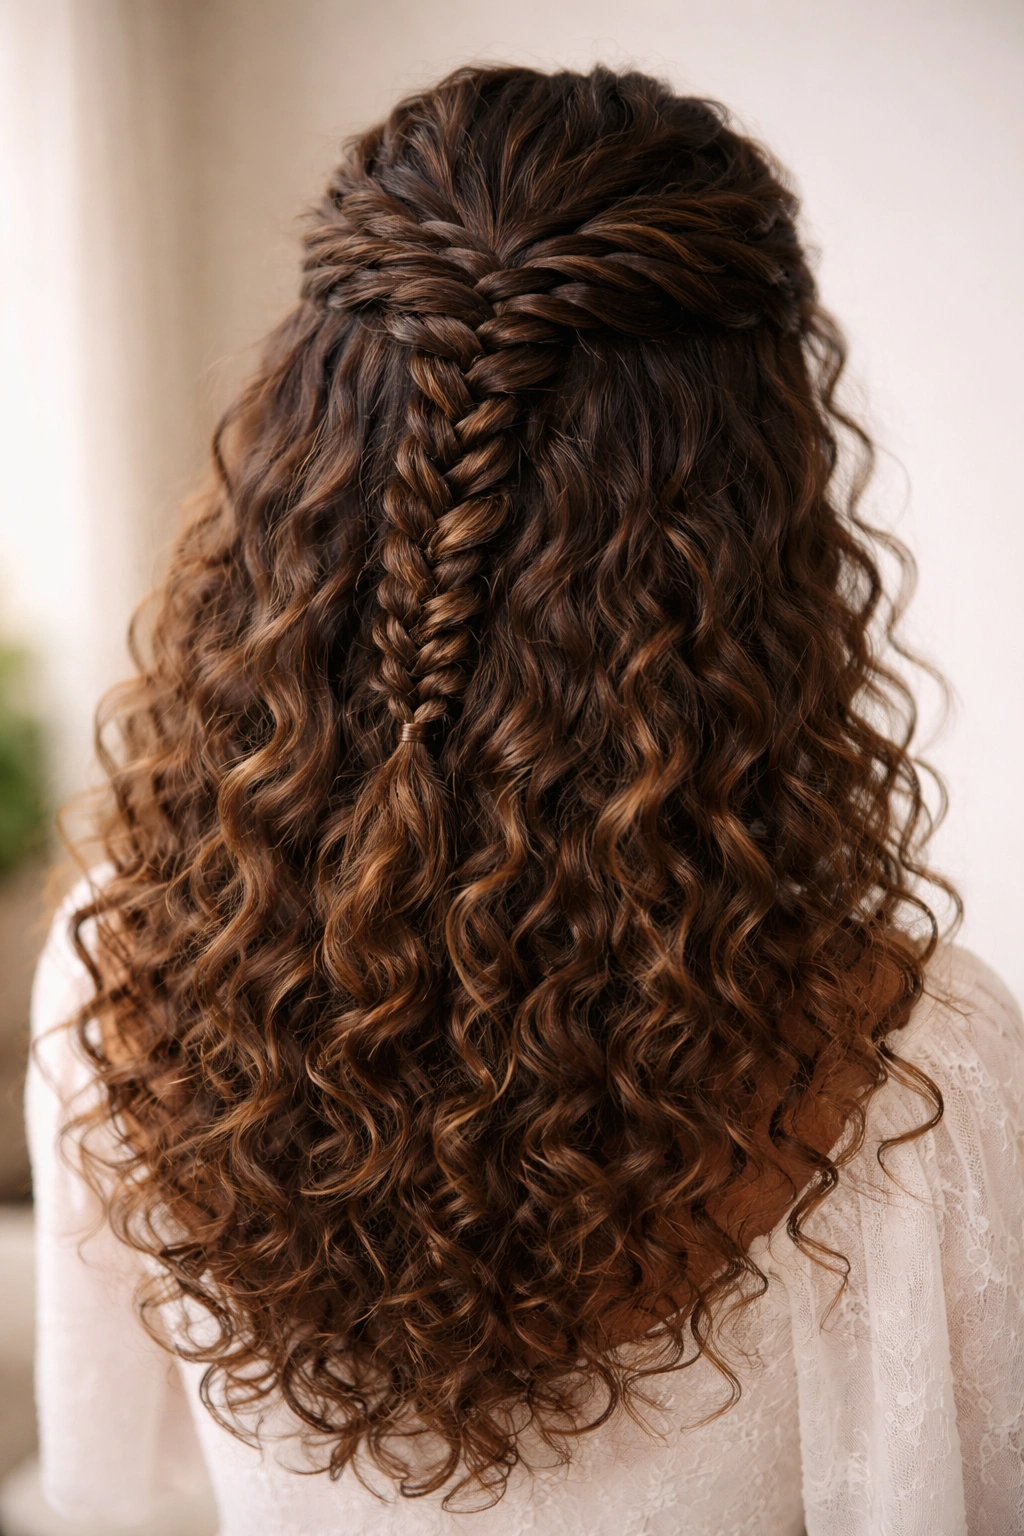
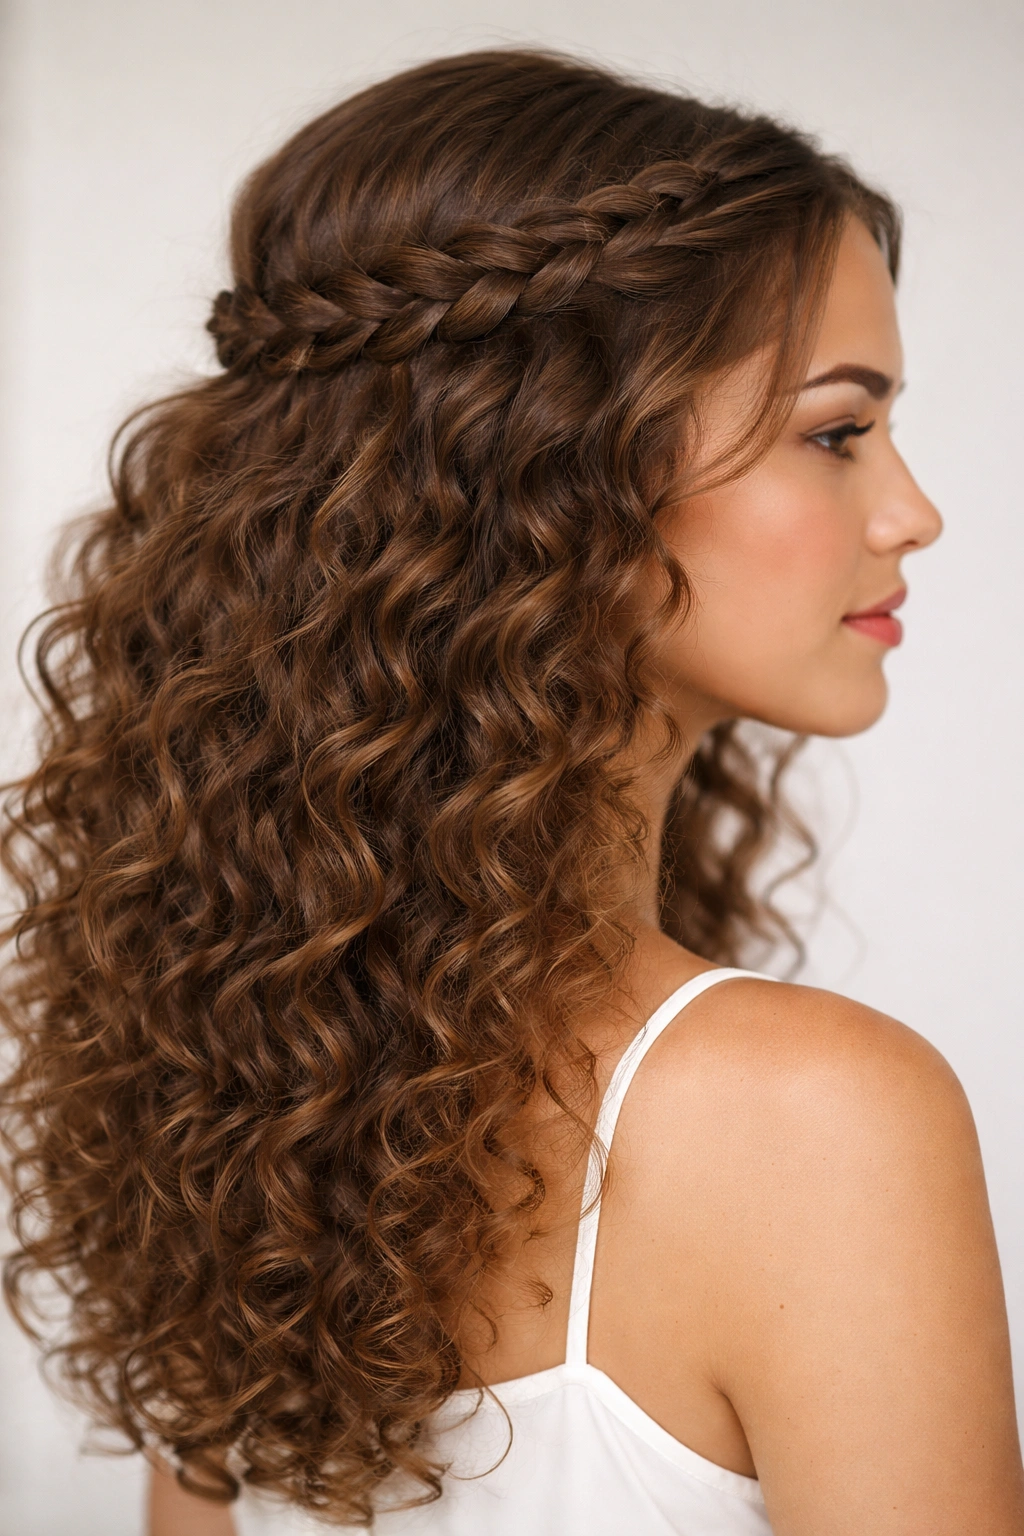
This is where most people start, and it remains a timeless choice for good reason. The classic French braid half-up works by gathering a section of hair from the crown and braiding down through the uppermost layers, securing it at the back of the head while leaving the bottom half completely free. For curly hair, the magic is in how the defined braid contrasts with the natural texture below it, creating visual interest without requiring an entire updo.
Why This Works for Curly Hair
The classic version is particularly effective for curly hair because curls actually give the braid more grip and texture. Your hair won’t slip out as easily as it might with straight hair, which means a less-polished, slightly loose braid often looks intentional rather than messy on curls. The braid’s defined structure also tames the flyaways and frizzies that typically escape at the crown, where you’re closest to the scalp and most vulnerable to breakage.
How to Execute It
- Start by spraying damp curls with a curl-enhancing product or light holding spray—this gives the sections slightly more grip without creating crunchiness
- Divide a section from ear to ear across the top of your head into three equal strands
- Braid down through those strands in the traditional over-under-over pattern, picking up hair from the sides as you descend through the layers
- Continue until you reach the back center of your head, roughly at your ear level or slightly below
- Secure with a small elastic, and gently pull the braid strands outward to loosen and expand them slightly
- Pin any loose curls around the secured braid for a softer, less severe look
Pro tip: Braid while your hair is still slightly damp—curls hold shape better in this state, and the braid will actually define more beautifully as it dries. You’ll get crisper lines without the braid feeling stiff.
2. Double French Braids Half Up
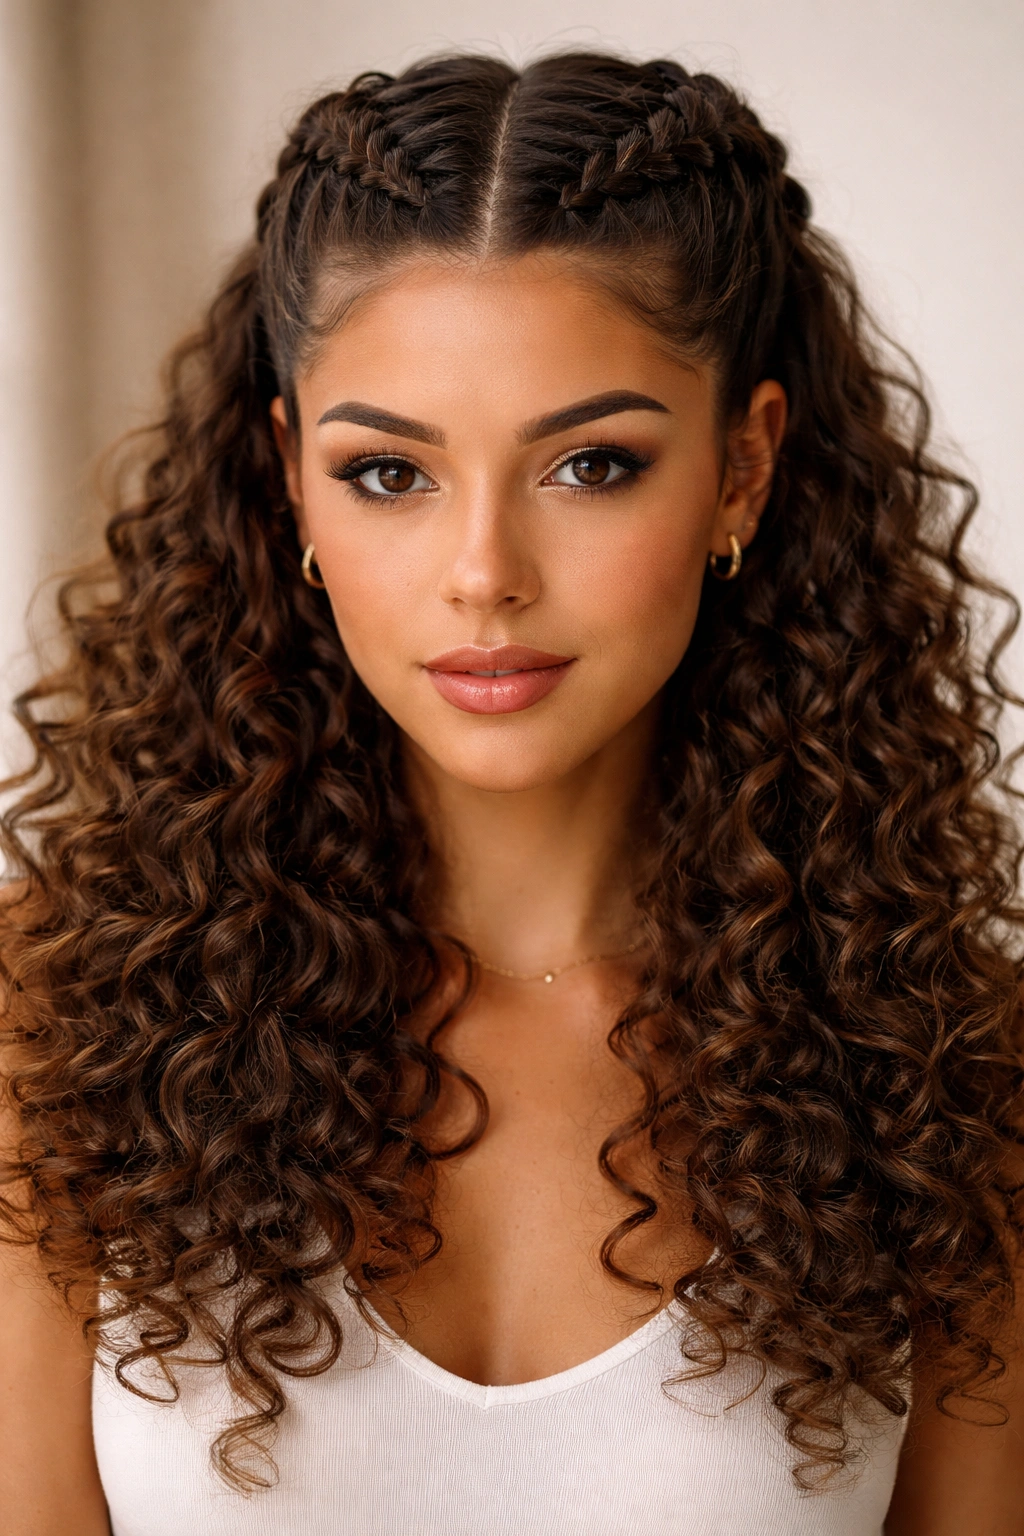
Instead of a single braid down the center, this style uses two French braids starting from either side of your head and meeting at the back. It’s a more sculptural, balanced look that works beautifully for thick, voluminous curly hair. The double braid creates a sense of movement and symmetry while distributing the volume more evenly across the crown.
How Double Braids Enhance Curly Texture
Two braids allow you to work with a smaller section of hair each, which actually makes the braiding process easier on textured hair. You’re not fighting to control a massive section that wants to curl in all directions simultaneously. The two braids also create a visual frame that’s wider and more encompassing, which flatters fuller curl patterns perfectly. Plus, the symmetry reads as intentional and high-effort, even though the execution is often simpler than a single centered braid.
Step-by-Step Approach
- Create a center part from your forehead to the nape of your neck
- On one side, start a French braid from the temple, picking up hair as you braid backward toward the center
- Repeat on the other side, braiding from the opposite temple
- As you reach the back center, cross both braids over one another and secure them together with a single elastic
- Loosen both braids by gently pulling the strands outward, creating a fuller, more romantic silhouette
- A few loose curls framing the face soften the look considerably
Worth knowing: If your curls are particularly thick or dense, you might find it easier to braid two smaller sections rather than fighting with full-head French braids. A partial double braid—starting just at the crown rather than from the temple—is equally effective and less labor-intensive.
3. The Twisted French Braid Half Up
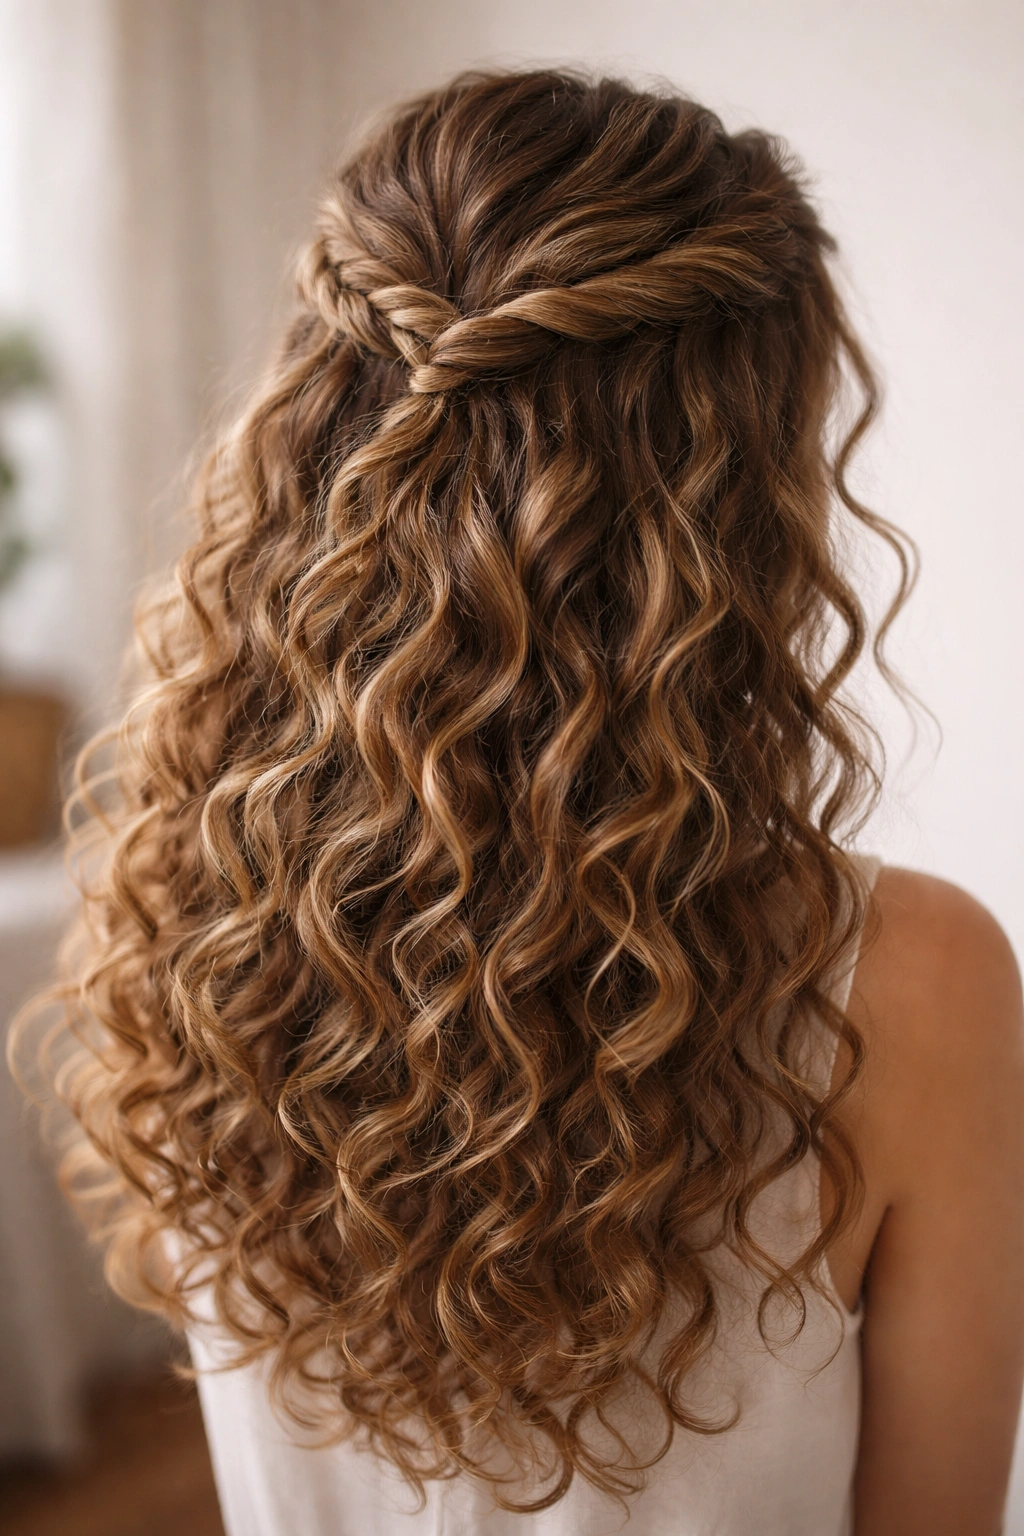
This variation replaces the traditional braid pattern with a twisted strand, which is often easier to execute on curly hair and creates a softer, more romantic aesthetic. Instead of the over-under pattern of a standard French braid, a twisted braid uses two strands that spiral around each other, creating a ropelike effect that’s both elegant and forgiving of imperfection.
Why Twists Work Better for Some Curl Patterns
Curly hair sometimes resists the tight over-under mechanics of a traditional braid, especially if your curls are very defined or springy. A twist uses a gentler motion that works with your curl pattern rather than forcing sections flat. The resulting style looks more relaxed and modern, which actually suits curly hair aesthetics better than a severely tight braid. Twists are also faster to execute and less likely to leave visible creases or damage along the twist line when you remove the style.
How to Create a Twisted Braid Half Up
- Divide the crown section into two parts
- Cross one section over the other, then simultaneously pick up a small piece of loose hair from the right side and add it to the right strand, then pick up a piece from the left and add it to the left strand
- Continue crossing the strands over each other and incorporating new hair until you reach the back of your head
- Secure with an elastic at the point where you stop adding hair
- Pull the twist gently to expand and soften it, revealing more of the texture within
- This creates a braid-like effect with a distinctly softer, more romantic feel
Insider note: Twists actually show the individual curl pattern more clearly than braids do. If your curls are your best feature, a twist rather than a braid might be the better choice—it frames the curls rather than compressing them.
4. Loose & Romantic French Braid Half Up
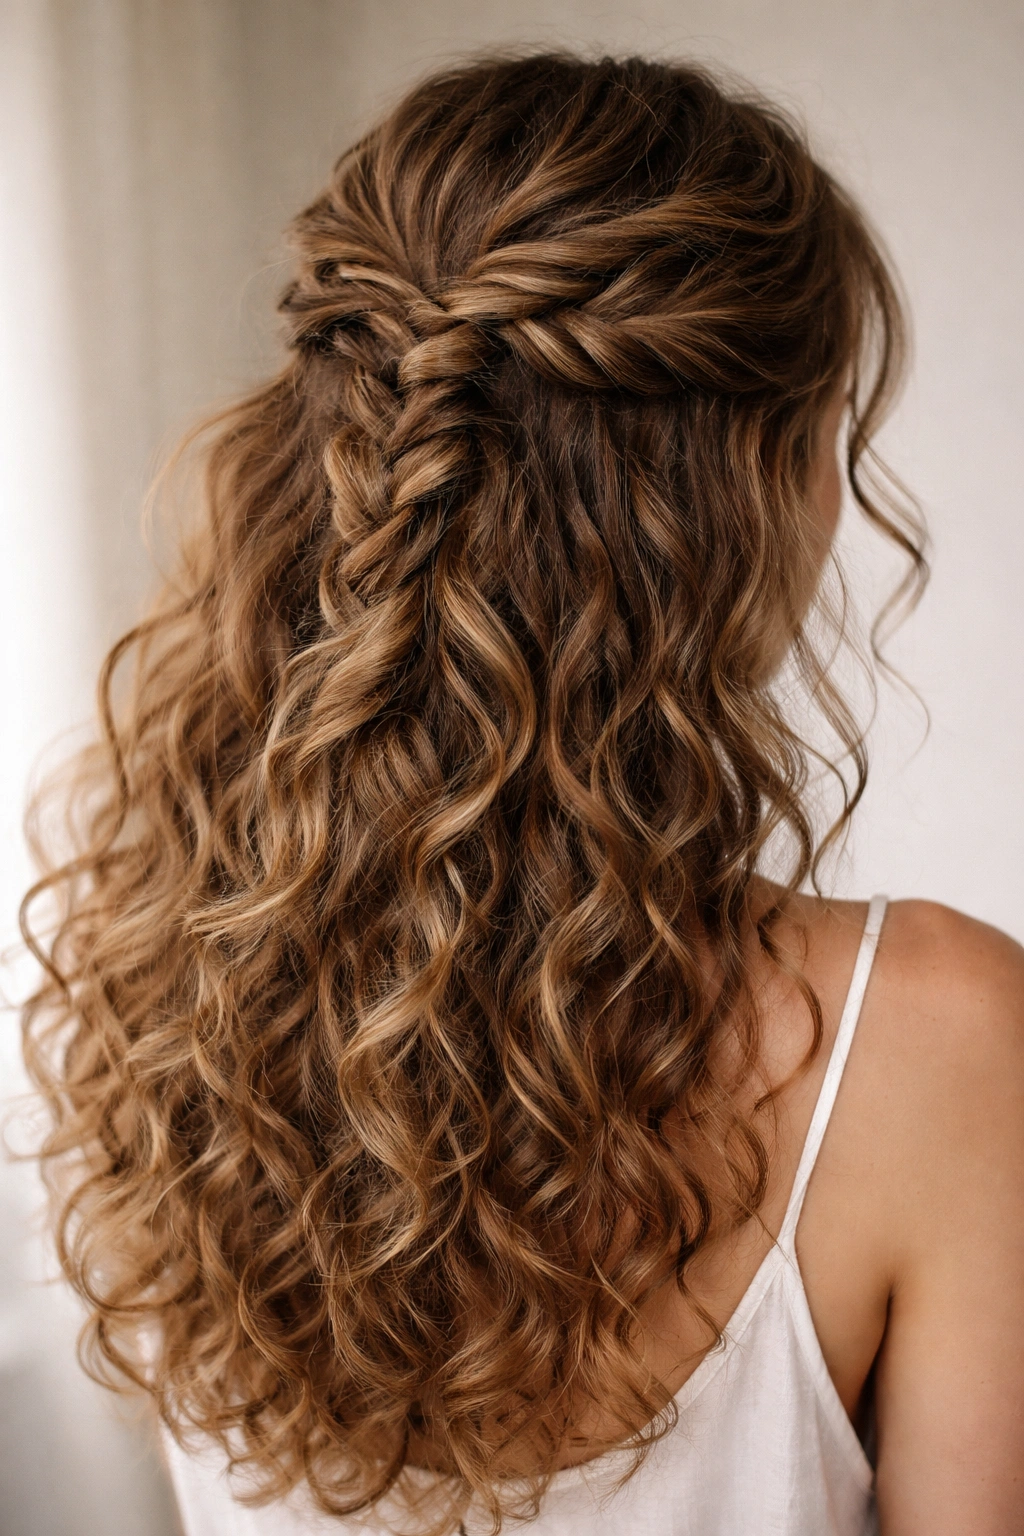
This is the deliberately undone version, where perfection is the enemy and texture is the goal. A loose, romantic French braid half-up embraces the natural volume and movement of curly hair rather than trying to tame it into submission. You’re aiming for something that looks effortlessly beautiful, with pieces falling out and the braid clearly bulging at the seams—and that’s exactly the point.
The Philosophy Behind Loose Braiding
Tight, structured braids can actually work against curly hair by compressing all that beautiful texture. A loose braid allows each individual curl to maintain its shape and bounce, creating visual interest through dimension rather than precision. This approach also feels more modern and less “formal hairstyle”—it’s the kind of thing you’d actually want to wear on a regular Tuesday, not just for special occasions.
Technique for Intentionally Loose Results
- Use completely dry curls—they’re already defined and won’t slip as much through the braid
- Divide your crown section into three strands and begin braiding, but don’t pull the strands taut as you cross them
- Keep your hands relaxed and your fingers loose, allowing natural give in the braid
- After securing, literally pull every section of the braid outward and slightly upward, expanding it until it’s roughly double its original width
- Gently separate any braided sections that are encasing individual curls, freeing them back up
- Let a few shorter pieces fall naturally around your face and temples
Pro tip: The loosest, most romantic braids actually come from braiding before your curls are fully dry or fully set. There’s a sweet spot—about 60-70% dry—where curls have enough texture to hold definition but enough pliability to braid loosely without fighting you.
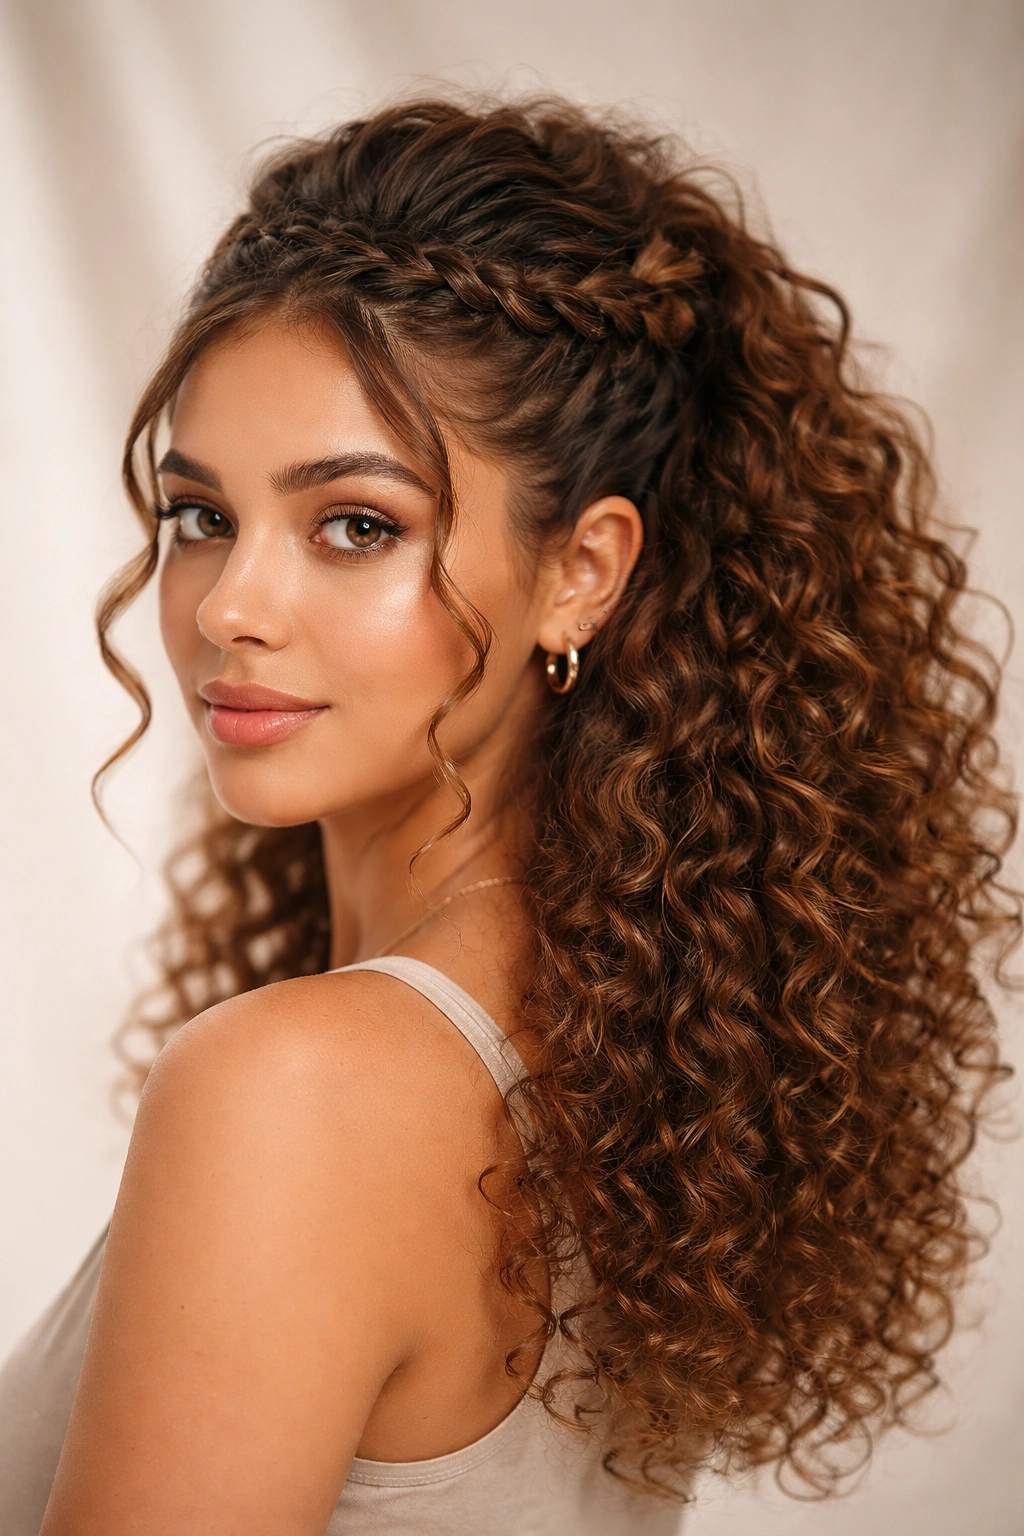
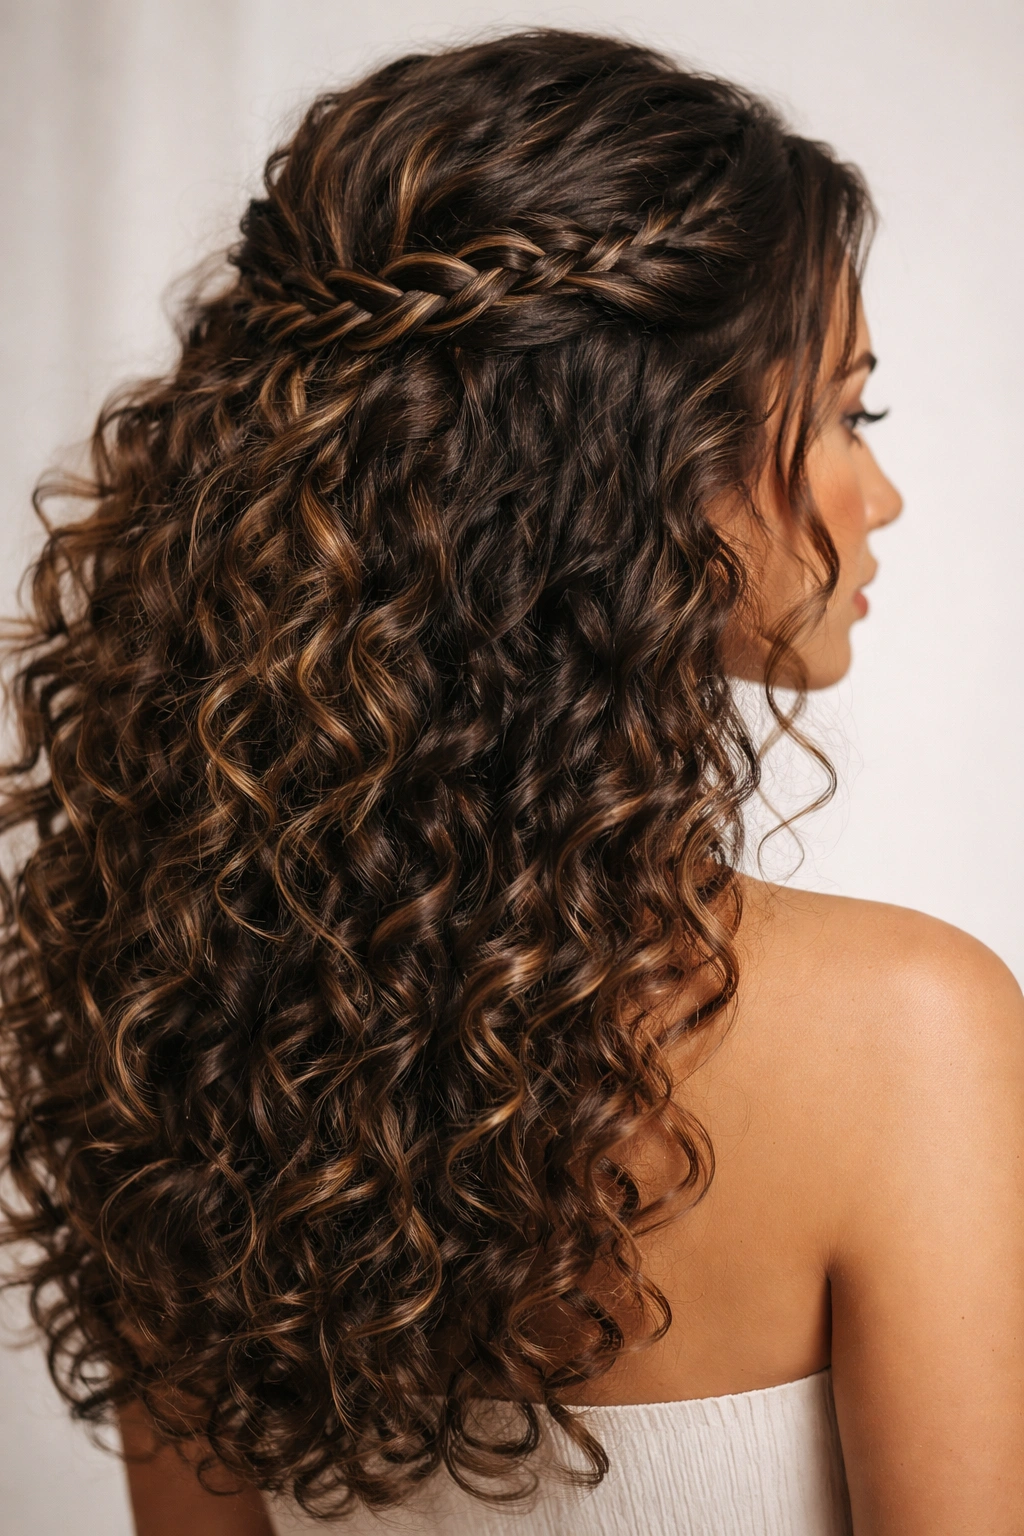
5. The Braided Crown Half Up
This style wraps a French braid around your head like a crown, rather than braiding straight back from the crown. It starts at one ear, braids across the back, and ends at the opposite ear, creating a horizontal band of braided texture that frames the face beautifully. For curly hair, this approach is particularly flattering because it draws the eye upward and outward rather than emphasizing vertical volume.
How This Style Complements Curly Features
A braided crown creates a softer frame for the face than a center-parted braid does. It’s especially flattering for round or wider face shapes, and it works beautifully with full, voluminous curls because the braid is positioned to complement rather than compete. The horizontal line of the braid also visually widens or narrows the face depending on how tight or loose you braid, giving you some control over proportions.
Step-by-Step for a Crown Braid
- Start at one ear level on the side of your head
- Begin a French braid using hair from that side of your head, incorporating hair as you braid toward the back
- Braid horizontally around the back of your head, picking up hair from both sides as you go
- Continue braiding until you reach the opposite ear
- Secure at the ear level on the opposite side with a bobby pin or small elastic
- Loosen the braid generously, pulling sections outward to create fullness and softness
- Allow several curls to escape from the braid, especially around the face
Worth knowing: This style benefits from slightly damp curls because the braid will better follow a smooth path around your head. Completely dry curls sometimes resist the curved path of a crown braid.
6. Thick & Chunky French Braid Half Up
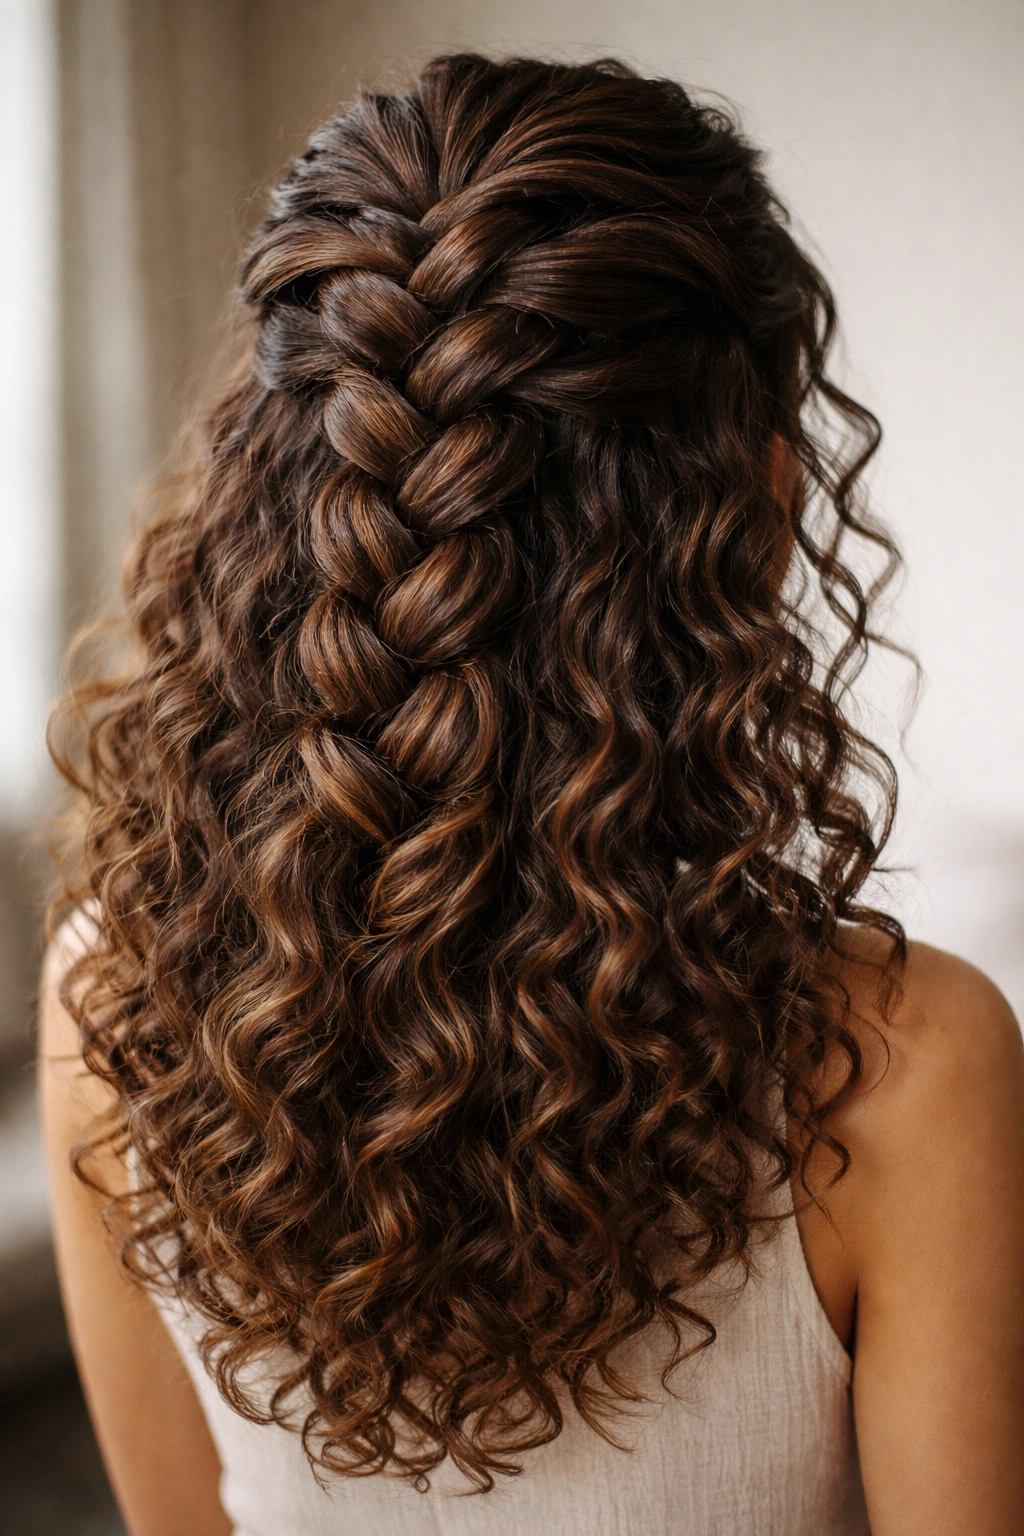
This version maximizes the size and visual impact of your braid by using thick sections and keeping the braid relatively compact (not super loose). You’re creating a bold, sculptural statement piece that showcases the braid itself as much as the curls below. This works best for people with thick, abundant curly hair who aren’t afraid of visual weight at the crown.
Why Chunky Braids Suit Thick Curly Hair
Thin, delicate braids can actually look lost in thick curly hair—they disappear into the overall volume and don’t create the visual impact you’d expect. A chunky braid, by contrast, holds its own visually and creates strong, confident lines. The thicker sections also tend to be easier to braid because you’re moving larger pieces of hair, which can be more manageable than fighting with tiny sections that want to pop out of place.
Creating a Chunky Braid Effect
- Divide your crown section into three extra-large strands instead of the usual three strands
- Braid using these thick sections, crossing them over and under while simultaneously picking up large chunks of surrounding hair (not thin strands, but substantial sections)
- Pull the sections tight enough that the braid looks defined and structured, but not so tight that you’re creating tension at your scalp
- This creates a braid that’s visibly thick and takes up more horizontal space
- Loosen very slightly just to soften the edges, but keep the bulk intact
Pro tip: Chunky braids look best with some texture and separation. After braiding, use your fingers to gently separate individual curls that got caught in the braid, rather than leaving them completely encased. This adds visual interest without unraveling the structure.
7. The Reverse French Braid Half Up
A reverse French braid (also called an inverted or inside-out braid) uses the opposite hand motion from a traditional braid, creating a completely different visual effect. Instead of pulling strands over one another, you pull them under, which causes the braid to bulge outward in a more textured, dimensional way. This approach is particularly stunning on curly hair because it shows off the curl pattern beautifully.
Visual Impact of Reverse Braiding
The reverse braid naturally creates more visible texture and dimension because of the way it structures the hair. The braid appears fuller and more interesting from the front, even if the underlying structure is the same tightness as a traditional braid. For curly hair, this means your braid actually showcases your curl pattern rather than compressing it. The effect is inherently more modern and less “formal hairstyle.”
How to Reverse Braid
- Divide your crown section into three strands as you normally would
- Instead of pulling the right strand over the center, pull it under the center
- Then pull the left strand under the center
- Continue this under-over-under motion as you descend, adding hair from the sides as you go
- The braid will naturally bulge outward, creating a fuller appearance
- Secure at the back and loosen by pulling the bulging sections outward
- This creates an almost braided rope effect that’s distinctly textured
Worth knowing: Reverse braids are often easier on curly hair because the underhand motion creates less tension on the strands. Your scalp will likely feel more comfortable, and you’re less likely to cause breakage from tight pulling.
8. Asymmetrical French Braid Half Up
Instead of centering your braid, this version positions the braid completely to one side of your head, creating an off-balance, artistic look. It’s a departure from traditional symmetry, and the result feels modern, intentional, and flattering on most face shapes. The asymmetrical placement also means you can show off one side of your face while still managing the crown area.
When Asymmetry Enhances Curly Hair
Asymmetrical styles actually complement curly hair particularly well because curls themselves are inherently asymmetrical and textured. A balanced, centered braid can sometimes feel at odds with the natural movement of curls. An asymmetrical braid feels more natural and cohesive with the overall texture and movement of your style. It also works beautifully if you have one side of your face you prefer to highlight or if your curls are denser on one side.
Steps for an Off-Center Braid
- Identify which side you want the braid on (usually the opposite side from where you part your hair)
- Divide a section from the temple on that side, running toward the opposite side of your head
- Braid diagonally across the back of your head, rather than straight down the center
- Pick up hair as you braid, but only from the side toward which you’re braiding
- End the braid at the opposite ear or slightly further back
- Secure and loosen as desired
- This creates a clear diagonal line that’s visually interesting and modern
Insider note: Asymmetrical braids photograph beautifully from one particular angle. If you’re doing this style for photos, tilt your head slightly toward the braided side for the most flattering angle.
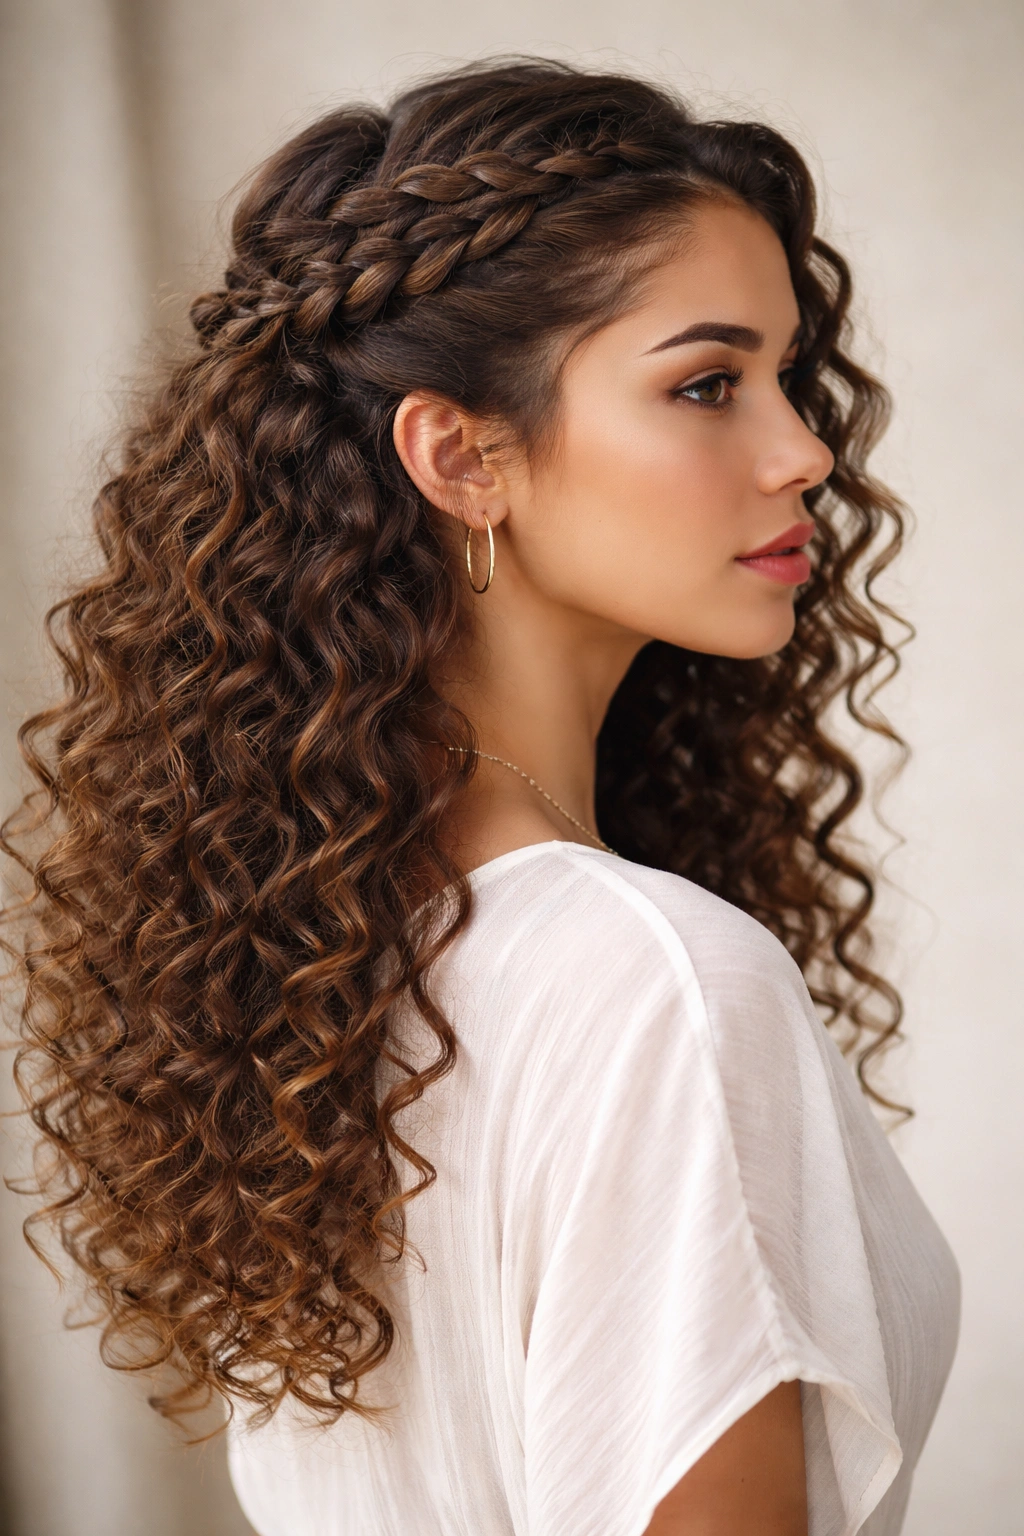
9. The Braided & Pinned Style with Multiple Strands
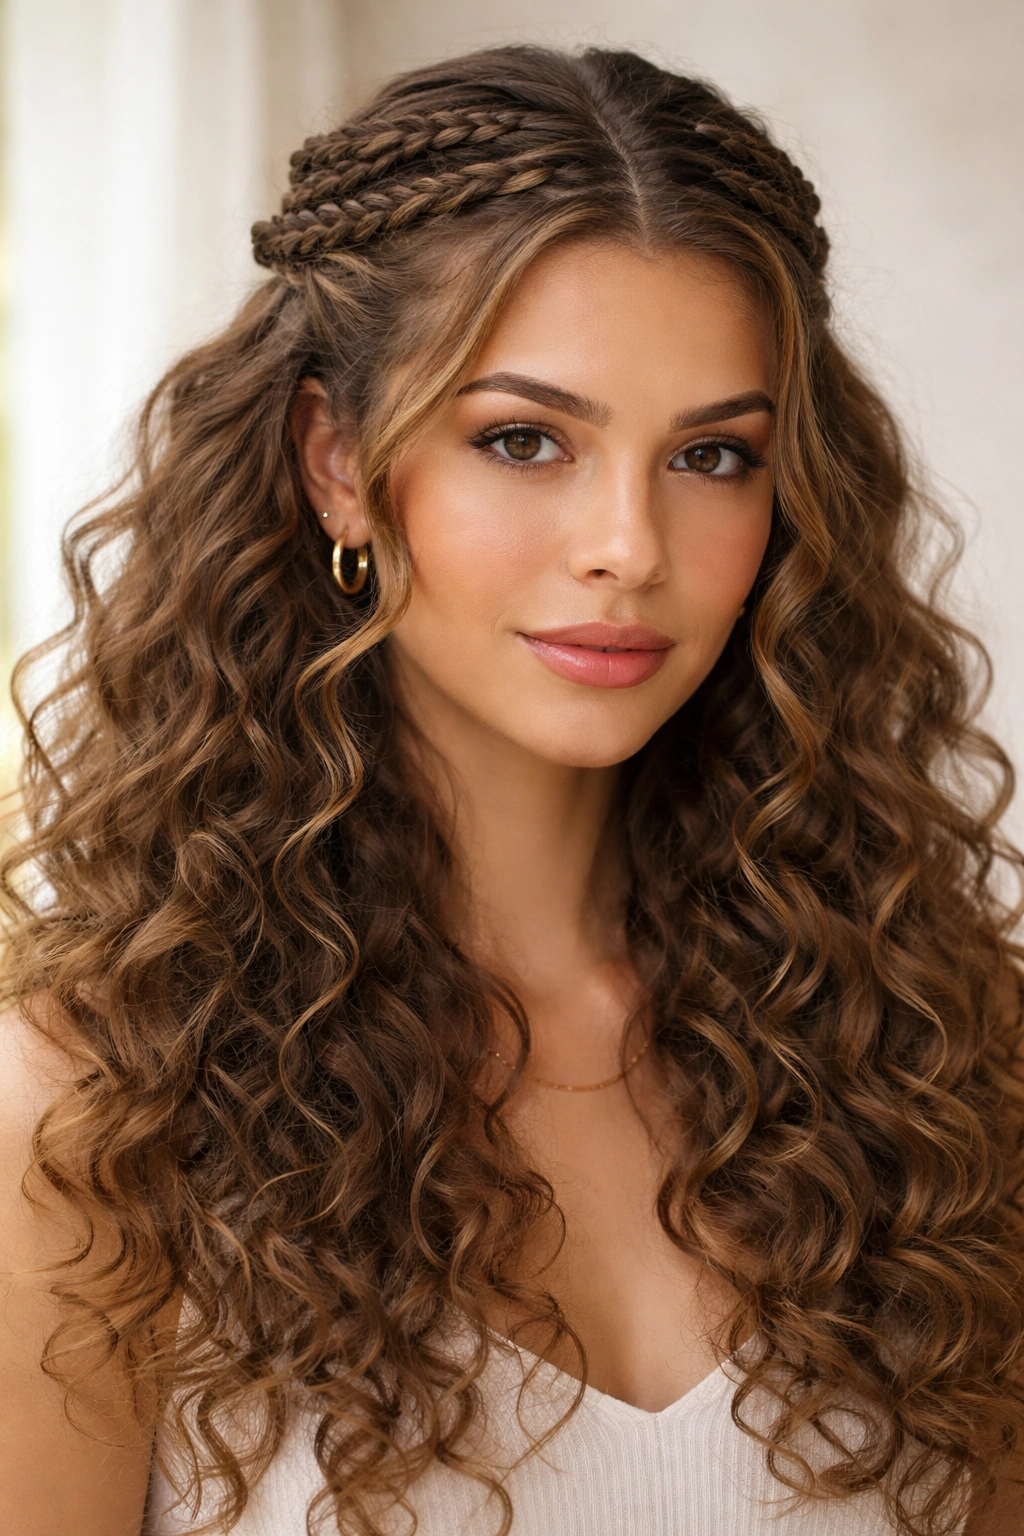
This approach uses two or three thinner braids positioned across the crown, rather than one large braid, creating a more intricate, detailed look. Each braid is secured separately with bobby pins, giving you more flexibility in placement and creating a visually complex style that’s actually easier to achieve than a single, large French braid.
Why Multiple Smaller Braids Work on Curly Hair
One large braid can sometimes look overwhelming on thick curly hair, but multiple smaller braids create visual interest without a sense of compression. You’re distributing the structural elements across a wider area, which actually helps tame crown volume while maintaining the beautiful texture of your curls below. The multiple braids also give you more styling options—you can position them where they’ll be most flattering and camouflage any areas where you want less volume.
Creating the Multi-Braid Look
- Divide your crown into three sections: one across the center, one above it on the left, one above it on the right
- Create a thin French braid in each section, each running from front to back (or any direction you prefer)
- Secure each braid separately with bobby pins at the back of your head
- Loosen each braid to create softness and texture
- The overlapping effect of multiple braids creates dimension and visual complexity
- This style is particularly striking if you braid each section in a slightly different direction
Pro tip: If you find three braids overwhelming, try starting with two—one on each side of a center part. This gives you visual interest without the time commitment of three separate braids.
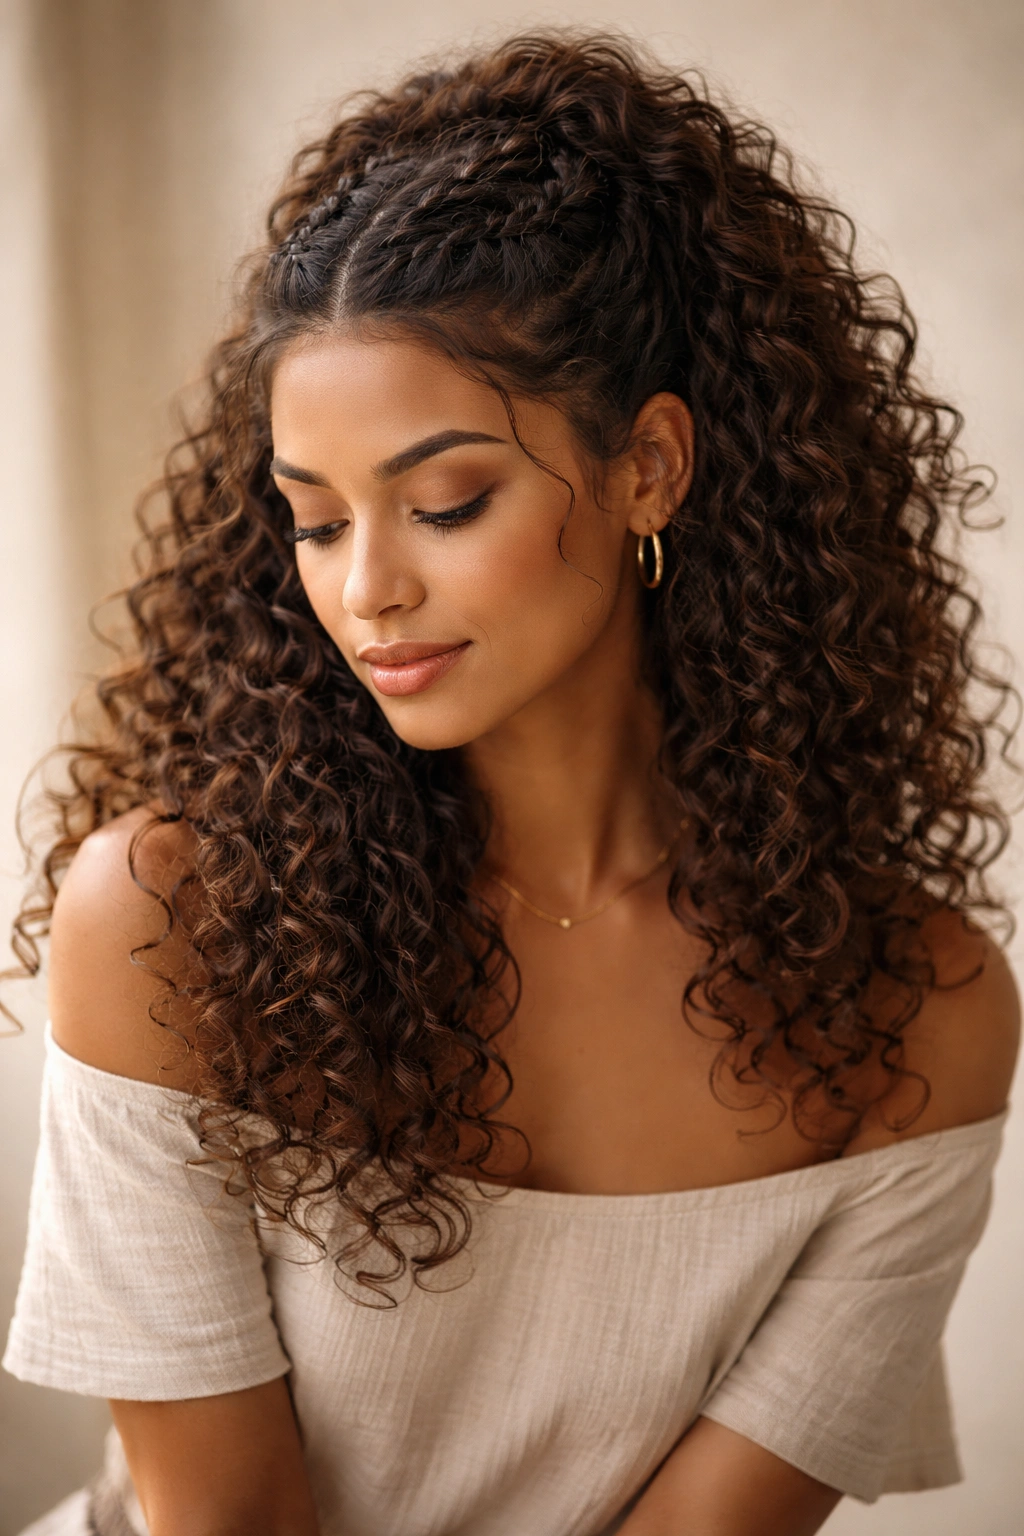
10. Flowing Undone French Braid Half Up with Textured Curls

This is the “I woke up like this” aesthetic, where your half-up is braided but your curls look completely natural and unmanaged. The key is using textured, piece-y curls that visibly escape the braid, rather than trying to contain everything. You’re creating the impression that you threw your hair up in two seconds while running out the door, even if you actually spent time perfecting the look.
Achieving the Undone Aesthetic with Texture
Textured, separable curls work magic here because they naturally want to break free from the braid’s structure. Rather than fighting this tendency, you embrace it. The curls that escape around the braid look intentional and beautiful rather than messy. This style also benefits from looking slightly imperfect—a few pieces out of place, a lopsided braid, uneven curl definition—all of these imperfections actually add to the charm rather than detracting from it.
How to Create This Look
- Work with completely dry, separated curls—you want visible texture and definition
- Braid loosely from the crown, allowing pieces to escape as you go
- Don’t worry if the braid isn’t perfectly even or straight
- Secure very loosely, and actively pull pieces out of the braid after securing it
- Use a light texturizing spray to enhance the separation and definition of individual curls
- Gently piece out curls around your face and throughout the length, making sure some are clearly breaking free from the braid’s structure
Worth knowing: This style often looks better a day after washing, when your curls have had time to fully develop their shape and separate naturally. Fresh-from-the-shower curls often look too clumpy and uniform for this aesthetic.
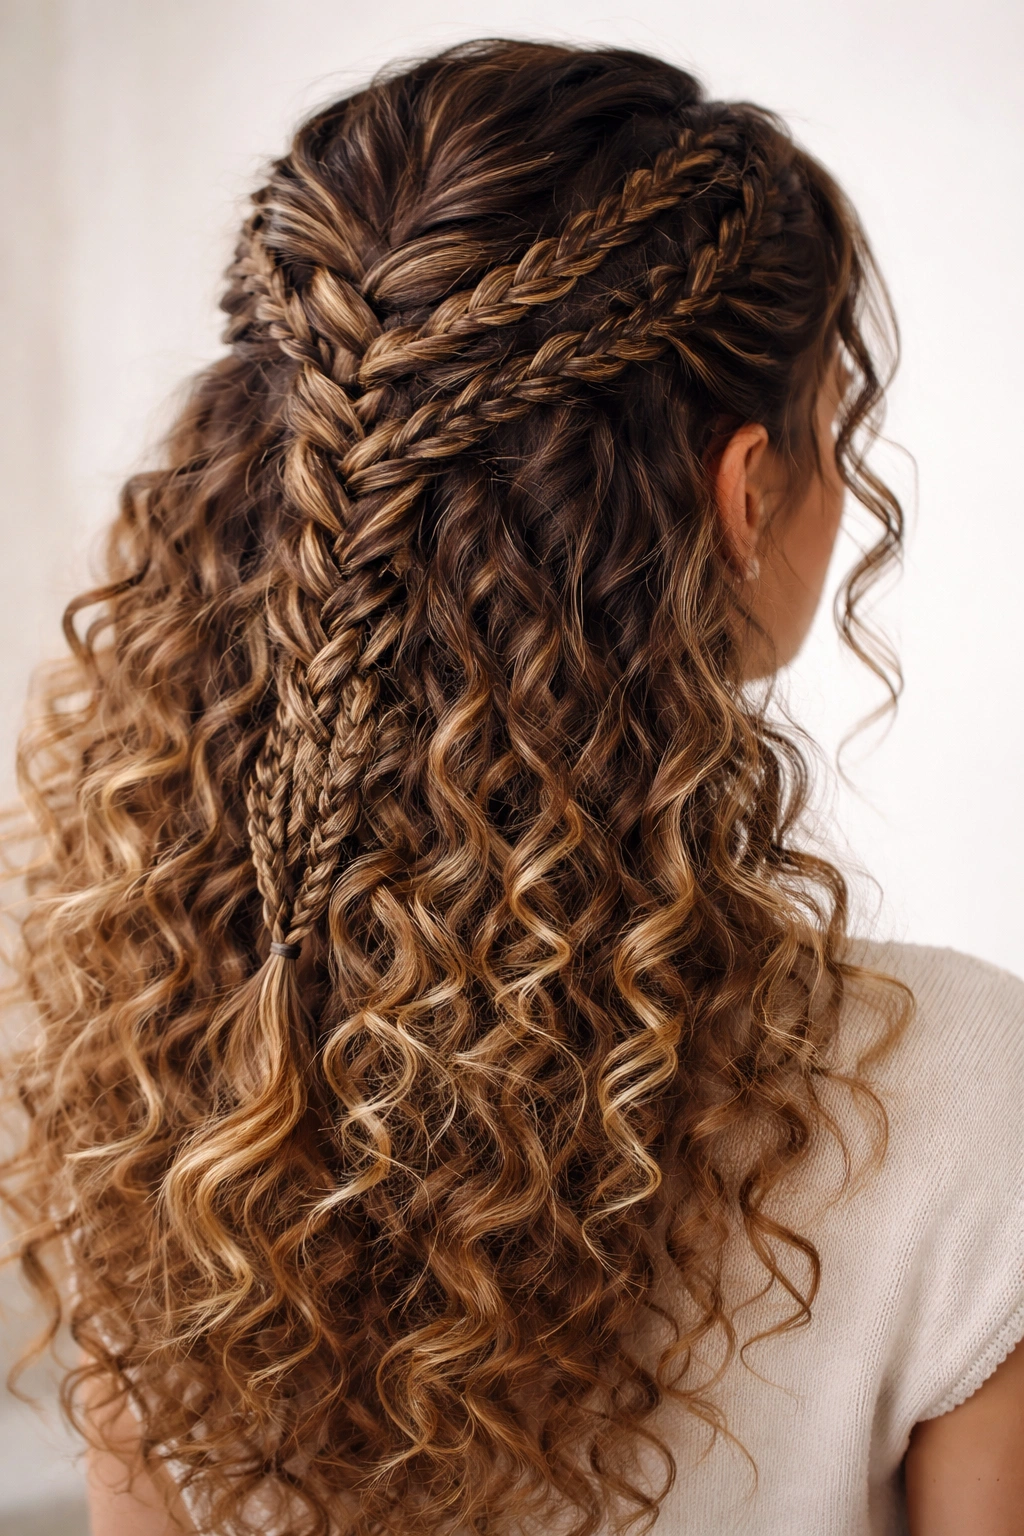
11. The Woven Half Up with Integrated Curls
Rather than braiding through sections of hair, this style weaves a braid through your existing curls without completely encasing them. Imagine taking a thin braid and threading it through your curls like you’re stringing a necklace. This is perhaps the most creative and visually unique approach, and it’s particularly stunning on people with defined, bouncy curls.
The Visual Magic of Weaving
A woven style showcases your individual curl pattern while adding a sculptural, intentional element to your styling. The braid becomes more of an accent or frame rather than the dominant feature. This works beautifully on curly hair because it doesn’t compress or contain your curls—it works around them and between them. The final effect is intricate and high-effort-looking, even though the execution is often simpler than you’d expect.
How to Weave a Braid Through Curls
- Create a loose French braid on the surface of your hair, without actually braiding underneath
- Rather than picking up thick sections from below, pick up very thin strands or even skip some sections
- This creates a braid that sits on top of your curls rather than containing them
- As you braid, gently manipulate your curls so they sit in front of and around the braid line
- The effect is that your braid is woven through the landscape of your curls, not incorporating them into the structure
- Secure and adjust your curls so they frame and surround the visible braid
Insider note: This style requires curls that are relatively well-defined and separated. If your curls are clumped together, the weaving effect won’t be visible. Day-two curls with clear definition work better than freshly-washed curls.
12. The Hybrid Style: French Braid Meets Other Braids
This is the advanced version, where you combine a French braid with other braiding techniques—Dutch braids, regular braids, fishtail braids, or even simple twists—to create a completely custom, artistic look. This approach is perfect for people who want a unique style and are comfortable spending a bit more time on their hair.
Combining Techniques for Maximum Impact
Hybrid styles allow you to tailor a look specifically to your curl pattern, face shape, and personal aesthetic. You might start with a French braid and transition into a regular braid halfway down, or use a Dutch braid on one side and a regular braid on the other. The combinations are endless, and you can adjust based on what works best for your specific curls. This approach also means you can change up your look constantly without learning a completely new style each time.
Ideas for Hybrid Combinations
- Start with a French braid and transition into a fishtail braid halfway down for a gradient of texture
- Use two thin Dutch braids (reverse French braids) on either side and connect them with a regular three-strand braid in the center
- Create a French braid that splits into two separate braids at the back of your head, like a Y-shape
- Braid partway down, then undo and re-braid the bottom section in a different style for a layered, composite effect
- Combine a braid with strategically placed bobby pins and curl-clusters to create an architectural, mixed-media style
Pro tip: The more complex your hybrid style, the more important it is to secure well at transition points. Use bobby pins and small elastics liberally—you’re building a more complex structure that requires more anchoring points than a simple braid.
Final Thoughts
French braids on curly hair aren’t about fighting your texture—they’re about working with it, showcasing it, and letting it enhance the braided elements you’re creating. The twelve styles above offer a range from conservative and polished to bold and artistic, but they all share one fundamental principle: your curls are the star, and the braid is the supporting frame.
What works for your hair specifically depends on your curl pattern, the density of your hair, and honestly, how much time you want to spend styling on any given day. Some days call for the quick structure of a classic braid; other days deserve the artistic complexity of a hybrid style or the romantic undone feel of a loose version. The beauty of half-up half-down styling is that you get both—the control where you need it and the freedom where you want it.
Start with whichever style calls to you most, and don’t stress about getting it “right” your first attempt. Braiding on curly hair is actually more forgiving than on straight hair because texture covers a multitude of imperfections. Every attempt teaches you something about how your hair behaves and what works with your specific curl pattern. A year from now, you’ll have a mental library of go-to styles that take ten minutes because your hands have learned the motion and your hair knows exactly what to do.