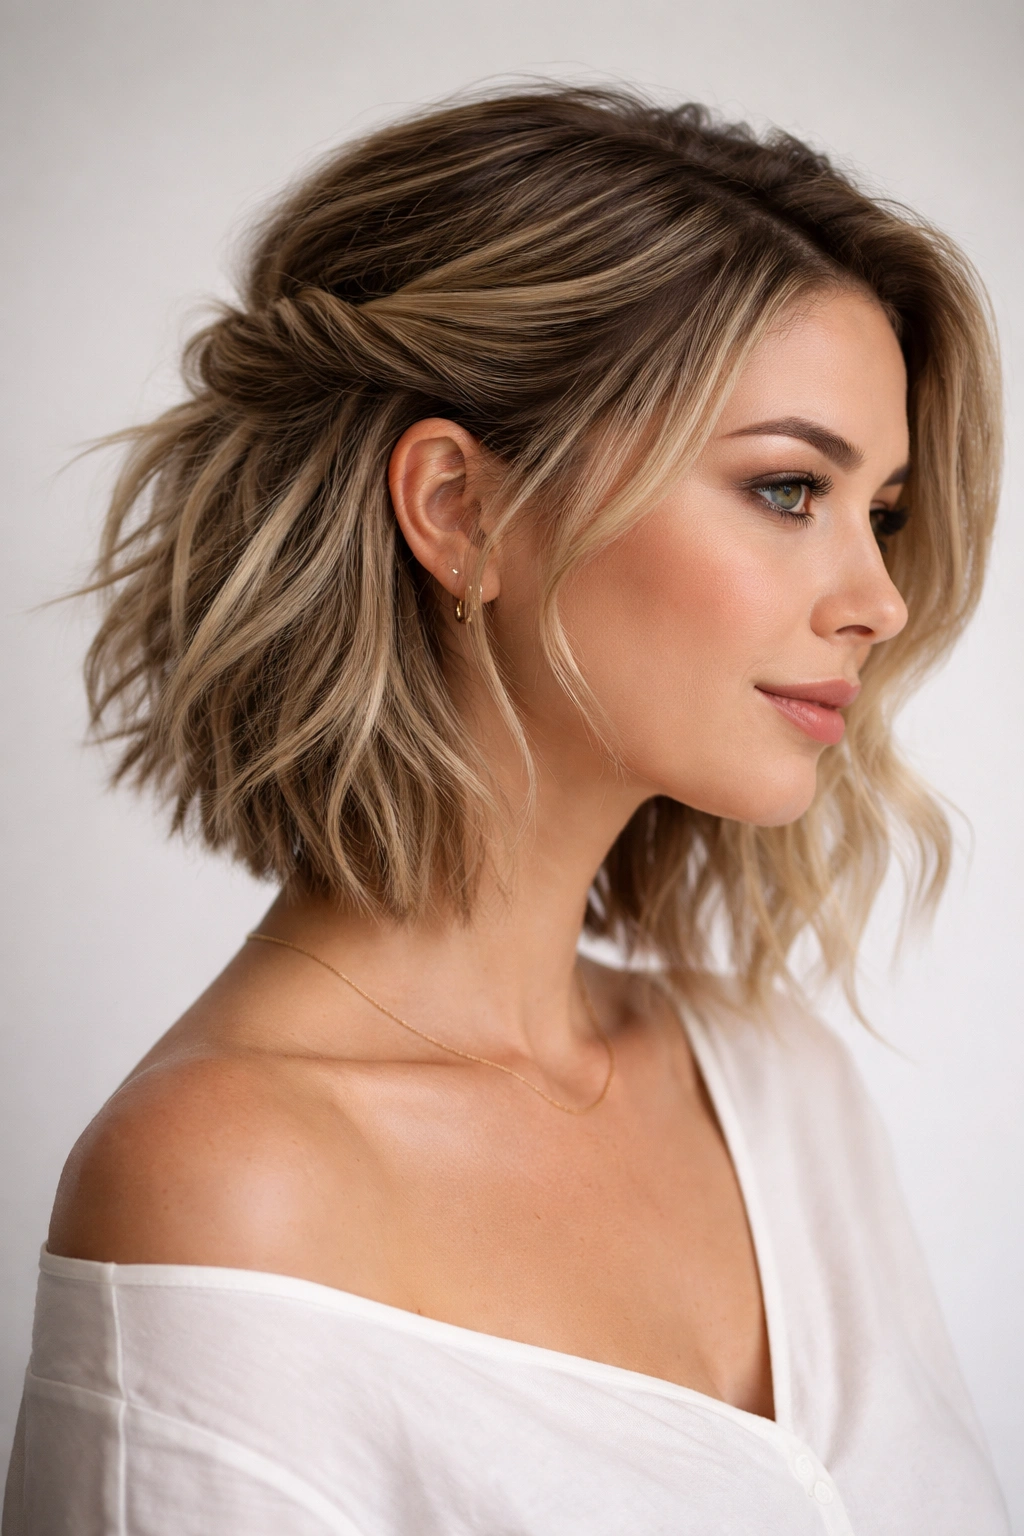
Short hair doesn’t limit your styling options — it actually opens the door to creative, dimensional half-up half-down styles that longer hair can’t quite pull off. When your stylist adds layers to short hair, those choppy, feathered, or disconnected lengths create natural texture and movement that makes half-up styles feel effortlessly polished rather than forced. A half-up half-down approach on short, layered hair sits right at that sweet spot: elegant enough for work or a date, casual enough for weekends, and genuinely flattering on most face shapes because it frames your features while keeping hair off your face.
The challenge with short hair isn’t doing a half-up style — it’s keeping it from looking accidental or too simple. That’s where layering becomes your secret weapon. Strategic layers give the style structure, catch light beautifully, and make even a basic twisted or pinned section feel intentional and polished. You get the sophistication of an updone look without committing to a full upstyle, and you keep the effortless, tousled vibe that makes short hair so appealing in the first place.
Whether you’re working with a pixie cut, a choppy bob, a modern shag, or something in between, the eight styles below show exactly how to layer your short hair and style it half-up half-down in ways that actually work. Each style adapts to different hair textures and face shapes, and I’ll walk you through the precise techniques, products, and styling tricks that make these looks stay put all day without feeling stiff or overdone.
1. Textured Layered Pixie Half-Up
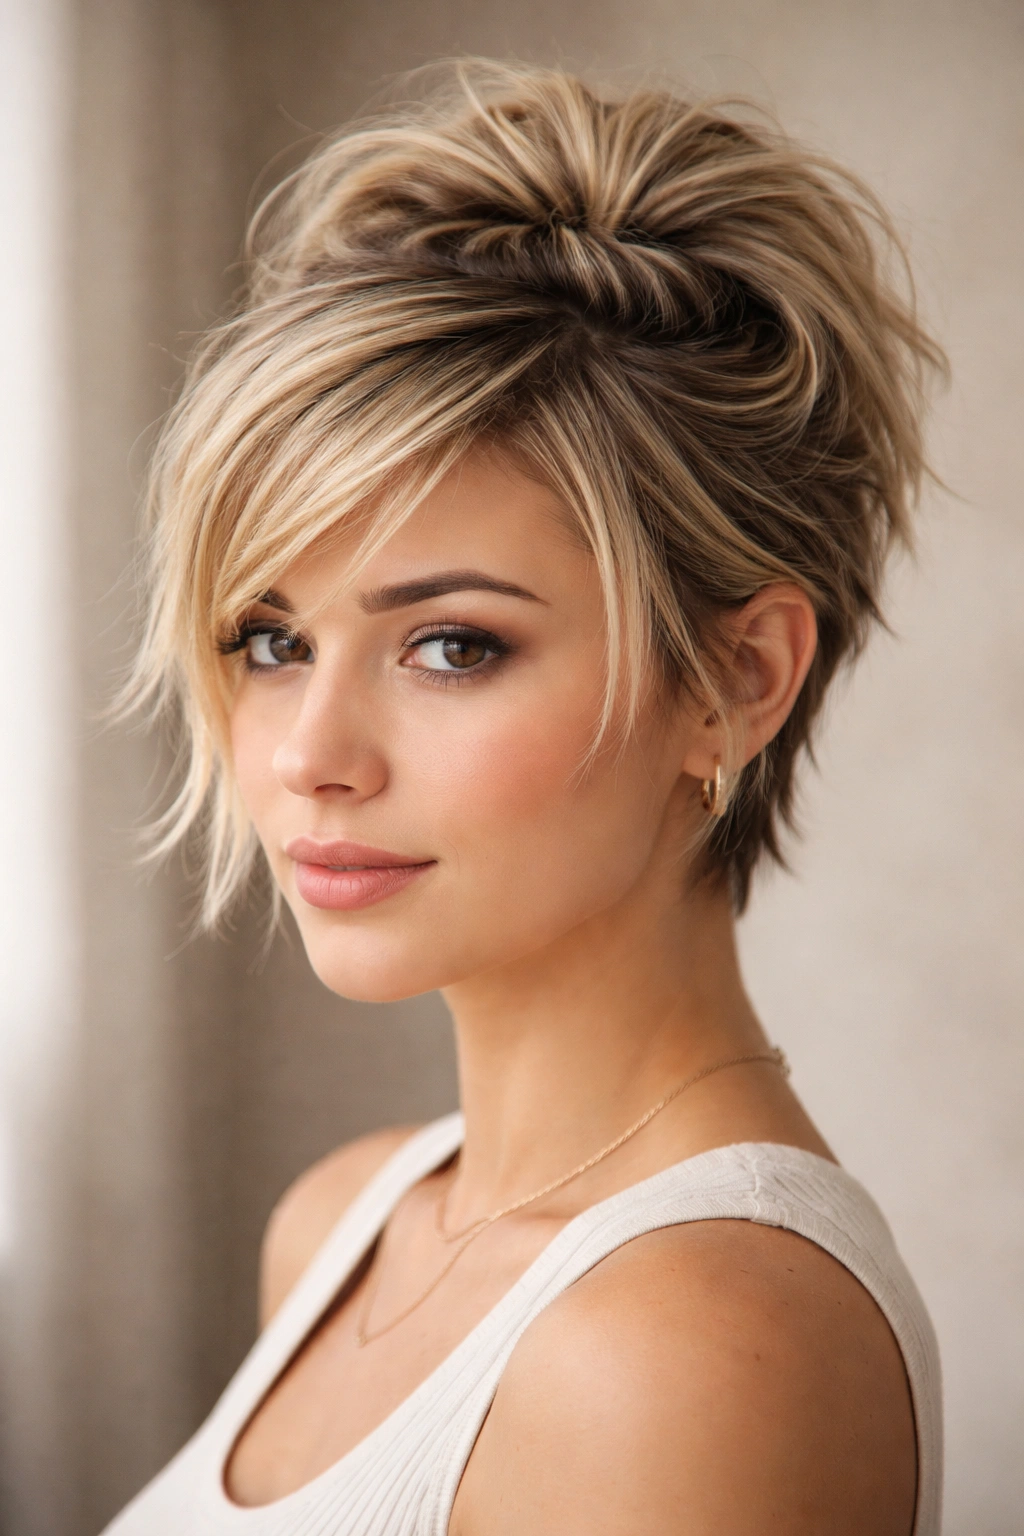
A pixie cut becomes instantly more dynamic when you add movement with a half-up twisted or pinned section. This style works because the short, choppy layers around your face have enough texture to catch and hold product, while the half-up component keeps everything from falling flat against your head. You’re not pinning much hair — just enough to create visual interest and height at the crown.
How to Build the Texture
Start with damp hair and apply a lightweight volumizing mousse to the roots, focusing on your crown and the sides. Blow-dry your pixie using a round brush or your fingers, directing the hair upward and away from your face. The key is creating movement in those short layers rather than smooth, sleek strands. Use a blow-dryer on a lower heat setting so the layers stay feathered and don’t clump together.
Once your hair is dry, run a texture spray or dry shampoo through your layers — this grip is essential on very short hair because there’s less hair to hold a twist or pin in place. The texture spray gives your fingers something to grip and helps the styled section hold throughout the day.
Pinning the Half-Up Section
Take a small section from one side of your part and gently twist it as you move toward the back of your head. You’re not creating a tight, polished twist — you want it to look relaxed and a little undone, which actually reads as more intentional on pixie cuts. Twist the section loosely and secure it with a small bobby pin at the back of your crown, hiding the pin underneath the twist.
Alternatively, you can take a section from each temple and pin both sides together at the back of your crown for a slightly fuller half-up look. Either way, let some of the shorter layers and baby hairs fall loose around your face — that’s not a styling mistake; that’s what makes this look modern and effortless.
Who It Suits Best
This style works beautifully on people with any face shape because the half-up component draws attention upward and the loose layers frame your features softly. It’s especially flattering on oval and round faces because it creates height and definition at the crown. If you have a longer face, you can wear the loose pieces a bit longer to balance proportions.
2. Modern Shag Half-Up Style
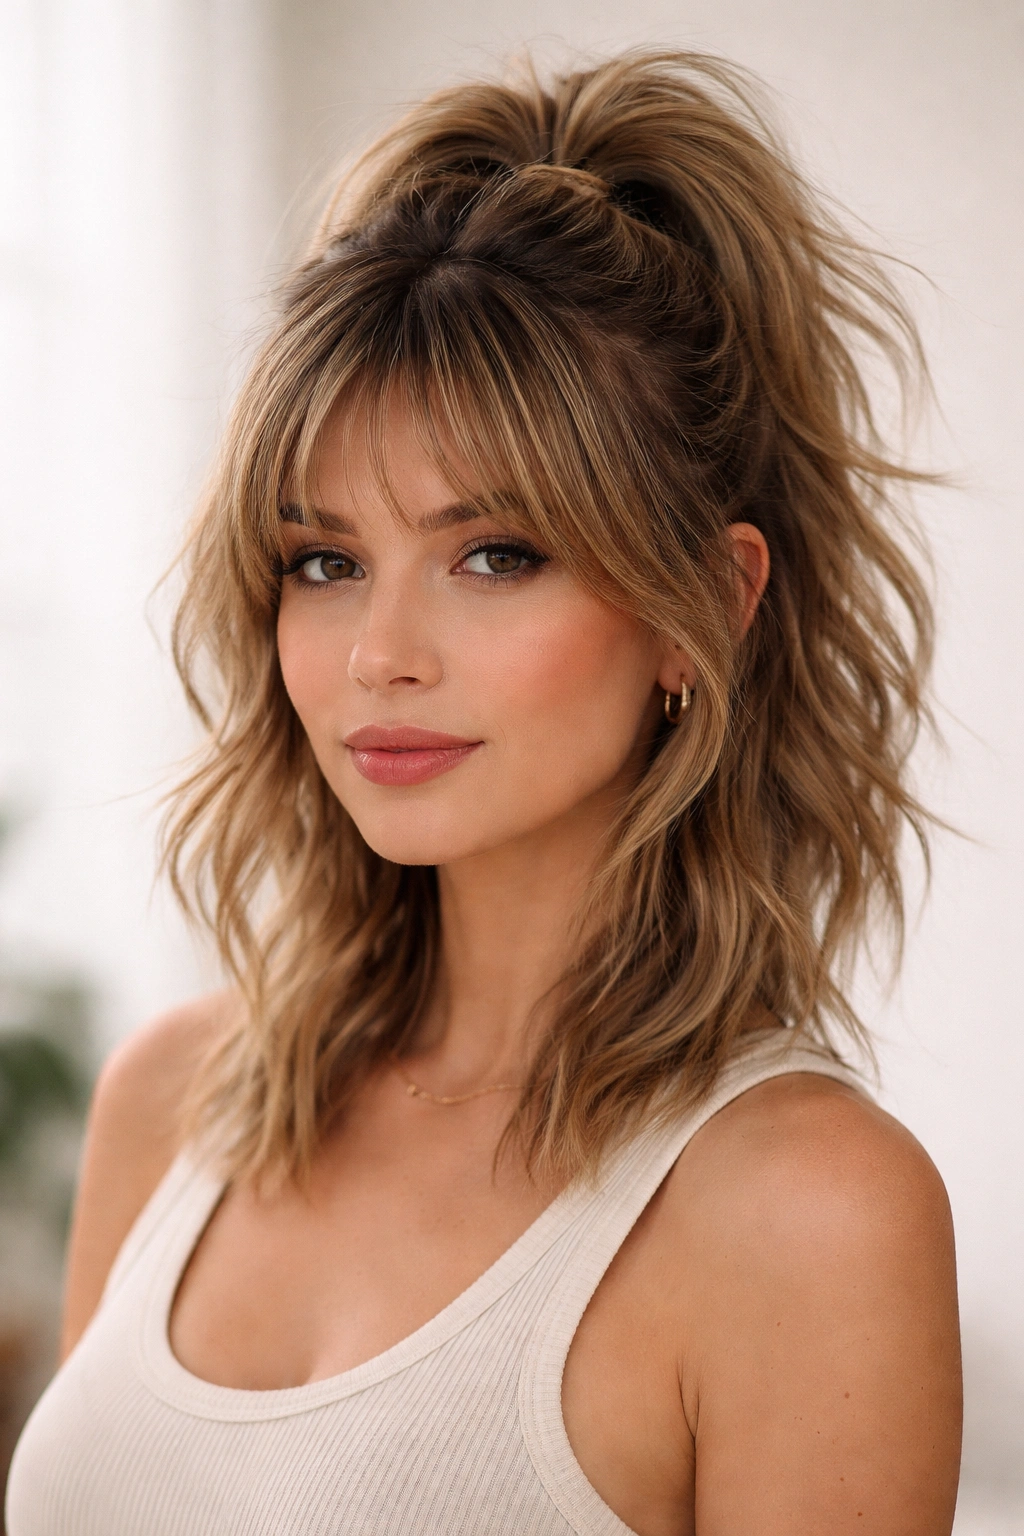
A layered shag cut is built for texture and movement, making it one of the easiest short styles to wear half-up. The distinct layers in a shag — shorter on top, longer around the face — naturally create the dimension you need for a sophisticated half-up look without having to tease or backcomb excessively. This style celebrates the shag’s inherent choppiness rather than trying to smooth it out.
Creating Volume in Shag Layers
Shags thrive on texture, so your first step is building grip into your hair. Apply a sea salt spray or texture spray to damp hair, starting at the roots. Rough-dry your hair with your head tipped upside down, using your fingers to encourage the layers to separate and dry in different directions. When you flip your head back up, you should see natural height and separation in your layers, especially at the crown.
Once dry, add more texture spray to the top layers and use a texturizing paste or pomade on your fingertips to define individual sections and create intentional choppiness. Run your fingers through your hair, breaking up any clumps and ensuring each layer sits distinctly. This gives you the foundation for a half-up section that feels cohesive and intentional, not like you’ve just pinned back a random chunk of hair.
The Half-Up Technique for Shags
For a shag, take a larger section than you would for a pixie — roughly from your temples back to your crown — and loosely secure it with a claw clip or a small elastic band. The beauty of a shag is that you don’t need a tight, sleek half-up; a softer, piecey look actually reads better with the cut’s texture. Leave the shorter face-framing pieces down entirely, and let a few longer strands fall loose from the pinned section.
If you prefer a more polished version, lightly mist the pinned section with light-hold hairspray and gently backcomb the underneath of the section to create subtle height. Smooth the top of the section with a fine-tooth comb, then release the elastic and replace it with a decorative clip or bobby pins hidden underneath. The result is a half-up style with enough structure to last all day but enough texture to feel modern.
Styling Notes and Variations
You can wear this style with a deep side part or a center part depending on your preference and face shape. A deep side part adds drama and asymmetry, which modern shags love. If you want a slightly more dressed-up version, add a delicate hair accessory — a small claw clip, a decorative bobby pin, or even a silk ribbon woven through the pinned section — to elevate the look for work or evening occasions.
3. Choppy Layers with Side Sweep Half-Up
This variation is perfect if your short, layered cut is heavily choppy with lots of movement around your face. Instead of pinning the hair straight back, you’re creating a soft, swept-to-the-side movement that maximizes the fluidity of the layers while keeping your hair off one side of your face. It’s polished without feeling rigid or formal.
Building the Sweep
Start with damp hair and blow-dry everything toward your desired side, whether that’s left or right. Use a blow-dryer to direct the longer face-framing layers to sweep gently across your forehead and temple, and encourage the top layers to follow the same direction. You want movement and flow, not a severe side-swept bangs look — think subtle and natural rather than dramatic.
Once your hair is dry, apply a light texturizing spray to create grip. Working with a few pieces from above your ear on the opposite side from where you want the sweep, gently twist or loosely braid these pieces as you move them toward the back of your head, following the natural direction of your side part.
Securing Without Looking Tight
Here’s where short, choppy layers require a different approach than longer hair. Because your strands are shorter, a traditional bobby pin might show or feel unstable. Instead, use a small decorative clip or a claw clip in a color matching your hair to hold the twisted or braided section. Position the clip slightly off-center at the back-middle of your crown, and let the swept section fall naturally from the clip rather than pulling it tight.
Alternatively, use a small elastic band, and immediately backcomb or tease the section lightly to add texture and grip. Then cover the elastic with a small decorative clip or by wrapping a strand of hair around the elastic and pinning it underneath. The goal is structure that feels intentional but not obviously styled.
Adapting to Your Face Shape
If you have a rounder face, sweep your hair to a side and pin it slightly higher on your crown to create vertical lift and definition. If you have a longer face, keep the pinned section slightly lower and let more wispy pieces frame your face for a softer, more balancing effect. Asymmetrical styling is especially flattering on angular faces because the offset placement echoes strong cheekbones and jawlines.
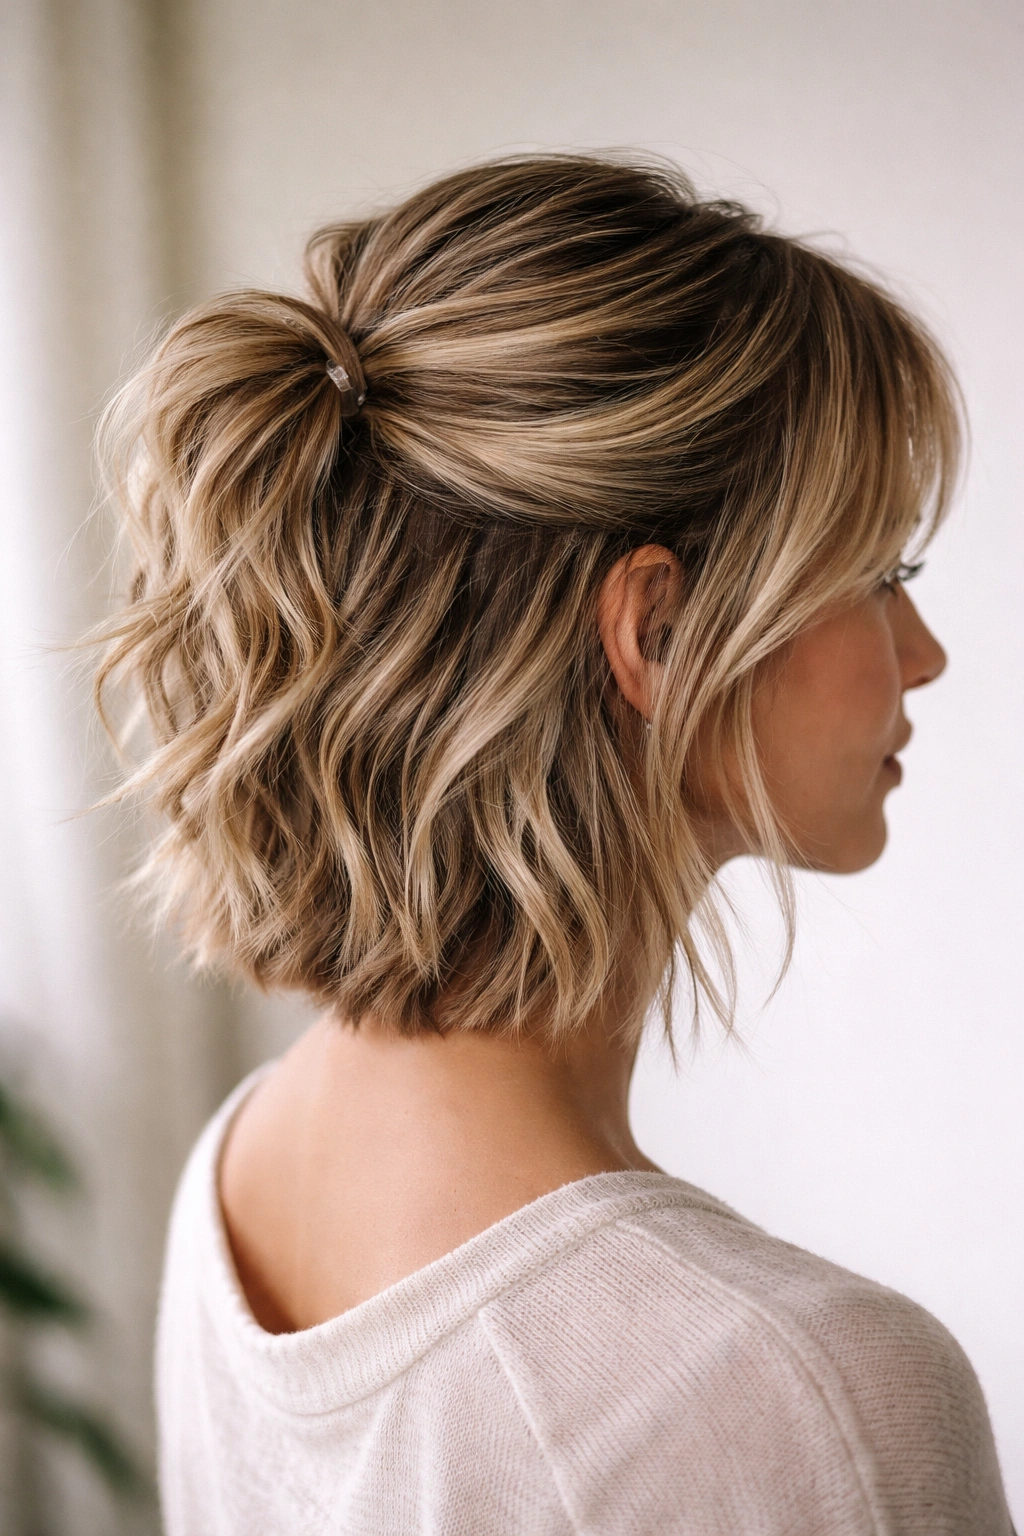
4. Wispy Layers with Twisted Crown Half-Up
This style emphasizes the smallest, shortest, most wispy layers in your short cut — the ones around your face and temples that are so short they often feel impossible to style. Instead of hiding them, you’re celebrating them as part of the overall effect. The twisted crown component sits right at the back of your head, and all those wispy pieces create a soft, romantic frame around your face.
Prepping Your Wispy Layers
Wispy layers need moisture and definition to look intentional rather than bedraggled. After blow-drying your hair, apply a lightweight smoothing serum or hair oil to your fingertips and run them gently through just the shortest layers around your face and ears. This catches the light and makes the wisps look deliberate. Follow with a light-hold hairspray to keep these pieces in place.
If your hair is naturally straight, wispy pieces can look limp. In this case, use a small curling iron or curling wand to add a soft curve to these shortest layers. You’re not creating ringlets — just enough bend that the wisps catch light and feel three-dimensional. Mist the curled wisps immediately with light-hold hairspray while they’re still warm.
Creating the Twisted Crown
Take a section of hair from one side of your head — starting roughly above your ear and moving toward the crown — and begin twisting as you move toward the center back of your head. Keep the twist loose and relaxed; tight twists read as too formal on short hair. As you twist, occasionally pull a tiny strand out of the twist to create a piecey, undone effect. This is the opposite of a perfect, sleek twisted upstyle; here you’re aiming for intentional texture.
Once you’ve twisted to the back of your head, secure the twist with a small bobby pin, tucking the end of the twist back into itself to hide the pin. Repeat from the other side, twisting that section and meeting it at the same pin point at the back of your crown. If that feels too complicated, you can twist just one side and let it sit as your half-up.
The Soft, Romantic Effect
This style is absolutely stunning when you let imperfection be the whole point. A few wispy pieces should fall loose around your face, maybe a couple of strands escaping from the twist at the back. This isn’t a messy mistake — it’s a carefully crafted “undone” look that reads as effortlessly beautiful. If you’re worried about pieces escaping during the day, lock them down with a dot of clear gel or a very light texture spray applied directly to the strands before you create the twist.
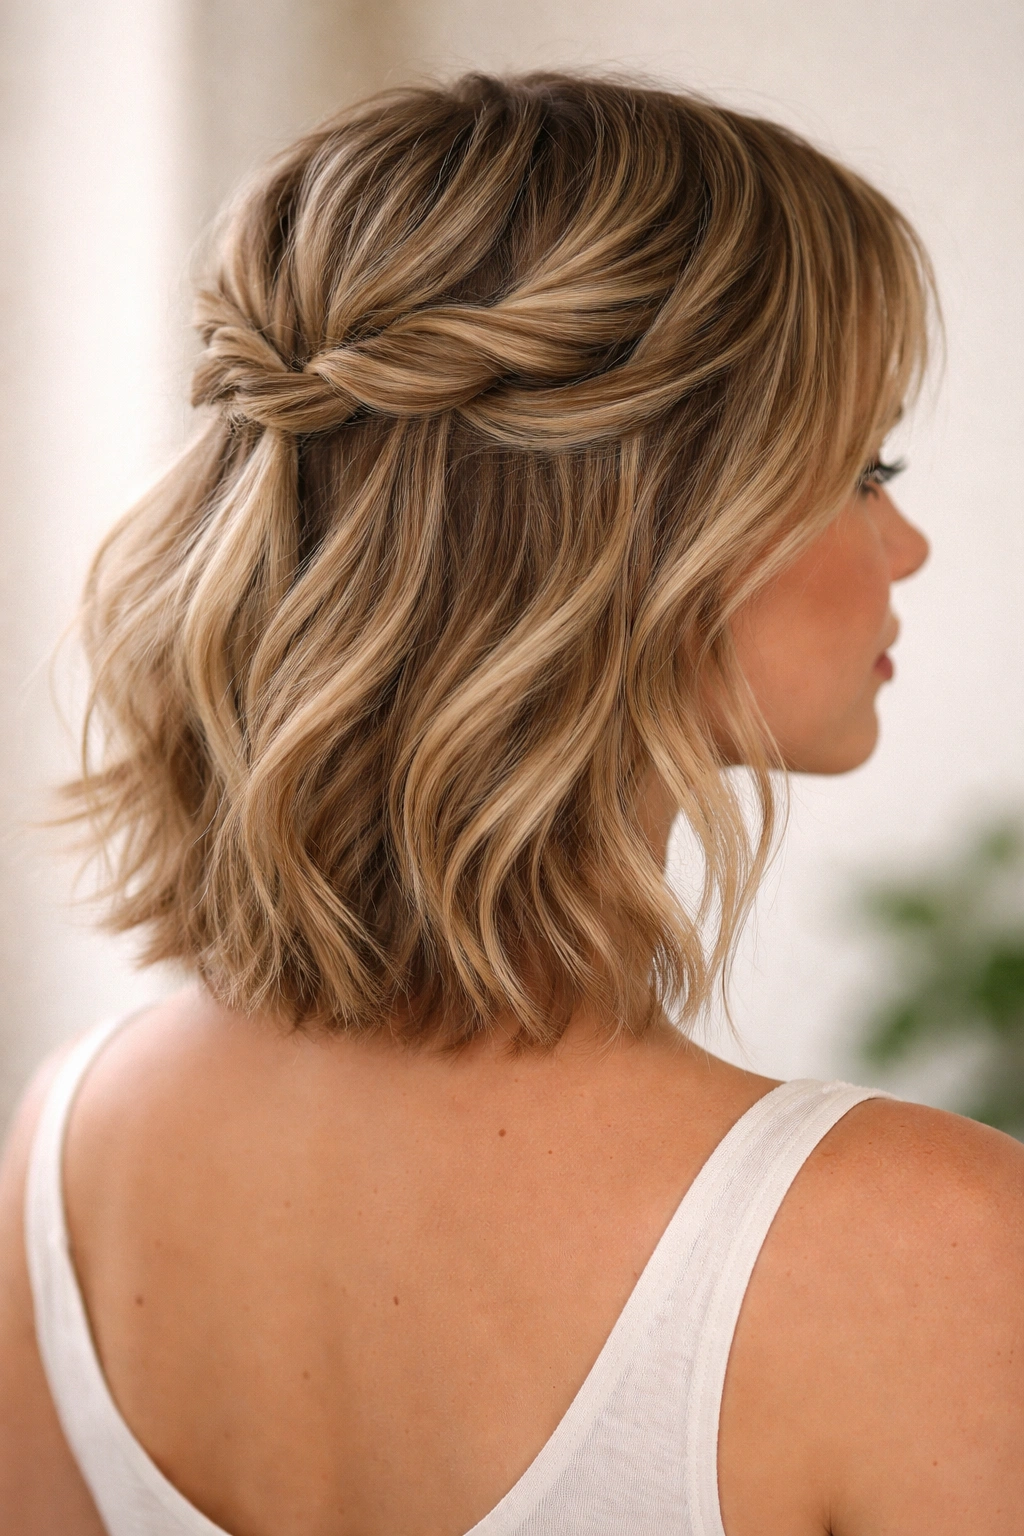
5. Disconnected Layers Half-Knot Style
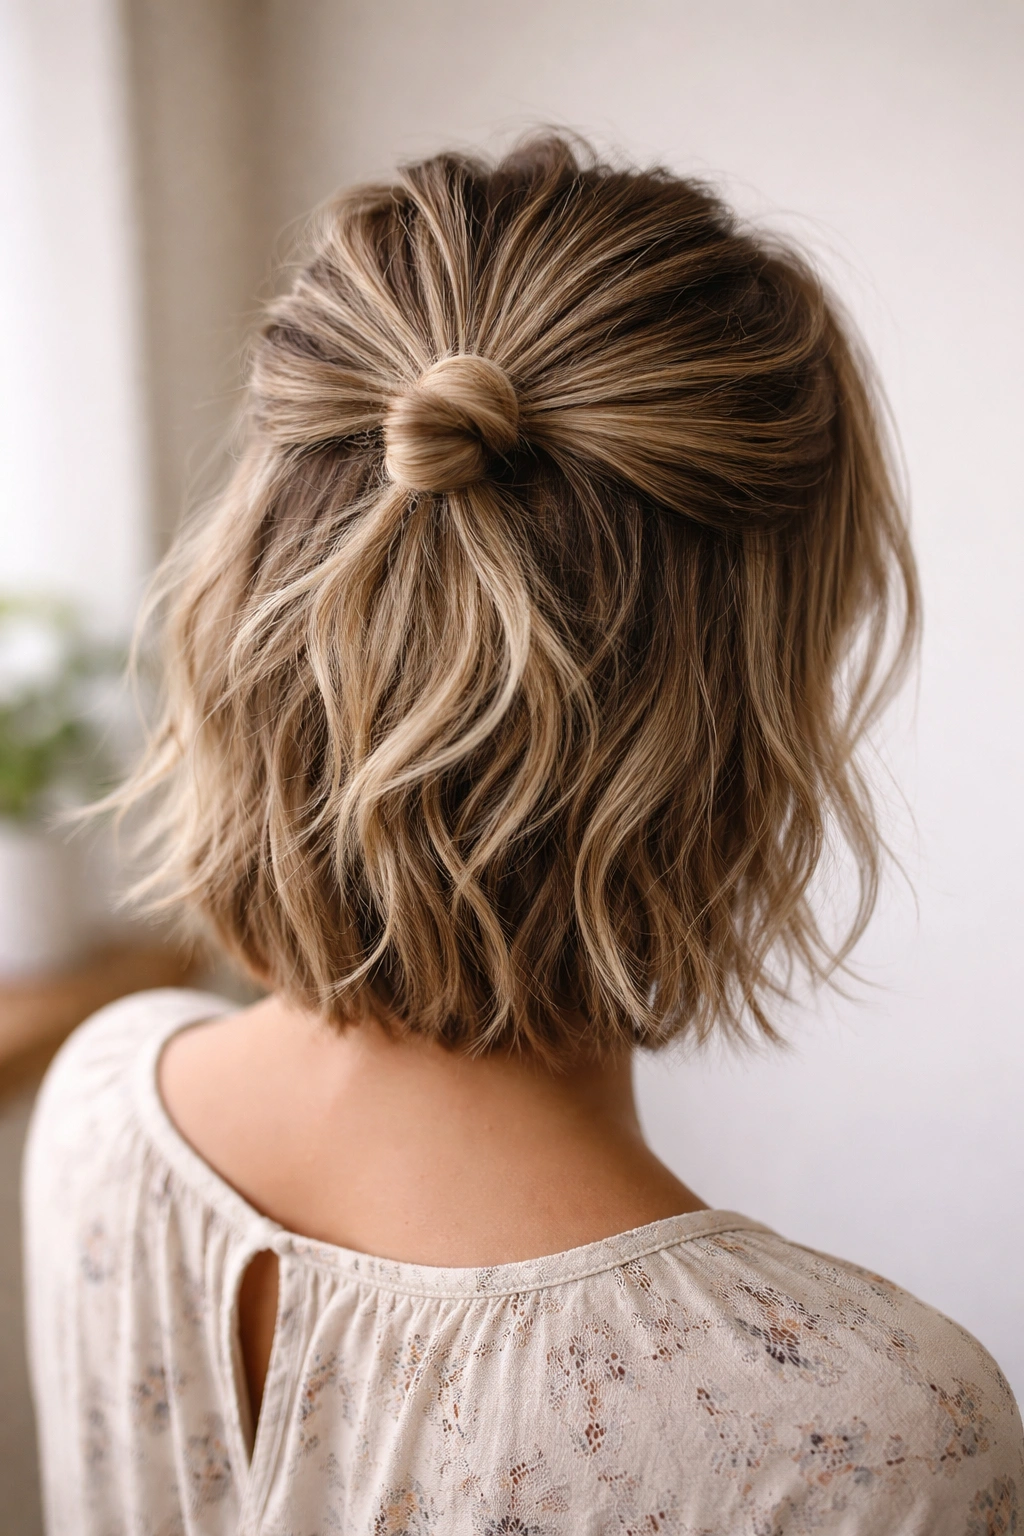
If your short cut features heavily disconnected layers — distinct separation between the very short top layers and longer layers underneath — you can create a mini knot or twist that’s much more casual and modern than a traditional half-up. The disconnected quality is the whole point; instead of blending everything into a sleek section, you’re emphasizing the separation and creating a deliberately choppy, textured knot.
Understanding Disconnected Layers
Disconnected layers mean the shorter top pieces don’t naturally blend into the longer underneath layers. This can feel awkward if you don’t style it intentionally. The solution: lean into the disconnection. Let your short top layers stay separated and textured, and work only with the longer underneath layers for your half-knot component. This approach actually makes the style easier to execute than trying to merge everything together.
How to Tie the Half-Knot
With disconnected layers, you’re working with genuinely different hair lengths, so a full, polished half-up knot isn’t realistic. Instead, create a mini knot using just the longer underneath layers. Tilt your head slightly and gather a small section of the longer hair from underneath your layers, starting above one ear and moving toward the opposite side. Tie this section into a simple overhand knot — not an elaborate bow, just a single knot — at the back of your crown.
This creates a delicate, textured knot that sits underneath or slightly offset by your shorter top layers. The disconnected quality means you can see texture and separation, which prevents the style from looking like you’ve tried too hard. Secure the knot with a small bobby pin underneath to prevent it from loosening throughout the day.
Styling the Top Layers
While your bottom layers are knotted, your short top layers should be as textured and piece-y as possible. Apply sea salt spray or texture paste to your fingertips and work through only the top shorter section, breaking up any clumps and ensuring individual strands are visible. You’re not smoothing these layers back — you’re emphasizing their choppiness.
For an extra modern touch, add a subtle color contrast by using a temporary color spray on just your top layers. A soft metallic or contrasting pastel can make the disconnected quality feel completely intentional and fashion-forward. This works best on shorter, bolder cuts where the contrast really reads visually.
6. Feathered Layers with Half Braid
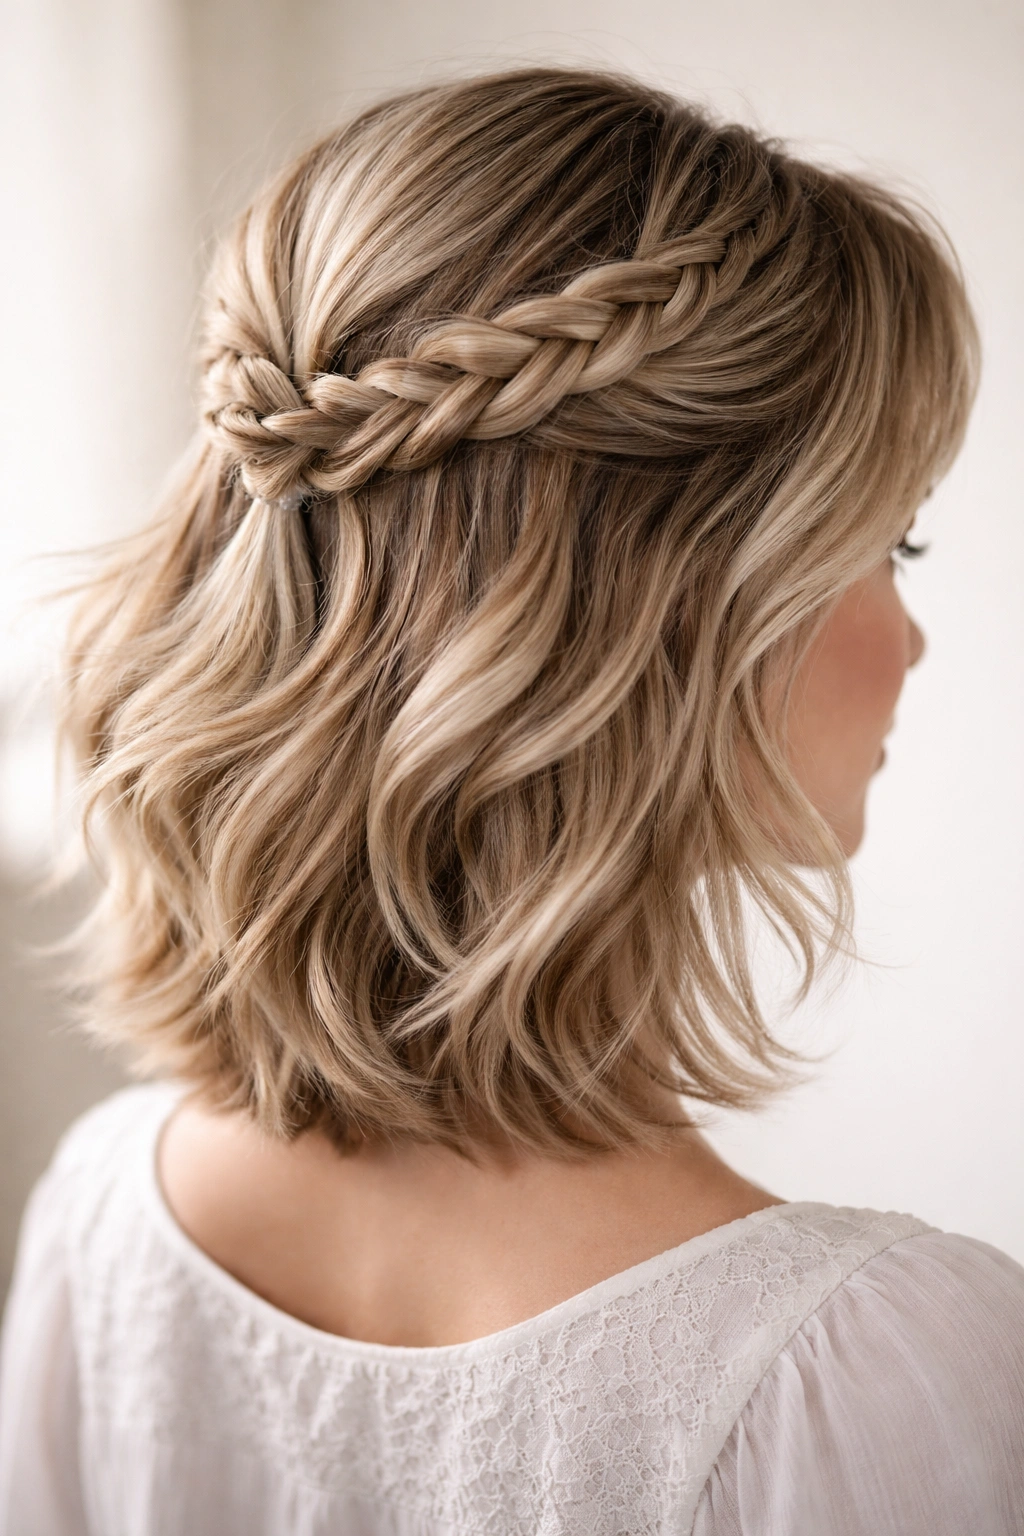
Feathered layers are built for movement and flow, making them ideal for a braided half-up style. Feathering creates curved, feathery ends rather than blunt layers, which means when you braid a section back, the braid actually catches all that texture and looks fuller and more interesting than it would on straight-edged layers. The braid becomes a vehicle for showing off your feathered texture.
Creating Feathered Texture
If your cut already has feathered layers, your job is simply enhancing the natural shape. Blow-dry your hair to encourage the feathered texture to curve and separate. If your hair is stick-straight, you’ll need to create the feathering effect with styling. Use a curling wand to gently curve the ends of your layers outward, creating that classic feathered shape. Work section by section around your head, curling the ends away from your face rather than under.
Once your feathering is in place, apply a light texture spray to keep the curves throughout the day. Feathered layers can fall flat if you don’t lock in the shape, but too much product will make them look stiff rather than naturally textured. Light-hold products are your best friend here.
The Half-Braid Technique
Take a section of hair from one side and begin a loose, loose French braid moving toward the back of your head. Because your layers are shorter, this won’t be a traditional full-length braid — you’re creating a braid that moves from your temple toward your crown, covering maybe the top third of your head. Keep the braid very loose and don’t pull tightly on the strands; loose braids actually show texture better than tight ones.
Every few twists of the braid, gently pull on the outside edges of the braid to create a soft, undone, textured appearance. This technique is called pancaking the braid, and it makes even short hair in a braid look fuller and more interesting. Secure the braid with a small bobby pin at the back of your crown, and let the remaining longer layers fall down below where the braid ends.
Styling Variations
If a full braid feels complicated, you can create a half-braided look by simply twisting your section back instead of braiding, and then securing it. The feathering will still show through and create the dimensional effect you’re going for. You can also braid just one side and leave the other side completely loose, creating an asymmetrical style that looks intentionally modern.
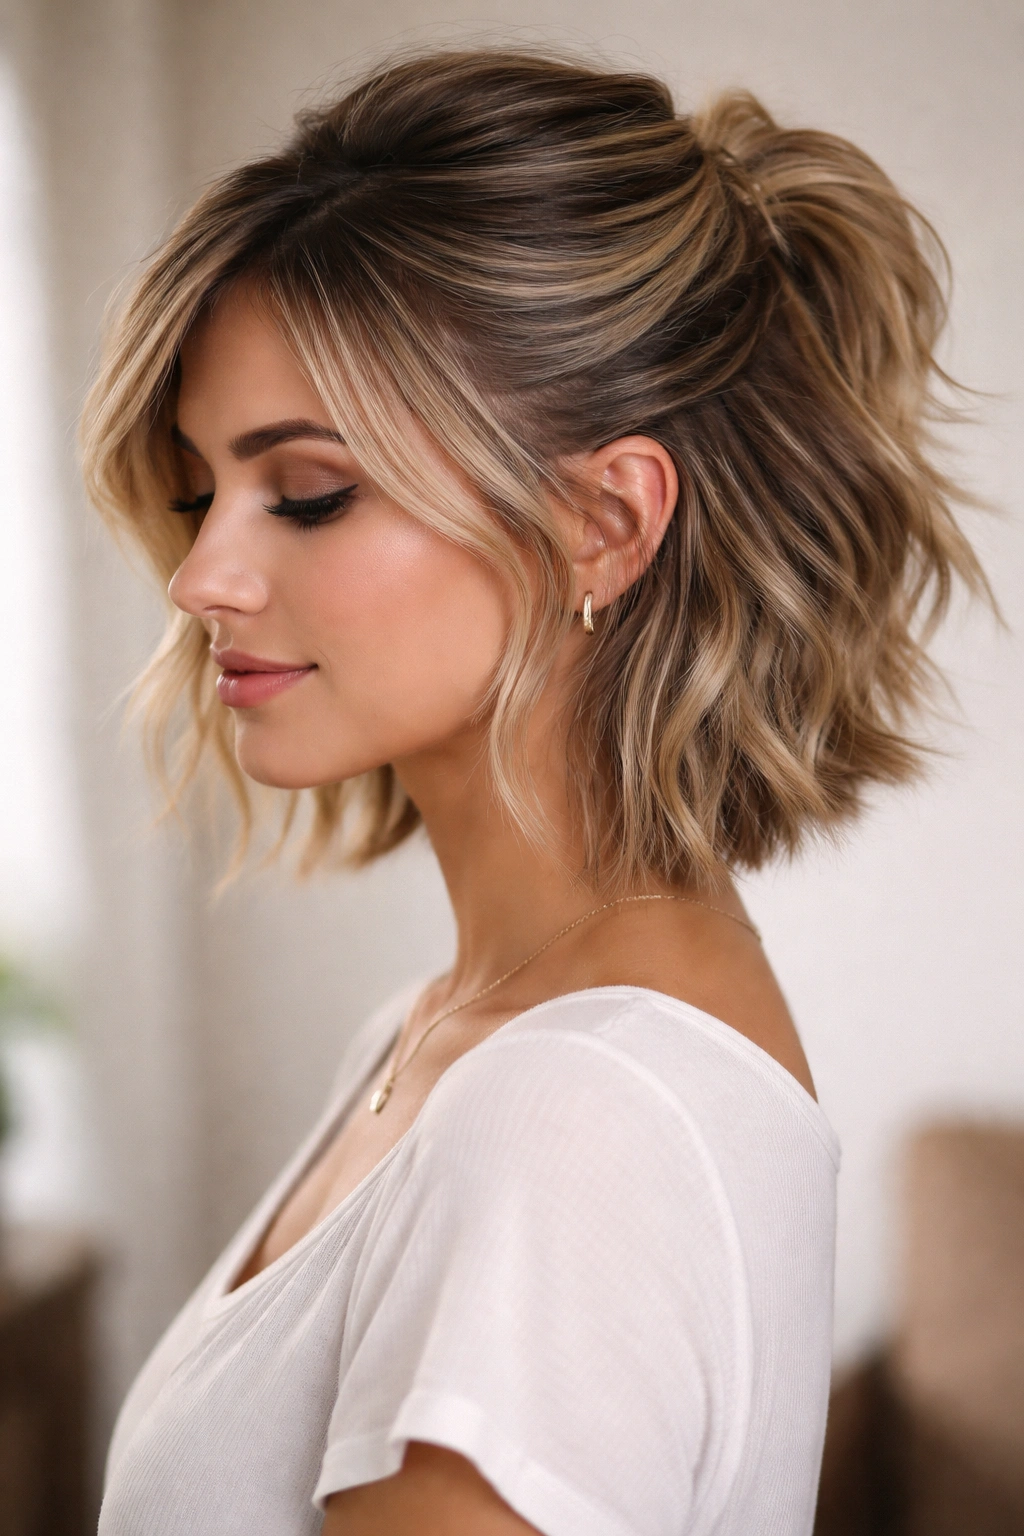
7. Choppy Bob Layers with Volume Half-Up
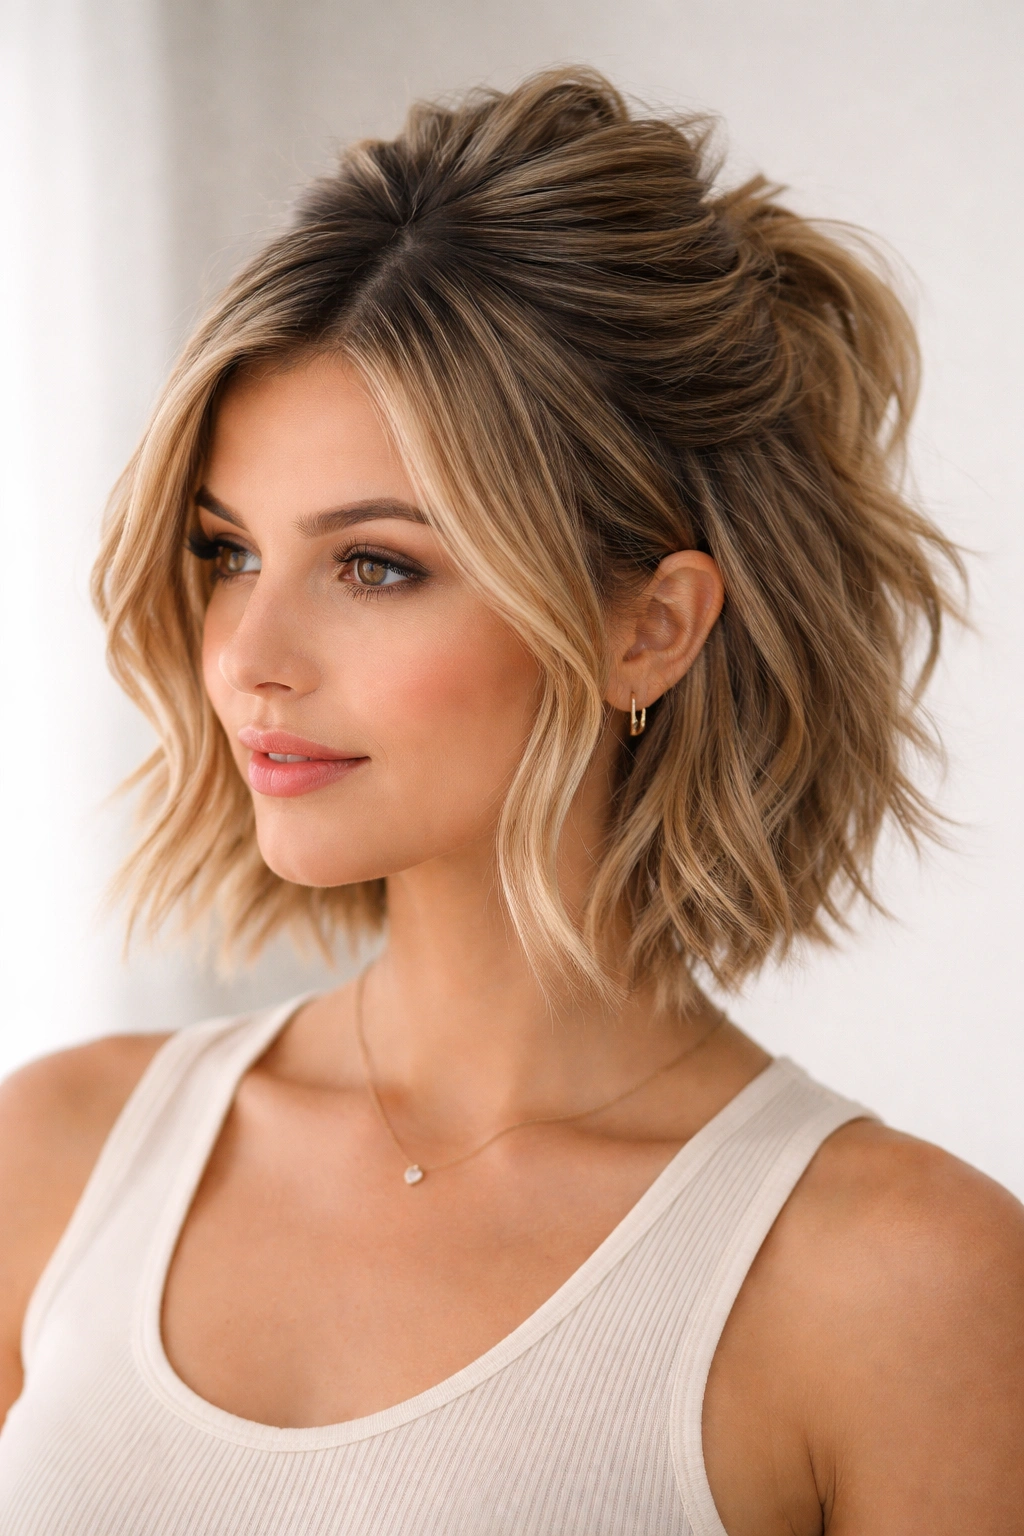
If you’re working with a choppy, textured bob cut with shorter layers on top and longer face-framing pieces, the half-up approach works beautifully when you focus on creating height and volume at the crown. The goal is looking fresh and intentional, not like you just pulled your hair back because you were having a bad hair day.
Building Lift at the Crown
This style hinges on volume, so start with your blow-dry. Apply volumizing mousse to damp roots, focusing on the crown and the area where you’ll be pinning your half-up section. Blow-dry using an upward motion, tipping your head in different directions to encourage volume from multiple angles. Use a paddle brush or your fingers to lift the hair away from your scalp as you dry.
Once your hair is completely dry, flip your head upside down and apply dry shampoo or volumizing spray to your roots. This creates texture and grip that will actually hold your half-up section in place on short hair. Flip back right-side up, run your fingers through to break up the powder, and you should see noticeably more volume, especially at your crown.
The Half-Up Twist with Texture
Take a section from one side of your part — starting roughly above your ear — and twist it gently as you move toward the back of your crown. Keep this twist very loose; tight twists actually flatten your crown volume. As you twist, occasionally pull tiny strands out to create a piecey texture.
Once you’ve twisted to the back of your head, you have two options: secure it with a bobby pin and then gently backcomb or tease the pinned section to add more height, or use a small claw clip to hold the twist in place without pinning. Either way, the key is creating visible volume and texture at the crown where the pin or clip sits.
Creating Definition with Choppy Texture
The choppy layers in your cut are your biggest asset here. Once your half-up is pinned, work a texture spray through the crown area and gently break apart any clumps of hair. Let the shortest, choppiest layers fall loose around your face — they should look intentional and piece-y, not messy. Use a fine-tooth comb to separate individual strands if needed, then lock everything in place with a medium-hold hairspray that won’t feel stiff.
This style is exceptionally flattering on round or square faces because the crown height creates vertical lift and definition. If you have a longer face, you can create a fuller half-up by pinning a slightly larger section, which adds width and balance.
8. Layered Asymmetrical Half-Tucked Style
An asymmetrical short cut with longer pieces on one side and shorter pieces on the other lends itself perfectly to a half-tucked style. Instead of pinning symmetrically at the back of your crown, you’re tucking one side behind your ear or pinning it off to one side, creating a distinctly modern, fashion-forward look. This works especially well if your cut is already intentionally uneven.
Playing Up the Asymmetry
First, identify which side of your cut is longer and more substantial — that’s the side you’ll be working with for the tucked component. Blow-dry this longer side with a slight wave or texture to give it dimension and prevent it from looking thin or one-dimensional. Use a curling iron to add soft curves that will catch light and look intentional.
The shorter side should be as textured and feathered as possible. Apply texture spray and use your fingers to break apart and separate those shorter pieces so they look deliberately choppy rather than awkwardly short. The contrast between the textured shorter side and the tucked longer side is what makes this style feel modern and intentional.
The Tuck Technique
Take the longer section from your fuller side and gently twist or braid it as you move it toward the shorter side of your head. As you move the longer pieces across the back of your head, tuck the twisted or braided section behind your ear or into a small claw clip positioned at the back-side of your crown, offset from center.
Don’t pull this section tight or make it look like a traditional half-up. You want it to look like you gently moved your longer pieces out of the way, not that you styled an intricate updo. The twist or braid should have gaps and texture visible; you can even pull out a few strands intentionally to enhance the undone effect.
Finishing Touches for Modern Appeal
This style is elevated when you add a touch of shine or a subtle accessory. Apply a smoothing serum or lightweight hair oil to your longer pieces before tucking them, which makes them look more polished and catches light beautifully. If you want to add visual interest, use a decorative clip in metallics, tortoiseshell, or a contrasting color to hold the tuck in place — this is your chance to make a subtle style statement.
The asymmetrical half-tuck works on virtually any face shape because you’re not adding volume or height; you’re simply creating movement and visual interest through the offset placement and texture. It’s especially stunning on people with strong features or distinctive face shapes because the asymmetry echoes and emphasizes those natural characteristics.
Final Thoughts
Every one of these eight styles proves that short, layered hair isn’t limited to sleek updos or completely down styles — you have sophisticated, modern options right in the middle. The secret to making half-up half-down work on short hair is leaning into the layering and texture rather than trying to tame everything into a polished, blended section. Those choppy, feathered, disconnected layers are exactly what makes these styles interesting and dimensional.
The other game-changer is understanding which approach matches your specific cut. A pixie-length cut and a choppy bob require totally different styling techniques and products, even though they’re both short. Spend time experimenting with your layers when you first get a cut, testing what texture products work, how much grip you need, and which pinning and twisting techniques actually hold on your specific hair length and density.
Most importantly, remember that the best version of any of these styles looks intentional but undone. If you’re seeing loose pieces, texture, slight imperfections, or a little separation between layers — that’s not failure, that’s exactly the point. That’s what separates modern, effortlessly beautiful short-hair styling from styles that feel overdone or stiff. Work with your cut’s natural qualities, add texture and grip where you need it, and trust that the layering you paid for actually does the heavy lifting for you.