Half-up half-down hairstyles have become a go-to for people who want to feel put-together without committing to a full updo. The beauty of these styles lies in their versatility—they work for casual days at home, professional office settings, date nights, weddings, and everything in between. What makes the half-up bun particularly appealing is how it combines the best of both worlds: the polished, intentional feel of an updo with the soft, romantic appeal of hair cascading down your back.
The half-up bun specifically strikes the perfect balance between effort and ease. You’re not wrestling with bobby pins to secure an entire head of hair, but you’re also creating enough visual interest and structure that your style looks deliberate and thoughtful. Whether you’re dealing with fine, straight hair that needs texture, thick curls that need management, or anything in between, there’s a half-up bun variation that’ll work for your hair type and skill level. The best part? Most of these styles take between 5 and 15 minutes once you get the hang of the technique.
Hair texture matters when choosing your half-up bun style. Wavy or curly hair naturally photographs well in these styles and often looks intentionally undone even with minimal effort. Straight hair can work beautifully too, especially with the addition of waves, texture spray, or strategic twisting to add dimension. Fine hair benefits from slightly messier, more voluminous bun styles that distribute hair weight evenly, while thick hair can handle sleeker, more defined versions. The great news is that every hair type has multiple styles that’ll look stunning.
1. Classic Half-Up Bun with Face-Framing Pieces
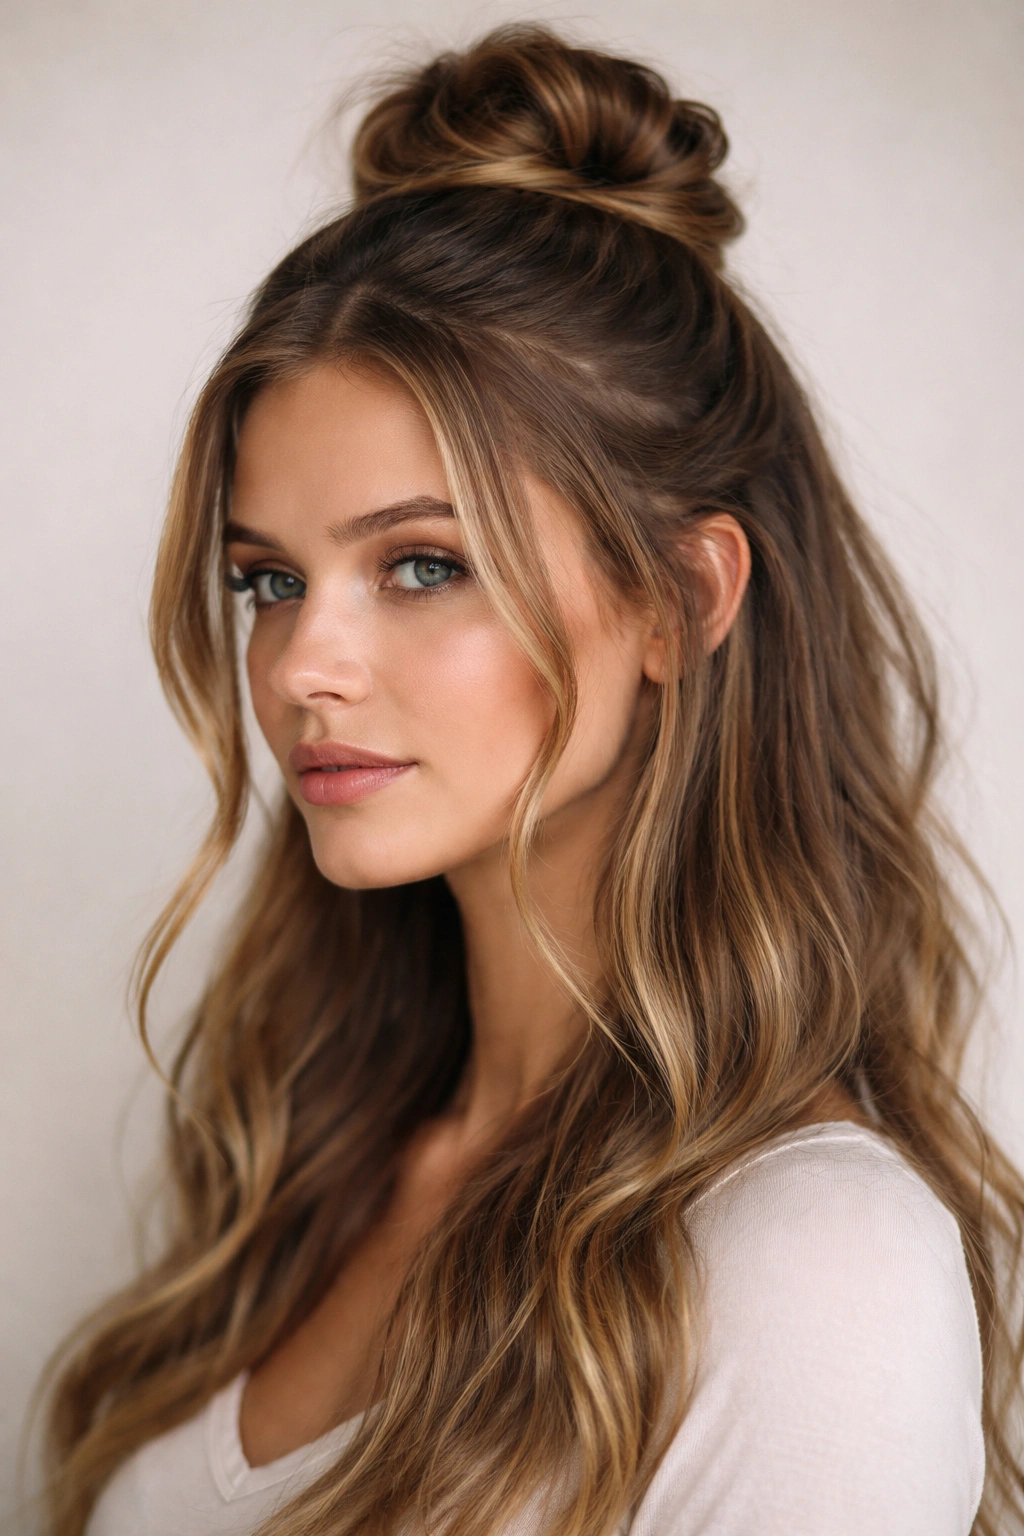
This is the foundational style that works for nearly everyone. Start with hair that’s either naturally textured or has some waves or curls added to it—this gives the final look more visual interest than starting with completely straight hair. Brush or finger-comb the top section from one ear, across the crown, to the other ear, leaving two small sections at the front near your temples untouched.
Why It Never Goes Out of Style
The reason this style remains so popular is simple: it’s flattering on virtually every face shape. Those deliberately left-out pieces frame your face and soften the overall appearance, which is why this version beats a completely sleek half-up style for most people. The face-framing element also draws attention upward, making it particularly flattering for those with longer face shapes. The looseness around the front also makes this style look effortlessly done rather than overdone.
How to Create the Look
- Gather the top half of your hair at the crown, securing it loosely with an elastic
- Gently tease or backcomb the bun section slightly to add volume
- Twist the gathered hair and wrap it around the base of the elastic to form a bun
- Secure the bun with bobby pins hidden inside the bun structure
- Leave the front two sections down intentionally, allowing them to frame your face
- Use a smoothing serum or light hairspray to keep flyaways at bay without making the look rigid
Pro tip: Don’t make the bun too tight at the crown. A slightly loose, relaxed bun looks infinitely more modern and wearable than a pulled-tight version that can cause tension headaches and look severe.
2. Twisted Half-Up Bun
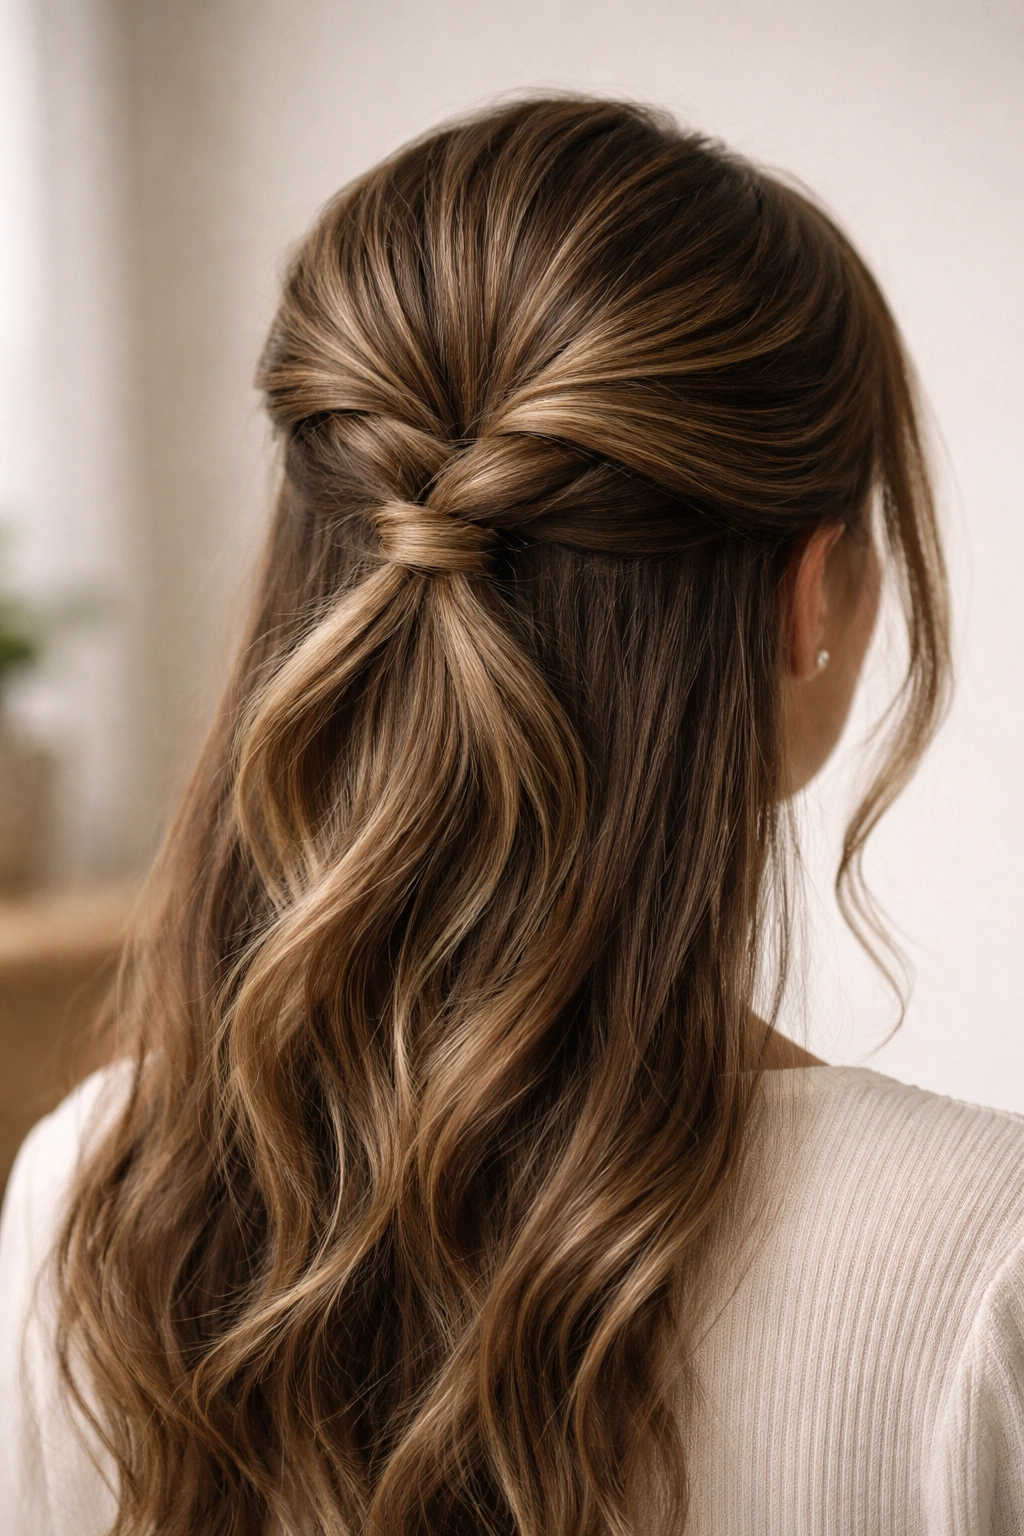
If you want something with a bit more visual texture and movement than a standard bun, the twisted version adds sophisticated detail without requiring advanced braiding skills. This style works particularly well on straight or wavy hair where the twist creates a clear visual line of interest.
What Makes the Twist Different
The twist serves as both a practical securing element and a design feature. Instead of simply gathering and balling up your hair, you’re creating a deliberate spiral that shows off your styling technique. This version looks especially polished for professional settings or more formal occasions because it reads as intentional and detailed. The twist also distributes the hair weight differently than a standard bun, which can make it more comfortable to wear for extended periods.
Building Your Twisted Bun
- Section off the top half of your hair as you would for a classic half-up style
- Divide this section into two equal parts
- Twist each section away from your face—so the right section twists to the right, the left section twists to the left
- When you reach the back, cross the two twisted sections over each other to create an X shape
- Continue wrapping the twisted sections around each other to form a spiral bun
- Pin securely, ensuring the pins catch both the twist and the hair underneath for maximum hold
Insider note: If your hair is very slippery or fine, lightly mist the section with texture spray before twisting. This gives the twist something to grip and helps it hold its shape throughout the day without needing excessive bobby pins.
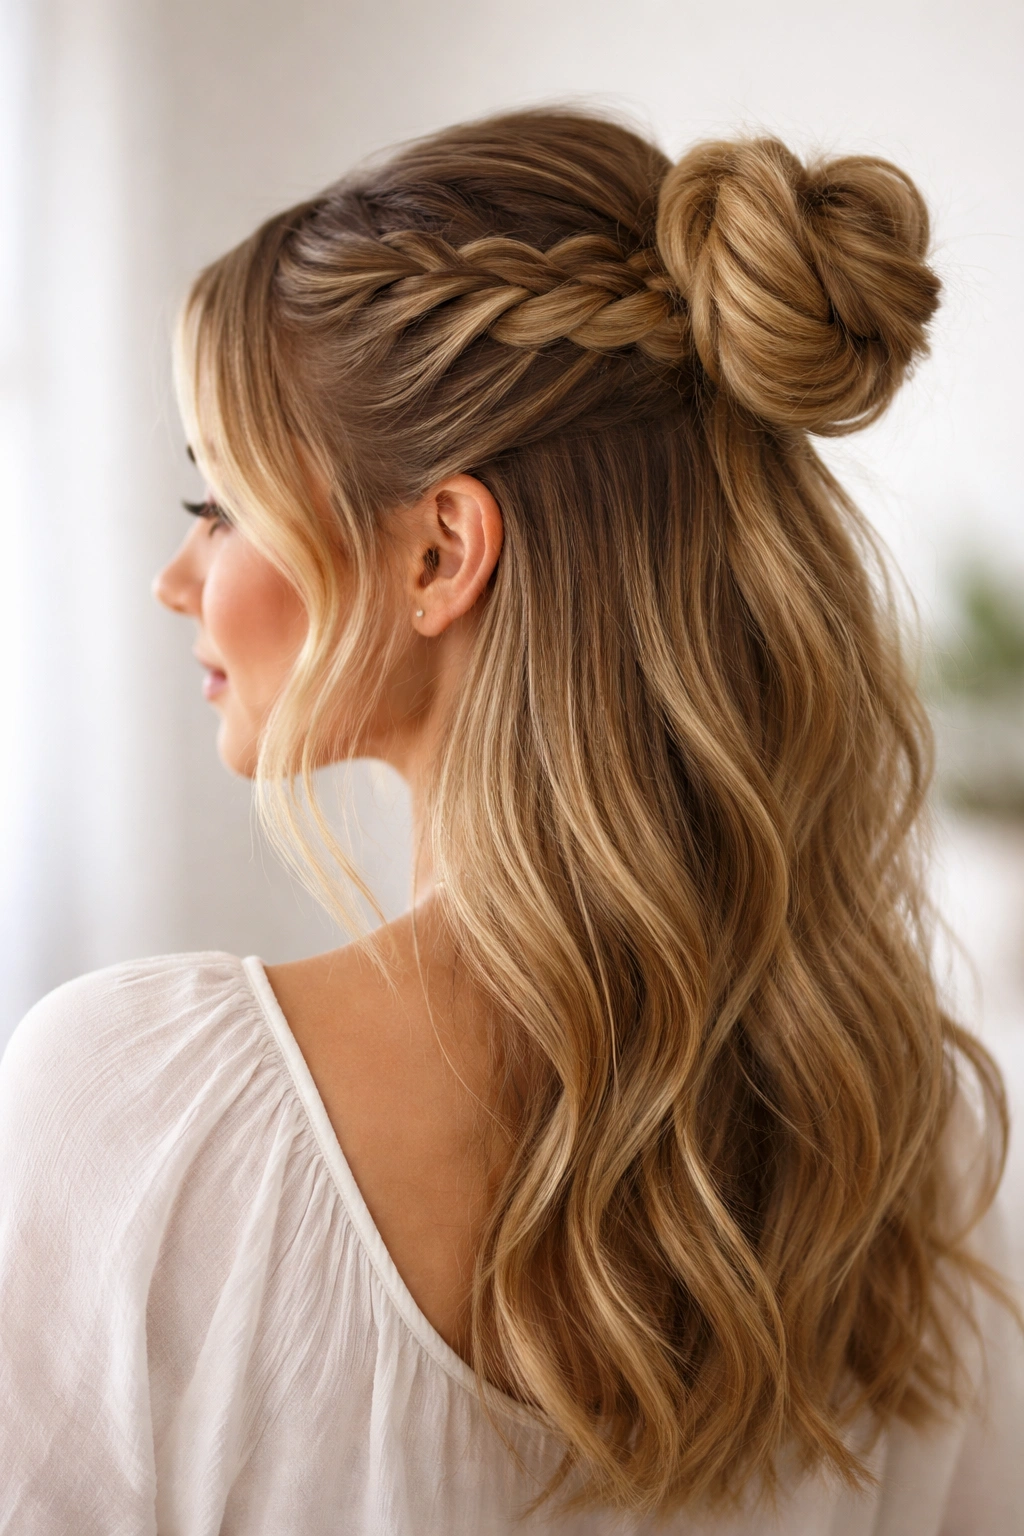
3. Braided Half-Up Bun
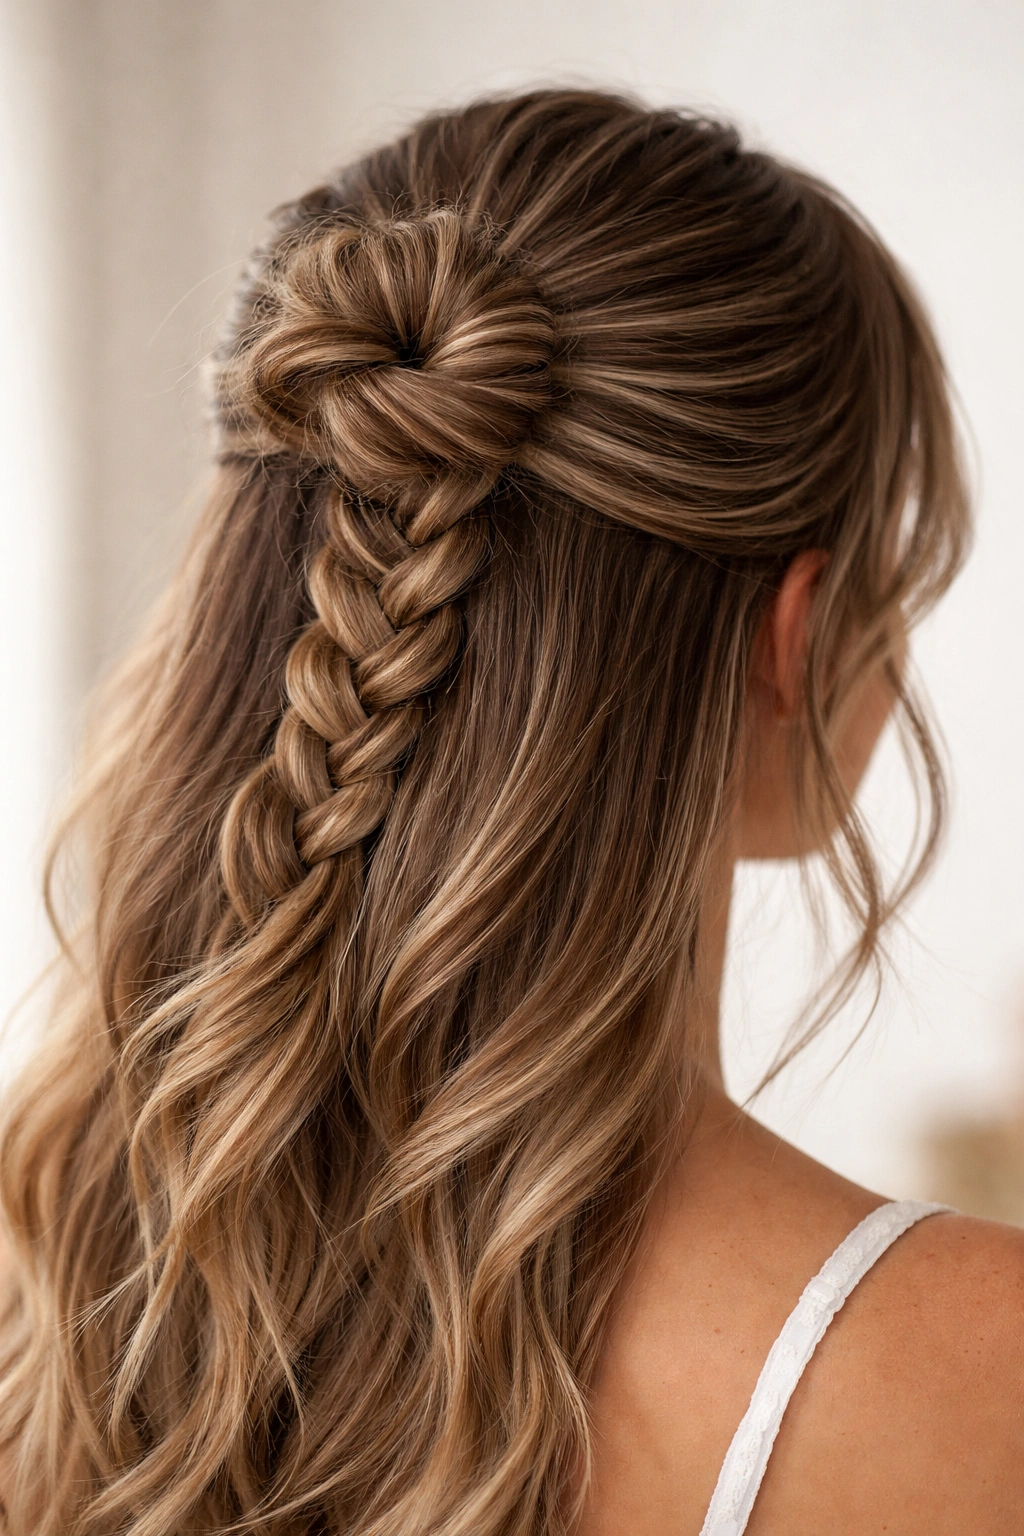
For those who’ve mastered basic braiding, this style elevates your half-up game significantly. The braid adds texture and interest while also being incredibly practical—braided sections hold much better than twisted sections throughout the day, especially if you’re working with fine or slippery hair.
Why Braids Hold Better
A braid interlocks the hair strands in a way that distributes tension evenly and creates inherent grip. This means you need fewer bobby pins, and the style is less likely to come loose as you move throughout your day. The texture of the braid also adds visual dimension—it catches light differently than smooth hair, making the style more visually interesting and photography-friendly.
Steps for a Braided Half-Up Bun
- Gather the top section of your hair at the crown, but don’t secure it yet
- Divide this section into three equal strands
- Braid these strands using a standard three-strand braid, working from the crown downward
- Once you’ve braided about three-quarters of the way down, secure the braid with a small elastic
- Take the braided section and coil it around itself to form a bun
- Use bobby pins to secure the bun, weaving them through the braid structure for maximum hold
- Gently pull the braid strands slightly to create a fuller, softer-looking texture
Worth knowing: Dutch braids (where you braid under instead of over) photograph slightly better and look more visually striking, but they’re also more time-consuming. French braids (starting at the crown and adding hair as you go) are faster but require more practice to get looking neat.
4. Sleek High Half-Up Bun
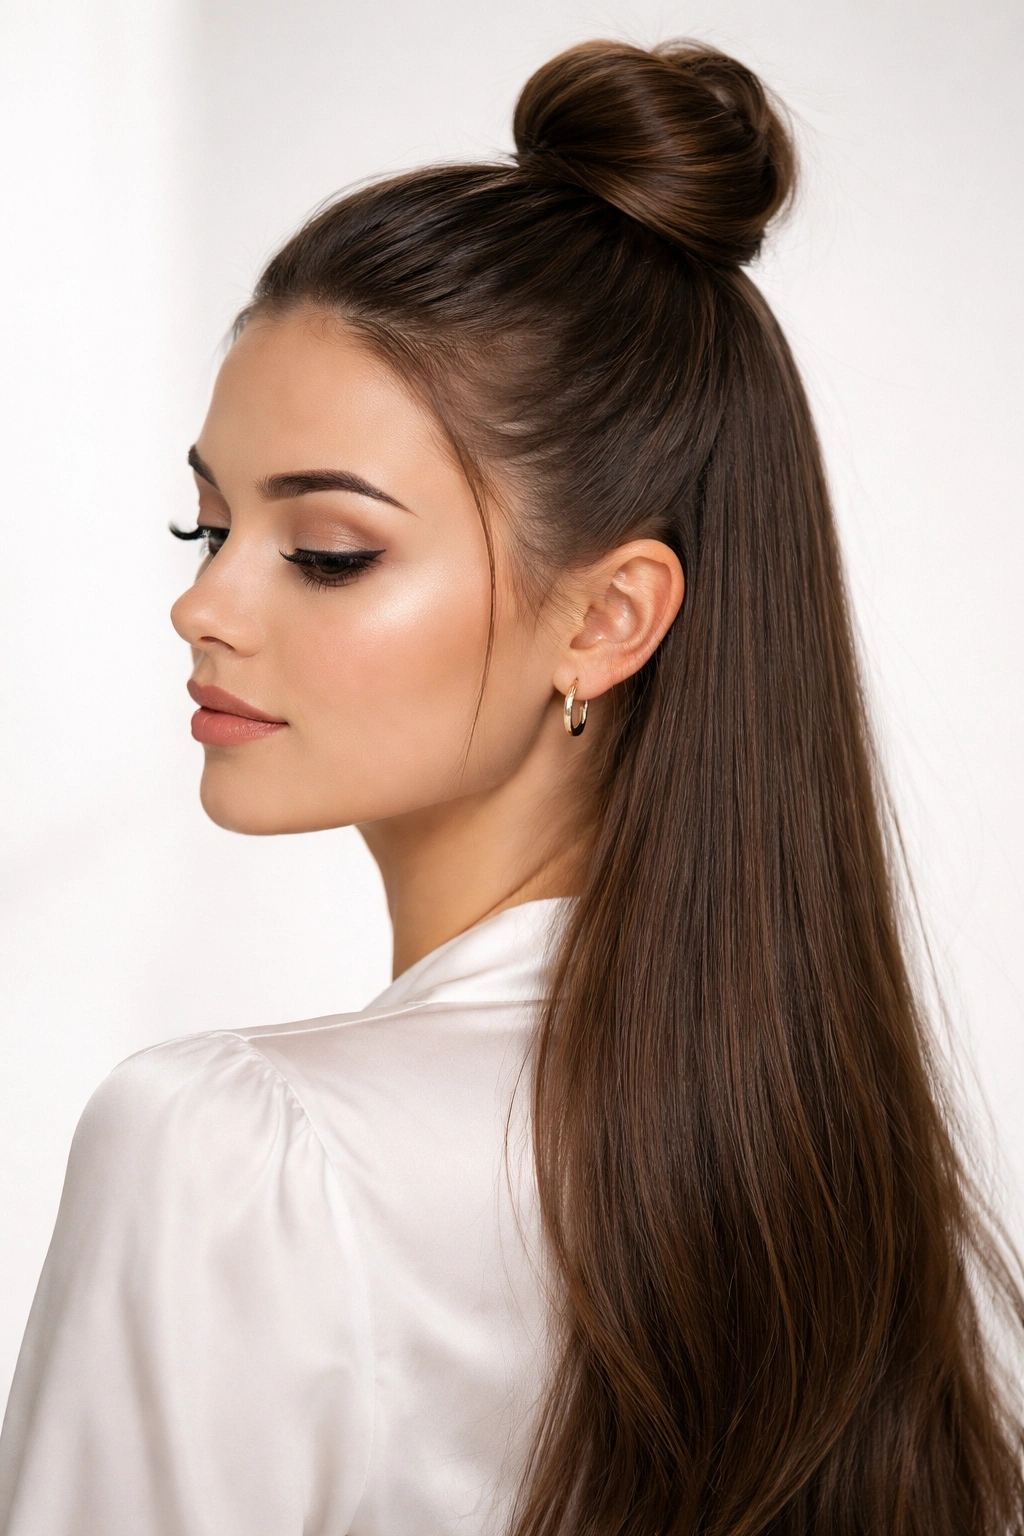
This is your style for moments when you need to look polished and professional. Everything about this version is refined and controlled—clean lines, no flyaways, a tightly secured bun positioned high on your crown. This works best on straight hair or hair that’s been blow-dried smooth.
When and Where This Style Shines
The sleek half-up bun is perfect for professional environments where you want to appear polished without sacrificing all your hair down. It’s also ideal for athletic activities, hot days when you need hair off your face, or any situation where you need maximum hold and minimum movement. The high placement also makes your neck appear longer and is subtly flattering on most face shapes.
Creating a Truly Sleek Finish
- Blow-dry your hair completely straight or use a straightening iron for maximum smoothness
- Brush your hair back from the hairline using a fine-tooth comb or paddle brush to eliminate bumps
- Gather the top half at your crown, positioning the elastic high and tight
- Smooth any flyaways with a gel or pomade applied to a fine-tooth comb
- Form the bun tightly and secure it with bobby pins placed close together
- Spray the entire style with strong-hold hairspray to lock everything in place
- Use a small amount of edge control or gel around your hairline for a completely finished appearance
Pro tip: If you have any frizz-prone areas, apply a tiny bit of smoothing serum to your hands and run them over the bun and the down-hair section before your final hairspray application. This catches any potential frizz before it becomes visible.
5. Textured Messy Half-Up Bun

This is the style you reach for when you want to look like you woke up with perfect hair—effortlessly chic and undone in the best possible way. It requires some intentional texture-building beforehand, but the payoff is a style that looks casually beautiful rather than formally styled.
Why Messy Doesn’t Mean Careless
A “messy” bun that actually looks good requires just as much thought as a sleek one—it’s just directed toward a different aesthetic. The goal is controlled texture, not actual messiness. You’re creating the impression of relaxed elegance, which means the messiness should be strategically placed and proportional. Strands should come loose in flattering ways around your face, not be haphazardly sticking out everywhere.
Building Intentional Texture
- Start with textured hair—either naturally curly, beach-waved, or curled with a curling iron
- Use a texturizing spray or dry shampoo on damp hair before styling for grip and dimension
- Gather the top half loosely, allowing some pieces to escape naturally around your face and temples
- Create a relaxed bun without pulling the hair tight—this loose tension is what creates the lived-in look
- Gently pull at the edges and sides of the bun to make it appear fuller and more undone
- Secure with bobby pins placed inside and underneath where they won’t show
- Leave a few face-framing pieces slightly loose and slightly wavy
Insider note: The absolute best way to achieve this look is to style your hair the night before. Hair that’s been in a bun or braids overnight naturally gets soft waves and texture that’s impossible to replicate quickly. You can literally just loosen it, adjust the loose pieces, and go.
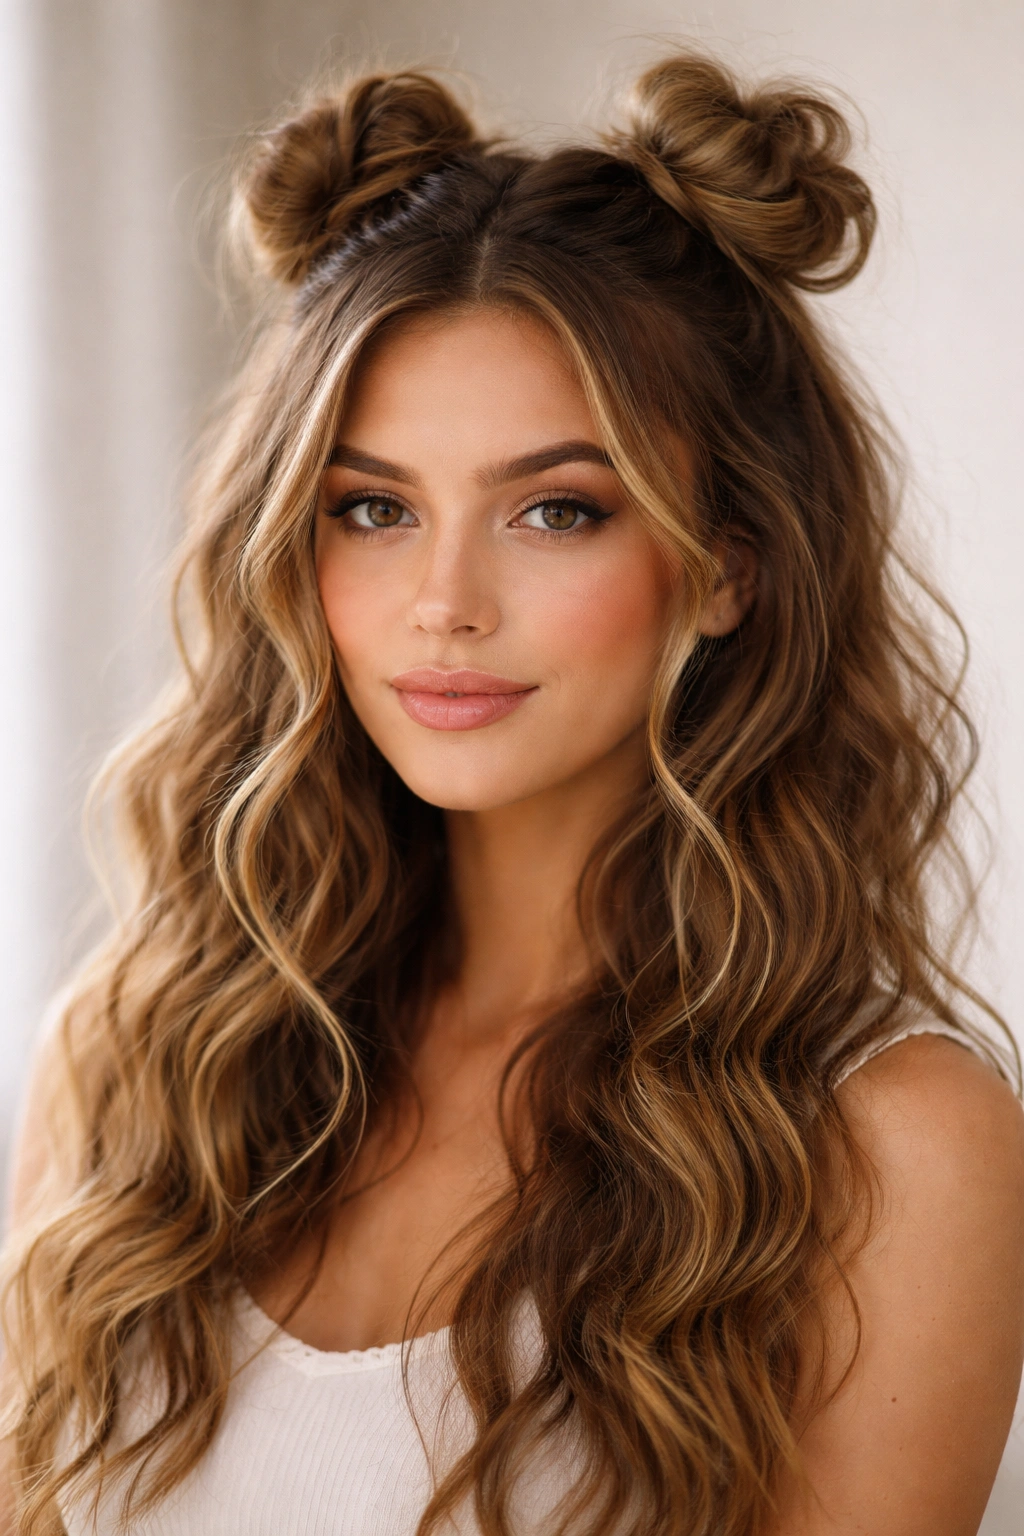
6. Double Bun Half-Up Style
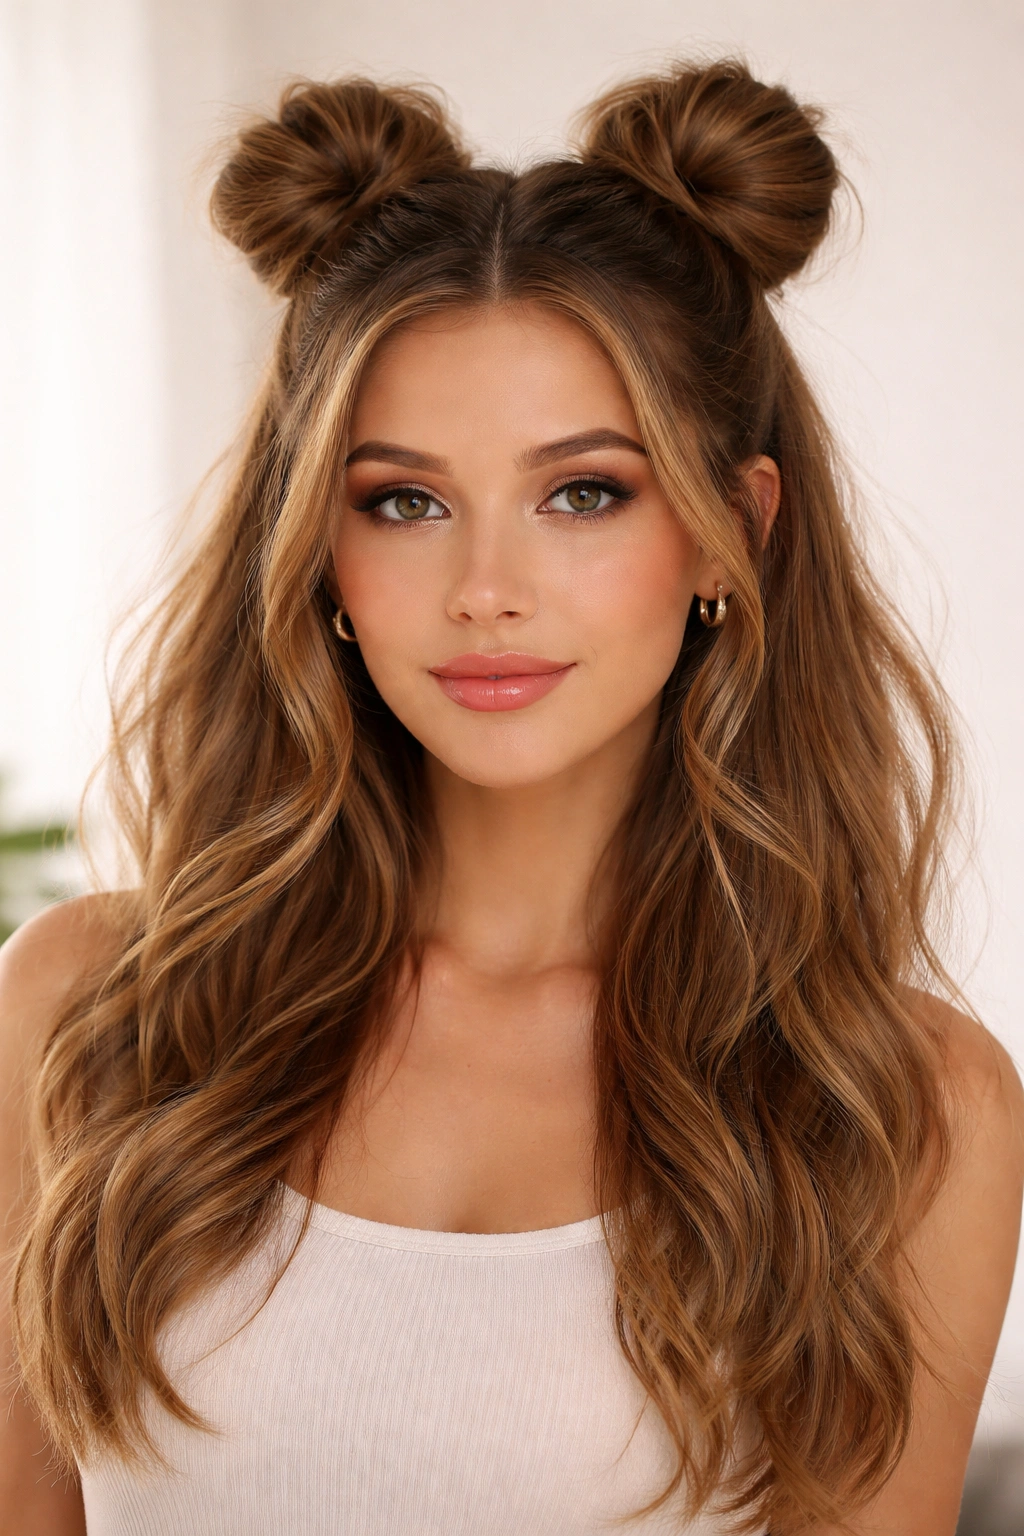
If you’re feeling playful or want to add a fun, youthful element to your half-up style, double buns offer visual interest and personality. This style works especially well on finer hair types because splitting the gathered section into two buns distributes the weight and volume more evenly than a single bun.
When Double Buns Look Best
Double buns read as fun and creative rather than childish when executed thoughtfully. They work beautifully for music festivals, creative workplaces, casual outings with friends, or any time you want your hairstyle to convey personality and playfulness. On finer hair, they actually solve the problem of a single bun looking too thin or sparse because the doubled version fills in gaps better.
Creating Balanced Double Buns
- Section off the top half of your hair as usual, then divide that section down the middle with a center part
- Create a bun from each side, securing them separately on either side of your crown
- Make sure both buns are approximately the same size and positioned at the same height
- Gently tease each bun slightly to make them appear fuller and more intentional
- Position face-framing pieces evenly on both sides for symmetry
- Add decorative clips or hair accessories if you want to elevate the playfulness
Pro tip: If your buns look too uniform and perfect, you’ve actually lost the fun factor. Let them be slightly different sizes or shapes—this actually makes them look more intentional and charming rather than like you’re trying too hard.
7. Bubble Braid Half-Up Bun
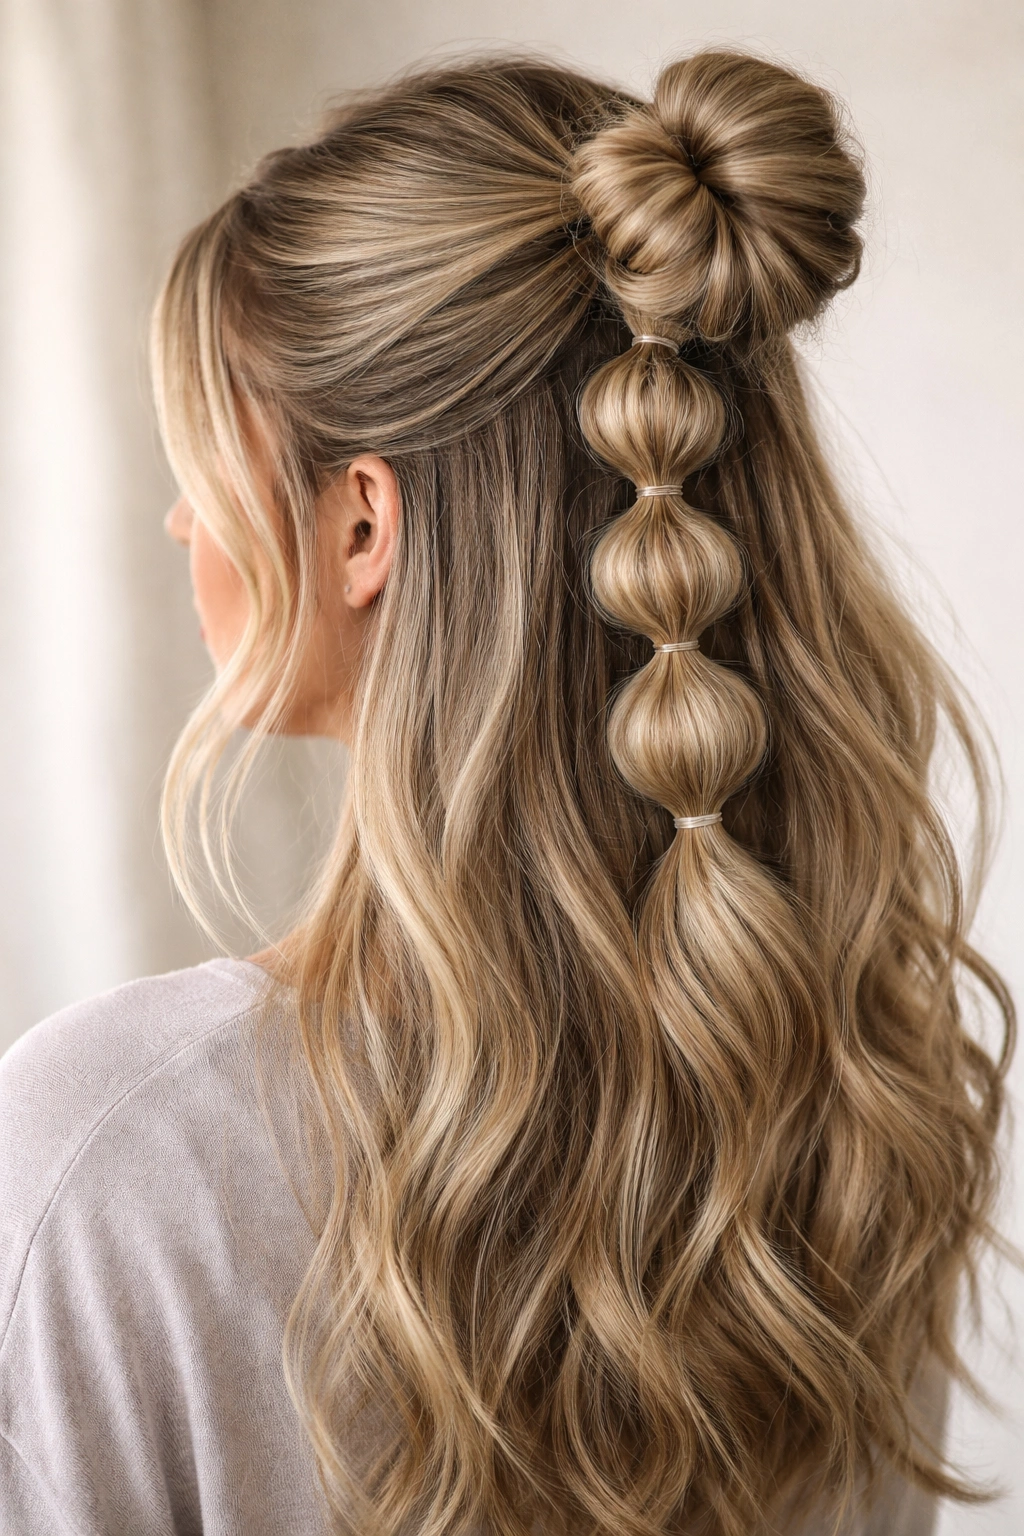
This style combines the visual interest of a bubble braid with the practical benefit of a bun. It’s a bit more time-consuming than some of the other styles, but the result is absolutely worth it. Bubble braids create vertical lines of interest and texture that photograph beautifully and look incredibly trendy.
Why Bubble Braids Stand Out
The bubble braid works by creating distinct sections or “bubbles” along a central braid, which gives the appearance of much fuller, thicker hair than you actually have. This is particularly useful if you have fine or thin hair. The vertical texture of the bubbles also elongates your face and neck, making it a flattering choice across most face shapes.
Building a Bubble Braid Bun
- Gather the top section and secure it loosely with an elastic
- Starting just below the elastic, divide the hair into three-strand braid sections
- Create one braid segment, then secure it with a small elastic
- Gently pull the braided section to expand the bubbles outward
- Create another braid segment below the first, securing it with another small elastic
- Continue this pattern for three to four bubble sections
- Take the final section of hair and wrap it into a bun at the base of your bubbles
- Secure everything with bobby pins throughout the braid and bun structure
Worth knowing: This style works better on hair that’s not freshly washed because you need some texture and grip for the bubbles to stay expanded. Day-old hair or textured hair is ideal for this technique.
8. Half-Up Bun with Decorative Clip
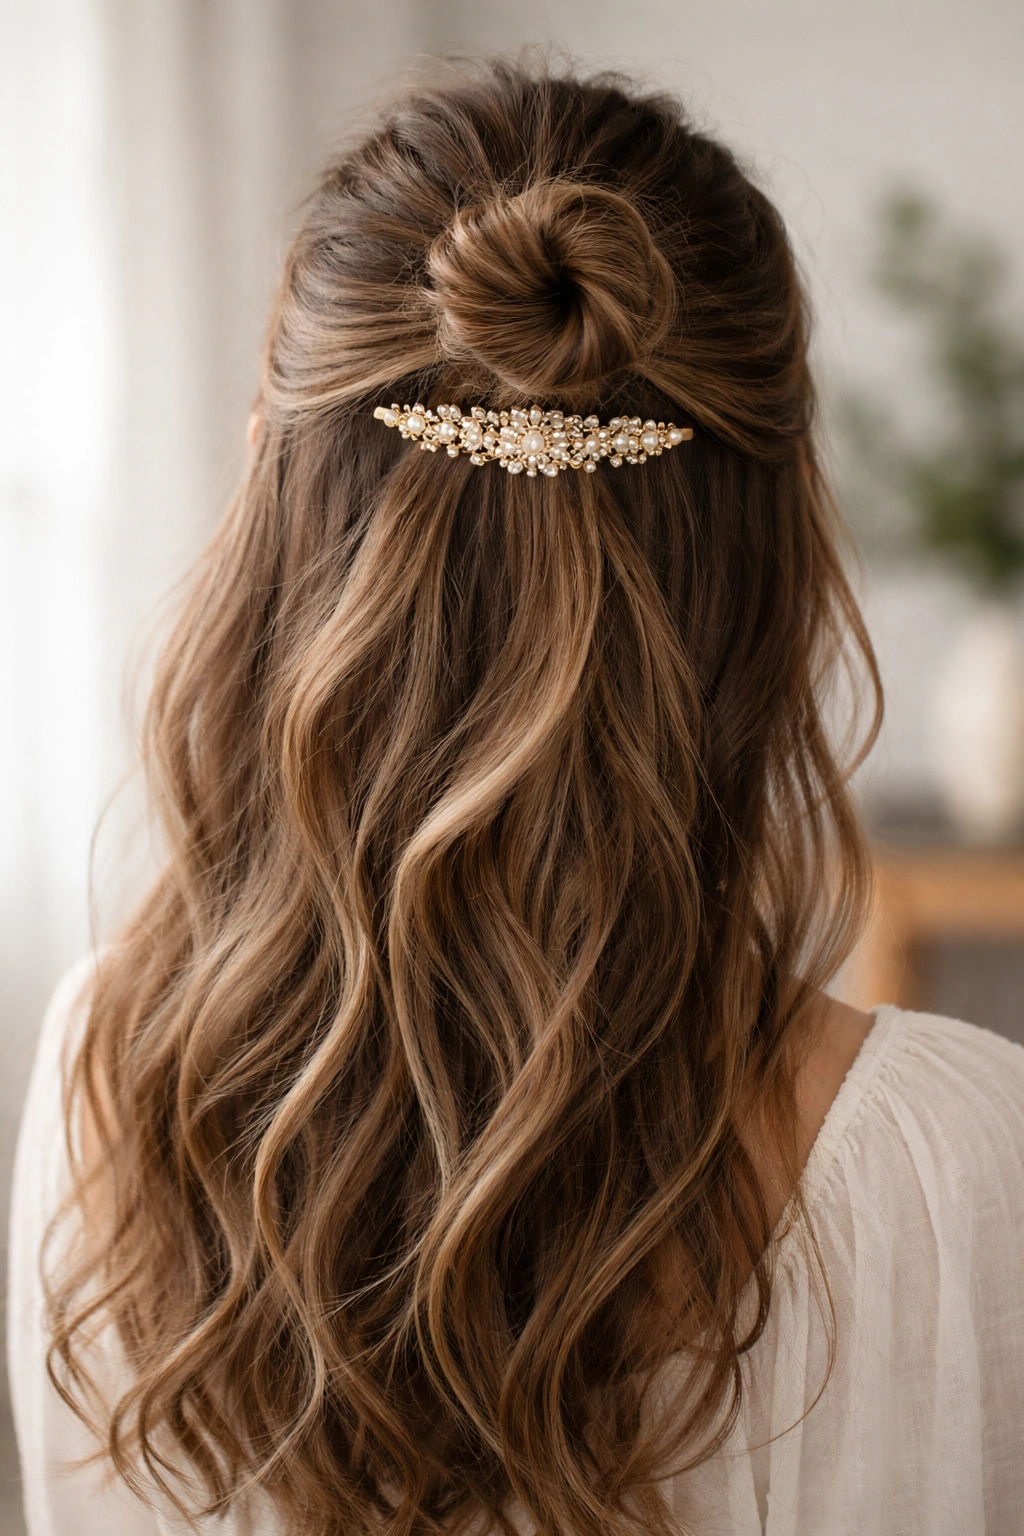
Sometimes the easiest way to elevate a basic half-up bun is to replace the typical elastic with a statement clip. This single change can transform your entire look from basic to intentional, whether you opt for a tortoiseshell clip, a decorative hair claw, a vintage-style barrette, or something sparkly for special occasions.
How Clips Change the Game
A decorative clip serves double duty—it secures your bun while also functioning as a style statement. This is why it’s perfect for anyone who finds regular elastic-based buns underwhelming. Clips also distribute weight slightly differently than elastics, which some people find more comfortable for all-day wear. Plus, switching clips gives you infinite styling possibilities with the exact same hair foundation.
Using Clips Effectively
- Style your half-up bun as you normally would, but don’t secure it with an elastic yet
- Instead, gather the hair at your desired bun position and hold it loosely
- Position your decorative clip horizontally across the gathered hair
- Close the clip securely, ensuring it catches all the hair in the half-up section
- Adjust the clip position until the aesthetic feels balanced with your face
- Create your bun shape around the clip, using bobby pins to secure any stray sections
Pro tip: For maximum visual impact, choose a clip that contrasts with your hair color. A tortoiseshell or gold clip on dark hair creates beautiful visual interest, while a delicate silver or pearl clip on blonde or light brown hair offers subtle elegance.
9. Low Half-Up Bun with Layers
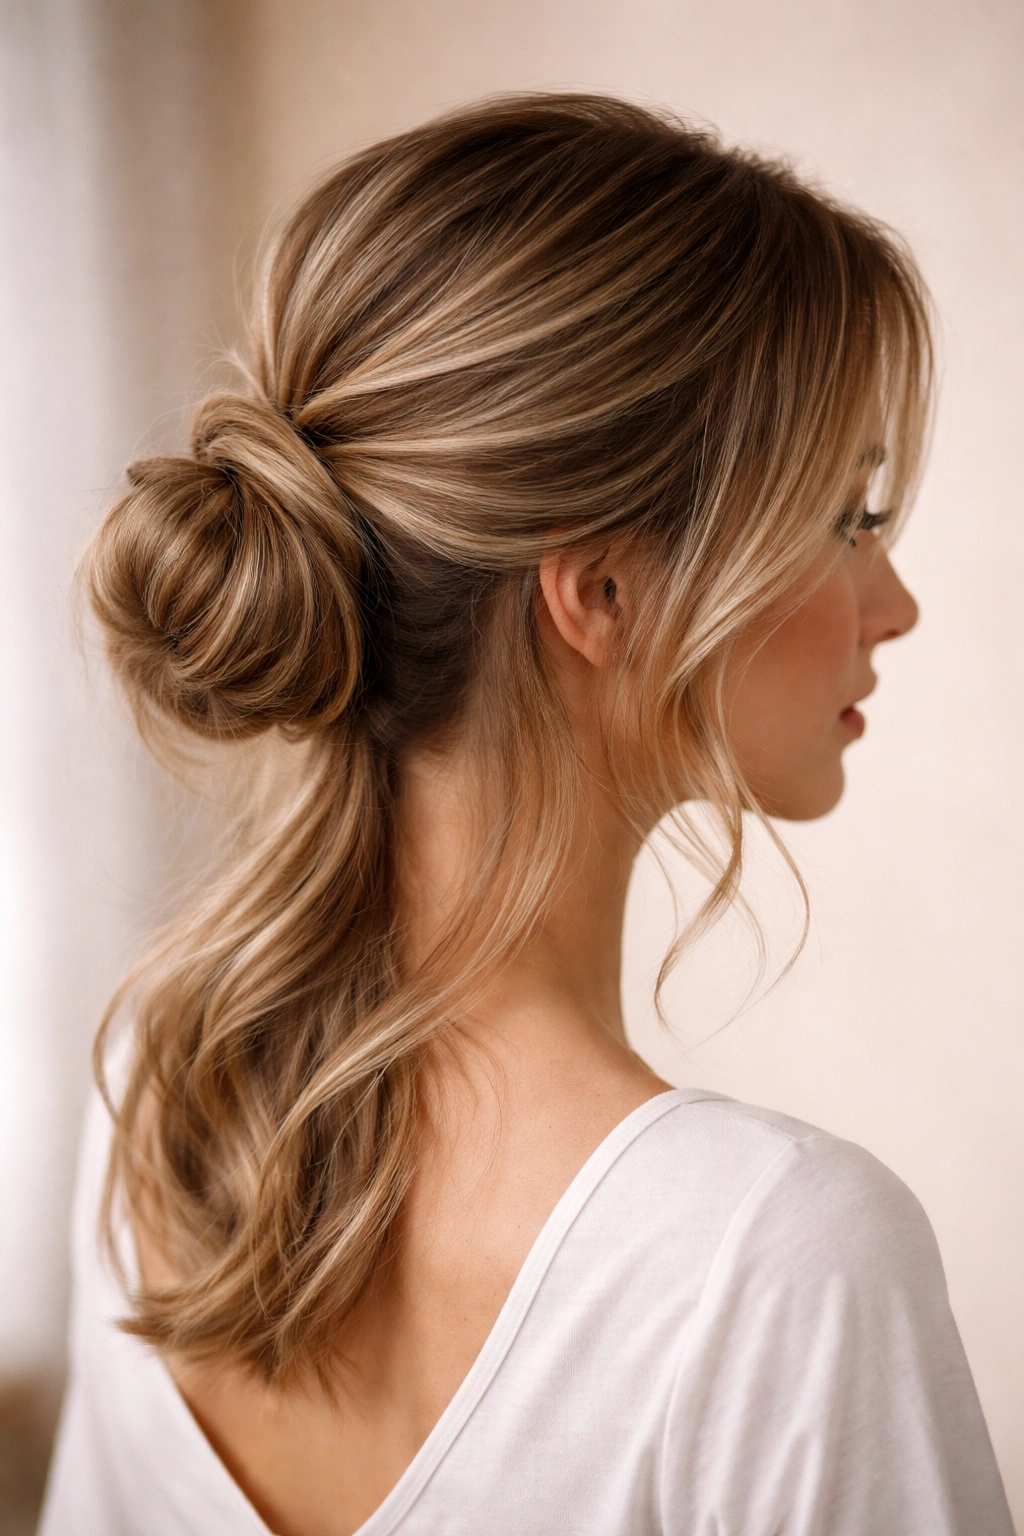
This is the grown-up, sophisticated cousin of the classic half-up style. By positioning the bun lower on your head—closer to your neck than your crown—you create a different silhouette that’s especially flattering on longer faces. The lower placement also makes longer hair feel less heavy since the bun’s weight sits closer to your body’s center of gravity.
Why Lower Placement Matters
Positioning your bun lower changes how the style interacts with your face shape and overall proportions. It’s subtly more formal than a crown-height bun, making it perfect for professional settings, dinners out, or any situation where you want to feel extra polished. The lower placement also naturally creates more separation between the bun and your face, which can be flattering if you prefer that balance.
Creating the Lower Placement
- Instead of gathering at your crown, position your hand placement lower—approximately at ear level from the back
- Gather the top and back sections of hair, leaving the front face-framing pieces completely untouched
- Secure the gathered section at this lower position with your elastic
- Create a bun at this lower anchor point, using bobby pins to secure it
- Leave the back section of your down-hair visible—this creates beautiful layering
- Style the down-hair with waves or curls for added dimension
Worth knowing: This style works especially well if you’re wearing your hair down to an event where you want it partially controlled but don’t want to commit to a full updo. It gives maximum flexibility for the casual parts of your day while still looking intentional.
10. Half-Up Dutch Braid Bun
A Dutch braid (which braids under instead of over, creating a raised, 3D effect) automatically looks more sophisticated and visually striking than a standard French braid. Combined with a bun, it creates a style that photographs beautifully and looks far more complicated than it actually is to execute.
The Visual Impact of Dutch Braids
Dutch braids create the illusion of much more hair volume than you actually have, which is why they’re popular among people with finer hair types. The raised, dimensional quality also catches light beautifully and photographs better than flat braids. Additionally, Dutch braids naturally taper as they progress down your head, which creates a visually pleasing line from your crown to your bun.
Executing a Dutch Braid Half-Up Style
- Gather the top section of your hair at the crown—don’t secure it yet
- Divide this section into three strands
- Begin a Dutch braid (braiding under instead of over) starting from your crown
- Continue the braid down toward the base of your half-up section, about three-quarters of the way
- Secure the braided section with a small elastic
- Coil the braid around itself to form a bun at the base
- Use bobby pins to secure the bun structure, weaving through the braid texture
- Gently pull the braid strands to create a fuller, more textured appearance
Pro tip: Practice Dutch braids on damp hair first—it’s significantly easier when the hair has some grip and texture. Once you’ve mastered the technique, you can do it on dry hair, but the learning curve is gentler on damp or textured hair.
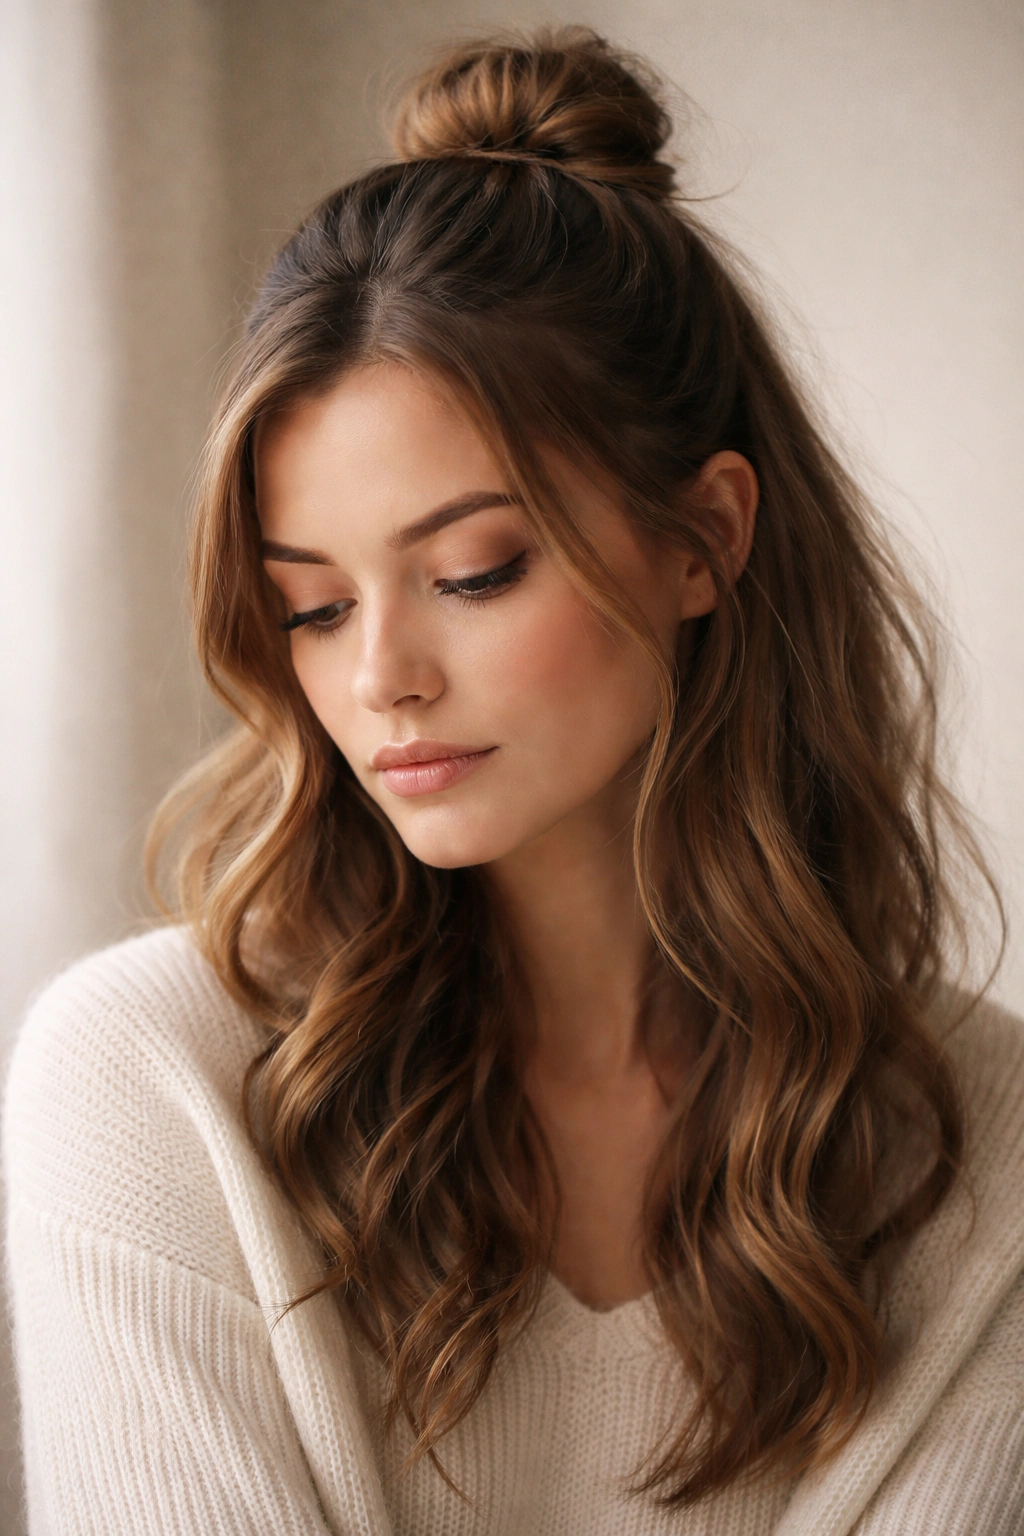
11. Romantic Half-Up Bun with Waves
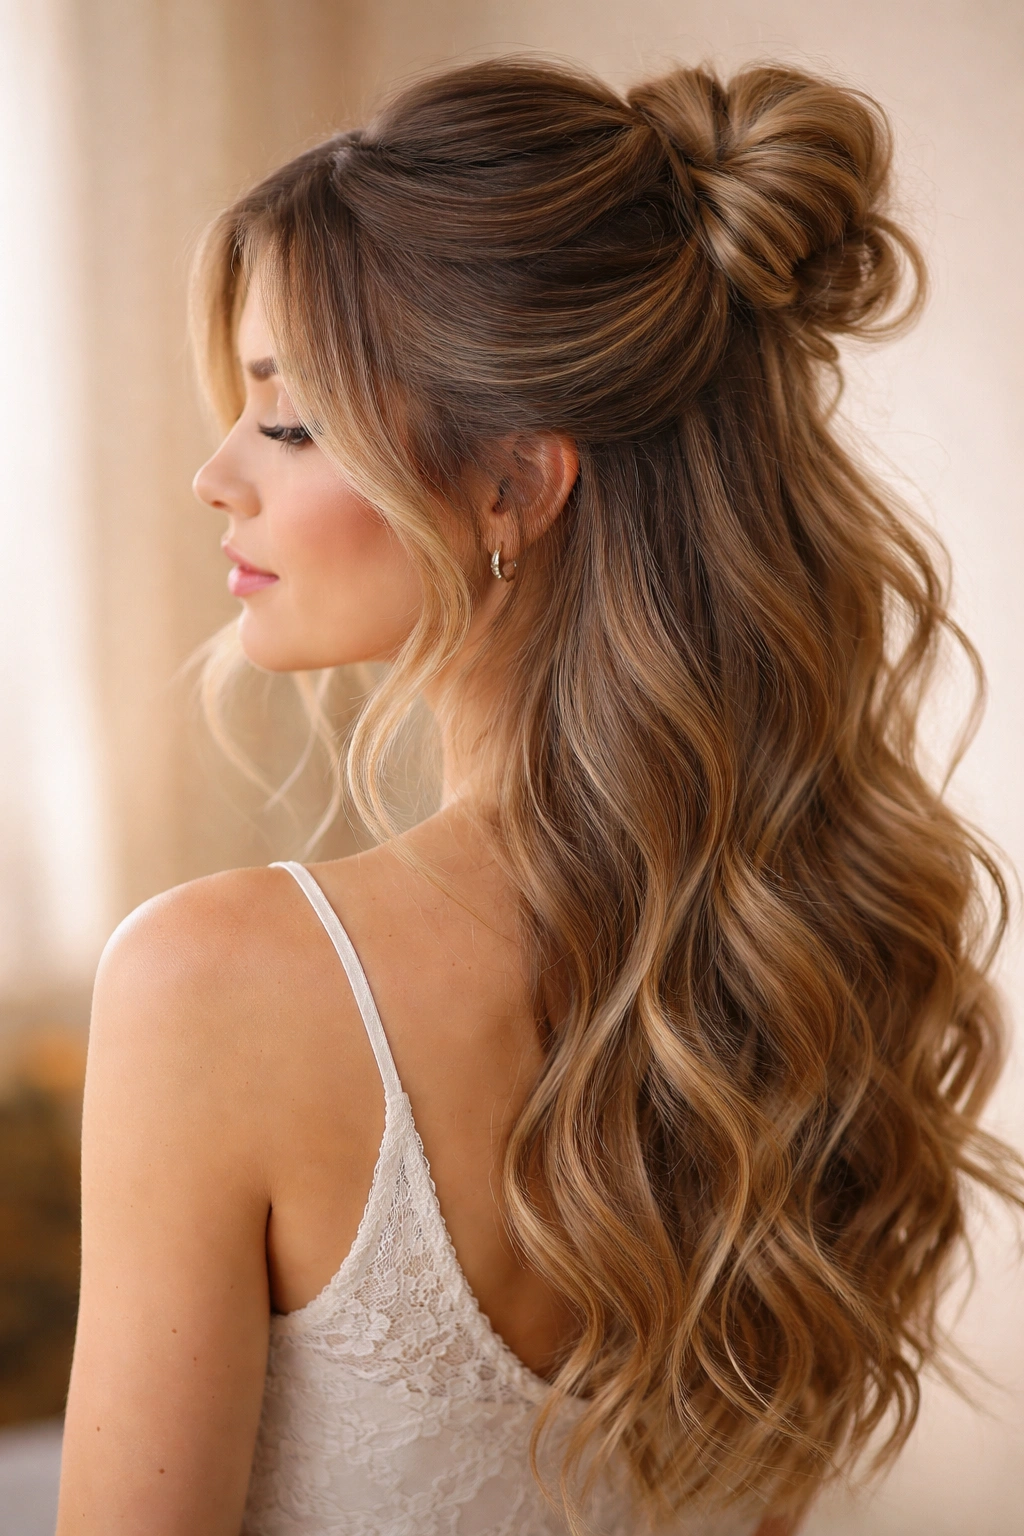
This is the style you choose when you want to feel beautiful and put-together but still soft and romantic. The combination of waves through the down-hair with a loosely constructed bun creates an aesthetic that’s both intentional and organic-looking. It’s perfect for dates, special events, or any time you want to feel feminine and elegant.
Creating Romantic Waves
The success of this style depends heavily on getting your waves right. You’re not going for tight, uniform curls but rather soft, relaxed waves that move naturally when you walk. These waves should start from roughly mid-length and flow through to your ends, creating dimension and movement throughout the down-hair section.
Building the Complete Look
- Curl your hair with a 1.5-inch curling iron, curling sections away from your face for a flattering direction
- Let the curls cool completely before touching them—this sets the wave shape
- Once cooled, gently run your fingers through the curls to break them up into soft waves
- Gather the top section at your crown and create a loose, slightly messy bun
- Leave face-framing pieces down, allowing them to be part of the wave pattern
- Lightly mist everything with a flexible-hold hairspray that won’t make it feel stiff
- Gently flip your head to encourage the waves to settle into beautiful, natural-looking shapes
Worth knowing: This style actually improves as the day goes on. Fresh curls can sometimes look a bit too uniform, but as they relax, they soften into those dreamy waves that make this style so romantic. If you’re doing your hair in the morning for an evening event, you’ll love how it evolves throughout the day.
12. Polished Half-Up Bun for Work
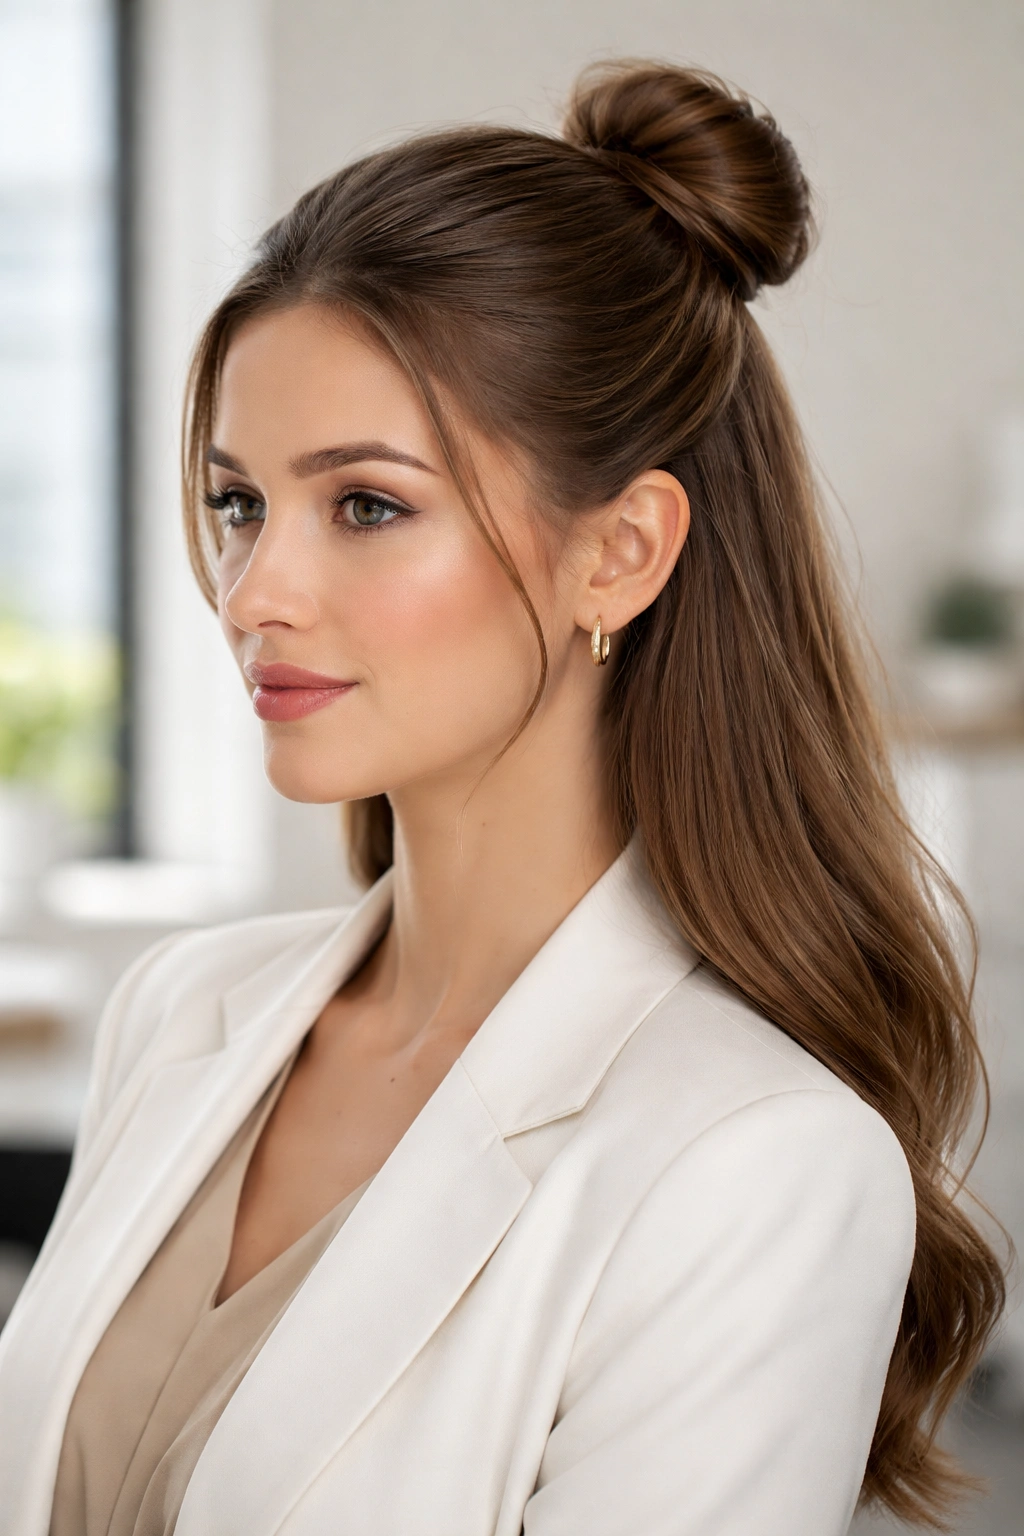
If you’re styling your hair for a professional environment where you want to balance approachability with competence, this version hits that mark perfectly. It’s not so formal that it reads as unapproachable, but it’s definitely intentional and put-together enough to convey that you take your appearance and your work seriously.
Professional Styling Considerations
The key to a work-appropriate half-up bun is clean lines, minimal flyaways, and a bun that’s secure enough that you won’t be adjusting it throughout your day. You want colleagues and clients noticing your competence, not distracted by loose strands or a bun that’s slowly unraveling. This means paying extra attention to your securing method and finish product.
Building Professional Polish
- Blow-dry your hair straight or use a straightening iron for a sleek base
- Use a fine-tooth comb to brush the top section smooth, eliminating any texture or bumps
- Gather at your crown and secure with a quality elastic that won’t slip
- Form a neat, compact bun and secure thoroughly with bobby pins
- Use pomade or edge control around your hairline to eliminate flyaways
- Apply a medium-hold hairspray that keeps everything in place without looking stiff or shiny
- Check throughout the day and adjust any stray pieces as needed
Pro tip: Invest in quality hair elastics that won’t slip. Cheap elastics that lose their grip throughout the day will drive you crazy in a professional setting. Also, keep a bobby pin or two in your pocket throughout the day for quick adjustments if needed.
13. Half-Up Space Buns
For anyone wanting to embrace their playful side, space buns offer that fun, youthful aesthetic while still keeping some hair down. These work especially well on people with curly or wavy hair, as the natural texture makes space buns look intentionally fun rather than trying too hard.
Making Space Buns Feel Intentional
The key to space buns not looking costume-like is in the execution details. You want them to be slightly imperfect, with some loose pieces and varied sizes. They should feel fun and creative, not like you’re trying to look like someone from a specific subculture or internet trend. The most charming space buns are the ones that feel like you did them on a whim.
Styling Space Buns Effectively
- Section your hair into two halves with a center part from your forehead to the nape of your neck
- Take one section at a time and gather the top portion (about one-third to one-half of that side)
- Create a bun from this gathered section, positioning it high and slightly toward the outer edge of your head
- Repeat on the other side, positioning the second bun at a similar height
- Leave the rest of the hair down—you can keep it straight, wavy, or curly depending on your preference
- Allow some pieces to escape around your face and ears for a softer, less severe appearance
- Add playful clips, ribbons, or hair accessories if you want to lean into the fun factor
Worth knowing: Space buns look best when they’re slightly messy and imperfect. If you’ve made them perfectly round and super tight, they’ll feel less charming. Slightly uneven, slightly loose, with a few escaped pieces—that’s the sweet spot.
14. Half-Up Bun with Ribbon or Pearl Accents
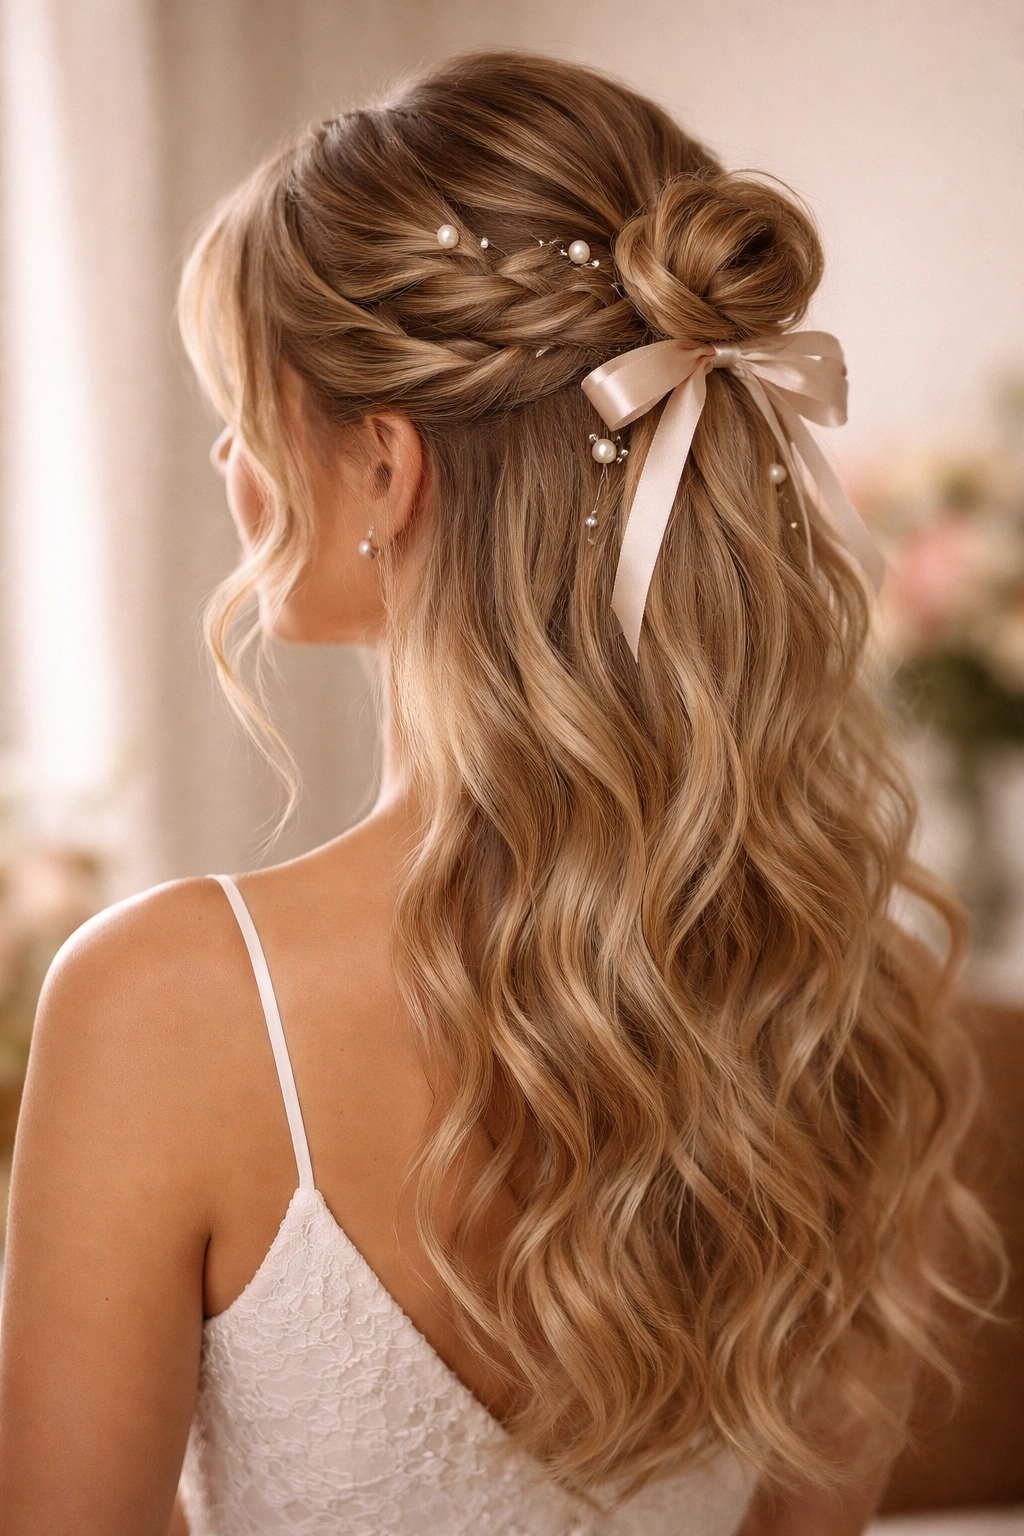
Sometimes the simplest way to elevate your half-up bun is to weave ribbon through it or add pearl accents that catch light and draw attention to your styling. This is perfect for special occasions, weddings, or any time you want a touch of elegance without going full formal updo.
Choosing Your Accents
Ribbon works beautifully woven through braided sections or wrapped around the base of your bun. Delicate pearl bobby pins scattered throughout create subtle sparkle and sophistication. Even something as simple as a velvet ribbon tied around your bun base can completely change the vibe from casual to special-occasion appropriate. The key is choosing accents that complement your overall aesthetic and the occasion.
Incorporating Ribbon and Pearl Details
- Create your base half-up bun using your preferred technique
- If using ribbon, thread it through your braided section as you braid (if you’re doing a braided style), or weave it through the bun structure after you’ve formed it
- Wrap the ribbon around the base of your bun and tie it in a bow if desired
- For pearl bobby pins, place them throughout the bun where they’ll catch light, spacing them evenly for balanced visual interest
- Ensure any accessories are secured well so they won’t shift during the day
- Consider your overall outfit when choosing accent colors and styles—they should complement, not compete
Pro tip: Ribbon looks more elegant when you use thin, delicate ribbon (usually ⅛ to ¼ inch width) rather than wide ribbons. For pearl or metallic accents, less is more—three to five well-placed accent pins look sophisticated, while overdoing it can read as costume-like.
15. Tousled Half-Up Bun with Volume
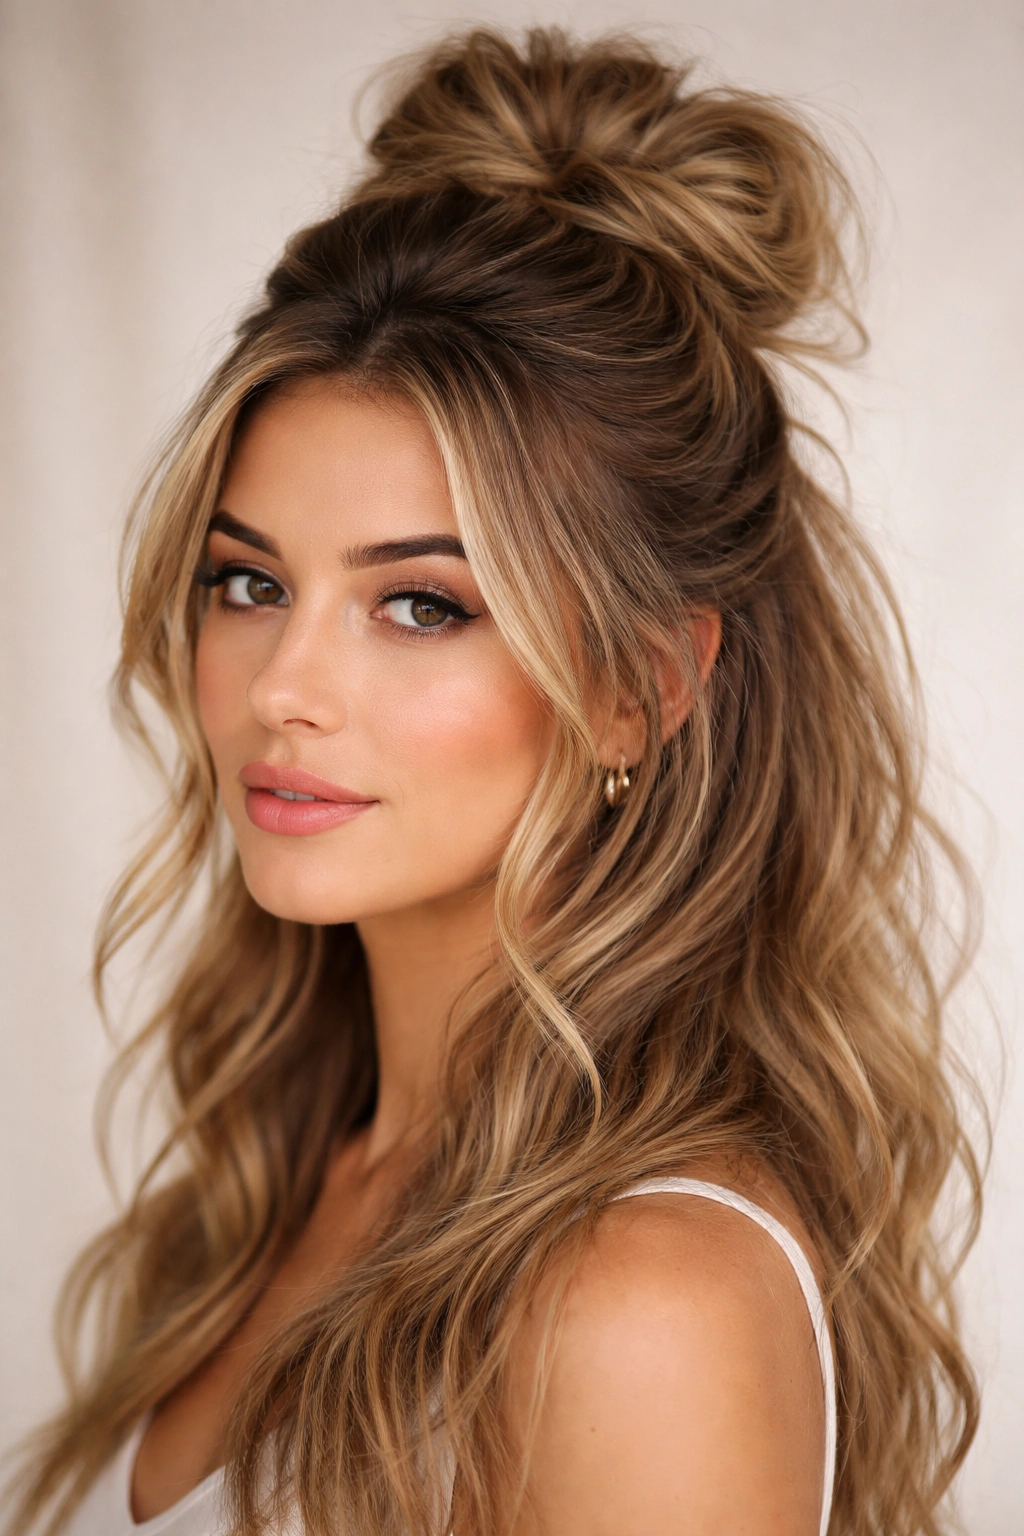
This final style is all about maximizing visible volume and texture. It’s perfect for people who want their hair to look full and thick, whether they naturally have voluminous hair or are creating the illusion of volume through strategic styling techniques. It’s also ideal for any occasion where you want to feel confident and powerful.
Building Intentional Volume
Volume in a bun comes from multiple sources: the way you gather your hair, the amount of teasing or backcombing you do before forming the bun, the looseness of the bun structure, and the texture you’ve added to your hair beforehand. Strategic backcombing isn’t just about hold—it’s also about creating dimension and the visual appearance of thicker hair.
Creating Maximum Volume and Texture
- Start with textured hair—curled, wavy, or day-old hair works best
- Apply a volumizing mousse or texturizing spray to damp roots before blow-drying
- Blow-dry your hair in sections, lifting each section at the roots and drying it upside-down for maximum volume
- Gather the top section at your crown, but don’t pull it tight
- Use a fine-tooth comb or teasing brush to backcomb the gathered section at the base, creating texture and grip
- Form a loose, slightly messy bun around this textured foundation
- Gently pull and adjust the bun to make it appear fuller and more voluminous
- Leave face-framing pieces intentionally loose and wavy
- Finish with texturizing spray rather than heavy hairspray to maintain the tousled appearance
Insider note: The secret to a truly voluminous half-up bun is not making it too neat. Let it be textured, slightly uneven, and full of personality. That’s what creates the appearance of abundant hair volume rather than a tight, compact bun that can sometimes look sparse.
Final Thoughts
Half-up half-down buns are one of those rare hairstyles that genuinely work for multiple occasions, hair types, and styling skill levels. Whether you’re running late and need something quick, preparing for a special event, or simply tired of wearing your hair exactly the same way, there’s a half-up bun variation that’ll feel perfectly suited to your needs and your hair.
The beauty of mastering these styles is that once you understand the basic concept—securing the top half while letting the bottom half flow—you can customize the look in countless ways. You can make it sleek or messy, add braids or twists, incorporate accessories, adjust the height, or play with the texture of your down-hair. One base technique becomes dozens of different styles depending on what you’re in the mood for.
The best version of any of these styles is the one that makes you feel confident and comfortable. Don’t get too caught up in making everything perfect—the most charming versions of these styles often have a slightly undone quality that reads as effortlessly beautiful rather than heavily styled. Experiment with different versions, practice the techniques that feel awkward at first, and soon you’ll have a rotation of go-to styles that you can execute in just a few minutes.