Short hair doesn’t mean you have to sacrifice the effortless, romantic appeal of half up half down styles. In fact, shorter lengths make these looks even easier to execute while giving them a modern, undone edge that longer hair can’t quite replicate. The key is understanding how boho styling works at a smaller scale — where texture, movement, and strategic placement matter more than pure volume. Whether you’re working with a pixie-length crop, a textured bob, or shoulder-length layers, there are boho half up half down possibilities that’ll make you want to abandon fully-up and fully-down styles forever.
The beauty of these styles for short hair lies in their versatility. You can wear them to the office with a polished top section and wispy pieces framing your face, take them straight to a beach wedding with salt-spray texture, or dress them down for a casual weekend vibe. Most of these styles take less than five minutes once you understand the technique, and they work whether your hair is naturally wavy, stick-straight, or somewhere in between. The boho aesthetic is all about intentional imperfection — embracing flyaways, creating texture with texture spray or a light braid, and letting your hair look like it happened by accident rather than taking an hour at the salon.
Let’s walk through eighteen different approaches to the half up half down style that actually work beautifully with short hair. These aren’t the same styles you’d see on long-haired models — they’re designed specifically for the realities and advantages of shorter lengths. You’ll find braided versions, twisted versions, sleek versions, and textured versions. Some use clips or pins, others use your own hair to secure the hold. Pick your favorites and start experimenting.
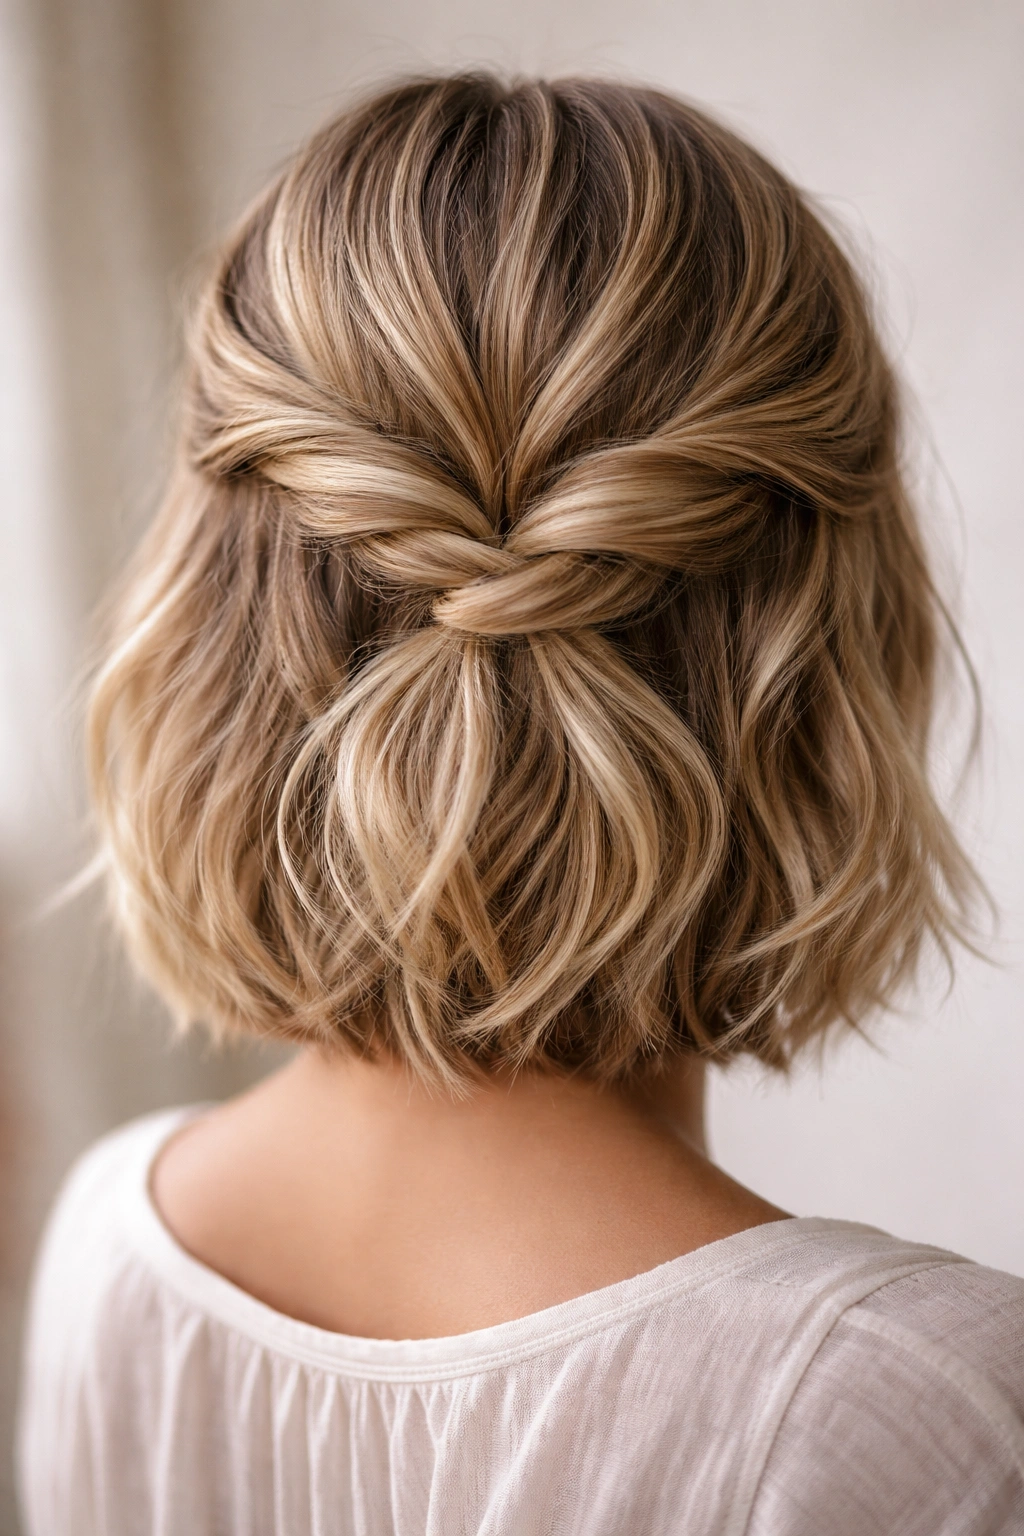
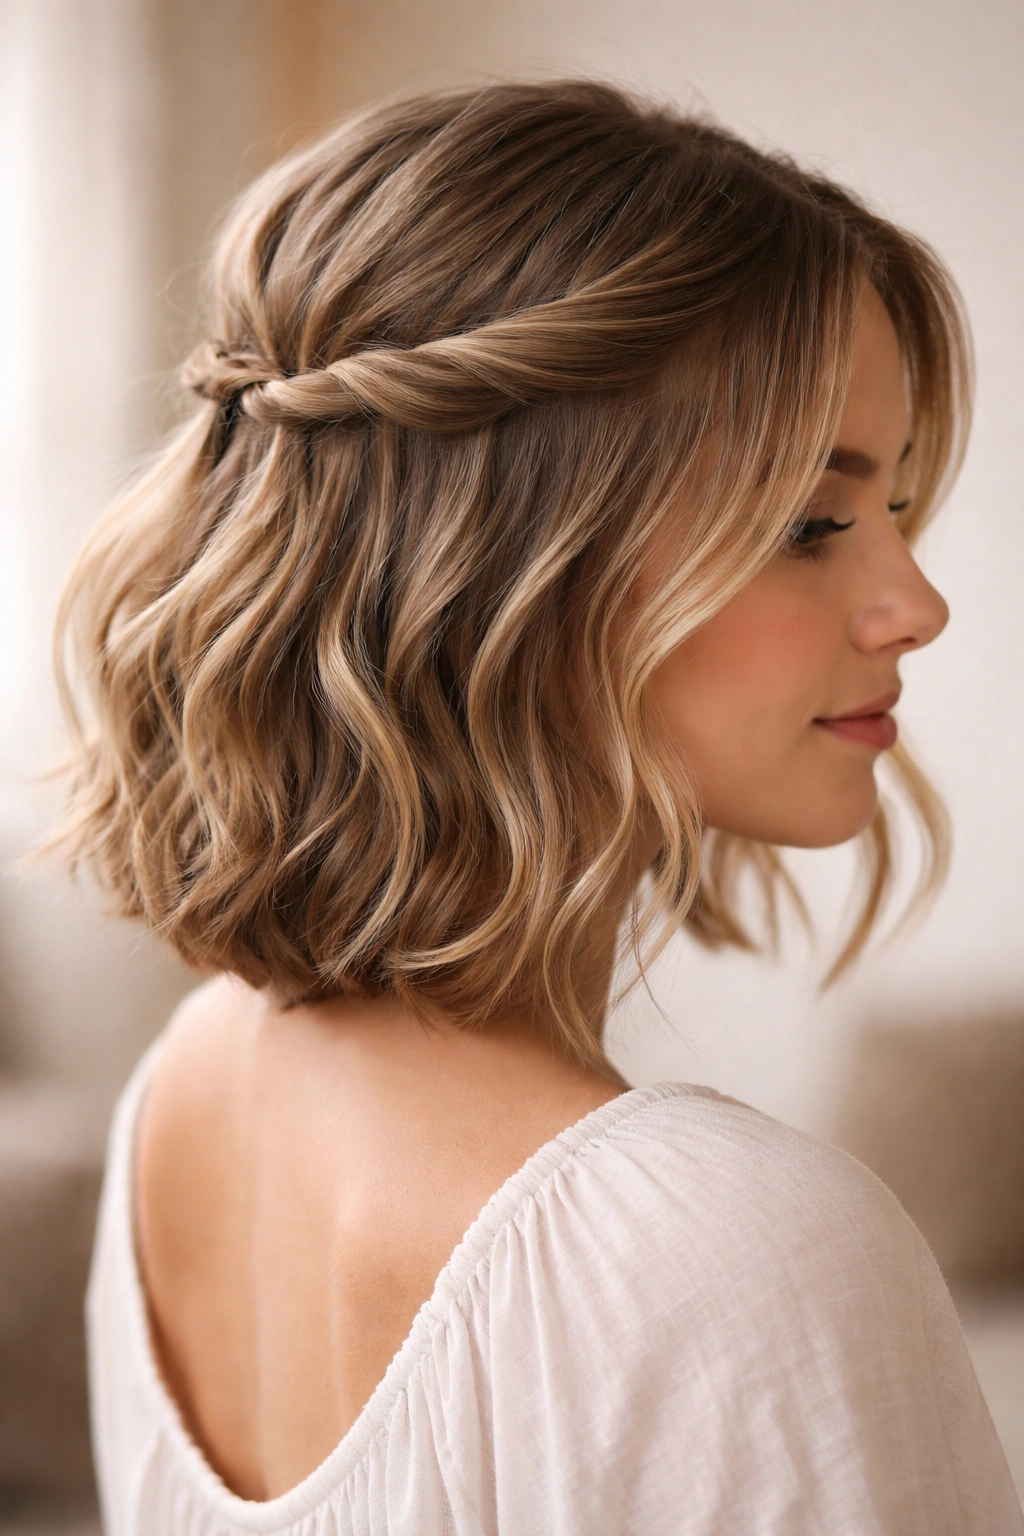
1. The Simple Twisted Half-Up with Face-Framing Pieces
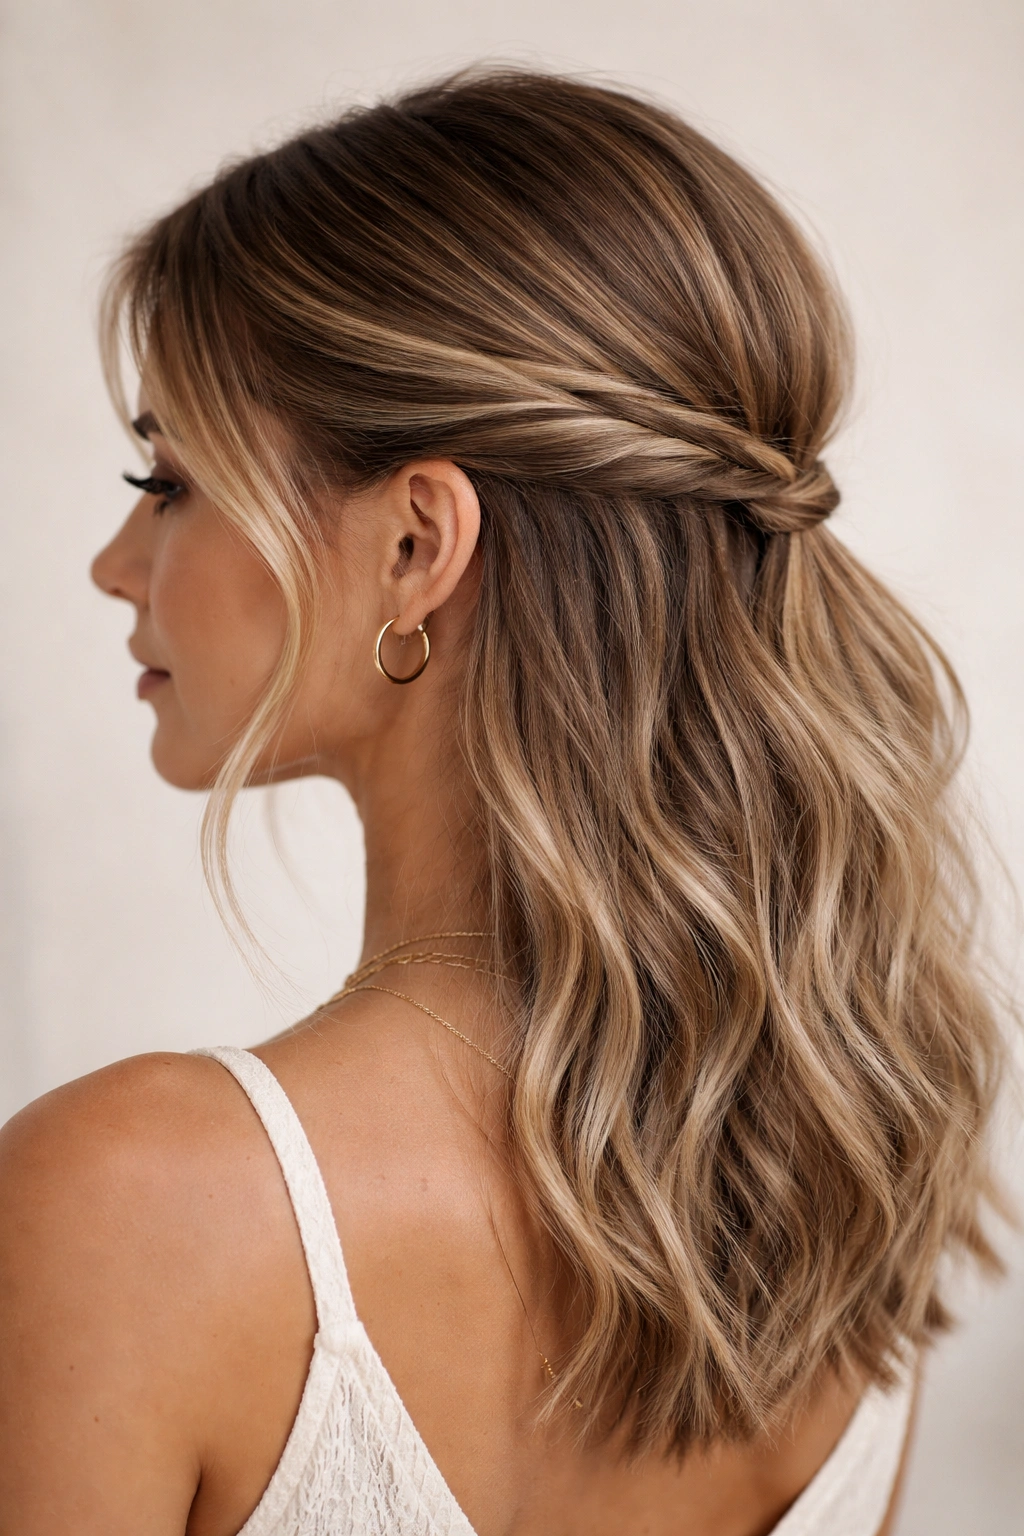
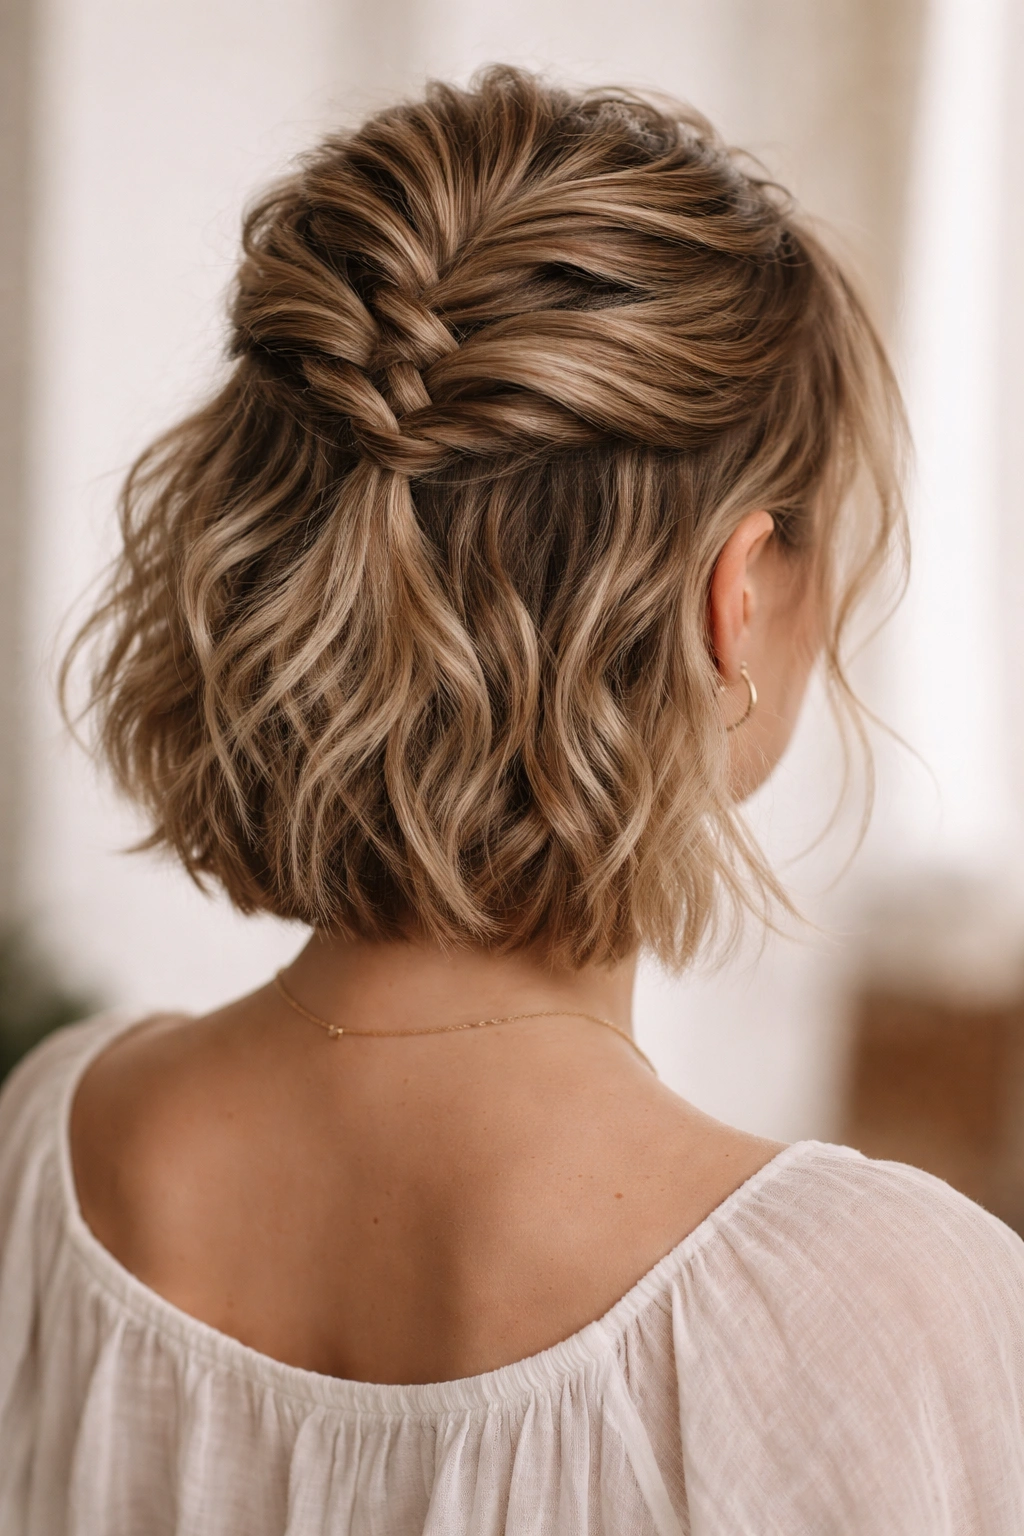
The most beginner-friendly boho option is also one of the most elegant. This style takes two small sections from near your temples, twists each one away from your face with a loose, relaxed hand, and brings them to meet at the back of your head where you secure them with a bobby pin or small clip. The magic comes from leaving deliberate pieces loose around your face and keeping the overall look soft rather than polished.
Why This Works for Short Hair
The twisted sections create the illusion of volume without requiring tons of hair length. On short hair, this technique actually looks more intentional and styled than it would on longer strands. The face-framing pieces serve a dual purpose: they’re part of the boho aesthetic and they soften the lines of a short cut. Even if your hair is very short — think chin-length or above — you can still execute this look by taking slightly larger sections and working with what you have.
How to Create Texture and Hold
- Prep your hair with a light texturizing spray or sea salt spray for grip and movement
- Don’t twist too tightly; aim for a loose, almost-unraveling quality that reads as intentional softness
- Use bobby pins that match your hair color and slide them in horizontally at the back for a hidden hold
- Gently pull and loosen the twist slightly after securing it to enhance the relaxed appearance
- Leave at least two small pieces completely loose on each side of your face
Pro tip: If your hair is very straight, create gentle waves with a curling iron or flat iron before twisting. The texture gives the twist something to hold onto and makes the final look exponentially more romantic.
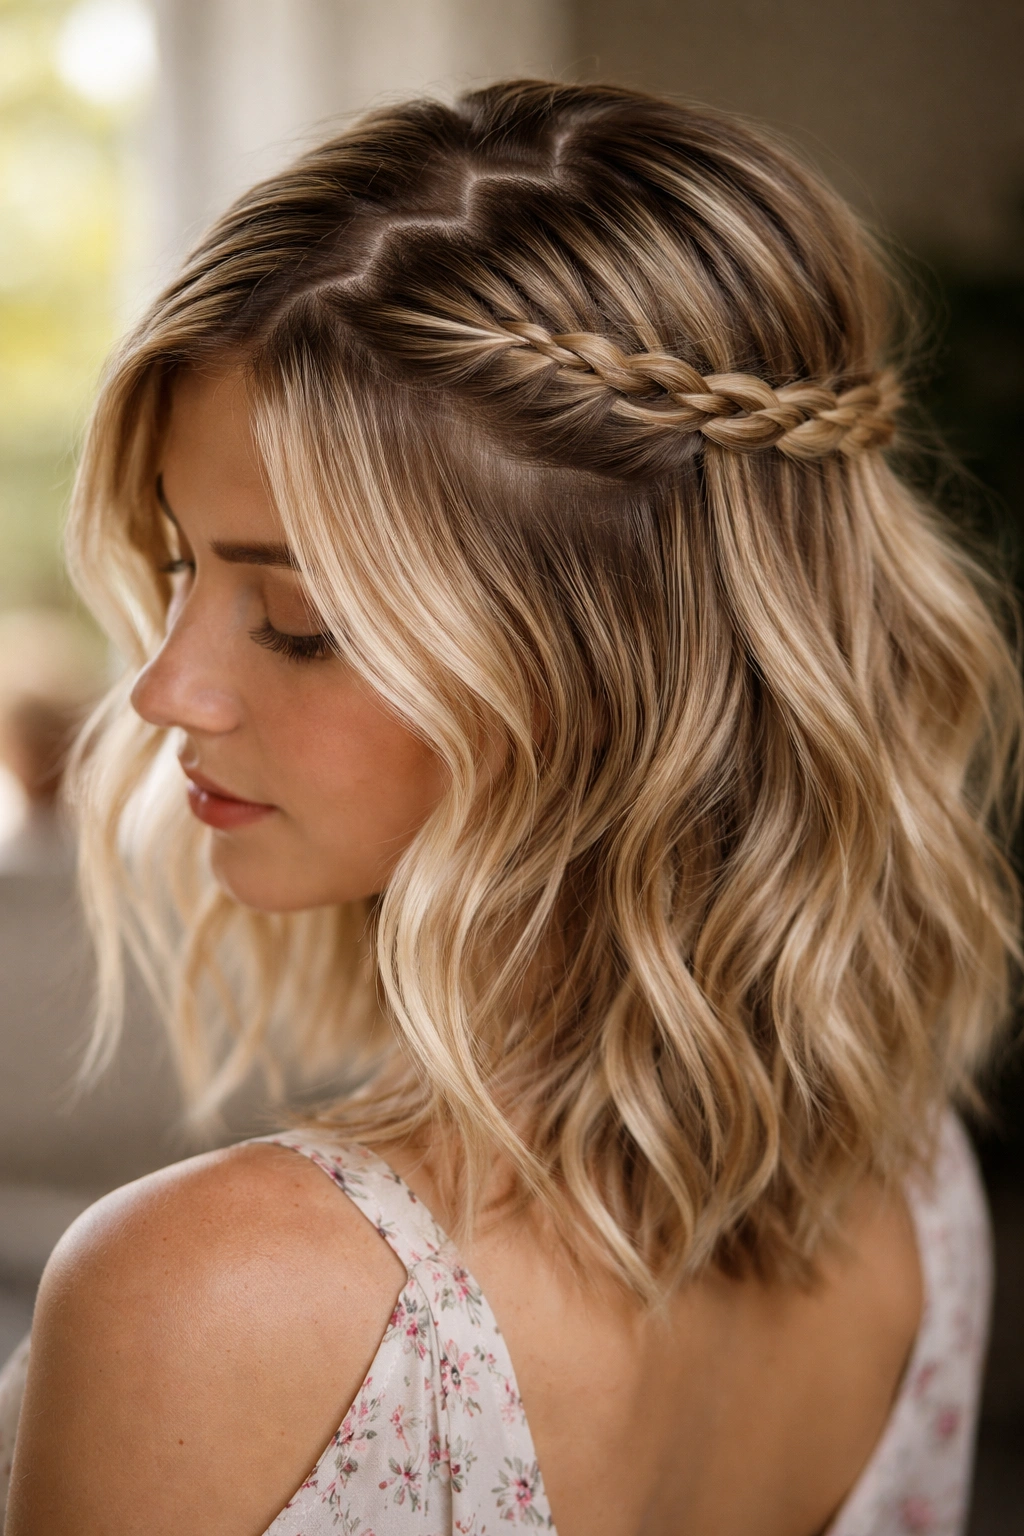
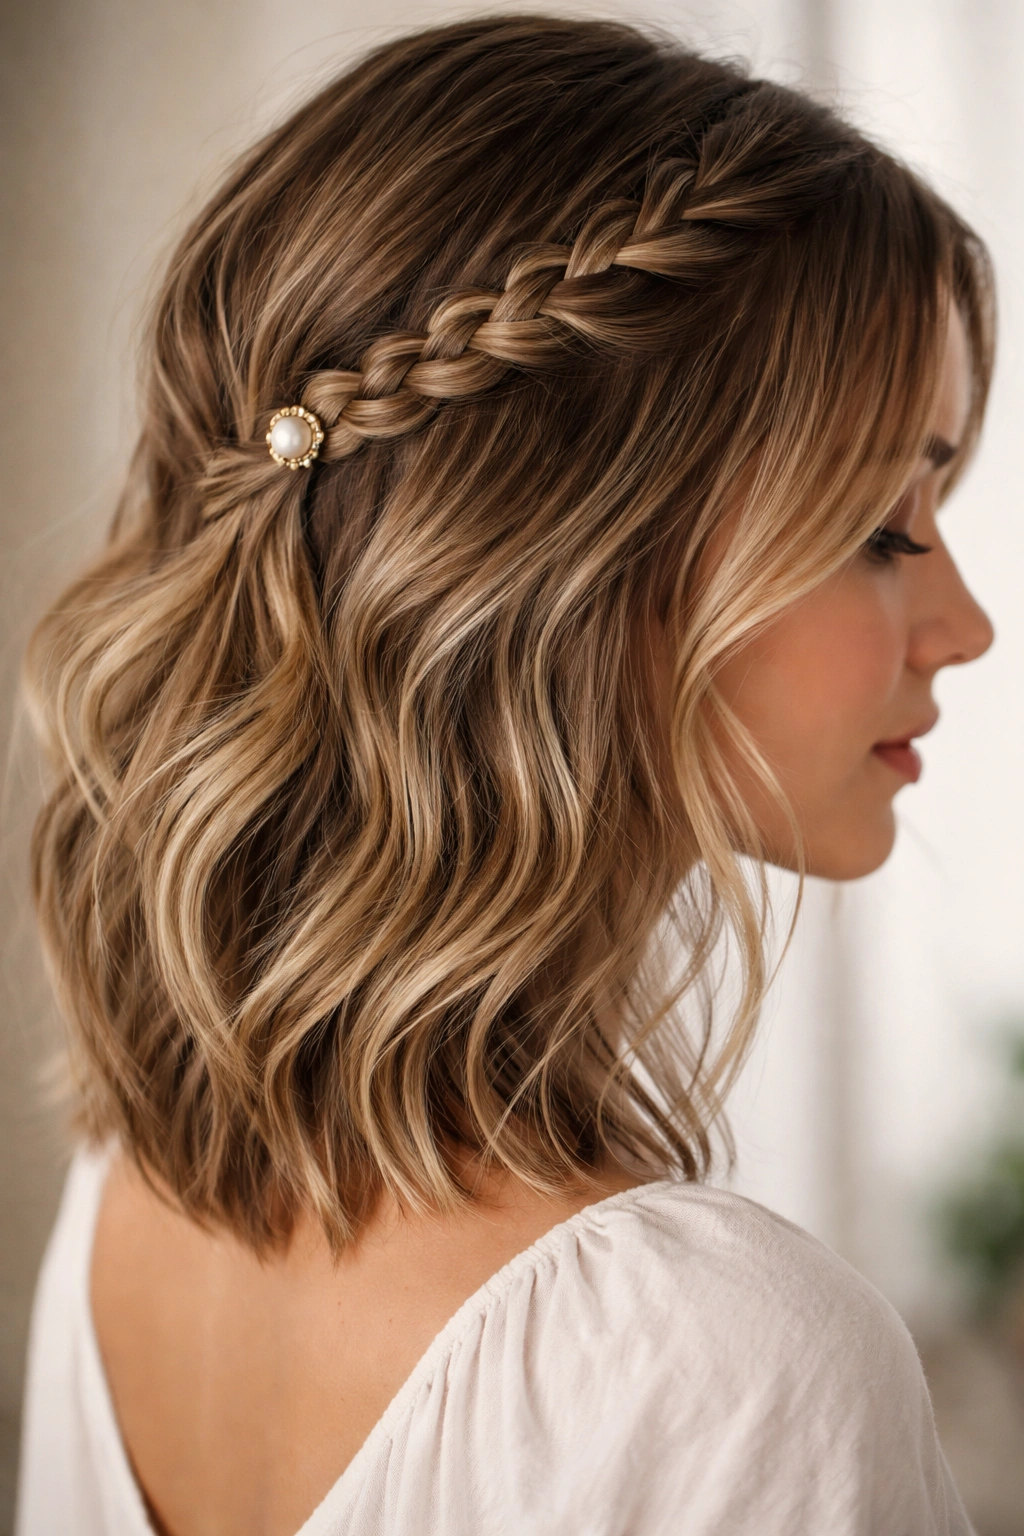
2. The Double-Braid Half-Up Crown
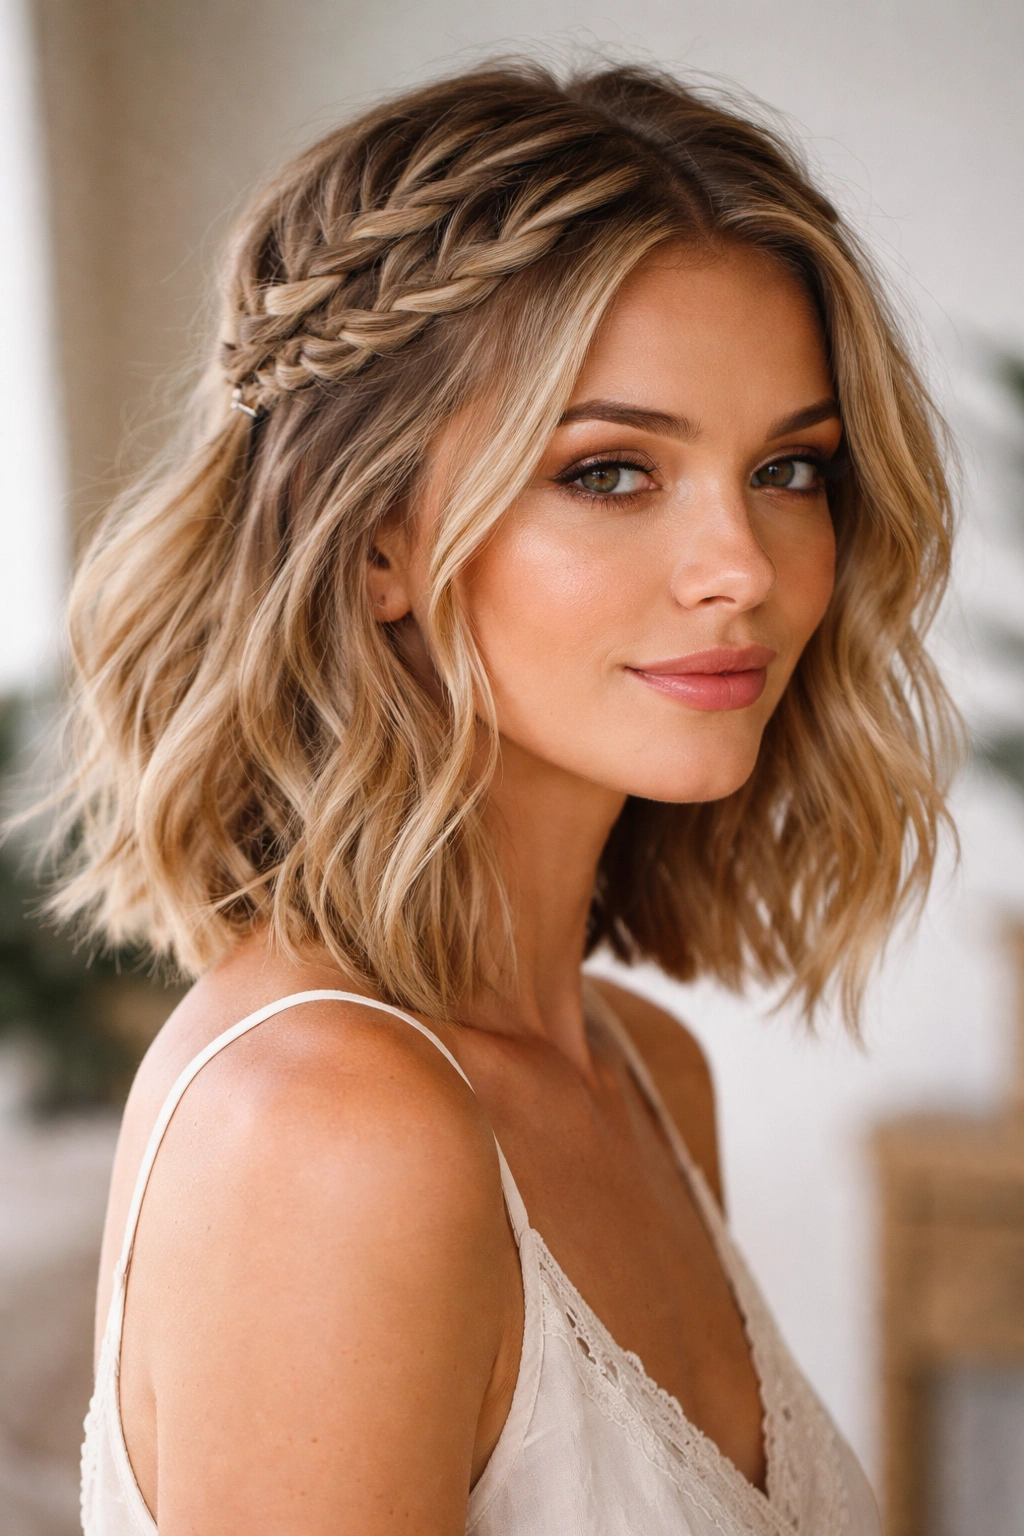
This style creates the illusion of a crown while keeping the rest of your hair down, which is perfect for short hair because it draws attention upward and frames the face beautifully. Start by taking a section from one temple, braid it loosely toward the back of your head, then repeat on the other side. Secure both braids together at the back with a clip, allowing the braided sections to sit slightly higher on your head for a crown-like effect.
The Boho Factor
Double braids read as intentional and styled without looking overly polished or formal. They create visual height on short hair, which naturally occurs lower on the head. The boho element comes from keeping the braids loose — you’re not aiming for salon-tight Dutch braids, but rather the slightly-messy-on-purpose French braid that looks like you braided your hair while walking to the beach.
Tips for Short-Hair Success
- Begin your braid slightly back from your temple rather than right at the hairline; this gives you enough hair to work with
- Incorporate tiny wisps and baby hairs into the braid intentionally; don’t fight them
- Skip the bobby pins entirely if you have enough hair to tuck one braid under the other at the back
- Finish by gently pulling the sides of each braid to widen and loosen the braided sections
- Mist lightly with hairspray to set while keeping a soft, undone appearance
Insider note: The looser and “messier” your braids look, the more boho they read. Perfection works against the aesthetic here.
3. The Sleek Low Twist with Texture Underneath
For a more polished boho vibe, try this variation: take two thin sections from the sides, twist them loosely, and secure them low at the nape of your neck with a discrete clip. The front and sides remain smooth and sleek (either naturally or with smoothing product), while the undersection has soft texture and movement. This creates contrast that feels intentionally styled.
Why Contrast Works
Pairing sleek with textured is a hallmark of modern boho styling. It avoids the all-soft-and-wispy look that can sometimes read as try-hard, instead creating a style that looks effortlessly put-together. On short hair, this technique is even more effective because the structural simplicity of a short cut pairs perfectly with the textural contrast of this approach.
Execution Steps
- Smooth the front and sides with a paddle brush and light smoothing serum
- Take two thin sections from your temples and twist them loosely backward
- Bring them together at the low back of your head (around the nape if your hair is very short)
- Use a tortoiseshell or pearl clip that acts as a visual anchor point rather than something to hide
- Mist the twisted sections with texture spray to enhance the contrast with your smooth front
Worth knowing: This style is genuinely versatile. Wear it to work and it reads polished. Wear it to dinner and it reads effortlessly elegant. The same style transforms depending on what you pair it with.
4. The Textured Half-Knot with Accessories
Instead of securing your half-up section with a regular tie or clip, try a half-knot — literally tying a small knot with two thin sections of hair. This creates a whimsical, distinctly boho focal point at the back of your head. The texture underneath remains down and loose, creating a layered, dimensional look.
Building the Look
Start with two sections from near your ears, bring them to meet at the back of your head, and literally tie them together in a simple knot. Don’t pull tight; keep it loose and organic. You can then weave a delicate chain or silk ribbon through the knot for an extra boho touch. The knot itself becomes the jewelry of the hairstyle.
Styling for Maximum Boho Impact
- Create texture throughout your hair before starting (waves, loose curls, or air-dried texture all work)
- Make the knot relatively small and loose; it should look accidental rather than precision-tied
- Leave at least three inches of hair hanging below the knot for movement
- Tuck a tiny sprig of baby’s breath or a silk flower behind one ear for a romantic detail
- Pull the section of hair just above the knot slightly forward to create a soft bump
Pro tip: Use silk ribbon instead of elastic — it holds just as well, looks more boho, and won’t create a dent in your hair. You can tie the ribbon ends in a little bow or let them hang down the back.
5. The Curved Clip Half-Up with Loose Waves
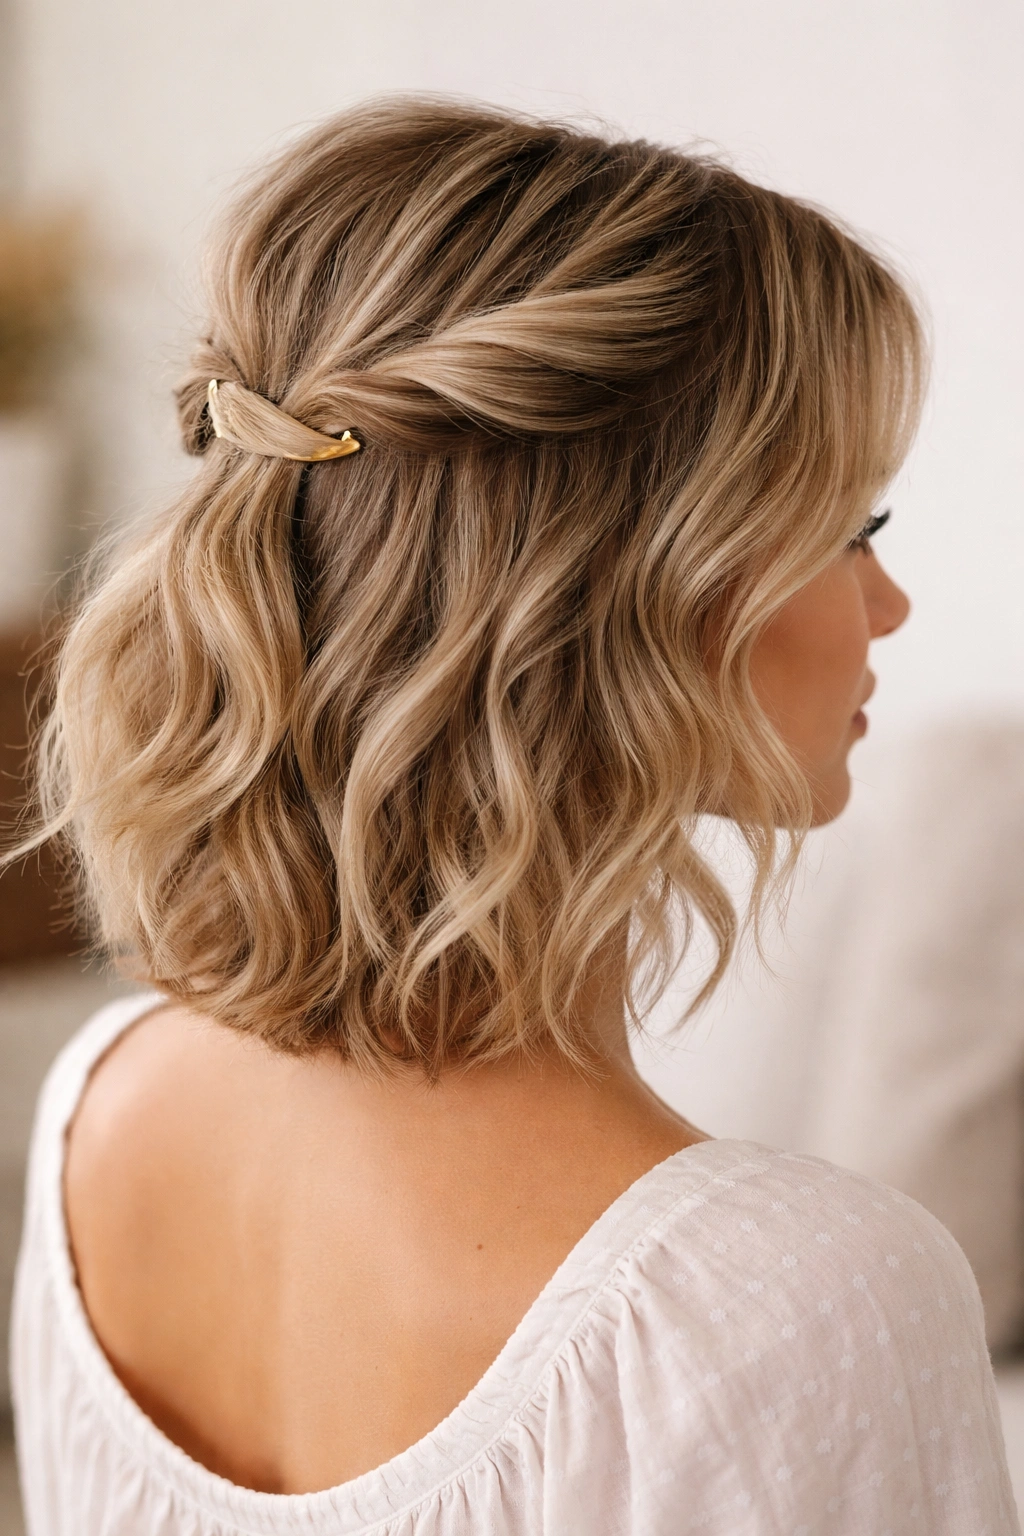
Sometimes the simplest approach is the most effective. Take a small section from each temple, bring them to meet at the back, and secure with a curved clip (think the classic claw clip) positioned slightly off-center for a carefree vibe. The focal point is the clip itself, which should be a pretty tortoiseshell, pearl, or metallic finish rather than a utilitarian black plastic one.
The Role of the Clip as Styling Tool
On short hair, a beautiful clip becomes a statement element rather than just a functional tool. Choose one that complements your hair color and skin tone — tortoiseshell works with almost everything, but consider metallics, pastels, or jeweled options depending on your personal style. The clip’s position matters: directly center reads formal and precise, while slightly off-center reads boho and relaxed.
Creating the Right Texture
- Prep your hair with a light salt spray to create grip
- Create soft waves with a 1.5-inch curling iron, waving sections away from your face
- Let the waves fall naturally for five to ten minutes before styling to allow them to relax slightly
- Gather your half-up section when your waves are still slightly warm for better hold
- Leave deliberate wispy pieces around your hairline and temples
Worth knowing: The specific type of clip changes the entire vibe. A minimalist geometric clip reads modern boho. A vintage-inspired ornate clip reads romantic boho. A colorful acrylic clip reads fun boho. Choose based on the mood you’re going for.
6. The Faux Hawk Half-Up with Texture
This style uses the half-up structure to create the illusion of a faux hawk in the center-back area. Take a narrow section from the crown and twist it back, then add two thinner sections from just behind your ears and twist those back as well, all converging at the low back of your head. The three twists create a dimensional focal point while the rest of your hair flows loose.
The Modern Boho Edge
The faux hawk is naturally edgy, and adding boho softness through loose twists and textured waves makes it feel contemporary and fresh. It’s perfect for someone who loves statement hairstyles but wants them to feel relaxed rather than severe. Short hair actually makes this style easier to execute because you don’t have the weight and bulk that longer hair would create.
Building Height and Dimension
- Create texture throughout your hair with waves or a texturizing spray
- Take three sections: one narrow section from your crown, two slightly wider sections from behind your ears
- Twist each section loosely, focusing on maintaining an organic rather than polished appearance
- Bring all three together at the low back of your head, securing with bobby pins hidden underneath
- Gently pull each twisted section to widen it and create the illusion of more volume
- Fluff the crown area slightly to enhance the height
Pro tip: This style photographs beautifully and works especially well if you have any layers in your cut — they’ll add natural texture and movement to the twisted sections.
7. The Single Side Braid with Swept-Back Top

For an asymmetrical boho look, try taking a braid from one side of your head while sweeping the opposite side back smoothly. This creates visual interest and avoids the “balanced” feeling that can sometimes read as too matchy-matchy. It’s especially flattering for round or square face shapes because the asymmetry creates a lengthening effect.
Asymmetry as Boho Statement
Boho styling embraces imperfection and asymmetry. This half-up variation leans fully into that philosophy by deliberately unbalancing the style. One side braided and textured, one side smooth and sleek — it’s intentional rather than accidental, which is what makes it feel modern.
Creating the Right Visual Balance
- Start the braid on your preferred side, beginning at the temple and angling toward the back
- Keep the braid loose and messy, pulling the sides out as you go
- Sweep the opposite side back smoothly with a fine-tooth comb and smoothing cream
- Secure both sections together low at the back of your head with a discrete clip
- Leave face-framing pieces loose on the smooth side to balance the texture on the braided side
Worth knowing: This style works beautifully if you have longer, layered short hair. The layers will add texture naturally to whichever side you’re braiding.
8. The Bubble Braid Half-Up
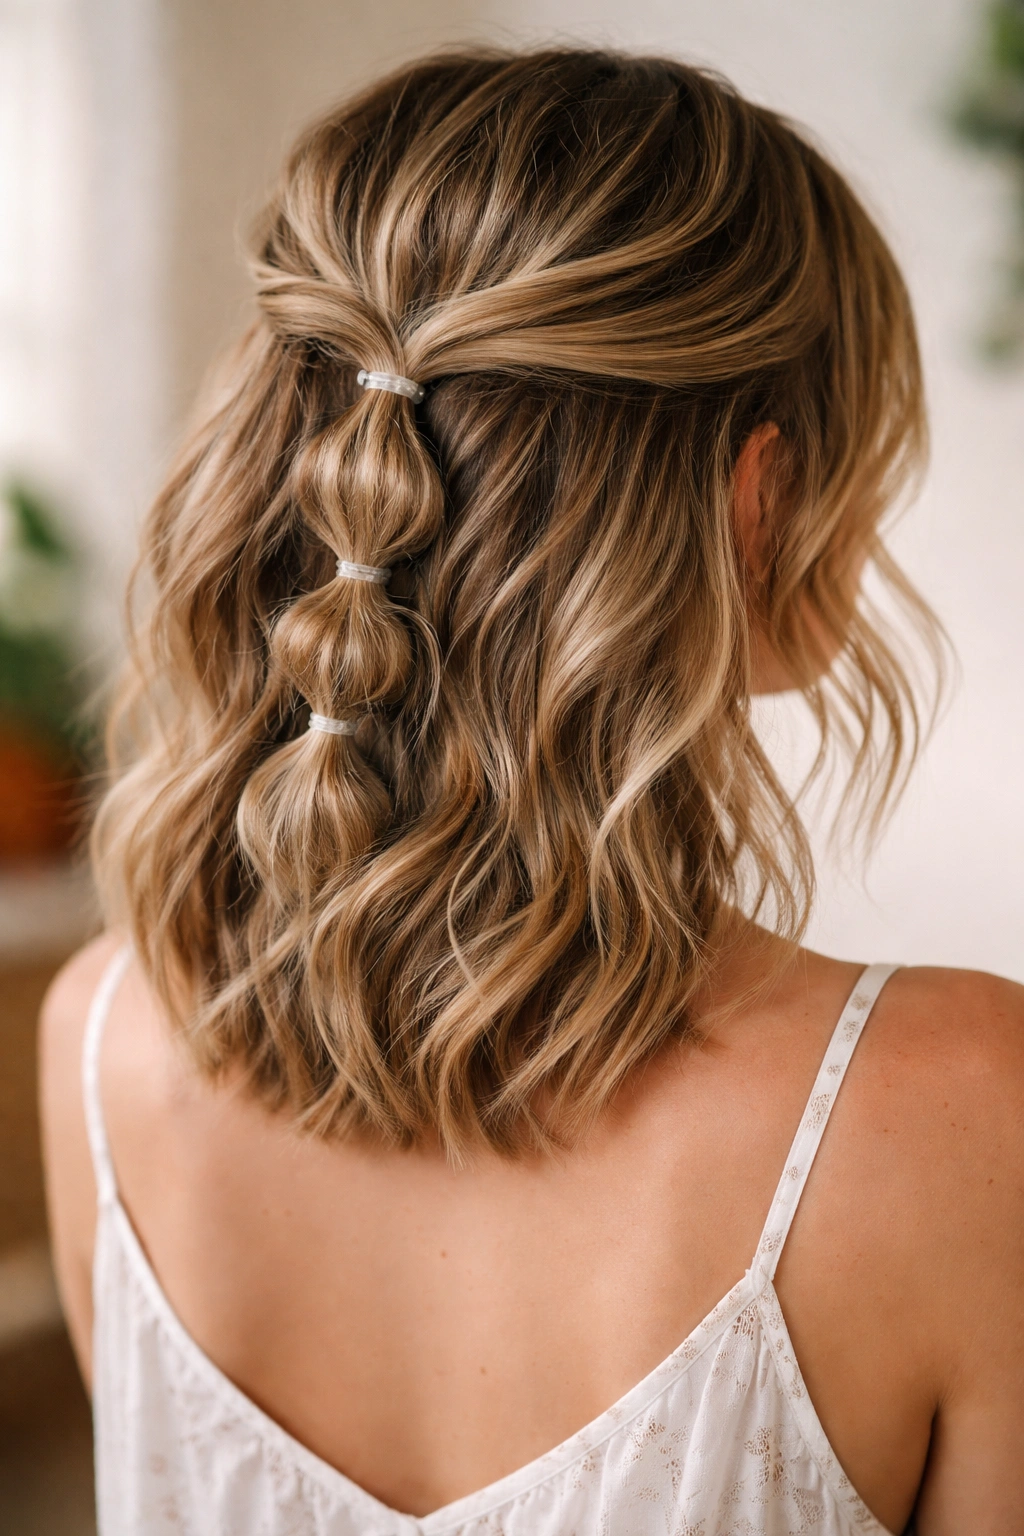
The bubble braid trend translates beautifully into boho styling when executed with a soft, loose hand. Create a small braid or twist at the back of your head from two sections taken near your ears, then use clear or pearl-colored elastics to create “bubbles” by securing the braid at intervals and gently puffing out the sections between each elastic. It’s playful, romantic, and surprisingly simple.
Why Bubbles Feel Boho
Bubbles are inherently soft and organic-looking, especially when you choose clear elastics that nearly disappear into your hair. There’s a whimsy to the style that fits perfectly with boho aesthetics. The puffed-out sections catch light and create dimension that reads as effortlessly styled rather than carefully constructed.
Execution and Styling Tips
- Create one large braid or twist using two sections from your temples, bringing them to the back
- Instead of one elastic at the base, use three or four clear elastics placed about 1 to 1.5 inches apart down the length of the braid
- After each elastic, gently pull the braid section outward and upward to create the bubble effect
- The bubbles should feel soft and slightly deflated, not perfectly uniform
- Leave 2 to 3 inches of unbubbled hair at the end to flow down your back
Pro tip: Use clear elastic bands from the hair care aisle rather than regular rubber bands. They’re nearly invisible and create a cleaner look. You can also use thin silk ribbons tied in small knots between the bubble sections for a more decorative approach.
9. The Romantic Rose Gold Clip with Tousled Waves
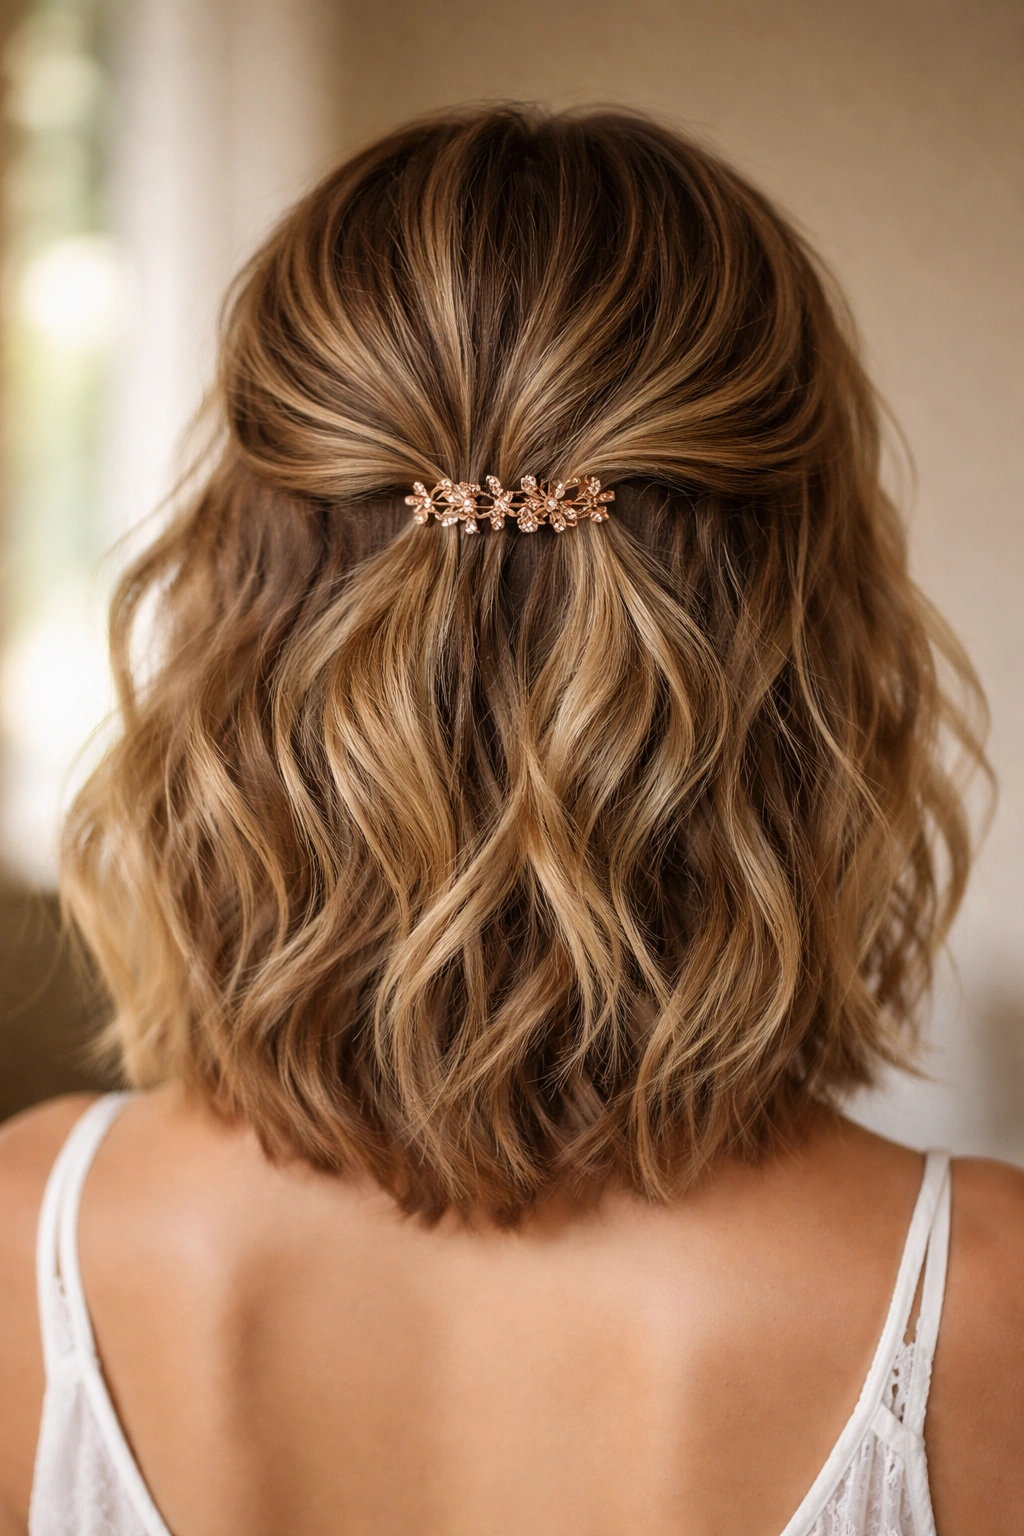
Keep this one beautifully simple: create tousled waves throughout your hair, take two small sections from near your temples, bring them back to meet at the center-back area, and secure with a pretty rose gold clip. The focus of the style is the waves and the clip, not an overly styled top section. This is boho in its most effortless form.
The Power of a Beautiful Accessory
On short hair, a gorgeous clip becomes the jewelry of the hairstyle. Choosing one in a warm metal finish like rose gold, copper, or champagne gold complements most skin tones beautifully. The clip should be small enough to feel delicate but substantial enough that it reads as intentional rather than accidental.
Wave-Creation Methods for Short Hair
- Use a 1-inch curling iron for shorter, tighter waves, or a 1.5-inch barrel for more relaxed waves
- Curl sections away from your face at the roots and mid-shaft, leaving the ends out of the curling iron for a lived-in look
- Allow waves to cool completely before touching them; this sets the wave and makes them last longer
- Run your fingers through the waves gently to break them up and create a softer, more romantic appearance
- Finish with a light hairspray that holds without feeling crunchy
Worth knowing: The smaller the clip, the more delicate and romantic the style reads. If you want a bolder statement, choose a larger clip, but make sure the rest of your styling remains soft to balance it.
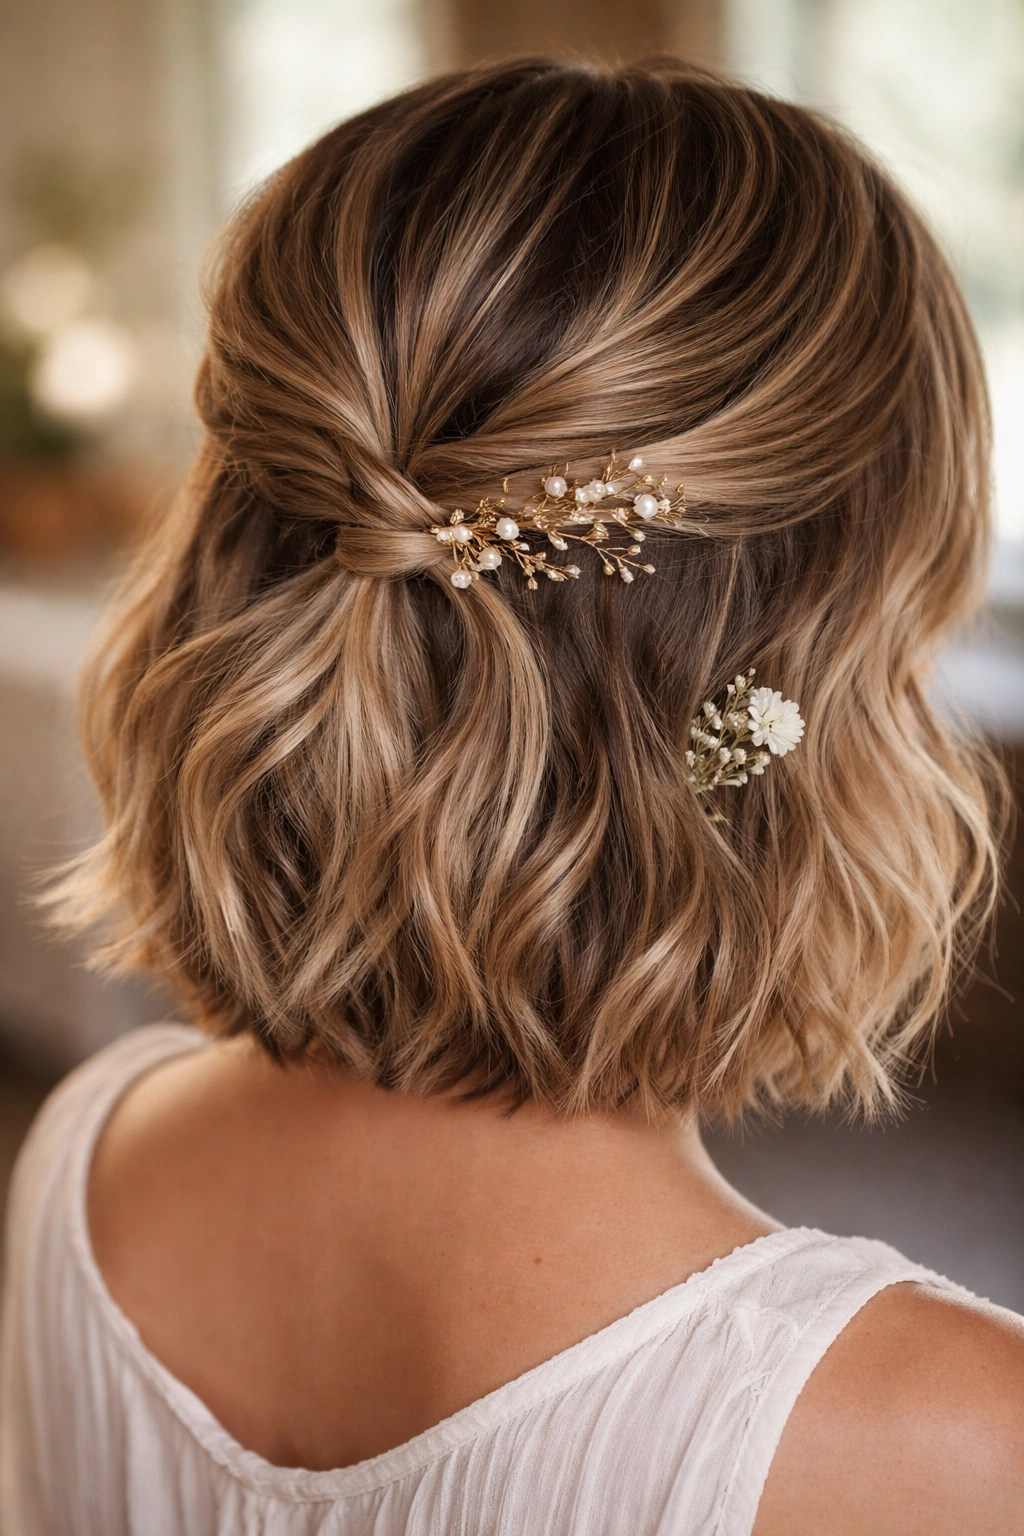
10. The Low Crown Braid with Baby’s Breath
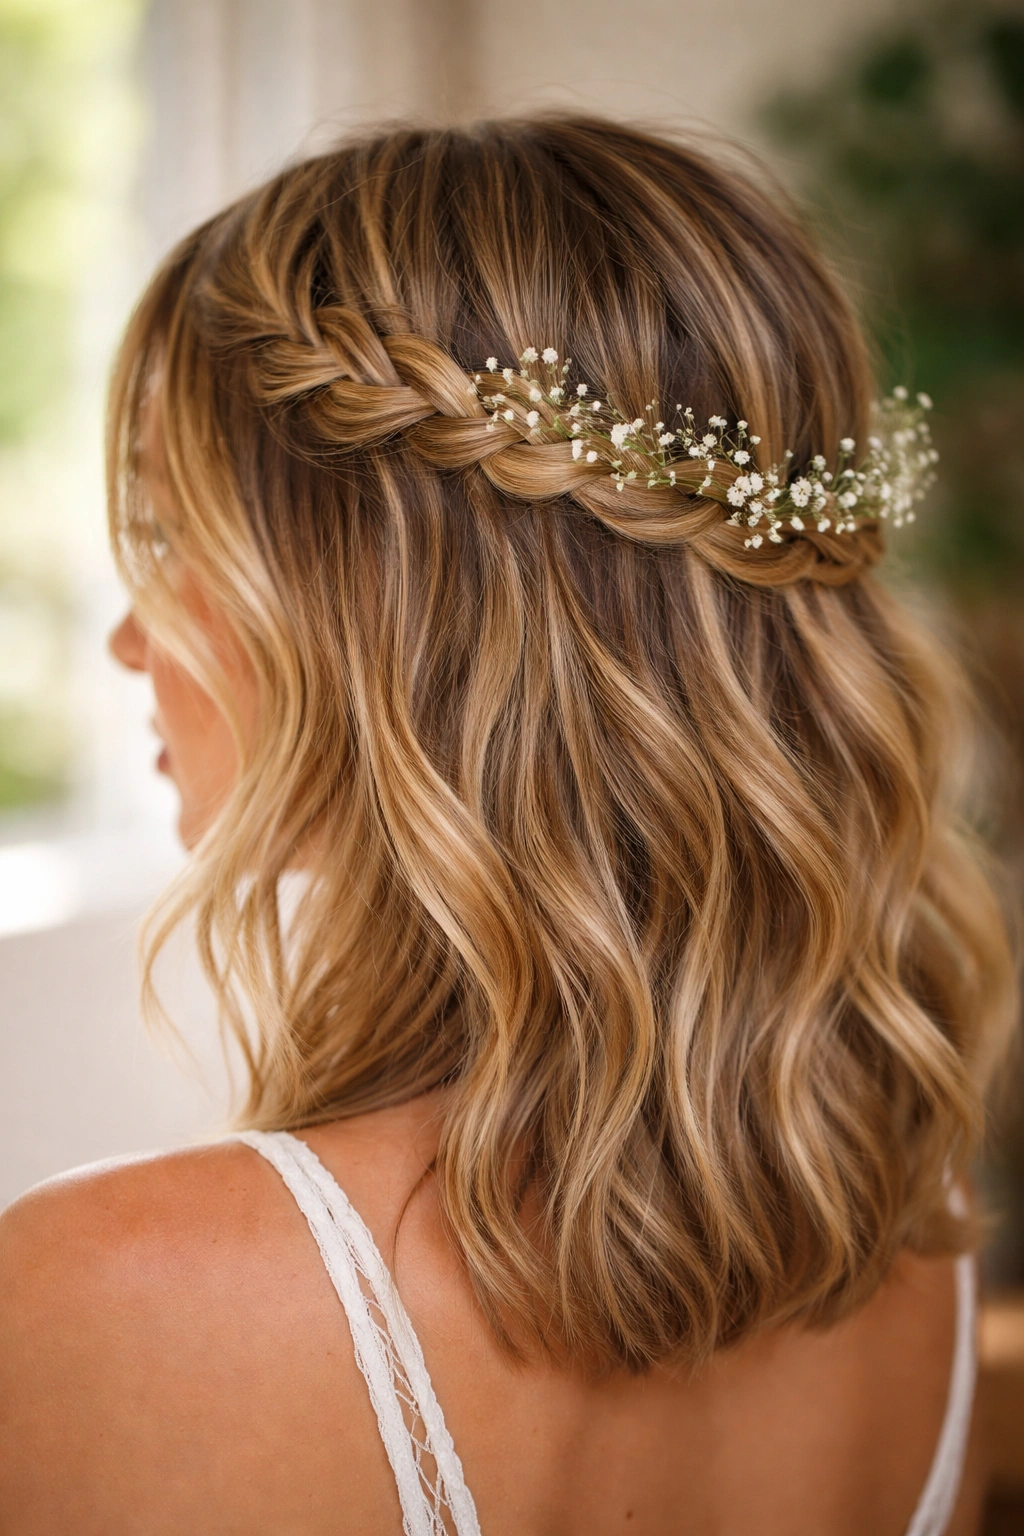
This style creates a literal crown effect by running a braid along the back of your head from one temple to the other, securing it low, and tucking a sprig of baby’s breath or small flowers through the braid. The rest of your hair falls loose beneath the crown. It’s quintessential romantic boho and works beautifully on short hair because the crown sits more visibly on a smaller head.
Creating the Crown Effect
The secret is angle and placement. Your braid should follow the natural curve of the back of your head, creating an actual crown-like silhouette. On short hair, this is easier to achieve and more visually striking because there’s less hair below the crown to obscure the shape. The flowers become the focal point that justifies the style.
Executing the Technical Work
- Start the braid at one temple, angling it across the back of your head toward the opposite temple
- Keep the braid loose and slightly off-center if that suits your face shape
- Secure the end of the braid at your opposite temple with bobby pins hidden in your hair
- Weave a small sprig of baby’s breath or silk flowers directly through the braid for a romantic touch
- Leave soft, wavy texture underneath the crown for romantic movement
Pro tip: Use real flowers if wearing the style for a special occasion (they’ll last several hours), or high-quality silk flowers for everyday wear or longer-lasting styles. Peonies, roses, and baby’s breath all photograph beautifully in boho crown braids.
11. The Textured Half-Up Ponytail with Flyaways
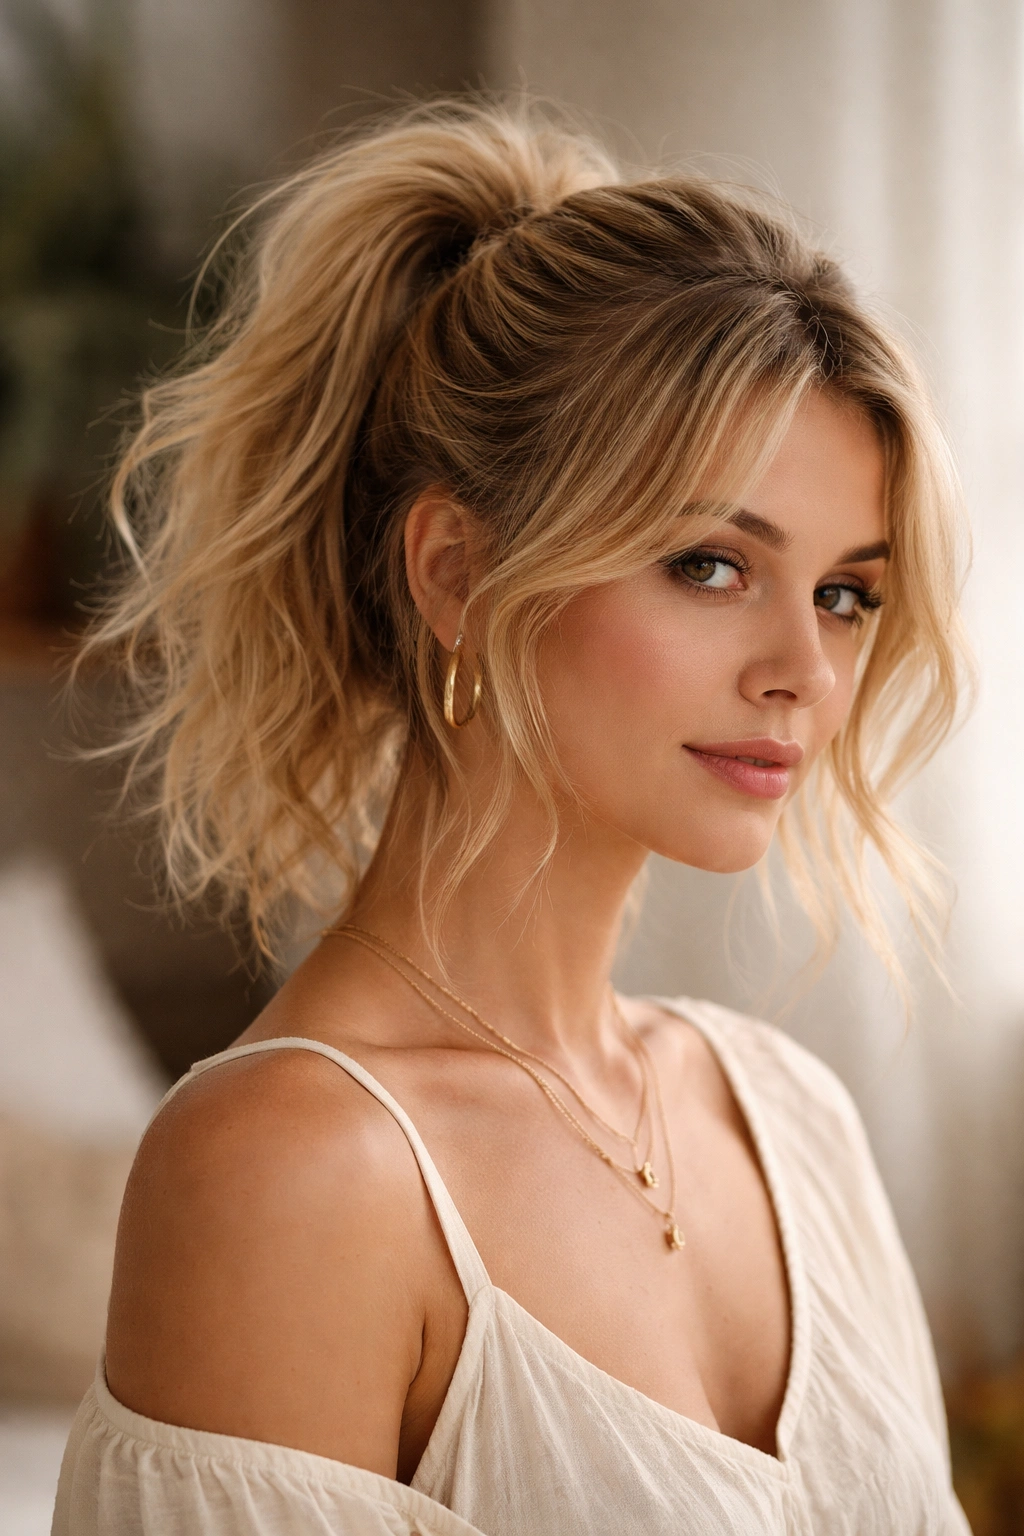
This approach treats the half-up section more like a mini ponytail rather than a pinned style. Take a generous section from the crown, bring it down and back to the nape of your neck, and secure with a clear or matching elastic. The key is leaving intentional flyaways and baby hairs around your face and hairline — they’re not a styling failure; they’re the entire point.
Embracing Imperfection as Styling Choice
Boho styling fundamentally rejects the idea that every hair should be in place. This style celebrates that philosophy by deliberately leaving your edges soft and undone. The messy pieces that would traditionally be considered mistakes are, in this context, the most boho element of the entire look.
Creating Intentional Texture and Flyaways
- Don’t prep your hair with excessive smoothing products; let your natural texture show
- Use a light texturizing spray to enhance natural waves or create slight texture in straight hair
- Create the half-up ponytail slightly higher than a traditional low ponytail (think crown level rather than nape level)
- Gently pull the ponytail section to loosen it and create volume
- Leave small wisps around your hairline and temples completely unsecured
- Mist with a light hairspray that holds texture without creating a helmet effect
Worth knowing: Your hair’s natural texture is an asset here. Wavy hair will read as effortlessly boho. Curly hair will read as romantically wild. Even straight hair can work if you embrace the flyaways and texture that naturally occur throughout your day.
12. The Zigzag Part Half-Up
Instead of a standard center or side part, create a zigzag part across the crown area of your head. From one end of the zigzag, take a section and create a small braid or twist that you bring back and secure low. The zigzag part itself becomes a design element, creating visual interest and a distinctly boho feel.
The Graphic Element as Styling Tool
A zigzag part introduces geometry and intentionality into a style that’s otherwise organic and soft. It reads as modern boho rather than traditionally romantic, which appeals to anyone who loves the boho aesthetic but doesn’t want to feel costume-y. The zigzag says you’re styling deliberately while the loose braid says you’re doing it effortlessly.
Creating a Clean Zigzag Part
- Use a rattail comb to create a sharp, clean zigzag line across your crown from one temple to the other
- Begin with one point of the zigzag positioned right above one of your ears
- Make the zigzag points about 2 to 3 inches apart for a bold effect, or tighter for a more subtle look
- From one end of the zigzag, take a section of hair and braid or twist it back
- Secure the braid at the low back of your head with a clip that echoes the geometric theme
Pro tip: Use a velcro roller under the zigzag part while your hair is still damp from styling to encourage waves that follow the zigzag pattern. This amplifies the graphic effect.
13. The Half-Up with Delicate Chain Weave
This style takes two thin sections from your temples, twists them loosely back, and instead of securing with an elastic, weaves a delicate chain bracelet or anklet through the twisted sections, using the chain itself as the securing element. It’s unexpected, whimsical, and entirely boho.
Using Jewelry as Hair Accessory
This approach merges fashion and hair styling in a way that feels completely intentional and boho. You’re essentially wearing your jewelry in your hair, which is a distinctly bohemian gesture. The delicate, dainty chain reads as romantic and whimsical rather than heavy or overdone.
Technical Execution
- Twist two thin sections loosely from your temples toward the back of your head
- When the twists meet at the back, open up the twisted sections slightly with your fingers
- Carefully weave a delicate chain through the opened-up twists, distributing it evenly
- The chain serves as the anchor; the twisted hair supports it and keeps it in place
- Let the chain hang slightly visible, with the twisted sections hugging it loosely
- Leave face-framing pieces intentionally loose for softness
Worth knowing: Choose a very delicate chain — something thin enough that it feels light and boho, not chunky or heavy. Gold, silver, and rose gold all work beautifully depending on your personal style.
14. The Swept-Back with Hidden Pins and Texture

For a style that reads as effortlessly polished, sweep your hair back from one side (not both — one side only for asymmetry) and secure it with one or two bobby pins hidden in the textured area at the back of your head. The front of your hair flows completely loose except for the swept-back section. The emphasis is on texture and movement rather than visible securing elements.
Minimalist Boho Styling
This approach proves that boho doesn’t always mean braids and visible styling. Sometimes the most boho look is one that appears to happen naturally — you simply swept your hair back because the texture and waves made it sit that way. The styling is invisible; the result is effortless.
Creating the Effortless Effect
- Create texture throughout your hair with waves or a texturizing spray before you begin
- Starting at your temple, gently gather a section and sweep it back smoothly
- The section should be relatively small and narrow — think barely-there
- Secure with bobby pins hidden in the textured back area where they’ll completely disappear
- Leave the other side completely loose and framing your face
- Finish with a light texture spray to enhance the natural movement
Pro tip: The asymmetry here is what makes it boho. If you swept both sides back evenly, it would read as a traditional half-up. The fact that you’re only sweeping one side back and leaving it asymmetrical is what gives it that intentional-looking boho edge.
15. The Triple Twist with Intertwined Sections
Instead of two twists meeting at a central point, create three separate twists from different areas of your head — one from above your right ear, one from above your left ear, and one from the crown center — and bring all three together at the low back of your head where you intertwine them and secure. This creates a complex, dimensional look that reads far more intricate than it actually is to execute.
Visual Complexity Made Simple
This style looks like you spent 20 minutes carefully crafting an intricate updo when actually it takes about 5 minutes once you understand the technique. The multiple twists create visual depth and dimension that especially flatters short hair by creating the illusion of more volume and complexity.
Step-by-Step Execution
- Create texture throughout your hair first with waves or texture spray for better grip
- Take three sections: a narrow one from your crown center, one from above each ear
- Twist each section loosely, working them back toward the center-back of your head
- As each twist reaches the back, gently intertwine them with each other rather than using elastics to separate them
- Secure all three together at the base with a single bobby pin or small clip
- Gently pull sections of each twist to loosen and widen them for a softer appearance
Worth knowing: The looser you keep each individual twist, the better the final intertwined effect looks. If the twists are too tight, the intertwining will create an overly precise appearance that works against the boho aesthetic.
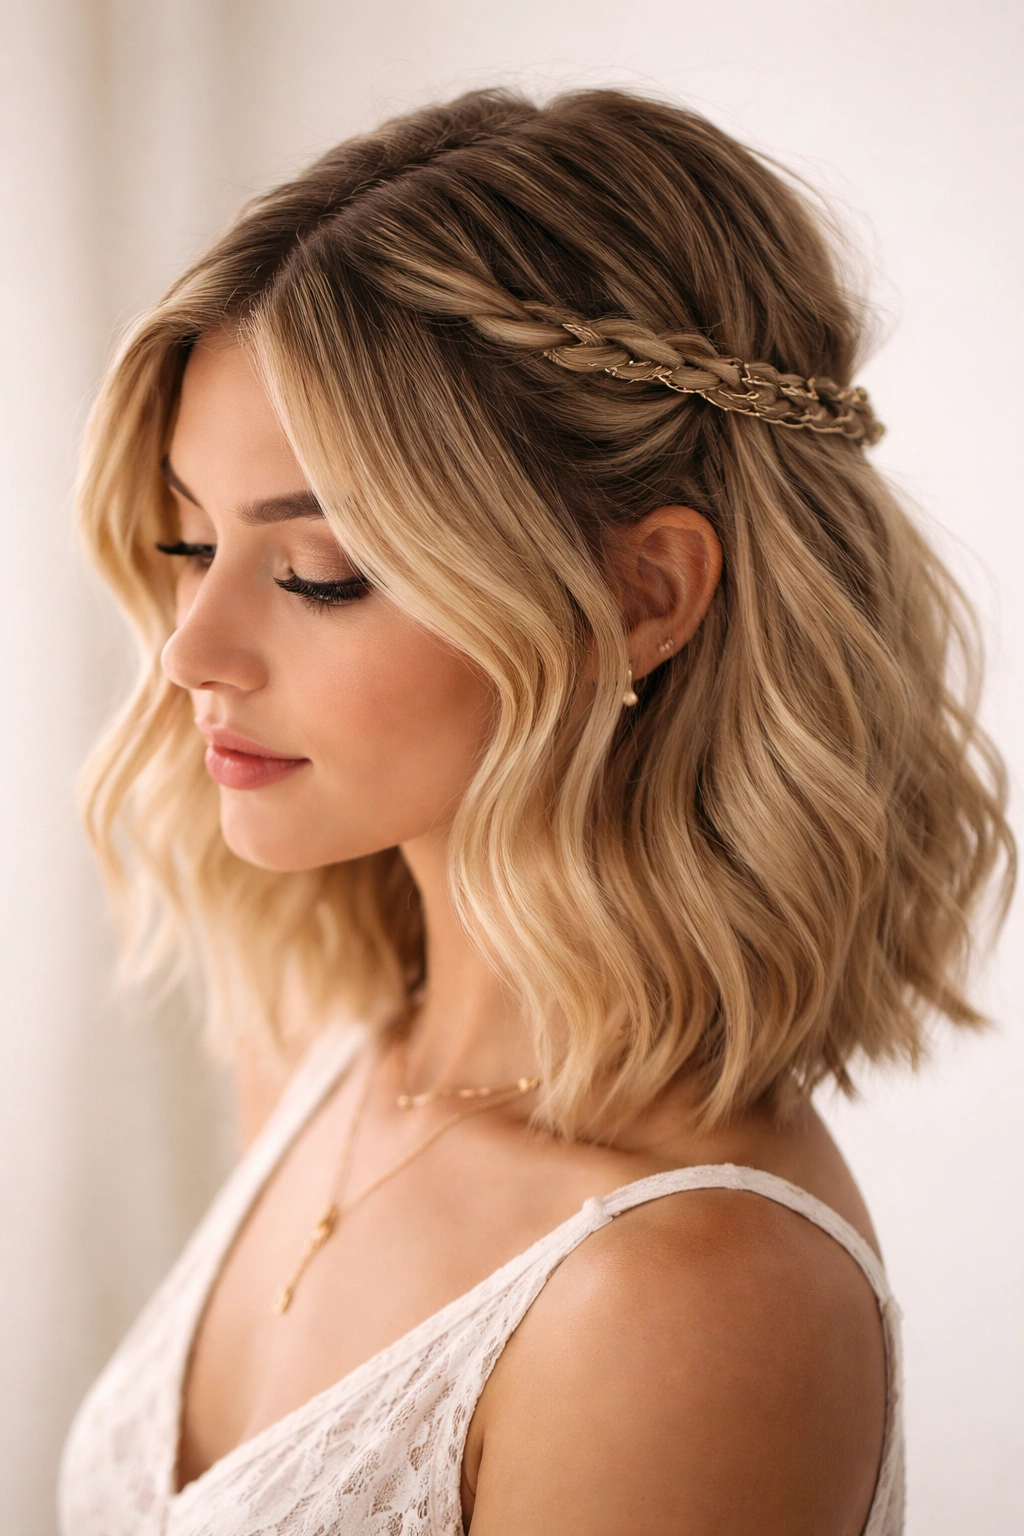
16. The Braided Section with Pearl-Tone Elastic
Create a small Dutch braid (braiding over rather than under, which creates a braid that looks dimensional and sits on top of your hair rather than nestled within it) from one temple, bringing it back and securing with a pearl-tone or rose-gold elastic. The braid should be loose enough that it reads as effortlessly styled. The non-braided side remains completely down and loose with waves.
Modern Boho Through Braid Type
A Dutch braid reads as more intentional and structured than a regular braid, which makes it feel more deliberately styled. On short hair, Dutch braids also look more visually impressive because every detail of the braid is visible — there’s no long length for it to get lost in. The pearl or metallic elastic becomes a tiny piece of jewelry in your hair.
Creating a Perfect Dutch Braid on Short Hair
- Dutch braids work best on slightly textured hair, so prep with a texture spray
- Take a section from your temple and begin a Dutch braid, working from the front of your head toward the back
- Pull each completed braid section outward slightly to widen it and create dimension
- Keep the overall braid loose and slightly undone-looking, not salon-tight
- When you reach the back of your head, secure with a pearl or metallic elastic that acts as a tiny accent piece
- Leave the opposite side of your head completely loose and wavy
Pro tip: Dutch braids photograph beautifully and work especially well for events or special occasions. The dimensional texture of the braid catches light in photographs in a way that regular braids don’t.
17. The Soft Crown with Scattered Clips
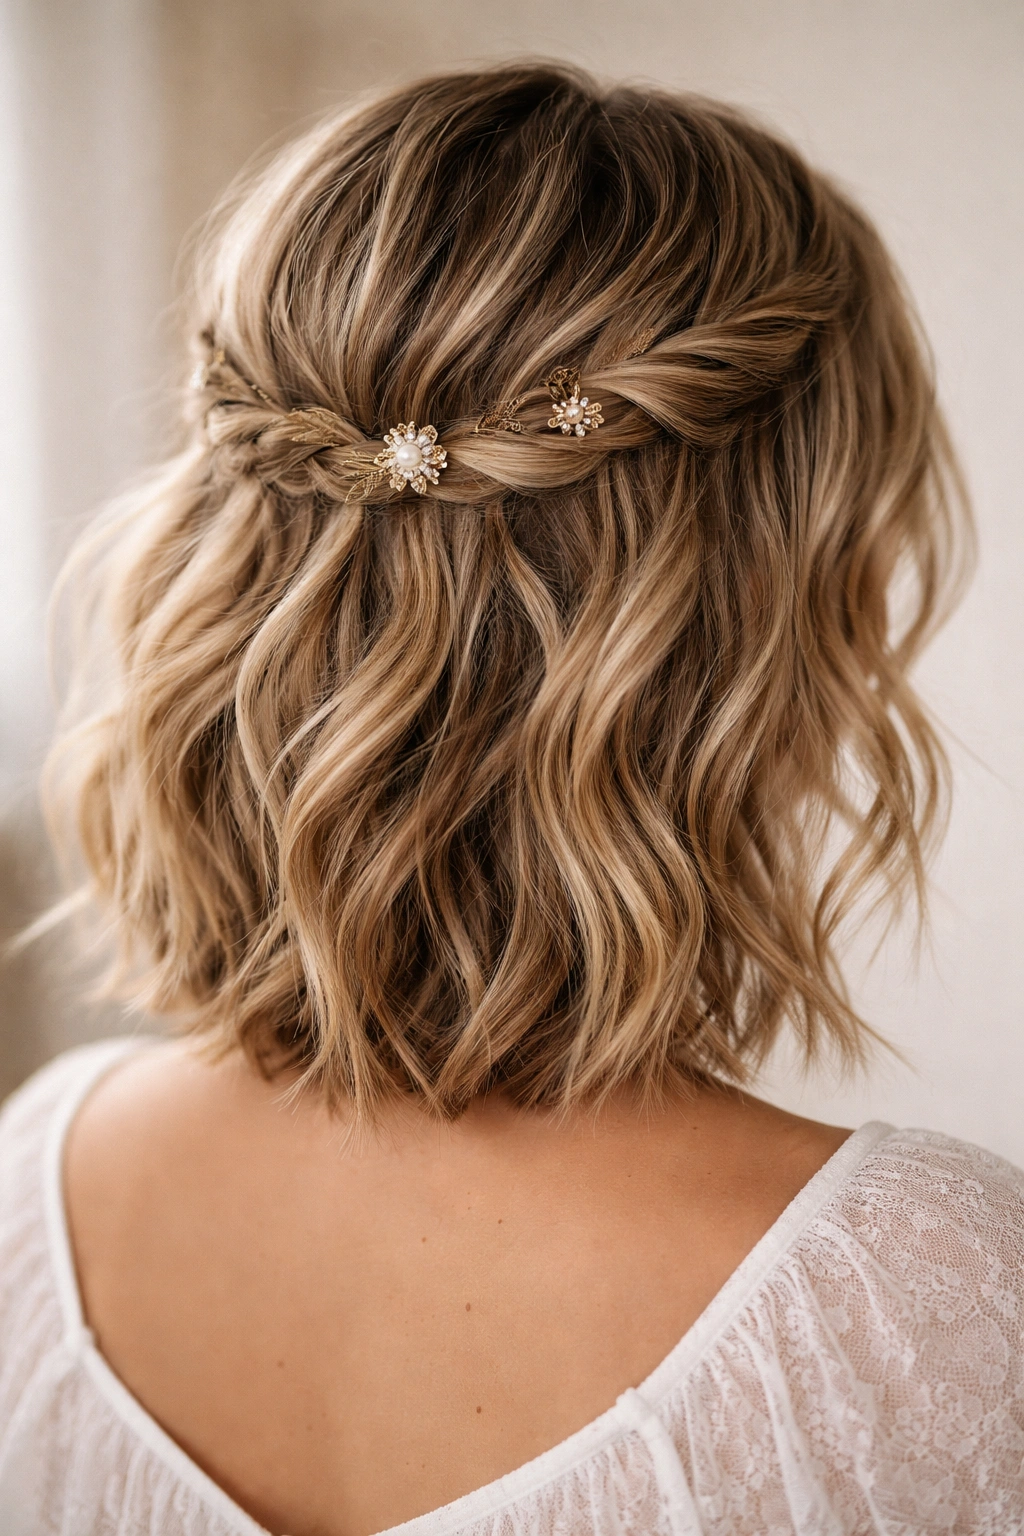
Instead of using one clip or elastic to create a traditional half-up, use two to three small, pretty clips scattered along the back of your head to subtly anchor your hair. Each clip holds a different small section, creating a crown-like structure that feels loose and organic rather than tightly secured. This is boho’s approach to precision styling.
Distributed Anchoring for a Loose Look
By using multiple small anchor points instead of one central securing point, you create a look that feels like your hair is holding itself in place through the natural texture and weight of waves. The clips are visible but small and decorative, so they read as styling elements rather than functional tools. It’s intentionally imprecise, which is exactly what boho is about.
Setting Up Multiple Clips for Success
- Create soft waves throughout your hair before beginning, especially at the crown
- Use three small, decorative clips (each about 1.5 to 2 inches long)
- Position the first clip at the center-back of your head, holding a small section from your crown
- Position the second clip slightly to the right, holding a section from just above your right ear
- Position the third clip slightly to the left, holding a section from just above your left ear
- The sections should interconnect slightly, creating a crown effect while looking loose and distributed
- Choose clips in complementary materials like tortoiseshell, pearl, or rose gold
Worth knowing: This style works beautifully if you have fine, thin hair because it distributes the weight across multiple anchor points rather than putting all the strain on a single elastic that might create a visible dent or seem to weigh your hair down.
18. The Face-Framing Half-Up with Ribbon Weave
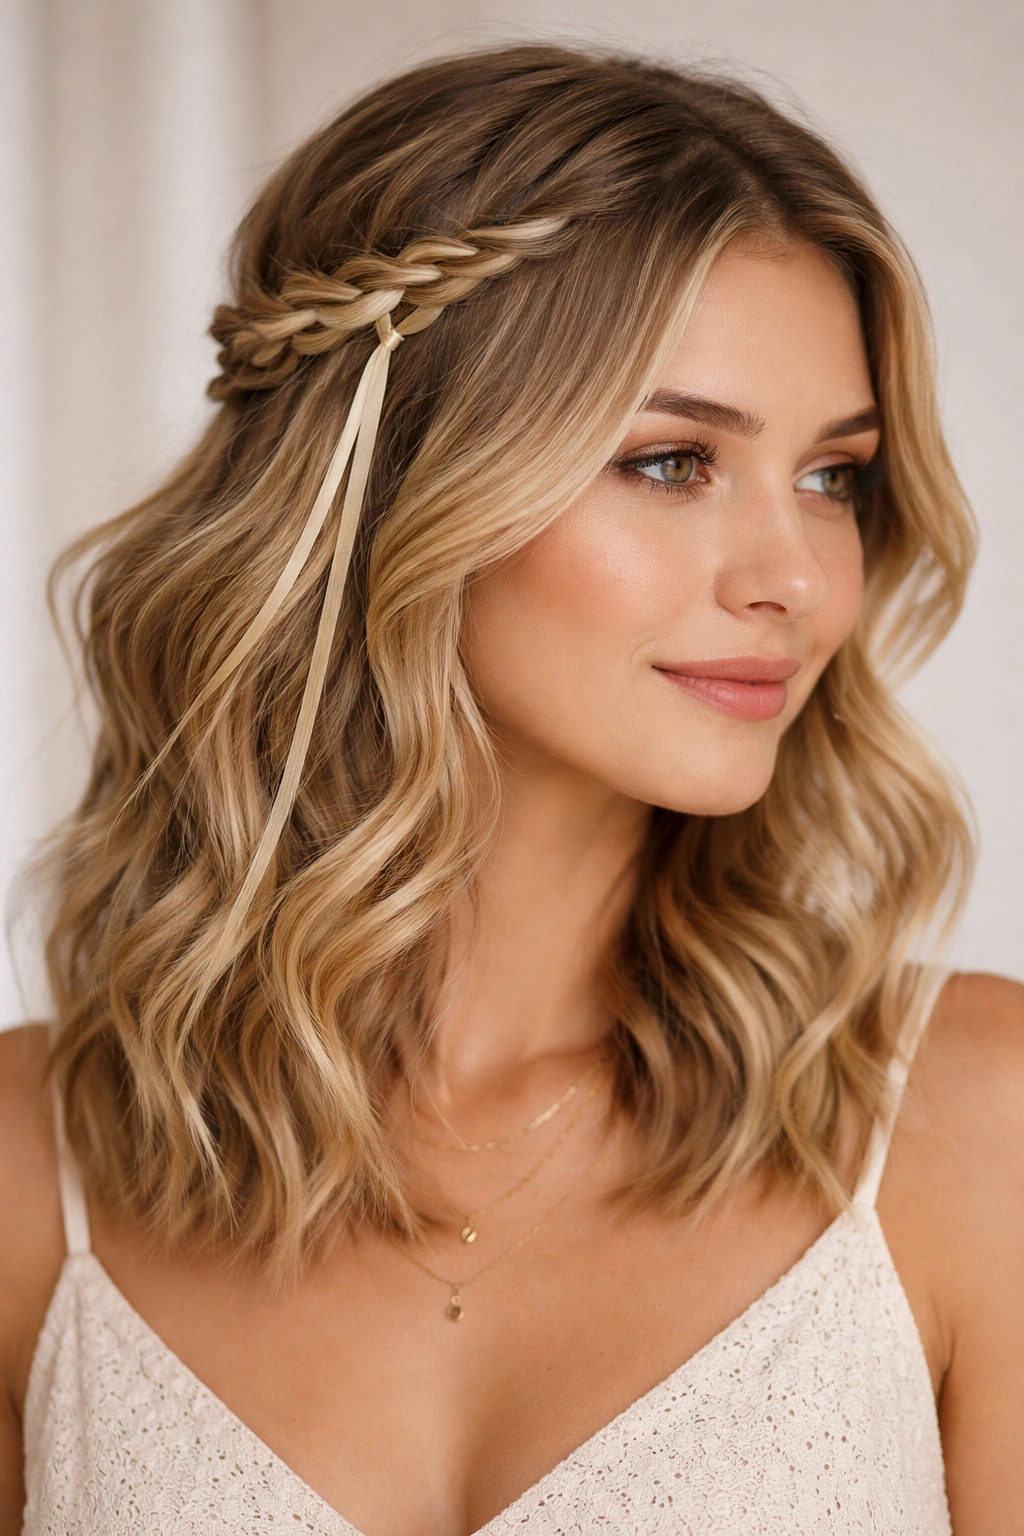
For the final and perhaps most undeniably boho option, create two thin sections from near your temples, bring them back to meet at the center-back, weave a delicate ribbon or silk cord through both sections as you bring them back, and secure at the base with a small clip. The ribbon creates a visible, decorative element that’s entirely boho. The rest of your hair flows loose with soft waves.
Ribbon as the Styling Star
The ribbon is doing double duty here: it’s a functional element that helps hold the hairstyle in place, and it’s a decorative element that creates visual interest and adds color or texture. Choosing the right ribbon — perhaps a pale blush silk, a sage green, or a gold metallic — transforms the entire mood of the style.
Ribbon Weaving Technique
- Choose a ribbon that’s about 0.25 to 0.5 inches wide; thinner ribbons read more boho than thick ones
- Starting from one temple, take a thin section of hair and hold the ribbon next to it
- As you gently twist or braid the section, weave the ribbon through it, alternating between pulling the ribbon forward and letting it follow the hair
- Repeat on the other side, bringing both the hair sections and ribbons to meet at the back
- Secure with a small clip at the base, and let the ribbon hang down the back slightly
- Leave soft, face-framing pieces around your hairline completely loose
Pro tip: Use real silk ribbon rather than synthetic — it photographs better, feels better in your hair, and reads as more intentionally boho. It also moves more naturally as you move throughout your day.
Final Thoughts
The versatility of half up half down styling for short hair proves that you don’t need long lengths to achieve romantic, boho looks. From simple twisted sections and delicate clips to more intricate braids and ribbon weaves, there’s an approach for every hair type, skill level, and occasion. The core of boho styling — texture, asymmetry, intentional softness, and visible imperfection — actually works better on shorter lengths because each element reads more clearly without being diluted across long strands.
The real key to pulling off these styles is understanding that boho is about intention rather than perfection. Flyaways aren’t a problem; they’re a feature. A slightly-too-loose braid isn’t a failure; it’s the whole point. When you approach these styles with the philosophy that undone is the goal, suddenly every element that would traditionally be considered a mistake becomes your styling advantage. Your short hair isn’t limiting you from boho styling; it’s actually making it easier to achieve that effortless, romantically intentional aesthetic.
Start with whichever style appeals to you most, practice it a few times until it feels natural, and then experiment with variations. Add texture spray, try different clips, weave in ribbons, or incorporate flowers. The sixteen styles above are a starting point, not a rulebook. Boho styling thrives on personalization and adaptation. Your version of any of these styles should feel like yours, not like you’re copying exactly what someone else did.