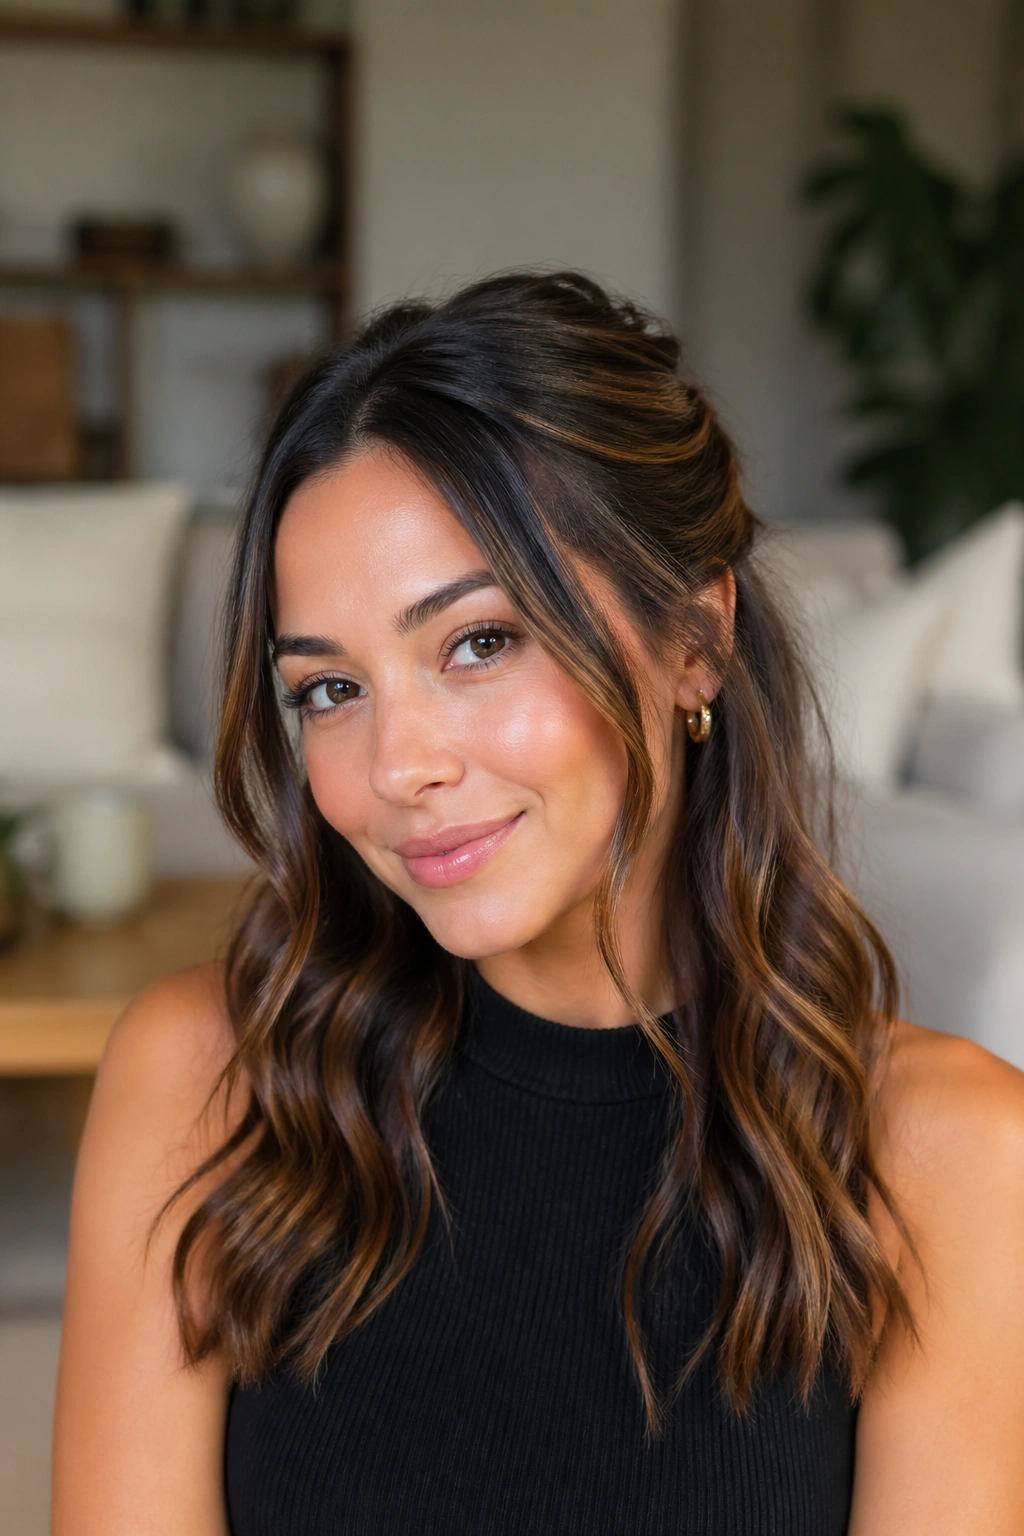
Half up half down hairstyles strike that perfect balance between polished and effortlessly undone—which is exactly why they’ve remained such a go-to for anyone looking to style their straight hair without committing to an entirely pulled-back look. There’s something incredibly versatile about this approach: you get the face-framing softness of hair down while simultaneously keeping the hair off your neck and face, which is practical for everything from workdays to special occasions. For straight hair specifically, half up styles work beautifully because the sleek, smooth texture of straight strands creates clean lines, defined sections, and a refined finish that makes even simple techniques look intentional and polished.
The real charm of half up half down styling lies in how customizable it is. You can dress it up with decorative elements, braid patterns, and intricate twists, or keep it minimal and modern with just a simple elastic and a few face-framing pieces. Straight hair is uniquely forgiving for these looks because it holds shape naturally without requiring heavy-duty styling products, and the way light reflects off smooth strands makes the overall style look shinier and more deliberately styled than it might on other hair textures.
What makes these styles particularly great for straight hair is that you can achieve them with minimal heat damage if you’re strategic about it. Many half up half down looks for straight hair actually look better without curling or straightening because your hair’s natural smoothness becomes a feature rather than something to fight against. Whether you’re prepping for a regular day or a special event, these eighteen looks will show you exactly how versatile and beautiful half up half down styling can be for straight hair.
1. The Classic Twisted Half Up

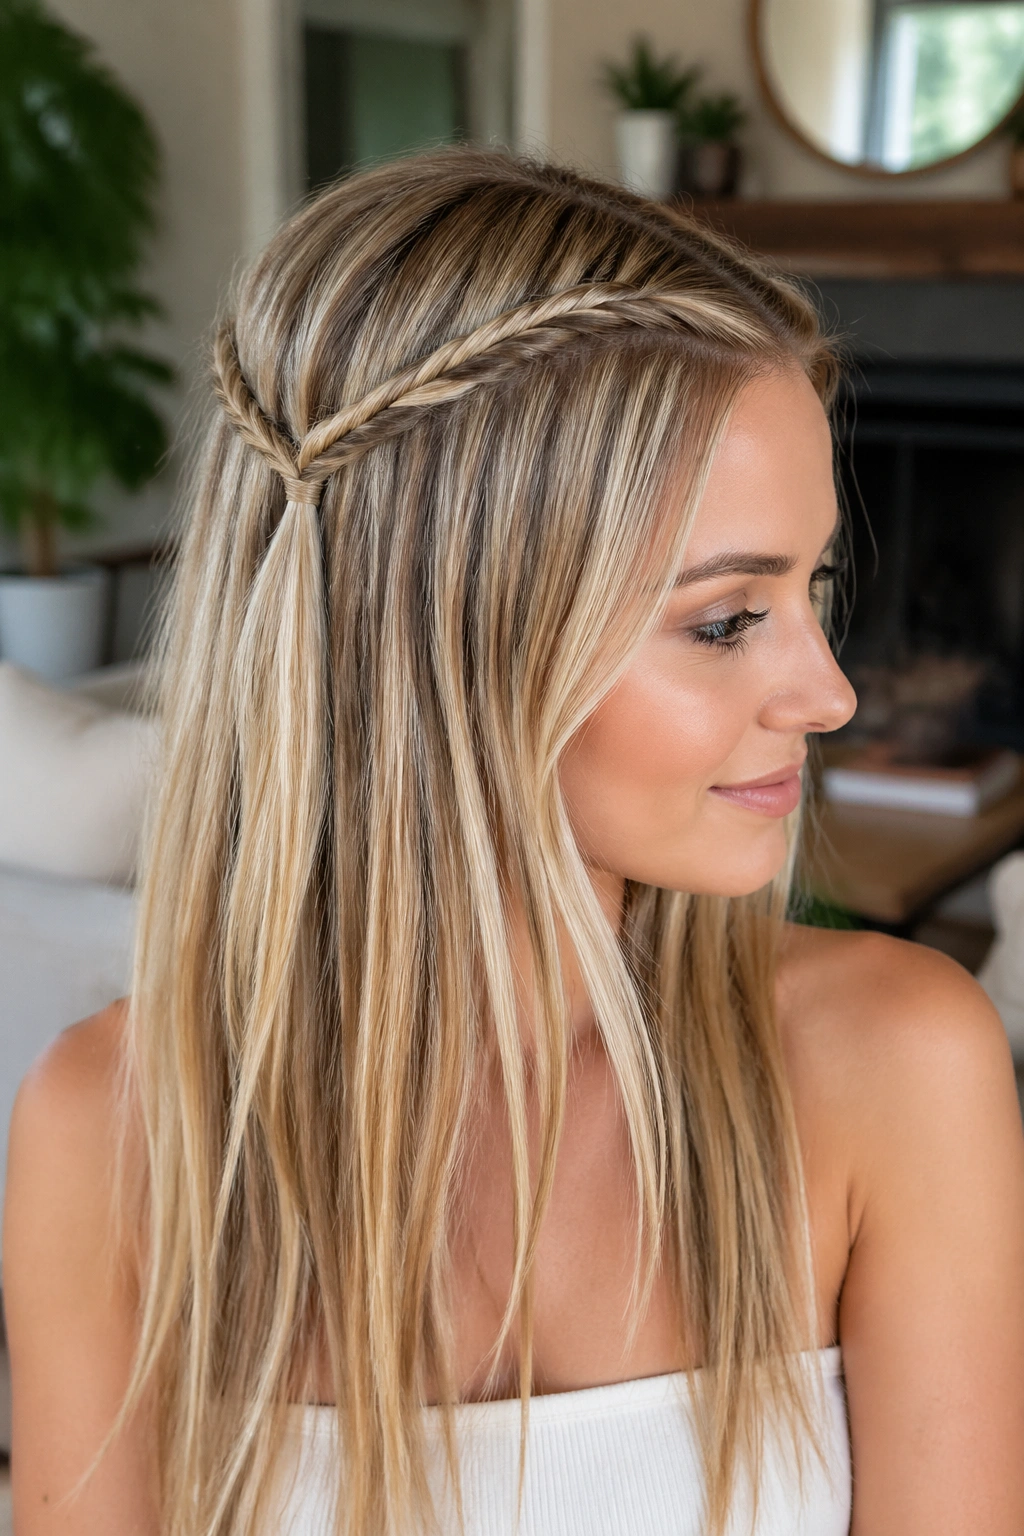
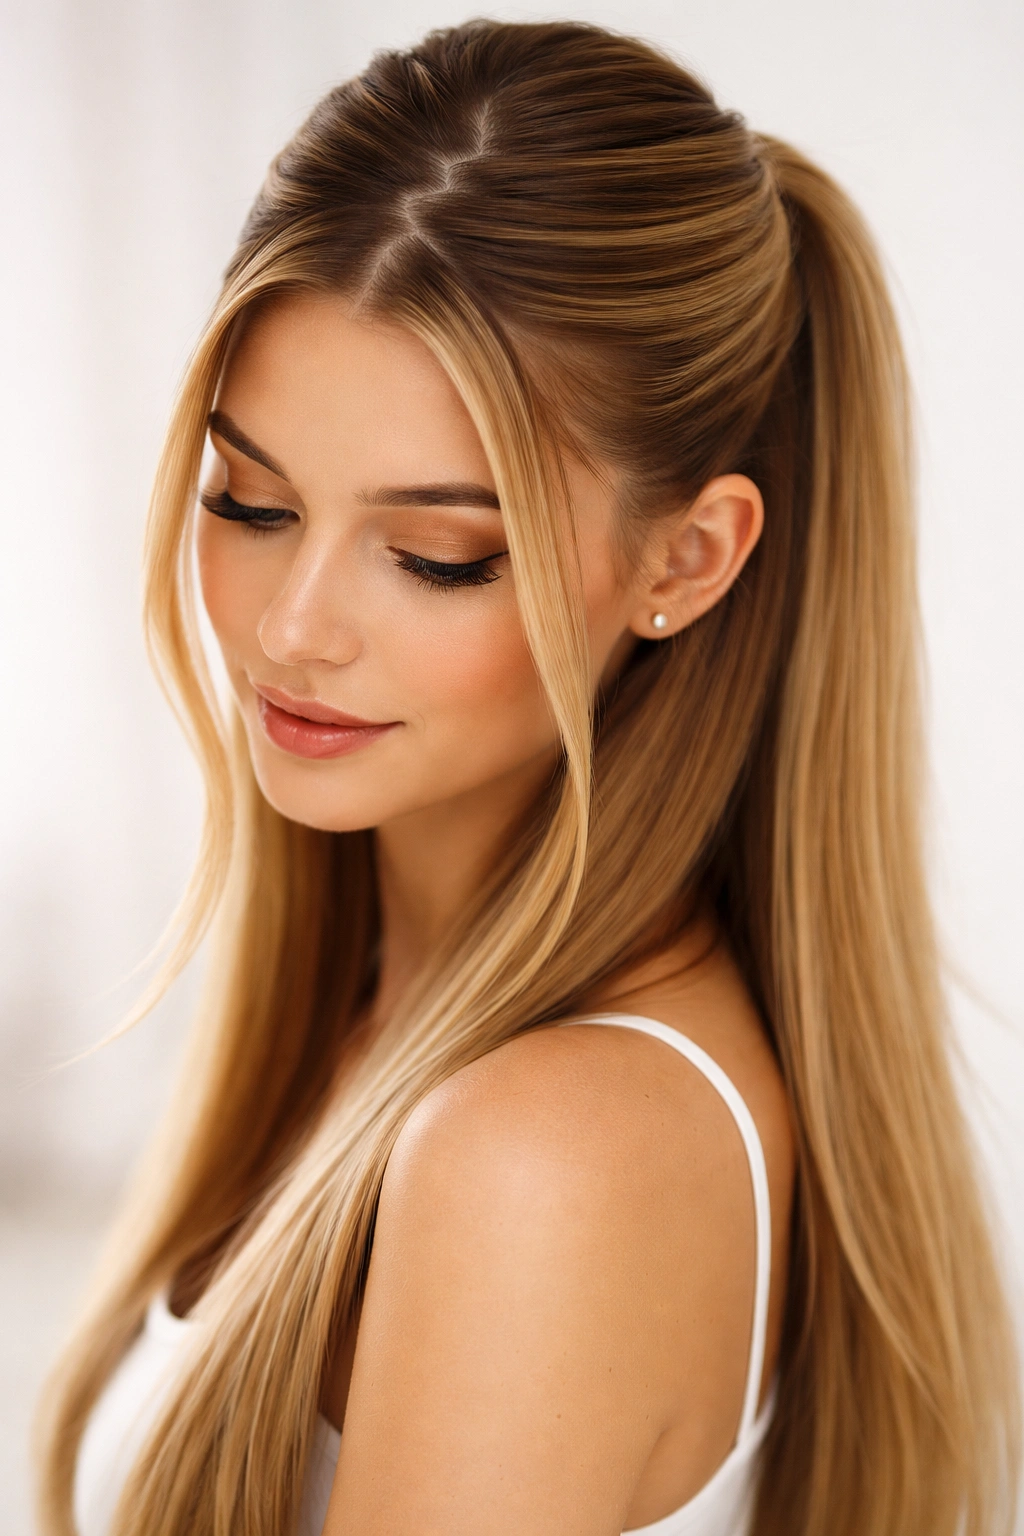
This is the foundation style that works beautifully for straight hair and serves as a jumping-off point for countless variations. You’re essentially taking a section from one side of your head, twisting it loosely as you work toward the back, and securing it with a clear elastic or bobby pins. The twist creates subtle texture and visual interest while keeping the style simple enough to wear on any day of the week.
Why It Looks Effortless
The beauty of a twisted half up on straight hair is that the twist creates a soft definition between the sections without requiring any additional styling. The smooth texture of straight strands actually enhances the twist because you can see the spiral pattern clearly—it looks intentional and refined rather than messy or underdone.
How to Get the Perfect Twist
- Start by brushing your hair smooth to eliminate any tangles or bumps at the crown
- Take a one-inch section from one side of your head at about ear level
- Twist it loosely as you work toward the back of your head, gathering a small amount of hair every inch or so
- Continue twisting until you reach the center back of your head
- Secure with a thin clear elastic, and gently tug on the twisted sections to loosen them slightly for a softer appearance
- Pin a small decorative clip or bobby pin at the base for a polished finish
Pro tip: Twisting toward the back rather than all the way across creates an asymmetrical look that feels more current and interesting than perfectly centered styling.
2. The Sleek Low Half Up with a Pearl Clip
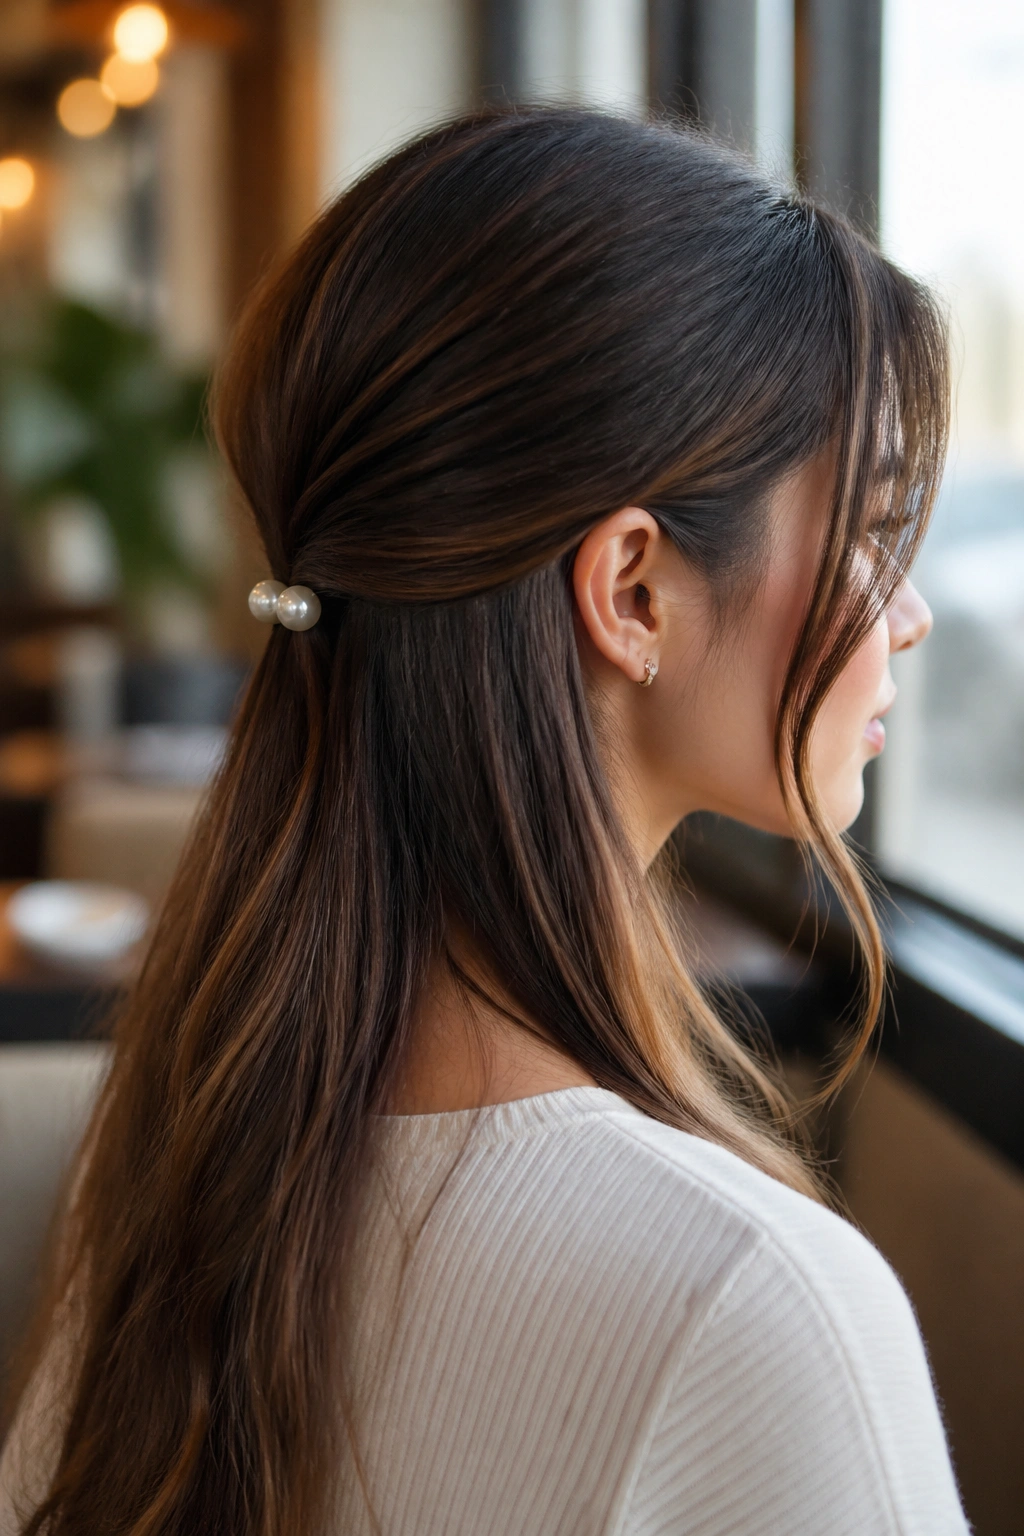
Taking the half up look lower—securing it closer to the nape of your neck—creates an unexpectedly sophisticated style that works for work, date nights, and everything in between. A pearl clip or elegant metal hair clip transforms the look from casual to dressy in seconds, making this a brilliantly versatile option.
Making It Work for Straight Hair
Straight hair’s natural smoothness makes low half up styles look refined rather than limp. The clean lines at your hairline and the visible separation between the up and down sections create a polished, intentional appearance without extra styling effort.
Styling Steps
- Brush your hair smooth and straight—no heat required unless you want extra shine
- Take a one-inch section of hair from the crown area on each side
- Bring both sections to the center back of your head, approximately two inches above your neck
- Secure with an elastic, and clip a decorative hair clip at the elastic’s base
- Leave the front sections loose and face-framing for a romantic touch
Worth knowing: The lower you place your half up, the more formal and intentional the style reads. This positioning works particularly well for sleek ponytails alternatives or when you want a polished look without the commitment of a full updo.
3. The Boho-Inspired Braided Half Up
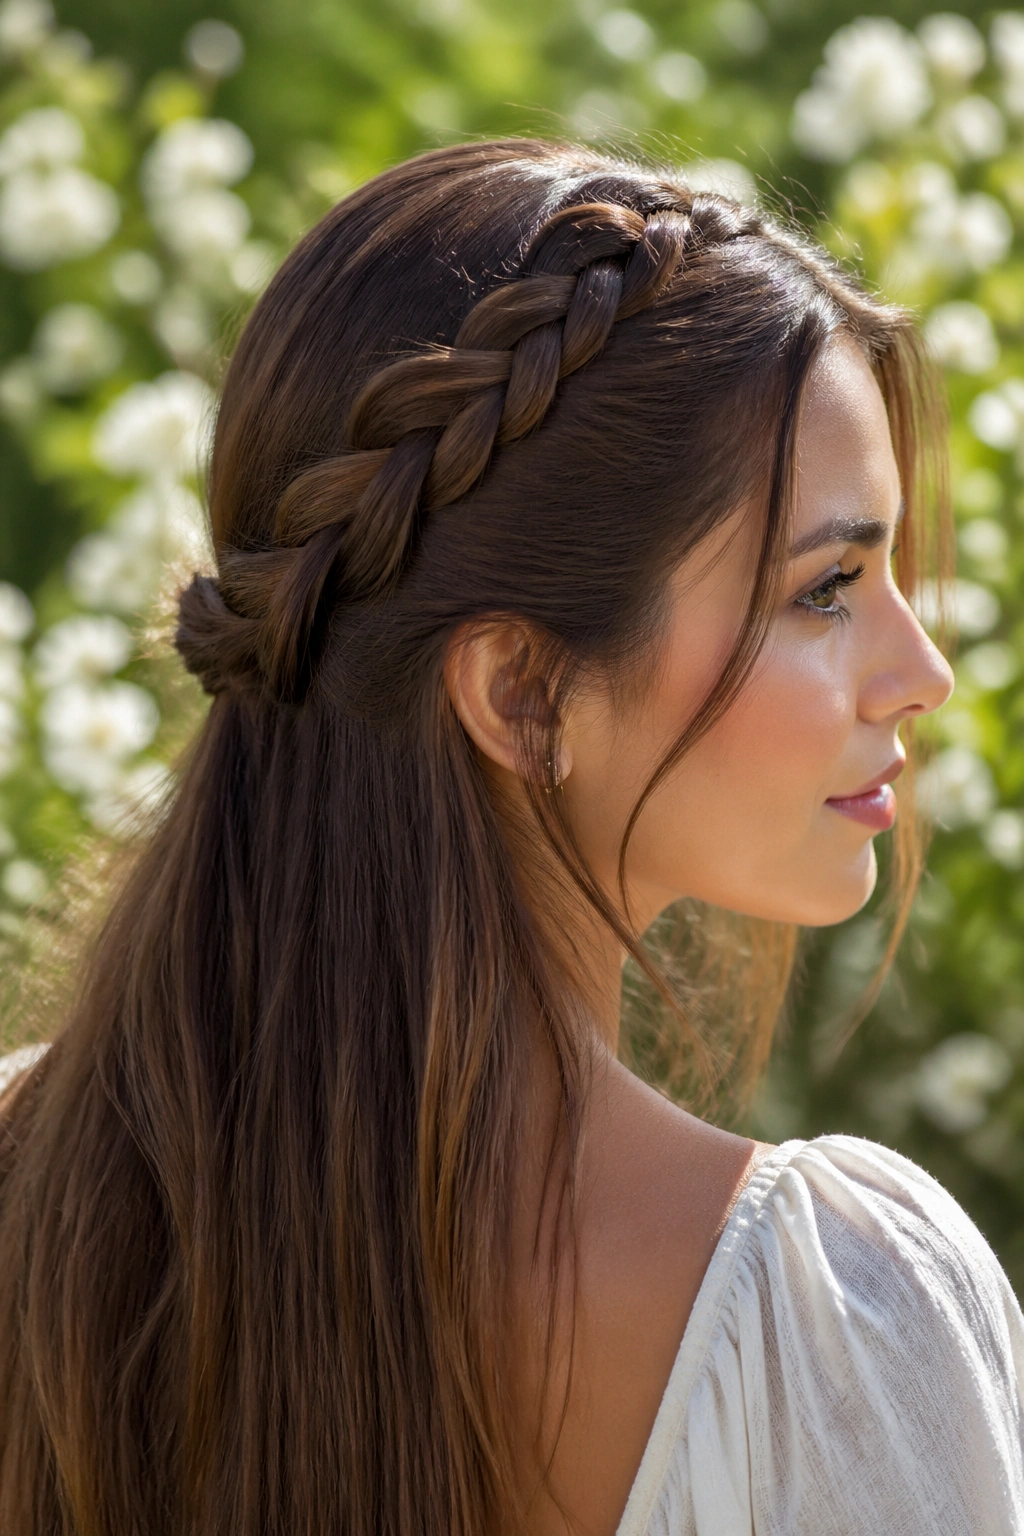
Braids add texture and visual interest to straight hair while maintaining that effortless boho aesthetic that never goes out of style. This look combines the best of both worlds: the pretty, undone feeling of half down styling with the slightly more dressed-up vibe of a braid.
Creating Texture in Straight Hair
Straight hair can sometimes look too flat when styled simply, but adding a braid immediately creates dimension and movement. The braid catches light differently than straight sections, making your whole style appear more dynamic and intentional.
Braid Technique for Beginners
- Divide your hair into a side part, with slightly more hair on one side
- Take a three-inch section from the fuller side, starting at the crown
- Create a basic three-strand braid, working downward and slightly toward the back
- Once you reach the center back, secure the braid with a small elastic
- Gently pull the braid sections apart to make it look fuller and softer
- Leave the opposite side completely down and face-framing for balance
Insider note: The key to making a braid look intentional rather than tight is to pull on each section as you braid. This loosens the braid immediately and creates that coveted textured, effortless appearance.
4. The Double Half Up with Mini Buns
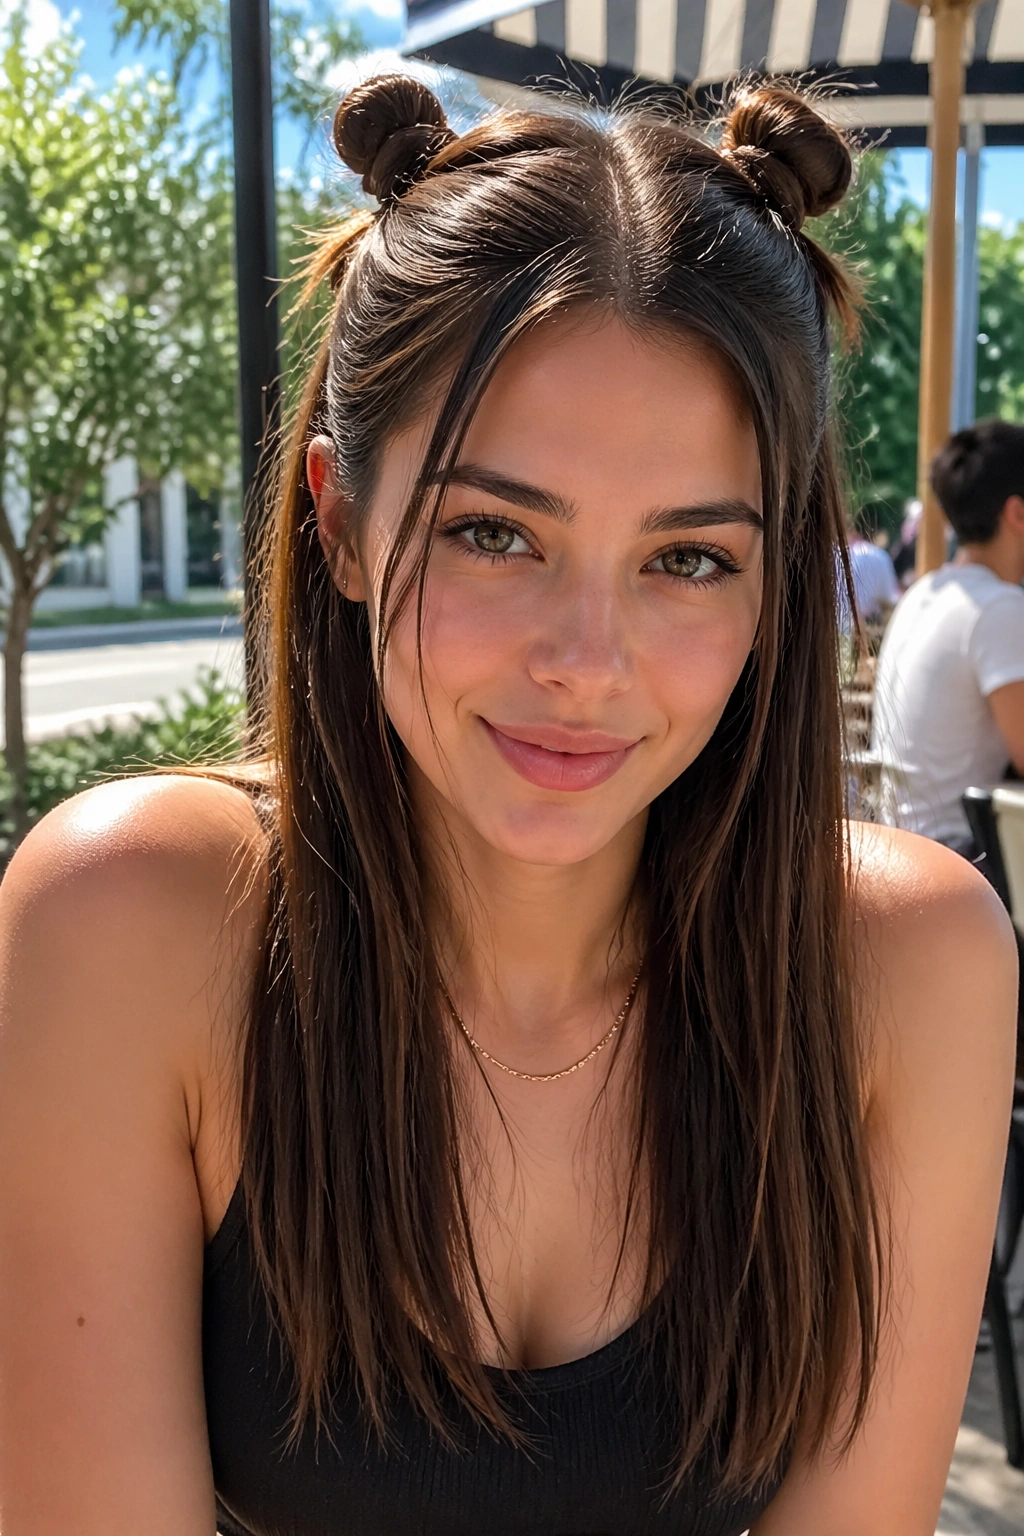
Two small sections twisted and secured, then curled into little buns at the crown, create an adorably playful style that works for casual outings, vacation days, or when you want something that feels youthful without being costume-like.
Making Mini Buns Look Polished
The secret to mini buns on straight hair is keeping them loose and undone rather than tight and perfect. Straight hair’s natural smoothness actually helps here—even a deliberately messy bun looks intentional because the base strands frame it so clearly.
Step-by-Step for Mini Buns
- Take a one-inch section from each side of your head at ear level
- Twist each section toward the center back
- Secure each twist with a small clear elastic just above where the two sections meet
- Gently curl each twisted section into a loose bun and secure with bobby pins
- Leave several face-framing pieces loose on each side
- Pull a few pieces from the buns to soften them and create intentional texture
Pro tip: Skip the bobby pins that match your hair color and use ones slightly lighter or darker for an intentional, contrasting look that reads as deliberate styling rather than hidden securing.
5. The Sleek Straight-Across Half Up
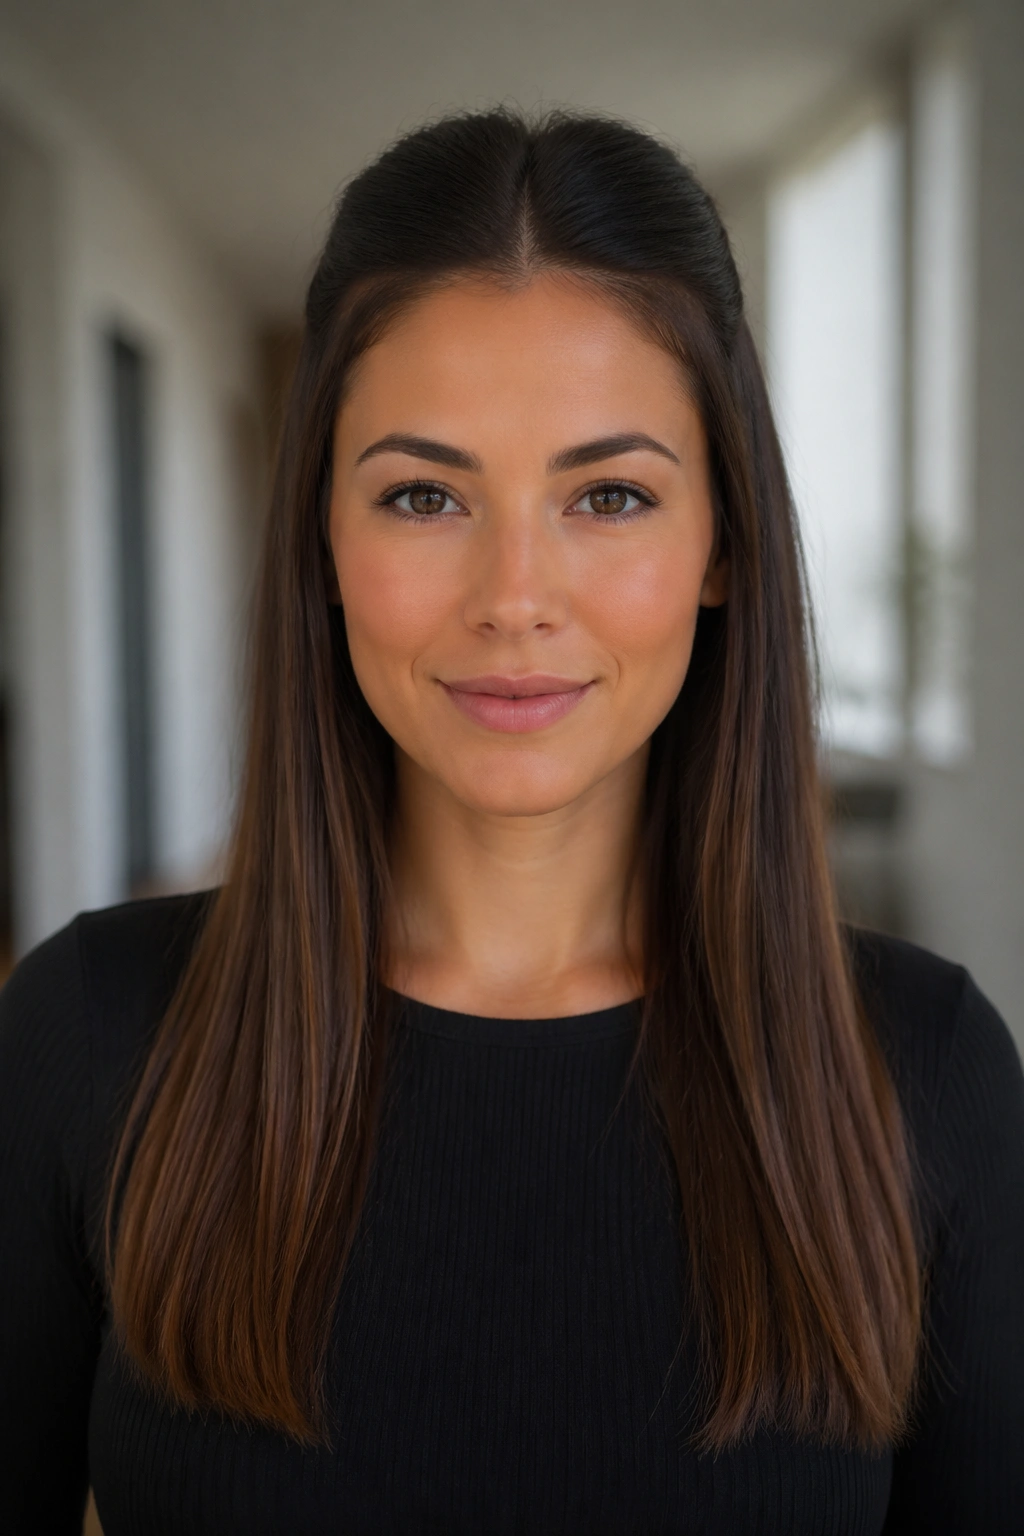
Sometimes the most elegant choice is the simplest: a clean, straight line across the back of your head where the up and down sections meet. This ultra-modern approach works beautifully for straight hair because the horizontal line you create looks sharp and intentional.
Why Straight Hair Shines Here
Straight hair’s uniform texture creates a perfect line of demarcation between the secured section and the down section. This clean separation is exactly what makes this minimalist approach feel so polished and contemporary.
Achieving the Straight-Across Look
- Brush all your hair back smoothly with a fine-toothed comb
- Imagine a line running horizontally from the top of one ear to the other, passing over the crown
- Clip the upper section back and out of the way temporarily
- Take the upper section and secure it at the crown with a thin elastic in a neutral shade
- Smooth any flyaways with a lightweight serum or styling cream
- Ensure the line between up and down sections is completely straight and even
Worth knowing: This style can read as slightly severe on some face shapes, so pairing it with a face-framing moment—like soft baby hairs or slightly wispy pieces at the temples—softens the overall effect.
6. The Twisted Crown Half Up
Taking two thin twists from opposite sides of your head and crossing them over the crown before securing them creates a delicate, sophisticated style that feels special without requiring complicated techniques.
The Crown-Crossing Technique
This variation of the twisted half up adds visual interest by creating an X or crossover pattern at the crown. For straight hair, this geometric approach looks modern and intentional.
How to Execute It
- Section off a one-inch piece from the right side of your head near your temple
- Twist it loosely as you work toward the back of your head
- Do the same on the left side, starting at the same height
- Cross the right twist over the left at the crown of your head, creating an X pattern
- Continue the left twist over to the right side
- Secure both twists together at the center back with bobby pins or a decorative clip
- Pull gently on the twist sections to create softness and dimension
Pro tip: Twisting in opposite directions (one clockwise, one counterclockwise) makes the crossing pattern more visually striking and intentional-looking.
7. The Half Up with Wispy Face-Framing Pieces
This is all about intention with the pieces you leave down. Rather than securing everything that’s not part of the half up, you deliberately leave thin, wispy sections at your temples and around your face that soften the overall look and create a romantic, feminine aesthetic.
Styling Straight Hair with Purpose
Straight hair’s smooth texture means wispy pieces stay exactly where you put them. They won’t frizz out or break away from the secured section, so you can create deliberate, intentional face-framing that looks refined rather than like you forgot to secure some hair.
Creating Intentional Wispy Sections
- Before creating your half up, take a very thin section from each temple and clip it out of the way
- Create your half up as normal (twisted, braided, or simply secured)
- Release the temple pieces and let them frame your face
- If desired, gently curve them around your face by running them between your fingers or using a small-barrel curling iron set to low heat
- Smooth the rest of your down hair with a serum for contrast between the textured face-framers and the sleek lengths
Worth knowing: The contrast between smooth down hair and slightly wavy face-framing pieces creates visual interest and makes the style feel intentional rather than accidental.
8. The Slicked-Back High Half Up with a Statement Clip
Creating a super-polished, slicked-back secured section at the crown and finishing it with a statement clip—think tortoiseshell, metal, or jeweled—transforms a simple half up into a head-turning style that works for special occasions or when you want to look particularly put-together.
Achieving the Slicked Look on Straight Hair
Straight hair is your secret weapon here. A light smoothing serum or gel creates that coveted slicked-back appearance without looking greasy or over-processed. The uniformity of straight hair means the slicked-back section looks intentionally sculpted rather than matted.
Steps for Slicked Perfection
- Apply a smoothing serum or lightweight gel to the upper portion of your hair
- Use a fine-toothed comb to brush the upper section smoothly back toward the crown
- Secure at the crown with a thin elastic in a neutral color
- Top the elastic with a statement clip in a color or material that complements your outfit
- Ensure no flyaways are visible—use the comb and serum to tame any strays
- Keep the lower section smooth and sleek as well for a cohesive, polished look
Pro tip: A tortoiseshell clip works with nearly every hair color and outfit, while metallic clips elevate the look to something more formal and evening-appropriate.
9. The Bubble Braid Half Up
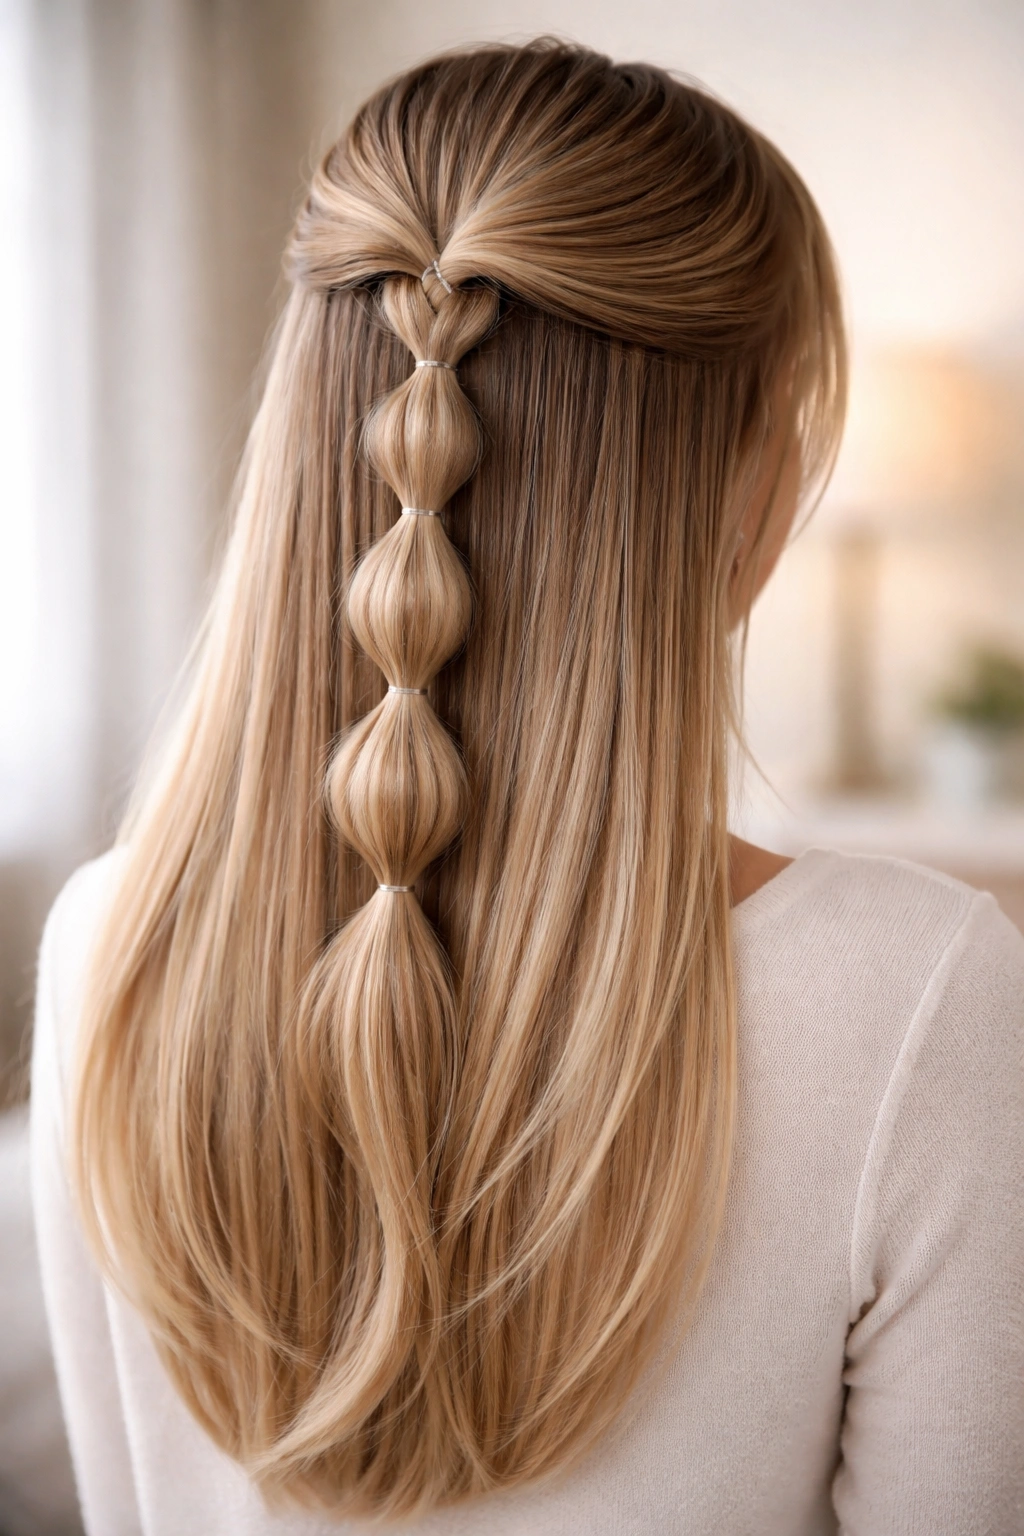
Creating a series of small sections secured with elastics along the twisted or braided half-up section creates a fun, dimensional bubble effect that’s surprisingly easy to achieve and instantly upgrades a simple half up to something more visually interesting.
Why Bubble Braids Work on Straight Hair
The geometric quality of the bubbles—round, full sections separated by clear elastic markers—looks intentional and modern on straight hair. The smoothness of straight strands makes each bubble look defined and purposeful rather than lumpy or irregular.
Creating the Bubble Effect
- Create a simple twisted or loosely braided half up, secured with an elastic at the center back
- Starting from the top, insert a new elastic about one inch down the length of your braid or twist
- Gently pull the section above the elastic outward and upward to create a bubble shape
- Continue adding elastics every inch down the length of your braid, creating bubbles as you go
- Pull each bubble slightly larger than the last as you move downward for a graduated effect
- Ensure each bubble looks full and intentional, not sparse or uneven
Worth knowing: Using clear elastics makes this style look modern and clean, while colored elastics matching your hair create a more subtle, unified appearance.
10. The Half Up Half Down with a Velvet Ribbon
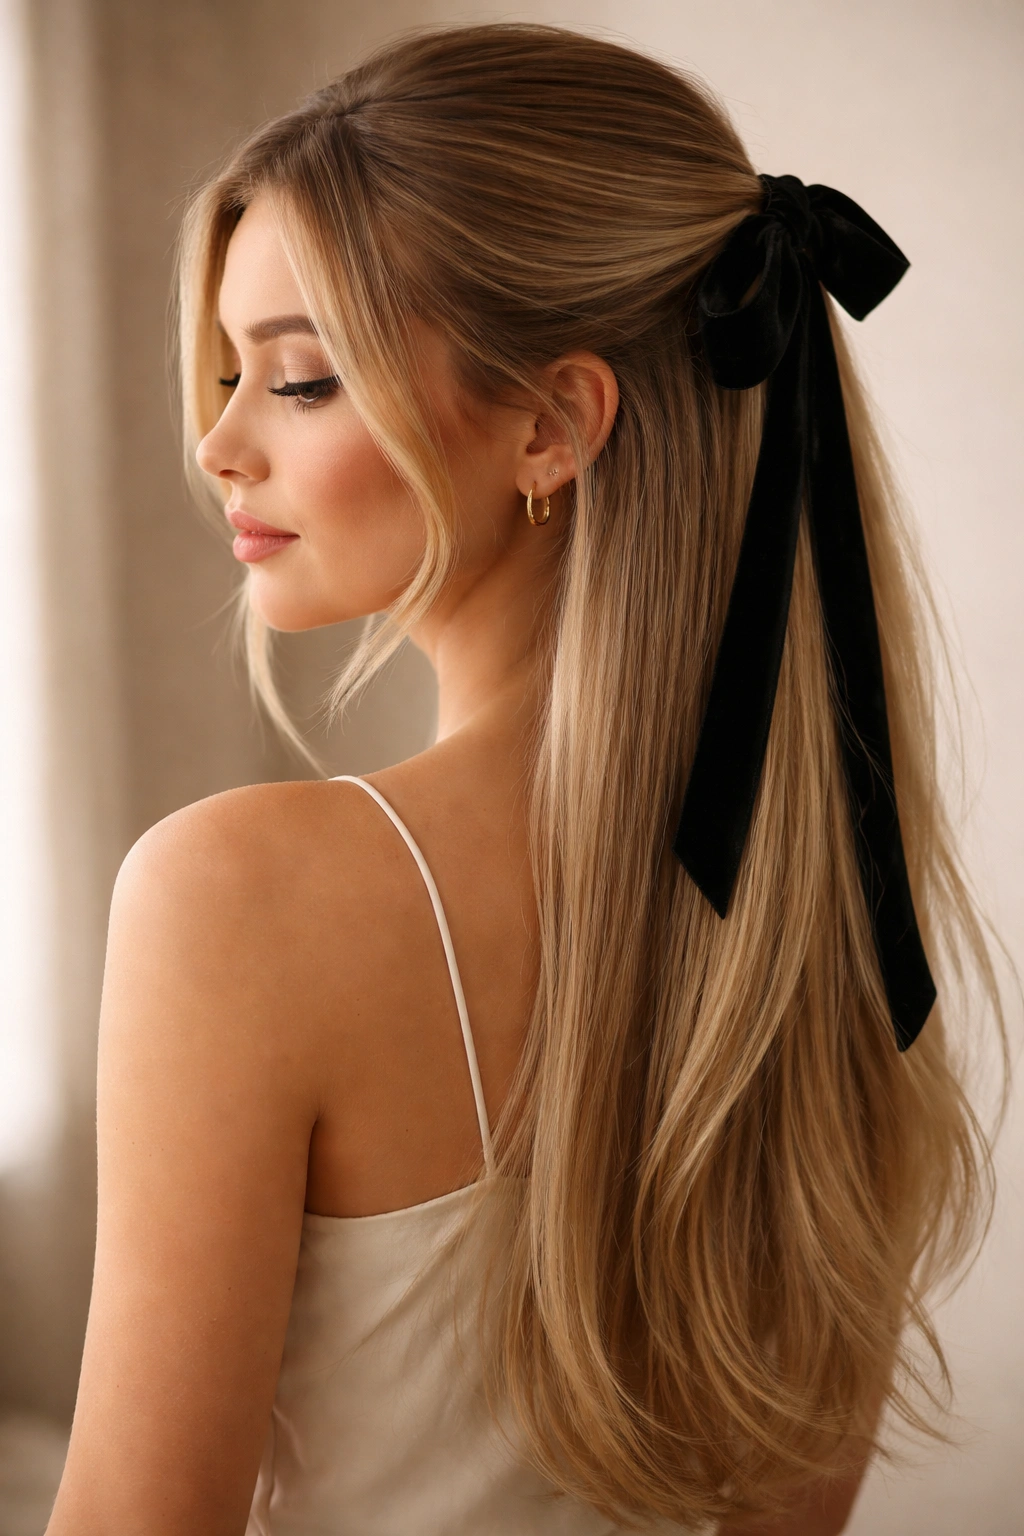
Integrating a velvet ribbon into your half up section—either by weaving it through a braid, tying it around a twisted section, or adding it as a decorative element at the base—instantly elevates the style from everyday to special occasion while maintaining that effortless half down aesthetic.
Selecting Ribbons for Straight Hair
Velvet and satin ribbons create a luxe appearance that works beautifully with the smooth texture of straight hair. The ribbon’s sheen contrasts beautifully with straight strands, making the overall style feel intentionally styled and elevated.
How to Incorporate Ribbon
- Take a twisted or braided half-up section as your base
- Secure the section at the back with an elastic
- Take a velvet ribbon approximately two inches wide in a complementary color
- Wrap the ribbon around the base of your secured section, covering the elastic
- Tie the ribbon in a bow or knot, or simply wrap it and secure the ends with bobby pins hidden underneath
- Adjust the secured section and ribbon so they look balanced and intentional
- Leave the ribbon ends to flow down slightly with your down hair for an ethereal touch
Pro tip: Coordinate the ribbon color to your outfit rather than your hair color for maximum visual impact.
11. The Zigzag Parting Half Up
Using a zigzag comb to create a zigzag parting line across the crown, then securing the upper section, creates a playful, textured look that’s unexpected and fun while remaining polished enough for most occasions.
Creating the Zigzag Effect
The zigzag parting creates visual interest at the crown without requiring elaborate techniques. On straight hair, the crisp lines of the zigzag are immediately visible and intentional-looking.
Steps for Zigzag Parting
- Use a zigzag comb (or the pointed end of a regular comb used in a zigzag motion) to create a parting line across the crown from one ear to the other
- The parting should start at one temple and zigzag across to the other temple
- Clip the upper section back temporarily
- Take the upper section and gather it into a half-up style: twisted, braided, or simply secured in a ponytail at the crown
- Secure with an elastic or clip
- Release the lower section and ensure it’s smooth and separated from the upper section by the zigzag parting line
- The zigzag should be clearly visible and create a playful, intentional visual element
Worth knowing: This is a particularly fun style for casual occasions, events where you want to stand out, or any situation where adding a little personality to your look feels appropriate.
12. The Half Up with a Claw Clip in a Contrasting Shade
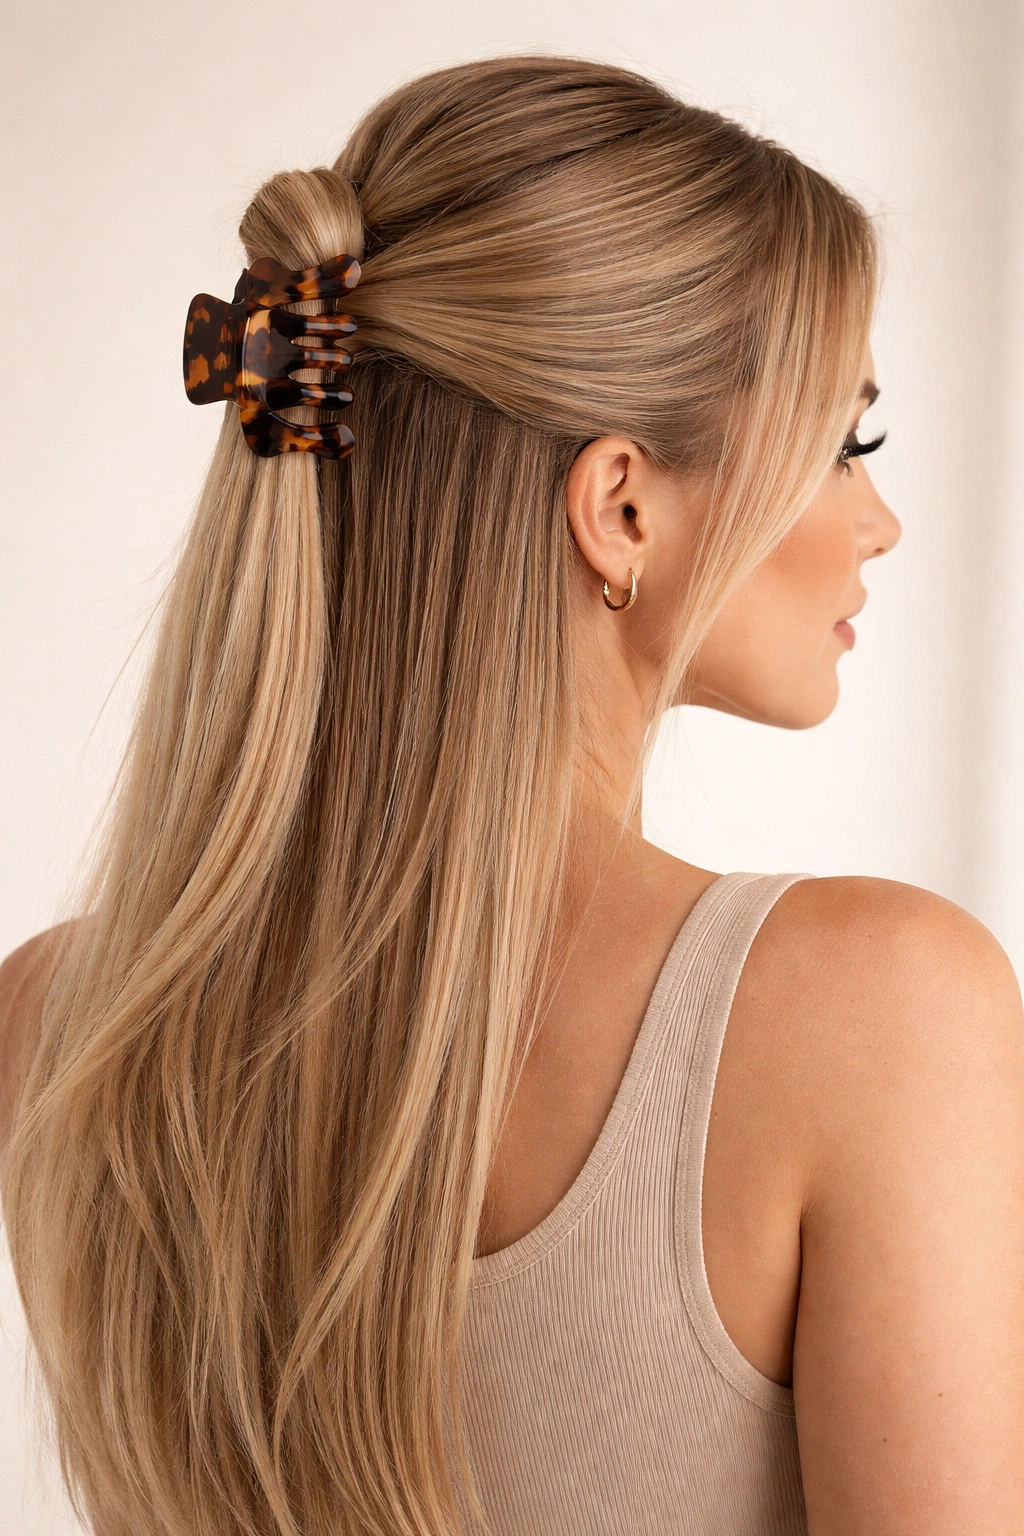
Trading in traditional elastics for a claw clip in a shade that contrasts with your hair—tortoiseshell on blonde or dark hair, clear on dark hair, or a jeweled clip regardless of shade—immediately upgrades the visual appeal of any half up style while adding a contemporary, intentional accessory moment.
Why Claw Clips Transform Half Up Styles
A claw clip instantly reads as intentional accessorizing rather than functional hair management. On straight hair, the clip sits cleanly against your strands without disappearing or getting lost, making it a visible styling element rather than a hidden fastener.
Styling with Claw Clips
- Create your preferred half up style: twisted, braided, or simply gathered
- Instead of securing with an elastic, use a claw clip at the base of your gathered section
- Position the clip so it’s visible and becomes part of the overall aesthetic
- Ensure the clip isn’t so tight that it creates a crease or dent in your secured hair
- Consider the clip a fashion statement—choose sizes and colors that complement your outfit
- Multiple smaller claw clips distributed along the length of a braid creates a particularly modern, intentional look
Pro tip: Tortoiseshell claw clips work with virtually every look and add a classic, sophisticated touch that feels more elevated than simple elastics.
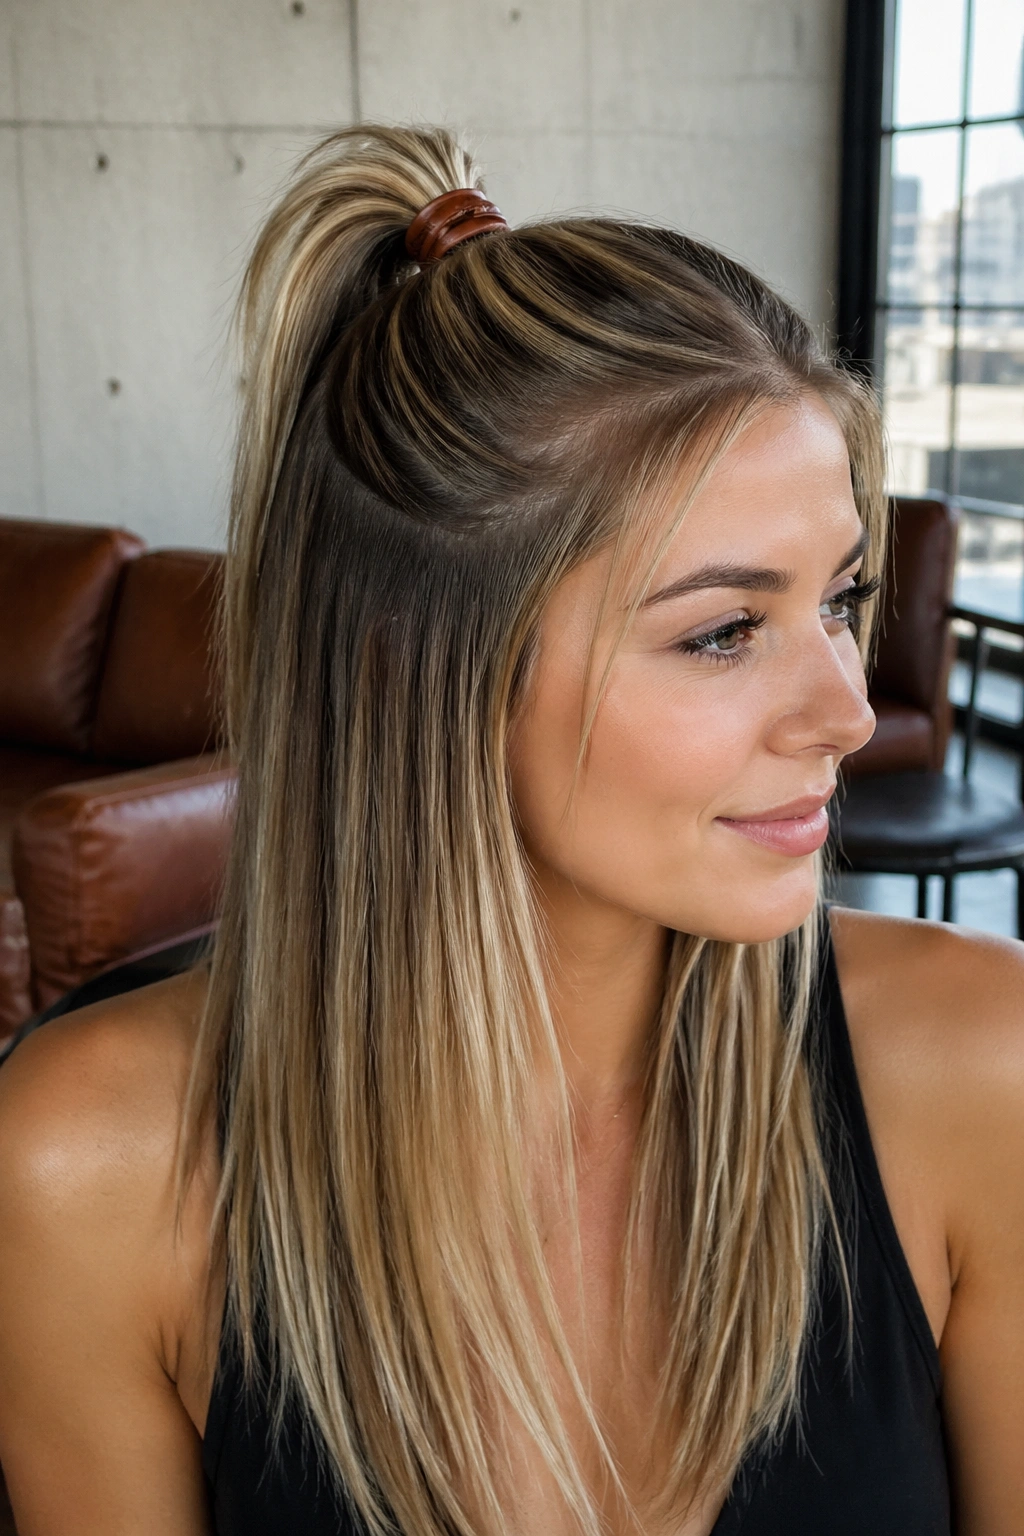
13. The Soft, Loose Low Bun Half Up
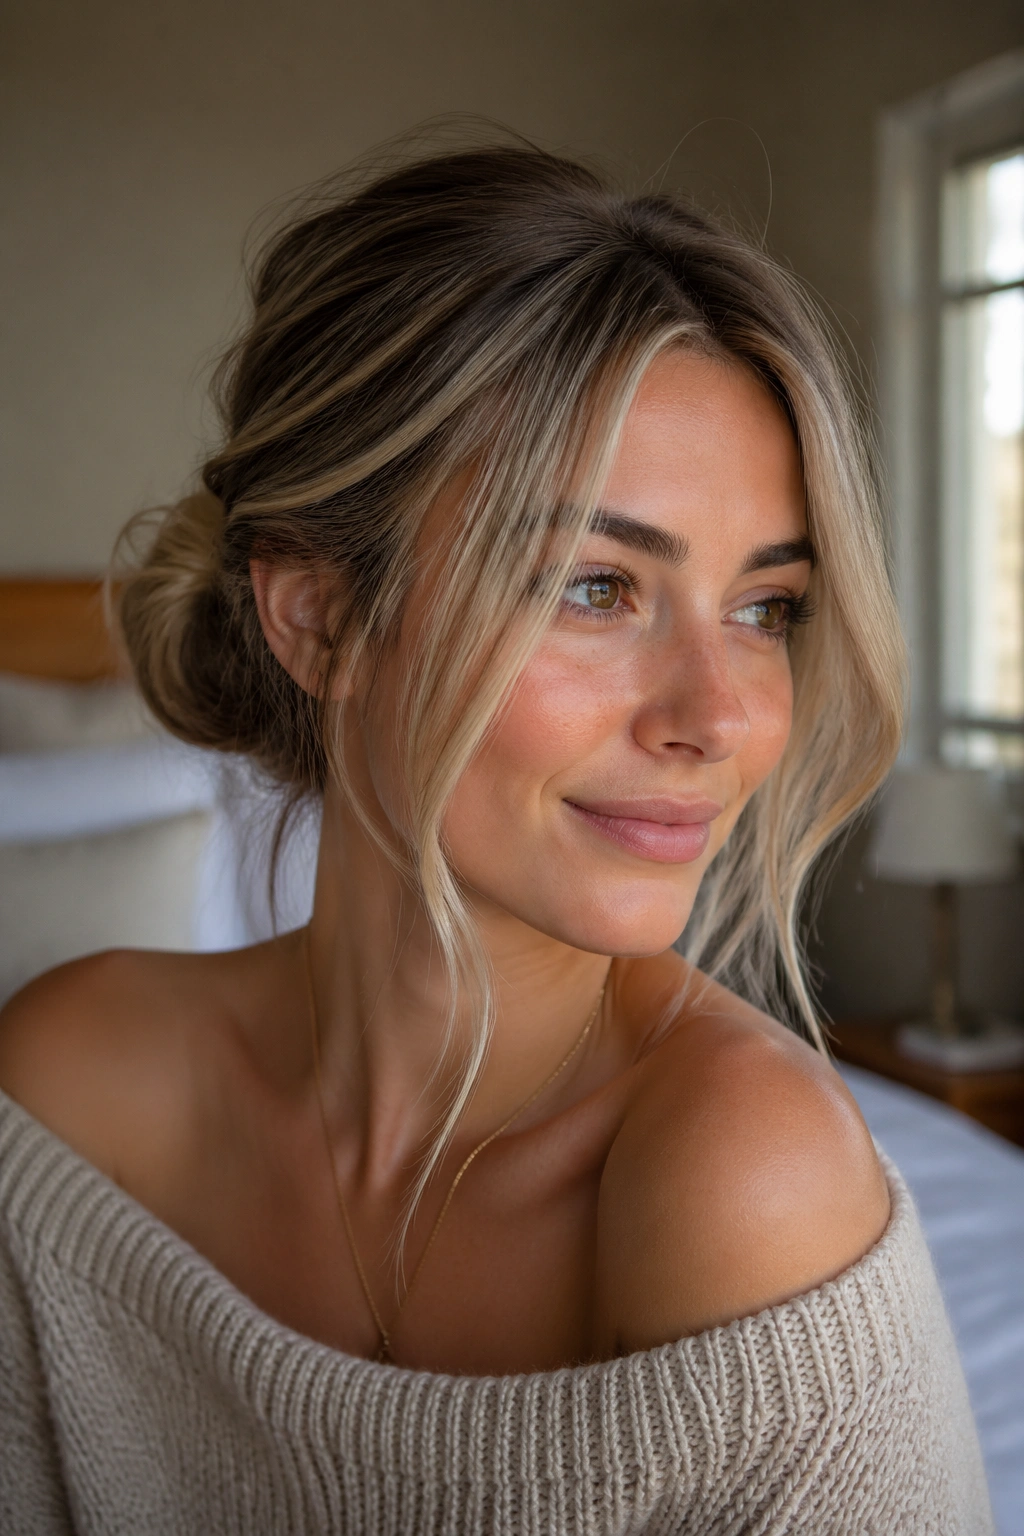
Securing a low half-up section into a soft, loose bun at the back of your head creates a sophisticated style that’s somewhere between a half up and a half-bun—perfect for situations where you want more secured hair than a simple half up but less of a commitment than a full updo.
Creating Softness in Straight Hair
Straight hair can sometimes look too neat and polished, which is exactly why you want to deliberately soften this style. Pulling sections from the bun, creating intentional texture, and leaving face-framing pieces loose all work together to make a low bun half-up feel romantic and intentional rather than severe.
How to Build a Soft Low Bun Half Up
- Gather the upper half of your hair at the crown and secure with an elastic
- Take this gathered section and create a loose bun at the back of your head (slightly lower than the crown)
- Don’t spiral the hair tightly—instead, loosely bunch it and secure with bobby pins
- Pull several sections gently from the bun to create intentional texture and softness
- Leave face-framing pieces loose on each side
- Use a light smoothing serum on the bun’s base to make it look intentionally styled rather than messy
Worth knowing: This style walks a beautiful line between casual and polished, making it perfect for work events, casual dates, or any occasion where you want to look put-together without appearing overdressed.
14. The Half Up with Micro Braids Woven Through
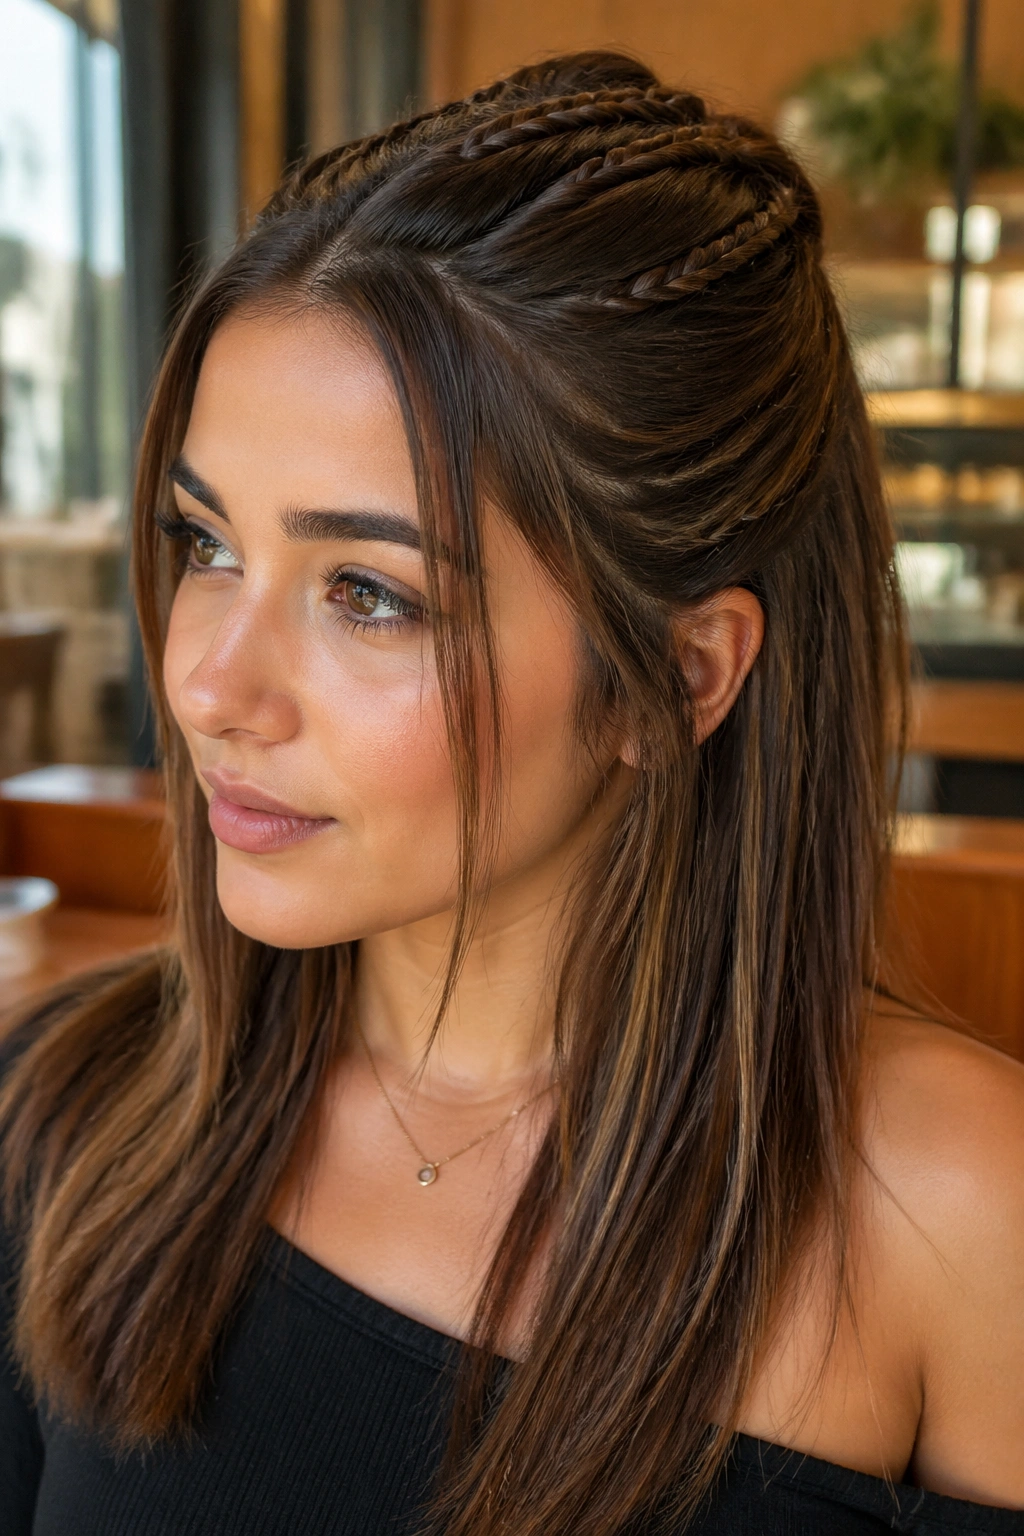
Taking several thin micro braids, weaving them through a twisted or gathered half-up section, and securing them all together creates a delicate, intricate-looking style that actually requires far less skill than it appears to.
Building Complexity in Straight Hair
Straight hair shows texture beautifully, so multiple thin braids create impressive visual complexity without requiring difficult techniques. The uniformity of straight strands means the braids sit cleanly against the head and each other.
Creating Micro Braids in Your Half Up
- Take a simple twisted or gathered half-up section and secure it loosely with an elastic
- Create three to five very thin (quarter-inch wide) micro braids from sections within your gathered area
- These braids should begin at the crown and end at the base of your half-up section
- Weave one or two of the braids through the twisted or gathered section, securing ends with bobby pins
- Leave one or two braids loose as decorative elements
- Pull gently on all the braids to soften them and create intentional texture
Pro tip: Practice micro braids on a willing friend or a braid practice head before attempting this on yourself, as coordinating multiple thin braids requires some spatial awareness.
15. The Half Up with Piece-y Waves in the Down Section
Creating gentle waves or texture in just the down section of your half up—while keeping the secured section smooth and straight—creates a beautiful contrast between sleek and textured that’s modern and visually interesting.
Combining Straight and Textured Elements
This style is all about intentional contrast. The smooth, secured upper section frames your face cleanly while the wavy lower section adds dimension and texture. On straight hair, this contrast is particularly striking because the difference between straight and wavy is so visually clear.
How to Create This Look
- Create your preferred half up style: twisted, braided, or simply secured at the crown
- Use a large-barrel curling iron or wand to add soft, loose waves to the down section
- Curl away from your face on each side for a face-framing effect
- Leave the waves loose and natural-looking rather than tight or controlled
- Use your fingers to break up the waves slightly once they cool
- Apply a light styling cream or serum to create definition and separation in the waves
Worth knowing: The key to making this style cohesive is ensuring the contrast between smooth and wavy feels intentional. If the waves are too subtle, the style looks unfinished; if too dramatic, it looks mismatched.
16. The Half Up with a Leather Hair Tie
Securing your half up with a sleek leather hair tie instead of a traditional elastic transforms the entire vibe of the style. Leather immediately reads as intentional accessorizing and adds an edge or sophistication depending on the leather’s color and finish.
Why Leather Works for Straight Hair
Leather sits cleanly against smooth straight hair without sliding or rotating the way some elastics do. The material’s weight and texture create a visible accessory moment rather than a functional fastener that disappears into your hair.
Styling with Leather Hair Ties
- Create your preferred half up style: twisted, braided, or gathered
- Secure with a leather hair tie in black, cognac, white, or a color that complements your outfit
- Position the tie so it’s visible and becomes part of the overall aesthetic
- Consider the leather tie a fashion statement equal to your accessory choices
- Wider leather ties work better for thicker hair sections; thin leather ties suit finer hair
- Layer multiple leather ties in complementary colors for a particularly intentional, coordinated look
Pro tip: A black leather tie works with virtually every aesthetic and adds instant sophistication, while cognac or tan leather reads as warmer and more approachable.
17. The Half Up with Extended Face-Framing Strands
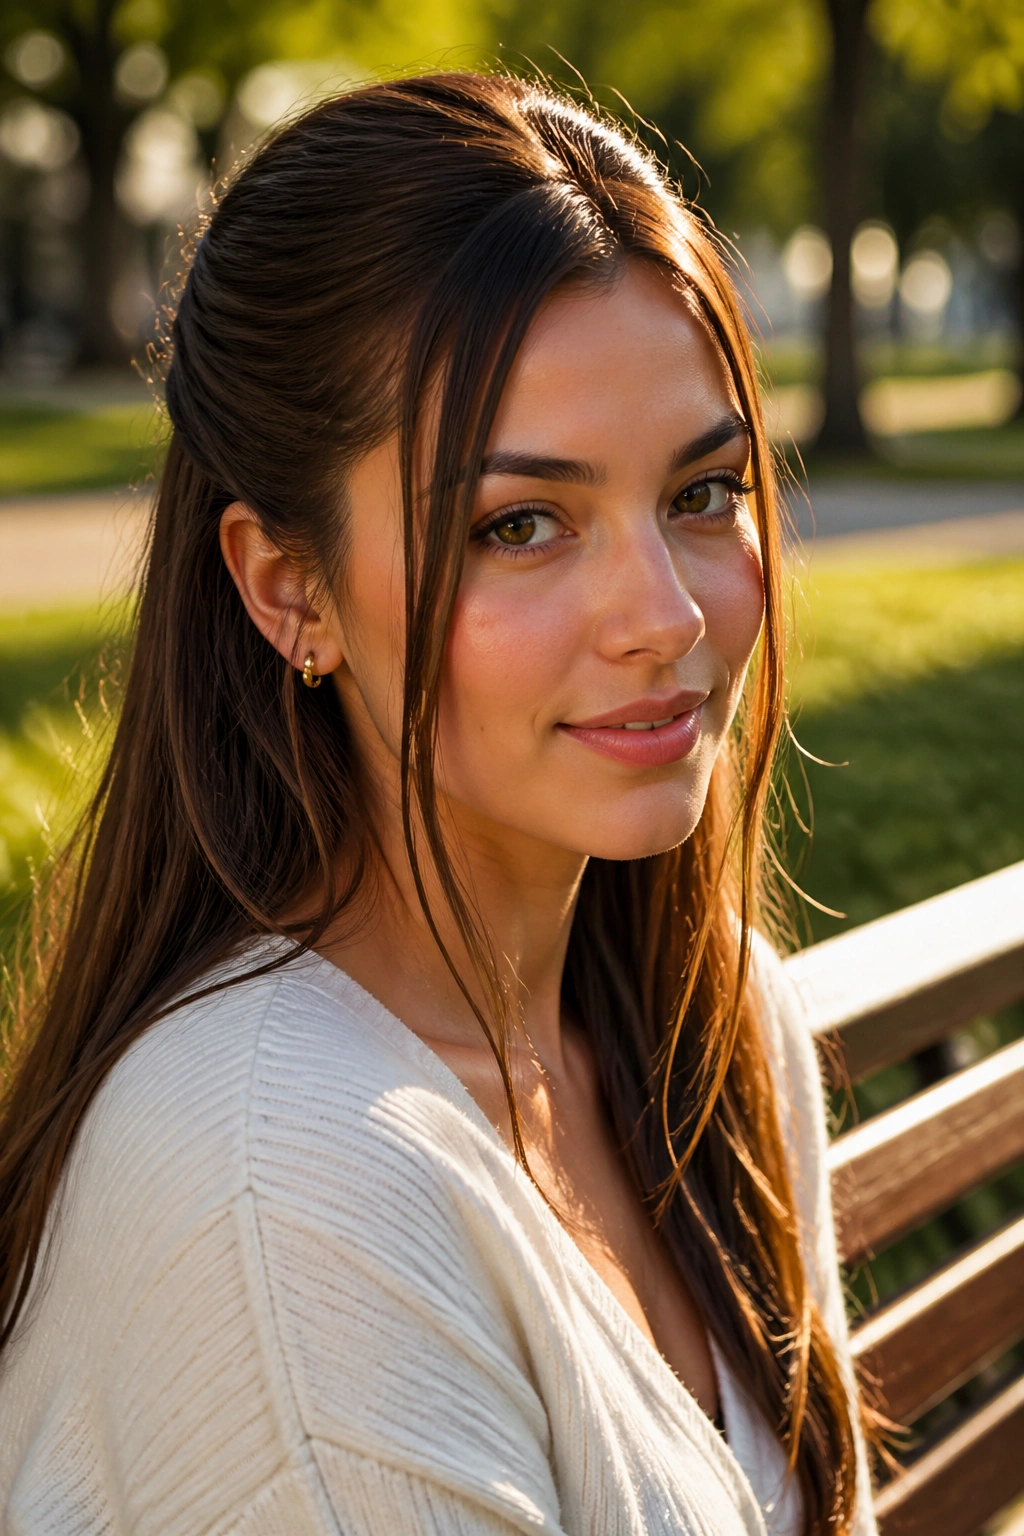
Deliberately leaving longer pieces out of your secured section to frame your face—much longer than micro wispy pieces—creates a romantic, soft aesthetic that works beautifully on straight hair because the longer pieces maintain their shape without constant adjustment.
Styling Longer Face-Framing Pieces
Straight hair holds the shape of longer face-framing pieces without frizzing or breaking away, so you can style them intentionally and know they’ll remain exactly where you positioned them throughout the day.
Creating Extended Face-Framers
- Before securing your half up, take a one-inch section from each temple
- Clip these sections away from your working area
- Create your preferred half up style with the remaining hair
- Release the temple pieces and let them fall alongside your face
- These pieces should be long enough to reach your collarbone or beyond
- If desired, add subtle waves to these pieces using a curling iron for additional softness
- Ensure these pieces feel intentional and part of the overall style rather than accidentally left out
Worth knowing: This style works particularly well for oval or long face shapes, as the longer pieces help frame and balance facial proportions.
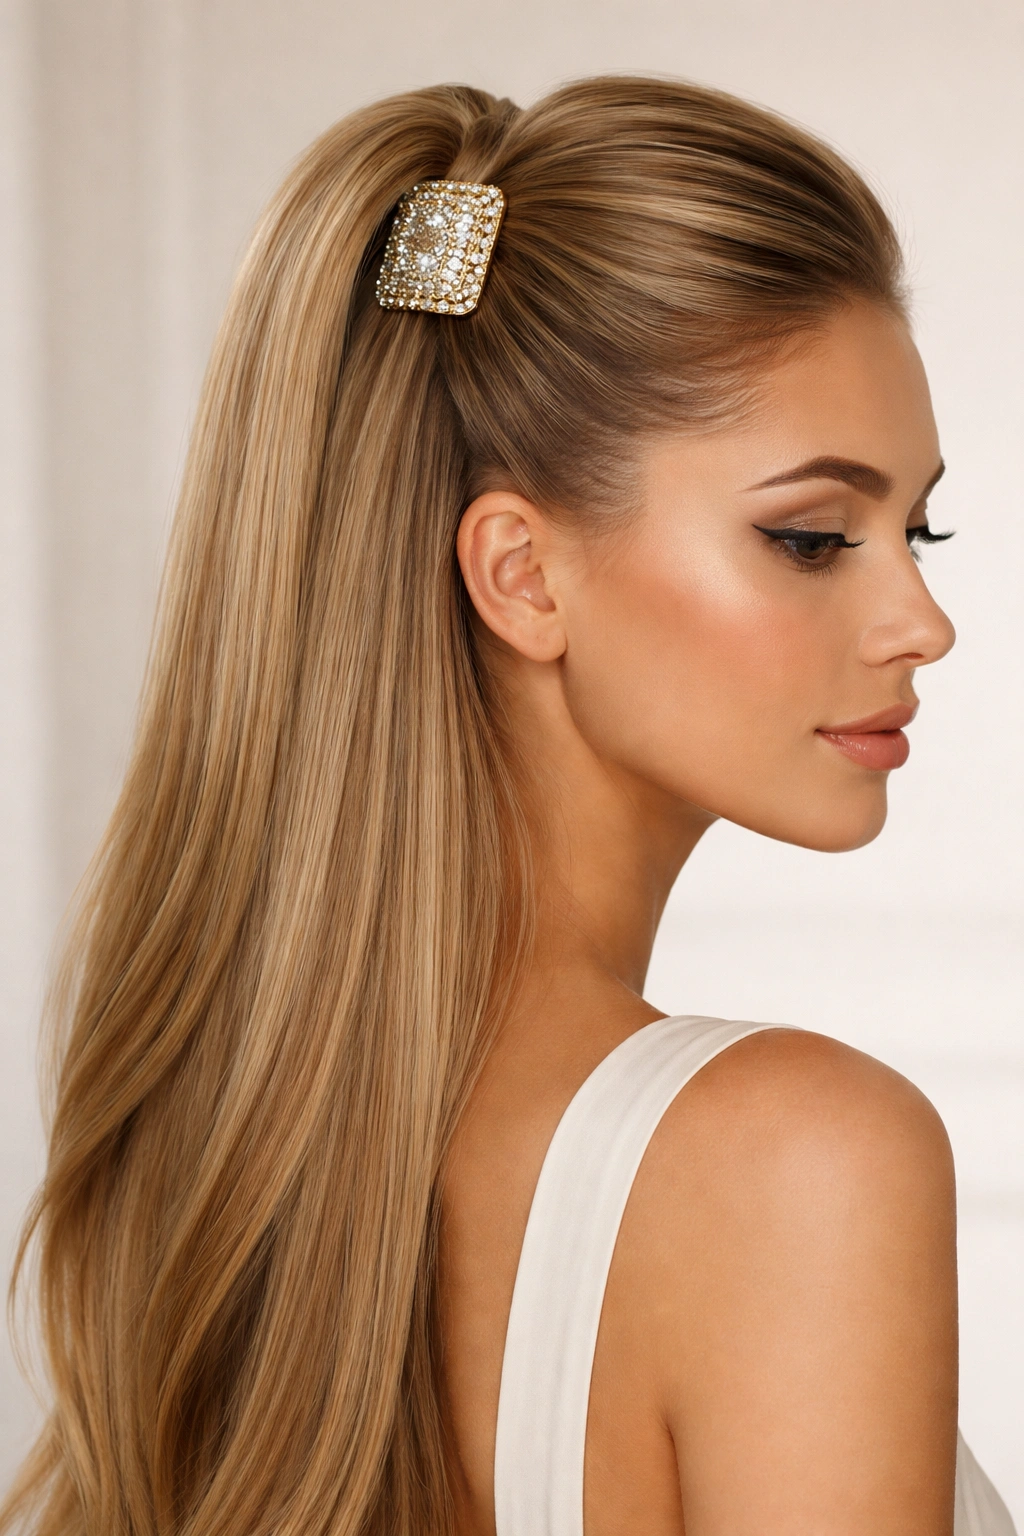
18. The Sleek Half Up Half Down with a Statement Barrette
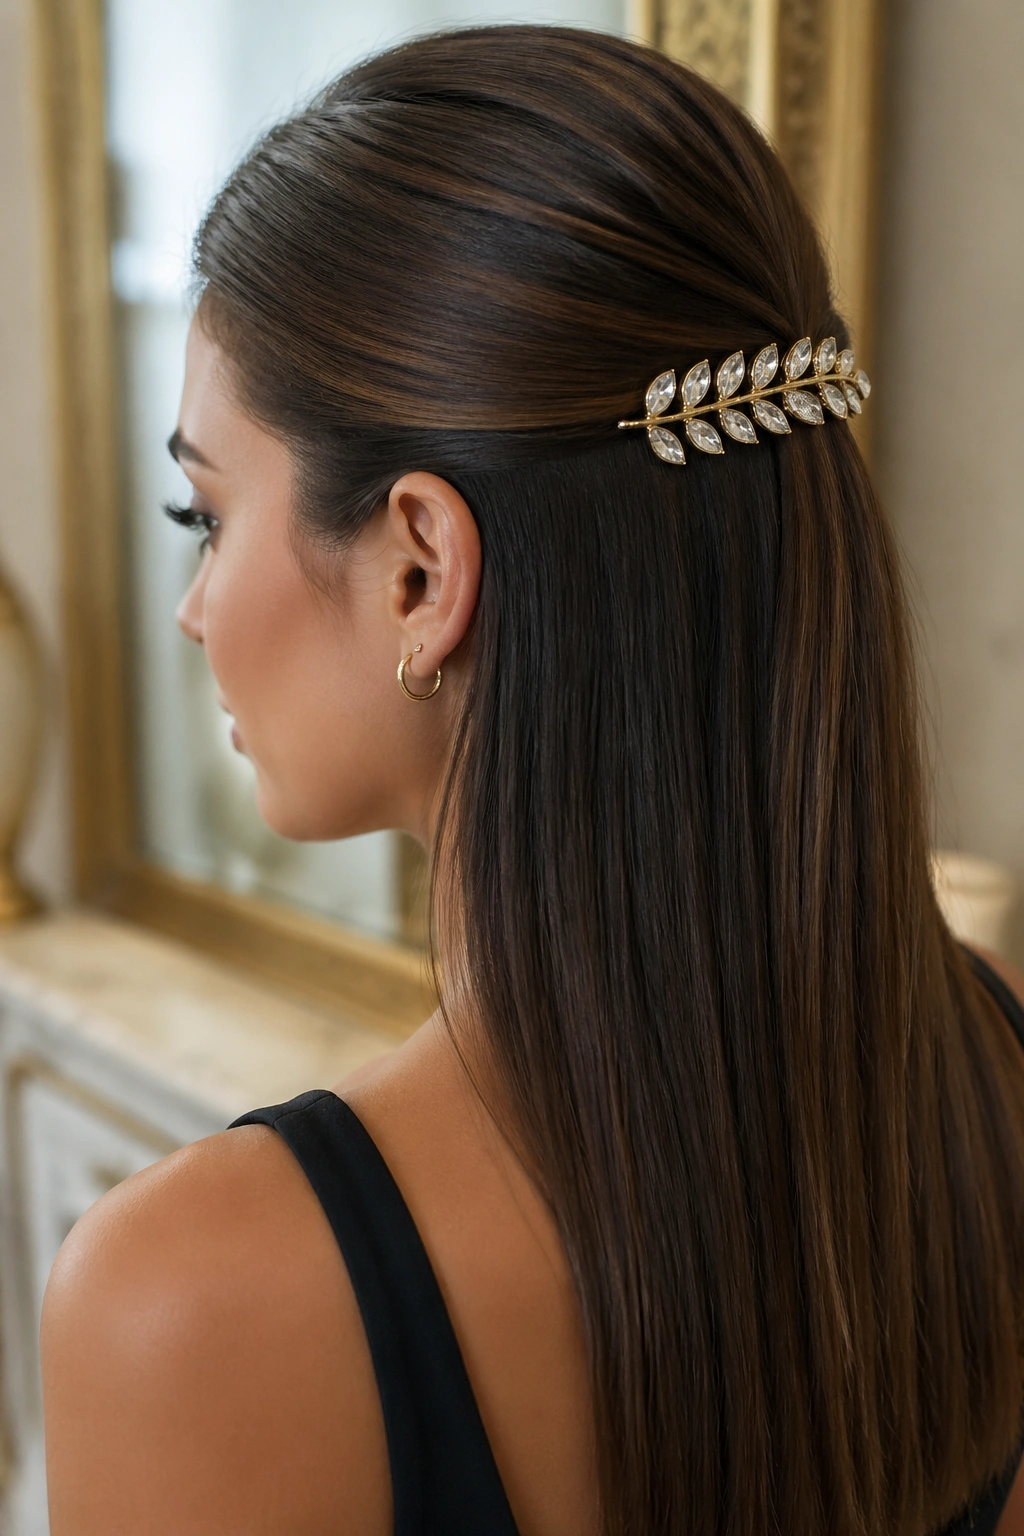
Securing your half up with a bold, decorative barrette—think jeweled, geometric, or oversized—transforms what might otherwise be a simple style into a statement look. On straight hair, the barrette sits cleanly against your smooth strands and becomes the focal point of your entire styling.
Making a Barrette the Main Event
Unlike elastics or clips that serve primarily functional purposes, a statement barrette is jewelry for your hair. On straight hair’s smooth surface, a decorative barrette is immediately visible and clearly intentional.
How to Style with a Statement Barrette
- Create your preferred half up style: twisted, braided, or simply gathered
- Secure temporarily with a clear elastic at the base
- Slide a decorative barrette over the elastic, positioning it so the design is centered and clearly visible
- Ensure the barrette sits securely and comfortably without pulling on your scalp
- Choose barrettes in jeweled, tortoiseshell, metal, or novelty designs depending on the occasion and your personal style
- Consider the barrette an outfit component rather than just a hair fastener—coordinate it with your jewelry or accessories
- Let the barrette be the visual focus of your styling rather than trying to downplay it
Pro tip: A simple tortoiseshell barrette adds elegance to casual styles, while a jeweled or metallic barrette instantly elevates a half up to evening-appropriate territory.
Final Thoughts
Half up half down styling for straight hair opens up an enormous range of possibilities, from incredibly simple and minimalist to intricate and intentional. The beauty of straight hair is that it requires minimal heat styling and product to look polished and refined—the smooth texture does much of the visual work for you. Whether you choose a classic twisted style, an elaborate braided look, or something modern like a slicked-back secured section with a statement clip, you’re working with hair that’s inherently cooperative and forgiving.
The real key to making any of these styles work is thinking about intentionality. Every piece left down, every twist added, and every accessory chosen should feel like a deliberate styling decision rather than something that happened by accident. Straight hair makes this easier because clean lines and smooth sections are immediately visible—there’s no guesswork about whether your style looks intentional or just unfinished.
Start with whichever style resonates with you first, and don’t be afraid to mix and match elements from different looks. That twisted crown half up can incorporate a ribbon or a claw clip. The wispy face-framing pieces work with nearly any base style. Once you discover which of these techniques feels most natural to you, you’ll find yourself reaching for that style repeatedly before branching out to try others. Half up half down styling is forgiving enough for daily wear but polished enough for special occasions—which is exactly why it remains such a reliable favorite for anyone with straight hair.