Fine hair is incredibly difficult to work with, especially when you’re trying to create styles that look polished and put-together. The strands slip out of twists, your waves fall flat by midday, and everything feels fragile—like if you breathe on it wrong, the entire look will collapse. Half up half down styles should be perfect for fine hair; they use less volume, distribute weight evenly across your scalp, and look effortlessly elegant without requiring a ton of product or tension. The problem is that most half up half down tutorials assume you’re working with medium to thick hair that naturally holds shape and stays in place. When you have fine hair, you need a completely different approach—one that focuses on strategic pinning, texture-building, and the right styling techniques to make strands cooperate and stay secured all day.
The good news is that half up half down styles are actually some of the most forgiving and flattering options available to you. Because you’re only styling half the hair, you’re not committing to a full updo that requires serious grip and hold. You get the polished, intentional look of a styled hairstyle without the weight and strain that can damage fine, delicate strands. The key is knowing which specific styles work best for fine hair, how to modify standard techniques to make them stick, and what products and tools will support your hair without flattening it or leaving it looking thin and wispy. This guide covers 18 half up half down styles that are genuinely achievable with fine hair, with specific instructions for how to make each one work no matter how delicate your texture is.
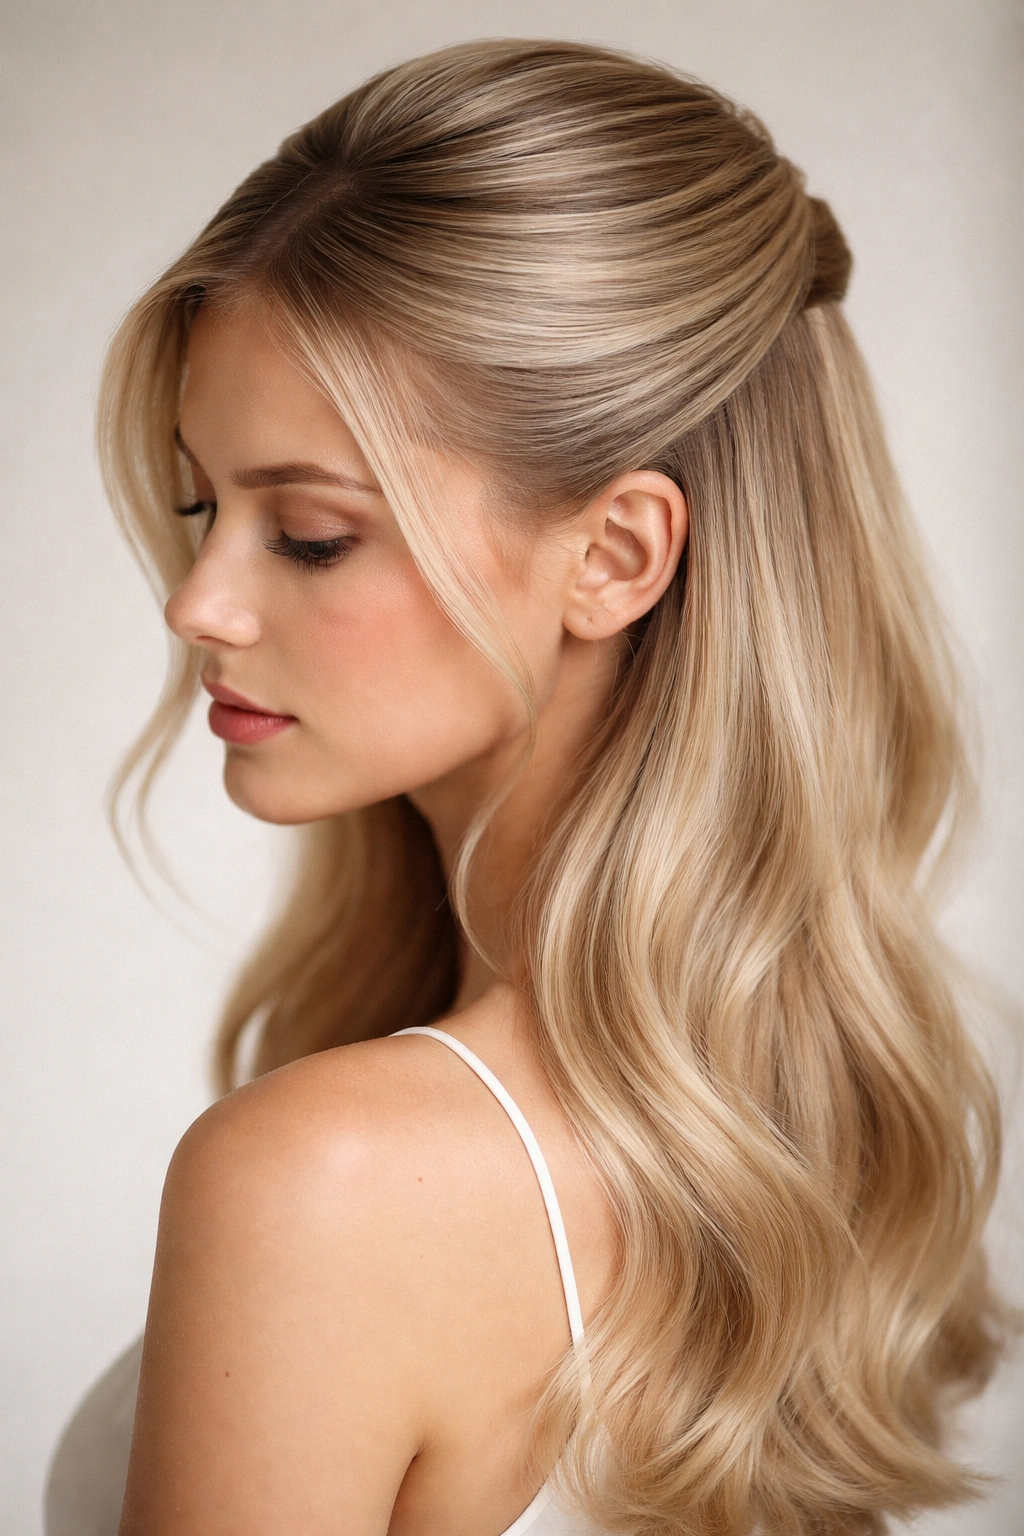
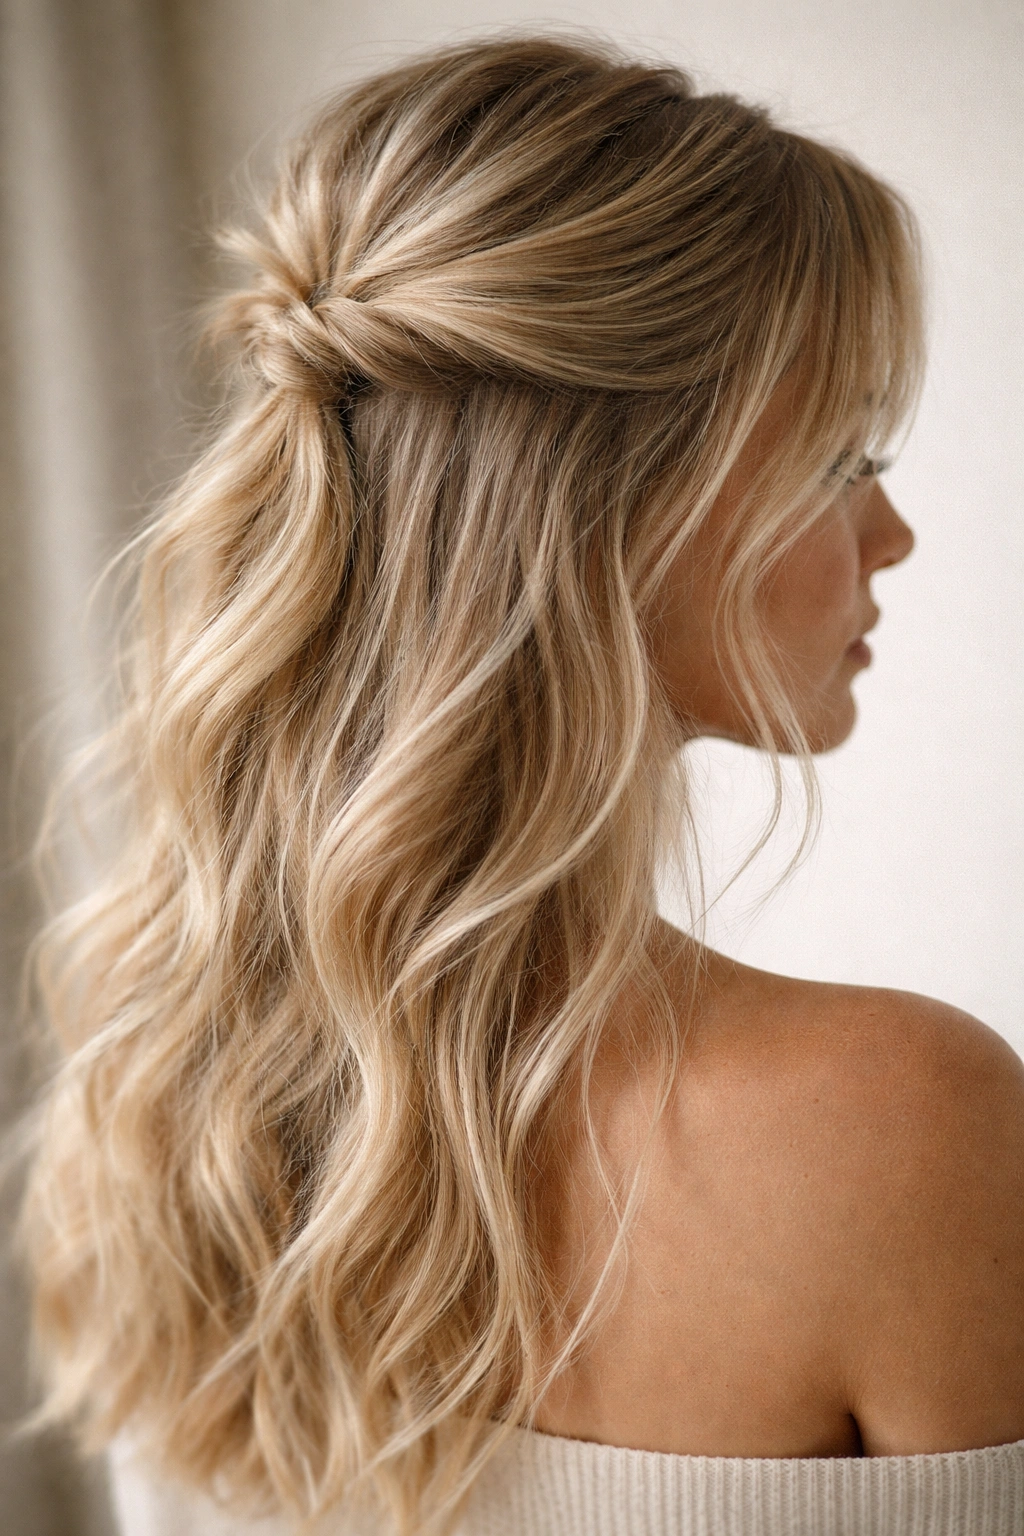
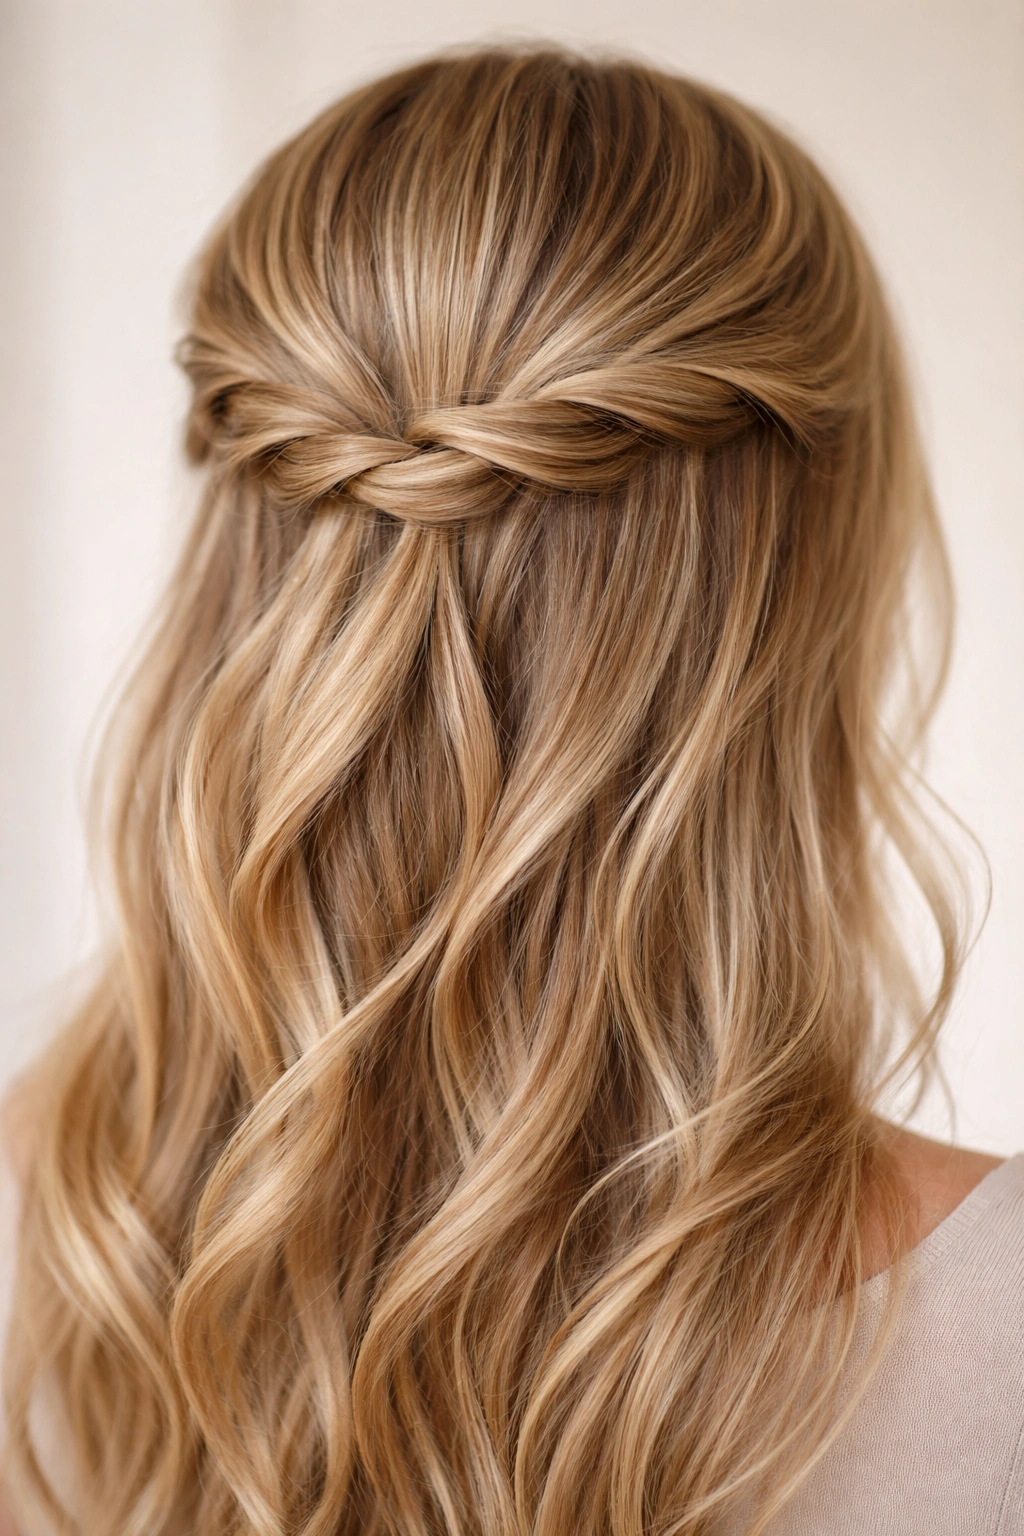
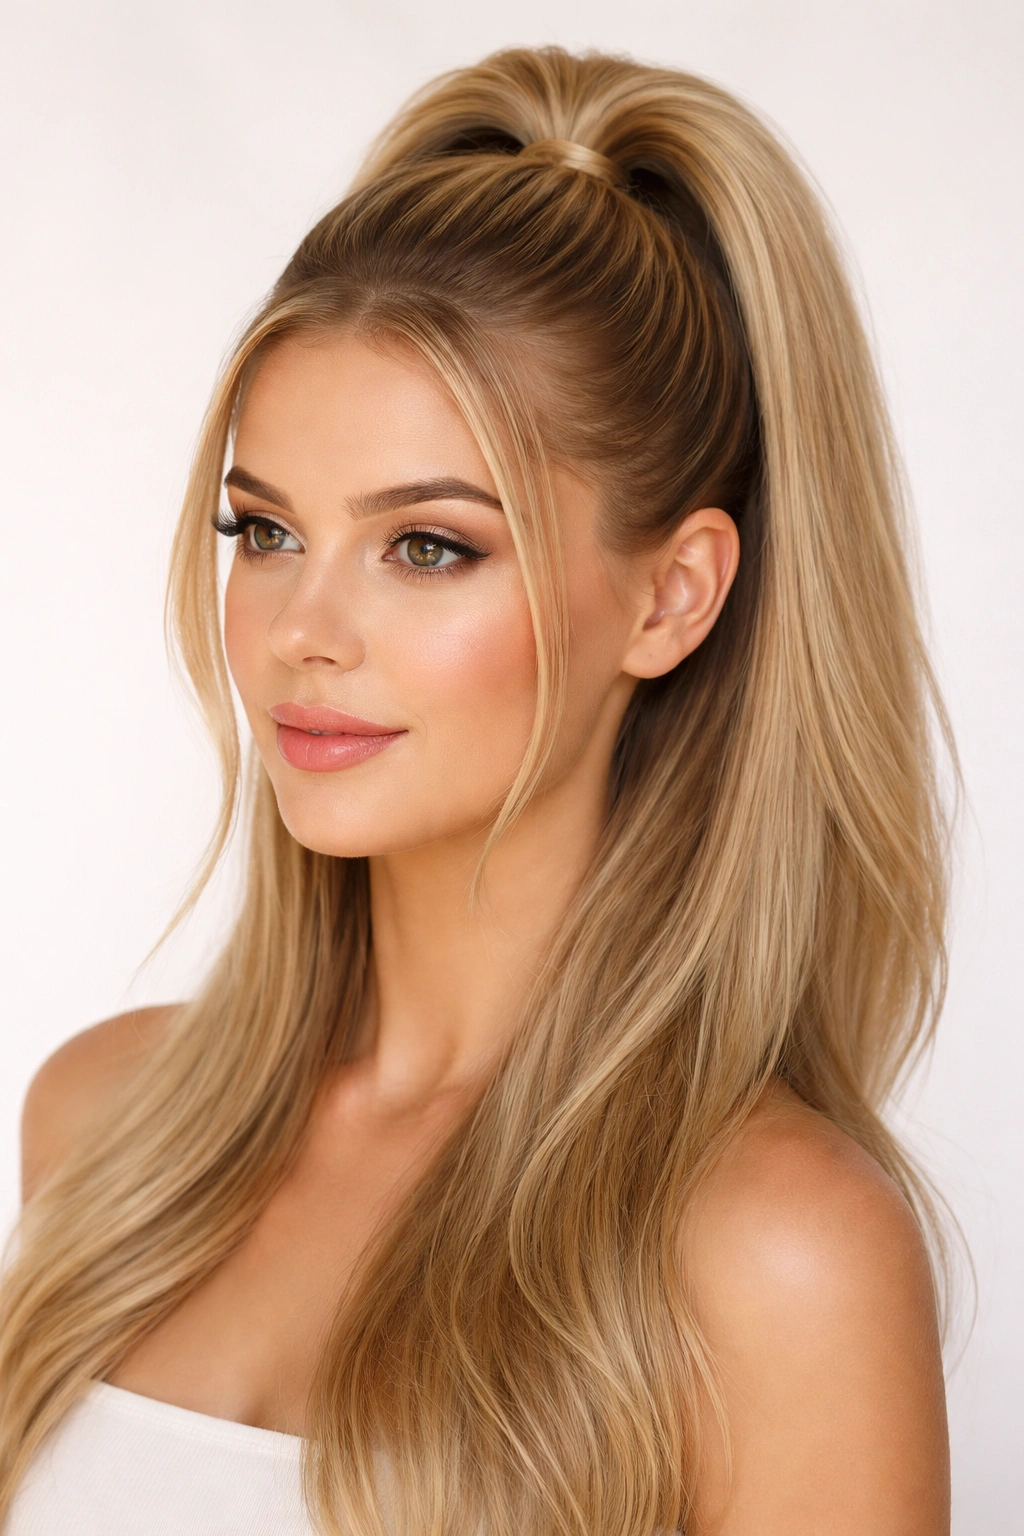
1. The Twisted Crown Half Up
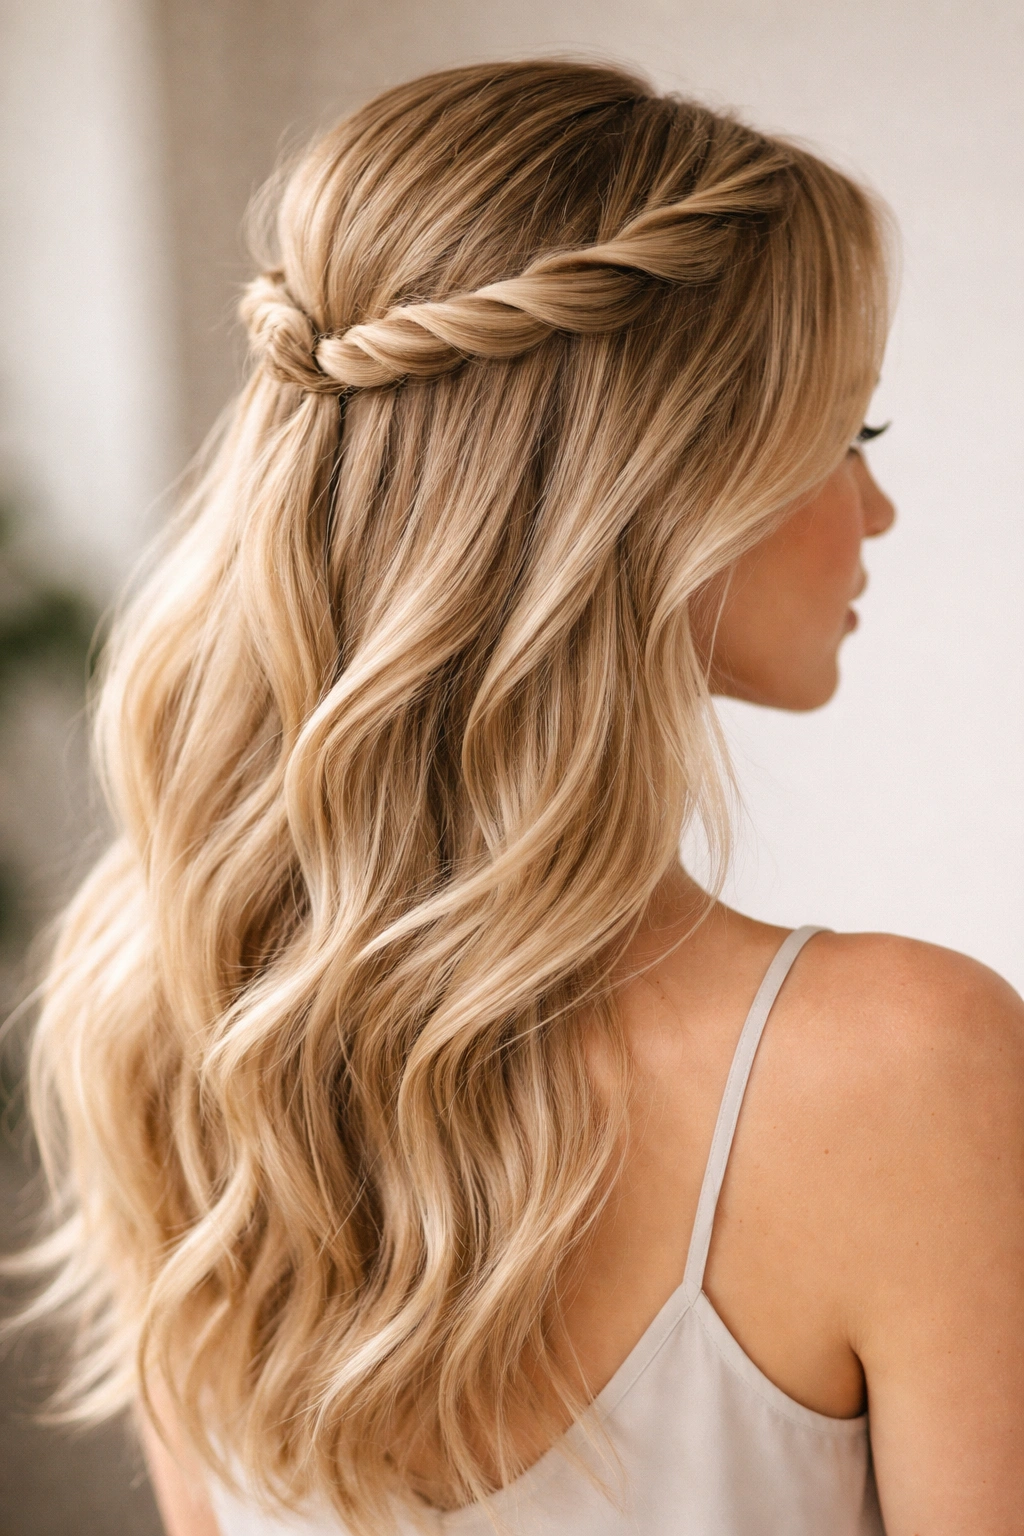
This style uses two simple twists that wrap around your head like a crown, with the back section left down for volume and movement. It’s deceptively elegant and works because the twists sit high on the head, creating the illusion of fullness without requiring any backcombing or heavy teasing that would damage fine strands. The style feels like something you spent 30 minutes on, when in reality it takes under five minutes and uses minimal product.
Why This Works for Fine Hair
The twisted crown style keeps tension away from your hairline and scalp, which means no breakage and no stress on individual strands. Because you’re twisting rather than creating a tight braid, the texture of the twist itself catches the light and creates dimension, which is exactly what fine hair needs to look thicker and more substantial. The style also sits high enough that the weight is distributed across a broad section of your head rather than concentrated in one small area.
How to Create the Perfect Twisted Crown
- Section out your hair with a side part, taking a generous section from your temple on one side and twisting it loosely while moving back toward the crown. The looser you twist, the fuller the style looks.
- Secure the first twist at the back of your head with a small bobby pin that matches your hair color, tucking the pin completely inside the twist so it’s invisible.
- Repeat on the other side with a matching twist, crossing the second twist under or over the first at the back of your head depending on which way feels more natural.
- Gently pull and loosen the twists slightly once they’re pinned—this creates a softer, puffier shape that reads as fuller and more romantic. Pull from the outer edge of each twist, working your way along its entire length.
- Set with a lightweight hairspray that offers hold without crunchiness or buildup, which would weigh down fine hair and make individual strands visible.
Pro tip: Do this style on second-day hair that has some natural texture and oils. Fresh-washed fine hair is often too slippery to hold any style for long, but hair that’s been worn for a day or two has better grip and will hold the twists more securely all day.
2. The Minimal Clip Half Up
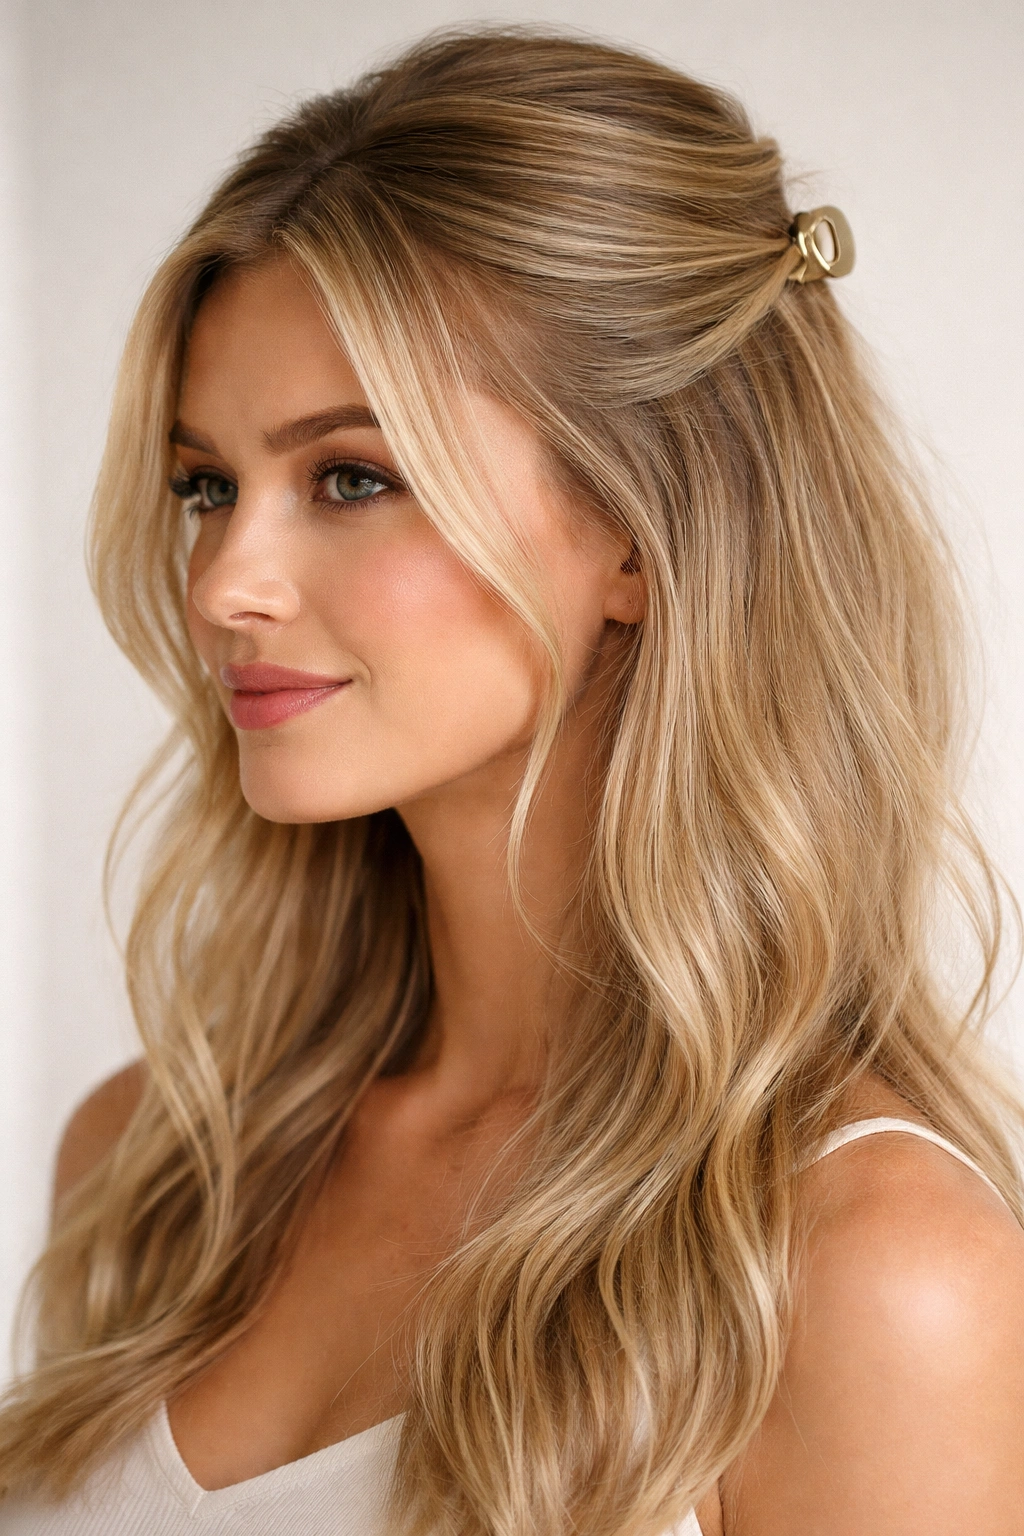
This is about as simple as it gets—you’re just pulling a small, delicate section from the crown area and clipping it back with a single barrette. The genius of this style is that it requires zero technique while still looking intentional and polished. For fine hair, less is genuinely more, and this style proves it.
Why Simplicity is Your Secret Weapon
Fine hair looks best when styling is minimal and movement is unrestricted. The moment you overwork fine hair or use too much product, it looks limp and tired. This style respects your hair’s natural texture and just adds enough structure to feel styled without feeling heavy or stiff. The clip also sits high on the crown, which automatically creates the visual illusion of more volume because the back of your hair can flow freely underneath.
How to Make the Clip Method Work
- Start with dry hair that has at least a little texture or wave from the day before. Completely smooth, freshly washed hair won’t hold a clip as securely.
- Take a vertical section from just behind your crown and pull it straight back, holding it at the base with your fingers. This section should be about two inches wide—wide enough to see and feel intentional, but not so wide that it looks like you’re trying too hard.
- Clip with a luxury-looking clip that you can leave in all day. Avoid cheap plastic clips that slip and tiny clips that create tension. A medium-sized tortoiseshell or pearl clip is timeless and beautiful.
- Tease the base slightly with a fine-tooth comb before clipping if the section feels too slippery. Just a few gentle strokes at the base create texture that helps the clip grip better without damaging your strands.
- Let the clip sit loose so it doesn’t create a pulled, uncomfortable look. You want it to feel relaxed and natural, not like your hair is being yanked back.
Worth knowing: Silicone-grip clips hold infinitely better than standard metal clips on fine hair. The textured interior keeps hair from slipping while the exterior still looks sleek and polished.
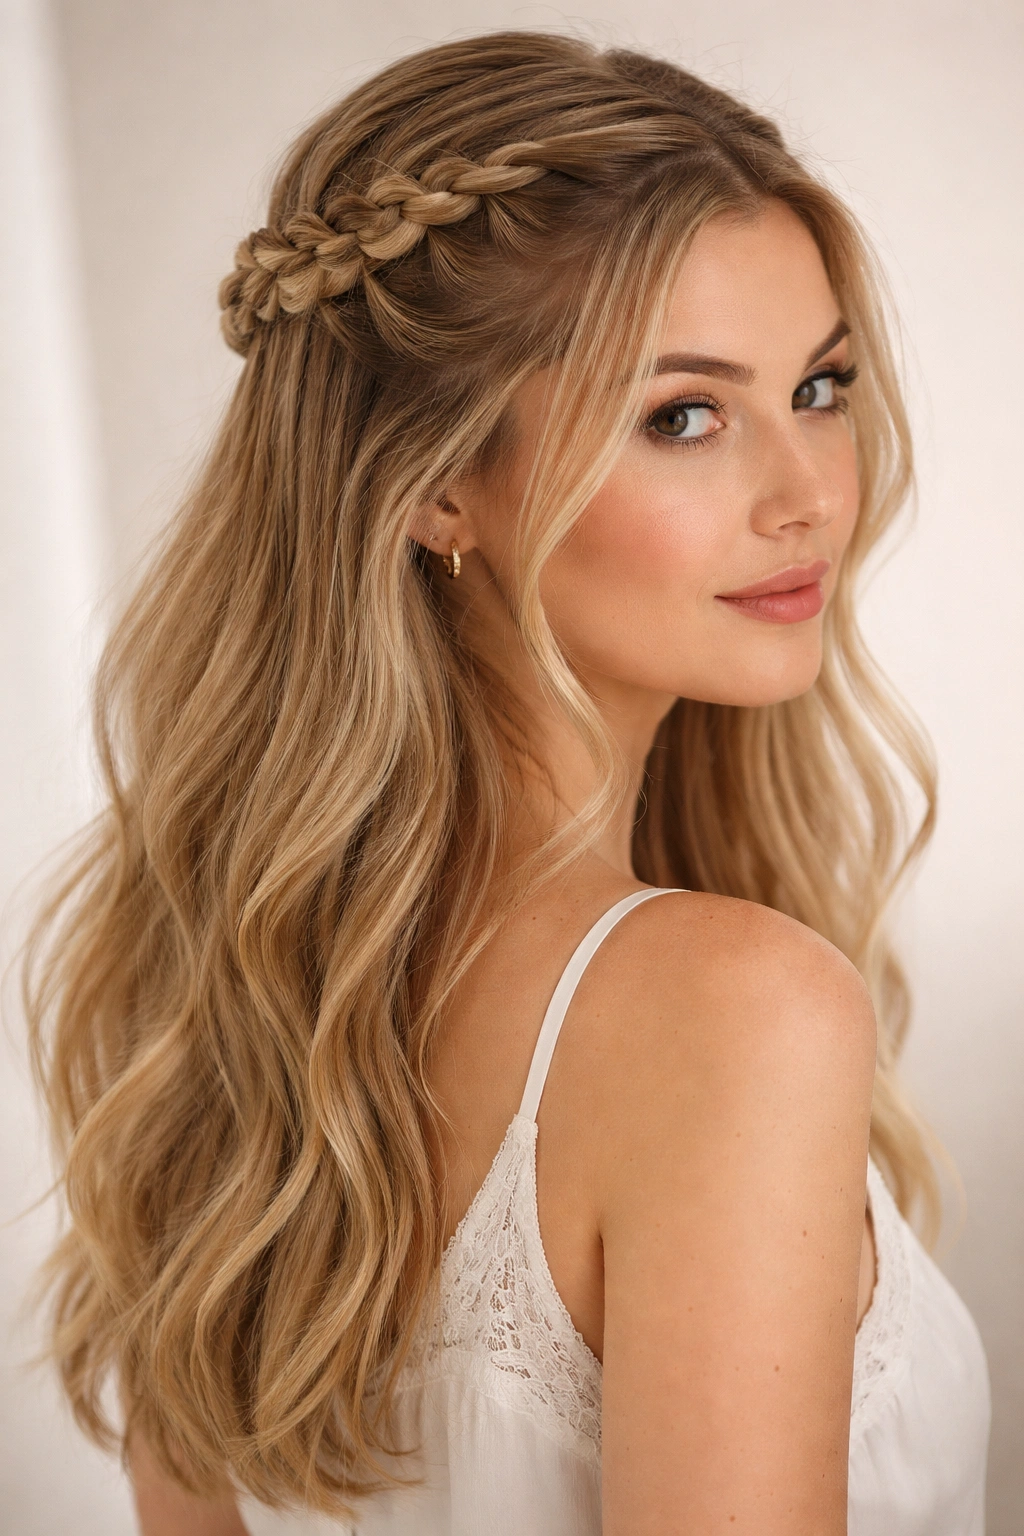
3. The Braided Half Up with Face-Framing Layers
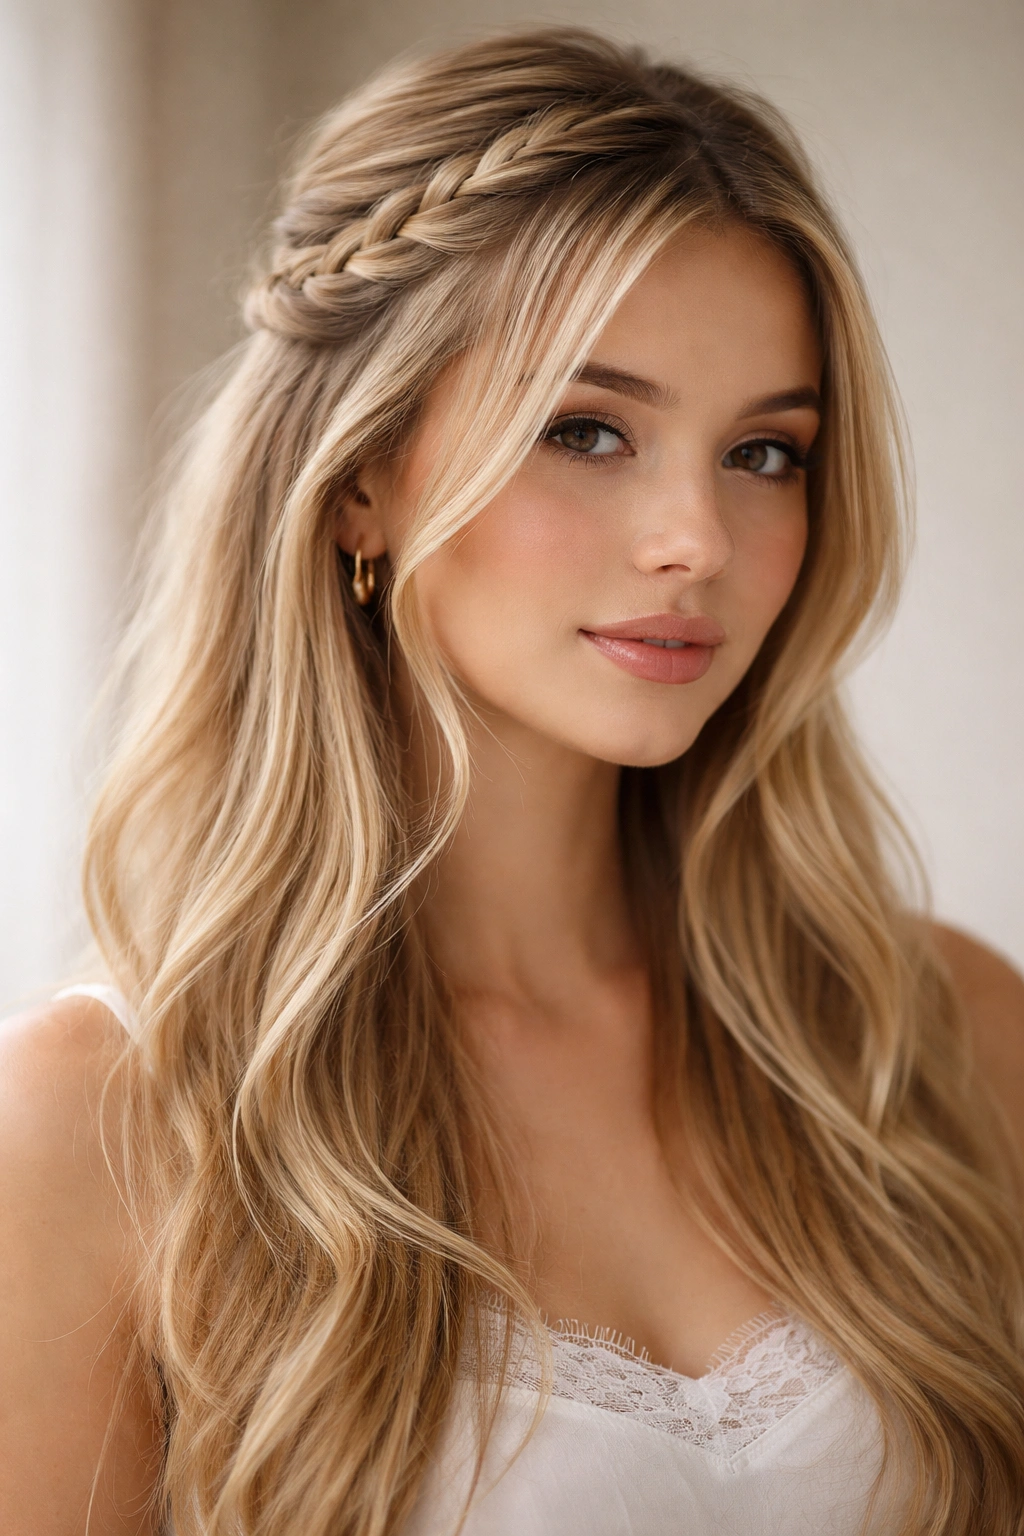
This style combines a single braid pulled to the back of the head with deliberately loose, wispy layers left in front to frame your face. The braid itself provides structure and security, while the face-framing layers add softness and movement that keeps the look from feeling too severe. For fine hair, this balance between defined style and gentle movement is essential.
Why Braids Work Better Than You Think
When you braid fine hair, you’re creating texture through the braid itself rather than relying on the hair to be naturally thick. The over-under-over pattern of the braid gives each strand something to grip, which means the style holds longer without you having to create tension on your scalp. A loose, textured braid is much more flattering to fine hair than a tight, precise one, because the loose version shows off the natural movement of your strands rather than flattening them.
How to Braid for Fine Hair
- Section a piece of hair from your temple area, making the section about two inches wide and extending from your hairline back to your ear.
- Start a three-strand braid right at your temple, braiding loosely as you move back toward your crown. Loose is the whole point—a tight braid will look skimpy on fine hair, while a loose, puffed-out braid looks full and romantic.
- Secure the braid at the back of your head with a small elastic that matches your hair color, then gently pull and loosen each section of the braid to make it wider and fluffier. This makes the braid look twice as thick as it actually is.
- Leave face-framing pieces on both sides of your face untouched. These wispy, unstyled layers are what keep the look soft and prevents it from feeling too polished or severe.
- Finish with hairspray that adds texture rather than shine. Texture spray is your friend when styling fine hair because it creates grip while adding volume.
Insider note: If your braid is looking too thin even after loosening, try braiding slightly damp hair. The moisture helps strands cling together slightly, making the finished braid look denser and fuller.
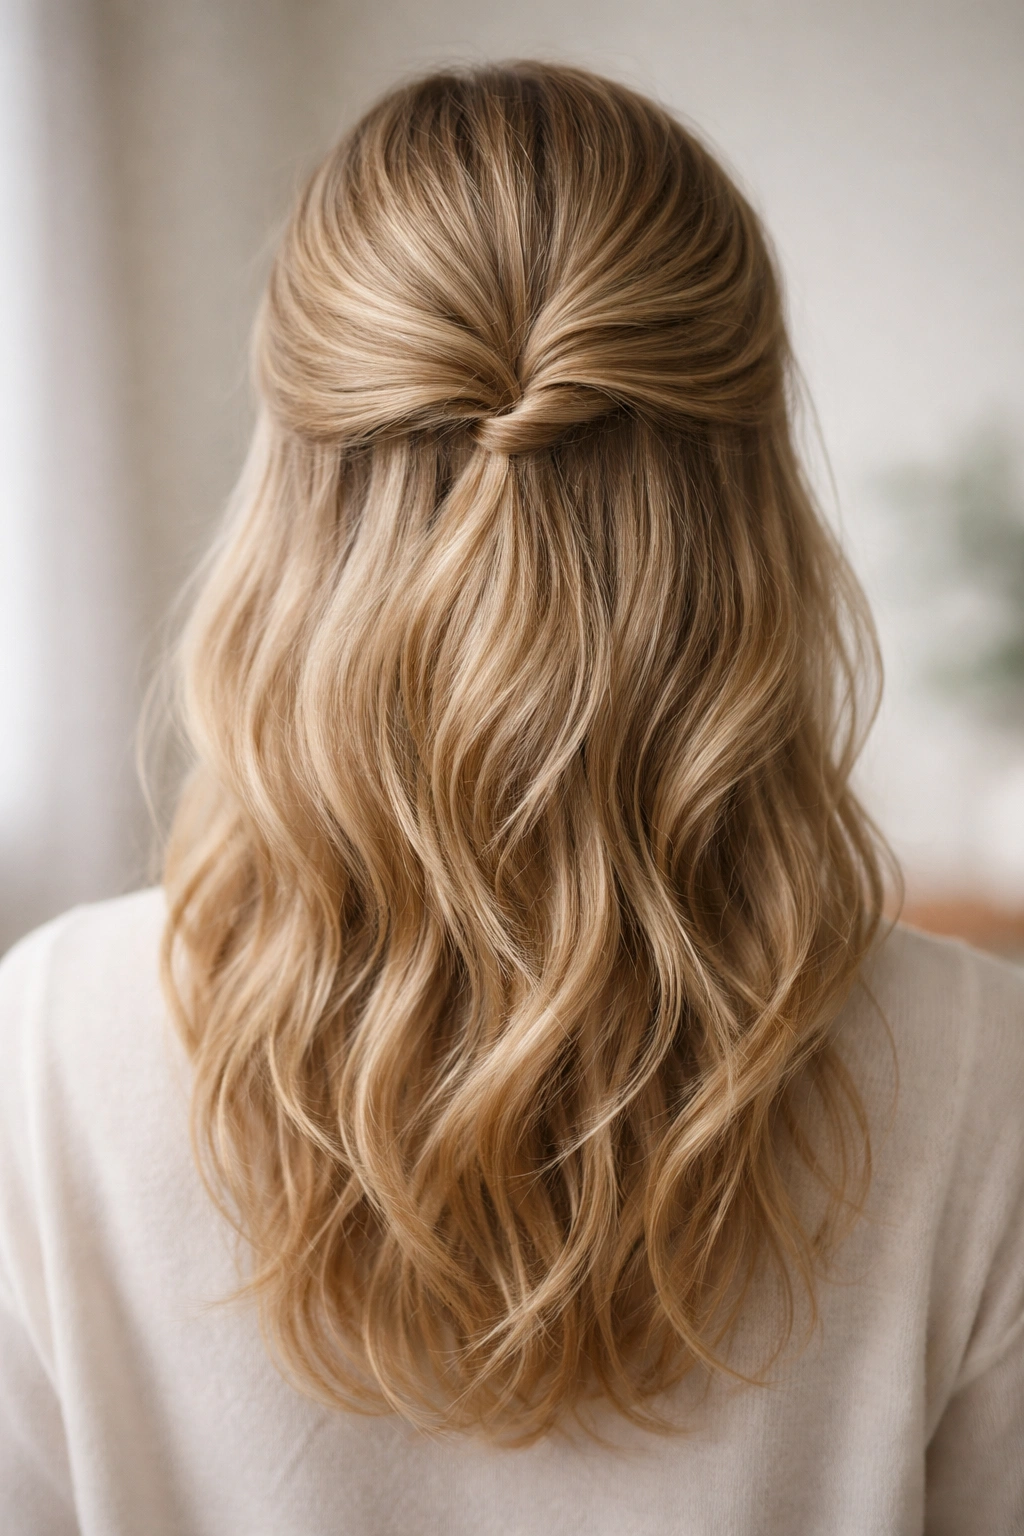
4. The Twisted Half Up with Hidden Elastic
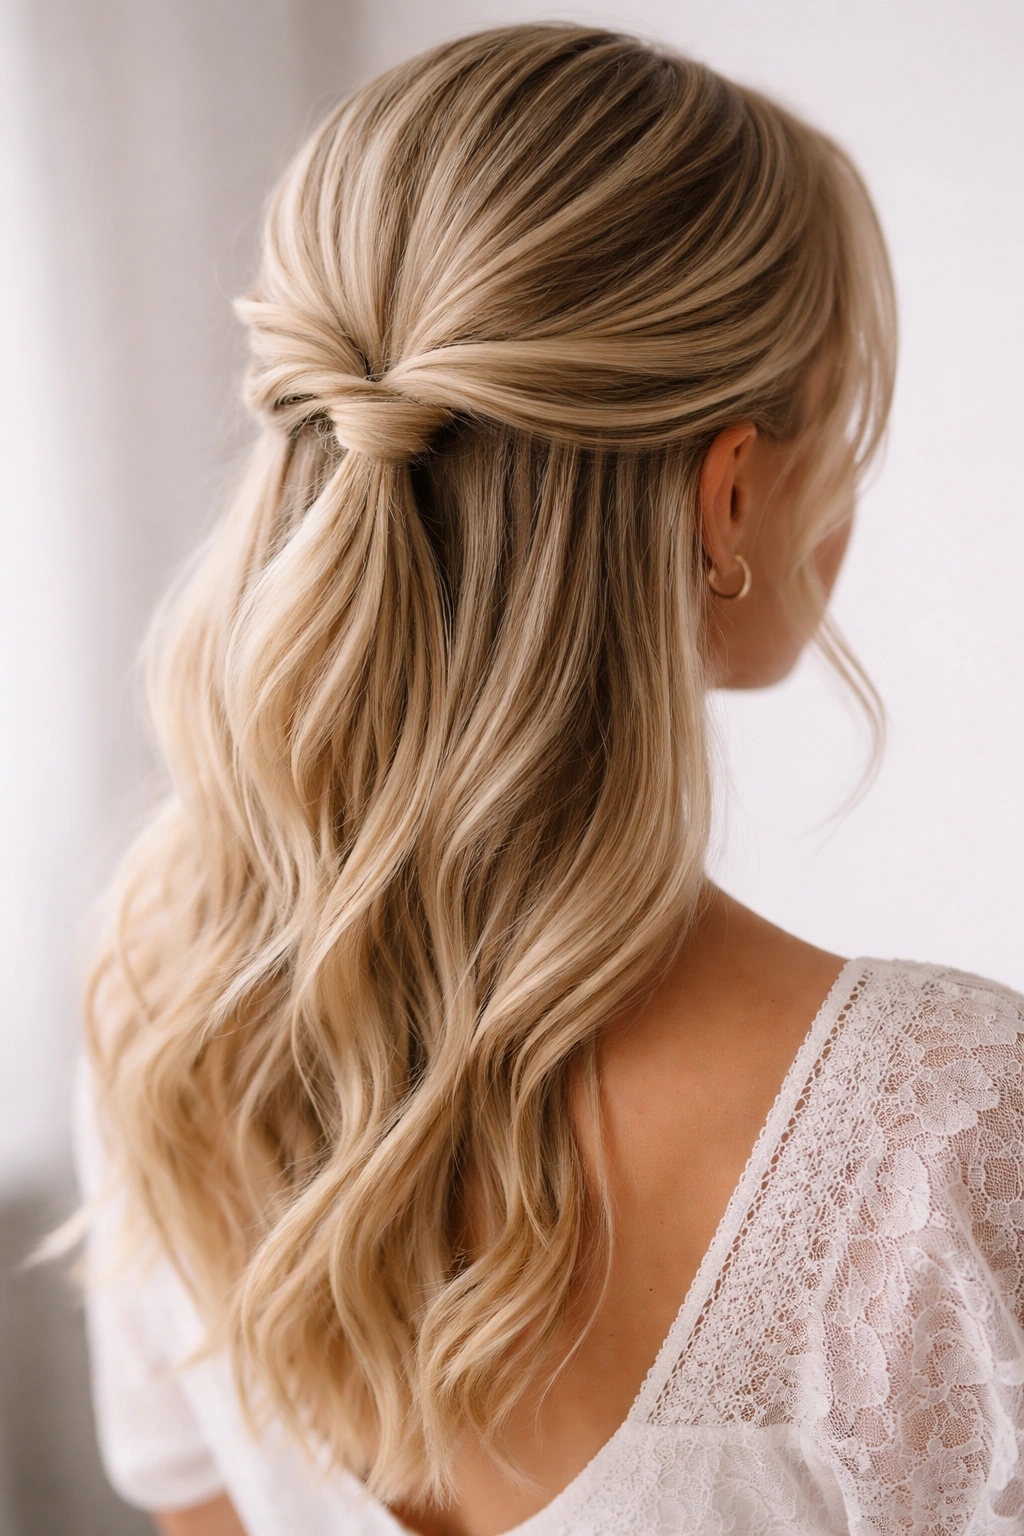
This style looks like you’ve twisted hair back and pinned it, but there’s actually a small elastic hidden inside the twist that keeps everything secure. The hidden elastic means the style holds all day without you having to worry about pins slipping or the twist unraveling, which is huge for fine hair that tends to shift and slide.
Why Hidden Elastics are a Game-Changer
An elastic gives you security without adding weight. When you use only pins on fine hair, there’s always a risk of things loosening throughout the day, especially as your hair’s natural oils break down your product. An elastic keeps the base secure so the pins just maintain the twist shape, not the entire weight of the style. This distributed security means better hold with less damage to your hairline.
How to Hide an Elastic Inside Your Twist
- Gather a two-inch section from just above your ear, extending toward the crown. Hold this section loosely in your fingers.
- Twist the section loosely as you move toward the back of your head. Keep it loose enough that you can see clear separation between the strands—this is what creates that full, romantic look.
- When you reach the back, clip the twisted section with a small clip temporarily to hold it in place while you work.
- Using a crochet hook or small tool, gently pull a small elastic through the underside of the twist, positioning it at the base where it can’t be seen from the front.
- Secure the elastic gently, then remove the temporary clip and use pins to anchor the twisted section just above the elastic, securing the twist’s shape while the elastic handles the actual weight.
- Loosen the twist by pulling gently on the outer edges to make it puffier and fuller-looking. This creates dimension that makes fine hair appear thicker.
Key technique: The crochet hook is essential here—without it, you’ll be struggling to thread that elastic for minutes. It’s a five-dollar investment that makes this style infinitely easier.
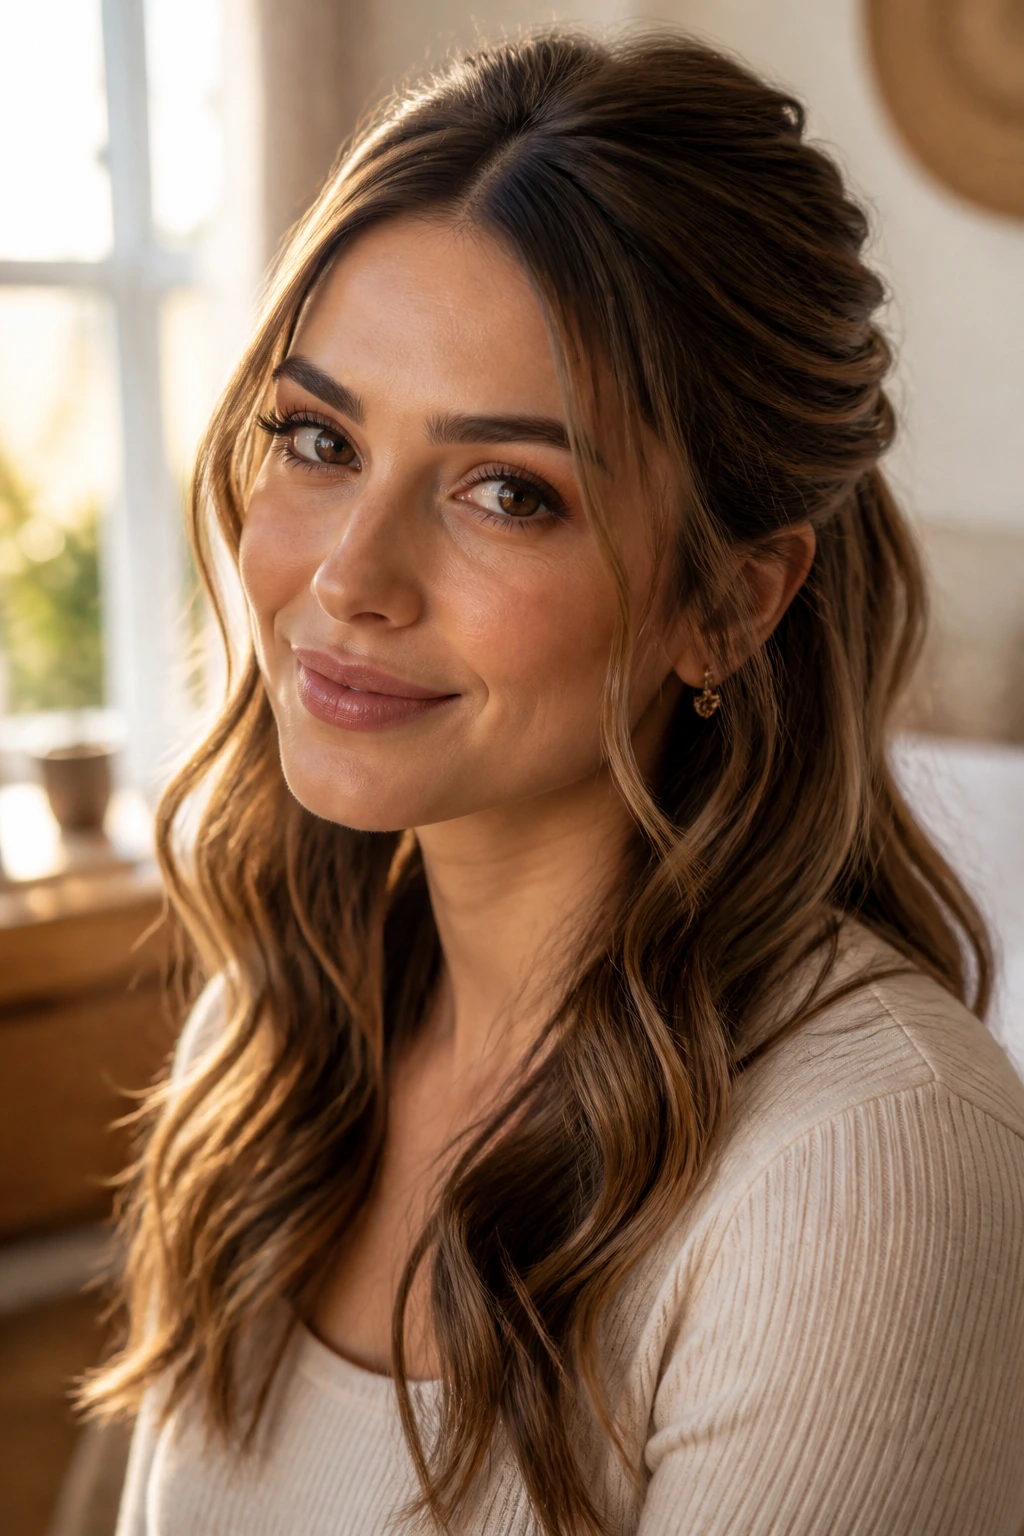
5. The Low Half Up with Soft Waves
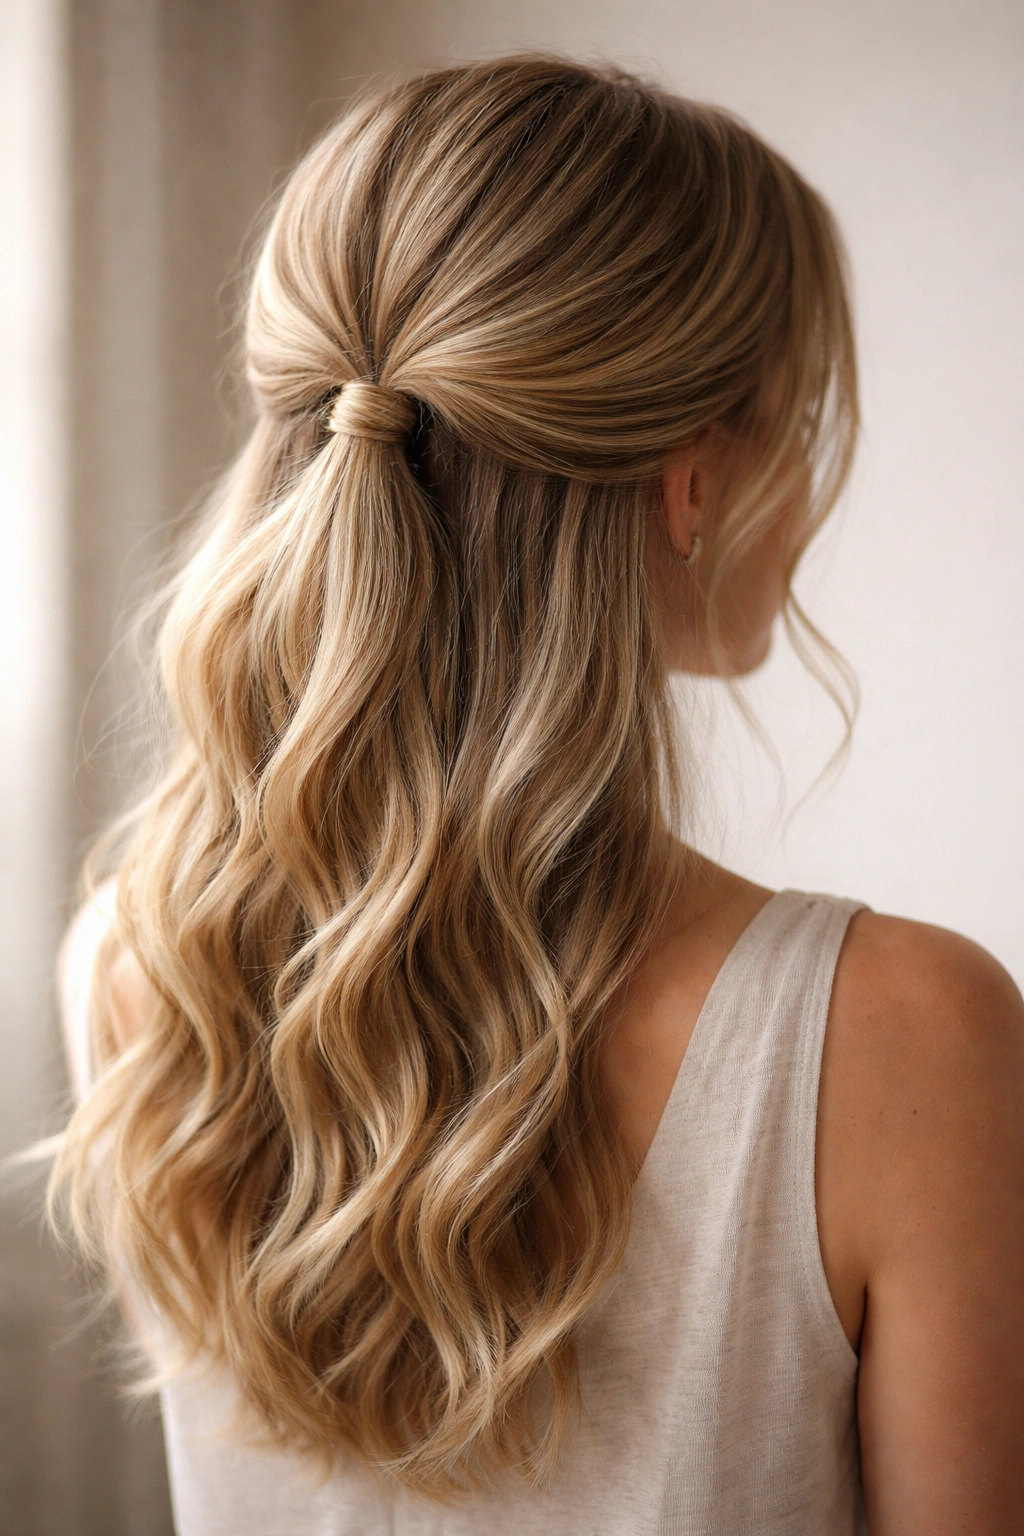
This style pulls hair back at a lower point on the back of the head, leaving maximum volume at the crown. The waves throughout the hair add texture and movement that makes fine hair look fuller, and the lower gathering point distributes weight better than high half-up styles. It’s romantic, soft, and genuinely flattering to fine, delicate hair.
Why Lower Gathering Points Suit Fine Hair
When you gather hair lower on the head, you’re pulling from a larger surface area of your scalp, which means tension is distributed more evenly. This is gentler on fine hair and less likely to cause breakage. The lower position also leaves room for volume at your crown, which is where the eye is drawn when looking at a hairstyle. More volume at the crown automatically makes thin hair look thicker.
How to Create Soft, Long-Lasting Waves
- Start with damp hair and apply a lightweight mousse to the roots. This creates texture that helps your waves hold without weighing down fine strands.
- Use a curling iron or wand that’s at least 1.5 inches in diameter—smaller barrels can make fine hair look choppy and thin. Wrap sections around the barrel, holding for 8-10 seconds, then release. Your goal is soft waves, not tight ringlets.
- Wave the entire head before gathering any sections back. This ensures waves are consistent throughout and gives you the full texture-building benefit.
- Once waves are set, gather a section from one side of your head at ear level, extend it to the other side, and secure at the lower back with a clip or elastic. Make sure the gathered section is substantial enough to feel intentional—at least two inches wide.
- Leave the top section loose so the crown volume is visible and emphasized. This is what creates the illusion of fullness.
- Set waves with a flexible-hold hairspray that lets hair move naturally while maintaining shape. Stiff hairspray looks terrible on fine hair.
Pro tip: Curl away from your face on both sides so waves face forward and frame your features. This is more flattering and creates better movement.
6. The Double Dutch Braid Half Up
Two braids that start at your temples and meet at the back of your head, where they’re secured together. This style looks intricate and time-consuming, but it’s actually straightforward once you’ve done it a couple of times. The two braids balance the visual weight better than a single thick braid, making it a smart choice for fine hair.
Why Two Thin Braids Beat One Thick Braid
A single thick braid on fine hair can look sparse because all your hair is concentrated in one central element. Two thinner braids distribute the hair visually across your head, creating the impression of more volume and fullness. Plus, two braids actually hold better than one because you’re securing two separate sections of hair rather than relying on one braid to contain all your volume.
How to Dutch Braid for Fine Hair
- Section off a piece of hair from your left temple, about two inches wide, extending toward your crown.
- Start a Dutch braid (which is like a French braid but the strands go under instead of over each other, creating a braid that sits on top of the hair rather than embedded in it). Dutch braids read as fuller and more textured on fine hair.
- Braid loosely, moving from your temple toward the back of your head. The Dutch braid method naturally creates a raised, textured look that’s perfect for fine hair because it catches the light and creates dimension.
- Secure with a tiny elastic at the back of your head, leaving a few inches unbraided so you can work with the braid later.
- Repeat on the right side with a matching Dutch braid moving toward the back.
- Combine the two braids by bringing the unbraided ends together and securing them with a single elastic or clip. You can leave them as two separate unbraided tails, twist them together, or tuck one into the other for a seamless look.
- Loosen each braid by gently pulling the outer edges, making them wider and puffier. This is what creates that full, romantic texture.
Worth knowing: Dutch braids are easier than French braids and look better on fine hair, so don’t feel like you need to master French braiding first. Start with Dutch if you’re learning.
7. The Sleek Gel Half Up with Curved Edges
This style takes the opposite approach from the soft, loose styles—it uses gel to create a sleek, smooth section that’s pulled back, leaving the bottom half down for contrast. The sleekness works beautifully with fine hair because gel defines individual strands without adding bulk, and the clean, architectural lines make the style feel deliberately minimalist rather than thin.
Why Gel Works for Fine Hair When Other Products Don’t
Gel is one of the only styling products that actually makes fine hair look intentional rather than limp. It defines strands, adds shine, and creates structure without the weight of creams or pomades. The key is using a gel that’s specifically formulated for fine hair—look for terms like “lightweight,” “flexible hold,” or “non-flaking” on the product.
How to Create a Sleek Half Up with Gel
- Apply gel to completely dry hair that you’ve combed smooth. You want a clean, even base with no texture or waves.
- Use a fine-tooth comb to comb the top section back smoothly, creating a sleek, precise line from your temple to the back of your head.
- Gather the section at the back into a smooth, tight half-up shape. The tightness is intentional here—it contrasts beautifully with the loose texture of the bottom half.
- Secure with a sleek clip or elastic that matches your hair color. The cleaner the line, the better this style looks.
- Smooth away any flyaways with a tiny brush or comb and a touch of gel.
- Define the curved edges at your temples by smoothing the hair back and using gel to set it, creating a clean, curved line that frames your face. This architectural detail is what makes the style look intentional and polished.
- Finish with a light hairspray that offers hold without adding visible product buildup.
Pro tip: This style looks best when the top section is genuinely sleek and the bottom section has soft waves or texture. The contrast is what makes it visually interesting.
8. The Half Up with Delicate Ribbon
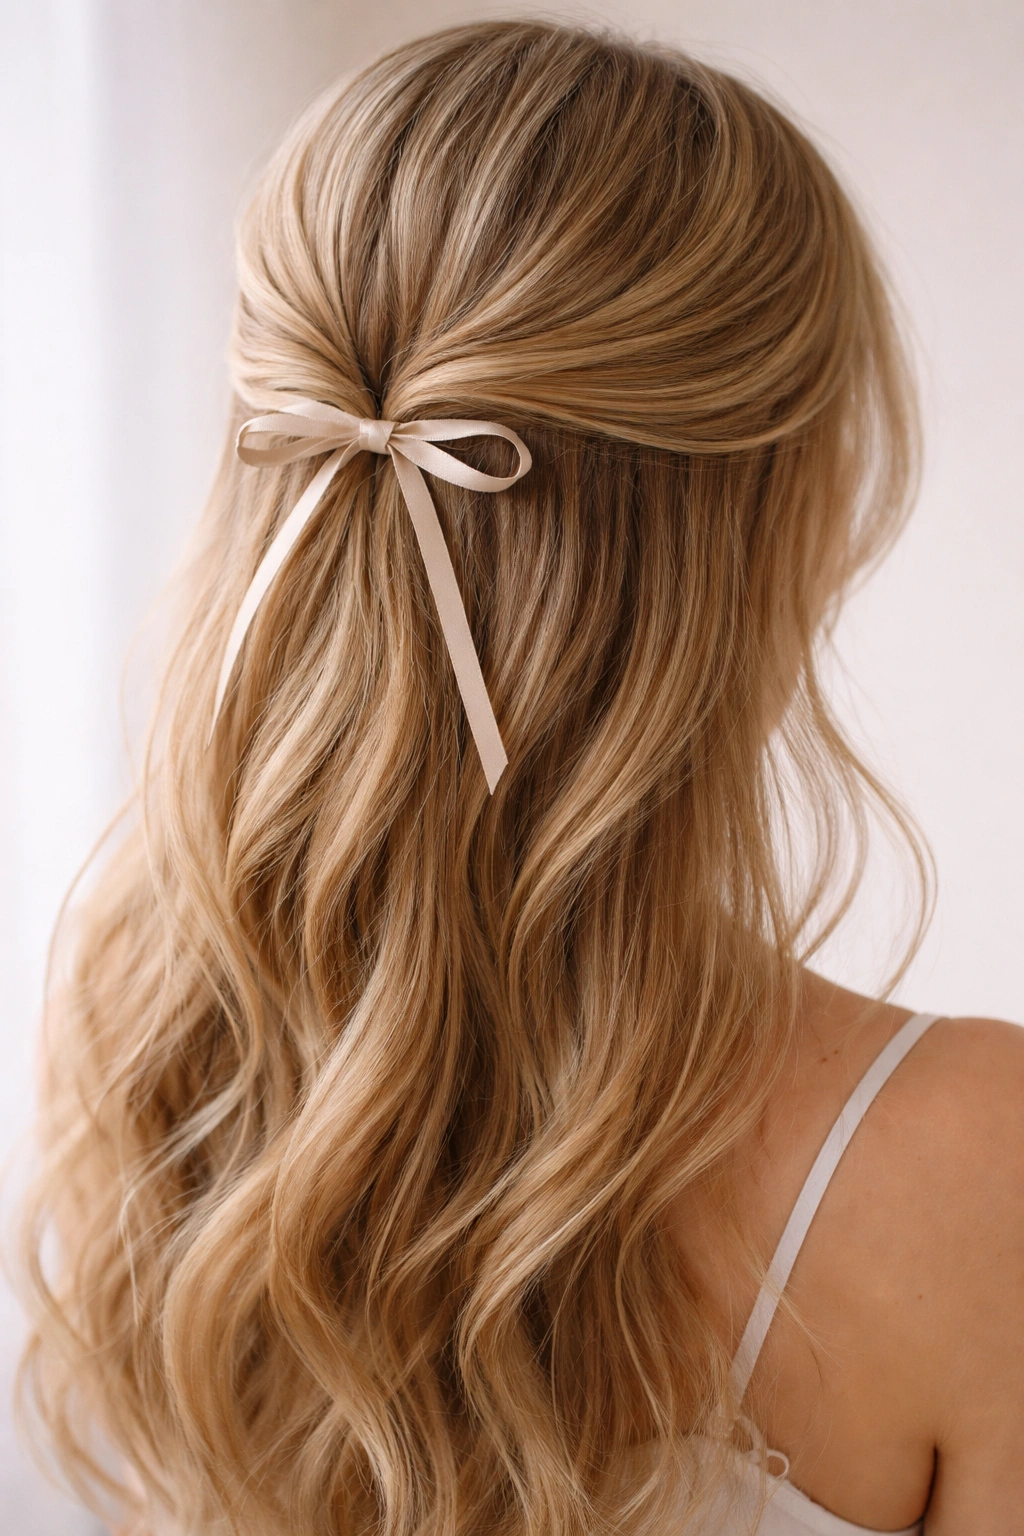
This style gathers a small section at the back and secures it with a thin ribbon instead of an elastic, creating an inherently romantic, vintage-inspired look. The ribbon doesn’t add any weight and actually helps secure the hair because it grips differently than elastic. It’s a small detail that makes a huge visual difference.
Why Ribbon Outperforms Elastic on Fine Hair
Ribbon creates visual interest without bulk. An elastic at the back of your head just looks like a line, but a ribbon becomes a design detail that draws the eye and adds elegance to the style. Ribbon also won’t leave that harsh crease mark in your hair that elastics often do, especially on fine strands that show every indentation.
How to Incorporate Ribbon Into Your Half Up
- Choose a thin ribbon in a color that either matches your hair or complements your outfit. Satin ribbon works beautifully because it doesn’t tangle in hair and glides smoothly.
- Pull back a section of hair from the crown area, gathering it at the back of your head. Make this section slightly smaller than you would for a regular half-up, since the ribbon will add visual presence.
- Tie the ribbon around the gathered section where you’d normally place an elastic. Start with a simple bow, then you can adjust it to be as understated or dramatic as you like.
- Distribute the bow so it’s centered and balanced. You can hide it at the back of your head or let it sit more visibly, depending on the look you’re going for.
- Tease the gathered section slightly underneath the ribbon to create a soft, puffy shape that looks fuller than the actual volume of hair you’ve used.
- Secure the gathered section with a small bobby pin underneath so the ribbon isn’t bearing all the weight. The ribbon is decorative; the pin does the actual holding.
Insider note: Double-sided ribbon that’s pretty on both sides is worth the splurge because the style will look polished from every angle.
9. The Textured Half Up with Dry Texture Spray
This style uses dry texture spray to add grittiness and grip to fine hair, making it possible to create intentional, moldable styles that would otherwise slip. The texture spray transforms fine hair into something that actually holds a shape, and it does this without adding weight or visible product. It’s like a cheat code for styling fine hair.
Why Texture Spray Changes Everything
Fine hair slides apart naturally, which is why so many styles don’t hold. Texture spray changes the surface of each strand, making them cling to each other just enough to hold a shape while still moving naturally. It also creates a matte finish that makes hair look thicker and reduces the shine that can sometimes make fine hair look thin.
How to Use Texture Spray for Maximum Hold
- Apply texture spray to completely dry hair, working it through the entire head in light mists rather than one heavy application. You want coating, not soaking.
- Once the spray is dry, work with your hair—twist sections, create braids, or smooth sections back. You’ll notice immediately that your hair has more grip and holds shapes you create.
- Create the half-up style using the texture and grip that the spray provides. You can use thinner sections because they actually hold now, and you’ll need less product overall.
- Pin or clip with confidence, knowing that the texture spray has given your hair the grip it needs to hold all day. The style won’t slip the way it would on untreated fine hair.
- Refresh with a light misting of texture spray midday if needed, but often you won’t need to because the spray holds that well.
- Set the final style with hairspray, choosing a flexible-hold formula that doesn’t fight with the texture spray.
Key technique: Texture spray is most effective when you apply it to clean, dry hair and let it fully dry before styling. If you try to style while it’s still slightly damp, it’s harder to control.
10. The Half Up With Faux Hawk Crown
This style creates the illusion of a mini faux hawk at the crown while leaving the back down. You’re using backcombing and teasing to create height and volume at the crown, then securing a small section on top while leaving the bottom undone. The result is a style with serious visual impact that’s achieved entirely through clever styling technique, not weight.
Why Faux Hawks Work for Fine Hair
A faux hawk is all about creating the illusion of volume through direction and texture, not actual thickness. You’re teasing the hair to create dimension and height, which is exactly what fine hair needs. The backcombed sections are fuller-looking than sleek sections, and that’s where you want all your visual emphasis to be.
How to Create a Fine-Hair Faux Hawk Half Up
- Section out the crown area from your forehead back to the crown, creating a stripe about three inches wide down the center of your head.
- Backcomb this section gently using a fine-tooth comb, working from the ends of the hair toward the roots in short, fast strokes. You’re creating texture and height, not a solid tangle. The goal is a textured, fluffy section, not a ratty mess.
- Smooth the top surface of the backcombed section with your comb so it looks polished on top while staying textured underneath. This gives you height without visible texture.
- Gather the smoothed section back and secure with a clip or elastic at the back of your head, leaving the rest of the hair down and loose.
- Gently pull and separate the backcombed section to enhance the height and create a soft, dimensional crown shape.
- Leave soft, wispy pieces around your face and temples to frame your features and prevent the style from looking too edgy.
- Secure everything with a texture spray or lightweight hairspray that holds the backcombing in place without crunchiness.
Worth knowing: Use a proper teasing brush (which has smaller, tighter bristles) rather than a regular comb. It creates better texture and is easier to control.
11. The Half Up With Scattered Braids
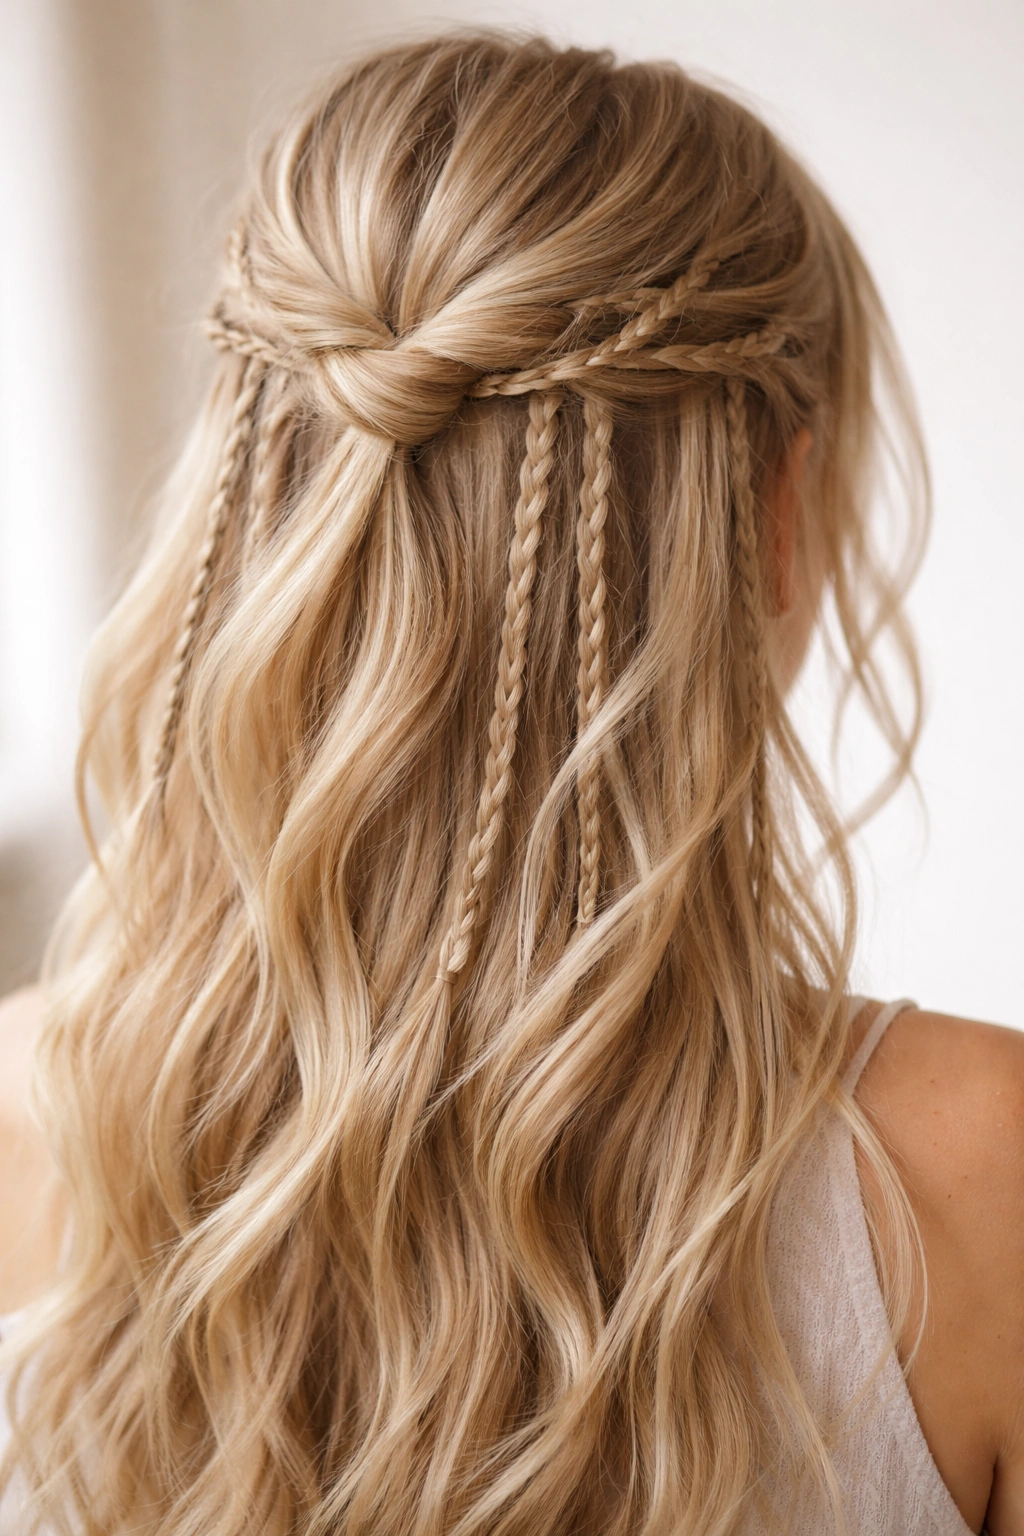
This style pulls the hair back at the crown with multiple thin braids scattered throughout the style, creating a bohemian, textured look. Instead of one big braid or a smooth gathering, you’re creating visual interest through multiple smaller braids that catch light and create dimension. For fine hair, this is brilliant because it adds texture and movement without requiring actual thickness.
Why Multiple Thin Elements Beat Single Thick Elements
When you break your volume up into several thinner elements instead of concentrating it in one thick braid or section, the overall look reads as fuller and more textured. Your eye reads texture and dimension as fullness, so a style with five thin braids looks thicker than a style with one thicker braid using the same amount of hair.
How to Create Scattered Braids in a Half Up
- Create 3-5 small, loose braids scattered throughout the crown and upper section of your hair. Each braid should be about an inch wide, which is thin enough to be proportional to fine hair.
- Start your first braid at one temple, moving back toward the crown. Make it as loose as possible—the looser, the fuller it looks.
- Secure the first braid with a tiny elastic or bobby pin at the back of your head.
- Create the second braid on the other side, mirroring the first for balance.
- Add 1-3 additional smaller braids throughout the upper section of your hair, spacing them out so they’re not clustered.
- Gather all the braids together along with your regular hair at the back, securing everything with a single clip or elastic. The braids stay visible and become part of the styling detail.
- Loosen all the braids by gently pulling the outer edges, making each one wider and puffier. This is what creates that full, textured, intentional look.
- Leave the bottom section completely loose with soft waves or natural texture visible.
Pro tip: Use ultra-thin elastic bands or tie off the braids with ribbon instead of elastic for a more delicate, finished look.
12. The Half Up With Curved Sections
This style gathers hair back in a curved, swooping line rather than a straight line from crown to back. The curved line is more flattering to most face shapes and creates a softer, more romantic aesthetic than a straight gathering. It’s subtle but creates a noticeably different visual impact.
Why Curved Lines Flatter Fine Hair
Straight lines can sometimes emphasize thinness because they draw the eye straight back without any visual break. A curved line creates a more flowing, gentle look that feels more cohesive with the face and longer strands. The curve also allows you to leave a few pieces out in front that frame the face, which softens the overall style.
How to Create a Curved Half Up Gathering
- Start by clipping your hair at the side of your head just above your ear on one side.
- Move back toward the crown in a gentle curve, clipping as you go so you’re controlling the shape. Think of the line you’re creating as a swooping curve rather than a direct path.
- Bring the curve to the back of your head, ending at the lower back area. A curved gather naturally sits lower than a straight gather, which is better for fine hair anyway.
- Use bobby pins or a small clip to secure this curved section, positioning the pins along the curve so they’re invisible from the front.
- Loosen the section gently to create softness and dimension. A curved section that’s too tight will look thin; loose it slightly for a fuller appearance.
- Leave face-framing pieces on both sides that follow the curve, softening the line and framing your features.
- Set with flexible-hold hairspray that lets the curved shape be visible without stiffness.
Insider note: This style is actually easier to execute than a straight half-up because the curve gives you more flexibility in where you start and end the section.
13. The Half Up With Twist-And-Pin Details
This style uses multiple small twists that are individually pinned throughout the crown section, creating a detailed, intricate look that’s actually very secure. Each small twist is pinned separately, so the whole style is distributed across many anchor points rather than relying on one gathering point. This is incredibly secure for fine hair.
Why Multiple Pins Beat a Single Securing Point
When you distribute the weight and hold across several pinned sections instead of one tight gathering point, you’re reducing strain on your hairline and scalp. Each individual pin handles less weight, which means better hold without damage. For fine hair that’s prone to breakage, this distributed approach is ideal.
How to Create Multiple Pinned Twists
- Section off the first piece of hair from your temple, about an inch wide.
- Twist this section loosely as you move toward the back of your head. Keep it loose—the looser it is, the fuller it looks.
- Pin the twisted section at the back with a single bobby pin, tucking the pin completely inside the twist so it’s invisible. This one twist now has one pin securing it.
- Section off the second piece next to the first, making sure there’s space between them so you can see all the details.
- Twist and pin this section just below or next to the first, repeating the process.
- Continue creating 3-5 more small twists, spacing them out across the crown and upper back area.
- Once all twists are pinned, gently loosen each one by pulling on the outer edges, making each twist wider and puffier.
- Make sure all your bobby pins are completely hidden within the twists. If you can see any pins from the front, tuck them in further.
- Set with texture spray or lightweight hairspray.
Key technique: Using bobby pins that match your hair color is absolutely essential because if a pin ever shows, it needs to blend.
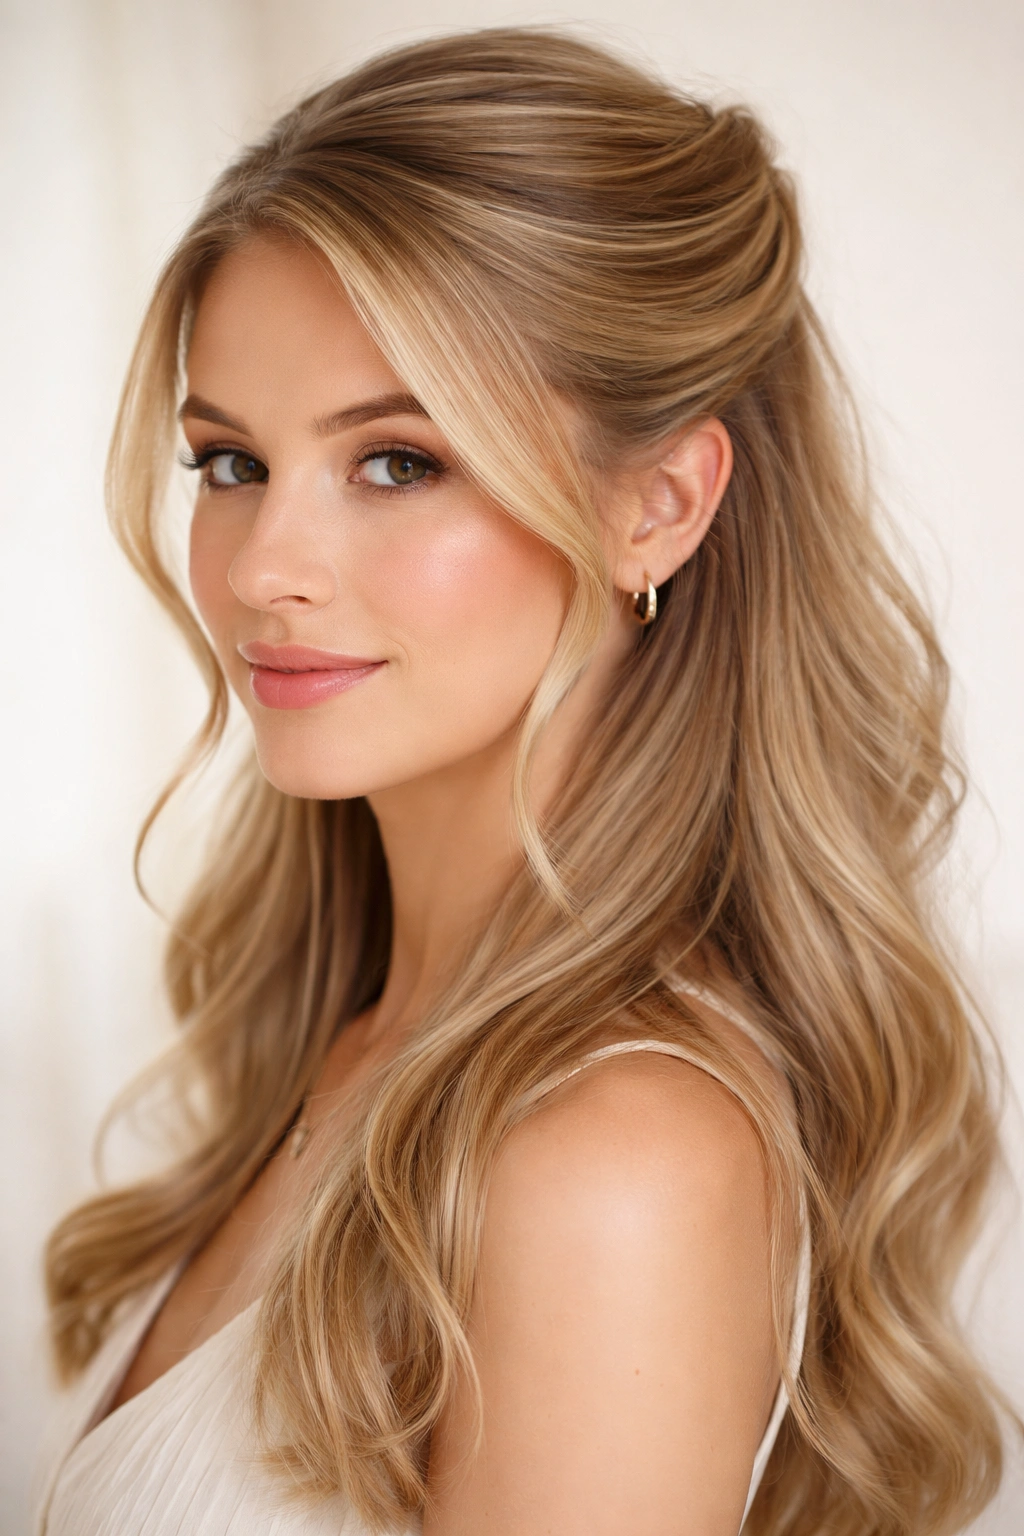
14. The Half Up With Loose Waves and Strategic Layering
This style focuses on creating beautiful waves throughout the entire head, then gathering a small section at the back. The waves throughout make the style look fuller, and the fact that you’re only gathering a small section means the waves remain visible and dimensional. It’s a beautiful, low-effort style that looks effortlessly romantic.
Why Waves Are Your Secret Weapon for Fine Hair
Waves and texture create the optical illusion of more volume. A head of perfectly straight hair has nowhere for light to bounce or texture to hide, which can make fine hair look especially thin. Waves give your hair dimension, movement, and visual fullness. Adding a half-up to wavy hair bridges the gap between completely down and fully styled, giving you polish without severity.
How to Create Long-Lasting Waves and Then Half-Up
- Apply a light mousse to damp hair at the roots for texture and hold.
- Use a 1.5 to 2-inch curling iron or wand to wave the entire head. Work in sections, wrapping hair around the barrel and holding for 8-10 seconds. Wave away from your face on the front sections and alternate direction on the back for natural movement.
- Let waves set completely before touching them. This usually takes 20-30 minutes.
- Once waves are set, gather a section from one side of your head at ear level and bring it to the other side at the same level, creating a straight or slightly curved line from ear to ear.
- Secure at the back with a clip or elastic that won’t be visible.
- Loosen the gathered section gently to add softness and prevent it from looking too tight.
- Leave waves throughout the bottom section completely visible. These waves are what make the style look full and intentional.
- Refresh waves midday with a light mist of texture spray or wave-setting spray if they need it.
Pro tip: This style actually looks better on day-two or day-three hair because the waves are more relaxed and natural-looking than fresh waves.
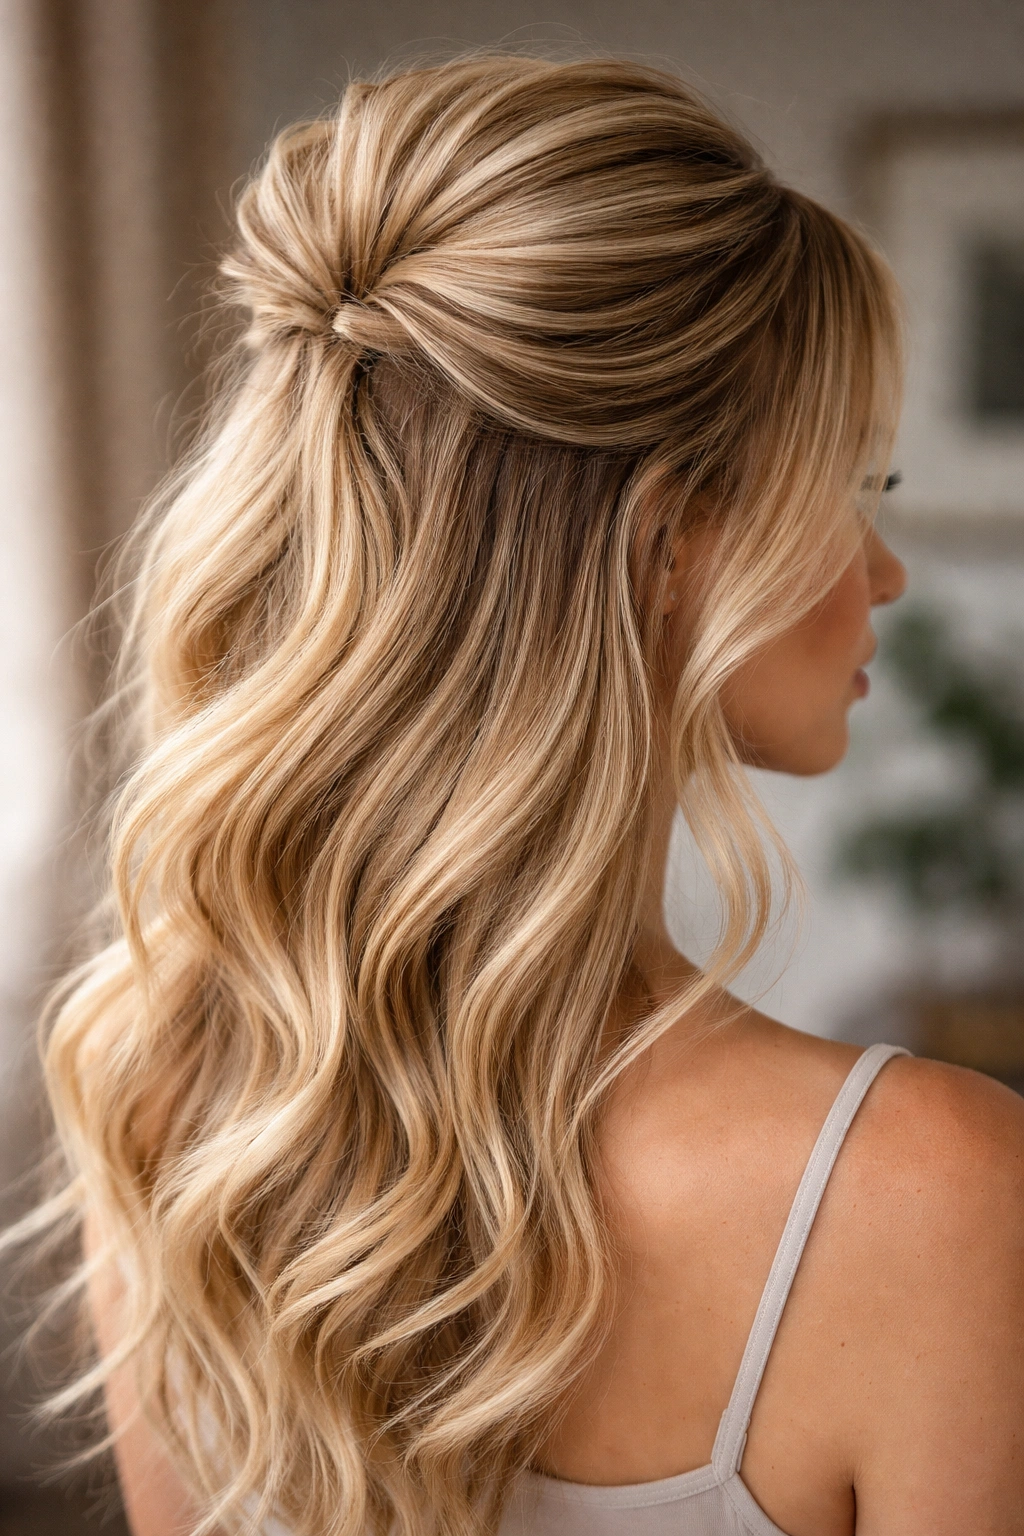
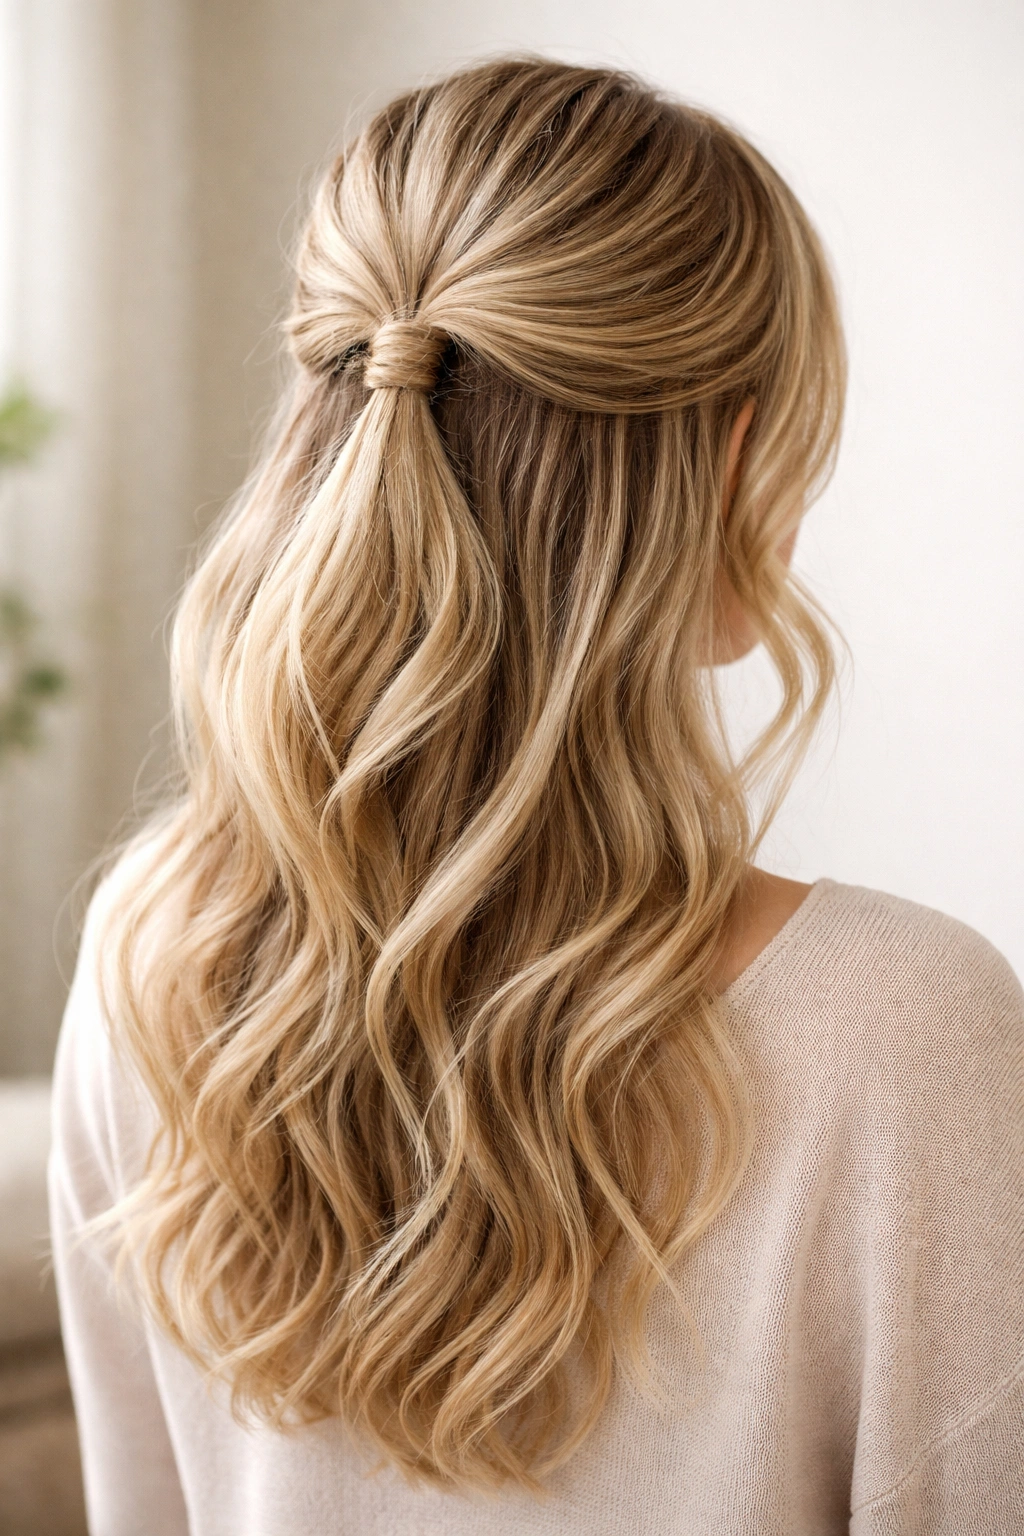
15. The Half Up With Mini Bun Detail
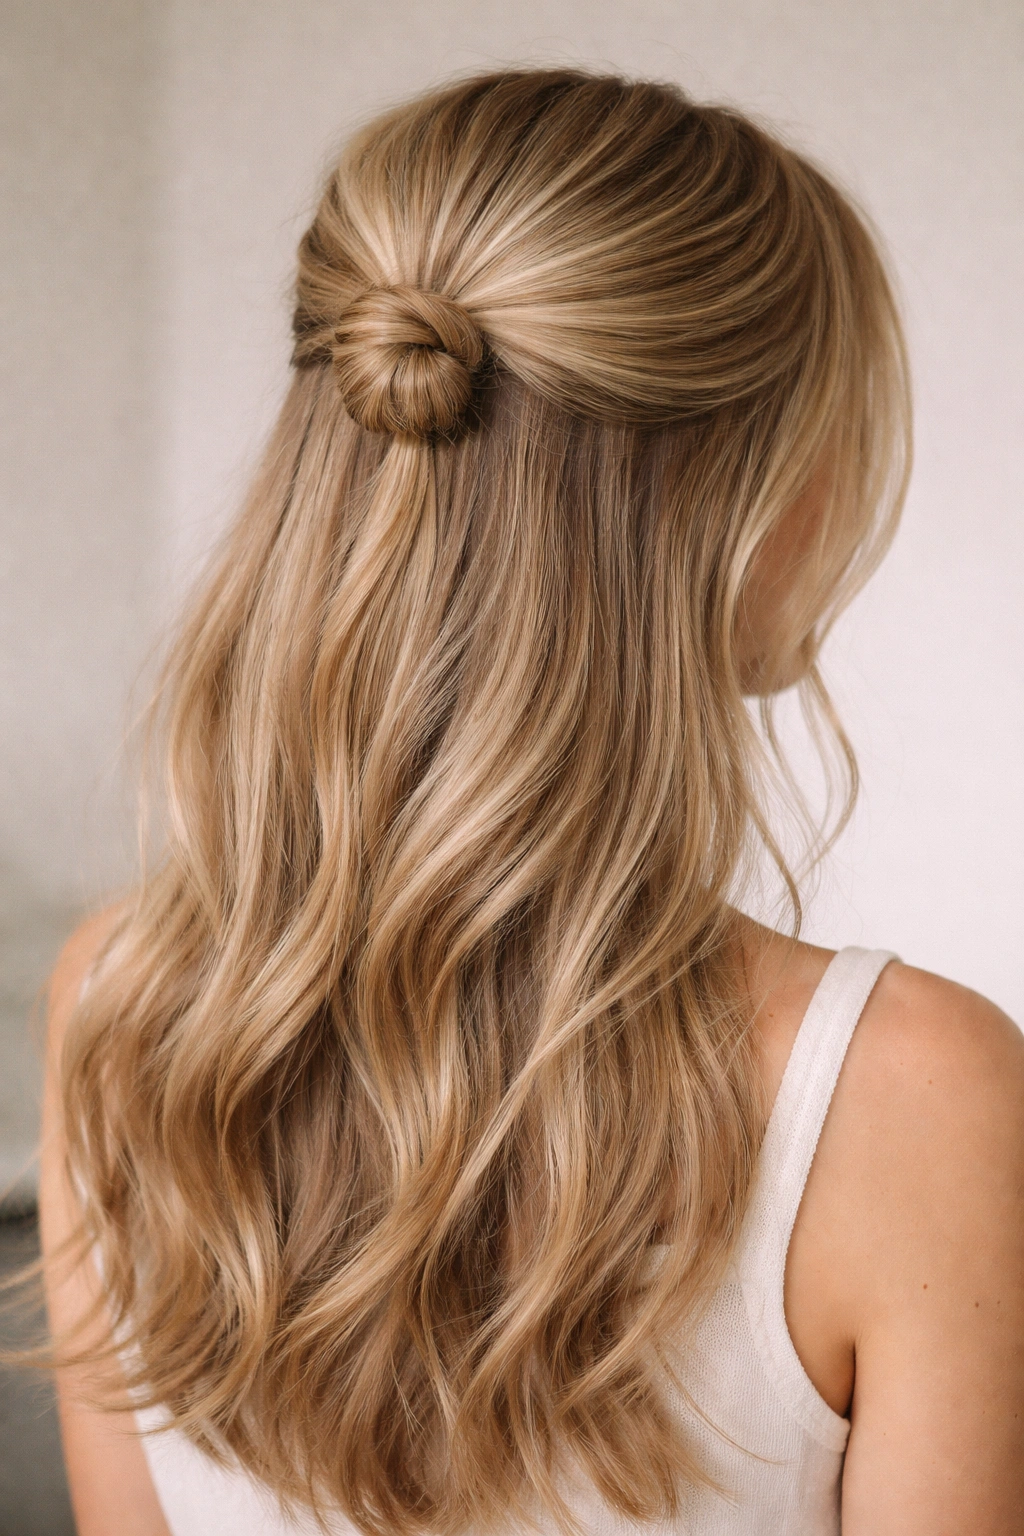
This style gathers a small section at the back and twists it into a tiny bun, which becomes a visual detail and anchor point. The mini bun adds texture and interest to the back of your head while keeping most of your hair down. It’s an unexpected twist (literally) on the standard half-up that makes a big visual impact.
Why Mini Buns Work for Fine Hair
A mini bun on fine hair looks intentional and styled without looking bulky. You’re creating a focal point at the back of your head rather than trying to hide your hair or create bulk. The twisting involved in making the bun creates texture that reads as fuller than straight or smooth gathered hair would.
How to Create a Secure Mini Bun
- Gather a section from the crown area, about two inches wide and extending from one temple to the other.
- Secure with a small elastic at the back of your head, leaving about three inches of hair below the elastic unsecured.
- Twist the unsecured section loosely.
- Wrap the twisted section around the base of your gathering to create a small bun shape, then secure with bobby pins.
- Loosen the bun by gently pulling the outer sections to make it look fuller and softer. You want it to look intentionally undone, not perfectly polished.
- Make sure all pins are hidden inside the bun where they can’t be seen.
- Leave wispy pieces around your face and temples for softness.
- Set with a light hairspray that allows the bun to maintain its soft, textured shape.
Worth knowing: A slightly messy, undone mini bun actually looks better on fine hair than a perfectly smooth one because it shows off texture rather than emphasizing sparseness.
16. The Half Up With Face-Framing Braids and Central Clip

This style creates two small braids on either side of your face, then gathers everything together with a clip at the back. The face-framing braids add softness and detail while the central clip keeps everything secure. It’s a style that looks intricate but is actually quite straightforward to execute.
Why Face-Framing Details Matter for Fine Hair
Your eye goes where there’s detail. By adding braids at the sides of the face, you’re drawing attention to your features rather than to the lack of volume. The braids also frame the face in a way that’s universally flattering, creating softness and movement that distracts from any thinness in the overall style.
How to Create Face-Framing Braids and Central Clip
- Take a piece of hair from your left temple, about one inch wide.
- Create a loose three-strand braid, moving from your temple back toward your crown. Keep this braid thin and loose—it’s a delicate detail, not a statement braid.
- Secure temporarily with a small clip while you work on the other side.
- Create a matching braid on the right temple, making sure both braids mirror each other in size and thickness.
- Gather all hair together at the back, including the two braids, securing with a clip or elastic at the lower back.
- Loosen both braids by gently pulling the outer edges to make them puffier and more textured.
- The back gathering should feel relaxed, not tight. A slight looseness here makes the style feel intentional and soft rather than severe.
- Leave small pieces unbraided at your temples for maximum softness.
Insider note: These braids don’t need to be perfect. Slightly loose, slightly undone braids actually look better than pristine ones.
17. The Half Up With Invisible Pins and Maximum Movement
This style uses the absolute minimum of visible elements—just bobby pins that are completely hidden inside the hair, securing a gathering at the back. There are no clips, no elastics, nothing visible from the front except the shaped style itself. It’s the most elegant, refined version of a half-up and requires only that your bobby pins are genuinely hidden.
Why Invisible Securing is the Most Elegant Approach
When there’s nothing visible except the shaped hair itself, the style reads as effortlessly elegant. There’s no clip to catch light, no elastic line to interrupt the flow—just intentional shaping. For fine hair, this kind of minimal approach is ideal because it directs attention to the movement and flow rather than to the styling elements.
How to Achieve Invisible Securing with Bobby Pins
- Gather a section from the crown area, bringing it back to the lower back. Make this section substantial enough to hold itself in place—at least two inches wide.
- Using bobby pins that match your hair color exactly, secure the gathered section with at least 3-4 pins, crisscrossing them in an X pattern at the base of the gather.
- Make sure each pin is completely inside the gathered section where it can’t be seen from the front, sides, or back.
- Distribute the weight across all the pins rather than relying on one anchor point. This keeps tension low and hold strong.
- Gently loosen the gathered section to create softness and prevent it from looking pulled tight.
- Leave several face-framing pieces out to soften the line and frame your features.
- Set with a flexible-hold hairspray that lets hair move naturally.
- Periodically check that your pins are still hidden and secure. You may need to tuck pins in further throughout the day.
Key technique: Practice finding the sweet spot with bobby pins where they’re completely hidden but still gripping securely. This takes a little finesse but is worth mastering.
18. The Sleek Ponytail Half Up with Glossy Finish
This final style gathers hair back in a high, sleek section and secures it with an elastic, then applies a glossy serum to create shine and definition. The glossiness is key here—it makes the style look intentional and polished rather than thin. The severe sleekness on fine hair works because the shine gives it presence and definition.
Why Gloss Transforms Fine Hair
A matte finish can sometimes make fine hair look more sparse because there’s nowhere for light to play. Adding shine and gloss gives the hair dimension and presence. The light reflection from a glossy finish makes hair look thicker and more substantial, and it’s one of the few ways to make a sleek style look full on fine hair.
How to Create a Sleek, Glossy Ponytail Half Up
- Smooth hair back with a fine-tooth comb, creating a sleek line from your hairline to the back of your head. This needs to be smooth and polish, with no bumps or texture visible.
- Gather at the crown in a clean, tight line, securing with an elastic that matches your hair color.
- Apply a glossy serum or anti-frizz serum to the gathered section and the lower half of your hair, distributing it evenly with your fingers or a comb.
- The gloss should be visible and intentional, creating shine and dimension in the style.
- Smooth down any flyaways with the serum, using a fine comb or brush to set them in place.
- Define the edges at your temples by smoothing the hair back and applying serum to create a clean, polished line.
- Leave tiny face-framing pieces out on both sides if desired, or keep the style completely pulled back for maximum polish.
- Finish with a light hairspray that doesn’t dull the gloss or add texture to your sleek section.
Pro tip: Glossy products are especially effective on fine hair because they’re lightweight while still adding presence and shine.
Final Thoughts
Half up half down styles are genuinely some of the most forgiving options available to anyone with fine hair. You get all the polish of a styled hairstyle without the weight, tension, and damage that comes with a full updo. The key is choosing styles that emphasize movement, texture, and light-catching details instead of relying on thick, heavy gathering points. Loose twists, scattered braids, strategic wave placement, and face-framing elements all work better on fine hair than tight, perfectly smooth styles because they create visual fullness through dimension and texture rather than through actual hair thickness.
The techniques that matter most for fine hair are using texture spray to create grip, loosening gathered sections to add softness, distributing weight across multiple pins instead of one tight gathering point, and always choosing styling methods that respect your hair’s delicate nature. None of these styles require tension on your hairline, heavy products, or damage-inducing techniques. They work with fine hair rather than against it, which is exactly what you need for a style that holds all day without leaving you with broken strands and a stressed scalp by evening.
Start with whichever style appeals to you most visually, then adapt based on what you learn. If you try a twisted half-up and find the twists slip out, the next time you’ll apply texture spray first. If a braided style is too loose, you’ll backcomb the section before braiding to add grip. Each time you style, you’re gathering information about what works for your specific hair texture, and that knowledge becomes infinitely more valuable than any one single technique. Your fine hair is workable, beautiful, and completely capable of holding these styles—you just need to approach them the way they’re designed for fine, delicate texture rather than the way they’d be done on thicker hair.