Fine hair requires a delicate styling approach—too much volume looks fake, too much product weighs it down, and hairstyles that demand thick, substantial strands often fall flat by midday. If you’ve struggled to find elegant updos that don’t look sparse or droopy, you’re not alone. The truth is, many classic hairstyles that work beautifully on thick or textured hair are genuinely challenging with finer strands.
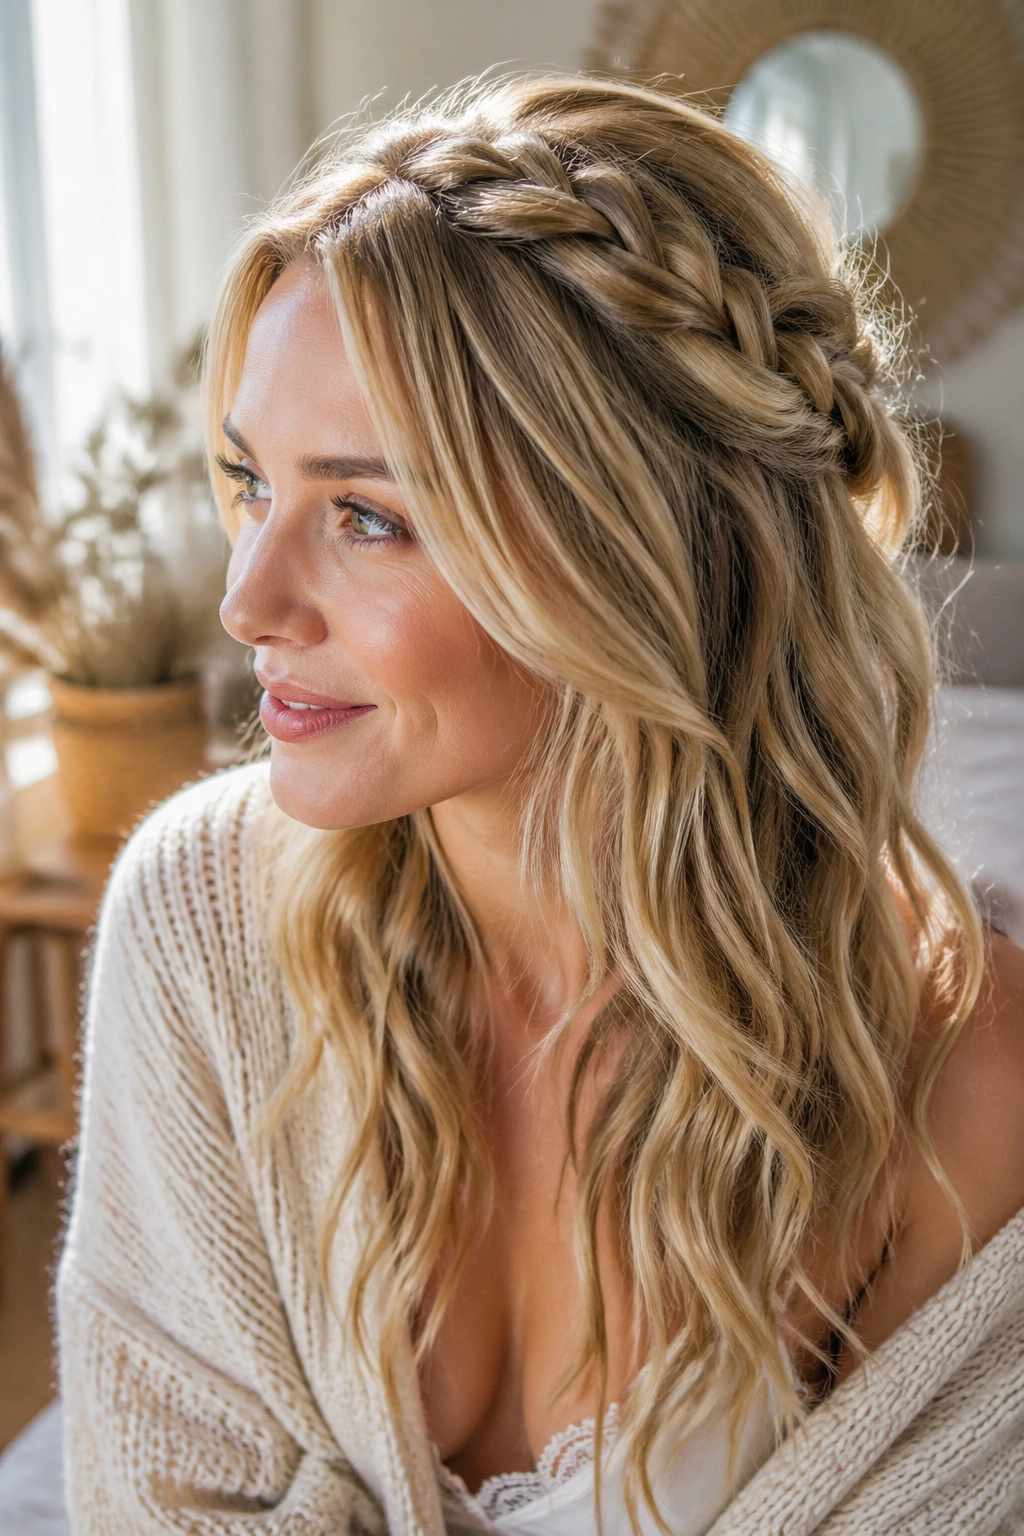
Half-up, half-down styles are naturally flattering for fine hair because they balance movement with structure. By pulling back only a portion of your hair, you create the illusion of fuller texture at the crown without committing to a full updo that exposes thin areas you’d rather conceal. When you add braids to the mix, something almost magical happens—the woven texture catches light differently, creates the appearance of more substance, and provides a grip that’s much more secure than slicked-back smoothness. Braids on fine hair actually look more intentional and intricate because the individual strands are visible in the weave, making the detail pop.
The fifteen braided half-up styles in this guide are specifically chosen and adapted for fine hair. Each one uses techniques that minimize stress on delicate strands, create the optical illusion of thickness, and hold throughout the day without slipping or requiring excessive product. Whether you’re heading to work, attending a special event, or simply wanting to elevate your everyday look, there’s a braided half-up style here that’ll work with your hair type rather than against it.
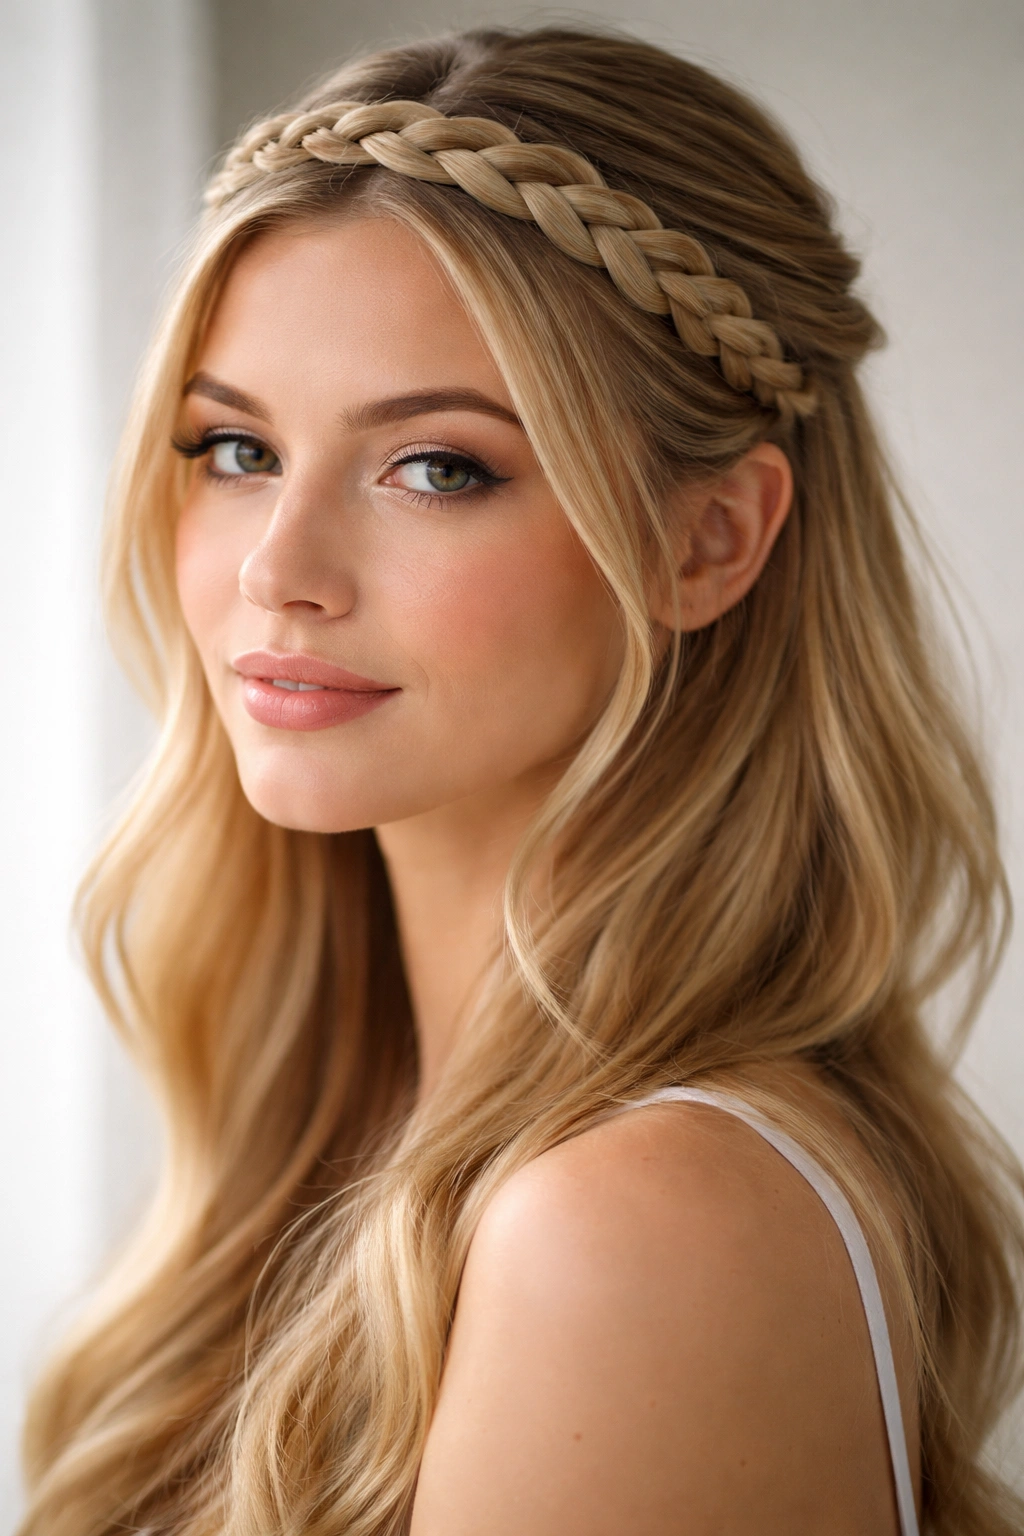
1. The Delicate Dutch Braid Half-Up
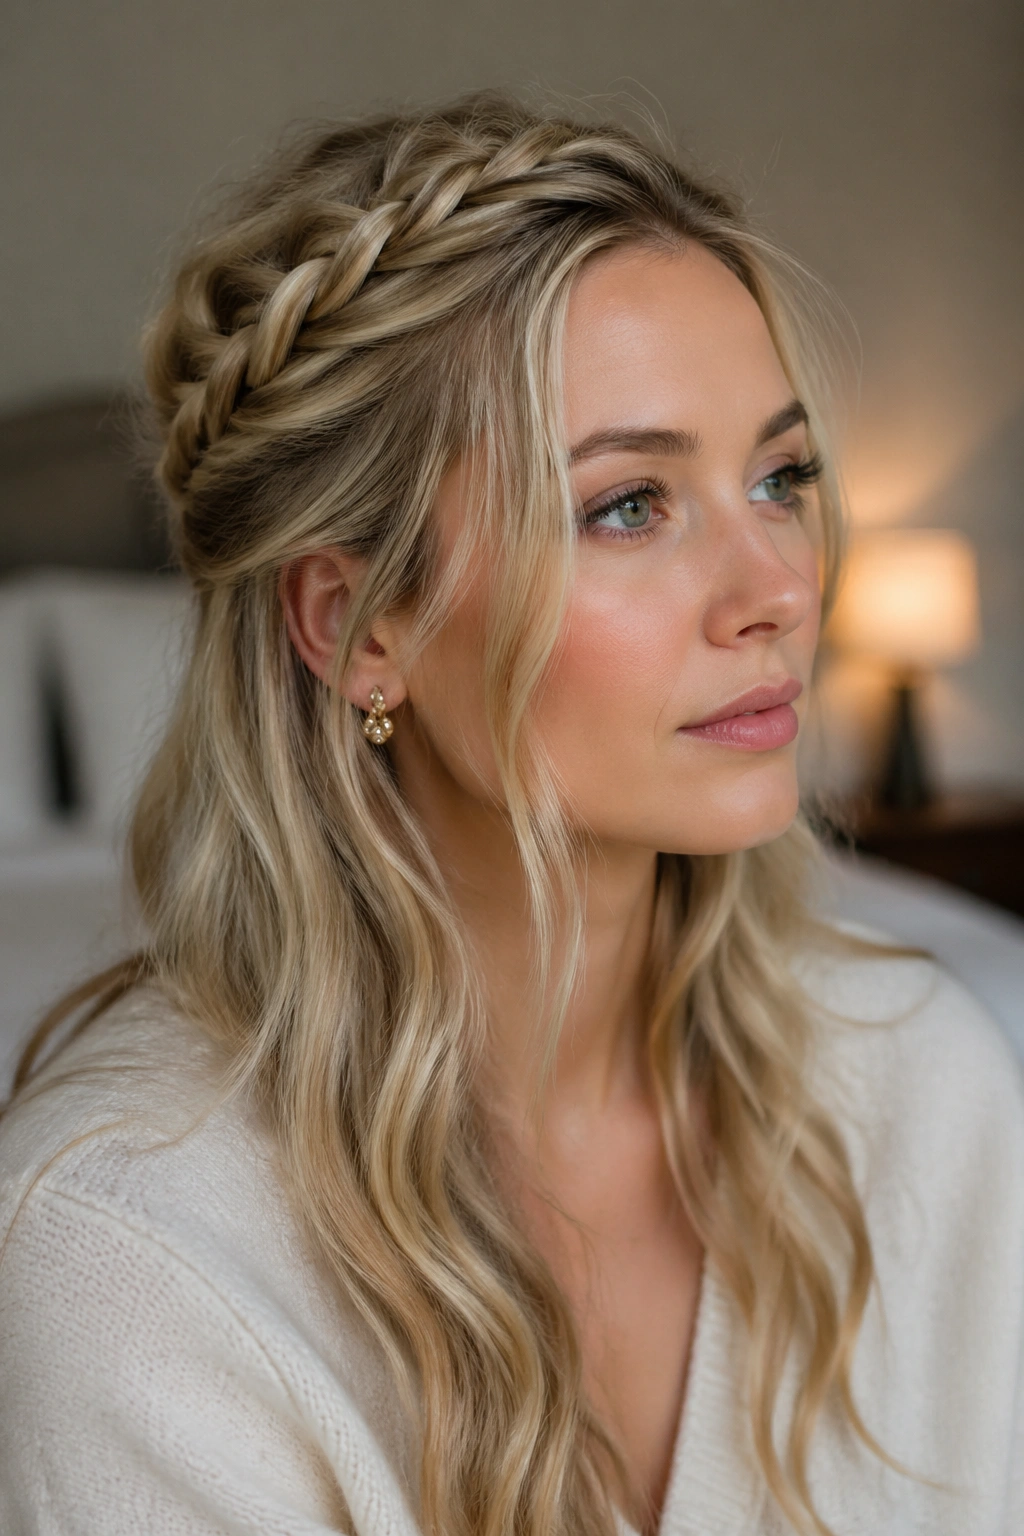
A Dutch braid is an inverted French braid that sits on top of your hair rather than into it, creating dimensional texture that’s particularly forgiving for fine strands. Start by sectioning a triangular portion of hair from your crown to behind each ear, leaving the underneath layers to flow freely. Divide this section into three thin strands and begin braiding by crossing each outer section under (rather than over) the center strand, continuously incorporating thin pieces from the sides as you move toward the back of your head.
Why This Works for Fine Hair
The Dutch braid creates visual depth because light reflects differently off each woven strand, making your hair appear thicker than it actually is. By keeping your braid sections thin and loose rather than tight, you eliminate strain on the follicle and prevent the hair breakage that can occur when fine strands are pulled taut. The underbraid creates a flattering frame around your face without exposing thin areas at your part or crown.
How to Achieve This Look
Teasing your hair very gently at the crown before you start braiding gives the braid something to grip without requiring excessive tightness. Use a lightweight texturizing spray or a tiny amount of dry shampoo on fine strands to improve grip—this is crucial since fine hair tends to slip out of braids more easily than thick hair. Secure the braid with a thin elasticated hair tie, not a thick fabric band that can create tension points. Once secured, gently pull on random strands within the braid to add volume and texture, making it look fuller and more intentional.
Pro tip: If your braid starts to slide out throughout the day, small bobby pins inserted horizontally through the braid strands and into the hair beneath will anchor it without being visible.
2. The Cascading Fishtail Half-Up
The fishtail braid creates an intricate, delicate appearance that suits fine hair perfectly because the weave is less dense than a traditional three-strand braid. Instead of working with three sections, you’ll split your hair into two pieces and repeatedly cross thin strands from the outside of one section over to the outside of the other. The result is a lacy, feathered braid that looks complex but is surprisingly easy to master.
Why Fine Hair Loves This Technique
The fishtail’s thin, alternating weave creates an airy look that doesn’t emphasize thinness—instead, it celebrates it by showcasing the delicate intricacy of the braid itself. Because you’re working with smaller sections throughout, there’s less bulk at any single point, which means no thick, heavy knots that pull on fine hair. The braid naturally looks fuller when you gently tug the sides apart after securing it.
Styling Steps for Best Results
Section your upper half horizontally from temple to temple, clipping away the bottom layers. Divide your upper section into two equal parts. Take a small strand from the outer edge of one section and cross it over to the outer edge of the opposite section. Repeat this motion, always pulling from the outside and crossing inward, until you’ve braided the way down to the back of your head. Secure with a small elastic, then go back and gently pull each X-shaped weave apart horizontally to create width and texture throughout the braid.
3. The Romantic Double Braid Half-Up
Creating two matching braids instead of one draws the eye across the back of your head, creating the optical illusion of more volume than a single braid. This style is particularly effective for fine hair because it distributes the weight of your styled section across two separate braids rather than concentrating it in one. The symmetrical design also looks more intentional and polished, even on thinner hair.
The Psychological Effect of Doubled Details
Two braids create visual balance and movement that a single braid simply can’t achieve. They frame the back of your head differently, and the duplication makes your styling effort feel more intentional and elaborate. For fine hair, this matters because it shifts attention from hair density to styling sophistication—you’re showing skill and care, not just trying to hide thinness.
Execution for Fine Hair
Create a middle part from your hairline to the nape of your neck. On one side, gather a triangular section from your temple toward the back, leaving underneath layers loose. Create a loose Dutch or French braid, incorporating only small sections from the sides to keep the braid lightweight. Repeat on the opposite side. Secure both braids at the nape with a small elastic, or cross them over each other before securing for an even more intricate look.
Worth knowing: Using matching barrettes or small clips instead of elastics at the ends gives this style a more intentional, vintage feel.
4. The Twisted Crown Half-Up
Not technically a braid, but textured enough to achieve the same effect—twists are actually gentler on fine hair than braids because they create less tension on individual strands. Start with a section of hair from your crown and divide it into two pieces. Twist each piece away from the center, then twist the two pieces around each other. The result is a ropelike texture that looks substantial even on thin hair.
Why Twists Outperform Braids for Ultra-Fine Hair
Twists distribute tension more evenly across multiple strands because you’re not weaving in a complex pattern—you’re simply rotating. This makes them ideal if you have particularly delicate hair or are prone to breakage. The twisted texture still creates visual dimension and catches light beautifully, giving the appearance of thickness without any actual density.
Creating the Perfect Twist
Section your upper half from ear to ear. Divide this section into two pieces. Take the right section and twist it away from your face, then take the left section and twist it toward your face—always twist in opposite directions for the most flattering spiral. Cross the two twisted sections around each other, pulling them taut as you work toward the back of your head. Secure at the nape with a small elastic.
5. The Waterfall Braid Half-Up
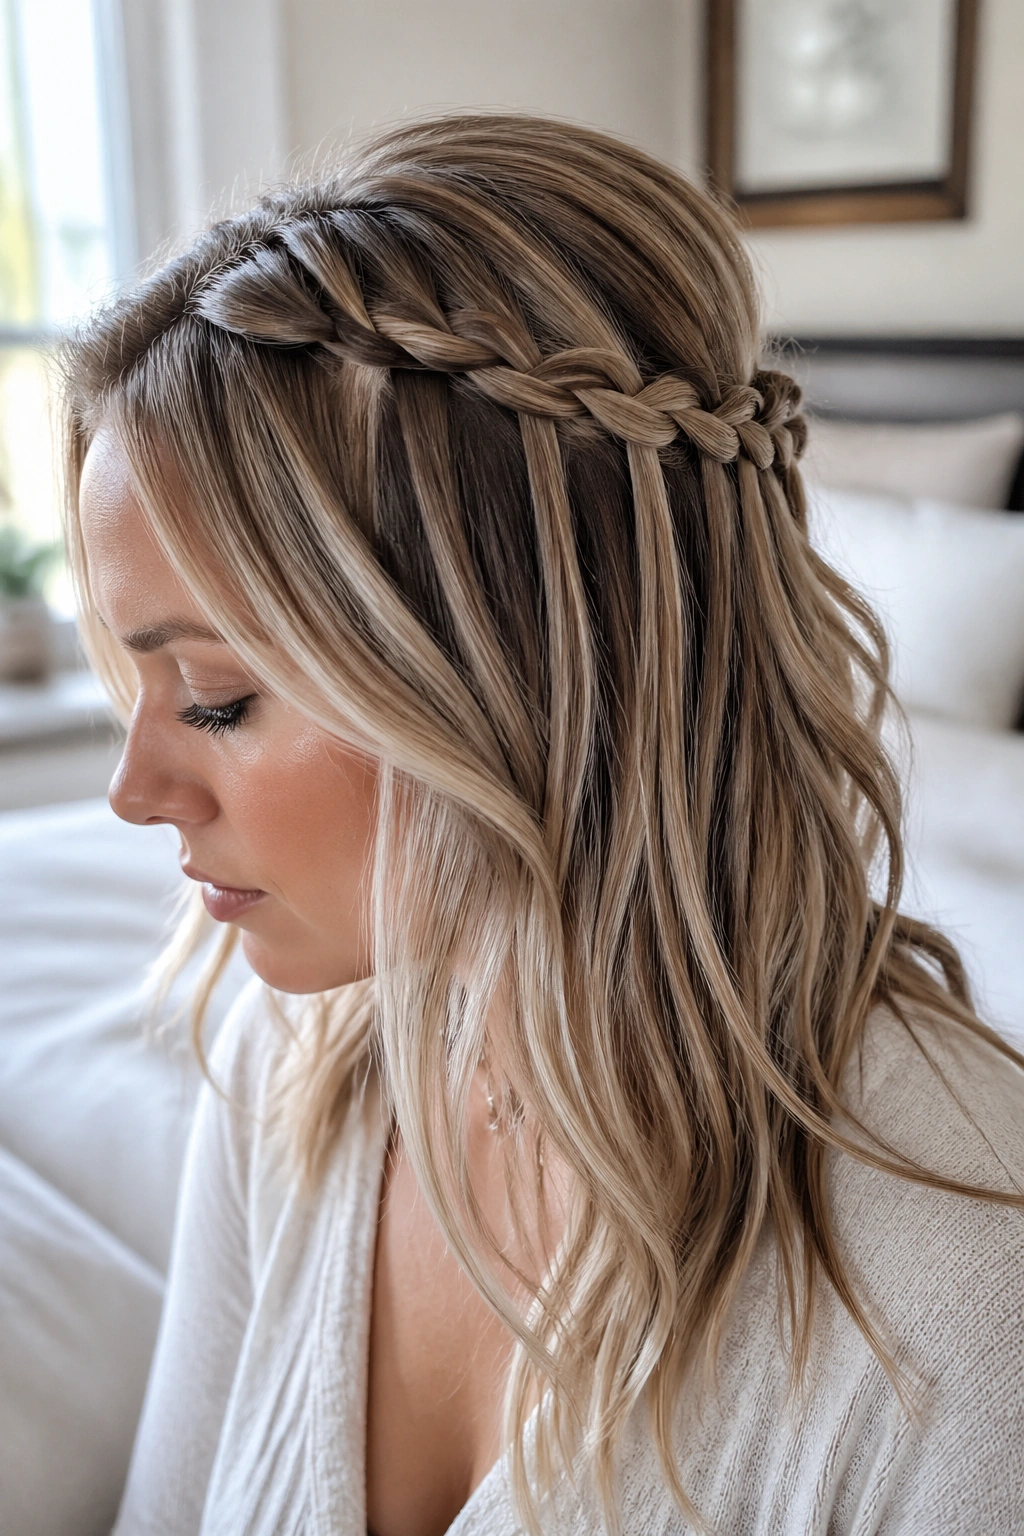
A waterfall braid creates the illusion of strands cascading down your sides while actually keeping hair secured and off your face. This style works on fine hair because the “waterfall” sections are thin enough to look like natural texture rather than a thick, heavy bundle. The effect is romantic and effortless-looking, which makes it perfect for events where you want polished beauty without obvious styling effort.
The Technical Magic Behind Waterfall Braids
As you braid, you continuously drop a strand from the braid and replace it with a new strand from the unbraided hair below. This creates the visual effect of hair flowing through your braid, even though it’s fully secured. For fine hair, this technique is perfect because the dropping and replacing of strands breaks up the visual weight—there’s no single thick braid claiming attention.
Step-by-Step Waterfall Technique
Start your braid at your temple with three small strands. As you create your first crossing, drop the bottom strand and pick up a new strand from the hair below. Continue braiding while repeating this drop-and-replace motion as you move toward the back of your head. The dropped strands fall naturally, creating the cascading effect. Finish by gathering everything into a half-up ponytail or securing the braid end with a clip.
6. The Boho Braided Half-Pony
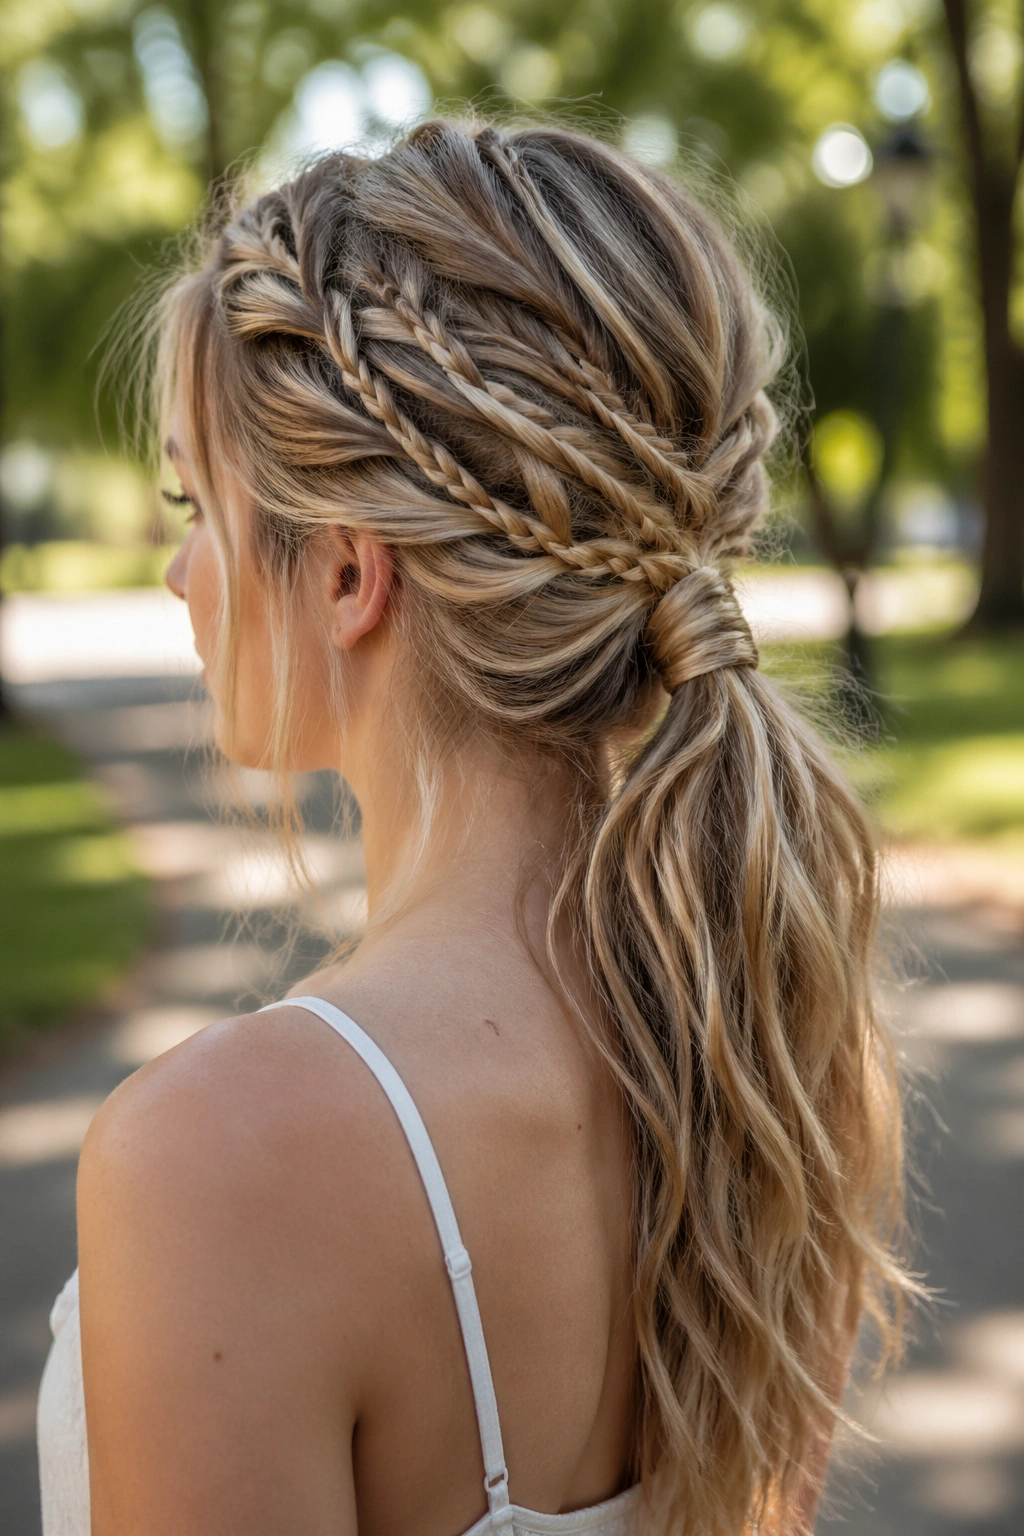
Combine the best of both worlds by weaving multiple thin braids throughout your upper section, then gathering everything into a low ponytail. This approach is ideal for fine hair because it breaks up the weight into several smaller braids rather than creating one thick one. The bohemian aesthetic also means that textured, slightly imperfect braids actually look more intentional and artistic.
Why This Style Flatters Fine Hair Especially
Multiple smaller braids create far more visual texture than a single large braid would on fine hair. Each braid catches light independently, multiplying the dimensional effect. The low ponytail that gathers everything together doesn’t pull as harshly on your crown as a high ponytail would, making it gentler on delicate strands while still achieving that polished half-up look.
Building Your Boho Braid Moment
Tease gently at your crown for grip. Create 2-3 thin braids throughout your upper half, placing them strategically but asymmetrically—one braid at your temple, another behind your ear, perhaps one at the crown. Leave some unbraided sections for a deliberately undone aesthetic. Gather everything loosely at the nape into a low ponytail, allowing some face-framing strands to stay loose. The braids will create texture throughout your ponytail, making it look fuller than a standard ponytail would.
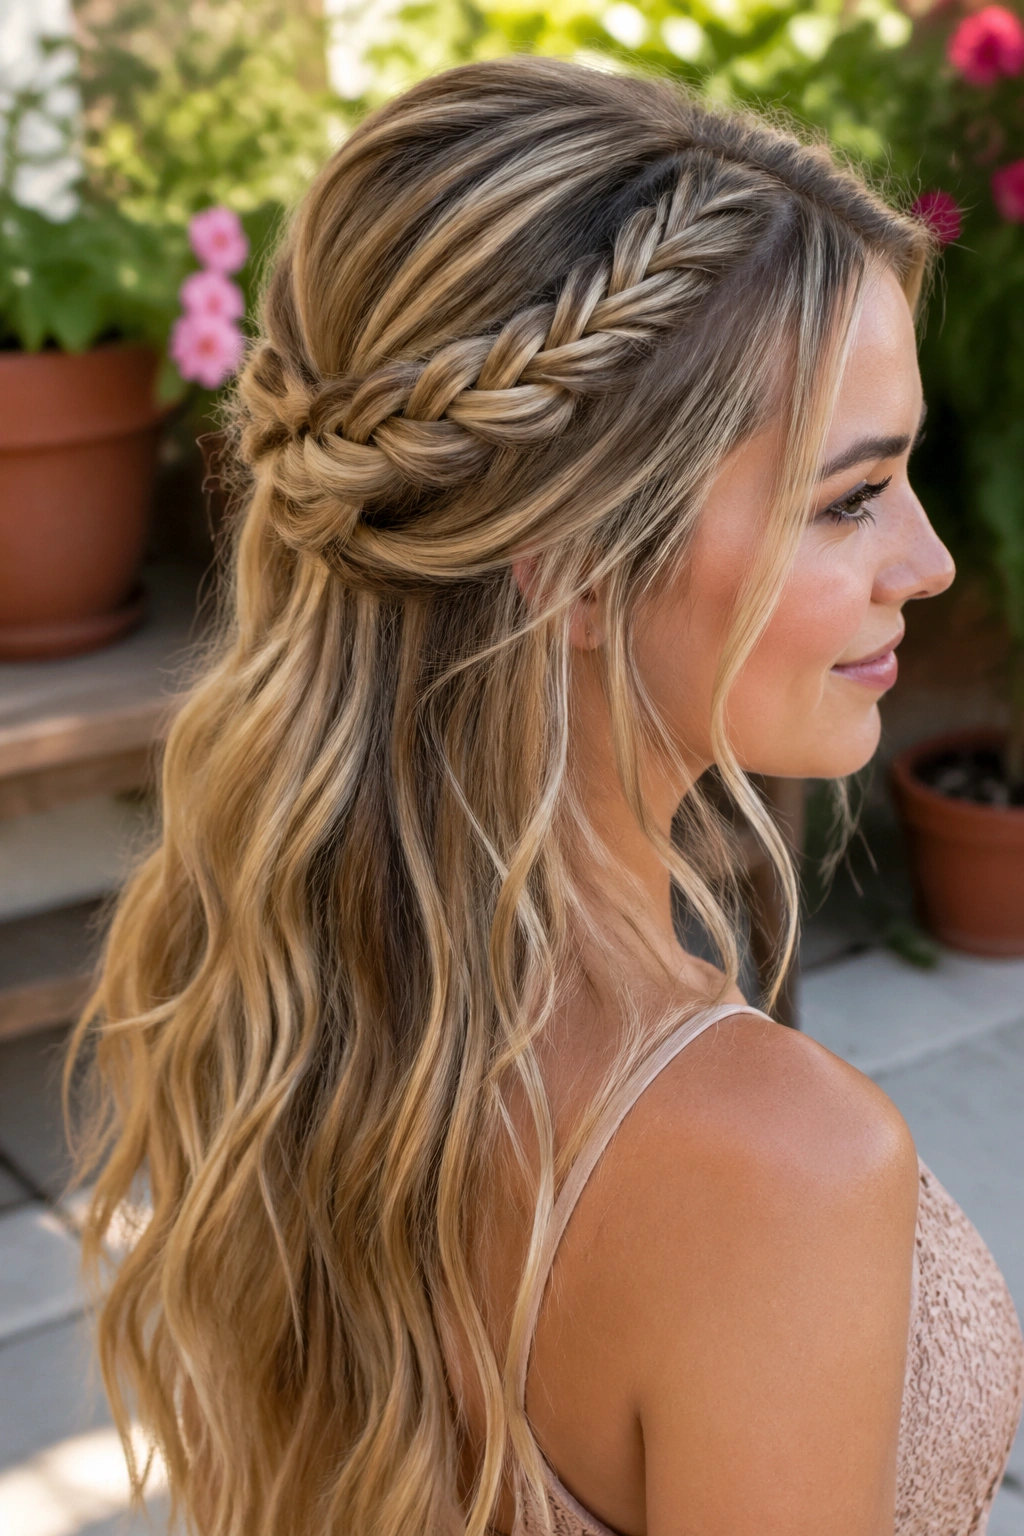
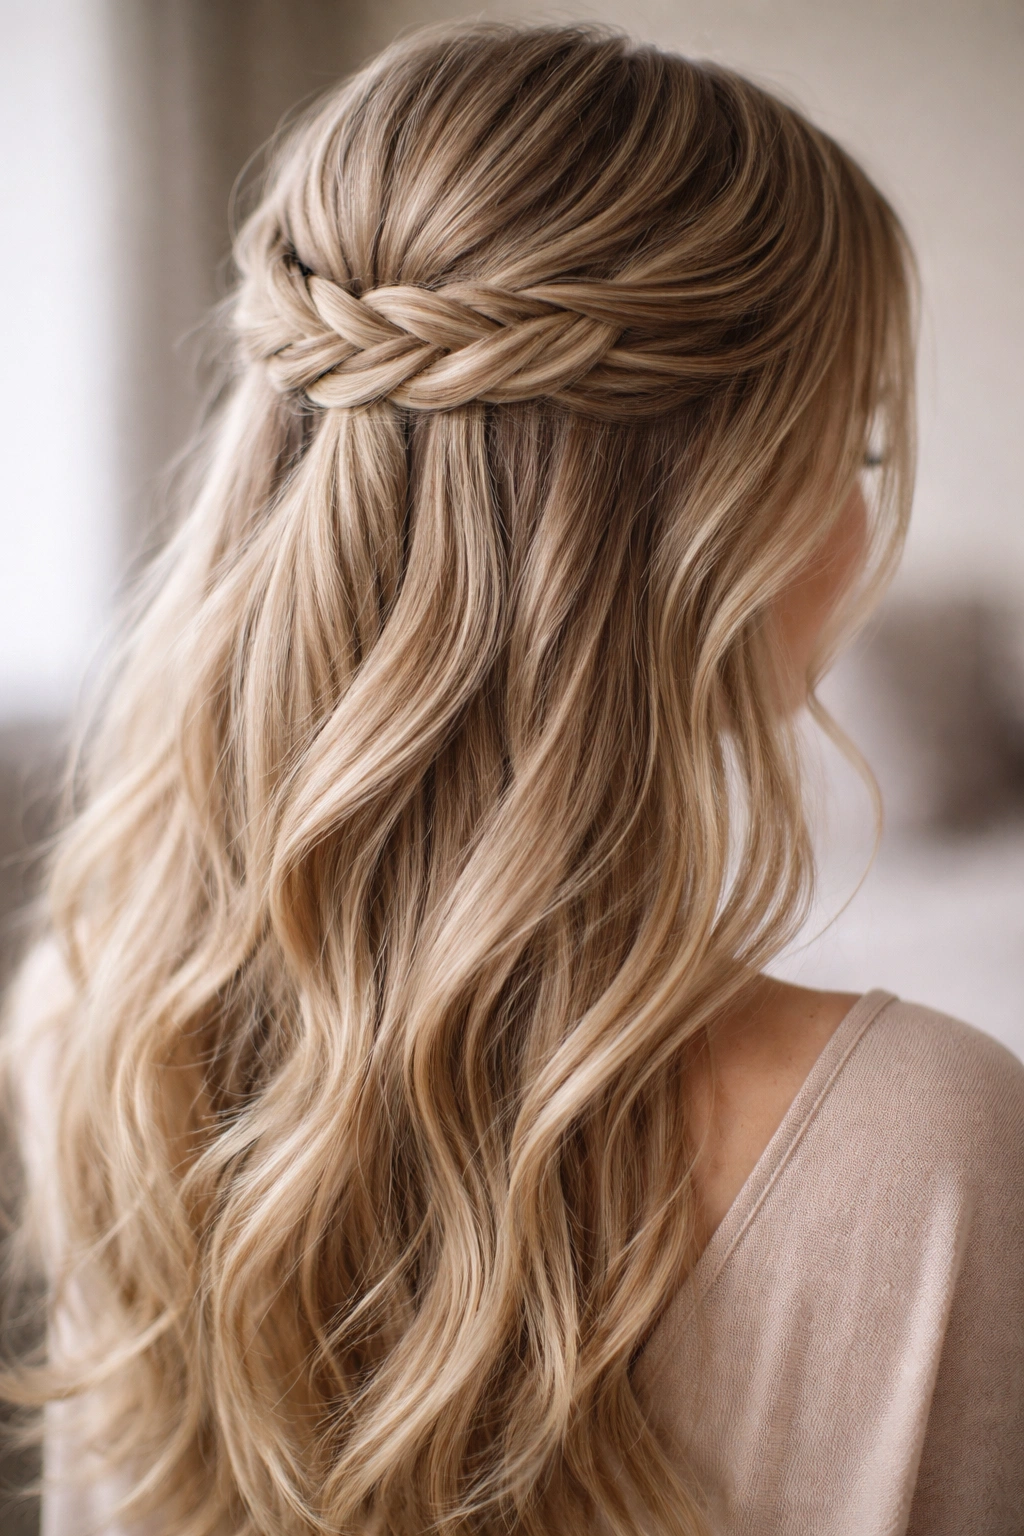
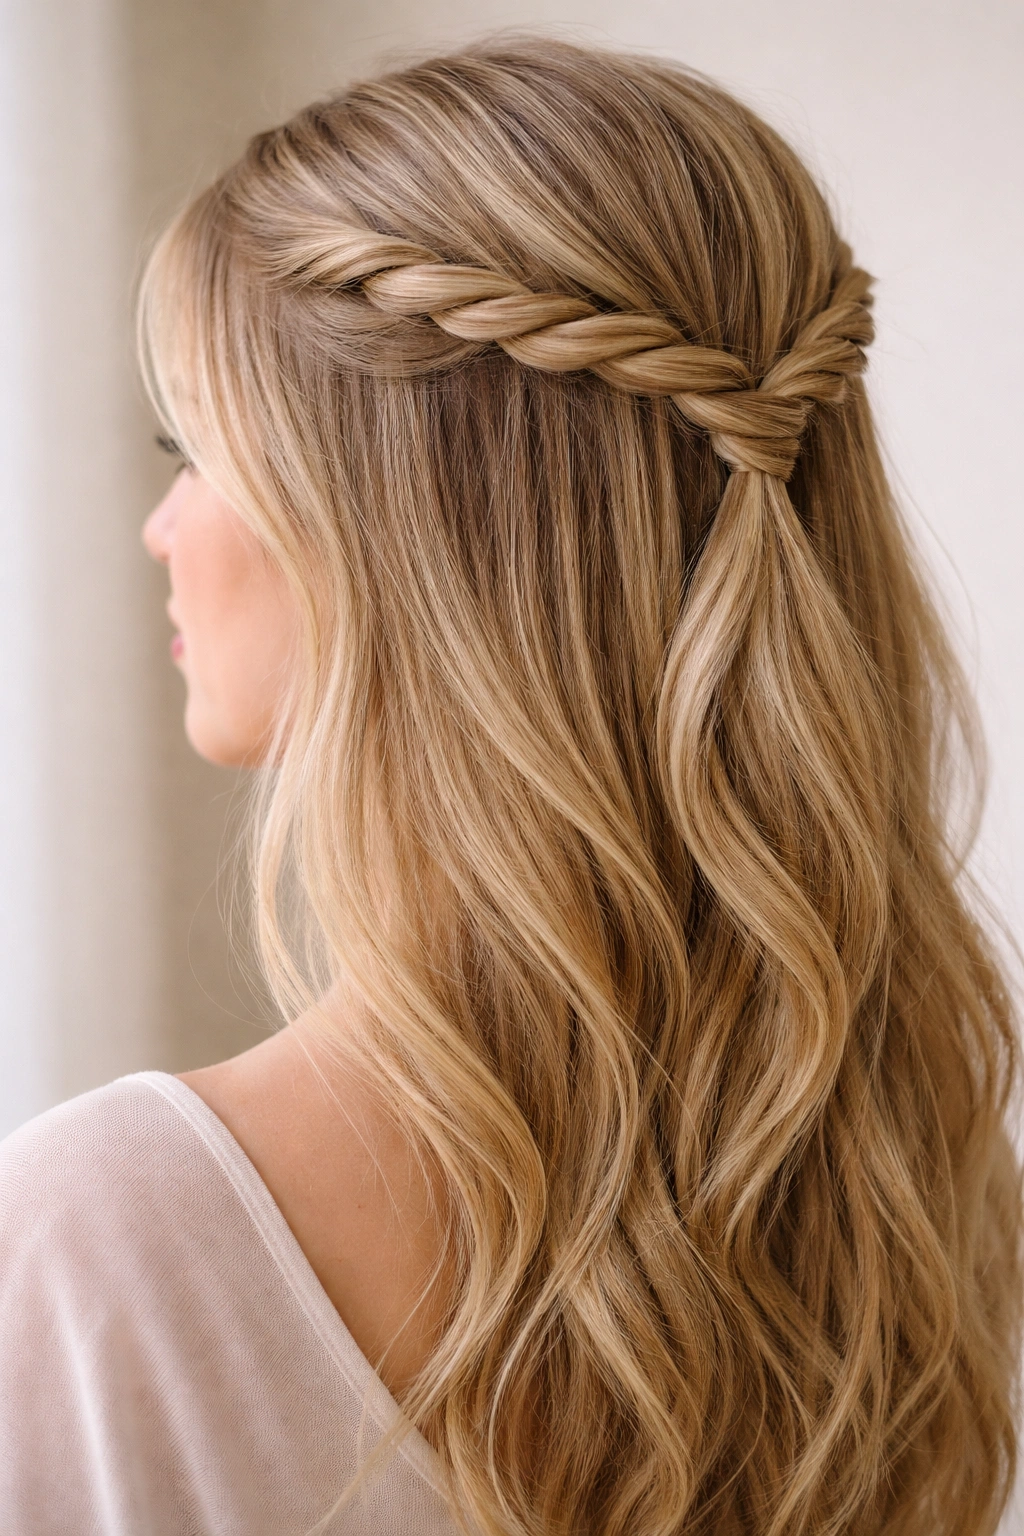
7. The Reverse Rope Braid Half-Up
A rope braid is created by twisting two sections around each other—it’s technically simpler than a traditional three-strand braid, yet it creates equally beautiful texture. The “reverse” version sits on top of your head rather than lying flat into your hair, giving fine hair a dimensional advantage. The twisted texture catches light from every angle, creating an appearance of depth and thickness.
The Advantage of Rope Braids for Fine Hair Texture
Rope braids don’t require as many strand combinations as traditional braids do, which means less manipulation of your fine hair overall. The two-section twist is also easier to keep loose and voluminous, which is exactly what fine hair needs. When you pull gently on the twisted sections afterward, the braid expands dramatically, making thin hair look substantially thicker.
Rope Braid Execution
From your crown, separate a section of hair into two equal pieces. Twist each piece tightly away from the center (right piece twists clockwise, left piece twists counterclockwise). Cross the two twisted pieces around each other, wrapping them tightly as you work downward. The result is a ropelike braid with prominent texture. Secure at the back and gently pull the twisted sections apart to create volume.
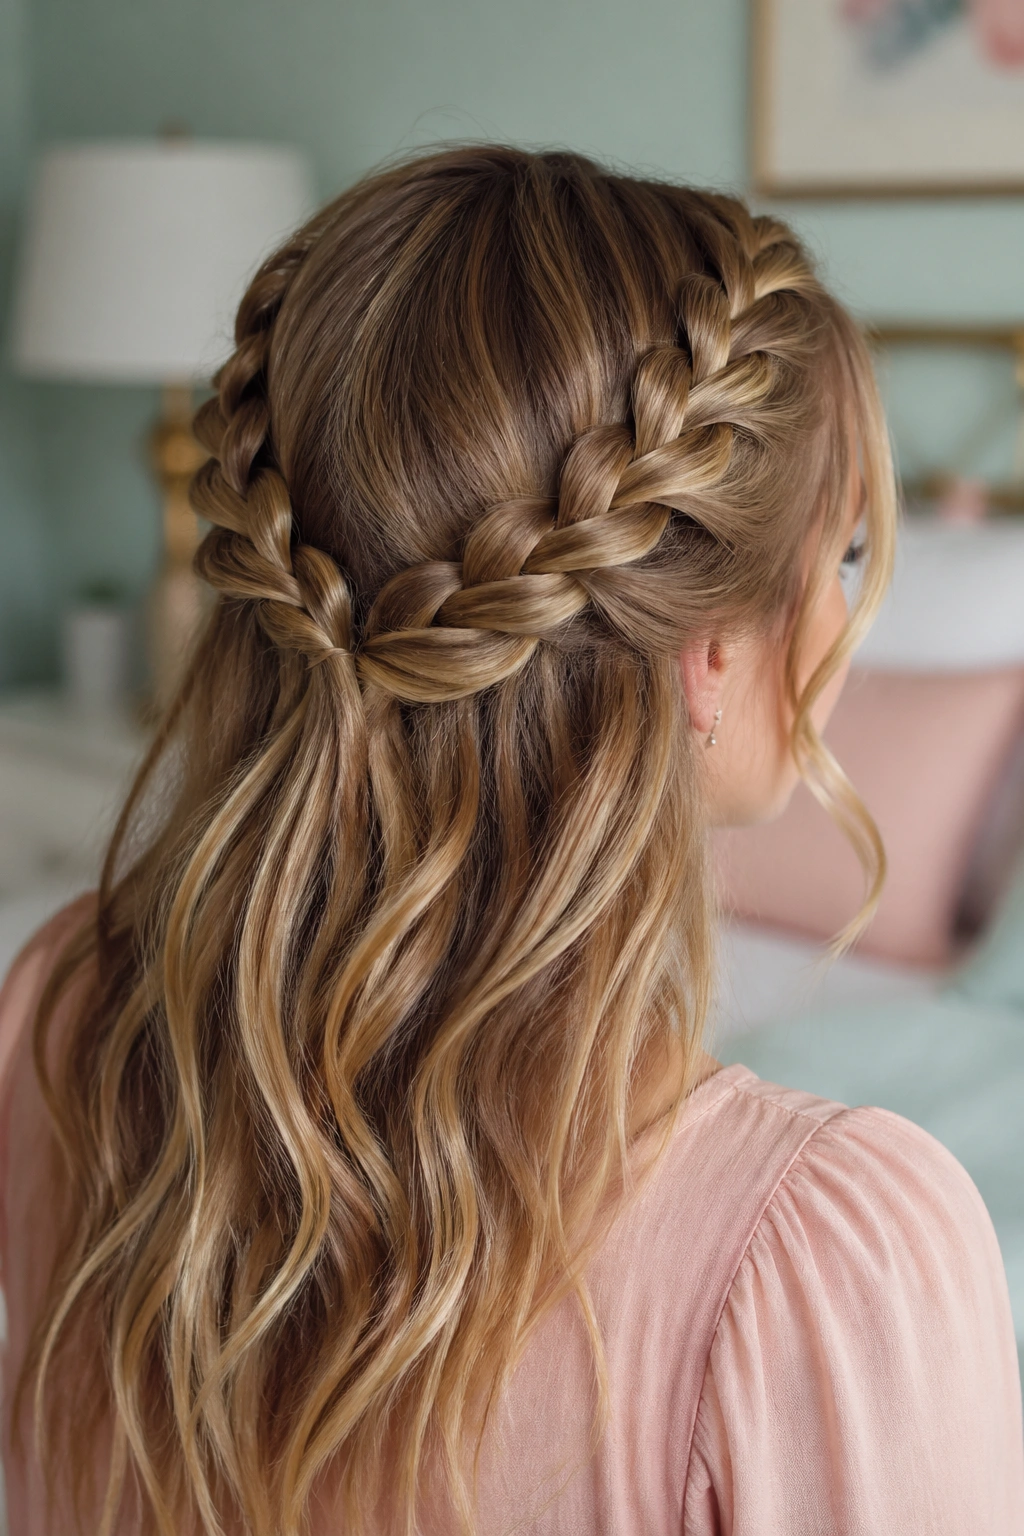
8. The Crown Braid Halo Half-Up
Instead of pulling your braid straight back, create a braid that follows a curved path from one side of your head to the other, creating a halo effect. This style is exceptionally flattering on fine hair because it distributes your styled section around your head rather than pulling everything straight back, which would emphasize thinness at the crown.
Visual Impact of the Halo Braid on Fine Hair
A halo braid creates the impression of a full, voluminous crown because the braid follows the natural curve of your head rather than fighting against it. The curved path also creates multiple angles where light can reflect off your braid strands, multiplying the visual texture. For fine hair, this is transformative because you’re working with the natural shape of your head rather than trying to create volume that simply isn’t there.
Creating Your Halo Effect
Start your braid at one temple and work diagonally upward toward the opposite side of your head, creating a curved path rather than a straight line. As you braid, incorporate thin sections from the top and sides, always moving along that curved halo path. Finish the braid at the opposite temple and secure with a small bobby pin or clip. Leave the bottom section of your hair down and flowing for maximum contrast between the structured braid and the loose waves.
Key detail: The most flattering halo braids sit slightly above where you’d normally wear a headband—not too high on your crown, not too low on your sides.
9. The Micro Braid Scattered Detail
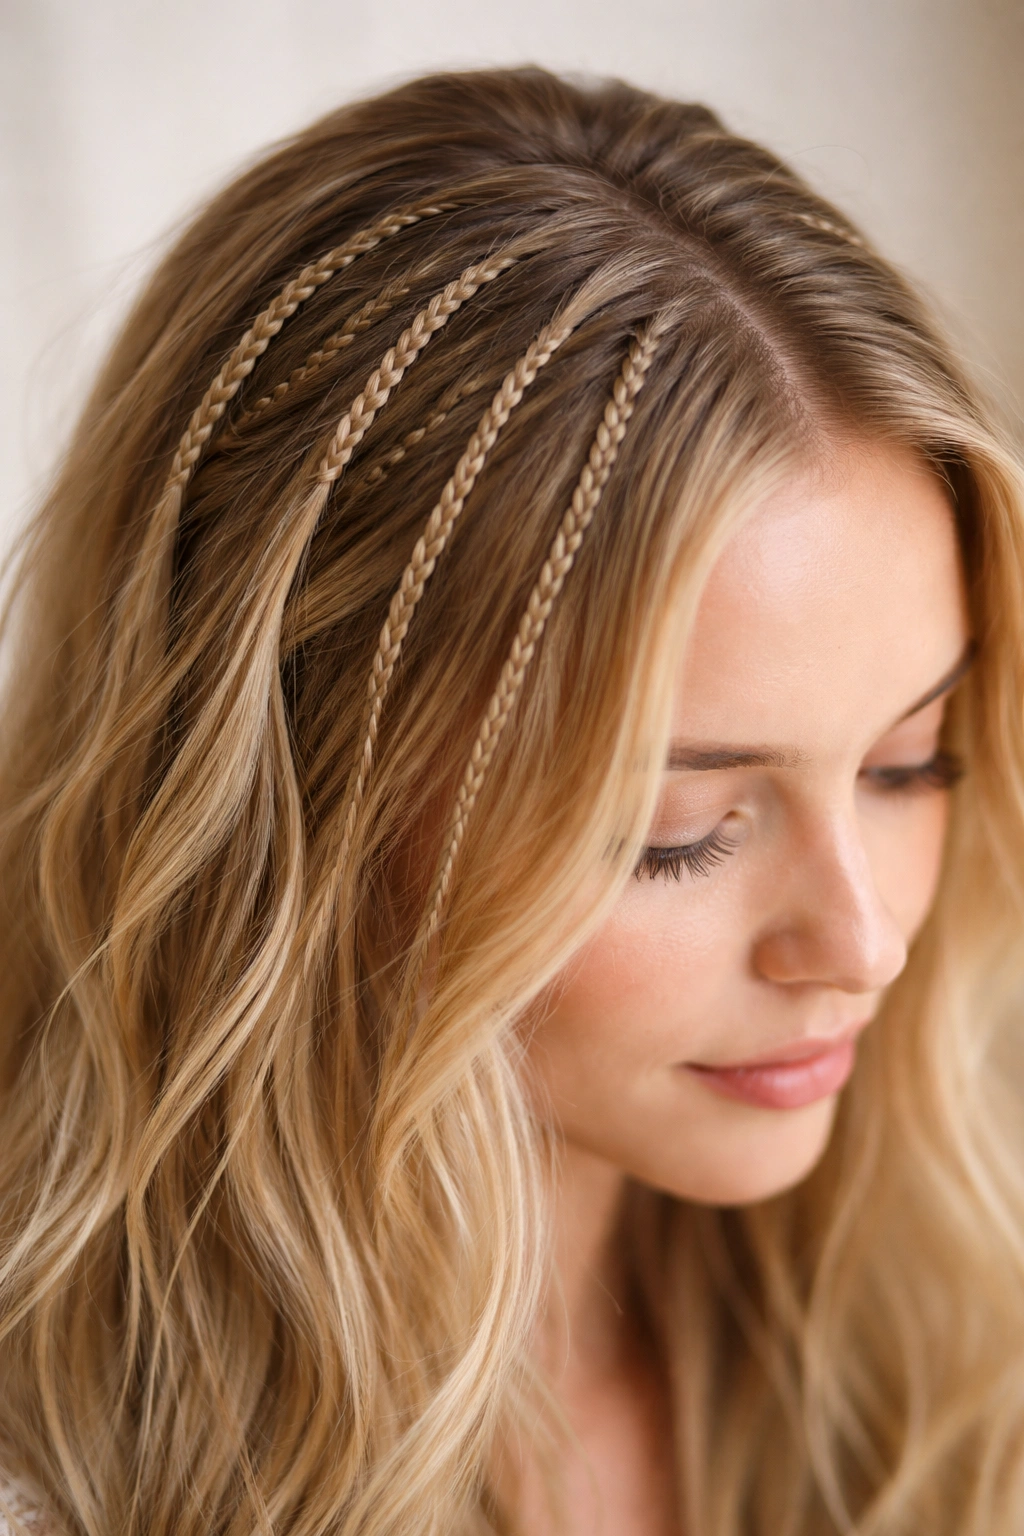
Instead of creating one braid, incorporate 5-8 thin micro-braids throughout your upper section, leaving most of your hair unbraided. This scattered approach is remarkably flattering on fine hair because multiple small braids create far more visual interest than one substantial braid would. The scattered detail also looks more modern and contemporary than a single, centered braid.
Why Micro Braids Multiply the Visual Effect
Each micro braid catches light independently, and the multiple braids throughout your head create a layered, textured appearance that reads as fuller than a single braid could. The spaces between the braids also matter—they create visual breathing room while the braids themselves add definition and structure. For fine hair, this balance between braided and unbraided sections is perfect.
Placing Your Micro Braids Strategically
Create your first micro-braid at one temple, a second near your crown, a third behind the other ear. Add another at the back if you like, or keep them concentrated toward the front for a different effect. Each braid should be no thicker than a pencil and should flow into your hair naturally. Secure some braids with tiny elastics, and let others flow into your half-up ponytail without their own separate closure. The asymmetrical placement looks far more intentional and artistic than perfectly matched braids.
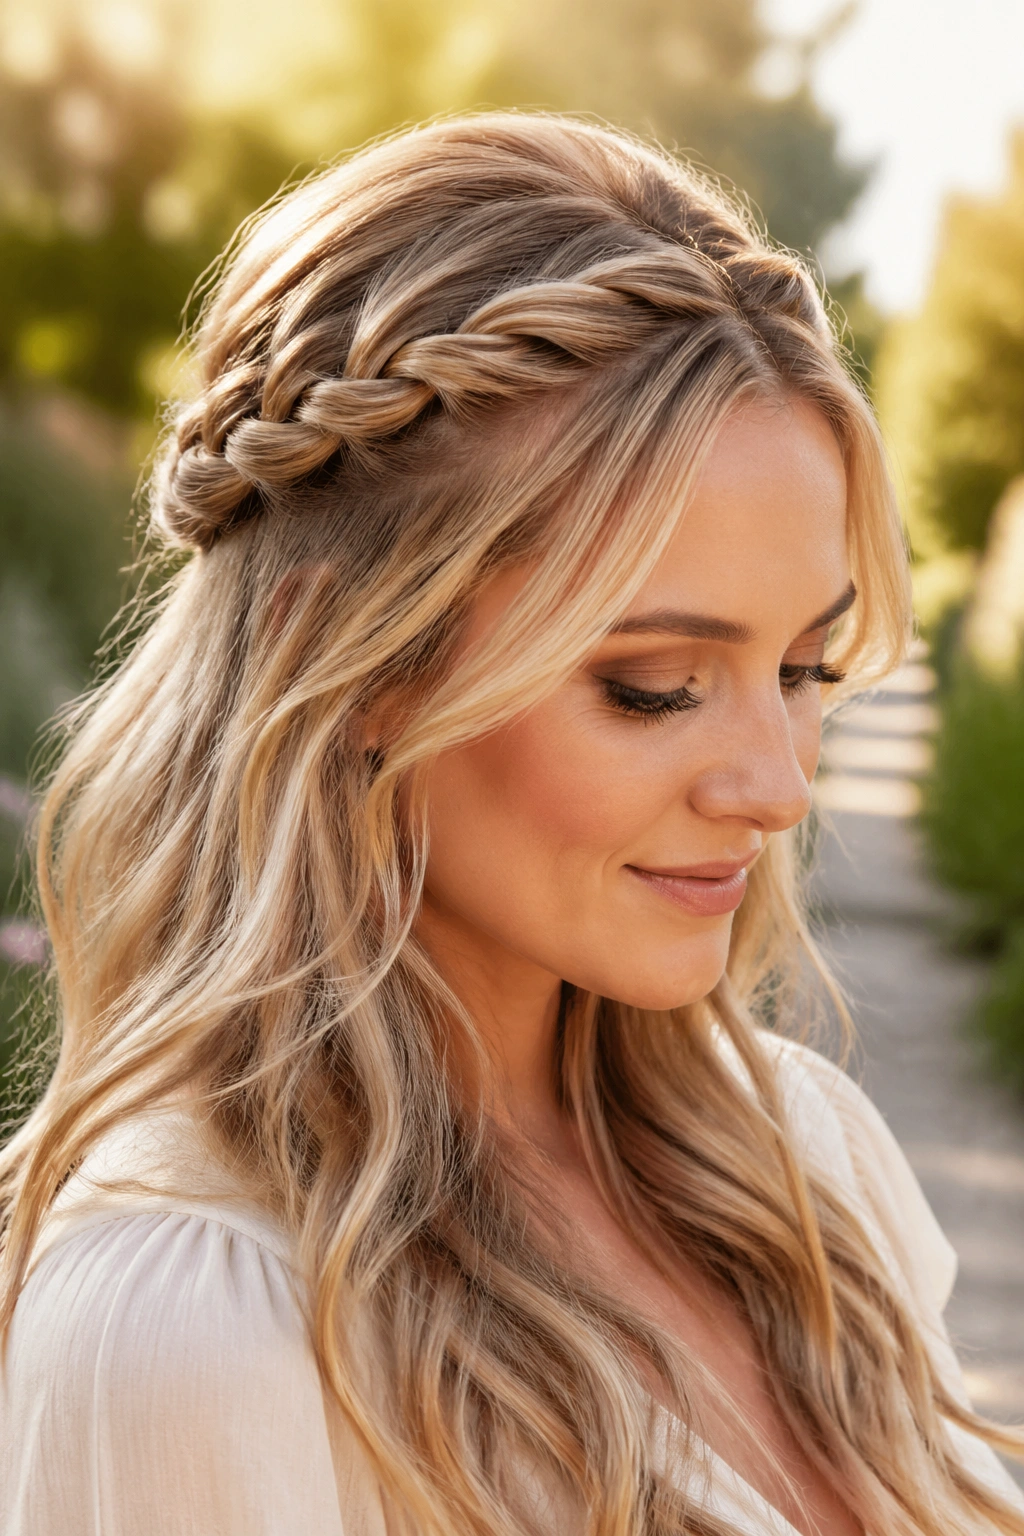
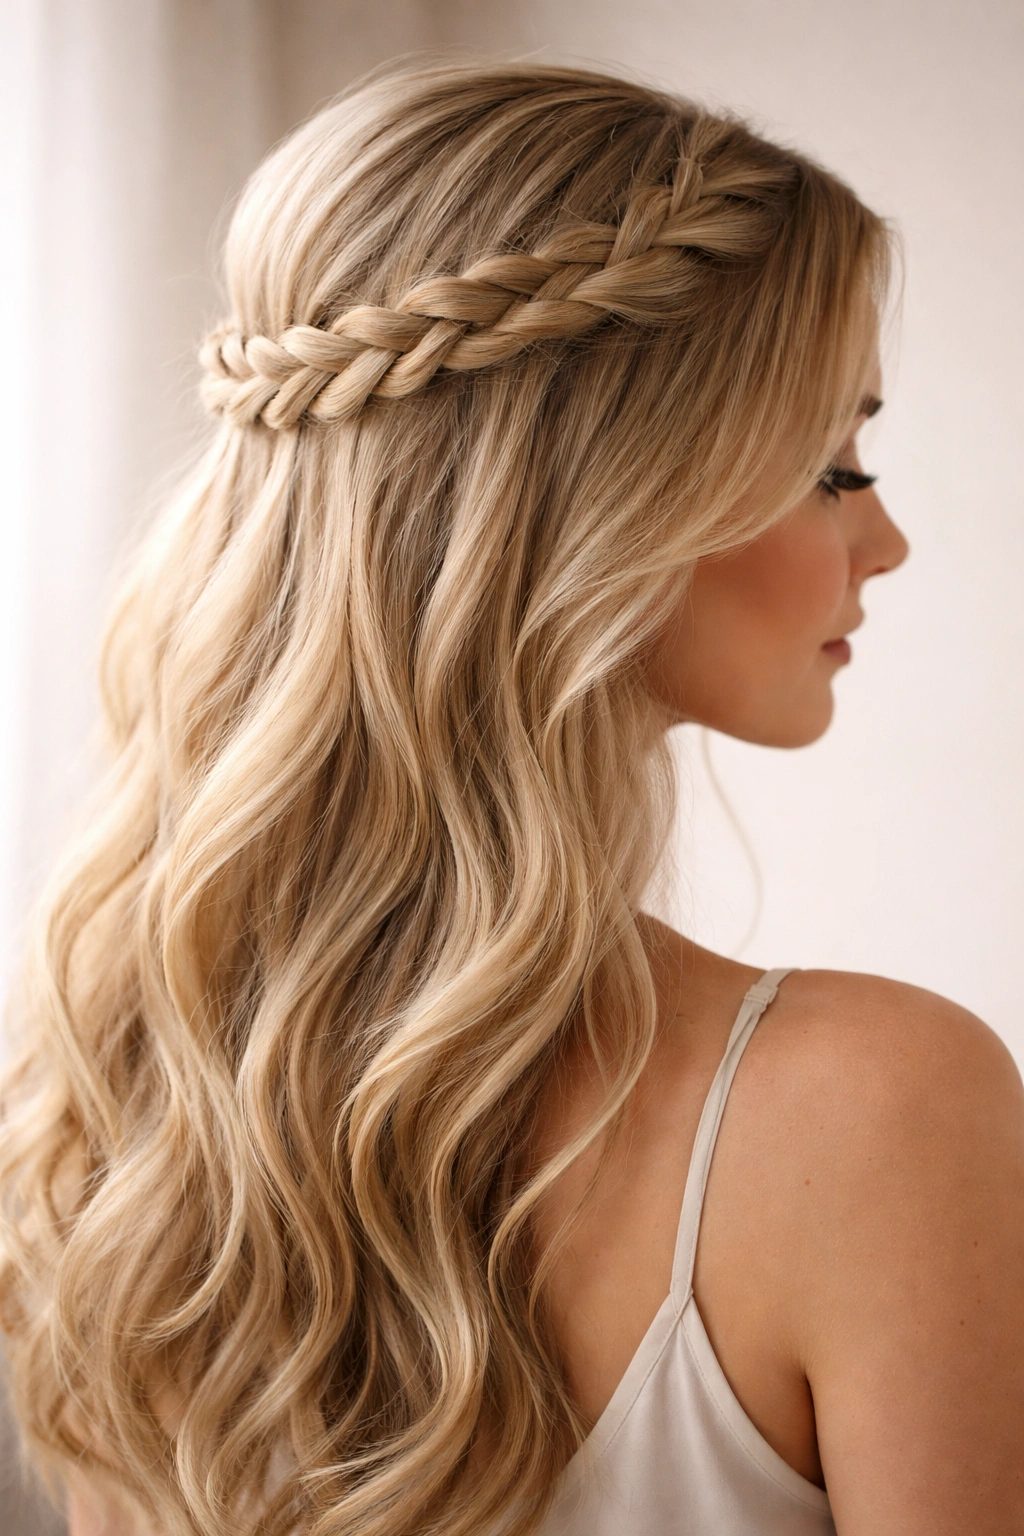
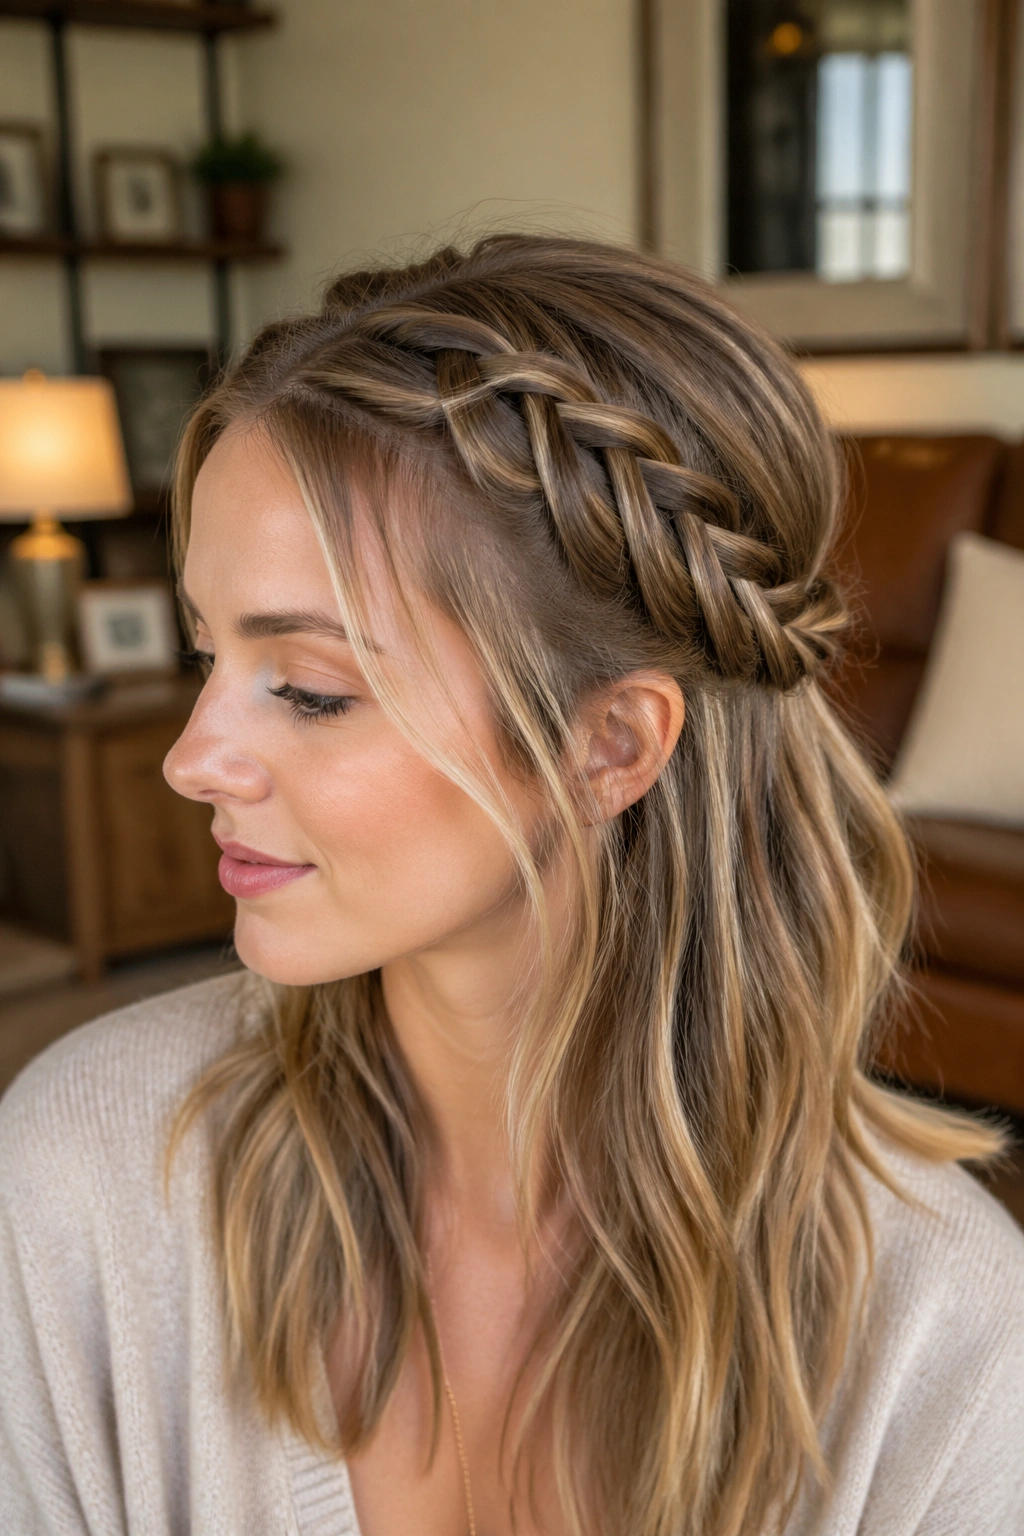
10. The Braided Headband Half-Up
Create a single thick braid that follows your hairline from one side of your head to the other, more like a headband than a traditional half-up braid. This approach positions your braid at the front where it frames your face and creates visual structure without pulling hair back from your crown, making it ideal for fine hair. The headband effect also works beautifully with side-parted hair and face-framing waves.
The Styling Advantage of Front-Facing Braids
A braid positioned like a headband becomes a focal point rather than something tucked away at the back of your head. This draws attention to your braid’s texture and detail rather than emphasizing any areas of fine hair. The braid also prevents your hair from falling into your face while keeping the bulk of your hair down and flowing—the best of both styling worlds.
Braiding Your Headband Style
Start your braid at one temple and work it horizontally across the back of your head at about ear level, finishing at the opposite temple. Incorporate small sections of hair from your crown into the braid as you work. When you reach the opposite temple, you can either secure the braid with a small clip or let the end blend into the remaining loose hair. Leave generous waves in your loose hair to contrast with the structured braid.
11. The Infinity Braid Half-Up
An infinity braid (also called a figure-eight braid) creates a crossover pattern that’s visually more intricate than a standard braid. This style works beautifully on fine hair because the crossover sections create the illusion of more texture at crucial points. The pattern also looks sophisticated and intentional, making fine hair appear carefully styled rather than simply thin.
What Makes Infinity Braids Different
Instead of braiding in a single direction, an infinity braid crosses over itself, creating an overlapping pattern that mimics a figure eight or infinity symbol. This crossing creates visual density at the crossover points while keeping the overall structure lightweight. For fine hair, those density points are exactly what you need for dimensional impact.
Executing the Infinity Pattern
Start your braid at your crown with three strands. Create a standard braid for the first few inches, then split your three strands into two pieces. Twist one piece to the left side of your head, twist the other to the right, then cross them back over each other. This crossover motion is the “infinity” component. Continue alternating between braiding forward and crossing strands to create the overlapping pattern. Secure at the back, where the complexity of the braid naturally draws focus.
12. The Bubble Braid Half-Up
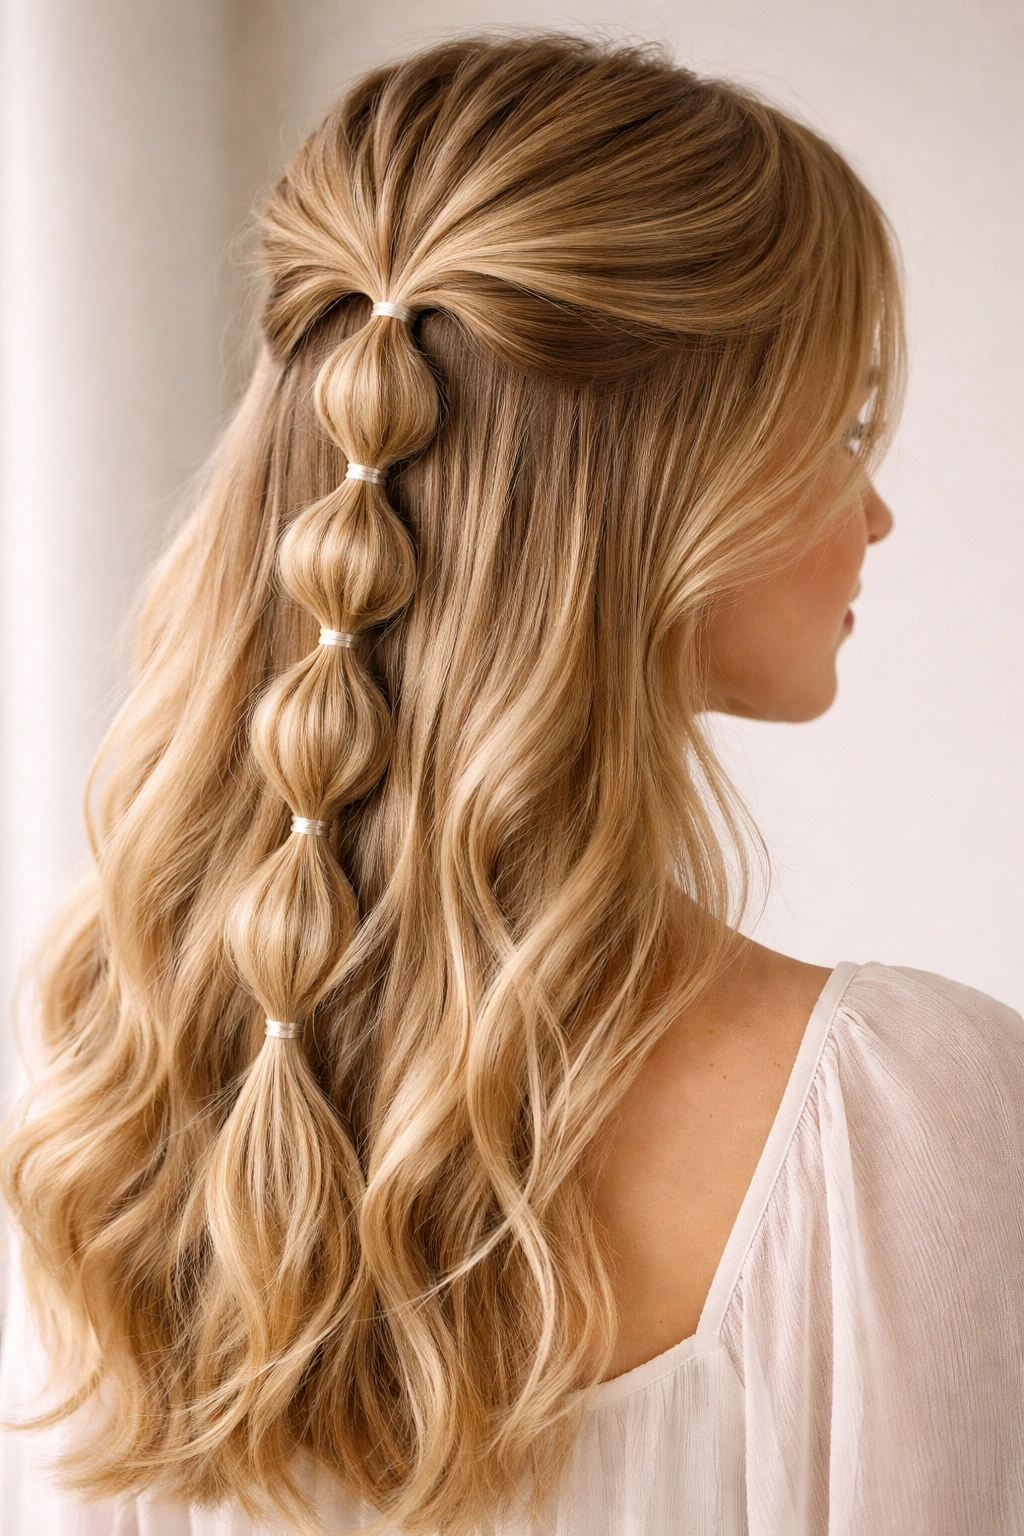
A bubble braid is created by securing a simple braid with multiple elastics placed at intervals, then gently pulling each section between the elastics outward to create puffed-out bubbles of hair. This playful style is surprisingly flattering on fine hair because the pulled-out sections create visual volume at multiple points along your braid. The bubble effect makes thin hair appear textured and deliberately styled.
The Volume-Creating Magic of Bubbles
Each bubble you create by pulling out the braided sections becomes its own focal point of texture and dimension. When you create 4-5 bubbles along a single braid, you’re multiplying the visual interest without adding actual hair—you’re just redistributing what you have. For fine hair, this is an elegant solution to creating the appearance of thickness and volume.
Creating Your Bubble Braid
Create a simple three-strand braid in your upper section, keeping it slightly tighter than you normally would (so the bubbles stay defined). Secure with a small elastic. Place another elastic about 2 inches below the first one. Gently pull the braided section between these two elastics outward and upward to create a puffed bubble. Continue this pattern—add an elastic, create a bubble, add an elastic, create a bubble—all the way down. The more bubbles you create, the more volume your braid appears to have.
13. The Lace Braid Half-Up
A lace braid is a French braid that only incorporates new hair from one side as you braid, creating an asymmetrical, delicate appearance. This style is particularly flattering on fine hair because the lace effect looks intentionally delicate rather than accidentally thin. The one-sided incorporation also requires less hair overall, making it perfect when you’re working with limited volume.
The Elegance of Lace Braiding
A lace braid creates an open, feathery look that’s perfect for showcasing fine hair’s natural delicacy. Instead of hiding thinness, the lace braid celebrates the delicate nature of your strands by featuring them in an intentionally delicate pattern. The asymmetrical design also looks modern and artistic—it’s not trying to create false fullness; it’s just beautiful.
Lace Braid Technique
Start your braid at your temple with three strands. Begin a standard braid, but as you work, only incorporate new hair from the side closest to your hairline. The other side remains untouched throughout the entire braid. This creates an open weave on one side of your braid while the other side stays clean. Continue this pattern all the way to the back of your head, then secure. The open side of the braid naturally sits on top of your hair, creating maximum visual texture.
14. The Asymmetrical Side Braid Half-Up

Shift your half-up section entirely to one side of your head, creating an asymmetrical braid that sits at a dramatic angle. This style works beautifully on fine hair because the off-center positioning creates visual interest and movement without requiring symmetrical volume. The side-swept approach also flatters most face shapes and creates a romantic, modern aesthetic.
Why Asymmetry Flatters Fine Hair
Asymmetrical styles don’t invite comparison between the left and right sides of your head, which can emphasize uneven volume. Instead, asymmetry creates visual movement and draws the eye in a specific direction, making any hair appear more intentional and styled. An asymmetrical side braid says “I’m creating a look” rather than “I’m managing thin spots.”
Styling Your Asymmetrical Braid
Create a deep side part, moving your part line several inches to one side of center. Gather a larger section of hair from the deeper side of the part and create your braid there, working from your crown toward the nape on the opposite side. The braid itself travels diagonally across the back of your head, creating dynamic movement. Secure the braid with a bobby pin or elastic, and leave all the hair on the opposite side flowing freely. This creates maximum contrast between the structured braid and the loose, flowing portion of your hair.
15. The Peek-a-Boo Braid Half-Up
Incorporate your braid subtly by weaving it among your other half-up hair rather than making it the obvious focal point. Specifically, create a thin braid that winds through a section of hair that’s been curled or waved, so the braid peeks through the waves. This style is ideal for fine hair because it uses movement and texture to disguise thinness rather than drawing direct attention to a braid.
Creating Movement With Hidden Texture
When you weave a braid through waves or curls, the braid becomes a detail rather than the main event. This approach works beautifully on fine hair because it doesn’t ask your hair to do all the heavy lifting in terms of creating volume—the waves do some of that work, and the braid does the rest. The combination of wave texture and braid texture creates a much fuller appearance than either element alone could achieve.
Executing the Peek-a-Boo Effect
Create loose, relaxed waves throughout your upper half-up section using a curling iron or waves from an overnight braid. Create a thin Dutch or French braid that follows a curved path through this wavy section, letting the waves partially hide the braid in places. The braid shouldn’t lie flat and obvious; instead, it should be revealed in some sections and hidden in the waves in others. Secure the braid end with a bobby pin tucked into the waves. The result looks effortlessly textured and intentionally undone.
Final Thoughts
Finding hairstyles that work with fine hair rather than against it is about understanding how light, texture, and visual balance create the appearance of volume. Braided half-up styles excel at this because they combine multiple visual strategies at once—the woven texture of the braid catches light differently than flat hair, the contrast between braided and unbraided sections creates dimension, and the positioning of the braid determines which areas of your head look fuller or less full.
The key to success with any of these styles is learning the differences between a tight braid (which pulls on fine hair and can cause damage) and a loose, intentionally textured braid that looks fuller and feels gentler. Always give your braids a gentle pull afterward to maximize volume. Use lightweight products sparingly, and let your braid’s detail speak for itself—you don’t need heavy styling products when the texture of the braid is doing the work.
Experiment with different placements, braid types, and texturing techniques. What works beautifully on one person’s fine hair might need slight adjustment for another. The most important thing is that you feel confident and beautiful in whatever style you choose. Your hair’s delicate nature is actually an asset when you style it with intention and care.