Medium locs offer the perfect canvas for experimentation. They’re long enough to hold sophisticated styling while still being manageable and versatile—and half-up-half-down styles showcase exactly why so many people fall in love with this length. Whether you’re seeking something sleek for work, romantic for date night, or effortlessly cool for everyday wear, there’s a half-up-half-down configuration that matches your vibe.
The beauty of half-up-half-down locs is that it strikes that rare balance between polished and relaxed. You’re showing off the length and movement of your locs while keeping them partially styled, which works beautifully for protecting your ends, managing frizz, and just looking intentional without appearing overdone. Plus, these styles can be dressed up with jewelry and accessories or kept minimal and natural—they’re genuinely versatile.
What makes medium locs perfect for this style category is that you have enough length to work with for visual impact, but not so much that the style becomes heavy or difficult to execute. Whether you’re thinking sleek and sophisticated, textured and playful, or something in between, there are numerous ways to arrange and secure your locs in a half-up-half-down configuration that complements your face shape, lifestyle, and personal aesthetic.
Let’s dive into 15 distinct half-up-half-down looks that’ll help you make the most of your medium locs.
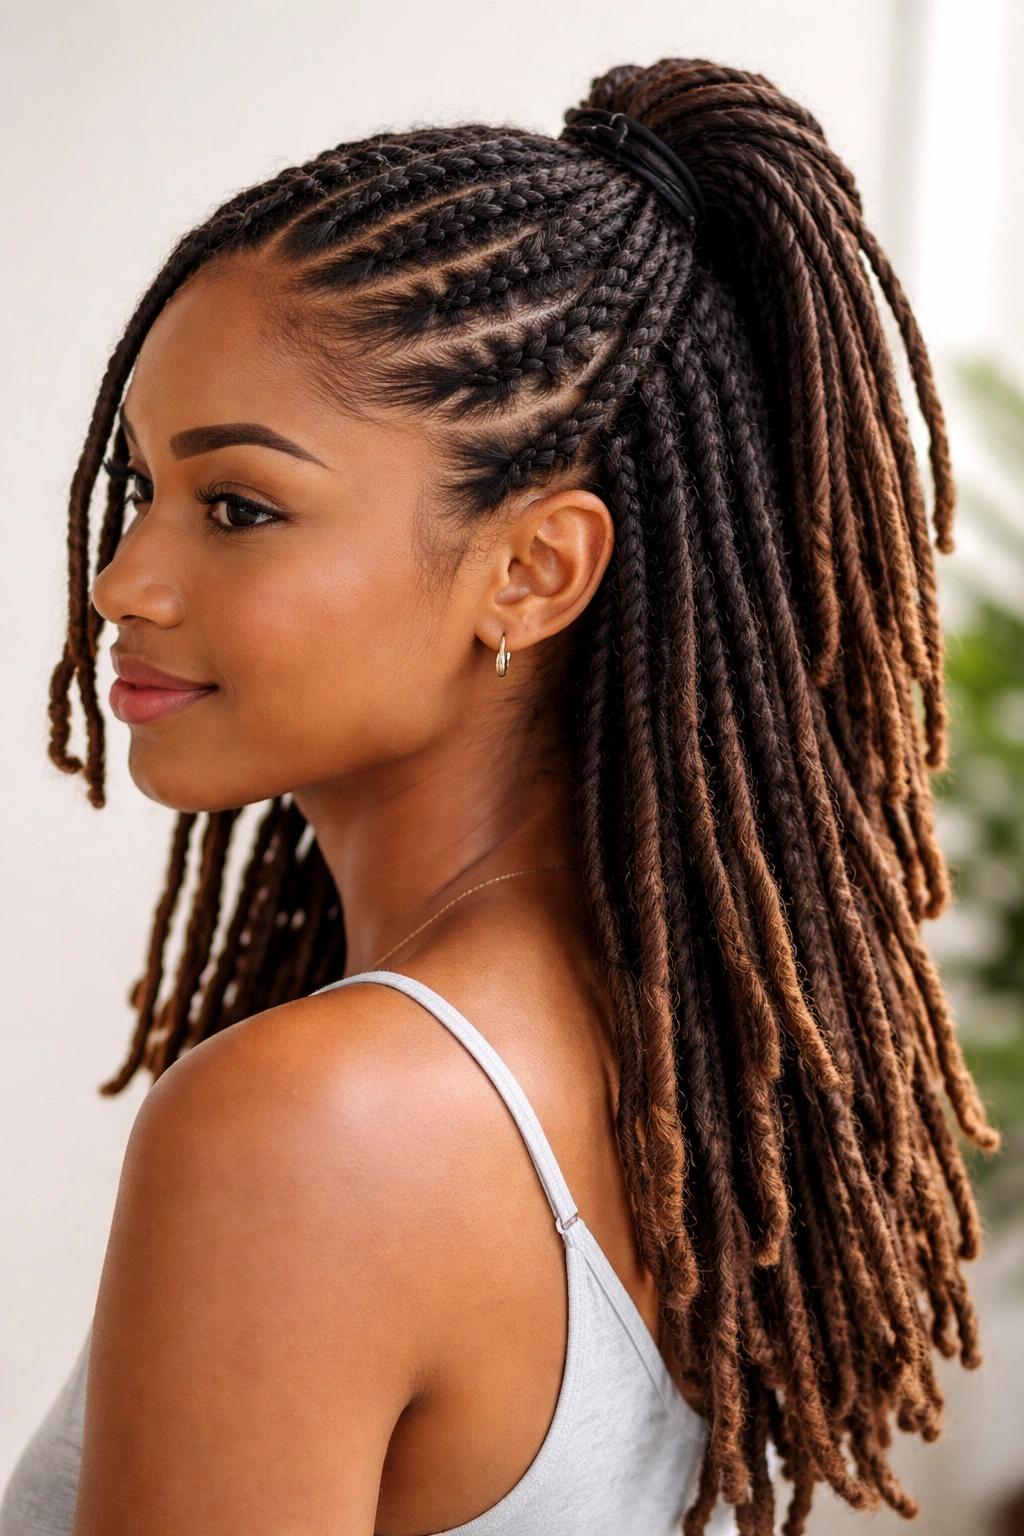
1. The Sleek High Pony with Side Sweep
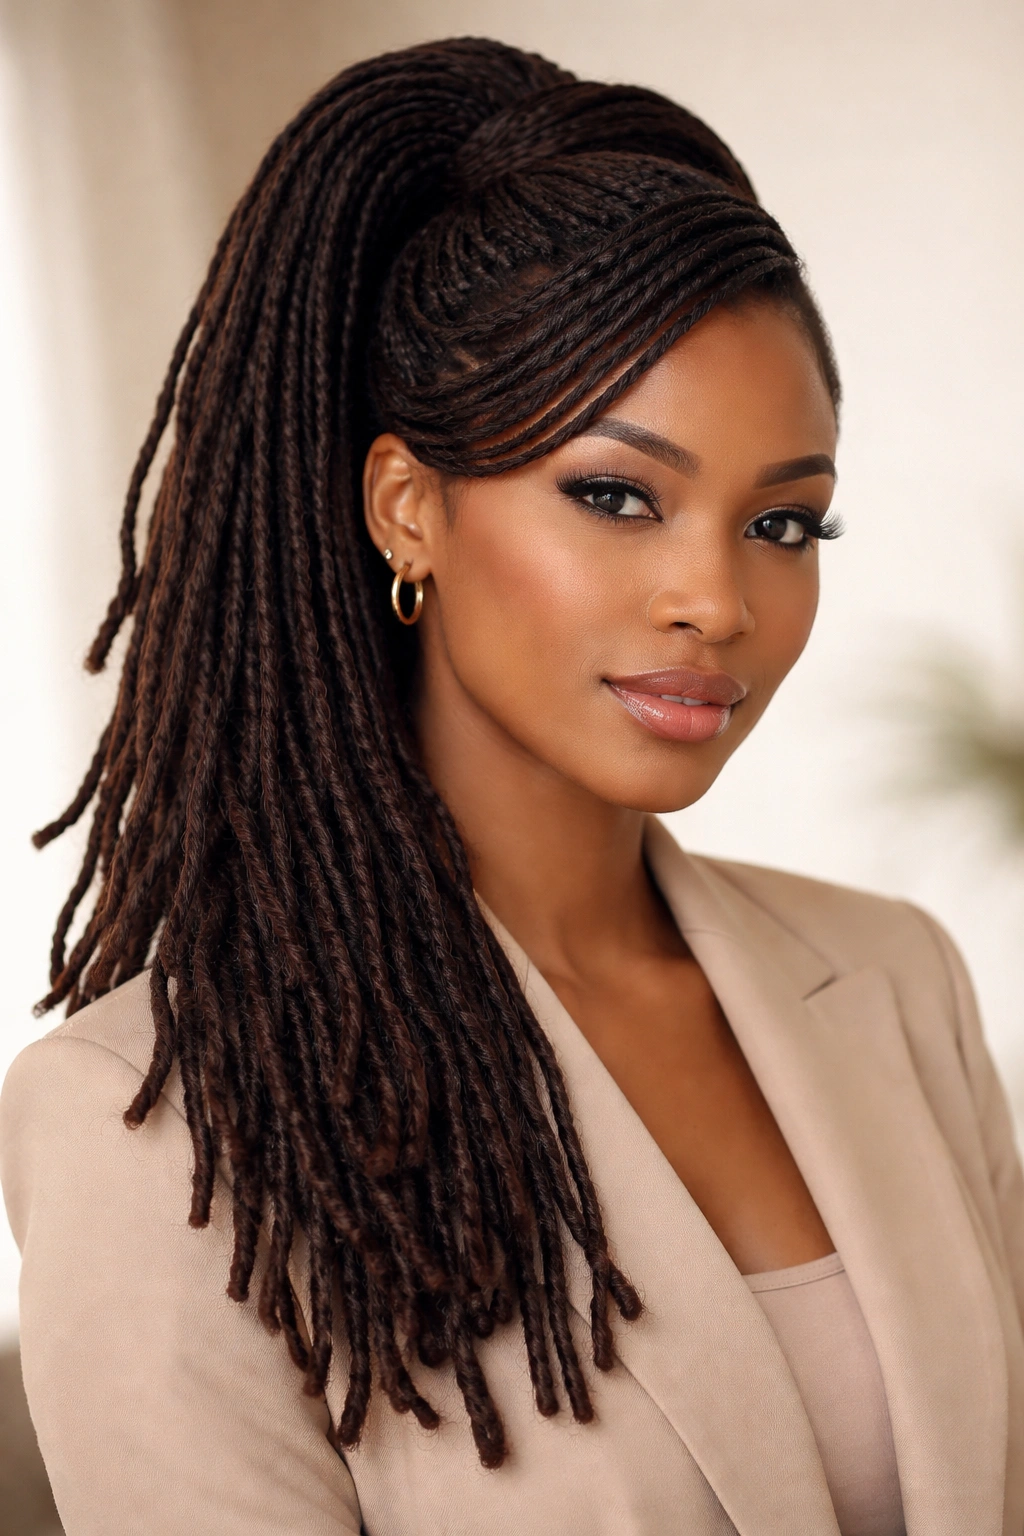
This style takes the half-up approach and elevates it by creating a polished high ponytail with the top section, while allowing the bottom locs to cascade freely. What sets this particular variation apart is that the upper section is positioned slightly off to one side, which adds dimension and prevents the look from feeling too symmetrical or severe.
The Execution Details
Start by sectioning the top third of your locs into a clean horizontal line from ear to ear. Smooth this section gently with edge control or a light-hold gel—you want it sleek but not crunchy. Secure the gathered locs into a high ponytail at the crown using a covered elastic or scarf. The key is positioning the ponytail slightly toward one side rather than dead center, which gives the style asymmetrical flair.
Why This Look Works
The high positioning draws attention upward and elongates the face, making it flattering for most face shapes. The sleek texture conveys polish without requiring chemical straightening—it’s a style that works for professional settings while still celebrating your locs. The side positioning adds movement and visual interest that keeps it from feeling corporate or stiff.
Best For
- Professional environments and workplace styling
- Days when you want visible hair movement paired with a controlled upper section
- Creating the illusion of length and height
- People who prefer their hair off their face and neck
Pro tip: Use a lightweight gel or mousse on the ponytail section only—this way you maintain texture on the loose locs below while keeping the top section smooth and defined.
2. The Twisted Crown Half-Up
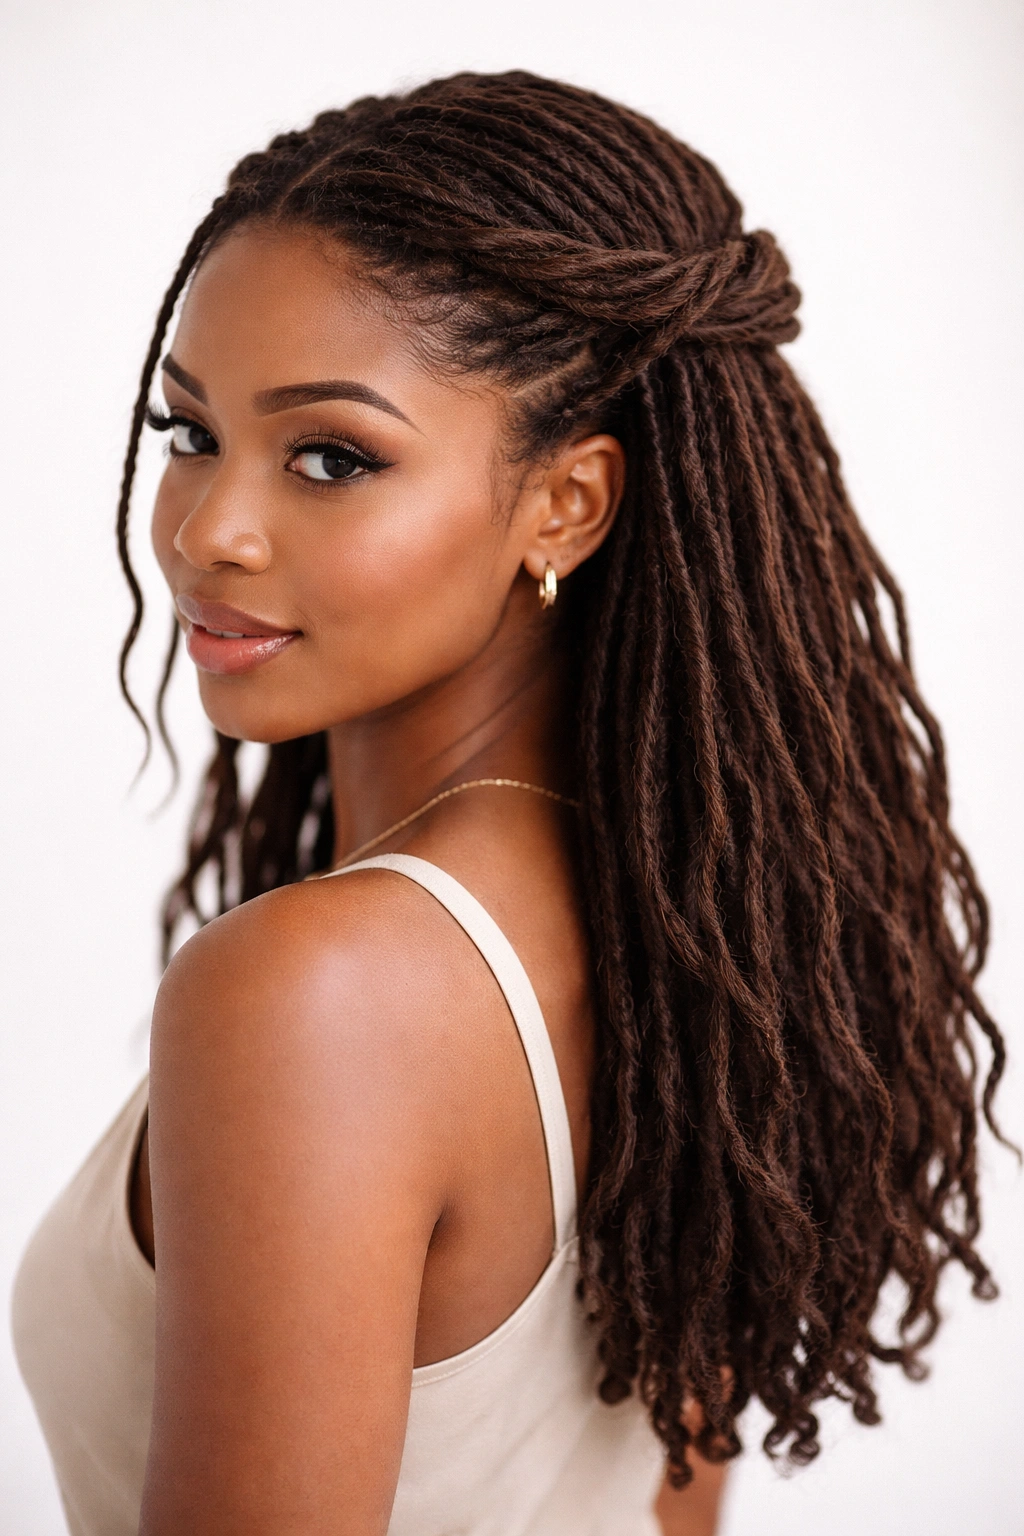
This style involves creating defined twists from both sides of your head that meet at the back, securing the upper portion of your locs while the rest flows below. The twists add texture and dimension that’s far more interesting than a standard ponytail.
Creating the Twists
Separate a section from the left side of your head (roughly from temple to ear area) and begin twisting downward and backward toward the crown. Repeat on the right side, twisting in the same direction so the two twisted sections feel cohesive. Where the twists meet at the back of your crown, secure them together with a decorative elastic or hair clip. The bottom half of your locs remains completely loose and unrestrained.
Why This Look Works
Twists add visual complexity without requiring re-locking or time-intensive installation. They frame the face beautifully and add a romantic, intentional quality to the style. The twisted sections catch light differently than straight locs, creating depth and movement that photographs well and looks impressive in person.
Best For
- Date nights and special occasions
- Adding texture without committing to a new install
- People who love intricate-looking styles but want something they can execute themselves
- Creating dimension on medium-length locs that might otherwise blend together
Insider note: Let your twists set for an hour or two before securing them—this helps them hold their shape better and prevents them from unraveling throughout the day.
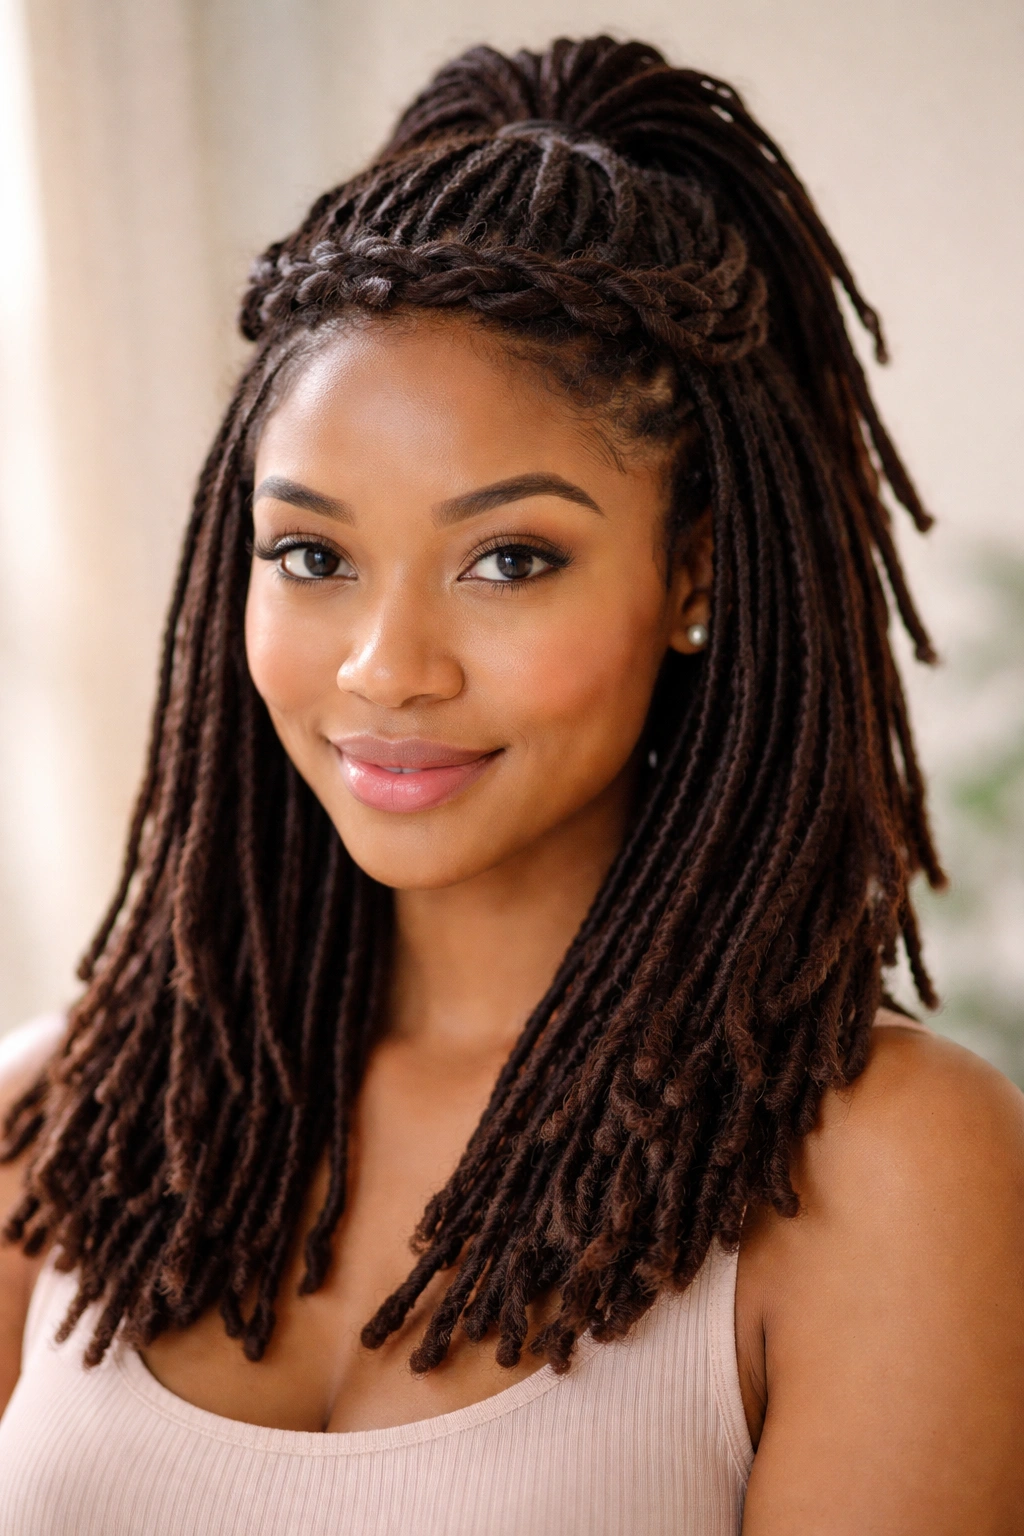
3. The Interlocked Front Section Half-Up
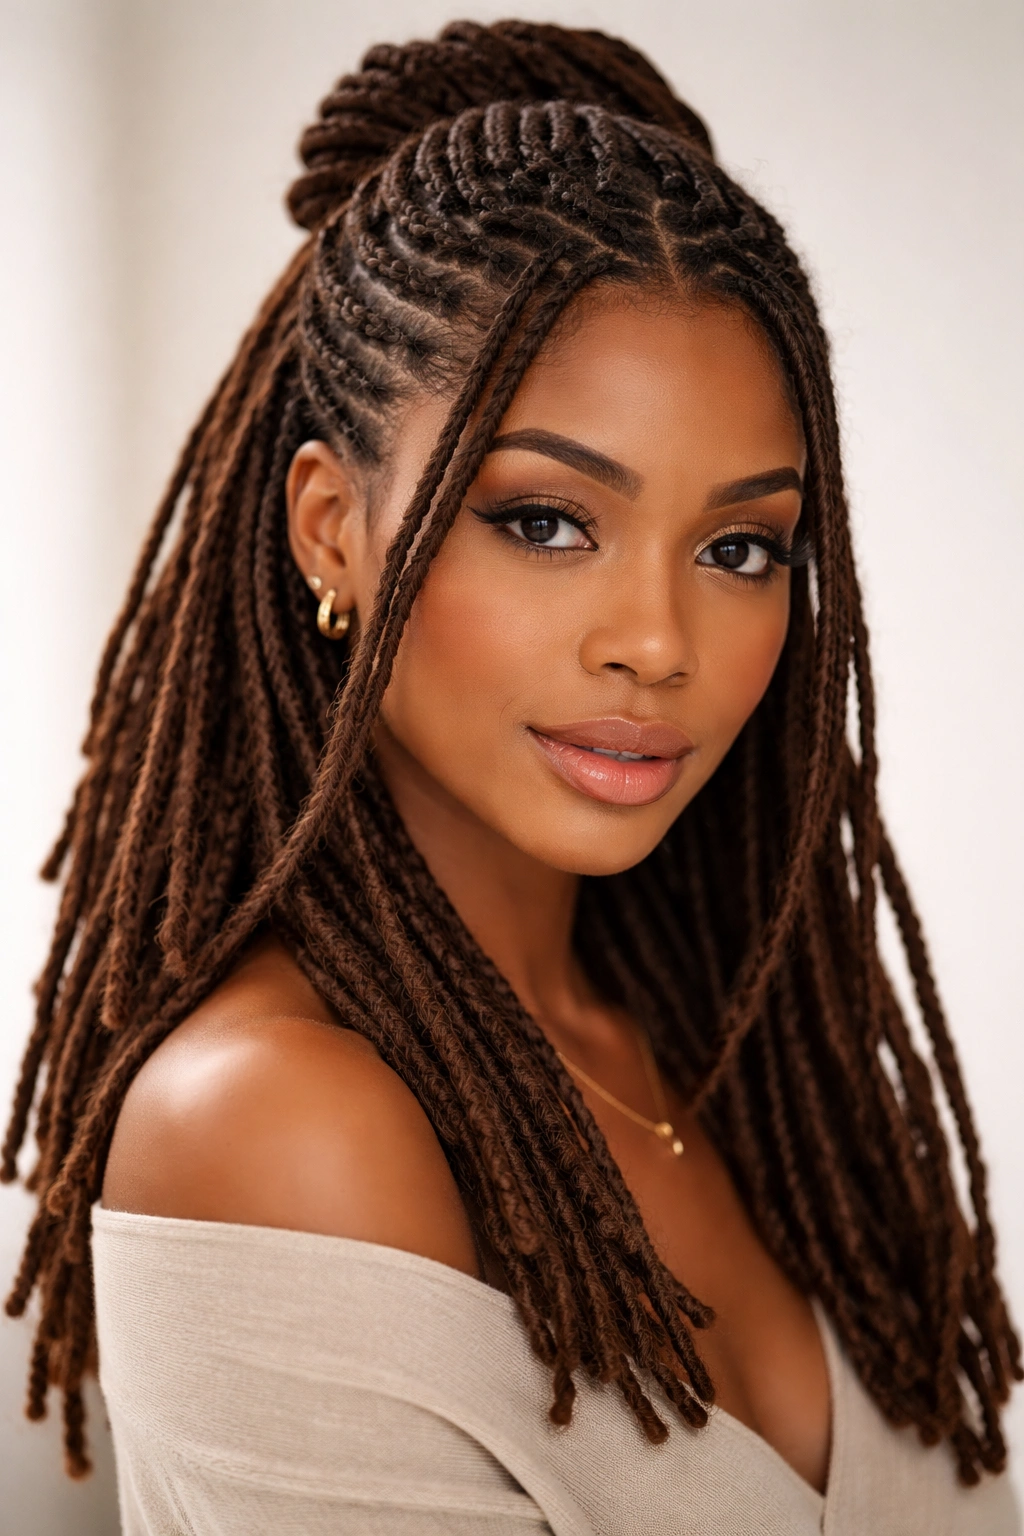
This variation uses the interlocking technique on just the front sections of your locs (roughly from hairline to mid-crown area), creating a textured top portion that’s secured back, with the remaining locs left to flow freely.
The Interlocking Method
Interlocking uses a small tool (crochet hook or interlocking tool) to pass a loc through its own base, tightening the roots and adding definition. For this style, apply interlocking to just the front third of your locs—the sections that frame your face and extend from forehead to crown. Once tightened and refreshed, gather these interlocked sections and secure them into a half-up configuration using an elastic or decorative clasp.
Why This Look Works
Interlocking instantly refreshes the appearance of locs by tightening the roots and adding crispness. When applied only to the top section, it creates visual contrast between the refined, tight top and the looser, more relaxed locs below. It’s a style that looks like you’ve invested serious time and care, yet you can maintain it relatively easily between full maintenance appointments.
Best For
- When you want to refresh your locs without a full retwist
- Creating a styled appearance that lasts for weeks
- People who appreciate geometric texture and defined lines
- Making medium locs look even more intentional and sculpted
Worth knowing: This style requires access to interlocking tools and some practice—consider having a professional loctician do the first application so you understand the technique before attempting it yourself.
4. The Wrapped High Half-Up
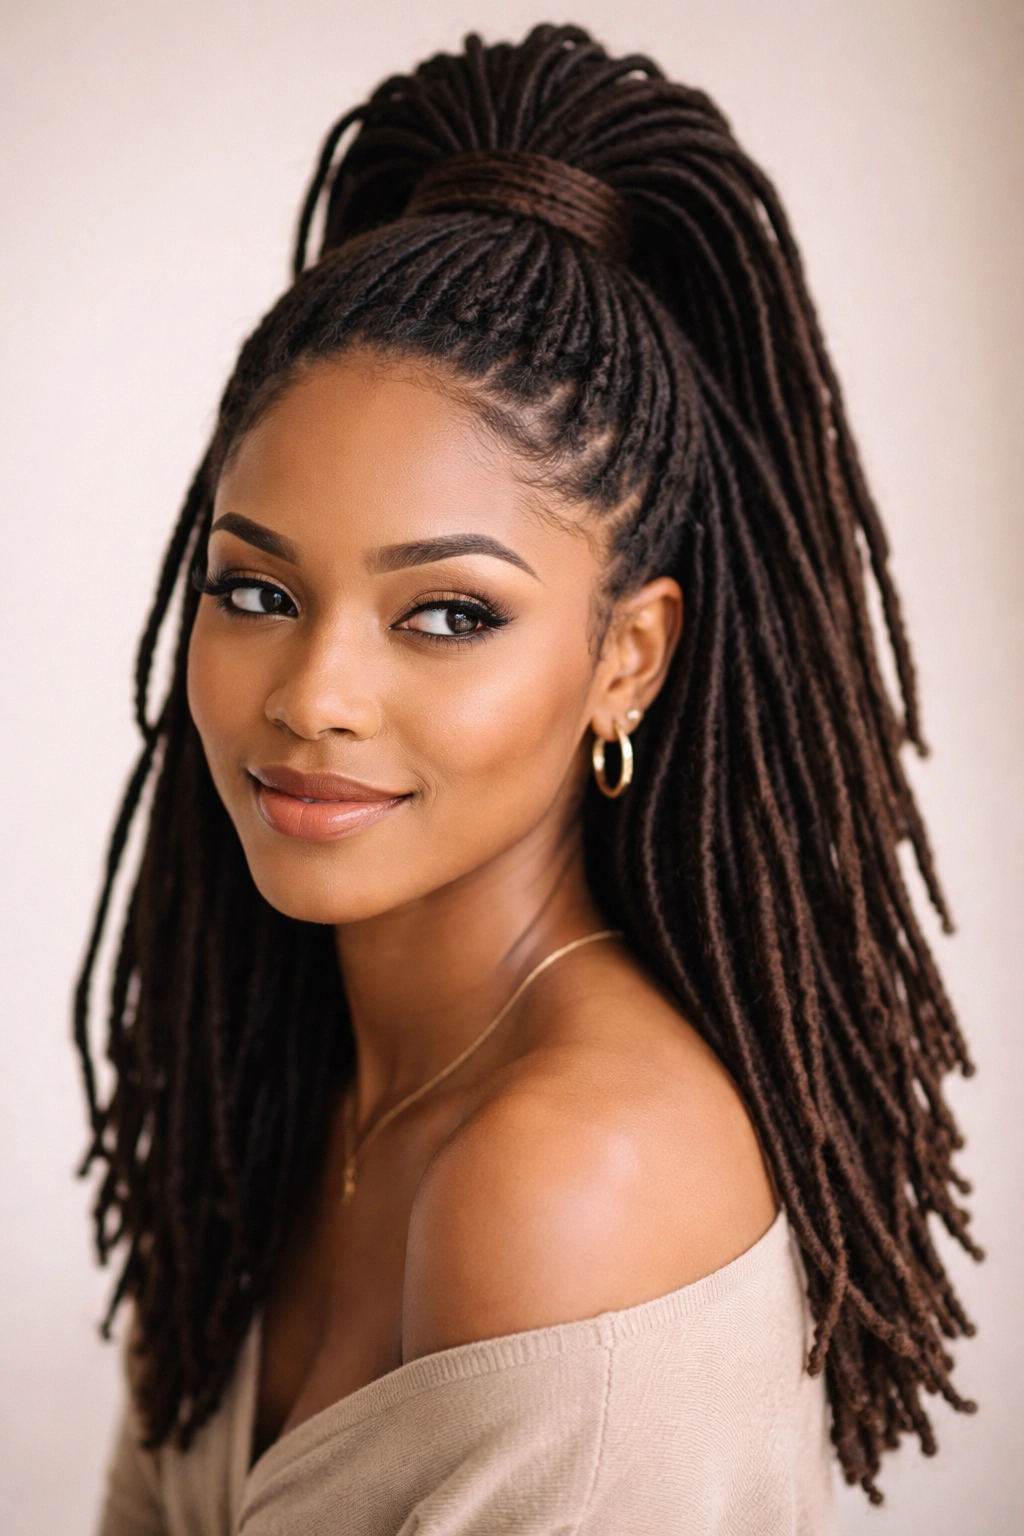
This elegant style involves gathering the top section of your locs into a high half-up position, then wrapping a small section of locs around the base of the ponytail to conceal the elastic and add a finished, polished appearance.
Building the Wrapped Base
Gather your top section of locs and secure them with an elastic. Take a single loc (or a very small section of locs) and wrap it tightly around the base of the ponytail where the elastic sits, securing the wrapped section with a small rubber band or by tucking it under. The effect is immediately more refined—the elastic disappears, and the style looks intentional and salon-worthy.
Why This Look Works
The wrapped base transforms a basic half-up ponytail into something that looks deliberate and carefully styled. It’s a detail that signals attention to grooming and adds a touch of sophistication. The technique works beautifully with both sleek and textured locs, making it incredibly versatile.
Best For
- Creating polished looks for events and important occasions
- Elevating everyday half-up styles without changing the core structure
- Anyone who wants their styling to look intentional and finished
- Professional settings where presentation matters
Pro tip: If you don’t have a small section of locs to wrap with, you can use coordinating thread or yarn wrapped around the base—it’s just as effective and adds an extra styling element.
5. The Low Side Half-Up with Texture
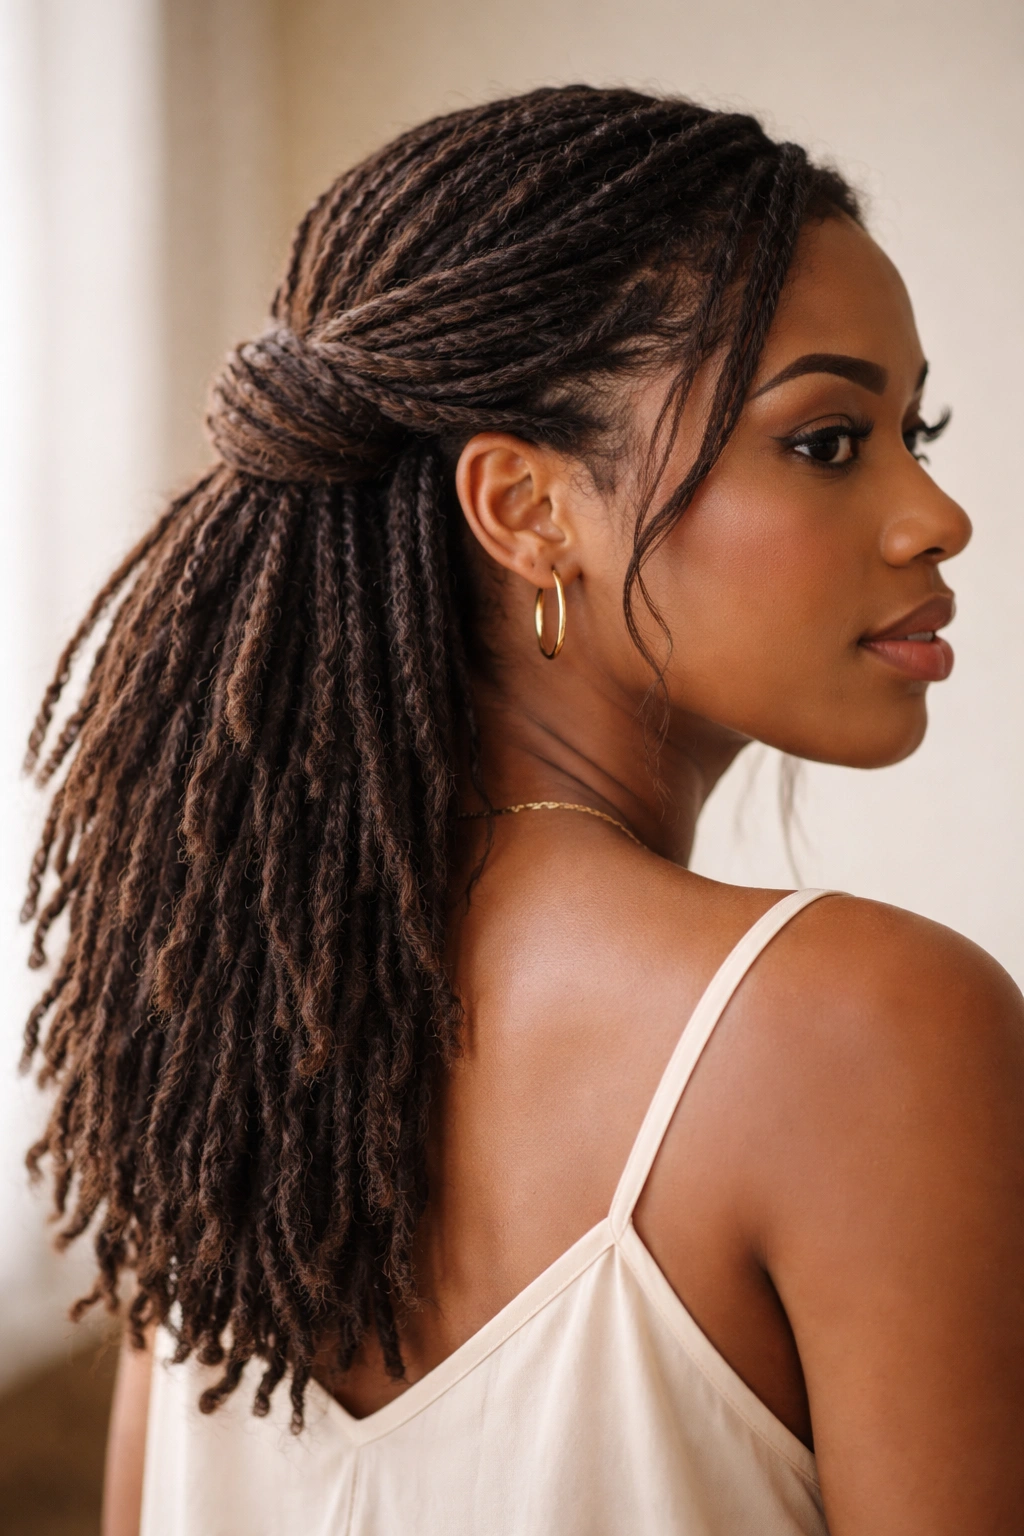
Position the gathering point lower (roughly at the nape of your neck) and slightly to one side, creating an off-center half-up that’s relaxed and undone-looking. Leave some texture in the gathered section rather than making it sleek.
Achieving the Casual Look
Section the hair across at a lower line—imagine a horizontal line from one ear to the back of your head at about mid-neck height. Rather than smoothing this section flat, let it maintain its natural texture. Gather it gently (not tightly) and secure with a soft elastic or scarf. The looseness in the gathering and the texture in the secured section keep this from feeling overdone.
Why This Look Works
There’s something effortlessly cool about a low, slightly messy half-up. It’s casual enough for everyday wear but intentional enough that people know you’ve styled yourself. The lower placement feels modern and flatters a wider range of face shapes than high half-ups. Side positioning adds another layer of visual interest.
Best For
- Everyday styling that feels put-together without being fussy
- Warmer months when you want hair off your face but still want movement
- People who prefer undone, relaxed aesthetics
- Transitional styling (works for both casual and dressy situations with the right accessories)
Quick fact: Textured half-ups actually look better when they’re slightly loose and imperfect—tightness reads as trying too hard, whereas gentle gathering creates that coveted intentional-casualness vibe.
6. The Double Half-Up with Locs

Instead of gathering all the upper locs at once, create two smaller half-ups positioned one above the other, with the topmost section floating higher and the middle section positioned lower.
Sectioning and Securing
Divide your top portion into two horizontal lines. Secure the very top section (roughly the upper inch-wide band from forehead to crown) into a small half-up. Then, below that, create another gathering point with the next section of locs and secure that separately. The bottom half of your locs remains completely loose. The two secured sections create texture and visual layers while keeping half your hair free.
Why This Look Works
Double half-ups are inherently more interesting visually than single ones. They create dimension and complexity that makes your locs appear thicker and more voluminous. The stacked effect is also genuinely flattering to many face shapes and can make medium locs look almost as impressive as longer lengths.
Best For
- Adding volume without adding weight
- Creating intricate-looking styles that don’t actually take much longer to execute
- Face shapes that benefit from increased crown height and dimension
- Anyone who wants a style that stands out slightly from typical half-ups
Insider note: Use different colored elastics or clips for the two sections—this emphasizes the layered effect and makes the style feel intentional rather than accidental.
7. The Scarf-Secured Half-Up
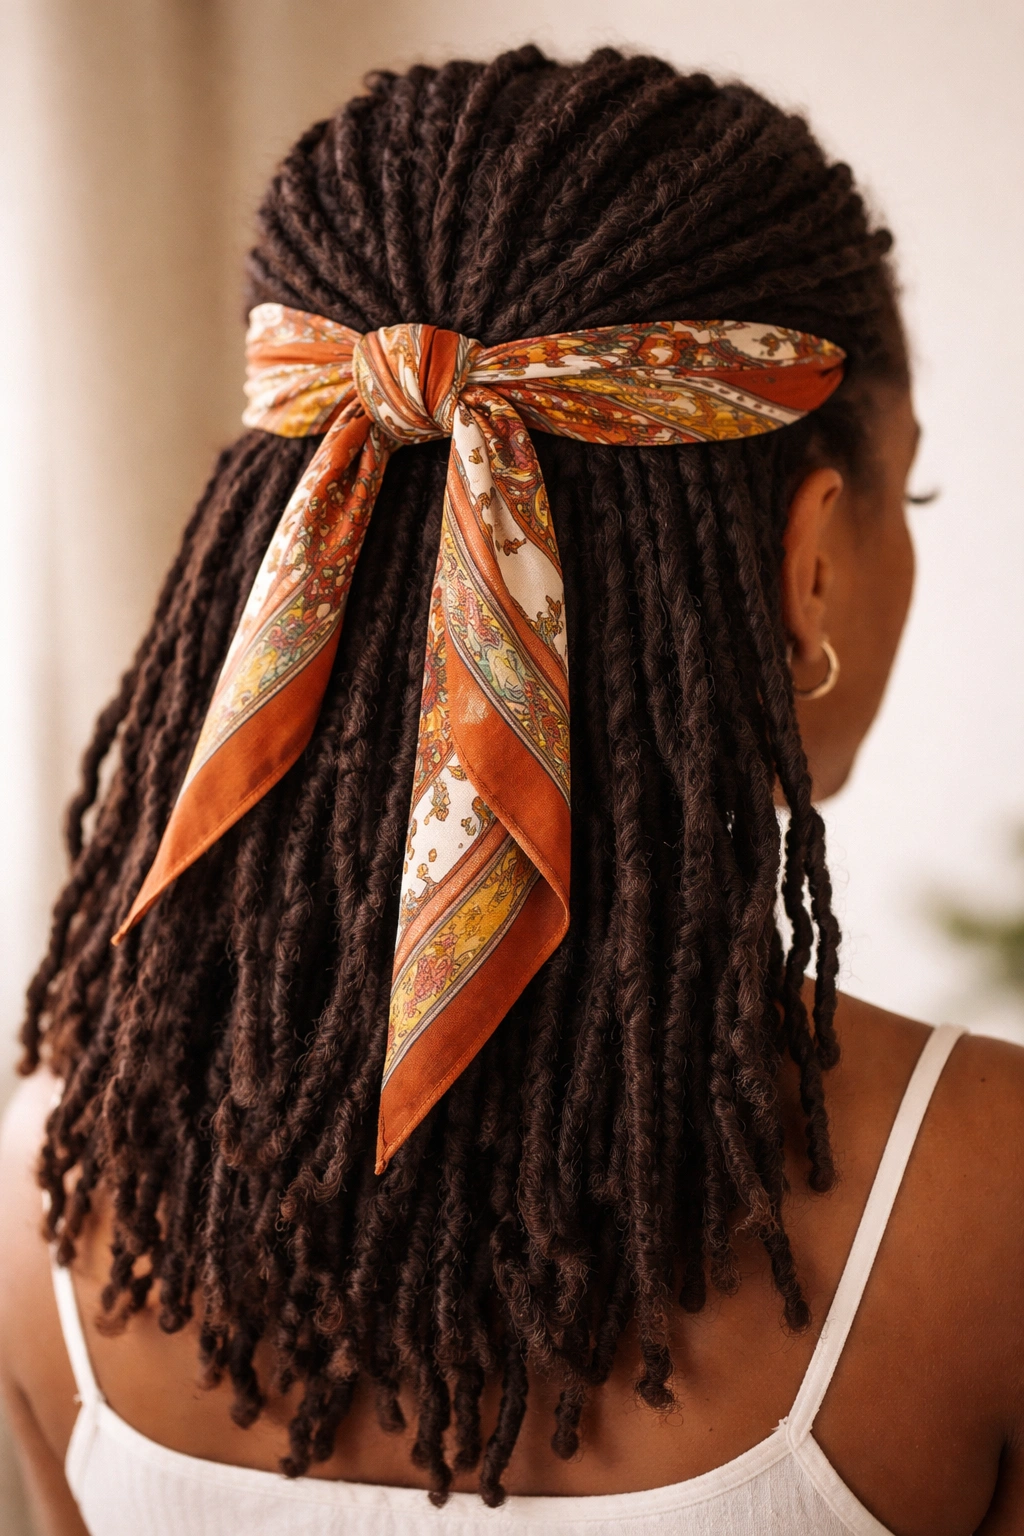
Gather the top section of your locs into a half-up position, but instead of using an elastic, use a coordinating scarf to tie and secure this section. The scarf can be knotted, wrapped, or woven through the locs.
Working with Scarf Ties
Fold a rectangular scarf in half lengthwise to create a long band. Gather your top-section locs and lay the folded scarf under them. Tie the ends of the scarf in a knot or bow to secure the locs, positioning the knot or bow where you want it—at the back for understatement, or off to the side for visibility. You can also weave the scarf’s ends through sections of locs for additional texture.
Why This Look Works
Scarves add color, pattern, and cultural richness to your styling. They protect the elastic and create a more finished appearance. Scarves also tend to feel more comfortable against locs than some elastics and distribute pressure more evenly. Plus, there’s inherent style in the visual impact of a vibrant or patterned scarf against your locs.
Best For
- Adding pops of color and personality to your styling
- Protecting your locs from elastic damage and tension
- Occasions where you want the styling to feel intentional and curated
- Celebrating and expressing cultural identity
Worth knowing: Silk and satin scarves are gentler on hair than cotton, which can cause friction and frizz. If you’re securing locs with a scarf, choose a natural fiber scarf and tie it snugly enough to hold without slipping.
8. The Braided Crown Half-Up
Create a braided crown using some of your locs on the upper section of your head, then secure the remaining upper locs into a half-up, with the braid creating the decorative element that secures and frames the half-up.
Building the Braid Crown
Section a few locs from one side of your head and begin a loose three-strand braid, working your way across the back of your crown toward the other side. Don’t braid tightly—allow the braid to sit slightly loose and display texture. Once you’ve created a braided arc across the crown, gather your top-section locs and tuck them behind or through the braided crown. Use a clip or elastic to finalize the style, allowing the braid to frame and hold the half-up.
Why This Look Works
Braided elements instantly elevate a style from simple to intricate. The crown positioning is flattering and draws attention upward. A braided element also provides visual interest and texture variation across your hair. This style manages to look both romantic and strong.
Best For
- Special occasions and celebrations
- Creating an impression of time and effort invested
- Building confidence through visibly intentional styling
- Photography and occasions where you want to stand out
Pro tip: Braid with locs that are similar thickness for the most cohesive, attractive final result. If your locs vary in size, the braid still works, but it looks more polished when the three strands are roughly equal.
9. The Cornrow-Secured Half-Up
Create cornrows (thin, scalp-hugging braids) from both sides of your head, meeting them at the back where they secure the upper portion of your locs into the half-up position.
Executing the Cornrows
Start a cornrow at your temple on the left side, following a line toward the back of your head. Repeat on the right side, running both cornrows toward the center back. Where they meet (around the crown or slightly below), you’ll have a structured line of braided locs. Gather your top-section locs above this cornrow line and secure them into a half-up—the cornrows act as an anchor and decorative frame.
Why This Look Works
Cornrows provide an intricate, sculptural element that’s both beautiful and functional. They hold up exceptionally well over time and can last for weeks. The geometric pattern created by cornrows adds visual sophistication. This is a style that truly celebrates the artistry and skill involved in locs.
Best For
- Long-lasting styling that maintains its shape through activity and weather
- Making a bold statement about cultural pride and aesthetic choice
- Creating maximum visual impact with structured, architectural detail
- Occasions when you need styling that won’t budge or shift
Insider note: Having a professional loctician create the cornrows ensures they’re even, well-executed, and sized appropriately for your locs. The difference between professional and DIY cornrows is noticeable.
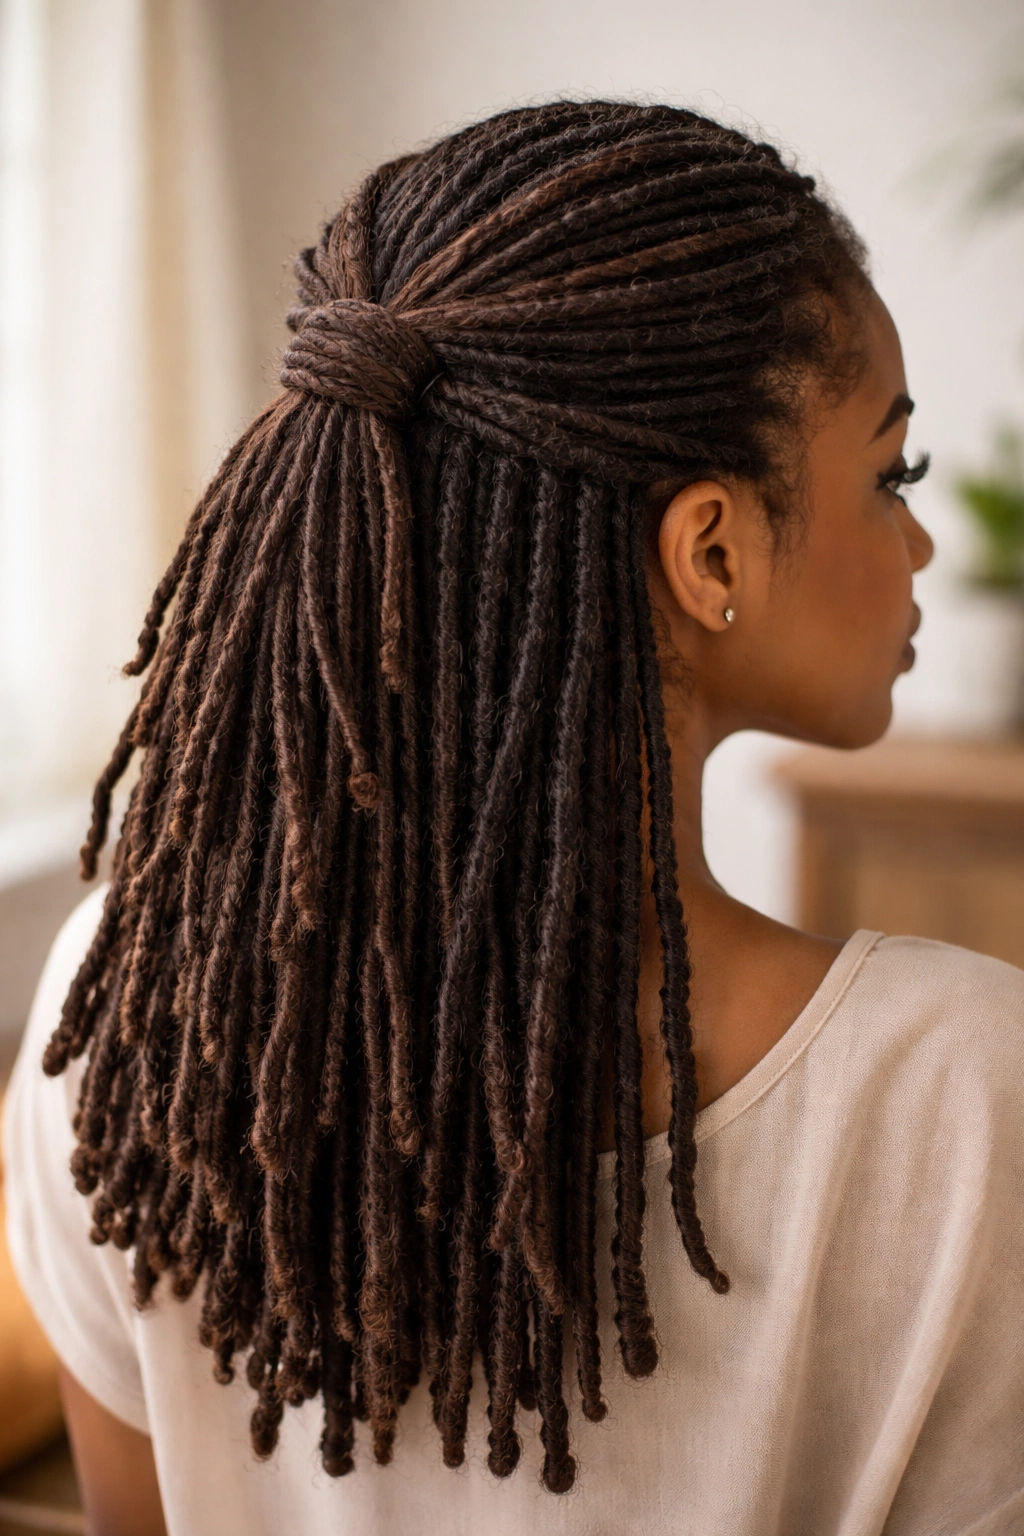
10. The Loose Knot Half-Up
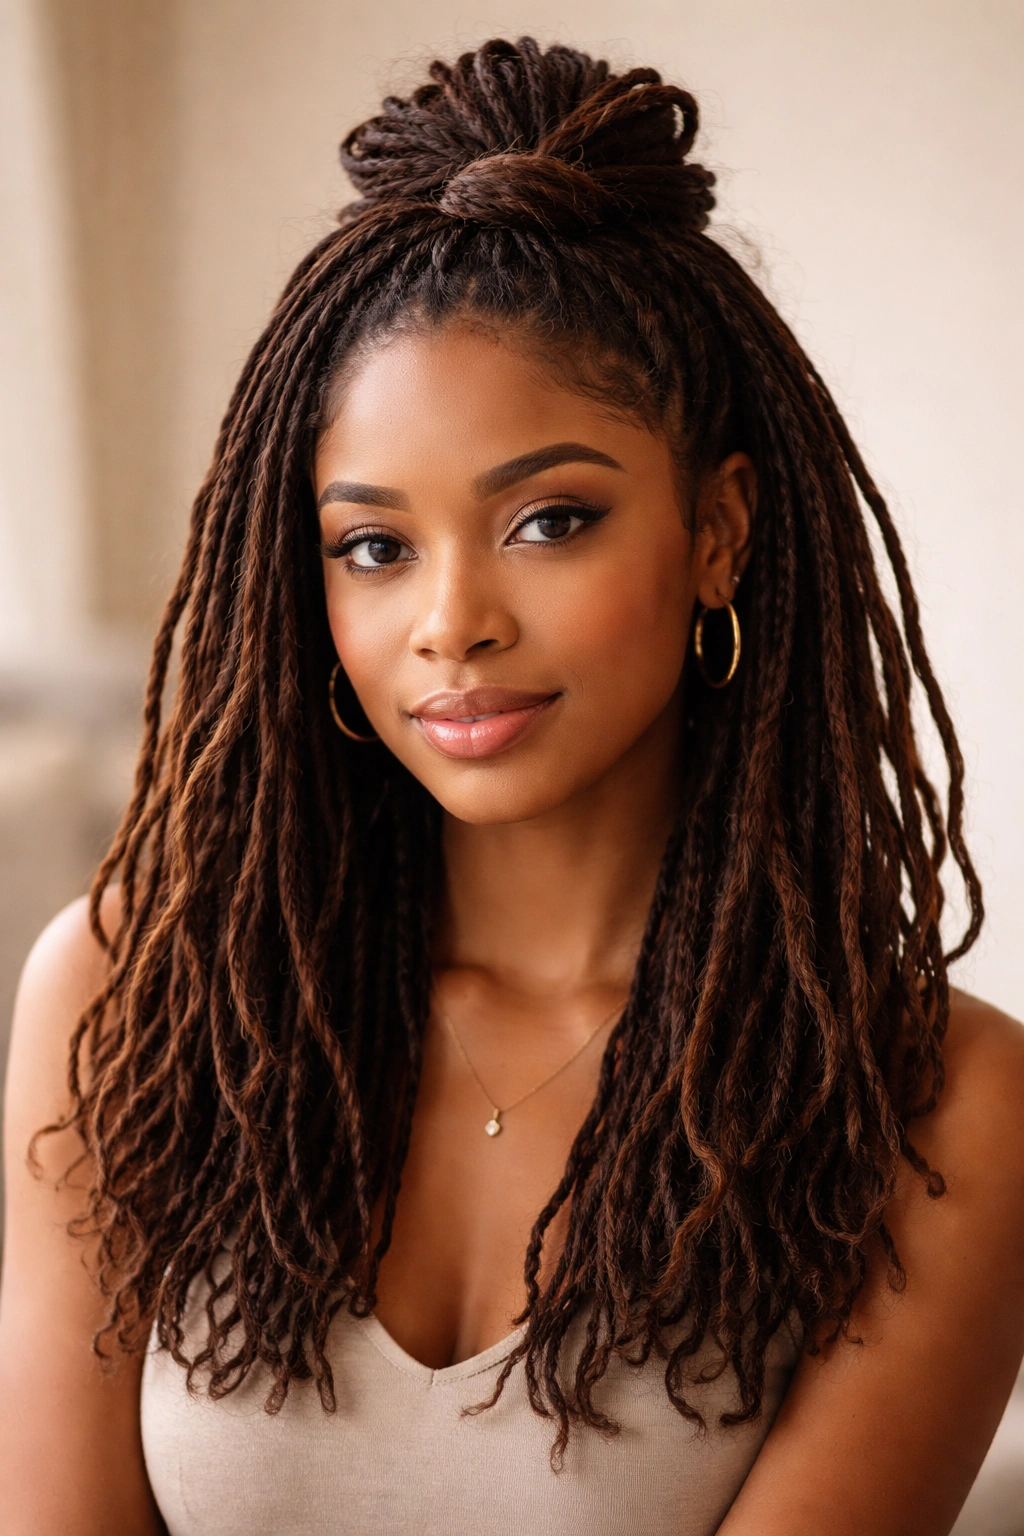
Gather the top section of your locs and tie them into a loose, decorative knot before allowing the rest of the locs to flow freely below.
Tying the Knot
Take your top-section locs and create a simple overhand knot (the same type of knot you’d use to start tying a shoelace). Don’t pull it overly tight—leave it slightly loose so the knot has dimension and doesn’t compress your locs. Position the knot where you prefer visually (centered or off to one side). The knot simultaneously secures and styles the upper portion while creating a completely unique look.
Why This Look Works
A loose knot is minimalist and modern—it’s styling without looking like you’ve invested a lot of effort, even though the result looks really cool. The asymmetrical nature of a knot adds visual interest. It’s one of the least formal ways to style a half-up while still clearly having intentional structure.
Best For
- Everyday styling that feels fresh and current
- Days when you want visual interest without fussiness
- Casual settings and laid-back occasions
- Anyone who loves minimalist aesthetics
Quick fact: The knot tightens slightly over the day due to the weight of the hanging locs, so tying it loose initially ensures it doesn’t compress too much as hours pass.
11. The Pin-Secured Half-Up with Metallic Accents
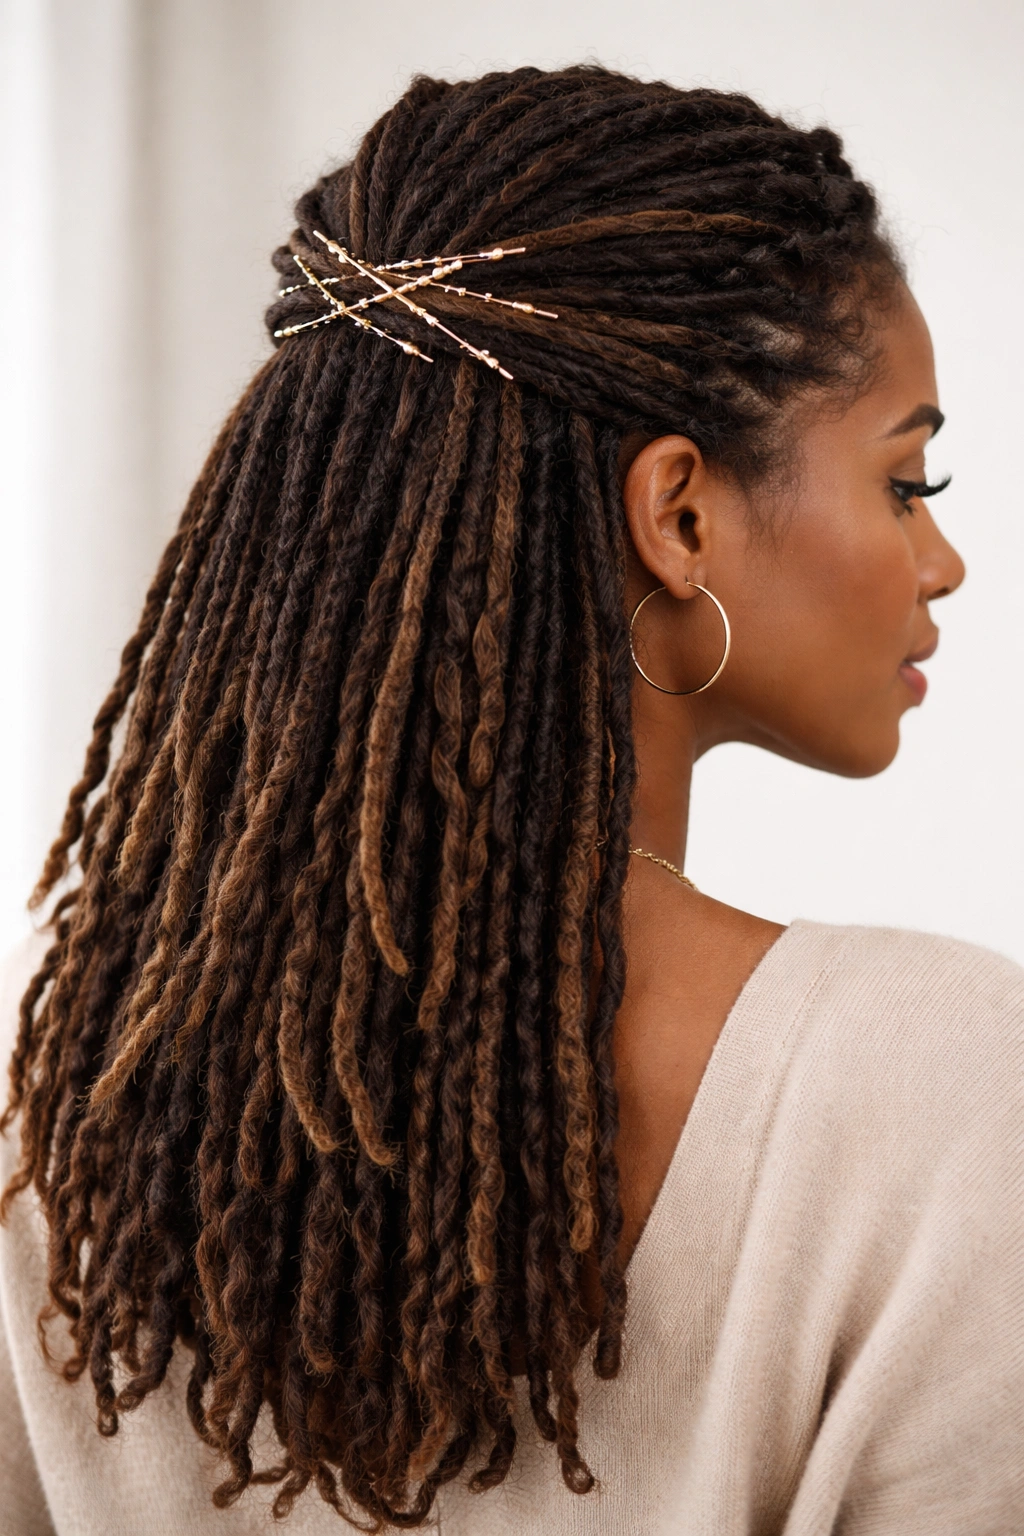
Gather your top section and secure it using decorative pins or clips rather than an elastic, choosing metallic options (gold, silver, or copper) that contrast with or complement your locs’ color.
Securing with Pins and Clips
Gather your top-section locs at your desired height and crisscross two or three decorative metal bobby pins or hair clips through the gathered section, positioning them visibly rather than hiding them. The metallic sheen becomes part of the style rather than something to conceal. You can layer different sized pins for visual interest or stick with matching ones for cohesion.
Why This Look Works
Metal accessories instantly modernize a hairstyle and add visual pop. Pins and clips create a more dynamic appearance than a simple elastic—they’re functional and decorative simultaneously. This approach works beautifully across face shapes and adds a contemporary edge to an otherwise classic half-up.
Best For
- Anyone who loves accessorizing and jewelry
- Creating a polished but definitely modern aesthetic
- Making a style statement that goes beyond basic hair styling
- Occasions when you want attention on details
Pro tip: Choose high-quality pins and clips—they hold better and look more intentional. Cheaper metals can slip or look cheap next to the texture and natural beauty of your locs.
12. The Wrapped and Pinned Half-Up
Combine techniques: gather the top section into a half-up, wrap a small section of locs around the base to hide the elastic (like in the wrapped style earlier), then secure a decorative pin through the wrapped section for added detail.
Layering the Techniques
Create your half-up with an elastic. Wrap a small section of locs around the base. Then, instead of just tucking the wrapped section, push a decorative pin through it, securing both the wrap and adding a visual accent. The pin becomes a jewelry-like detail that catches light and draws the eye.
Why This Look Works
This style combines multiple techniques into one cohesive, polished look. It’s more elaborate than a basic half-up but not so complex that it requires professional installation. The combination of wrapping and pinning creates a styled appearance that reads as intentional and carefully executed.
Best For
- Events and occasions when you want to look special
- Creating a sense of elevated everyday styling
- Anyone who loves layering details into their aesthetic
- Making a memorable impression
Insider note: This style stays polished longest when done with slightly tighter sections than some other half-ups—the added elements mean you want secure anchoring throughout the day.
13. The Side-Swept Waterfall Half-Up

Create a partial waterfall effect on one side of your head using locs, beginning the waterfall from the top section and allowing one strand to “waterfall” down while catching others, then secure all the top locs into a side-positioned half-up.
Building the Waterfall Element
Start a three-strand braid with one loc at your crown, but instead of incorporating all strands back into the braid (as in a traditional waterfall braid), allow one strand to drop at intervals, replacing it with a new section. This creates the waterfall effect. After creating this partial waterfall down one side, gather all the upper locs (including the waterfall braid) and secure them into a side-positioned half-up. The waterfall component creates visual complexity and movement.
Why This Look Works
Waterfall elements add sophistication and romance to any style. They’re visually intricate without being heavy or burdensome. The technique is also somewhat underused with locs, which means you’re likely to turn heads—people recognize it as something that took skill and intention.
Best For
- Romantic occasions and date nights
- Creating visual movement and dimension
- People who want their styling to feel artistic
- Making a style statement that’s elegant rather than casual
Worth knowing: Waterfall braids require some practice to execute smoothly, so if you’re new to the technique, watch several tutorials or have a friend or professional demonstrate before attempting on your own locs.
14. The Messy High Half-Up with Texture
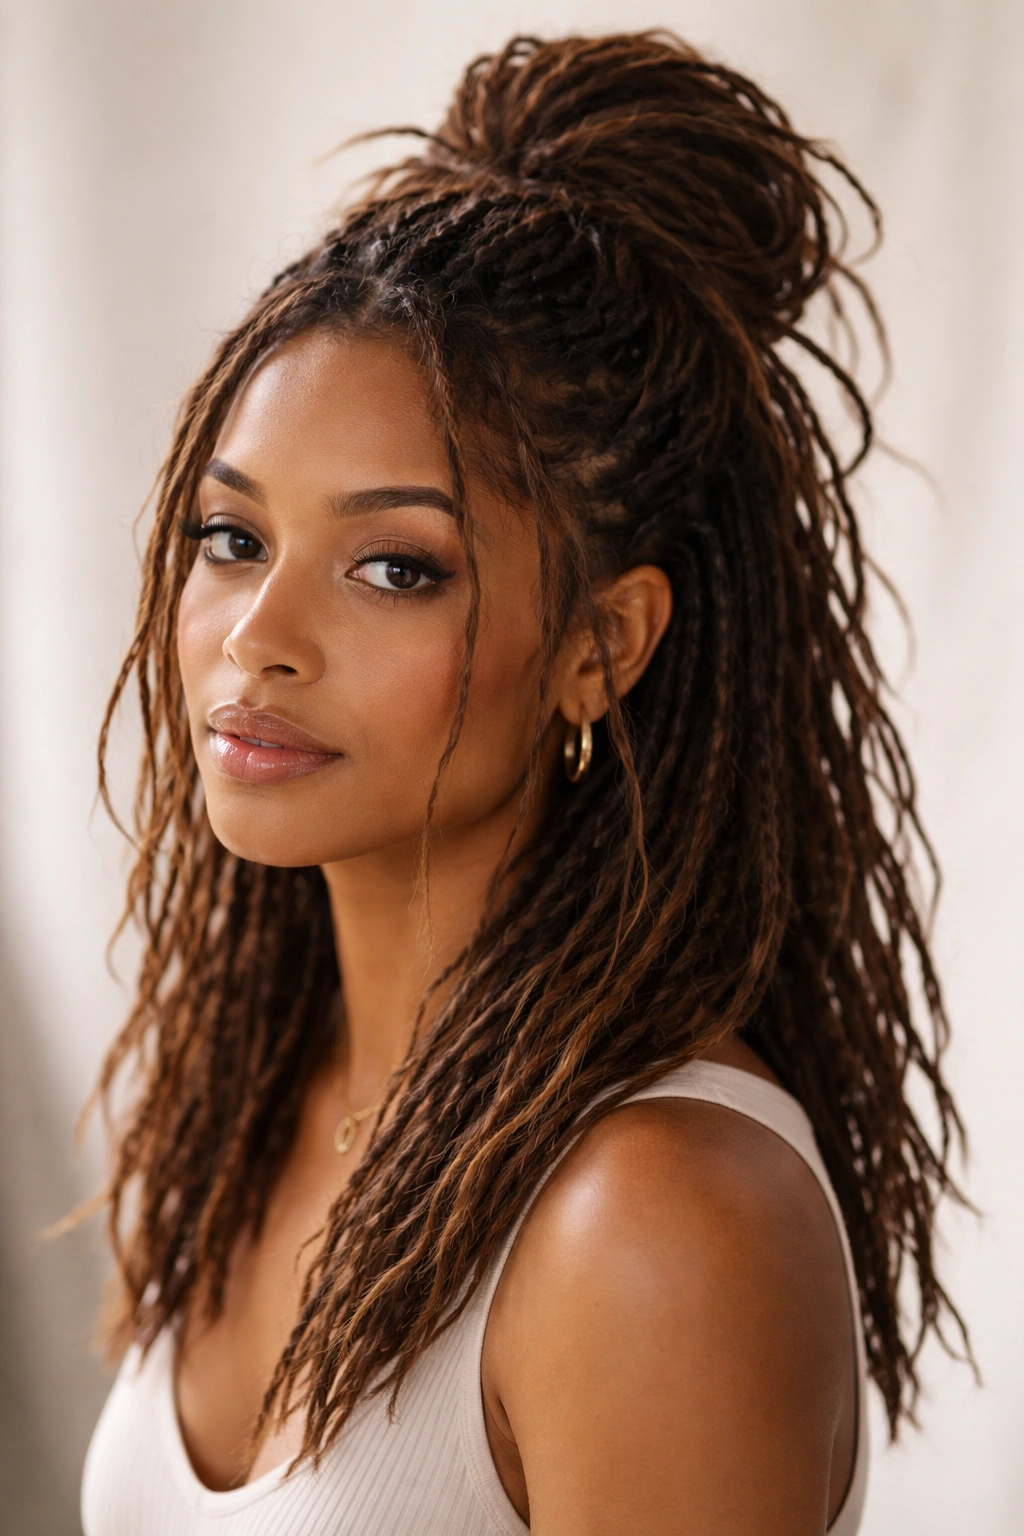
Gather the top section of your locs at a high point (crown height or slightly higher) into what looks deliberately undone—not perfectly sleek, but not neglected either. The looseness and texture are the point.
Achieving Intentional Messiness
Section the top third of your locs and gather them loosely at the crown, using a soft elastic or scarf that doesn’t create harsh tension. Allow individual locs to fall slightly loose around the face and from the gathered section. The texture should feel relaxed—like you threw your hair up without over-thinking it, even though you absolutely did style it intentionally. This is the “perfectly imperfect” aesthetic.
Why This Look Works
Messy-on-purpose styles are inherently modern and flattering. They communicate confidence and ease. This look also celebrates the natural texture of locs rather than fighting it. The high placement still keeps hair off your face and neck, which is practical, but the loose gathering keeps it from feeling severe or uptight.
Best For
- Everyday styling that looks cool without looking labored
- People who prefer relaxed aesthetics
- Creating the impression of effortless style
- Warmer months when you want hair somewhat controlled but still feeling light
Pro tip: Use a silk scarf instead of a rubber elastic for this style—it distributes pressure more gently and allows the gathered section to maintain more texture throughout the day.
15. The Bubble Half-Up (Multiple Sections)
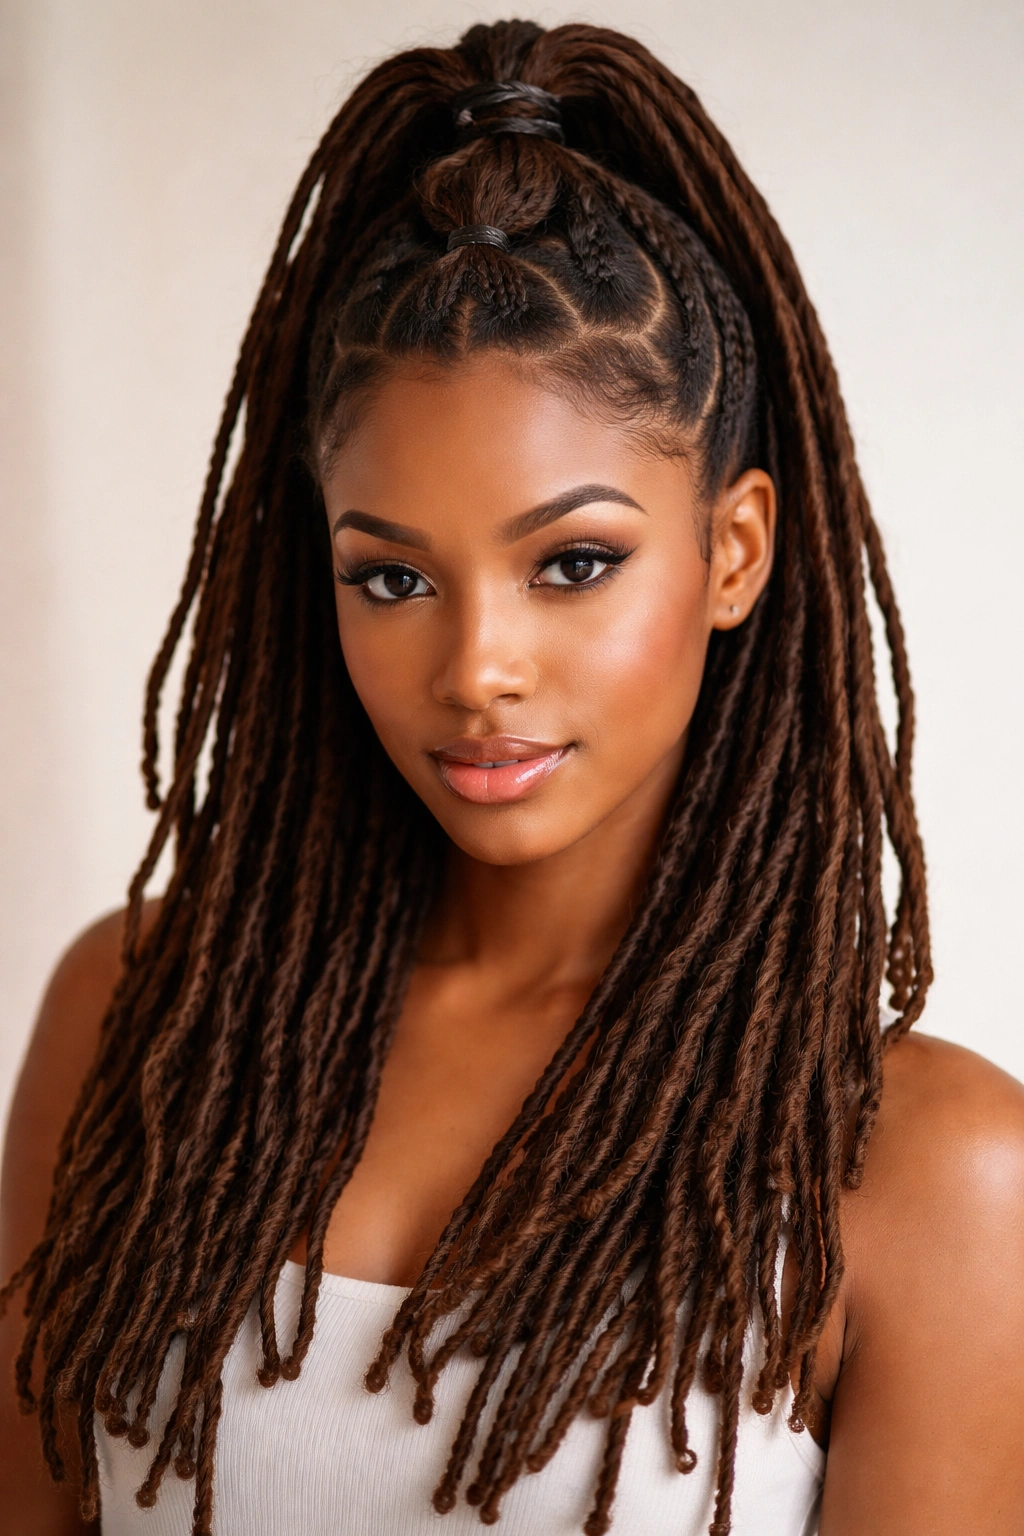
Create the illusion of a bubble pony (several elastics positioned close together on a high ponytail) using only the top section of your locs, creating distinct segments that look dimensional and deliberate.
Creating the Bubble Effect
Gather your top section into a high half-up and secure it with an elastic. Then, using additional elastics, create sections (bubbles) within that half-up by wrapping elastics around the ponytail at regular intervals (every 2-3 inches, approximately). Each elastic creates a defined section that poofs slightly between the bands. The locs below remain completely loose, creating a striking contrast between the segmented, dimensional upper section and the flowing lower locs.
Why This Look Works
Bubble ponies are visually striking—the segmented effect adds volume and dimension that’s really impressive. It’s a style that trends regularly and always photographs well. The technique works beautifully with locs because the texture creates natural poofing between elastics, making the bubbles look full and healthy.
Best For
- Creating maximum visual impact
- Photography and occasions where your hair should stand out
- Adding volume without actually adding length
- Anyone who loves detailed, intentional styling
Quick fact: This style holds up better when you use slightly tighter elastics (not painfully tight, but snug enough that they won’t slip) and when you position the bubbles at fairly regular intervals. Uneven spacing reads as accidental rather than intentional.
Final Thoughts
Medium locs give you the absolute sweet spot for styling versatility—long enough to move and flow beautifully, but manageable enough that trying new configurations doesn’t feel overwhelming. The half-up-half-down style category is genuinely limitless, and these 15 looks only scratch the surface of what’s possible.
The beauty of this particular length and texture is that you can rotate between styles regularly, which keeps your locs interesting and extends their lifespan by varying where tension and pressure sit. One day you’re working a sleek wrapped high pony, and the next you’re going messy-casual with a loose knot. You’re protecting your ends by gathering them some days, while still getting full-length visual impact on other days.
Start with the styles that feel most natural to your aesthetic and skill level. If cornrows and braids intimidate you, lean into the simpler wrapped and pinned options. If you love complexity, challenge yourself with the waterfall or bubble techniques. The most important thing is that your half-up-half-down style makes you feel confident and beautiful—because that’s what truly matters.