Half up half down hairstyles are a game-changer for anyone sporting long locs. They give you the best of both worlds—the freedom and flow of wearing your locs completely down, combined with the practicality and elegance of a styled updo. Whether you’re heading to work, attending a formal event, or just looking for a way to switch up your everyday look, these styles offer versatility that never goes out of fashion.
What makes half up half down styles so appealing for long locs is that they work with your hair’s natural texture and structure rather than against it. Unlike some protective styles that require significant manipulation, these looks celebrate the beauty of your locs while keeping them off your face and neck. Long locs are particularly stunning in this configuration because they have enough length to create volume, movement, and visual impact in both the secured and the flowing sections.
The techniques for securing long locs in half up half down arrangements are simpler than you might think, and once you master a few key methods, you’ll be able to adapt and personalize these styles endlessly. Each of these fifteen approaches works beautifully on locs of substantial length and can be customized based on your personal aesthetic, the occasion, and how much styling time you have available.
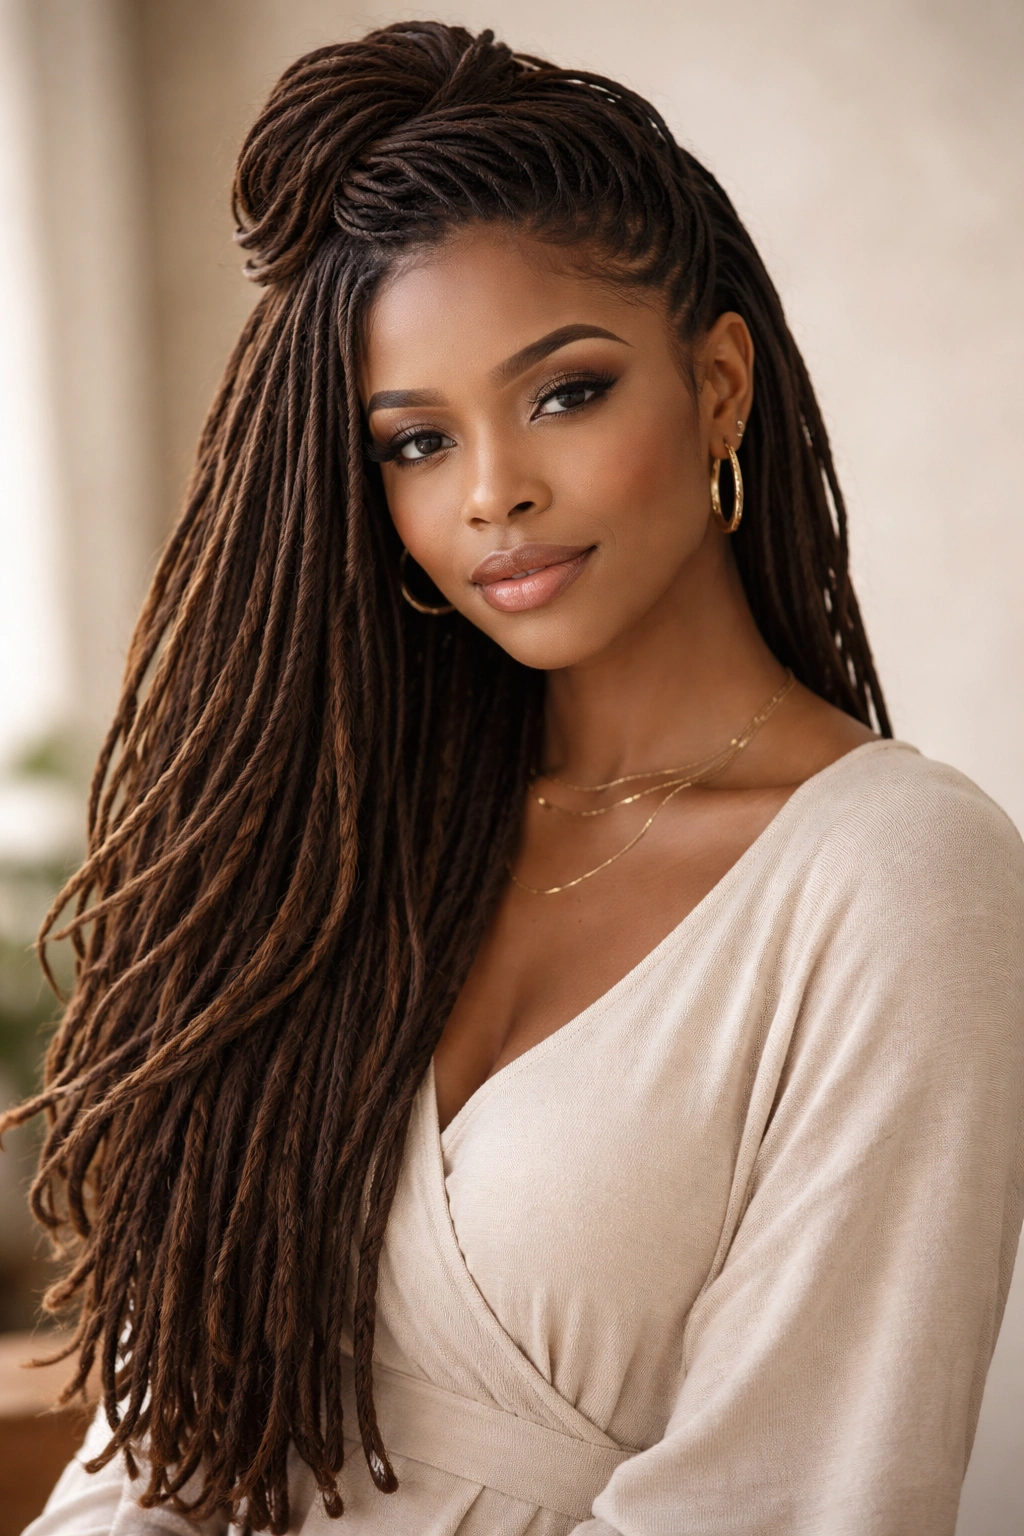
1. The Classic High Crown Half-Up
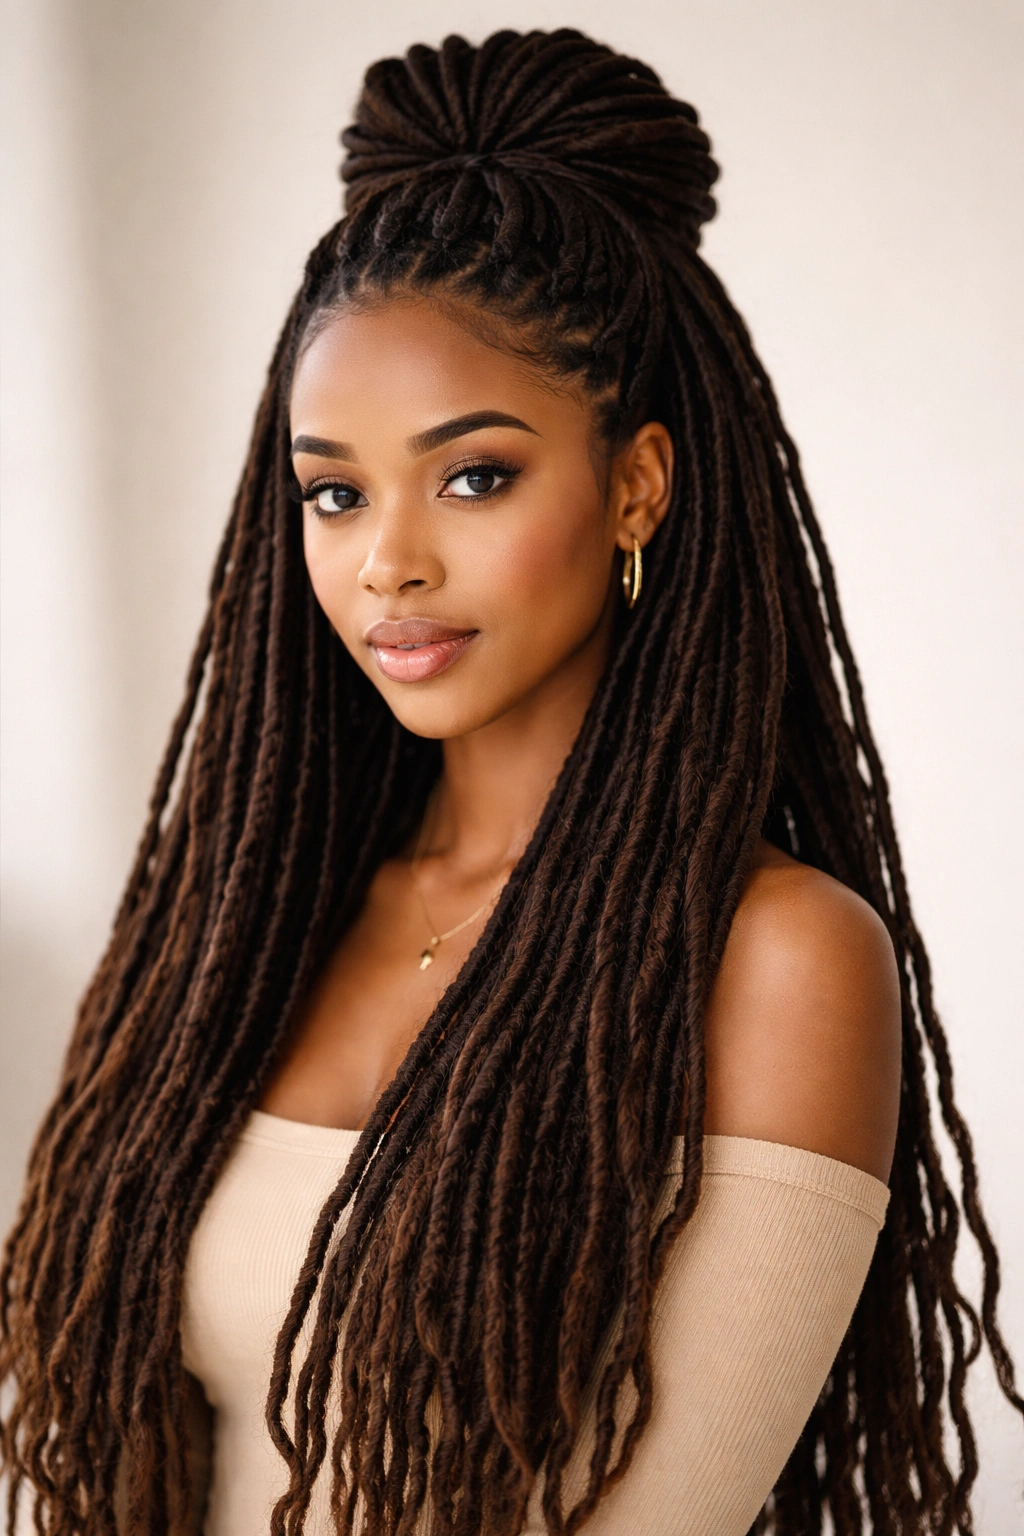
The classic high crown half-up is the foundation style that every loc wearer should master. Gather the top section of your locs from roughly ear to ear, bring them up and away from your face, and secure them at the crown of your head with a hair tie, hair stick, or decorative clip. The beauty of this style lies in its simplicity—it’s polished enough for professional settings but casual enough for everyday wear.
Why This Look Works for Long Locs
This style keeps hair off your face and neck without sacrificing the stunning length you’ve cultivated. The secured section adds height and dimension to your overall silhouette, while the loose locs flowing down your back maintain that impressive length and movement. High crowns also tend to be the most forgiving option if your locs have different thicknesses or lengths, since any variation disappears into the overall aesthetic.
How to Nail the Execution
- Divide your locs into three sections: the front left, front right, and back. Gather both front sections and secure them at the crown first
- Use a sturdy hair tie or elastic that won’t slip through your locs as the day goes on
- Leave at least three to four locs loose on each side of your face for a softer, more intentional frame
- You can smooth down the secured section with a light gel or edge control if you want a polished look, or leave it textured for a more relaxed vibe
Pro tip: This style actually gives you time for a quick refresh if needed throughout the day—simply remove the tie and resecure it if things slip or shift. That’s the beauty of the classic approach.
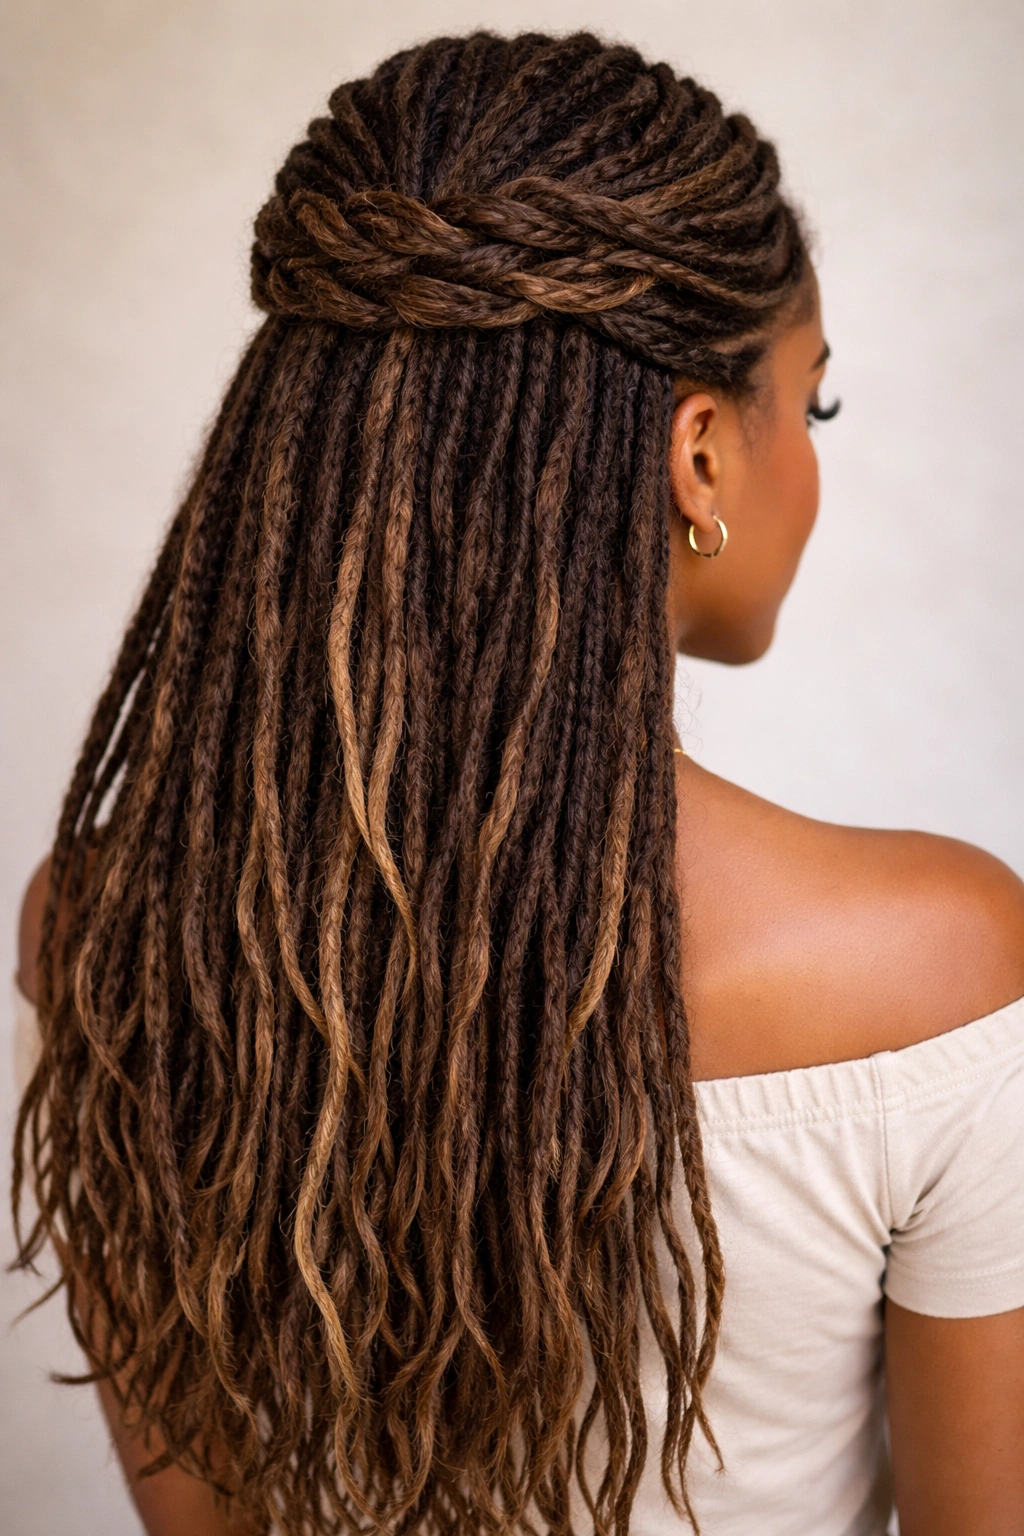
2. The Twisted Crown Half-Up
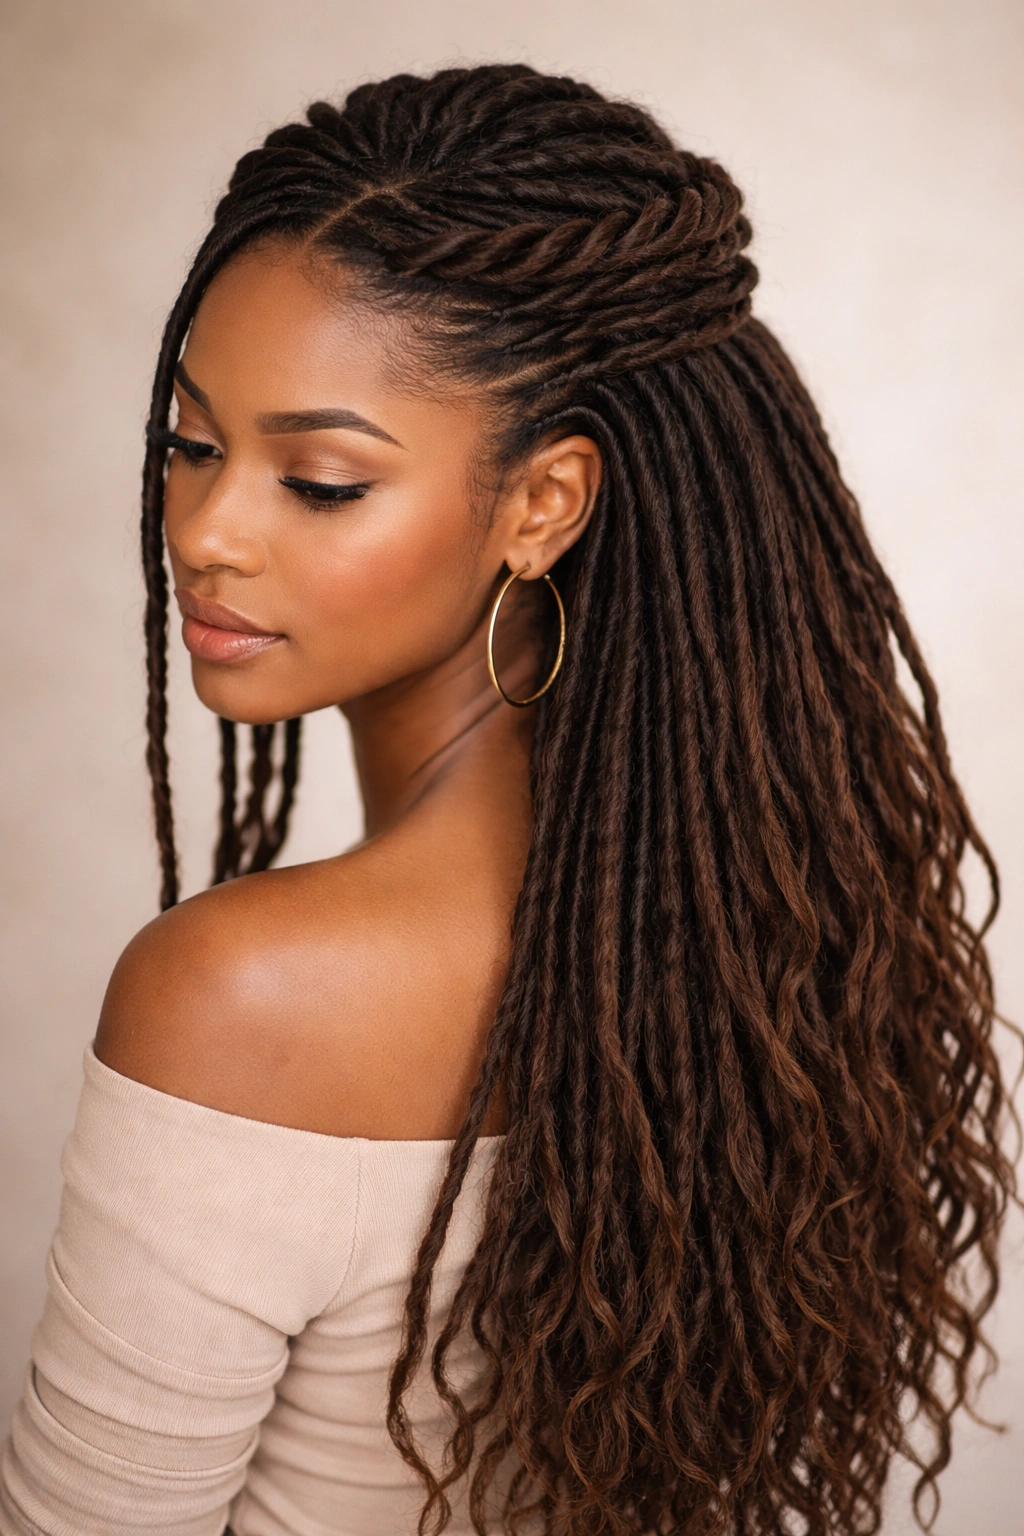
For a more textured and intricate appearance, twist your locs as you’re gathering them up toward the crown. You’ll take locs from either side of your head and gently spiral them upward and backward before securing them together at the apex of your head. This creates a focal point of visual interest while maintaining the relaxed flow of the style.
What Makes Twisted Sections Special
Twisted locs add movement and dimension that a simple gathered section doesn’t achieve. The twists catch light differently than straight sections, creating shadows and highlights that make the style appear more intentional and considered. When you have really long locs, these twists can be quite dramatic and become a true statement element of the look.
Creating Your Twisted Crown
- Start with clean, dry locs for the easiest twisting—wet locs are more slippery and harder to control
- Begin twisting from one side of your head, incorporating locs as you spiral upward and backward
- Use both hands, with one hand holding the base and the other rotating the locs away from your body
- Secure the twists together at the crown with a hair tie that matches your locs, a decorative band, or even a wooden hair stick pushed through the twists
- Leave the bottom section of your locs completely loose for maximum impact
Worth knowing: Twisted crowns work particularly well if you’re attending an event where you want to look intentional and put-together—the twists signal that you’ve taken time with your appearance, even though the actual styling is relatively quick.
3. The Two-Bun Half-Up
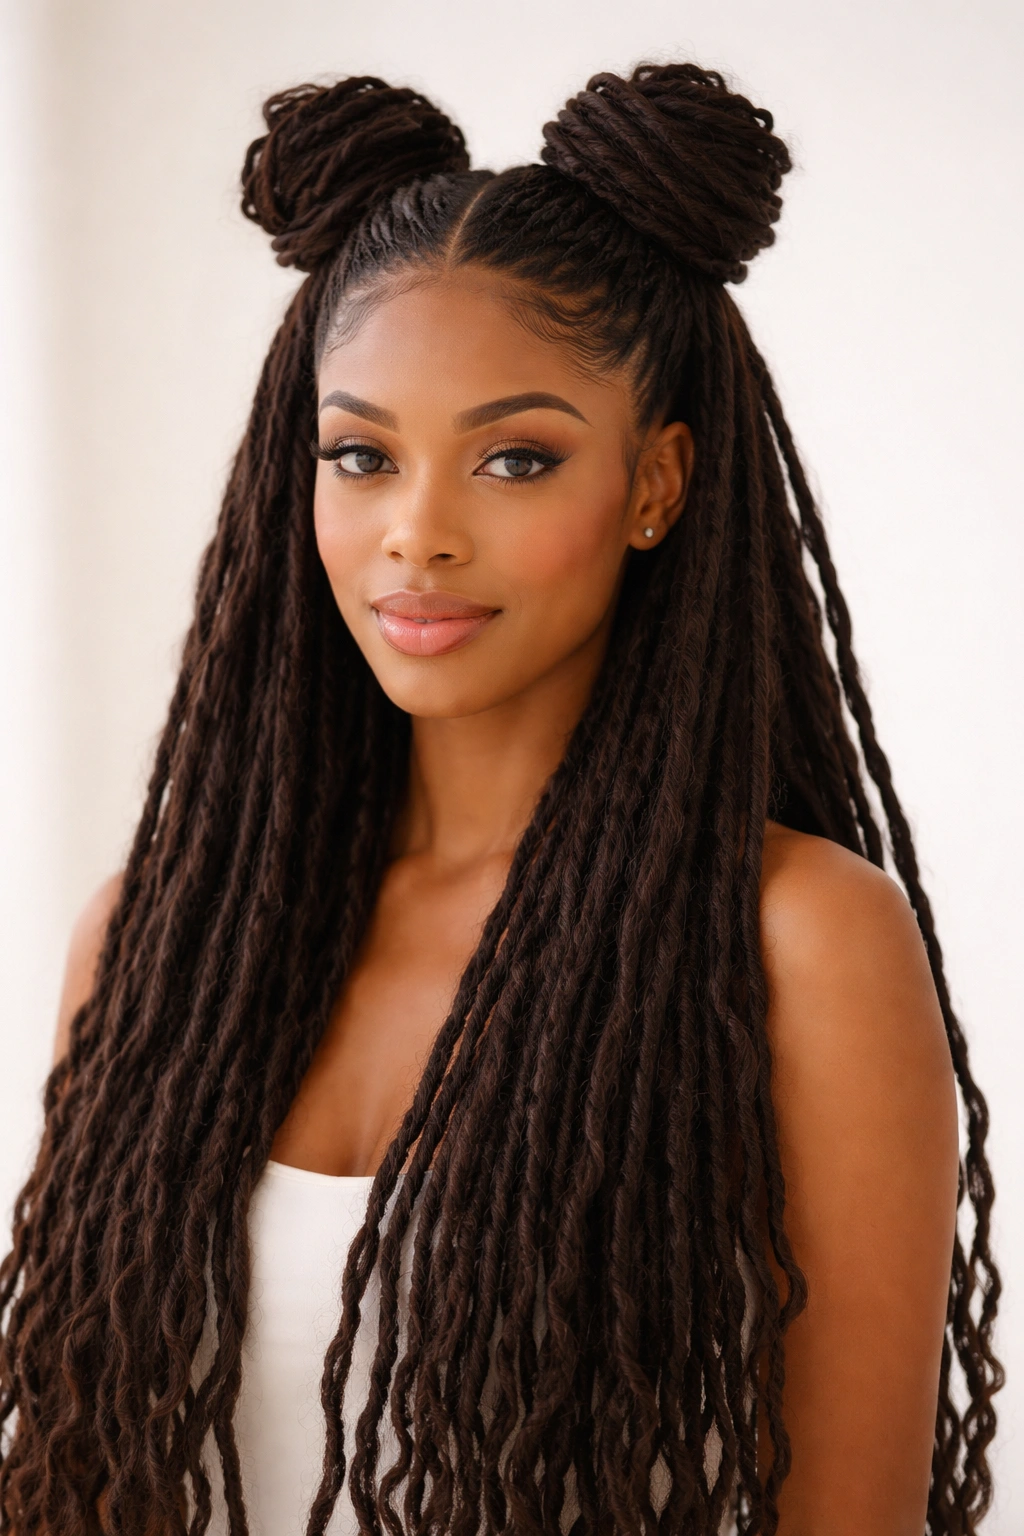
Instead of securing all your top locs into a single point, create two smaller buns on either side of your crown and leave the remainder flowing down your back. This style is playful and modern, offering a softer alternative to the high crown while still keeping hair completely off your face.
Why Two Buns Instead of One
Twin buns create better balance on a wider face and distribute the weight of your locs more evenly across your scalp, which can feel more comfortable if you have a lot of length and density. Two secured sections also leave more locs loose, maximizing the impressive flow of your longer locs while still achieving the practical benefit of a half-up style.
Styling Two-Bun Perfection
- Divide your locs into three sections: left top, right top, and everything else stays loose
- Gather the left top section and twist or coil it around itself at the side of your crown, then secure with a small elastic or hair stick
- Repeat on the right side, making sure both buns sit at approximately the same height
- The key is making sure your buns look intentional, not accidental—secure them firmly so they don’t flatten throughout the day
- You can wrap a thin loc around each bun’s base to hide the elastic and add refinement
Insider note: This style photographs beautifully from behind and photographs well from the front too, which makes it ideal if you’re planning to post on social media or attend an event where you’ll have photos taken.
4. The Braided Half-Up Hybrid
Incorporate braiding into your half-up style by French-braiding or Dutch-braiding your locs as you bring them up from one or both sides toward the crown. The braided sections add intricate texture while maintaining the practical benefits of a half-up arrangement. This hybrid approach elevates a simple look into something that feels elevated and artistic.
Making the Braiding Work
You can braid using your individual locs as strands, or you can braid by weaving multiple locs together. Either approach works—it depends on your skill level and comfort with manipulation. The crucial part is practicing the braid in the mirror a few times before you attempt it on a day when you need to look polished.
Two-Braid vs. Single-Braid Approaches
- Single braid: Braid from one side, bringing the braid diagonally across toward the back of your head, and secure both ends together with a hair tie
- Dual braids: Braid from both sides simultaneously, then secure both braids together at the back of your crown for a more structured, formal look
- Mix and match: Braid one side and leave the other side as a simple twist or section for an asymmetrical, fashion-forward aesthetic
- The braids can be tight and precise, or loose and textured—both work beautifully on locs
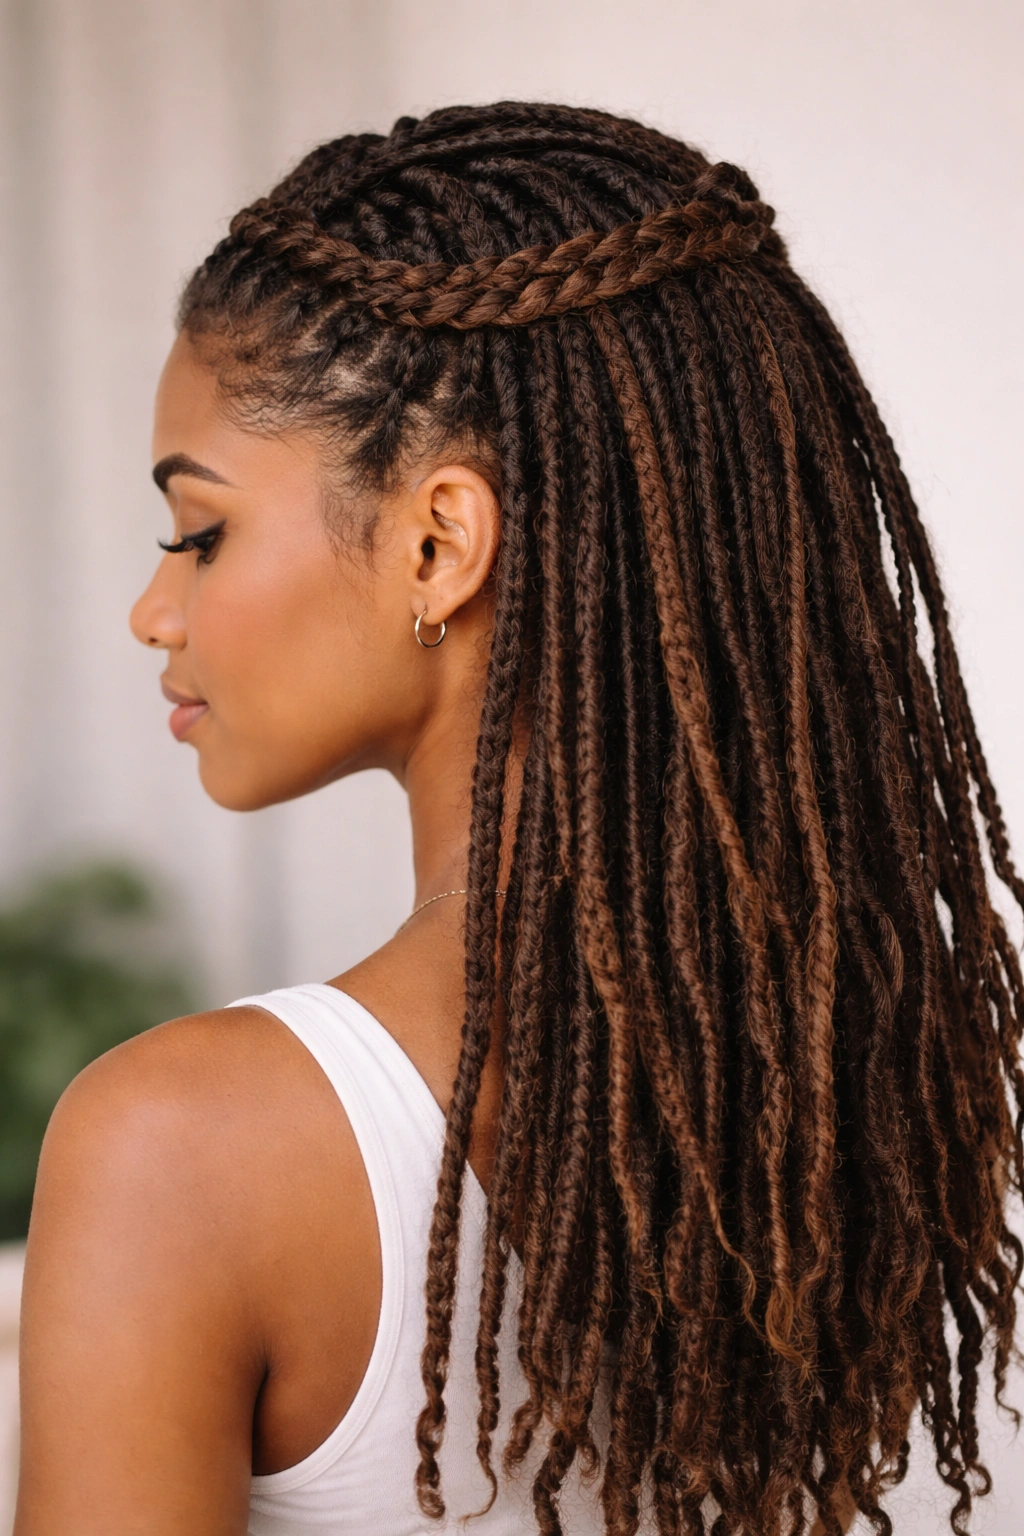
5. The Side-Swept Half-Up
Gather your top locs and secure them toward one side of your head rather than at the center crown. The resulting style has an asymmetrical, sophisticated edge that works beautifully at both casual and formal events. A side-swept half-up is also incredibly flattering because the secured section adds height and dimension to one side of your face while leaving the other side completely open and framed by flowing locs.
Creating the Asymmetrical Appeal
The side-swept approach requires gathering more locs from the fuller side of your head and fewer from the opposite side. Secure everything toward the back of the head on your chosen side. This creates an intentional imbalance that looks modern and considered rather than accidental.
Styling Tips for Side-Swept Success
- Decide which side you want to sweep toward—typically the side opposite your part or the side that suits your face shape best
- Gather considerably more locs from the opposite side, which creates volume and movement on that side while showing off your face on the other
- Smooth down the secured section gently with a light product for polish
- Let the loose locs hang heavily on the side that’s completely exposed, creating a visual weight that balances the secured section on the opposite side
6. The Four-Strand Wrapped Half-Up
For a refined, intricate look, divide your top locs into four strands, create a four-strand braid or weave, and secure the result at your crown. Four-strand braiding creates a thicker, more textured braid than a three-strand version, and the extra visual complexity makes the style feel special without requiring significantly more effort or skill.
Understanding Four-Strand Construction
A four-strand braid involves working with four separate sections and weaving them together in a specific pattern. With locs, you can either use four individual locs (if they’re thin enough) or bundle multiple locs into four sections. The resulting braid is wider, denser, and catches light in more interesting ways than a three-strand braid.
Walking Through the Technique
- Divide your top section into four distinct parts, handling them with both hands
- Cross the first strand over the second, then the fourth under the third
- Bring the fourth strand over the first, and the second under the third
- Continue alternating this over-under pattern as you work the braid backward and upward
- Practice this slowly the first few times—four-strand braids feel complex initially but become intuitive quickly
Real talk: This style is worth the practice because it genuinely transforms how polished and intentional your look appears. People notice the effort and artistry.
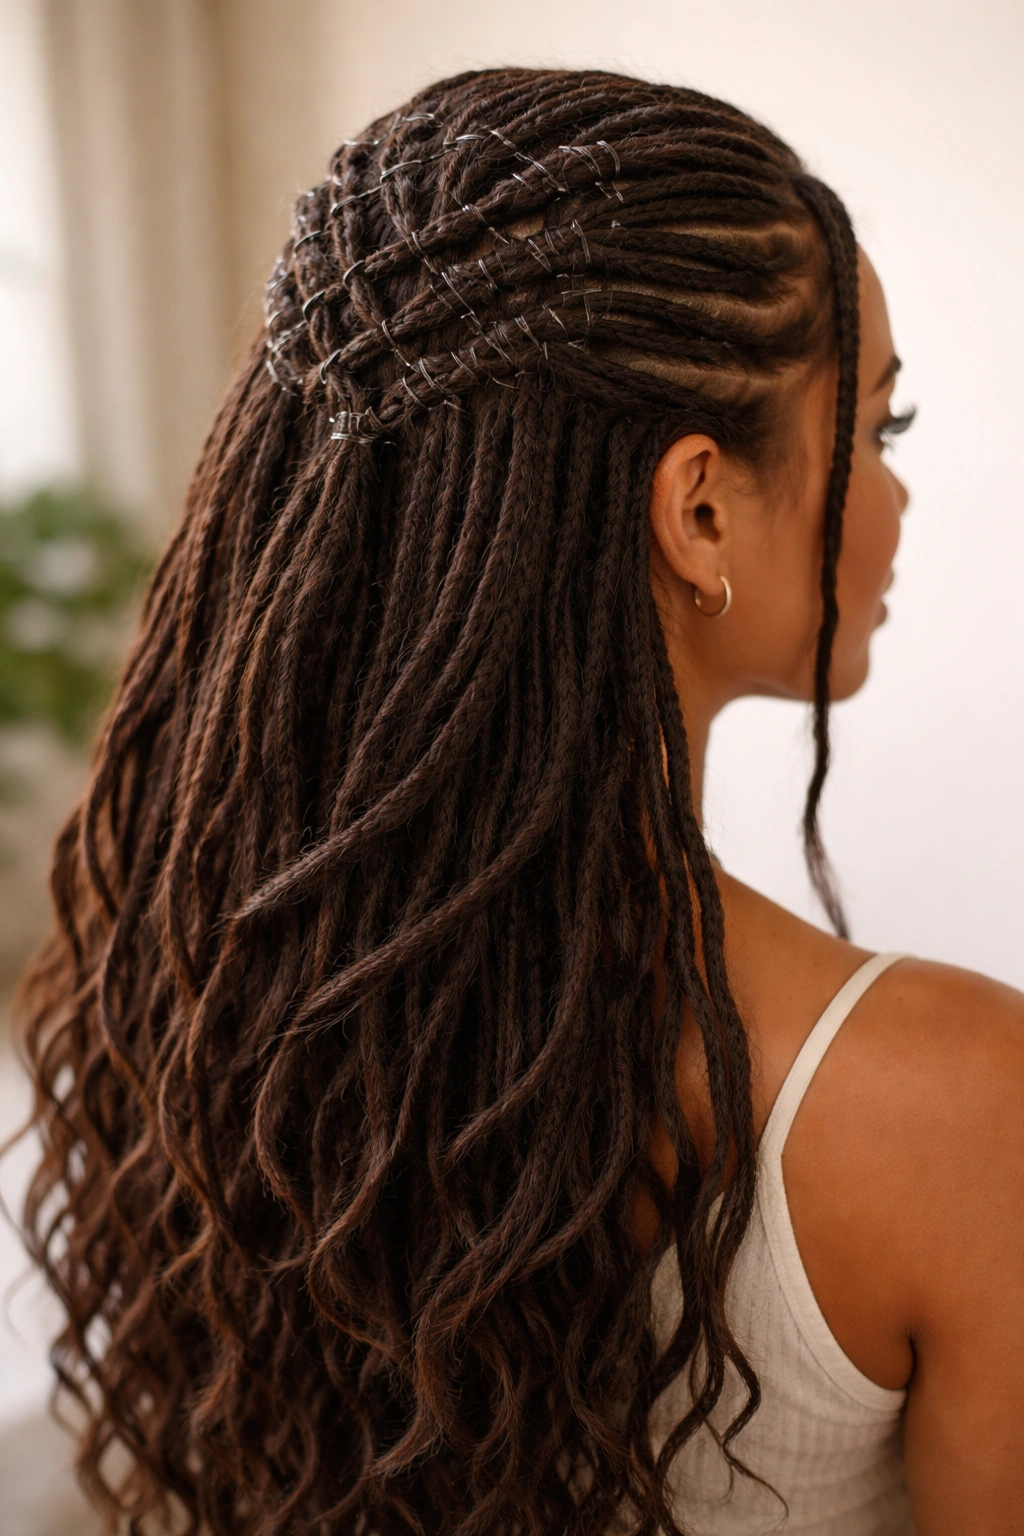
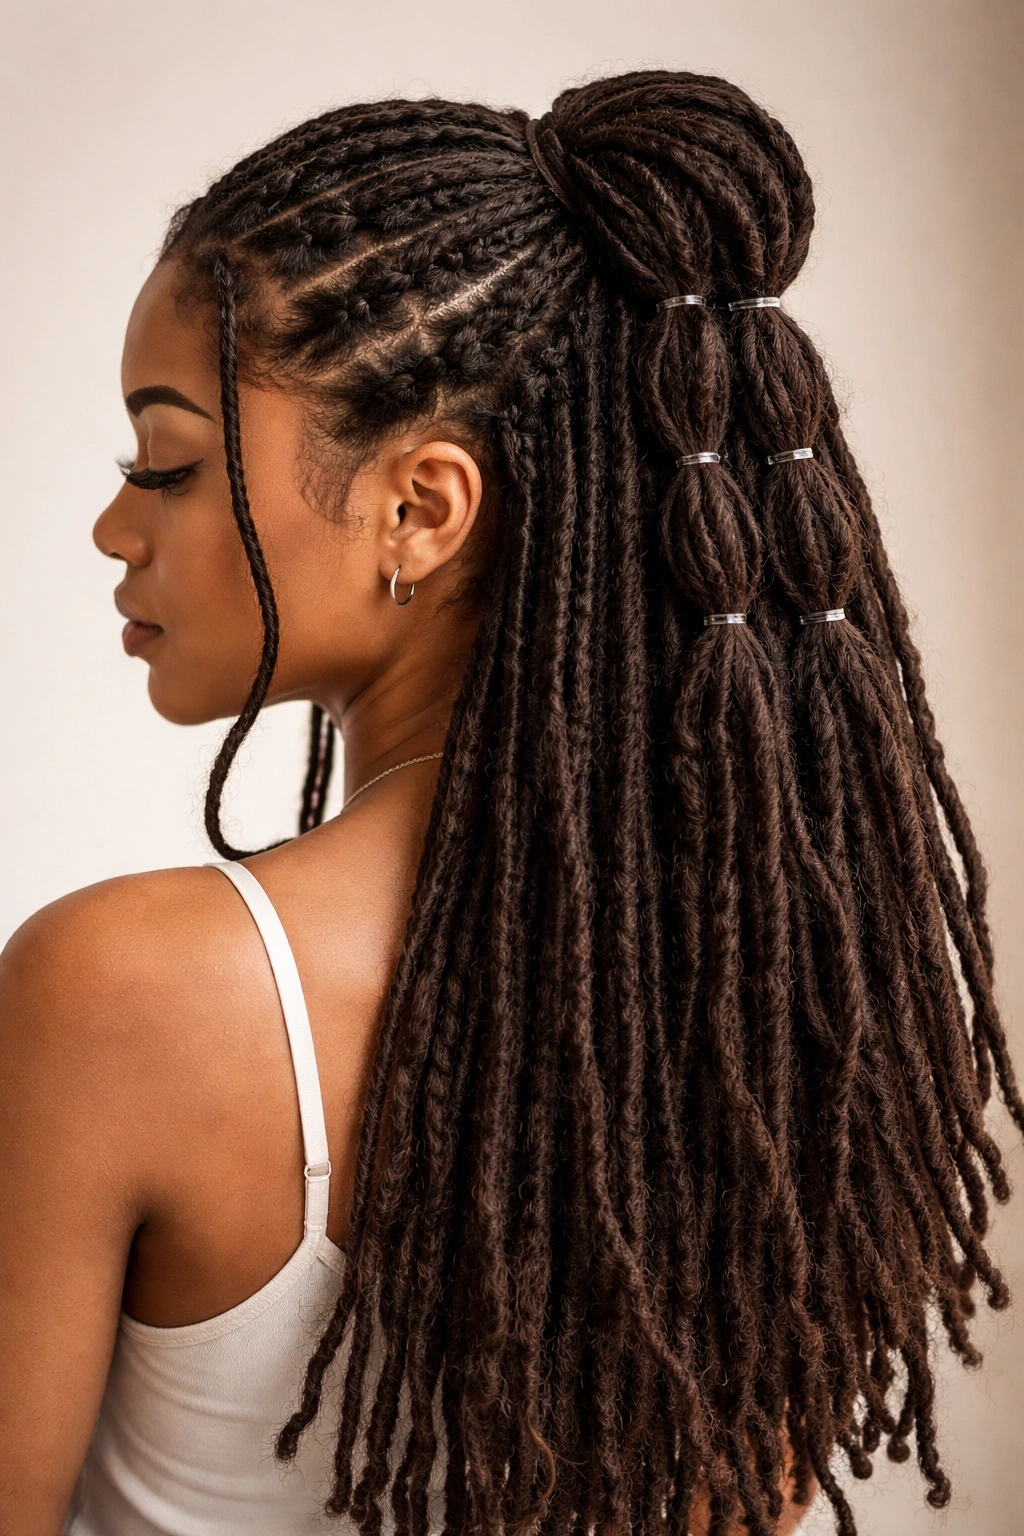
7. The Bubble Half-Up with Elastic Sections
Create visual interest and dimension by securing your locs in a half-up style, then dividing that secured section into multiple smaller sections and securing each with a tiny elastic. This creates a “bubble” effect with poufed-out sections, adding height, volume, and a playful texture to your style. The bubbles draw the eye upward and make your locs look fuller and more voluminous.
Why Bubbles Add Visual Impact
Bubbles break up what could be a monotonous secured section into distinct, dimensional pockets. Each bubble catches light independently, creating shadows and highlights throughout the style. On long locs, this technique prevents the secured section from looking flat or heavy—instead, it appears light, sculptural, and intentional.
Creating Perfect Bubbles
- First, create a basic high crown half-up and secure it with an elastic as usual
- Divide that secured section into three to five smaller subsections, depending on how many bubbles you want
- Place a tiny elastic around each subsection, spacing them about an inch to two inches apart
- Gently fluff and puff out each bubble slightly with your fingers to create dimension and prevent the overall effect from looking too tight
- You can use clear elastics to keep the focus on the texture, or colored elastics that coordinate with your locs for a bold statement
8. The Dutch Braid Half-Up with Pendant Locs
Dutch braid your locs backward from your front hairline toward the crown, then secure the braid at the crown while allowing some locs to hang freely from that point, creating a cascading waterfall effect. This style combines the texture and interest of a Dutch braid with the flow and movement of long locs, making it both visually striking and practical for keeping hair off your face.
The Dutch Braid Difference
A Dutch braid is an inverted French braid—instead of braiding over, you braid under, which makes the braid sit on top of the scalp and appear bolder and more defined. For locs, this creates a particularly striking effect because each loc in the braid remains visibly distinct and textured rather than blended together.
Building Your Dutch Braid Half-Up
- Start at your hairline with three locs that you’ll use as your initial strands
- Braid by crossing strands under rather than over, pulling the braid tight enough to sit on your scalp
- Continue the braid straight back toward the center crown
- When you reach your crown, secure the braid’s end with a small elastic
- Allow several locs to fall freely from that secured point, creating a fountain or cascade effect
- This works particularly well if you allow the loose locs to be slightly longer or fuller than the braided section
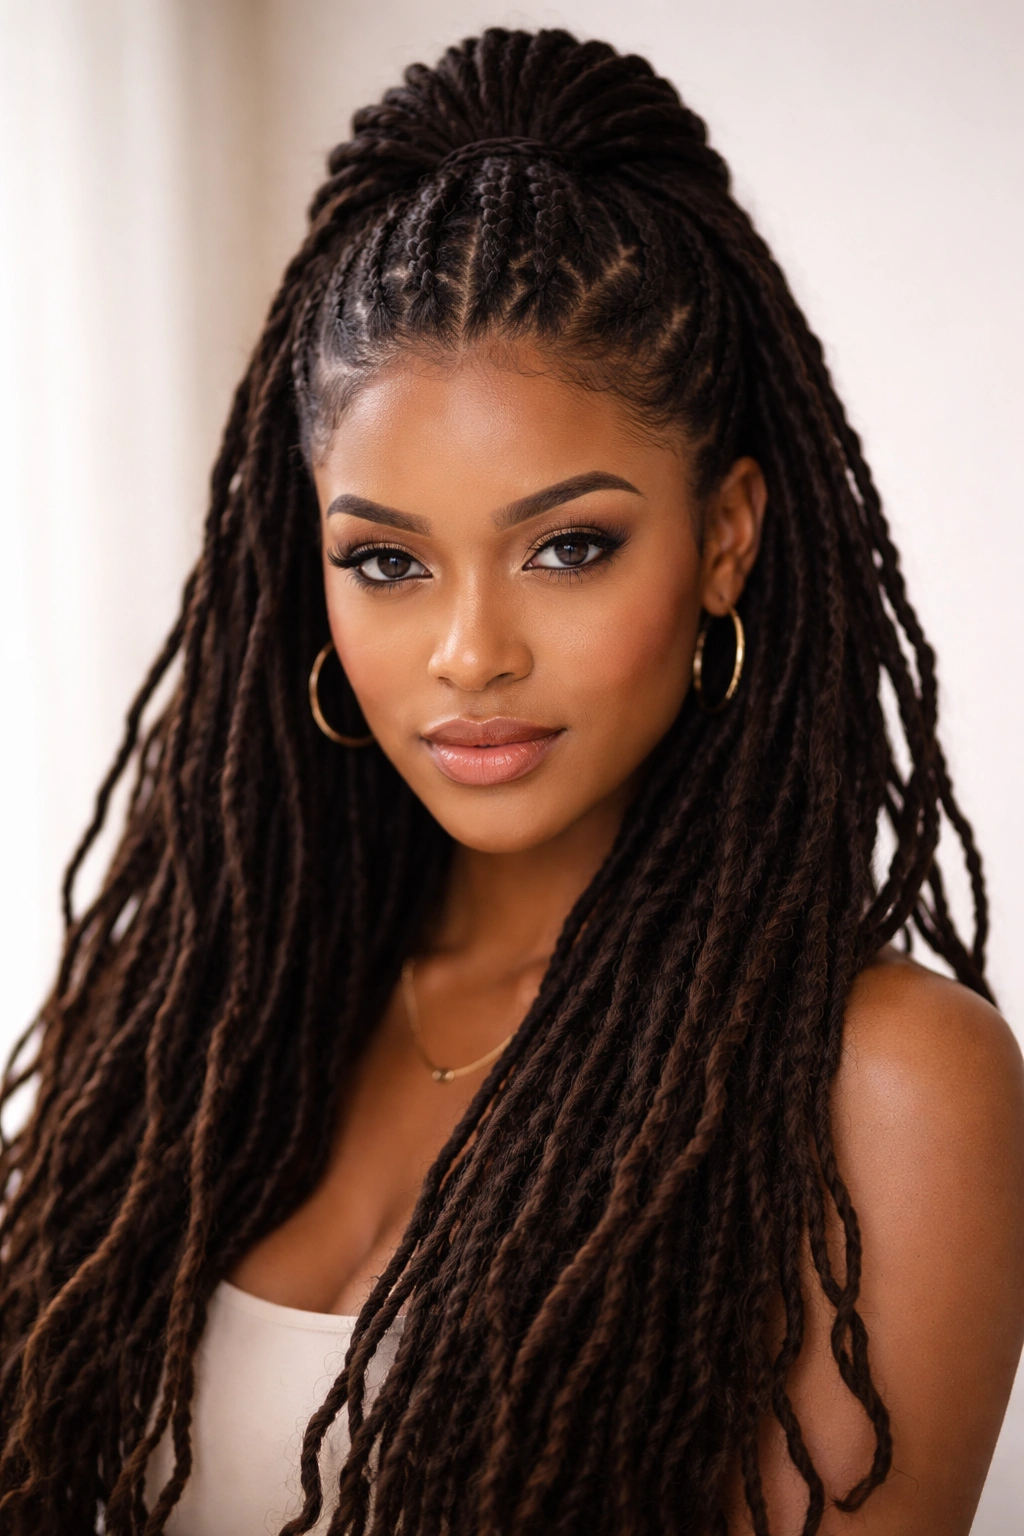
9. The Pulled-Back Crown with Face-Framing Locs
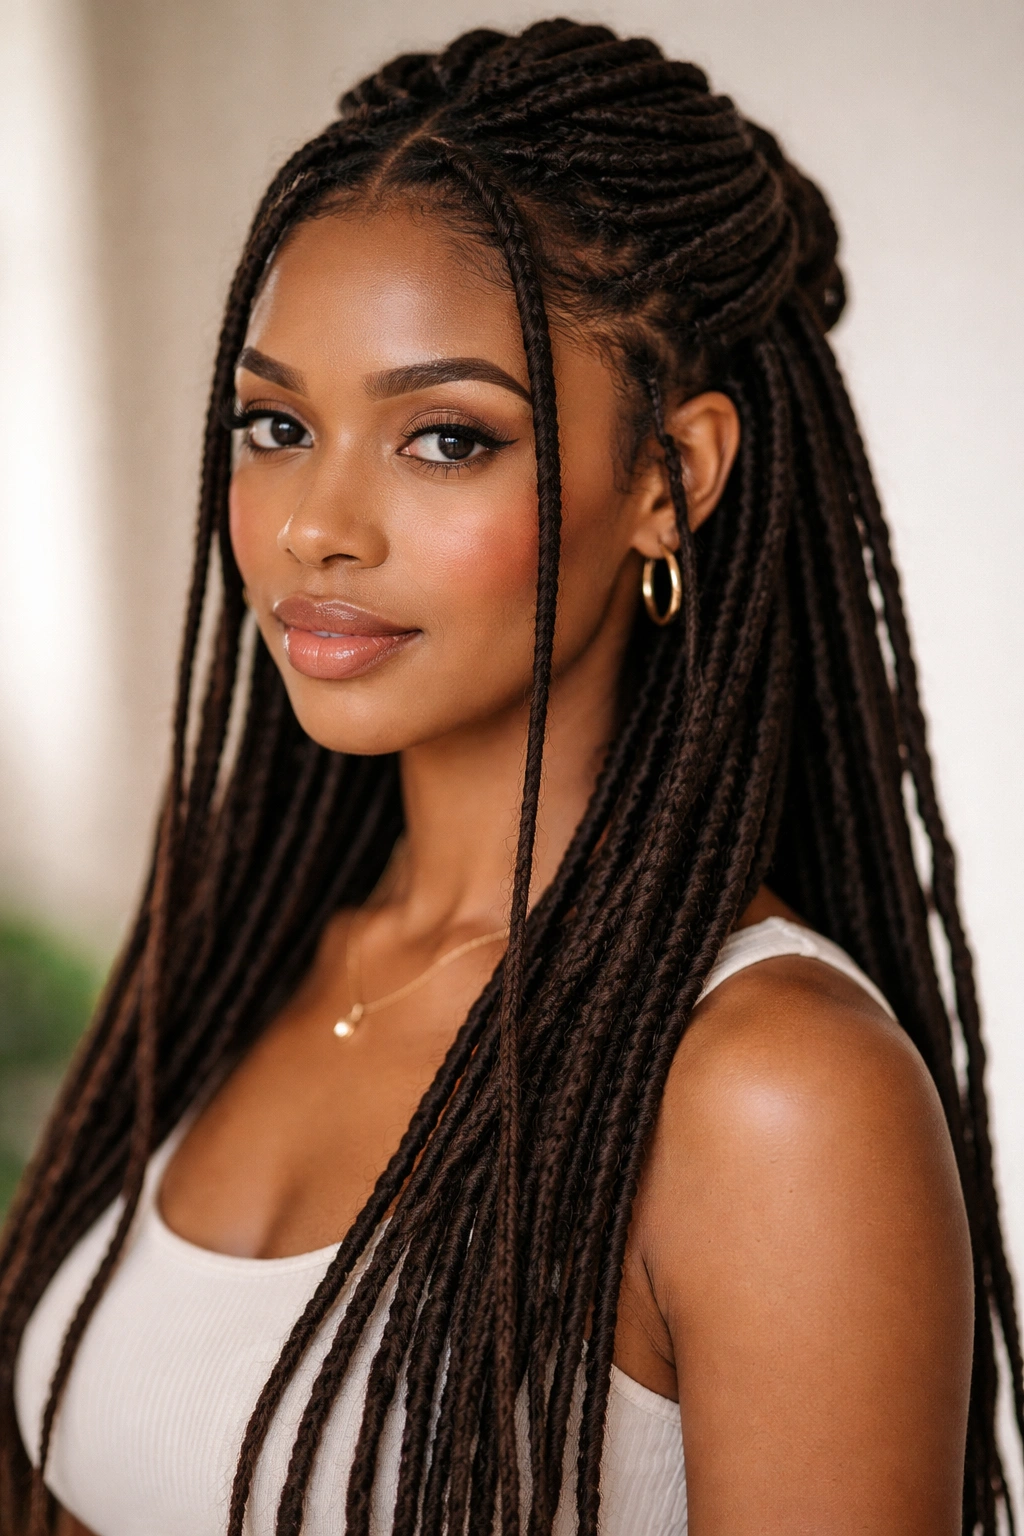
Gather and secure your top locs at the crown in a simple half-up style, but intentionally leave several thin locs loose on each side of your face. These face-framing locs soften the overall look and create a more romantic, approachable aesthetic compared to a pulled-back style that exposes your entire face. This is an excellent option if you’re not comfortable showing your full face or if you prefer a softer presentation.
Why Face-Framing Matters
Face-framing locs draw attention to your features while still keeping the bulk of your hair styled and off your neck. They create a flattering frame that works with most face shapes and add a subtle element of movement and softness to an otherwise more structured half-up arrangement.
Selecting and Positioning Your Frame
- Identify three to four thin, manageable locs on each side of your face
- Secure all remaining top locs at the crown, pulling the secured section slightly back and up
- Leave your chosen frame locs completely loose and unsecured
- You can style these frame locs with a light product to add shine, or leave them completely natural
- The frame locs should fall naturally in front of your shoulders, not behind them
Pro tip: If you have any locs that are shorter or thinner than your others, this is the perfect place to position them since they’ll naturally frame your face without looking out of place.
10. The Loc Wrap Half-Up
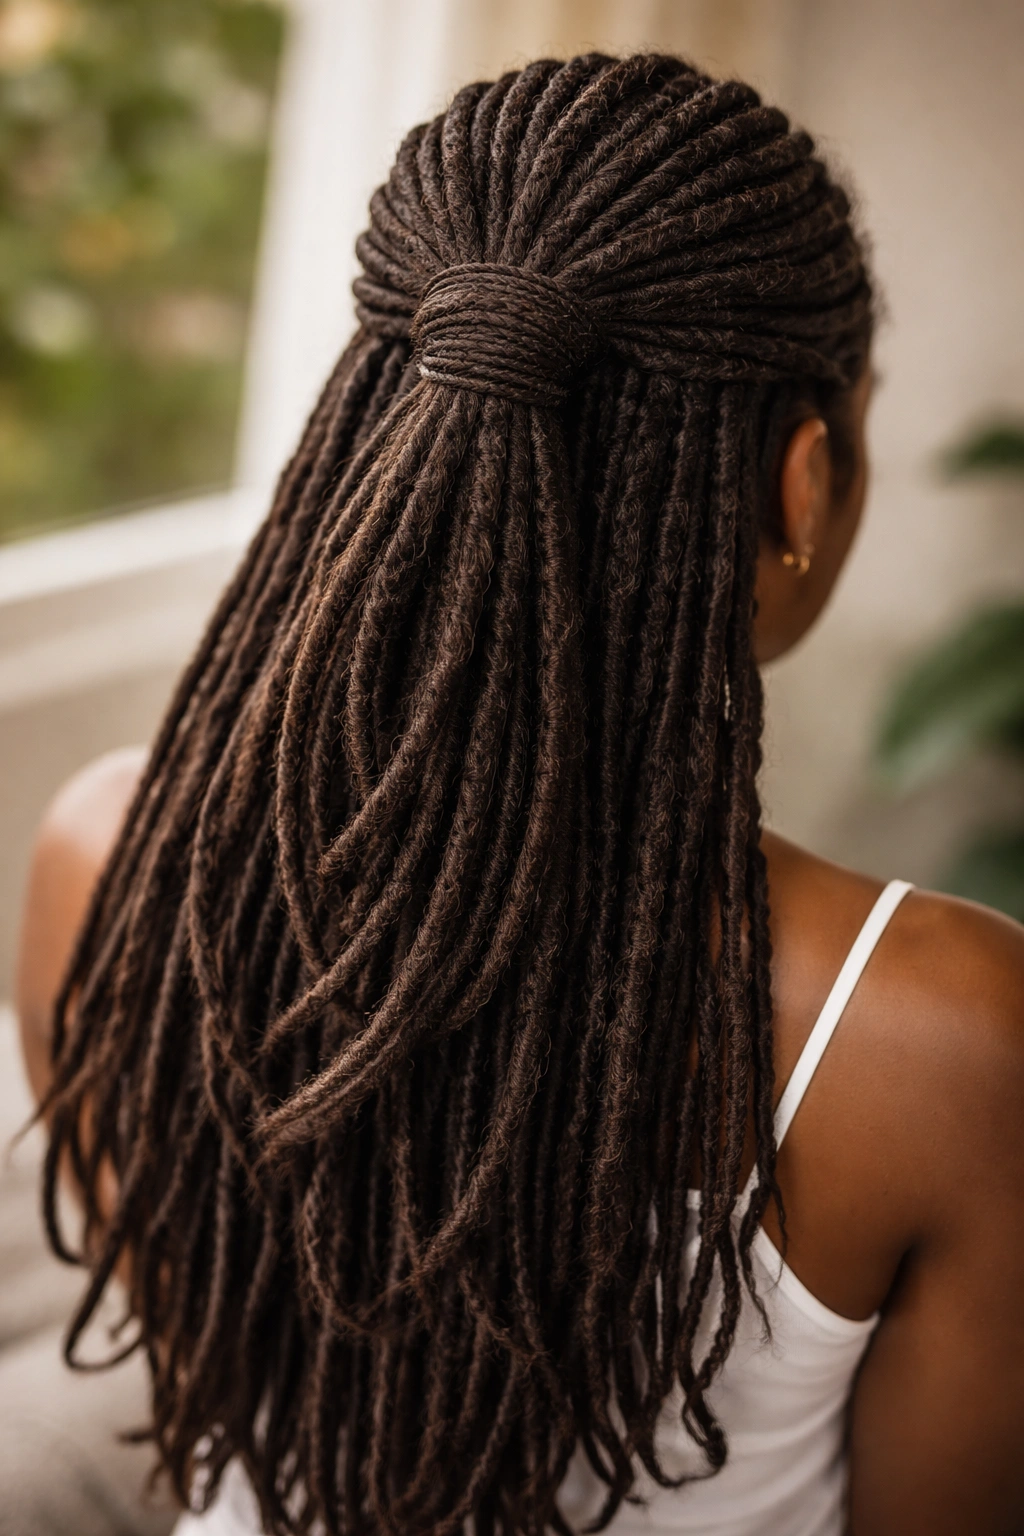
Instead of using a standard elastic or hair tie, secure your half-up style by wrapping a thin loc around the gathered section multiple times, then tucking the end under one of the wraps to hide it. This creates a completely natural look where everything is loc-based and no visible accessories interrupt the aesthetic. A loc wrap is also incredibly practical because it won’t slip out, can be adjusted throughout the day, and actually gets stronger the more you adjust it.
Why Loc Wraps Are Superior
A wrapped loc holds incredibly firmly because it grips textured hair differently than a smooth elastic does. Unlike elastics, which can slip or snap, a loc wrap just gets tighter if it does start to loosen. The wrap also looks completely intentional and aesthetically cohesive—no plastic elastic showing through your beautiful locs.
Executing a Perfect Loc Wrap
- Gather your top locs and bring them up to your crown
- Select one thin loc to use as your wrap—it should be long enough to circle your gathered section multiple times
- Position this wrap loc at the base of your gathered section and begin wrapping it around and around, creating horizontal bands
- Wrap it at least four to five times to ensure it holds firmly throughout the day
- Tuck the end of the wrap loc under one of the bands you’ve created, pushing it through with your fingers until it’s completely hidden
- The result looks like your locs naturally formed that gathered section
11. The Zig-Zag Half-Up with Linear Sections
Create a half-up style where your secured section is divided into multiple linear channels or zig-zag patterns using thin elastics. This geometric approach adds modern flair and visual interest to a traditional style. The channels or zig-zags divide the secured section into distinct visual blocks, making the style appear more intentional and sculptural.
Building Your Geometric Sections
You’ll start with a standard half-up at the crown, then subdivide that gathered section using the elastic placement method described in the bubble style. However, instead of creating puffy bubbles, you’ll position your elastics in a specific pattern—either vertical lines (channels) or a diagonal zig-zag. This creates a grid-like or lightning-bolt visual effect.
Positioning Your Elastics Strategically
- Create your base half-up and secure it firmly at the crown
- Use tiny elastics (the kind that typically come in huge packs) to divide the secured section
- For channels: Place elastics vertically down the center, creating three to five distinct vertical lines through the secured section
- For zig-zag: Place elastics in a diagonal pattern across the secured section, creating a lightning-bolt or chevron effect
- Leave enough space between elastics that each section remains visibly distinct
- The visual result is modern, architectural, and incredibly eye-catching
12. The Low Messy Half-Up Bun
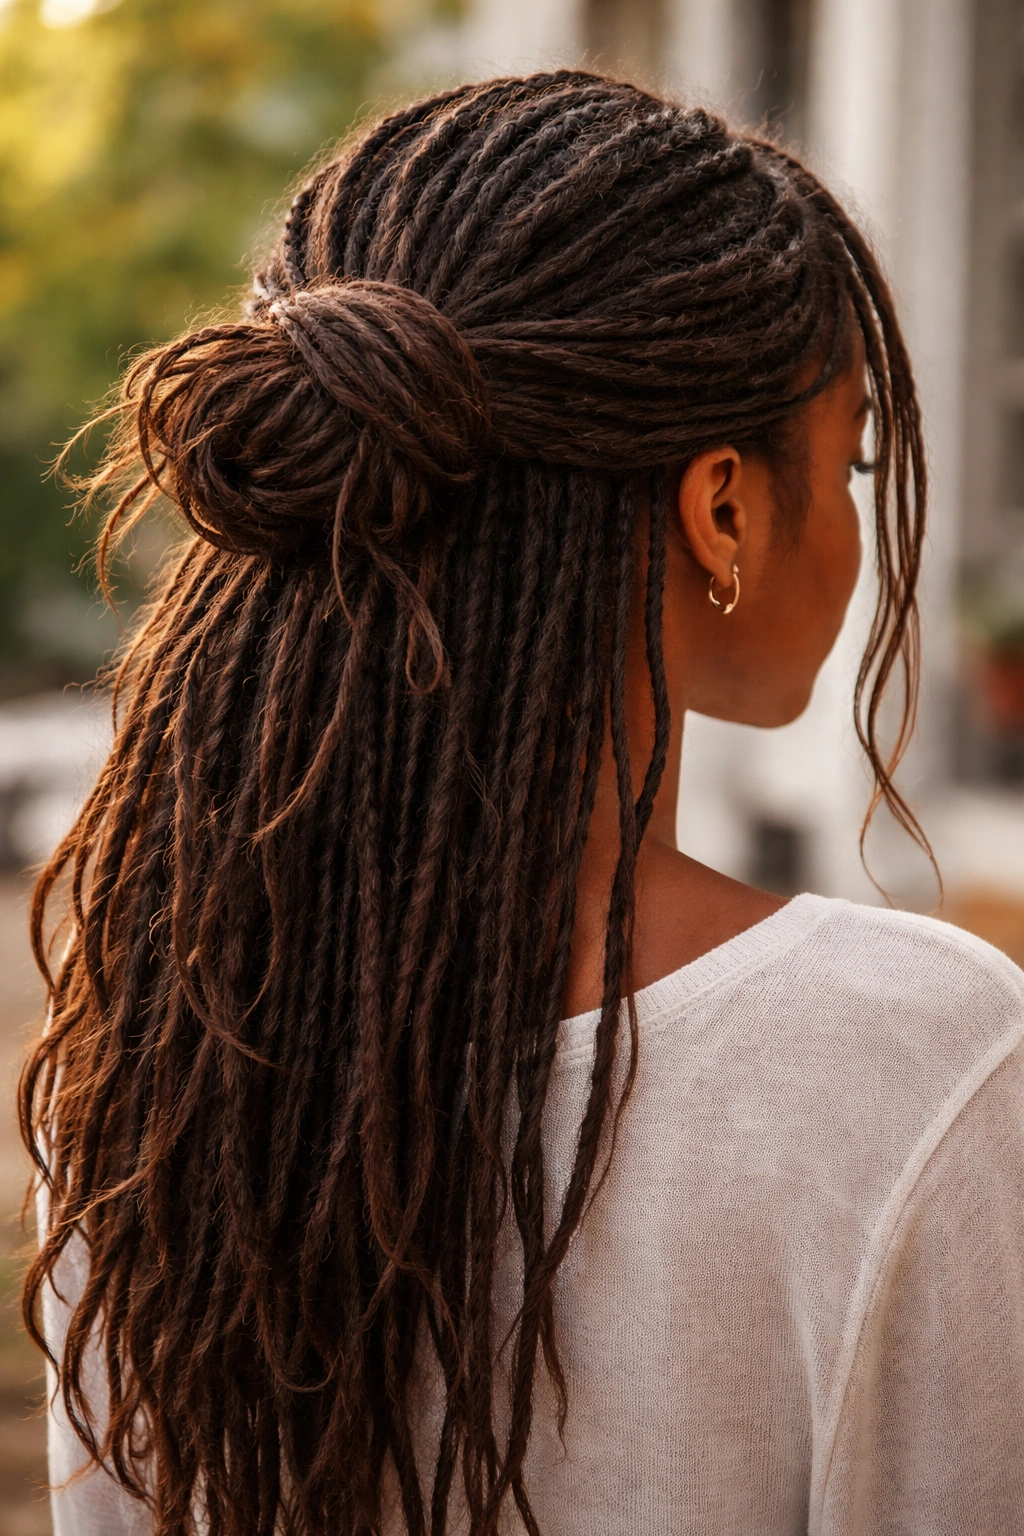
Instead of securing your top locs at the crown, gather and secure them much lower—at the nape of your neck—and create an intentionally loose, textured bun from that gathered section. This low, messy variation of the half-up style is incredibly comfortable for all-day wear and looks effortlessly put-together rather than rigidly styled. The looseness allows your locs’ natural texture to shine through while still keeping the bulk of your hair off your shoulders and neck.
Why Low Placements Work Better for Some Days
A low secured section is more comfortable for sleeping, moving, and physical activity than a high crown half-up. It also puts less tension on your scalp, which is important for long-term loc health. The low placement is also more casual and approachable, making it ideal for relaxed settings where a tight, polished style might feel too formal.
Creating Intentional Messiness
- Gather your top section loosely—you’re not aiming for a tight, precise gather
- Bring this gathered section down to the nape of your neck, below where your collar would sit
- Secure it with an elastic, but not so tightly that it compresses your locs completely
- Rather than securing everything into a tight bun, gently coil the gathered section and let pieces escape and frame the base of the bun
- Use your fingers to pull apart the bun slightly, creating puffiness and texture
- A few stray locs escaping from the bun is exactly what you’re going for—it looks intentional and polished, not careless
13. The Mohawk-Inspired Half-Up Center Line
Gather locs from both sides of your head, bringing them up to create a center line from your forehead backward to your crown, with locs flowing freely on either side. This creates a mohawk-inspired aesthetic without the extreme length reduction or shaving required for an actual mohawk. The center line adds edge and modernity to your style while the loose sides maintain the flowing length and movement of your locs.
Understanding the Mohawk Half-Up Structure
Rather than securing the top third of your hair at the crown (like a traditional half-up), you’re creating a defined center channel of secured locs running from front to back. The secured section is much narrower than a standard half-up, which means more locs remain loose and flowing on the sides of your head.
Constructing Your Mohawk Center Line
- Divide your locs into three sections: a center section roughly two to three inches wide running from your forehead to your crown, and two equal side sections
- Gather the center section locs and begin braiding, twisting, or simply securing them as you move backward toward your crown
- Leave the side locs completely loose and flowing
- Secure the gathered center section at your crown with a clip, elastic, or by wrapping it with a thin loc
- The result is a bold, striking center line with a softer perimeter of loose locs
- This works beautifully when you want to convey confidence and style without looking overly formal
14. The Multi-Level Half-Up Cascade
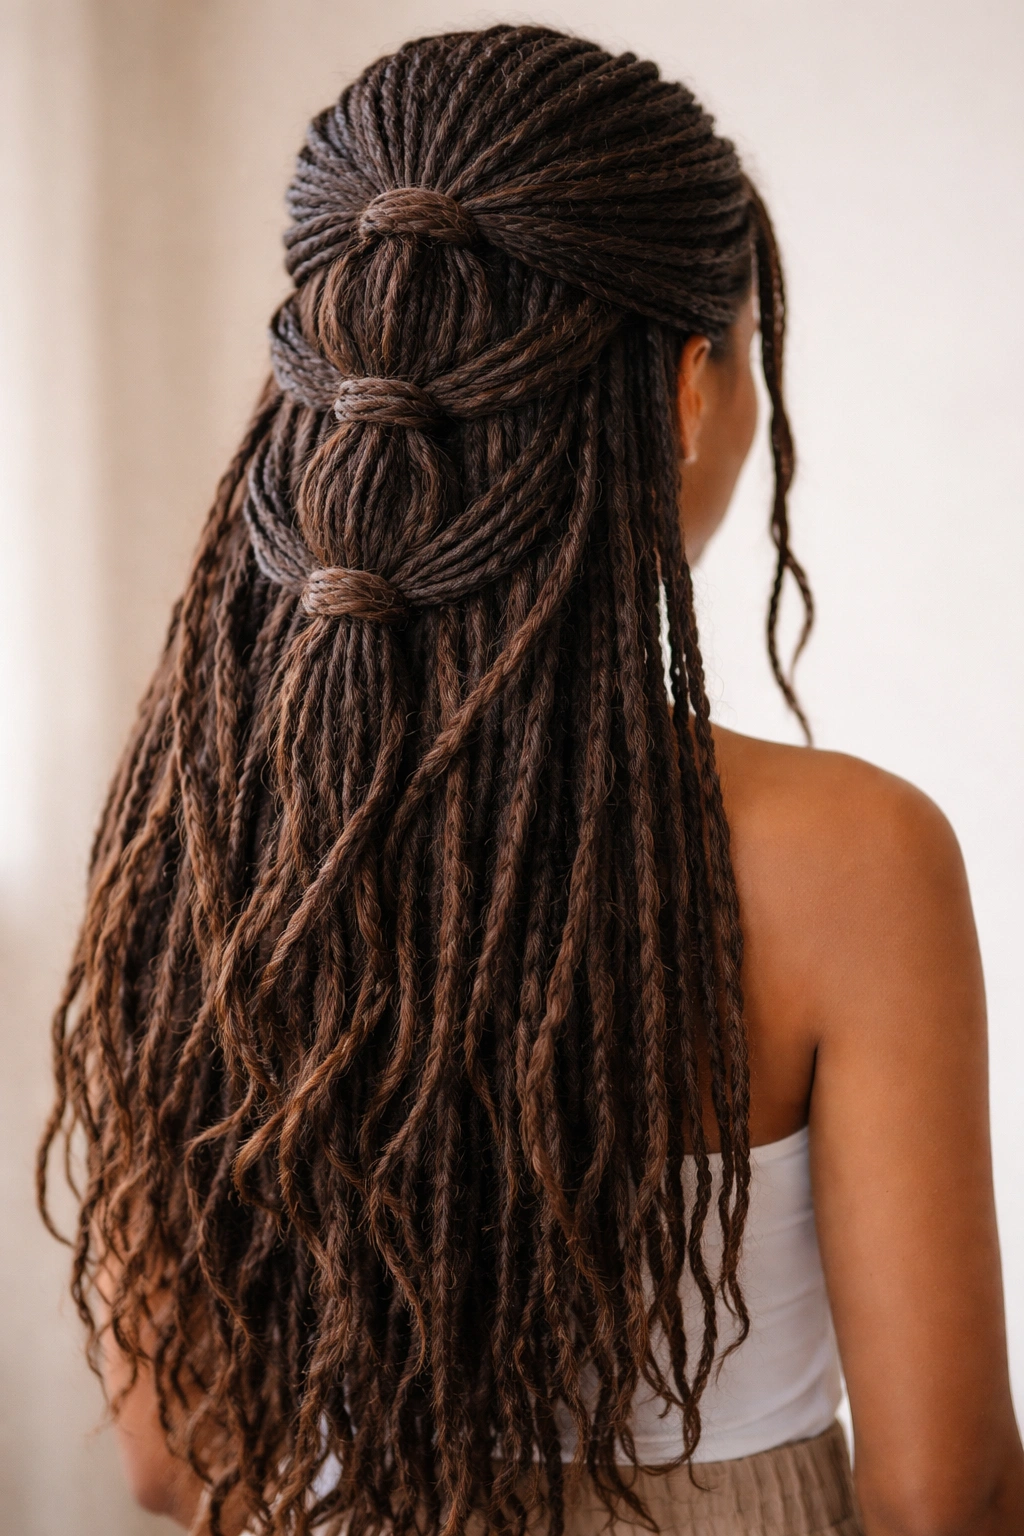
Create visual depth and dimension by securing your locs in multiple stages as they move backward, creating a cascading waterfall effect. Rather than securing everything at once at the crown, you’ll create a series of smaller secured sections stacked vertically down the back of your head, each one releasing additional locs that flow down from that point. This style is dramatic, romantic, and incredibly beautiful.
How Cascading Creates Visual Drama
Each secured section acts as a release point for locs, creating a series of flowing sections that increase in length as they move downward. The viewer’s eye follows these cascades downward, emphasizing your length and creating movement throughout the entire back of your head. This style works particularly well on truly long locs because you have the length to create obvious, visible layers of cascades.
Building Your Cascade
- Start with a traditional half-up at the crown, securing your top locs
- Gather a new section of locs about two inches below the first secured section and secure that as well
- Continue this process two to three more times, each secured section about two inches below the previous one
- As you work downward, gather slightly fewer locs each time so that by the final secured section, you’re only gathering a few thin locs
- The result resembles a series of waterfalls, with each cascade releasing locs that flow beneath it
- You can use elastics that match your locs for a seamless look, or decorative elastics that coordinate with your outfit for a bolder statement
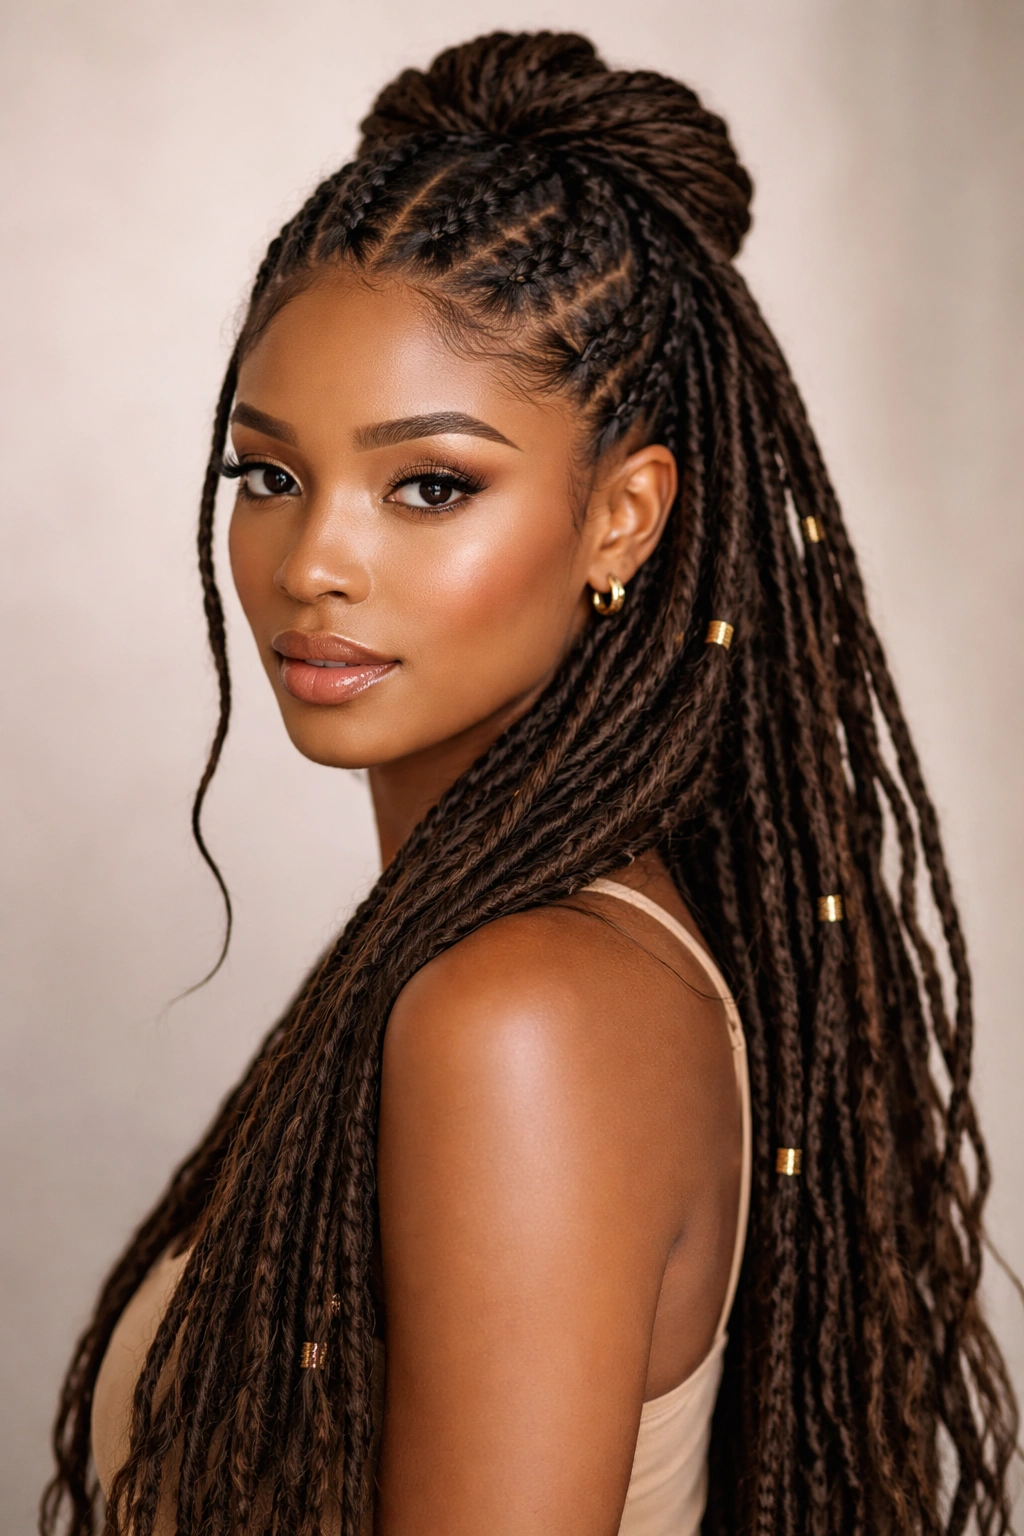
15. The Elegant Half-Up with Ornamental Cuff
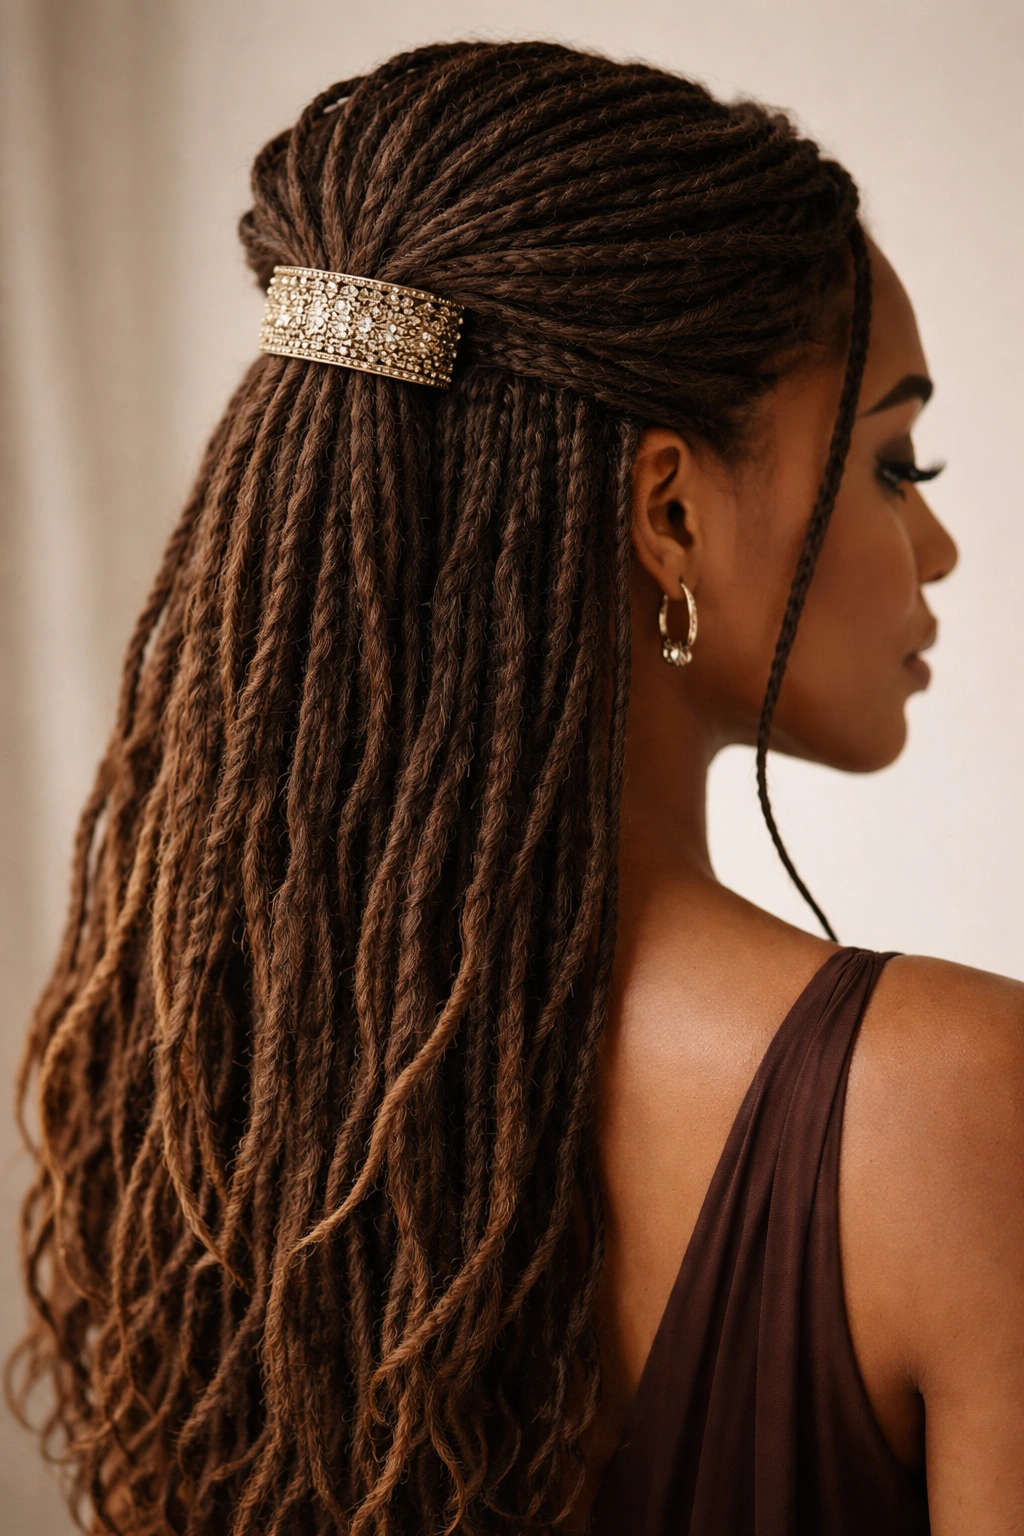
Secure a simple half-up style at your crown, then use a decorative hair cuff, metal ring, or ornamental piece to frame and define the gathered section. The ornamental piece adds luxury and intentionality to your style, transforming a basic half-up into something that looks like you’ve put considerable thought and effort into your appearance. Gold, silver, copper, or jeweled cuffs all work beautifully depending on your aesthetic.
Choosing the Right Ornament
Metal cuffs designed specifically for locs come in various sizes and styles. Some are open rings that you slide around your gathered locs, while others are clamping pieces that you position over your gathered section. The right choice depends on the thickness of your gathered section and your personal style preferences.
Styling with Ornamental Pieces
- Create your base half-up style at the crown, making sure your gathered section is smooth and well-secured with an elastic underneath
- Slide or position your chosen ornamental cuff over the gathered locs, positioning it about a half-inch to one inch below the crown
- The cuff should sit firmly enough that it doesn’t shift throughout the day but not so tightly that it’s uncomfortable
- You can choose an ornament that matches your skin tone for subtlety, or select a bold, contrasting color for a statement piece
- This style works for casual and formal settings depending on the ornament you select—delicate pieces work for professional settings, while bold statement cuffs work beautifully for social events
Final Thoughts
Half up half down styles offer the perfect intersection of practicality and beauty for anyone with long locs. Whether you choose a simple classic high crown, an intricate four-strand braid, or a dramatic multi-level cascade, you’re working with a foundational style framework that adapts endlessly to your creativity, the occasion, and your personal aesthetic.
The versatility of these styles means you can wear a different look every single day without repeating yourself for weeks. More importantly, you’re not sacrificing the length and movement you’ve worked so hard to cultivate—you’re celebrating it while also keeping your hair off your face and neck when you need to.
Start with whichever style speaks to you most, practice it a few times, and then experiment with the techniques once you feel confident. The skills you develop with one style translate directly to others. Before long, you’ll be creating your own variations and hybrid approaches based on these foundations, making each style truly your own.