Half up, half down hairstyles sit in that sweet spot for natural hair — they look polished enough for professional settings or special occasions, yet they’re far more protective and manageable than wearing your entire head down. The magic happens when you combine sleek, controlled styling on top with the volume and texture of your natural curls, coils, or waves hanging free. It’s a style that celebrates the dimension of natural hair while still giving you that intentional, put-together aesthetic.
The challenge most people face is making that top section actually stay slicked back and smooth throughout the day without creating tension that stresses your edges or requires heavy products that weigh down your hair. The right technique, combined with the correct products and protective methods, changes everything. These 12 styles show you how to create gorgeous half up, half down looks that work whether you’ve got tight coils, loose waves, or something in between — and how to keep them looking fresh from morning through evening.
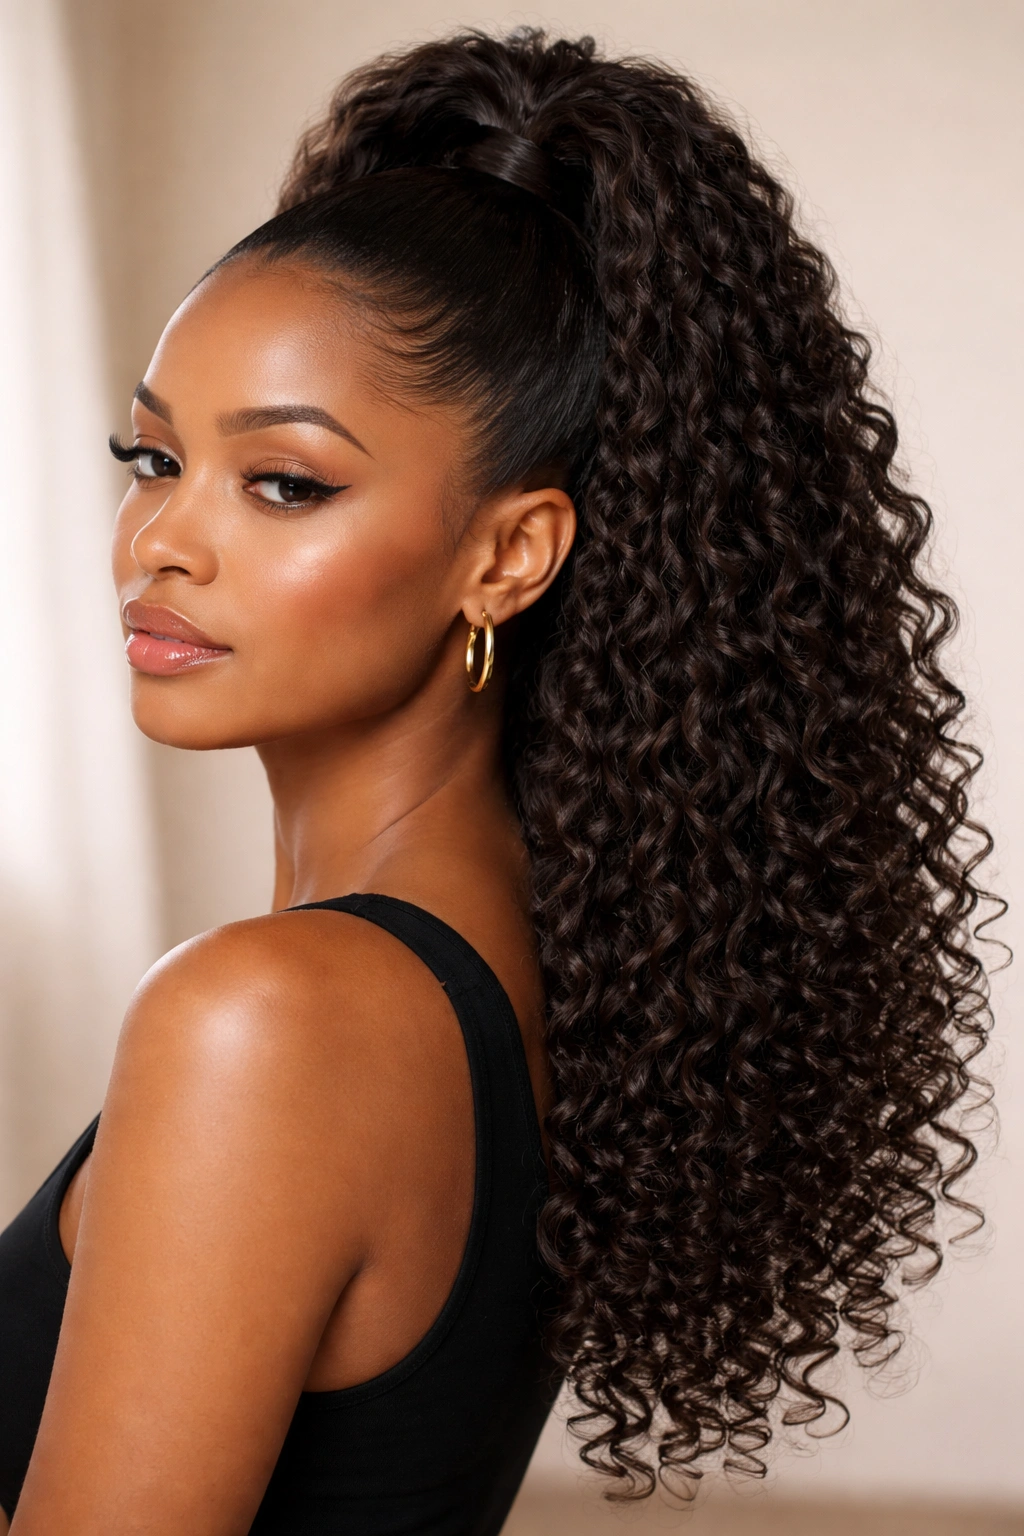
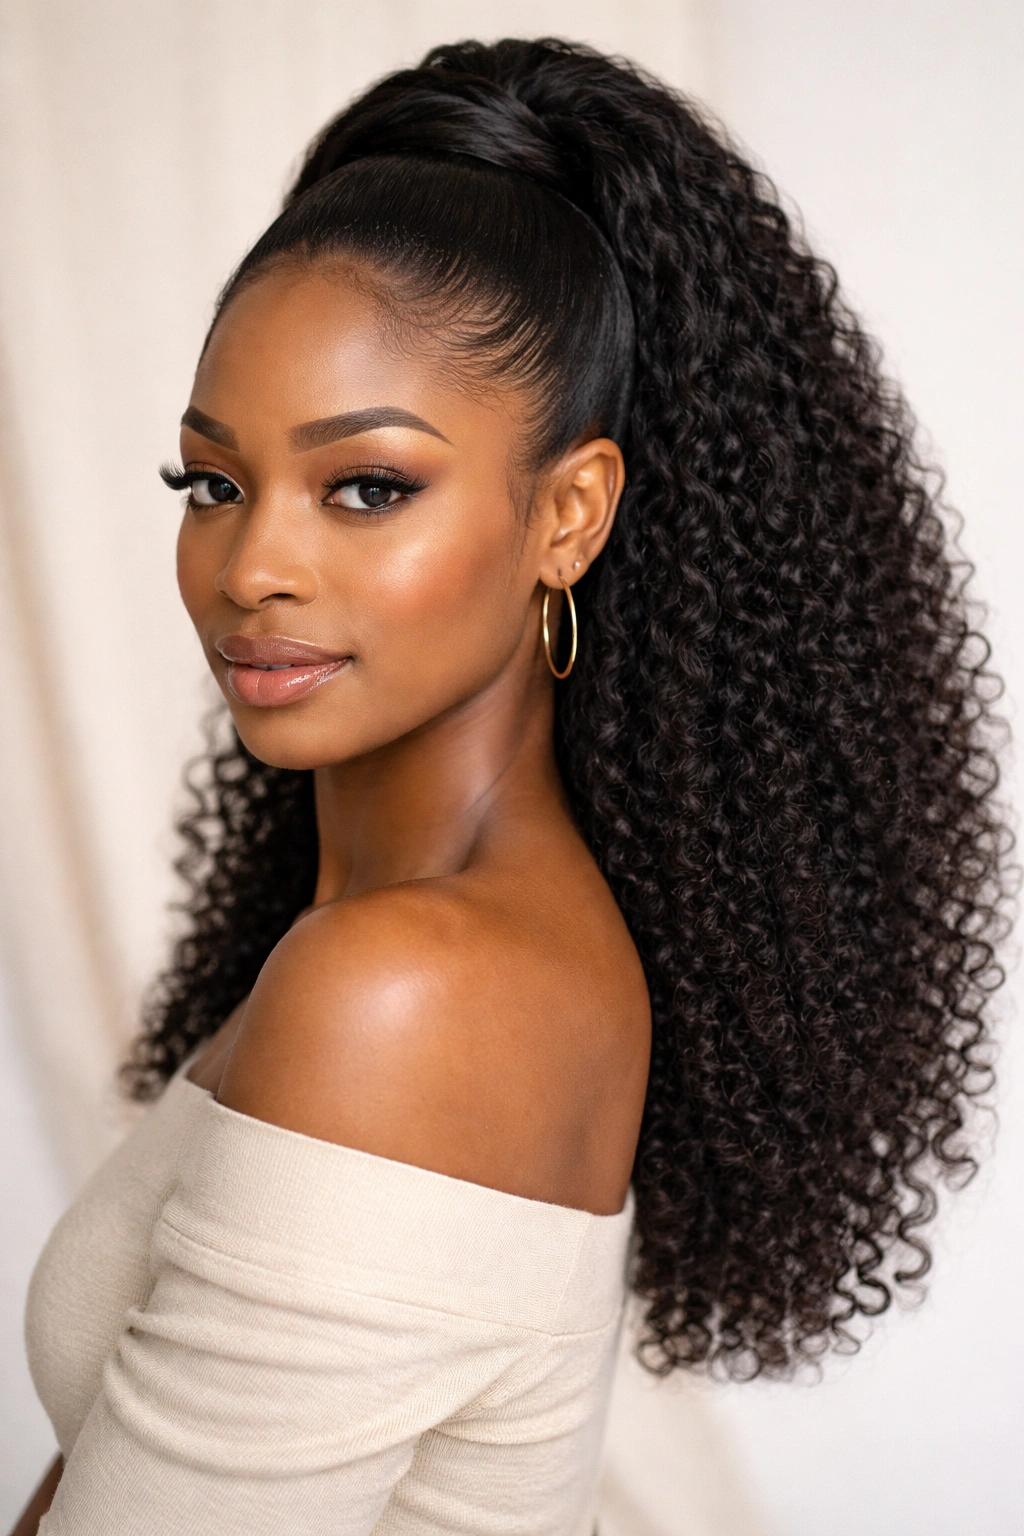
1. Classic High Puff Half-Up
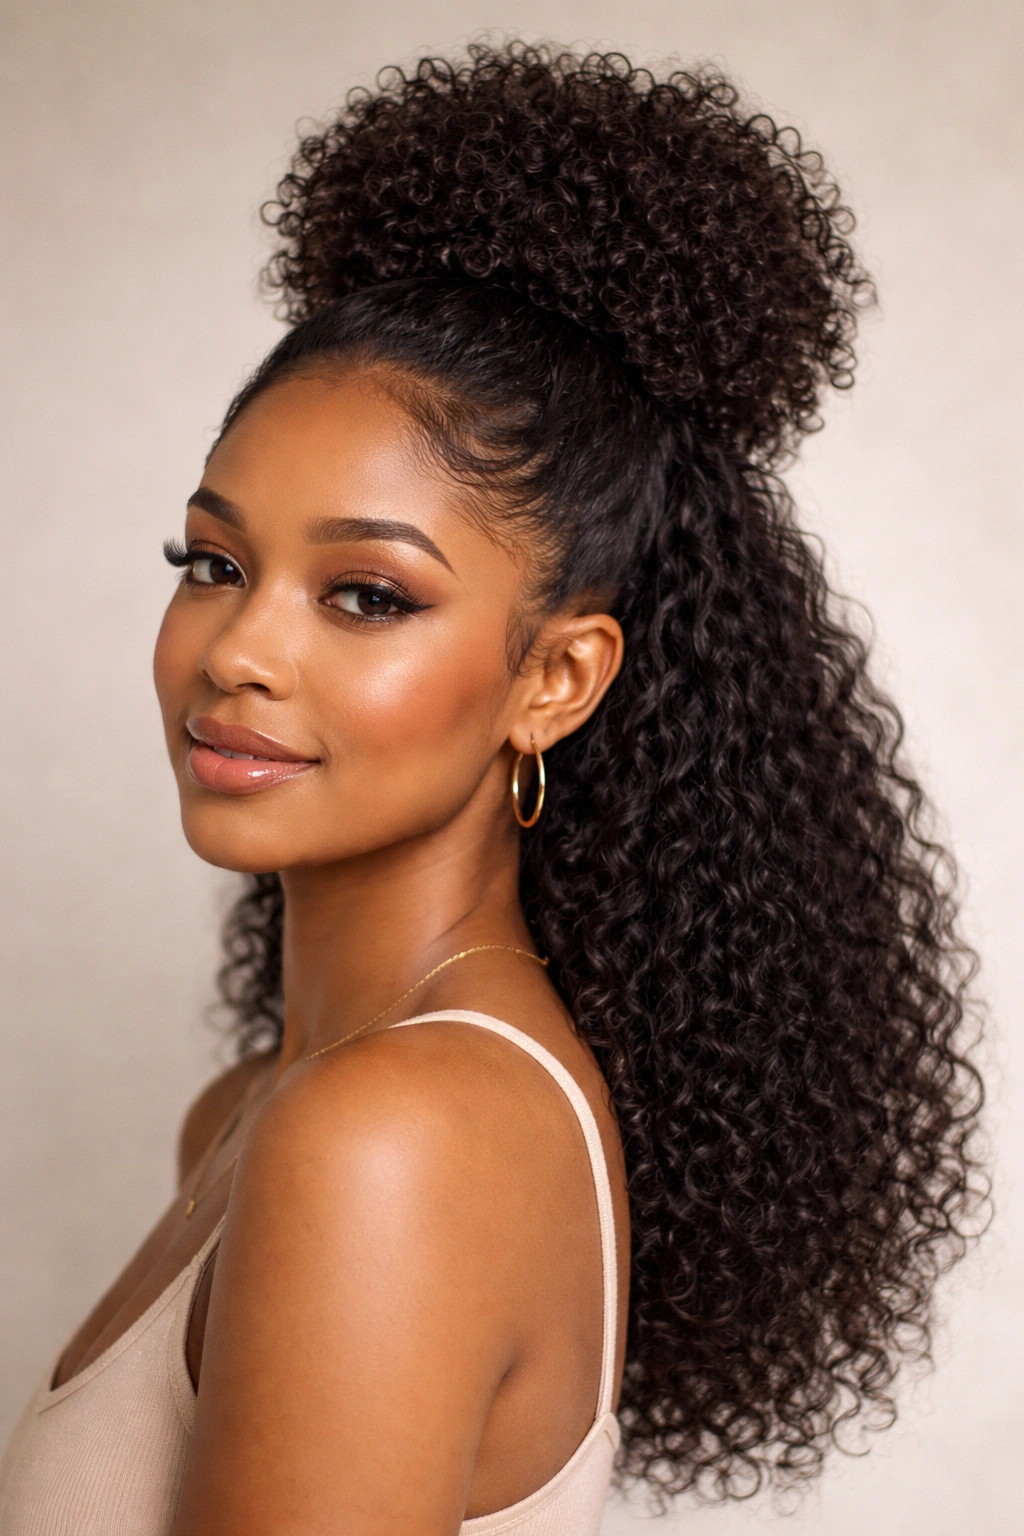
This is the foundation style that works for virtually every hair texture and type. The idea is straightforward: gather the top section of your hair into a high ponytail, then fluff it into a puff, while leaving the rest of your hair down and free.
The Technique and Product Approach
Start with damp or slightly dampened hair, because product grips better on damp hair than completely dry strands. Apply a lightweight smoothing cream or edge control to your hairline and the top portion you’re gathering — products like shea butter-based creams or argan oil serums work without leaving a heavy residue. Use a fine-tooth comb or your fingers to brush the hair upward and back, directing everything toward where you want your puff positioned, typically at the crown or slightly higher.
Securing and Styling the Puff
Gather all that hair into a elastic hair tie at the crown, making sure you’ve captured all the baby hairs and flyaways into that sleek base. Once secured, gently pull and separate strands within the elastic to create that airy, rounded puff shape. The key is using your fingers, not a comb, because finger-fluffing creates a softer, more natural-looking volume. You can hairspray the puff lightly to keep it in place, but skip heavy products that make natural texture look stiff and unnatural.
Why This Works
The high puff sits at the best angle for visual balance — it elongates your face, shows off your natural texture, and the sleek base photographs beautifully. Because you’re not creating tension across a large section of scalp, this style is much gentler than a traditional high ponytail that pulls from root to tip. You’re only anchoring the very top section, leaving your neck and most of your hairline relaxed.
2. Sleek Low Puff with Edge Control
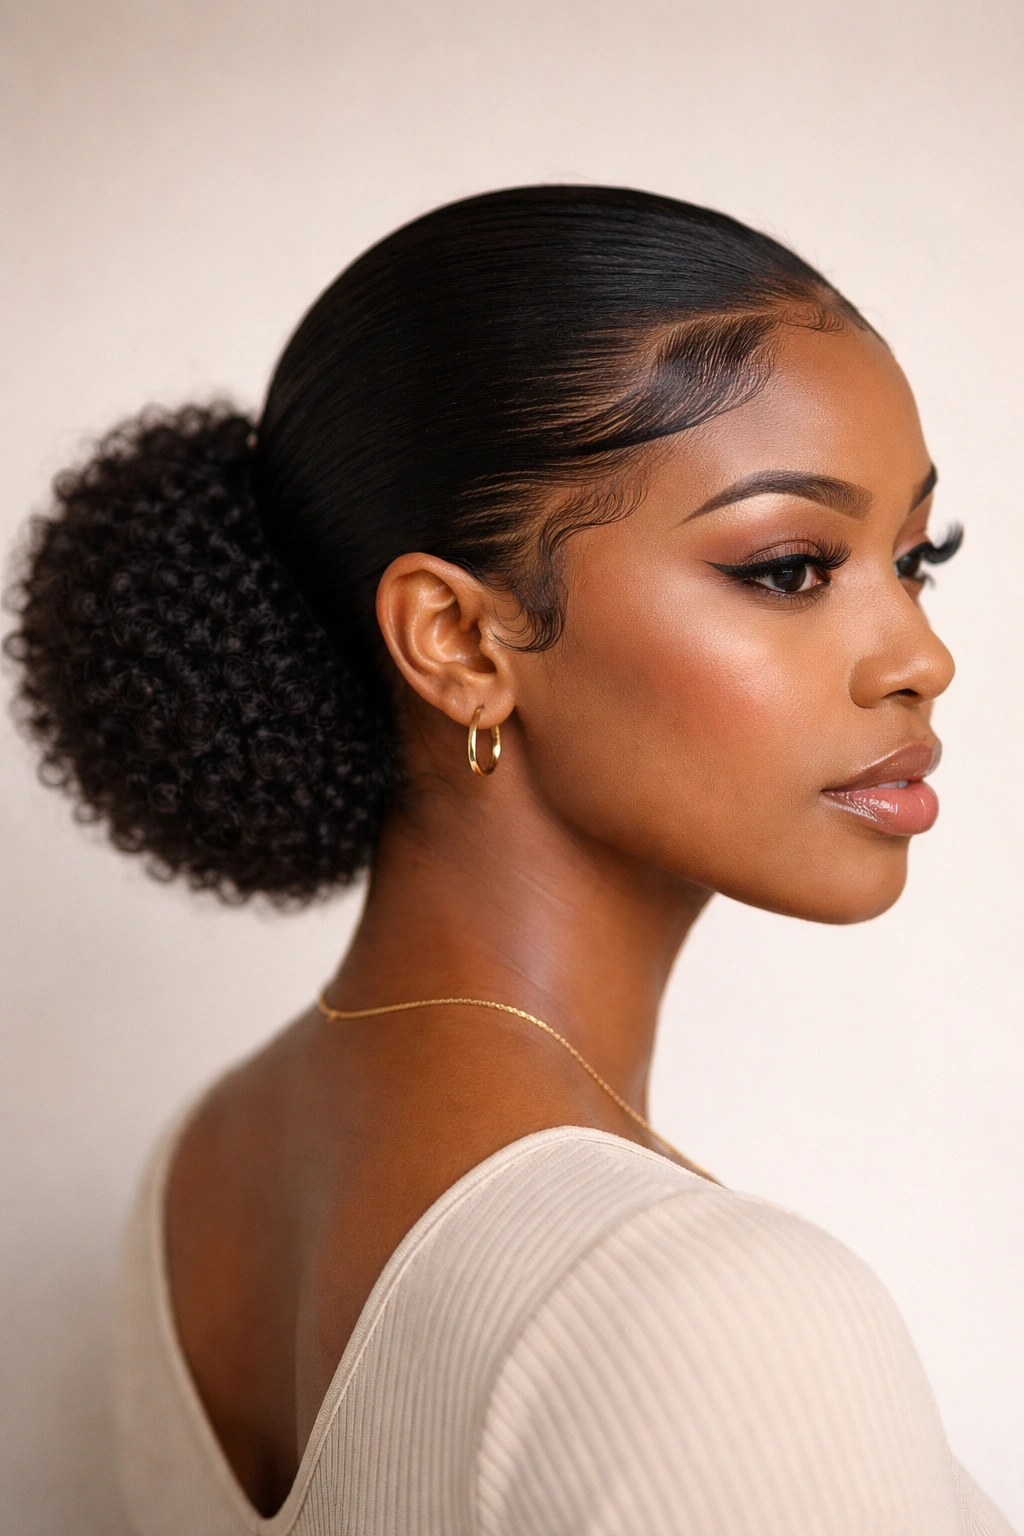
A lower placement puff still gives you that polished half-up vibe but feels softer and more approachable, almost vintage in the best way. This version works particularly well if you have a longer face shape or if you want a style that reads as sophisticated without feeling severe.
Preparing Your Hair and Applying Control Products
The low puff requires more precision with edge control because those edges frame your face directly. Use a firmer-hold edge control product — something with a little more grip than your standard smoothing cream — and apply it to your hairline, temples, and the perimeter of where your puff will sit. Work the product in with a fine-tooth comb or edge brush, smoothing every strand in the direction you want it to go: back and slightly upward, creating clean lines that frame your face.
Creating the Low Puff Placement
Rather than gathering at your crown, you’re collecting hair from slightly lower, roughly at the nape of your neck or just above where your ears would naturally tuck behind. This lower placement means you’re keeping more hair down on the sides and back, which changes the whole silhouette. Gather gently with your fingers or a medium-tooth comb, secure with an elastic at that lower point, then fluff and separate that puff section for texture and dimension.
Maintaining Sleekness Throughout the Day
The edges on a low puff are more visible and more likely to dry out or frizz as the day goes on. Before you leave the house, apply a tiny amount of finishing spray or a gel mixed with moisturizer around your hairline to lock everything in place. Keep a small container of edge control in your bag for touch-ups if you need them. The key to keeping this style looking polished for 8+ hours is controlling frizz in those visible front sections.
3. Top Knot Half-Up with Textured Ends
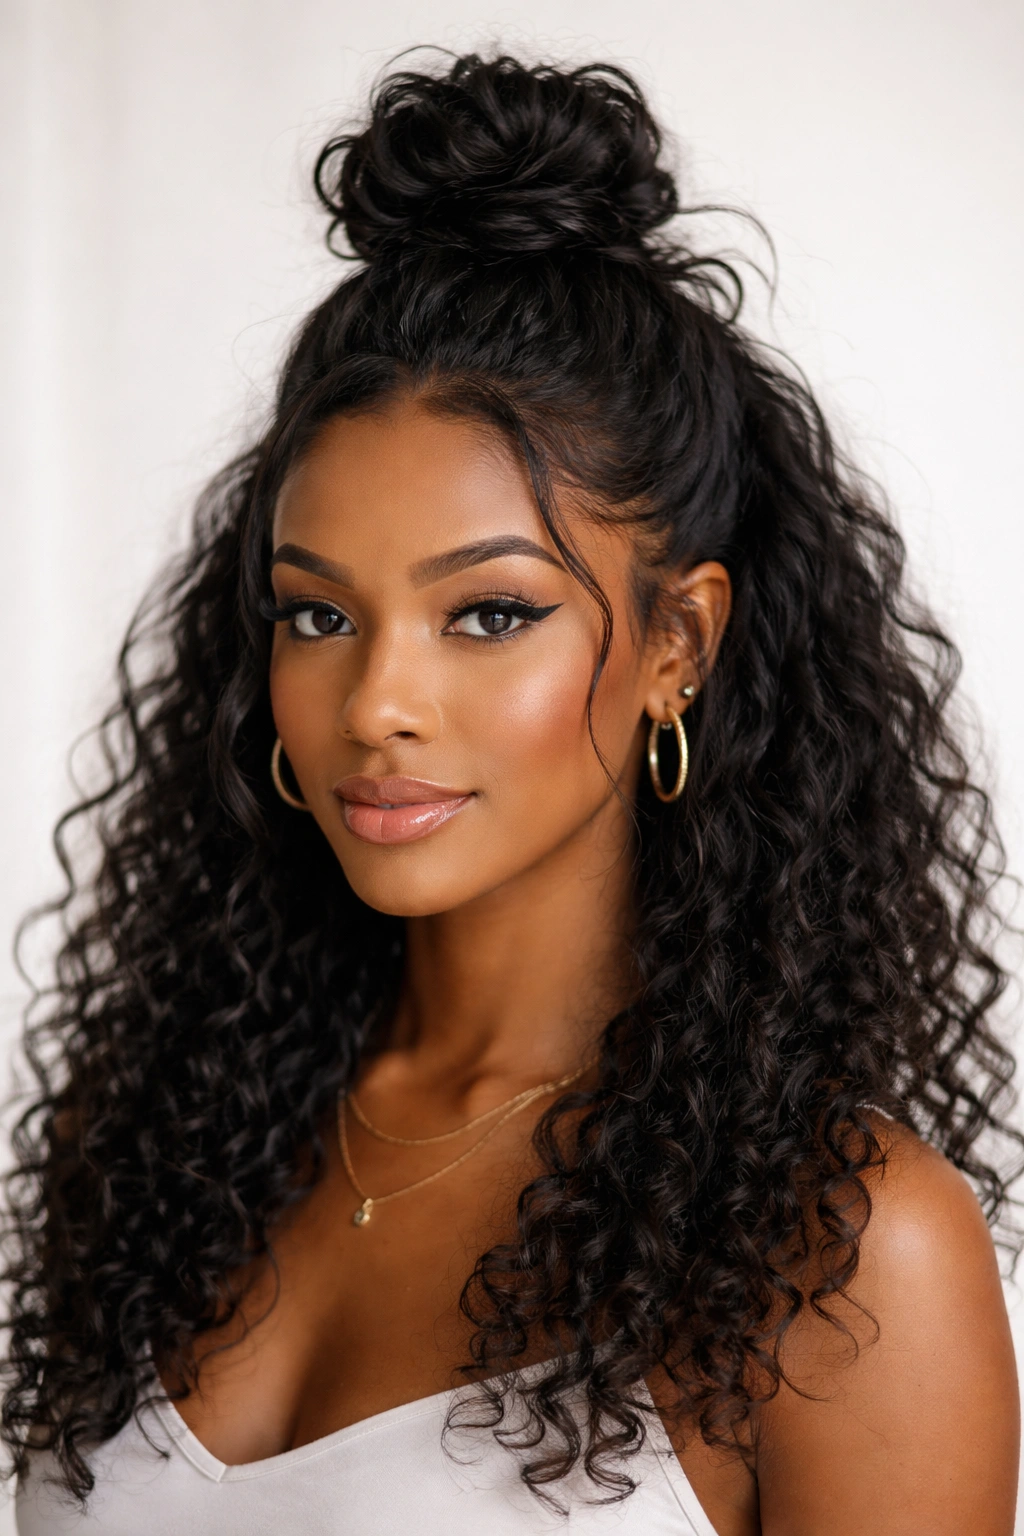
Instead of a traditional puff, twist or coil that gathered hair into a compact knot, then let the rest fall naturally. This creates a more defined, intentional-looking style that works beautifully for church, dates, or any situation where you want to look like you spent time getting ready.
The Twist-and-Wrap Technique
Gather your top section smoothly back, then take that gathered ponytail and begin twisting it tightly. As you twist, you can wrap that twisted rope around itself at the base to form a knot, pinning it in place with bobby pins as you go. For texture, you don’t need to make this knot perfect — a slightly loose, organic-looking knot often looks better on natural hair than something that’s wound too tightly. Leave some strands escaping from the knot for a softer, more romantic aesthetic.
Choosing Your Knot Height and Tightness
A high knot (positioned at your crown) looks modern and graphic. A medium-height knot, positioned more toward the back of your head, feels classic. The tightness of your twist also matters — a looser twist creates more texture and visual interest, while a tighter twist looks sleeker and more controlled. For natural hair, the slightly-loose approach usually photographs better and moves more naturally.
Complementing Your Loose Texture
While your top is structured into a knot, make sure your loose hair underneath hasn’t been stretched or compressed where it was gathered. Gently shake out the lower sections so your natural curls, coils, or waves have room to express themselves fully. If your hair has been pulled back for a while, you may want to lightly re-fluff or finger-comb the loose section to restore its bounce.
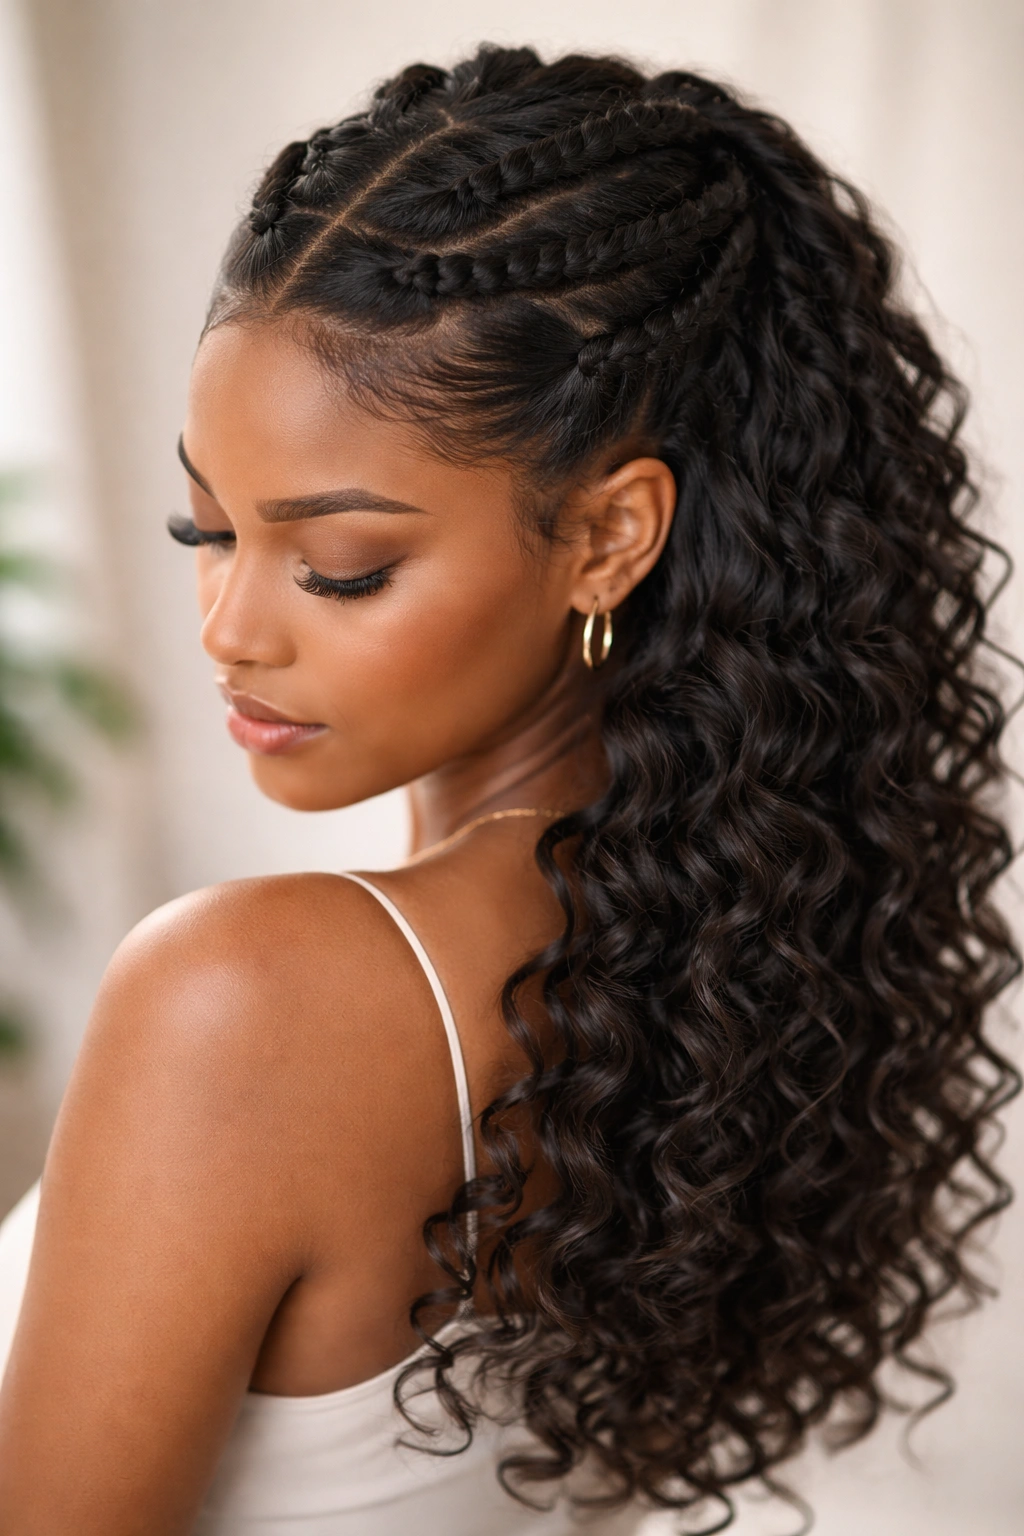
4. Smooth Braided Crown Half-Up
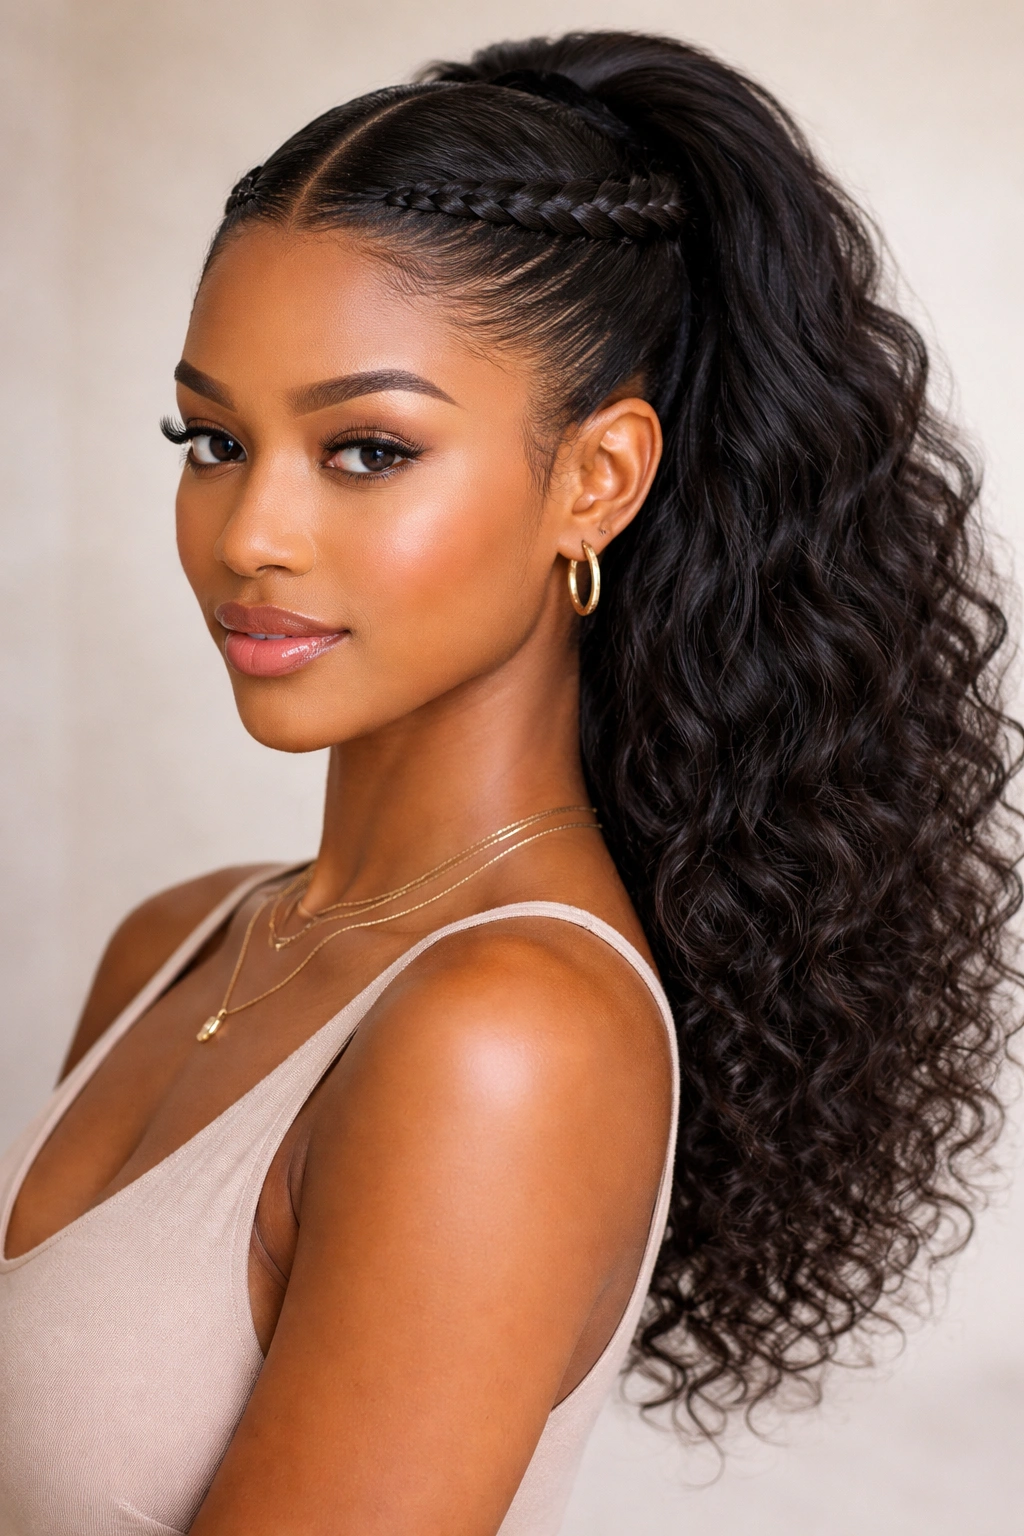
Braiding the top section instead of gathering it smoothly creates visual interest and adds a protective element — the braid tightens gradually over the day rather than staying in one tight spot. A crown braid that follows your natural hairline looks intricate while actually being quite manageable to create.
Executing a Clean Feed-In Braid
Rather than starting with all your hair gathered, a feed-in braid begins at one side of your head and gradually incorporates more hair as you move across. Start at one temple with a small section, begin a three-strand braid, and with each pass, grab new hair from your scalp and feed it into the braid. This creates a braid that looks thick and full without requiring you to section and tension all your hair at the start, which is gentler on edges and scalp.
The Path and Direction of Your Braid
You can feed-in braid across your entire crown from ear to ear, creating a band of braided hair that sits like a crown, then gather everything (the braid plus the unbraided back section) into a half-up puff or knot. Alternatively, braid only one side, gathering that braid with the top back section into a secured style. The direction the braid goes — forward to back, side to side, or at an angle — changes how the style photographs and feels.
Securing and Finishing
Once your braid reaches where you want it to end, secure it with a small elastic that matches your hair color, or tuck the end into your gathered half-up section. You can loosen the braid slightly (called “pancaking”) to make it look fuller and more textured, which works especially well on natural hair since the braid already has inherent dimension from your curl pattern. A light hairspray keeps flyaways down without making the braid look stiff.
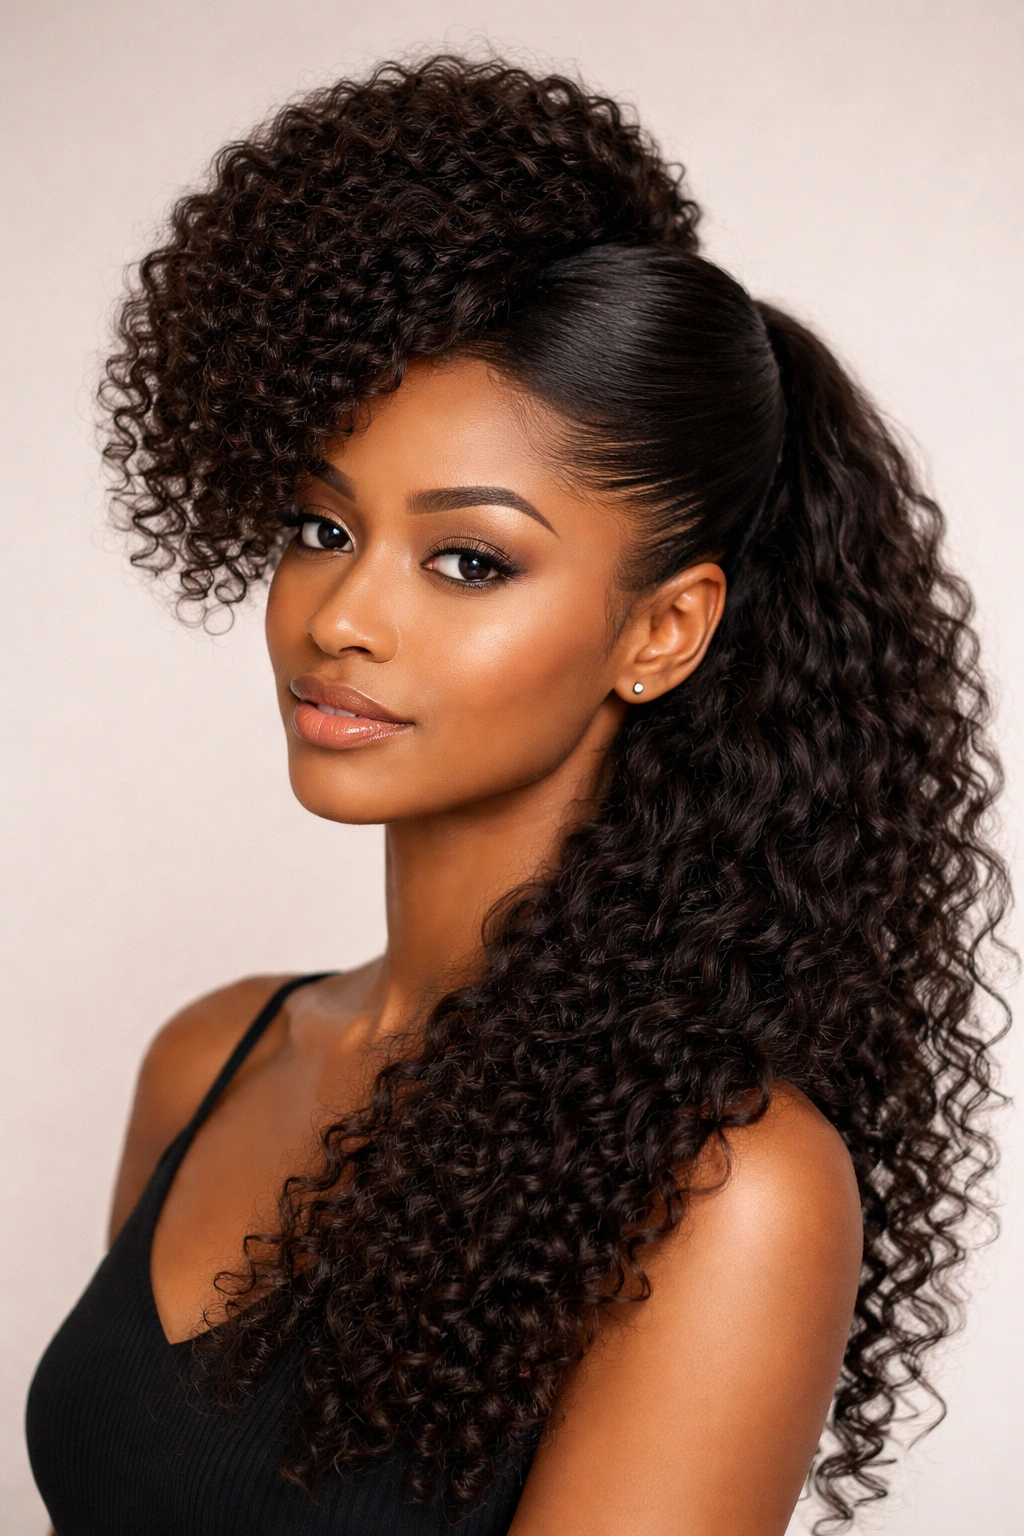
5. High Half-Up with Coils Left Down
This style celebrates the full pattern of your natural coils by leaving as much hair loose as possible while still pulling back enough for a polished look. It’s an especially good choice if you’re growing out protective styles or if your coils are at a length where they have beautiful definition and bounce.
Sectioning for Maximum Loose Texture
Rather than gathering hair from the very crown, you’re gathering a smaller, more defined section — think of a band across the top of your head from temple to temple, with everything below that left completely down. This smaller section is much easier to manage and requires less styling time. Section this top band off with clips to keep it separate from the lower section while you prep the loose hair.
Prep the Lower Section First
Before gathering your top, spend time on the lower section. Apply your leave-in conditioner or curl enhancer and use your fingers or a wide-tooth comb to separate and define individual coils. Let this section air dry slightly or use a diffuser to encourage curl definition and minimize frizz. You want the down section to look intentional and well-defined, not just like you left your whole head down without styling.
Smooth Styling of the Upper Section
For the gathered top section, use a smoothing product and a fine-tooth comb to create clean lines that contrast visually with the coily texture below. You can gather this into a high ponytail, a puff, or even braid it — the contrast between the sleek top and the defined coils below is what makes this style visually striking. The sleekness up top actually highlights how beautiful your coil pattern is in the loose section.
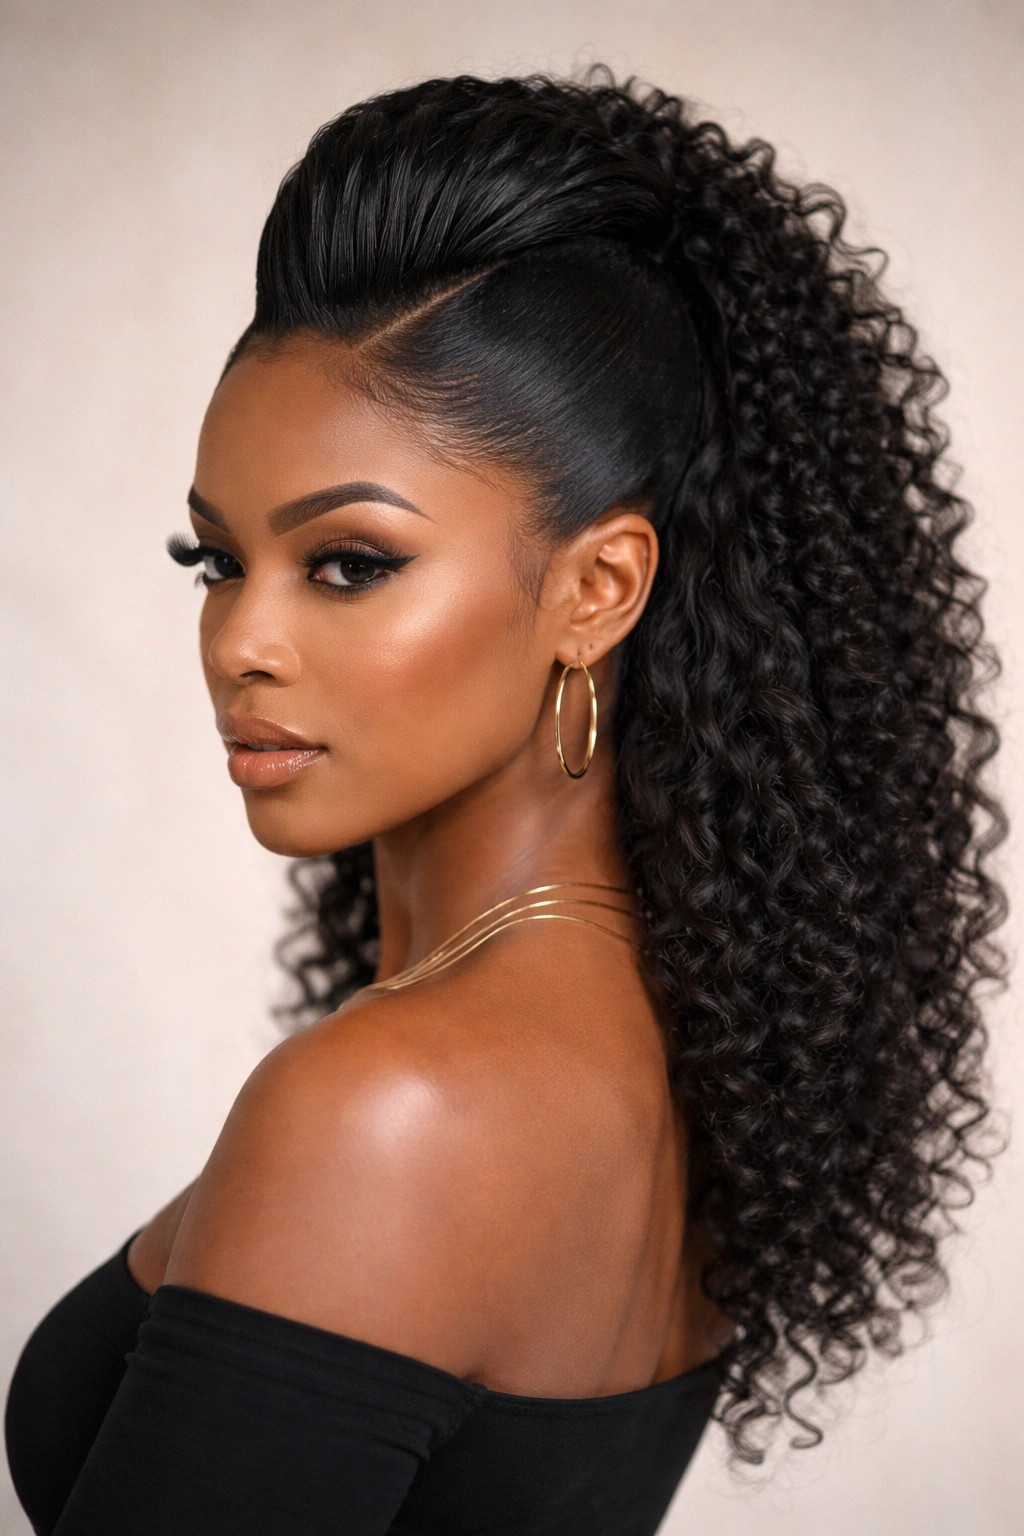
6. Side-Swept Half-Up Puff
Instead of centering your puff, sweep it to one side for an asymmetrical, fashion-forward look that’s surprisingly flattering and photograph-friendly. This style works beautifully on camera and adds visual movement to your overall appearance.
Creating the Side-Sweep Direction
Gather your top section and direct everything toward one side of your head — typically toward the direction your hair naturally parts or grows. You might start smoothing hair back from the opposite side, moving diagonally toward where your gathered point will be. This diagonal direction is more interesting visually than a straight-back pull, and it’s often more comfortable since it doesn’t create tension in a straight line across your scalp.
Positioning Your Puff to One Side
Secure your gathered section with an elastic positioned to that side, then fluff and separate the puff so it sits prominently on one side of your head. The loose hair on the opposite side falls freely. This creates an asymmetrical silhouette that’s very chic and works well for styling that leans into movement and attitude rather than perfect symmetry.
Balancing the Overall Look
With the puff off to one side, be intentional about how the rest of your hair falls. If your loose hair all falls the same direction as your puff, the style can feel unbalanced. Instead, you might flip the lower section slightly to the opposite side for better visual proportion, or leave it to fall naturally in whatever direction feels best. The key is considering the overall shape, not just the top section.
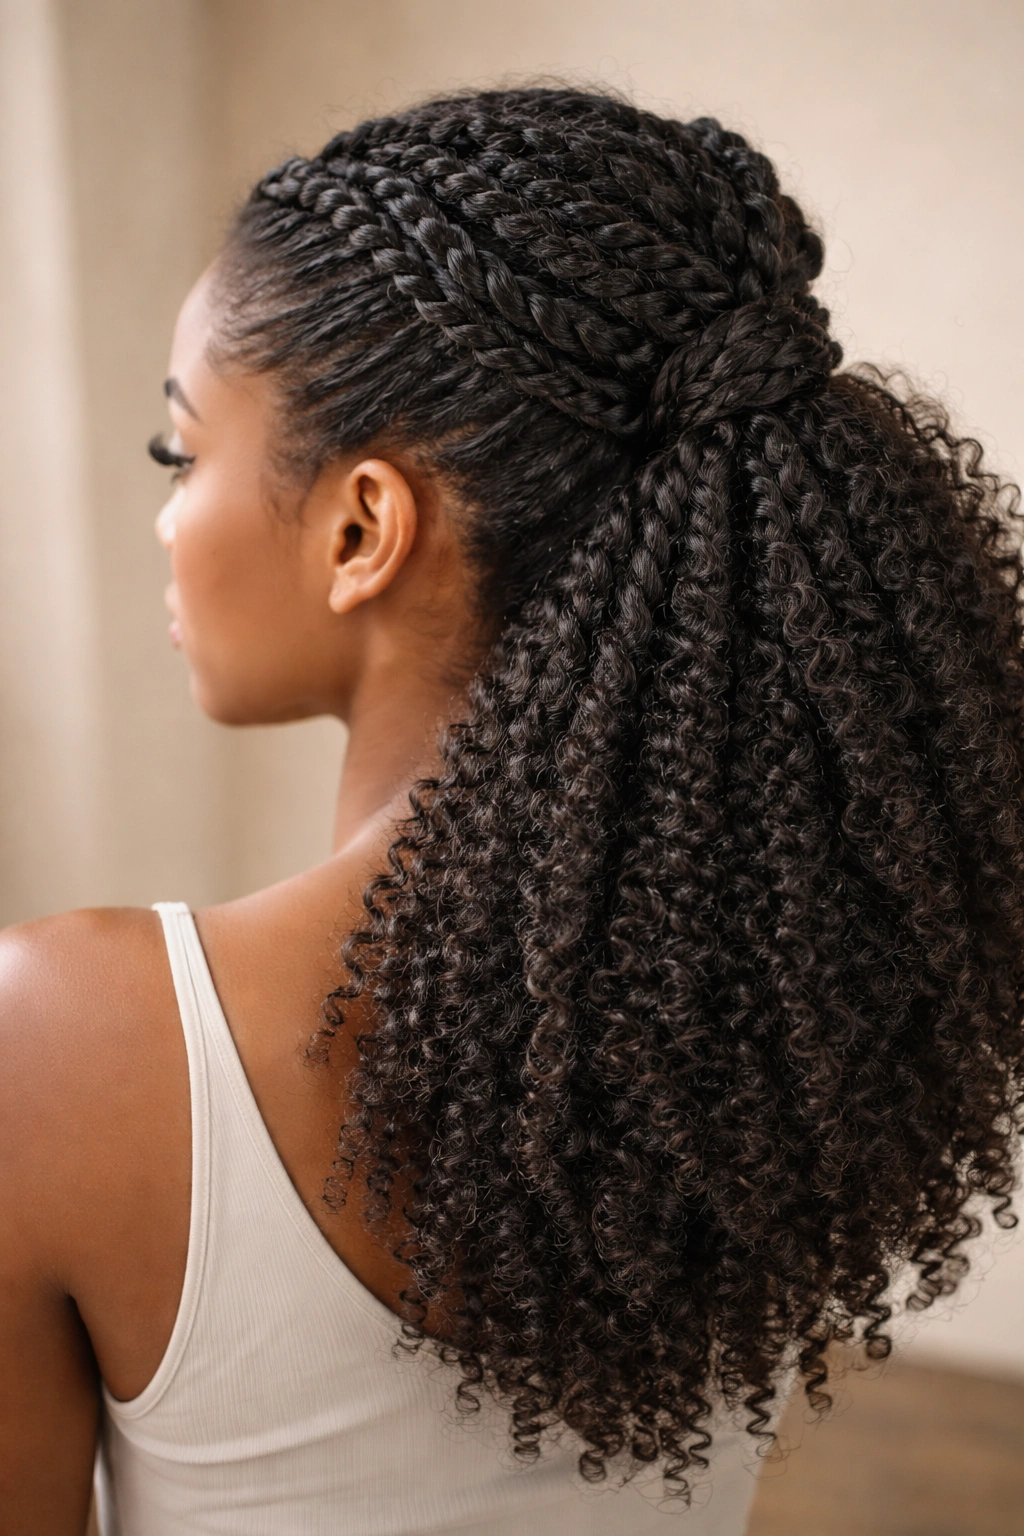
7. Feed-In Braids Half-Up Style
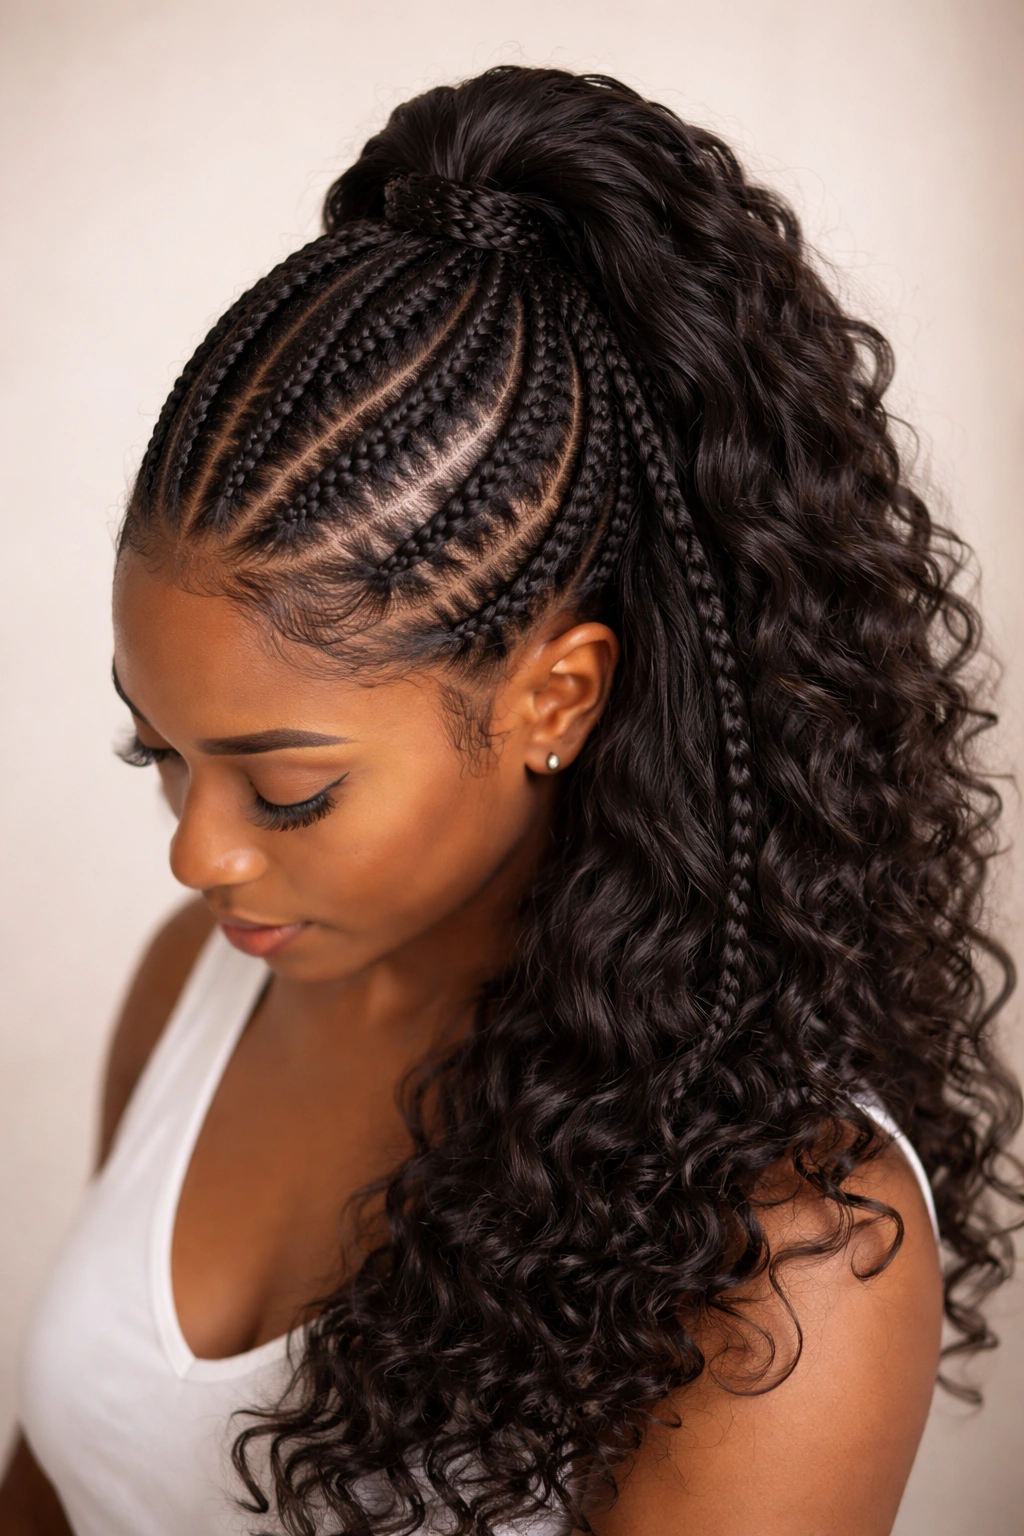
Instead of a single braid, create two or three feed-in braids that start from your hairline and converge at a midpoint where they’re gathered together with the rest of your half-up style. This version is more textured, more protective, and more intricate-looking than a single braid.
Starting Multiple Braids
With two braids, you might start one at each temple. With three, you might do one at the center and one at each side. Begin each braid small and feed in more hair as you go, moving toward your crown and then down toward your center gathering point. Because you’re starting from so many different points, this style requires more attention during creation, but it’s absolutely achievable once you practice it a few times.
Converging the Braids at Your Gathering Point
As each braid reaches your designated half-up gathering point, you’ll secure them all together with an elastic, along with any unbraided hair in that top section. The braids create linear texture while everything converges into a cohesive style. You can leave the gathered section as braids, or unravel them and fluff them together into a puff.
The Protective Benefit
Feed-in braids distribute tension across multiple points rather than concentrating it in one spot, making this style gentler on your edges and hairline. It’s an excellent choice if you like protective styling but want the aesthetic of a half-up, half-down look rather than all-up braids. Because the braids are incorporated into a larger style, they don’t read as full protective braids — they read as a more casual, fashion-forward half-up.
8. Twisted Half-Up with Loose Curls
Two-strand twists create a beautiful textured aesthetic while still being much faster to install than traditional braids. Twisting the top section and gathering those twists into a half-up style gives you dimension, texture, and a sophisticated look.
Creating Clean Two-Strand Twists
Section your top portion into 4-6 subsections, depending on how thick you want each twist. For each section, take two strands and wrap them around each other, alternating over and under, moving from root to the point where you want to gather. The tighter you twist, the more defined and long-lasting the twist will be. For a softer look, twist more loosely or separate the twists slightly once they’re complete.
Gathering Your Twists Together
Once your twists reach your gathering point, you can twist them all together into a thicker twisted rope, or simply gather them with an elastic and let each individual twist be visible. The individual-twists approach is more visually interesting and shows off each twisted section distinctly. Secure everything at your gathering point — high, medium, or low depending on the vibe you want.
Styling the Loose Lower Section
The loose curls or coils below should be distinct from your twisted top. Apply curl cream or leave-in conditioner to the lower section and encourage natural curl definition with your fingers or a wide-tooth comb. You can also use a diffuser to dry the lower section for maximum bounce and definition. The contrast between the deliberate twists above and the free-form curls below is what makes this style visually compelling.
9. Slicked Back Half-Up with Undercut
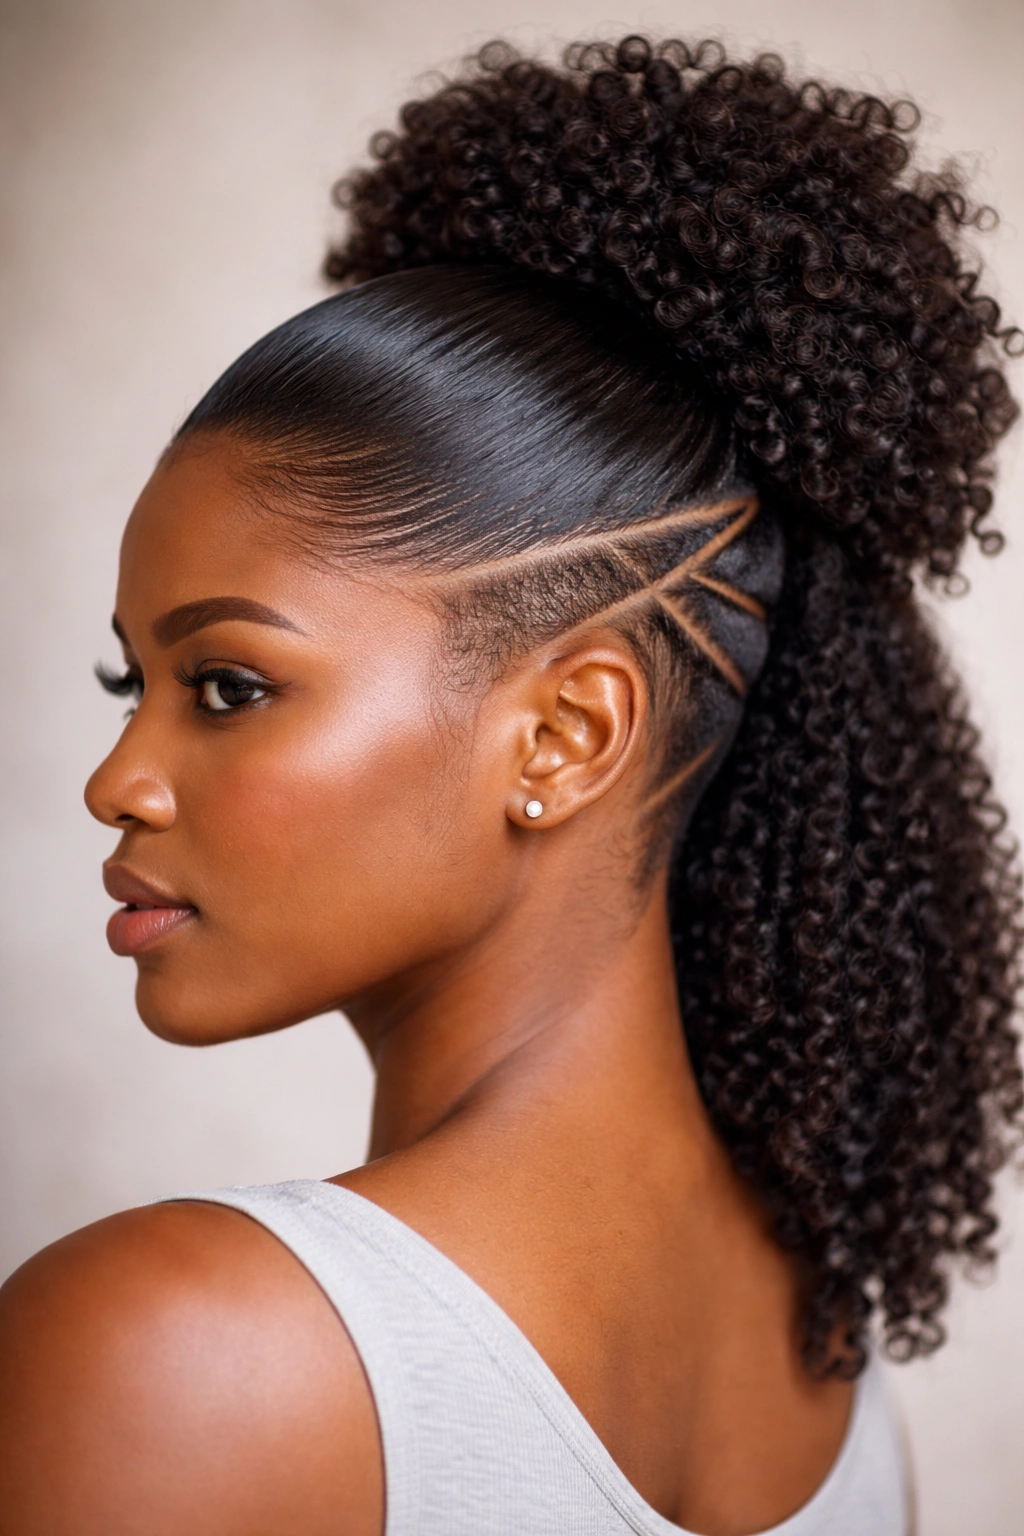
If you have an undercut, fade, or shaved design on the sides or back of your head, a sleek half-up style shows off that design element beautifully. The smooth, slicked-back styling on top creates the perfect contrast with any clean lines or shaved sections underneath.
Using Edge Control for Maximum Sleekness
An undercut demands perfectly sleek styling to frame it effectively. Use a firm-hold edge control or smoothing gel and apply it generously to the section you’re pulling back. Work it in with a fine-tooth comb or edge brush, smoothing every strand in the direction you’re pulling (straight back or at a slight angle). Multiple passes with the comb ensure every strand is lying flat and caught by the product.
Securing Your Undercut Style
Gather your top section into a high or medium-height puff, knot, or ponytail. The slicked styling extends all the way to the back of your head and your gathering point. What makes this different from a standard slicked half-up is that once you gather your top section, a significant portion of your undercut becomes visible and framed by the slicked styling around it. This is your chance to show off a design you’ve invested in.
Maintaining Sleekness With Movement
Even though you’re showing off an undercut, the style still has movement — your loose lower hair moves freely, and the gathered top can be fluffed for texture. The contrast between the sleek, controlled top (with undercut showing) and the free-moving bottom creates visual balance and interest.
10. Two-Strand Twist Half-Up
Rather than traditional braiding, you can twist your gathered section into a chunky two-strand twist, which is faster to create and shows off a beautiful spiral texture. This works particularly well if you have time constraints or prefer the aesthetic of twists over braids.
Creating a Thick Two-Strand Twist Base
Gather your top section smoothly back, then divide that gathered section in half. Take one half in each hand and begin wrapping them around each other, over and under, from your scalp down the length. You can twist all the way to the ends, creating a long twisted tail, or twist only partway and then gather the bottom into a puff or bun. The thickness of your two-strand twist depends on how much hair you gathered — a generous section creates a visibly chunky, impressive twist.
Pancaking for Texture and Dimension
Once you’ve completed your two-strand twist, gently separate and widen the sections slightly (called pancaking) to create a fluffier, more textured appearance. This step makes a two-strand twist look fuller and more intentional, and it’s especially flattering on natural hair where texture is an asset. You’ll see the spiral pattern more clearly once you’ve pancaked it.
Finishing Your Twisted Half-Up
You can tuck the end of your twist into itself and secure with bobby pins, or let it fall loose as a twisted ponytail. If you’re gathering your top section into another formation (like tucking the twist into a puff), the ends of the twist become less visible anyway. The visual focus is on that thick, textured spiral at the back and top of your head.
11. Mohawk-Inspired Half-Up
For a bolder aesthetic, create a mohawk-shaped arrangement with your half-up by keeping the very center section smooth and slightly elevated, with hair pulled smooth on either side. It’s edgy without being a full commitment to a real mohawk.
Creating the Center Ridge
Starting at your hairline, use edge control and a fine-tooth comb to smooth all your hair — it should all be going straight back initially. Then, take a narrower section right down the center of your head (from forehead to the back of your crown) and smooth this section slightly upward and back. This creates a center “ridge” that stands slightly taller than the surrounding sections. Everything to the left and right of this center section gets smoothed straight back.
Managing the Sides
The sides of your head get smoothed back just as thoroughly as your center section, but they’re directed straight back rather than elevated. This creates visual contrast — your center ridge stands proud while the sides are smooth and sleek. You might gather everything at the back into a puff or knot, or leave the sides completely loose for a more dramatic, punk-aesthetic effect.
The Edgy Vibe
This style reads as intentional and fashion-forward rather than just having your hair pulled back. It works especially well if you’re going for an artistic, creative, or bold personal aesthetic. The key to making it work is committing to the sleekness and the elevation of that center section — it needs to be noticeable enough to read as intentional.
12. Sleek Bun Half-Up with Long Sides

Where the classic high puff floofs for volume, this style goes the opposite direction: a smooth, compact bun at the top with your longest hair left to fall freely down the sides and back. It’s chic, intentional, and works beautifully for professional settings or formal occasions.
Smoothing and Securing Your Bun Base
Gather your top section smoothly and secure with an elastic. Rather than fluffing it into a puff, you’re keeping this section compact and controlled. You can create a bun by twisting that gathered section and wrapping it around the base of your elastic, securing with bobby pins as you go. The tighter and neater you make this bun, the more formal and polished the overall style reads.
Creating Clean Lines
Because your top section is neat and compact, your focus shifts to creating clean lines at the base of your bun where it transitions to your loose hair. Make sure you’ve captured all flyaways and baby hairs into that smoothed-back section. You might apply a very light edge control or finishing spray just to any stray hairs at the nape of your neck or around your bun’s perimeter.
Balancing the Proportions
A sleek bun on top paired with length hanging below creates a specific silhouette — it’s elegant and elongating, especially if you have the length to show significant loose hair. The compactness of the top makes the freedom of the loose section even more visually striking by contrast. This is a style that reads as “I am put together” rather than casual, making it perfect for work environments, family events, or any situation where you want polished sophistication.
Final Thoughts
Half up, half down styling gives you the best of both worlds for natural hair — protection and control on top, freedom and texture below. The 12 styles above show how different small choices change the whole vibe: where you position your gathering point, whether you smooth or braid your top section, how you finish that loose hair underneath. Each variation works, and more importantly, each one celebrates your natural texture rather than fighting against it.
The real secret to making any of these styles last all day is twofold: prep your hair properly (don’t skip the conditioning step on that loose section), and use products strategically rather than heavily. A light edge control on just the areas you need it, a hydrating leave-in on your loose curls, maybe a finishing spray — these targeted applications keep your hair healthy and looking good far longer than drowning everything in product. Experiment with these styles, figure out which positioning and technique feels best for your specific hair texture and density, and then own it. When you feel confident in your style, it shows.