Bridesmaids need hairstyles that stay flawless through hours of photos, dancing, and celebration without screaming “I spent three hours at the salon.” The half-up half-down look—especially when you slick back the top section—delivers effortless elegance with just enough edge to feel modern. It’s a style that works whether the bride wants romantic softness, structured geometry, or editorial polish, and it keeps hair away from the face and neck in the most flattering way possible.
The beauty of slicked-back half-up styles is that they’re way more versatile than most bridesmaids realize. You can dress them up with precious metals and gems, keep them minimal and modern, or lean into romantic curls and texture. The slicked-back element—whether it’s gloss-smooth or gently sculpted—creates a visual anchor that makes even simple waves underneath feel intentional and expensive. Plus, these styles photograph beautifully from every angle, which matters when you’re in the background of what feels like a thousand photos all day long.
What makes a slicked-back half-up actually work is understanding the prep and the products. You’re not just combing hair back and calling it done—you’re creating a polished surface that catches light, holds shape, and looks intentional. Whether you’re using gel, mousse, or a lightweight hairspray, the technique matters as much as the style itself. Let’s walk through twelve proven versions that’ll work for different hair types, wedding aesthetics, and bridesmaid personalities.
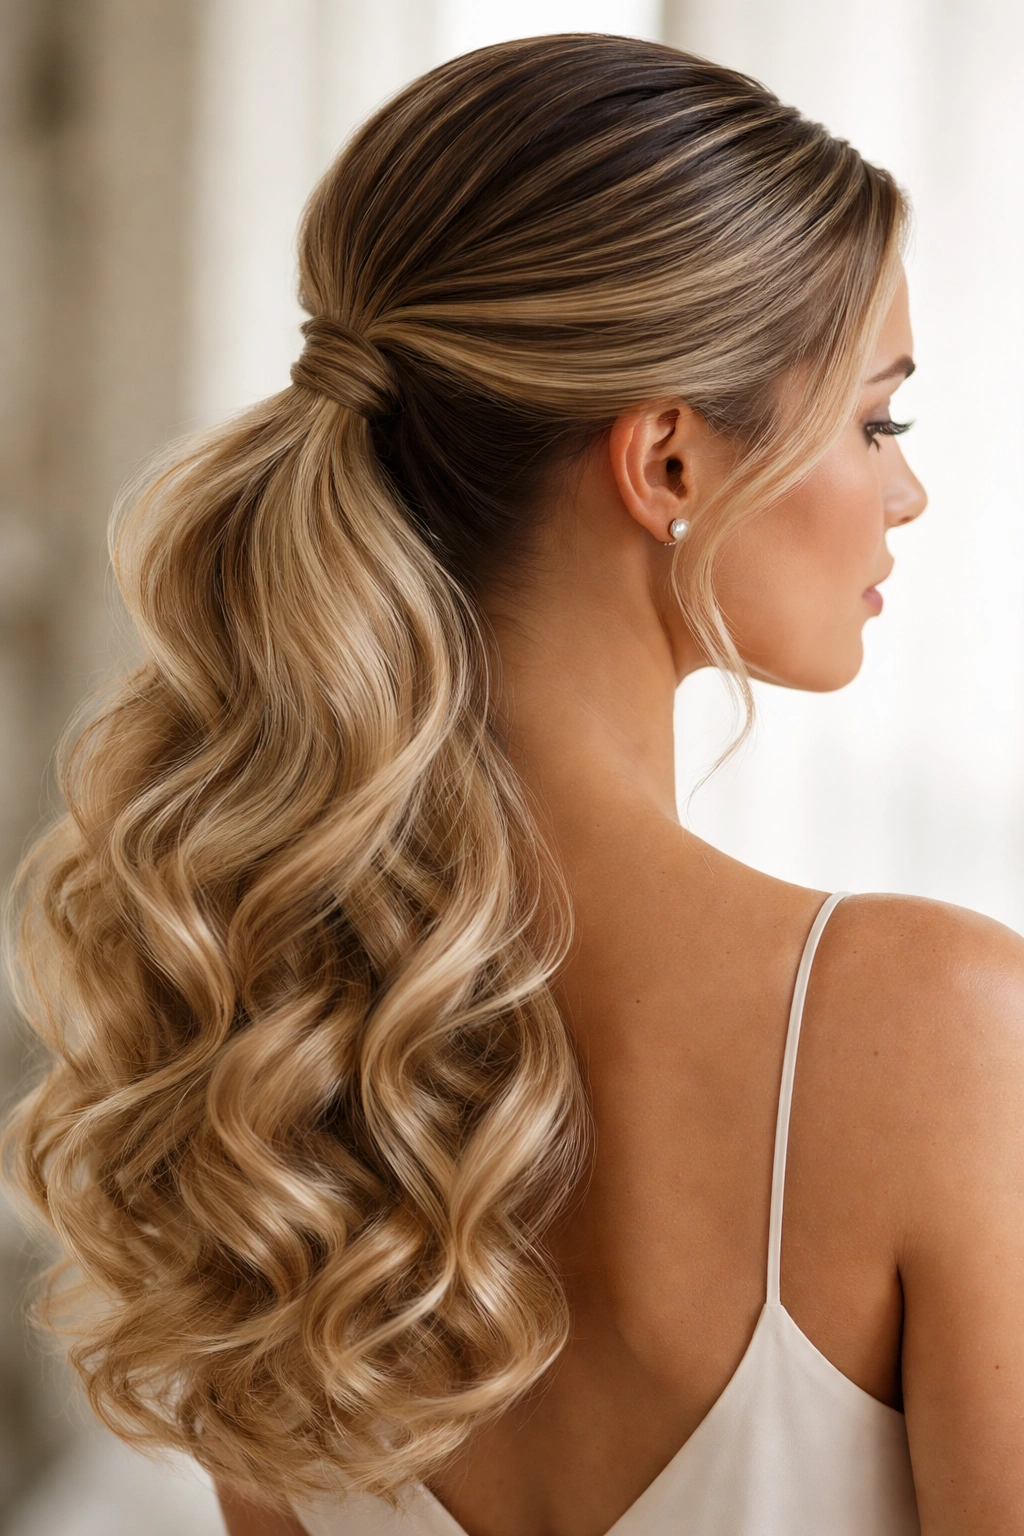
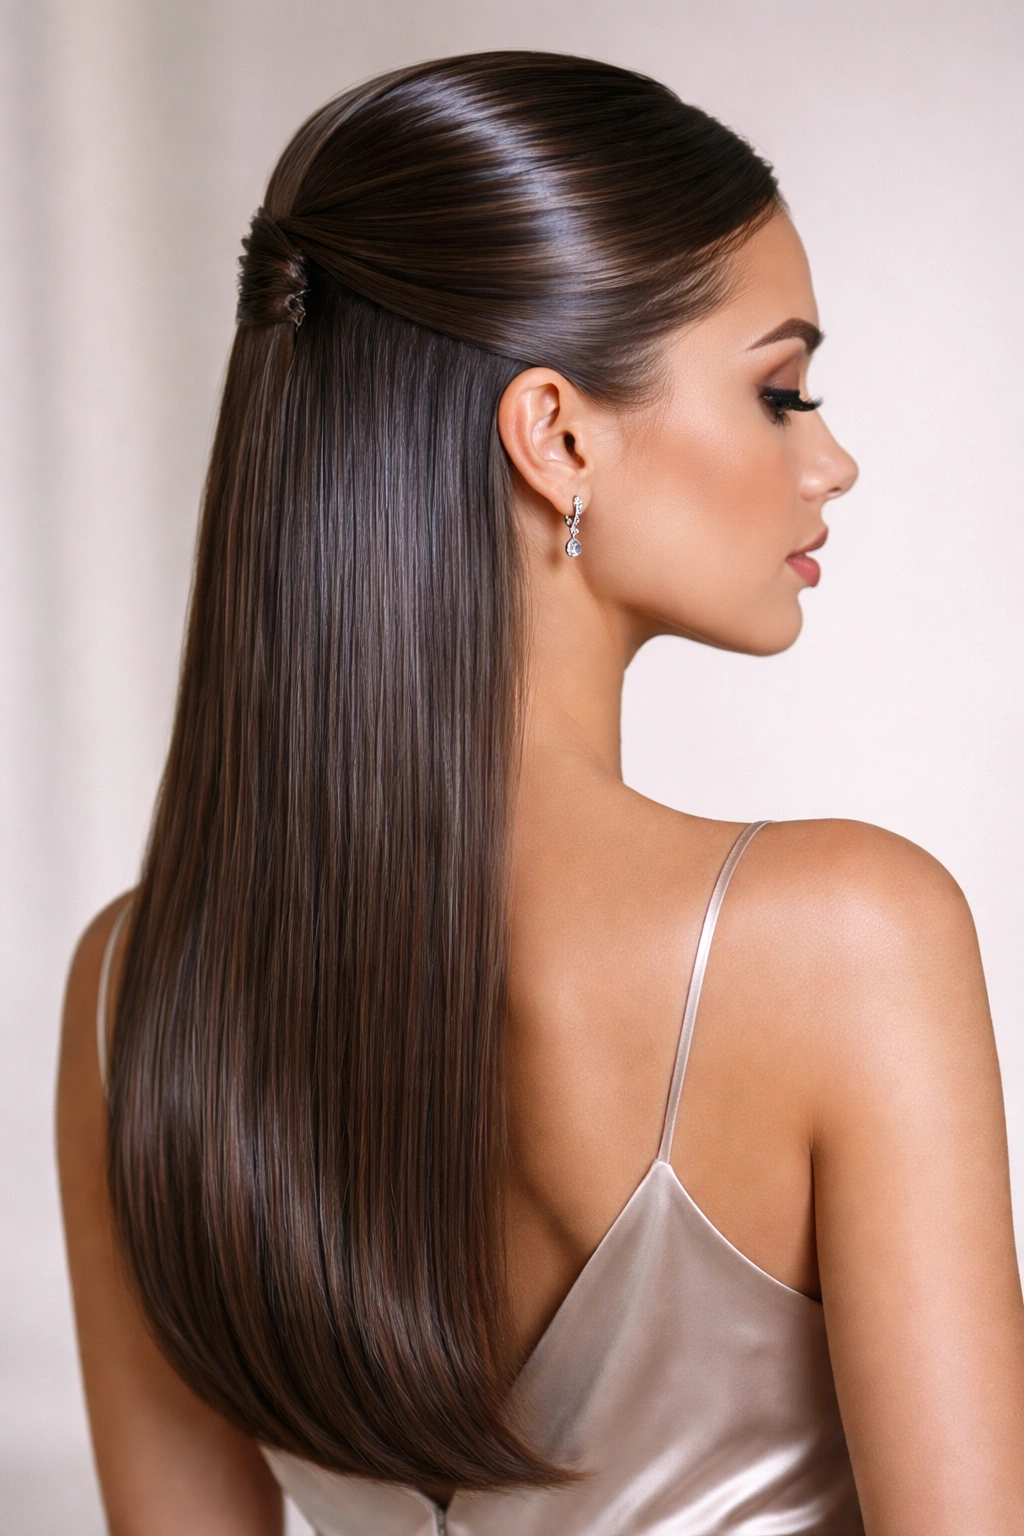
1. Classic Sleek with Center Part
This is the foundation style that works for literally any wedding vibe. Start with damp hair and apply a lightweight smoothing serum or gel from the roots of your center part all the way to where the ponytail begins. Blow-dry using a paddle brush to create a mirror-smooth surface—this takes patience, but it’s what separates “slicked back” from “wet hair.” Gather the top half at the crown and secure with a clear elastic or a thin metallic band, then let the bottom half fall in soft waves or loose curls.
Why This Style Keeps Working
The center part is flattering on nearly every face shape, and the sleek back creates the kind of elongated visual line that photographs beautifully. It’s especially stunning on bridesmaids with longer hair (shoulder-length or beyond), and it works whether you’re going minimal or adding accessories.
Styling Essentials
- Use a lightweight gel or mousse, not heavy pomade, so the hair doesn’t look wet or plastic
- Apply a finishing spray with light hold to keep flyaways invisible without adding weight
- Keep the ponytail placement slightly higher than you think—crown-level looks more polished than mid-head
- Leave 2-3 face-framing pieces on either side if the bride’s vibe is soft; go fully pulled back for editorial impact
Pro tip: Add a thin comb or metal bobby pin into the slicked-back section for an unexpected detail that catches light in photos.
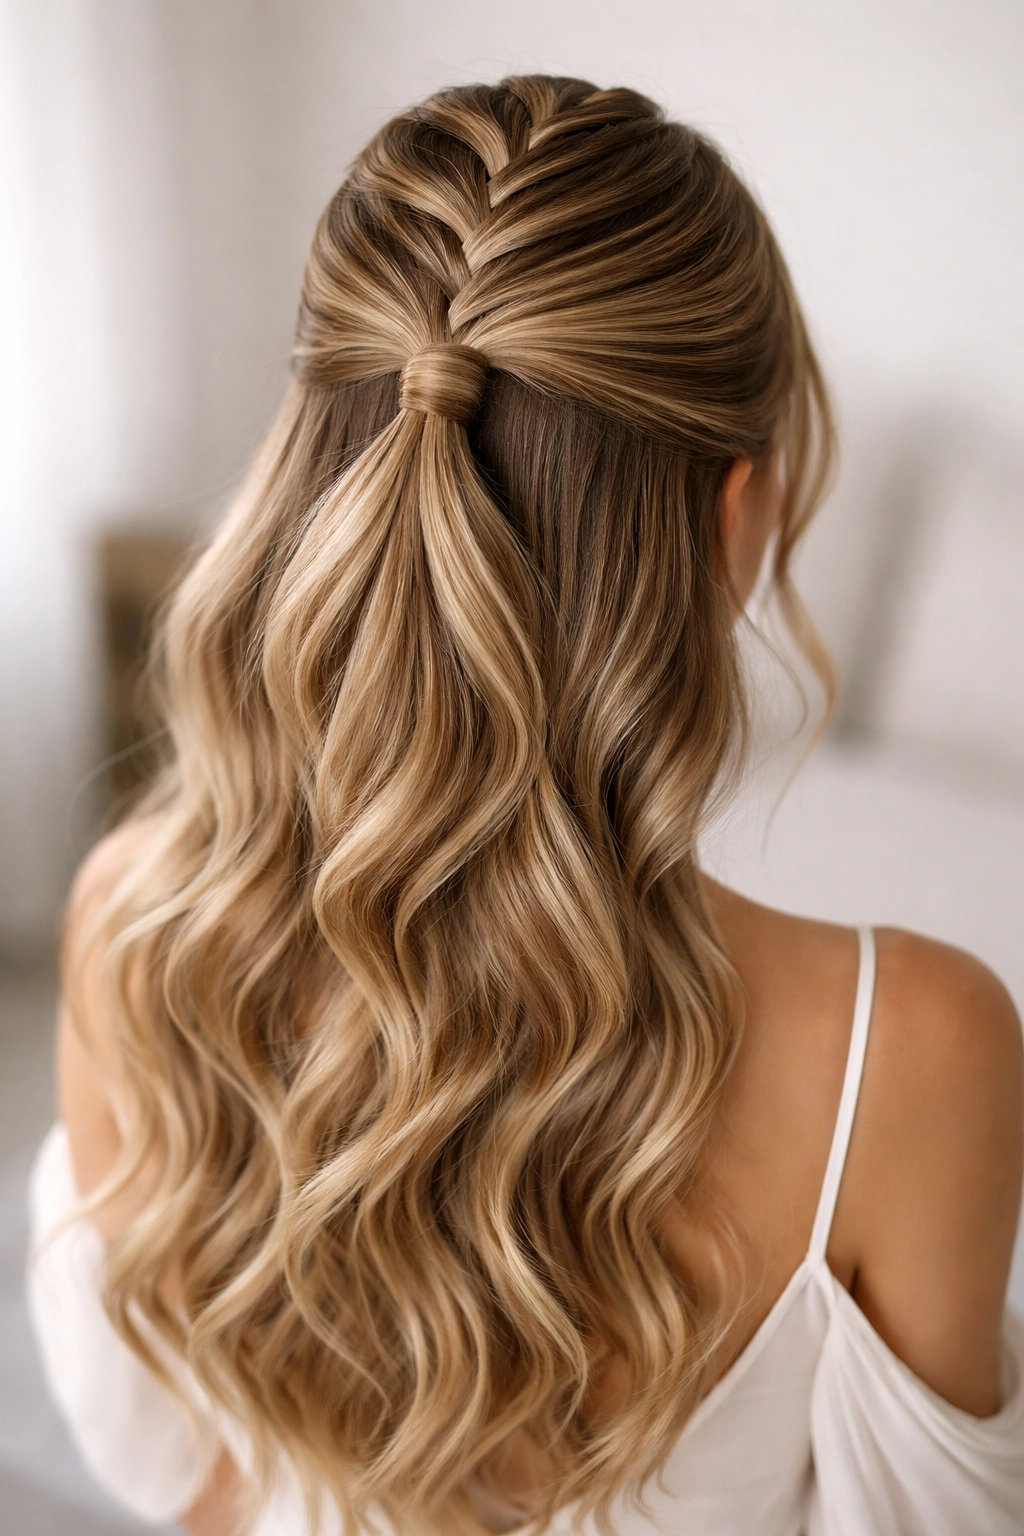
2. Twisted Crown with Loose Waves
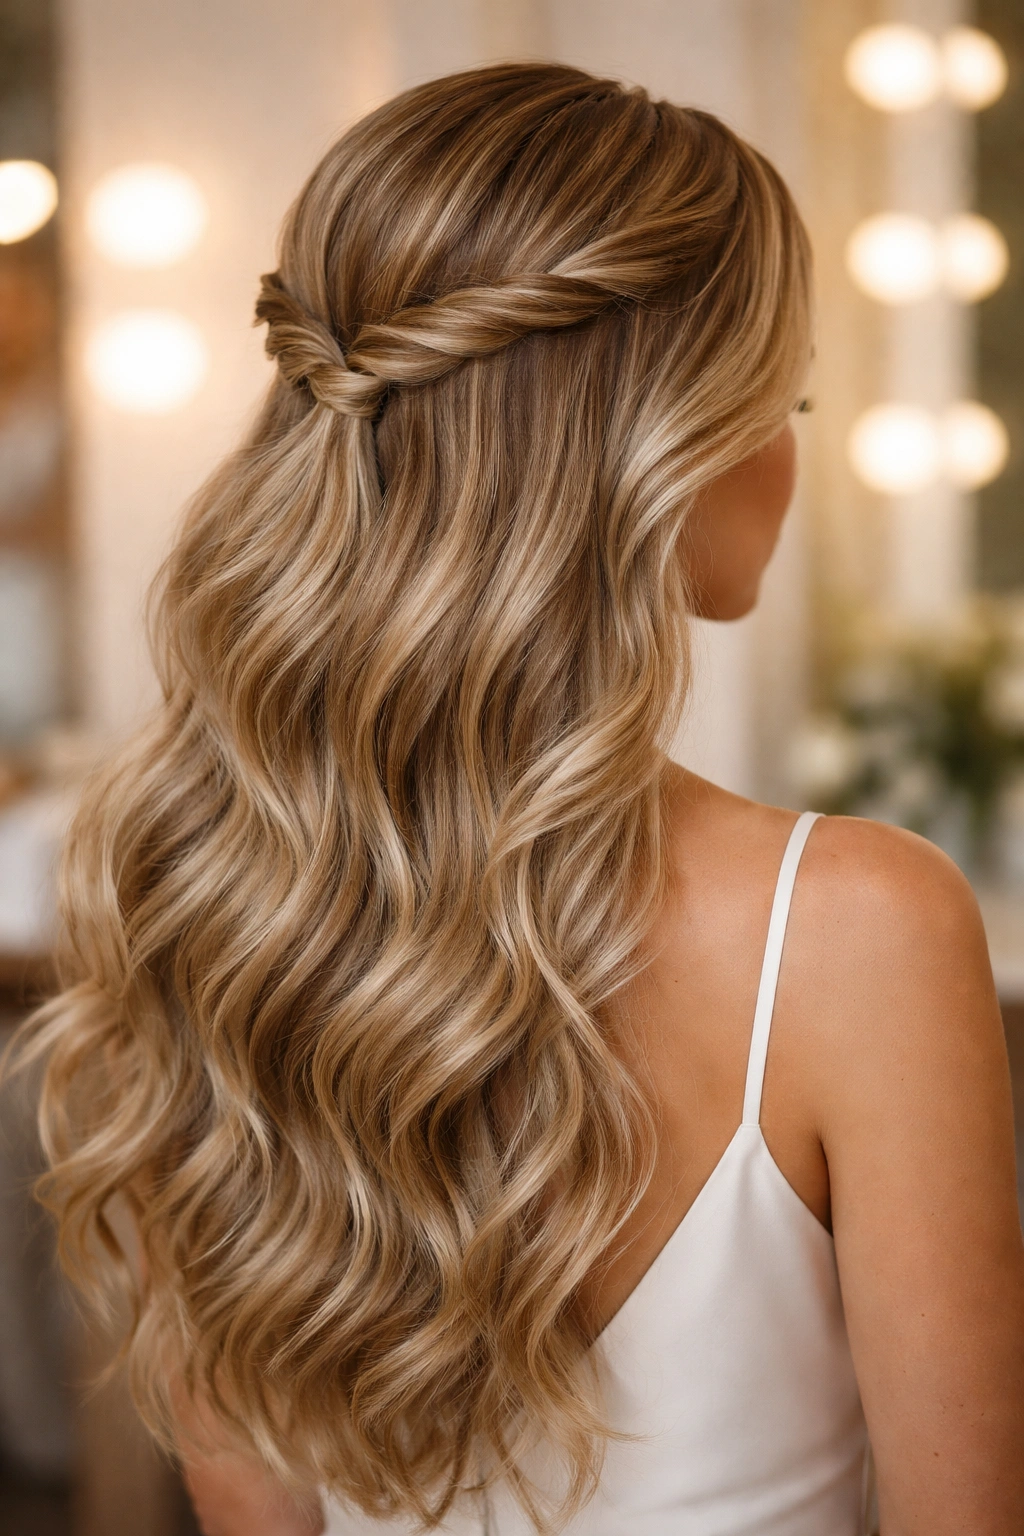
Instead of a center part, create a side part and twist both the front sections back toward the crown, crossing them over each other before pinning into a half-up ponytail. The twist adds dimension to the slicked effect—it’s not completely flat, but it’s still neat and controlled. Let the bottom half fall in romantic waves or curls, and consider leaving one or two pieces down by the face for softness.
The Twisted Advantage
Twists read as more romantic and intricate than a straight slick-back, but they take just as little time to execute. They also work beautifully for bridesmaids with wavy hair that doesn’t want to be completely smoothed down—the twist itself creates enough texture that you don’t need glass-smooth hair to pull this off.
Step-by-Step Execution
- Begin with your hair in two sections: front-left and front-right, with the back left loose
- Apply gel or mousse to both front sections and twist them tightly back toward the crown
- Cross the right twist over the left twist and pin both where they meet
- Gather the entire top half (including the back section) into a low ponytail at the crown
- Tease the wave or curl formation in the bottom half for romantic fullness
Worth knowing: If your hair is fine or thin, use a texturizing spray before twisting so the twist grips better and doesn’t slip out after a few hours.
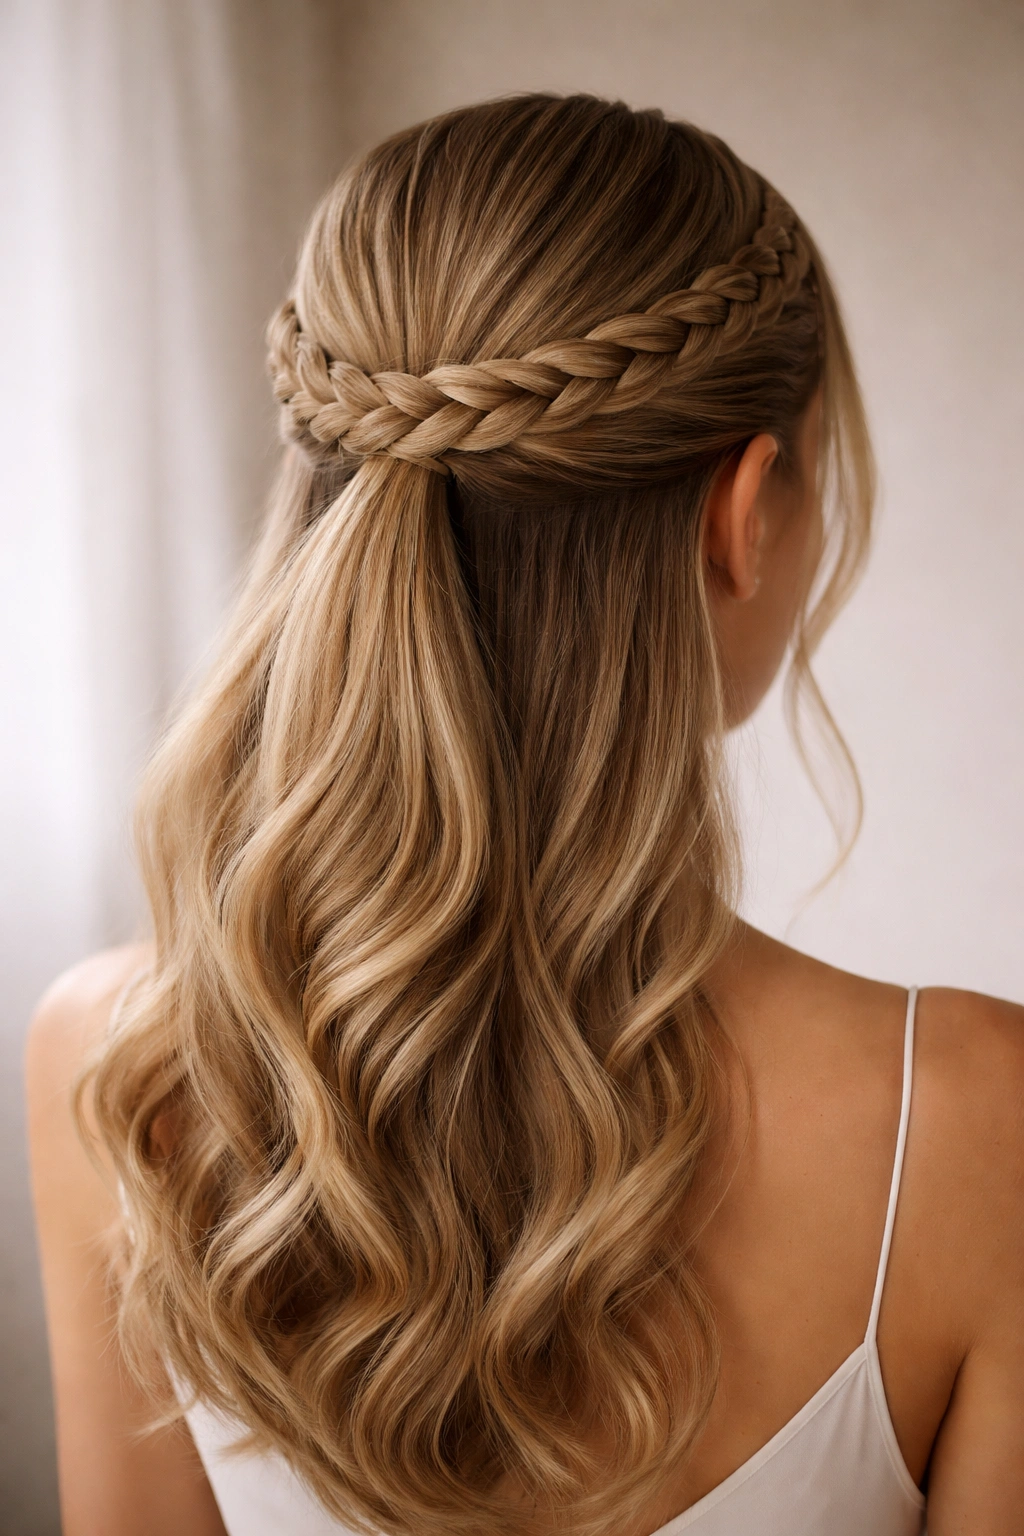
3. Braided Halo Design
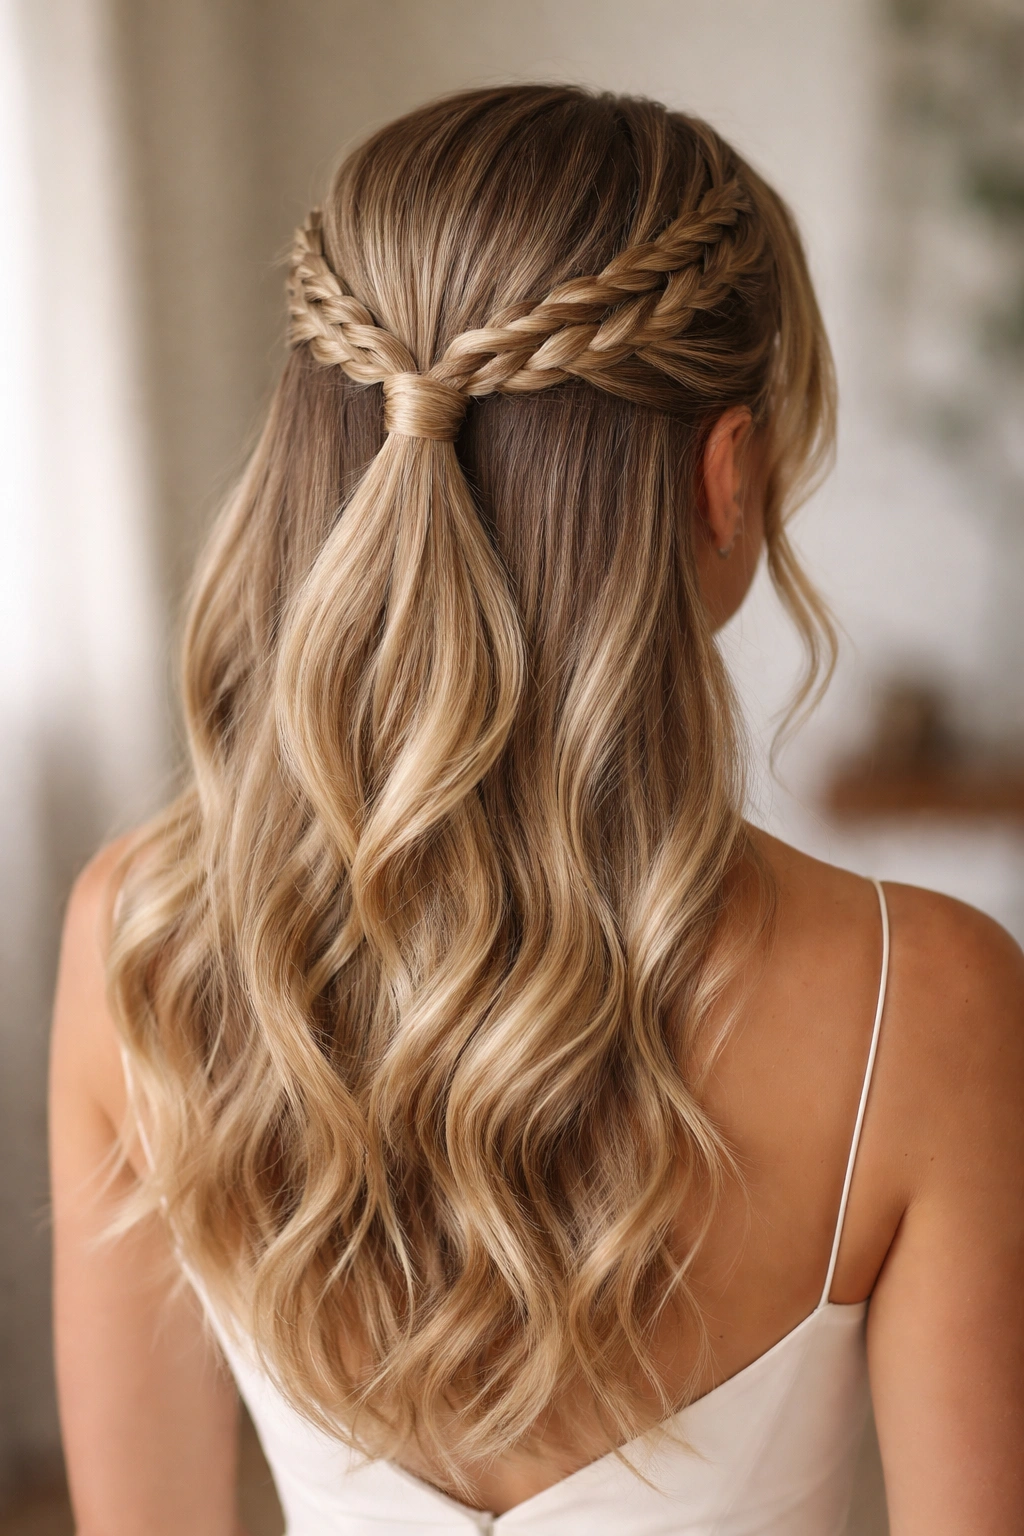
This is the style that makes people ask, “How long did that take?” even though it’s surprisingly quick. Create two Dutch or French braids that start from each temple and curve up and around the back of the head, meeting at the crown. Secure both braids into a half-up ponytail, leaving the bottom half down in waves or curls. The braids create a halo effect that’s both polished and distinctly more interesting than a regular slick-back.
Why Bridesmaids Love This Version
Braids add texture and visual interest without requiring perfectly smooth hair. If your hair has some natural wave or bend to it, the braid actually uses that to its advantage. It’s also a style that holds beautifully all day—once the braids are secure, they’re not going anywhere.
Braid Technique That Actually Works
- Begin each braid at the temple and incorporate hair as you move back and upward
- Keep the braids on the tighter side if you have fine hair; looser braids work for thicker hair
- Feed small sections from the front hairline into the braid as you move, not huge chunks
- The goal is for both braids to meet at the crown at roughly the same height
- Secure the ponytail with a elastic that matches your hair color for invisibility
Insider note: If your braids look too perfect, gently pull and tease the edges to create a softer, more romantic texture.
4. Double Dutch Braids Half-Up
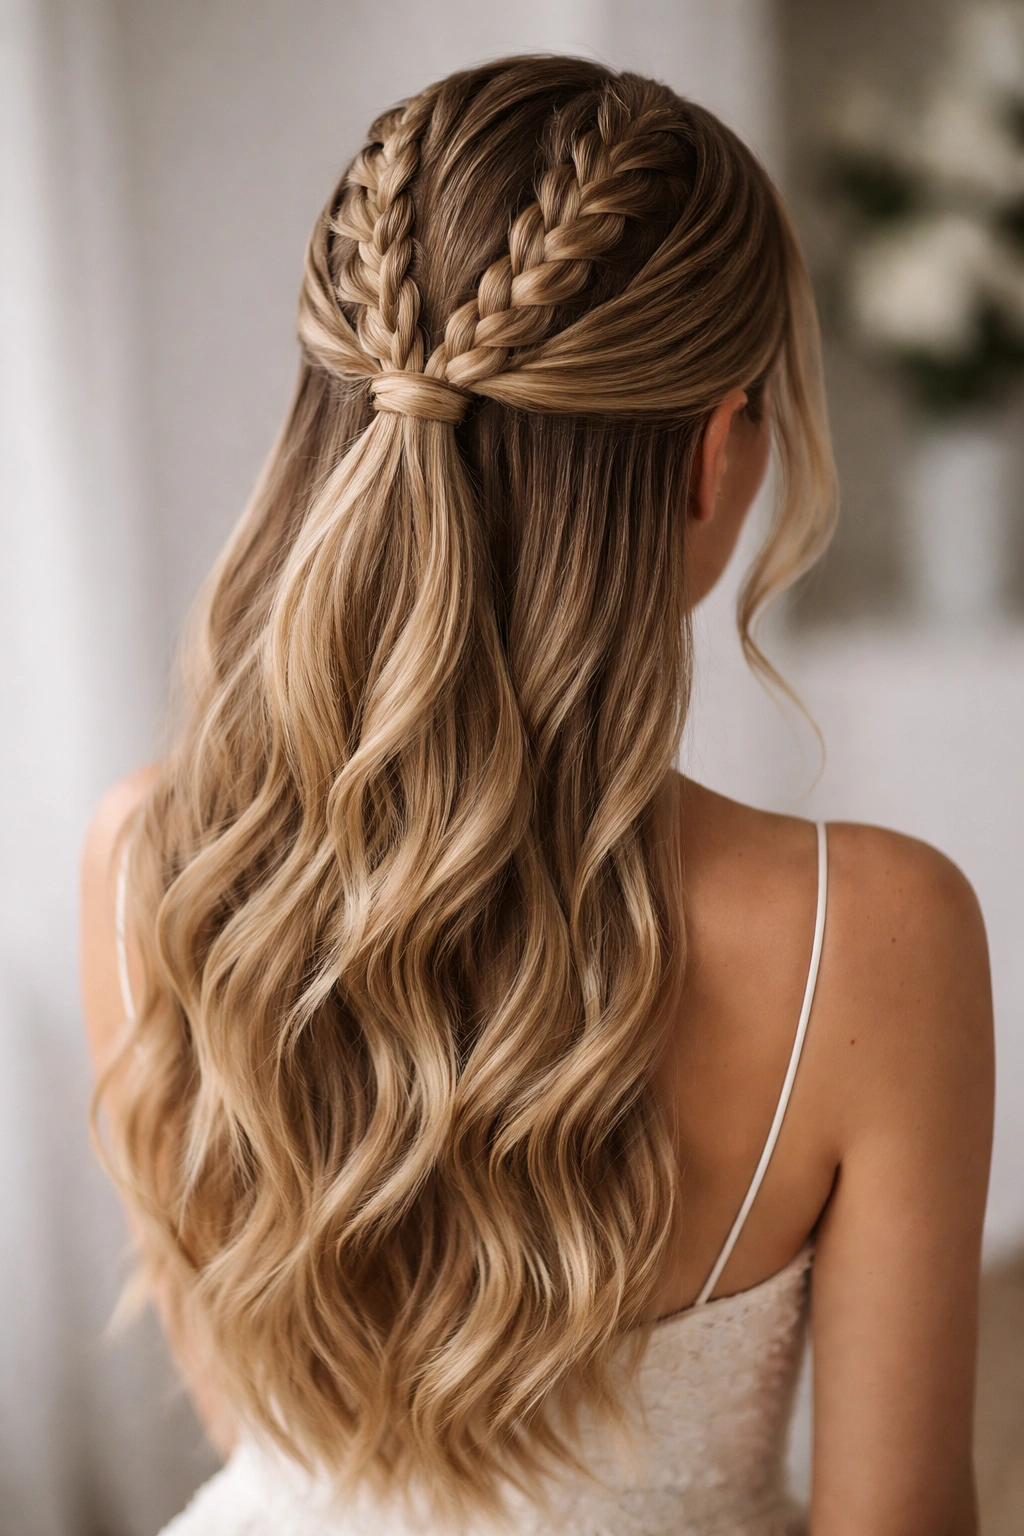
Go bolder with two parallel Dutch braids that sit closer to the center, creating a structured, almost sculptural effect. Start both braids at the crown and braid straight down so they run side-by-side along the back of the head, meeting at the nape where you gather them into a half-up ponytail with the rest of the loose hair. This creates a striking geometric element that’s very current and works beautifully for modern wedding aesthetics.
The Modern Edge
Double braids running vertically create movement and visual interest while keeping that slicked-back polish. They’re especially striking when you pair them with sleek, shiny waves underneath—the contrast between the braided texture and smooth waves is really dynamic.
Execution for Maximum Impact
- Create two even sections from your crown, dividing your hair down the middle
- Braid each section Dutch-style (braiding on top of the hair rather than underneath)
- Braid all the way down to where you want the ponytail to sit
- Secure the loose hair and the braid ends together in a single ponytail
- Smooth the sides and back with styling cream for contrast against the textured braids
Real talk: This style works best on hair that’s at least shoulder-length. If you have shorter hair, the braids won’t have enough length to create the intended visual effect.
5. Curved Slick Back with Curls
Here’s where slicked-back moves beyond structured into genuinely romantic territory. Smooth the top half completely back using gel, but instead of a centered part, create a slight curved line from one side that flows around the back of the head. Secure into a low ponytail at the back, then release the bottom half into full, bouncy curls. The slicked-back top and curly bottom create a beautiful contrast that reads as both polished and feminine.
Curve Placement Matters
The curved line (rather than a straight part or center divide) creates an asymmetrical elegance that’s more interesting than a typical slick-back. It also flatters different face shapes differently—experiment with starting the curve from the left or right side of your part to see which direction feels better for your face.
Getting the Curve Right
- Apply smoothing serum and gel to damp hair
- Use a comb to create a curved partition line from one temple back to the ear area
- Blow-dry everything back and smooth thoroughly with a paddle brush
- Gather at the crown and secure; release the lower half
- Curl the bottom section using a 1.5-inch curling iron or wand in the direction away from your face
- Spray the entire style with a flexible hold spray
Pro tip: Curl in sections and finger-comb the curls instead of leaving them super defined—this creates a softer, more integrated look.
6. Zigzag Pattern Top Section
Take the slick-back concept and introduce a geometric zigzag pattern along the top. Create a zigzag part from your center or side, then smooth each section back in alternating directions before pinning everything into your half-up ponytail. It sounds complicated but it’s actually quick, and it creates a visual texture that’s completely unique and super Instagram-worthy.
Geometric Appeal
This style is perfect for bridesmaids who want something that stands out without being chaotic. The zigzag creates clear lines and structure while maintaining that sleek aesthetic. It photographs beautifully because of the visual dimension it creates.
The Zigzag Technique
- Divide your center part into three or four sections using a zigzag pattern, not a straight line
- Apply gel section by section, smoothing each part back alternately
- Secure everything at the crown into your half-up ponytail
- The zigzag pattern will be visible from above and from the side, creating visual interest
- Keep the bottom half in soft waves rather than curls so the geometric top remains the focus
Worth knowing: This style requires slightly drier hair than a regular slick-back—if your hair is too wet, the zigzag pattern won’t hold its shape through the day.
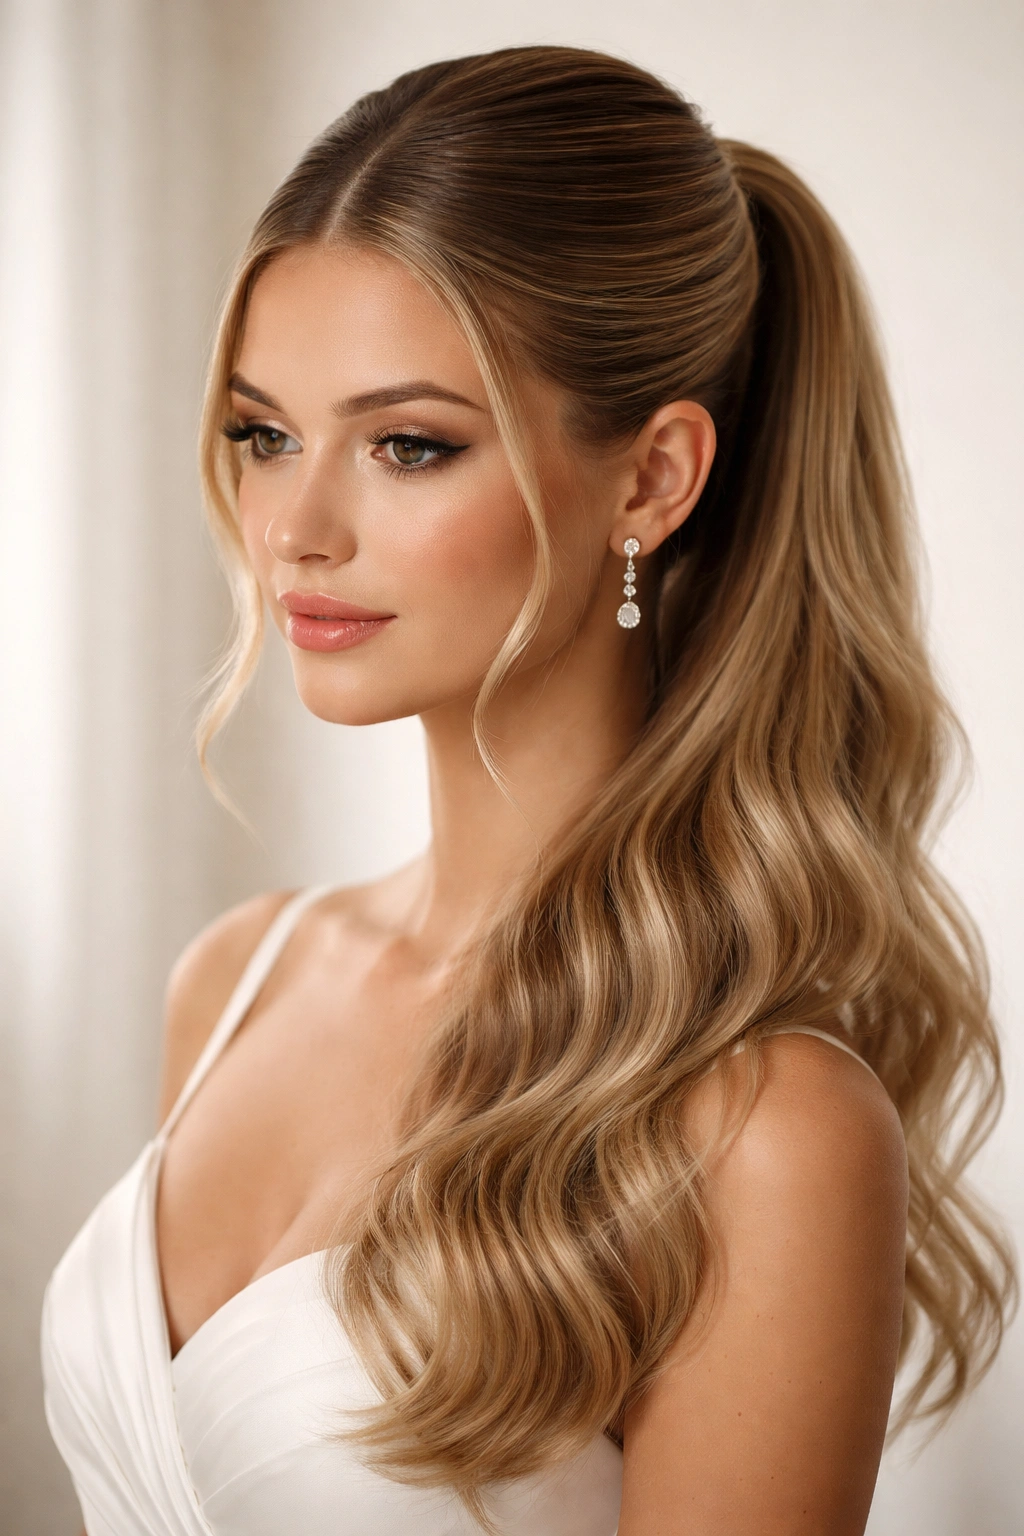
7. Smooth Gel with Face-Framing Pieces
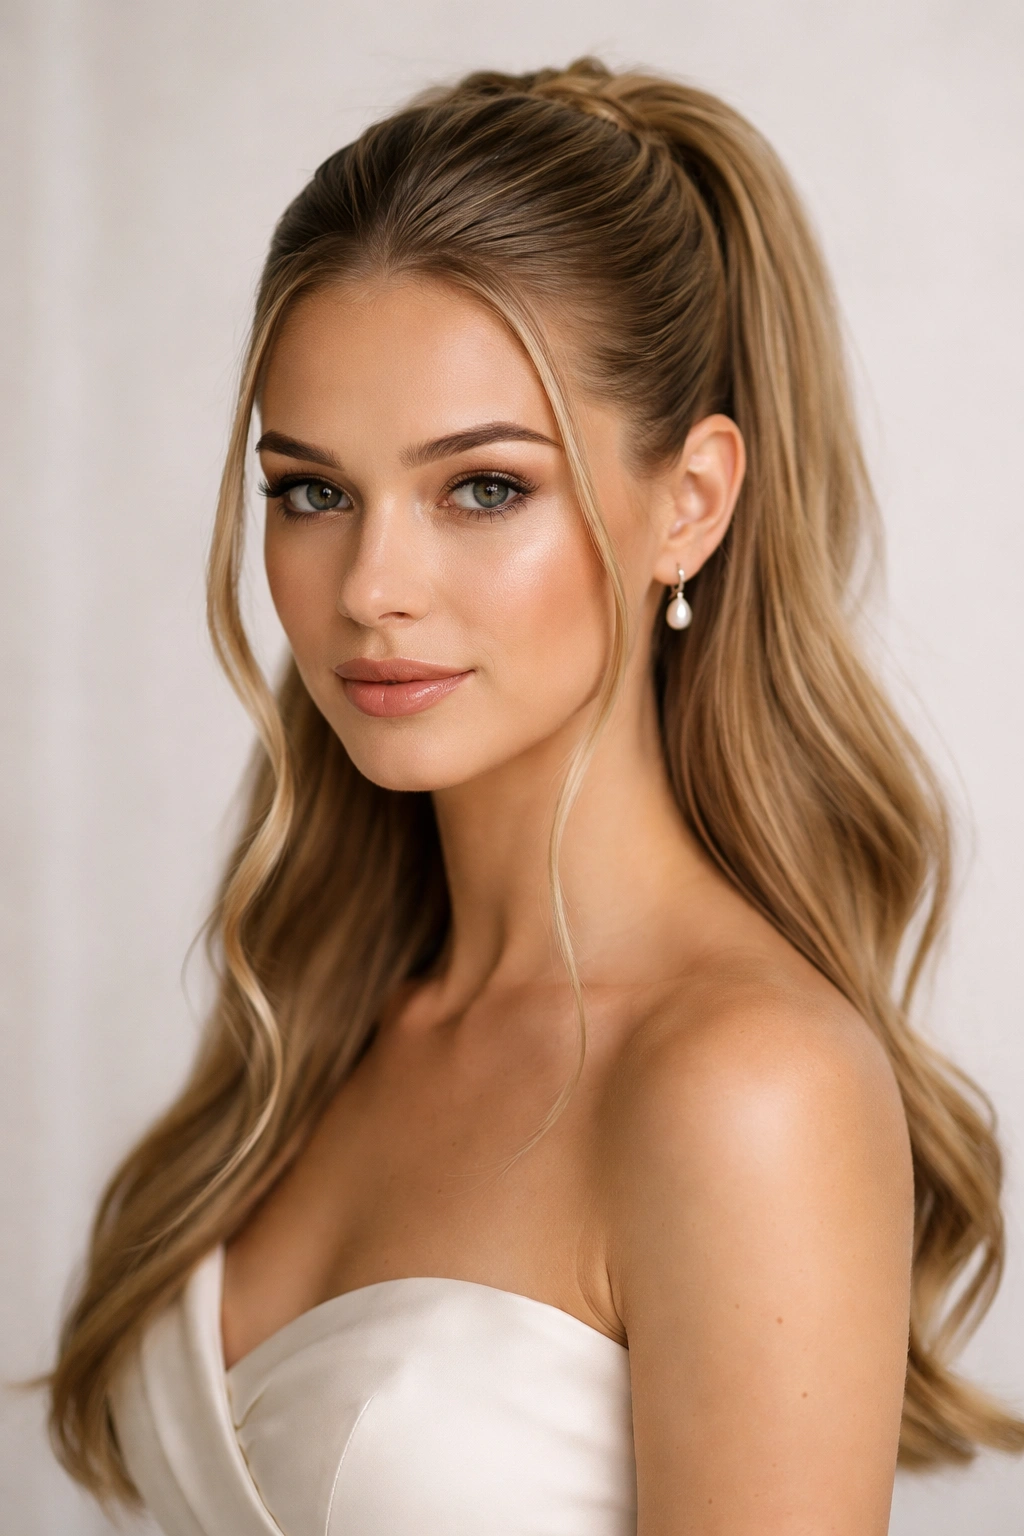
Sometimes the most elegant version is the simplest. Apply smoothing gel or mousse to create a completely polished slick-back, but intentionally leave 2-3 pieces down on each side of your face—not pulled forward awkwardly, but framing the face softly. These pieces can be completely straight and smooth for a modern look, or gently waved for romantic softness. The half-up ponytail sits at the crown, and the entire look has editorial sophistication.
Why Face-Framing Changes Everything
Those intentional pieces prevent the slicked-back look from feeling severe or harsh. They soften the overall effect while maintaining the polished aesthetic. It’s a styling detail that makes the difference between “styled” and “beautifully styled.”
Creating Intentional Face-Framing
- Apply gel all the way to the back while your hair is damp
- Blow-dry with a paddle brush, smoothing everything straight back
- Before you secure the ponytail, gently release 2-3 pieces from each side near your temples
- These pieces should fall naturally along your jawline—don’t force them forward
- You can leave them straight or create a very gentle wave using a flat iron or curling iron
Real talk: If your face is on the rounder side, longer pieces work better. If your face is more angular, shorter, more delicate pieces frame it better.
8. Twisted Side Sections
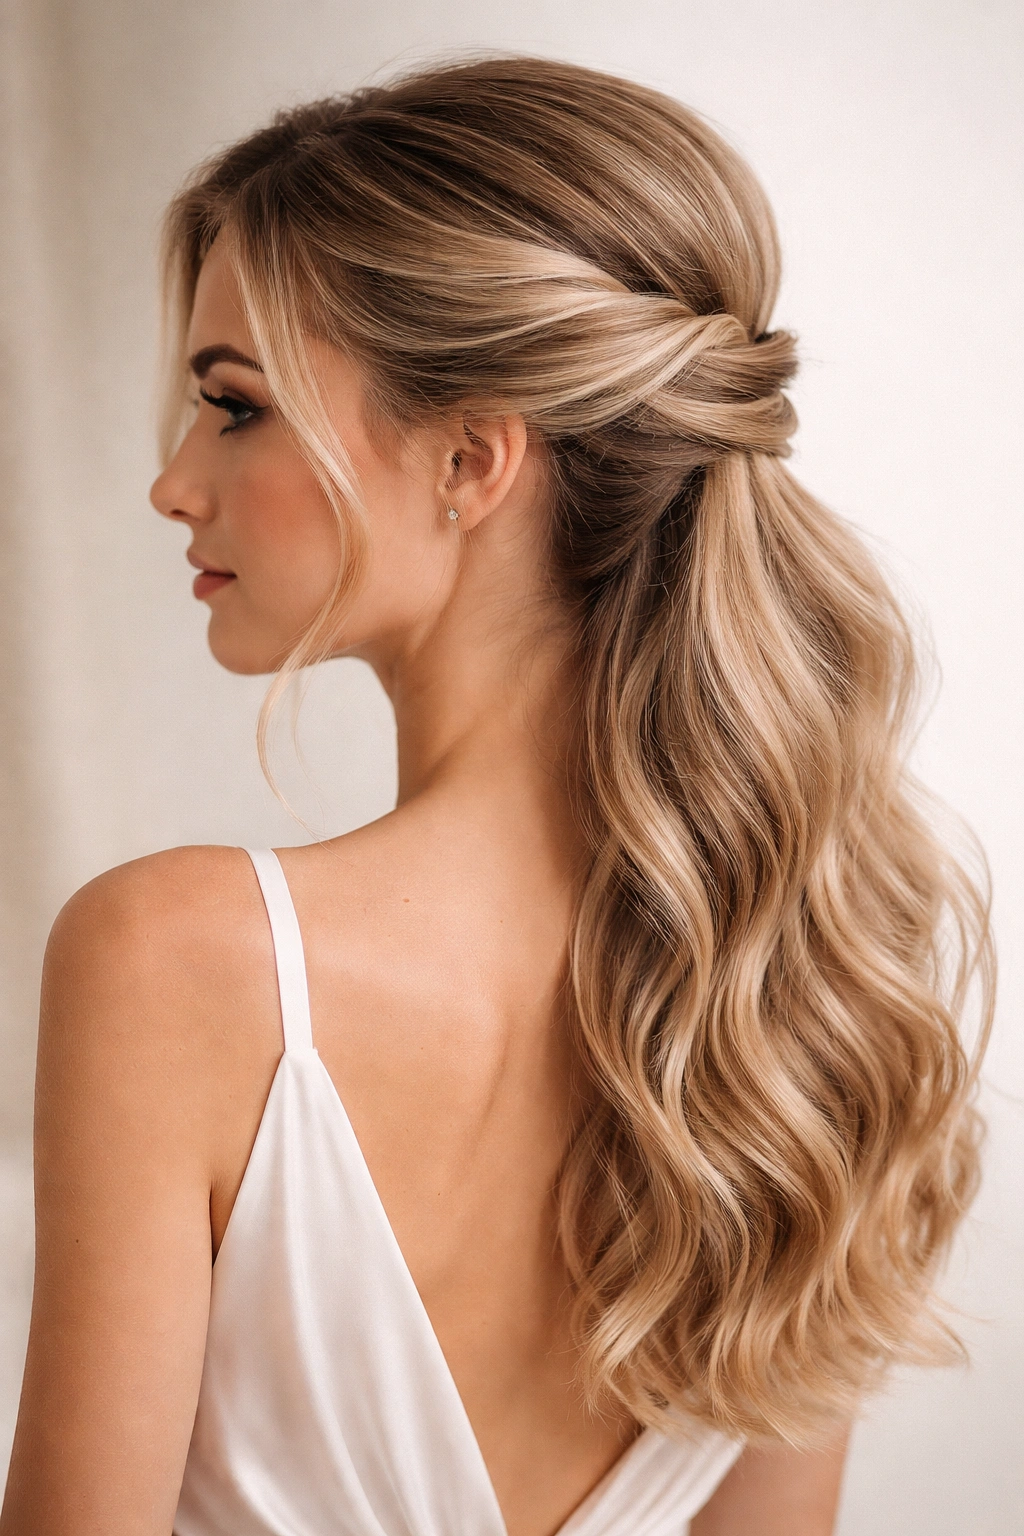
Rather than working with a center part, create a deep side part and twist the larger front section all the way back to the crown, then twist the smaller section and wrap it around the first twist like a crown before securing everything into your half-up ponytail. This creates a sculptural, almost braided-looking effect without actually needing to braid. The asymmetry is incredibly flattering and modern.
Asymmetrical Elegance
This style shines on bridesmaids with asymmetrical face shapes or anyone who feels better with their hair favoring one side. It’s also perfect if you’re working with slightly thinner hair—twists add perceived volume without requiring super thick hair.
The Double-Twist Technique
- Create a deep side part at least 2 inches from the center
- Apply gel to the larger front section and twist it tightly back toward the crown
- Twist the smaller section and wrap it around the base of the first twist
- Secure both twists (and any remaining loose hair) into a low ponytail
- Leave the bottom half in waves or curls to soften the geometry
Insider note: The direction you twist matters. Twist both sections in the same direction (both clockwise or both counterclockwise) for a cohesive look.
9. Braided Band Half-Up
Create a single substantial braid (Dutch or French) that sits like a headband across the back of the head, gathering the top layer of hair as it goes. Instead of sectioning the hair into two halves, this braid actually defines where the half-up ponytail begins. Once the braid reaches the opposite side, secure it and gather all the hair—both what the braid passed through and the bottom half—into a ponytail at the nape.
The Sculptural Statement
A braided band creates a completely different silhouette than a traditional half-up. It sits higher on the head, creates a clear architectural line, and works beautifully for upswept faces or bridesmaids who want their entire look to feel very intentional and designed.
Creating a Braided Headband
- Start the braid at one temple and begin with a small Dutch braid
- As you move back along the scalp, incorporate the upper-layer hair into the braid so it feeds through
- Continue the braid until it reaches the opposite temple
- Secure the braid end and then gather the remaining hair into your ponytail
- Leave the lower section in waves or curls
Pro tip: This style has more hold and longevity than traditional half-ups because the braid itself acts as a secure anchor for everything else.
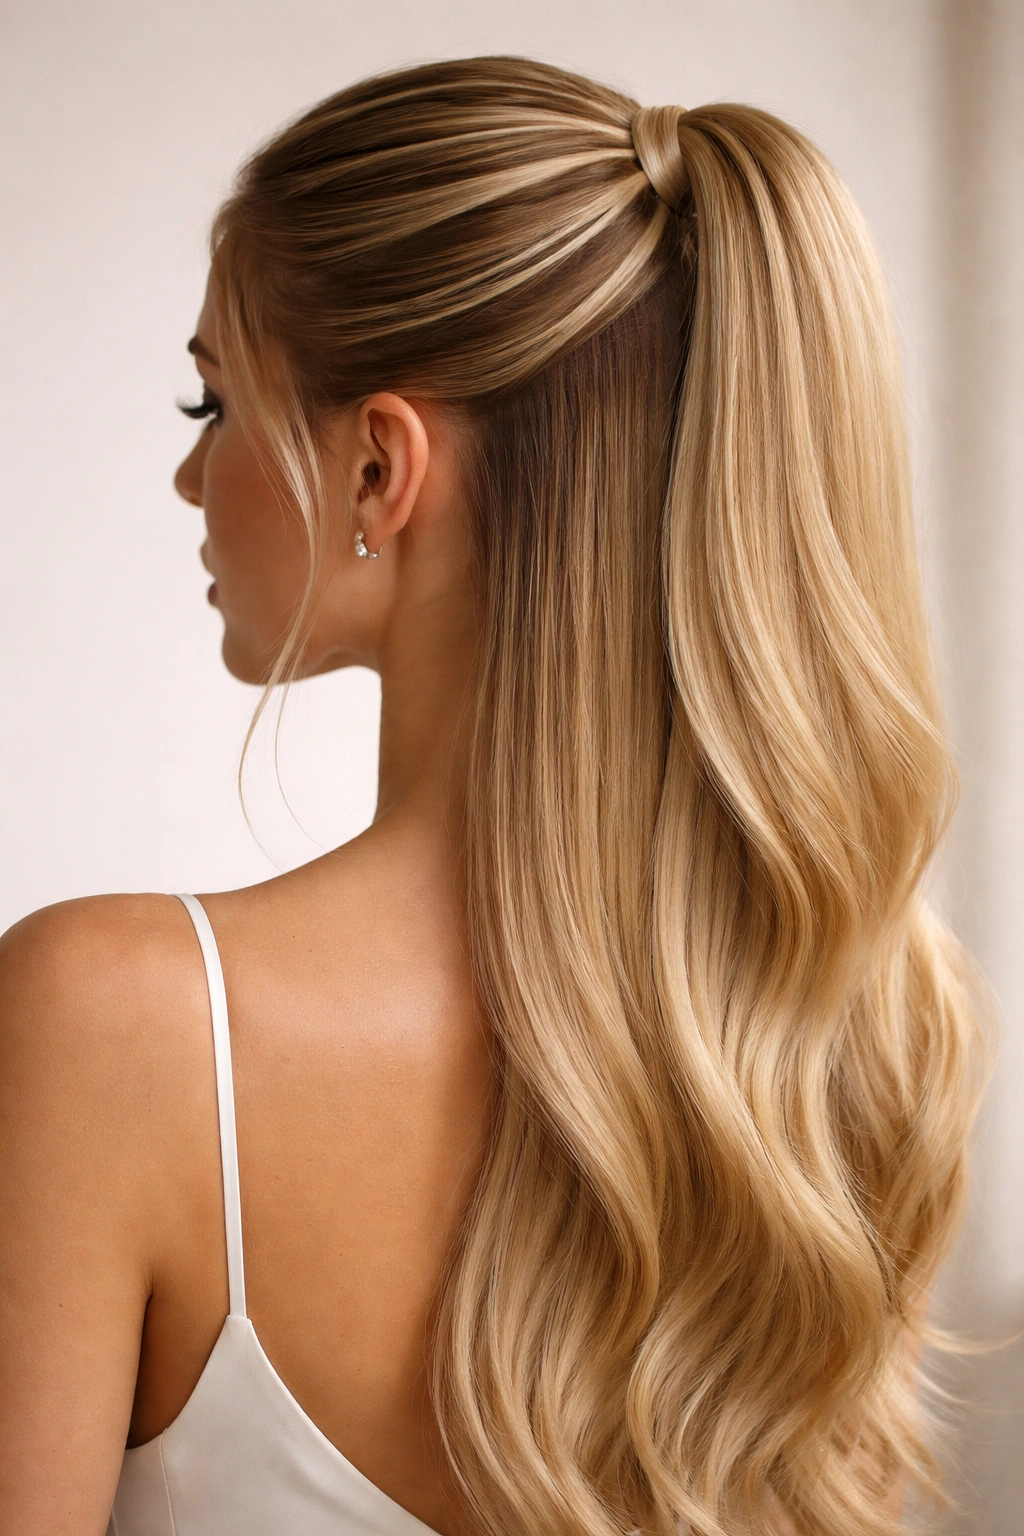
10. High Shine Sculptural Back
This is where the products and technique create the entire style. Use a heavy-duty styling cream or gel (not mousse) to create an extremely polished, almost wet-looking slick-back. Part your hair however suits your face, then smooth everything back and secure at the crown, but don’t curl or wave the bottom—instead, let it fall completely straight, creating a stark contrast between the sculptural, shiny top and the sleek, straight bottom. Add a statement clip or comb if the bride’s aesthetic allows it.
The Product Matters
The difference between “slicked back” and “high shine sculptural” is literally the product. You’re not going for a wet look per se, but rather a polished surface that catches and reflects light beautifully.
Execution for Maximum Shine
- Use a smoothing cream or gel specifically formulated for shine and control
- Apply to damp hair and blow-dry with a paddle brush until completely smooth
- Don’t over-brush once it’s dry—this creates frizz and kills the shine
- Secure the ponytail at the crown using a sleek elastic or metal comb
- Leave the bottom section completely straight—no waves, no texture
- Finish with a light hairspray that won’t dull the shine
Worth knowing: This look requires hair that’s been treated well and isn’t overly damaged. Damaged hair won’t have the natural shine you’re going for, no matter what product you use.
11. Spiky Pompadour Half-Up
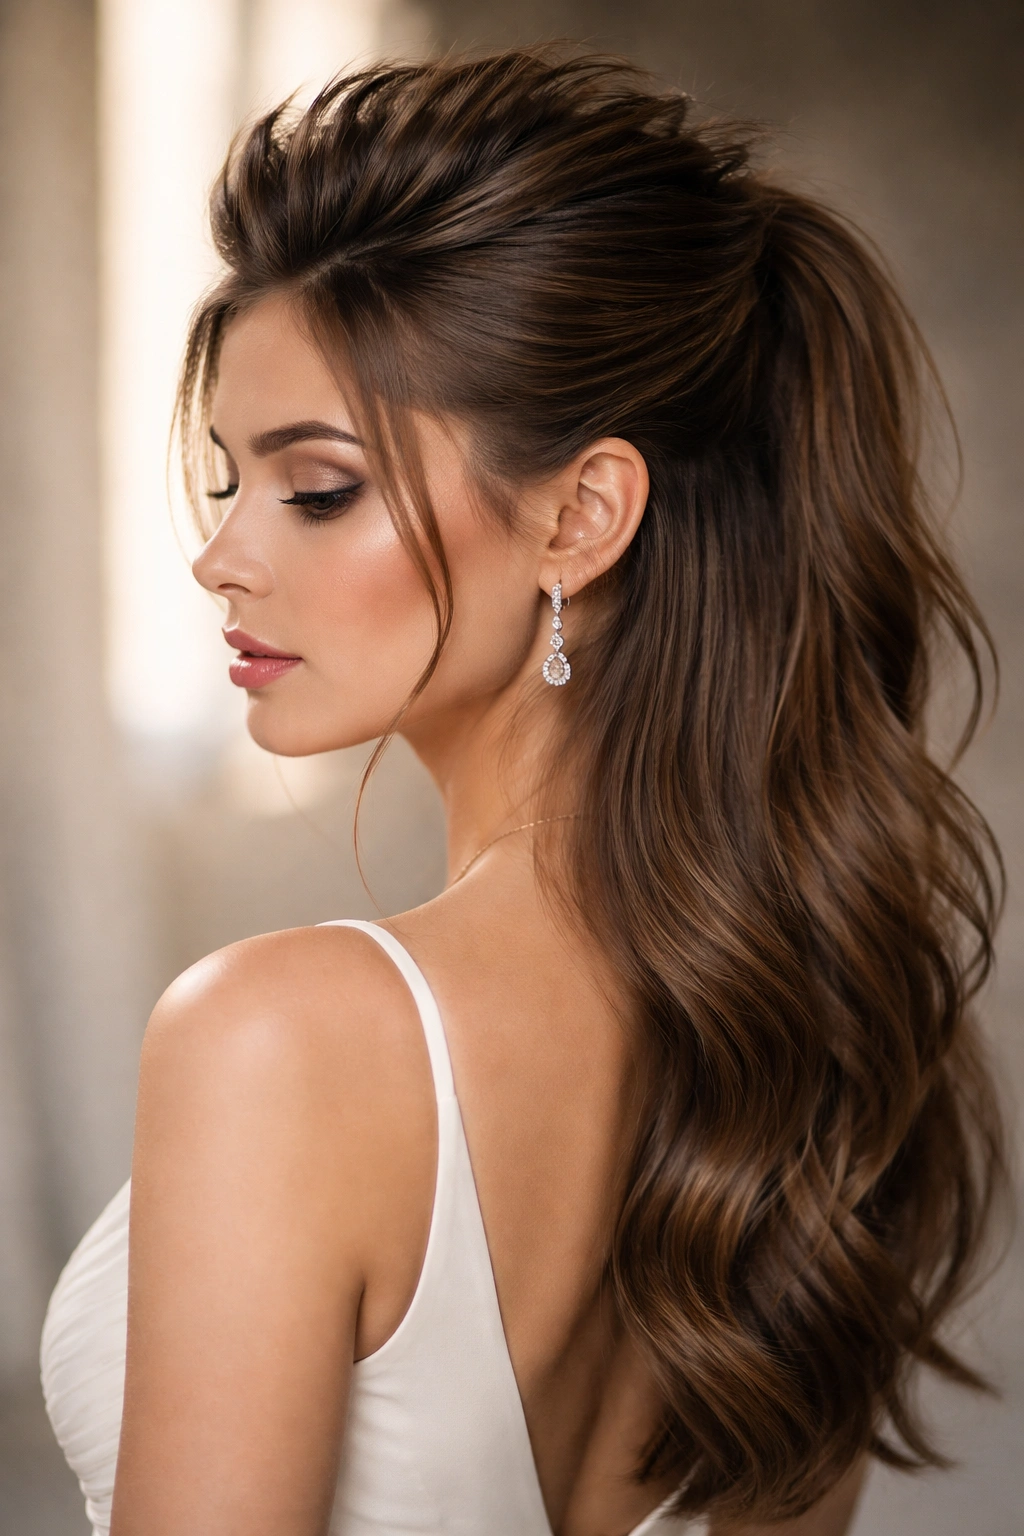
Bring some edge to bridesmaid season with a controlled pompadour element at the crown. Tease the hair above where your ponytail will sit, smooth the very top into a polished surface, and let the teased section underneath create subtle height. Secure the ponytail as usual, and pair this with either sleek straight hair underneath or textured waves for contrast.
Modern Meets Structured
This style works for bridesmaids who want something that feels fresh and current rather than traditionally romantic. It’s the kind of style that photographs incredibly well because of the dimension and texture it creates at the crown.
Building the Subtle Pompadour
- Blow-dry your hair with volume at the crown—don’t flat-iron everything first
- Gently tease the hair at the very top of where your ponytail will sit using a fine-tooth brush
- Smooth the outer surface with your brush so it looks controlled rather than messy
- Secure the ponytail, allowing the teased section to create subtle height at the crown
- Pair with straight hair or waves below, depending on the wedding vibe
Real talk: The key to this looking polished rather than chaotic is restraint. You’re creating subtle height, not a full 80s prom look.
12. Geometric Hold Half-Up
For maximum architectural impact, create clean, geometric sections using clips or tiny elastics before you secure the main ponytail. Smooth everything back with gel, but create two or three small, defined horizontal sections that sit above your main ponytail, each with its own tiny elastic. The result is a layered, sculptural effect that’s very modern and editorial—think high-fashion runway, not traditional bridesmaid.
For the Bold Bridesmaid
This style is definitely not for everyone, but for bridesmaids who love fashion and want their hair to be a statement, it’s absolutely perfect. It photographs beautifully and feels completely intentional and designed.
Creating Geometric Sections
- Apply gel and smooth all the hair straight back
- Create your first horizontal section about 2 inches above where your main ponytail will sit
- Secure this section with a tiny clear elastic
- Create another section about 1.5 inches above that
- Finally, gather everything into your main ponytail at the crown
- You now have 2-3 defined tiers of hair, each creating a distinct line
- Leave the bottom half straight or in soft waves depending on the overall aesthetic
Insider note: The smaller the elastics and the more precise you are with section placement, the more editorial the final result.
Final Thoughts
The beauty of slicked-back half-up styles is that they’re a category rather than a single look. Whether you’re going minimal and modern with a simple center-parted slick-back, adding romance with twists and waves, or making a statement with geometric patterns and volume, there’s a version that fits both the wedding aesthetic and your personal style. The key to making any of these styles work is understanding the prep—damp hair, the right product for your hair type, and time spent getting the top half genuinely smooth and polished.
Product choice matters more than most bridesmaids realize. Lightweight gels and smoothing creams are your friends; heavy pomades tend to look plastic and weigh hair down. And remember that the bottom half of the style—whether it’s straight, waved, or curled—completely changes the vibe of whatever’s happening on top. A sleek-backed top paired with bouncy curls reads romantic; the same top with straight hair reads editorial and modern.
These styles hold beautifully through a full day of celebration, which is honestly the whole point of getting your hair done for a wedding. You want something that looks as intentional at the reception as it did in the getting-ready photos. With the right styling tools, a good hairspray, and one of these twelve approaches, your bridesmaid hair is going to look polished, current, and completely stunning.