Half up half down hairstyles have become the ultimate go-to for anyone with long hair who wants that perfect balance between polished and effortlessly cool. You get the best of both worlds—your face is framed beautifully while the rest of your hair flows freely down your back, creating an elegant yet relaxed look that works for literally any occasion. Whether you’re heading to a wedding, a casual coffee date, or just a regular day at the office, there’s a half up half down style that fits your vibe and your hair type.
The magic of these styles is their sheer versatility. You can dress them up with intricate braids and delicate accessories, or keep them simple and undone for that effortless, just-rolled-out-of-bed appearance. Long hair gives you the real estate to experiment with textures, twists, and creative pinning techniques that shorter hair simply can’t pull off. From sleek and polished to romantic and flowing, half up styles work with your hair’s natural texture and can be customized in about a hundred different ways.
What really sets a great half up half down style apart is how it enhances your face shape and complements your personal style. The right style can make you feel confident, put-together, and genuinely beautiful without requiring hours at a salon or professional styling. Most of these looks are absolutely doable at home once you know the basic technique—and honestly, the more you practice, the faster and easier they become.
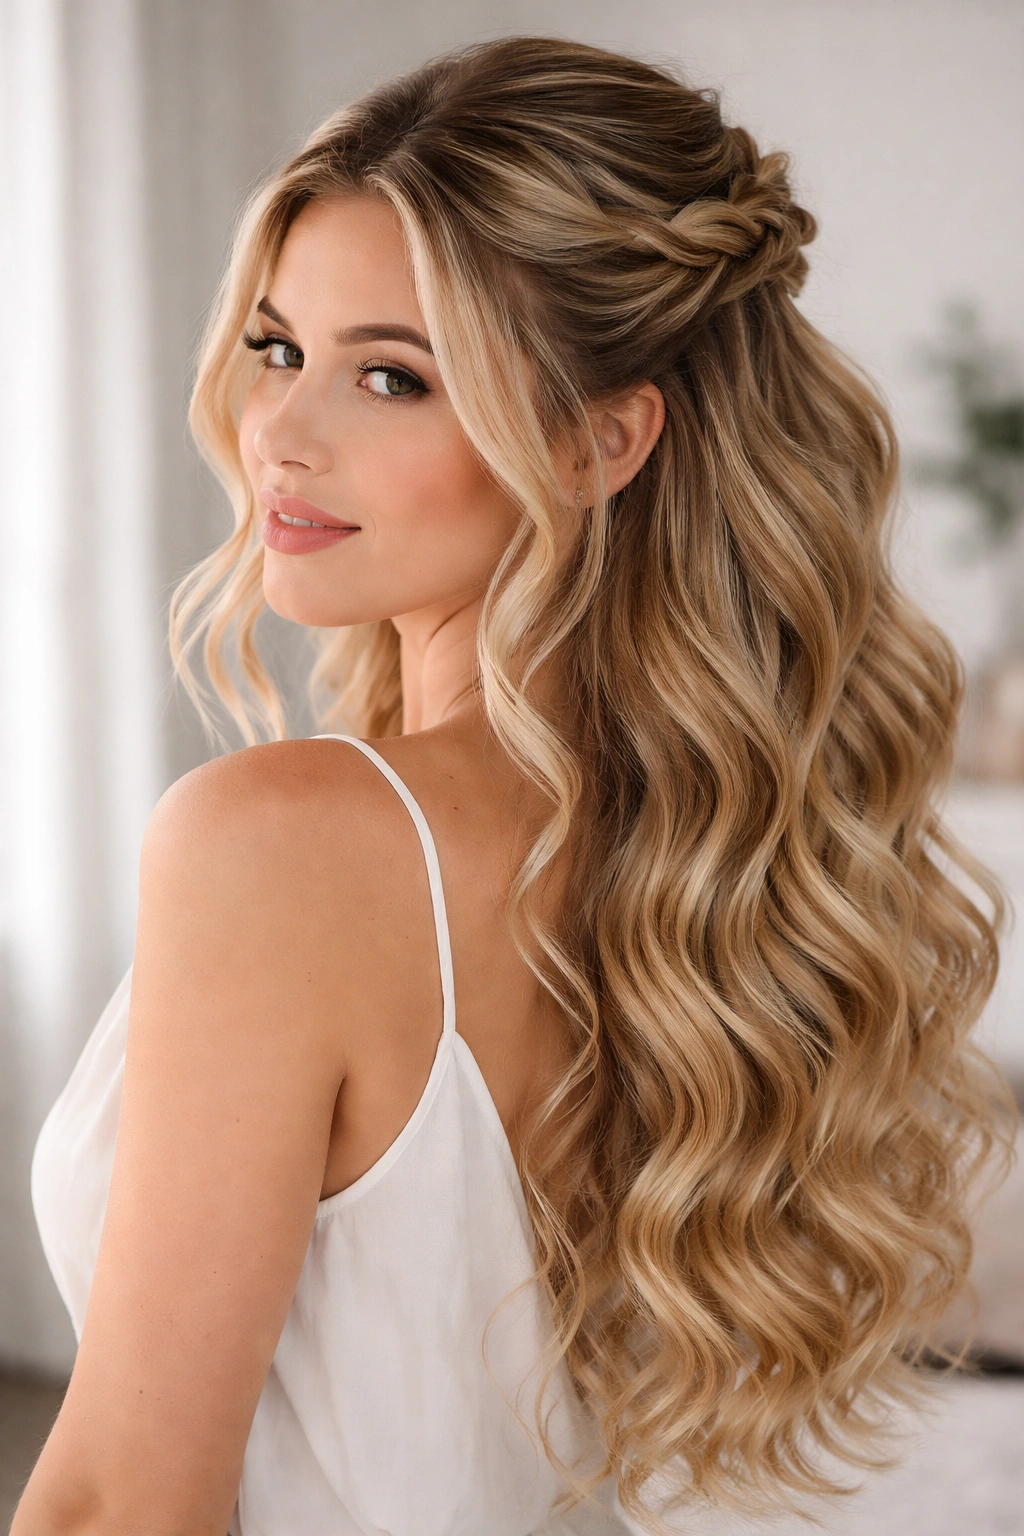
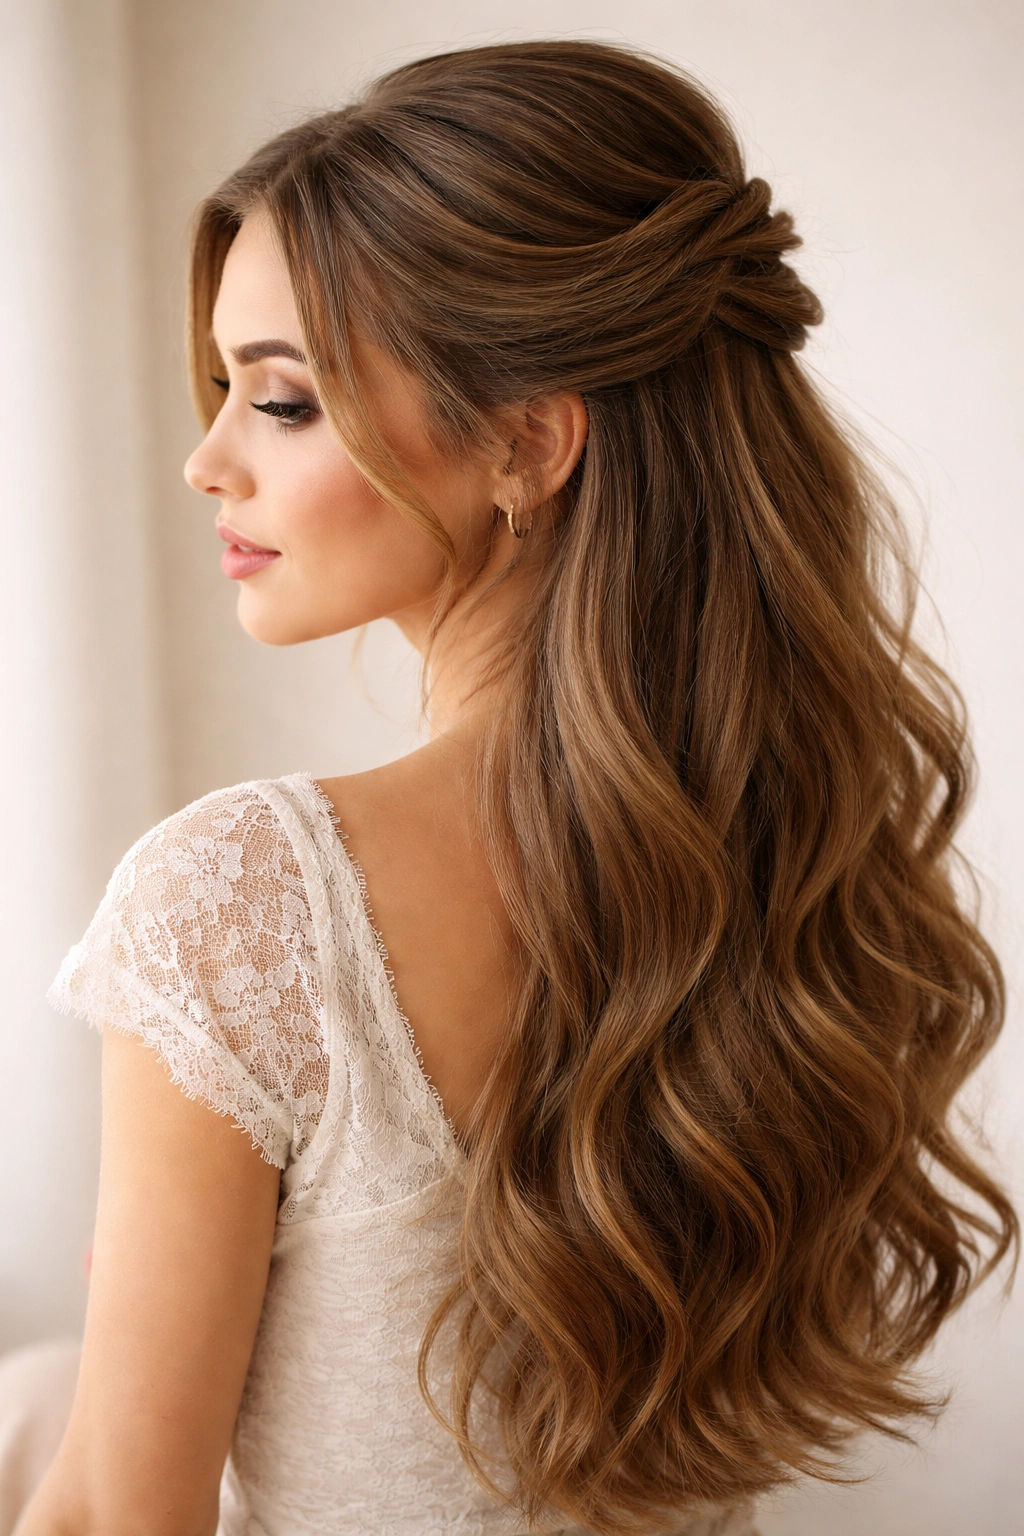
1. Classic Twisted Half Up
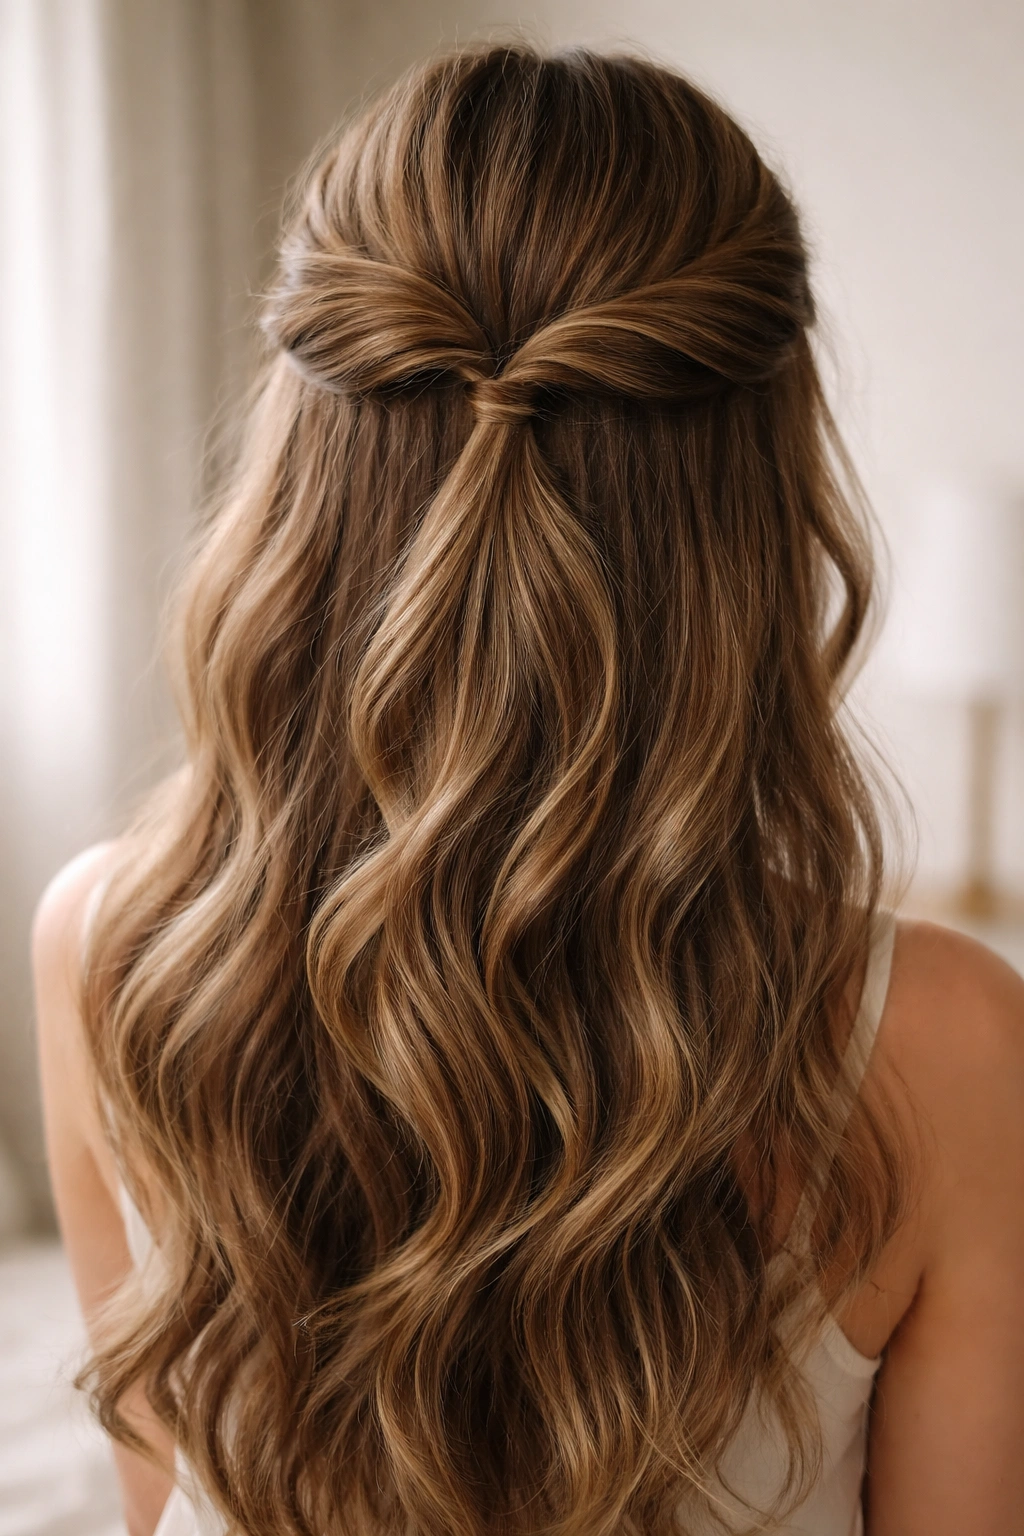
The twisted half up is where elegance meets simplicity, and it’s the foundation that most other half up styles build from. You’re taking a section from each side of your head at temple level, twisting each section loosely as you move back, and securing both twists together at the crown with a bobby pin or small elastic. The result is a soft, romantic look that frames your face while keeping hair off your shoulders.
Why It Works for Every Hair Type
This style works beautifully on straight hair, wavy hair, and curly hair because the twist itself adds dimension and visual interest regardless of your natural texture. The looseness of the twist means it’s forgiving—tighter twists look polished and intentional, while messier twists give you that “I didn’t try too hard” vibe that’s incredibly appealing. The twist also adds volume at the crown naturally, making even fine hair look fuller and more dimensional.
How to Get This Look
Section hair starting at your temples—aim for sections about 2-3 inches wide. Twist each section loosely away from your face as you move backward, holding the twist gently so it stays loose and romantic rather than tight. Once both sections reach the back of your head, secure them together with a bobby pin hidden inside the twist, or use a small clear elastic if you prefer. Leave the rest of your hair down and let it cascade. For extra softness, gently pull at the twist to loosen it slightly after securing—this gives you that effortlessly beautiful texture.
Pro tip: Use a texturizing spray on damp hair before styling to give your twists something to grip. This prevents them from slipping and keeps the style intact for hours.
2. Braided Crown Half Up
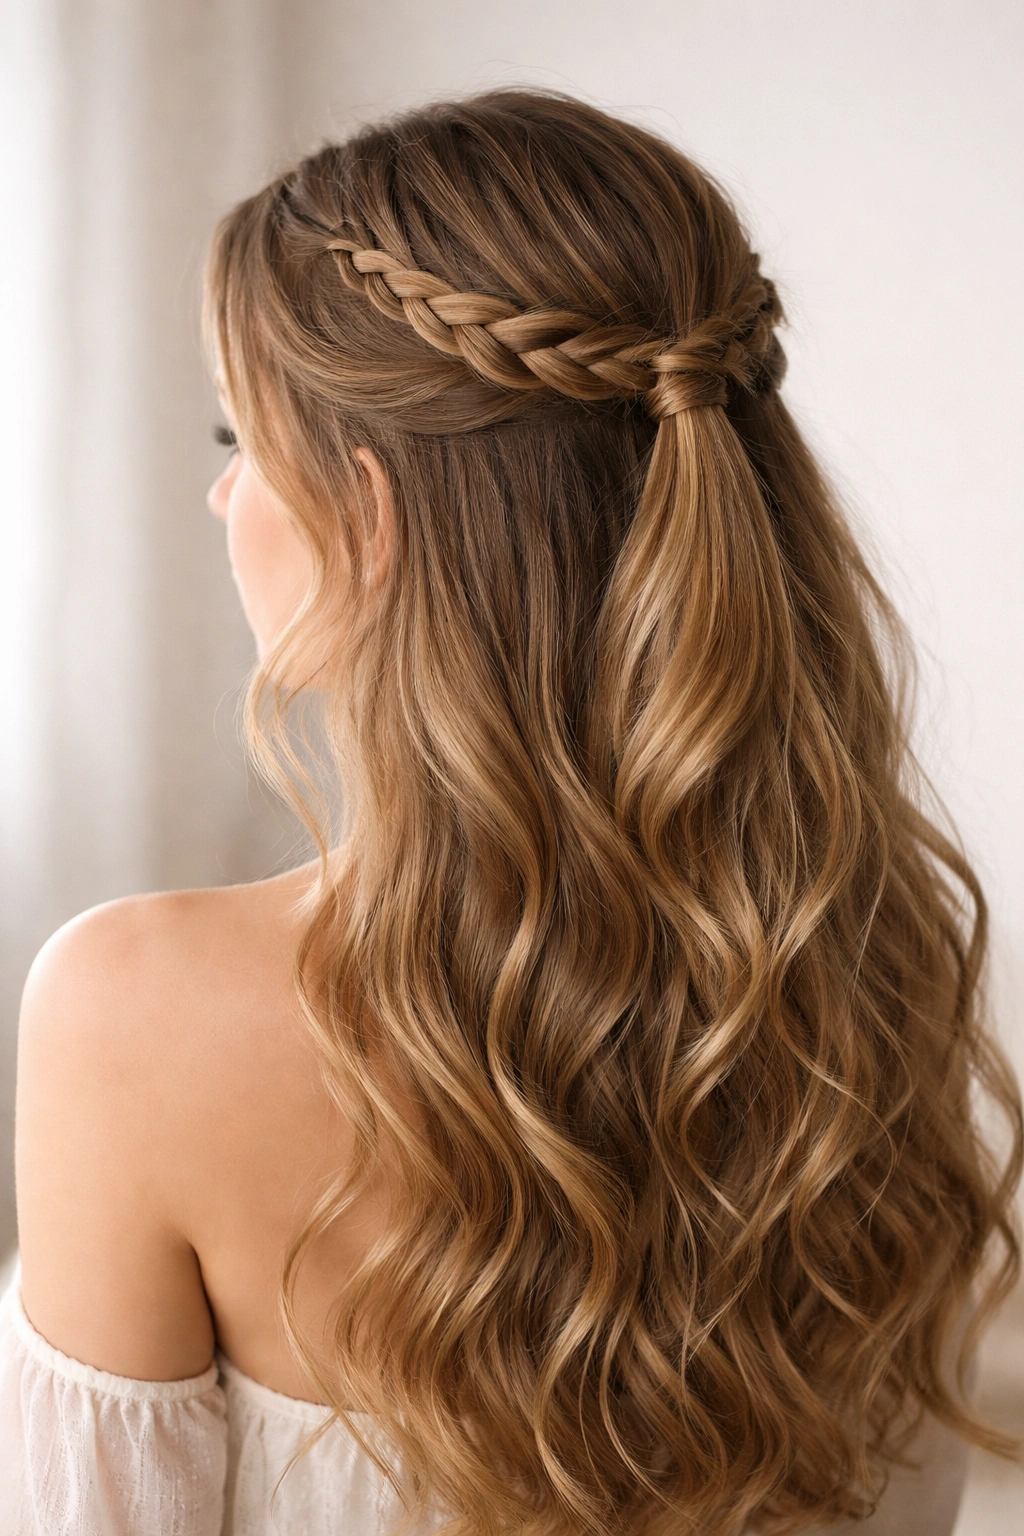
This style takes the half up concept and elevates it with a delicate braid that wraps around your head like a crown before gathering into a ponytail at the back. It’s romantic, it’s Pinterest-worthy, and it looks far more complicated than it actually is. The braid starts at one temple, travels along the top of your head in a gentle arc, and connects with the hair gathered from the other side at the crown.
The Romantic Factor
The crown braid reads as deliberately styled and elegant—this is the style you wear when you want to feel genuinely beautiful and put-together. It works especially well for date nights, weddings, formal events, and any occasion where you want to look intentionally polished. The braid frames your face softly and draws eyes upward, which is flattering for most face shapes. Long hair gives you enough length to create a substantial braid that actually looks like something special.
Execution and Styling Tips
Start by taking a section at one temple and begin a standard three-strand braid, pulling it gently back and slightly upward as you move across the back of your head. You’re aiming for a soft arc that follows your natural hairline. Pick up additional small sections of hair as you braid to incorporate more hair and create a fuller look. Once you reach the opposite temple, gather all of your loose hair along with the braid and secure everything together with an elastic band. The ponytail can stay loose, or you can braid it further if you want an even more dramatic look.
3. Messy Textured Half Up

This is the style that looks like you didn’t try, but in the best possible way. You’re creating a half up style, but instead of neat and polished, you’re embracing texture, slight undone-ness, and that effortlessly beautiful quality that actually takes way more skill than it looks. The key is working with your hair’s natural wave or texture and enhancing it rather than fighting against it.
Creating Intentional Imperfection
Start with textured hair—use a sea salt spray, waves from a curling iron, or natural texture if that’s what you’re working with. Take a section from each side and create loose twists or braids that deliberately look a bit loose and imperfect. Pull pieces out strategically, especially around your face and the crown, so you have flyaways and strands that catch the light. The twist or braid itself should look relaxed, like you grabbed a section of hair and casually twisted it back without overthinking it.
Best Practices for This Look
Don’t use too much product—a light texturizing spray works better than heavy gels or creams that make hair look stiff. The goal is soft, tousled, and deliberately loose. Don’t be afraid to pull at sections and make the style look less finished. Use bobby pins that match your hair color so they disappear, and hide them completely inside the twists and textures. This style actually improves as the day goes on—it loosens up slightly and becomes even more effortlessly beautiful by evening.
Worth knowing: This style is perfect if you have a day where your hair isn’t cooperating. Instead of fighting against flyaways and texture, you’re leaning into them intentionally.
4. Double Dutch Braid Half Up
Two braids are better than one, and this style proves it. You’re creating two Dutch braids (braids that sit on top of the hair rather than underneath, like French braids work in reverse) that start near your temples and travel backward toward the crown, where they meet and combine into a single ponytail or bun. It’s eye-catching, youthful, and works beautifully on long hair.
Why Double Braids Stand Out
Two braids create visual balance and add serious dimension to your look. They frame your face with definition while keeping hair off your shoulders. Dutch braids have that dimensional quality that regular braids can’t quite achieve—they appear thicker and more substantial because they’re pulling hair upward rather than weaving it under. This style screams intentional styling in the best way, and it’s the kind of look that makes people ask “How did you do that?”
The Technical Breakdown
Start with a section near one temple, about the width of your index and middle fingers combined. Create a Dutch braid by crossing strands over the center rather than under—this creates that raised, dimensional appearance. As you braid backward, add small sections of hair along the way, gathering more hair into the braid. Do the same on the opposite side, mirroring the braid. Once both braids reach the back of your head, secure them together with a ponytail elastic, or you can gather them into a cute half-up bun if you prefer. Gently pull at the braids to loosen them slightly for a softer, fuller appearance.
5. Sleek Low Ponytail Half Up
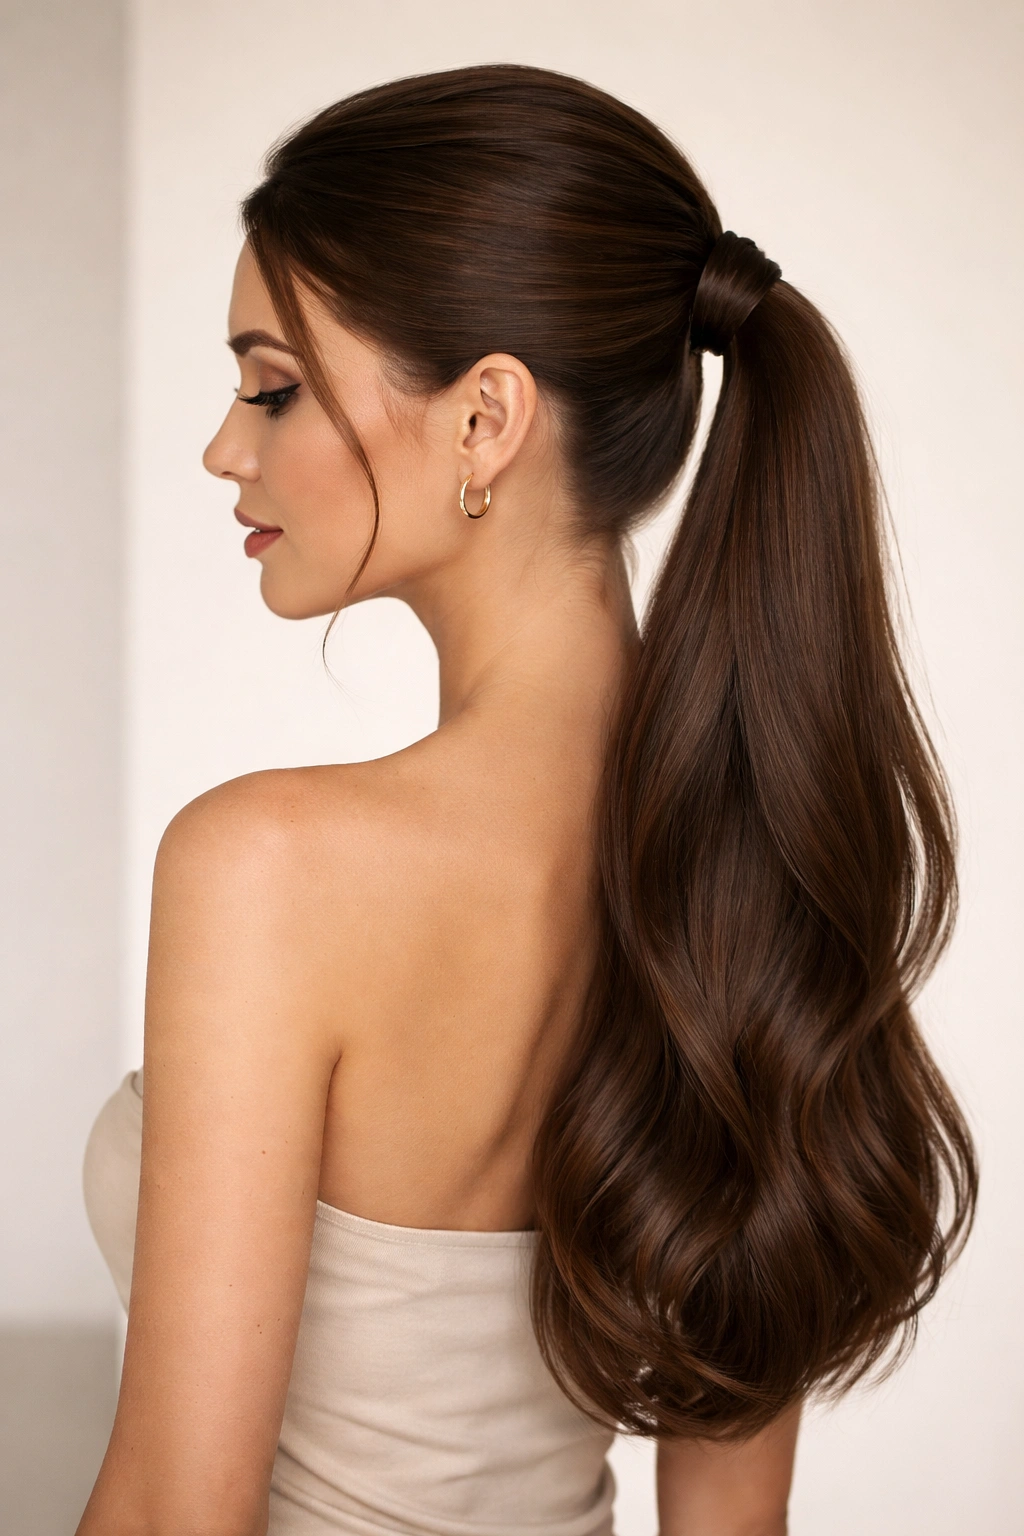
Sometimes the best styling is the simplest styling. This style takes all the hair from the upper half of your head and gathers it into a sleek, polished ponytail positioned lower at the nape of your neck. It’s minimalist, it’s modern, and it looks effortlessly cool in a way that’s hard to achieve with more elaborate styles. The lower placement gives it a completely different energy than a high ponytail.
The Modern Appeal
This look is all about clean lines and intentional simplicity. It works for professional settings, casual days, and everywhere in between. The lower placement of the ponytail makes it feel mature and sophisticated rather than playful or girlish. Sleekness is achieved through the way you smooth the hair and position the elastic—you’re creating an almost architectural quality that reads as very put-together and controlled.
Creating Perfect Sleekness
Start by brushing the upper half of your hair thoroughly and using a smoothing serum or light styling cream to eliminate frizz and flyaways. You want the finish to be smooth and polished, almost like the hair is wet-look sleek even though it isn’t. Use a fine-tooth comb to brush the section backward and gather it into a ponytail positioned at the nape of your neck—lower than you’d think, almost where the bottom of your skull meets your neck. Use a clear elastic and hide it with a small section of hair from the ponytail itself, wrapping it around the elastic and securing with a bobby pin. Finish with a light hairspray to keep everything in place and ensure the sleekness lasts all day.
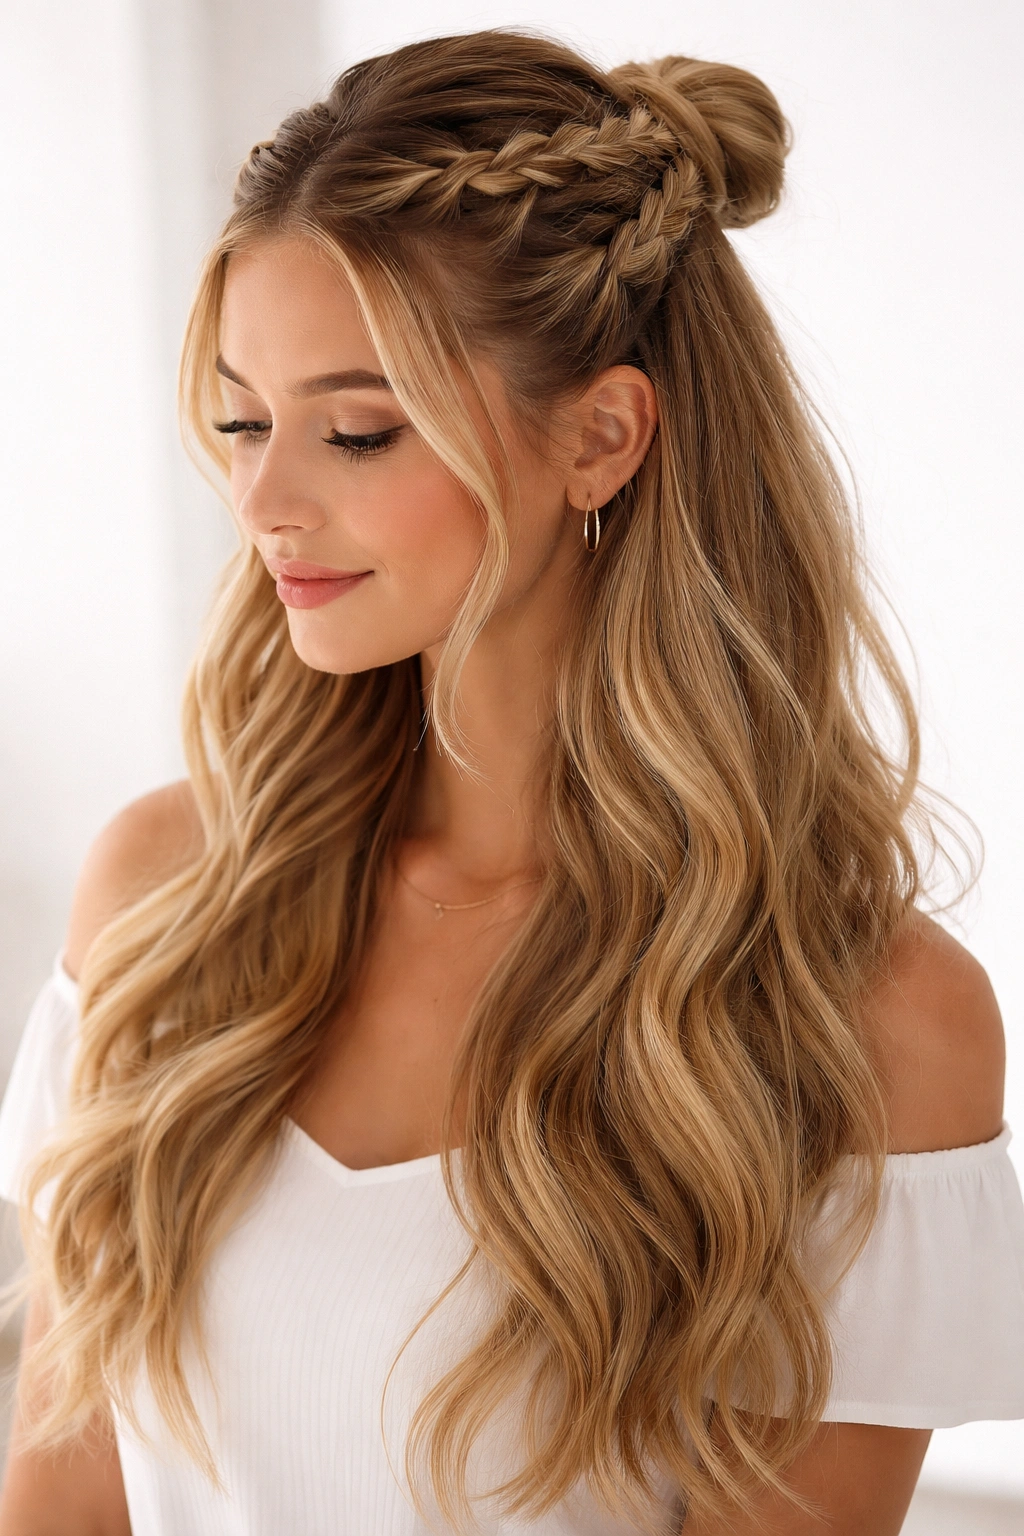
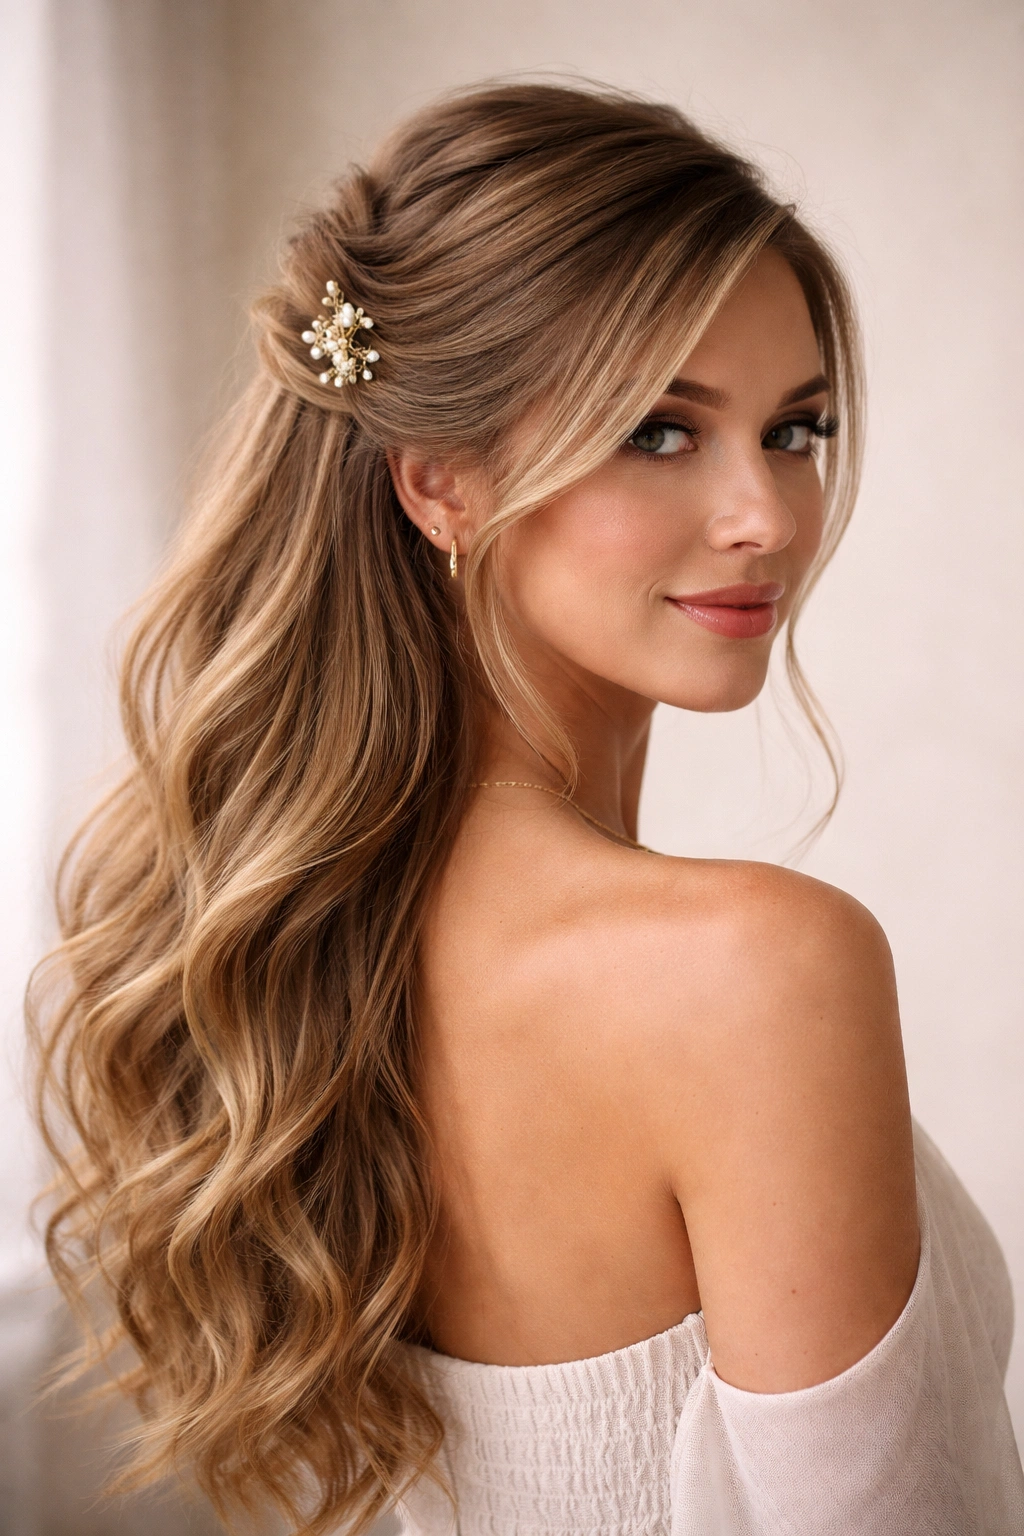
6. Half Up Bun with Face-Framing Pieces
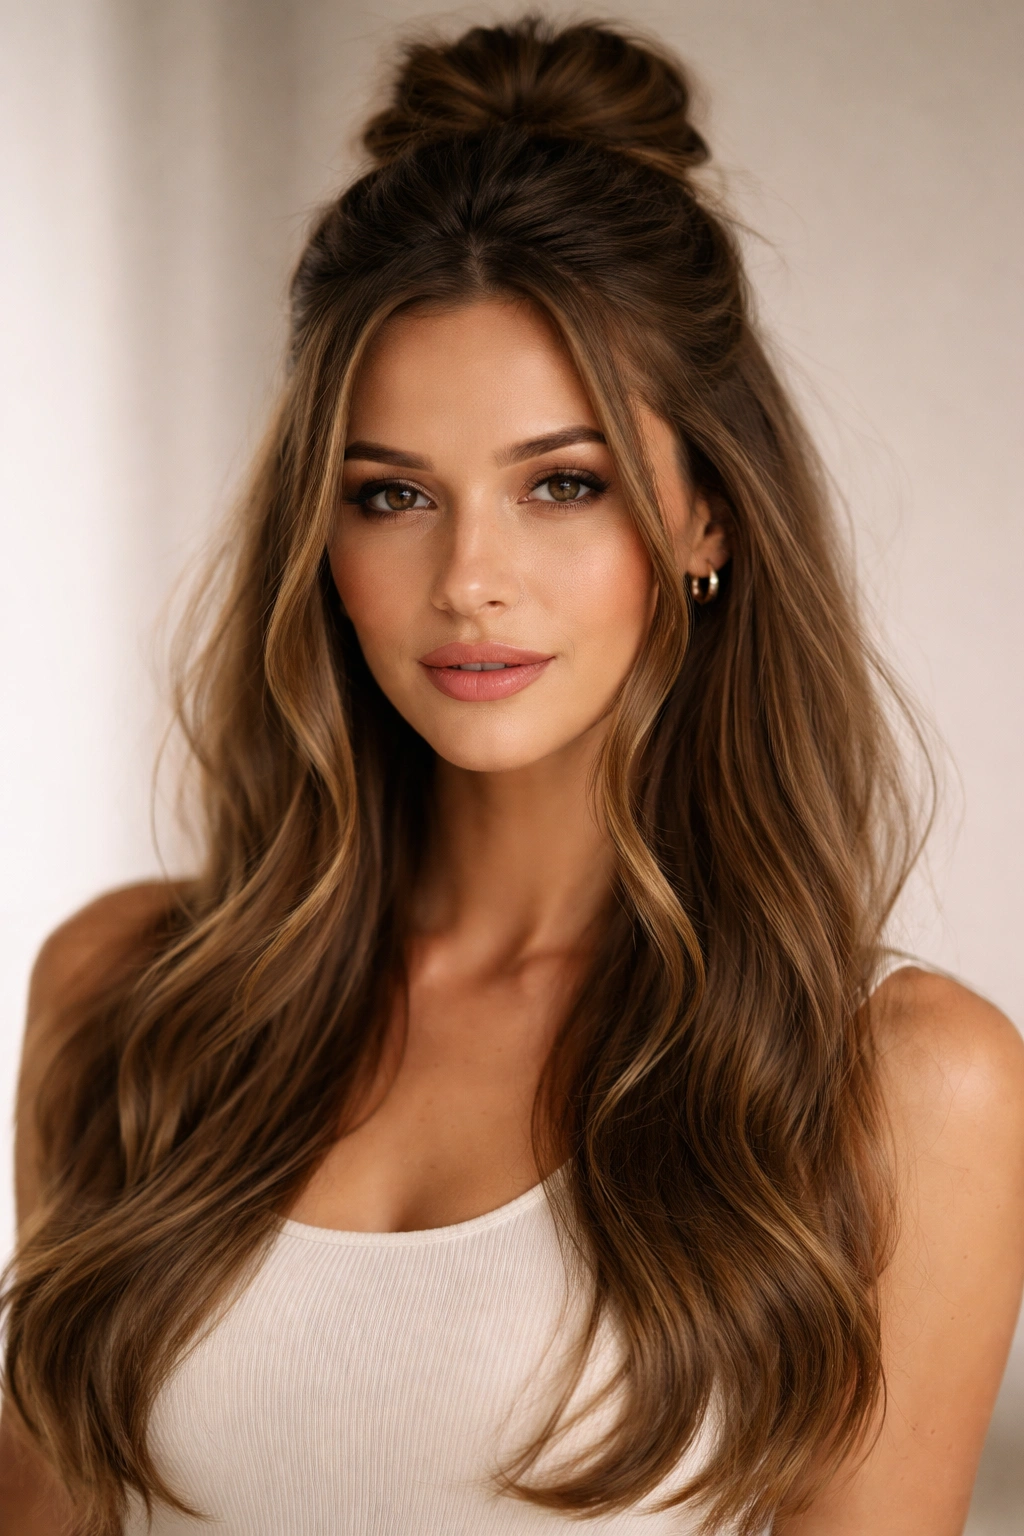
This style gathers the top half of your hair into a bun positioned at the crown while leaving long pieces in the front to frame your face. The face-framing pieces are the key detail that makes this style feel intentional and flattering. It’s elegant enough for formal occasions but can also work for casual settings when styled appropriately—everything depends on whether you aim for polish or texture.
The Face-Framing Magic
Those front pieces are doing serious work for your face shape and overall aesthetic. They soften the look of a bun (which can sometimes read as too severe or pulled-back), and they add movement and dimension. The pieces catch light differently than the rest of your hair and draw attention to your facial features in the most flattering way. This is a smart styling choice if you have a longer face shape, as the horizontal framing pieces create visual balance.
Building the Perfect Half Bun
Take a clean section from just above your ears and sweep it backward toward the crown. Gather this section into a small ponytail at the crown using a clear or matching elastic. From this ponytail, create a bun by twisting the ponytail and wrapping it around the base of the elastic, securing with bobby pins. For the face-framing pieces, leave a section about 2-3 inches wide on each side of your face untouched. These pieces should fall naturally down the front, framing your cheekbones and jaw. For polish, straighten or curl these pieces depending on the overall style. For a softer look, leave them to fall naturally or add loose texture to them.
Pro tip: Curl the face-framing pieces away from your face for a flattering, softening effect that enhances your features.
7. Waterfall Braid Half Up
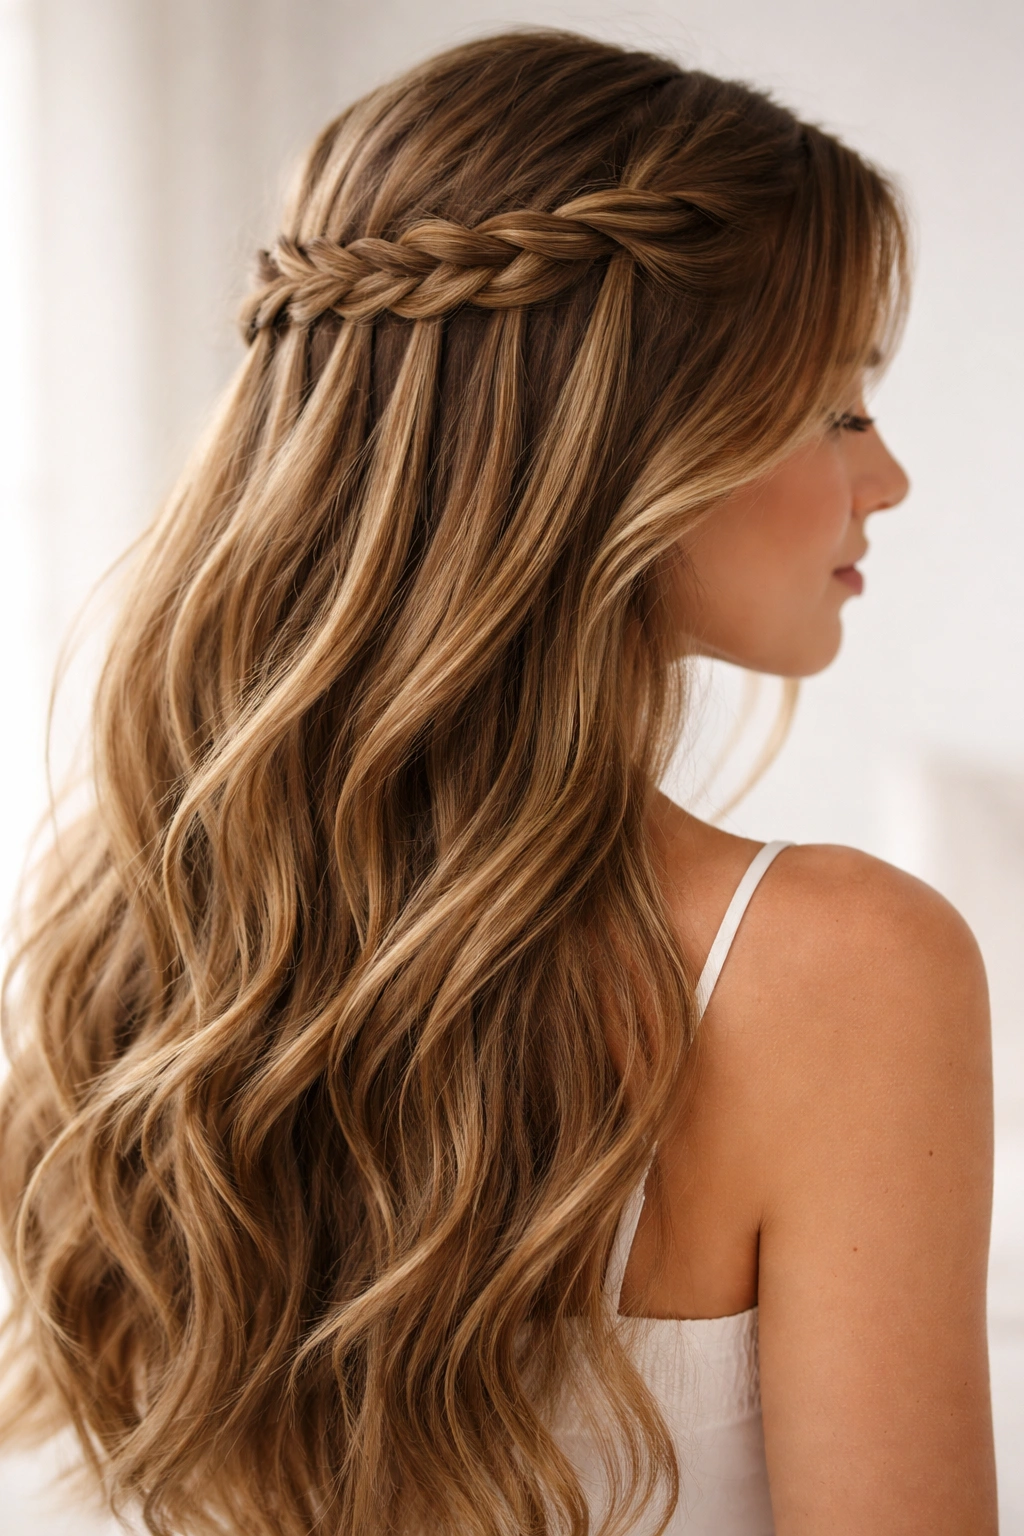
The waterfall braid is a style that looks incredibly intricate but follows a logical, repeatable pattern. A braid travels horizontally across the back of your head (or along the top from one side to the other), but instead of incorporating all the hair like a regular braid, you let sections of hair fall free as you go—creating a waterfall effect. These falling pieces blend with the bottom half of your hair, creating layers and movement.
The Visual Complexity
This style creates the illusion of much more complexity than it actually requires. From the front, it reads as an intricate, styled look. From the back or side, you can see how the sections cascade down. It’s the kind of style that makes people genuinely impressed because it looks like it took serious skill—even though once you understand the pattern, it becomes quite manageable.
How the Waterfall Works
Start with a small three-strand braid at one temple. As you braid, follow this pattern: cross the back strand over the center, drop it so it falls freely down the side of your head, then pick up a new strand of hair from below where you’re braiding to replace the one you dropped. Repeat this sequence as you move the braid backward across your head. The result is a braid that travels horizontally while creating strands of hair that fall freely. Once you’ve traveled as far back as you want (usually to the opposite temple or the back of your head), you can secure the remaining braid hair with a bobby pin, or gather everything together into a half-up style and secure it with an elastic.
8. Twisted Half Up with Accessories
This is the styled-up version of the basic twisted half up—you’re using the same twisting technique but elevating it with strategic accessories that add personality and intentional styling. A delicate hair clip, a pearl barrette, a decorative comb, or even fresh flowers can completely transform the vibe of a simple twisted half up.
Choosing the Right Accessory
The accessory should feel like a deliberate style choice, not like it’s sitting on top of your hair as an afterthought. Metal clips work for modern or edgy looks, pearls or crystals feel elegant and formal, tortoiseshell or matte finishes read as more casual and cool. Fresh flowers (real or silk) add a romantic, bohemian quality. The key is choosing something that coordinates with your outfit and the overall aesthetic you’re going for. If your outfit is minimal, the accessory can be more statement-making. If your outfit is already busy or bold, keep the accessory subtle.
Accessory Placement Strategy
Position the accessory right where the two twists meet at the back of your head. This placement covers the bobby pin or elastic and makes the accessory look intentional rather than like you’re trying to hide something. You can place it slightly off-center for a more interesting, less symmetrical look. Make sure the accessory is secure—the last thing you want is for it to slip and fall during the day. If you’re using a hair clip, position it so the twists run through it securely. If you’re using a barrette or comb, make sure it’s tight enough that it won’t shift.
9. Half Up Fishtail Braid
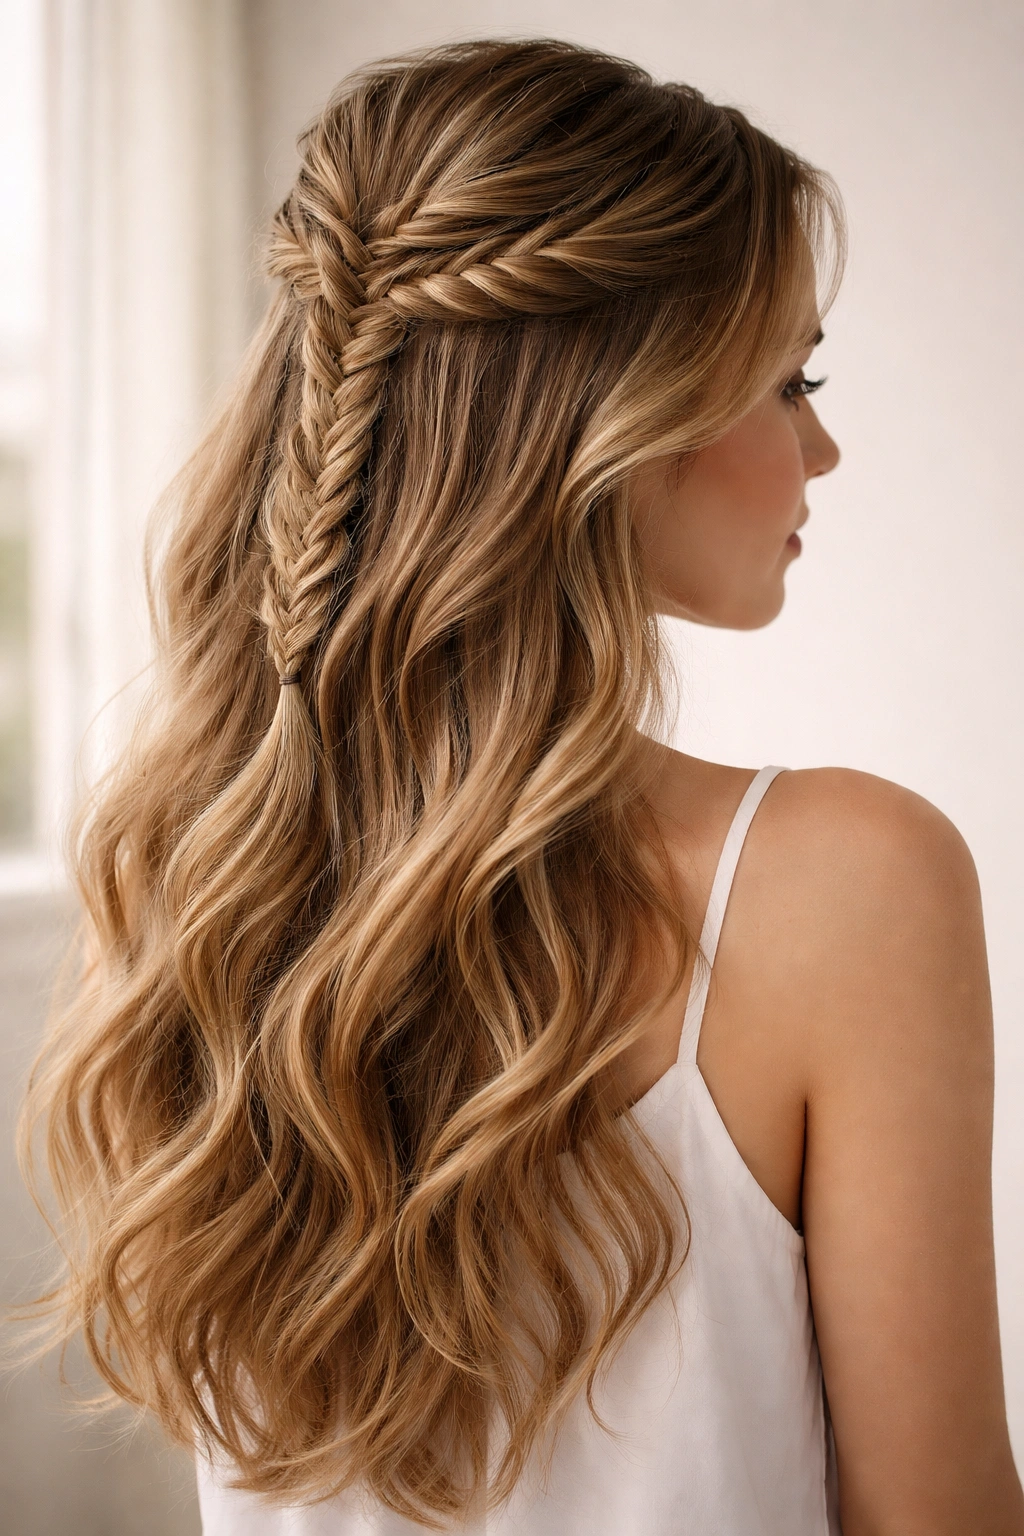
The fishtail braid is the delicate, intricate-looking cousin of the regular braid, created by taking tiny sections from each side of a two-strand base rather than using three equal strands. When you create this style as a half up look, you get the elegant, dimensional appearance of a fishtail with hair still flowing freely below. It’s sophisticated and surprisingly easy once you master the technique.
The Delicate Appeal
Fishtail braids have an airy, almost lacy quality that regular three-strand braids can’t quite achieve. They look intricate and suggest you spent significant time on styling, but the technique is actually quite straightforward. The small sections create a detailed texture that catches light beautifully and adds dimension. This style reads as intentionally styled and works wonderfully for occasions where you want to look polished and put-together.
Creating a Fishtail Braid
Start by dividing a section of hair (from each temple or across the top of your head, depending on where you want the braid) into two equal sections. Take a small strand from the outside of the right section and cross it over to the left section. Then take a small strand from the outside of the left section and cross it over to the right. Continue alternating back and forth, always pulling from the outside edge and crossing to the opposite side. The strands should be quite thin—the thinner the sections, the more delicate and dimensional the final braid appears. As you complete the braid, secure it with a bobby pin or elastic, and gently pull at the braid to loosen it and make it appear fuller and more luxurious.
Worth knowing: Practice this a few times before you need to wear it. The motion becomes automatic after a few tries, but it’s definitely different from regular braiding.
10. Half Up Half Down with Curls
This is less about a specific braiding or twisting technique and more about how you style the overall look. You’re creating a half up style using any method (twists, braids, simple sections) and then giving serious attention to the bottom half by adding beautiful waves or curls. The curls in the lower half transform the entire aesthetic and make the style feel more romantic and intentional.
The Curl Styling Strategy
The curls should be loose, flowing, and romantic rather than tight and structured. Think soft waves rather than tight barrel curls. You’re using a curling iron or wand to add dimension to the bottom half of your hair—sometimes just curling the very ends, sometimes creating waves from midway down. The curls catch light, add movement, and create a sense of flow that coordinates beautifully with an upswept crown.
Coordinating the Overall Look
The top half doesn’t need to match the curl pattern of the bottom half—in fact, a sleek or softly twisted crown with dramatic curls below creates nice visual contrast. You might do sleek twists at the crown and loose waves below, or a neat braid with flowing ringlets. The key is thinking about how these two elements work together. Curl the bottom section first, then create your half up style afterward. Use a light hairspray to help the curls hold without making them feel stiff. The beauty of this combination is how movement and flow work together—the curves above complement the curves below, creating a cohesive, intentional look.
11. Sectioned Half Up with Multiple Twists
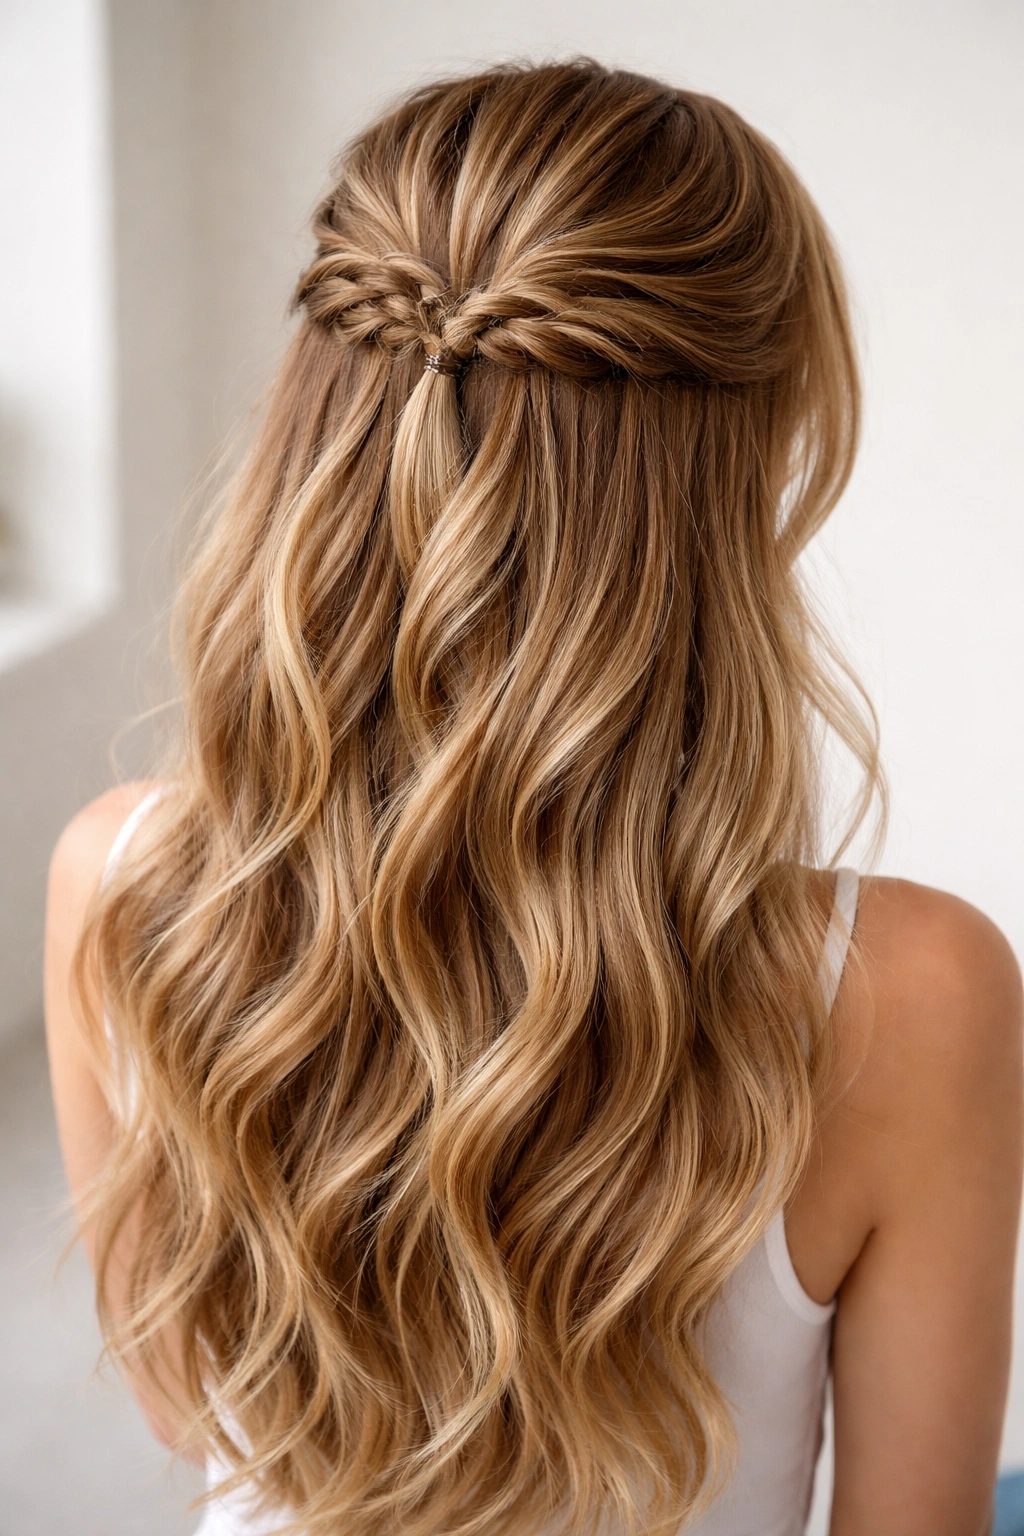
Instead of creating one or two thick twists, this style uses multiple thinner twists that all gather together at the crown. You’re sectioning the upper half of your hair into 3-4 thin sections, twisting each one separately, and then gathering all of them together with a single elastic. It creates more visual interest and texture than a simple two-twist style, and it’s easier to achieve than you might think.
The Textural Richness
Multiple thin twists create a richer, more textured appearance than one or two thick ones. Each twist catches light slightly differently, and when gathered together they create volume and dimension at the crown. This style works beautifully on both straight and textured hair—if you have waves or curls, the multiple twists play off that texture in a really appealing way. The style reads as more deliberately styled than a simple half up, without requiring significantly more skill.
Sectioning and Execution
Divide the hair you’re gathering into the upper half into 3-4 sections, starting at the temples and moving backward. Each section should be roughly 1.5 to 2 inches wide—thin enough that the twists look delicate, but thick enough that they hold shape. Twist each section loosely as you move it backward toward the crown. Don’t overthink the twisting—just keep it loose and relaxed. Once all sections reach the crown, gather them together and secure with a matching or clear elastic. Gently loosen each individual twist slightly by pulling at the edges, which makes the overall style look softer and more intentional. This creates an effortlessly beautiful gathered look at the crown with plenty of texture and dimension.
12. Half Up with a Sleek Low Bun
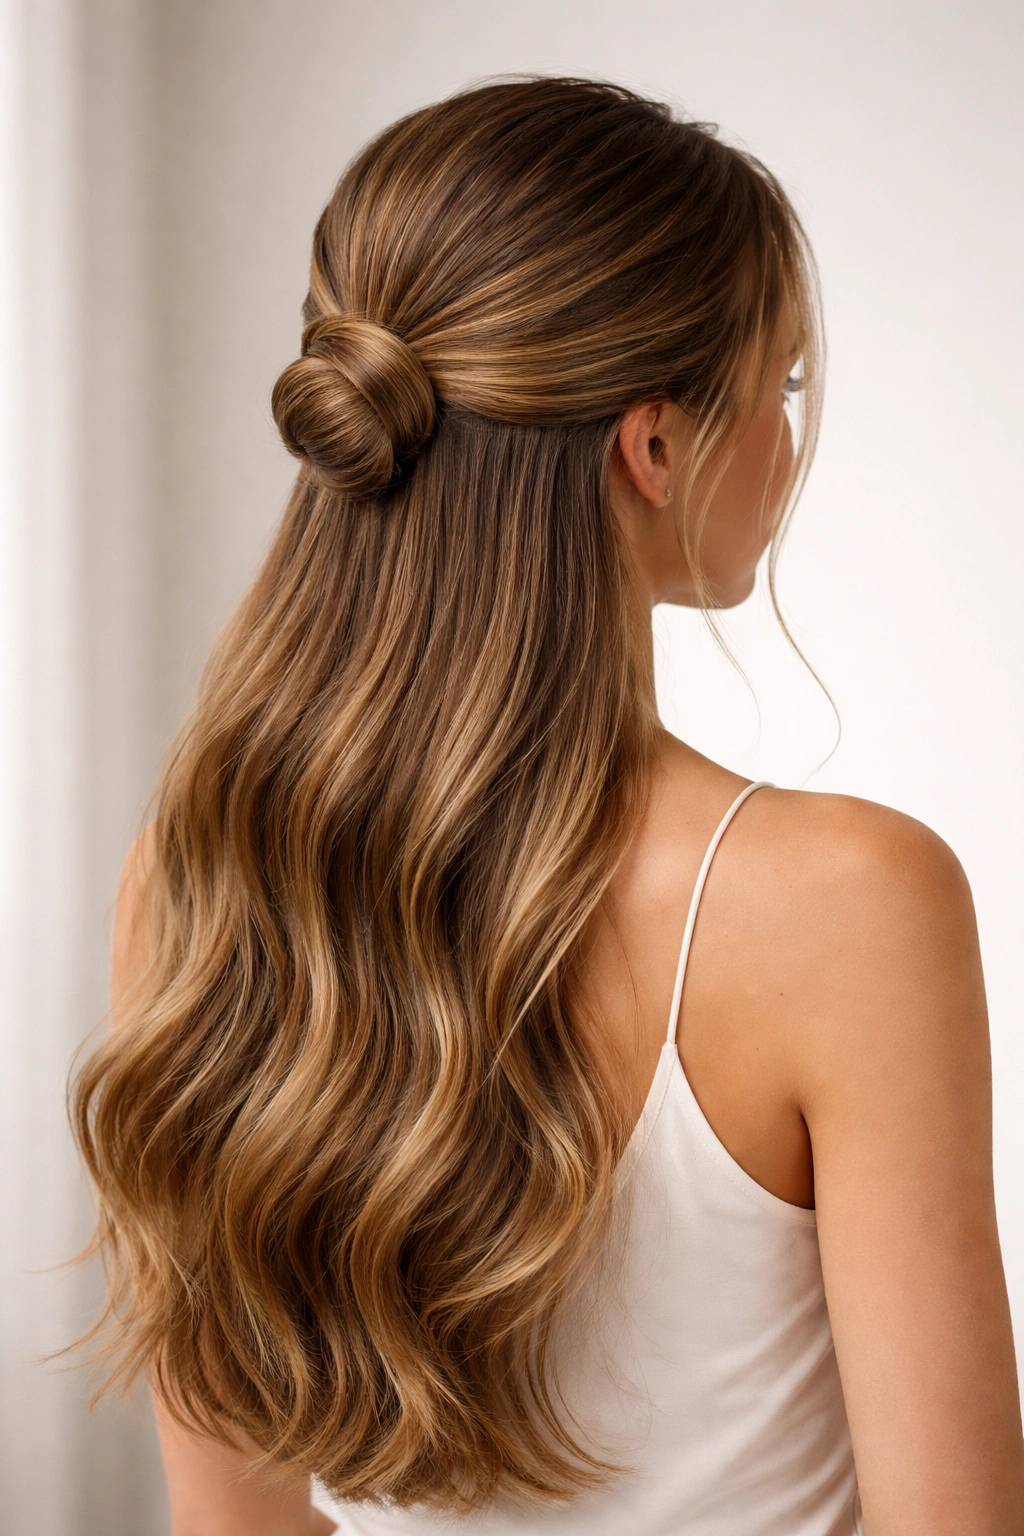
This style takes the concept of a bun and places it lower on the head than a traditional crown bun would sit, while still keeping the bottom half of your hair down and flowing. You’re creating a half up style with the gathered portion forming a small, neat bun positioned at the base of where your half up and half down meet—essentially creating a graduated look where some hair is up, some is in a bun, and the rest flows freely.
Creating Visual Interest Through Placement
The lower bun position keeps this from feeling too formal or severe. It’s elegant without being overly polished, and it maintains movement in the lower half of your hair while still managing the upper half neatly. This works beautifully if you have thick hair that benefits from being distributed across multiple layers rather than gathered all in one spot.
The Assembly Process
Start by taking a larger section than you would for a typical crown ponytail—gather hair from roughly ear level backward. Secure this larger section into a low ponytail positioned just above the nape of your neck. From this ponytail, create a small, neat bun by twisting the ponytail and wrapping it around the base, securing it thoroughly with bobby pins. The key is making sure the bun itself is secure and neat while the hair below it flows freely and softly. You can leave the very bottom section of hair loose and flowing, or if you prefer, gather just the upper portion into the low bun and let the longest section cascade freely below it.
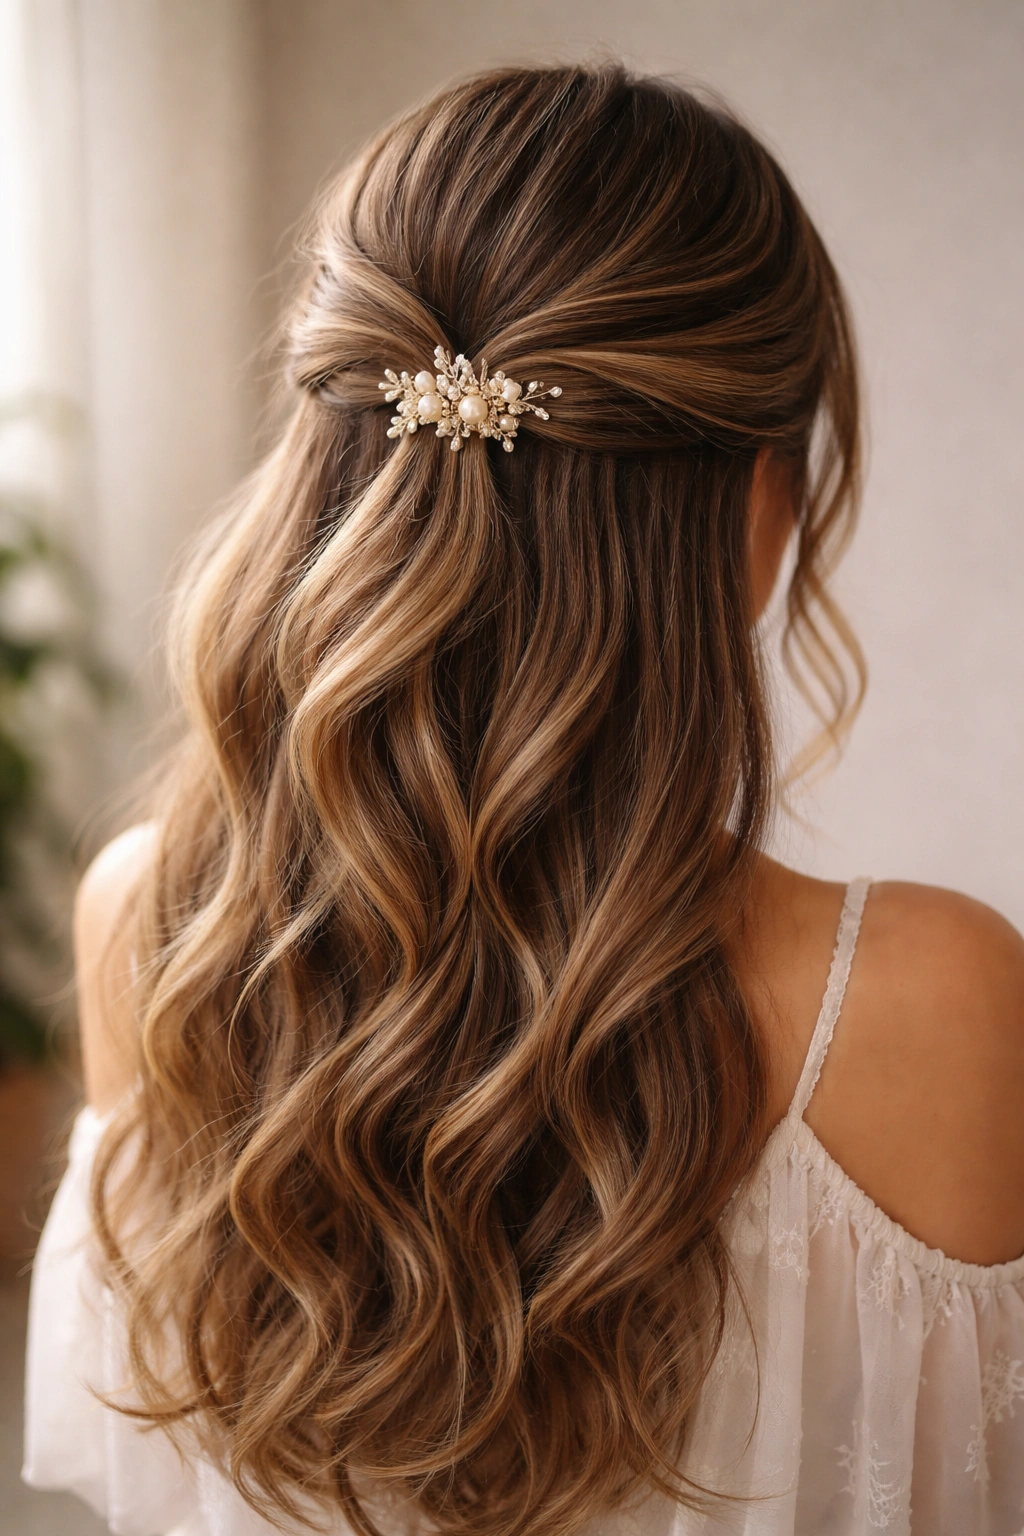
13. Half Up with Pearl or Crystal Pins
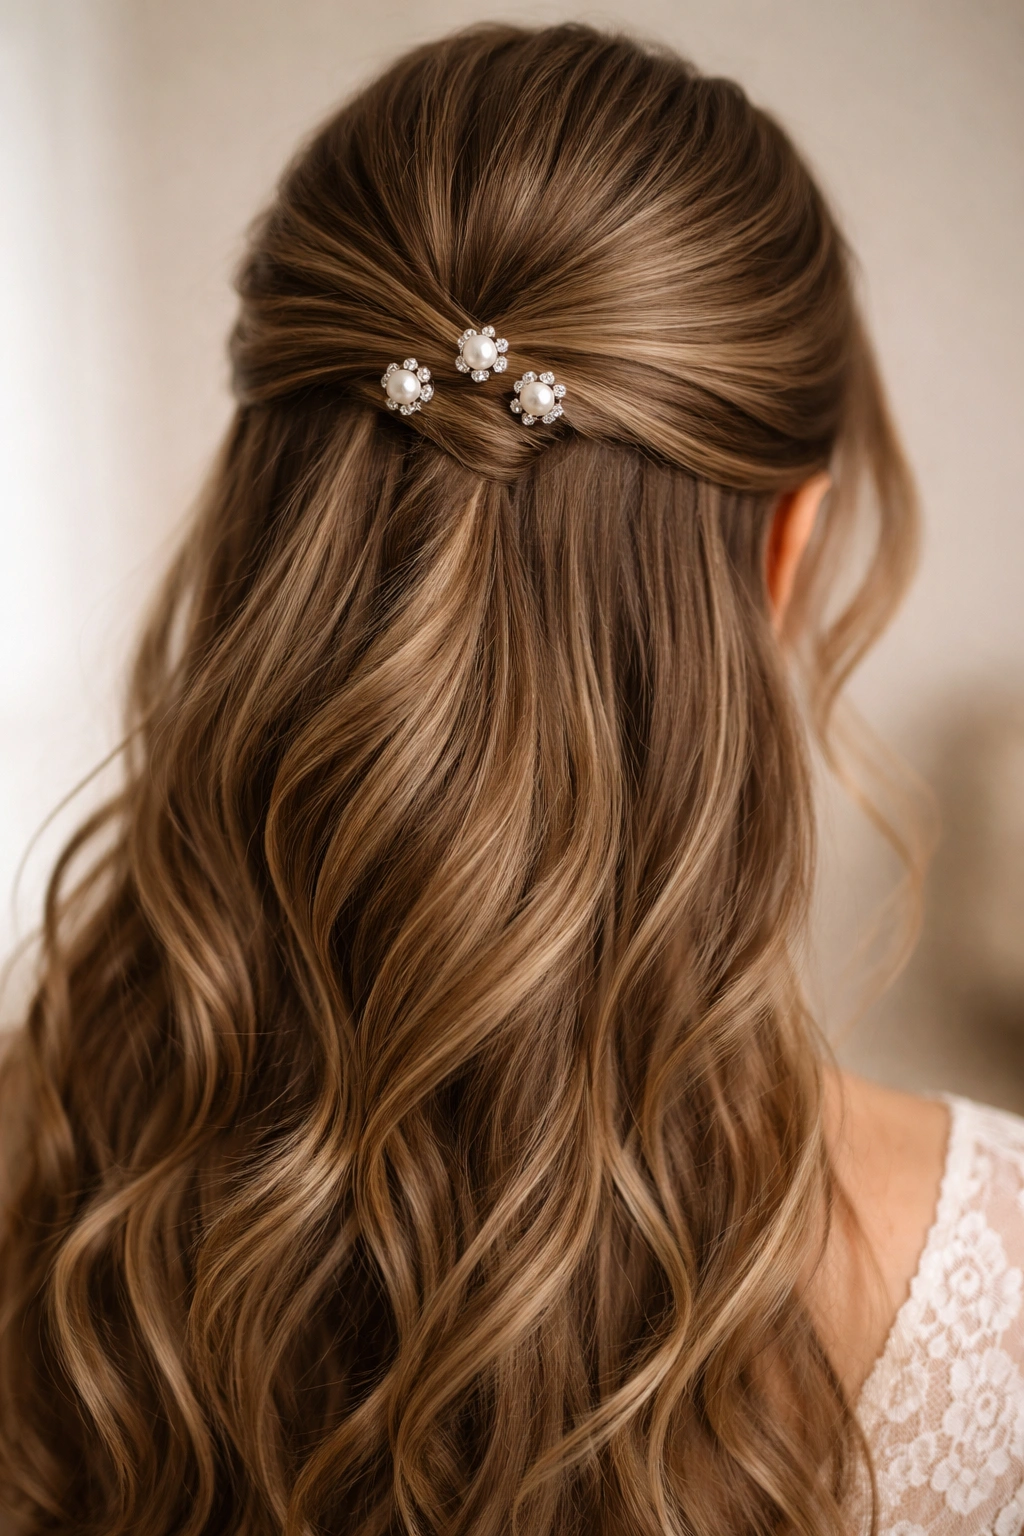
This style focuses on the accessory as the primary styling element. You’re creating a simple half up (using twists, a braid, or just a clean section) and then using multiple delicate pins or clips with pearls, crystals, or decorative elements to secure and embellish the style. The pins become part of the aesthetic rather than functional elements you’re trying to hide.
Strategic Pin Placement
Place pins along the back of the crown where the half up gathers, spacing them out so they create visual interest and balance. You might use three pins in a triangular arrangement, or space them in a line along where the braid or twist sits. Metal finishes (gold, silver, rose gold) coordinate with different overall aesthetics. Pearl or crystal pins feel more formal and elegant, while colorful or enamel pins can be playful and fun.
Making Pins Look Intentional
The key is positioning pins so they look like a deliberate styling choice rather than functional bobby pins. If you’re using actual bobby pins, choose ones with decorative heads that match your aesthetic. If you’re using hair clips or comb pins, position them so they’re clearly visible and part of the design. Don’t try to hide them—visibility is what makes them work as a styling element. Make sure whatever you choose is actually secure enough to do the job of holding hair; decorative doesn’t mean non-functional.
Pro tip: If using delicate crystal or pearl pins, place them after you’ve secured the main style with a clear elastic or bobby pin. This way the decorative pins are really just adding sparkle, not doing all the holding work.
14. Half Up Half Down with Side Sweep
This style positions the gathered portion slightly off to one side rather than centered at the back of your head. You’re creating asymmetry, which adds visual interest and a more modern, fashion-forward feel compared to a centered half up. It’s a subtle change that creates a completely different energy.
The Modern Asymmetry
Side-swept styles feel more current and intentional than perfectly centered styles. They also work beautifully to flatter specific face shapes—if you want to draw attention away from one side of your face, you can position the gathered portion on the opposite side. The asymmetry creates movement and visual flow that moves the eye in an interesting direction.
Building the Side-Swept Look
Create your half up style (twist, braid, or simple section) but gather it slightly off-center toward one side of the back of your head. You might gather it about 2-3 inches to the right or left of where you’d normally position a centered half up. This creates an off-center ponytail or twisted section. You can then secure it with an elastic or bobby pin. The asymmetry is more noticeable and dramatic if you use a visible accessory—place a decorative pin, clip, or hair stick slightly off-center for emphasis.
15. Wrap-Around Braid Half Up
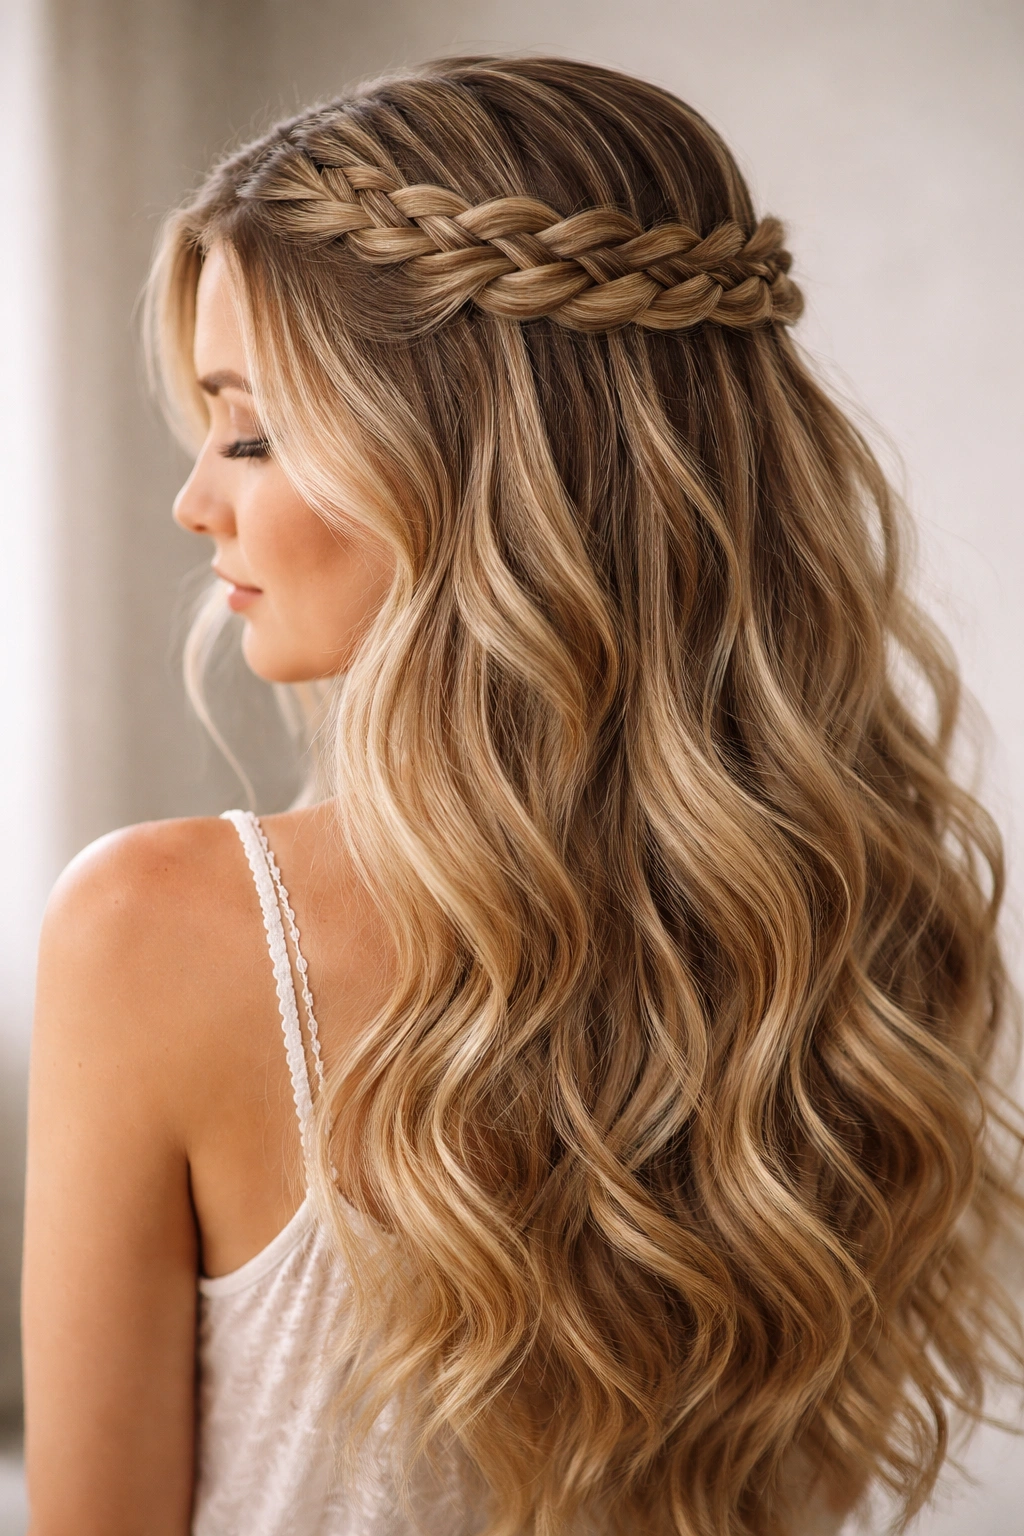
This style uses a single braid that wraps around your head like a crown or headband, then gathers with loose hair into a ponytail or bun at the back. The braid starts at one side of your head, travels around toward the opposite side, and incorporates some hair as it goes while letting other sections of hair remain down and free. It’s romantic, it’s elegant, and it feels like real statement styling.
The Crown Effect
A wrap-around braid creates the sense of an ornamental headpiece—it’s the kind of style you’d see in romantic period dramas or wedding photography. The braid frames your face from above and draws attention upward. It’s especially flattering if you have a longer face, and it works beautifully with soft waves in the lower portion of your hair. The braid itself becomes a design element, not just a functional styling method.
Creating the Wrap-Around
Start with a small braid at one temple, using three-strand braiding technique. As you braid, keep the braid elevated and positioned along the top and back of your head, traveling toward the opposite temple. You can incorporate small sections of additional hair as you go, or keep the braid relatively thin so it reads as an ornamental band rather than a thick structural braid. Once you’ve traveled across most of your head, you can secure the end of the braid with a bobby pin, or gather it with the remaining loose hair into a ponytail. The loose hair below the braid flows freely, creating romantic movement and balance.
16. Half Up with Ribbon or Bow Detail
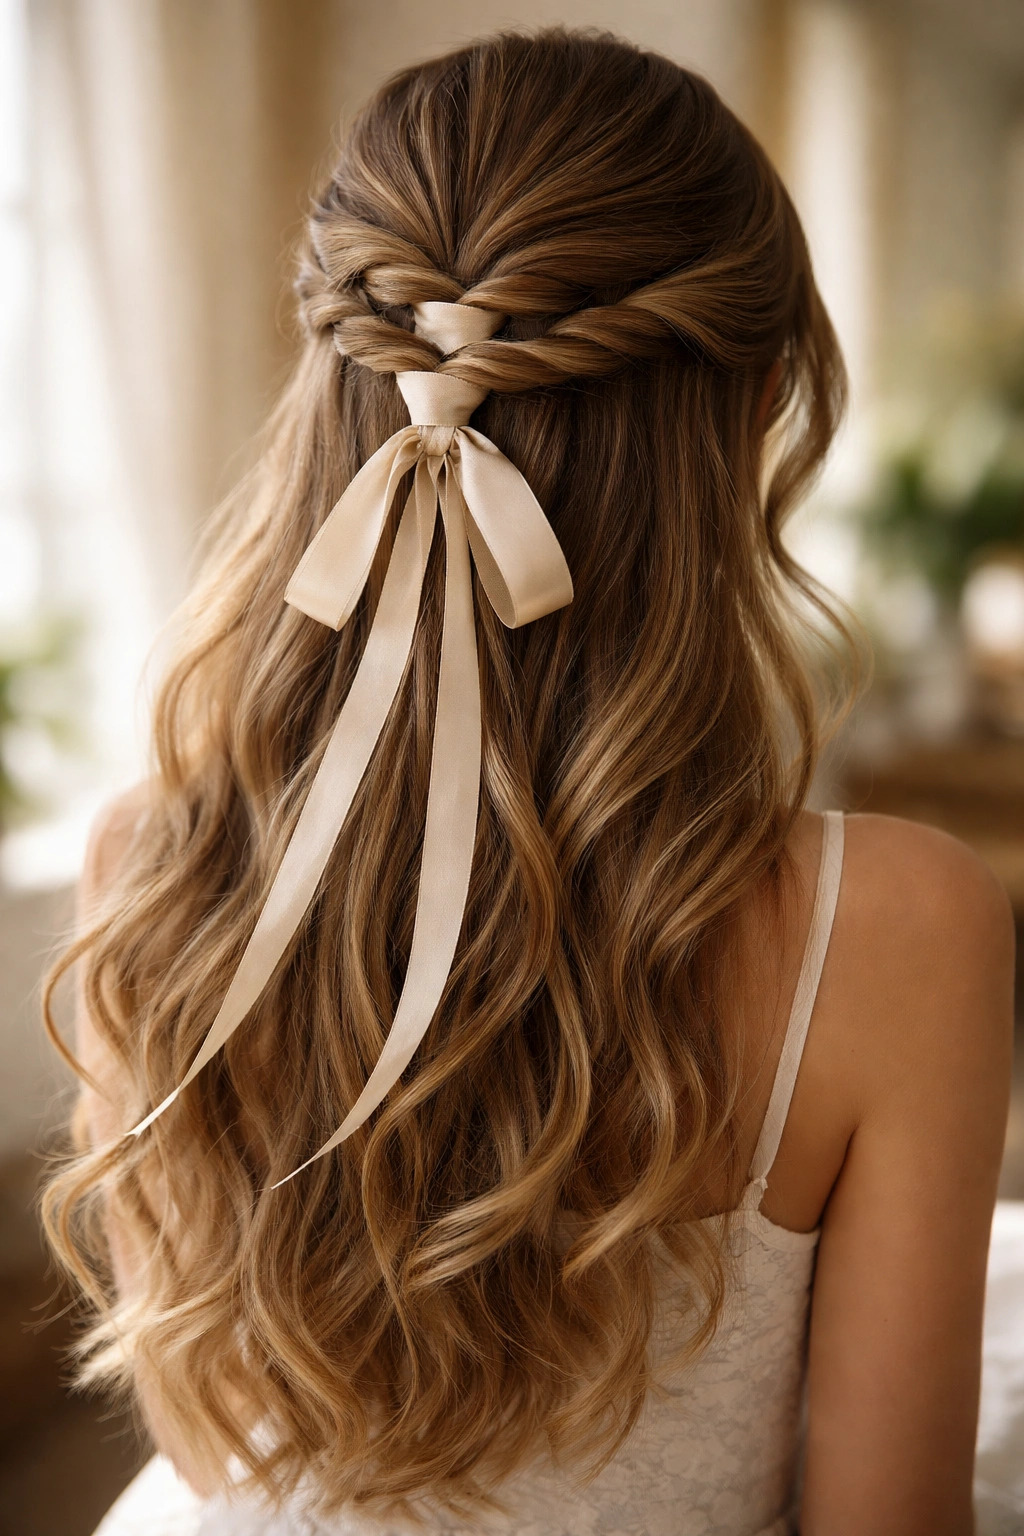
Take a simple half up style and thread a ribbon, silk scarf, or decorative bow through the gathered portion at the crown. The ribbon weaves through the hair or wraps around it, adding color, texture, and personality to an otherwise simple style. This is an incredibly versatile approach because the ribbon or bow can completely change the vibe—preppy with a crisp bow, romantic with a silk ribbon, bohemian with a patterned scarf.
Choosing Your Ribbon or Bow
The ribbon should coordinate with your outfit and the overall aesthetic you’re creating. Silk ribbons feel elegant and refined. Grosgrain ribbons feel more preppy and classic. Patterned scarves add a bohemian, eclectic energy. The ribbon width matters—thicker ribbons are more statement-making, while thin ribbons feel delicate and refined. Choose something long enough to weave through or wrap around your gathered hair comfortably.
Integration Technique
Secure your half up style first with a clear elastic or bobby pin. Then thread the ribbon through the gathered section, weaving it in and around the hair so it becomes part of the texture rather than sitting on top. If you’re using a bow, position it so the knot sits at the secure point and the tails flow downward with the rest of your hair. If you’re using a ribbon, you can weave it through and let the ends cascade, or wrap it around multiple times to create a choker-like effect at the crown. Make sure whatever you choose is secure enough that it won’t slip throughout the day.
17. Half Up Cornrow or Tight Braid
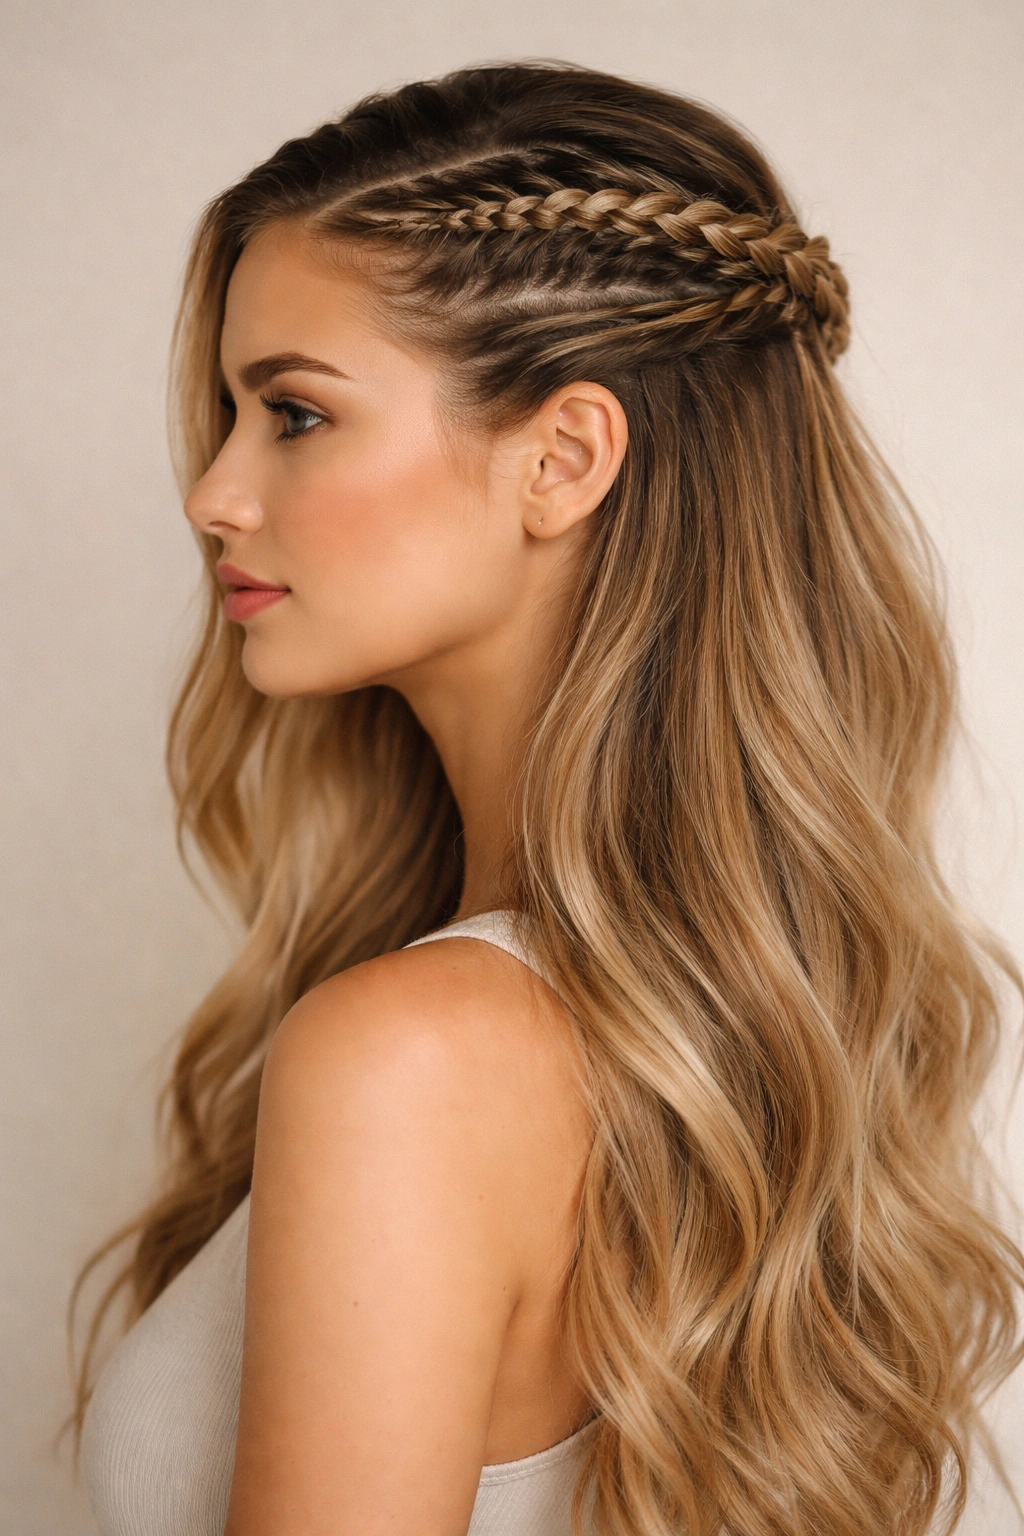
This style uses either cornrows or a tight, structured braid as the gathering element. Instead of soft, loose twists or braids, you’re creating something with more architectural definition. The cornrow or tight braid travels from the temples backward to the crown, where it gathers with the loose hair. This style is more structured and modern than its loose counterparts.
The Structured Aesthetic
Cornrows and tight braids have a completely different energy than loose, romantic braiding. They read as intentional, modern, and fashion-forward. Cornrows in particular have cultural significance and create a bold, striking look. A tight braid reads as more controlled and polished than a loose one. Both options work beautifully for creating definition and visual interest.
Technical Execution
A cornrow is similar to a regular braid but you’re incorporating hair continuously along the path of the braid, keeping everything close to the scalp. Start at one temple and create a cornrow that travels backward toward the crown, adding hair along the way. Do the same on the opposite side if you want two cornrows. Once both reach the crown, gather all the loose hair together with the cornrow ends and secure into a ponytail or bun. A tight braid follows the same principle but travels at a distance from the scalp rather than directly against it. The key for both is keeping tension consistent so the result looks intentional and neat, not accidentally loose.
Worth knowing: These styles are perfect if you love the structured look and want something that will hold solidly all day without loosening.
18. Half Up with Delicate Chains or Hair Jewelry
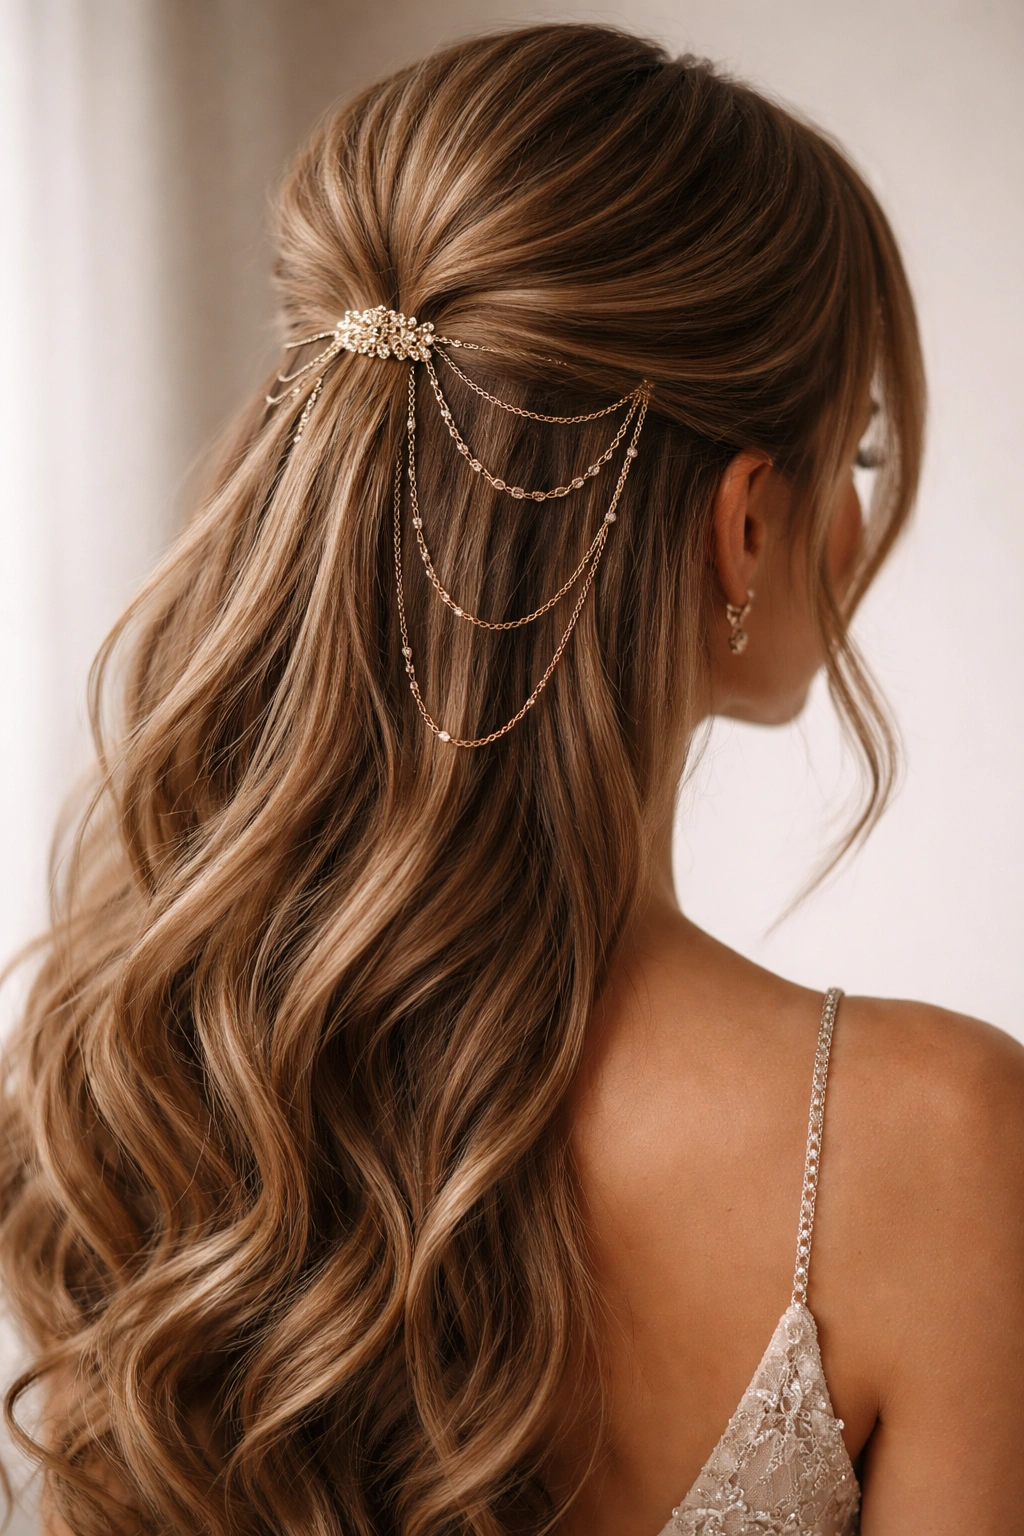
This is the dressed-up, jewelry-focused version of a half up style. You’re creating a simple half up (twist, braid, or gathered section) and then adorning it with delicate hair chains, cuffs, or jewelry pieces designed specifically for hair. These accessories drape through or around the gathered portion, adding sparkle, glamour, and a high-fashion edge.
The Jewelry Factor
Hair chains and jewelry add sophistication and intentional glamour that elevates an otherwise simple style. They catch light beautifully and read as luxury and elevated styling. Hair cuffs or coiled rings worn around gathered sections of hair create interesting texture and visual interest. These accessories range from delicate and subtle to bold and statement-making, so you can choose based on the occasion and your personal style.
Wearing Hair Jewelry Successfully
Position the chains or jewelry through the gathered section so they’re secure and won’t slip. If you’re using a hair chain, you might thread it through a ponytail or secured section so it hangs against the hair. If you’re using a cuff, wrap it around the gathered section just like you would a regular elastic. Make sure whatever you choose is actually secure—decorative and functional should go hand in hand. The jewelry should feel like a deliberate style choice that coordinates with the rest of your outfit and aesthetic, not like it’s competing for attention.
Pro tip: Gold and silver chains work with virtually any outfit, but rose gold adds a softer, more romantic feel. Choose based on your skin tone and the overall aesthetic you’re creating.
Final Thoughts
Half up half down styles are the ultimate versatile approach to long hair—they work for casual days, formal events, and everything in between. The beauty of these styles is that once you master the basic techniques of twisting, braiding, and sectioning, you have infinite ways to customize and play with them. You can keep things simple and effortless, or lean into intricate details and accessories that transform the style into something formal and special.
The best part about long hair is that you genuinely have options. If a style doesn’t work on your first try, your hair is long enough that you can take it down and try again without consequence. Embrace that freedom—experiment with different textures, different placements, different accessories, and different techniques until you find the styles that make you feel most confident and beautiful.
Remember that the styling tools and products you use matter just as much as the technique. A good texturizing spray can make twists hold better, a lightweight smoothing serum keeps sleek styles clean, and the right bobby pins that match your hair color make the difference between visible pins and invisible ones. Invest in good tools—a quality brush, a smooth curling iron, bobby pins that actually hold—and you’ll find that these styles become easier and more beautiful every time you create them.