Long hair offers endless styling possibilities, but few looks are as effortlessly chic and practical as the half-up half-down style. It’s the perfect middle ground—polished enough for work, dates, or special occasions, yet casual enough for everyday wear. Whether you’re dealing with thick waves, fine strands, or somewhere in between, the half-up half-down approach works because it keeps hair off your face while letting you show off your length. The beauty of this style is that it adapts to your hair texture, personal aesthetic, and the tools you have on hand.
What makes half-up half-down styles so universally appealing is their versatility. You can dress them up with braids and accessories, keep them simple with just a clip or elastic, or customize them to match your mood and outfit. They work whether your hair is straight, wavy, curly, or coily. They transition seamlessly from morning to evening. And honestly, most of them take just a few minutes to master.
The following 18 styles range from classic and timeless to modern and creative. Some require minimal styling skills, while others offer a chance to build your braiding or twist techniques. Each one is designed to look intentional and polished without demanding a trip to the salon or hours spent at your mirror. Pick your favorites, practice them a few times, and you’ll have a whole arsenal of looks ready to go.
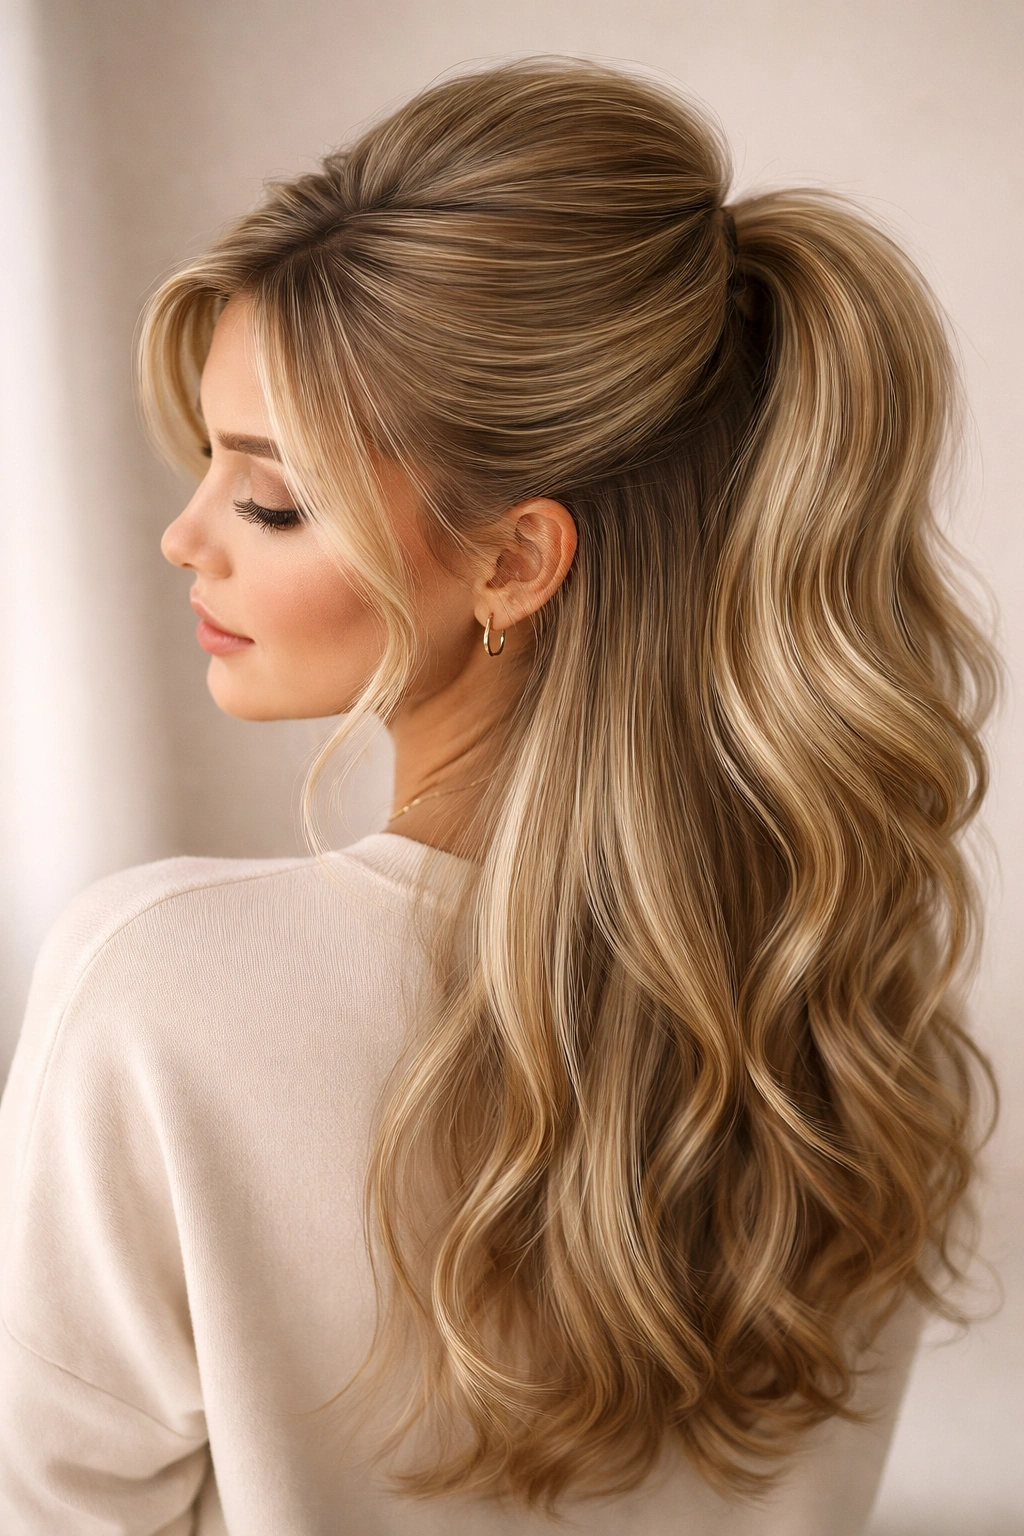
1. The Classic Half-Up Ponytail
This is the foundation of the half-up half-down world, and it deserves respect because it’s effective. You’re simply taking the top section of hair—roughly from your temples to the crown—and securing it with an elastic at the back of your head. The result is clean, balanced, and works with virtually every hair type and texture.
Why It’s the Go-To for Everyone
The classic half-up ponytail works because it’s proportional and flattering on most face shapes. It pulls back just enough hair to frame your face without looking severe. You can wear it to the gym, the office, a brunch date, or anywhere in between. It takes about thirty seconds to create, which means you can do it without thinking.
How to Make It Your Own
- Tease the crown lightly for subtle volume before securing the ponytail
- Use a silk elastic instead of standard rubber bands to prevent breakage
- Leave a few face-framing pieces loose on either side for a softer appearance
- Wrap a thin section of hair around the elastic base to hide it completely
Pro tip: If you want the ponytail to sit higher, gather your section at the crown rather than at the nape where your head starts to curve. Higher placement looks more intentional and modern.
2. The Twisted Half-Up Style

Twists are the lazy person’s best friend because they look more intricate than they actually are. Instead of a simple ponytail, you’re creating one or two twists on either side of your head and securing them together at the back. The twisted texture adds visual interest and dimension without the technical skill required for braiding.
What Makes Twists So Effective
Twists catch light differently than smooth hair, which makes them read as more styled and intentional. They also grip better than straight hair, so the style holds longer even without product. For people who shy away from braiding, twists offer the same polished aesthetic with about half the effort.
Easy Twist Techniques
- Start with damp or textured hair—smooth, dry hair can slip out of twists
- Take a section from one temple, twist it loosely toward the back, and pin it
- Repeat on the other side and cross the pins or tuck one twist underneath the other
- You can twist toward the face (for a softer look) or away from it (for more drama)
- For extra hold, spritz the section lightly with hairspray before twisting
Pro tip: If your twists feel loose, gently pull at the edges of the twist to loosen and texturize it—this paradoxically makes it look fuller and helps it grip better.
3. The Half-Up Bun
Take the classic ponytail and curl it into a bun, and you’ve elevated your look instantly. This style is the perfect bridge between casual and polished. You get the softness of long hair flowing down while pulling back just enough to look intentional and put-together. It’s sophisticated without trying too hard.
Why This Style Reads as “Styled”
A bun signals more effort than a ponytail, even if you’ve only added thirty seconds to your routine. It works for professional settings, formal events, or whenever you want to look a bit more refined. The contrast between the gathered bun and the loose hair below creates visual balance and draws attention to your face.
Creating a Secure Half-Up Bun
- Gather the top half of your hair into a high ponytail
- Twist the ponytail loosely or divide it into sections
- Wrap these sections around the elastic base to form the bun shape
- Secure with bobby pins inserted into the bun, not just the elastic
- Use a light hairspray to tame flyaways without making it look stiff
Pro tip: A slightly undone, textured bun looks more modern than a perfectly smooth one. Gently pull at the edges after you’ve secured it for that relaxed-but-intentional vibe.
4. The Braided Half-Up Style

A single braid running from one side of your head to the other, then secured at the back, adds genuine texture and interest. Unlike a full braid hairstyle, a half-up braid frames your face while letting the length flow freely below. It’s feminine, slightly romantic, and works for both casual and dressed-up occasions.
Braid Basics for Half-Ups
You don’t need intricate braiding skills for this to look good. A simple three-strand braid works perfectly. Start at one temple, braid loosely toward the back of your head, and secure with a small elastic. The key is keeping the braid loose and slightly undone—tight braids look dated and constrictive.
Braid Styling Options
- Start the braid at one ear and finish at the opposite ear for balance
- Use two parallel braids on either side of your head instead of one
- Combine a braid with a twist on the opposite side for asymmetry
- Add subtle color or temporary hair chalk to the braid for visual interest
- Braid sections that aren’t quite at the front—starting just behind your temples
Worth knowing: Braids hold better in slightly textured hair. If your hair is very smooth and slippery, mist it lightly with dry shampoo or texturizing spray before braiding.
5. The Dutch Braid Half-Up
A Dutch braid is simply a reverse braid—instead of crossing sections over each other, you cross them under. This creates a raised, almost sculptural appearance that reads as more intentional and modern than a regular braid. When done as a half-up style, it’s genuinely striking.
The Visual Impact of Dutch Braids
Dutch braids sit higher on the scalp and catch light in a different way, which makes them look more substantial and deliberate. They also pair beautifully with longer hair because the contrast between the textured braid and the smooth lengths below is visually interesting. Dutch braids work especially well if you have waves or curls—the texture highlights the braid structure.
Dutch Braid Tips
- Practice on yourself or a friend before styling for an event—the hand position is slightly different than a regular braid
- Start the braid at the crown or slightly back from your hairline
- Pull each section snugly as you braid to keep the structure defined
- Finish the braid at the nape of your neck and clip it into place
- Gently loosen the braid afterward for a slightly fuller, softer appearance
Pro tip: If you’re new to Dutch braiding, practice with damp hair—it’s easier to grip and control than dry hair.
6. The Sleek Gel Half-Up Ponytail
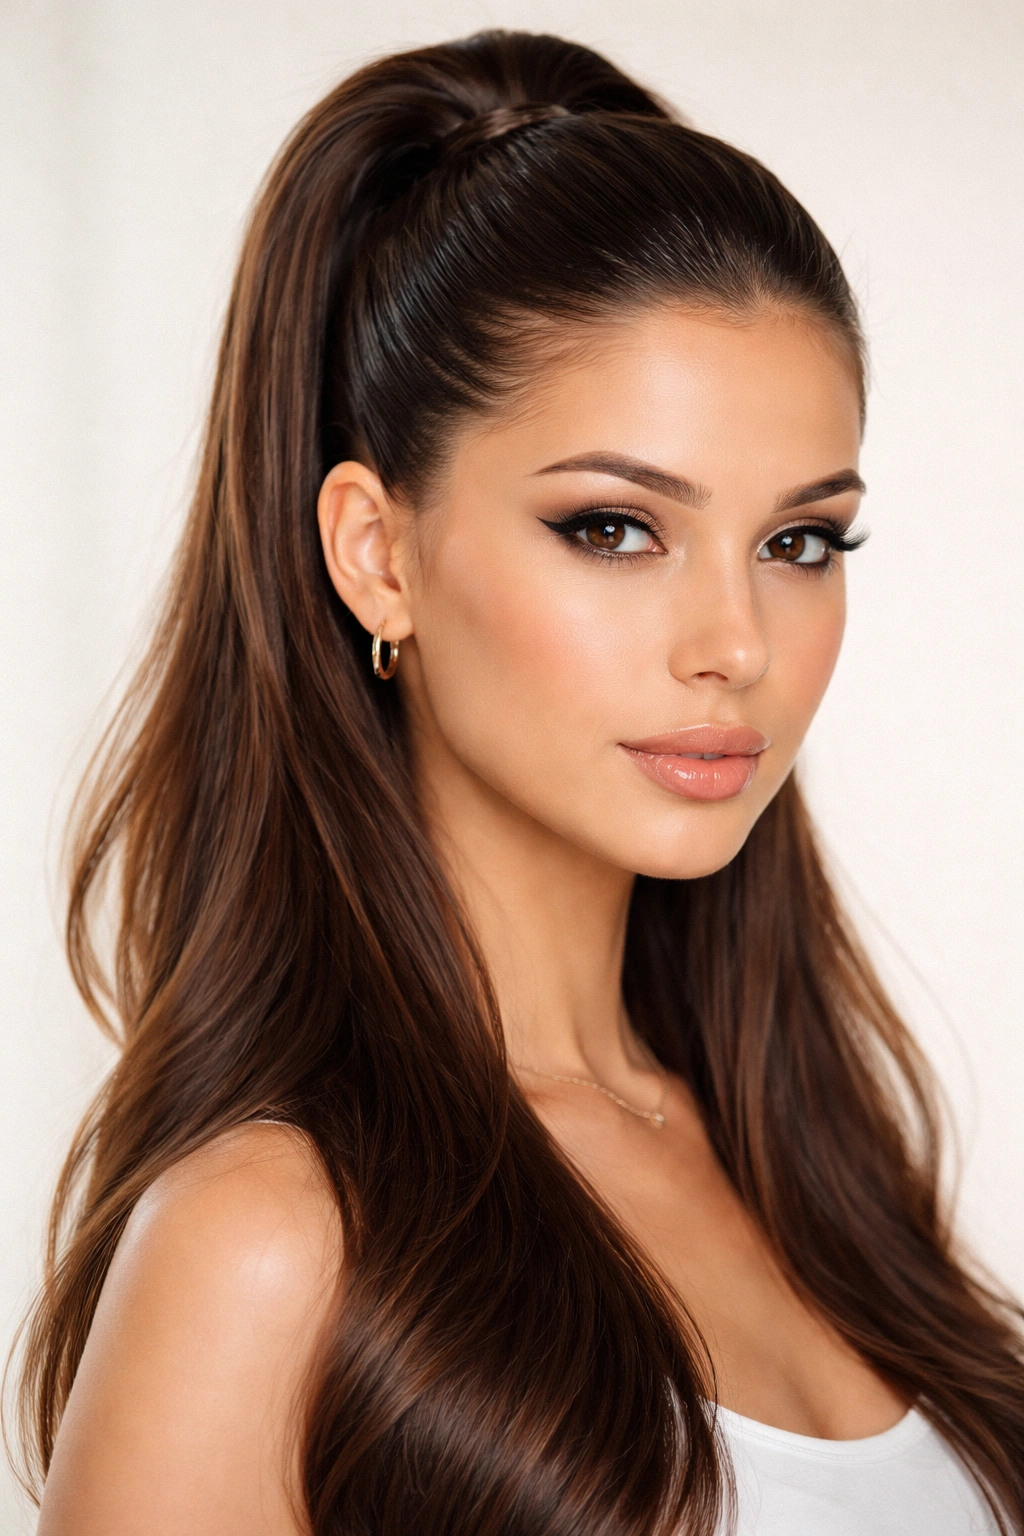
Sometimes the most striking half-up styles are those with maximum grip and polish. A sleek gel-smoothed half-up ponytail looks expensive, intentional, and modern. It works particularly well if you have straight or wavy hair, and it’s the perfect choice for gym sessions, formal events, or whenever you want a super clean, no-nonsense look.
Why Gel Changes the Game
Gel creates hold and shine simultaneously. It tames flyaways, keeps everything exactly where you want it, and reads as intentional styling rather than accidental messiness. The sleekness also makes your hair look glossier and more polished. It’s minimal effort that reads as maximum intention.
Getting the Sleek Look Right
- Start with dry hair and apply gel to your hairline and the sections you’ll be pulling back
- Use a brush or your fingers to smooth everything into place
- Gather the top section and secure it tightly at the crown
- Smooth any loose pieces with the brush and a touch more gel
- A clear or tinted gel can match your hair color perfectly
- Finish with a light hairspray to keep everything locked in place
Pro tip: Gel works best when applied to damp hair and allowed to dry, rather than applied to completely dry hair. Dampen your roots and temples slightly, apply gel, and blow-dry for a truly locked-in look.
7. The Low Half-Up Ponytail with Accessories

By moving your half-up ponytail lower—closer to the nape of your neck—you create a more relaxed, bohemian vibe. Adding accessories like hair clips, cuffs, ribbons, or decorative elastics instantly elevates the look and makes it feel intentional and curated. This is the half-up style for anyone who loves experimenting with accessories.
Accessory Options That Transform the Style
A tortoiseshell claw clip is modern and sophisticated. Velvet scrunchies add a luxe, romantic touch. Metallic hair cuffs worn above your elastic create an avant-garde moment. Silk ribbons woven through the base add movement and softness. Pearl-studded clips feel elegant. Even a simple colored elastic can tie your whole look together.
Placement and Proportion
- Gather hair lower—starting from just above your ears and finishing at your lower crown
- Secure with an elastic, then add your chosen accessory
- Multiple small clips arranged around the ponytail base look more curated than one large one
- Match your accessory to your outfit or go intentionally contrasting
- For special occasions, accessorize with flowers or delicate hair jewelry
Worth knowing: Heavier accessories work better when placed at the base of the ponytail, where they have something substantial to grip. If your ponytail feels like it might slip, use a textured elastic or double-elastic the section.
8. The Faux Hawk Half-Up
A faux hawk—created by teasing and volume at the crown—is bolder and more edgy than a standard half-up. You’re gathering hair from the sides and back, creating maximum height and drama at the crown, then securing everything at the nape. It’s a statement style that works for anyone who wants their half-up to feel modern and intentional.
Creating Height and Definition
Teasing is the secret to a truly impressive faux hawk. Work section by section, backcombing gently at the roots to create volume. Smooth the outer layer with a brush so it looks intentional rather than tangled. The more volume you create, the more dramatic your faux hawk becomes.
Faux Hawk Styling Steps
- Section the hair from temples on one side to the opposite side, leaving the crown and back free
- Tease the crown area heavily for maximum height
- Smooth the outer layer and pin in place
- Gather the remaining hair into a low ponytail or bun at the nape
- The contrast between the high volume at the crown and the gathered sections below creates the effect
- Finish with hairspray to hold the texture and shape
Pro tip: A faux hawk reads best when you have some texture or waves in your hair. If your hair is completely straight, add some waves with a curling iron before teasing for a more cohesive look.
9. The Half-Up Half-Down with Face-Framing Pieces
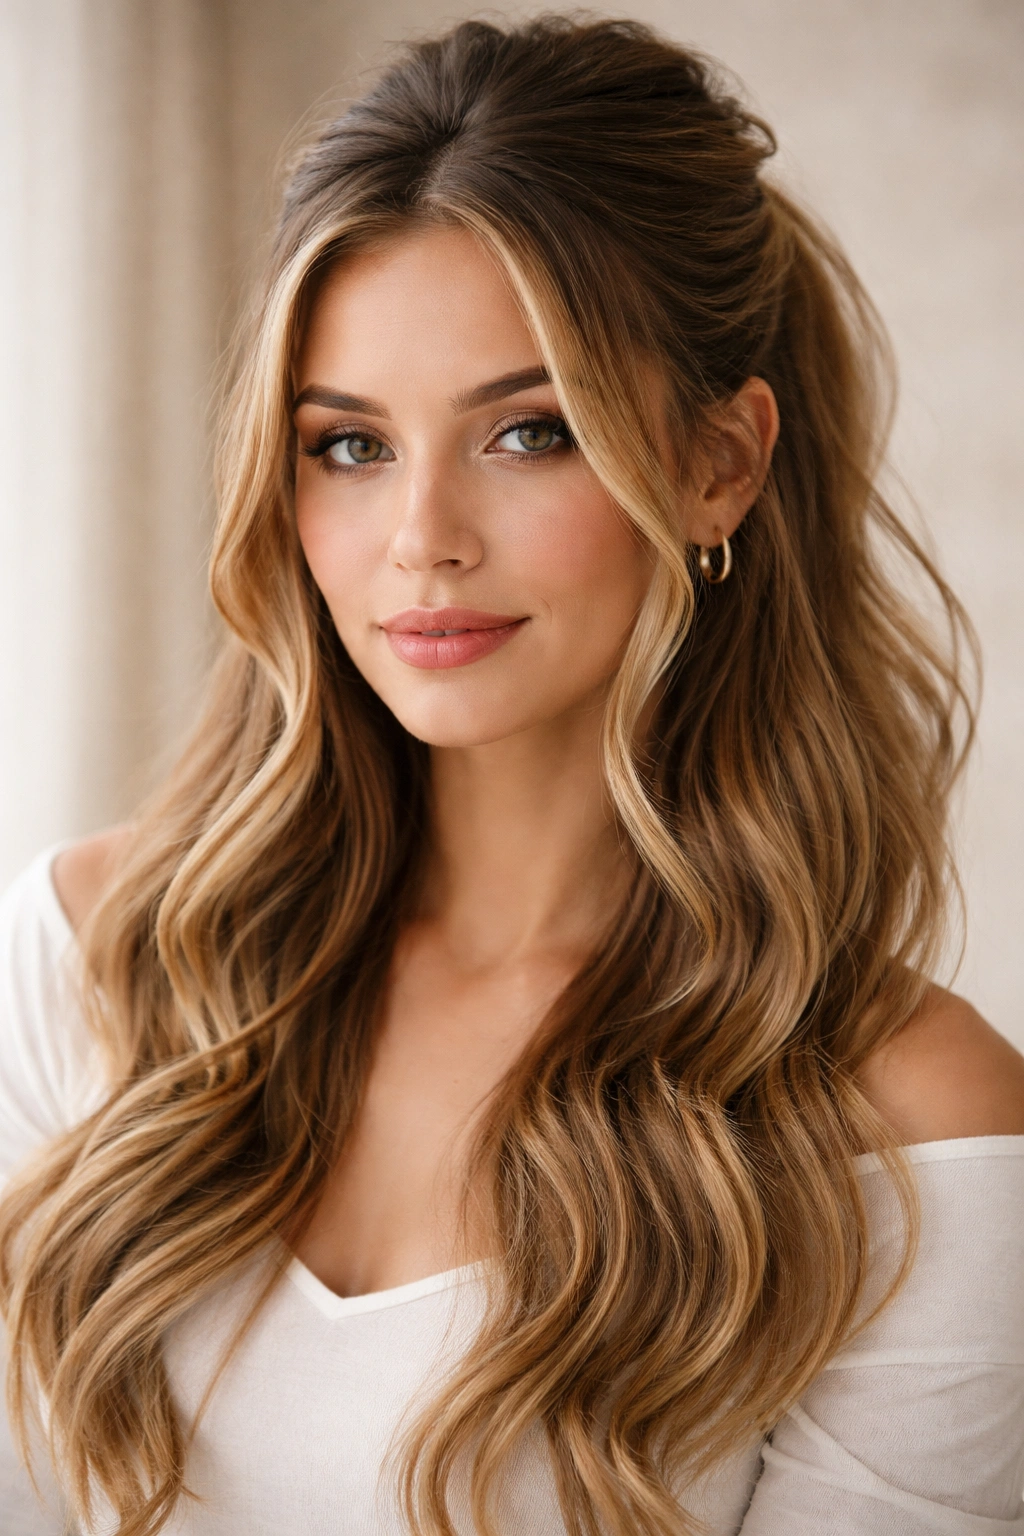
This style is simple but incredibly flattering: gather the back half of your hair into a ponytail or bun, but leave strategic pieces loose around your face. The contrast between the secured back and the soft pieces in front is deeply romantic and flattering, and it works for any face shape because the loose pieces can be customized to flatter your features.
Why This Style Is So Universally Flattering
Face-framing pieces soften the overall look and draw attention to your features. They also feel romantic and slightly undone, which reads as effortless rather than overly done. If you have a round face, longer pieces elongate it. If you have a longer face, shorter, wavier pieces add balance. There’s flexibility built in.
Customizing the Face-Framing
- Pull the back section into a secured style—ponytail, bun, or twist
- Leave sections from your temples and around your face loose
- Curl or wave the loose pieces with a curling iron for extra softness
- Make sure the loose pieces are long enough to frame your face—typically from the cheekbone down
- For a more romantic look, leave more pieces loose; for a more polished look, keep it to just a few
- Blend the texture of the loose pieces with the texture of the gathered section
Pro tip: Slightly curled face-framing pieces look intentional and soft. Blow-dry with a round brush, then use a curling iron on the mid-lengths and ends for that romantic wave.
10. The Bubble Ponytail Half-Up
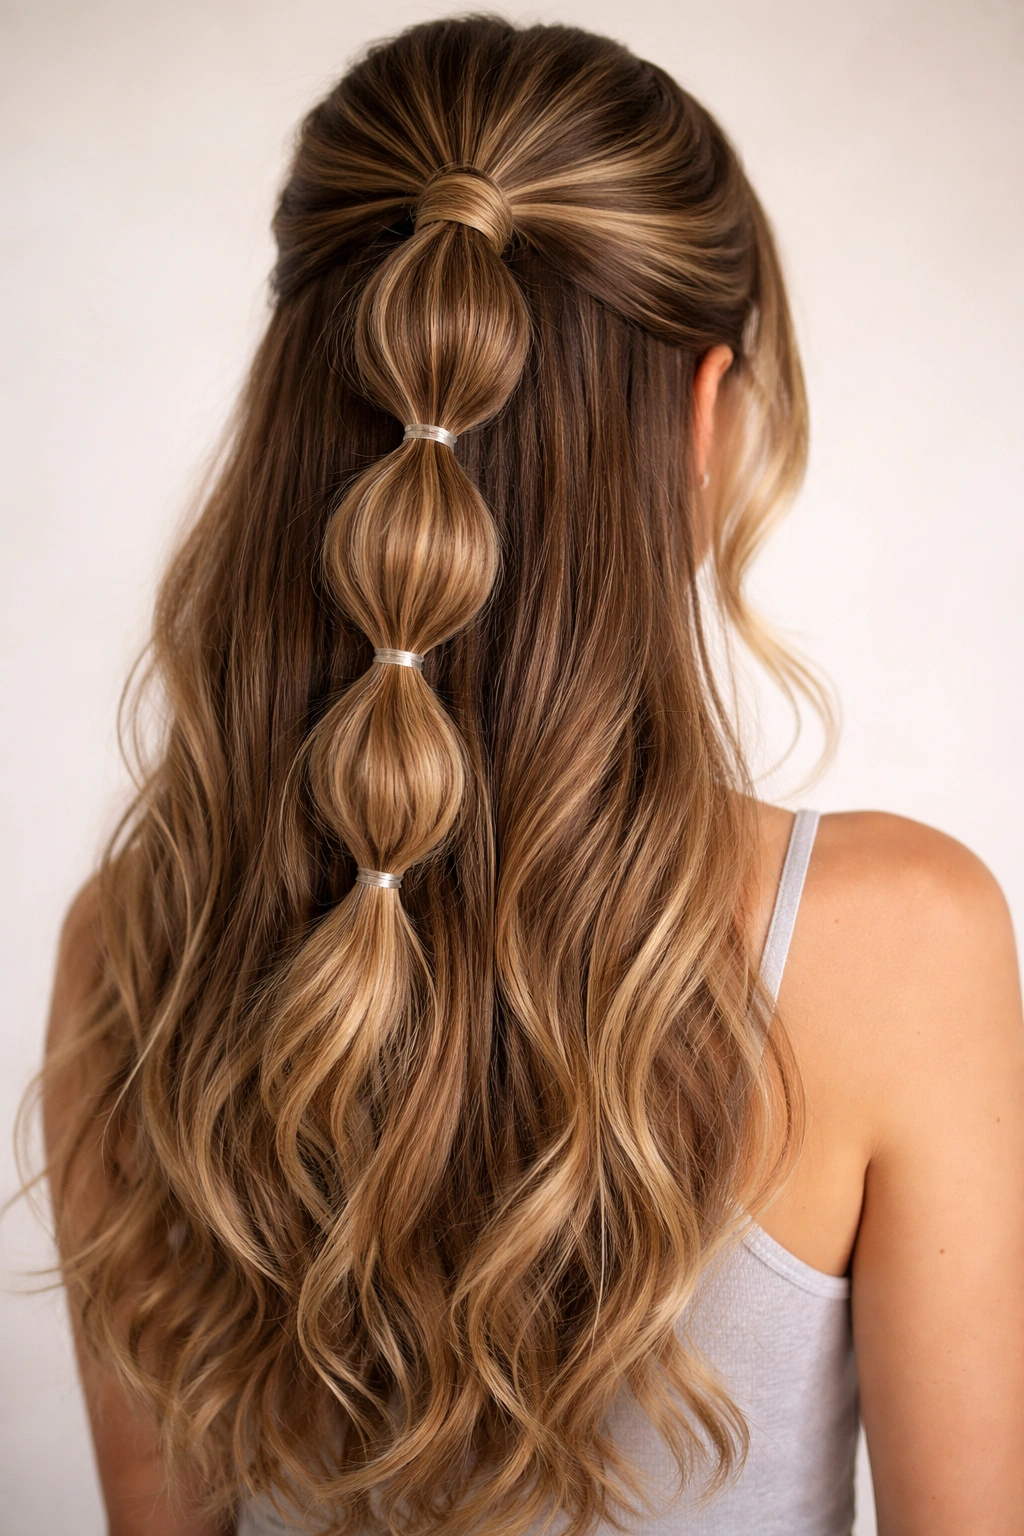
A bubble ponytail—created by securing multiple sections of a ponytail with individual elastics—is playful, modern, and surprisingly easy. When done as a half-up style, it creates a stacked, sculptural look that’s perfect for anyone who wants their style to feel youthful and fashion-forward.
What Makes Bubble Ponytails Work
The segmented, stacked appearance reads as intentional and editorial. It also distributes the weight of long hair more evenly, which can feel more comfortable if you have very thick or long hair. Bubble ponytails are also more forgiving than standard ponytails—if one section shifts, it still looks okay because the style is inherently textured and imperfect.
Creating the Bubble Effect
- Gather the top half of your hair into a ponytail and secure with an elastic
- Measure down a few inches and add another elastic, creating the first bubble
- Gently pull the hair between the two elastics to puff it out slightly
- Continue down the ponytail, adding elastics every 2-3 inches
- The more elastics you use, the more dramatic the effect
- Pull each bubble gently to create maximum dimension
Worth knowing: Fine or thin hair can look wispy between elastics, so this style works best if you have at least medium thickness. If your hair is fine, use fewer, larger bubbles for a more balanced look.
11. The Sleek Low Half-Up Twist
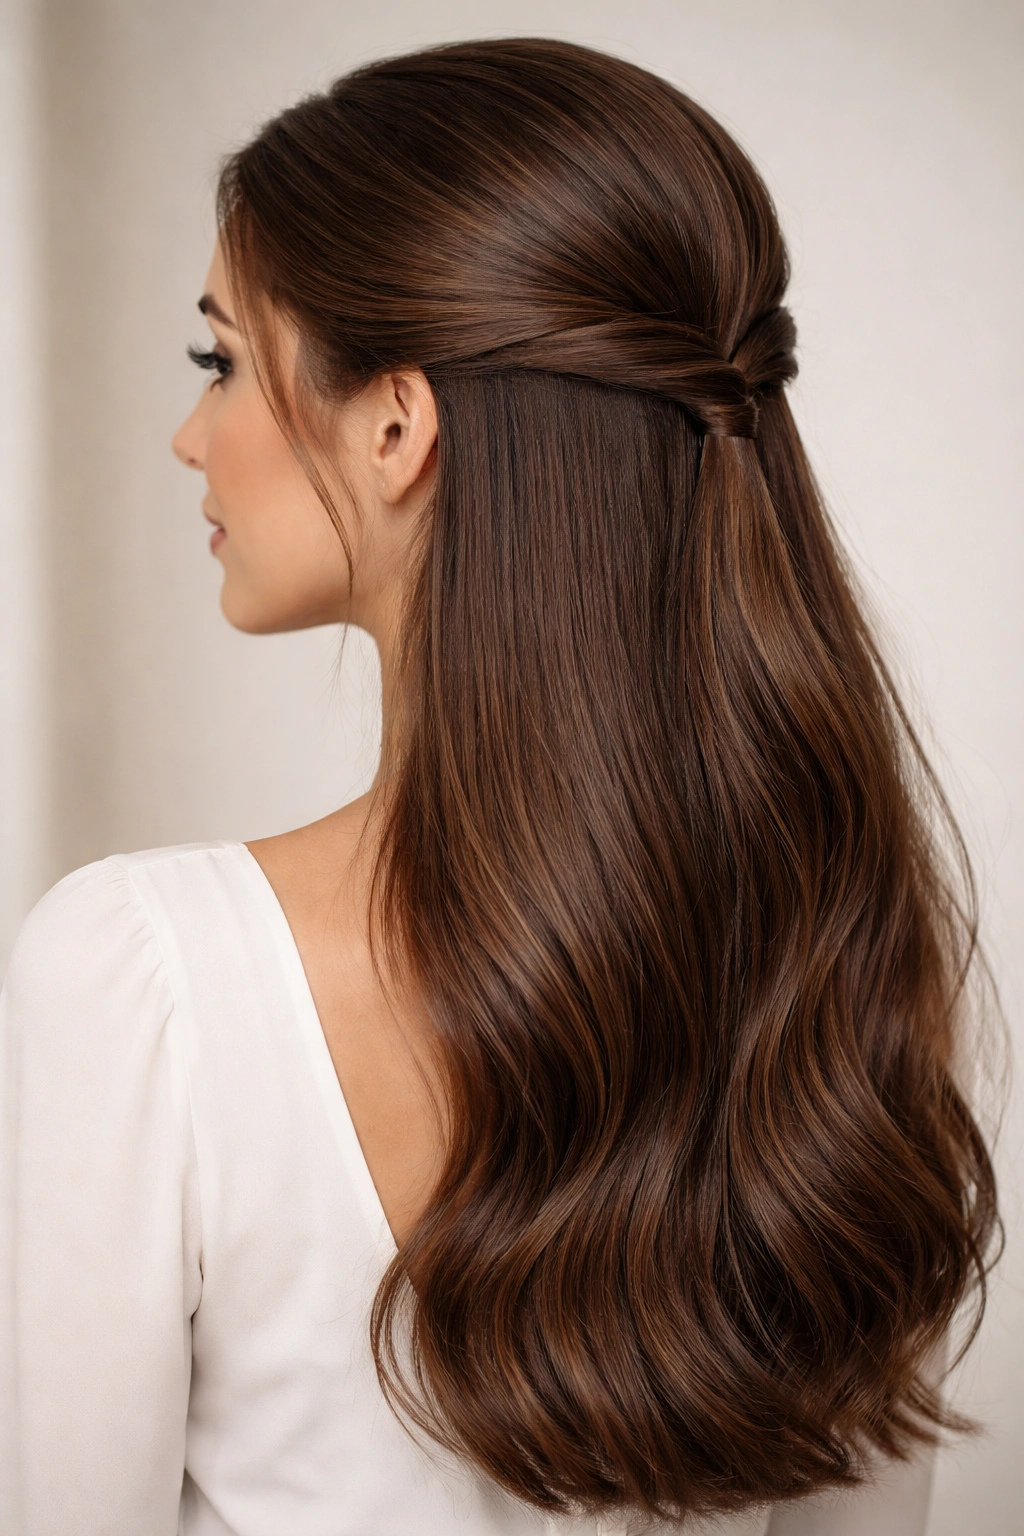
A low half-up twist combines the sleekness of a gel-smoothed style with the texture and interest of a twist. You’re creating a smooth, almost architectural look at the back while maintaining that undone softness of twisted hair. It’s sophisticated without looking stiff, and it works beautifully for professional settings.
Why Twists Appear More Complex Than They Are
A twist reads as more intentional and styled than a simple section of smoothed hair. It also captures light in a way that makes your styling look more considered. Twists grip better than smooth sections too, so your style holds longer and looks better at the end of the day.
Executing the Sleek Twist
- Apply lightweight gel to the sections you’ll be twisting to smooth the surface
- Take a section from one temple and twist it loosely toward the back
- Repeat on the other side, twisting in the same direction
- Secure both twists together at the nape with bobby pins or a small elastic
- The gel should create a smooth surface while the twist adds subtle texture
- Leave the lower hair completely loose and unstyled for contrast
Pro tip: A slightly undone twist looks more modern than a tight, perfect one. After securing it, gently pull at the edges of the twist to loosen and texturize it.
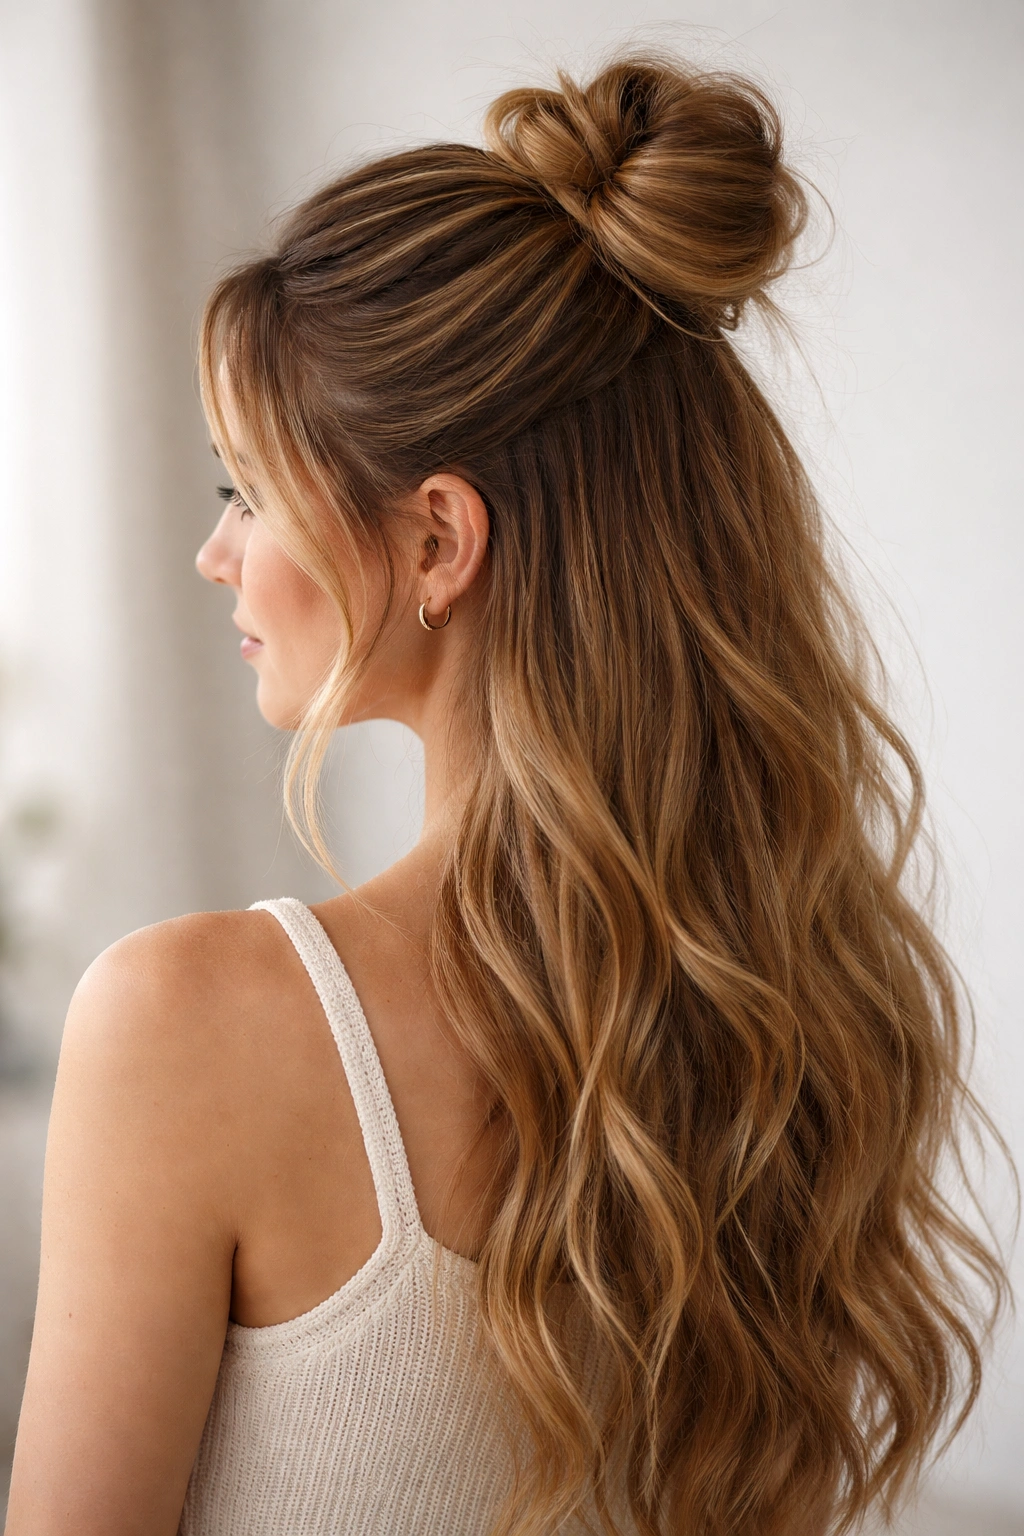
12. The Half-Up Half-Down Topknot
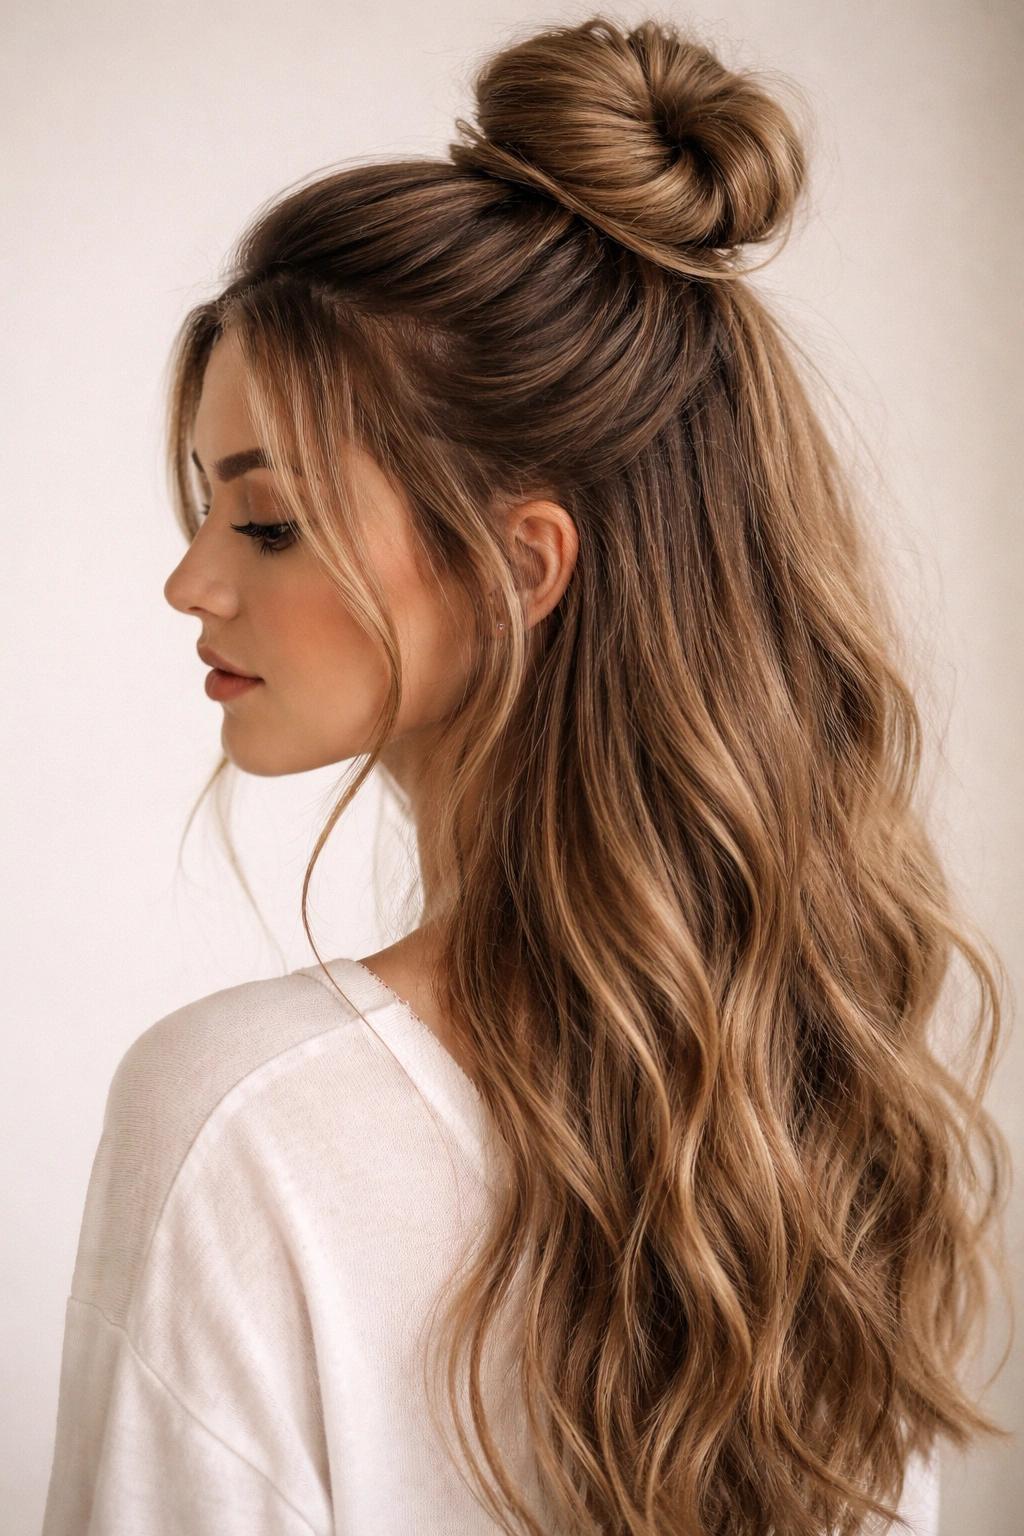
A topknot sits much higher than a standard bun, positioned right at the very crown of your head. When done as a half-up style, it creates an adorable, youthful look that’s perfect for casual occasions, day dates, or whenever you want to look playful and fun.
The Appeal of the Topknot
A topknot reads as less formal than a bun, which makes it perfect for relaxed settings. It also exposes more of your neck and jawline, which many people find flattering. The style is also quicker to create than a traditional half-up because you’re working with less hair.
Creating a Topknot Half-Up
- Gather hair from the very crown of your head—visualize a small circle at the very top
- Secure with an elastic, positioning it as high as possible
- Twist the ponytail loosely and wrap it around the elastic base
- Pin securely and gently pull the knot to create shape and texture
- Leave everything below the topknot completely loose
- For extra cuteness, let a few short pieces frame your face
Worth knowing: Topknots work best with some texture or waves in your hair. If your hair is very straight and slippery, tease lightly at the crown before gathering to help everything grip and hold.
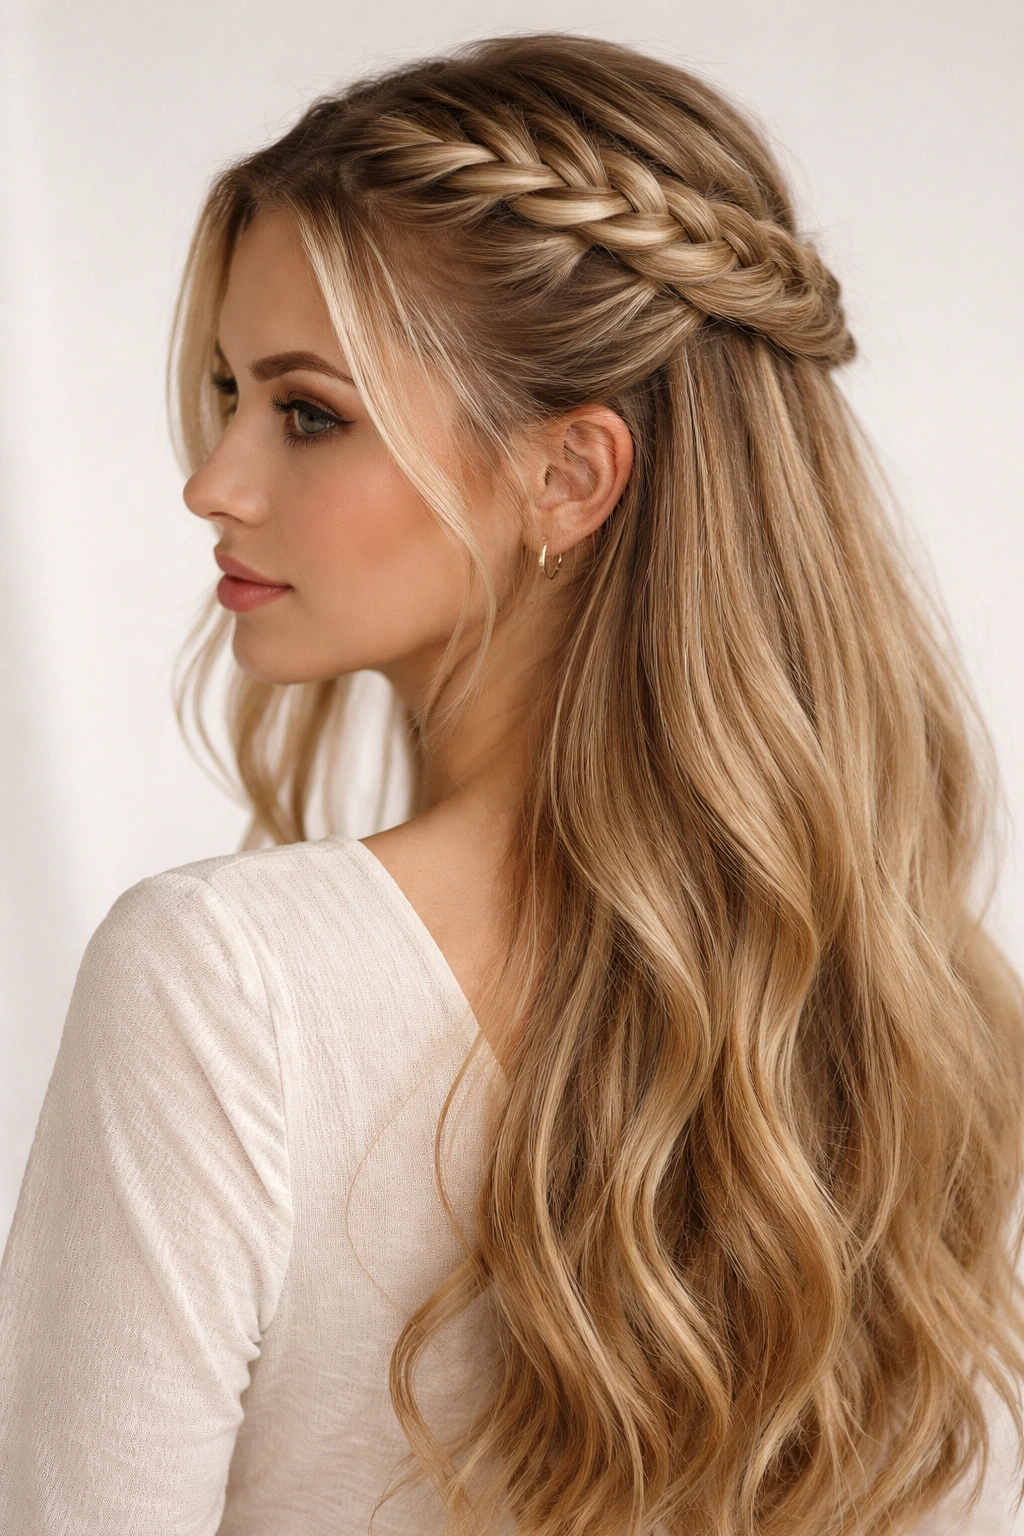
13. The Braided Crown Half-Up
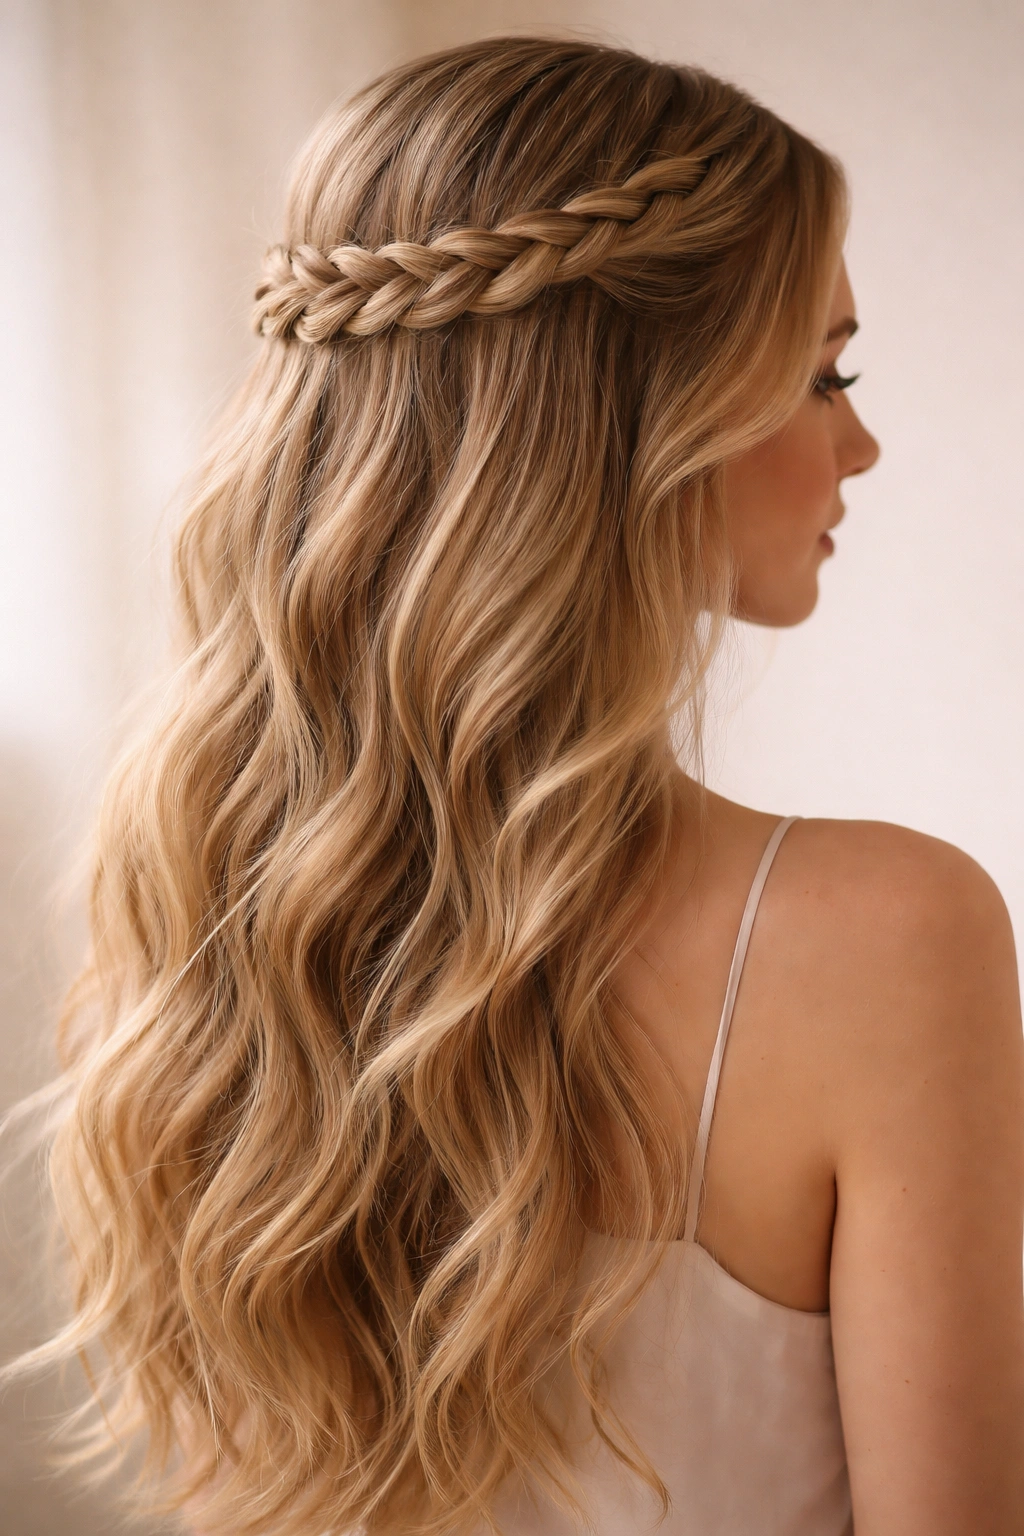
A braided crown—where you braid from one temple, across the back of your head, and down to the opposite temple—creates a genuinely romantic, fairy-tale aesthetic. Secure the braid loosely at the end and let the rest of your hair flow free. It’s intricate-looking but surprisingly manageable, and it works for everything from casual days to formal events.
The Romance of a Braided Crown
A braided crown draws attention upward and to your face, which is flattering for almost everyone. It also distributes your hair in a way that feels balanced and intentional. The style reads as effortful without being severe or overly formal.
Executing a Braided Crown
- Start braiding at one temple, taking hair from your hairline
- Braid loosely across the back of your head, following your natural hairline
- Add hair to your braid as you go, similar to a French braid technique
- Finish the braid at the opposite temple
- Secure with a small elastic or bobby pins tucked underneath
- Leave all hair below the braid completely loose and wavy
- Gently pull the braid to loosen and texturize it for a softer, more romantic appearance
Pro tip: If you’re new to this braid, practice it a few times before wearing it to something important. The hand position is unique, and muscle memory helps tremendously.
14. The Half-Up with Ribbon or Silk Tie
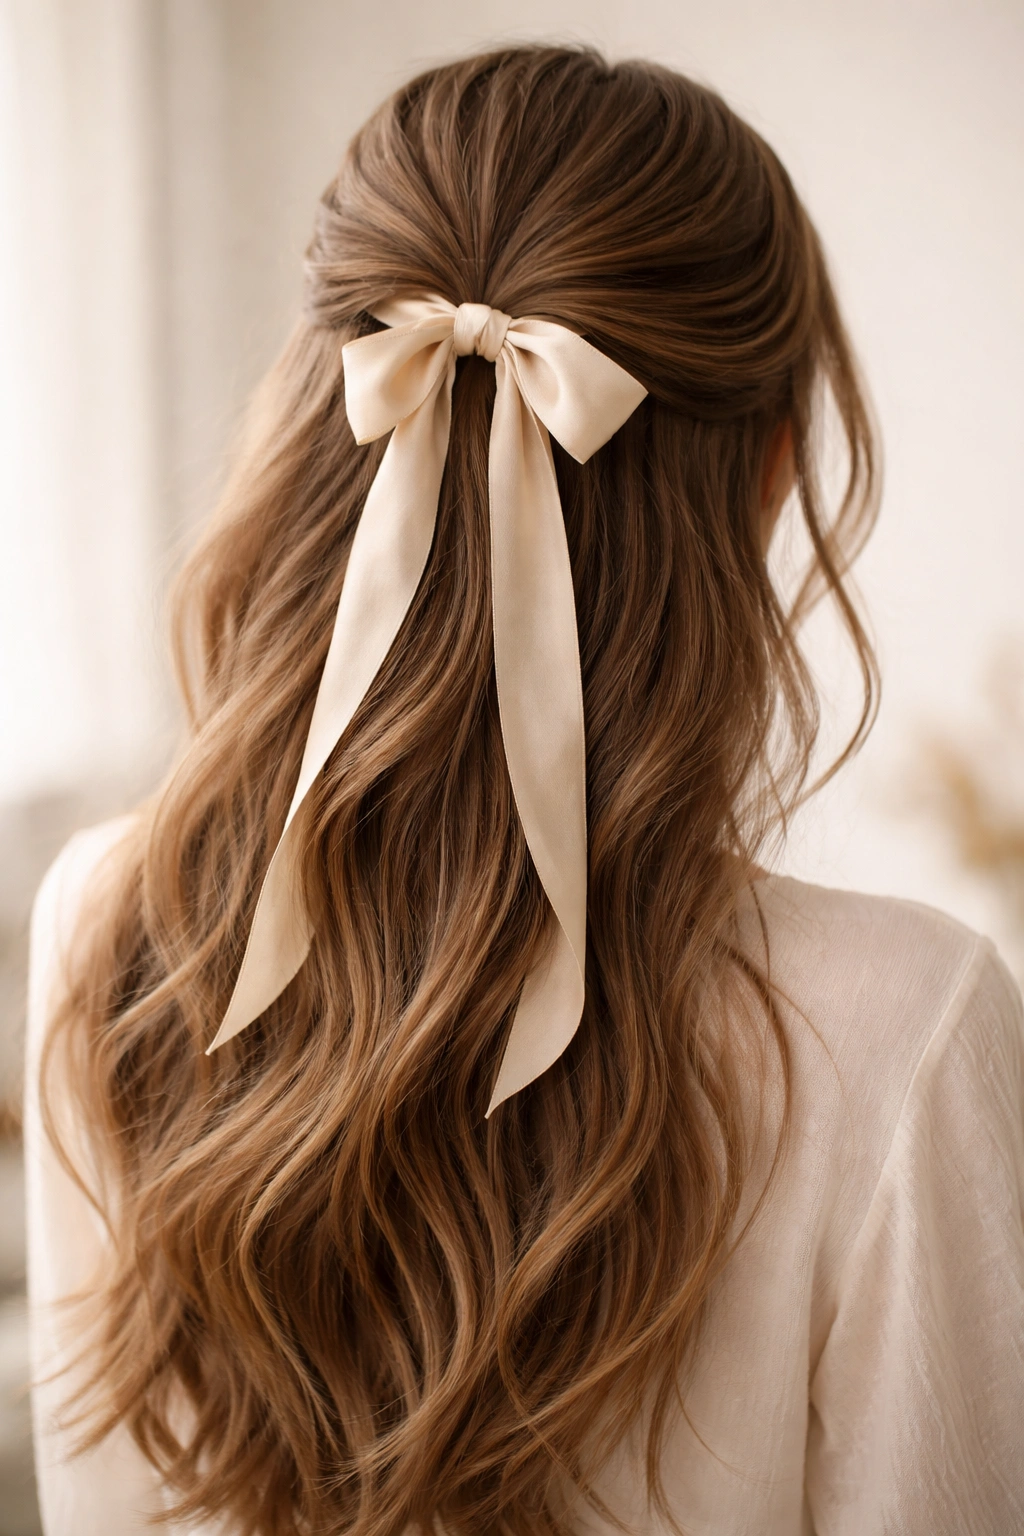
Adding a ribbon, silk tie, or decorative cord through your half-up ponytail or twist completely changes its vibe. You can use delicate ribbons for a feminine, romantic look, metallic cords for edge and glamour, or silk ties in unexpected colors for artisanal flair. The accessory does most of the heavy lifting in terms of style elevation.
Why Ribbons Transform a Basic Style
A ribbon instantly signals intention and effort. It also adds color and movement without requiring any additional styling. Ribbons work with virtually every hair type and texture, making them accessible to everyone.
Styling with Ribbons
- Gather your half-up section as you normally would
- Before securing with an elastic, drape a ribbon or silk tie underneath
- Secure the elastic, then wrap the ribbon around the base of the ponytail
- Tie the ribbon ends together or leave them to flow with your hair
- Wide ribbons create drama; thin ribbons create delicacy
- Match your ribbon to your outfit or go intentionally contrasting
- Velvet ribbons feel luxe; silk ribbons feel smooth and elegant; patterned ribbons add personality
Worth knowing: If you’re using a ribbon, secure your ponytail first with an elastic, then wrap the ribbon around the elastic base. If the ribbon is integral to the hold, it can slip if the elastic shifts.
15. The Textured Half-Up Curls
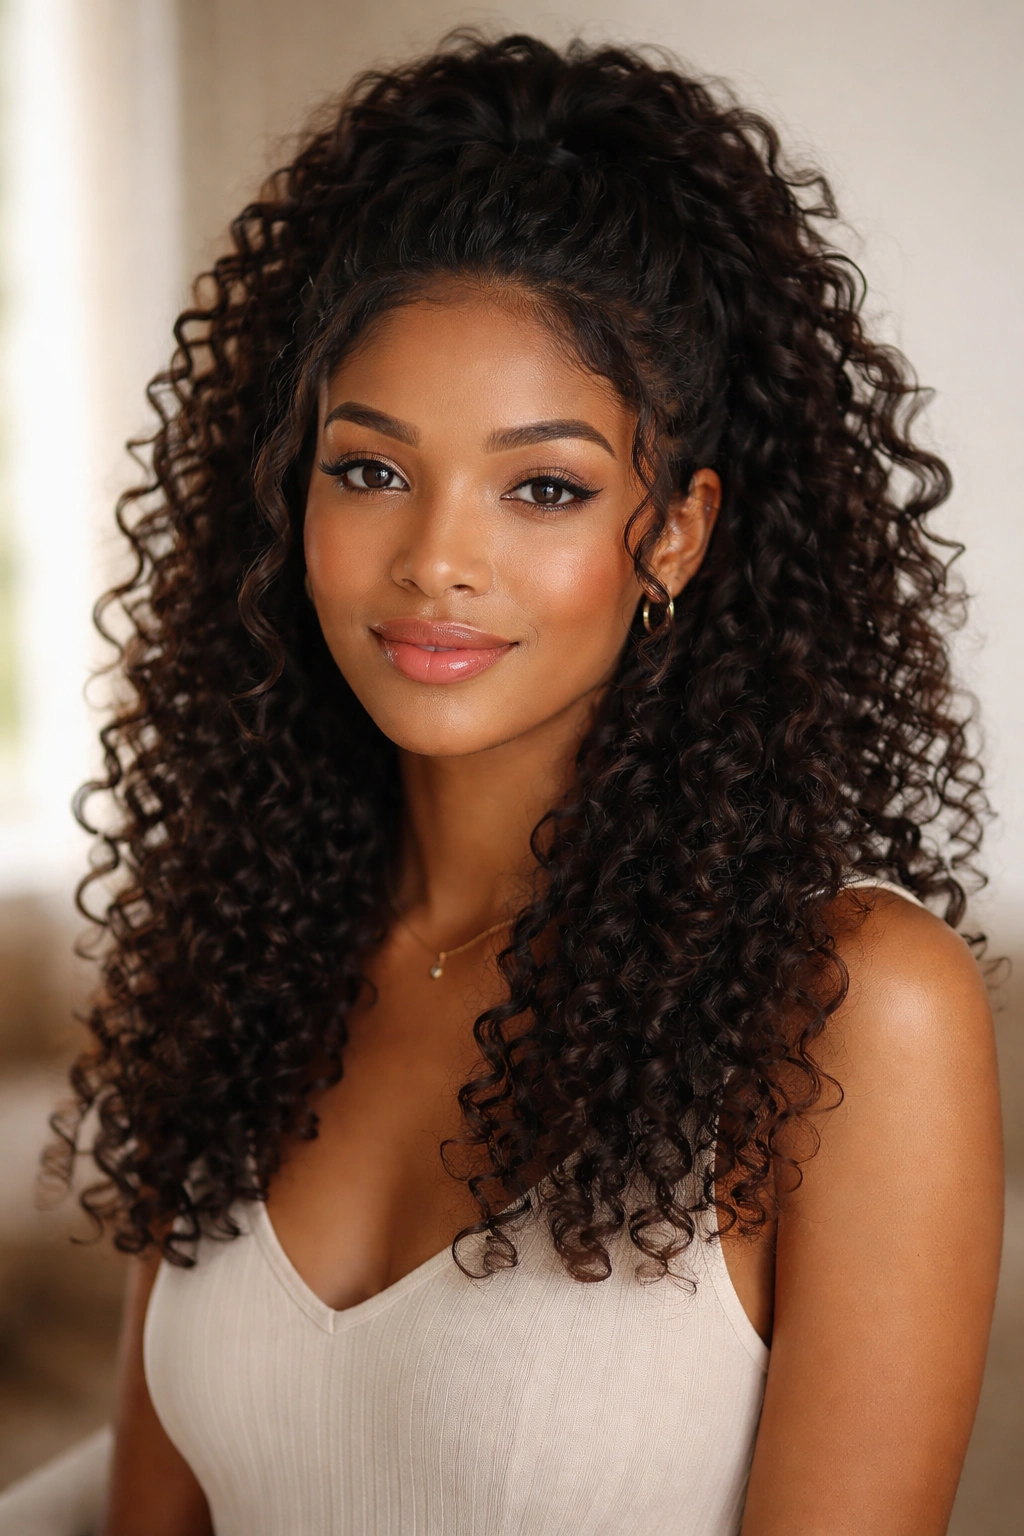
If you have naturally curly or coily hair, a half-up style that celebrates your natural texture is incredibly striking. Gather just enough hair to frame your face while letting your curls fall freely in back. The contrast between the intentional gathering and the free, natural texture is beautiful and authentic.
Working with Your Natural Texture
Half-up styles are inherently flattering on curly hair because they remove hair from your face while celebrating the texture everywhere else. You don’t need to change your curl pattern or use heat tools—just enhance what you already have.
Styling Curly Hair Half-Up
- Apply curl cream or gel to damp hair and scrunch in your usual products
- Air-dry or diffuse until your curls are fully set
- Take a section from each temple, twisting or braiding lightly
- Secure both sections together at the back with a clip or elastic
- Your natural curls provide all the texture and interest you need
- For extra hold, use smaller sections and a secure elastic
- Avoid metal clips on wet curls—they can cause breakage
Pro tip: If you want additional definition, apply a light hairspray to the sections you’ll be twisting or braiding. This helps them grip without weighing down your curls.
16. The Sleek and Textured Mix
Pair a sleek, gel-smoothed section in front with textured, voluminous curls below. This creates visual contrast and a modern, editorial look. You’re essentially creating a half-up that’s all about balance—refined on top, full and romantic below.
Why This Contrast Works
The juxtaposition of sleek and textured reads as intentional and fashion-forward. It also flatters different features: the sleekness draws attention to your face, while the curls add softness and dimension. It’s sophisticated without being severe.
Creating the Sleek-and-Textured Look
- Apply lightweight gel to your roots and hairline, smoothing everything back
- Gather the top section into a sleek ponytail or bun
- Curl the remaining hair with a large-barrel curling iron for soft waves
- Make sure there’s a clear visual distinction between the sleek section and the curled section
- The curls should feel loose and romantic, almost undone
- Finish the curls with a light hairspray that doesn’t crunch
Worth knowing: This style requires a bit more preparation than some half-ups because you’re working with two distinct textures. Give yourself extra time if you’re new to this approach.
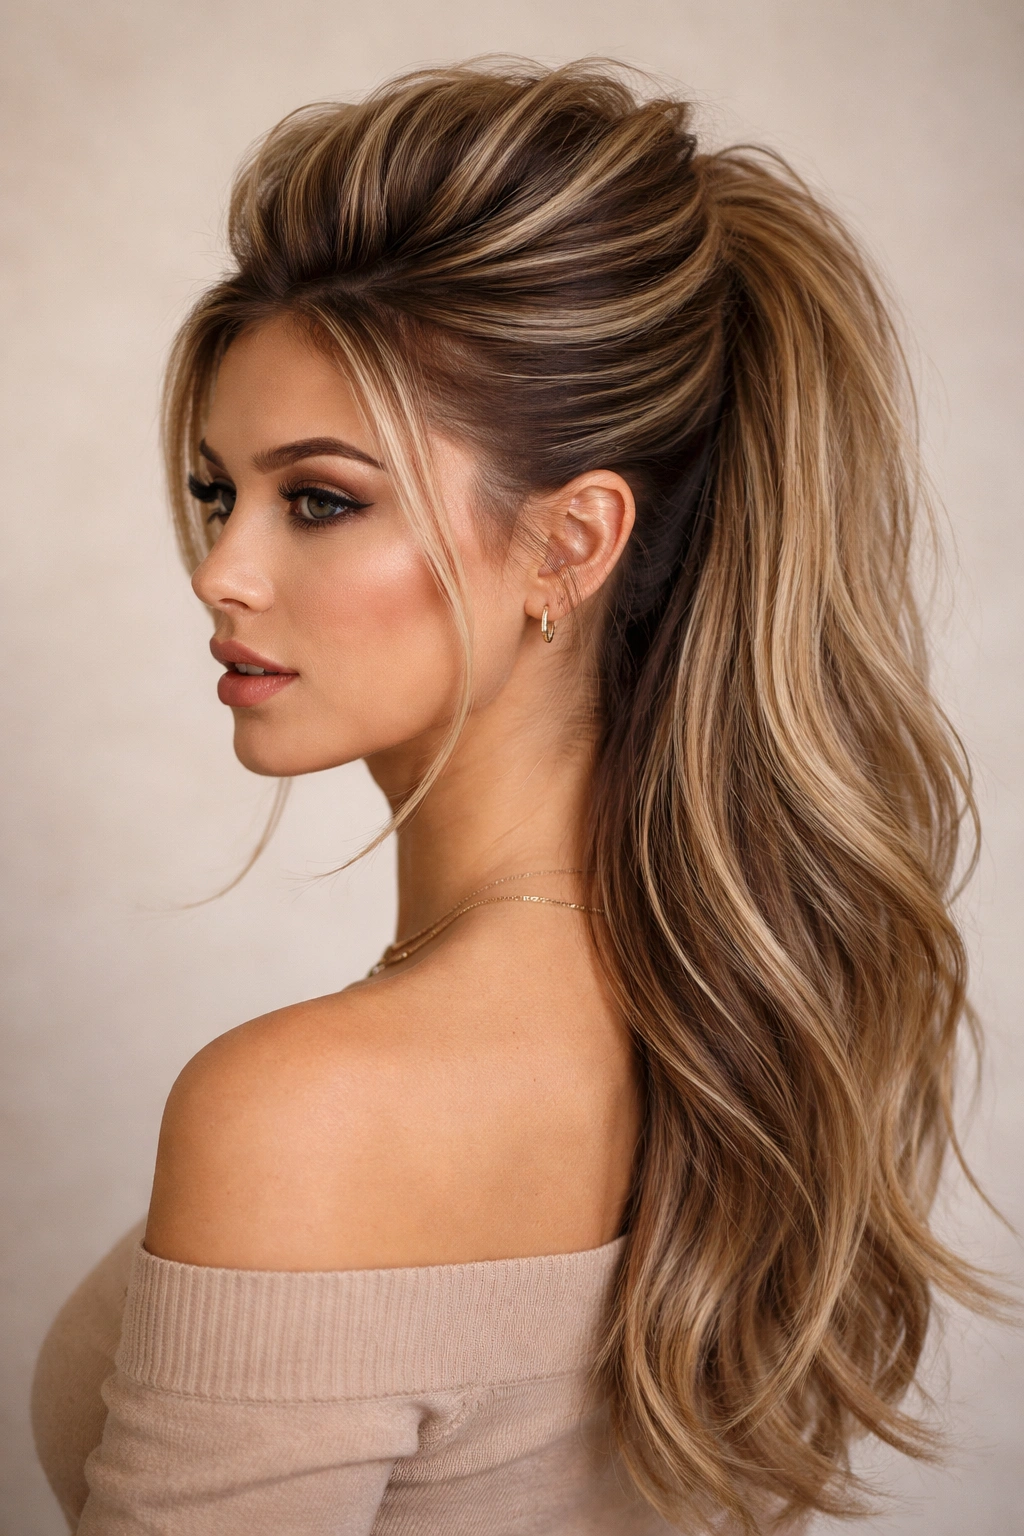
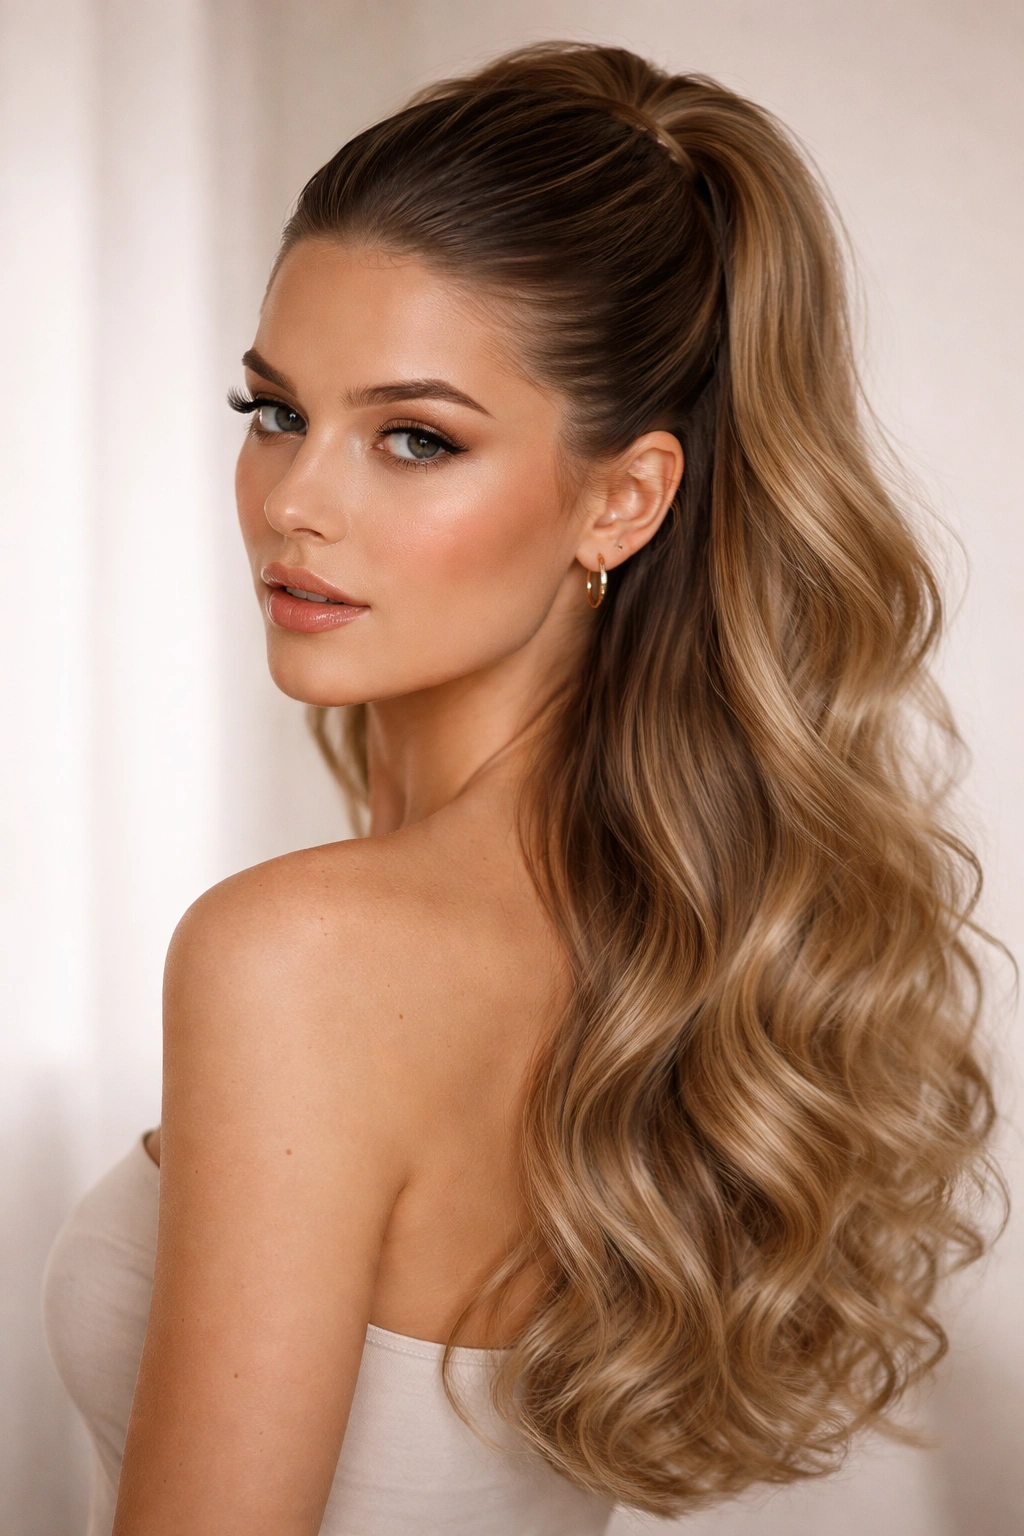
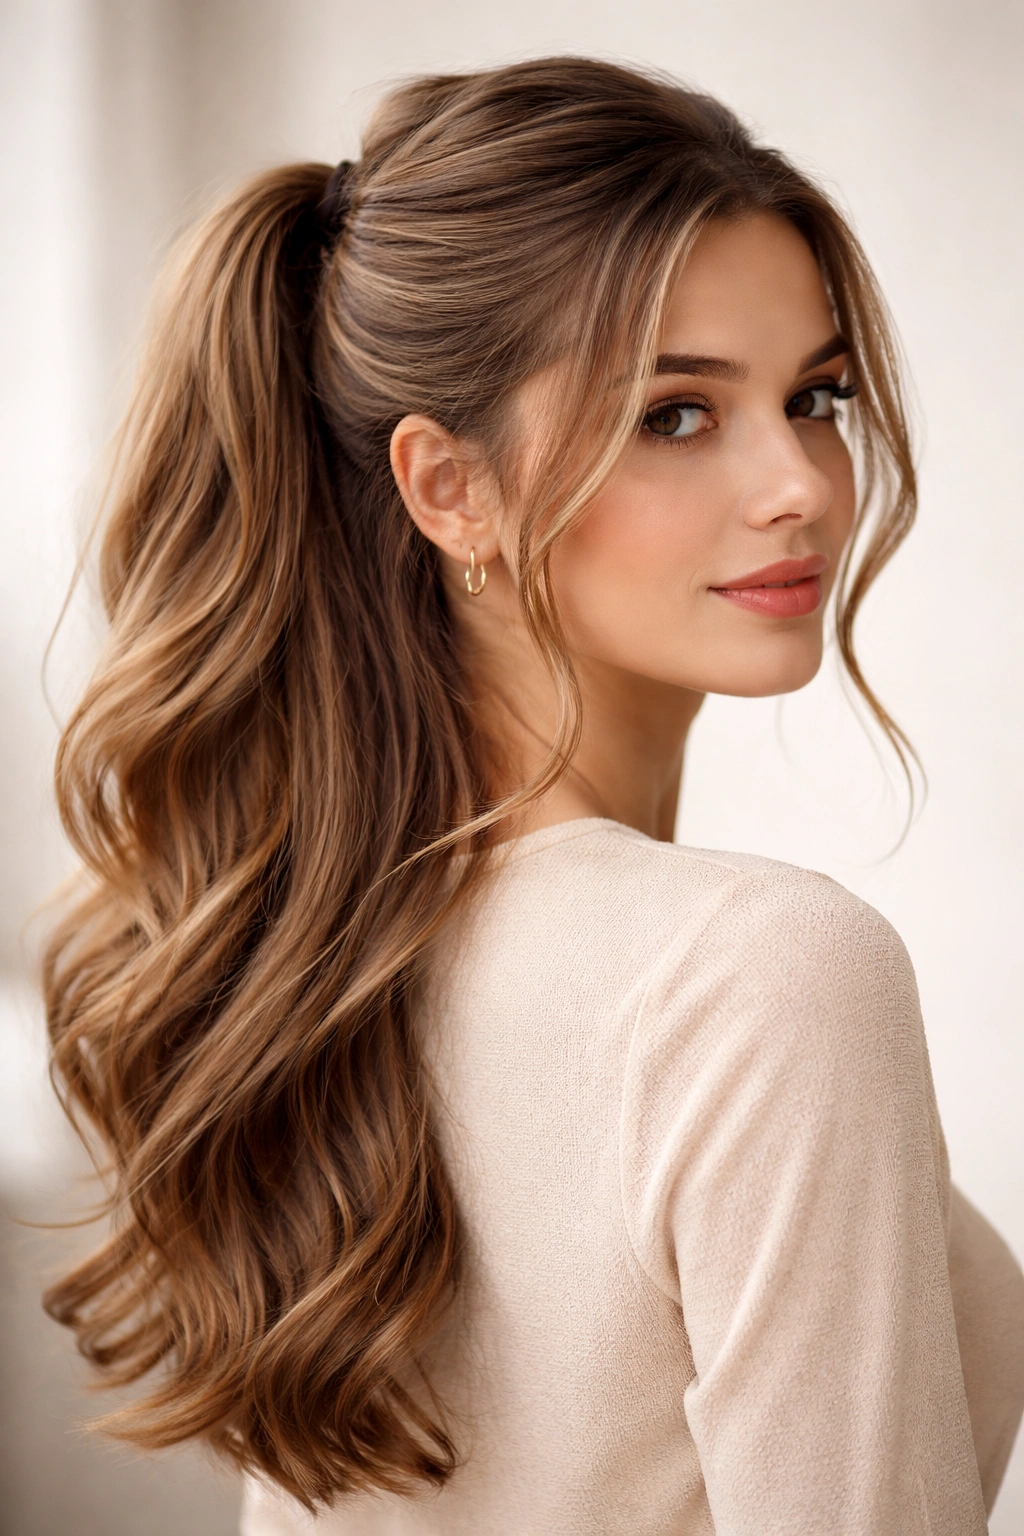
17. The Half-Up Half-Down with Volume at the Crown
Create maximum height and drama at the crown by teasing and gathering just the very top layer of hair, then securing a ponytail or bun at your natural crown. The height draws attention upward and creates an elegant, elongated silhouette. It’s glamorous without being over-the-top.
Why Crown Volume Is So Flattering
Height at the crown is universally flattering because it elongates the face and creates a balanced proportion. It also makes your hair look fuller and more voluminous overall. This style works for any hair type, though it’s especially effective on medium to thick hair.
Building Crown Volume
- Tease gently at the very crown using a teasing brush or backcombing technique
- Smooth the outer layer with a regular brush so it looks intentional
- Gather the back section into a ponytail or bun at your natural crown point
- The volume you created at the top should be visibly higher than the secured section
- Secure tightly so the volume doesn’t deflate as the day goes on
- Finish with hairspray to lock everything in place
Pro tip: Dry shampoo or texturizing spray adds grip before teasing, making the backcombing easier and longer-lasting.
18. The Half-Up Half-Down with Vintage Wave
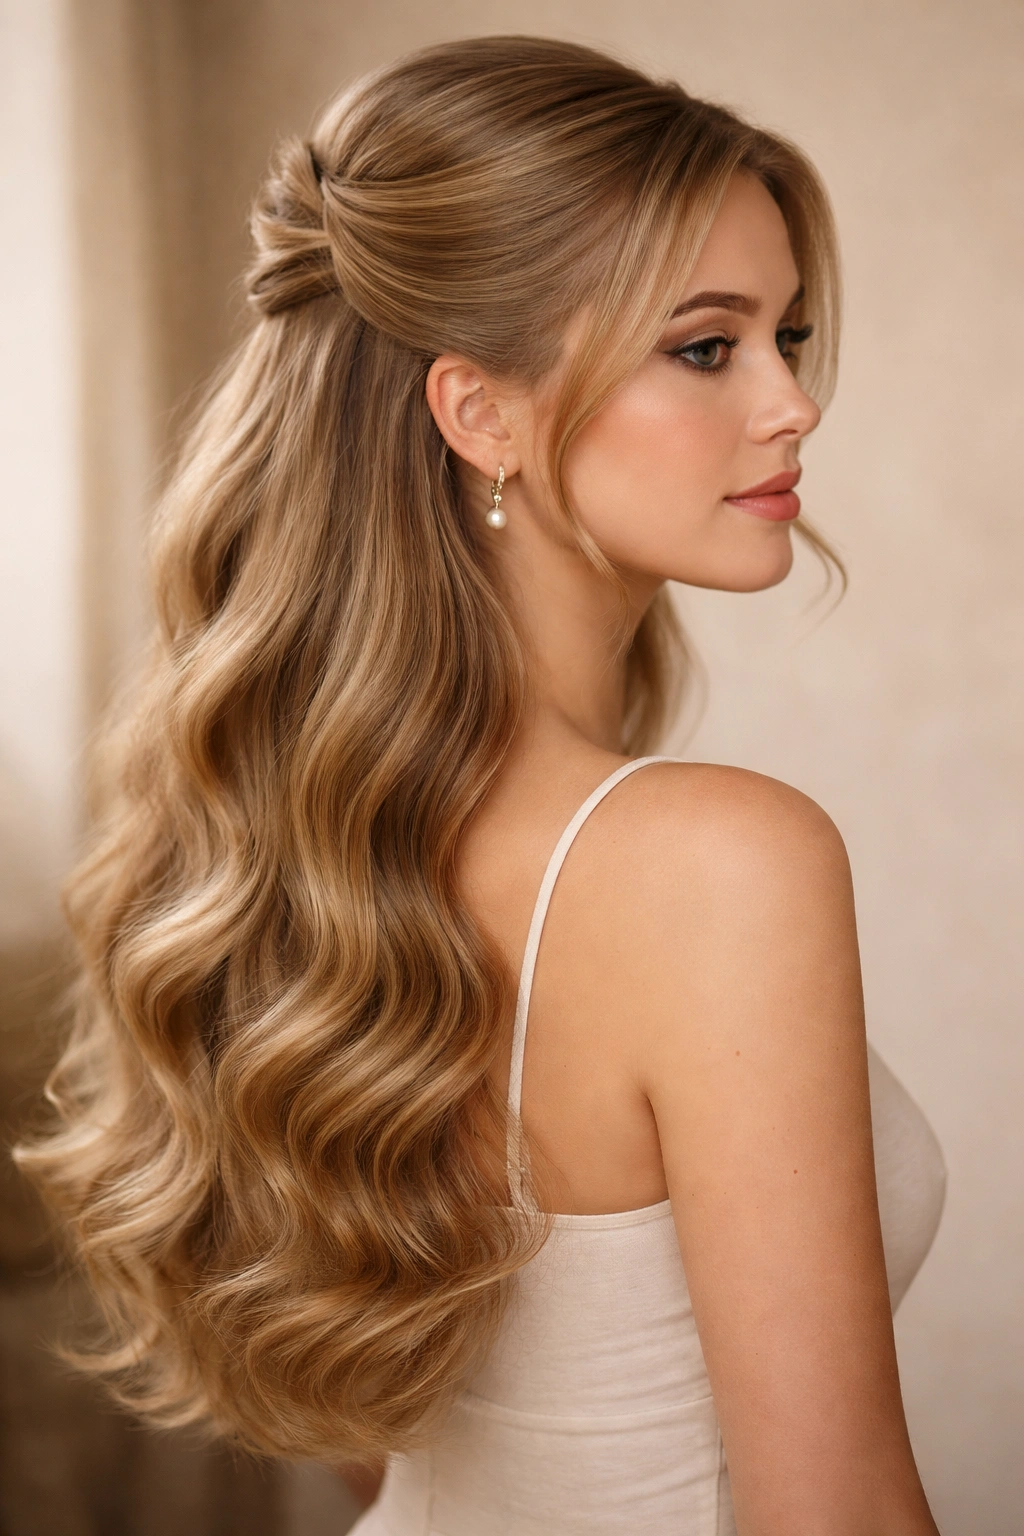
Pair a classic half-up with vintage-style waves throughout your hair for a timeless, elegant look. The waves add softness and romance while the half-up keeps everything polished and intentional. It’s the perfect style for anyone who loves a more classic, feminine aesthetic.
Why Vintage Waves Feel Timeless
Soft, romantic waves never go out of style. They’re flattering on almost every face shape and work for both casual and formal occasions. The combination of a structured half-up with soft waves creates visual balance and sophistication.
Creating Vintage Waves
- Start with clean, dry hair or apply a heat protectant spray
- Use a large-barrel curling iron, curling sections away from your face
- Leave the curl on the iron for a few seconds to set the shape
- Curl different sections in alternating directions for natural-looking waves
- Once all hair is curled, gently brush through with a paddle brush to soften the waves
- Create your half-up by gathering the top section and securing it gently
- The waves should move throughout the entire ponytail and loose hair below
- Finish with a flexible hairspray that holds without crunching
Worth knowing: Vintage waves look best when they’re touchable and soft, not crunchy. Use a light hairspray and avoid over-brushing after curling.
Wrapping Up
Half-up half-down hairstyles are genuinely the sweet spot of hair styling. They offer sophistication without requiring hours of effort, versatility across every hair type and texture, and the freedom to customize based on your mood, outfit, and occasion. Whether you’re drawn to the simplicity of a classic ponytail, the intricate appeal of braids, the romance of loose waves, or the edge of sleek styling, there’s a half-up style here that fits.
The secret to mastering these styles is practice. Pick two or three that appeal to you most, spend a few minutes working on them over the course of a week, and they’ll become second nature. Once you’ve built that muscle memory, you can create any of these looks in just a few minutes without thinking.
Remember that the best version of any style is the one that makes you feel confident and comfortable. Don’t stress about perfection—some of the most beautiful half-up half-down hairstyles are slightly undone, with a few loose pieces and soft texture. That’s not a styling failure; that’s the whole point.