Half up, half down hairstyles have earned their place as a go-to look for a reason—they offer the polished appeal of an updo without sacrificing the flowing elegance of wearing your hair down. For medium-length hair, this styling sweet spot works particularly well. Your hair is long enough to create movement and texture, but short enough to avoid the limp, weighed-down appearance that sometimes happens with very long hair when half is pulled up. Medium length also means you won’t struggle with securing the top section or creating enough volume on either side.
What makes half up, half down styles so versatile is their genuine range. You can dress them up for formal events or keep them casual for everyday wear. They work equally well on straight hair, wavy hair, and curls. You can incorporate braids, twists, loops, and accessories—or keep things minimal and refined. The style manages to look effortlessly put-together even when you haven’t spent a lot of time on it, which is part of their lasting appeal.
If you’ve been wearing your medium hair the same way for months, or if you want options that feel fresh without requiring a dramatic change, half up, half down styles deserve a closer look. Whether you prefer romantic waves, sleek finishes, textured braids, or playful twists, there’s a version here that will work with your hair type and personal style. Let’s walk through eighteen styles that showcase just how versatile medium-length hair can be.
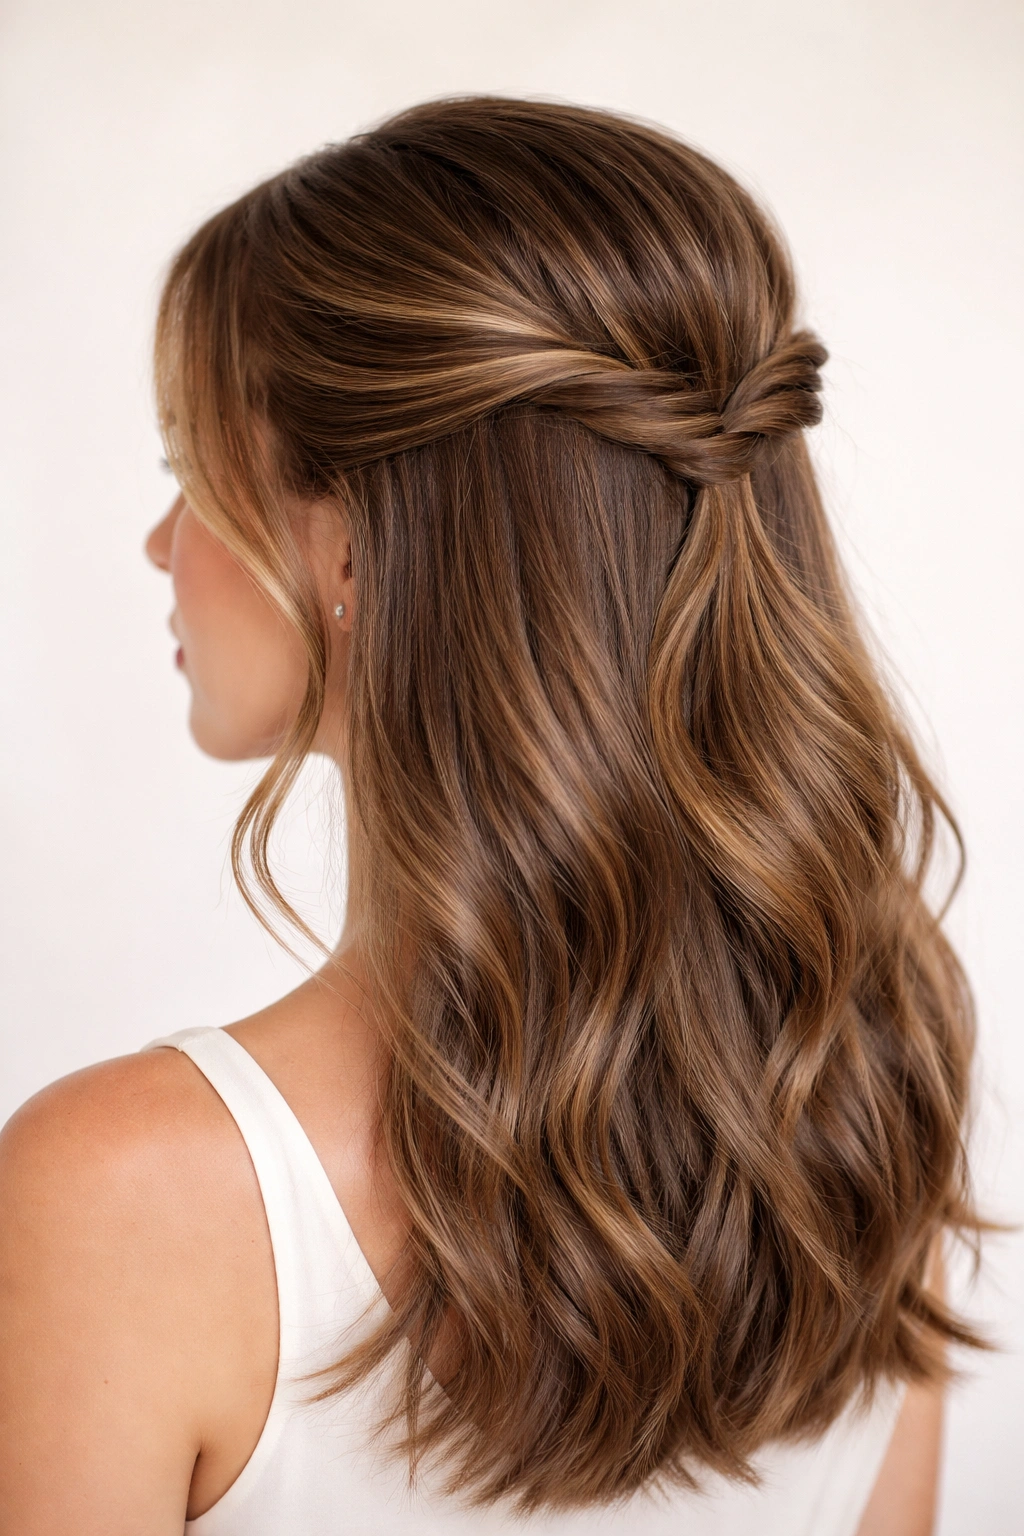
1. Classic Twisted Half Up
This timeless style twists two sections of hair from either side and pins them together at the back of the head, creating an elegant, romantic look that works for any occasion. The beauty of the twisted half up is its simplicity—you don’t need any special tools or advanced styling skills, and the finished result looks intentional and polished every single time.
Why This Works for Medium Hair
Medium hair gives you the perfect amount of length to create visible twist detail without the twists being so long they lose their shape or fall flat. The twisted section sits at the crown where it has natural support and volume from the hair beneath it. This is genuinely one of the easiest half up styles to master, and it’s nearly impossible to execute poorly.
How to Create This Look
- Start with either freshly washed hair with some texture, or hair that’s been styled with waves the day before
- Part a section from your right temple and twist it loosely, moving back toward the crown
- Repeat on the left side, twisting in the same direction so both twists spiral the same way
- Secure both twists together with bobby pins at the back of the crown, tucking the ends beneath the visible twist so the pins stay hidden
- Gently pull and loosen the twist slightly to create a softer, fuller appearance
- This style holds beautifully throughout the day without needing touch-ups
Pro tip: Use a texture spray or dry shampoo at the roots before twisting—it gives your hair much better grip and prevents slipping throughout the day.
2. Double Braided Half Up
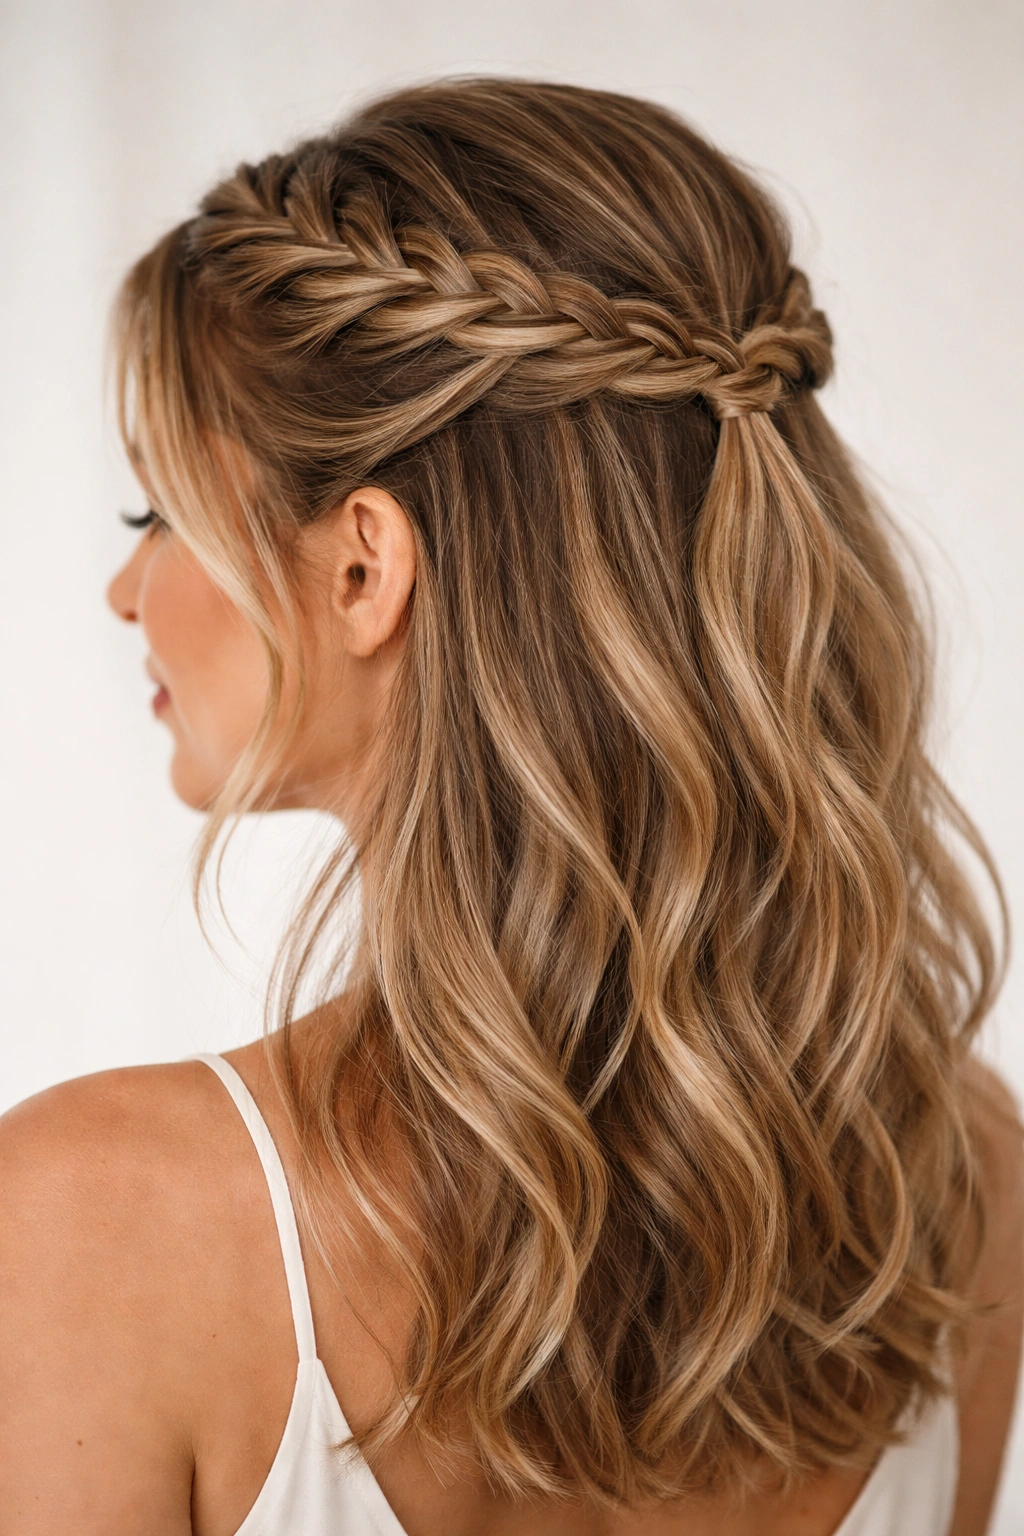
Two Dutch or French braids begin at your temples, travel back toward the crown, and join together in the middle, creating a polished frame for your face and a focal point at the back of your head. This style feels more deliberate and artistic than a simple twist, and it photographs beautifully.
Why This Works for Medium Hair
Medium hair is actually the ideal length for double braids. The braids are long enough to have presence and texture, but short enough that you can braid them tightly enough to hold their shape without looking stringy. The braid creates dimension that draws attention to the upper half of your face and creates the impression of an even fuller head of hair.
How to Create This Look
- Section hair down the middle of your scalp from your forehead to the back of your head, creating a clear guide for each braid
- Begin a French braid at one temple, adding hair as you move toward the back
- Create an identical braid on the opposite side, making sure both braids are the same tightness so they look balanced
- Secure both braids where they meet at the back with bobby pins, then gather the loose hair below into a small elastic
- Leave the ends of the braids slightly loose and textured rather than tight and slicked
Worth knowing: If your hair is very fine or straight, apply a sea salt texture spray and gently backcomb each section before braiding—this prevents the braids from looking thin or slipping out.
3. Sleek Low Half Bun
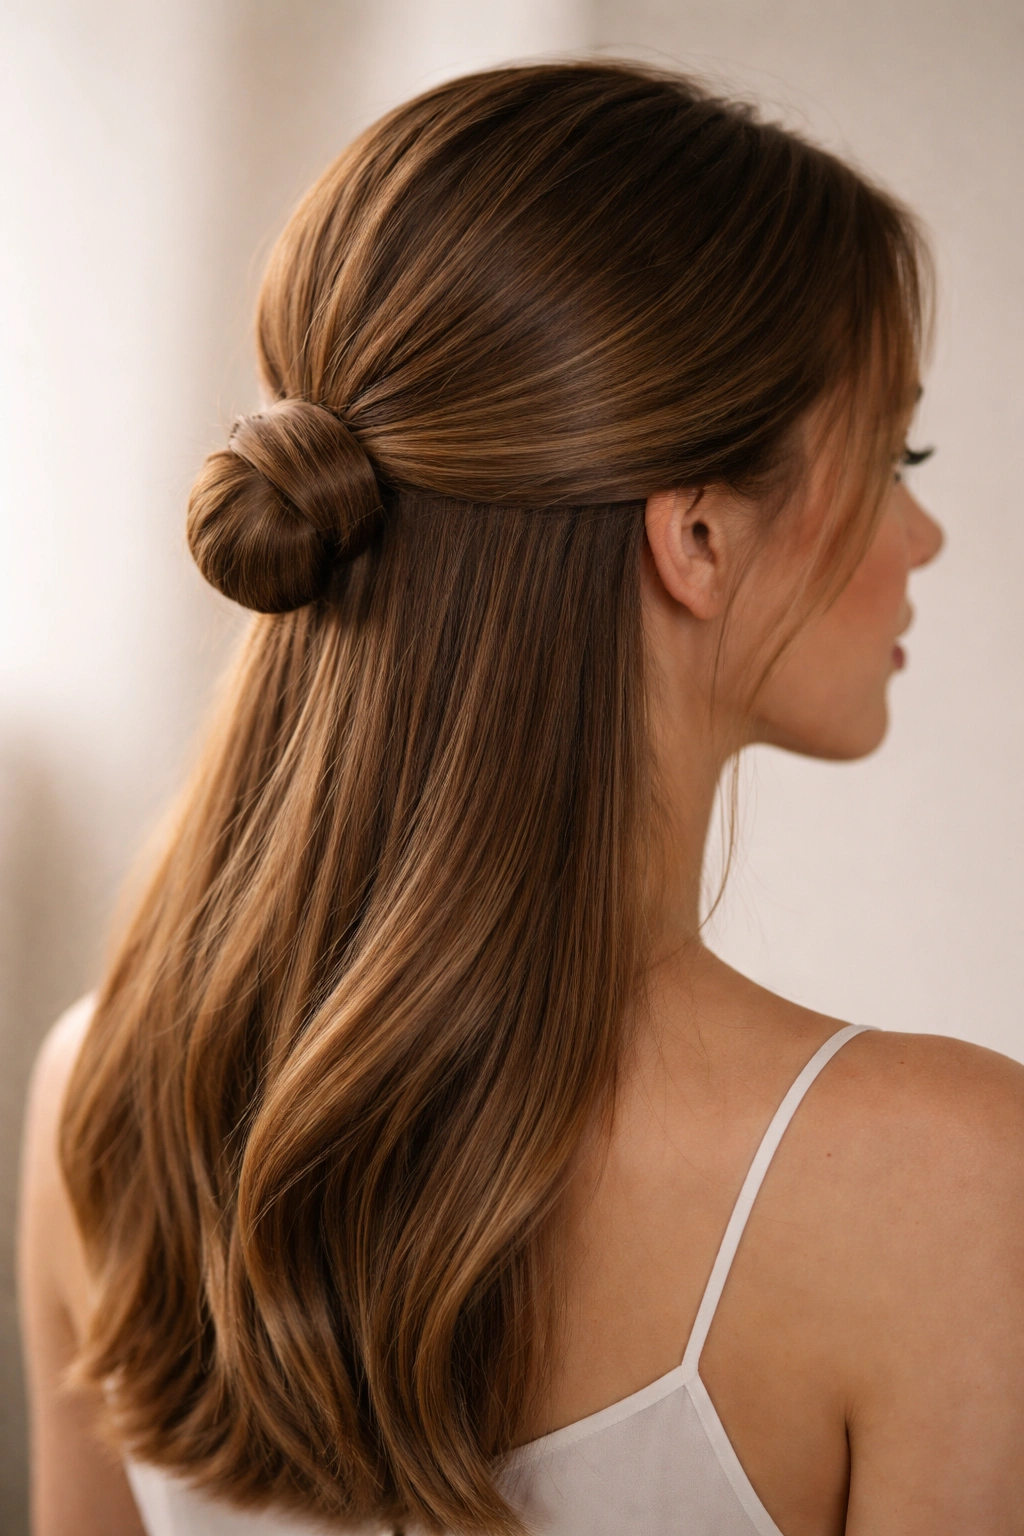
Half of your hair is pulled back and twisted or braided, then coiled into a small, compact bun at the nape of your neck, while the remaining hair flows loose below. This is the most refined option if you want something that feels professional and modern rather than romantic or playful.
Why This Works for Medium Hair
The low bun sits at a flattering spot on medium-length hair—not too high on the crown where it might look sparse, and not so low that it disappears into your loose hair. The half-bun silhouette elongates your neck and face without pulling everything back tightly. It feels deliberate and intentional rather than like you simply threw your hair up because you needed it off your face.
How to Create This Look
- Create a deep side part and pull the larger section back toward the nape of your neck
- Twist or braid this section, then coil it into a small, neat bun and secure with bobby pins
- Leave the front and side sections loose, smoothing them slightly or leaving them textured depending on your preference
- Pin any shorter pieces or baby hairs that escaped the bun with bobby pins that match your hair color
- Use a light hairspray to keep everything polished without looking stiff
Pro tip: This style looks especially sophisticated when you leave face-framing pieces loose around your cheekbones—it softens the look and creates a more intentional style rather than a purely utilitarian updo.
4. Messy Bun with Loose Waves
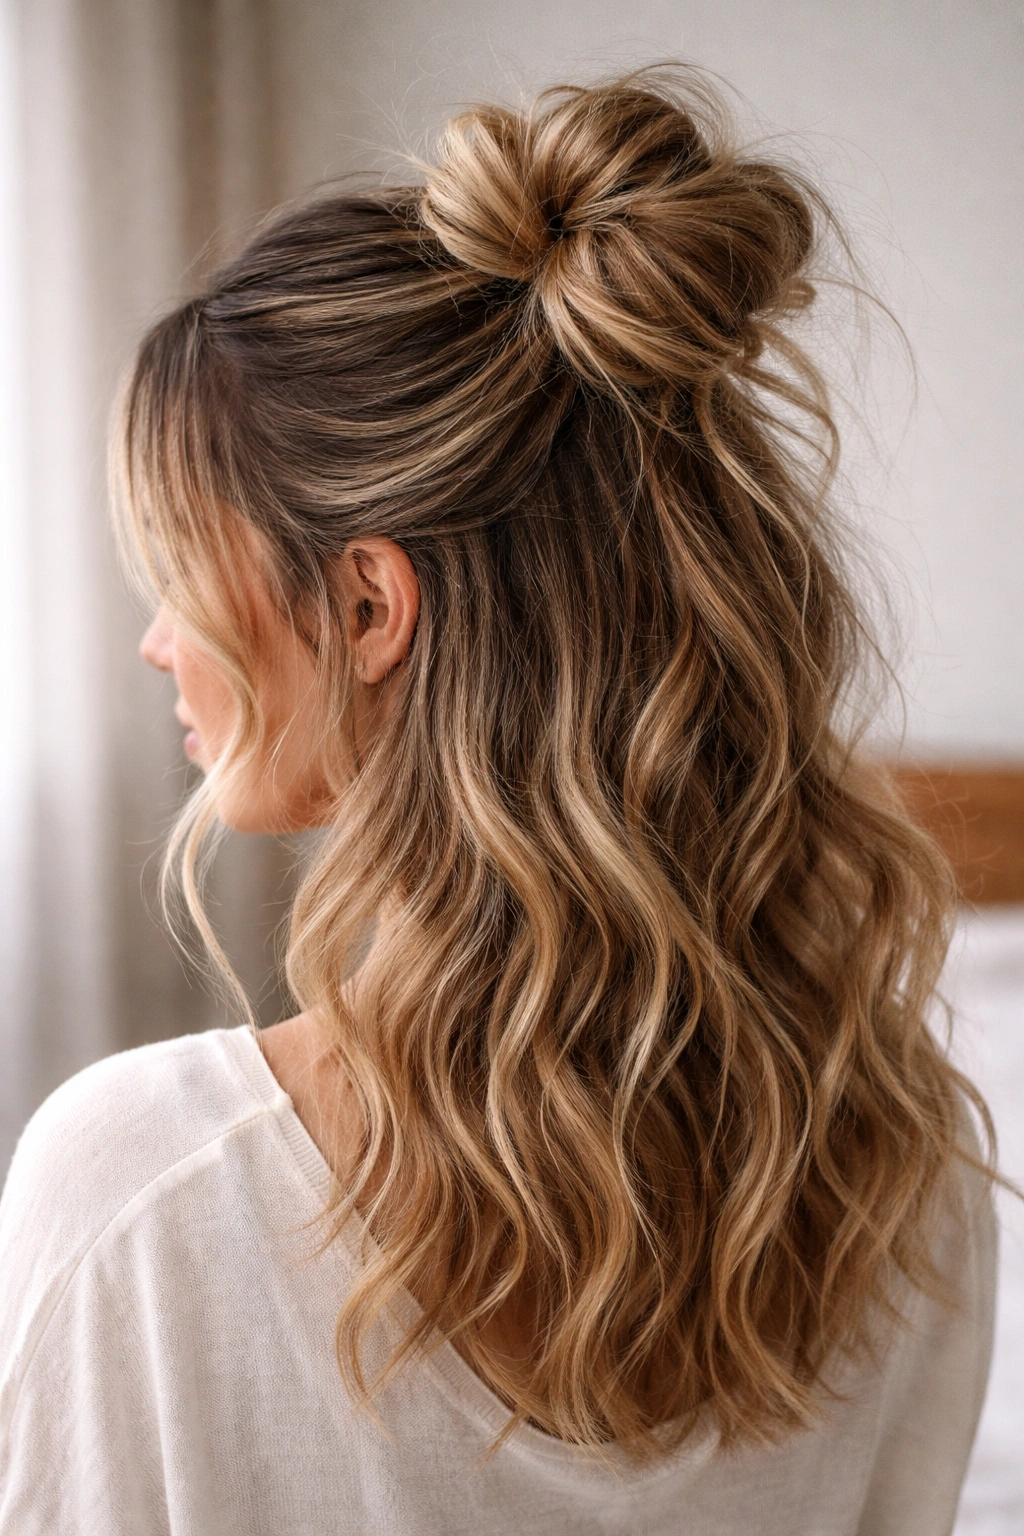
Tousled, undone waves fill the lower half while the top section is gathered into a deliberately imperfect bun that sits slightly off-center. This style prioritizes texture and movement, and it’s genuinely forgiving because “perfect” is the opposite of what you’re going for.
Why This Works for Medium Hair
Medium hair holds the perfect amount of wave without looking either too tight or too sparse in the bun. The loose sections have enough length to create real movement without being so long they look limp. This is the style that looks better after you’ve worn it for a few hours and pieces have loosened naturally—it’s made to look lived-in.
How to Create This Look
- Curl your hair loosely with a 1.5-inch curling iron or braid it overnight for natural waves
- Pull the top section back, twist or gently braid it, then wrap it into a loose bun at the crown
- Pull pieces out intentionally from the bun—don’t aim for perfection, aim for textured chaos
- Leave the bottom half completely loose, letting the waves cascade down your back
- Use a flexible hairspray rather than a strong hold product so the look stays soft and natural-looking
Real talk: This style actually improves over 24 hours as small pieces fall out and the texture becomes even messier. Wear it on day-two hair whenever possible for the best results.
5. Half Up with Center Braid

A single braid starts at the crown, travels down the center back, and is incorporated into the half-up section, creating a striking focal point that runs vertically down the middle of your hair. This is visually interesting and feels more artistic than a simple half-up twist.
Why This Works for Medium Hair
Medium hair gives you enough length for the braid to be clearly visible and textured without looking thin or stringy. The center placement is naturally flattering on most face shapes because it draws the eye to your features rather than pulling everything to one side. The braid also adds surface area to the styling, making thinner or finer hair look fuller.
How to Create This Look
- Brush your hair smooth and create a clean center part if you want a sleek look, or leave it slightly textured for a softer appearance
- Beginning at your crown, start a three-strand braid that travels straight down the center back of your head
- Create this braid slightly loose so it has texture and dimension—tight braids can look harsh
- Once you reach the point where you want the half-up section to end, secure the braid with a bobby pin or small elastic
- Leave everything below the braid point completely loose, and gently pull and loosen the braid slightly for a fuller appearance
Worth knowing: This style works best when you use a clear elastic or bobby pin that matches your hair color, so the securing point doesn’t visually interrupt the braid.
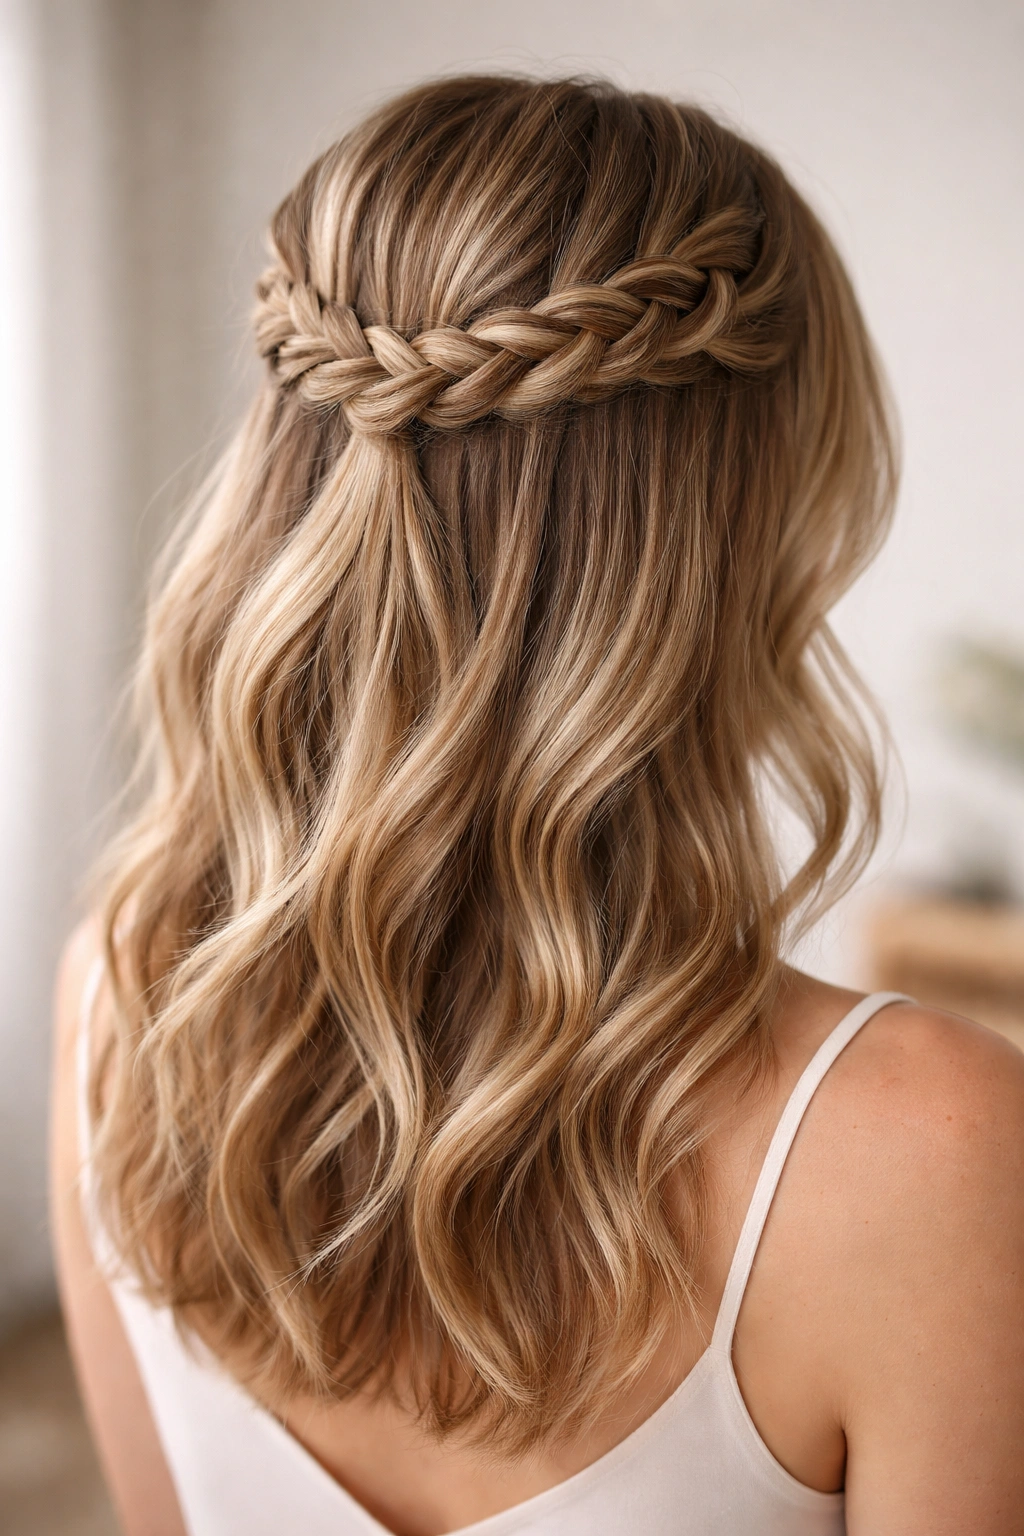
6. Halo Braid Half Up
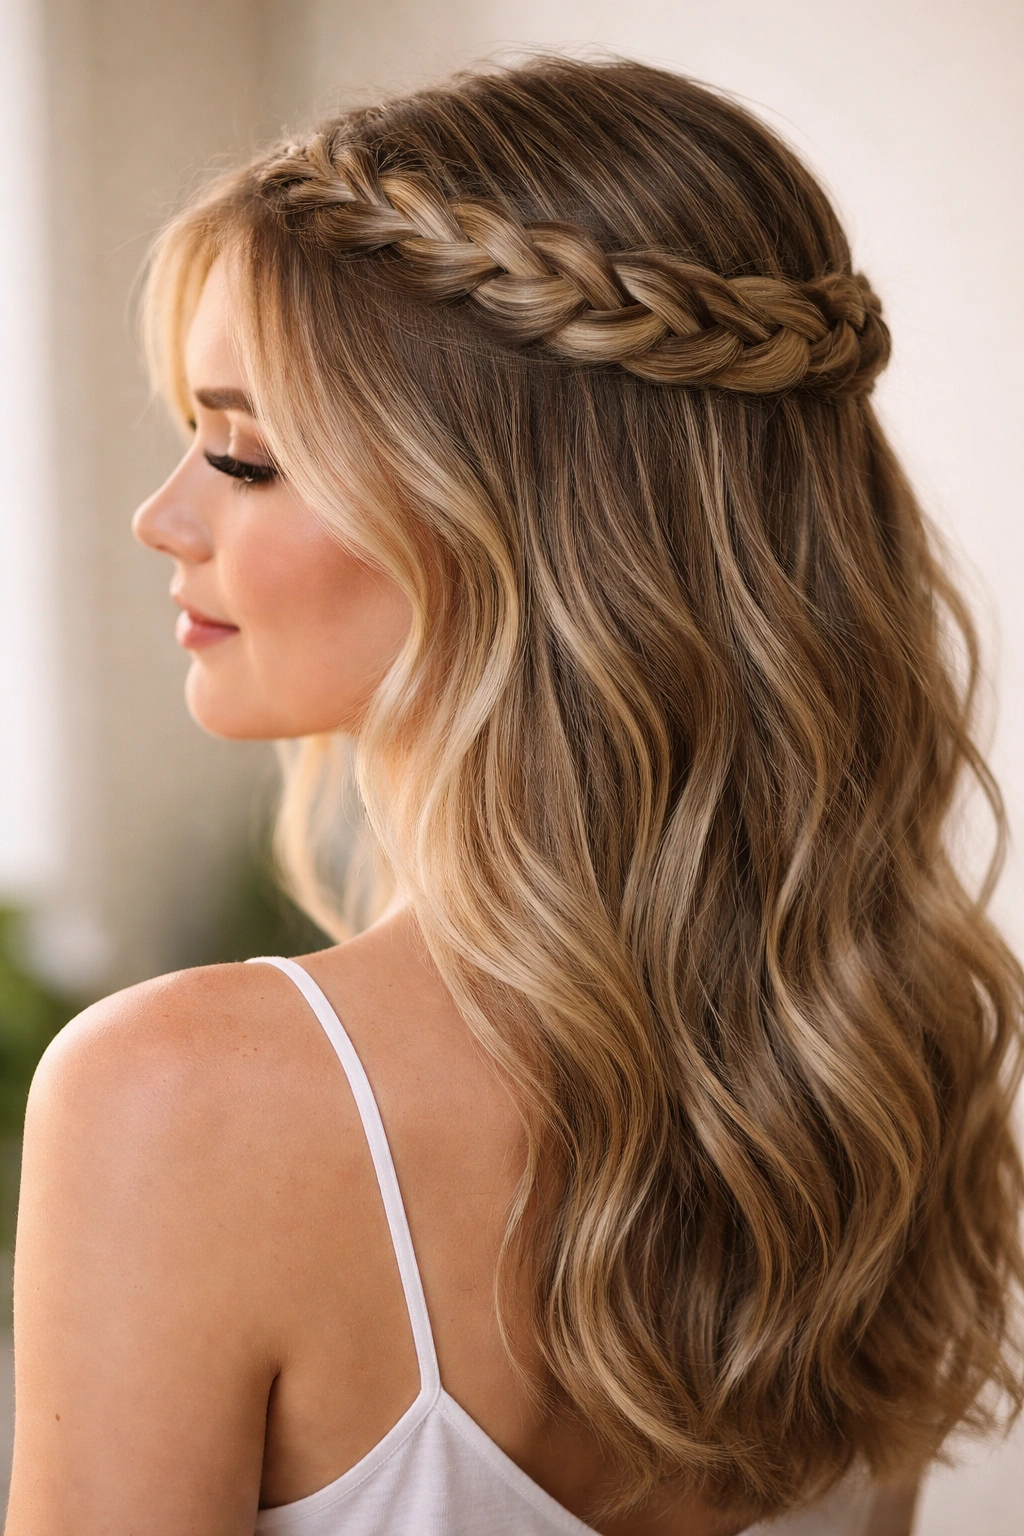
A continuous braid begins at one temple, wraps partway around the back of your head like a halo, and is secured at the opposite temple while the rest of your hair flows loose below. This creates a flattering, decorative frame that feels special enough for events but works for everyday styling too.
Why This Works for Medium Hair
The braid sits at the perfect height on medium-length hair—high enough to be visible and beautiful, low enough that it doesn’t look like you’re pulling everything tightly back. The halo effect naturally flatters most face shapes by drawing attention upward and creating a soft frame around your face. The braid also serves a practical purpose by keeping hair out of your face without requiring a full updo.
How to Create This Look
- Start a French braid at your right temple, adding hair as you move back and around your head
- Continue braiding around the back of your head at about ear level
- End the braid at your left temple, where you’ll secure it with bobby pins tucked underneath so they’re hidden
- Let the braided section sit loosely rather than pulling everything tightly—this creates a more romantic, intentional look
- Use bobby pins that match your hair color so the securing points blend in seamlessly
- Leave your hair down and loose below the braid, adding waves or texture if desired
Pro tip: If your braid seems too tight or slicked, gently pull and loosen it after securing—this softens the look and makes it feel less severe.
7. Twisted Half Up with Clip
Two twists or sections are pulled back from the sides and secured with a decorative clip or claw clip at the crown, which becomes a visible focal point of the style. The accessory transforms the half-up from simple to polished instantly, and you can change clips to match different outfits or moods.
Why This Works for Medium Hair
Medium hair creates the right balance—the twists have substance and texture without looking droopy, and the clip sits at a flattering height without getting lost in your hair. The visible accessory adds interest to an otherwise simple style, making it feel more intentional. A clip also keeps the style secure throughout the day without relying on bobby pins that need constant adjusting.
How to Create This Look
- Pull a section from your right temple and twist it loosely toward the back
- Do the same on the left side, creating two parallel twists
- Bring both twists together at the crown and secure them with a decorative clip
- Choose a clip size and material that coordinates with your outfit or personal aesthetic—tortoiseshell, metal, or colorful clips all work beautifully
- Leave the rest of your hair down, creating waves or leaving it straight depending on your preference
- Gently pull the twists loose after clipping for a softer, fuller appearance
Real talk: A quality clip stays in place far better than bobby pins alone, and it’s a reversible styling choice—if you want to let your hair down later, you simply remove the clip with no damage or mess.
8. Braided Crown Half Up
A crown braid (sometimes called a Dutch or French braid flipped and fluffed for a fuller appearance) sits at the very top of your head, with hair released and secured at the back of the crown, allowing the remaining hair to fall freely. This is a playful, youthful style that feels special without being overly formal.
Why This Works for Medium Hair
Medium hair holds a crown braid beautifully at the correct height—high enough to be visually interesting, but with enough remaining hair below to create real movement and flow. The braid doesn’t disappear into thinner sections of hair, and the style doesn’t require a full updo to look intentional.
How to Create This Look
- Brush your hair smooth and create a slight texture with waves or texture spray if your hair is very straight
- Starting at your right ear, begin a Dutch braid (braiding strands under rather than over the center strand)
- Continue braiding around the top and back of your head, adding hair as you move
- Stop braiding when you reach your left ear, then secure the end with bobby pins tucked behind the braid so they’re invisible
- Gently pull and loosen the braid to create a fuller, more textured appearance
- Leave everything below the braid completely loose, creating waves or curls if desired
- The crown should look intentionally full and soft, not tight and slicked
Pro tip: Practice this style on day-two or day-three hair when your hair has natural texture—it braids more easily and holds its shape better throughout the day.
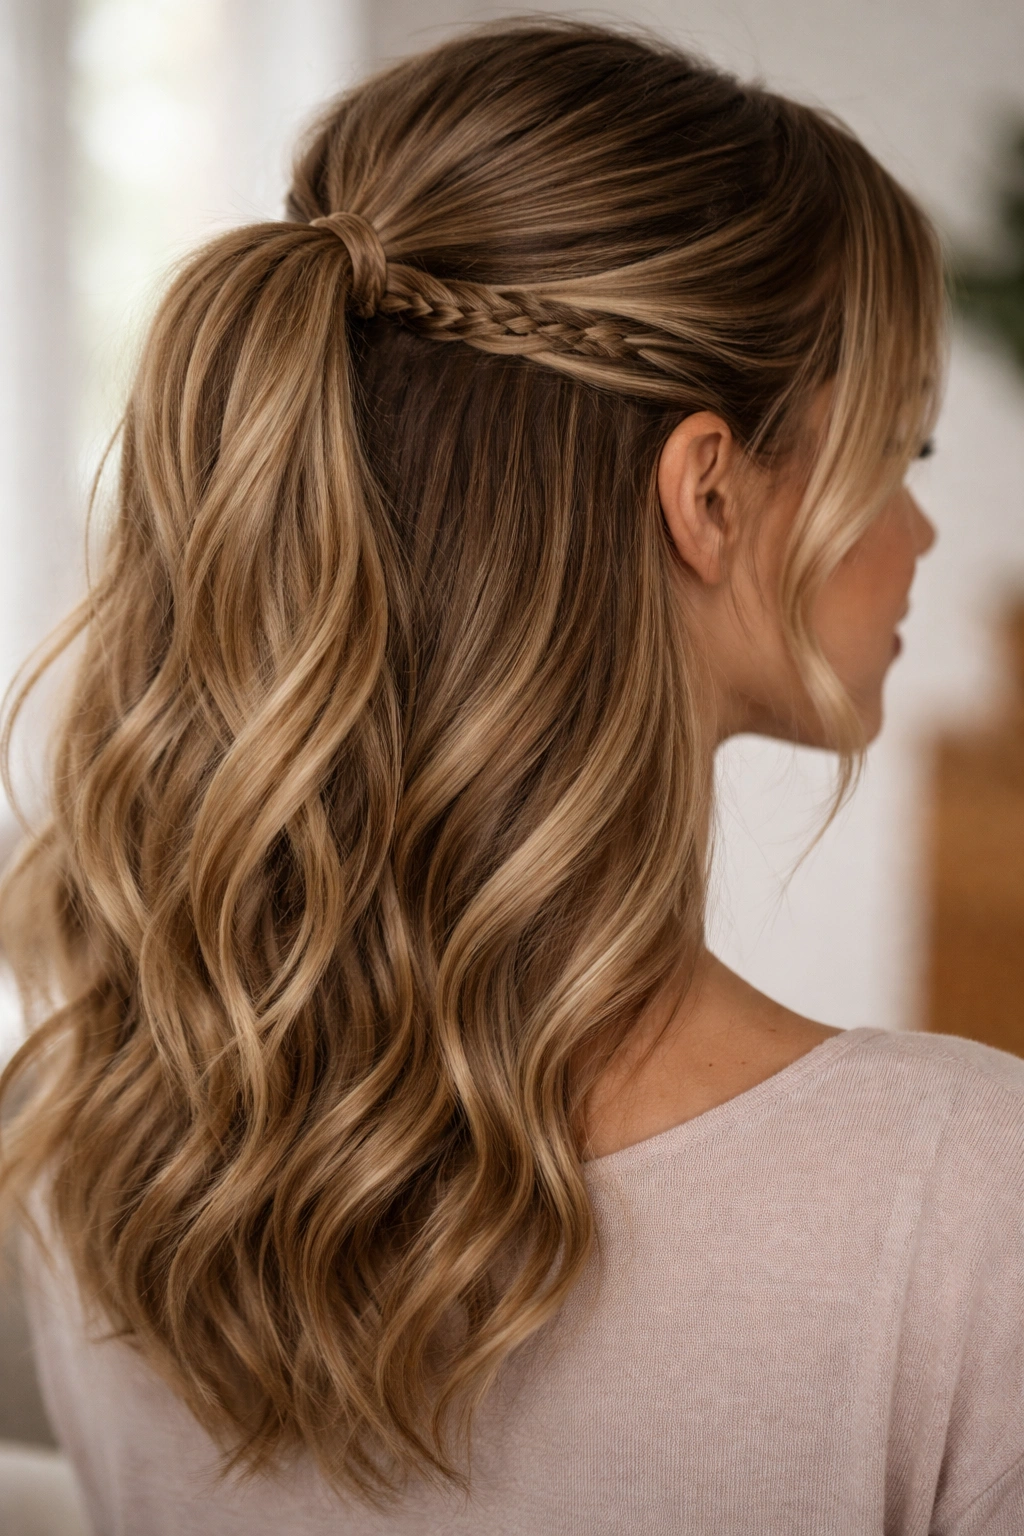
9. High Ponytail Half Up
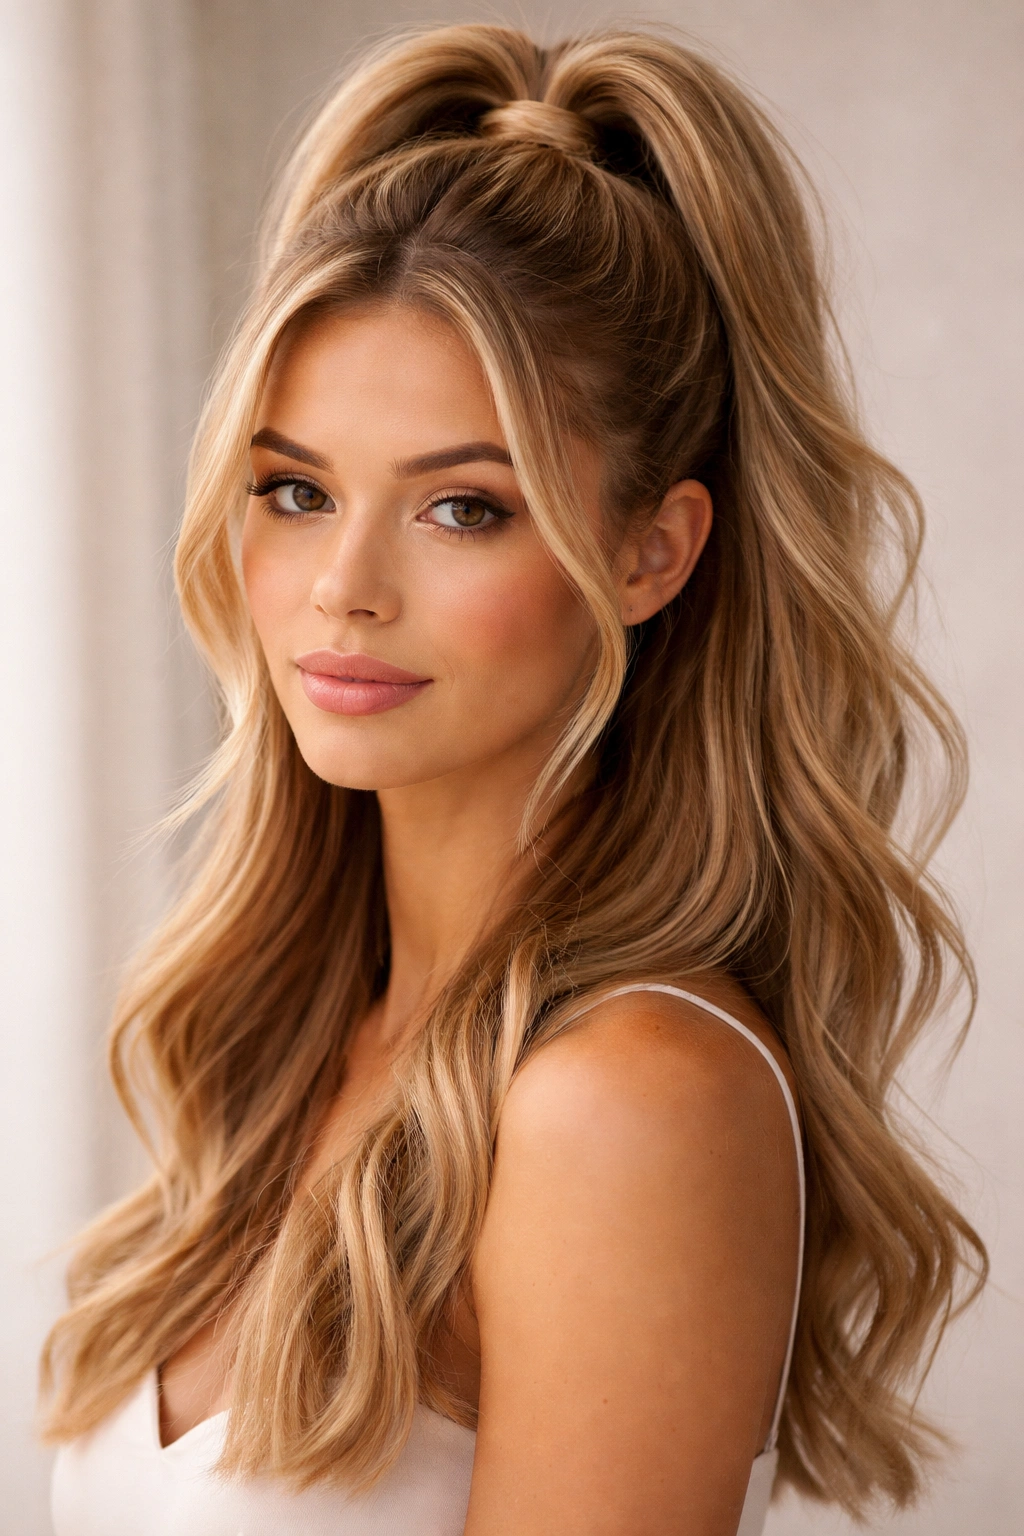
The top half of your hair is gathered into a high, neat ponytail at the crown, while the bottom half flows freely, creating a silhouette that’s more polished than a basic half-up but less formal than a full ponytail. You can add texture, wrap a section around the base, or keep it sleek depending on the occasion.
Why This Works for Medium Hair
A high ponytail hits the perfect spot on medium-length hair—it’s high enough to feel intentional and flattering, but with enough hair remaining below to create genuine volume and movement. The style works equally well on straight, wavy, or curly hair. It’s secure enough to last through work or school but still feels effortless and wearable every single day.
How to Create This Look
- Use a fine-tooth comb to gather the top section of hair into a smooth, neat section at your crown
- Secure with a small elastic, positioning it high so it sits directly on the crown rather than drooping down
- For extra polish, take a very thin section from the ponytail, wrap it around the base to hide the elastic, and secure it with a bobby pin
- Leave the bottom half completely loose, creating waves if desired or leaving it straight
- You can make this style sleek or textured depending on your preference and the occasion
- Use a light hairspray to keep flyaways smooth without making the style feel stiff
Worth knowing: A high ponytail sits better and looks fuller when you start with slightly textured or second-day hair rather than freshly washed hair that’s too slippery.
10. Bubble Braid Half Up
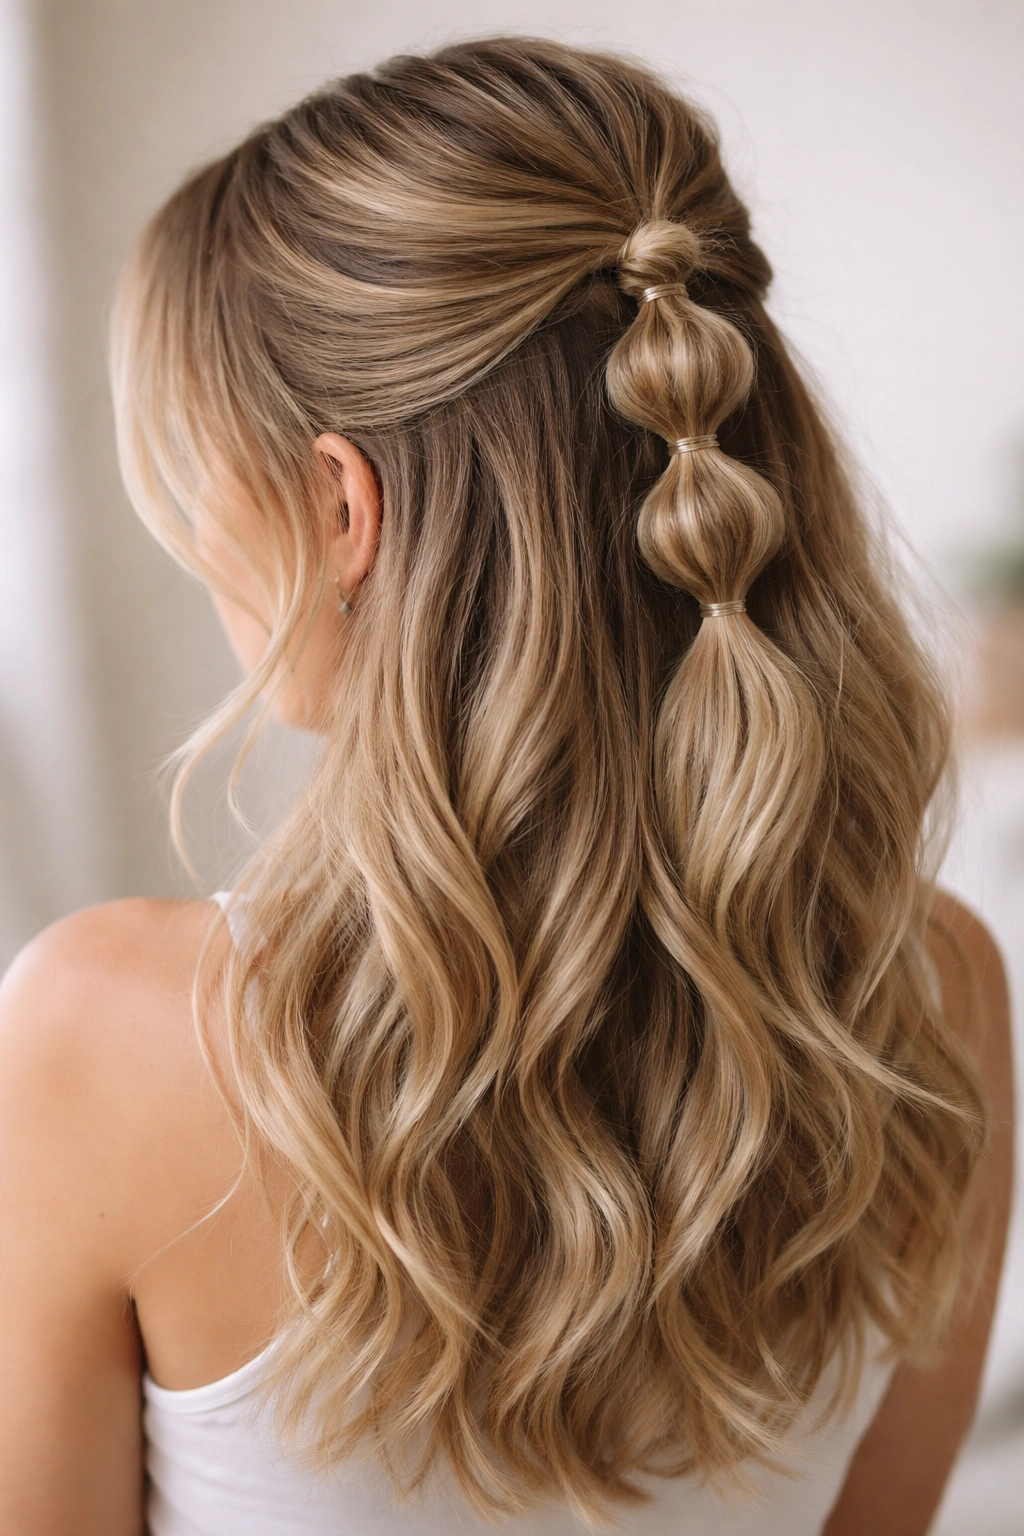
Multiple small sections are pulled back and stacked vertically, with each section secured separately to create a “bubble” or spherical effect, while the remaining hair flows down in loose waves. This playful, dimensional style is trending but also timeless in its charm and youthful energy.
Why This Works for Medium Hair
Medium-length hair creates the ideal proportion for bubble braids—not so short that each bubble looks stubby, not so long that the bubbles get lost in length. Each bubble has enough surface area to look intentional and textured. The style also works beautifully on any hair type, from straight to curly.
How to Create This Look
- Pull the top section back and secure with a small elastic
- Just below that elastic, create another section and pull it back, gathering it around the elastic below to create a bubble effect
- Continue this process downward, creating 3 to 5 bubbles depending on how much hair you want to pull back
- Gently pull each bubble to create a fuller, fluffier appearance—the bubbles should look dimensional and textured
- Secure the final bubble with a bobby pin or small elastic
- Leave everything below the final bubble loose, creating soft waves
Pro tip: Use small clear elastics throughout so they blend into your hair and don’t visually interrupt the bubble effect. Gently pull each bubble immediately after securing it to soften the look and create the best appearance.
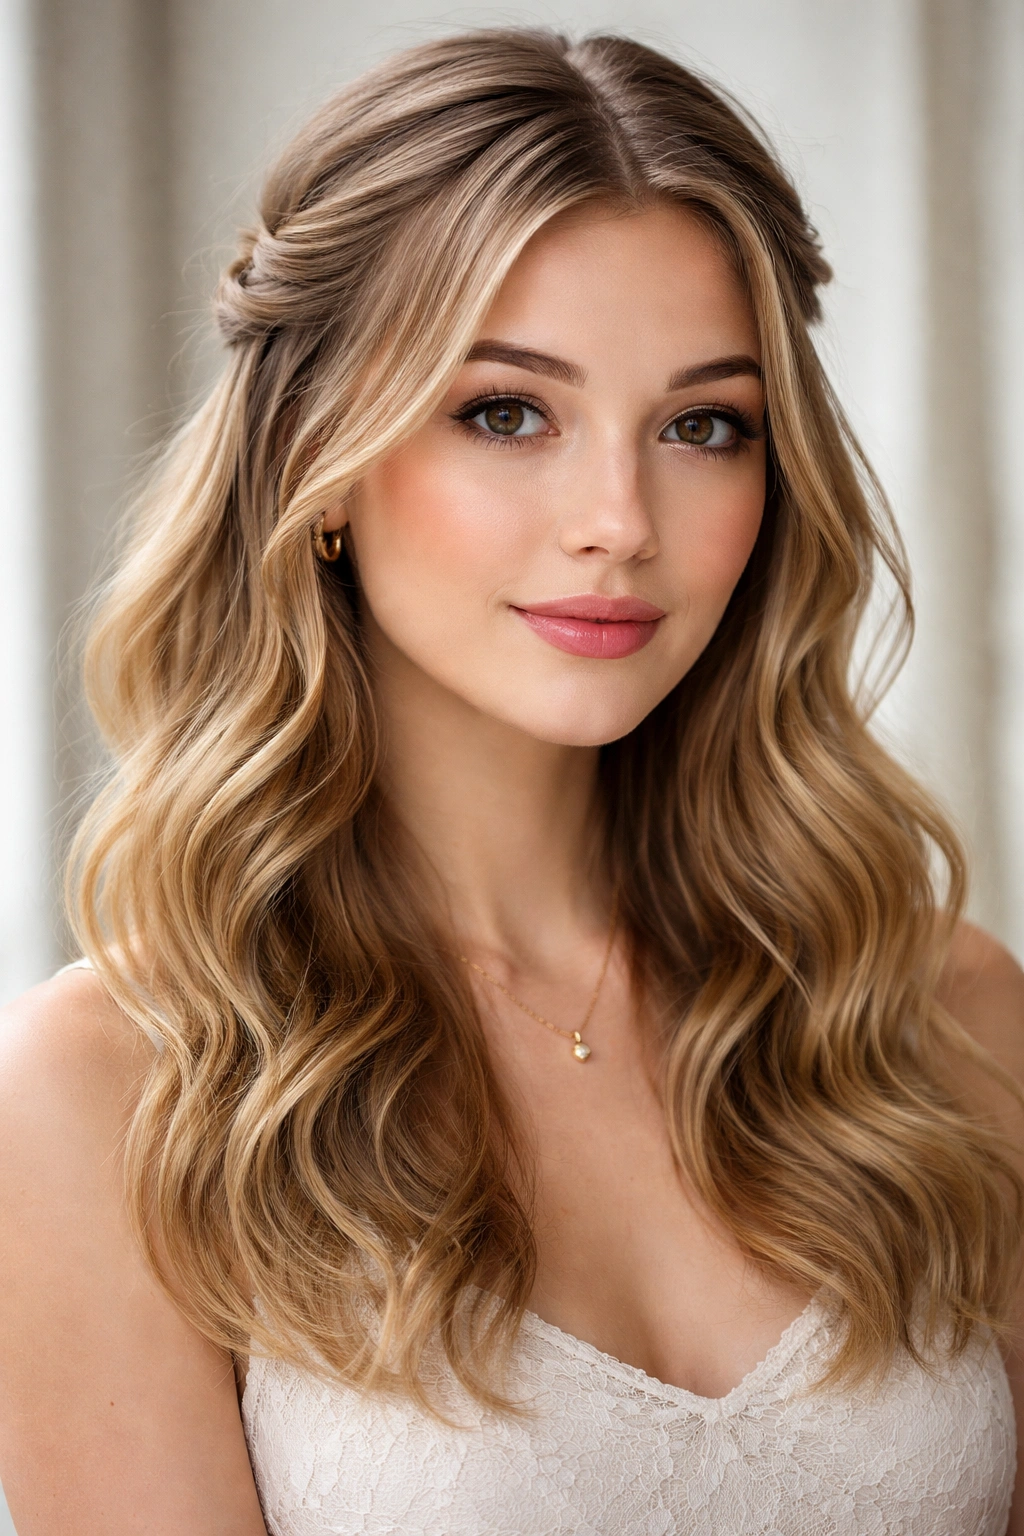
11. Twisted Half Up with Face-Framing Pieces

Two twists travel back from your temples toward the crown while intentional face-framing pieces remain completely loose around your cheekbones and jawline, creating a soft, romantic, carefully undone look. This is the style that bridges casual and polished perfectly.
Why This Works for Medium Hair
Medium hair has enough length that face-framing pieces actually frame your face rather than disappearing or looking scraggly. The twists behind them stay secure without needing excessive pins or products. The combination of pulled-back twists and loose face-framing pieces creates dimension and visual interest while keeping hair off your forehead and ears.
How to Create This Look
- Starting with slightly wavy or textured hair, create face-framing pieces by isolating a small section on each side of your part and leaving them completely loose
- Pull a larger section from your right temple, avoiding the face-framing piece, and twist it loosely back toward the crown
- Repeat on the left side with a matching twist
- Secure both twists together at the crown with bobby pins
- Gently pull the twists loose for a softer appearance
- Curl the loose face-framing pieces if desired, or leave them in their natural texture
- Use a light hold spray so the loose pieces maintain movement and don’t stick to your face
Real talk: The key to nailing this style is intentionally leaving the face-framing pieces rather than having them accidentally escape—it creates a completely different aesthetic when it’s deliberate.
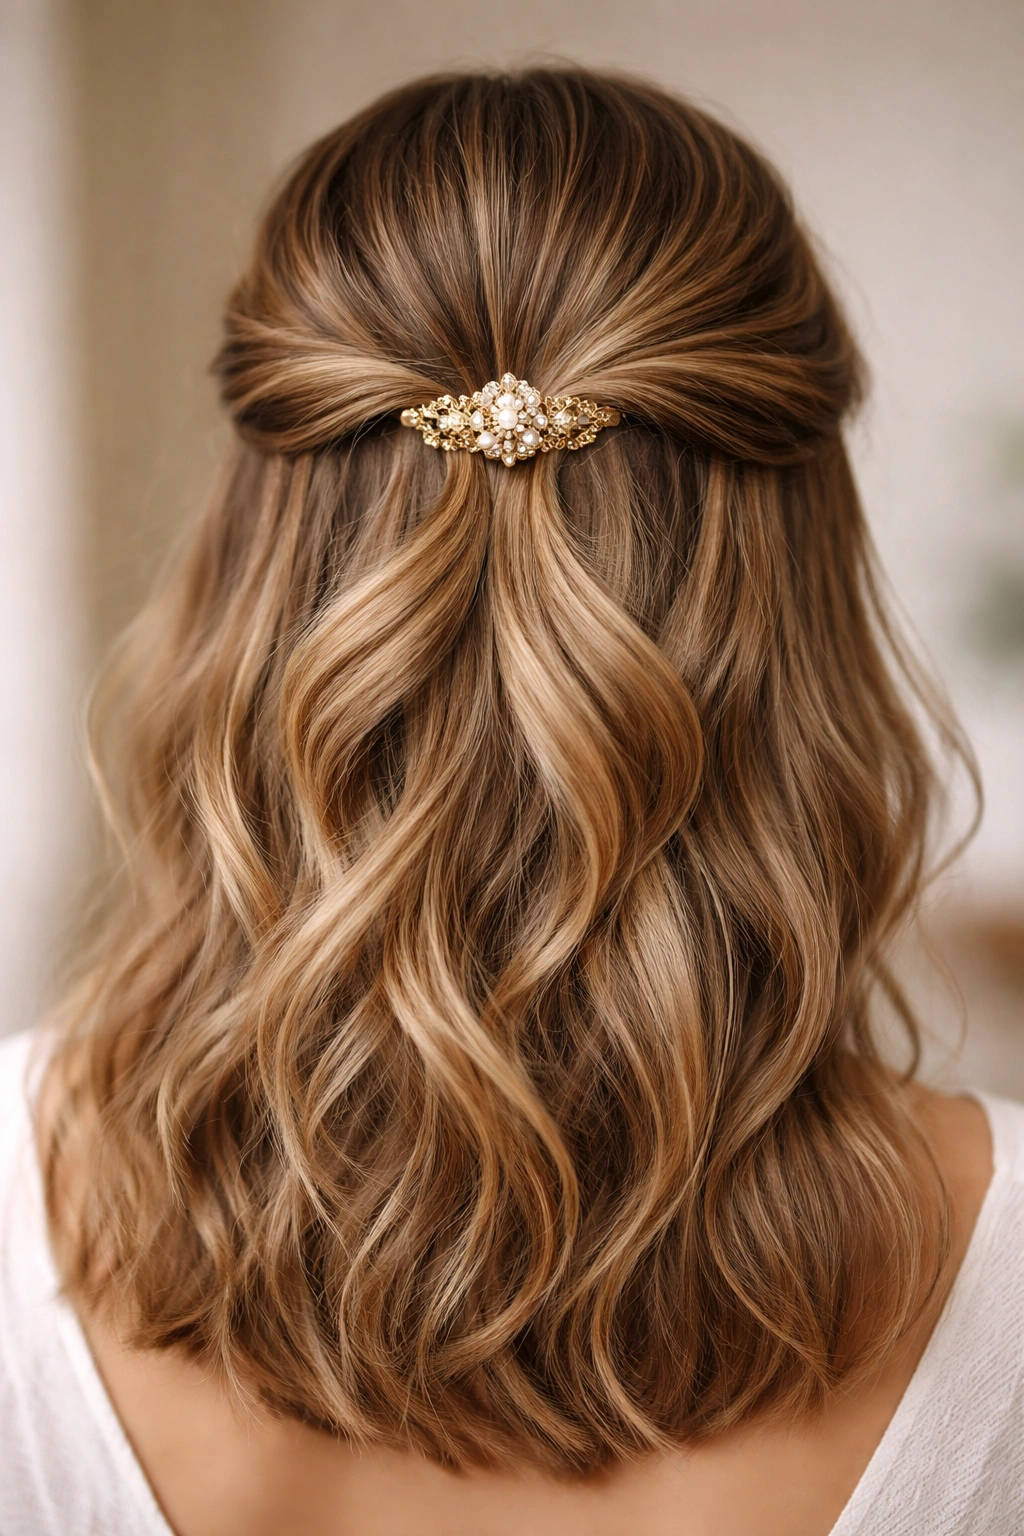
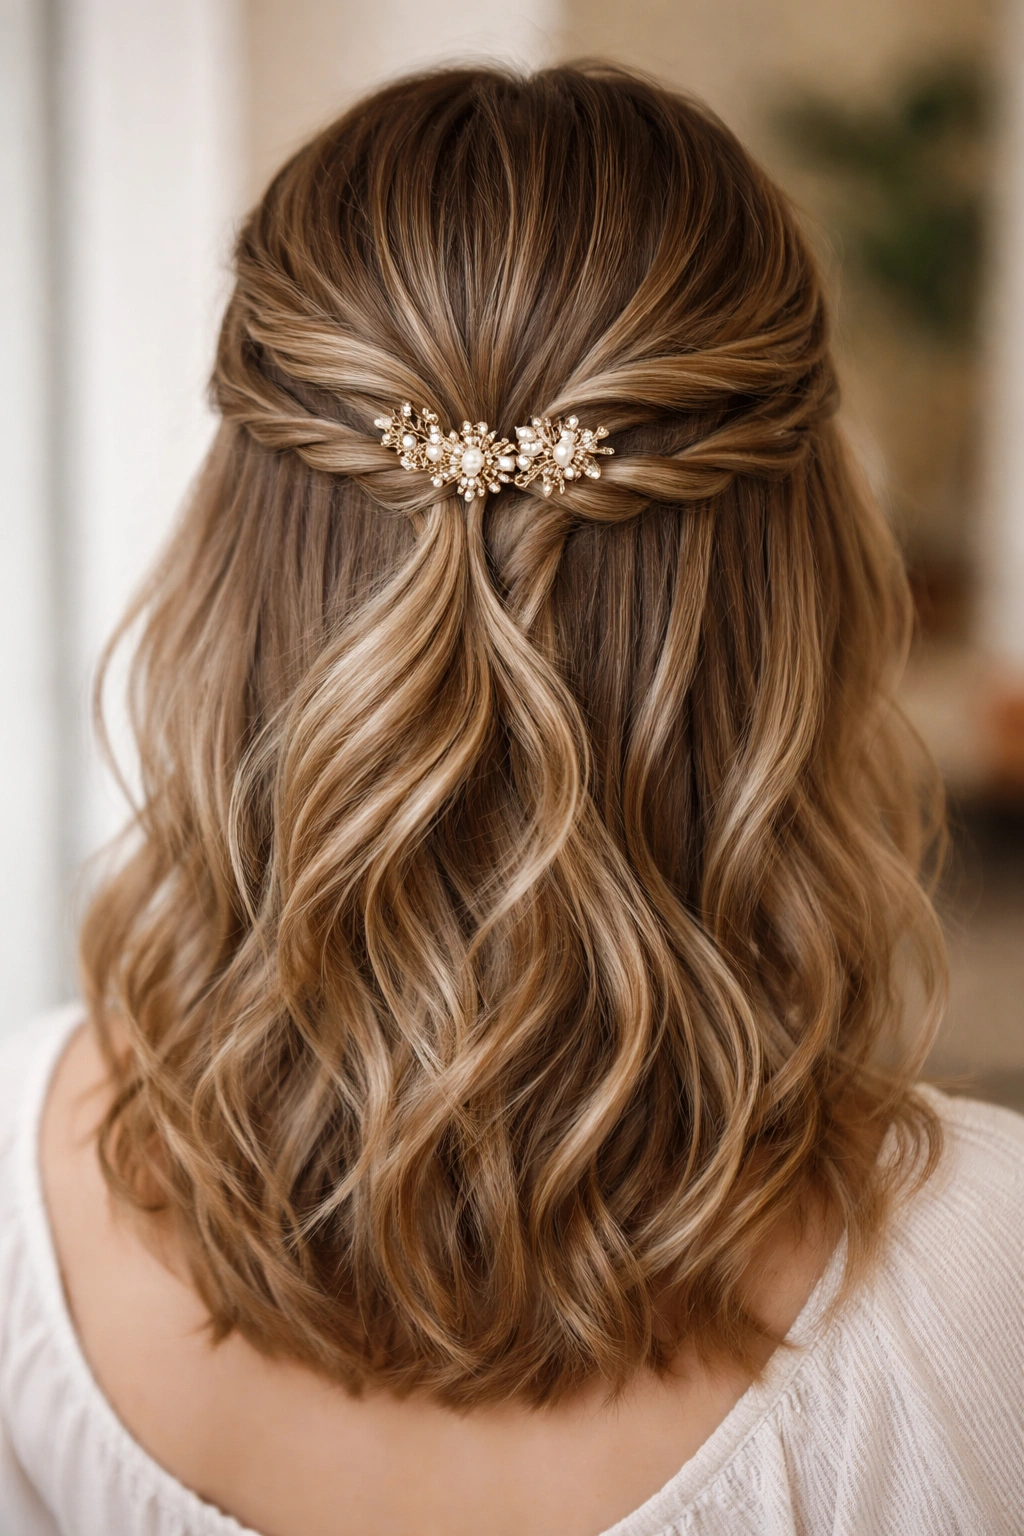
12. Half Up with Pearl or Metal Hair Clip
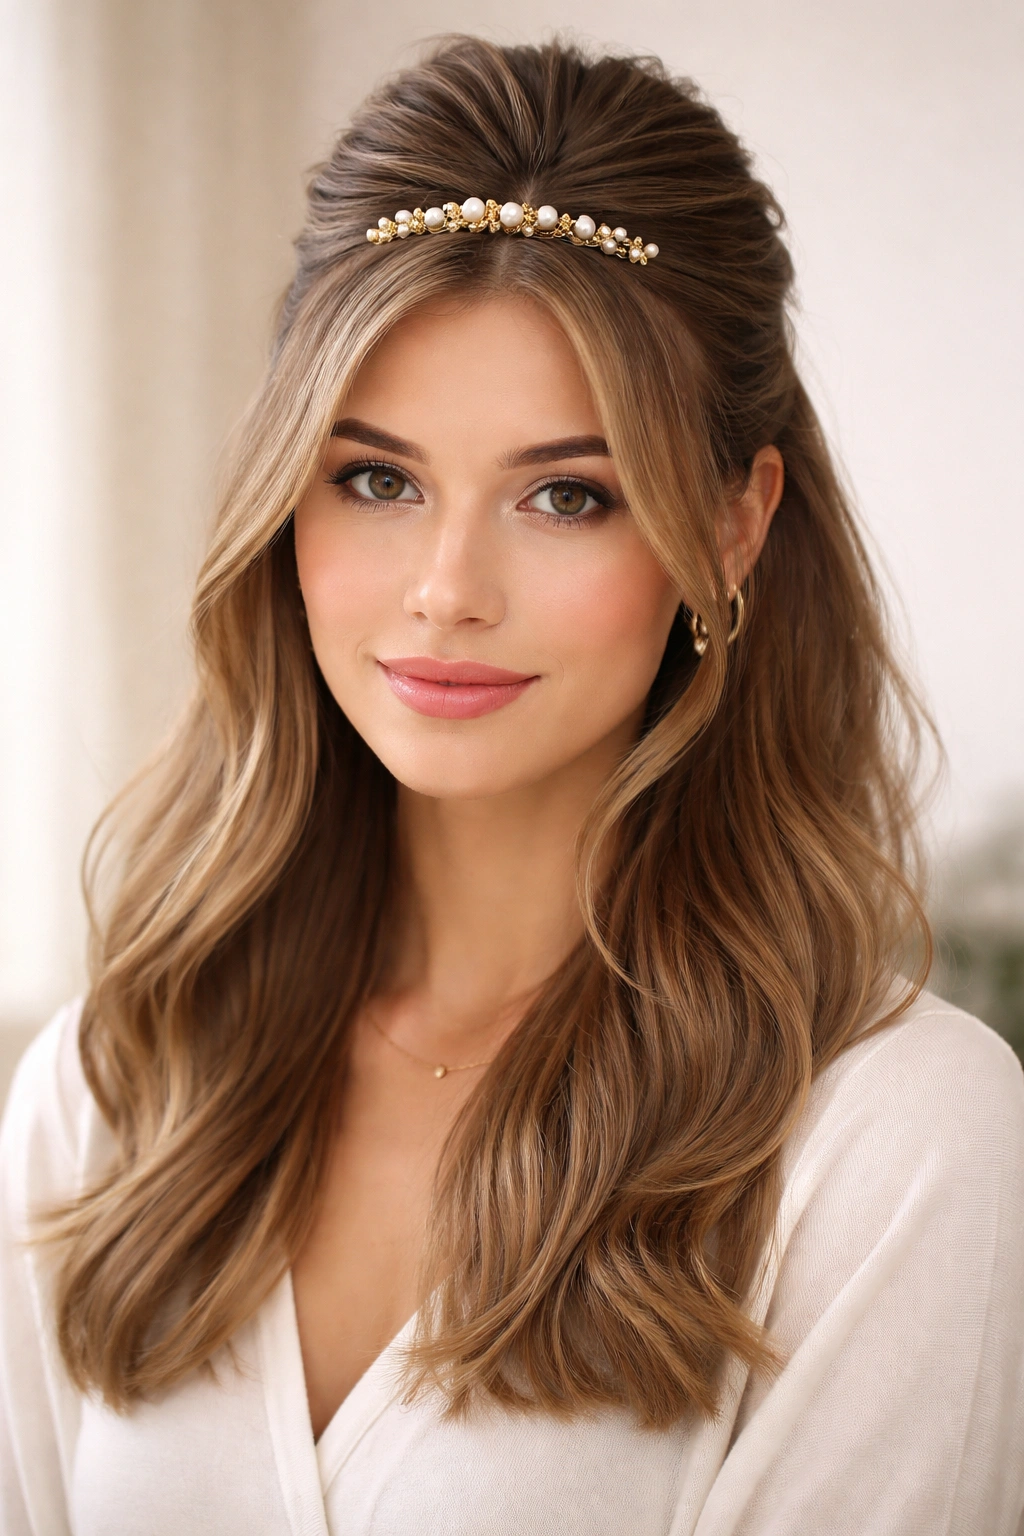
The top section is pulled back smoothly and secured with a decorative metal or pearl clip positioned prominently at the crown, transforming an otherwise simple style into something elegant and special. The accessory does the heavy lifting in terms of visual interest, so the hair itself can stay simple and sleek.
Why This Works for Medium Hair
Medium hair provides the right amount of bulk for a clip to sit securely without slipping, and the visible accessory doesn’t get swallowed up in shorter hair. The clean, polished lines of a sleek half-up look sophisticated and contemporary. A quality clip eliminates the need for multiple bobby pins and gives you a reversible styling choice.
How to Create This Look
- Smooth the top section back with a fine-tooth comb, creating clean, polished lines
- Gather this section at the crown and secure it smoothly with your chosen clip
- Choose a clip in a metal tone or pearl color that complements your personal style and outfit
- Leave the bottom half loose and smooth, or add soft waves depending on your preference
- Make sure no flyaways or loose pieces escape the clip—sleekness is the point of this style
- A light hairspray keeps everything polished and in place without looking stiff or over-styled
Worth knowing: A good clip actually holds better throughout the day than bobby pins, and it’s instantly reversible—no damage to your hair when you let it down.
13. Soft Side-Swept Half Up
The top section is pulled to one side, twisted loosely, and secured with bobby pins tucked behind the twist, creating an asymmetrical, romantic look that’s particularly flattering on oval and heart-shaped faces. The side-swept element feels more intentional and artistic than a centered half-up.
Why This Works for Medium Hair
Medium hair cascades beautifully when pulled to one side—there’s enough length that the movement is visible, but not so much that it looks droopy or weighted down. The off-center placement creates dimension and draws attention to the side of your face, which many people find more flattering than a centered style. The twist on medium hair has enough texture to be clearly visible.
How to Create This Look
- Start with slightly wavy or textured hair for the most romantic appearance
- Gather a large section from the top of your head and pull it toward one side
- Twist this section loosely as you move it to the side, maintaining the texture and movement
- Secure the twist with bobby pins tucked behind so they’re completely hidden
- Leave the opposite side of your hair completely loose, creating waves if desired
- Gently pull the twist loose after securing to create a softer, fuller appearance
- Use bobby pins that match your hair color so securing points blend in seamlessly
Pro tip: This style is even more romantic when you leave one face-framing piece completely loose on the swept side, creating an intentional softness rather than a purely swept-back look.
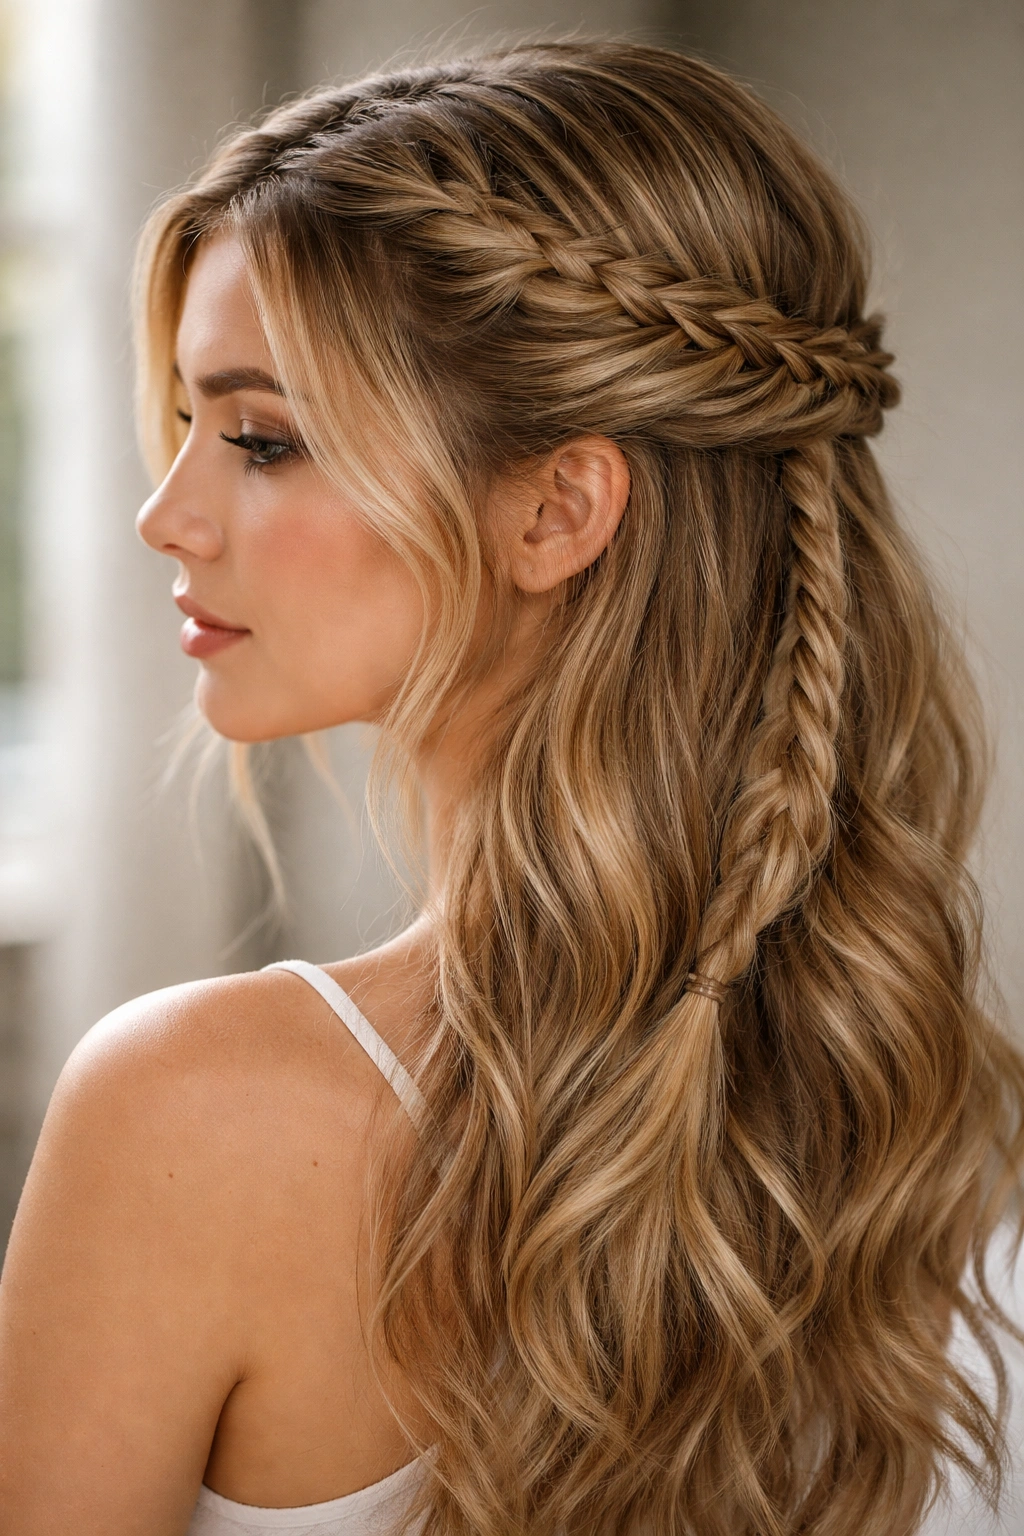
14. Half Up Fishtail Braid
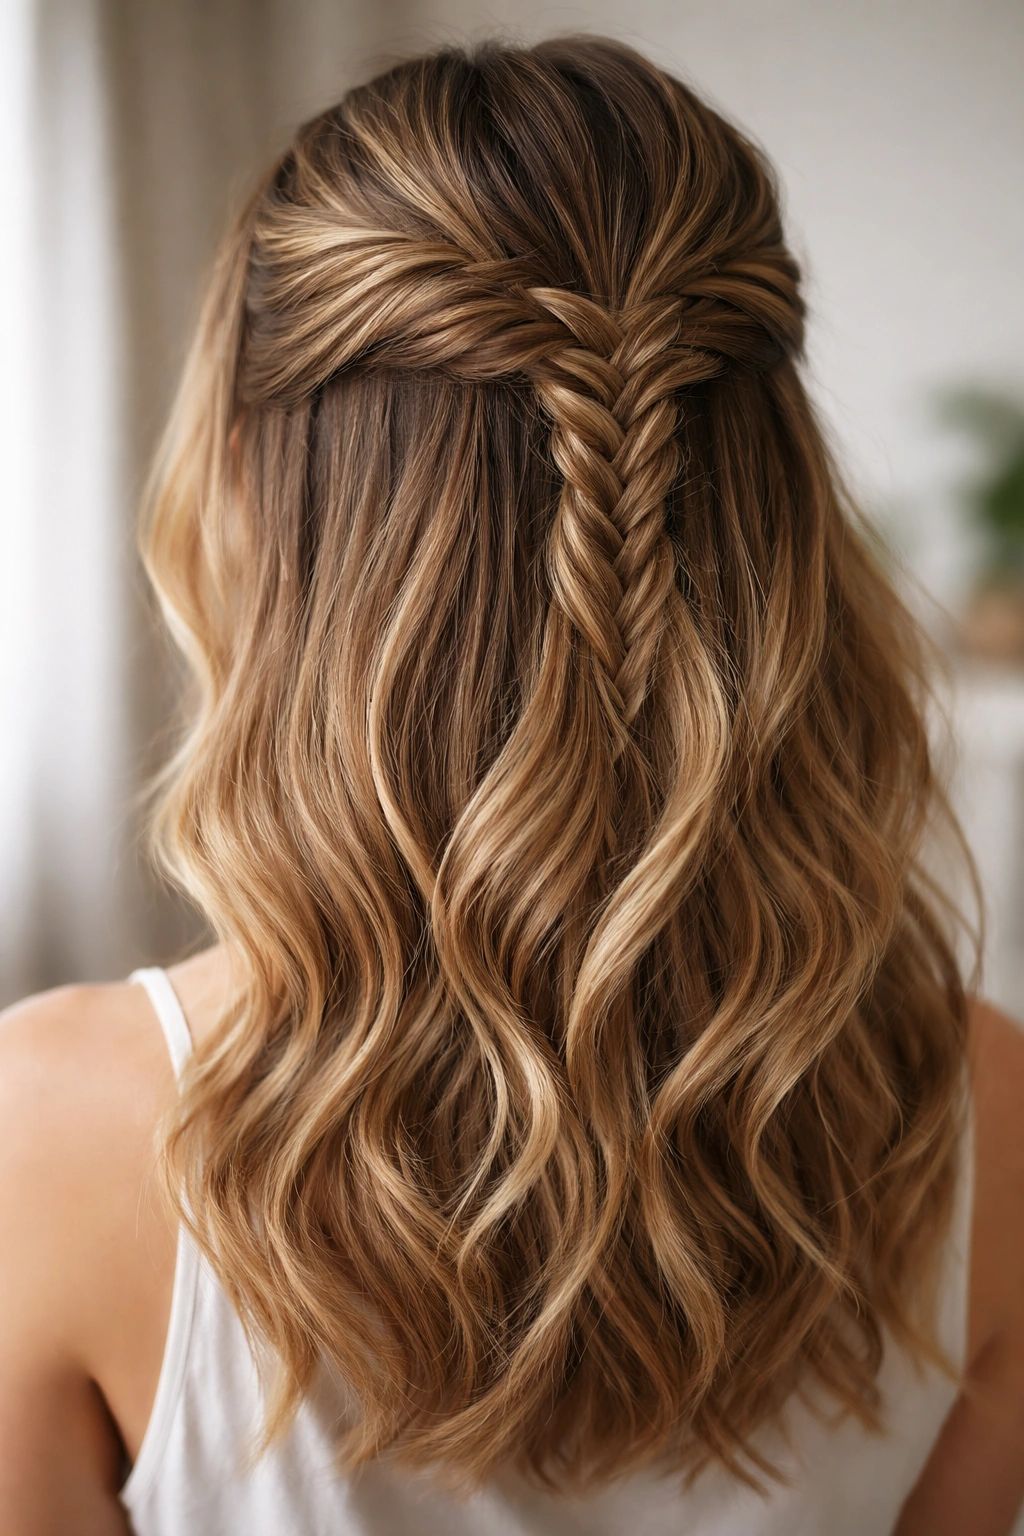
A fishtail braid (created by taking small outer sections and weaving them to the center for a delicate, intricate look) pulls back from the crown and integrates into the half-up section, adding visual texture and interest without the bulk of a traditional braid. This style is perfect if you want something decorative but refined.
Why This Works for Medium Hair
Fishtail braids look most delicate and beautiful on medium-length hair—the braid has enough length to show off the intricate woven pattern, but not so much that it becomes sparse or thin-looking. The fishtail’s refined aesthetic works on any hair type and any occasion. This braid also creates the appearance of more hair because the weaving technique spreads the hair out wider.
How to Create This Look
- Gather the top section back and begin a fishtail braid at your crown
- Create a fishtail by taking a small piece from the outer edge of one side, crossing it over to the opposite side, then repeating with the opposite side
- Continue this process, keeping the braid slightly loose for a softer appearance
- Secure the braid once you reach your desired length with a small elastic
- Gently pull and loosen the braid to add texture and fullness
- Leave the remaining hair down, creating waves if desired
- Use bobby pins or a small elastic that matches your hair color so the securing point blends in
Real talk: Fishtail braids look more complicated than they actually are—they just require a slightly different hand motion than a traditional three-strand braid, but once you practice it a couple of times, it becomes second nature.
15. Double Twisted Half Up with Accessory
Two twists pull back from your temples, meet at the crown, and are secured with a decorative claw clip or elastic adorned with beads or charms. This combines the simplicity of twisted sections with a focal-point accessory that elevates the entire look. It’s playful enough for casual wear but polished enough for events.
Why This Works for Medium Hair
Medium hair creates the right proportions for this style—the twists are visible and textured without overwhelming your features. A decorative accessory added to the securing point becomes a genuine focal point rather than simply a functional element. The style manages to feel both undone and intentional, casual and special, which is a difficult balance to strike.
How to Create This Look
- Pull a section from your right temple and twist it loosely back toward the crown
- Create an identical twist on your left side, matching the tightness so both twists look balanced
- Bring both twists together at the crown and secure them with an elastic
- Slide a decorative claw clip, scrunchie with charms, or hair clip onto the elastic so it becomes a visible design element
- Gently pull the twists loose after securing to create softness and volume
- Leave the rest of your hair down, creating waves or leaving it straight depending on your preference
- Choose an accessory color and style that complements your outfit or personal aesthetic
Worth knowing: The accessory should sit where the twists meet rather than on top of the crown—this creates a more polished, intentional appearance.
16. Half Up with Braided Underside
The top section is pulled back into a ponytail, but instead of a simple elastic, a braid is woven underneath where the elastic sits, hiding the elastic completely and adding decorative detail to the back of the head. This style works beautifully in photos and looks significantly more intentional than a basic half-up.
Why This Works for Medium Hair
Medium hair gives you enough length in the half-up section to braid decoratively without the braid looking thin or sparse. The braided underside is visible from behind and in photos, making this style feel more special than it actually is to create. It’s polished without being overly complicated, perfect for events or days when you want to feel put-together.
How to Create This Look
- Pull the top section back into a ponytail and secure with a small elastic at the crown
- Take a thin section from the ponytail and begin a three-strand braid
- Braid this section and wrap it around the base of the ponytail, tucking it underneath so the braid sits where the elastic is
- Secure the braided section with bobby pins tucked underneath so they’re completely hidden
- Leave the hair below the ponytail loose and flowing, creating waves if desired
- This braid becomes visible when you move or turn your head, creating an element of surprise
- Gently pull the braid loose slightly to create more texture and dimension
Pro tip: This style photographs beautifully from behind because the braided detail adds visual interest that a plain half-up ponytail doesn’t have.
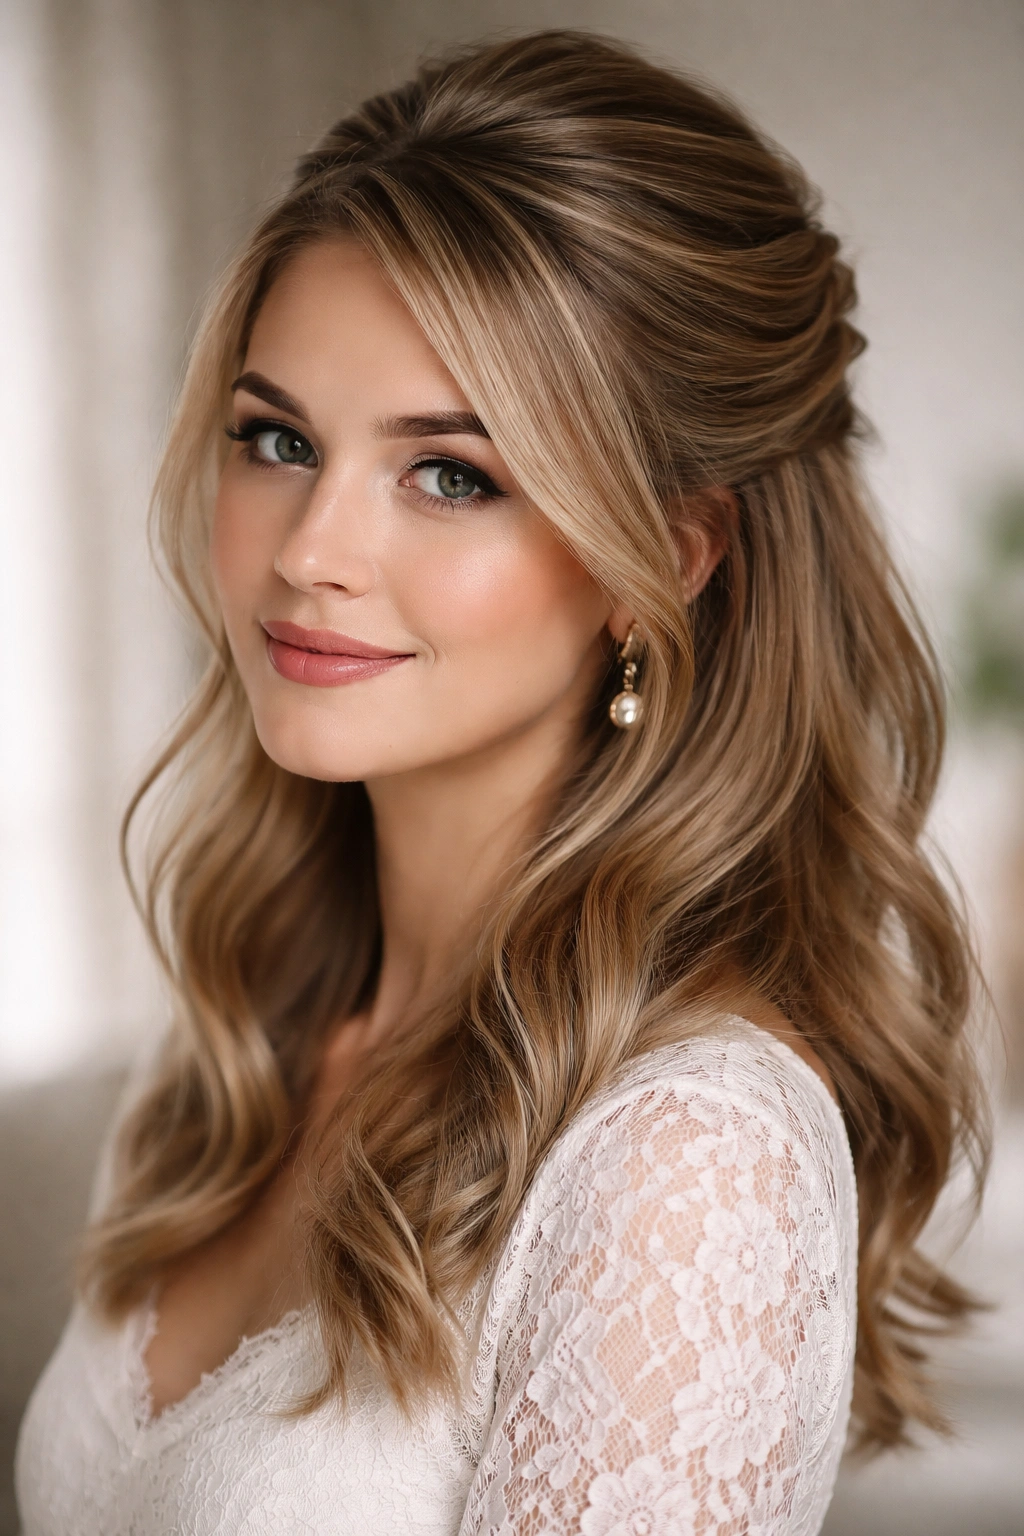
17. Romantic Half Up with Waves
Minimal pinning—just a small, loose twist or braid from each temple—secures the top half while the entire lower half falls in soft, romantic waves created with a curling iron or overnight braiding. This is the least structured half-up option, prioritizing movement, romance, and an effortlessly undone appearance.
Why This Works for Medium Hair
Medium hair creates the perfect amount of wave—not so short that waves look tight and don’t have length, not so long that waves look droopy. The minimal pinning means you’re relying on texture rather than structure, which works beautifully on medium hair. This style requires less maintenance throughout the day because there are fewer pins and elastic bands that need adjusting.
How to Create This Look
- Create loose waves throughout your entire head using a 1.5-inch curling iron or by braiding overnight
- Pull one loose section from your right temple and create a soft twist
- Repeat on the left side with a matching twist
- Bring both twists together and secure with bobby pins tucked behind so they’re hidden
- Leave the bottom half completely loose, allowing the waves to cascade down
- Gently pull the twists loose after securing for maximum softness
- Don’t aim for perfection—the slightly undone appearance is the entire point
- Use a flexible hairspray rather than a strong hold so the waves maintain movement
Real talk: This style looks better and better as you wear it throughout the day—pieces loosen naturally, the waves soften, and it becomes increasingly romantic rather than looking messy.
18. Half Up Crown Braid with Tail
A crown braid begins at one ear, wraps around the back of the head to the opposite ear, then releases into a loose tail that flows down the side, creating an asymmetrical, eye-catching focal point. This is a showstopper style that feels special without requiring excessive styling time.
Why This Works for Medium Hair
Medium hair is long enough for the braid to wrap fully around the head and still have length remaining for the flowing tail. The asymmetrical element is visually interesting and flattering on most face shapes. This style manages to be both romantic and structured, polished and playful.
How to Create This Look
- Begin a Dutch or French braid at your right ear, braiding back and around your head
- Continue braiding until you reach your left ear, adding hair as you move
- Instead of securing the braid where it ends, release it into a loose tail
- Let this tail flow down over your shoulder and down your back
- Gently pull the braid loose to create texture and fullness
- The tail can be straight, wavy, or curled depending on your preference
- Secure the end of the tail with a small elastic that matches your hair color
- This style is visually striking and photographs beautifully from the side
Worth knowing: This style works best when you braid loosely enough that the braid has volume and texture rather than looking slicked and thin. Gently pulling the braid immediately after securing is essential.
Final Thoughts
Half up, half down styles for medium hair offer an incredible range of options—from romantic and soft to sleek and polished, from simple twists that take two minutes to more intricate braids that make a statement. The beauty of medium-length hair is that it’s long enough to show off texture and movement, but short enough that styling stays manageable and doesn’t require excessive product or constant adjusting throughout the day.
The styles that work best for you depend entirely on your hair texture, daily routine, and personal aesthetic. If you have thick hair, you might gravitate toward sleeker styles like the low half bun or the high ponytail half up, which look refined without appearing limp or weighed down. If you have finer hair, textured styles like the messy bun with loose waves or the bubble braid create the appearance of more volume and fullness.
Start by trying the styles that appeal to you visually, then experiment with variations once you find a few you love. Change the clip you use, adjust how loose or tight you braid, try different face-framing pieces, or add waves versus keeping everything straight. The real skill isn’t in perfecting one specific look—it’s in understanding the basic principle of pulling back part of your hair while leaving the rest loose, then getting creative with how you achieve that balance. Once you’ve mastered a few of these options, you’ll have the foundation to create your own variations that feel uniquely yours.