Messy braided half up half down styles sit somewhere between deliberately undone and effortlessly put-together—which is exactly why they’ve become a go-to for people who want their hair to look like they spent zero effort but somehow landed in a magazine spread. There’s something genuinely appealing about mixing structure with texture, confining some of your hair while letting the rest cascade loosely down your back. These styles work for casual coffee runs, wedding guest appearances, date nights, and that awkward Tuesday when you didn’t have time for a full wash but your hair needs something. The beauty of messy braided half up styles is their flexibility—they look good on every hair type, they hide oil better than a fully down style, and you can dress them up or down depending on your mood. Whether you’re working with thick waves, fine texture, or somewhere in between, there’s a braided half up style waiting to become your new default.
1. The Relaxed Double Dutch Half Up
Double Dutch braids running from the front of your head toward the back, but kept intentionally loose and wispy, create a bohemian vibe that feels sophisticated without trying too hard. The key is braiding with less tension than you normally would—let pieces escape as you go, don’t pull them back in. Loop the two finished braids together at the back of your head with a small elastic or bobby pin, leaving the bottom half of your hair down in soft waves.
How to Build This Look
Start by sectioning your hair down the center from your forehead back to where you want the braids to meet. Spray a texturizing spray or dry shampoo on damp hair if it’s too slippery to braid. Braid each side loosely, starting just above your temple and moving backward, and let small strands fall naturally as you work. Tug gently at the finished braids to widen them—this creates that messy, romantic texture. Bring them together at the back of your head with a delicate gold or pearl clip, or tie them with a thin elastic and let the bottom half hang loose.
Styling Tips for Maximum Texture
- This works best on day-two or day-three hair, when your hair already has some natural texture and bend
- Braid right after you shower while your hair is damp, then let it air dry for wave definition
- Use a sea salt spray before braiding to create grip and texture
- Pin down any stray pieces with bobby pins that match your hair color once you’re done
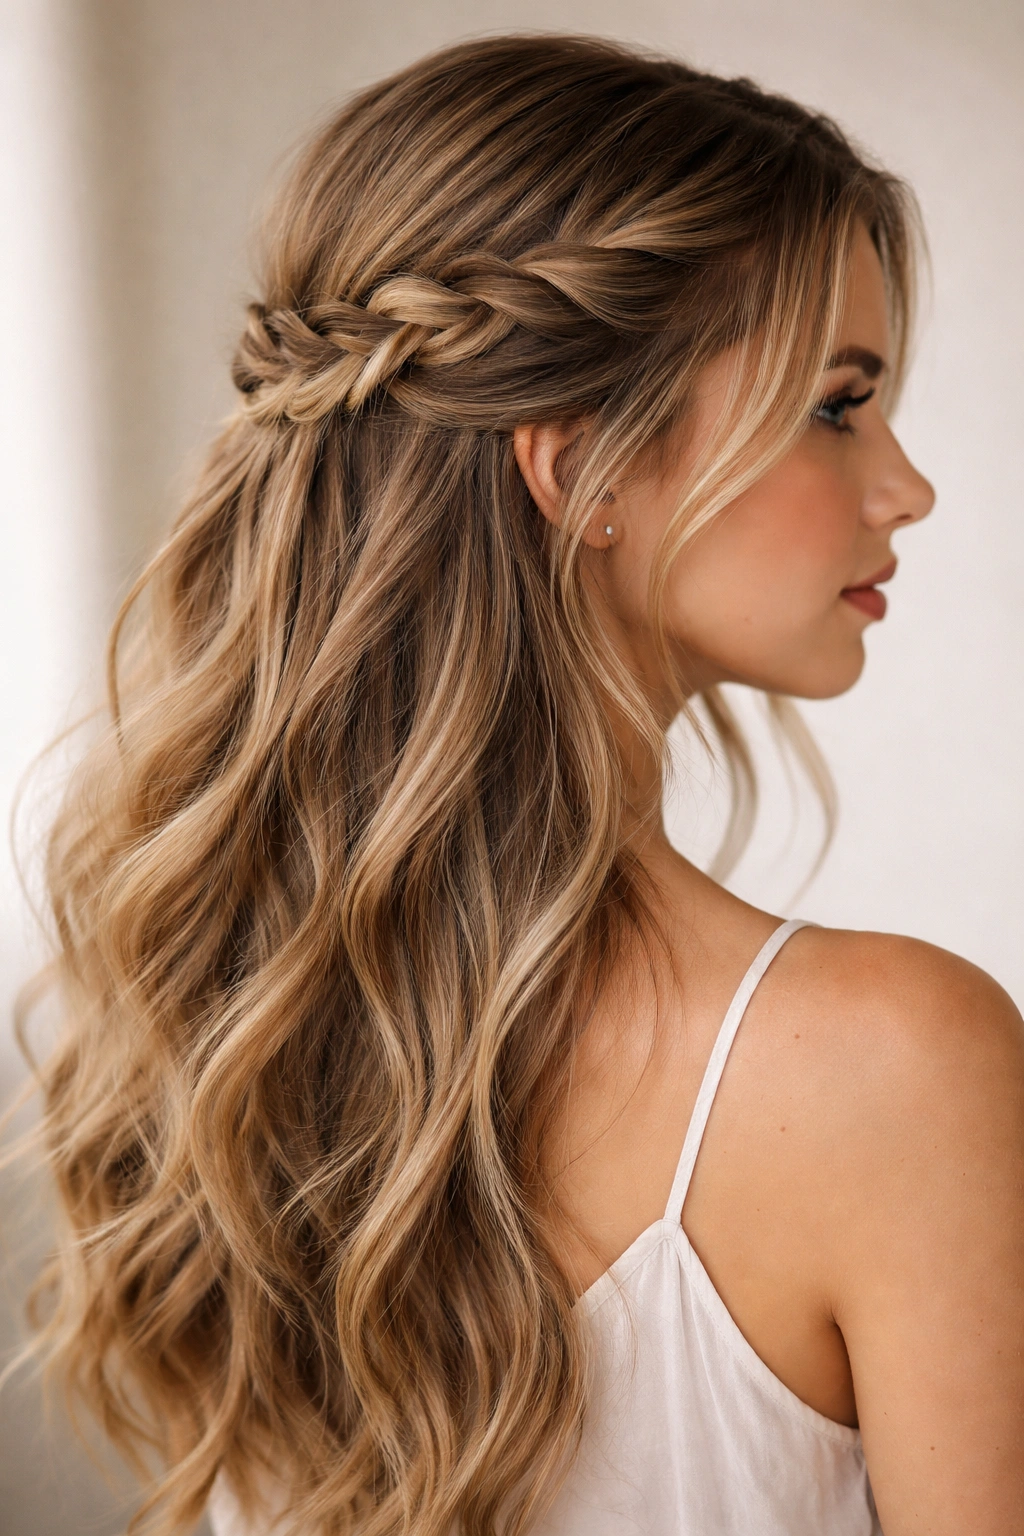
2. The Twisted Crown Half Up
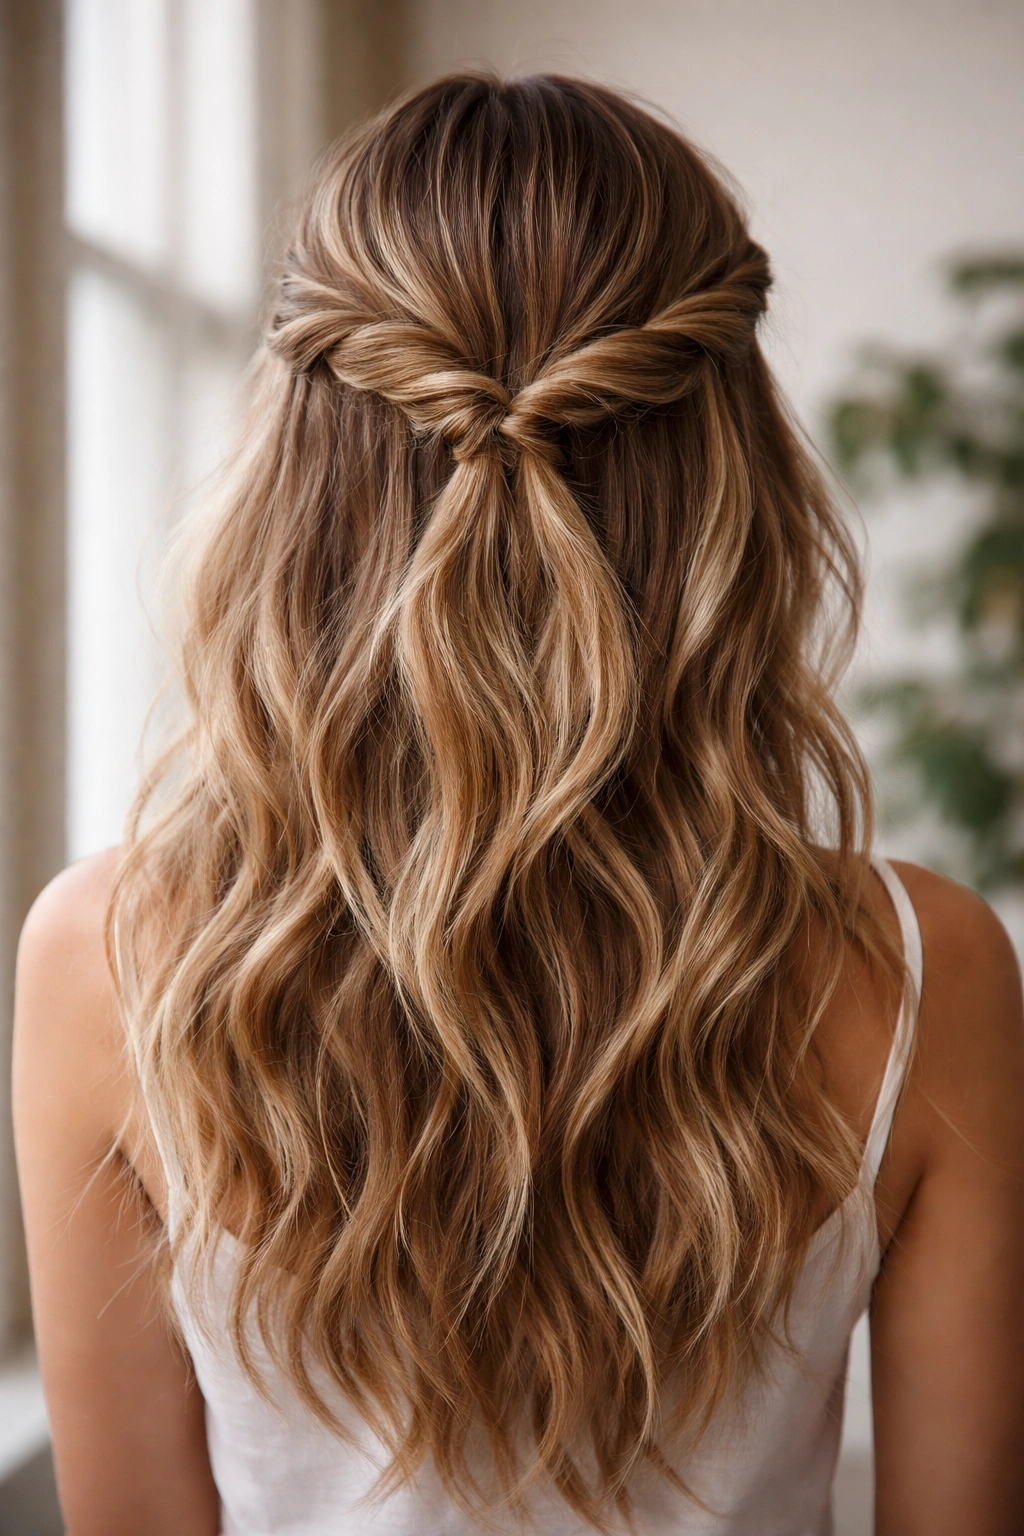
Instead of traditional braids, create a half up style using twisted sections of hair that wrap around the crown of your head. Twist two thick sections from the front side-sections, pull them back and up, then secure them together. The twist gives structure while the unraveling, slightly undone feeling keeps it relaxed and modern.
The Technique That Makes It Work
Divide your hair at ear level—everything above that line is your upper section. On one side, take a 2-inch section of hair from the temple area and twist it loosely as you move backward, wrapping it around your head’s crown. Repeat on the other side. Pin both twists at the back where they meet, and spray lightly with texture spray before twisting to keep them from looking too sleek. The looseness of the twist is everything—you want visible separation between the strands, not a tight, finished spiral.
Quick Customizations
- Add a delicate hair stick, vintage clip, or decorative bobby pins where the twists meet for an instant upgrade
- Leave face-framing pieces down and slightly out of the twist for softness
- Tug at the twists gently after securing them to create more texture and dimension
- Pair this with a wet-look gloss cream for a more polished evening version
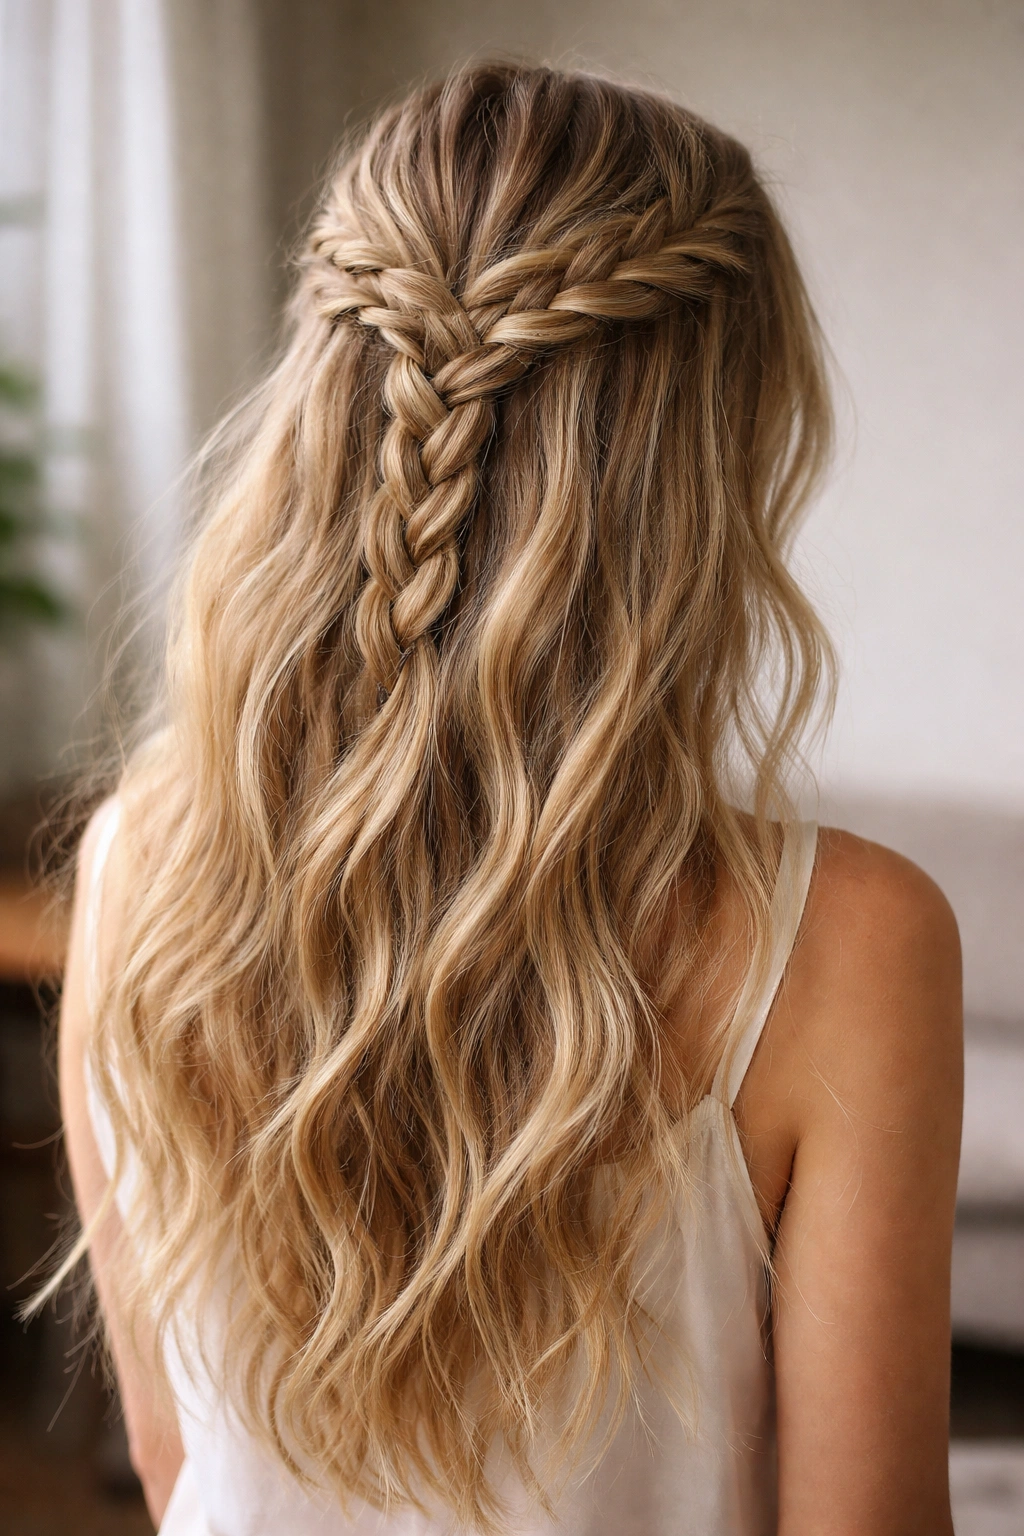
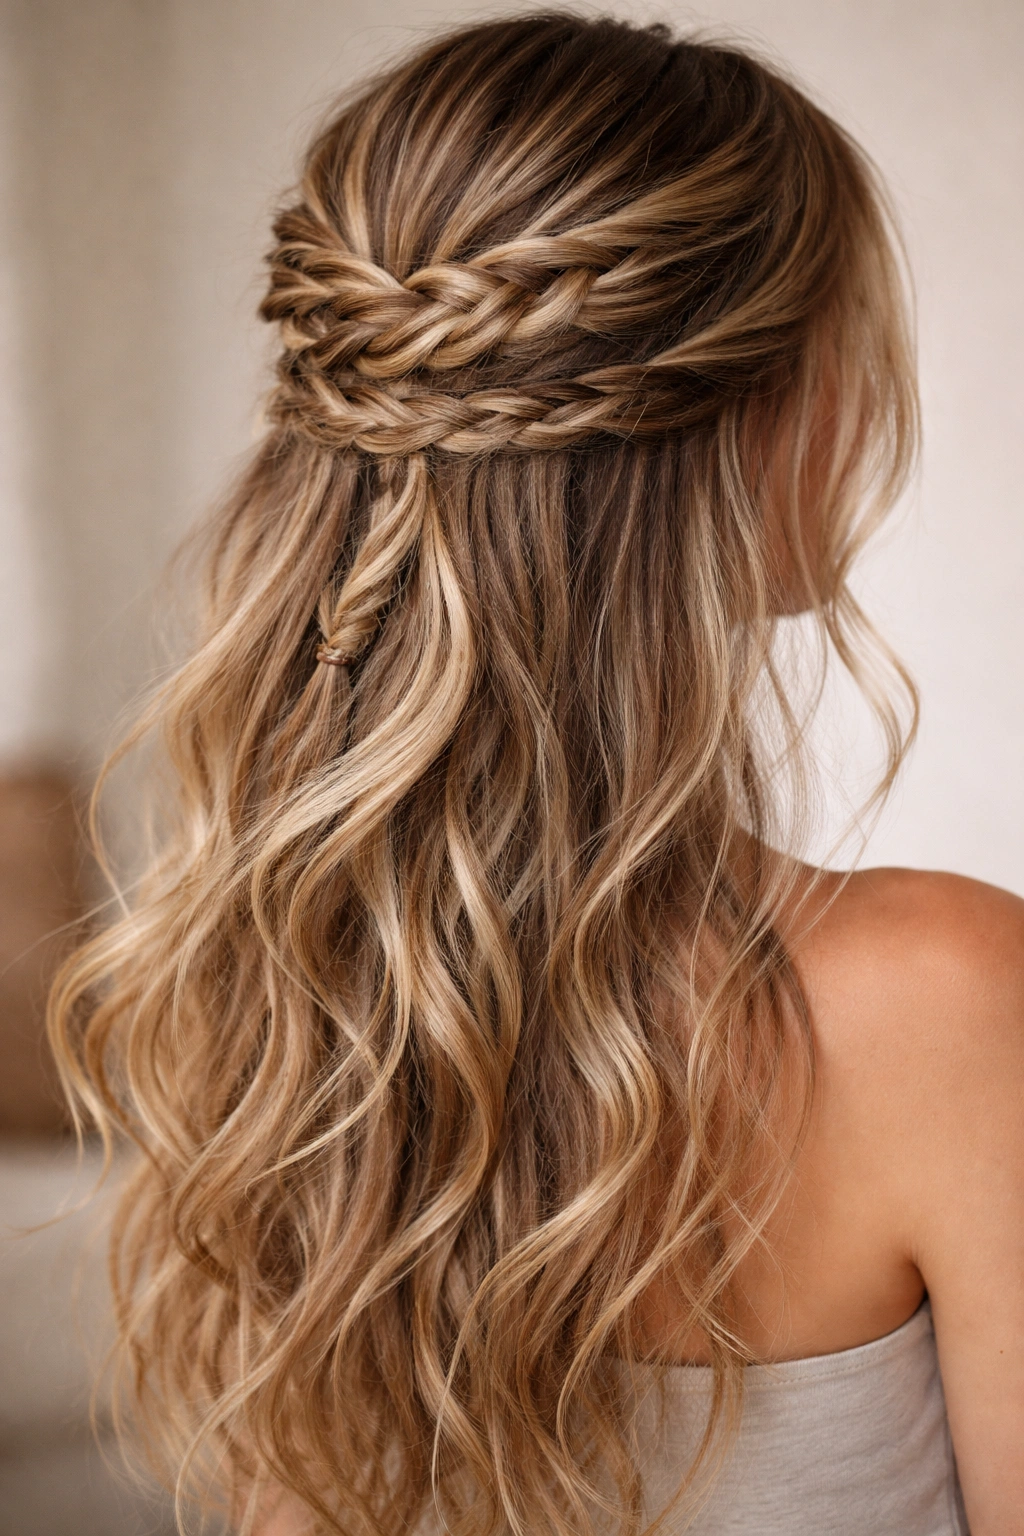
3. The Messy Fishtail Half Up
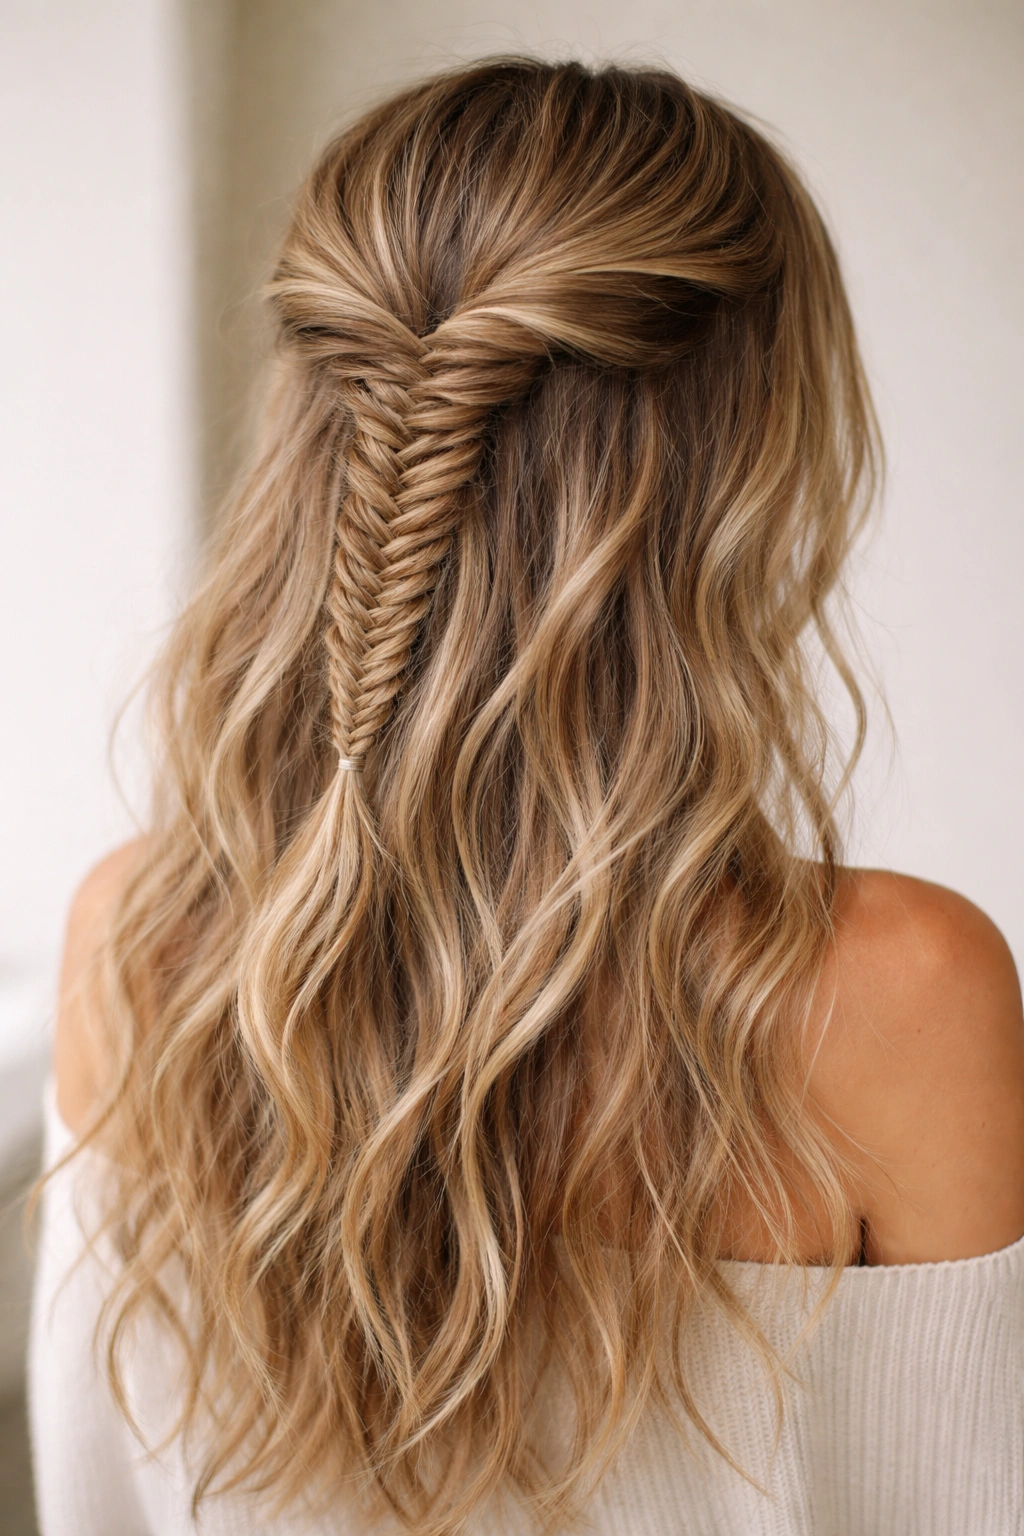
A fishtail braid is a more intricate-looking style that feels special but honestly isn’t that complicated. Pull back a fishtail from one side of your head, secure it at the back center with a small elastic, and leave the remaining hair down. Tug at the braid after you’ve secured it to make it fuller and messier—fishtails look best when they’re slightly undone.
Why Fishtail Works as a Half Up
The interlocking pattern of a fishtail braid naturally catches the light and creates visual interest without being over-the-top. Because you’re only braiding one section and leaving the rest down, it reads as both intentional and relaxed. The fishtail is forgiving with texture—it actually looks better when your hair isn’t perfectly smooth, so second-day waves are genuinely ideal here.
The Real Steps to Get It Right
Start the braid at your temple, not at your center part, and move it diagonally back toward the nape of your neck. Braid it loosely, picking up small sections from the outer edges as you work. Stop when you reach about the nape area, secure it with a tiny elastic, then flip it over your shoulder and spray it with light texture spray. Use your fingers to gently pull the sides of the braid outward—this technique, called “pancaking,” makes even a tightly braided fishtail look tousled and romantic.
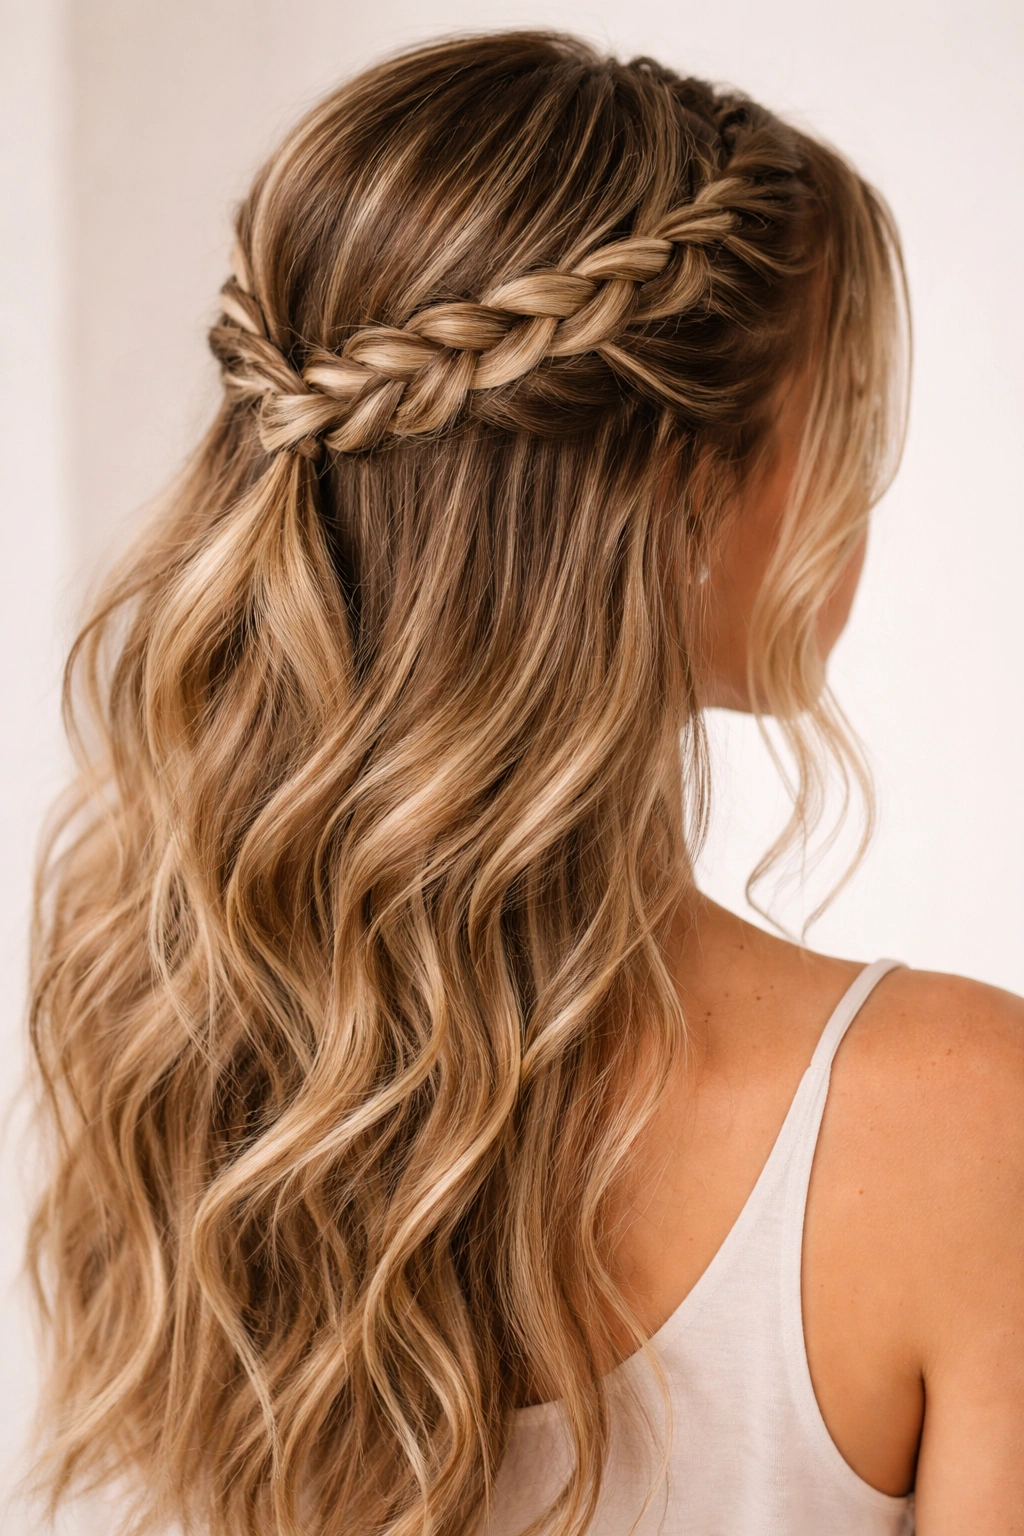
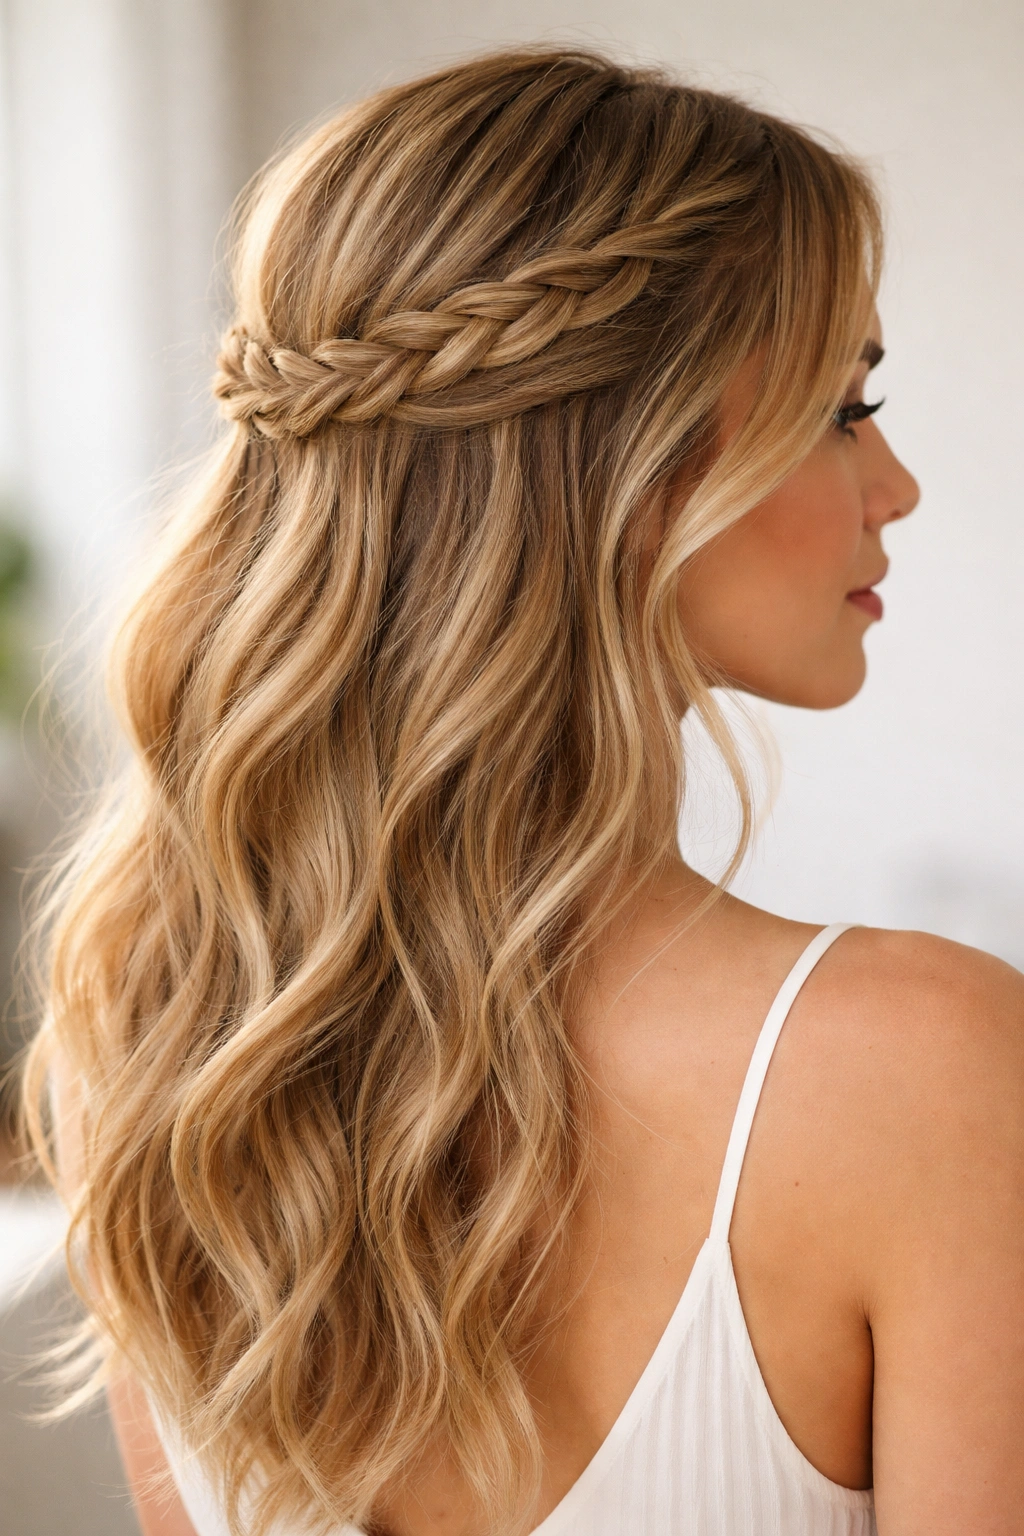
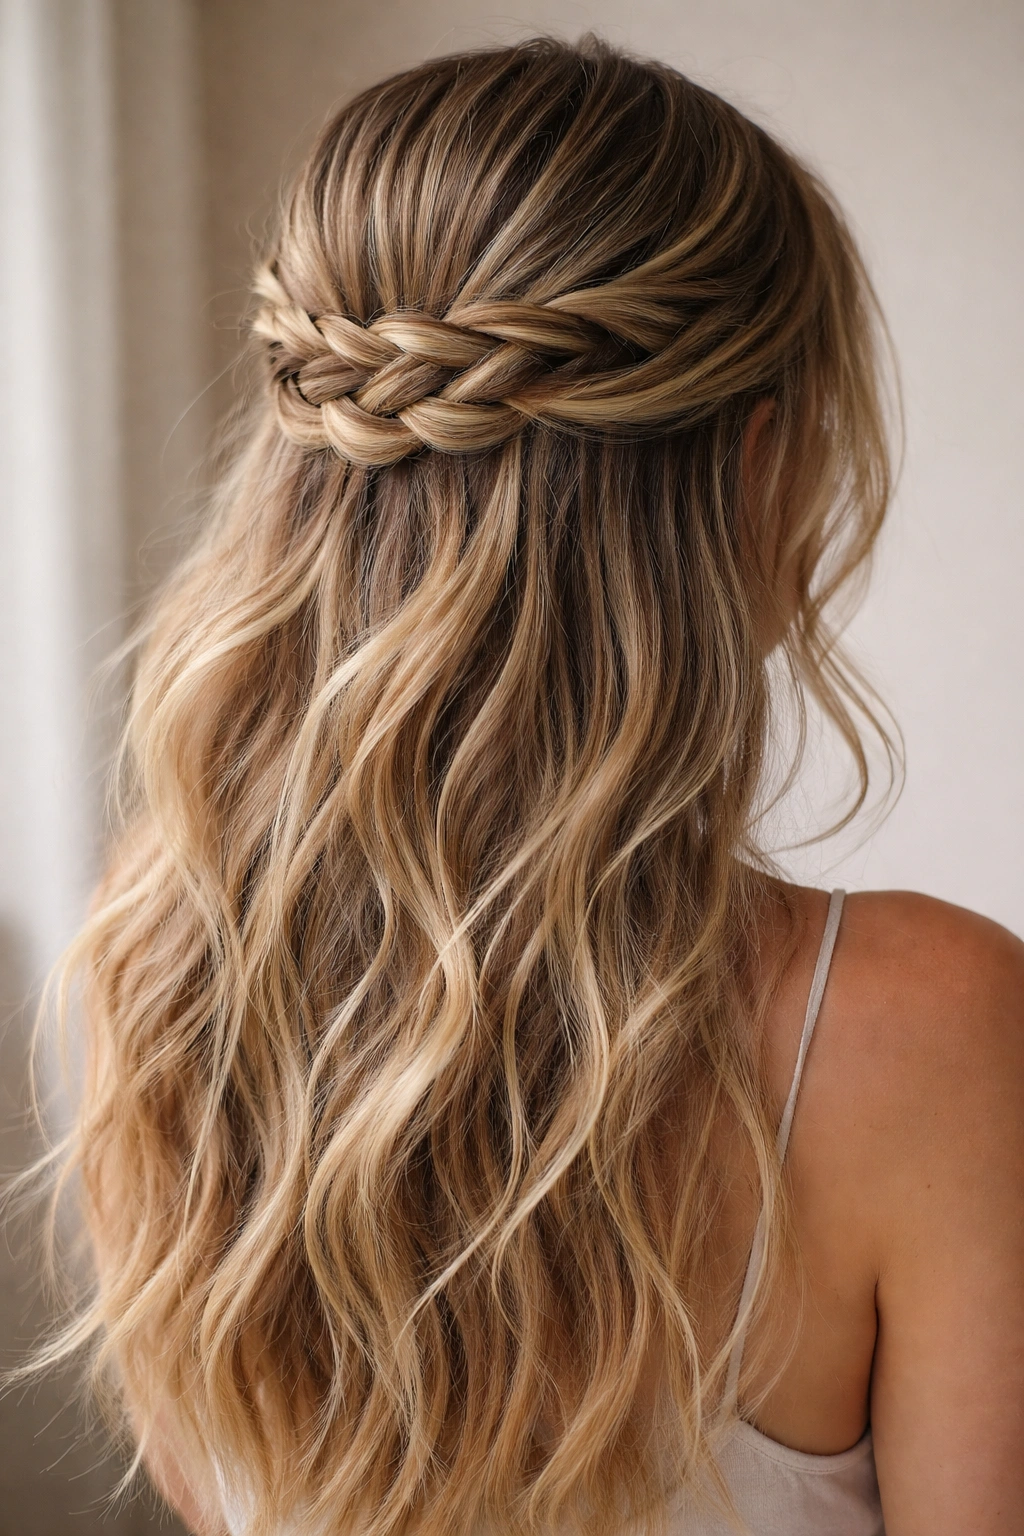
4. The Braided Halo with Loose Ends
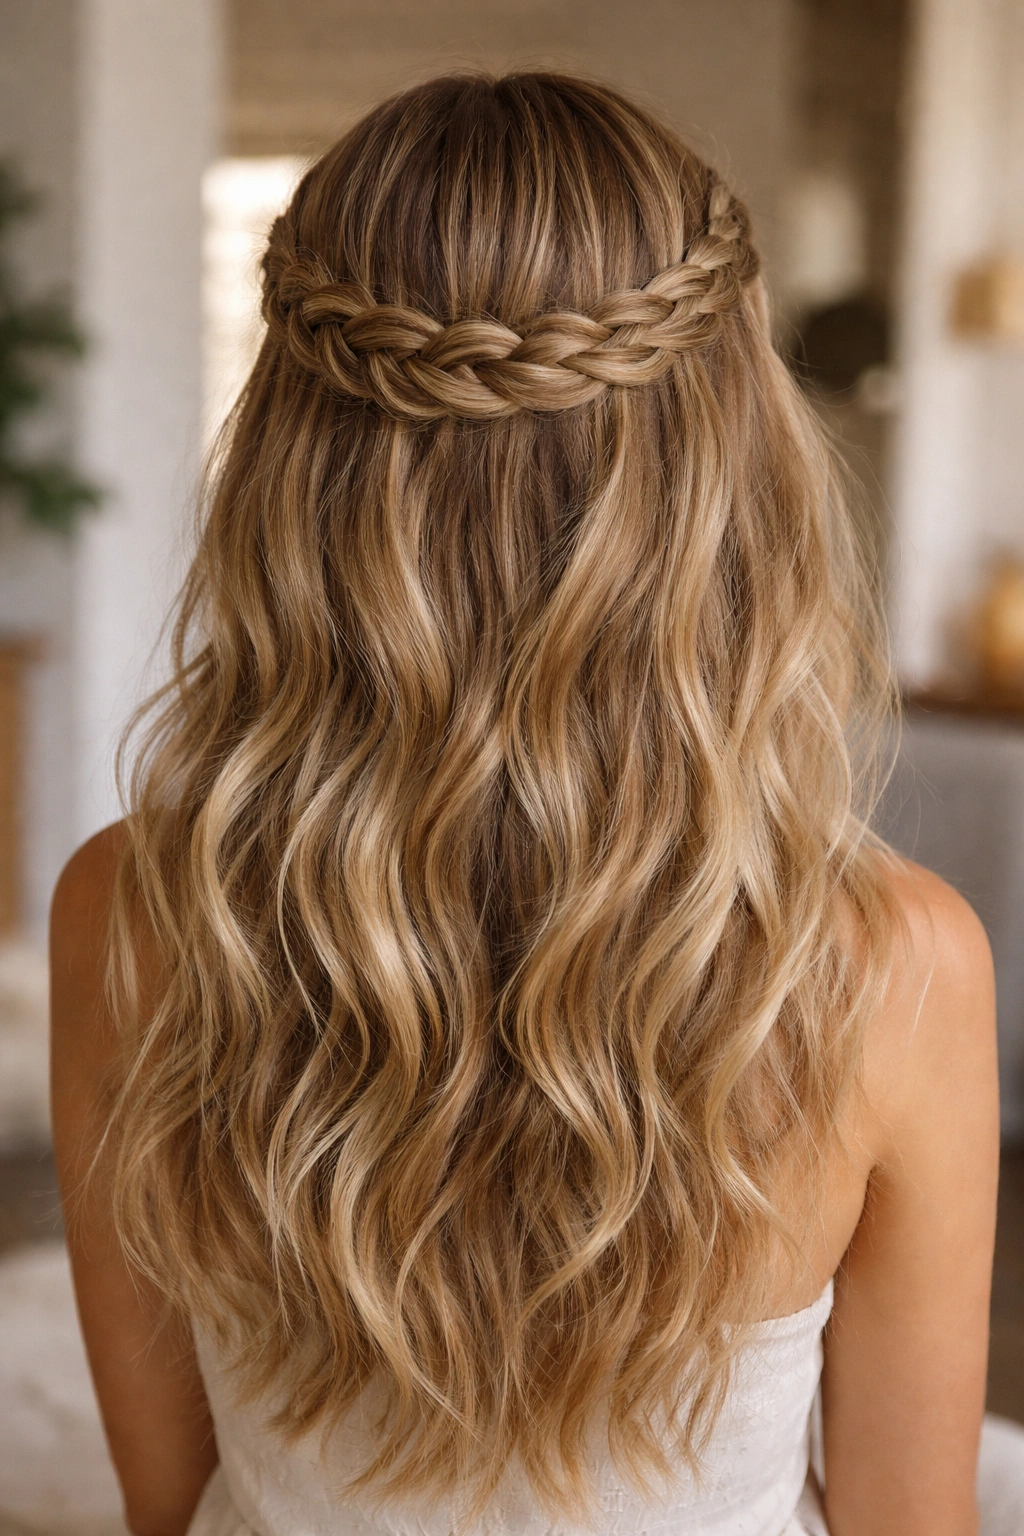
This style wraps a single braid around the crown and back of your head in a halo shape, with the bulk of your hair hanging loose underneath. It’s easier than it sounds: braid one long section starting from one side temple, wrap it around the back, and pin it behind the opposite ear. Instantly you have structure and a bit of ceremony without actually putting much hair up.
Construction and Customization
Begin the braid at one temple, using a section about 2 inches thick. Braid loosely as you move around the back of your head, angling slightly downward as you approach the opposite side. Secure the end with a small clear elastic, then wrap it around and pin it with bobby pins that match your hair color. The beauty here is that 80 percent of your hair stays down, so you get the look of an updo with the ease and comfort of wearing your hair down.
Making It Look Intentionally Undone
- Braid while your hair is slightly damp so strands stay put but you can pull at them later
- After securing the halo braid, tug gently at each section to widen it and create texture
- Leave a few wispy pieces loose around your face and nape
- Finish with a soft-hold spray so flyaways catch the light romantically rather than looking messy in a bad way
5. The Twisted Rope Half Up with Texture
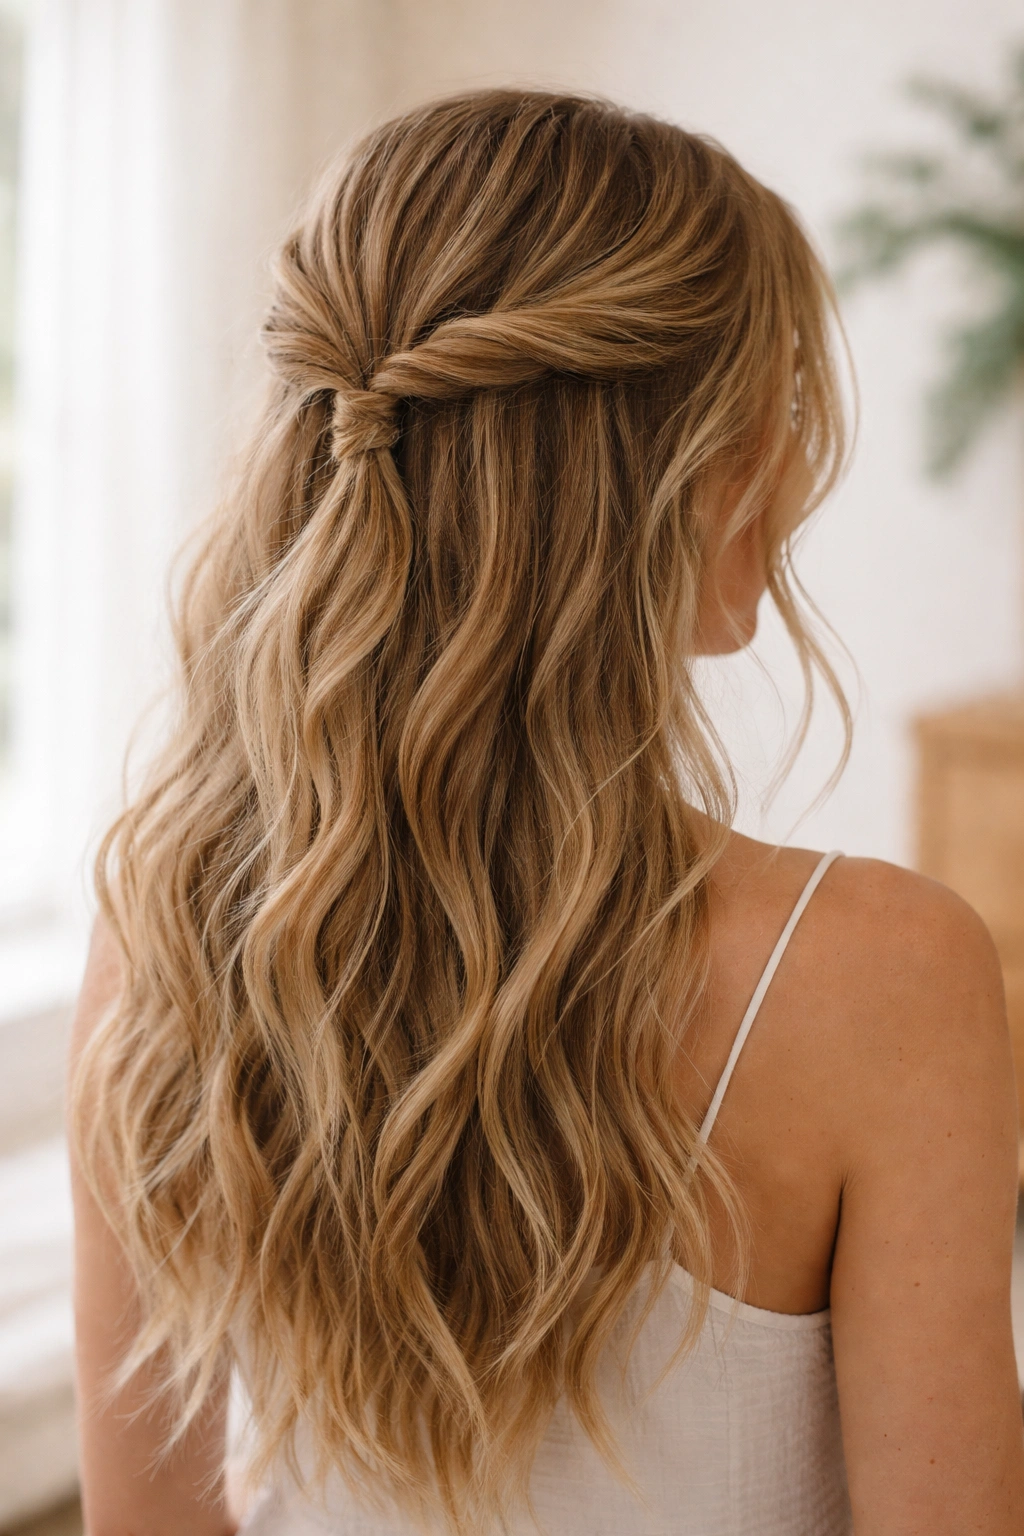
Two twisted sections from the front of your head, twisted more loosely than a traditional rope twist, pulled back and secured together. It reads as more polished than a true messy braid but still maintains that intentionally undone texture that makes these styles so appealing. Rope twists are faster than braids and give a sleeker line while still allowing for that effortless-looking dimension.
Building the Rope Twist Detail by Detail
Section your hair at the temples, taking about 1.5 inches of hair on each side. Divide each section in half lengthwise, then twist the two halves around each other as you move backward. The looser your twist, the better—you’re not going for polished rope, you’re going for that relaxed, I-didn’t-try-too-hard energy. Meet both twists at the back center of your head and secure with a small elastic. Spray before twisting to help the twist stay intact without looking stiff.
Elevating the Look with Accessories and Texture
- Use a metallic hair clip or decorative bobby pins where the twists meet
- Tug gently at each twist after securing to create dimension and separation
- Leave 2-3 thin face-framing pieces out for softness
- Try this style on second-day hair when you have natural waves and texture already built in
6. The Three-Strand Braid with Incorporated Texture
A classic three-strand braid pulled back from one side of your head, but braided loosely and then textured afterward with gentle tugging to make it look fuller and less formal. This is the simplest braided half up option, which makes it perfect for everyday wear. One braid from temple to center back, secured with an elastic, done.
The Simplicity That Makes It Work
Start at your temple on one side and braid straight back, loosening your tension as you go. You want the braid to feel relaxed, not tight and finished-looking. Once you’ve secured it at the back center, gently pull at the outer edges of each braid loop to widen them and create that fuller, messier appearance. This single tug-and-release step is what transforms a regular braid into a textured, intentionally undone style.
Everyday Wear Tips
- This style works on every hair type and texture level
- Braid on day-two or day-three hair for best results
- Use a matte or textured elastic in a color matching your hair
- Pair with face-framing pieces left down for a softer look overall
- Repeat this style all week if you love it—there’s no commitment required
7. The Curved Dutch Braid Half Up
Dutch braids (where you braid under instead of over, creating a raised effect) work beautifully for half up styles, especially when you curve them slightly toward the center rather than going completely straight back. The raised texture of a Dutch braid creates more visual interest than a regular braid, and the curve adds a custom, personalized feeling even though it’s not significantly more complicated.
Why Dutch Braids Offer More Impact
The inverted structure of Dutch braids creates natural dimension and catches light differently than traditional braids. When you curve them gently instead of braiding straight back, you’re creating a custom shape that flatters your face and head shape. Start each Dutch braid at your temple, moving at a slight angle toward the center back rather than moving straight horizontally.
Execution for Maximum Visual Impact
Divide your hair down the center or to one side, depending on your face shape. Create a Dutch braid on each side (or just one, if you prefer asymmetry), moving at a gentle curve toward the center back of your head. Bring both braids together and secure with a single elastic, or cross them for an X pattern at the back. Tug gently at the finished braids to create that intentionally undone texture.
Styling Considerations
- Dutch braids show texture more than regular braids, so they’re especially effective on wavy or textured hair
- Braid slightly tighter than you would a regular braid since the under-braiding creates some looseness naturally
- This style pairs beautifully with a middle part for a symmetrical look
- Accessorize the back where braids meet with vintage clips or delicate gold pieces
8. The Side-Swept Braided Half Up

All of your braided section comes from one side of your head, swept back and secured at the opposite side. This asymmetrical approach feels more modern and artistic than centering everything, and it draws attention to whichever side of your face you want highlighted. It’s a subtle shift that makes an impact.
The Asymmetry Advantage
Start your braid at your temple on one side (let’s say the left), braid it loosely as you move across the back of your head, and pin it behind your right ear or on the right side of the back of your head. The asymmetry is flattering because it creates visual movement and directs attention. It also feels intentional—the viewer senses you made a choice here, even if the braid itself is just as simple as any other half up style.
Creating Natural-Looking Asymmetry
- Leave slightly more hair down on the heavier side to balance the visual weight of the braid
- Consider your face shape and which side you want to showcase
- Braid loosely and then tug to create texture so the asymmetry feels polished rather than accidental
- Pair with a deep side part if you want to lean fully into the asymmetrical aesthetic
9. The Four-Strand Half Up Braid
A four-strand braid is more intricate-looking than a three-strand, creating an impressive woven pattern that reads as more special without actually requiring much more skill. Take a section from the front of your head, divide it into four strands, and braid using the four-strand technique, then secure it back. Pull at it gently to make it look less perfect and more textured.
What Makes Four-Strand Braids Worth the Effort
The pattern created by four strands is genuinely beautiful—it has more visual texture and dimension than a standard three-strand braid. People will absolutely notice and assume you spent way more time on this than you actually did. The braid looks intricate enough for a special occasion but can be worn casually too, depending on how you style the rest of your hair and what you pair it with.
The Four-Strand Technique Broken Down
Divide your braid section into four equal strands. Cross the right-outer strand over the right-center strand. Cross the left-outer strand under the left-center strand. Repeat this pattern all the way down. Yes, it’s slightly more complex than three-strand braiding, but once you do it twice, your hands remember. Braid it loosely, secure at the back, and tug at it generously to create that textured appearance.
10. The Braided Crown with Center Part
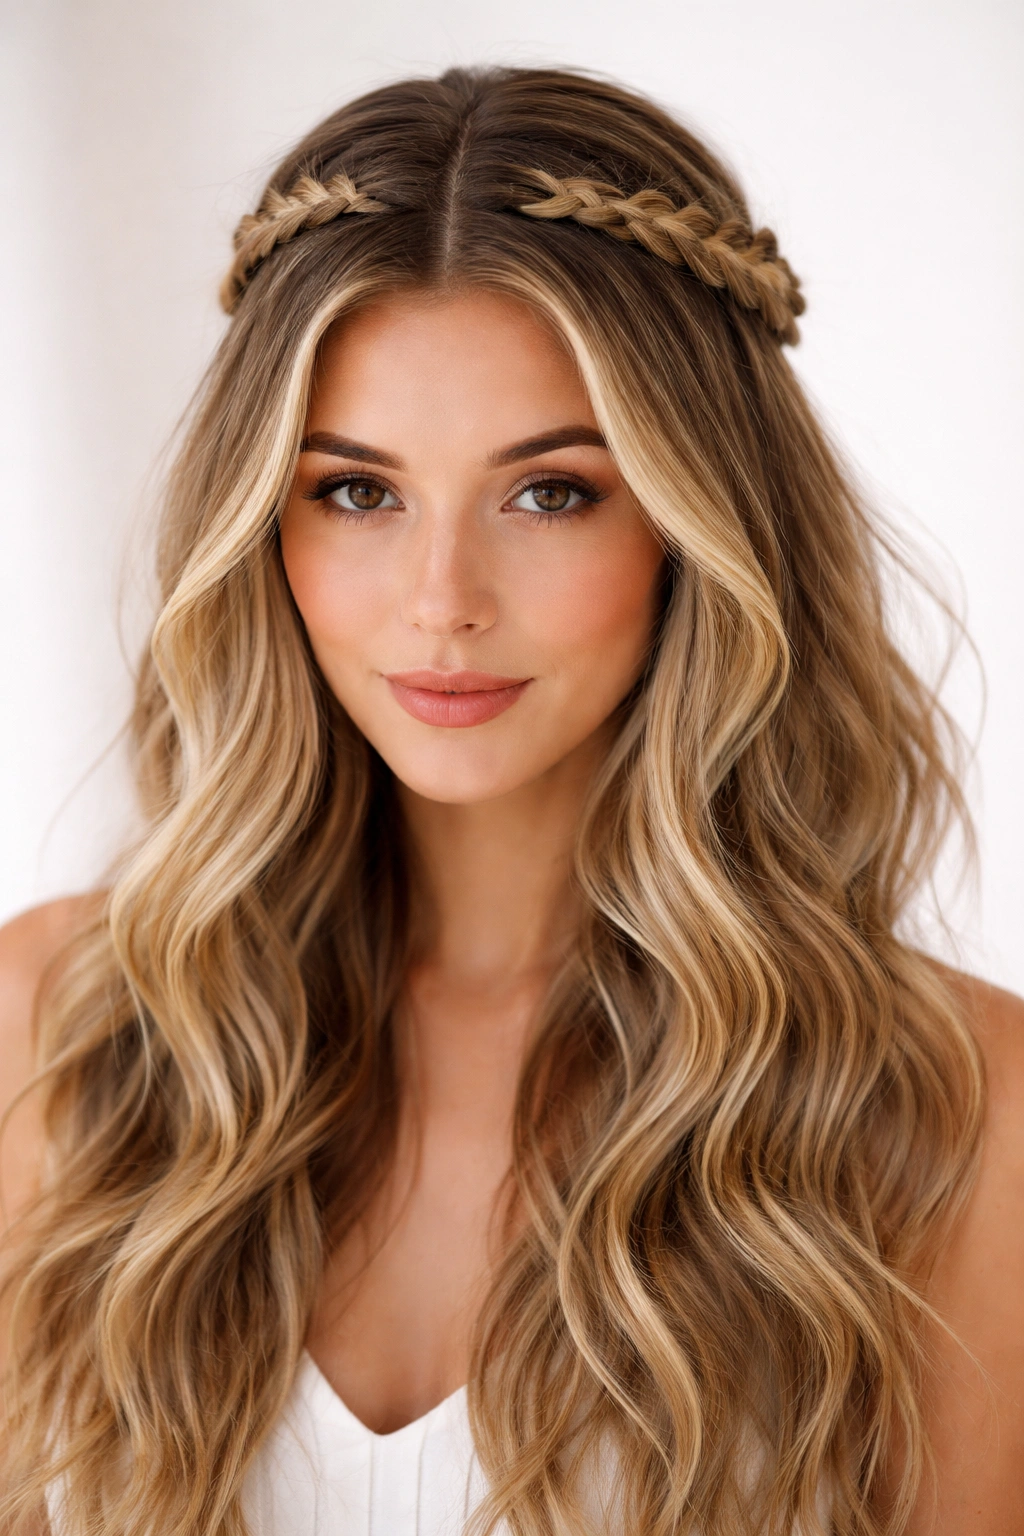
Create two Dutch or regular braids that start at each temple and meet at the center back, creating a crown effect around the top of your head. Your hair flows loose underneath, but the braided crown gives structure and visual interest to the whole style. This works especially well on people with longer hair because the contrast between the structured braids and flowing waves is more dramatic.
The Crown Concept and Why It Works
By braiding sections that frame your face and wrap around the top of your head, you’re creating a natural focal point that draws eyes upward. The crown effect is inherently flattering—it highlights your face and creates a halo-like appearance. The loose hair underneath balances it so the whole effect feels effortless rather than fussy.
Step-by-Step Crown Creation
Create a center part from your forehead to the nape of your neck. On one side, create a braid starting at your temple, moving at a slight upward angle as you move toward the back. Do the same on the other side. Meet both braids at the center back of your head and secure them together with a single elastic or cross them into an X pattern before securing. Leave the rest of your hair loose and wavy for contrast.
Enhancement Ideas
- Tug gently at both braids to create dimension and softness
- Leave small pieces loose around your face before starting the braids
- Add a delicate hair stick, pearl clip, or vintage comb where the braids meet
- This style is ideal for people with longer hair or significant length
11. The Braided Wrap-Around Half Up
Take a section of hair from one side, braid it loosely, then wrap the braid around the back of your head like a headband, pinning it on the opposite side. This is similar to the crown concept but using only one braid instead of two. It’s simpler to execute but still creates that polished, intentional look.
Why One Braid Can Be Just As Impactful
One braid wrapped across the back creates a clean line of texture and visual interest without feeling too structured. It reads as feminine and romantic, especially if you tug at the braid to create softness. The wrap-around positioning gives you that secured, put-together feeling while the loose hair underneath keeps everything relaxed and modern.
Execution and Styling
Start your braid at one temple, braid loosely down the side of your head, and continue braiding as you move around the back. Once you’ve reached the opposite side, secure the braid with bobby pins on that side. The braid should curve around the back of your head like a headband or headpiece. Tug gently at the finished braid to create texture, and leave some face-framing pieces loose for softness.
Making It Look Effortless
- Use bobby pins in a color matching your hair so they disappear
- Don’t worry if the curve isn’t perfectly symmetrical—asymmetry reads as more intentional
- Pair this with loose, tousled waves for maximum impact
- Add a delicate hair comb or clip if you want to dress it up for an event
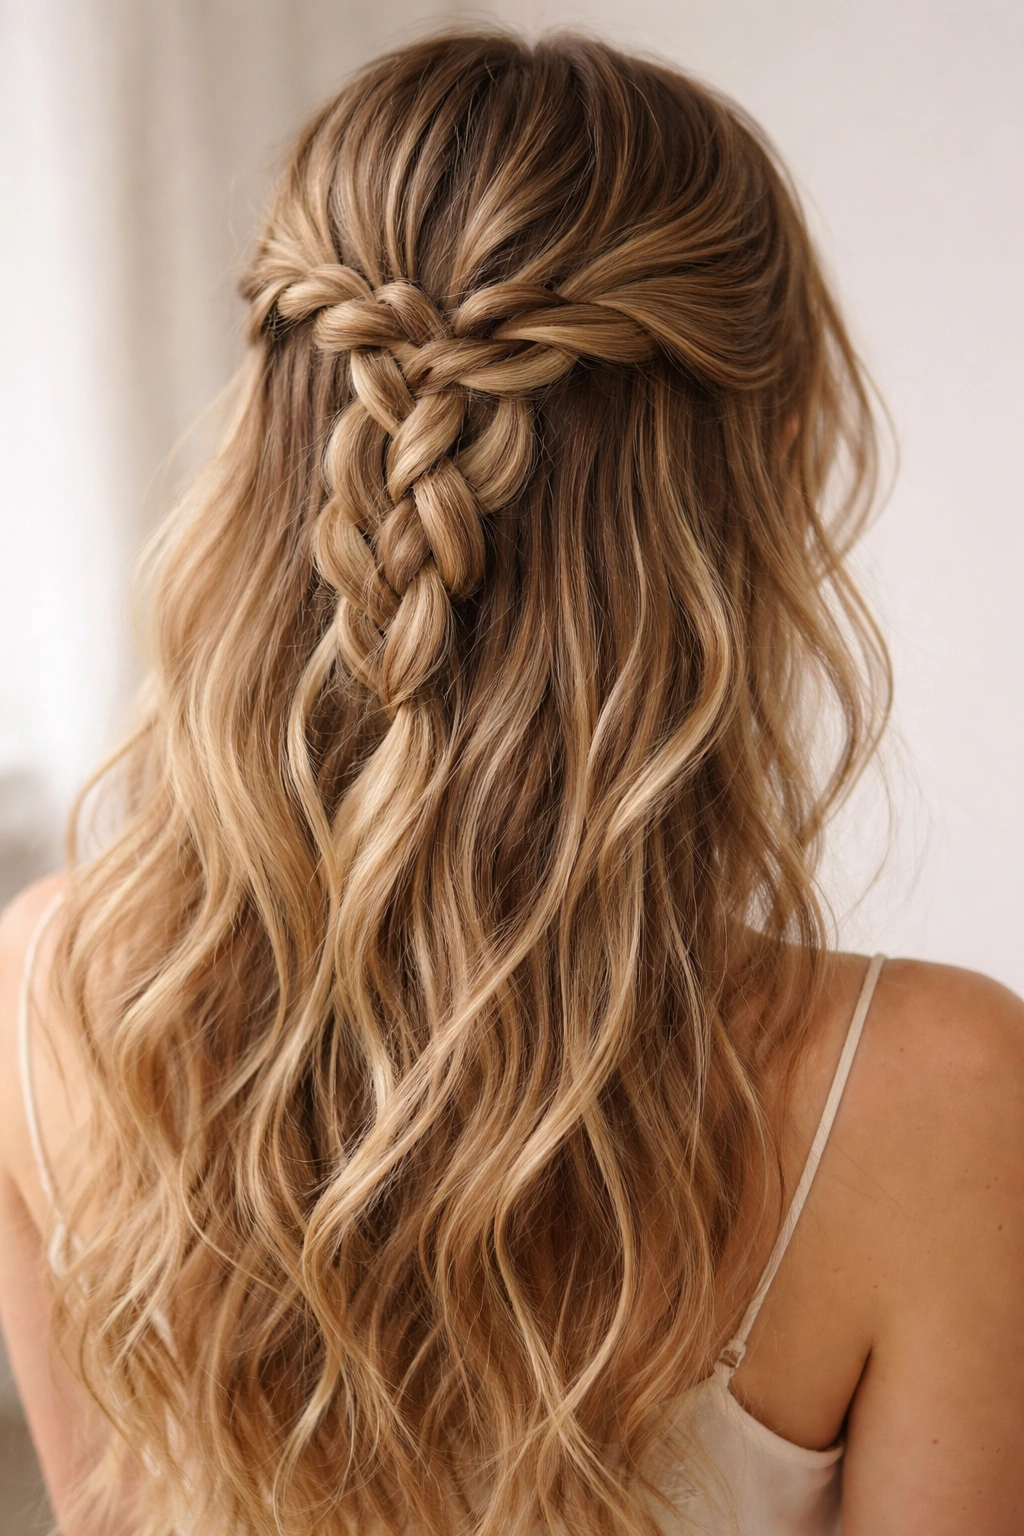
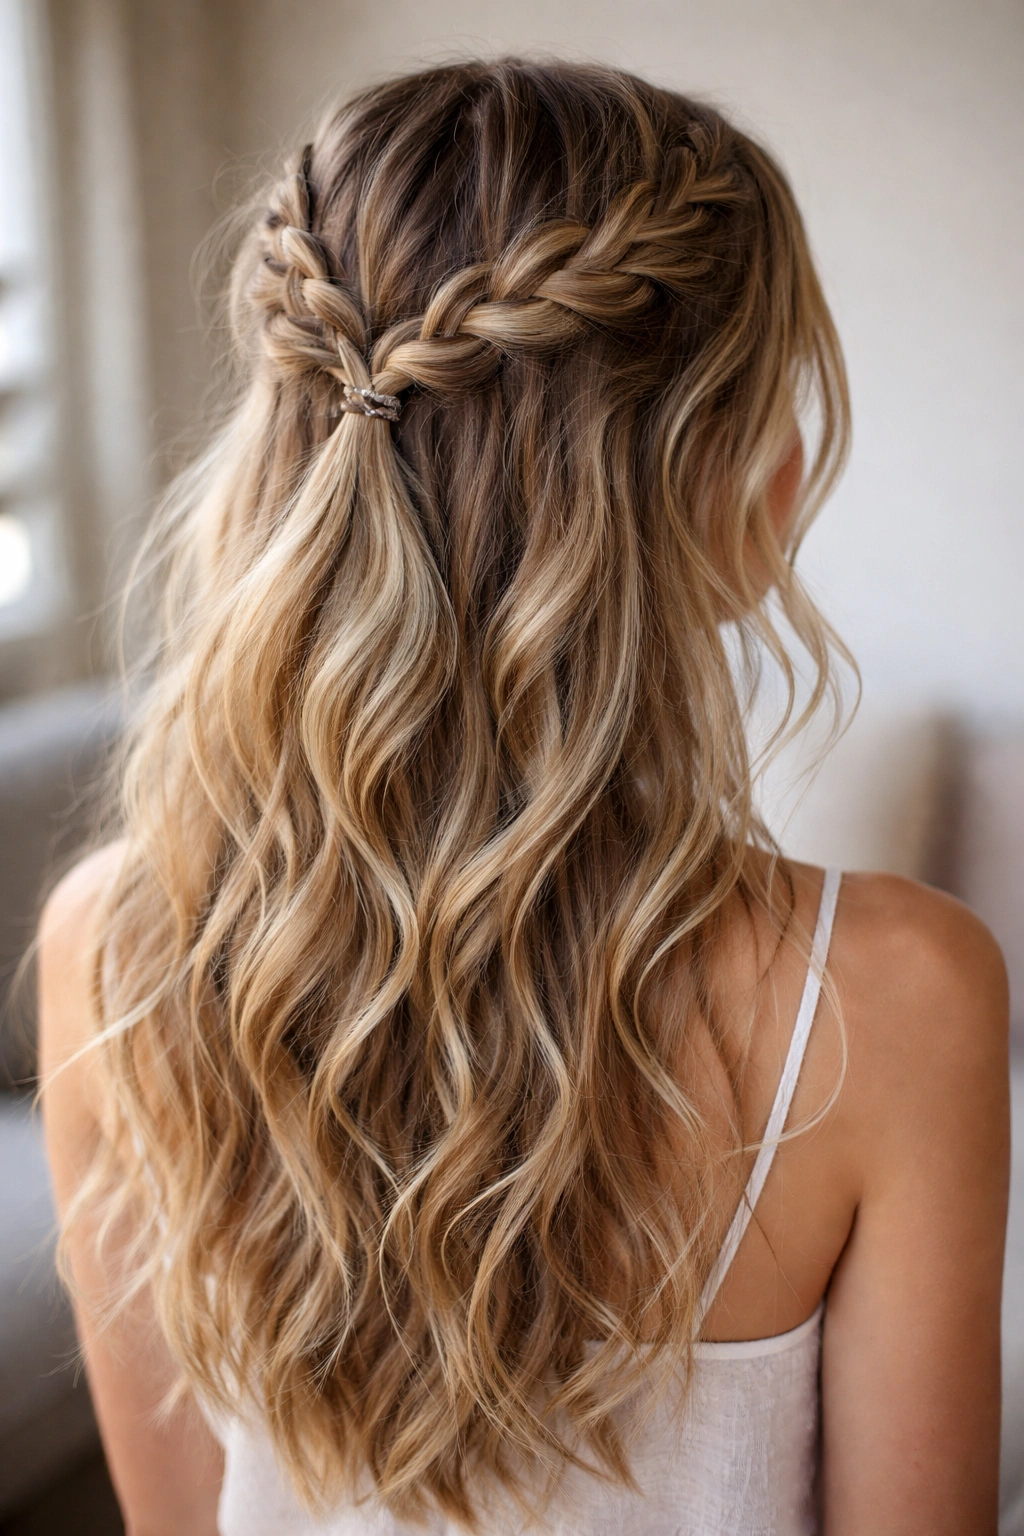
12. The Waterfall Braid Half Up
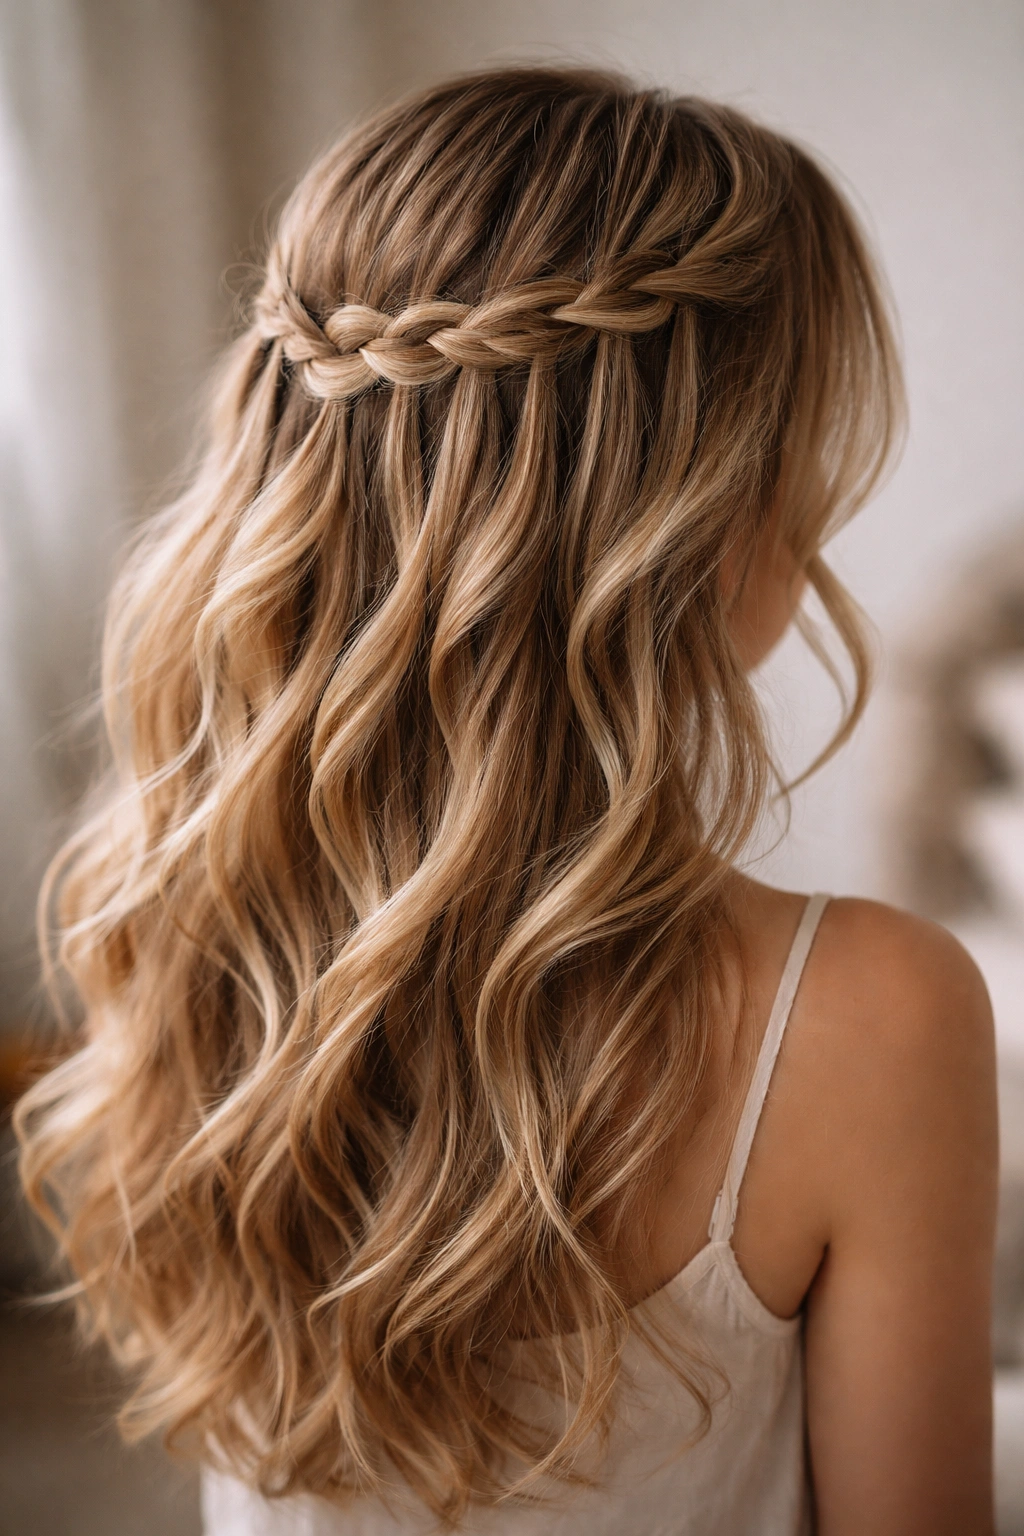
A waterfall braid creates the illusion of a cascade of hair by dropping strands as you braid, creating a pattern where some hair flows freely while other sections are woven into the braid. Pull back a waterfall braid to the center back and secure it. The dropped strands mix with your loose hair for an incredibly romantic, flowing aesthetic that’s surprisingly easy to execute.
Understanding the Waterfall Technique
A waterfall braid looks complicated but operates on a simple principle: you braid, but periodically you drop a strand from the braid and let it fall freely while picking up a new strand from above. This creates the waterfall effect where sections of hair cascade down like—well, like a waterfall. The effect is ethereal and romantic, perfect for people who want their half up style to feel special and effortlessly beautiful.
Step-by-Step Waterfall Execution
Start your braid at one temple. Braid normally for a few loops, then drop the lower strand and let it fall freely. Pick up a new strand from the top section of hair and add it to your braid. Continue braiding normally for a few more loops, then drop the lower strand again. Keep repeating this pattern as you move across your head toward the center back. Secure the finished braid with a small elastic. The dropped strands will mix with your loose hair, creating a flowing, waterfall-like appearance.
Styling Tips for Maximum Romance
- This works best on shoulder-length or longer hair
- Waterfall braids show better on hair with waves or texture already built in
- Braid slightly tighter than you would a regular braid since the dropped strands create some looseness
- Pair with loose waves or curls for a cohesive, intentional romantic look
- This is an ideal style for weddings, special events, or when you want your hair to feel elevated
13. The Braided Bun Hybrid Half Up
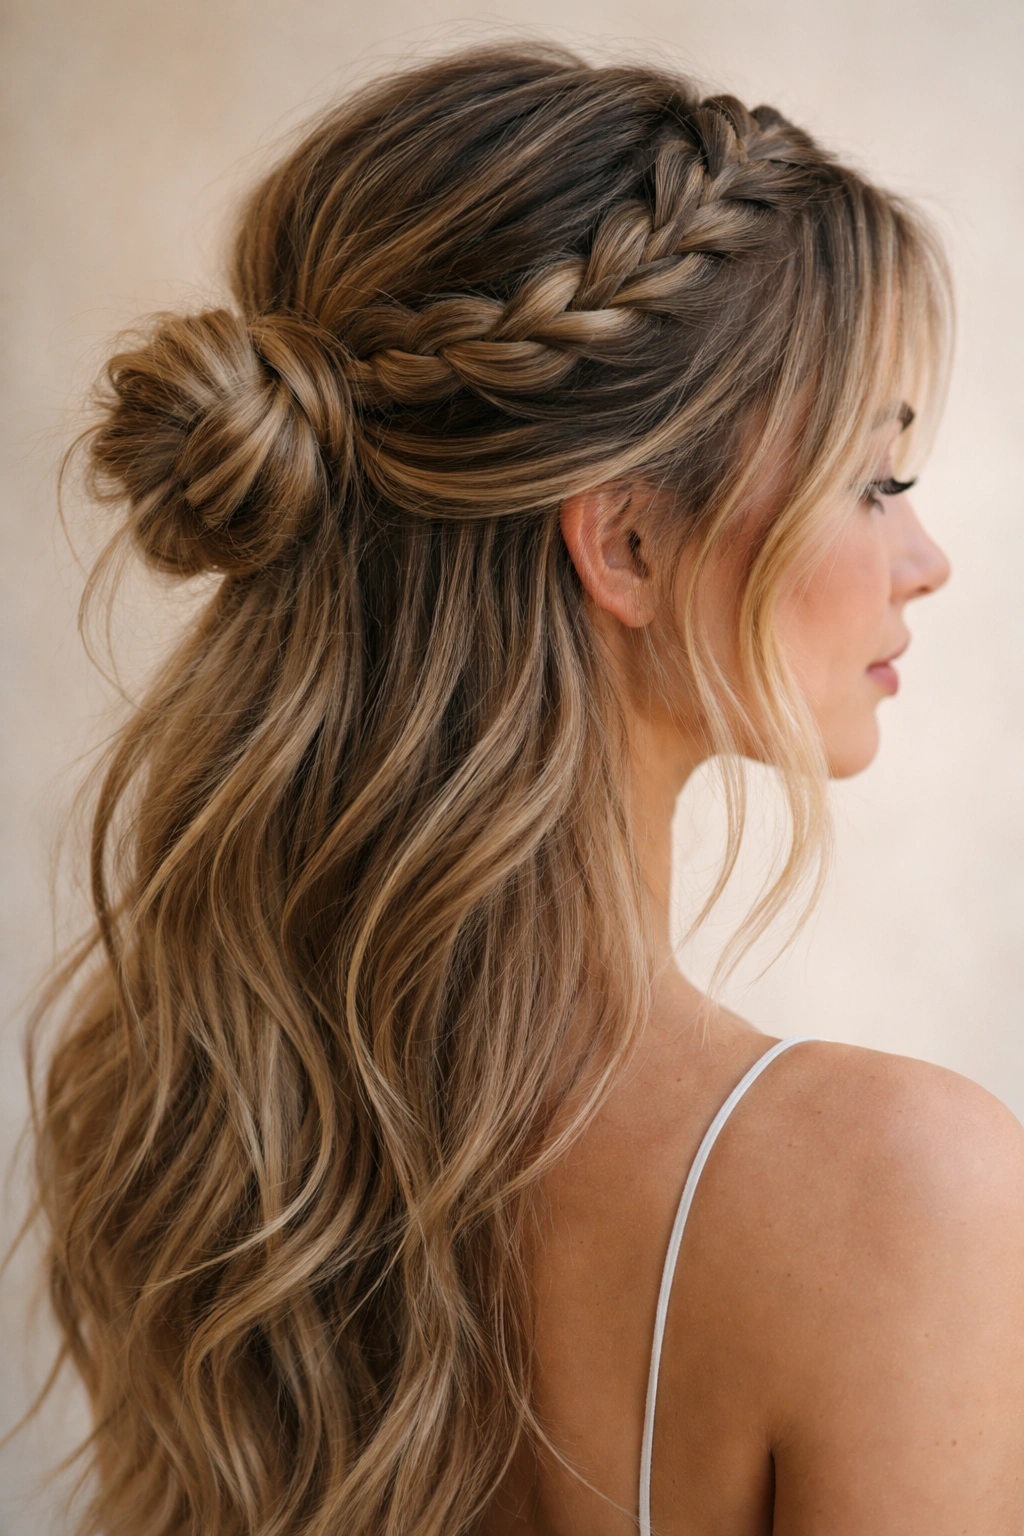
Create a braid from your hairline that incorporates loose strands and then transition that braid into a small, undone bun at the back. You’ve technically put some hair up (the bun) but kept so much down (the bottom half) that it reads as a half up style rather than a traditional updo. This creates height and visual interest while maintaining that relaxed aesthetic.
Bridging Braid and Bun
Start by creating a loose braid from one side or from the center front of your head, moving toward the back. Once you reach the nape or slightly lower, stop braiding and gather the remaining length into a small, deliberately undone bun. Twist the remaining hair loosely and pin it with bobby pins, letting small pieces escape. The combination of the textured braid transitioning into the imperfect bun feels polished but relaxed—exactly the vibe these styles achieve.
Creating the Undone Bun Transition
- Braid from the front or side, moving toward the back
- Once you’ve braided about half the length of hair you’re working with, stop the braid and gather the remaining hair
- Twist the remaining hair loosely or gather it without twisting for an even messier effect
- Secure with bobby pins that match your hair color
- Tug gently at both the braid and bun sections to create texture and dimension
14. The Braided Ponytail Half Up
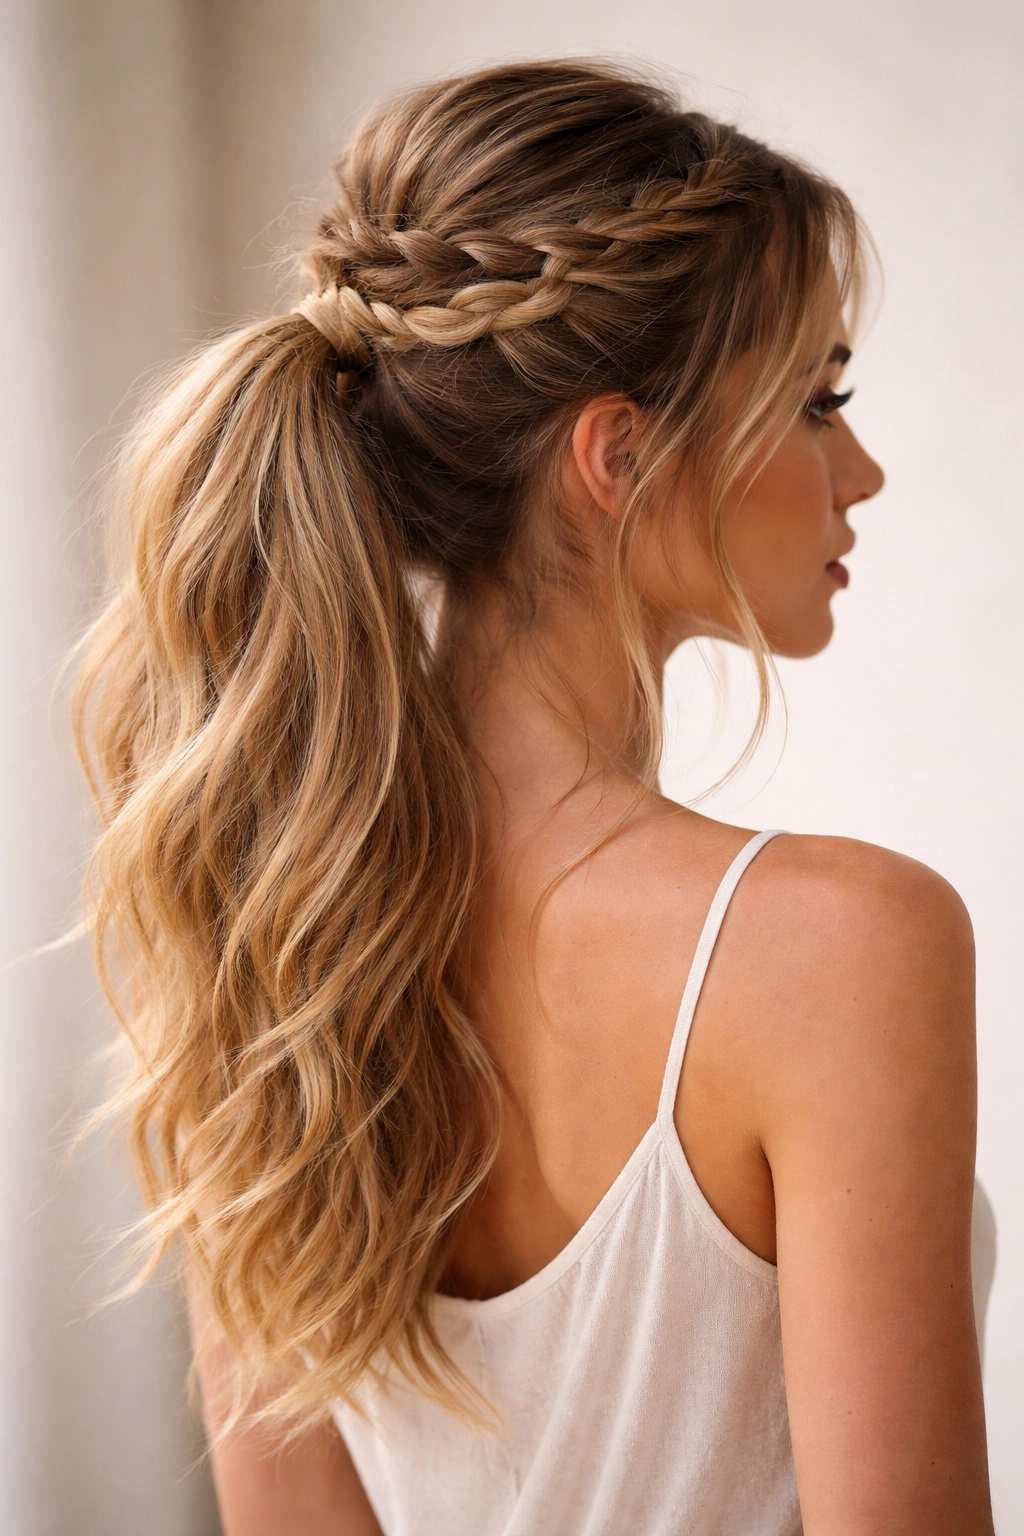
Create a half up section by braiding loosely from both temples and securing the braids together, then gather all of your hair (both the braided section and the rest) into a ponytail below the securing point. You now have a textured, braided top section with a ponytail underneath—it’s a half up style elevated into something a bit more polished.
Layering Structure for Visual Interest
The magic of this style is in the layering: you see the braided texture at the crown, then the fuller ponytail underneath. It creates dimension and visual movement. The braided sections add interest that a regular ponytail lacks, while the ponytail keeps the length and volume. This is perfect for situations where you want more polish than a half up alone would provide but aren’t ready for a full updo.
Building This Hybrid Style
Braid loosely from both temples toward the center back, securing the braids together with a small elastic. Then take a hair elastic slightly larger and lower, and secure all of your hair—both the braided sections and the loose hair—into a ponytail. You can use the same elastic to encompass everything, or use two separate elastics if you want more definition between the braided section and the ponytail. Tug at both the braids and the ponytail to create texture throughout.
Customization Options
- Use decorative elastics or hair cuffs for a more polished look
- Wrap a small section of hair around the base of the ponytail to hide the elastic
- Add hair extensions to the ponytail if you want extra volume and length
- Pair with loose waves through the ponytail for a soft, romantic effect
15. The Braided Twist and Pin Half Up
Combine braiding and twisting in one style: braid one section, twist another, and pin them together at the back. The mix of textures (the woven braid plus the spiral twist) creates more visual interest than using just one technique. It’s a more artful, intentional-looking style that feels special without being overly complicated.
Combining Two Techniques for Impact
By mixing braids and twists, you’re creating visual variety within one hairstyle. The eye travels from the woven pattern of the braid to the smooth spiral of the twist, creating a more dynamic, interesting look. The difference in texture between the two techniques is subtle enough that the style reads as cohesive, but unique enough that it clearly isn’t just a standard half up.
Execution with Mixed Techniques
On one side of your head, create a loose braid from your temple toward the center back. On the other side, create a loose twist (two sections of hair twisted around each other) moving in the same direction. Secure both the braid and twist together at the back center with a single elastic or bobby pins. The combination of the two different textures creates a more interesting, customized look. Tug at both sections gently to create dimension.
16. The Bubble Braid Half Up
A bubble braid is a series of small ponytails stacked on top of each other with hair pulled out between each section to create a bubbling effect. Use this technique for your half up section: create 2-3 small bubble sections, secure them together, and leave the rest of your hair down. It’s playful and youthful, with a sculptural quality that’s more visually interesting than a straight braid.
What Makes Bubble Braids Unique
Bubble braids create a dimensional, sculptural quality through the contrast between the pinched sections (held by elastics) and the puffy sections (where hair is pulled out). On a half up style, this creates an unusual silhouette that reads as more creative and fashion-forward than traditional braids. The technique looks more complicated than it actually is, making it a great confidence-builder.
Creating Perfectly Puffy Bubbles
Gather a section of hair from your hairline and secure it with a small elastic. Below that elastic, create another small ponytail and secure it with another elastic. Repeat once or twice depending on the length of hair you’re working with. Now comes the magic: gently pull the hair between each elastic outward and upward to create the bubble effect. Each bubble should puff out nicely. Secure your final bubble at the back center with a bobby pin or small elastic, and leave the rest of your hair loose.
Customization for Different Occasions
- Use colored elastics that match your hair for a subtle, cohesive look
- Use metallic or contrasting elastics for a bolder, more playful effect
- Vary the size of your bubbles—smaller bubbles feel more delicate, larger ones feel bolder
- This style works especially well on people with thicker, textured hair that shows the bubble effect clearly
17. The Infinity Braid Half Up
An infinity braid (also called an infinity twist or pretzel braid) creates a woven, interlocking pattern by crossing sections of hair in a specific pattern. It’s more intricate-looking than a standard braid but uses a similar braiding motion. Pull one infinity braid back from your temple and secure it, leaving the rest loose. The pattern looks impressively complex without being that much harder.
The Visual Interest of Infinity Braids
Infinity braids create a pretzel-like or figure-eight woven pattern that’s genuinely eye-catching. The overlapping, interlocking effect creates more visual depth and texture than a traditional braid. People will assume you spent significantly more time on this than you actually did, making it perfect for occasions when you want to look elevated without the effort of a true updo.
Executing the Infinity Braid Pattern
Start at one temple with a section of hair. Divide that section into three strands. Cross the right strand over the center, then cross the left strand over the new center. Now here’s where it differs from a regular braid: instead of picking up new hair for the next weave, you cross the right strand under the center strand (instead of over). Then cross the left strand under. Alternating between going over and going under creates the infinity or pretzel effect. Secure at the back and tug gently to create texture.
Styling for Maximum Impact
- This braid shows best on hair with some contrast or texture (darker hair, highlighted hair, textured hair all work well)
- Braid slightly tighter than you would a regular braid to keep the pattern visible
- Tug gently at the finished braid to create dimension without completely loosening the pattern
- Pair with loose waves or curls that complement the complexity of the braid
18. The Braided Layers Half Up
Create a half up style that uses multiple braids of varying thickness and length, stacking them on top of each other. You might have one thick braid on top, a thinner one in the middle, and thin wisps as the bottom layer. All of these braids are secured together at the back, creating a multidimensional, visually complex style that feels incredibly intentional and artistic.
Layering Braids for Dimensional Impact
By creating braids of different thicknesses, you’re creating depth and dimension within a single hairstyle. The visual interest compounds—instead of looking at one simple braid, the eye travels through multiple woven layers. This technique works beautifully for people who want their half up style to feel special, artistic, and completely customized.
Building the Braided Layers Effect
Start with a section of hair from your temple, about 1.5 inches thick. Braid this loosely and secure it at the back center. Just below that secured braid, take a slightly thinner section (about 1 inch) and create another braid. Secure this one just below the first. Repeat one more time with an even thinner section if you have enough hair, or stick with two layers if that works better for your hair length and thickness. All of the braids should meet at approximately the same point at the back of your head and be secured together with bobby pins or a single elastic. Tug gently at each braid to create texture and separation.
Customizing the Layered Approach
- Use the same color elastic for all layers, or use slightly different colors to emphasize the layering
- Vary the thickness of each braid to create visual interest
- Leave small face-framing pieces loose around your temples and forehead
- This style works especially well on longer hair where multiple braid layers can be clearly seen
- Pair with loose, tousled waves to create a polished, intentional romantic look
Final Thoughts
The beauty of messy braided half up half down styles is that they meet you wherever you are—whether you’re someone who has mastered complex braiding techniques or someone who wants something more interesting than just pulling your hair back but doesn’t have time for an elaborate updo. The consistent thread through all eighteen of these styles is that the intention matters more than the perfection. A braid that’s slightly loose, with pieces tugged out to create dimension, reads as more modern and effortless than a tight, polished braid ever could. You’re not aiming for a finished look—you’re aiming for a styled look that suggests you made an intentional choice about your appearance without spending three hours on it. Start with one or two styles that appeal to you, practice them a few times until your hands remember the motions, and then feel free to adapt and customize based on your hair type, length, and what you’re doing that day. The best hairstyle is always the one you’ll actually wear.