A quince celebration calls for a hairstyle that’s elegant, romantic, and picture-perfect—but when you’re working with short hair, the options can feel limited. The truth is, short hair opens up incredible possibilities for the half up half down style, one of the most versatile and flattering looks for any formal occasion. Instead of fighting against your length, you can work with it to create volume, movement, and sophistication that photographs beautifully from every angle.
The half up half down approach is specifically designed for the challenges short hair presents. You get the polished, intentional look of an updo while keeping the face-framing softness that makes you feel beautiful and comfortable throughout the evening. Whether your hair is naturally curly, stick-straight, thick, fine, or somewhere in between, there’s a half up half down quince style waiting for you. These styles range from delicate and romantic to bold and dramatic, each offering its own way to make a statement on your big night.
What makes short hair perfect for half up half down styles is the natural volume at the crown and the way the lower layers catch light and movement. You don’t need extra extensions or complicated techniques—just the right strategy for pinning, curling, and accessorizing to create the elevation and detail that makes a hairstyle feel truly special. Let’s explore twenty distinct variations that work specifically with shorter lengths.
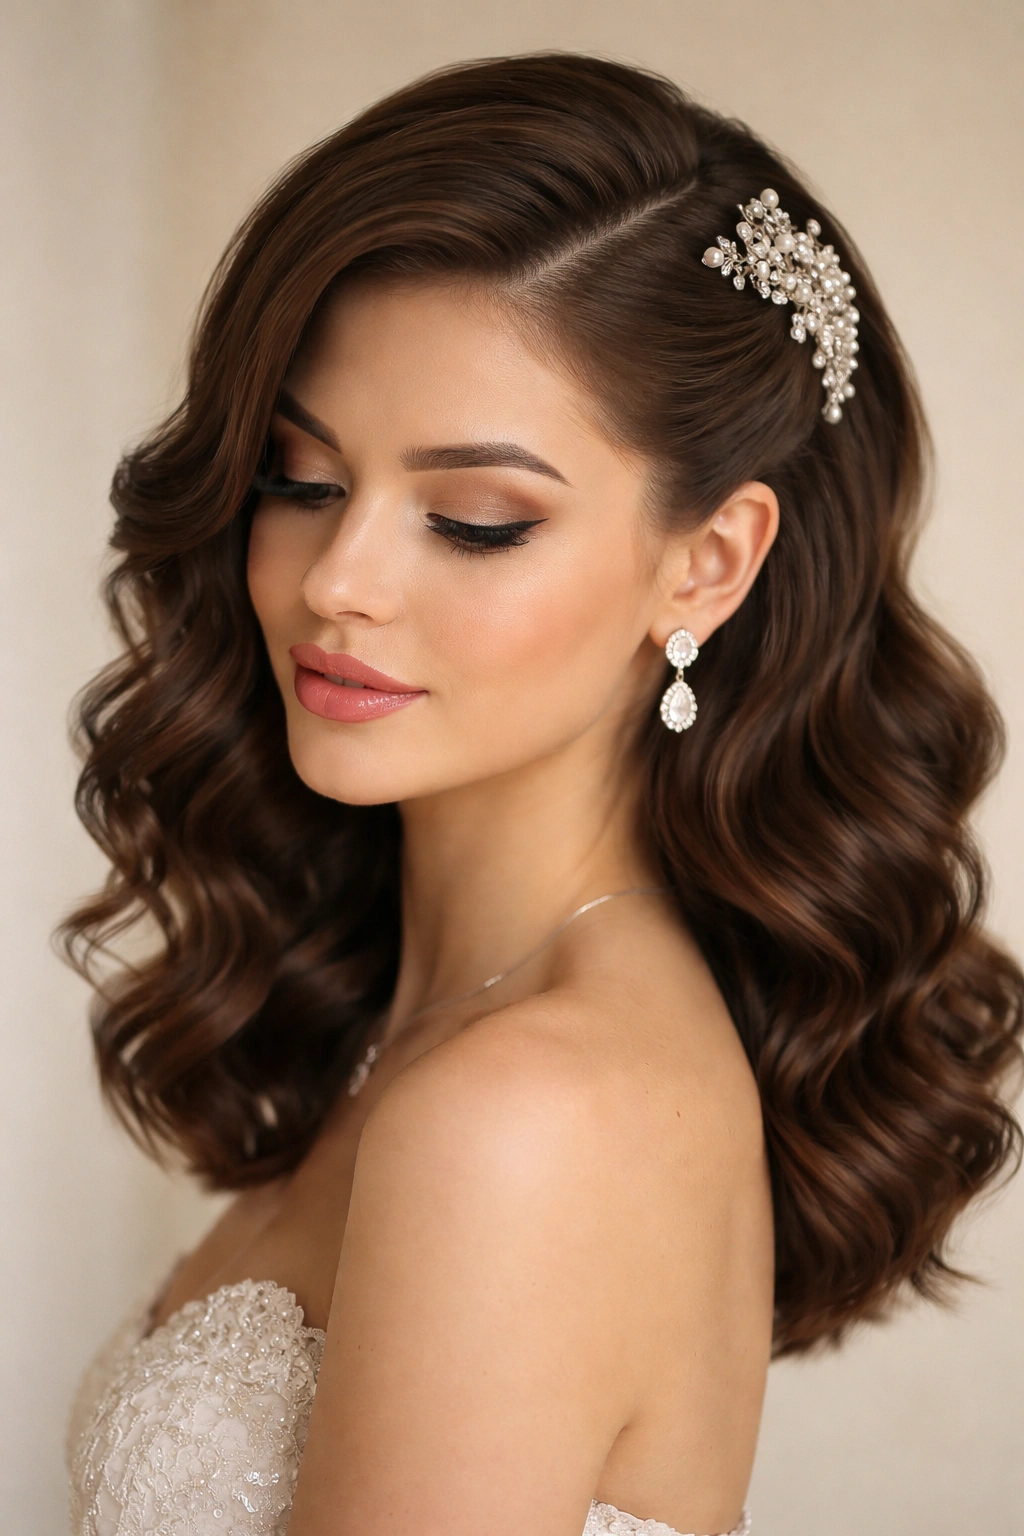
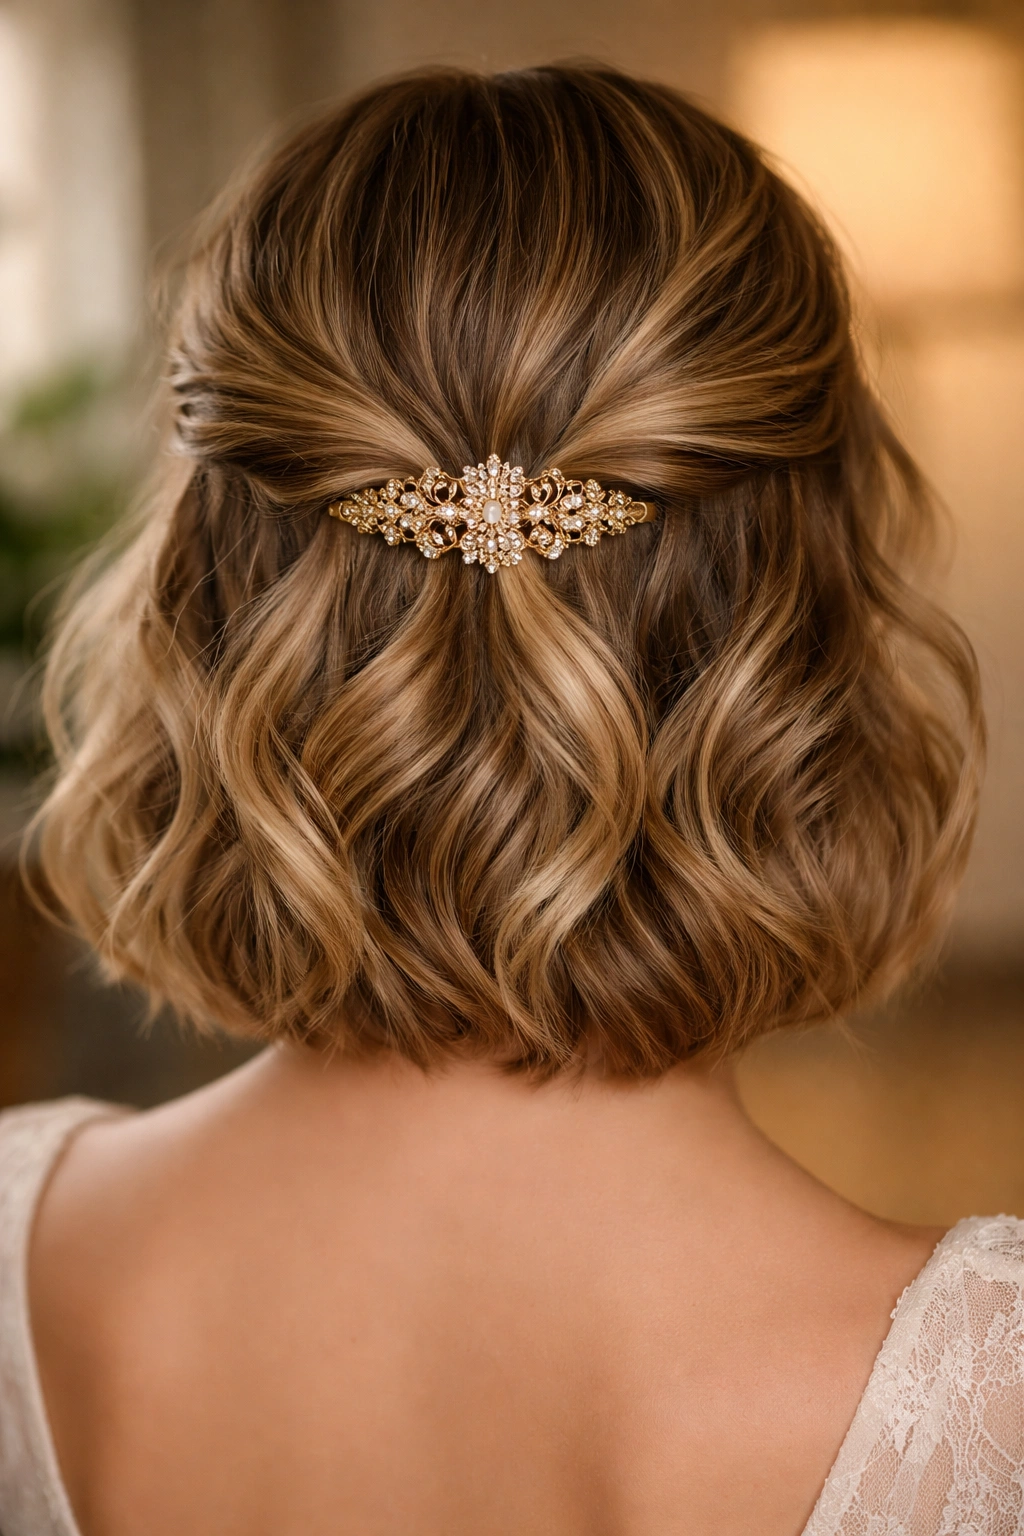
1. The Twisted Crown Half-Up with Loose Waves
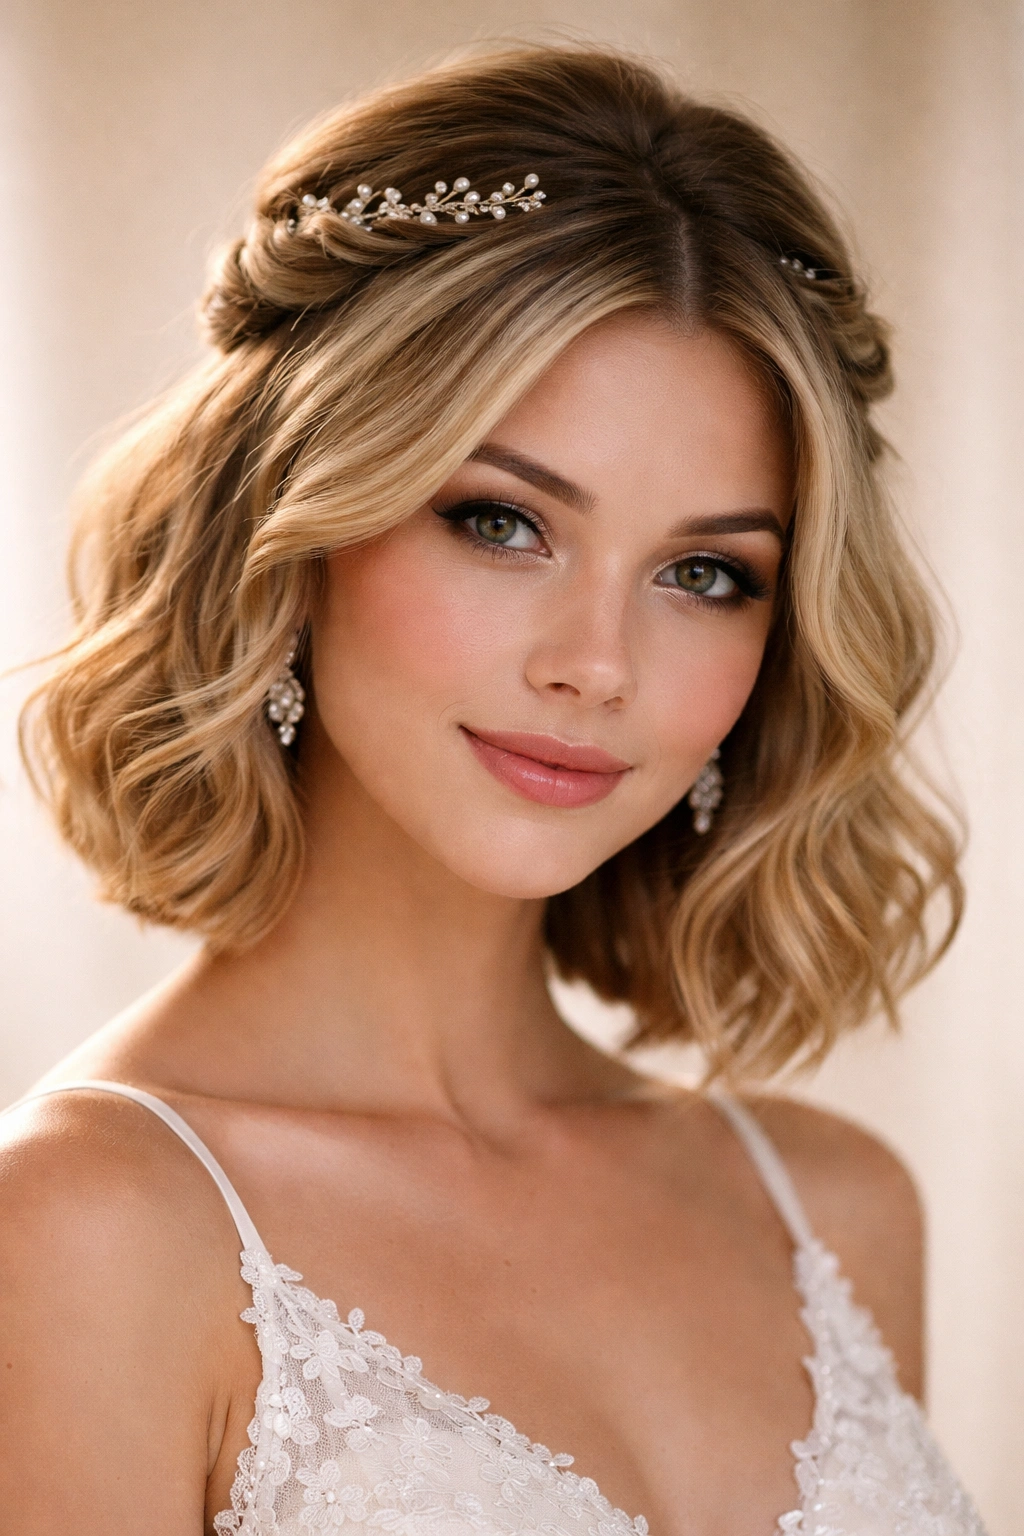
This style creates an ethereal, romantic effect by twisting small sections of hair from each temple and securing them at the crown with a delicate clip or bobby pin. The lower half of your hair falls in soft waves that frame your face beautifully, while the twisted sections add dimension and visual interest to the crown area.
Why This Style Works for Short Hair
The twisted sections create the illusion of more volume at the crown without requiring much length. The waves in the lower portion catch light and create movement, making even collar-length hair feel bouncy and alive. This style is forgiving if your hair is baby-fine or thin, because the twists add texture and the clip becomes a focal point rather than the hair quantity itself.
How to Create It
Start with hair that’s been curled with a one-and-a-half-inch curling iron for soft, lasting waves. Take a one-inch section from your right temple and twist it slowly as you move back toward the center-back of your crown. Do the same from the left side. Secure both twisted sections together with a crystal-embellished bobby pin or decorative clip. Use a light hairspray to keep flyaways smooth but not stiff.
Pro tip: Twist the sections loosely rather than tightly—loose twists photograph better and feel more romantic than tight, structured ones.
2. The Sleek Low Pony with Lace Detail

This style pulls a small, defined section of hair into a low ponytail at the nape of your neck while leaving the sides and front layers down to frame your face. A piece of delicate lace ribbon, wrapped around the base of the ponytail, adds handmade-looking elegance without fuss.
Creating Dimension in the Ponytail
Backcomb the hair that will go into the pony before securing it to create texture and hold. The texture means the ponytail sits up slightly away from the back of your head, creating visible volume even with shorter lengths. Wrap the lace around the elastic multiple times to fully cover it, then secure the lace ends with bobby pins hidden underneath.
Styling the Face-Framing Section
Leave one-inch pieces of hair on each side of your face completely loose—don’t pin them. Use your curling iron to create a soft curl that falls in the opposite direction from your face, so the curl moves inward and gently frames your cheekbones. This soft curve makes your face feel more open and photogenic.
Worth knowing: This style works best if you have at least shoulder-length hair, but it absolutely can work with shorter bobs if you’re willing to use a small-barrel curling iron on just the lower sections.
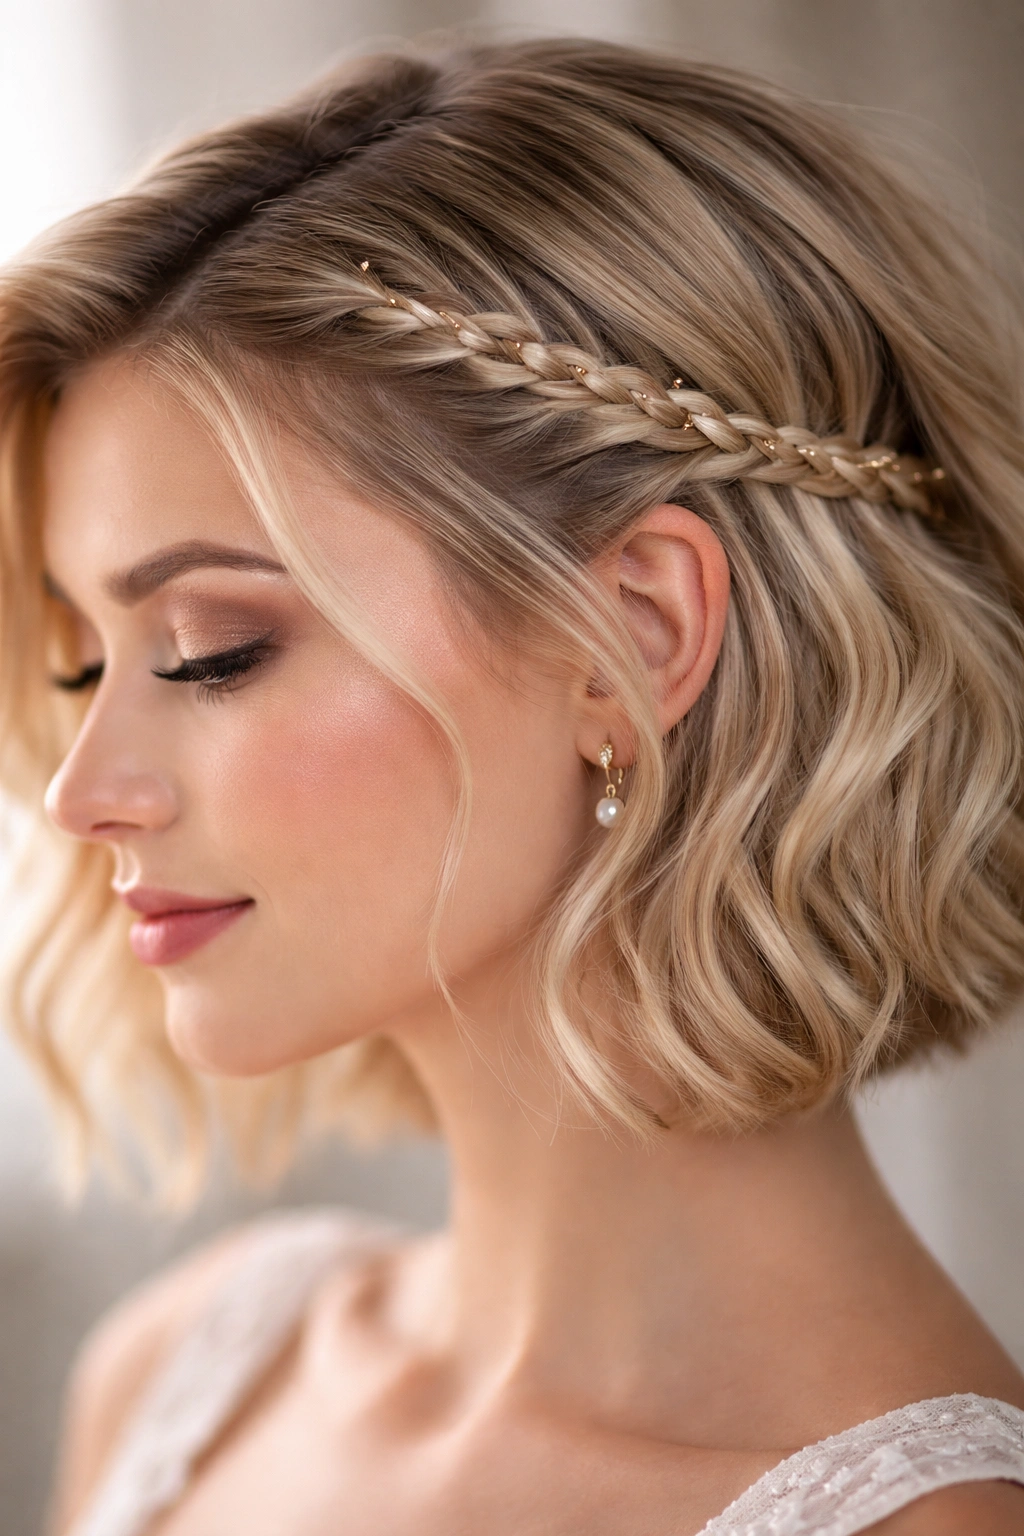
3. The Braided Half Crown with Volume
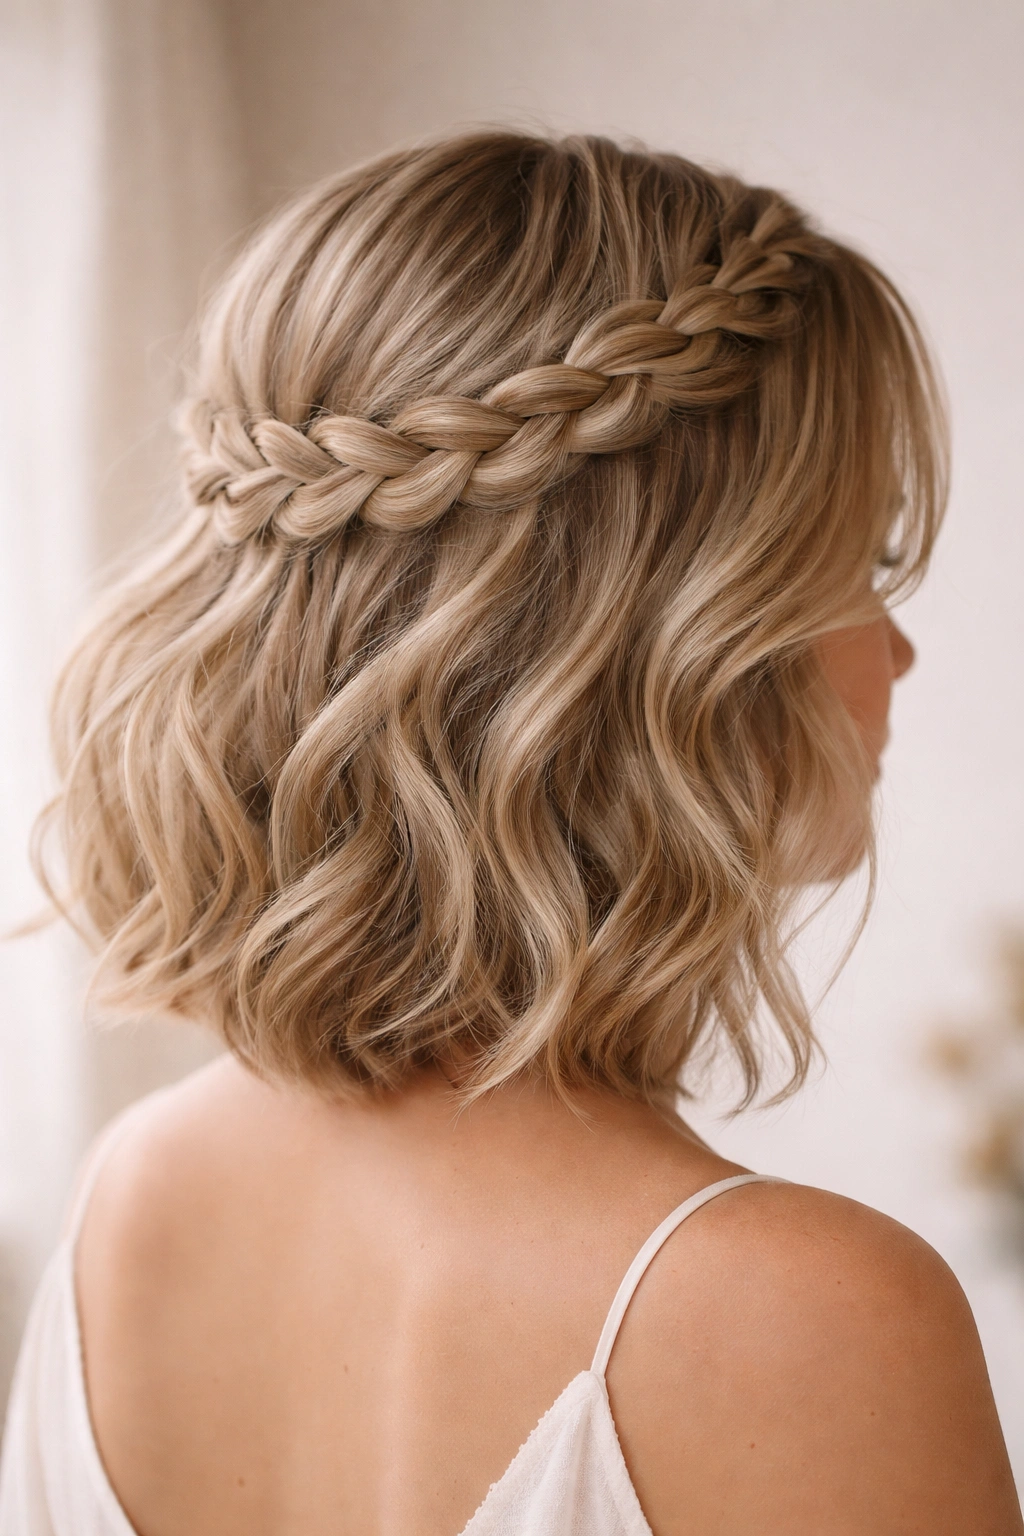
This style creates a braid that starts at one ear, travels across the back of the head, and ends at the opposite ear—like a half crown—while the hair below remains loose and voluminous. The braid becomes the visual centerpiece of the entire hairstyle.
Mastering the Half-Crown Braid
Begin the braid at your right ear by taking three thin sections and braiding them tightly for the first few inches to establish control. As you move across the back of your head, add small sections of hair to the braid on both the top and bottom sides, French-braid style. This captures more hair without requiring much length. End the braid at your left ear and secure it with a tiny elastic.
Creating the Volume Below
Curl all the hair that hangs below the braid into loose waves using a 1.5-inch curling iron. The contrast between the structured braid above and the flowing waves below creates a balanced, intentional look that feels both modern and romantic.
Insider note: If braiding feels intimidating, you can fake a braid by teasing a section of hair smooth, then pinning thin ribbon to follow the exact path a braid would take across the back of your head.
4. The Stacked Curls Pinned Half-Up
This style curls your entire head with smaller hot rollers or a curling iron to create tight, springy curls, then selects curls from the crown area and pins them upward and back, leaving the front and side curls down.
Building Lasting Curl in Shorter Hair
With shorter hair, you need smaller curl diameters to create hold and definition. Use a 1-inch or 1.25-inch barrel curling iron, and curl each section away from the face. Leave the curls cool in the barrel for a full ten seconds before releasing—this sets the memory of the curl and extends the hold.
Pinning Curls Strategically
Take three to four individual curls from the crown area—not all of them, just enough to create an intentional gathered effect. Pin each curl upward and slightly back using bobby pins that match your hair color. The remaining curls fall freely, creating a romantic, feminine effect.
Real talk: Smaller barrel curls require more maintenance throughout the evening. Bring bobby pins and a light hairspray in your clutch for touch-ups if any curls begin to relax.
5. The Sleek Gel-Slicked Top Knot with Loose Waves Below
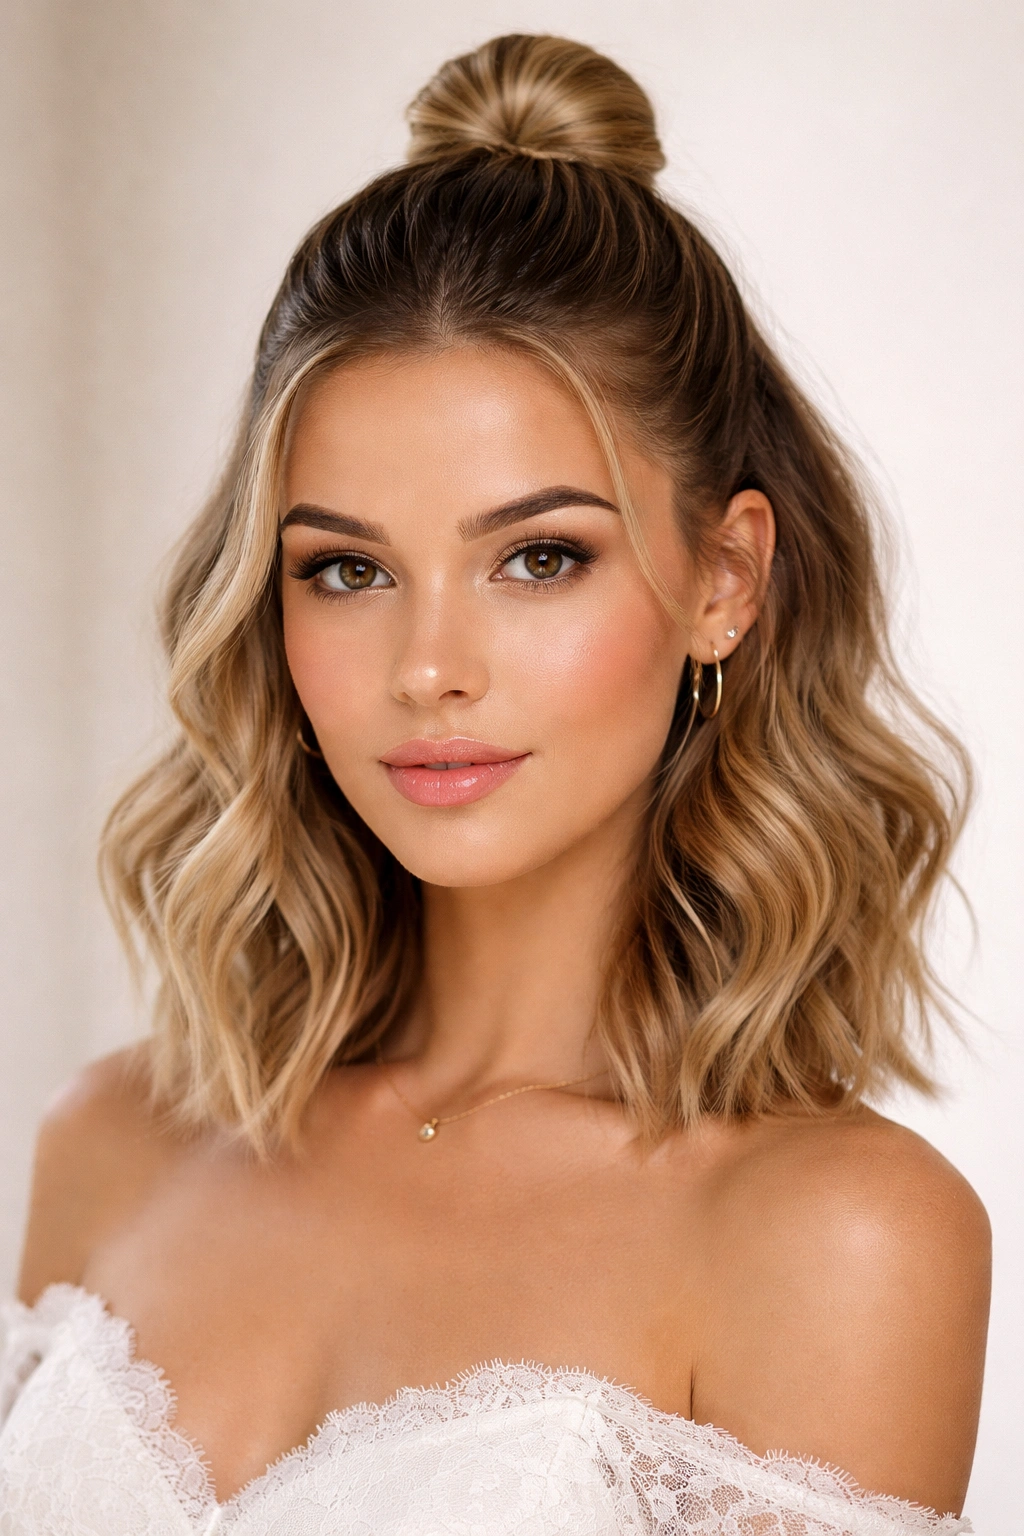
This modern, edge-forward style slicks the top section of hair with styling gel or pomade, twists it into a small bun at the crown, then contrasts it with completely loose waves in the lower section.
Creating the Sleek-Slicked Effect
Use a strong-hold styling gel or pomade on damp hair. Comb the top section smoothly back toward the crown, gathering it as if you were making a full high ponytail, but only securing the top portion. Twist this gathered section and wrap it around the base to form a small, neat bun. The contrast between the wet-look smoothness and the textured bun creates an ultra-modern aesthetic.
Balancing the Contrast
The lower waves must be romantic and textured to balance the sleekness above. Curl the entire lower half of your hair away from your face and release the curls fully—don’t brush them out. You want defined, bouncy waves that feel lush and full.
Pro tip: This style photographs incredibly well because the contrast between the two textures creates visual interest and a sense of intentional design.
6. The Velvet Ribbon Wrapped Half-Up
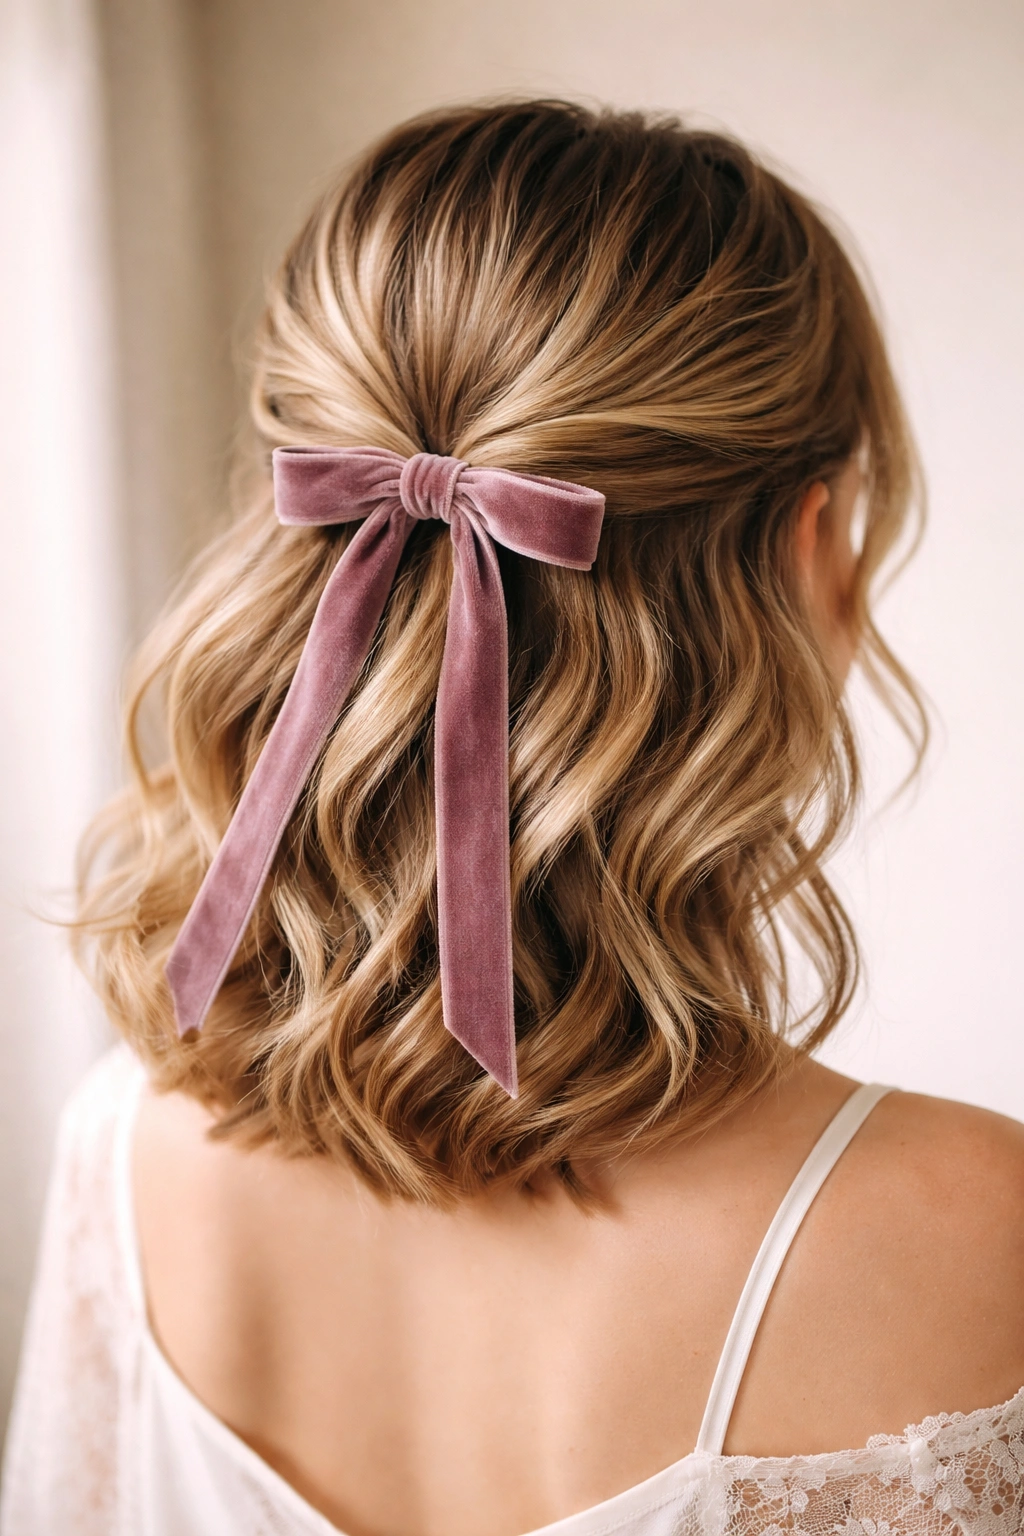
This romantic style gathers hair from both temples and the crown area into a centered point, then wraps a piece of velvet ribbon around the gathered section and ties it into a bow. The effect is whimsical and elegant simultaneously.
Selecting the Right Hair Sections
You’re not creating a traditional ponytail—instead, you’re gathering individual sections from specific areas. Take a small section from above each ear, and two sections from the crown area closest to the center part. Gather these four sections together and secure them loosely with a small elastic or decorative clip.
The Velvet Ribbon Finishing
Choose a ribbon in a color that complements your dress—deep jewel tones work beautifully against most quince gown colors. Wrap the ribbon around the gathered section multiple times, covering the elastic entirely. Tie it into a bow at the center, and ensure the bow sits at the back, not the top of the head, so your face is fully visible in photos.
Worth knowing: Velvet ribbon feels luxurious and photographs with incredible texture, much better than satin or silk ribbon options.
7. The Swept Side Half-Up with Metal Clip
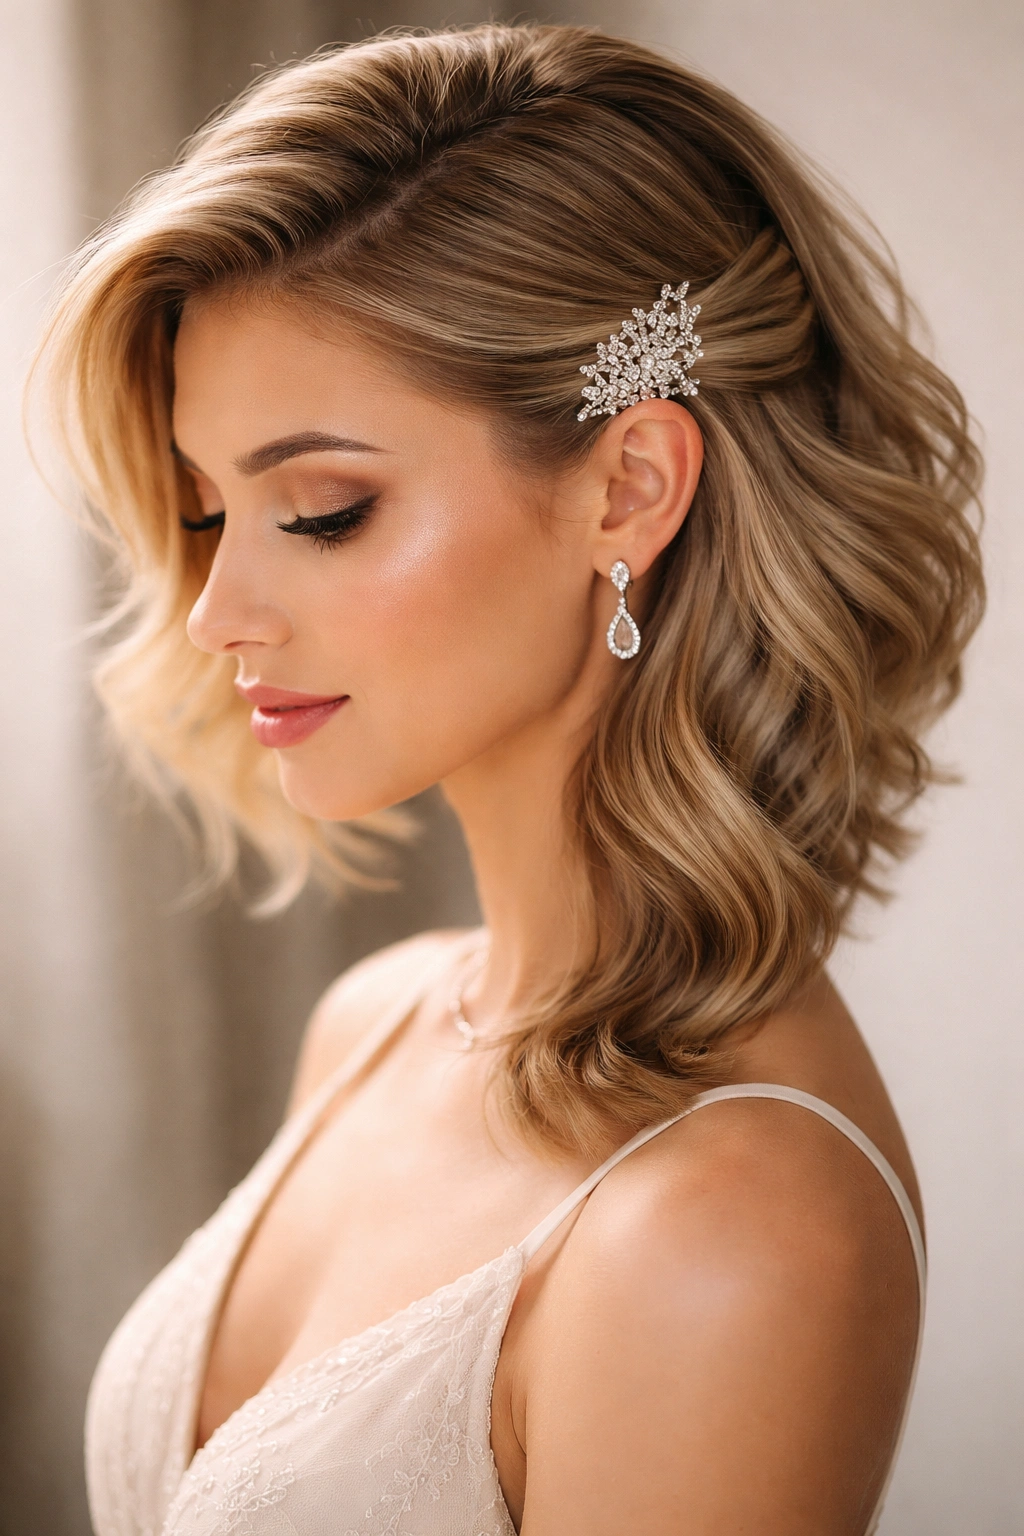
This asymmetrical style sweeps all the hair to one side of the head, pins a small section at the temple, and secures it with a statement metal clip. The entire head of hair cascades down one side, creating a dramatic, elongated line.
Achieving the Sweep
Tease the crown area gently to create a base and height. Use a paddle brush to smooth the hair over to your chosen side, gathering it loosely as you move. The gathering happens naturally as you brush—don’t force it into a tight formation.
The Placement of the Clip
Position your metal clip at the temple area where you’ve swept the hair, securing the swept section so it stays in place without pulling tight. The hair below the clip should flow freely down that side of your head and over your shoulder. This creates a flattering line for photographs and makes you feel glamorous throughout the event.
Insider note: A rose gold or gold metal clip complements warm skin tones beautifully, while silver works for cooler undertones.
8. The Double Twisted Half-Up with Pearl Detail
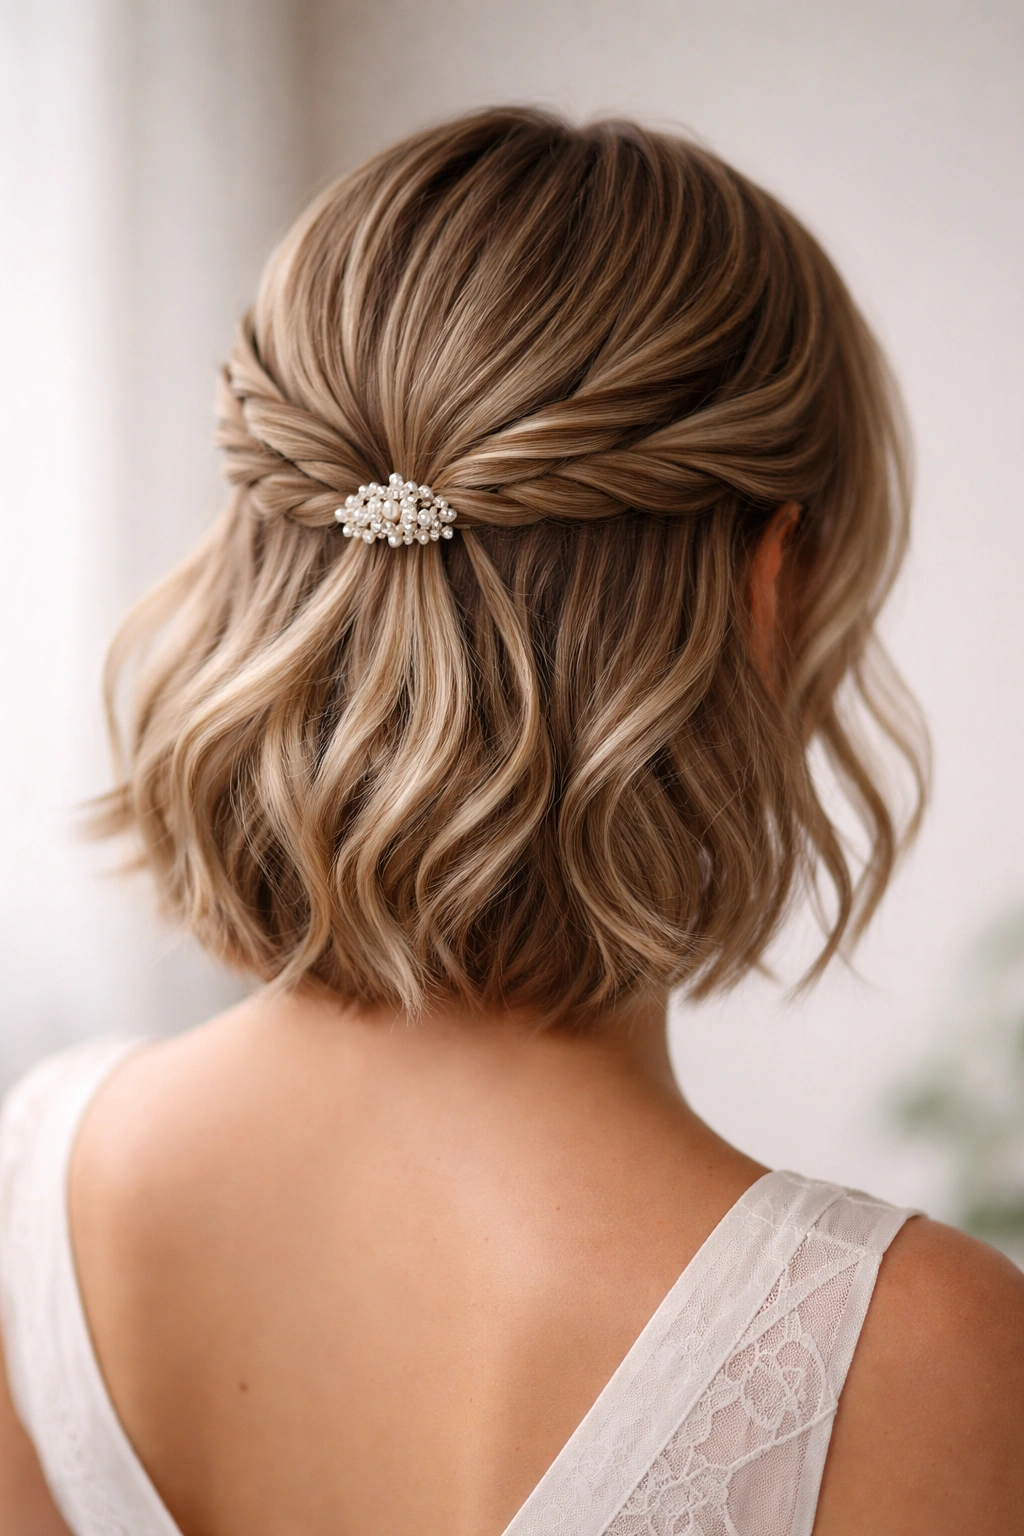
This style creates two independent twists that start at each temple, travel back toward the crown, and merge together at the center-back. A pearl hair pin or decorative clip secures the merged twists, adding refined detail.
Executing the Twin Twists
Take a two-inch section of hair from above your right ear and twist it firmly as you move toward the center-back of your crown. Do the same on the left side. The two twists should converge at approximately the same point—the center-back crown area. Cross one twist over the other, then secure both together with a pearl-embellished or decorative pin.
The Texture Addition
Before twisting, backcomb each section slightly to add texture and grip. This prevents the twists from unwinding throughout the evening and creates a more interesting visual texture than perfectly smooth twists would offer.
Real talk: This style takes practice, but once you master it, it becomes your go-to because it feels polished and holds beautifully all day and night.
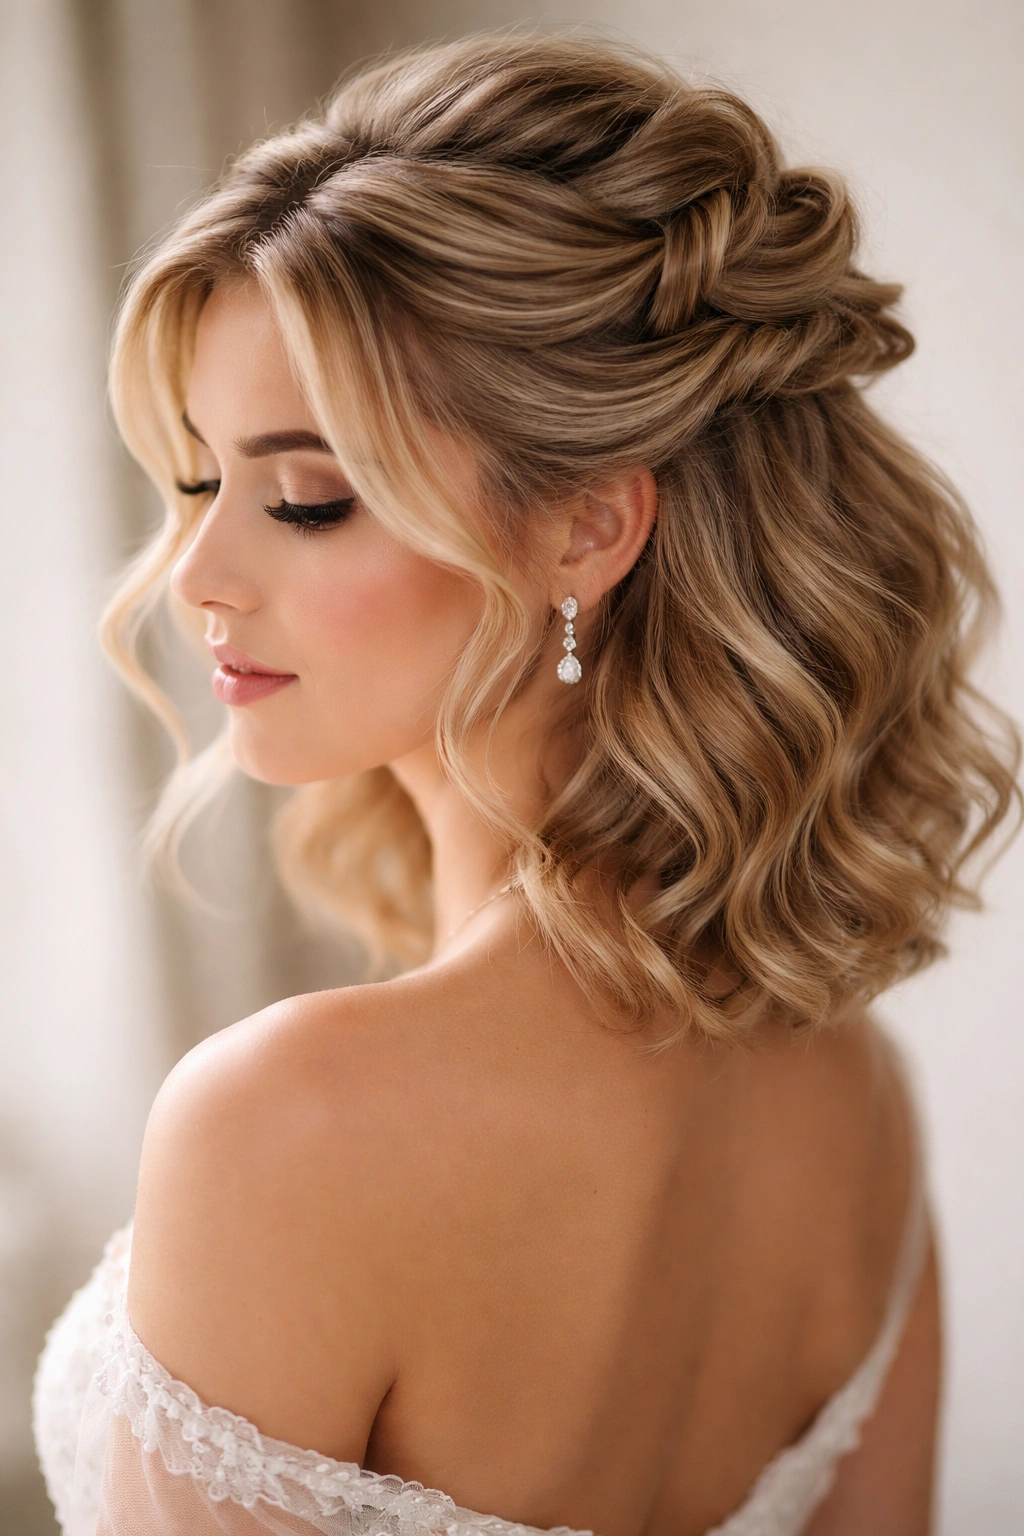
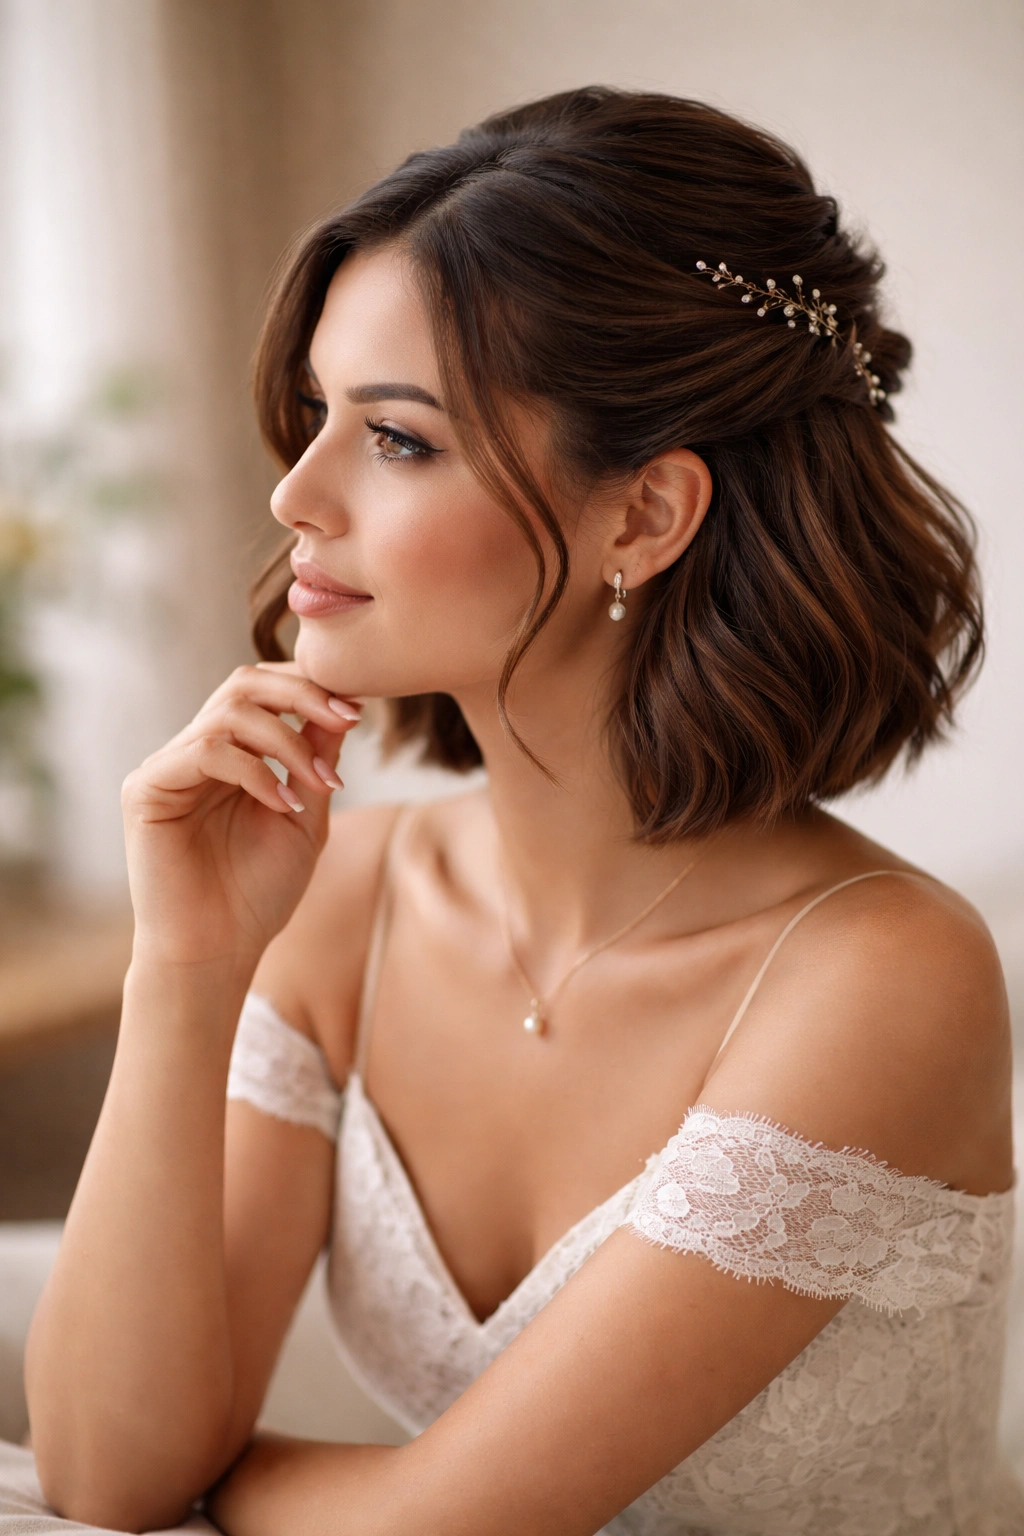
9. The Faux Facelift Half-Up with Teased Crown
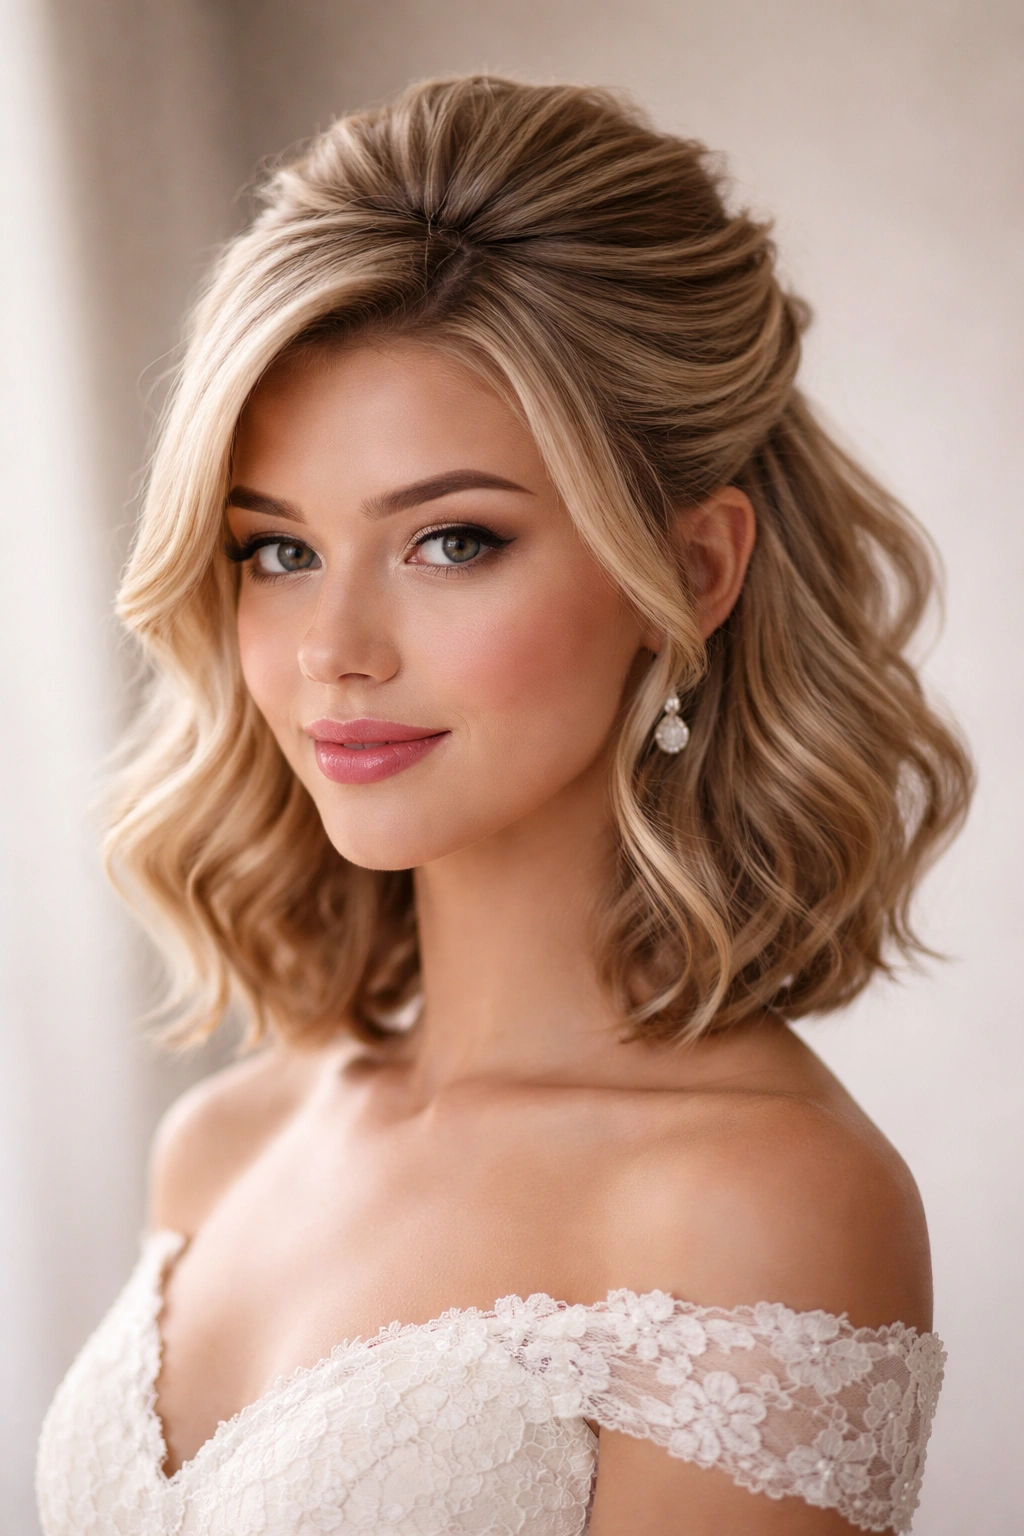
This style teases the crown area for height, then gathers a section of hair at the front-crown and pins it back, creating a lifted, open feeling around the face. The effect subtly flatters your features by adding height and opening up the face.
Teasing for Intentional Height
Use a fine-tooth teasing brush and backcomb the crown section in one-inch sections. Build height gradually—you’re not going for a huge beehive, just intentional volume that lifts the style away from your head. Smooth the top layer with a paddle brush so it looks polished, not messy.
The Gathering and Pin
Once you’ve teased the crown, take a one-inch section of hair from your center part—right at the front of the crown—and gather it with the teased hair. Pin this gathered section to the back and slightly down from where it naturally falls. The effect is subtle but transforms the entire face-framing.
Pro tip: Tease only at the roots, not throughout the entire length, so your style doesn’t look overly voluminous or costume-like.
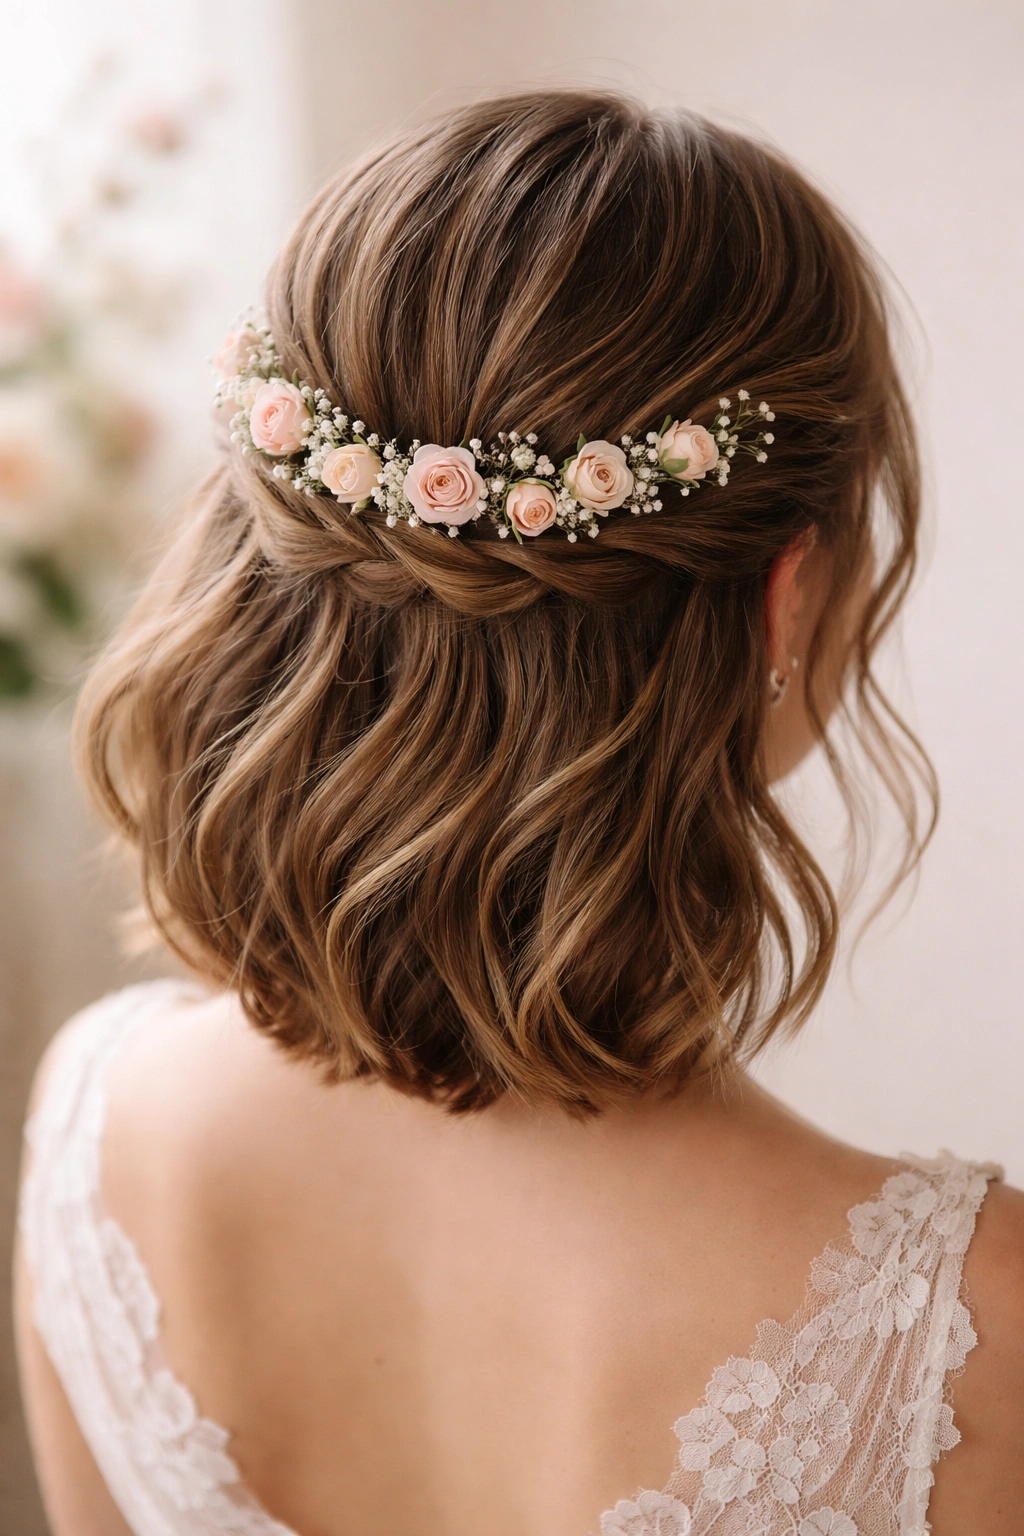
10. The Romantic Floral Crown Half-Up
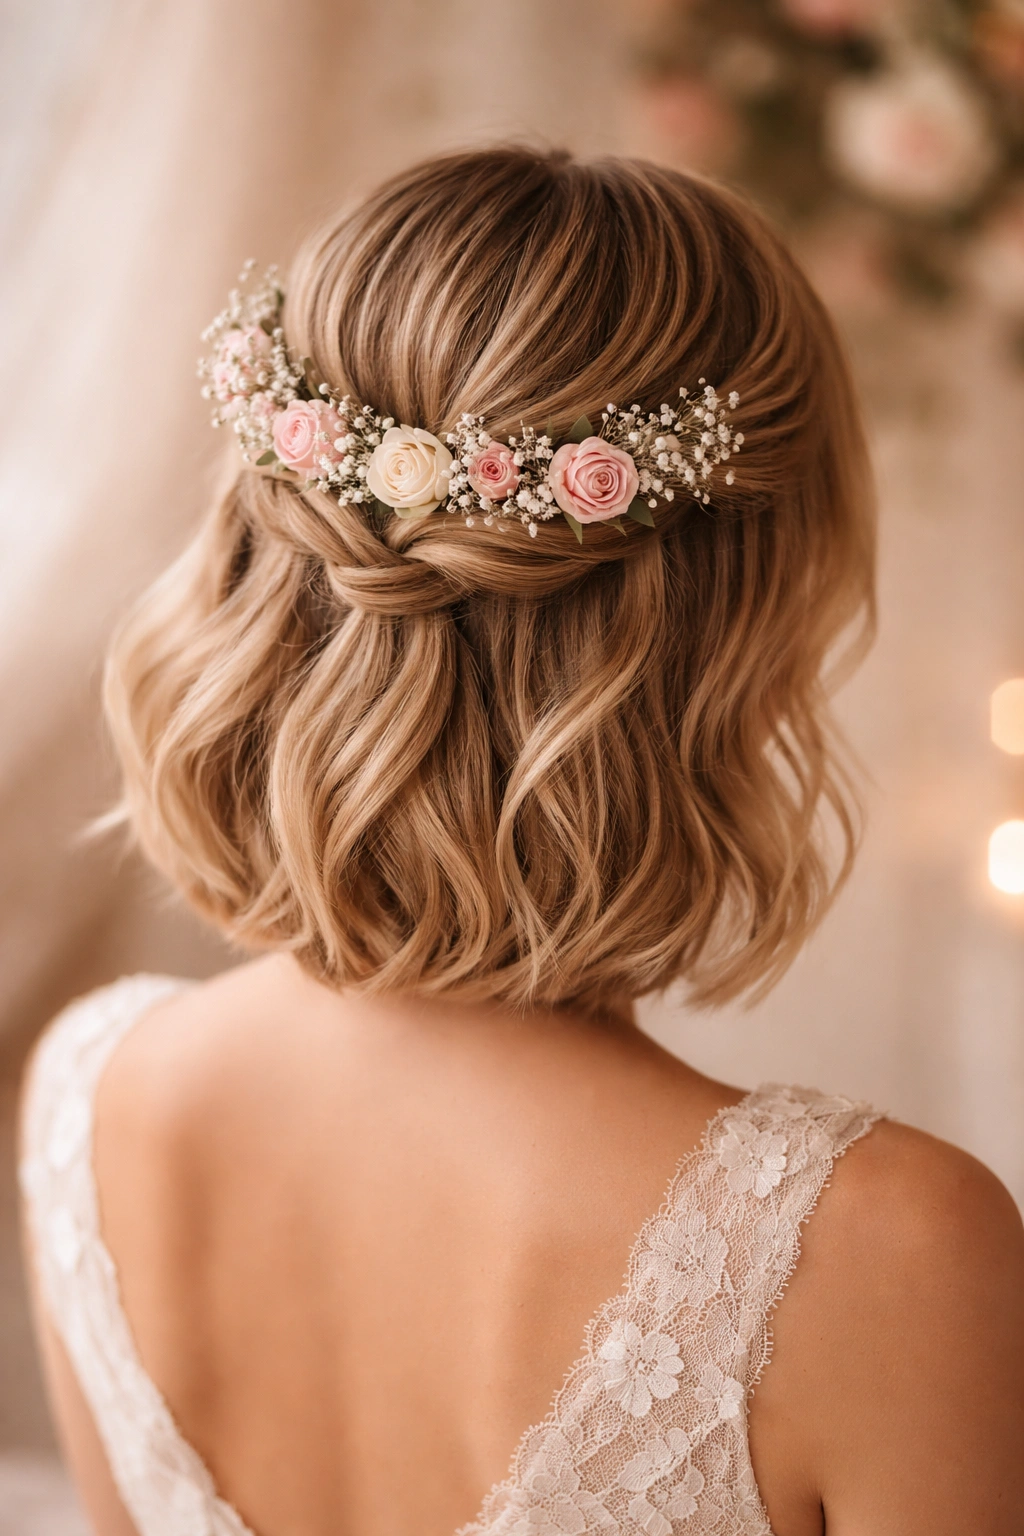
This style creates a full half-up section by twisting sections from both sides and the crown, then secures them and uses a delicate floral crown—fresh flowers or a decorated headpiece—as the focal point where the sections meet.
Building the Foundation for the Crown
Create three twisted sections: one from each temple and one from the crown center. Gather all three twists together at the back crown area and secure them snugly with an elastic. This creates a stable base for the floral crown to rest upon.
Selecting and Positioning the Floral Crown
A delicate floral crown with small, feminine flowers works beautifully with shorter hair because it doesn’t compete for visual space. Position the floral crown so it rests directly over where your pinned sections meet, at the back crown. The flowers cascade softly from this gathering point.
Worth knowing: If using fresh flowers, ask your florist to secure them to a flexible wire band that won’t slip. Fresh flowers feel incredibly romantic in photos and during the event itself.
11. The Textured Braid with Accessory Weaving
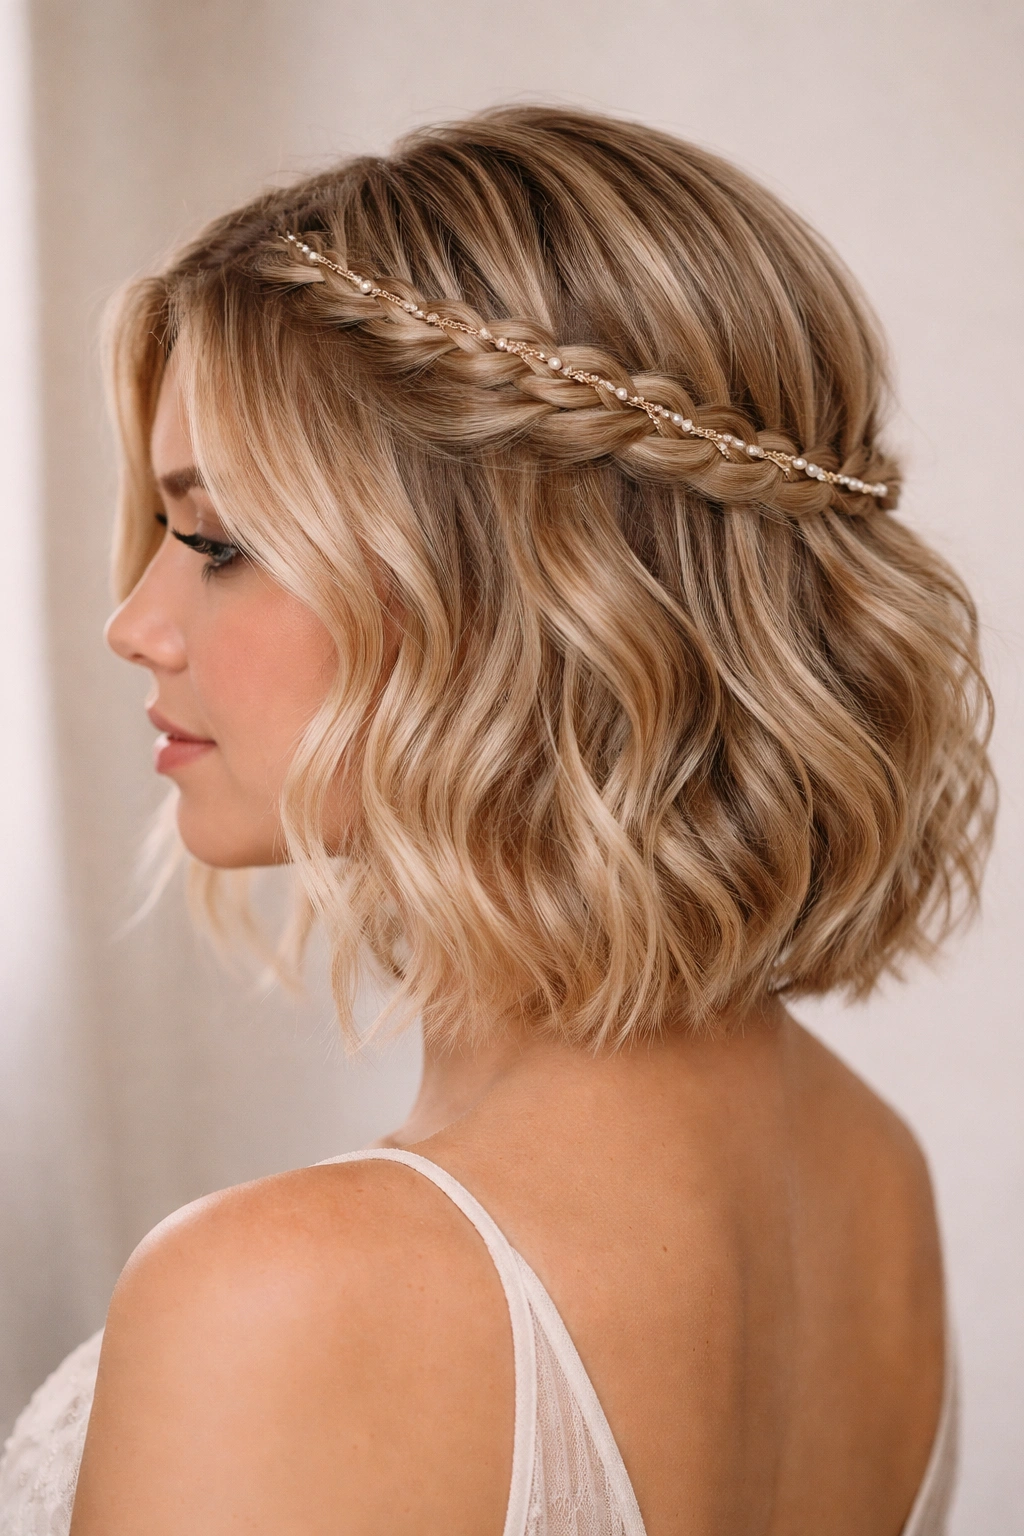
This style creates a loose, textured braid that runs from one side of the head to the other (creating a half-crown effect), and weaves a thin ribbon, chain, or decorative strand through the braid as you create it.
Creating a Textured Braid
Tease each section of the braid before braiding it—this creates texture and makes the final braid look fuller and more interesting. As you braid, don’t pull the braid tight. Let it sit loosely, even gently loosening it further after you’ve completed it by pulling on the outside edges of each braid loop.
Weaving the Accessory
As you create the braid, weave a thin ribbon or delicate chain through the braid by passing it over and under the three braid sections. You’ll naturally incorporate the accessory as you braid, or you can weave it through after the braid is complete using a thin needle if you’re working with ribbon.
Insider note: Weaving an accessory through a braid makes it look infinitely more intentional and designed than a plain braid, even if the braid itself is simple.
12. The Curved Side Pin with Cascade Waves
This style gathers hair from the crown and sides in a gentle curved formation, pins it to one side of the head, and allows the remaining hair to cascade down the opposite side in romantic waves.
Mapping the Curve
Imagine a curve that starts at your right temple, travels back toward your crown, and curves down toward your left ear. You’re gathering hair along this curved path. Use bobby pins to secure hair along this curve, creating a pinned formation that follows the natural line of your head shape.
Creating the Cascade Effect
All the hair that falls below this curved pin should be curled in the opposite direction—away from the side where your hair is pinned. This creates a visual movement that pulls the eye toward your face and creates a balanced, intentional composition.
Real talk: This style works particularly well if you have a round face because the pinned curve elongates your face while the cascading waves add softness.
13. The Soft Updo with Loose Tendrils

This style gathers most of your hair into a soft, loose updo at the back of your crown, but deliberately leaves a few pieces around the face unbound. These tender pieces frame your face and soften the overall effect.
Building the Soft Updo Base
Create a low ponytail at your crown by gathering hair and securing it loosely. This ponytail becomes the foundation. Twist the ponytail loosely, then wrap it around the base to form a soft bun. Secure it with bobby pins, but leave the overall structure relaxed—you’re not going for a tight, neat bun, but rather a romantic, slightly undone effect.
Strategic Tendril Placement
Before gathering your hair, identify specific pieces around your face that you want to leave loose—one or two at each temple works beautifully. Curl these pieces away from your face with a small-barrel curling iron. As the night progresses, these tendrils gently fall and frame your face, creating an increasingly romantic appearance.
Pro tip: The loose tendrils aren’t a styling mistake—they’re intentional and make the style feel effortlessly beautiful rather than overly formal.
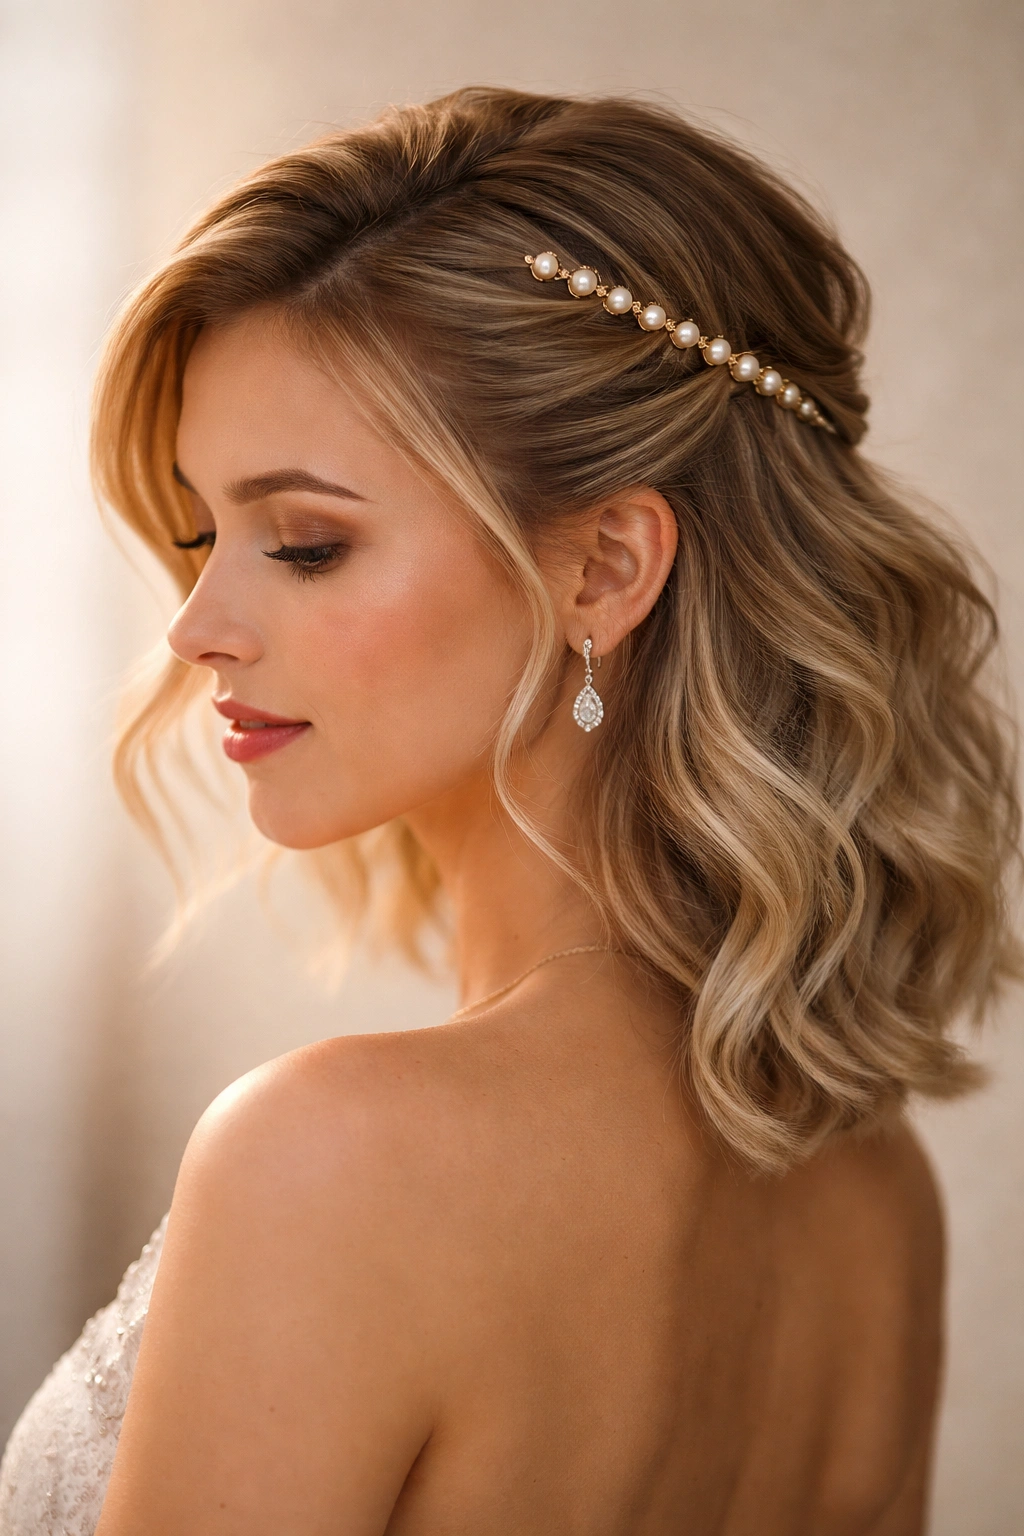
14. The High-Shine Half-Pony with Hair Jewelry
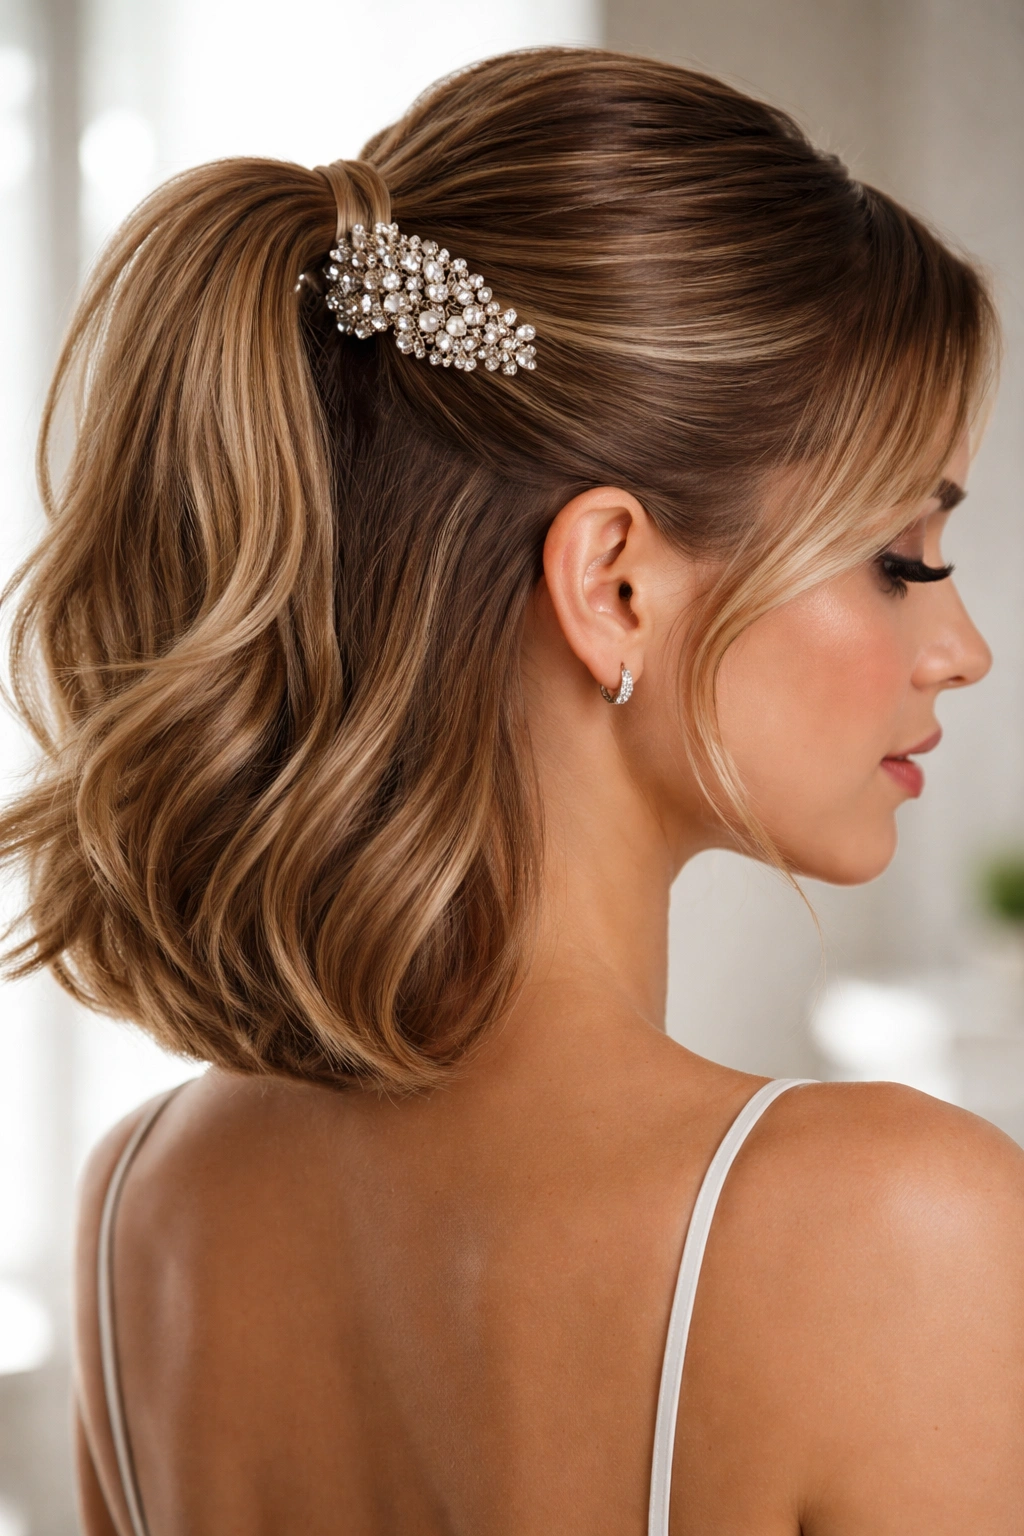
This polished style creates a sleek, smooth half-ponytail using shine serum and careful brushing, then secures it with decorative hair jewelry or an ornate comb instead of a standard elastic.
Achieving High Shine
Apply a hair shine serum to damp hair before blow-drying. Blow-dry the entire head smoothly using a paddle brush and an ion dryer to minimize frizz. The result should be incredibly glossy and smooth. Gather your half-pony section and secure it tightly with a clear elastic, then immediately wrap the base with the elastic piece of your chosen hair jewelry so the jewelry covers the elastic entirely.
Selecting the Right Hair Jewelry
An ornate crystal comb, a hair stick, or a decorative hair fork works beautifully. Choose something that feels substantial and catches the light—light-catching details photograph beautifully and make your hairstyle feel intentional and elevated.
Worth knowing: The higher the shine on your hair, the more expensive and luxurious your entire look feels, even if everything else is simple and understated.
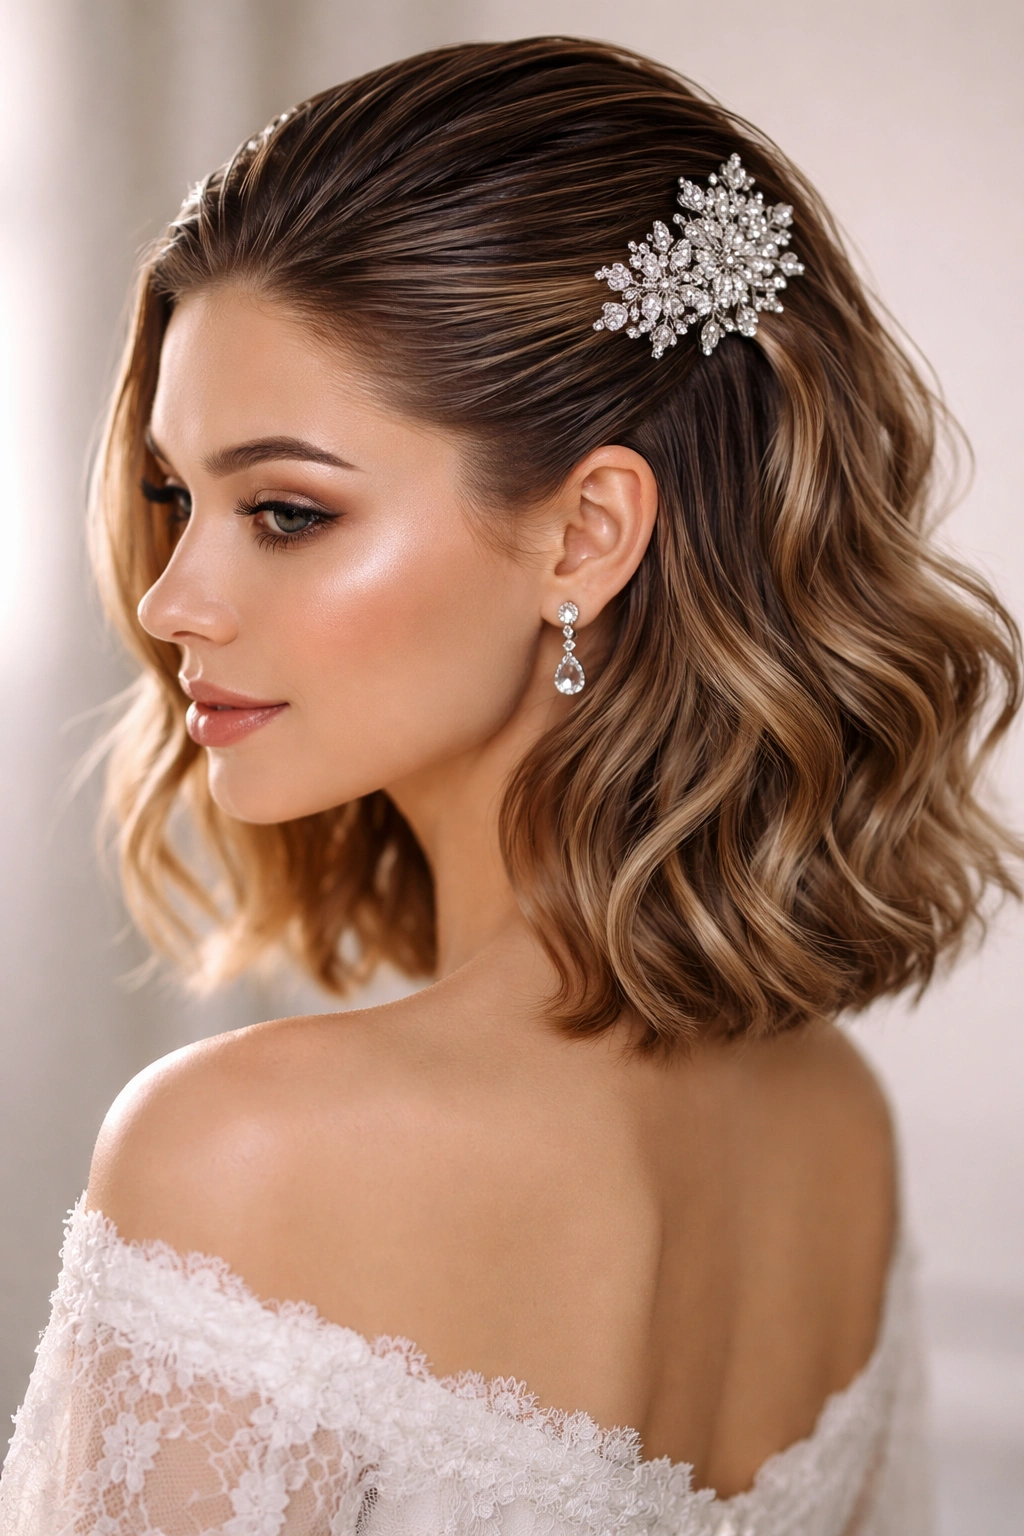
15. The Side-Parted Half-Up with Deep Waves
This style starts with a deep side part, then creates a half-up section by gathering hair from the less-parted side and securing it. Deep waves throughout create movement and dimension.
Creating the Side Part
Create a part that starts at one temple and travels back toward your crown—make it deep and intentional. You’re not creating a subtle side part; you’re creating a dramatic one that becomes part of the style’s structure.
The Half-Up Gathering
Gather hair from the side with less volume and sweep it back, securing it with a decorative clip or bobby pin at the back of your head. The other side—the fuller side of your deep part—falls completely down and frames your face.
The Wave Pattern
Curl your entire head with a 1.25-inch curling iron, curling away from your face. This creates waves that all lean in the same direction, enhancing your deep side part and creating a cohesive, directional look.
Insider note: A deep side part can subtly change how your face is perceived in photos—experiment with different part placements during your hair trial to see which feels most flattering for your face shape.
16. The Threaded Braid with Decorative Cord
This style creates a thin, delicate braid from one temple area, weaves a decorative cord or embroidered thread through it, and secures both the braid and the cord together at the back crown.
Braiding Fine and Thin
For shorter hair, create a thin three-strand braid using small sections of hair. Thin braids look more delicate and work better proportionally with shorter lengths than thick, chunky braids.
Threading and Securing
As you complete the braid, thread a decorative cord—embroidered thread, thin chain, or beaded strand—through the three-strand sections. Secure both the braid and the cord at the back crown using bobby pins that match either your hair or your cord, depending on which you want to be more visible.
Real talk: This style requires patience and practice, but the result looks incredibly special and handmade in the best way.
17. The Half-Up Halo with Flower Crown
This style creates a halo effect by gathering hair from all around your head’s perimeter, securing it at the back crown, then placing a small flower crown or delicate headpiece around the gathered section.
Creating the Halo Gathering
Take small sections of hair from your right temple, right side, left side, and left temple. Twist each section loosely as you gather it back. Once all sections are gathered at the back crown, secure them together. The effect creates a gathered “halo” around your head.
The Flower Crown Placement
Position a delicate flower crown or decorative headpiece so it rests right at the gathering point—essentially framing the point where all your twisted sections meet. The flowers or embellishments should sit at the back, allowing your face to be fully visible.
Pro tip: This style works beautifully for outdoor or garden quince celebrations where the flowers feel natural and romantic.
18. The Wet-Look Gel with Ornate Pin Half-Up
This modern style applies wet-look gel to the upper half of your hair, combs it smoothly back toward the crown, gathers it loosely, and secures it with an ornate statement pin. The lower half remains soft and wavy.
Applying the Wet-Look Effect
Use a wet-look styling gel on damp hair and comb the upper section smooth. The gel creates a polished, intentional appearance that photographs beautifully. Gather this slicked section and secure it at the back crown with just a small elastic—the goal is to look casually gathered, not tightly secured.
The Statement Pin Placement
Cover your elastic with an ornate pin—something with crystals, pearls, or metallic detailing. This pin becomes a focal point and justifies the sleek, modern styling above it.
Worth knowing: The wet-look effect requires a strong-hold gel and benefits from hairspray to extend its hold, but it creates a fashion-forward appearance that’s different from traditional romantic quince styles.
19. The Twisted and Tucked Half-Up with Ornate Clip
This style creates two loose twists from the sides, tucks them together at the back crown, and secures them with an ornate clip that becomes a visible design element.
The Loose Twist Technique
Take a two-inch section of hair from above each ear and twist it loosely as you move it toward the back of your head. Loose twists look more romantic and romantic than tight twists, and they photograph better too. These twists should feel relaxed and slightly undone.
The Tuck and Secure Method
Bring both twists together at the back crown and tuck the ends of each twist underneath the gathered section. Secure with an ornate clip that sits right on top where the twists meet. The clip should be visible and beautiful—not hidden.
Insider note: The “tucked” element makes this style feel more finished than a standard twist-and-pin approach, creating an appearance of intentional design.
20. The Romantic Low Bun with Wispy Face-Framing
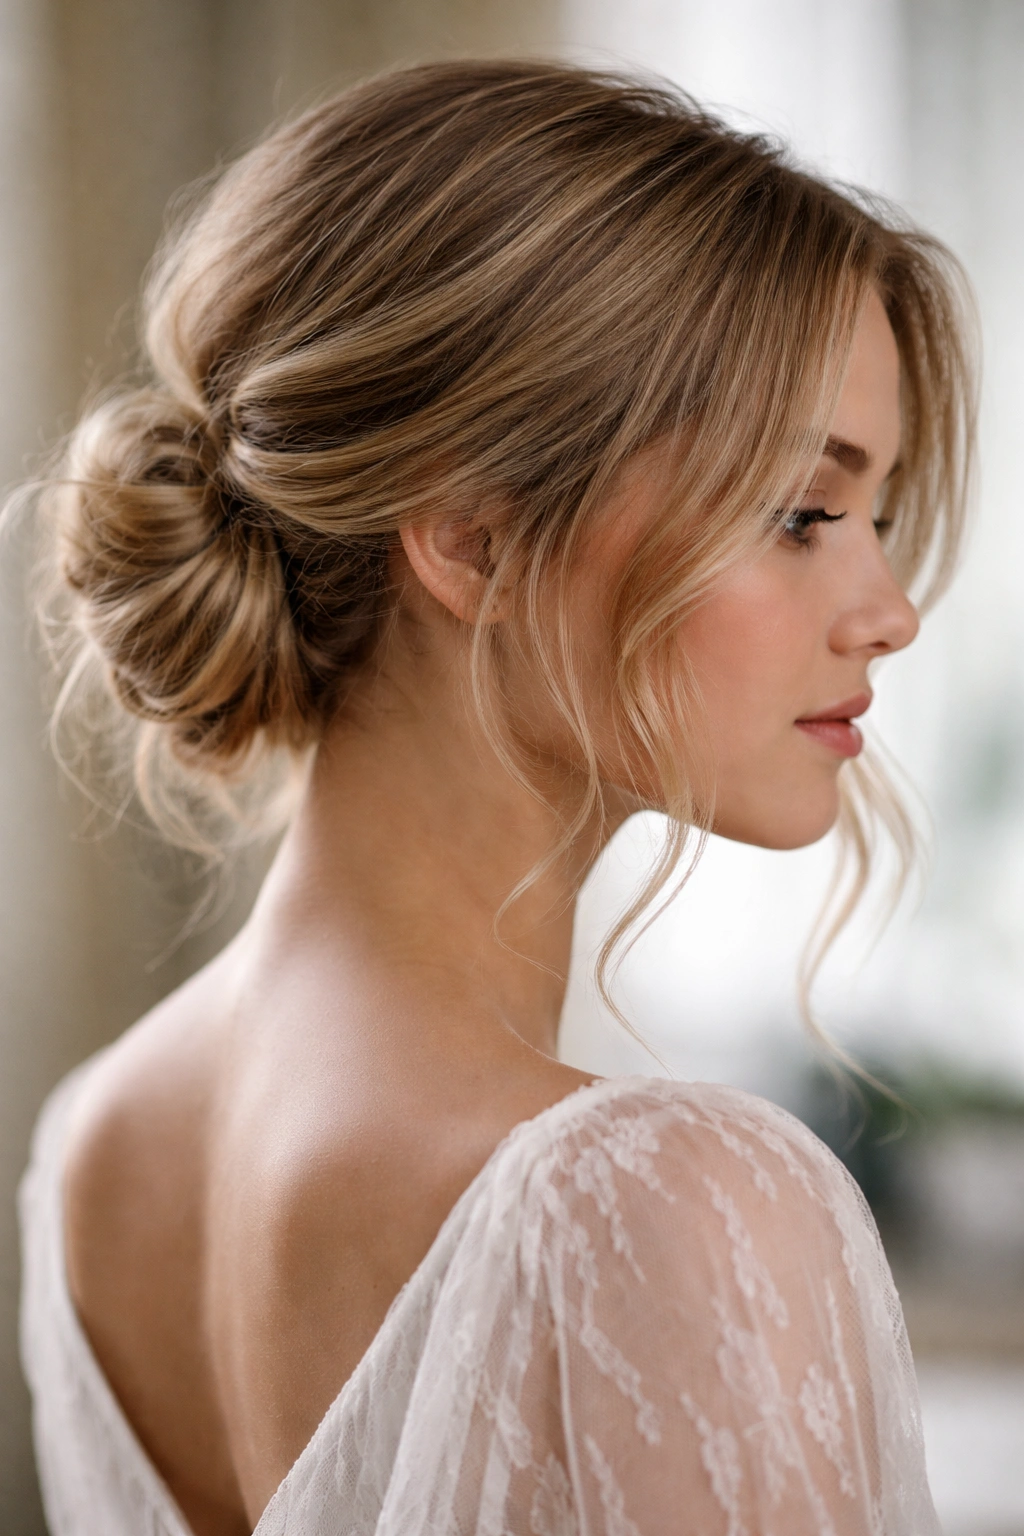
This style creates a low, loose bun at the back of your head (just barely a half-up, since most of your hair is gathered), then deliberately pulls out wispy, soft pieces around your face to frame it beautifully.
Building the Loose Bun Structure
Gather your hair low at the back of your head and secure it with a small elastic. Twist the gathered ponytail loosely and wrap it around the base. Secure with bobby pins, but keep the overall structure soft and slightly undone. This isn’t a ballet bun; it’s romantic and textured.
Creating Intentional Wisps
Before securing the bun, identify and separate small pieces of hair at your temples and along your hairline. Curl these pieces with a small-barrel curling iron, creating soft, face-framing waves. These wisps soften the entire style and make you feel approachable despite the formal occasion.
Real talk: The “slightly undone” look is hardest to achieve because it requires confidence that the style is intentional, not accidentally messy. Embrace the wisps and loose tendrils—they’re the most romantic element of this style.
Final Thoughts
Finding the perfect half up half down style for your quince when you have shorter hair is entirely possible—it just requires understanding what works proportionally with your length and choosing styles that emphasize movement, texture, and intentional detail rather than relying on sheer volume. Each of these twenty styles works because they view short hair as an asset, not a limitation, and they create visual interest through clever pinning, texture-building techniques, and thoughtful accessory placement.
The most important element in any half up half down style is that you feel confident and beautiful wearing it. Practice whichever style speaks to you well before your event—even just practicing the technique two or three times makes an enormous difference in how smoothly the style comes together on the day that matters. Your hair is part of your complete look, and when it’s styled intentionally and reflects your personality, it contributes to the feeling of being fully prepared and ready to celebrate yourself.
Consider doing a formal hair trial with a professional stylist who has experience with short hair and quince celebrations. Bring photos of styles that inspire you, discuss what makes you feel beautiful and confident, and trust their expertise about what will work specifically for your hair type, face shape, and dress. The investment in a professional trial pays dividends in photos and confidence on the day itself.