There’s a particular kind of elegance that half up half down hairstyles bring to formal events — especially rehearsal dinners, where you want to strike that perfect balance between polished and approachable. Unlike a full updo, which can feel reserved or overly formal, a half up half down style signals that you’ve made an effort without appearing untouchable. You get to show off carefully styled waves or curls while keeping hair off your face and neck, which is especially practical if you’ll be eating, moving around a room, and chatting with guests for hours.
Rehearsal dinners have their own dress code language. They’re more relaxed than a wedding ceremony but still require thoughtful styling — you’re not showing up in everyday hair, but you also don’t need the architectural drama of a full updo. The half up half down approach hits that sweet spot perfectly. Whether you’re the bride, a bridesmaid, a family member, or a guest, this style reads as intentional and sophisticated while remaining comfortable and wearable for an evening of celebration.
The beauty of half up half down styles lies in their versatility. You can work with virtually any hair length, texture, or thickness. You can incorporate flowers, ribbons, clips, or beads for added dimension. You can keep the loose section sleek and straight, soft and wavy, or romantic and curled. You can play with braids, twists, knots, and intricate pinning techniques to add visual interest to the upper section. The styling possibilities are genuinely endless, which is why these looks translate so well across different face shapes, dress styles, and personal aesthetic preferences.
What follows are twenty distinct half up half down styles, each offering a different vibe while maintaining that rehearsal-dinner-appropriate balance of elegance and wearability. Some are romantic and soft; others are modern and sharp. Some are embellished and eye-catching; others are understated and classic. You’ll find looks that work beautifully with short hair, long hair, fine hair, thick hair, straight texture, curly texture, and everything in between. Pick the one that resonates with how you want to look and feel on the night of the rehearsal dinner.
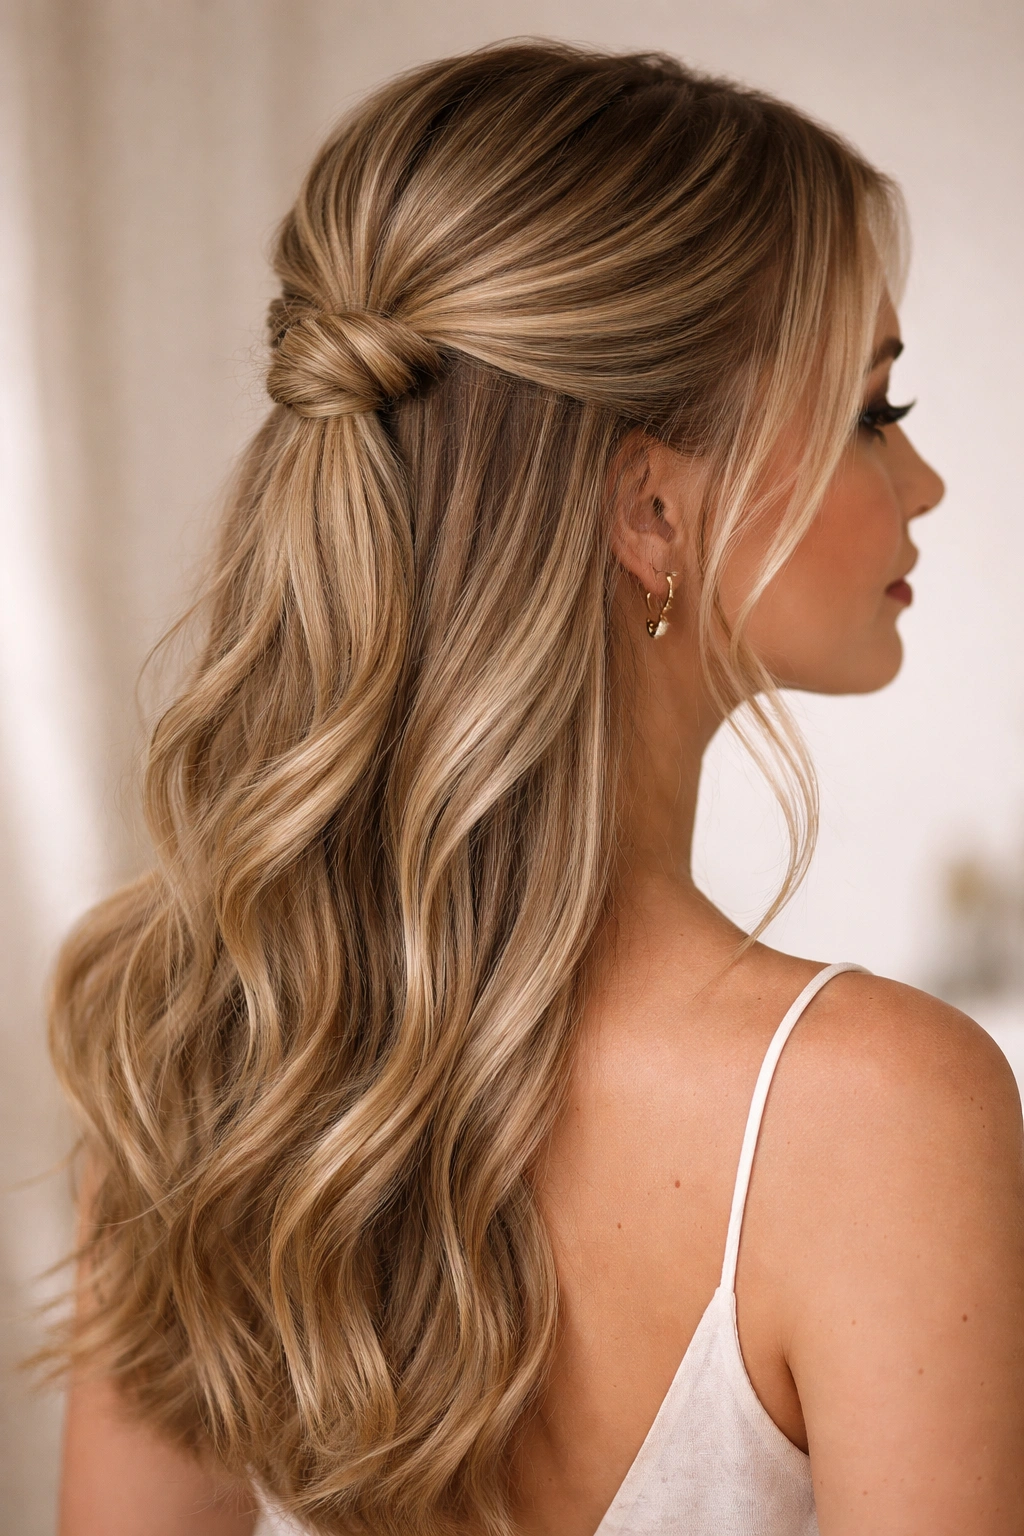
1. The Soft Romantic Half-Knot with Loose Waves
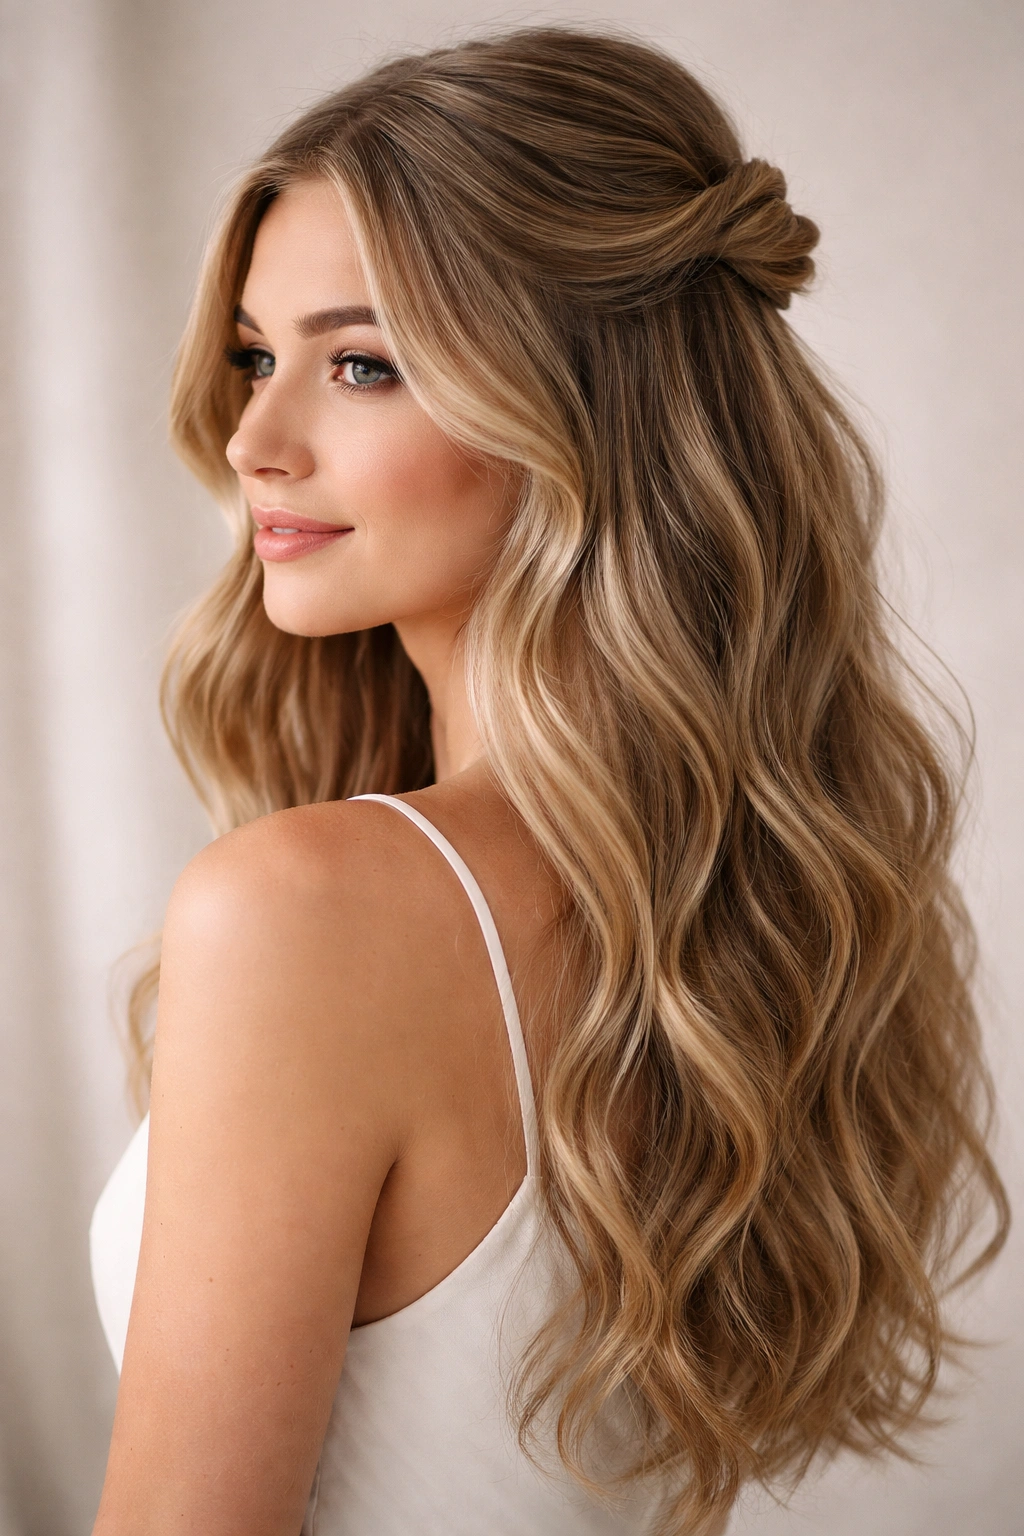
This style creates an effortlessly polished look that reads as intentional rather than hurried. You’re securing approximately the top third of your hair into a loose knot at the crown, leaving the majority of your hair down in soft, flowing waves that cascade past your shoulders. The knot sits high enough to clear your face but low enough to avoid looking overly formal.
Why It Works for Rehearsal Dinners
The soft romantic knot appeals to nearly every aesthetic. It photographs beautifully from multiple angles, doesn’t require advanced styling skills, and suits both traditional and modern rehearsal dinner settings. The combination of texture and restraint makes it feel appropriate for an evening event without looking costume-like.
How to Create This Look
- Start with second-day or third-day hair, which holds texture better than freshly washed hair
- Create soft waves throughout your entire head using a curling iron or by blow-drying your hair with a round brush
- Take a 2-3 inch section from your crown area
- Twist or braid that section loosely, then wrap it around itself to form a small knot
- Secure with bobby pins in a color matching your hair
- Pull a few wispy face-framing pieces down around your temples and ears
- Use a light texture spray to enhance waves without making them look crunchy
- Finish with hairspray that offers hold without stiffness
Pro tip: Let the knot sit a bit loose and imperfect — overly tight, precise knots can read as severe rather than romantic.
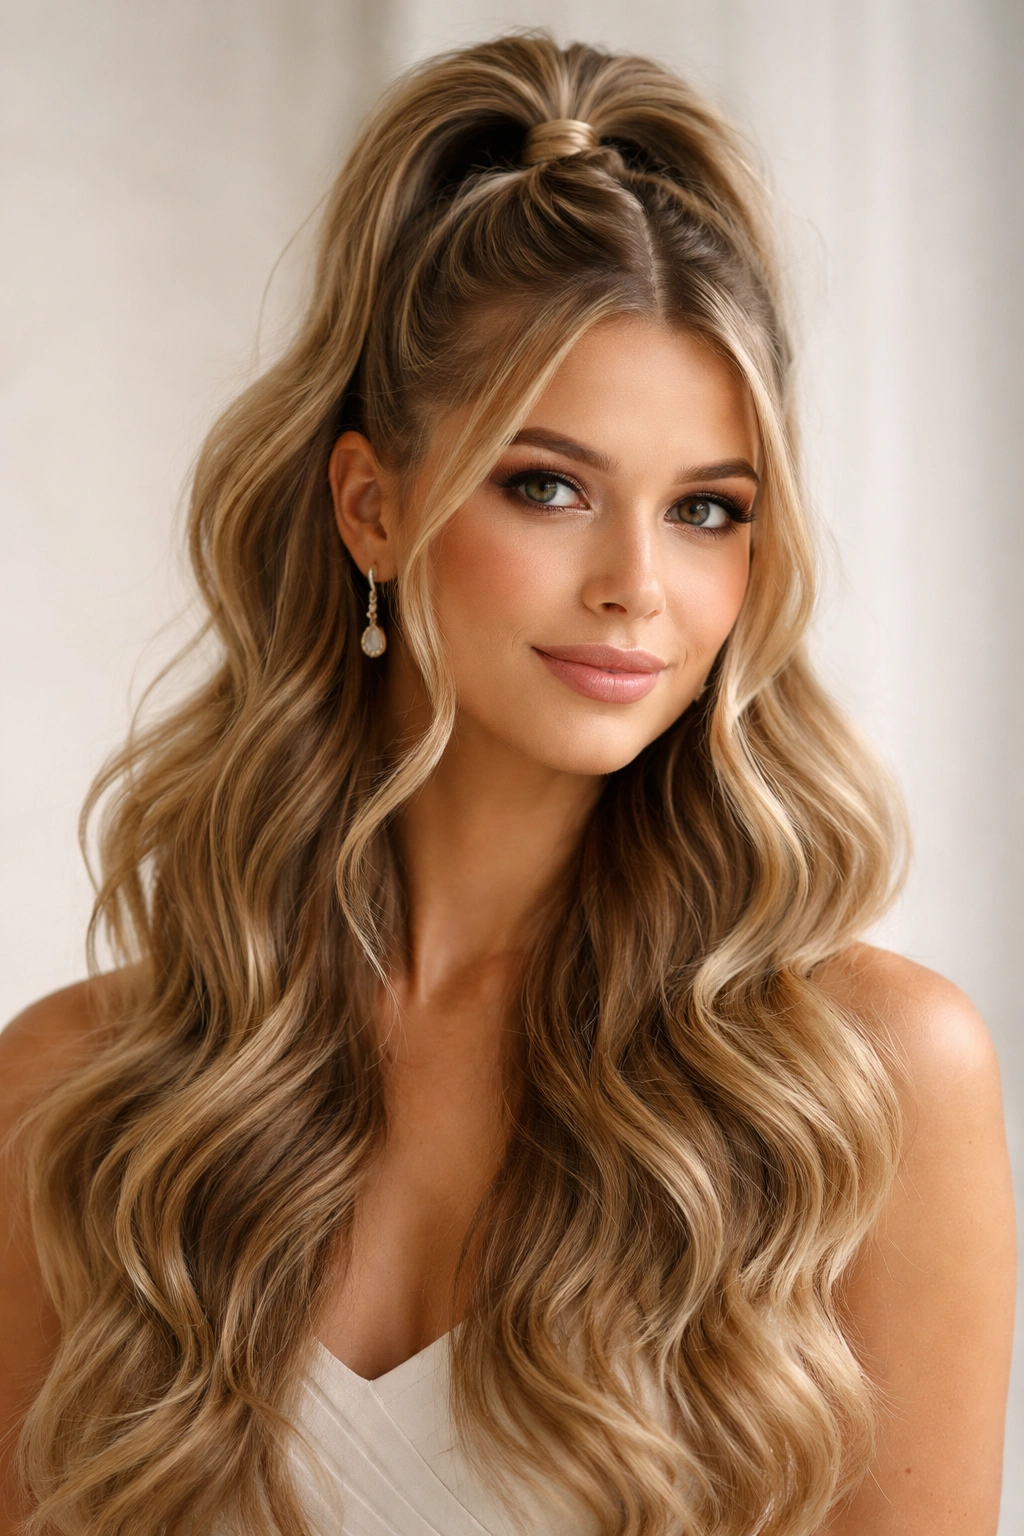
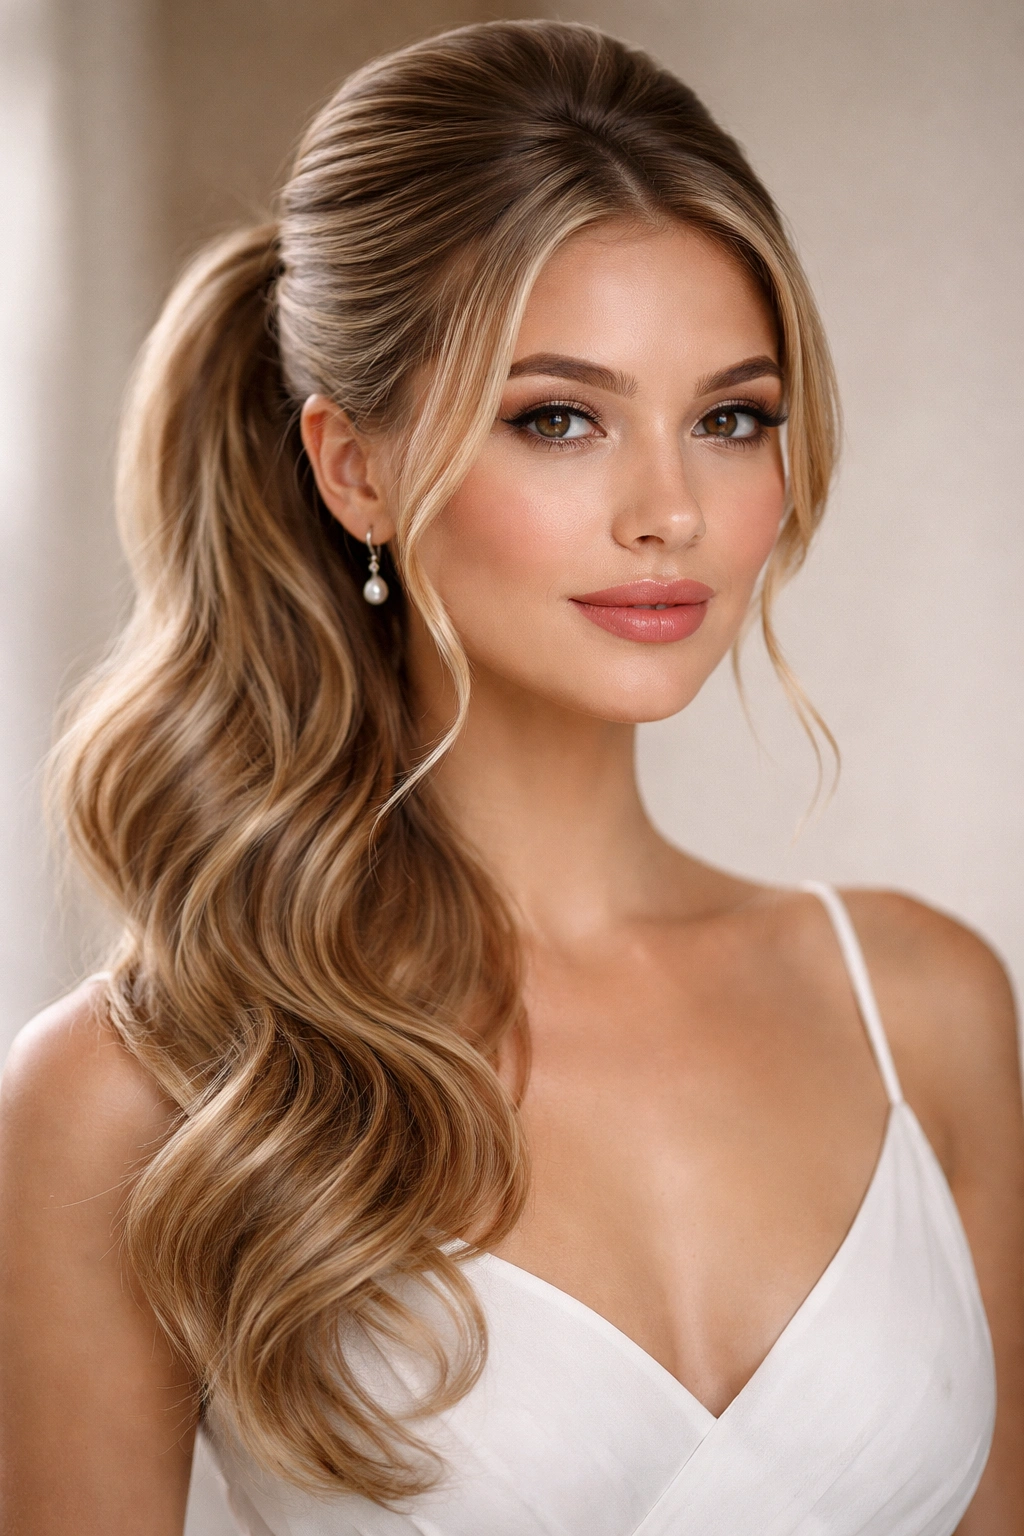
2. The Sleek High Ponytail with Half-Up Section
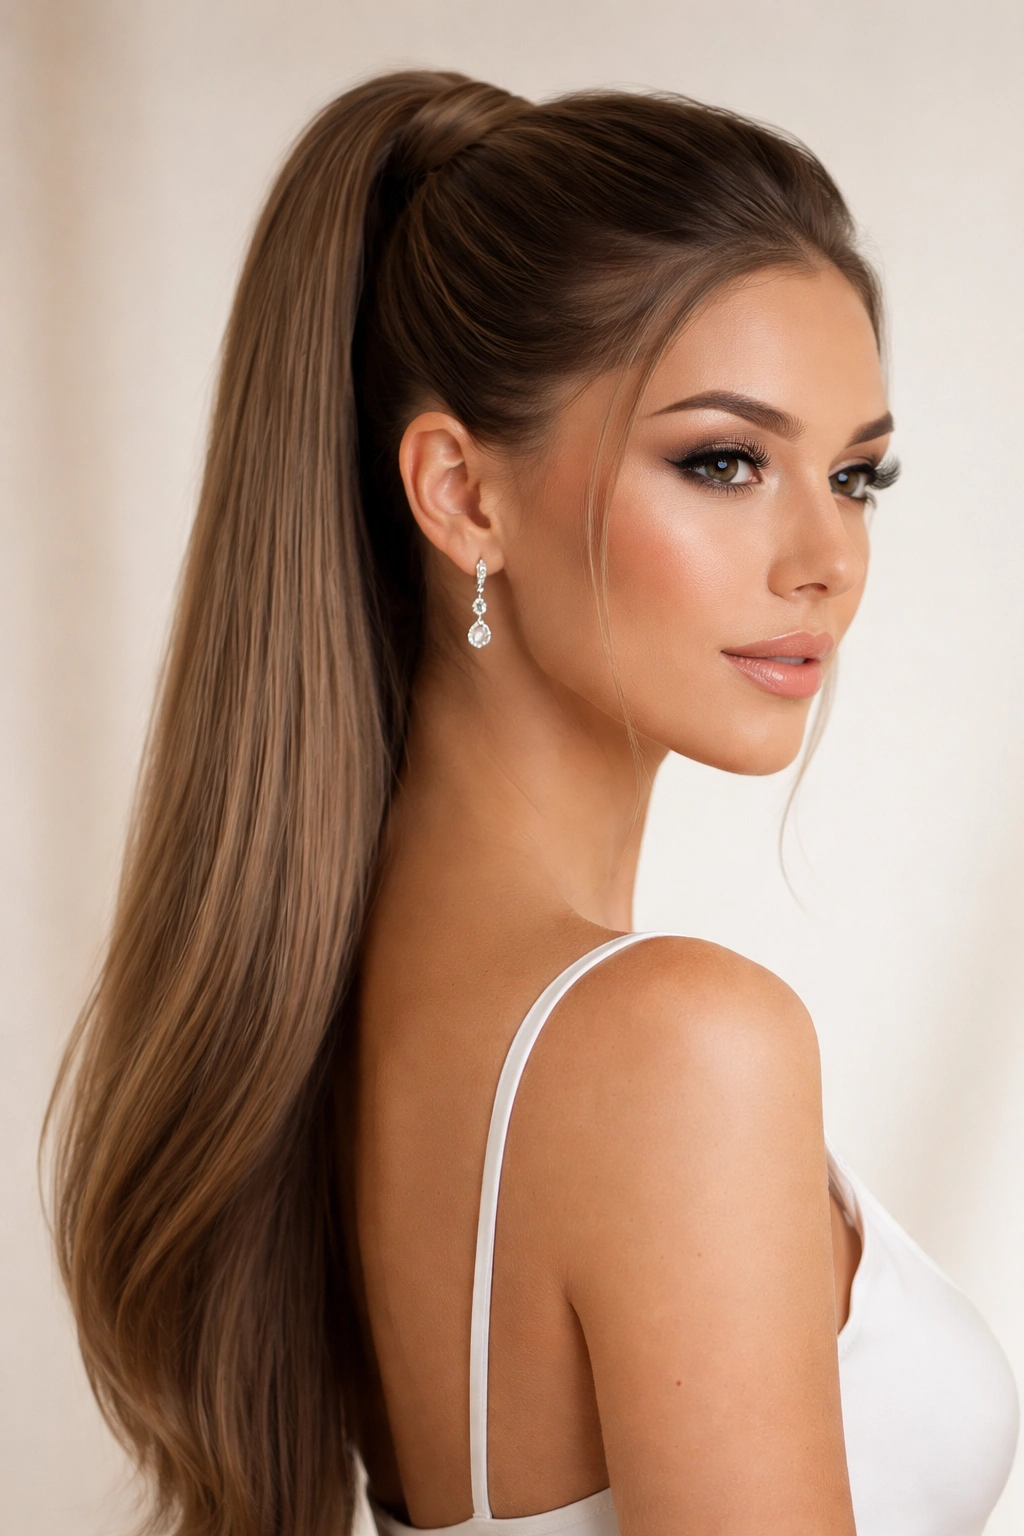
This modern, polished take on the half-up-half-down style features a structured high ponytail formed from the upper half of your hair, while the lower half remains down and straight or slightly curved. It’s particularly striking when you create sharp, clean lines in the upper section while keeping the bottom half sleek and smooth.
What Makes This Style Stand Out
The contrast between the structured top and the loose bottom creates visual interest and contemporary appeal. It’s more formal than a casual knot but less formal than a complete updo, making it ideal for rehearsal dinners with a modern or minimalist aesthetic.
Styling Steps
- Brush your hair smoothly, applying a smoothing serum or anti-frizz product to both sections
- Determine where your “half” mark falls — usually around ear level or slightly higher
- Gather the upper half into a clean, high ponytail, securing with an elastic that matches your hair color
- Use a fine-tooth comb to smooth any flyaways in both the ponytail and the loose section below
- Straighten or lightly curve the bottom section using a flat iron
- Add shine spray or a light glossing product for reflectivity
- Consider wrapping a thin section of hair around the elastic base to conceal it
Insider note: This look works especially well if you have naturally straight or easily straightened hair. If you have naturally curly or wavy hair, you’ll want to spend extra time smoothing to achieve the sleek effect that makes this style impactful.
3. The Braided Crown Half-Up
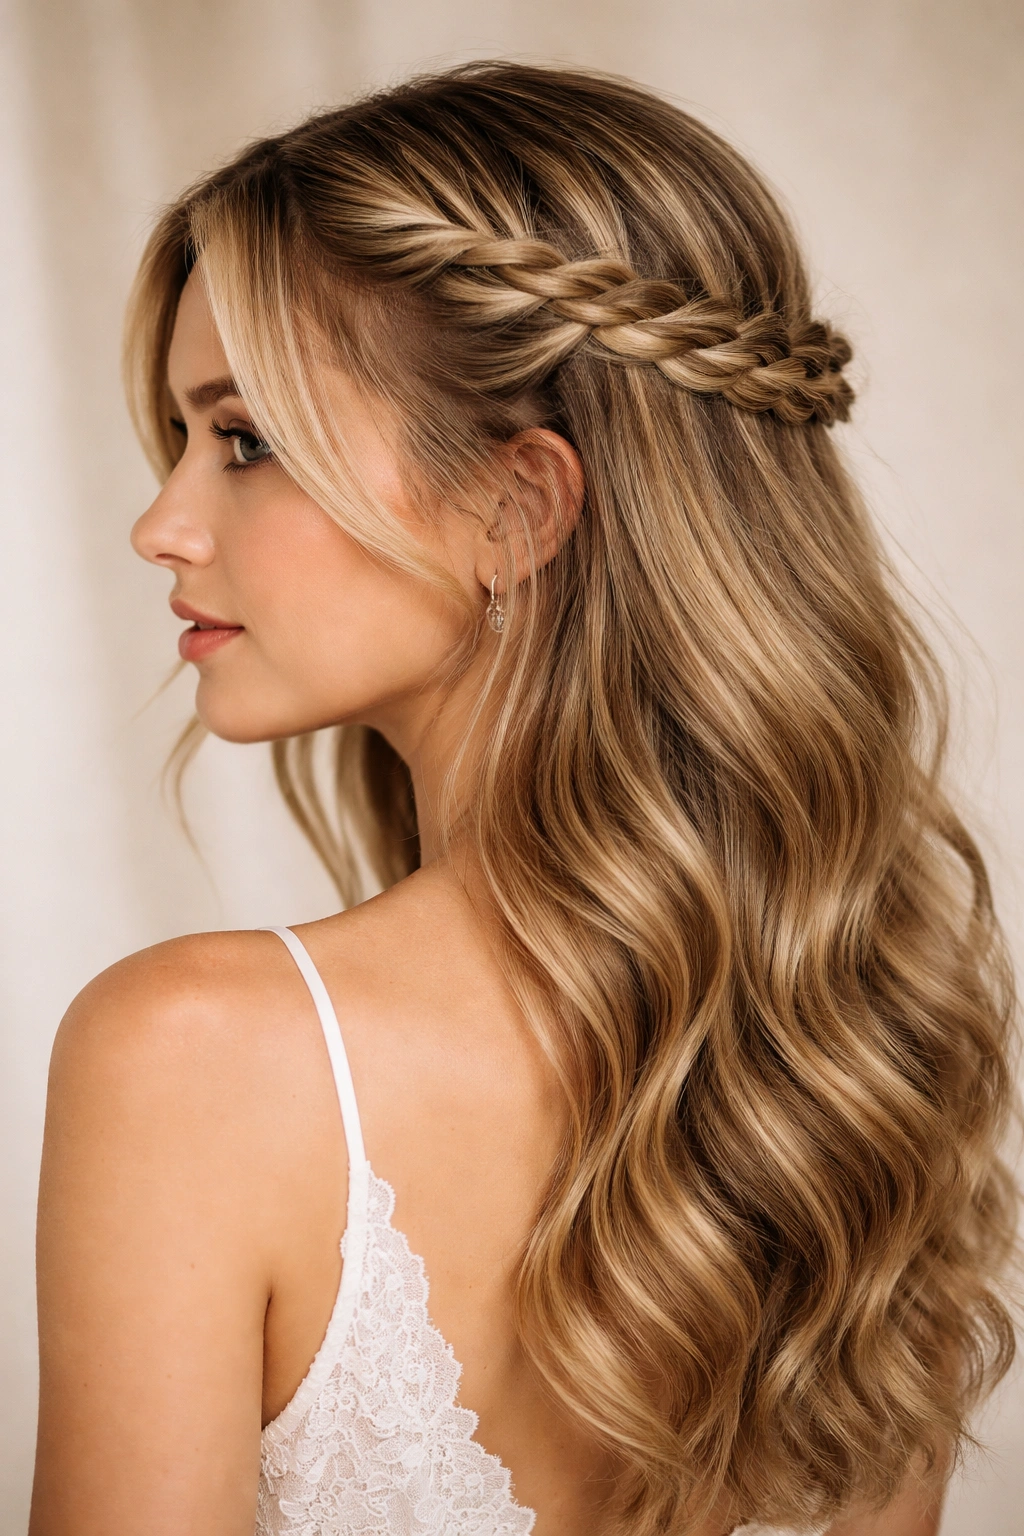
A braided crown that begins at one ear, travels across the back of the head, and ends at the opposite ear creates a strikingly elegant frame. The braid holds back the top section while allowing waves or curls to flow freely below, creating a romantic, whimsical aesthetic.
Why This Works
The braid serves as both functional hair management and decorative element. It’s detailed enough to show thoughtful styling without being so intricate that it screams “high maintenance.” The flowing hair below the braid balances the structure above, creating visual harmony.
Execution Details
- Begin with textured hair — waves, curls, or loose texture work better than flat, straight hair for this style
- Start a Dutch braid (where the braid sits on top of the hair rather than underneath) at one ear
- Incorporate more hair as you move across the back of the head toward the opposite ear
- Secure the end of the braid with a small elastic
- Use bobby pins to anchor the braid to your head, ensuring it doesn’t pull or slide throughout the evening
- Leave the hair below the braid in its natural texture or enhance waves with a curling iron
- Pin the end of the braid down along the back of your head so it blends rather than hanging visibly
Worth knowing: The tighter you braid, the more formal the look appears. Looser braids feel more bohemian and relaxed, which might suit a casual rehearsal dinner better than a formal one.
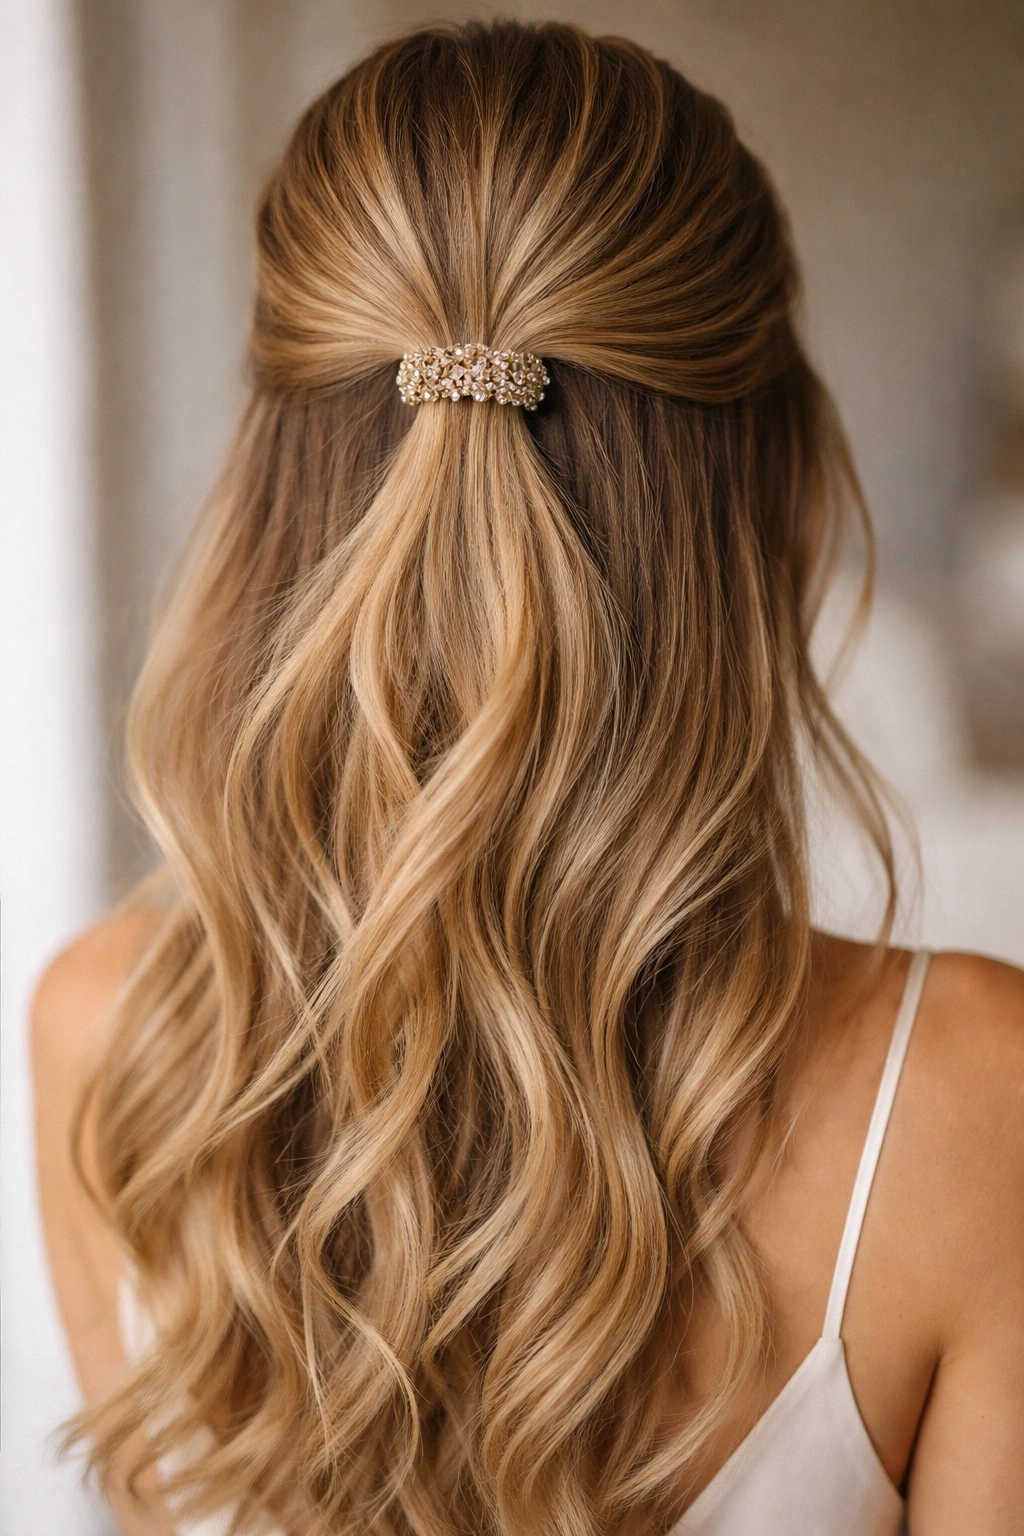
4. The Twisted Half-Up with Decorative Clip
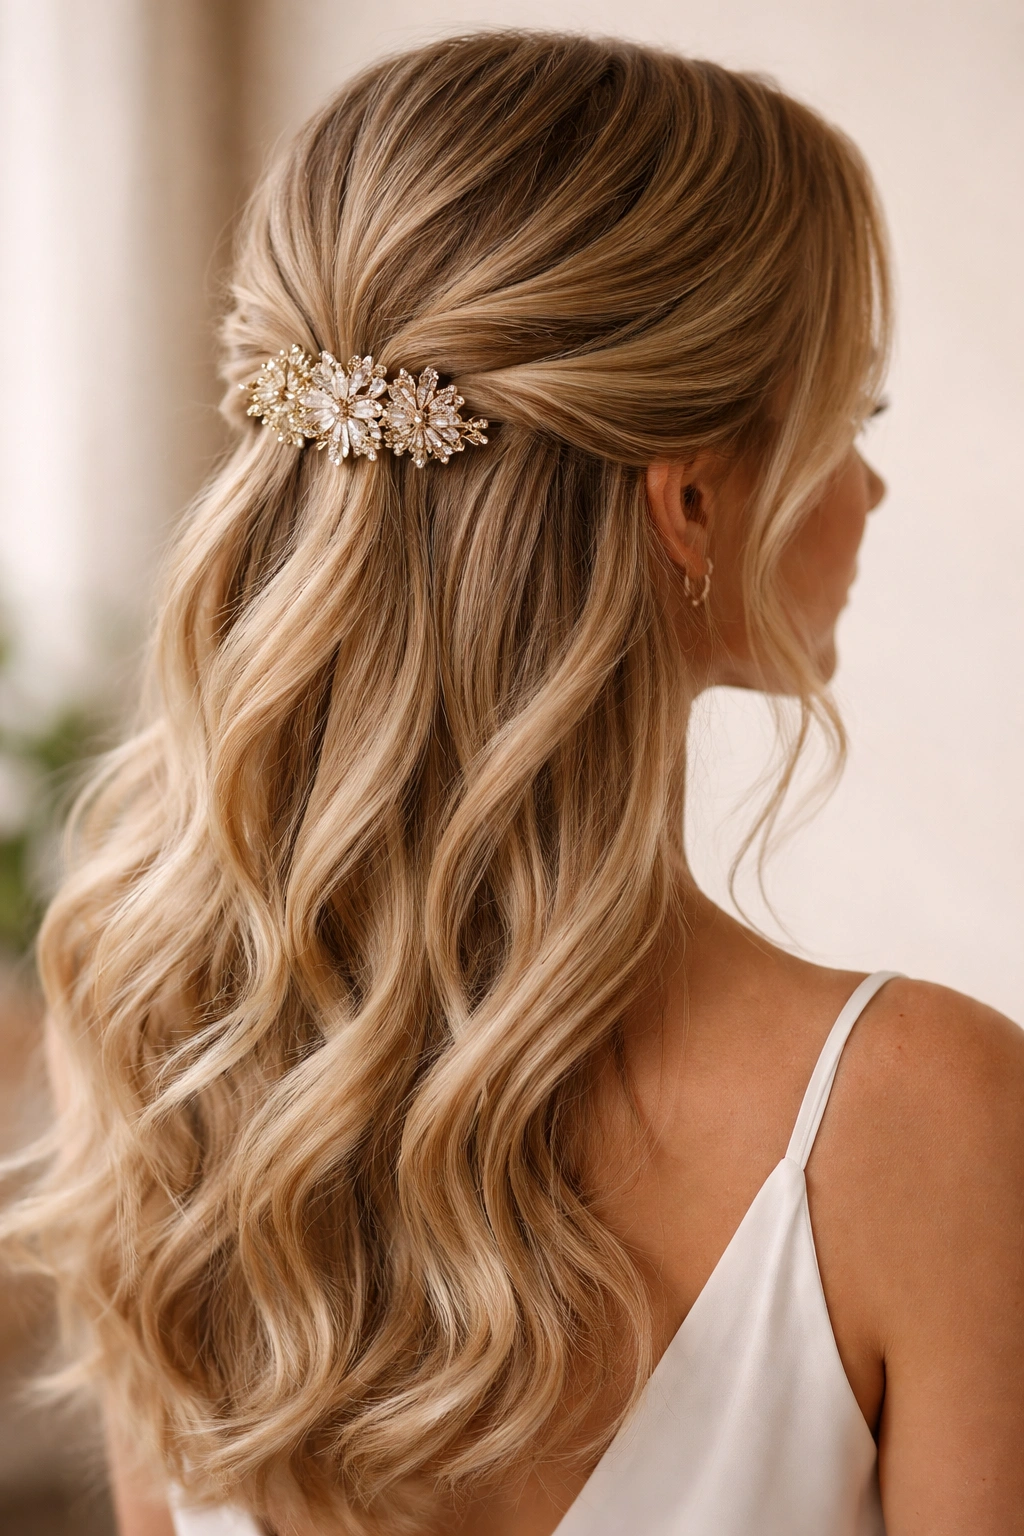
Two sections of hair are twisted — one from each side of your head — and brought together at the back, where they’re secured with a decorative comb, clip, or barrette. This creates a polished, elegant frame without requiring braiding skills.
The Appeal of This Style
Twisted sections are infinitely more forgiving than braids. Even if your twists aren’t perfectly even or your technique is unrefined, the softness of twisted hair creates a romantic, intentional aesthetic. Twists also photograph beautifully because they catch light along the twisted lines.
How to Achieve It
- Take a 1-2 inch section of hair from one side of your head, starting near your temple
- Twist that section firmly (tightness matters less than consistency) as you move toward the back of your head
- Repeat on the opposite side, twisting the hair in the same direction
- Bring both twisted sections to the center back of your head at roughly the same height
- Twist the two sections together one final time or leave them as separate twists
- Secure with a decorative clip, ornate comb, vintage barrette, or pearl-studded piece
- Let the rest of your hair hang loose in waves, curls, or soft texture
- Use a lightweight hairspray to hold the twists in place without making them look stiff
Real talk: The clip you choose dramatically influences the overall vibe. A simple, understated clip reads classic. A jeweled or ornate clip reads more playful or romantic. Choose based on your dress and the formality level of your event.
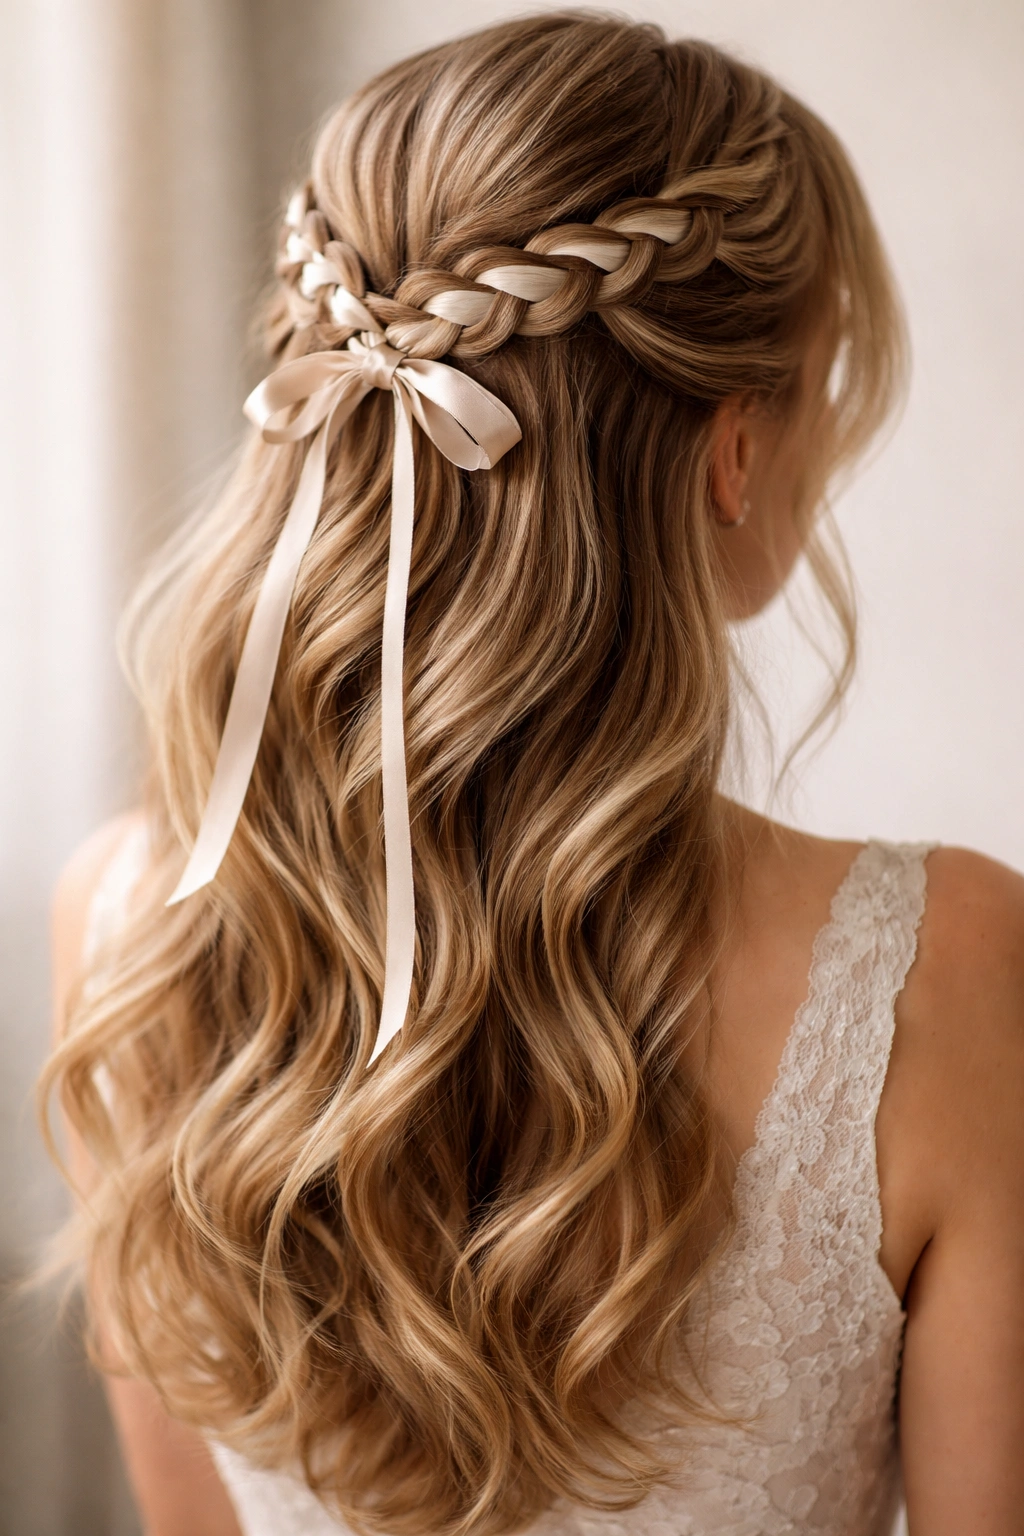
5. The Low Half-Up with Velvet Ribbon
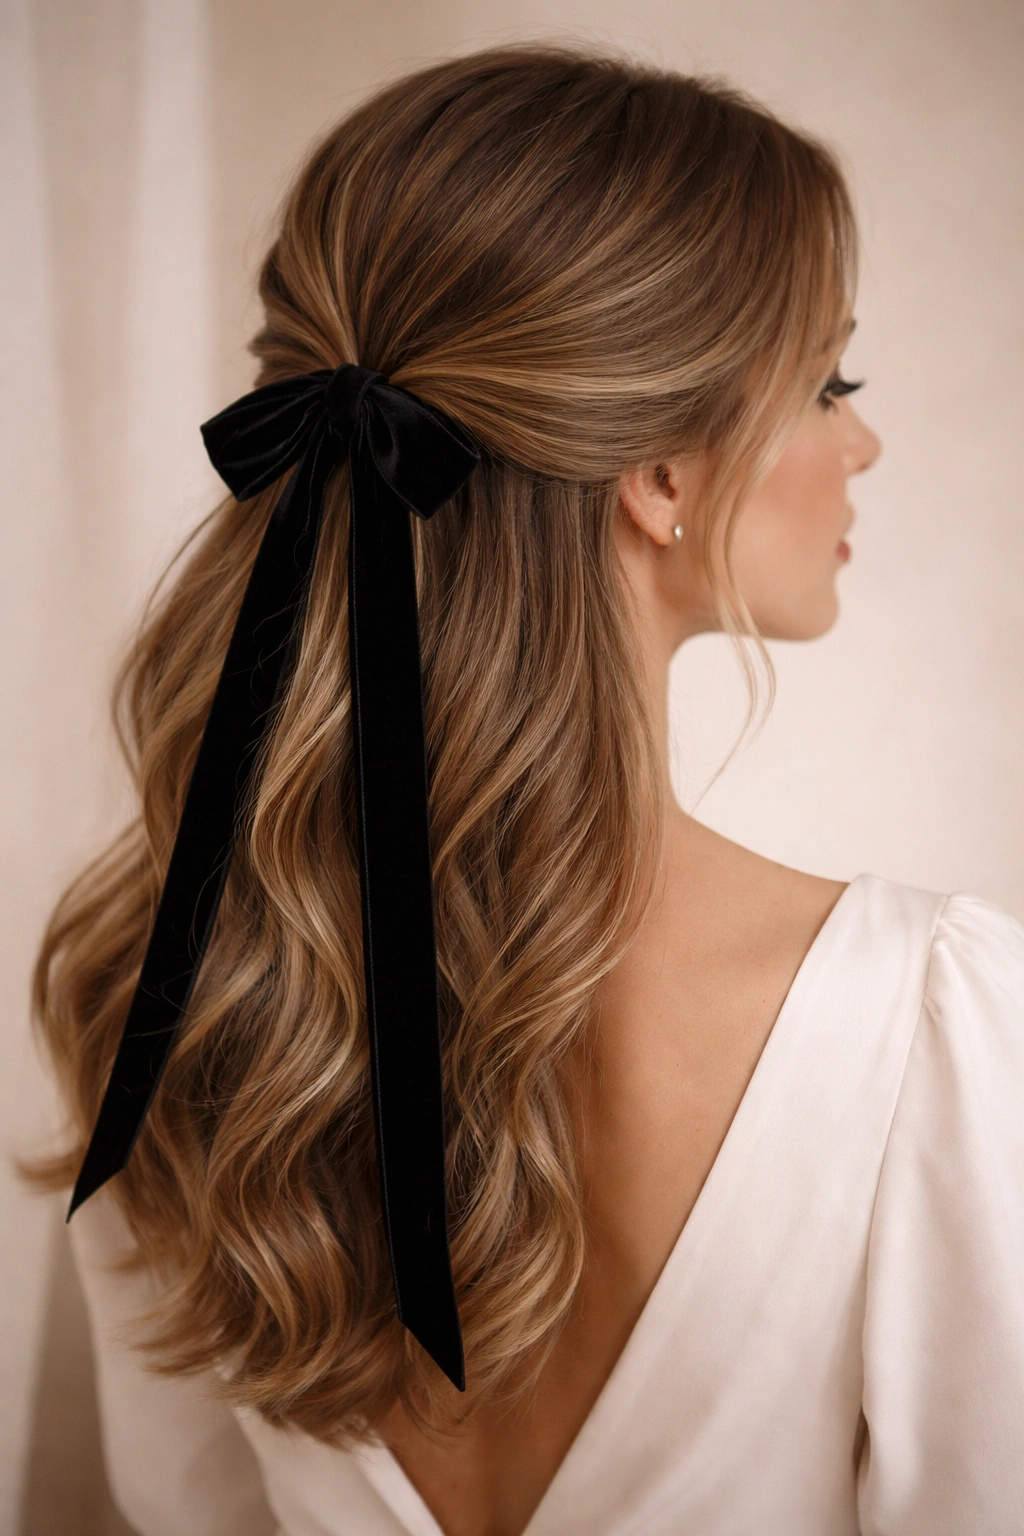
A low half-up secured with a silk or velvet ribbon creates an unexpectedly luxe aesthetic that feels both vintage and contemporary. The ribbon weaves through the secured section and often extends down the back, creating a cascading visual element that photographs beautifully.
Why This Look Resonates
Ribbon adds texture, color, and visual interest in a way that metal clips or elastics cannot. It softens the overall impression and introduces an intentional design element. It also feels special and deliberate — like you’ve styled your hair specifically for this occasion.
Creating the Look
- Gather the top half or top third of your hair into a low ponytail or knot at the nape of your neck
- Cut a length of silk or velvet ribbon approximately 18-24 inches long
- Weave the ribbon through the gathered section, incorporating it into the knot or wrapping it around the base
- Let the ends of the ribbon hang down the back of your hair, creating a streamlined tail that blends with your loose waves
- Secure the ribbon with bobby pins so it doesn’t slip
- Ensure the ribbon sits flat against your hair rather than bunching
- Keep the loose section in soft waves, curls, or spirals
- Consider ribbon colors that complement your dress — metallics, jewel tones, or soft pastels all work depending on your aesthetic
Pro tip: Silk and velvet ribbons feel more luxe than grosgrain or standard ribbon. The fabric drapes better and photographs with more dimension. Invest in a quality ribbon if possible.
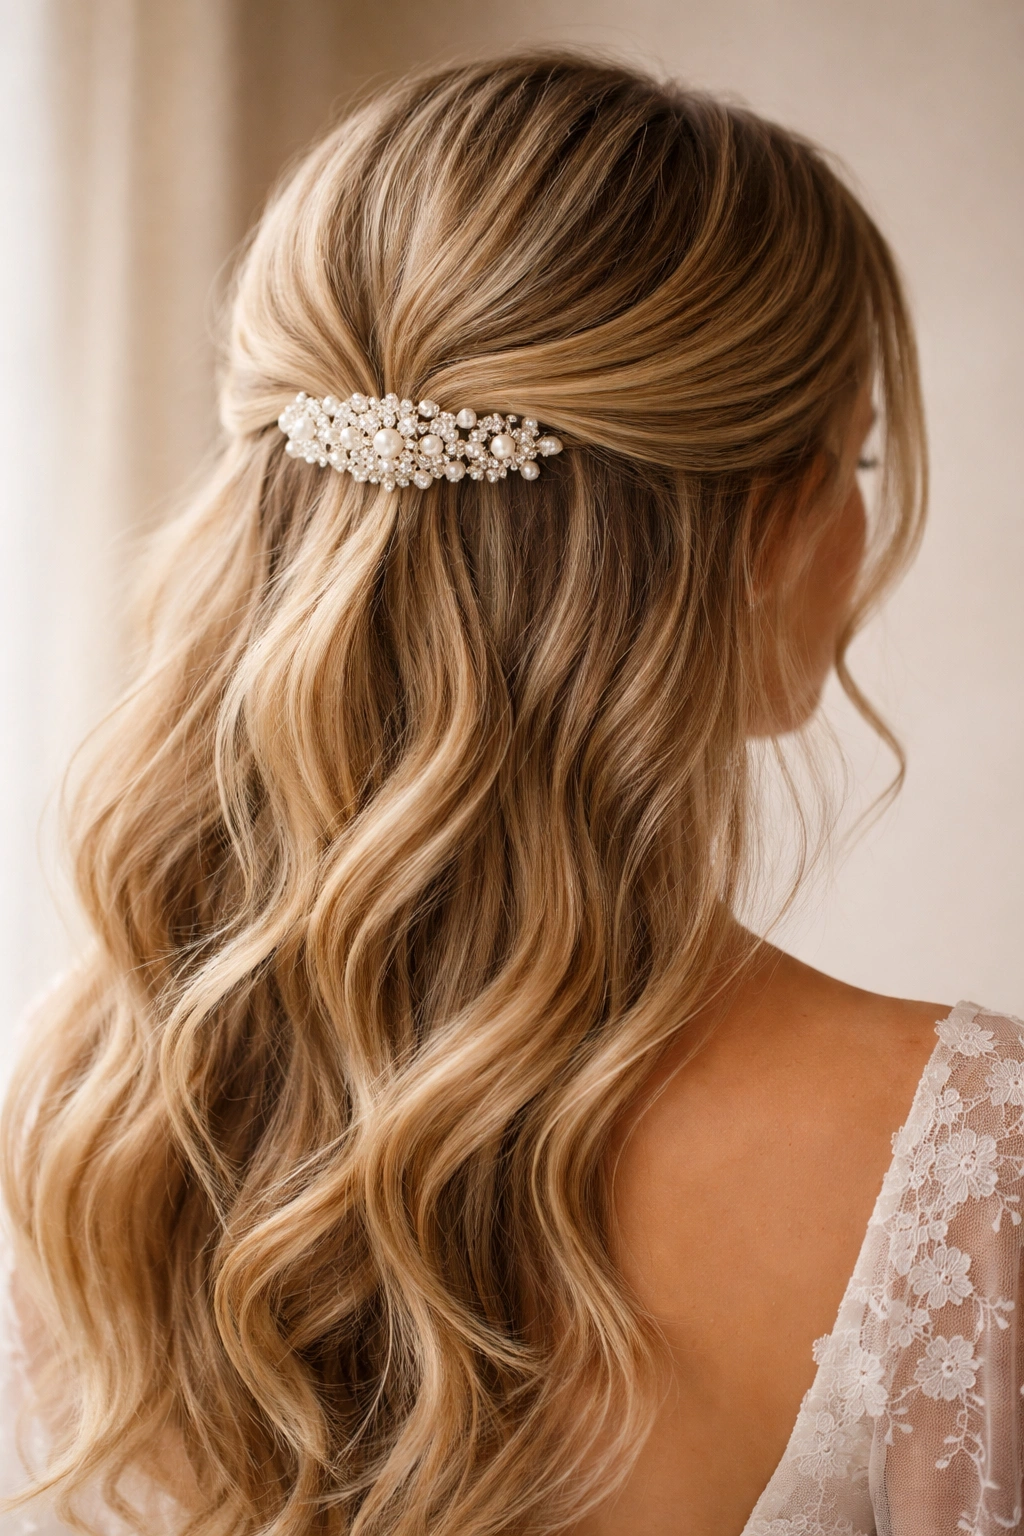
6. The Braided Half-Up with Pearl Accents
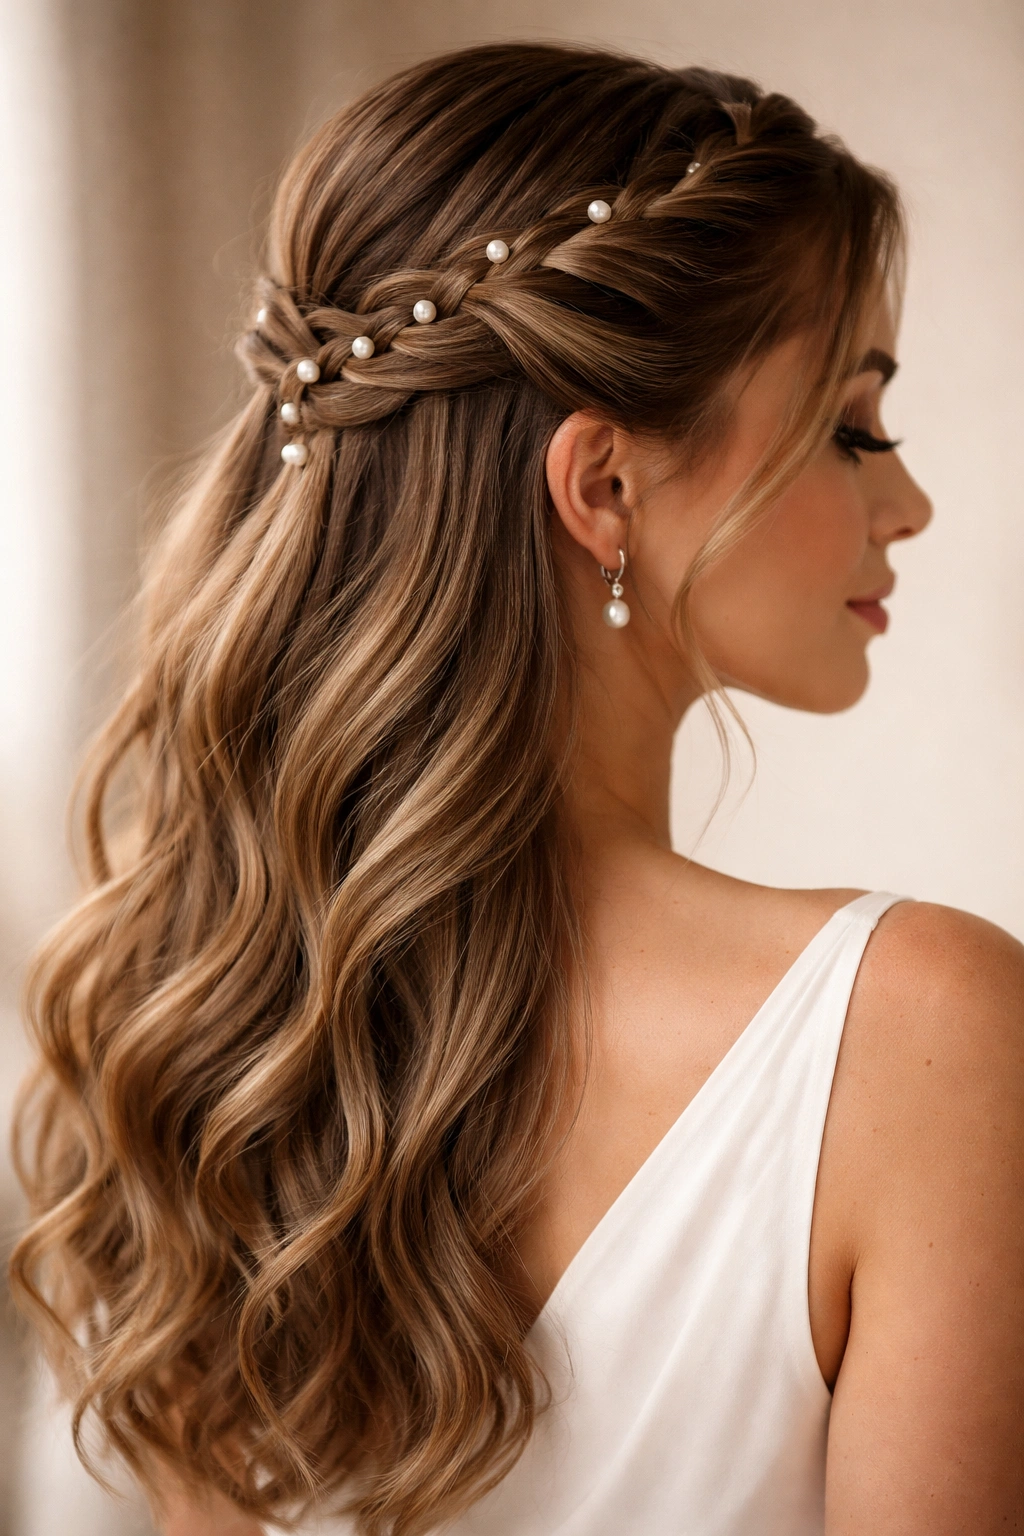
A single Dutch braid or French braid runs from one side of your head to the center back, where it’s secured with an elastic that’s been wrapped in pearl beads or secured with pearl-studded clips. Pearls woven throughout the braid itself add subtle sparkle and sophistication.
The Elegance Factor
Pearls read as universally appropriate for formal events. Unlike rhinestones or heavy jewelry, pearls add elegance without excess. They catch light softly and create depth when woven into braided hair.
How to Execute This
- Apply a light mousse or texturizing spray to your hair for better grip when braiding
- Create a Dutch braid (braid sitting on top of the hair) starting from one temple
- Braid toward the center back of your head, incorporating a strand of faux pearl beads or real pearl strands as you braid
- Weave the pearls loosely so they’re visible but not so tightly incorporated that they’re difficult to manage
- Secure the braid with a clear elastic, then wrap pearl-studded clips or a pearl-wrapped elastic around the base
- Let the hair below the braid flow in its natural texture
- Consider the thickness of your braid — a thicker braid shows off beads and texture better than a thin, tight braid
- Keep flyaways smoothed with a fine-tooth comb and lightweight hairspray
Worth knowing: If you’re not confident in your braiding, start practicing at least a week before the rehearsal dinner. Braiding becomes easier with repetition, and you’ll feel more confident when you can execute the look without stress.
7. The Half-Up Bubble Braid
A playful yet sophisticated style where the top section is pulled up and secured into a ponytail, then that ponytail is divided into sections, and each section is fluffed upward to create bubble-like protrusions along the length. The bottom half remains down in waves or curls.
Why This Modern Approach Works
The bubble braid feels contemporary and fashion-forward without sacrificing sophistication. It’s a style that people notice and comment on — it’s eye-catching without being over-the-top. It works particularly well if you want your hair to be a statement element of your overall look.
Step-by-Step Instructions
- Blow-dry your hair with texture or use a curling iron to create waves or curls throughout
- Create a high or mid-height half-up ponytail from the upper section of your hair
- Secure tightly with a hair elastic
- Divide the ponytail into 3-4 equal sections, roughly 2-3 inches apart along the length
- Take a small elastic and secure each section, creating distinct “bubbles” between the elastics
- Gently tease or fluff each bubble section upward to create dimension and visual interest
- Leave the bottom half flowing in whatever texture you’ve created
- Use hairspray to hold the bubbles in place while maintaining a soft, not-crunchy appearance
Real talk: This style requires more styling time than many others, but it’s absolutely worth it for impact. Plan an extra 15-20 minutes for the bubble creation and fluffing.
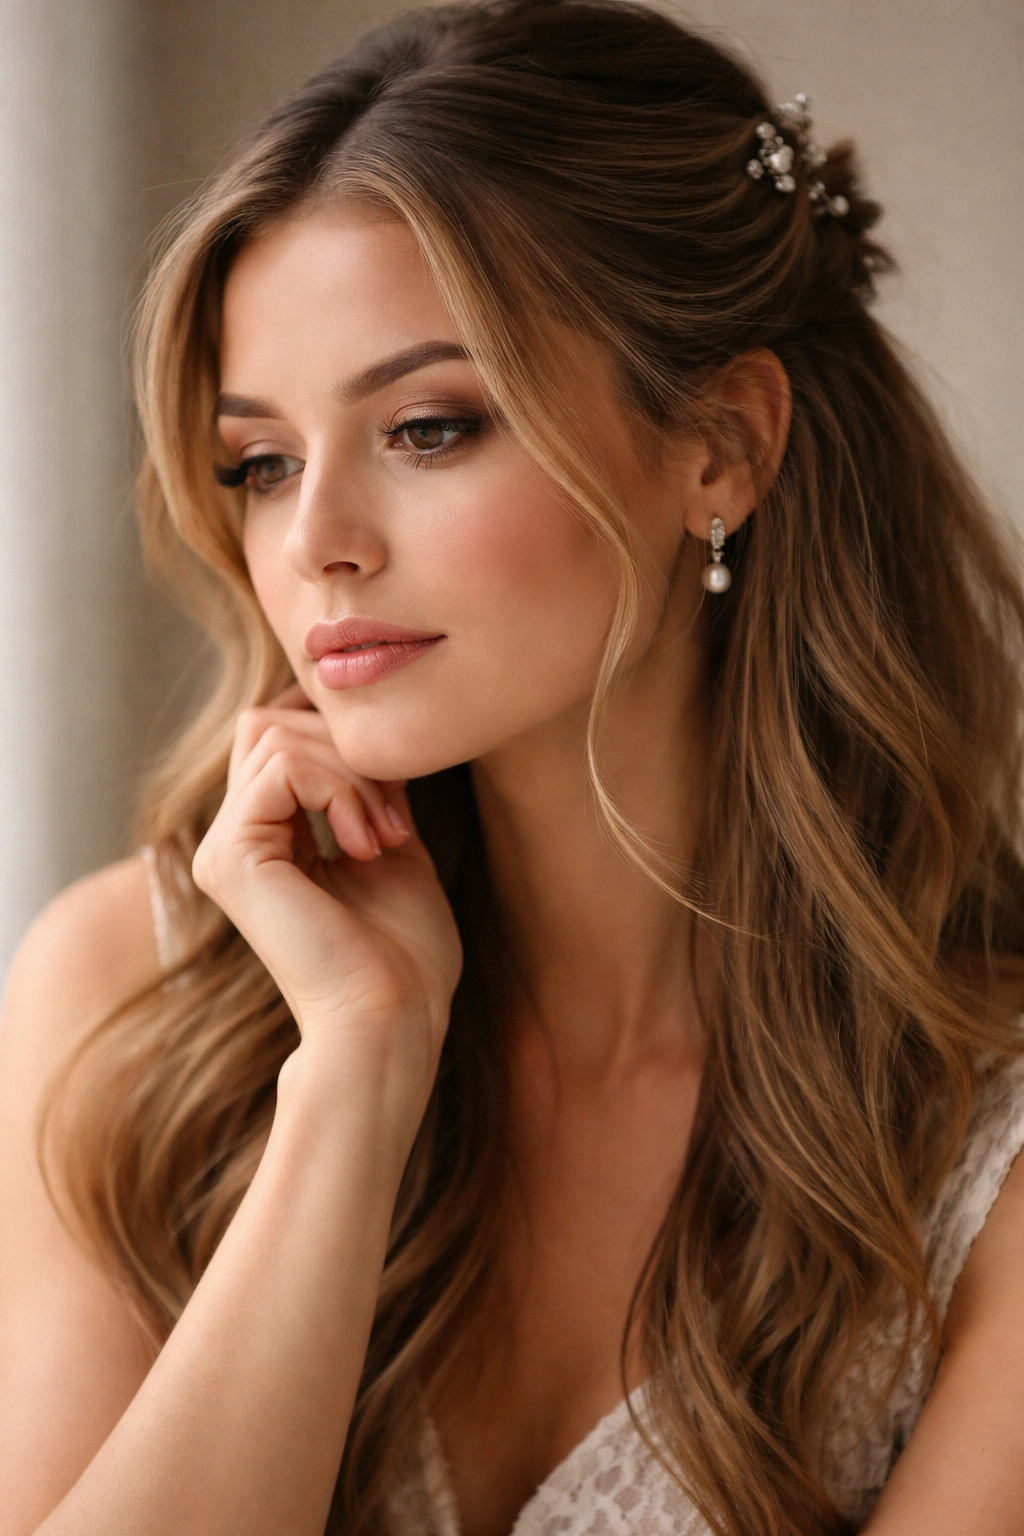
8. The Half-Up Twisted Knot with Face-Framing Pieces
A refined take where the upper half is brought together into a twisted knot at the crown, but intentional face-framing pieces are left out on both sides to soften the look. These pieces can be straight, wavy, or lightly curled.
The Sophistication of Strategic Framing
Face-framing pieces serve a dual purpose: they soften an otherwise sleek style and they beautifully frame your face shape. They also allow the style to feel less severe — a tight knot without framing pieces can read as harsh, but the same knot with purposeful face-framing pieces feels intentional and flattering.
How to Create This
- Select which pieces you want to frame your face — typically one or two sections from each temple area
- Gently pull those face-framing sections to the side and temporarily clip them out of the way
- Gather the remaining top section of hair together
- Twist the gathered section and wrap it around itself to form a knot
- Secure with bobby pins
- Release the face-framing pieces
- Style them separately — you can leave them straight, add a soft wave with a curling iron, or gently twist them
- Ensure the face-framing pieces move and feel separate from the knot rather than being pulled tightly back
- Use a light hairspray that allows movement rather than a heavy-hold product
Insider note: The length of your face-framing pieces matters. If they’re too short, they’ll stick up awkwardly. If they’re too long, they’ll blend with the rest of the loose hair. Aim for pieces that hit around cheekbone or jawline level for ideal framing.
9. The Half-Up with Metallic or Beaded Elastic
A straightforward half-up secured with an elastic wrapped in metallic wire, beads, or crystals that catch light and add subtle glamour. The simplicity of the style means the elastic becomes the focal point, making its appearance crucial.
Why This Works for Formal Events
This is a style that photographs beautifully — the metallic or beaded elastic catches light in photos and adds visual interest. It’s also incredibly practical because all of your styling energy goes into creating gorgeous texture in the hair itself, not into complex techniques that require significant time or skill.
Creating the Style
- Blow-dry your hair with waves or use a curling iron to create texture throughout
- Create a clean half-up ponytail at mid-crown height
- Secure with a clear elastic
- Choose a metallic elastic, beaded elastic, or wrap a regular elastic with metallic wire or beading thread
- Wrap the decorated elastic around the base of your ponytail, securing it so it sits in the same location as the original elastic
- Gently tease the ponytail slightly to create volume and texture
- Leave the bottom half in soft waves or curls
- Consider parting your hair in a way that flatters your face shape — center parts feel modern, side parts feel romantic
Pro tip: If you can’t find a pre-made beaded or metallic elastic, wrap a regular hair elastic with metallic embroidery thread or attach small beads with clear thread. You can create a custom piece that matches your dress color or aesthetic perfectly.
10. The Half-Up Fishtail Braid
A fishtail braid (which creates a delicate, intricate-looking texture) runs from one or both sides of your head to the back, where the top half is secured. This creates an elegant, detailed look that feels more intricate than it actually is to execute.
The Appeal of Fishtail Braids
Fishtail braids photograph beautifully because of their intricate, woven appearance. They also look impressive relative to the skill required — even beginners can achieve a fishtail braid that looks professional and polished. Unlike French or Dutch braids, fishtail braids sit higher on the hair, creating more visible detail.
How to Execute a Fishtail Braid Half-Up
- Start with textured hair or create waves with a curling iron first
- Take a section of hair from one side of your head, starting near your temple
- Create a fishtail braid: divide the section into two parts, then repeatedly take a small piece from the outside of one side and cross it over to the other side, alternating sides as you move backward
- The braid should look delicate and intricate as you move toward the back of your head
- Bring the finished braid to the center back and secure with a bobby pin
- Repeat on the opposite side, or do a single fishtail braid for a less symmetrical, more romantic look
- Leave the rest of your hair in waves or curls below the braids
- Use a light texturizing spray to enhance the fishtail effect without making it look stiff
Worth knowing: Fishtail braids require slightly damp or textured hair to stay together. If your hair is too dry or too slippery, the braid will fall apart. Start with damp hair or apply a light mousse before braiding.
11. The Half-Up with Decorative Hairpins
A simple half-up style elevated by the addition of vintage or decorative hairpins that sit along the line where the top and bottom sections meet. The pins become a design element rather than just a functional necessity.
Why This Approach Stands Out
Decorative hairpins allow you to maintain a timeless, simple half-up while adding a touch of personalization. The pins can match your dress, your jewelry, or your overall aesthetic. They photograph beautifully and signal that you’ve paid attention to detail.
Creating the Look
- Gather the top half of your hair into a simple ponytail or knot at your crown
- Secure temporarily with a clear elastic, but don’t worry about making it perfect yet
- Select 3-5 decorative hairpins that match your desired aesthetic (vintage, modern, ornate, minimal, etc.)
- Insert the pins horizontally along the line where the ponytail begins, spacing them evenly
- The pins should be visible and meant to be seen — this isn’t about hiding them
- Remove the clear elastic if it’s visible beneath the pins, or cover it with a small section of hair
- Leave the bottom half in soft waves or curls that complement the pins aesthetically
- Consider the color of your pins: gold works with warm skin tones and warm-toned dresses, silver works with cool tones, and tortoiseshell works with virtually everything
Pro tip: Invest in quality hairpins. Cheap, thin pins slip out constantly. Good hairpins have proper grip and hold throughout an evening of movement and activity.
12. The Half-Up Half-Down with Heatless Curls

An entire head of soft curls created using heatless methods — like braiding damp hair overnight or using a heatless curler set — combined with a simple half-up secured at the back. The romance comes entirely from the texture, not from the restraint technique.
The Beauty of This Approach
Heatless curls are gentler on your hair than heated styling, and they create a soft, romantic texture that photographs beautifully. Combined with a half-up, this style reads as effort-appropriate for a formal event without feeling overdone. It also allows you to wear your hair down significantly while keeping it off your face.
How to Create Heatless Curls Plus Half-Up
- Three to five days before the rehearsal dinner, create heatless curls using your preferred method (braiding, heatless curler set, or wrapping damp hair around a headband)
- Keep the curls in place by sleeping on a silk pillowcase and gently managing them throughout the days leading up to the event
- On the evening of the rehearsal dinner, refresh the curls by lightly misting with water and letting them air dry, or by running your fingers through them gently
- Take the top section of curled hair and secure it at the back of your head with a bobby pin, decorative clip, or elastic
- Let the bottom half of curls cascade freely
- Use a light spray to enhance the curl definition without adding weight or crunchiness
- Consider parting in the center or to the side to balance the overall look
Insider note: Heatless curls last longer and look more natural than curls created with a curling iron. If you’re going to an evening event and want your curls to maintain texture throughout the night, heatless curls are your best bet.
13. The Half-Up with Woven Ribbon Detail
A braided or twisted half-up where ribbon is woven throughout the secured section, creating a woven pattern that blends the braid or twist with the ribbon color and texture. This creates a notably intricate and intentional aesthetic.
What Makes This Visually Striking
When ribbon is woven through a braid, it creates a pattern and visual interest that catches the eye. Unlike a simple ribbon wrap, weaving ribbon through a braid creates a more cohesive, designed look. It’s fancy without feeling costume-like.
Execution Details
- Choose a ribbon color that either matches your hair or complements your dress
- Begin a Dutch braid or French braid from one side of your head toward the back
- As you braid, weave a ribbon through the braid by crossing it under and over sections
- Keep the ribbon tension consistent so the weaving pattern looks intentional and even
- Continue the braid and ribbon to the back of your head
- Secure both the braid and ribbon with bobby pins
- Ensure the ribbon blends visually with the braid rather than appearing like an afterthought
- Leave the bottom half in soft waves or curls
- Finish with a light hairspray that holds without stiffness
Real talk: This style is more time-intensive than a simple half-up. Weaving ribbon while braiding requires focus and practice. Attempt it a few times before the actual event so you can execute it confidently.
14. The Half-Up with Cascading Side Section
A half-up where the top section is secured into a ponytail or knot, but a substantial section of hair from one side is left longer than the other and falls in cascading waves or curls. This creates asymmetry and visual interest.
Why Asymmetry Works
Asymmetrical styles feel contemporary and intentional. They’re less formal than perfectly symmetrical styles, making them ideal for rehearsal dinners that skew toward modern or casual. They also photograph beautifully from angles because the asymmetry creates dynamic visual interest.
How to Create It
- Gather the top section of your hair as usual, leaving the sides out
- From one side, take slightly more hair and keep it separated from the ponytail or knot
- Secure the top section in a half-up style
- Let the separated side section fall longer than the opposite side, creating an intentional cascade
- Style the cascading section in soft waves or spiraled curls
- The opposite side should be shorter and tidier, creating visual contrast
- Use bobby pins along the hairline to keep the asymmetrical section in place, preventing it from moving to the center
- Consider your face shape: asymmetrical styles work best when the longer side falls away from your face, not covering it
Worth knowing: This style works best with shoulder-length or longer hair. If your hair is shorter, the asymmetry is less noticeable and may read as accidental rather than intentional.
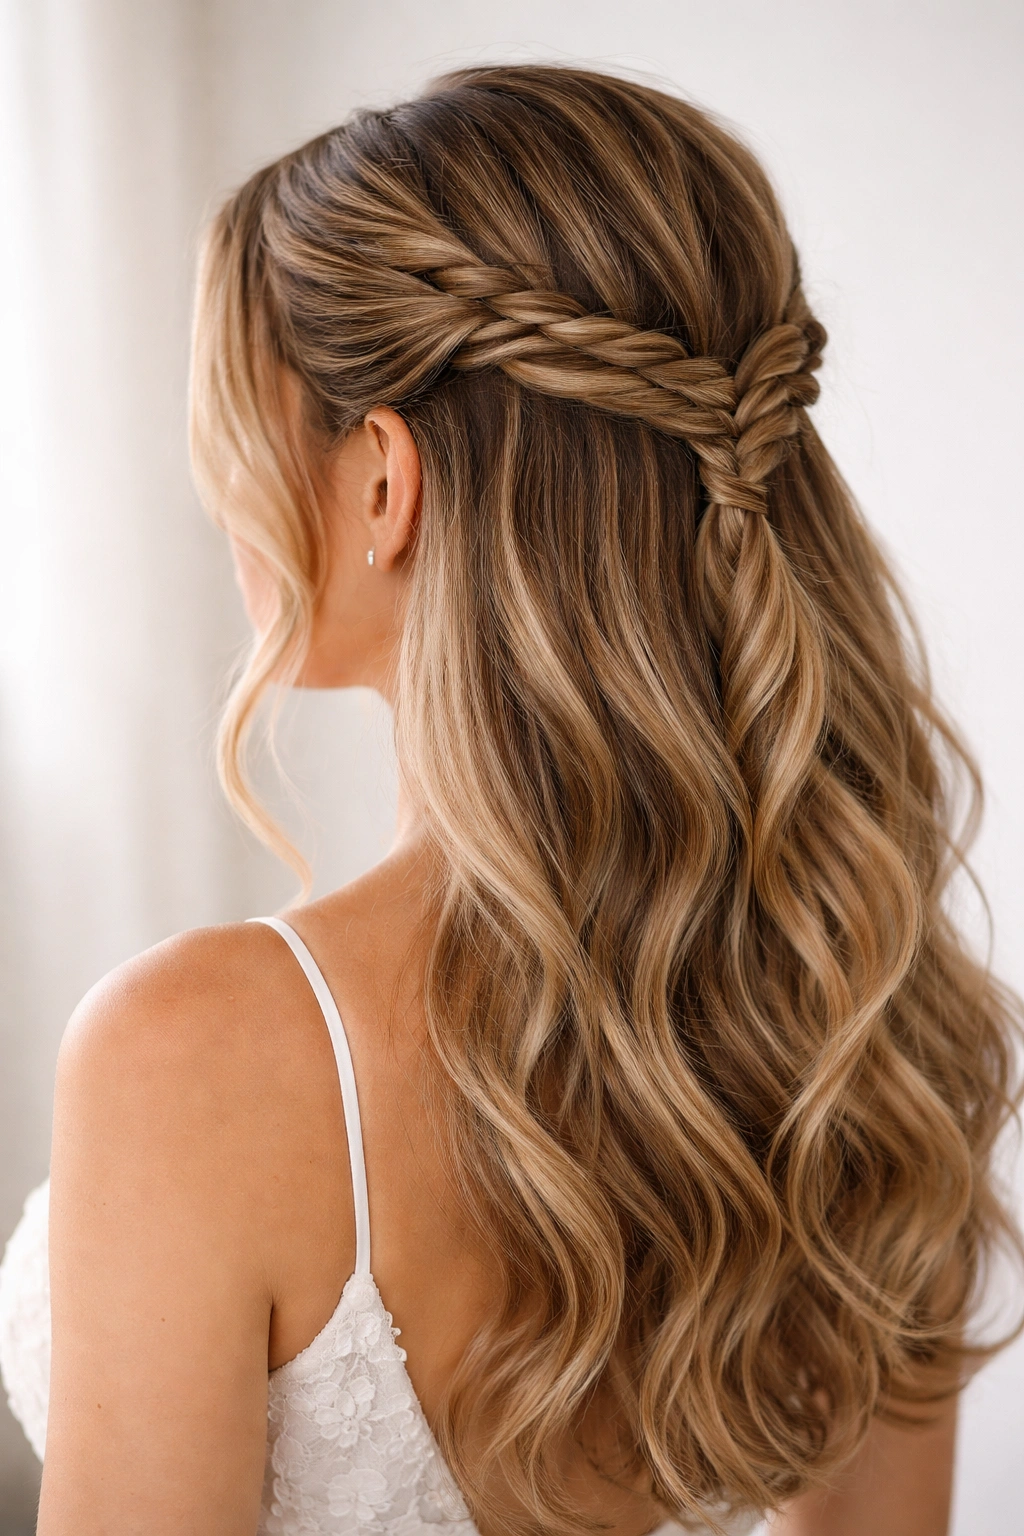
15. The Half-Up with Twisted Low Ponytail

A modern approach where the upper half is gathered and twisted (rather than braided), then brought down and secured into a low ponytail with the rest of the hair. The result is a unified look that’s neither fully up nor fully down, but a seamless combination.
The Appeal of This Hybrid Approach
This style offers the best of both worlds: structured styling in the upper section for a polished look, combined with the flow and movement of hair down. It’s elegant without being formal, and it works with virtually any hair texture or length.
Execution Steps
- Gather the top third of your hair into a section
- Twist the gathered section as you move downward, maintaining consistent tension
- When you reach your mid-back or desired ponytail height, bring the twisted section together with the rest of your hair
- Secure the entire ponytail with an elastic that matches your hair color
- Gently tease or add volume to the ponytail if desired
- Take a thin section of hair from the ponytail and wrap it around the elastic base to conceal the elastic
- Secure the wrapped section with a bobby pin
- Keep the ponytail soft and full rather than sleek — this style works better with texture than with overly smooth, flat hair
- Consider curling the ends of the ponytail for added romance
Pro tip: Practice this style once before the actual event. The key to making it look intentional (rather than accidental) is maintaining consistent tension in the twist and ensuring the transition point between the twist and ponytail isn’t too loose or too tight.
16. The Half-Up with Accessorized Bun
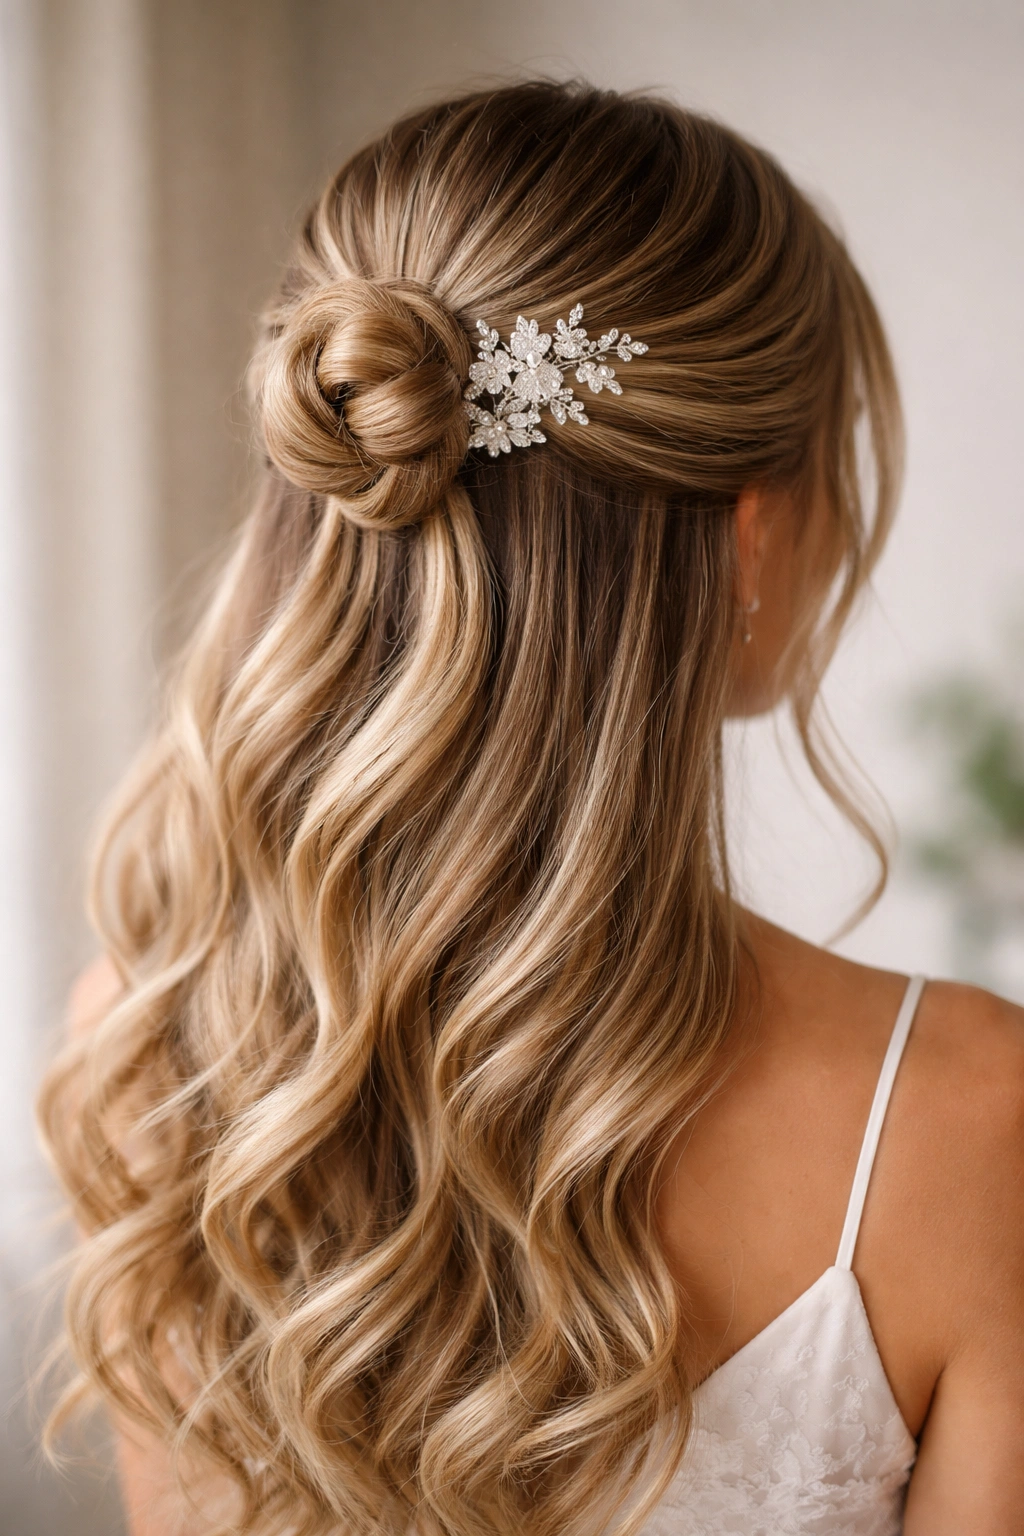
A small, decorative bun sits at the crown, securing the upper half of your hair, while the lower half flows in waves or curls. The bun is adorned with a jeweled pin, pearl cluster, or floral accessory that makes it feel special and intentional.
Why This Combines Practicality with Style
A bun keeps hair neatly off your face and neck while looking polished. Adding an accessory transforms it from utilitarian to decorative. It’s perfect if you’re planning to eat dinner, move around a room, and be physically active without constantly adjusting your hair.
Creating the Look
- Gather the top half of your hair into a high ponytail
- Create the bun by twisting the ponytail and wrapping it around itself, securing with bobby pins
- Make the bun relatively small and compact rather than loose and wild — this works better with adorned buns
- Select an accessory (jeweled brooch, pearl cluster, floral pick, decorative comb, vintage pin)
- Insert or attach the accessory to the front or side of the bun where it’s visible
- Ensure the accessory is secure and won’t shift throughout the evening
- Leave the bottom half in soft waves or curls that complement the formal aesthetic of the bun
- Keep the bun surface relatively smooth even if the ponytail itself is textured
Insider note: Small, secure buns photograph better than large, loose ones. A well-structured bun that won’t shift during the evening is far preferable to a romantic, loose bun that requires constant readjustment.
17. The Half-Up with Subtle Face-Framing Curls
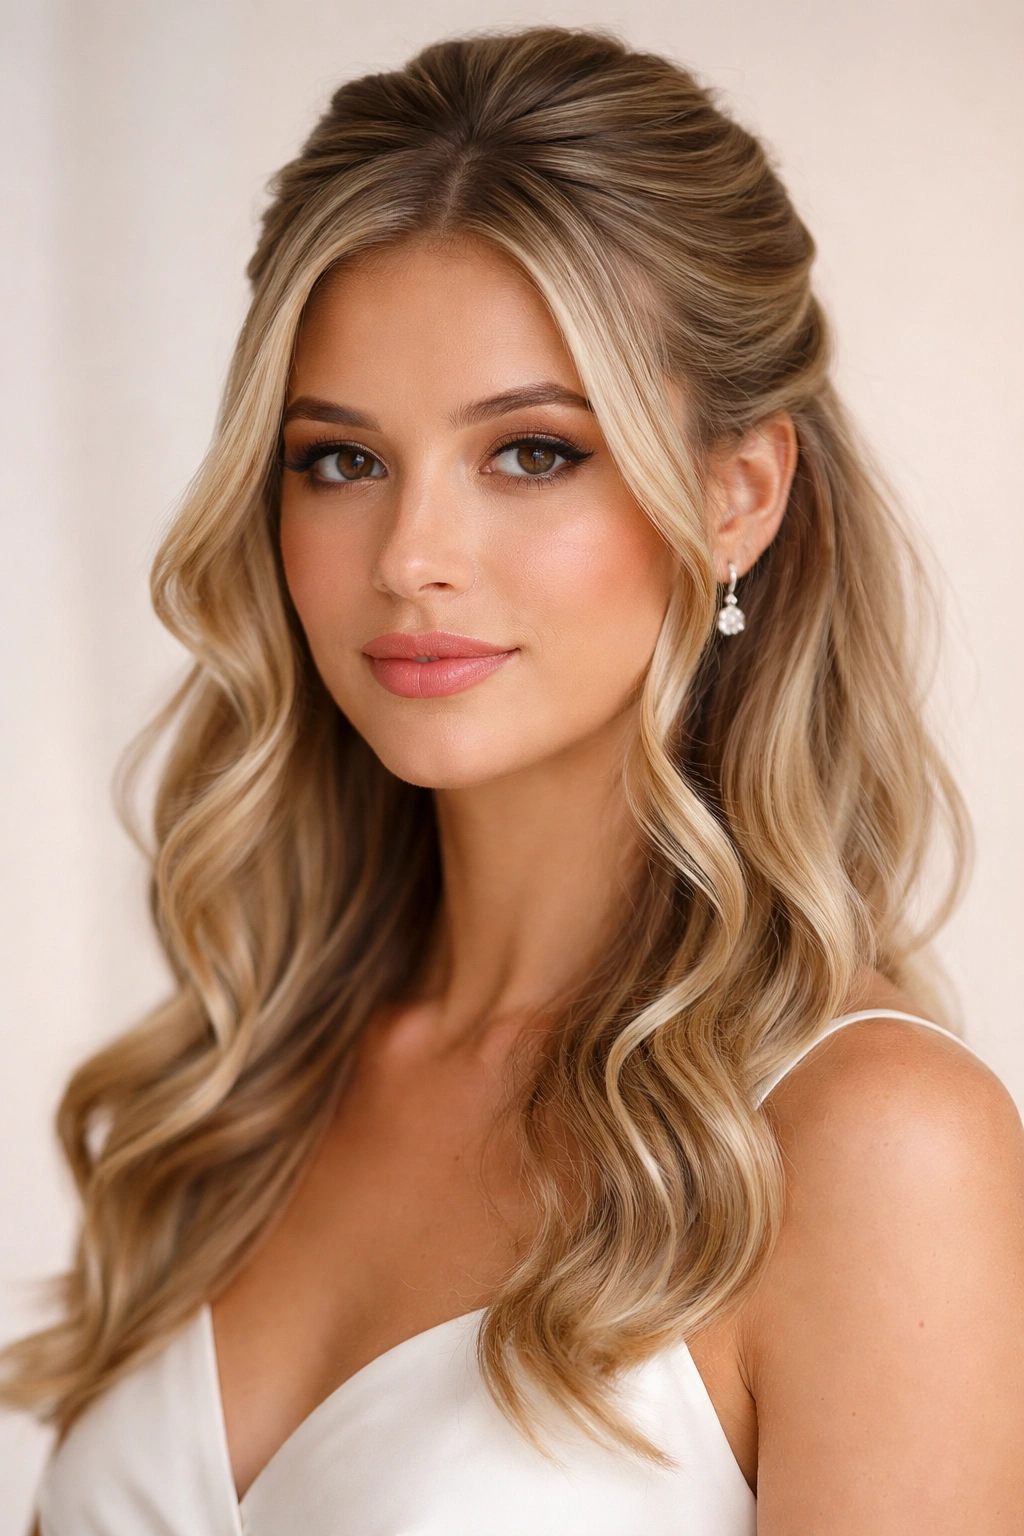
A sleek half-up — either a ponytail or secured section — paired with intentional, loose curls that frame the face. The contrast between the polished, secured upper section and the romantic, loose curls creates balance and dimension.
The Effectiveness of Strategic Contrast
This style works because it combines opposing aesthetics: sleek and romantic, controlled and flowing, modern and vintage. The face-framing curls draw attention to your face shape and features, making it flattering across different face shapes.
How to Execute This
- Gather the top half of your hair into a ponytail or secured section at the crown
- Make this secured section as smooth and polished as possible using a smoothing serum and fine-tooth comb
- Secure with an elastic or decorative clip
- Using a 1-inch curling iron, curl small sections of hair from the hairline backwards, creating loose, bouncy curls
- Specifically target the pieces that frame your face: temple area, cheekbones, jawline
- Allow these face-framing curls to fall and move naturally rather than pinning them back or securing them
- Keep the bottom half of your hair in soft waves or loose texture that complements the face-framing curls
- Use a light hairspray that holds the overall shape without making individual curls look stiff or immobile
Real talk: This style is effective because most people naturally draw their eyes to the face first. The frame-framing curls are like an intentional accent that highlights your best features.
18. The Half-Up with Braided Top Section
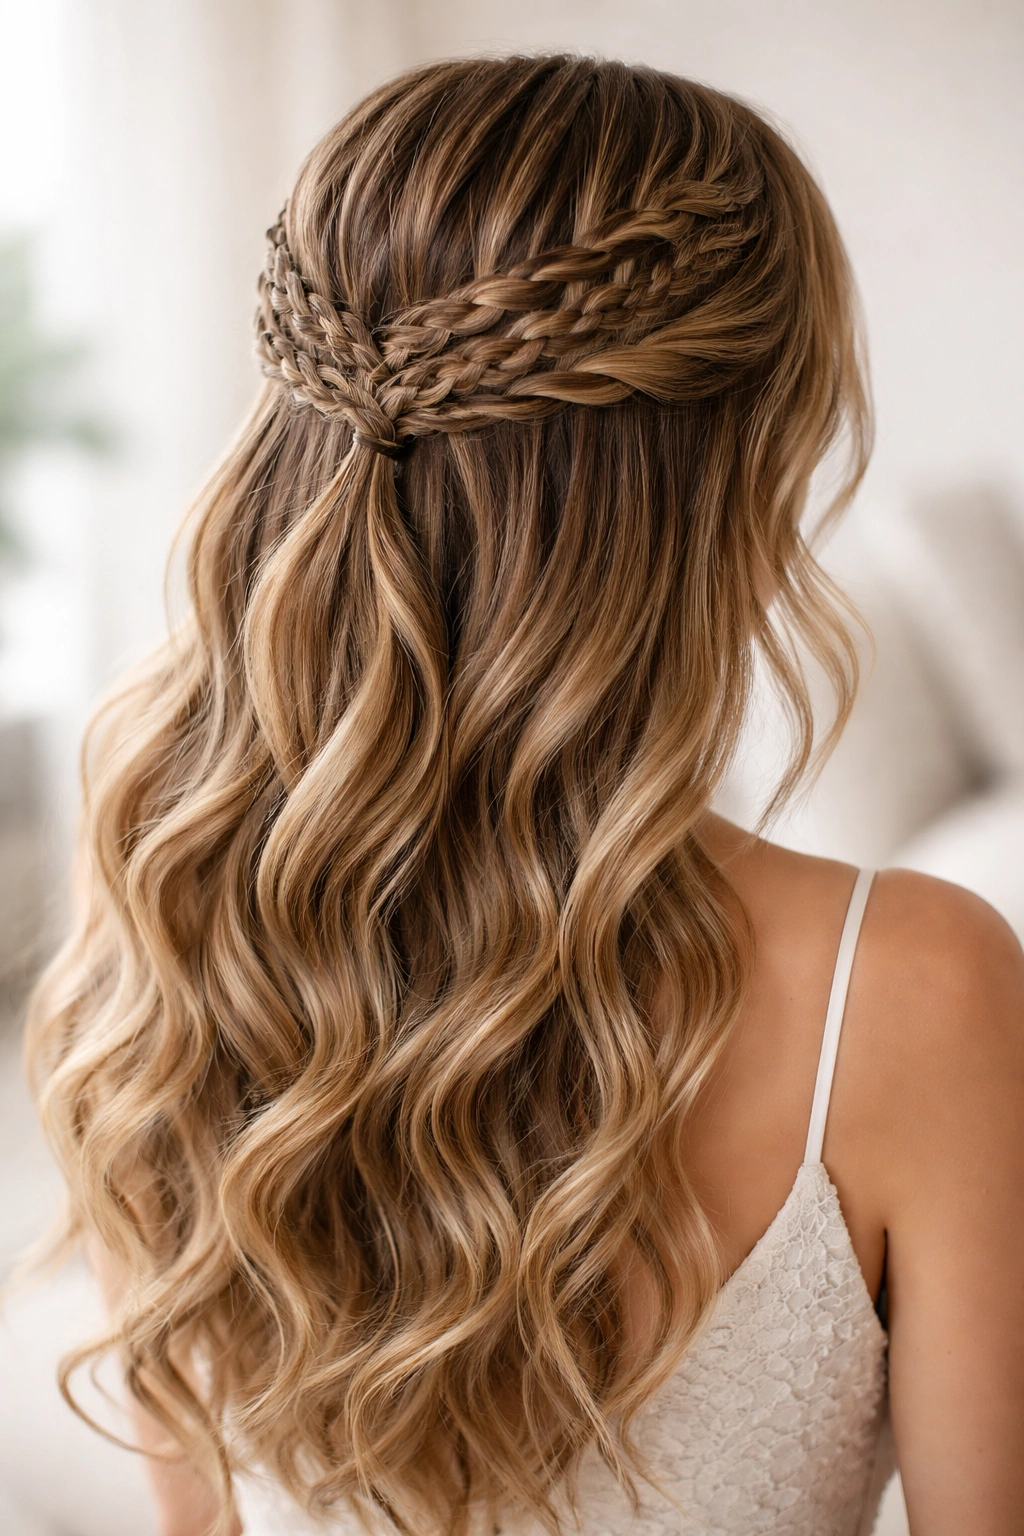
The entire top half of the head is covered in a grid of small, delicate braids that are then swept back and secured together at the back. The effect is intricate and detailed, with the bottom half flowing freely.
The Drama of This Approach
Multiple braids covering the top section create a style that’s noticeably more effort than a single braid or simple half-up. It reads as intentional, detailed, and fashion-forward. It’s the choice for someone who wants their hair to be a notable element of their look.
Creating the Style
- Divide the top section of your hair into 3-5 even parts
- Create a small French braid or Dutch braid in each section, starting at the hairline and moving toward the back
- Keep the braids relatively close together so they create a cohesive pattern across the crown
- As you finish each braid, secure it with a small elastic
- Gather all the finished braids at the back of your head and secure them together with a larger elastic or decorative clip
- Ensure the braids are taut enough to look intentional but not so tight that they pull painfully on your scalp
- Leave the bottom half in soft waves or curls that contrast with the detailed braids
- Use a firm-hold hairspray to keep all the braids in place, but not so much that the hair looks crispy
Worth knowing: This style is time-intensive and works best if you’re comfortable with braiding. Practice at least twice before the actual rehearsal dinner so you can execute it efficiently and confidently.
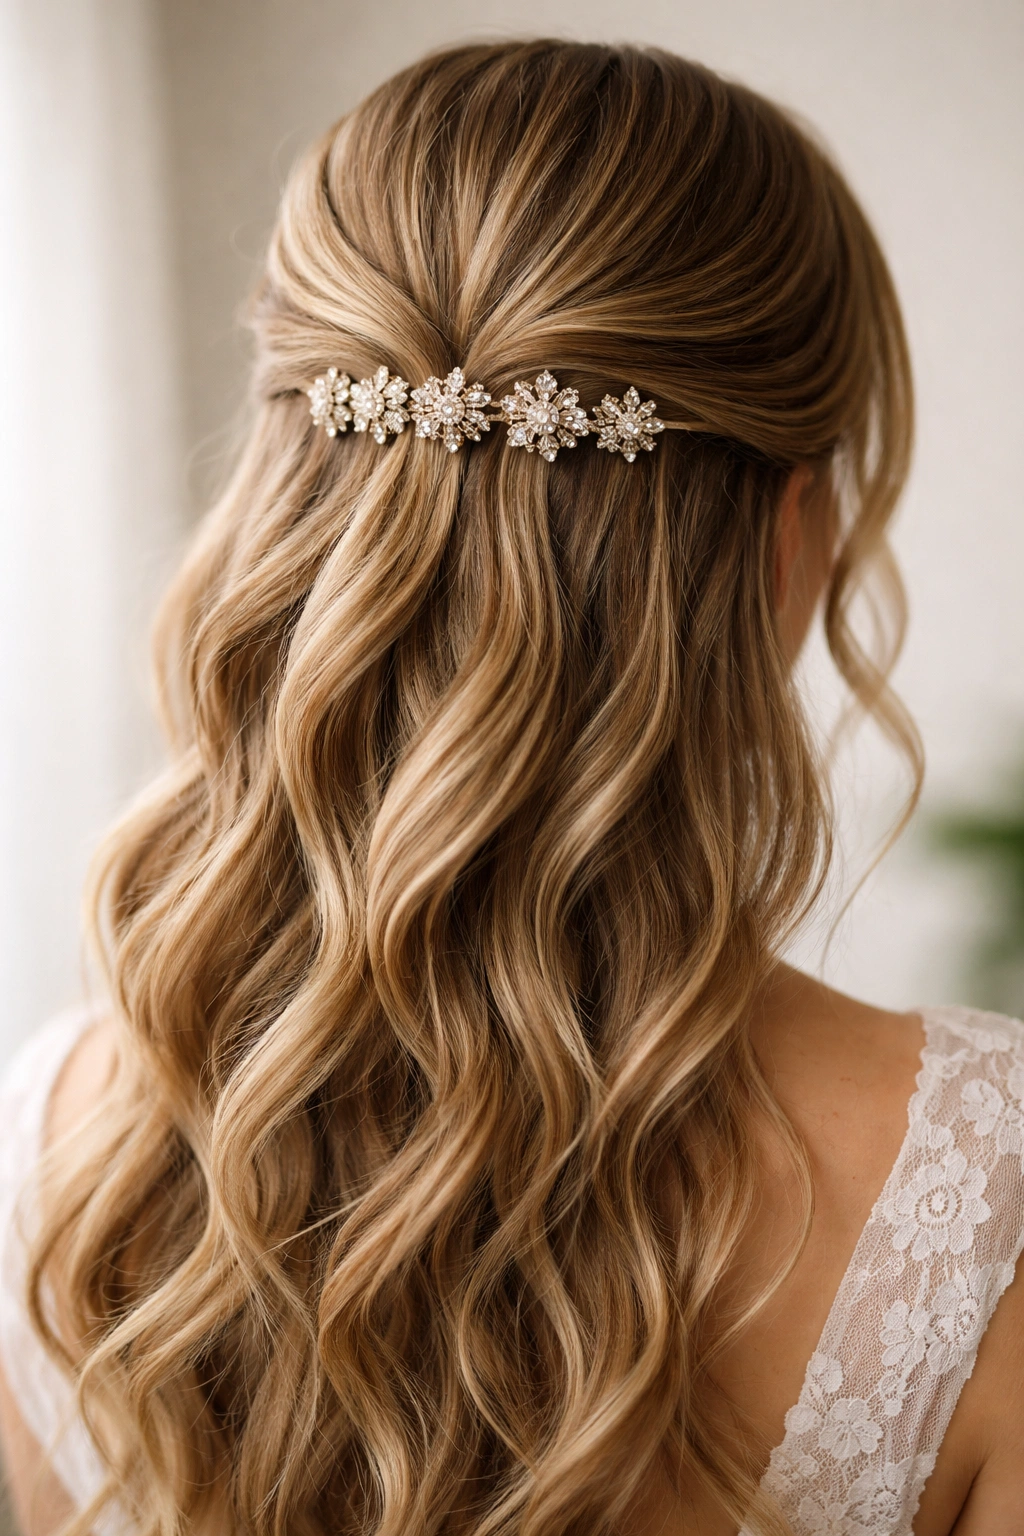
19. The Half-Up with Pearl or Crystal-Studded Comb
A simple half-up — either a ponytail, knot, or twist — secured with an ornate, jeweled comb that sits prominently where the secured section meets the loose section. The comb becomes the focal point and style signature.
Why a Statement Comb Works
A beautiful comb is functional and decorative simultaneously. Unlike a standard elastic, a statement comb draws the eye and adds visual interest to an otherwise simple style. It also allows you to choose styling based on what matches your overall aesthetic rather than what’s easiest to hide.
Execution
- Create a standard half-up in your preferred style: ponytail, knot, twist, or loose braid
- Secure temporarily with a clear elastic or bobby pins
- Select a pearl or crystal-studded comb that matches your dress, jewelry, or overall color palette
- Remove the clear elastic and replace it with the decorative comb, inserting the comb horizontally through the secured section
- The comb should sit at the point where the upper and lower sections meet, making it a visible, intentional design element
- Adjust the height and angle so the comb is visible and flattering
- Leave the bottom half in soft waves or curls
- Ensure the comb is secure enough that it won’t shift or fall throughout the evening
Pro tip: Choose a comb with curved teeth rather than straight teeth — the curve is more comfortable against your scalp and holds hair more effectively.
20. The Half-Up with Soft Textured Updo Hybrid

A hybrid style that’s neither traditional half-up nor traditional updo, but rather a fully textured, romantic style where the top is loosely secured and the bottom is loosely swept upward, creating the impression of an elaborate updo without the structured, formal appearance of one.
Why This Works as a Rehearsal Dinner Style
This style reads as intentional and detailed — worthy of a formal event — while maintaining a soft, romantic aesthetic that doesn’t read as overly formal or stiff. It’s the choice for someone who wants elegance without severity.
How to Create This Sophisticated Style
- Blow-dry your entire head with waves or use a curling iron throughout to create soft, romantic texture
- Take the top section of hair and loosely twist or braid it, securing with a bobby pin
- Taking the bottom sections of hair, gently pull some upward toward the twist or braid, securing with additional bobby pins as you go
- You should create an effect where pieces of hair are pulled upward and secured, but the overall impression is soft and romantic rather than structured
- Leave some wisps and pieces down around the face and neck rather than securing everything
- The finished style should look complex and intentional but still feel effortless and romantic
- Use a light texture spray to enhance waves and movement throughout
- Finish with hairspray that holds without stiffness, allowing movement and flexibility
Insider note: This style takes the most practice to execute well. The goal is to look intentionally romantic rather than accidentally messy. Spend time adjusting, adding texture, and ensuring bobby pins are hidden and secure.
Final Thoughts
The beauty of a half-up half-down style lies not in complexity, but in versatility. Whether you choose a simple twist with face-framing pieces, an elaborate braided crown, or a romantic low ponytail, you’re selecting a hairstyle that honors the formality of a rehearsal dinner while remaining comfortable enough for an evening of celebration. The styles above offer varying levels of complexity, so you can choose based on your comfort level, hair type, and available time for styling.
The most important element isn’t following a style perfectly — it’s choosing one that makes you feel confident and beautiful. If a particular style resonates with how you want to look and feel, that’s the one to commit to. Consider practicing it once before the actual event, gather any necessary accessories or styling products in advance, and approach the evening knowing you have a polished, thoughtful hairstyle that complements your overall look.