Prom night deserves a hairstyle that feels as special as the occasion itself, and half up half down styles are the perfect choice for wavy hair. This effortless-looking but carefully crafted approach balances elegance with relaxed glamour — you get the polished, pulled-together vibe of an updo without sacrificing the movement and texture that makes wavy hair so gorgeous. The beauty of half up half down styles is that they work for virtually every dress, venue, and personal aesthetic. Whether you’re drawn to romantic and soft, sleek and modern, or bold and embellished, there’s a half up half down variation that feels authentically you.
Wavy hair is genuinely one of the best hair types for this category of styles. Your natural texture adds dimension, movement, and visual interest that straight hair has to create through styling tricks and waves. Those waves catch light differently depending on how you arrange them, and they hold volume naturally without requiring as much backcombing or teasing. The challenge isn’t creating fullness — it’s deciding how much to emphasize your waves, whether to soften them, and which sections to pull up for maximum impact.
This guide walks you through 15 specific half up half down prom styles designed for wavy hair, from delicate and romantic to statement-making and bold. Each style includes the exact techniques that work best for waves, styling tips that prevent the dreaded frizz, and practical guidance on how long the style will last through dancing, photos, and celebrating. Whether you’re planning to wear this style to prom yourself or you’re a stylist looking for fresh inspiration, you’ll find detailed, implementable ideas here.
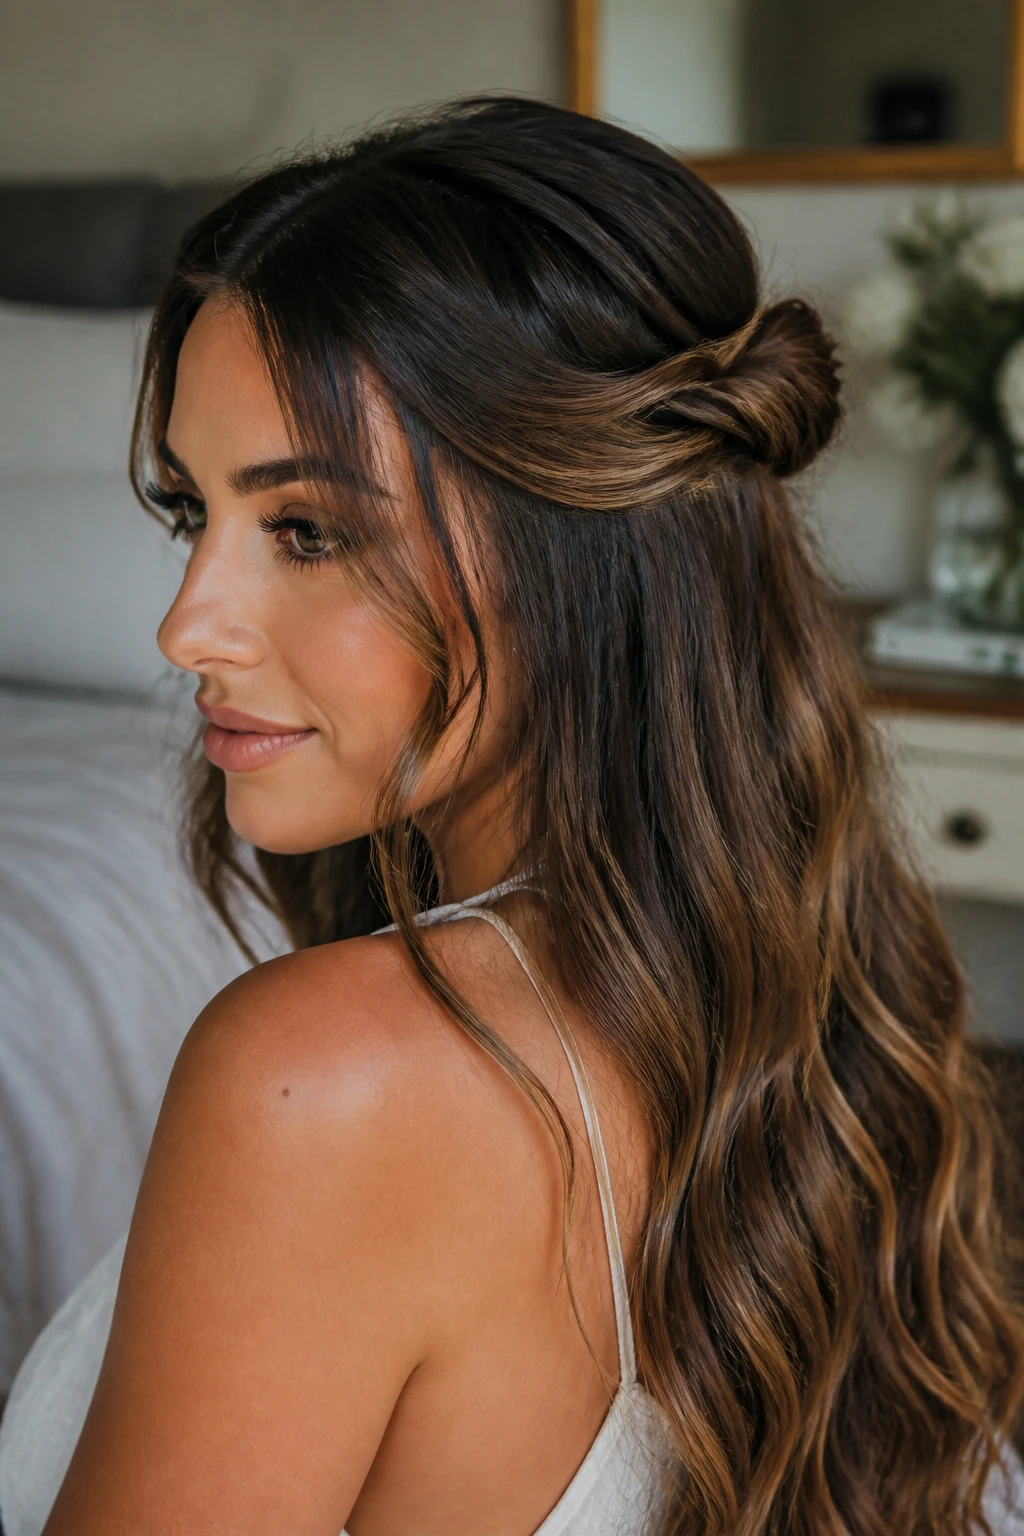
1. The Soft Twisted Crown
This style creates an effortlessly romantic silhouette by taking two sections from above your ears and twisting them upward and across the back of your head, where they meet and blend into a loose crown. It’s the half up half down style that looks like it took five minutes but actually creates a polished, intentional look.
Why It Works for Wavy Hair
Your natural waves fill in behind the twisted sections, creating dimension and softness without looking sparse or thin. The twists define the top of your head while allowing the rest of your waves to cascade down your back in full, beautiful texture. This style enhances your wave pattern rather than fighting against it — the twists anchor the style while everything else is free to move.
How to Create It
- Section off hair from above each ear, about 2 inches wide, and clip the rest away
- Lightly mist the sections you’re working with to tame any flyaways without weighing down your waves
- Twist each section upward and back, keeping the twist slightly loose and textured — don’t make it tight and perfect
- Bring both twisted sections to meet at the back center of your head, about 2-3 inches above your nape
- Secure with bobby pins hidden in the twist, then gently tug the twist in a few spots to loosen it and create that “undone” texture
- Release the clipped hair and let your waves fall naturally, breaking up the twisted sections slightly for a soft, romantic vibe
- Finish with a texture spray rather than traditional hairspray — it holds the style while maintaining movement in your waves
Pro tip: Do this style on second-day waves if possible. Fresh waves are harder to twist smoothly, and second-day texture grips better and holds twists longer.
2. The Pearl-Studded Half Ponytail
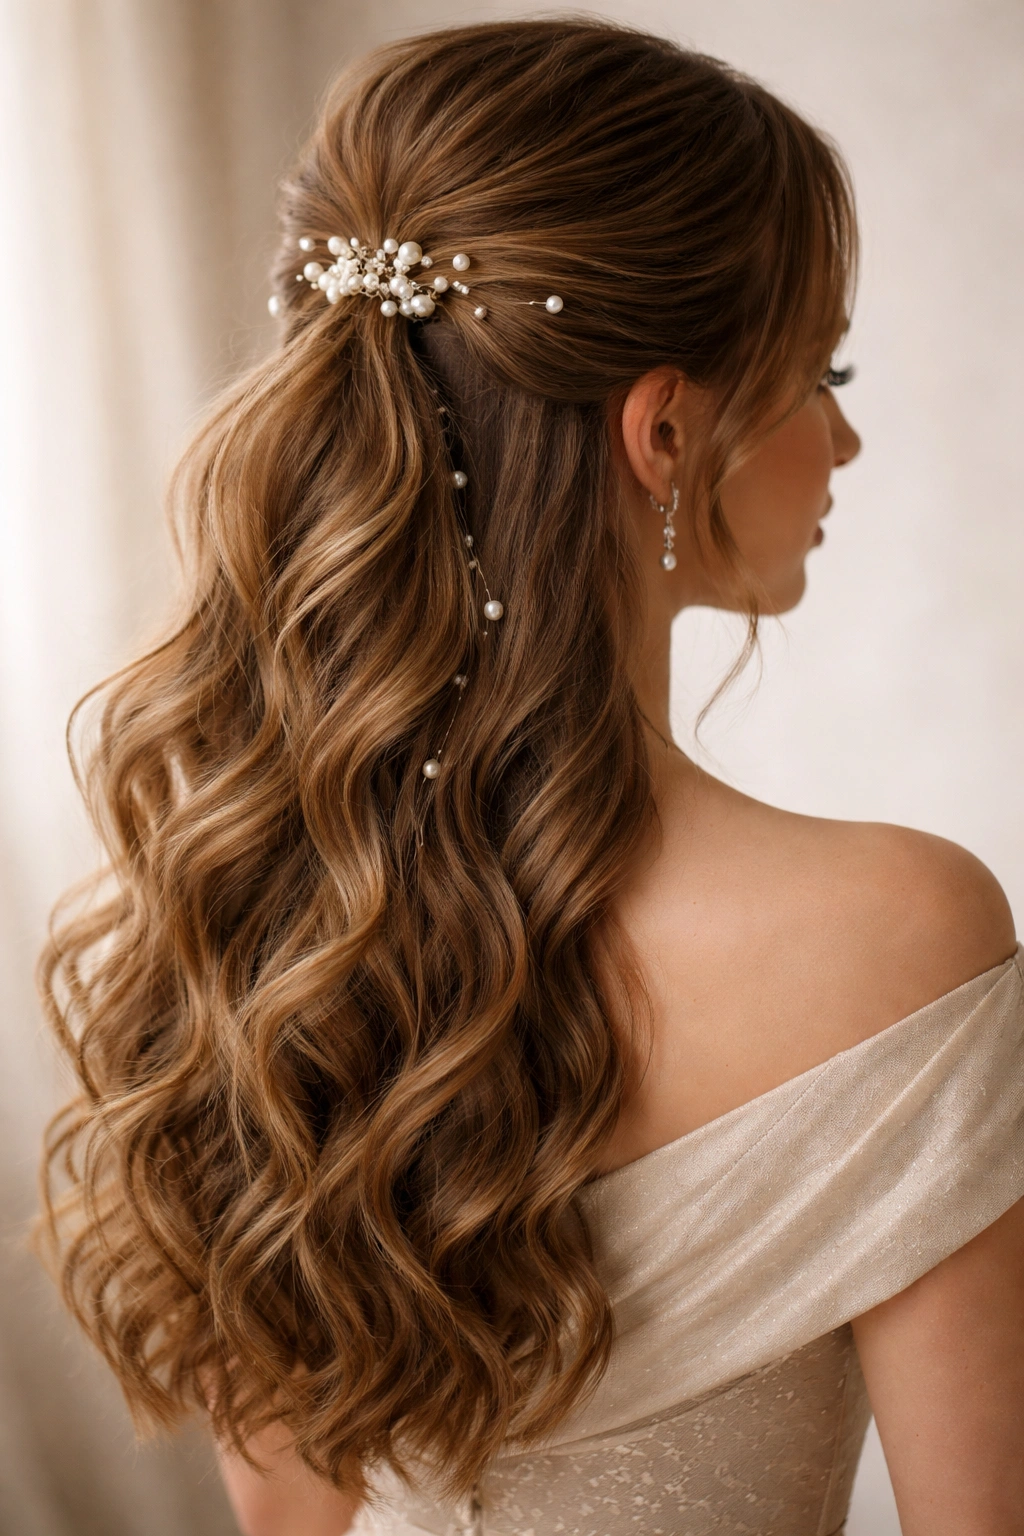
This is the half up style with serious sparkle — a classic half ponytail elevated with pearl pins, pearl clips, or a pearl hair stick woven through the base. It’s romantic, slightly formal, and works beautifully with strapless and sweetheart necklines.
What Makes It Stand Out
The pearls catch light and draw attention to your hair itself, rather than to excessive product or over-styling. For wavy hair, this approach is perfect because it lets your texture shine while adding just enough embellishment to feel special without looking overdone. You’re not trying to disguise your waves or tame them into submission — you’re celebrating them with elegant accessories.
Styling Steps
- Create a half ponytail by gathering hair from your temples, above your ears, and the crown, leaving the sides and lower back section down
- The half ponytail should sit about 2-3 inches above your nape, slightly off-center for a more interesting look
- Use a clear elastic or thin hair tie to secure it — this keeps the focus on the pearls instead of the elastic
- Pin pearl-studded bobby pins around the base of the ponytail, clustering them on one side or creating a half-circle pattern
- Gently pull some face-framing waves loose from the secured section so they can mix with the down hair
- Lightly wave the bottom section with a large-barrel curling iron if you want more defined waves, or let your natural waves do the work
- Set the whole look with a light-hold hairspray that won’t make your waves feel stiff
Worth knowing: Pearl pins come in different sizes and densities. Opt for smaller, more delicate pins rather than chunky costume pieces — they’re more sophisticated for prom and won’t feel heavy in your hair.
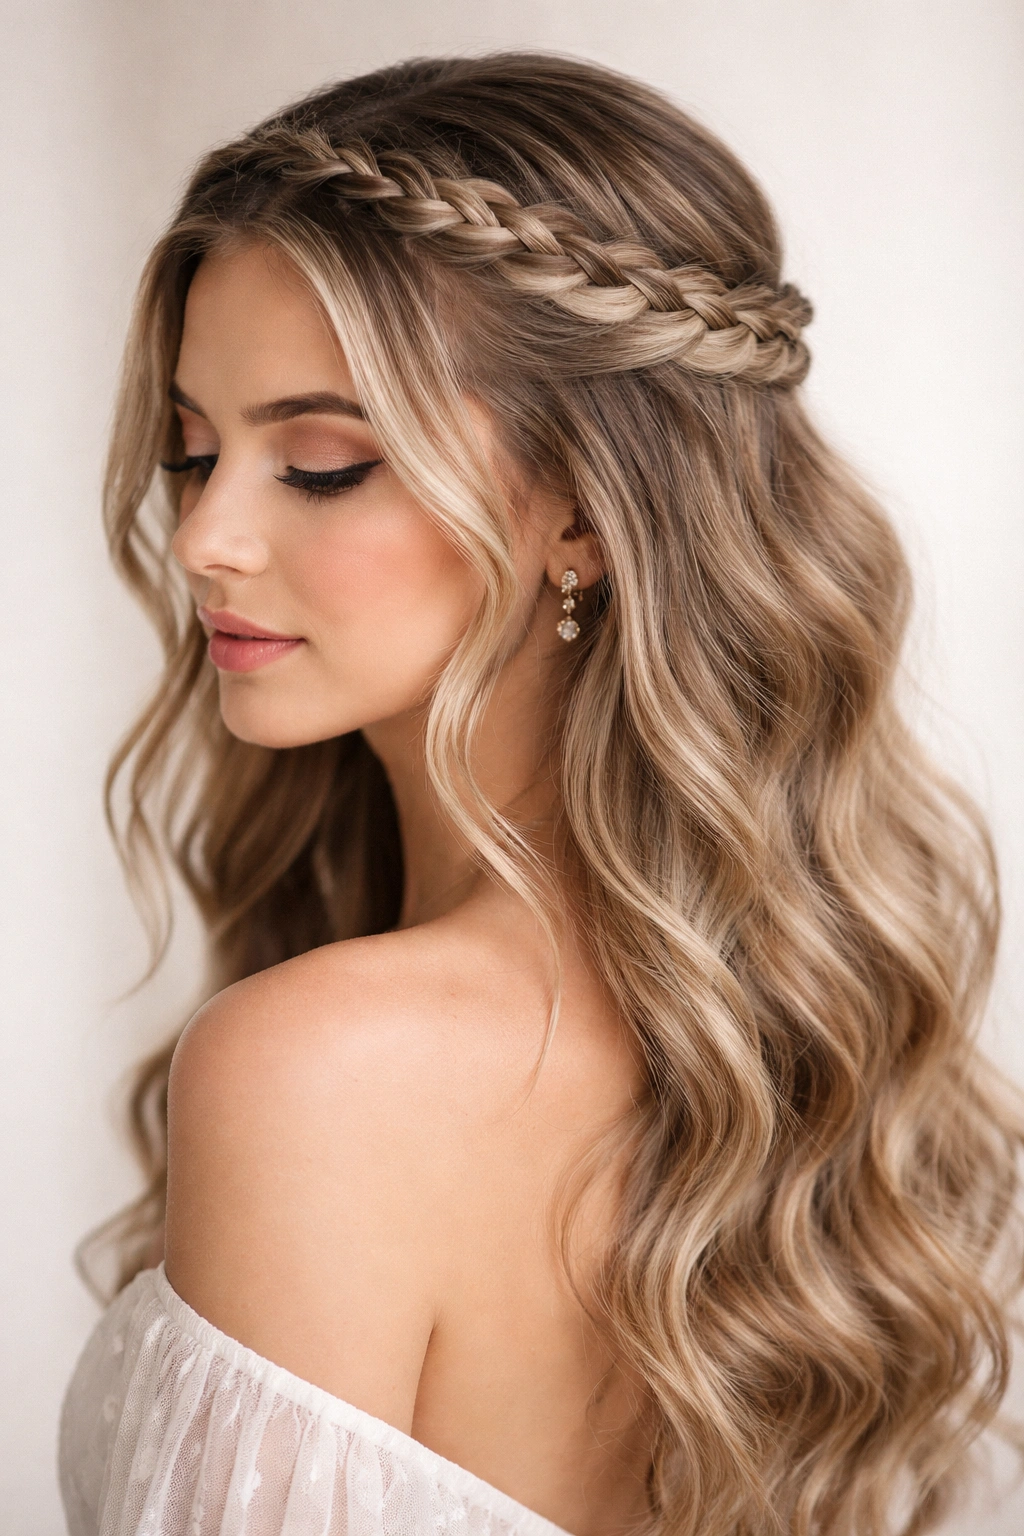
3. The Loose Braid Crown
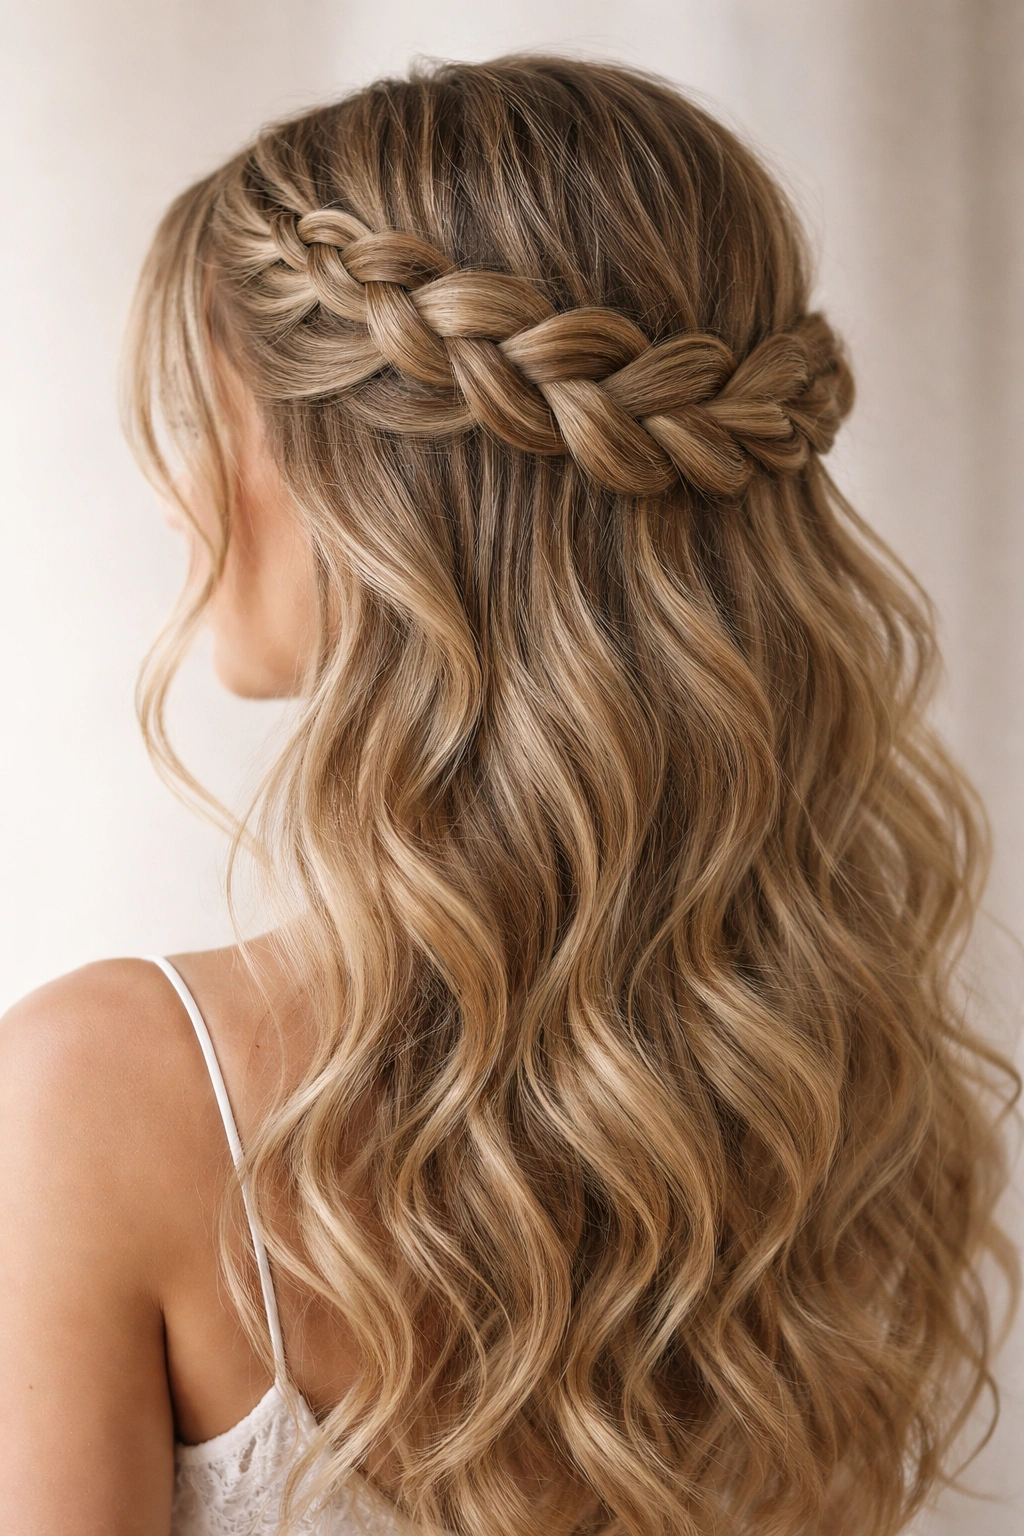
A thick, loose braid that starts above one ear, wraps around the back of your head, and ends above the opposite ear creates a soft, romantic crown effect. This style is pure elegance and feels like something from a fairytale.
Key Benefits
Braiding creates structure that keeps your half-up section secure for hours of dancing, while the loose, textured quality of the braid maintains that effortless, romantic vibe that makes half-up styles so appealing. For wavy hair, a thick braid with gently loosened loops looks more textured and intentional than a tight, perfect braid would.
How to Build It
- Section off hair from above one ear and clip the rest away
- Start the braid at your temple above one ear, braiding three-strand style but keeping the braid extremely loose and chunky
- As you braid back along the nape, occasionally pull the loops of the braid gently outward to create texture and visual interest
- Braid all the way around to above your opposite ear, creating a crown effect around the back of your head
- Secure the braid end with a clear elastic or bobby pins tucked inside the braid itself
- Release the hair you clipped away and let your waves tumble down, mixing with the end of the braid
- Very gently tug the braid loops again, creating a purposeful, undone quality
- Finish with texture spray and a light hairspray to hold the shape without stiffening your waves
Insider note: Do a Dutch braid (braiding under instead of over) rather than a standard three-strand braid. It sits up slightly higher and showcases the thickness and dimension of your wavy hair more dramatically.
4. The Side Sweep Half-Up
A modern, slightly edgy style where the top section of hair is swept dramatically to one side, secured with a sleek clip or claw, and left slightly tousled. The rest of your waves fall freely down the other side of your body, creating serious asymmetrical elegance.
What Makes It Different
This style feels more modern and less traditionally “princess” than some half-up options, which makes it perfect if your aesthetic is sophisticated and contemporary rather than romantic. The side-sweep emphasizes one side of your face and creates interesting negative space, making it naturally photogenic from certain angles.
Step-by-Step Instructions
- Brush through your waves gently to smooth them without losing the texture completely
- Take a section of hair from the crown and from one side of your head, gathering it toward the opposite side
- Sweep this section smoothly across the back of your head to the opposite side, like you’re creating a diagonal line
- Secure with a tortoiseshell claw clip, pearl clip, or sleek metal clip positioned above your ear on the side you’ve swept toward
- Leave a few face-framing waves loose on both sides so the style doesn’t feel too severe
- Use a light hairspray to keep the swept section smooth and in place, but don’t overdo it — a few pieces moving slightly adds to the modern aesthetic
- Let the rest of your waves cascade down the side of your body that has the least hair, creating that striking asymmetrical look
Pro tip: This style looks incredible with earrings because one ear is exposed. Skip the earring on the side with all the hair and go dramatic on the exposed side.
5. The Velvet Ribbon Half Ponytail
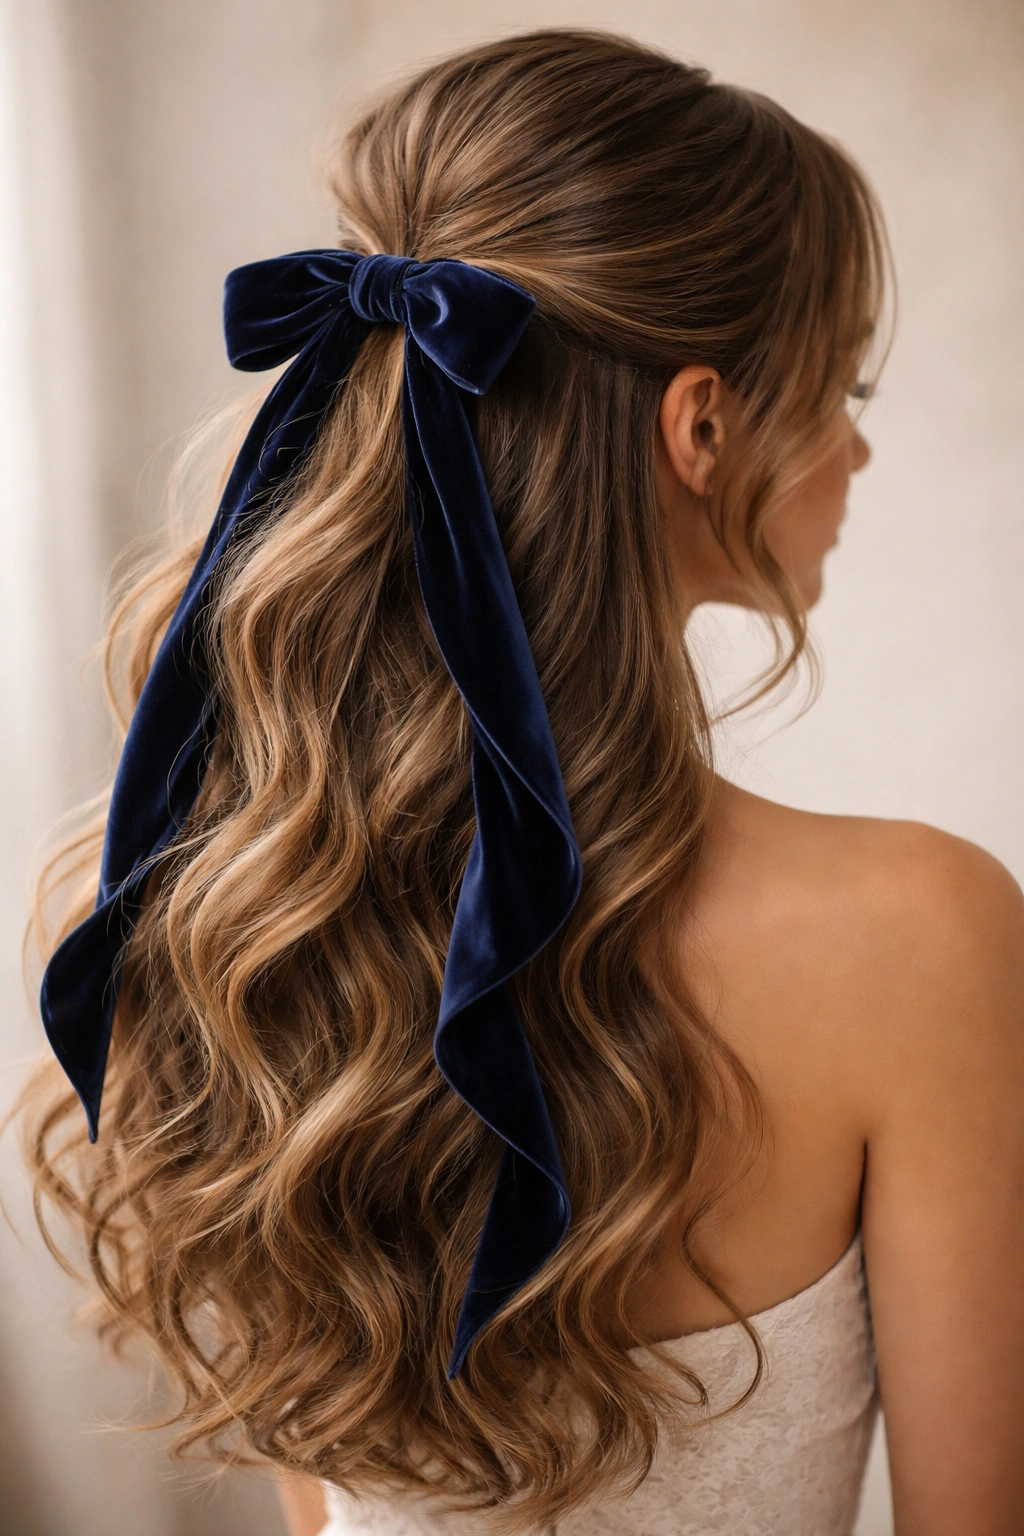
A classic half ponytail tied with a luxury velvet ribbon instead of a traditional elastic. The ribbon drapes down your back, intertwines with your waves, and adds a touch of textural sophistication that elevates the entire look.
Why It Stands Out
Velvet ribbon adds luxury and visual interest without being flashy. It catches light differently than metal accessories, creates a lovely visual line down your back, and feels incredibly soft and elegant. For wavy hair, a velvet ribbon moves with your waves rather than creating a harsh line, so it looks more romantic and less structured.
How to Create It
- Gather hair from your temples and crown into a half ponytail, positioning it about 2-3 inches above your nape
- Instead of using a traditional elastic, wrap a 24-30 inch length of 1-2 inch wide velvet ribbon around the base of your ponytail
- Tie the ribbon in a simple knot or bow, positioning it slightly off-center for a more interesting look
- Allow the ribbon tails to drape down through the ponytail section and mix with your waves
- Gently separate waves to let the ribbon weave through naturally rather than sitting on top
- If desired, you can braid the ribbon into the ponytail section or wrap it loosely around the hair for extra dimension
- Use bobby pins to secure any sections that feel loose, tucking the pins so they’re not visible
Real talk: Velvet ribbon can slip if you don’t secure it well. After tying it, add a small bobby pin through the knot on each side — the pins will be hidden by your hair and ponytail but will keep the ribbon from sliding.
6. The Halo Braid with Face-Framing Waves
A delicate braid that loops across the very top and sides of your head like a halo, creating the illusion that you’re wearing a crown. The rest of your waves fall freely, and intentional face-framing sections add softness and dimension.
Why It Works for Prom
This style is whimsical, romantic, and absolutely photograph-worthy. It works for both traditional ball gowns and more modern dress styles because the halo effect is universally flattering. For wavy hair, the halo braid creates a defined crown while your texture provides the softness that keeps it from looking too princess-y.
Styling Instructions
- Section hair with clips, leaving only the top and sides free to braid
- Start a thin, delicate three-strand braid above one ear, keeping it very loose
- Braid across the top of your head like you’re creating a halo, going from one side of your head around the back to the other side
- As you braid, gently pull the braid loops to loosen them and create texture
- Secure the braid end with bobby pins tucked inside or with a clear elastic hidden inside the braid itself
- Release the clipped hair and gently tousle your waves to add movement and softness
- Create face-framing waves by loosely curling 1-2 inch sections of hair on each side of your face with a large-barrel iron
- Let these face-framing sections blend naturally with your down waves
What to know: The halo braid needs a bit of depth to look intentional rather than thin and flimsy. Make sure you’re doing a relatively thick braid, not a tiny one — this showcases your wave texture beautifully.
7. The Twisted Half-Up with a Statement Claw Clip
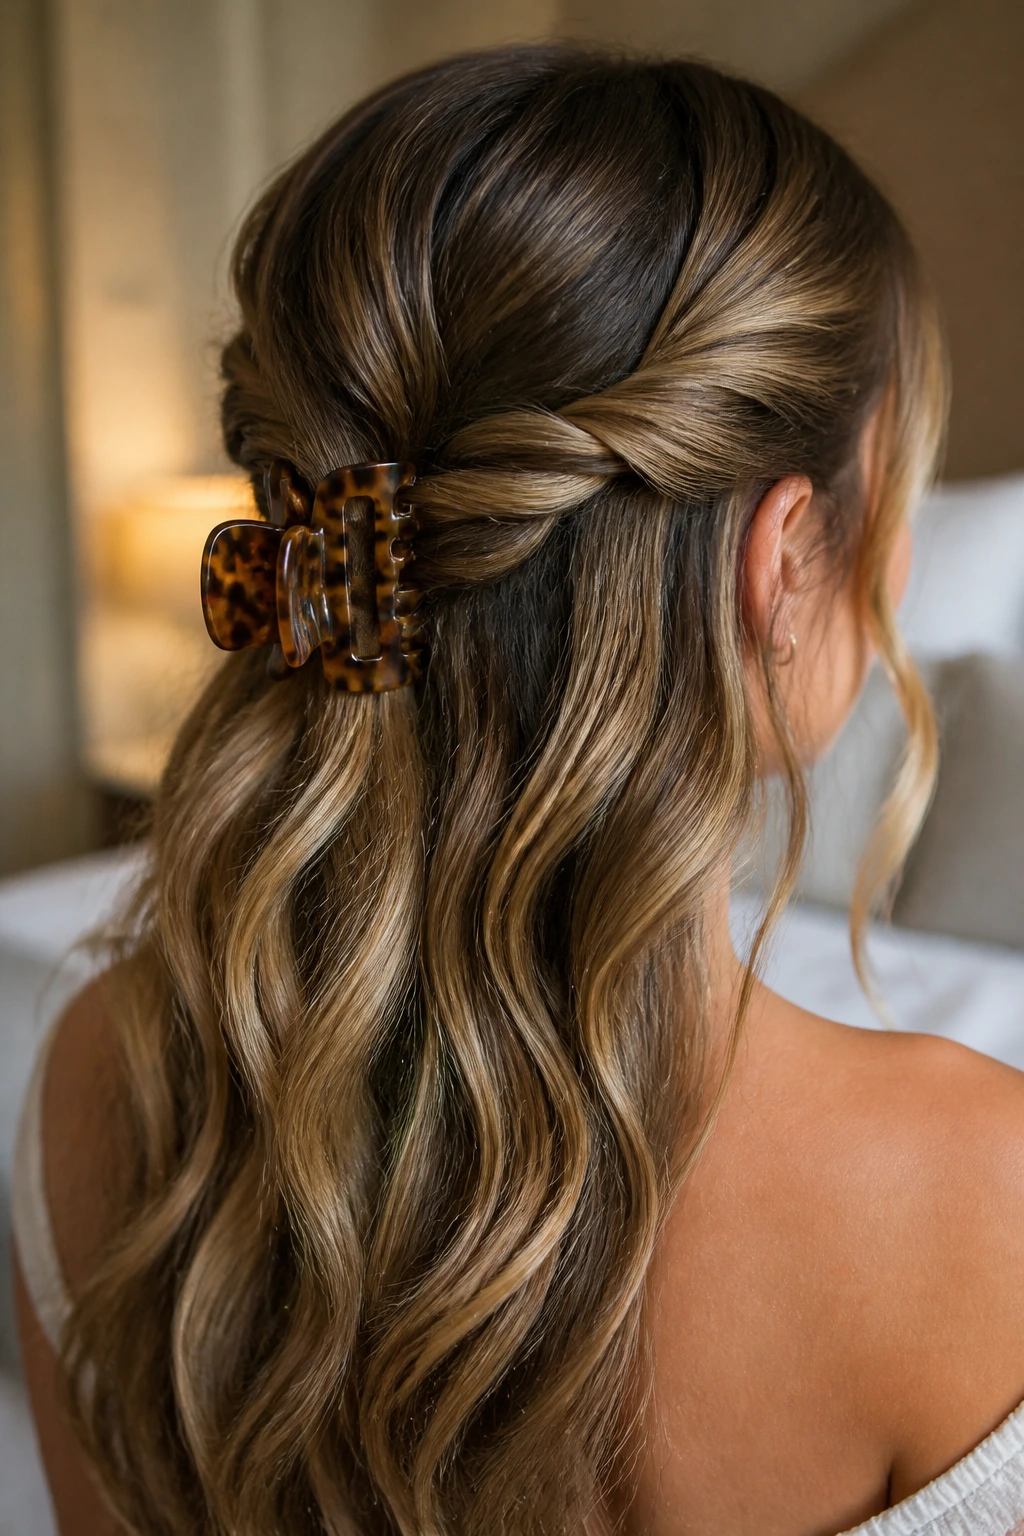
Two thick twists originating from above your ears that meet at the back of your head and are secured with a large, statement claw clip in tortoiseshell, metal, or pearl. The style is instantly recognizable and feels fashion-forward.
What Makes It Stand Out
Claw clips are having a major moment, and they’re actually perfect for holding wavy hair because the textured grip works with your natural texture rather than against it. A statement clip instantly elevates a simple half-up style into something that feels intentional and trendy without requiring extra embellishment or complexity.
How to Build It
- Section hair from above each ear, about 2.5-3 inches wide, and clip the rest away temporarily
- Twist the right section upward and toward the back of your head, keeping the twist chunky and textured
- Twist the left section upward and toward the back, matching the thickness and texture of the first twist
- Bring both twists together at the back center of your head, about 2 inches above your nape
- Rather than securing with a tiny elastic, gather both twists together and clip with your statement claw clip
- Gently tug both twists to loosen them and create that effortless, textured quality
- Release the clipped hair and flip your head to create movement and volume in the down section
- Finish with texture spray to enhance your natural waves and a light hairspray to hold the twists in place
Pro tip: Choose a claw clip color that coordinates with your dress or with your skin tone. A tortoiseshell clip works with almost everything, but metals and pearls add different vibes — think about your overall aesthetic.
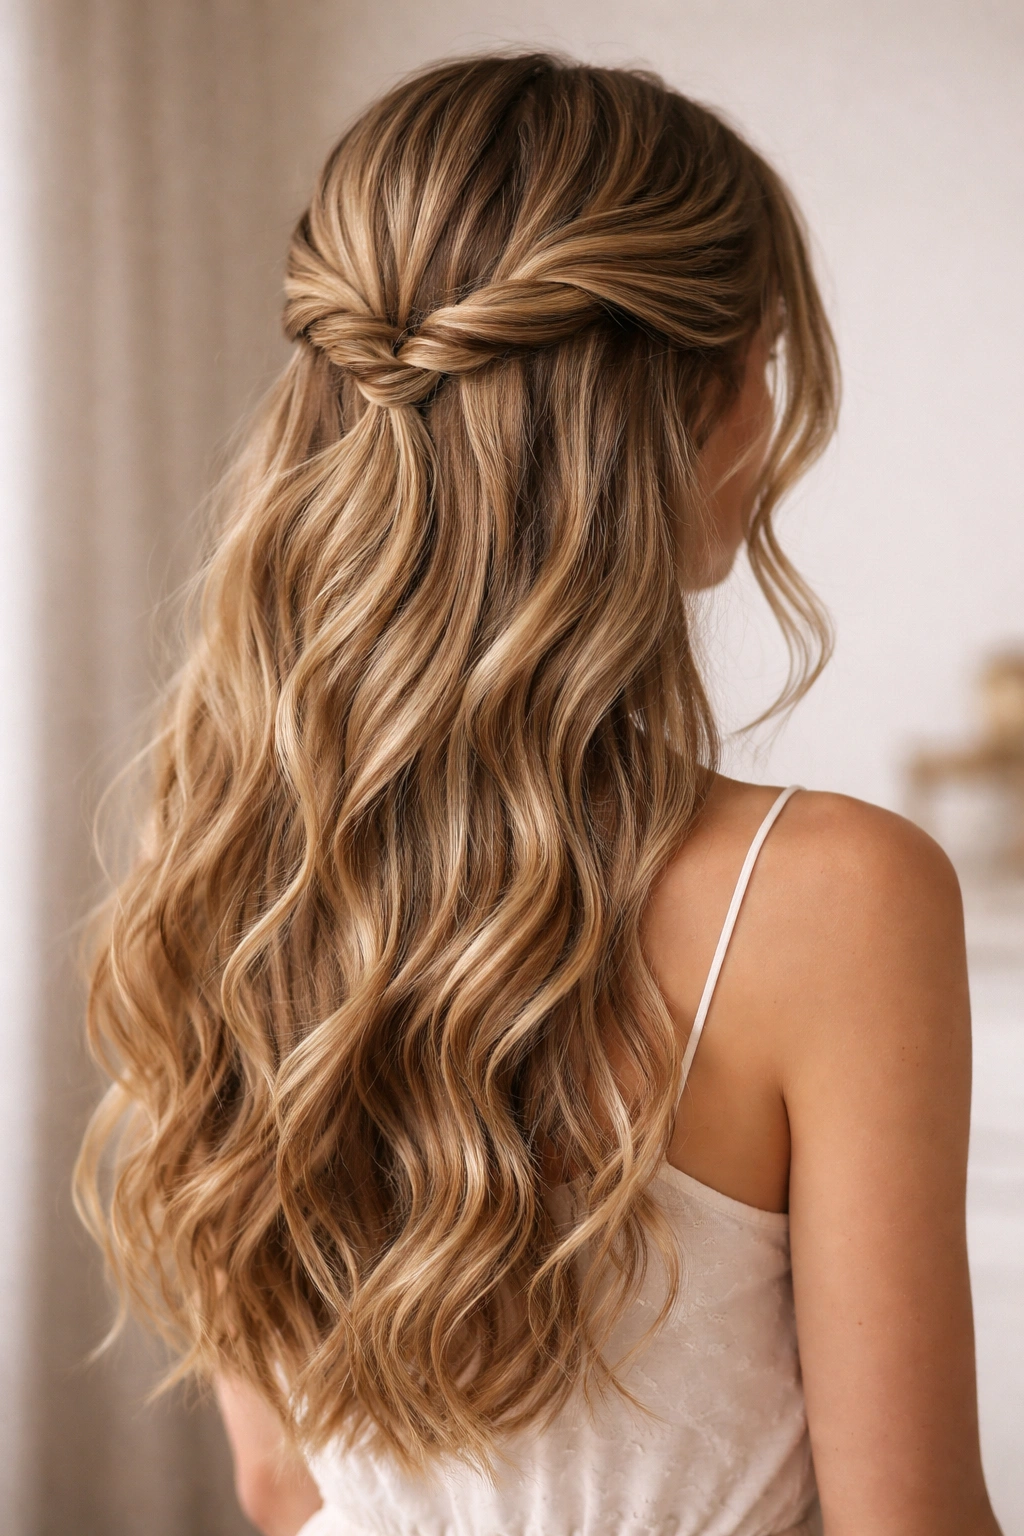
8. The Romantic Waterfall Braid Half-Up
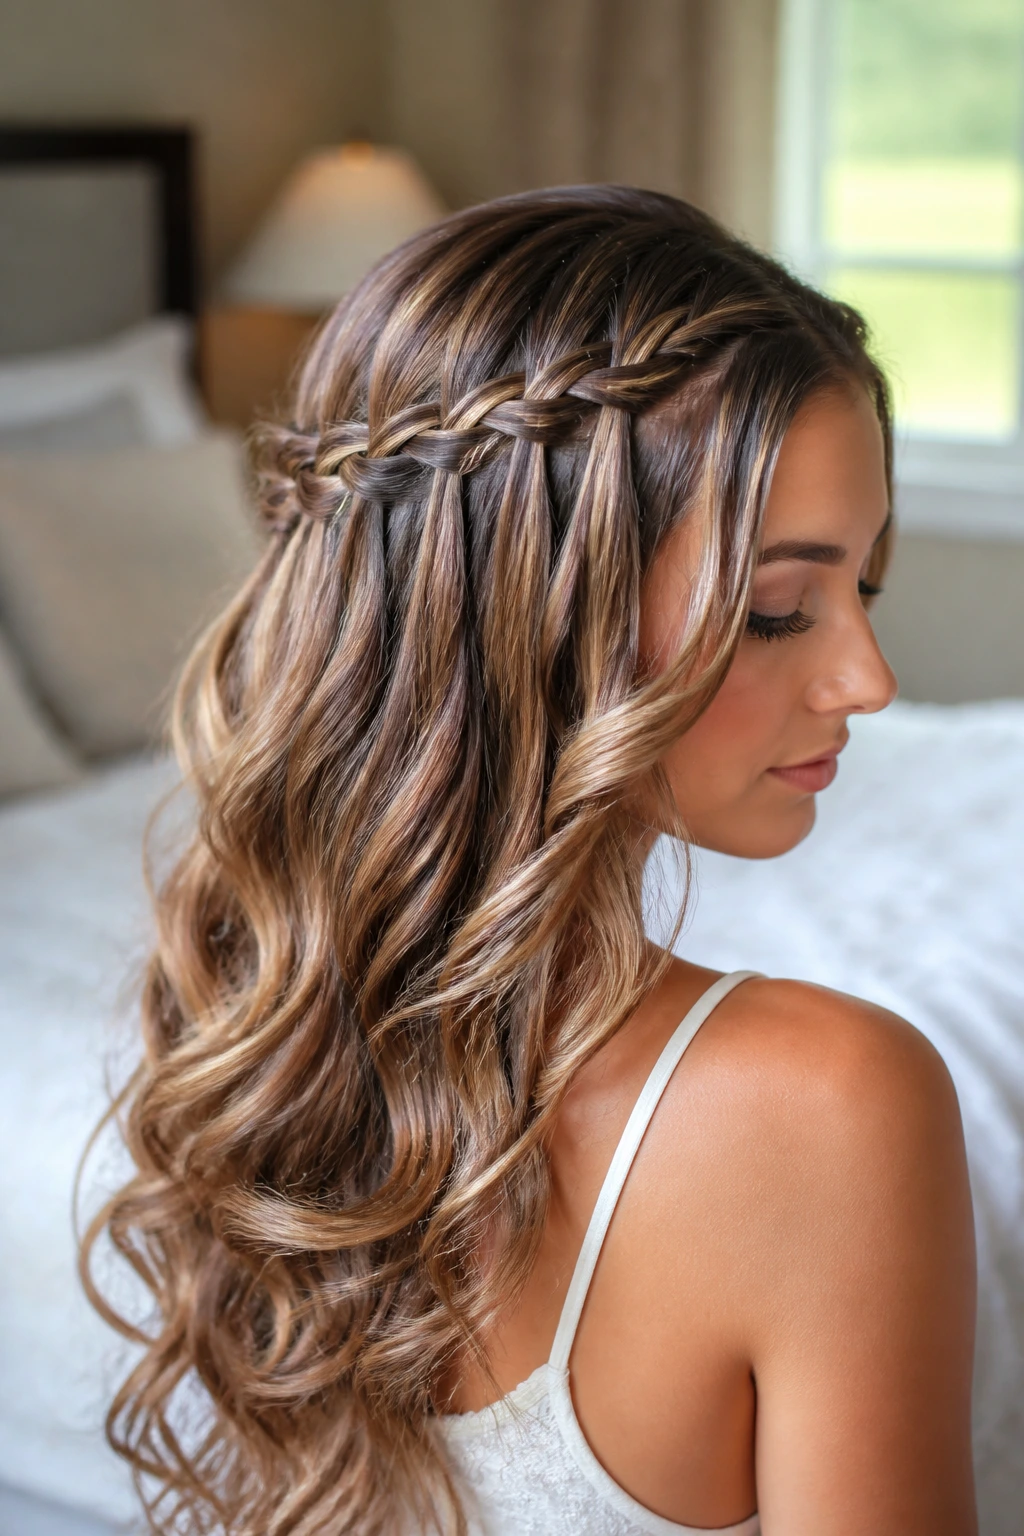
A waterfall braid that starts above one ear and flows diagonally across the back of your head, creating the impression of waves cascading down. The braid itself incorporates only the top section of hair, while strands “fall” through the braid to mix with your down waves.
Key Benefits
A waterfall braid creates the illusion of length and movement without actually pulling all your hair up. For wavy hair, the falling strands create a gorgeous mixed texture where the braid sits neatly on top and your waves flow below, creating depth and visual interest from every angle.
Step-by-Step Instructions
- Section off the top portion of your hair from above one ear and clip the rest away
- Start a standard three-strand braid above your ear
- As you braid, drop the bottom strand after every crossover, letting it fall loose to mix with the down section
- Pick up a new strand from above the braid to replace the dropped strand, continuing the pattern
- Braid diagonally across the back of your head in a waterfall pattern
- End the braid above your opposite ear and secure with bobby pins
- Release the clipped hair so the “waterfall” strands mix naturally with your down section
- Use a curling iron on the down section if desired, or let your natural waves work their magic
- Gently pull the braid loops to create texture and loosen the appearance
Insider note: Waterfall braids look most striking on thick or medium-density hair. If your hair is on the finer side, do a chunky waterfall braid with thick sections to make the effect more visible.
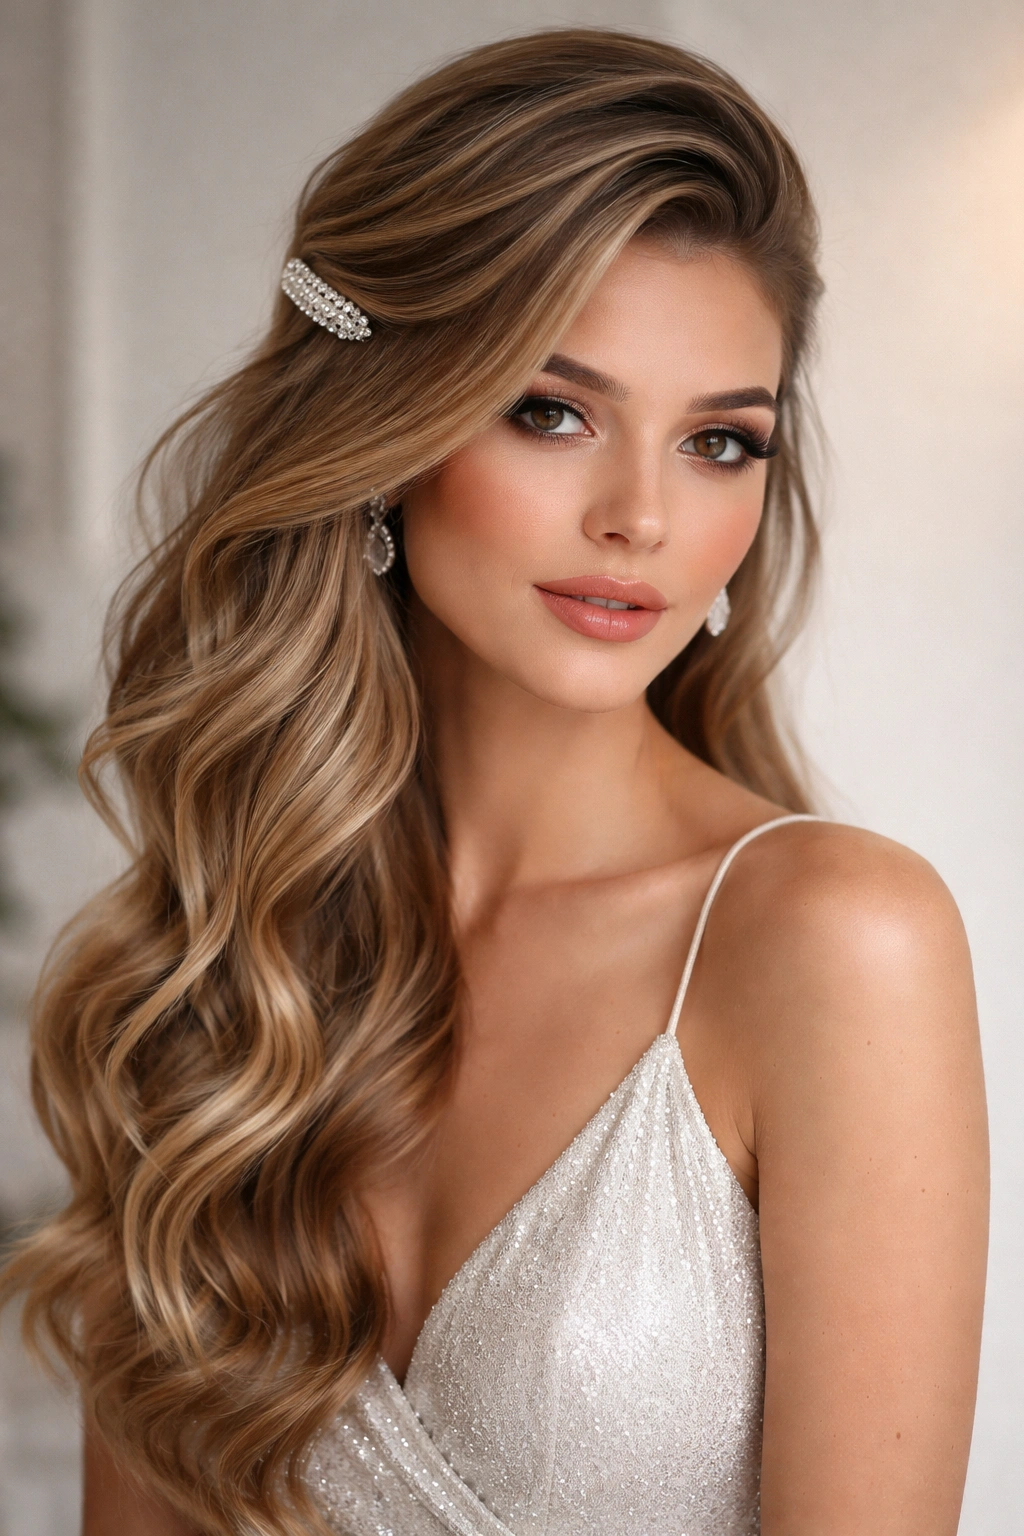
9. The Sleek Geometric Half Ponytail with Pins
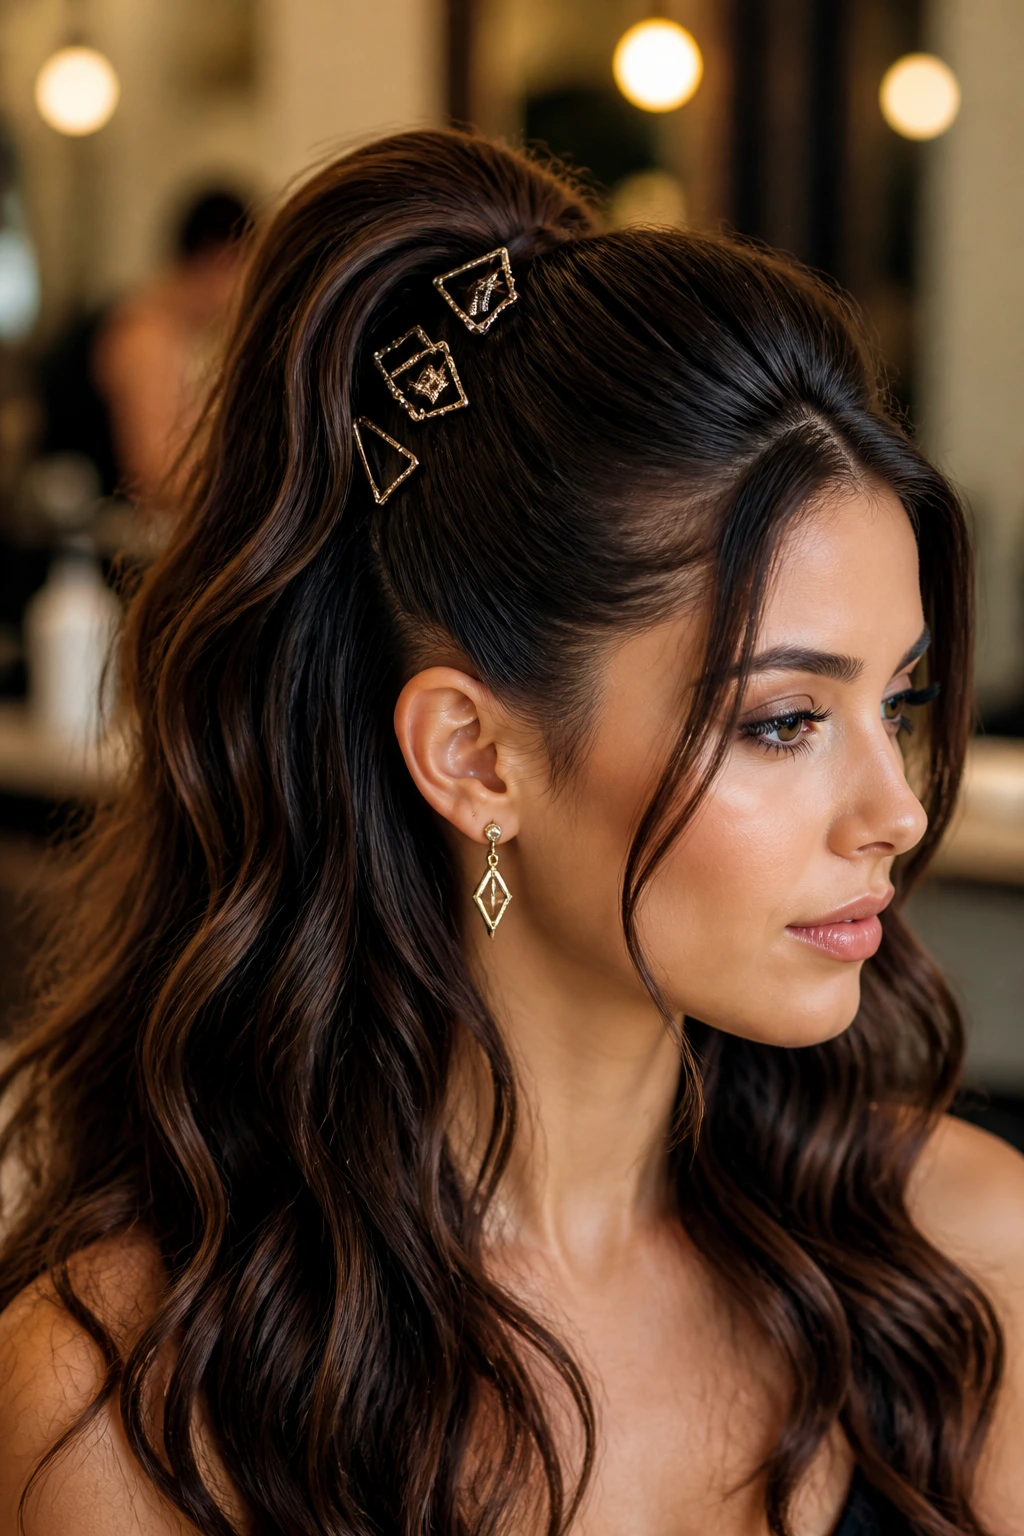
A high, smooth half ponytail positioned slightly to one side, secured with a thin elastic, and then accented with geometric-shaped bobby pins, hair sticks, or modern metal clips arranged in a deliberate pattern. It’s architectural, modern, and fashion-forward.
What Makes It Different
Instead of hiding your hair tie and accessories, this style makes them part of the design. The geometric arrangement of pins creates visual interest and shows intention. For wavy hair, you’re smoothing the top section to create contrast with the textured waves below — it’s a play between order and flow.
Styling Steps
- Apply a smoothing serum or light mousse to the top section of your hair to tame the waves slightly — not eliminate them, just calm them
- Gather the top section (from crown and temples) into a half ponytail positioned slightly off-center
- Secure with a thin, sleek elastic in a color matching your hair
- Arrange 3-5 geometric bobby pins, hair sticks, or modern metal clips in a deliberate pattern around the base of the ponytail (could be a straight line, a V-shape, or an asymmetrical scatter)
- Leave the down section with your natural waves, or enhance them with a curling iron for more defined dimension
- Use a smoothing spray on the secured section and a texture spray on the waves to create contrast between the smooth and textured sections
Worth knowing: The pin arrangement is the star of this style, so invest in pins that actually look good. Skip cheap plastic options and go for actual tortoiseshell, matte black, brushed gold, or pearl pins that photograph well.
10. The Soft Knot Half-Up
Two sections from the crown are twisted together at the back of your head into a loose, organic knot shape, then secured. It looks effortlessly romantic, like something you created in five minutes, but it actually holds beautifully through hours of wearing and dancing.
Why It Works for Wavy Hair
A knot in wavy hair looks soft, textured, and romantic rather than stiff and artificial. The knot creates a focal point at the back of your head while allowing your waves to frame your face and cascade down your back, creating a balanced, sophisticated silhouette.
How to Create It
- Take a section from one side of your crown (about 2 inches) and gather it up loosely
- Take a matching section from the other side of your crown and gather it up
- Bring both sections together at the back of your head, about 2-3 inches above your nape
- Tie them in a simple overhand knot, like you’re tying your shoes but with hair
- Pull gently on the knot loops to loosen and expand them, creating texture and softness
- Secure the knot with bobby pins, tucking them inside or beneath the knot so they’re hidden
- Release the rest of your hair so it falls naturally and frames the knot
- Very gently tug individual waves to add movement and prevent the style from looking too stiff
Pro tip: After securing the knot, flip your head backward and shake it gently. This creates volume and movement in the down section and makes the style feel intentional rather than accidental.
11. The Braided Half-Up with Ribbon Weave

A thick, loose half-up braid with a coordinating ribbon woven throughout the braid. The ribbon can match your dress color, your accessories, or your skin tone — creating a custom, elevated look that feels specially designed for your prom aesthetic.
Why It Stands Out
Ribbon-woven braids feel special and intentional without being overdone. The ribbon adds color, texture, and luxury that elevates a simple braid into something that feels like couture. For wavy hair, the thick, loose braid paired with ribbon creates visual interest that photographs beautifully.
Step-by-Step Instructions
- Gather hair from your crown and temples into a half-up section, clipping the rest away
- Secure a 24-36 inch length of ribbon to the base of this section using a small bobby pin
- Divide your hair section into three strands for braiding
- Begin a thick, loose three-strand braid, incorporating the ribbon as a fourth component (so you’re braiding hair-ribbon-hair-ribbon-hair-ribbon)
- Keep the braid very loose, pulling the loops gently as you go to create texture
- Braid down to about your lower back, then secure the braid and ribbon ends together with a clear elastic
- Release the clipped hair so it falls naturally and mixes with the braided section
- Gently pull the braid loops and ribbon to create an even more textured, romantic appearance
Real talk: Ribbon can slip if it’s not secured properly at the base. Double-check that your initial bobby pin is tight, and consider adding a second pin on the opposite side of the braid base for security.
12. The High Volume Crown Half-Up with Face-Framing

A voluminous half-up section teased at the crown for maximum height and drama, styled with 3-4 intentional face-framing waves. The style is bold, statement-making, and absolutely jaw-dropping in photos.
Key Benefits
High-volume styles photograph gorgeously and make a confident statement. For wavy hair, teasing and volume enhancement brings out the dimension and richness in your waves without looking harsh or artificial. The face-framing waves soften the high crown and prevent the style from looking severe.
How to Build It
- Apply a teasing spray to the crown area of your hair to give it grip and texture
- Gather hair from your crown and gently backcomb or tease it to create volume — you’re aiming for significant height and texture here
- Smooth the top layer of the teased section so it looks polished on top while maintaining volume underneath
- Gather this voluminous crown section plus hair from your temples into a half ponytail positioned at the crown of your head
- Secure with bobby pins and a clear elastic, nestled into the teased section so the volume stays intact
- Release the remaining hair, paying special attention to creating face-framing waves on both sides of your face
- Use a curling iron to create 2-3 loose waves on each side, positioned to frame your cheekbones and soften the overall look
- Set the volume with a light hairspray and the face-framing waves with texture spray
Insider note: Backcomb gently and only in the middle section of your hair at the crown — you don’t want backcombing near your hairline or sides, just in the area you’re going to secure.
13. The Elegant Low Half-Up with Subtle Sparkle

A low, refined half-up positioned just above your nape, secured with a delicate crystal clip, pearl pin, or thin wire adorned with small stones. The style is understated, elegant, and perfect for more formal or traditional prom aesthetics.
What Makes It Stand Out
This style is proof that you don’t need drama and volume to look stunning. Elegance comes from simplicity and intention. The low positioning keeps your neck exposed for a more mature, sophisticated look, while the subtle sparkle catches light without overwhelming your natural beauty.
Styling Instructions
- Gather hair from just above your ears into a low half-up position, about 1 inch above your nape
- Use a thin, delicate elastic to secure the ponytail
- Conceal the elastic with a delicate crystal clip, pearl hair pin, or wire embellished with small stones
- Leave a few strands loose on either side of your face to soften the look
- Keep your natural wave pattern relaxed and soft — don’t over-curl or add extra texture
- Use a smoothing serum on the half-up section and a light texture spray on the down waves
- Finish with a light hairspray to hold everything in place without creating stiffness
Worth knowing: A low half-up style relies on your accessories being beautiful rather than your styling being complex, so invest in a quality, elegant clip or pin rather than trying to make a simple elastic look fancy.
14. The Double-Twisted Side Half-Up

Two twists that originate from above opposite ears, meet at the back center of your head, then continue as one larger twist down toward your lower back. It’s dynamic, sophisticated, and creates a beautiful focal point at the back of your head.
Why It Works for Wavy Hair
Twisting creates definition and hold that works beautifully with wavy texture. For wavy hair, double twists look textured and romantic rather than slick and artificial. The way the twists combine creates visual interest that photographs from multiple angles.
How to Create It
- Take a thick section from above your right ear and twist it loosely toward the back of your head
- Take a matching section from above your left ear and twist it loosely toward the back, meeting the first twist at the back center
- Where the two twists meet, secure them together with a bobby pin
- Continue twisting all the hair from this combined base down toward your lower back, creating one larger, loose twist
- The twist can end anywhere from your mid-back to your lower back depending on your preference
- Secure the twist end with a clear elastic and bobby pins
- Very gently tug the entire twist to loosen it and create that effortless quality
- Let the remaining waves frame your face and fall naturally on either side
Pro tip: This style can feel off-balance if the two starting twists aren’t exactly the same size and tension. Spend time making sure they’re symmetrical before they meet — this creates a polished final look.
15. The Romantic Cascading Waves with Pearl Crown
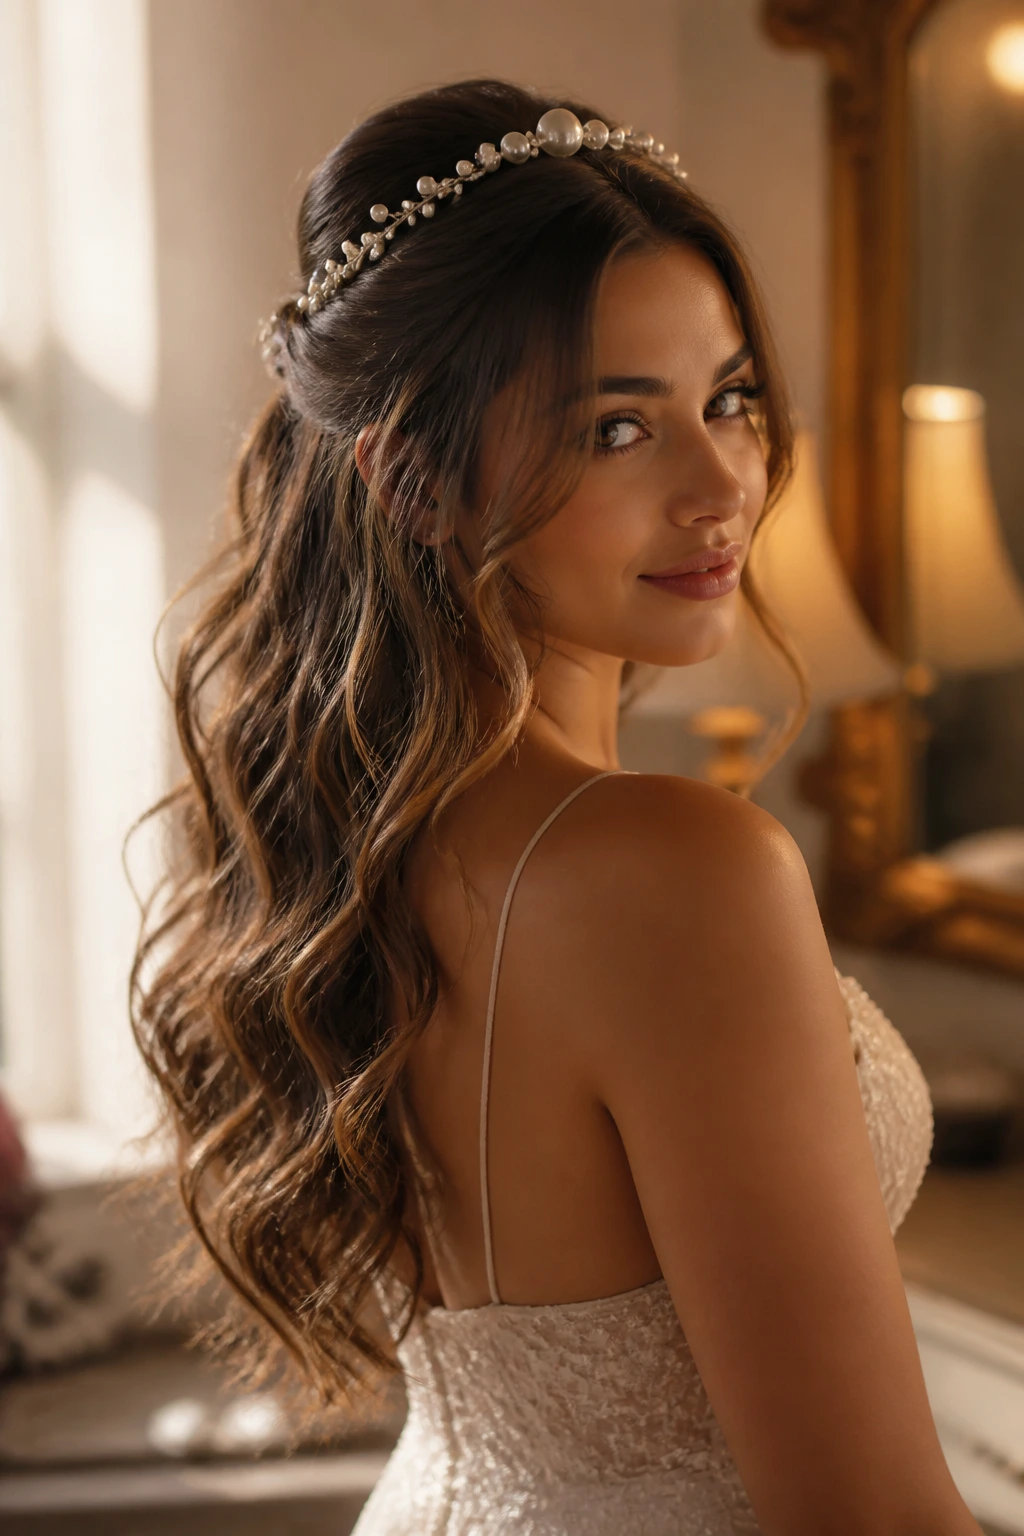
A simple, understated half-up with the focus entirely on your cascading waves, enhanced and shaped with a curling iron, and adorned with a delicate crown of pearl pins or a pearl hair comb. The style celebrates your wave texture as the star rather than burying it under braids or twists.
Why It Stands Out
Sometimes the most elegant style is the simplest one. This approach honors the beauty of your natural waves rather than attempting to transform them into something else. For wavy hair, emphasizing what you already have through skillful styling and subtle accessories is often more striking than creating an overly constructed updo.
Step-by-Step Instructions
- Take a light section from your crown and temples — just enough to create definition, not a heavy half-up
- Secure this light section loosely with a clear elastic or pearl clip, positioning it at the crown of your head
- Release the remaining hair, which should be predominantly waves falling down
- Using a large-barrel curling iron, enhance and shape your natural waves by curling sections away from your face on both sides
- Create loose, flowing waves rather than tight curls — aim for movement and romance
- Gently brush or finger-comb the curls to soften them into waves
- Arrange a delicate crown of pearl pins across the back of your head, or place a pearl hair comb just behind where your half-up section is secured
- Use a flexible hold hairspray that allows movement rather than locking everything in place
- The goal is for your waves to look effortlessly beautiful, not stiffly styled
Real talk: This style works best if you have naturally wavy hair or you’re willing to spend 20-30 minutes creating beautiful waves before securing the small half-up section. The waves are the entire point, so don’t skip this step.
Final Thoughts
The beauty of half up half down styles for wavy hair is that they work because they embrace your texture instead of fighting against it. Your waves are the texture foundation that makes every style more interesting, more romantic, and more visually striking than these same styles would be on straight hair. The key to choosing your prom style is thinking about which aesthetic feels most authentically you — are you drawn to romantic and soft, modern and sleek, statement-making and bold, or elegant and understated?
Once you’ve chosen your style, the technical details matter more than anything. Securing your hair properly with bobby pins positioned strategically rather than just hoping an elastic will hold everything is the difference between a style that looks great for four hours and one that looks great for twelve. Don’t skip the texture spray in favor of traditional hairspray — texture spray enhances your wave pattern and holds it without stiffness. And finally, remember that the small details create the biggest impact. A perfect delicate comb, a quality ribbon, real pearl pins, or an elegant clip can transform a simple half-up style into something that feels custom-designed for your prom night.