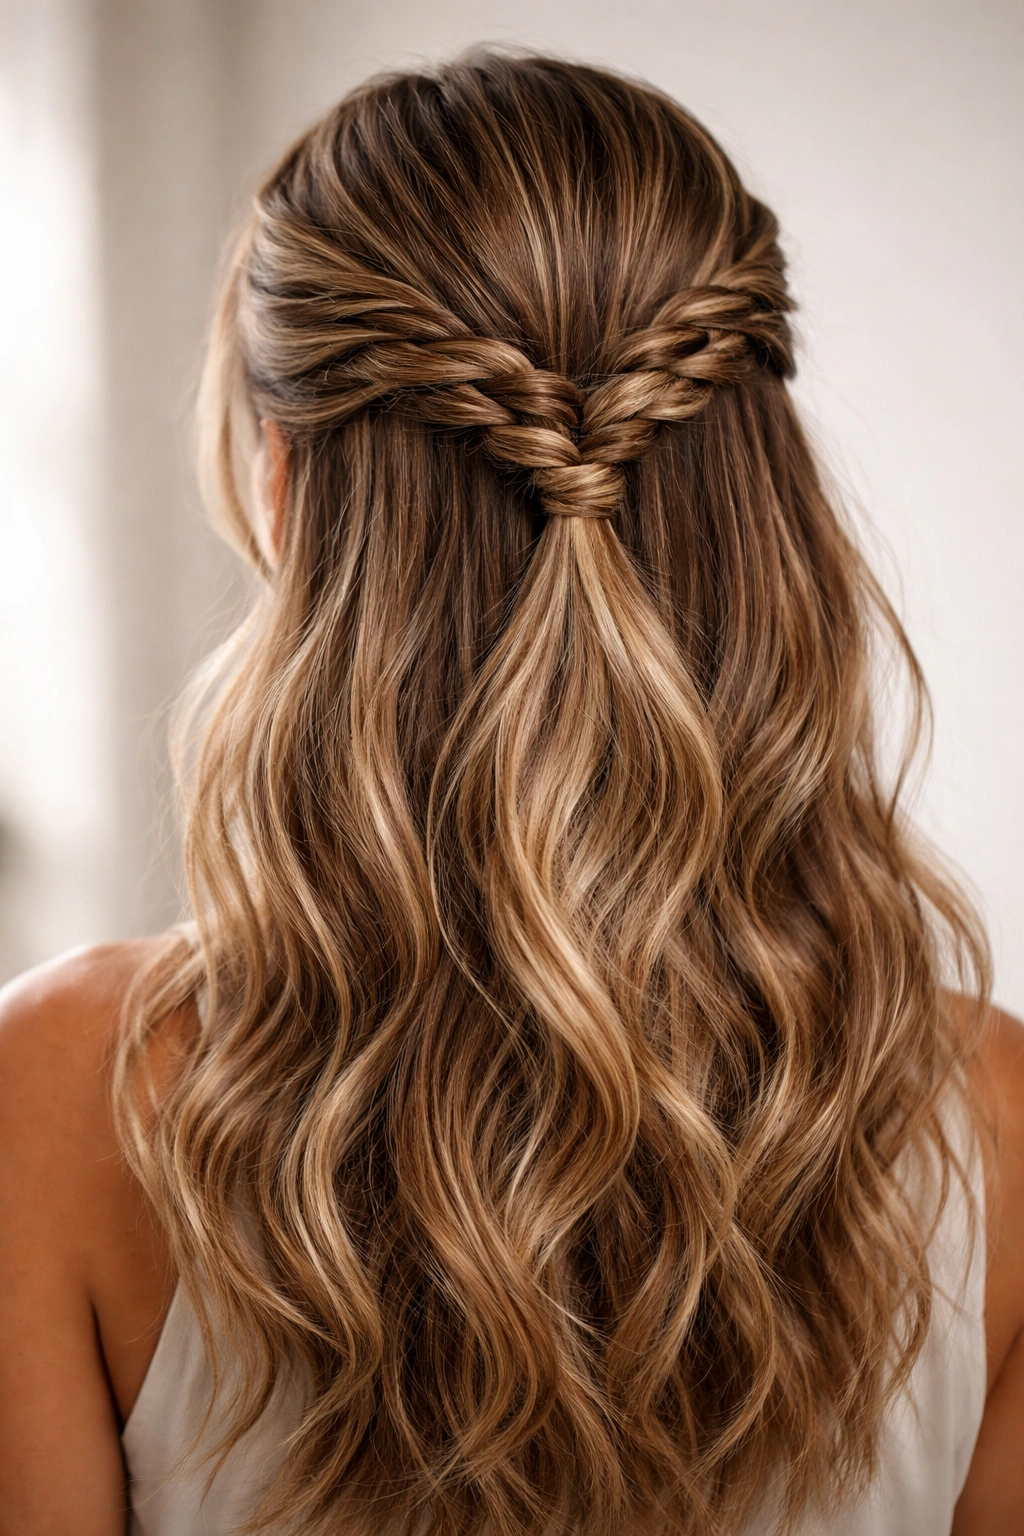
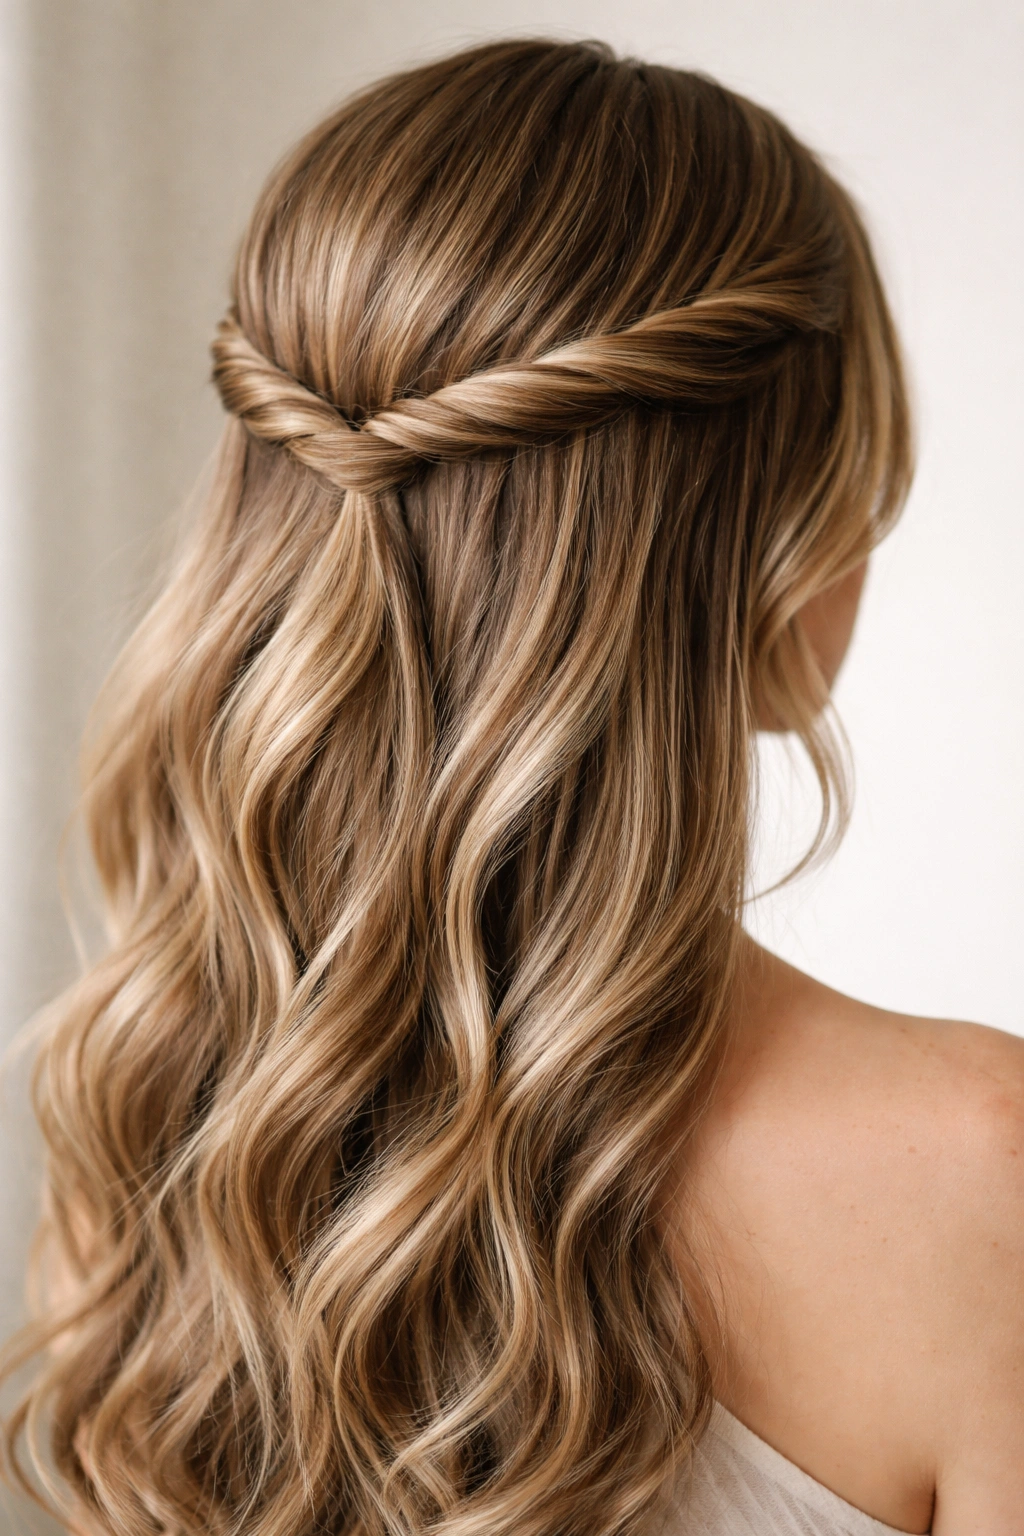
The half up half down hairstyle has earned its place as a true wardrobe essential—it’s flattering, approachable, and works for nearly every hair type and occasion. What makes it even better is that twisting elements into this classic look takes it from simple to sophisticated without requiring an arsenal of styling tools or hours in front of the mirror. Whether you’re rushing out the door before work or getting ready for something special, half up half down twist styles offer that perfect balance between polished and effortless.
The beauty of adding twists to a half up half down style lies in the texture and visual interest they create. Instead of a plain half-up ponytail that can read as a bit basic, twists catch the light, add dimension, and show that you’ve put genuine thought into your appearance. They also happen to be incredibly forgiving—slight imperfections in your twists actually add to the romantic, undone vibe rather than detracting from it. The best part? Most of these styles take under ten minutes to execute, even if you’re not particularly skilled at styling.
This guide walks through twelve distinct twist variations you can recreate today, each one detailed enough that you’ll understand exactly how the twists work and where they sit. You’ll discover styles that flatter different face shapes, suit various hair lengths, and work for everything from casual weekends to more formal events. Whether your hair is fine and straight, thick and curly, or somewhere in between, there’s a twist style here that will work beautifully for you.
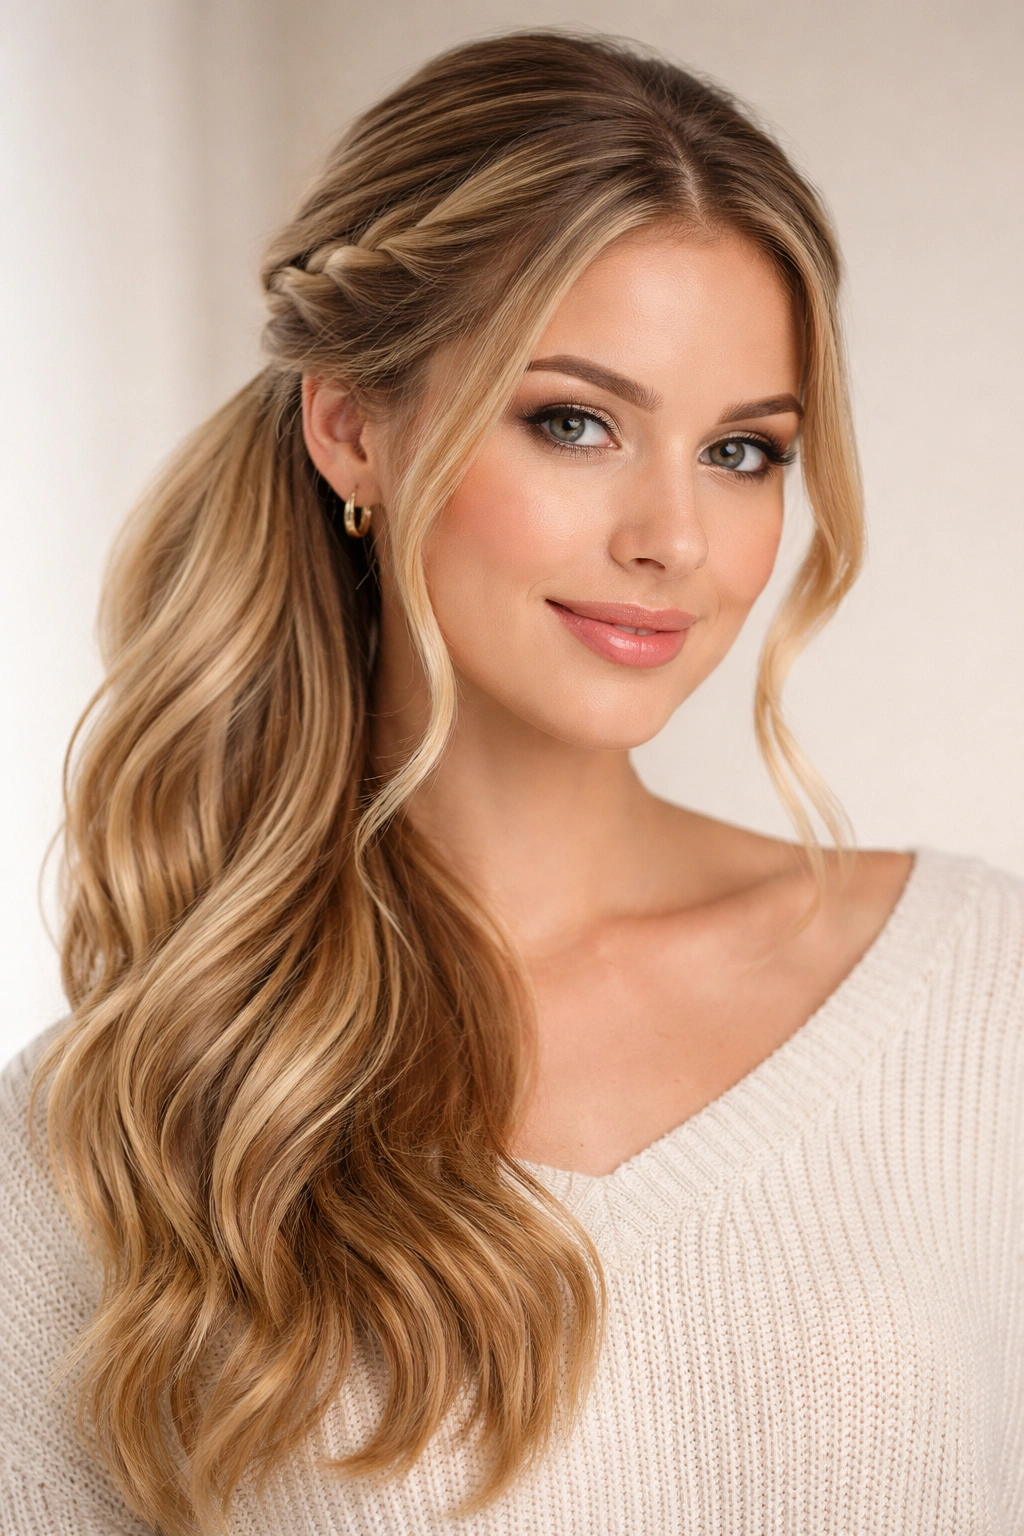
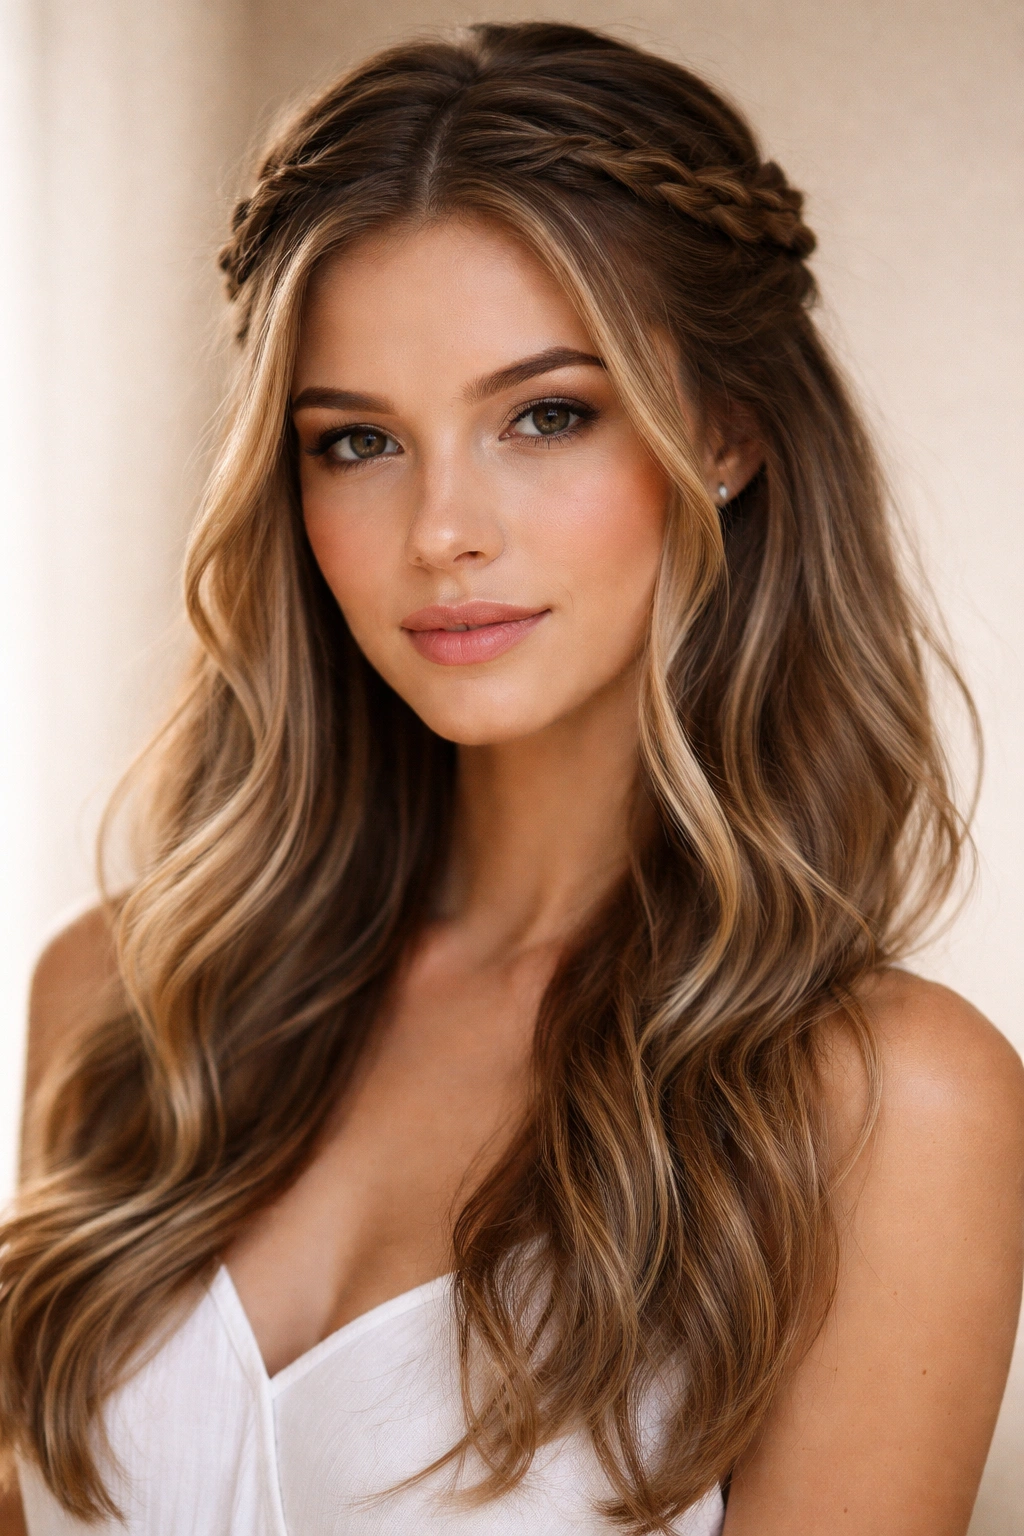
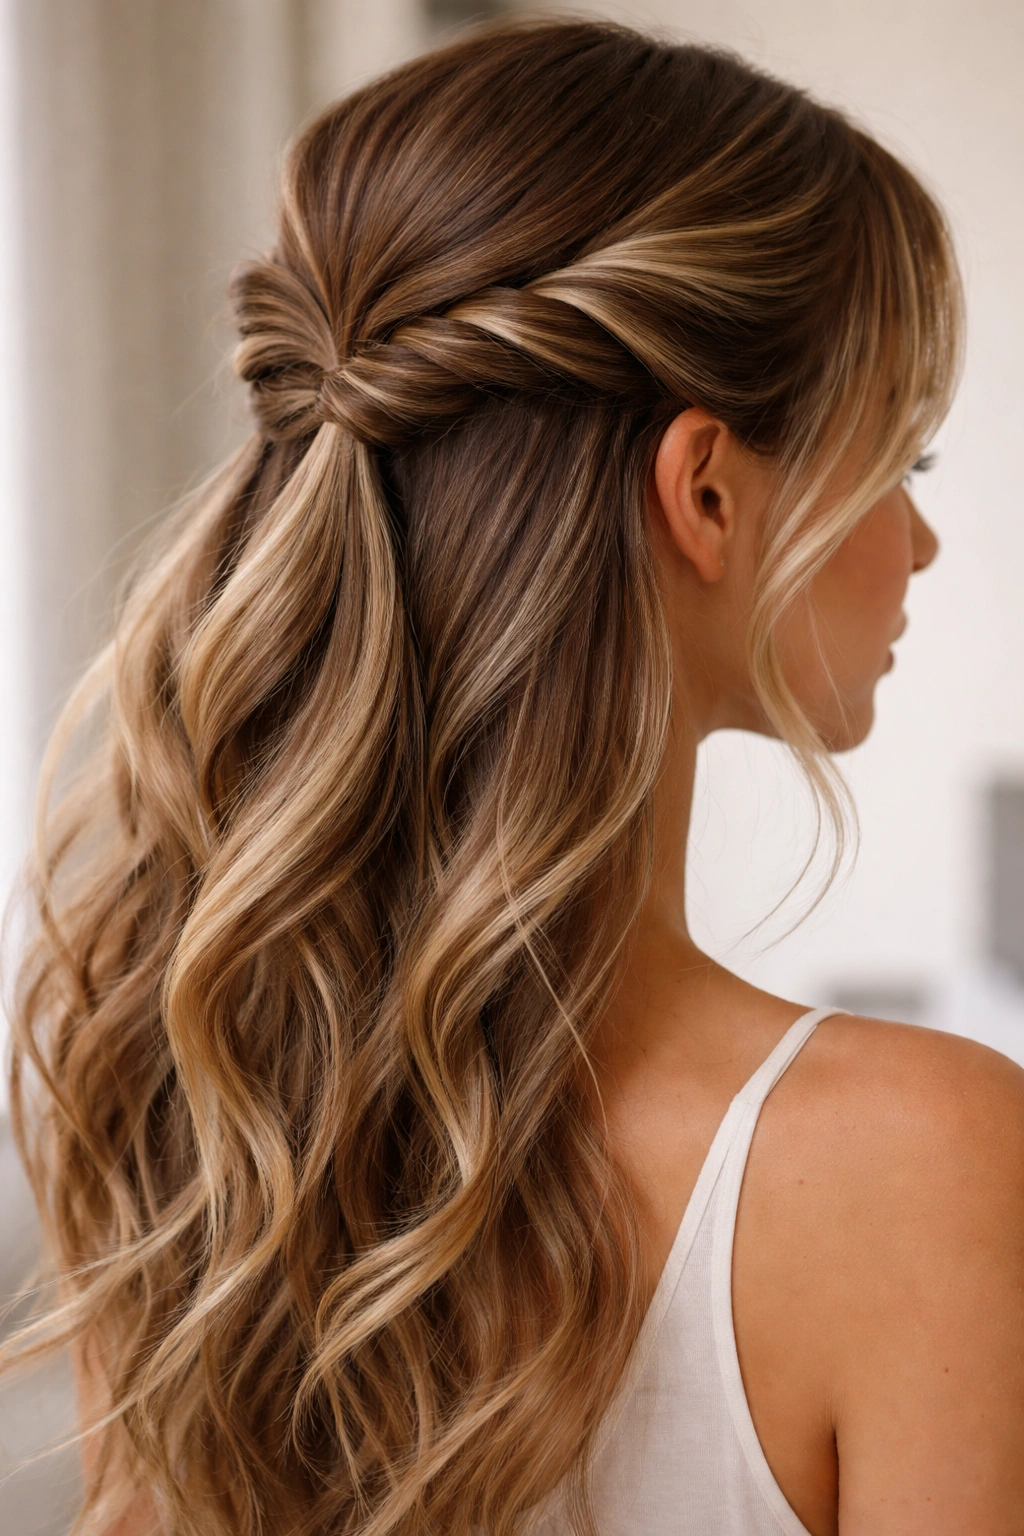
1. The Wrapped Crown Twist
This style creates the illusion of a crown by wrapping a twisted section entirely around the back of your head. The effect is romantic and polished—it looks far more complicated than it actually is to create. Start by taking a one-inch section of hair from one side of your head near your temple, twisting it tightly as you work backward toward the back of your head.
How to Create the Wrapped Crown
The key to this style is tension and consistency. Keep your twist tight and even as you twist, maintaining a section that’s roughly the same thickness throughout. As you twist, gradually add small amounts of hair from the surrounding area to make your twisted section thicker and more substantial. By the time you reach the back of your head, you should have a twine-like strand that’s roughly as thick as a pencil. Wrap this twisted section across the back of your head toward the opposite ear, securing it with bobby pins as you go to ensure it stays in place.
Why This Style Works Best
- Creates instant elegance without needing a full updo
- Secures easily and stays put throughout an entire day
- Photographs beautifully from all angles
- Works equally well with straight hair and textured curls
2. The Double-Twist Side Pony
Two twists instead of one instantly amplifies the visual impact while maintaining simplicity. This style gathers your hair into a half-up ponytail, but the twists frame and secure it in a way that feels intentional and sophisticated. The dual twists also provide extra grip, so your ponytail stays exactly where you put it rather than loosening throughout the day.
Building This Two-Twist Look
Divide the hair you plan to pull back into half—you’ll create one twist on either side of your head. Take a one-inch section from the left side near your ear, twist it back toward the center of your head, and secure it temporarily with a small clip. Repeat on the right side, creating a matching twist. Once both twists are complete, gather all your half-up hair into a ponytail at the crown, making sure the twists sit on top of or slightly in front of the elastic. This arrangement makes the twists more visible and prominent.
Best for Which Hair Types
- Works beautifully on straight, smooth hair where the twist definition is clearly visible
- Also flatters textured hair where the twist catches light and adds shimmer
- Ideal for medium and longer hair lengths; on very short hair, the ponytail sits too high
3. The Spiral Twist Half-Up
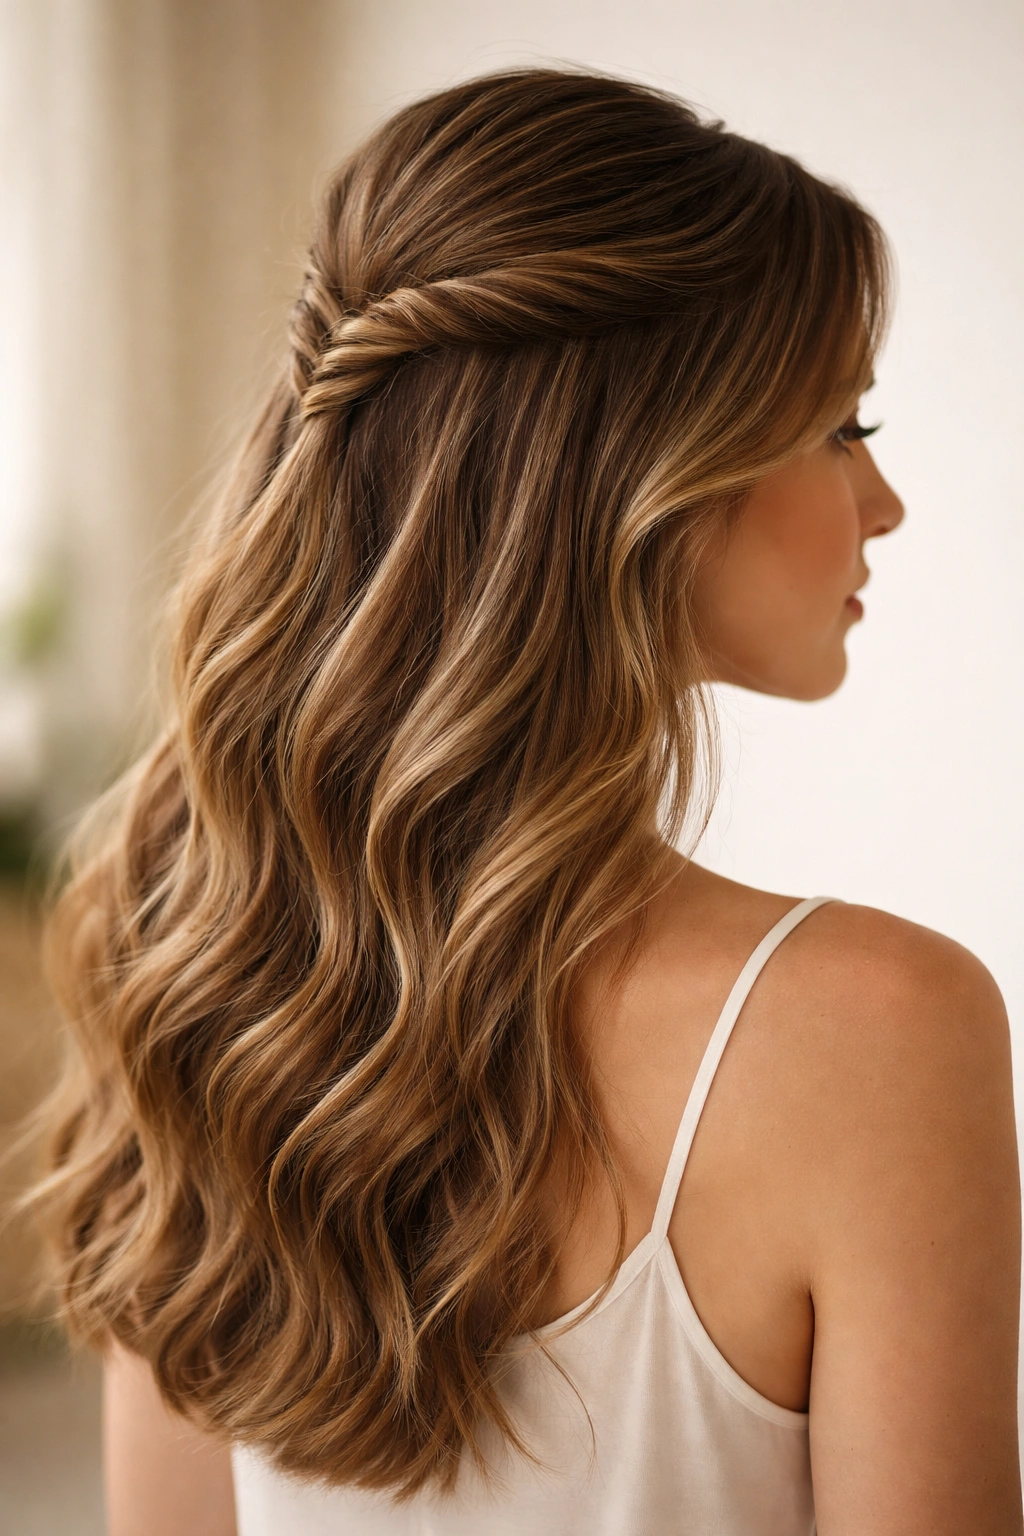
Instead of a single straight twist, create a spiraling effect that curves gently as you work back toward the crown. This adds movement and visual intrigue—the spiral catches light differently depending on the angle and creates the impression of texture even if your hair is perfectly straight. The spiral also works beautifully as a container if you have flyaways or baby hairs that tend to escape other styles.
Executing the Perfect Spiral
Begin at one temple with a one-inch section of hair and twist it, but instead of twisting straight back, angle it slightly as you twist—aim for a gentle curve that follows the natural line from your temple toward the back of your crown. Continue twisting as you gradually angle the section backward and slightly inward. The twist itself should complete a gentle spiral pattern by the time you reach the back. Secure it with bobby pins matched to your hair color so they’re less visible, and if you want extra security, a tiny dab of gel or mousse on your fingers before pinning adds grip.
The Visual Effect
- Creates the appearance of a more intricate style than the effort required
- The spiral motion makes even thin hair appear fuller
- Complements soft, romantic makeup and clothing
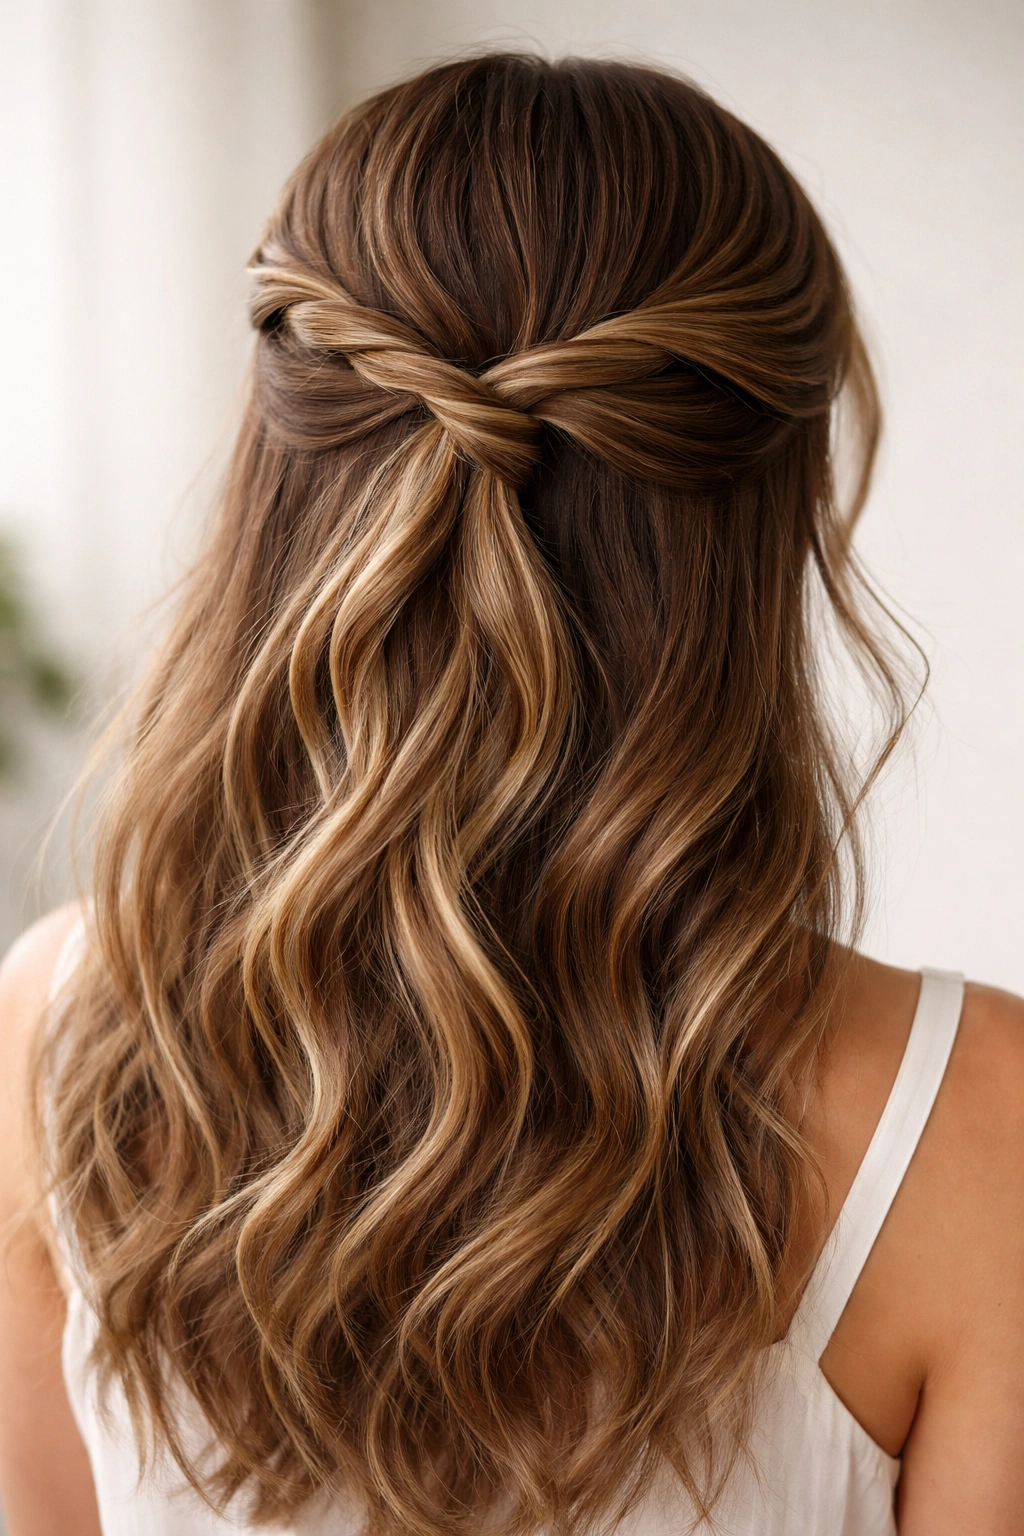
4. The Loose Infinity Twist
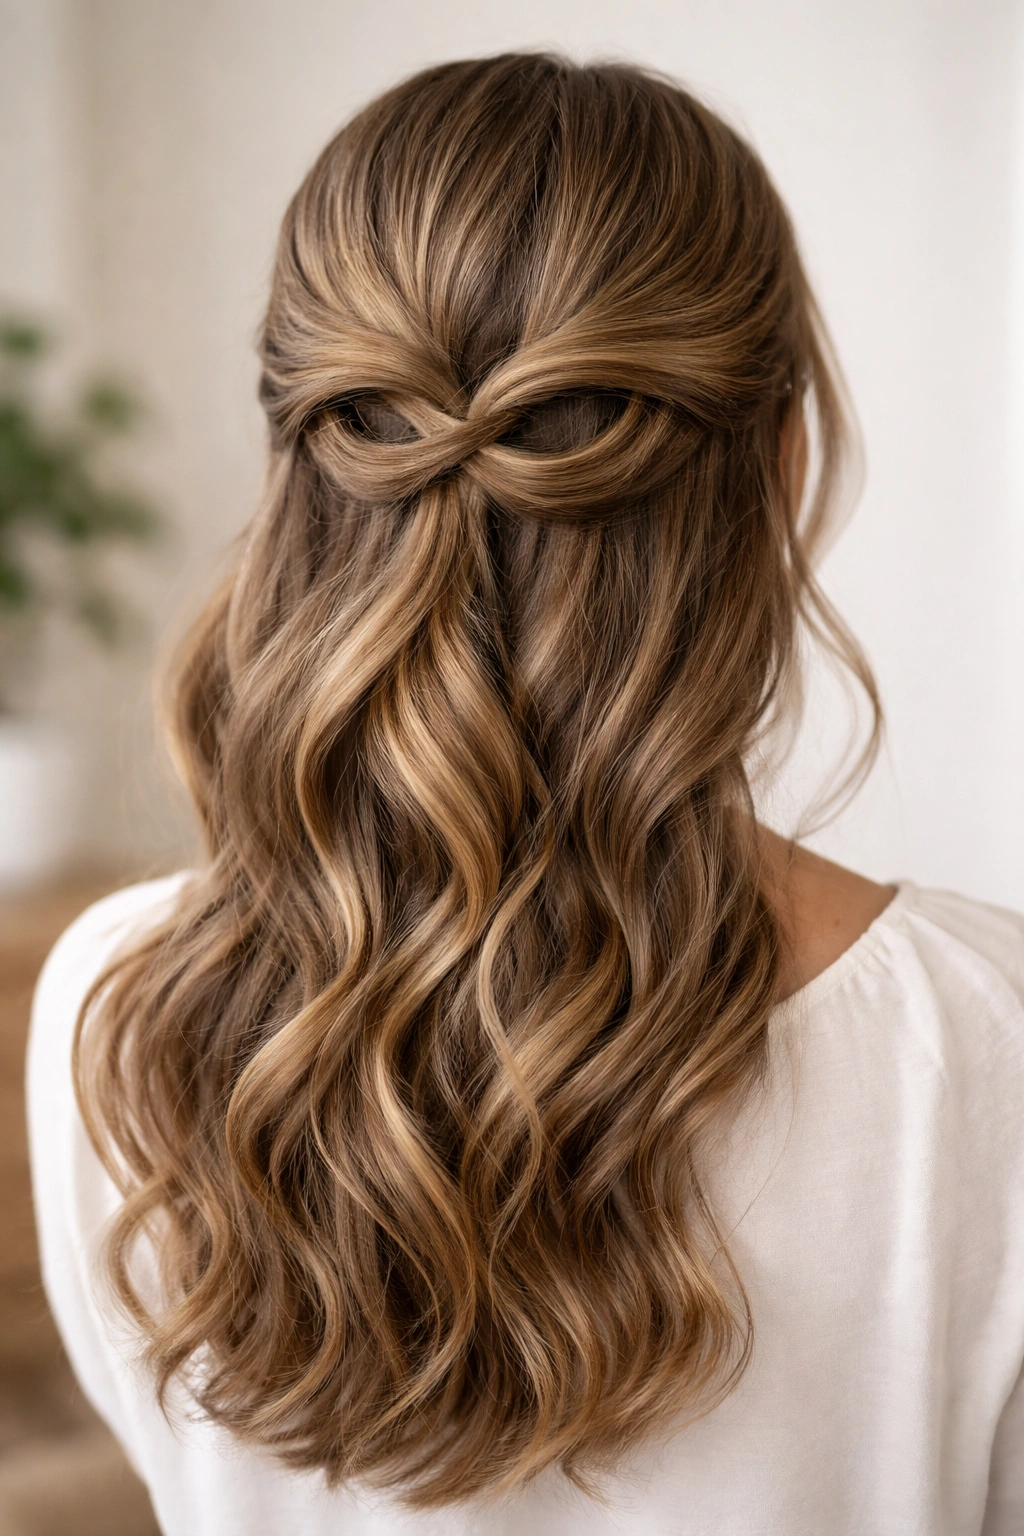
This style takes two twists and loops them to create an infinity symbol (or figure-eight) shape at the back of your head. The looping effect is entirely visual—what you’re actually doing is simpler than it looks, but the result feels like genuine artistry. This style reads as formal enough for special occasions but doesn’t require any backcombing or teasing to achieve.
Creating the Figure-Eight Effect
Create your first twist on the left side, working from near your ear toward the back center of your head. Rather than securing it at the crown, loop it slightly to one side and pin it there. Now create your second twist on the right side, and loop it in the opposite direction so the two twists create mirror-image loops. Where the two twists overlap or pass near each other in the middle, they form the visual impression of an infinity sign. Use bobby pins to secure each loop individually, and a light hairspray applied after pinning ensures the twists hold their shape.
When to Wear This Style
- Perfect for weddings, proms, or date nights
- Sophisticated without requiring an entire updo
- The looping keeps hair off your face while maintaining length and movement
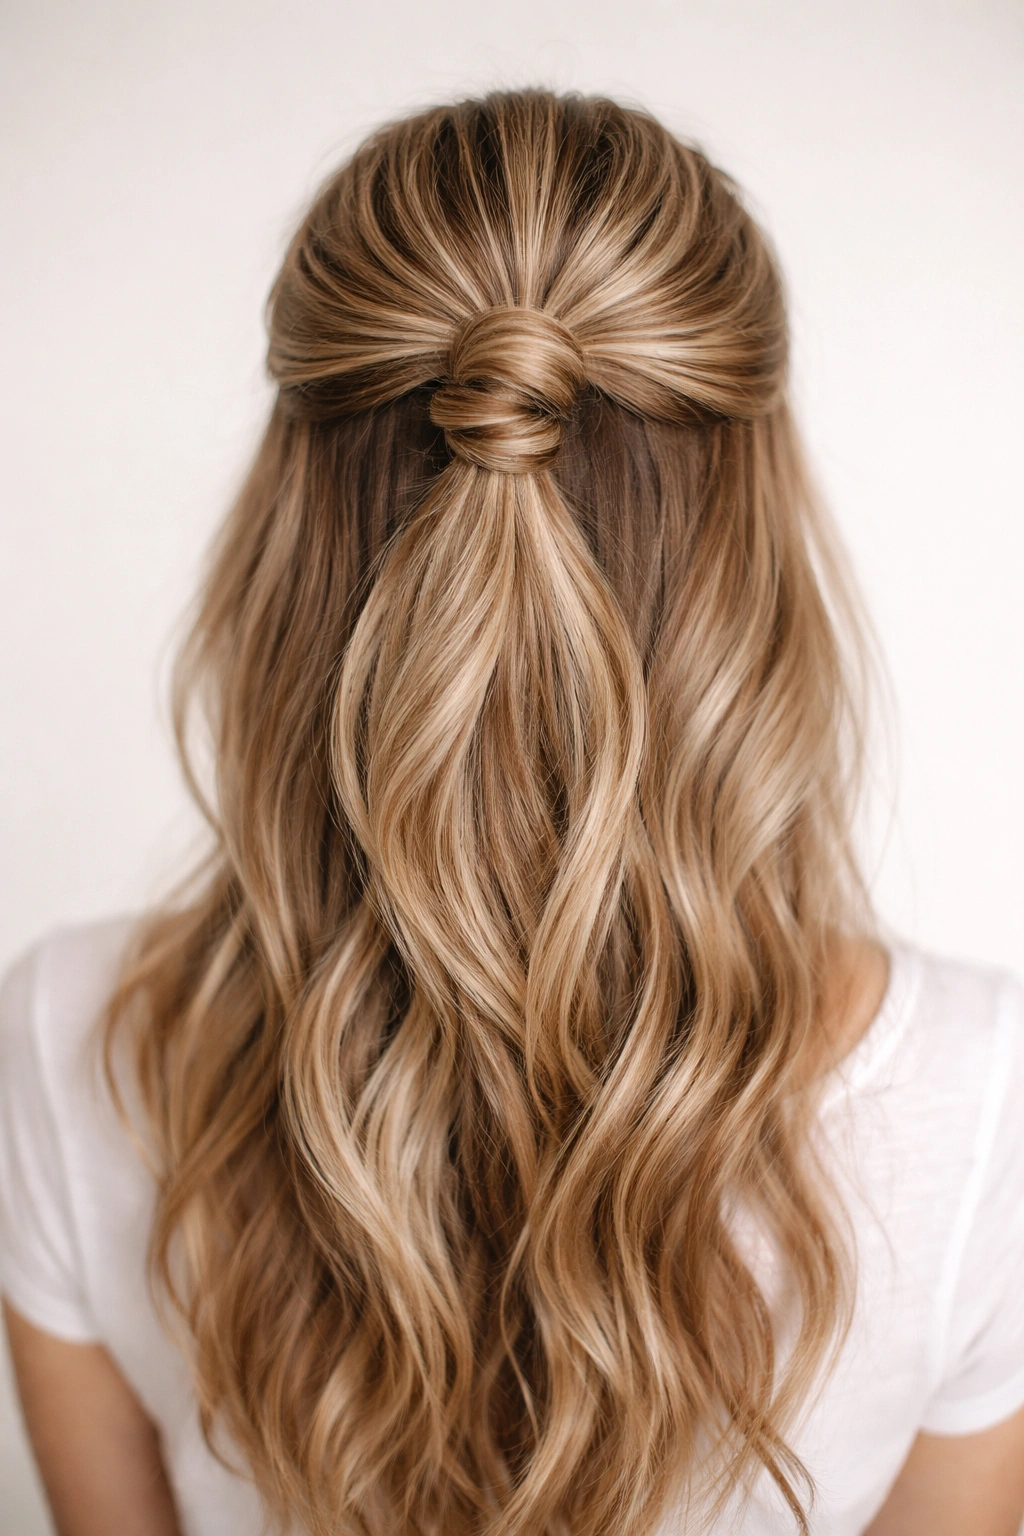
5. The Interlocking Twist Hold
Two twists that literally interlock with each other before being secured into a half-up pony create a secure, visually striking style. The interlocking mechanism holds everything in place more firmly than traditional twists, which means this style is genuinely practical for active days—workouts, sports, or just moving around a lot. The interlocking also creates a small decorative knot-like element that draws the eye.
How the Twists Interlock
Create one twist on the left side of your head as usual, working from temple toward the back. Create a matching twist on the right side. Here’s where this differs from other styles: take one twist and weave it slightly over and under the other twist, creating a brief interlocking moment before they both continue toward the back center. Secure both twists together at the crown with a ponytail elastic, and the interlocking holds firm. This style requires a bit more coordination than basic twists, but once you do it once, your hands remember the motion.
Practical Benefits
- Exceptionally secure; recommended for active days
- The interlocking creates visual interest at the crown where everyone can see it
- Works beautifully with second-day hair or slightly textured waves
6. The Halo Twist with Face-Framing Pieces
This romantic variation combines a twisting halo that circles your head with intentionally loosened face-framing pieces left down. The effect is soft and deliberately undone—very on-trend for people who want polish without severity. The face-framing pieces also help this style work beautifully on more oval or longer face shapes where full half-ups can sometimes feel severe.
Building the Halo with Intentional Looseness
Create your halo by taking two sections (one from each side) and twisting them as they curve around the back of your head to meet in the middle. Rather than pulling these sections too tightly, keep them deliberately loose and slightly loose-twisted—aim for a casual, romantic feel rather than structured precision. The loose texture actually makes the style read as more intentional and sophisticated, not lazy or sloppy. Once the twists meet in the back, secure them together and leave the front sections of your face completely down and undone. These face-framing pieces should curl or wave slightly for the best effect.
Best For
- Softer, romantic occasions like bridal showers or garden parties
- People with fine hair (loose twists don’t require as much volume)
- Creating the effortless-chic aesthetic for everyday wear
7. The Chunky Three-Strand Twist

Rather than traditional two-strand twists, this variation creates a thicker, more pronounced element by incorporating a three-strand twist into your half-up style. The three-strand twist is actually less intimidating than it sounds—if you can braid, you can create this—and it adds dramatic visual interest. The chunkier texture also works beautifully on textured hair where the definition shows dramatically.
Mastering the Three-Strand Twist
Divide a section of hair near your temple into three equal parts. Instead of crossing the sections over each other the way you would for a braid, you’re twisting them around each other. Take the right section and twist it over the center, then take the left section and twist it over the center. Continue this twisting motion as you work toward the back of your head. The result looks similar to a braid at first glance, but the twisted construction creates a rounder, more substantial-looking element. Once you reach the back, incorporate this three-strand twist into your half-up pony or secure it separately depending on your preferred final look.
Texture and Visual Impact
- Creates significantly more visual impact than two-strand twists
- Works beautifully on curly and coily hair where the twist structure is clearly visible
- Takes slightly longer but genuinely impressive once mastered
8. The Sleek Back Twist with Smoothness
For people who prefer polished, controlled looks, this style creates smooth, tightly-twisted sections that frame the face and hold everything back with precision. Unlike some looser, romantic twist styles, this version prioritizes sleekness and definition. It’s ideal for professional settings, athletic activities, or any situation where you want zero hair movement throughout your day.
Achieving Maximum Smoothness
Start with damp hair and apply a smoothing serum or lightweight gel—this is crucial for the sleek effect. Create your twist sections by taking small, precise sections near each temple and twisting them very tightly as you work backward. The tighter your twist, the smoother and more defined it appears. Work slowly and deliberately, using a fine-tooth comb or old toothbrush to smooth any flyaways as you twist. Once both twists are complete and secured at the back, apply a tiny bit of edge control or finishing gel to any baby hairs or flyaways, smoothing them back against your head. The result is polished and put-together without a single strand out of place.
Ideal Situations for This Style
- Job interviews and professional settings
- Gym and sports activities
- People with naturally straight hair or those who smooth their hair regularly
9. The Pearl-Pinned Twisted Waves
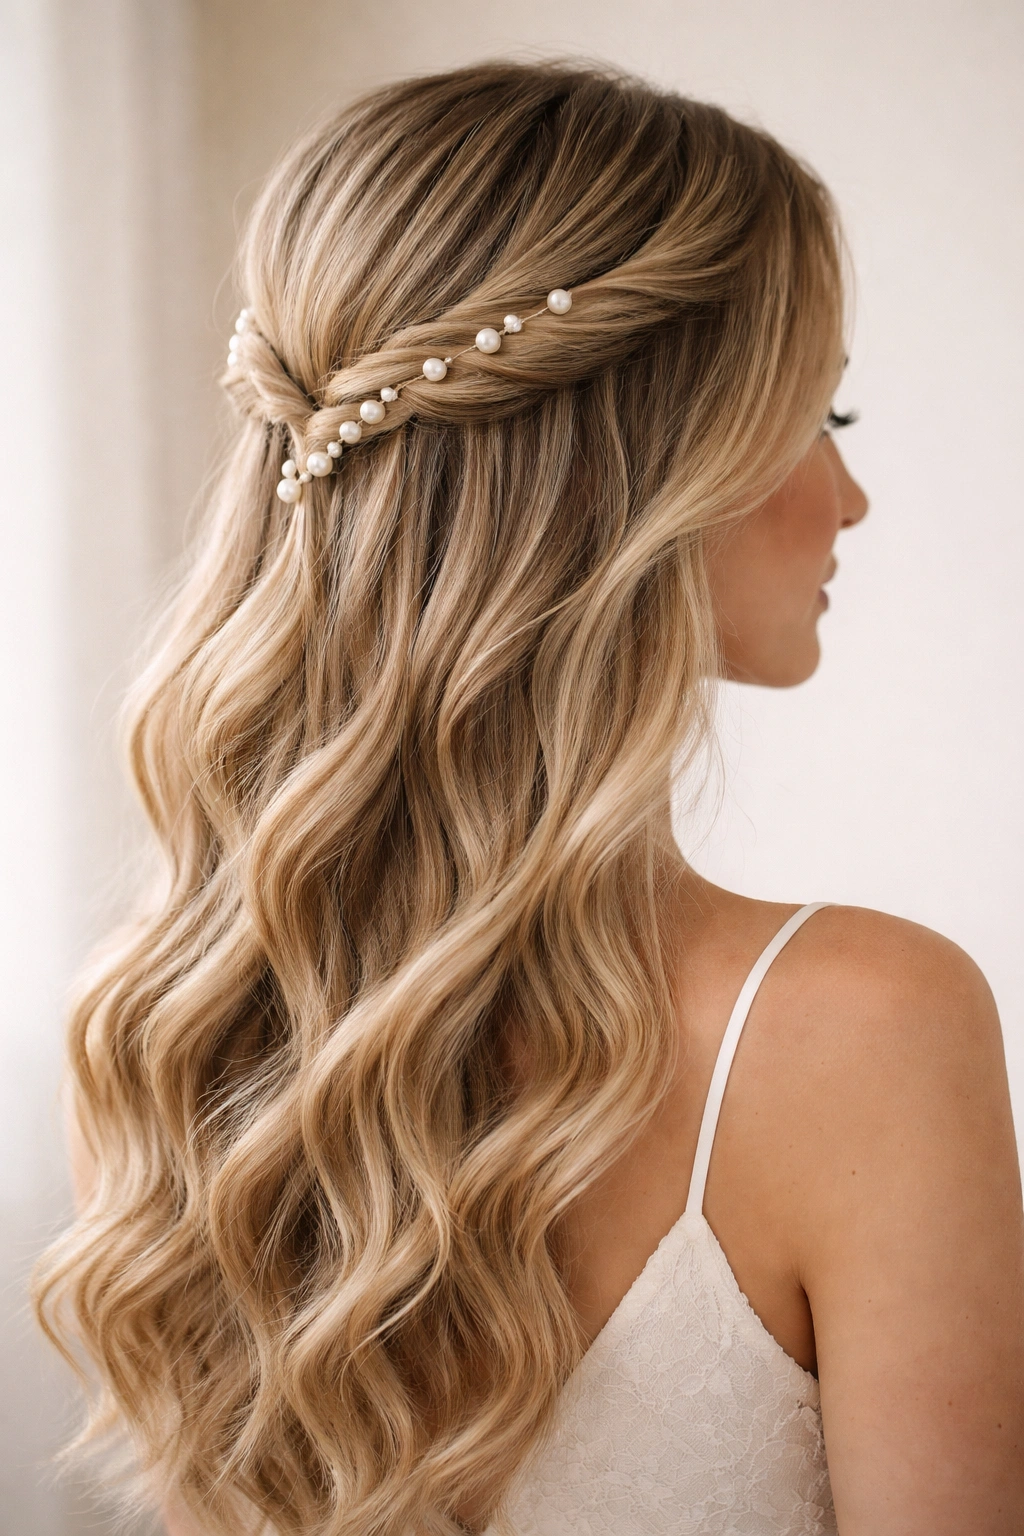
This style combines loose, romantic twists with pearl bobby pins or decorative hair clips that become part of the design rather than hidden. The pearls (or whatever decorative pin style you choose) add glamour and intentionality. This variation works beautifully for weddings, parties, or any occasion where you want visible embellishment.
Incorporating Decorative Elements Intentionally
Create your twists slightly looser than usual—this gives them more surface area for securing visible pins. As you pin each twist into place, use pearl-headed bobby pins or decorative clips instead of trying to hide them. Space the pins evenly along the twist so they create a line of sparkle or shine. The pins should sit on top of the twisted hair where they’re clearly visible, not hidden beneath. For extra flair, you can pin at regular intervals along the entire twist, or cluster them in one central spot where the twists meet at the back. This style reads as intentionally decorated rather than utilitarian.
Design Possibilities
- Use gold, silver, rose gold, or pearl pins depending on your jewelry and skin tone
- Pearl pins add femininity and work beautifully for formal occasions
- Metallic or jeweled pins add edge and work for evening or party settings
10. The Twisted-Through Bun Half-Up
This hybrid style combines a half-up section with a small, twisted bun that sits right at the crown. The twisted bun acts as the securing point for your half-up, and it adds dimension and texture at the crown. This style splits the difference between a full bun and a traditional half-up—you get some hair up, some hair down, and a decorative element in between.
Creating the Twisted Bun Component
Take a section of hair from the very crown of your head (roughly where a traditional high ponytail would sit) and create a loose twist by working just a few inches upward. Stop twisting before you reach the ends of this section, and instead wrap the twisted part into a small, loose bun form. Secure this mini-bun with bobby pins, but don’t make it tight—it should look loose and slightly undone. Now gather your half-up section (everything from your temples backward but not including the top crown area) into a ponytail just above or slightly incorporating the mini-bun. The bun becomes both decorative and functional, anchoring your ponytail in place.
Versatility of This Style
- Works on any hair length from shoulder-length and longer
- Flatters different face shapes because the twisted bun sits high and adds height
- Creates volume at the crown even if your hair is fine
11. The Reverse Twist Half-Up
Most twists spiral in the same direction, but this style reverses the twist direction on one side, creating visual asymmetry and interest. The reverse-twisted section actually sits differently—it catches light at different angles and creates the illusion of more complexity. This style is perfect for people who like asymmetrical or unconventional looks.
Creating Directional Contrast
Create your first twist on the left side working from temple backward, twisting in your normal direction (say, right-over-left or whatever feels natural). When you create the second twist on the right side, deliberately reverse your twisting direction—work left-over-right instead of right-over-left. This reversal changes how the twist sits and catches light. The two twists will look noticeably different from each other in a way that’s visually interesting rather than accidental-looking. Both twists still secure together at the back into a half-up pony, but the reversal creates the impression of more elaborate styling.
When This Style Stands Out
- Perfect for editorial or creative styling situations
- Interesting enough that people often ask how you did it
- Works beautifully in photographs where the asymmetry reads as intentional
12. The Twisted Rope Half-Up with Texture
This final style combines multiple thin twists that are then rope-twisted together, creating a textured, multi-layered effect at the back. The rope-twisting technique—where you twist two already-twisted sections around each other—creates visual complexity and texture that reads as very intentional. This is genuinely impressive-looking despite being achievable by anyone willing to practice a few times.
The Multi-Step Twist Construction
Create two separate, thin twists (about half the thickness of your normal twist) on either side of your head, working from temple toward the back. Once both thin twists are secure enough to hold their shape, take the two completed twists and wrap them around each other in a rope motion—one twisted section spiraling around the other. This rope-twisting should happen as the sections move toward your crown, creating a thick, dramatically textured element. Secure everything at the back with a ponytail elastic, and the result looks far more intricate than the actual steps required.
Why This Style Impresses
- Genuinely difficult-looking despite being achievable with practice
- The texture creates drama and sophistication
- Works beautifully on wavy, curly, or textured hair where the multiple twists show clearly
Final Thoughts
The versatility of half up half down twist styles means you can rotate through different variations depending on your mood, the occasion, and how much time you have available. Some mornings call for the sleek precision of the sleek back twist, while other days feel right for the romantic looseness of the halo twist with face-framing pieces. Once you practice a few of these styles, your hands develop muscle memory and the process becomes faster and more intuitive.
The real magic of these styles lies in their flexibility—you can dress them up or down, adapt them for different hair types, and make them your own with small tweaks and personal touches. A style that feels romantic on someone with straight hair might read as edgy on someone with curls. Pearl pins transform a style into something formal, while the same style without pins works for everyday wear. This adaptability is why half up half down twists have remained popular for so long and will continue working beautifully for years to come.
Start with whichever style speaks to you most, practice it a few times to build confidence, and then branch out to others. You’ll quickly develop favorites that become your go-to styles, and you’ll understand your hair well enough to improvise variations that work specifically for your texture and preferences. That’s when these hairstyles transform from “something you’re trying” into “something you just naturally do.”