Slicked back hairstyles have a polished, effortlessly put-together vibe that works for everything from casual days to special occasions. When you combine that sleek aesthetic with a half-up half-down style, you get something genuinely versatile—the bottom half stays down for length and movement, while the top is secured with a smooth, controlled finish. It’s a style that flatters most face shapes, works on different hair types with the right products, and honestly requires less maintenance than it looks.
The beauty of slick back half-up styles is that they sit right in that sweet spot between casual and intentional. You’re not committing to a full updo, but you’re not leaving everything loose either. The slicked-back elements add sophistication, while the flowing hair below keeps things modern and relaxed. Whether you’re heading to work, getting ready for a date, or just wanting to feel polished on a regular day, these styles deliver.
What makes these hairstyles even better is how customizable they are. You can adjust the sleekness level depending on the occasion, play with the size and placement of your half-up section, add texture or keep everything smooth, and incorporate clips, ties, or scarves to make them uniquely yours. The techniques stay consistent, but the variations are endless.
Let’s walk through twelve styles that nail this aesthetic, with practical tips for achieving each one and the products that actually make a difference.
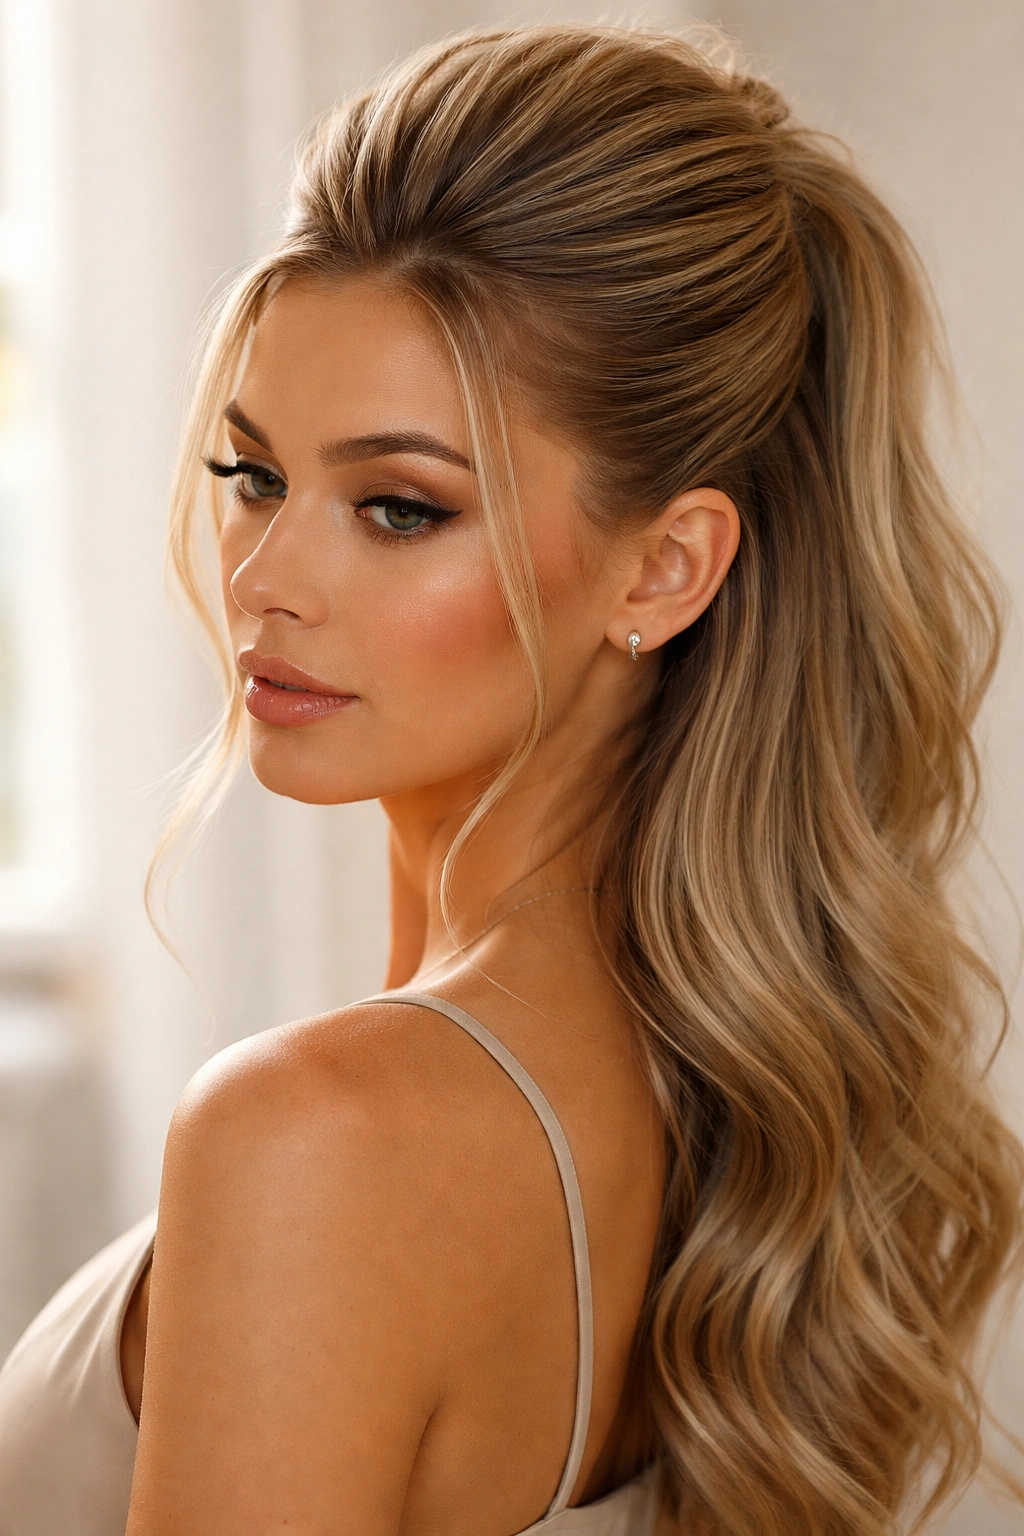
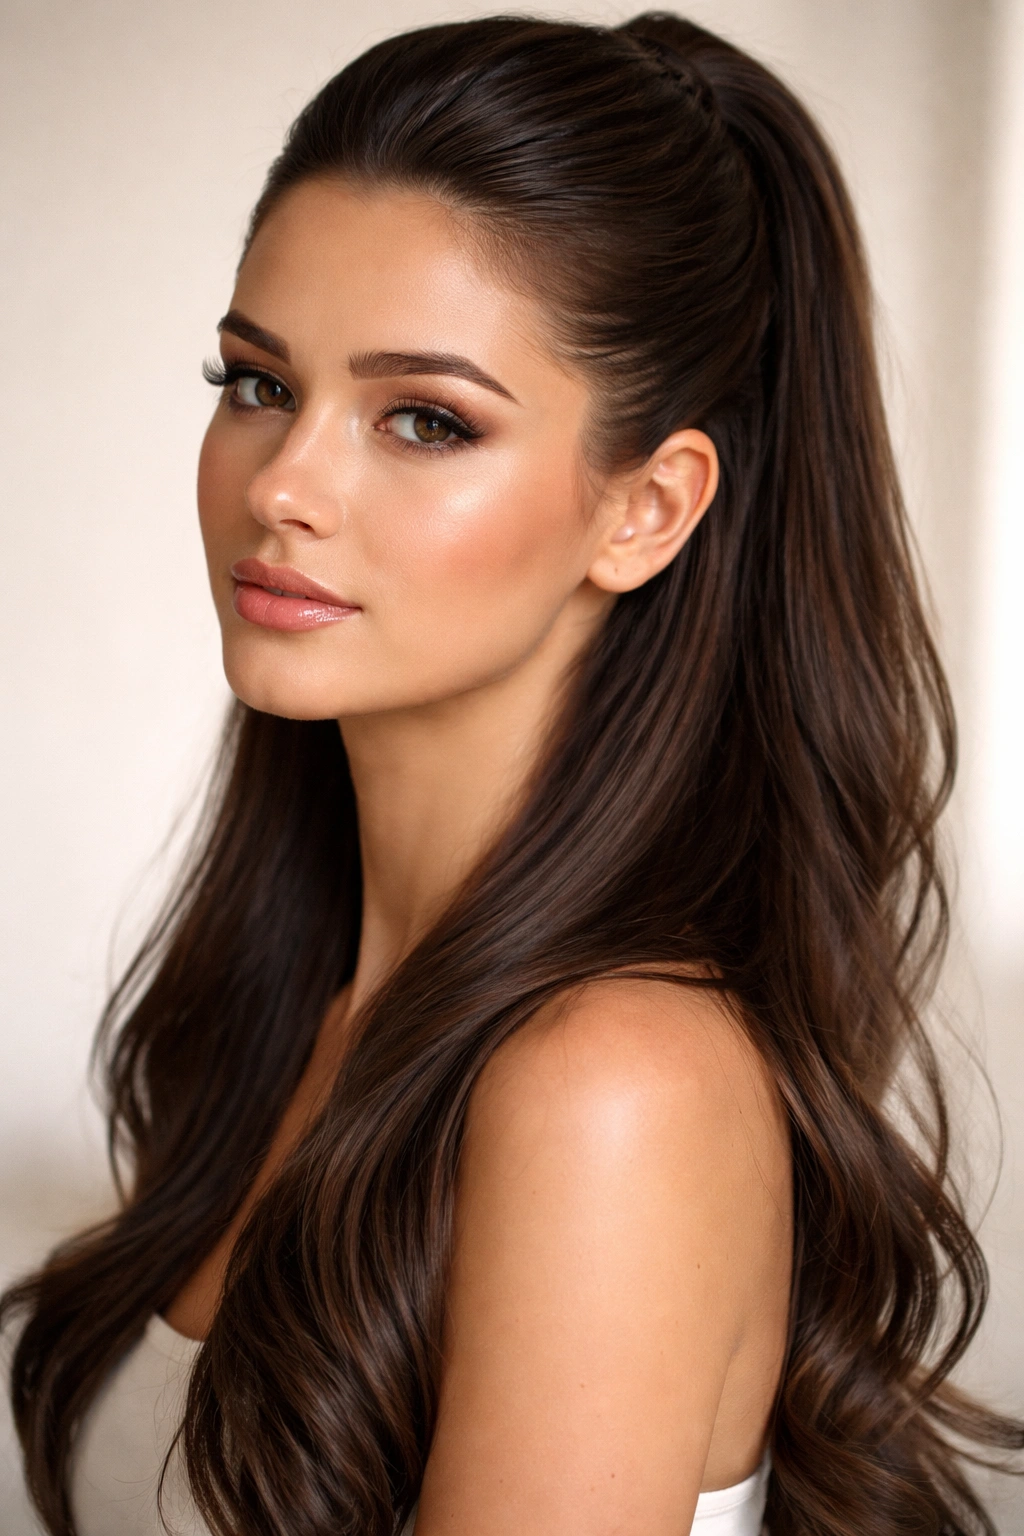
1. Sleek High Ponytail Half-Up Style
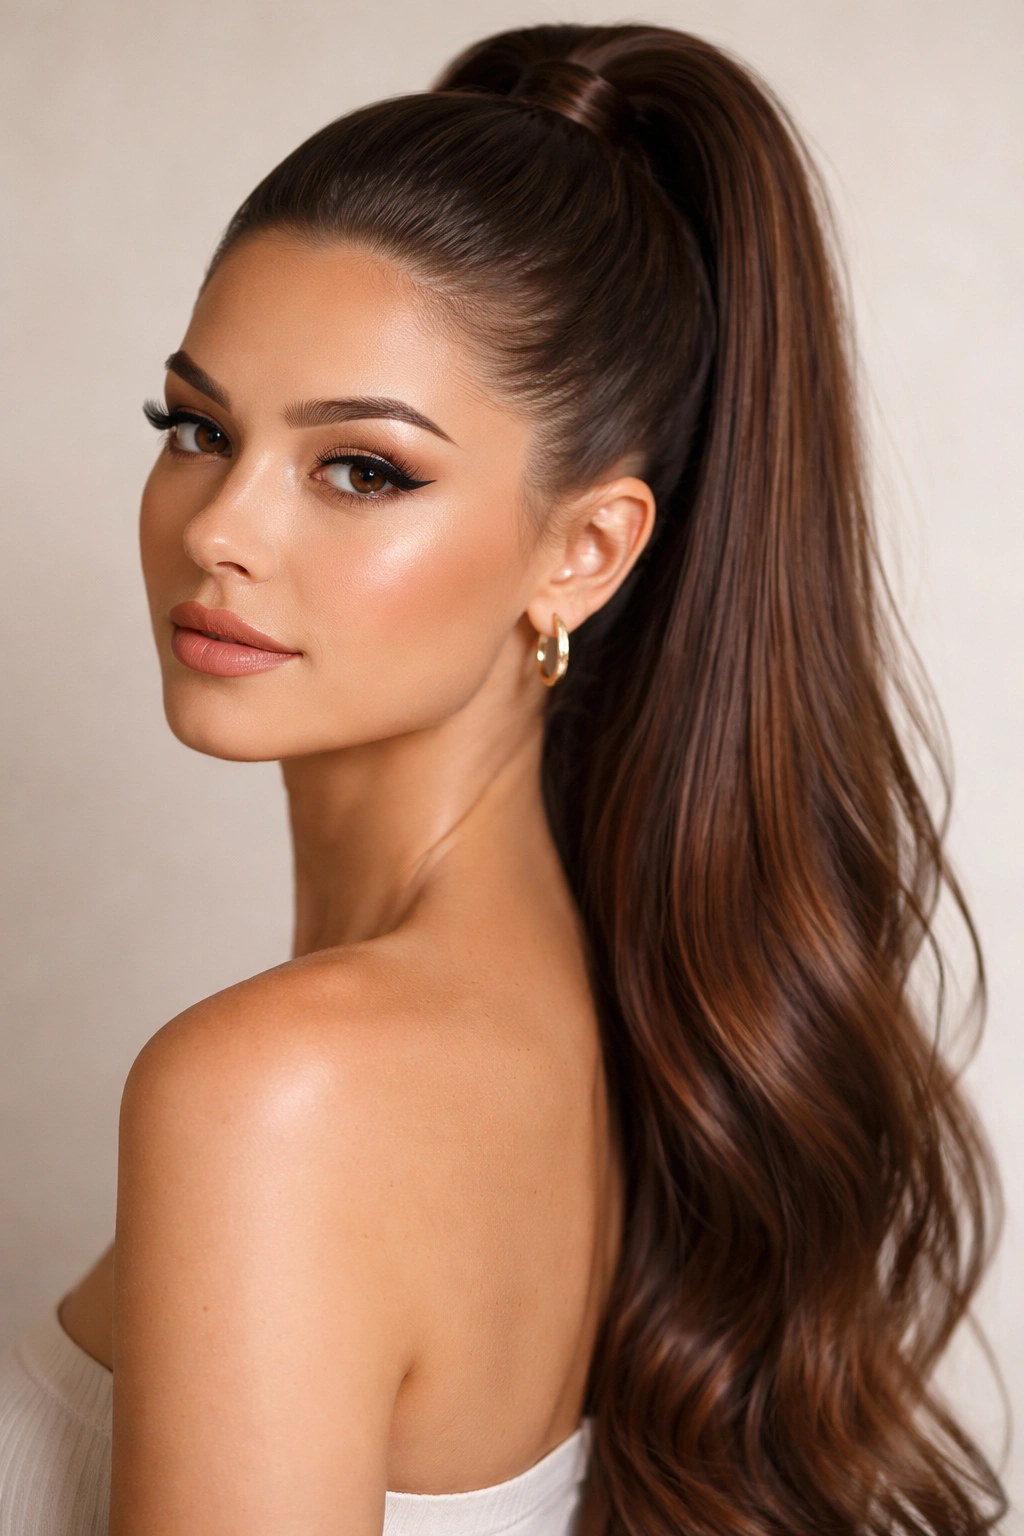
This is the most polished version of the half-up concept—you gather the top portion of your hair into a high ponytail while leaving the underneath section completely down and flowing. The sleekness comes from smoothing all the top section back against your head without any bumps, waves, or flyaways.
Why This Style Works
The high half-up ponytail is incredibly flattering because it opens up your face and neck while still providing that structured, intentional look. It draws the eye upward and works beautifully for people with longer hair or those wanting to emphasize their facial features. The contrast between the smooth, controlled top and the free-flowing bottom creates visual interest without looking complicated.
How to Perfect It
- Start with damp hair and apply a lightweight smoothing cream or gel to the top section from your hairline back to where you want the ponytail
- Brush this section straight back with a fine-tooth comb, working out all tangles and ensuring zero bumps
- Gather at your preferred height (high, mid, or low) and secure with an elastic that matches your hair color
- Use a small brush or your fingers with a bit of extra gel to smooth down any stray pieces around your hairline and temples
- For extra hold and shine, apply a light hairspray after smoothing
Pro tip: The key to true sleekness is using the right amount of product—too little and flyaways appear, too much and your hair looks wet or greasy. Start with a dime-sized amount and add more only if needed.
2. Twisted Half-Up with Slicked Sides
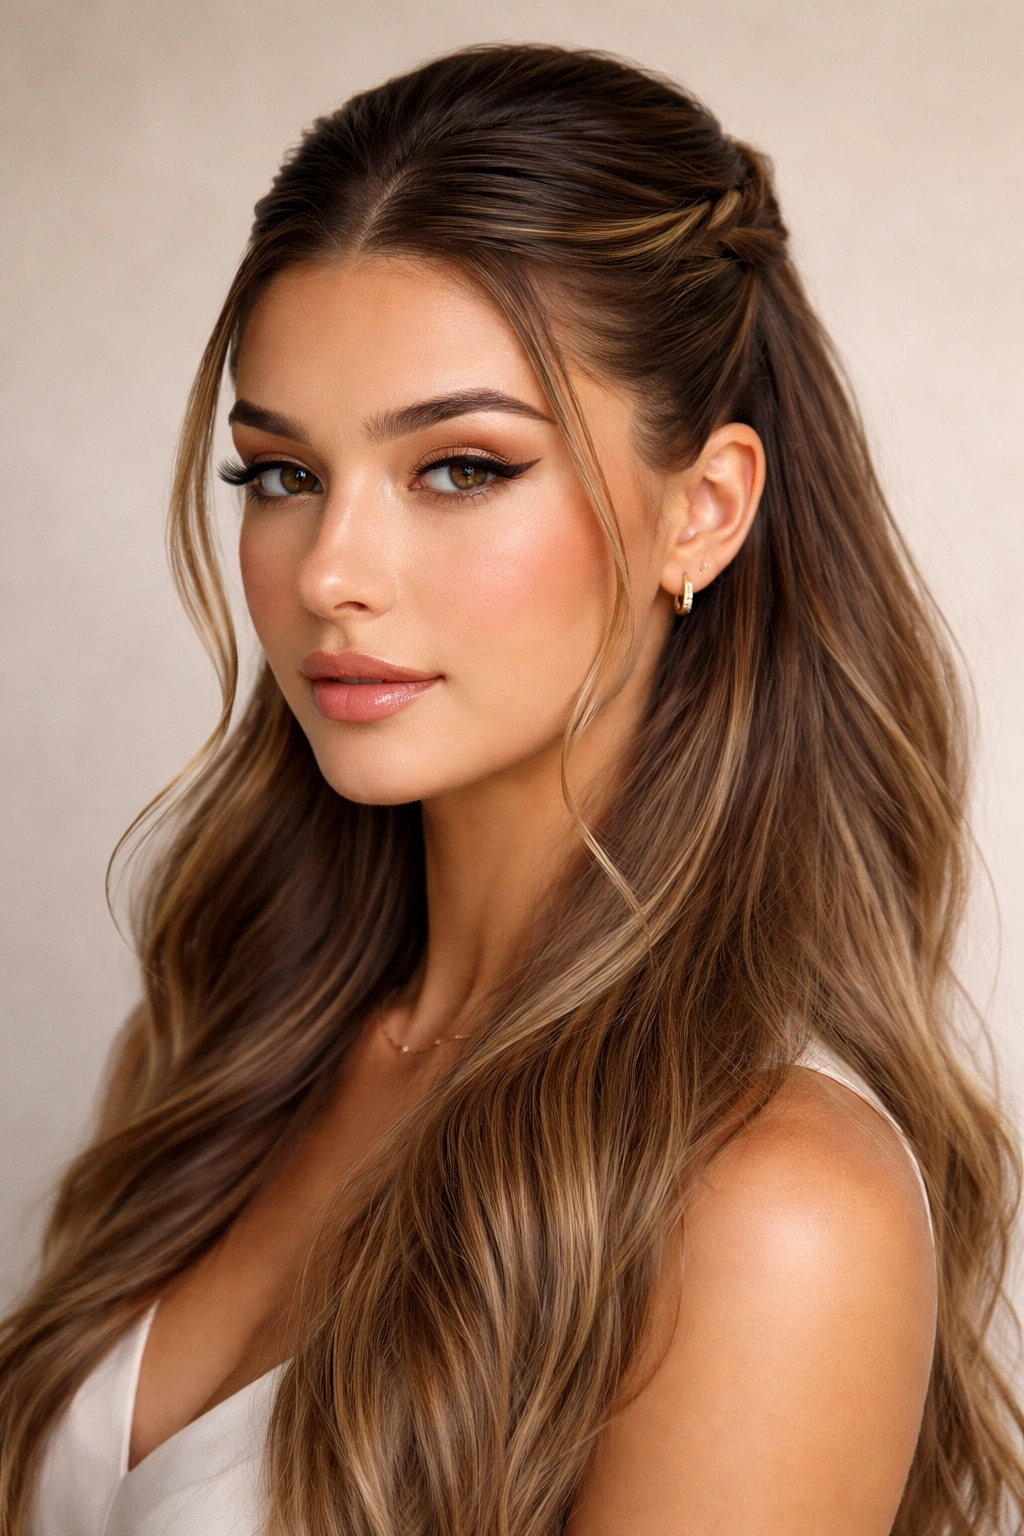
This version adds a touch of movement and detail to the basic half-up concept by incorporating twists. You slick back the sides and front sections, then twist two small sections from near your temples and bring them back to meet at a center point where you secure everything together.
The Appeal of This Style
Twisted styles read as more intentional and artistic than a simple ponytail, but they’re actually just as easy to execute. The twists add dimension and visual texture while the slicked-back sides keep everything looking refined and polished. It’s the perfect bridge between casual and “I made an effort.”
Step-by-Step Technique
- Apply smoothing cream to your sides, front sections, and around your hairline
- Brush everything sleek and flat against your head
- Starting at one temple, take a small section of hair about one inch wide and twist it loosely as you move toward the back of your head
- Repeat on the other side, twisting the section in the same direction
- Meet both twisted sections at the crown or just below, and secure all your gathered hair with an elastic
- Gently loosen the twists slightly by pulling on them—this creates a softer, fuller appearance while keeping the style secure
Worth knowing: Twisting creates texture and can actually hide minor bumps in your hair better than a straight-back style, making it forgiving even if your hair isn’t perfectly smooth.
3. Double Bun Half-Up Look

Double buns positioned at the back of the head create an adorable, youthful half-up style while maintaining that slicked, polished appearance. You smooth everything back, section the top half into two parts, and create a bun from each section.
Why Double Buns Feel Fresh
Double buns have playful energy without sacrificing sophistication when executed with sleek sides and a smooth finish. They’re perfect for people who want something a bit more interesting than a single ponytail but still want the half-up silhouette. The style works particularly well if you have thick hair or lots of volume to work with.
Creating the Look
- Smooth the entire top half of your head back with a gel or smoothing cream
- Divide this top section down the middle from your forehead to the back of your head
- Create a bun from the left section by rolling the hair and securing it with bobby pins and an elastic
- Repeat on the right side, positioning the bun at the same height as the left one
- Smooth your hairline and sides again with a fine-tooth comb and extra gel for definition
- Tuck any stray ends into the buns and pin them securely
Pro tip: Make these buns slightly loose and fuller rather than tight and small—that’s what gives the style that cute, modern feel rather than a strict, rigid appearance.
4. Slicked Back Half-Up with Braided Sections
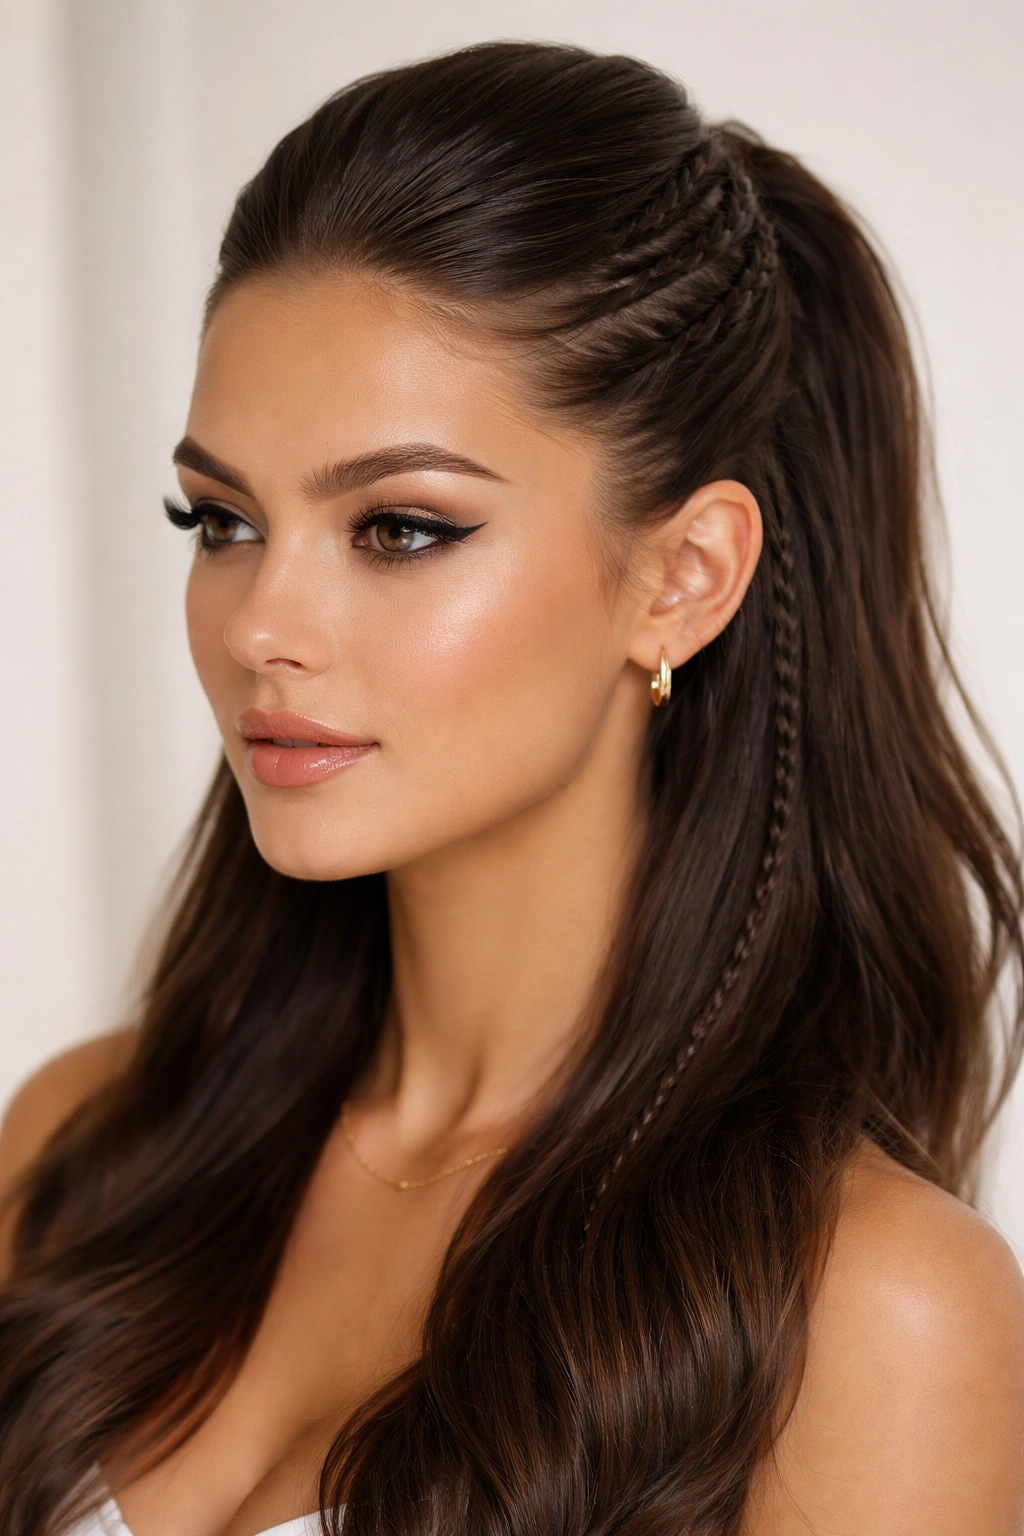
This style combines the sleekness of a slicked-back aesthetic with the dimension of braids. You create one or more small braids from the front sections and work them back toward a center point where everything is gathered and secured.
The Sophistication of Braids
Braids automatically add visual complexity and texture to any style, which means you can get away with less total volume and still have a style that reads as intentional and put-together. They also hold incredibly well, so this is a fantastic choice for people with slippery hair or for styling when you need everything to stay in place.
Building the Braid Half-Up
- Apply smoothing product to your sides and the front sections of your hair
- Take a section from one side near your temple and create a simple three-strand braid as you move it toward the back
- Repeat on the other side, braiding in the same direction
- If you want more detail, create one thin braid down the center back of your head as well
- Gather all braids at the back and secure with an elastic, tightening any loose strands in the braids first
- Use a small brush to re-smooth your sides and hairline for contrast between the texture and the sleek areas
Quick technique note: Slightly loose braids look more romantic and modern than tight ones—you’re aiming for a pretty braid you can see, not a rope-like structure that looks pulled.
5. Smooth Half-Up with Face-Framing Layers
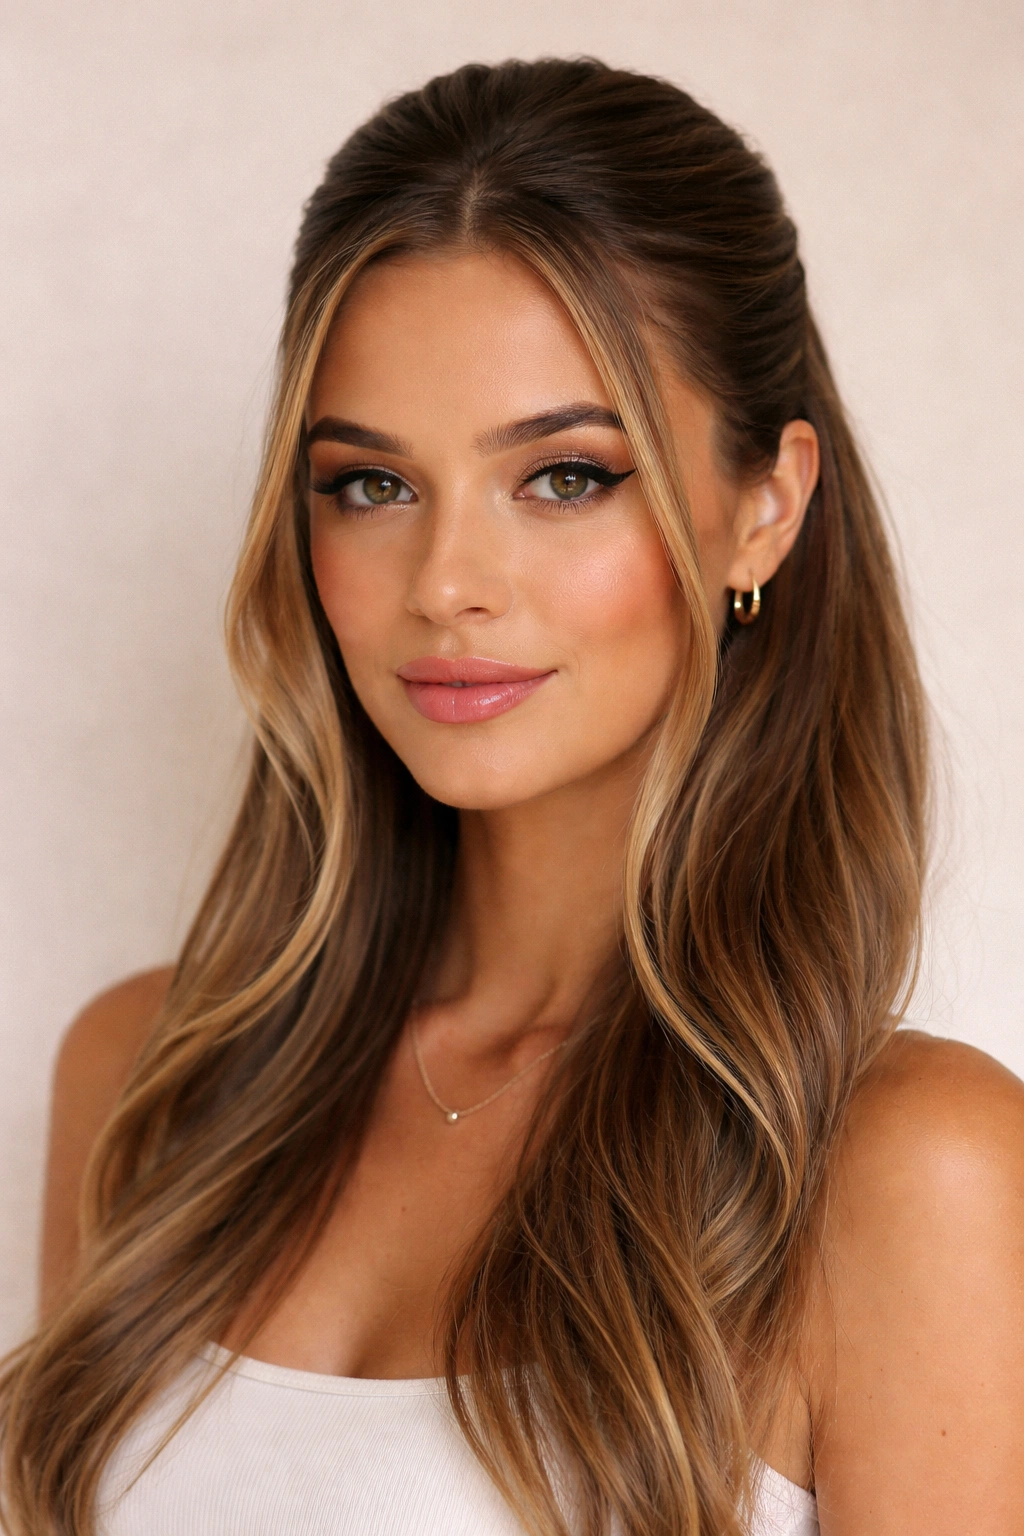
This style keeps most of your hair down while pulling back only a small section at the crown, leaving intentional pieces around your face loose and free. The sides and front stay sleek, but you strategically leave out small sections for a softer, less rigid appearance.
Why Face-Framing Works
Face-framing pieces are incredibly flattering—they draw attention to your best features and soften the overall look without sacrificing the polished vibe. This style is ideal if you have face-framing layers already cut into your hair, but you can create the effect with any hair if you’re strategic about which pieces you leave out.
Executing the Look
- Apply smoothing product to your sides and back sections, leaving the very front and around your face untouched
- Brush the sides and back smooth against your head
- Gather a section from just above your ears and toward the back of your head
- Secure this half-up section with an elastic at the crown or slightly lower
- Let the front pieces (around your face and temples) fall naturally—these stay down and frame your face
- Ensure the back section of your hair (below the half-up) is smooth and sleek, creating a sharp contrast with the looser face-framing pieces
Insider note: This is the easiest version to style if you’re short on time—the face-framing pieces hide any imperfections, and the bottom doesn’t need to be perfectly smooth.
6. Slicked Half-Up with Statement Hair Clip
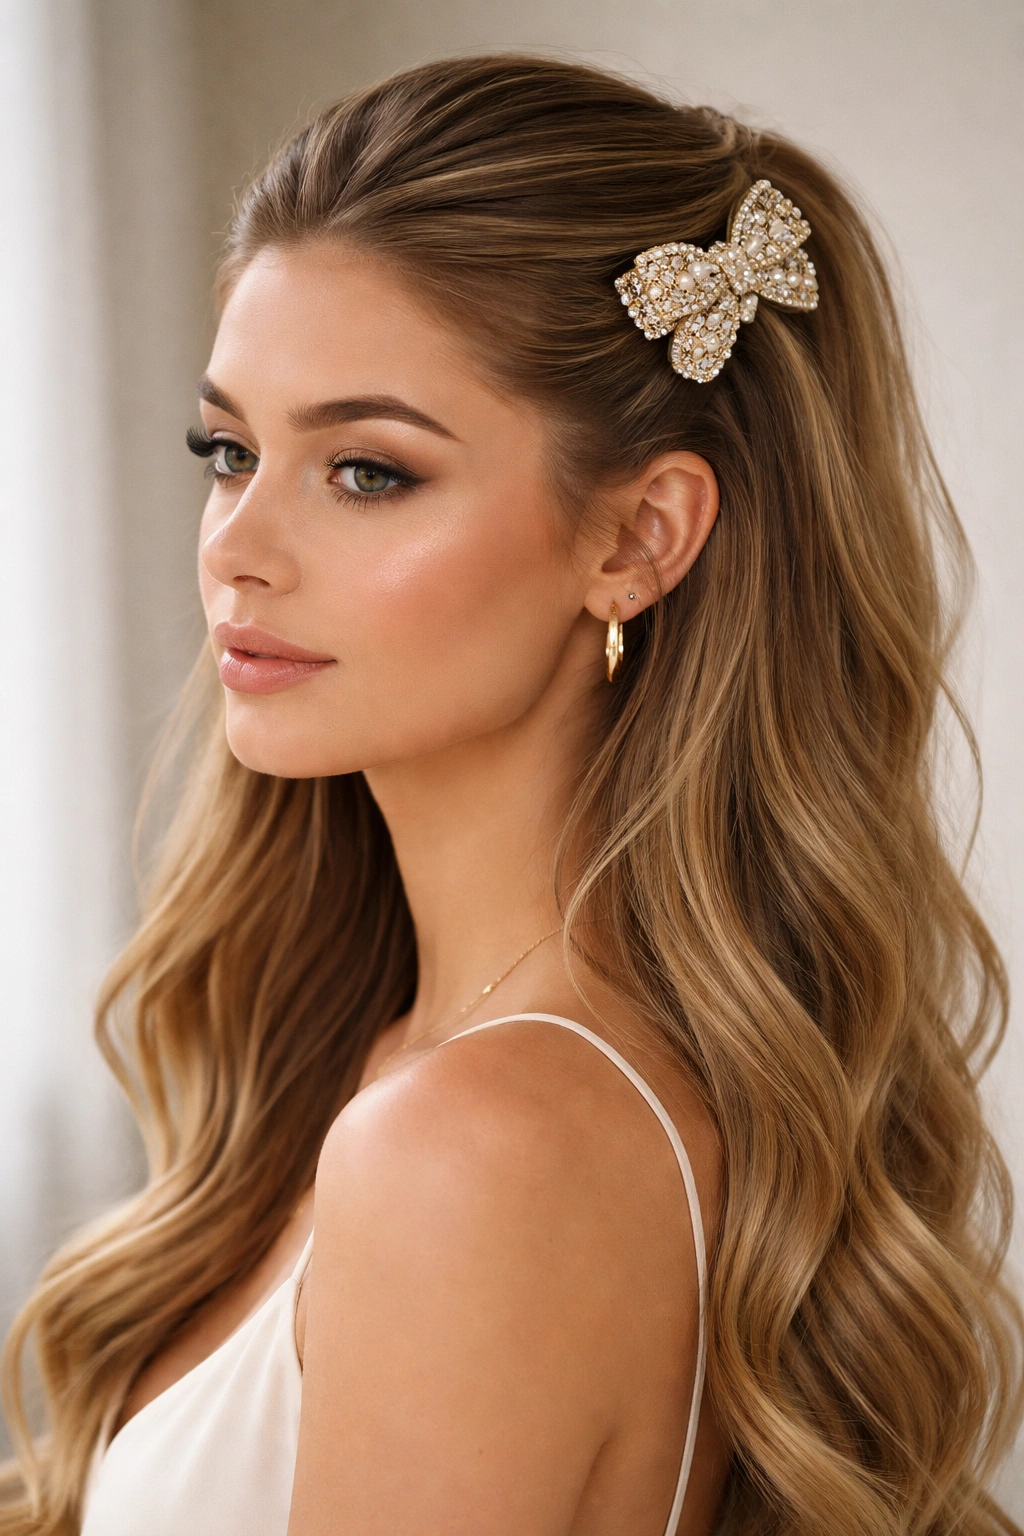
A statement clip—think tortoiseshell, pearl-studded, or oversized metal—replaces a traditional elastic and becomes part of the design. You slick everything back smoothly and secure the half-up section with a clip that’s visible and intentional.
The Impact of a Good Clip
A quality hair clip is jewelry for your head and can instantly elevate a simple style. It draws the eye, adds personality, and makes even a basic half-up look feel fashion-forward. This is the easiest way to make your hairstyle feel more intentional and coordinated.
Styling for Maximum Clip Impact
- Smooth your entire top section back with gel or cream, making sure everything is completely sleek and bump-free
- Gather your top half into a high or mid-height position (wherever you want your clip to sit)
- Use a clip rather than an elastic, positioning it so it’s fully visible
- Make sure the gathered hair is ultra-smooth and sleek on all sides—the clip will catch the light, so any bumps under it will show
- If using a claw clip, twist your hair slightly before clamping it to ensure maximum grip and a fuller appearance
- Smooth your hairline one more time with a fine-tooth comb and gel
Pro tip: Claw clips hold slicked hair better than barrettes—if you have slippery hair, stick with a claw or use a clip that grips rather than clasps.
7. Half-Up Top Knot with Gel-Set Sides
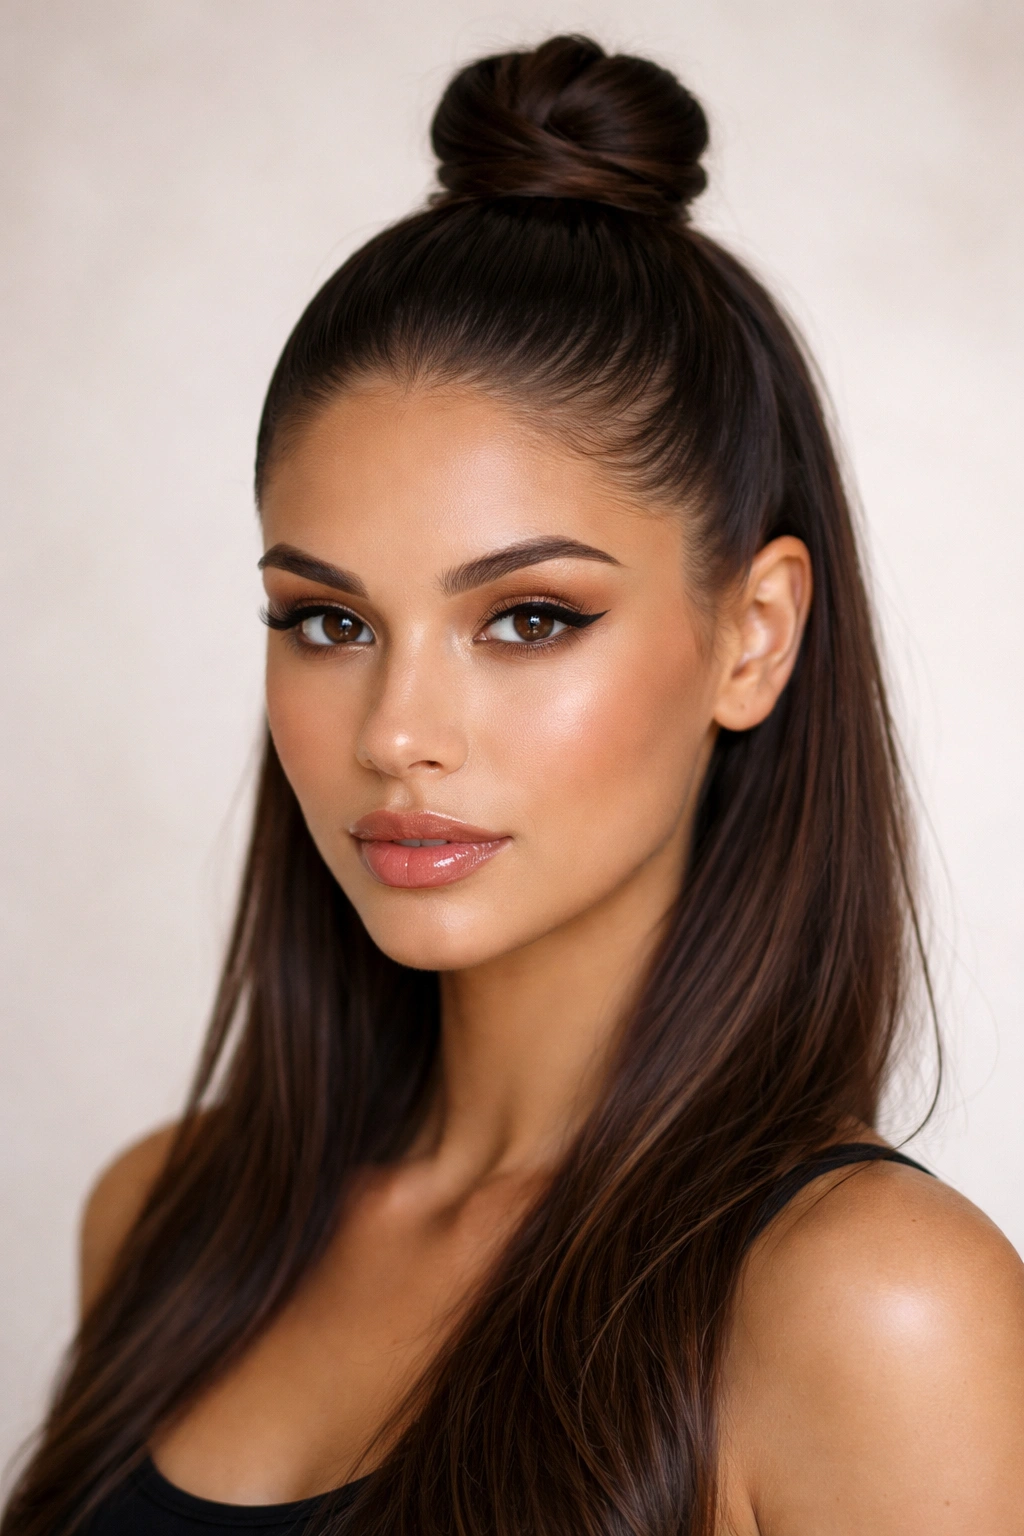
This style gathers the top section into a knot at the crown while keeping your sides and front completely smooth and gelled down. It’s a variation that feels sporty and modern without being too casual.
When a Top Knot Works Best
A top knot half-up is perfect if you want your hair completely off your face and neck without the commitment of a full updo. The tight, smooth sides create a sleek aesthetic while the top knot gives you lift and volume at the crown. This works especially well for people with thick hair or anyone doing athletic activities while still wanting to look polished.
Creating the Top Knot Half-Up
- Apply a strong-hold gel or pomade to your sides, front, and hairline
- Brush everything backward and downward, creating a smooth surface all the way around
- Gather the top section at your crown and twist it or roll it into a knot formation
- Secure the knot tightly with bobby pins and a small elastic or hair tie (put the elastic underneath the knot where it won’t show)
- Pin any loose pieces into the knot
- Go back and re-smooth your sides and front with extra gel, creating defined, sharp edges
Worth knowing: This style works best if you blow-dry your hair first to create volume at the roots—a top knot on flat hair can look too severe.
8. Smooth Half-Up Bun with Decorative Pins
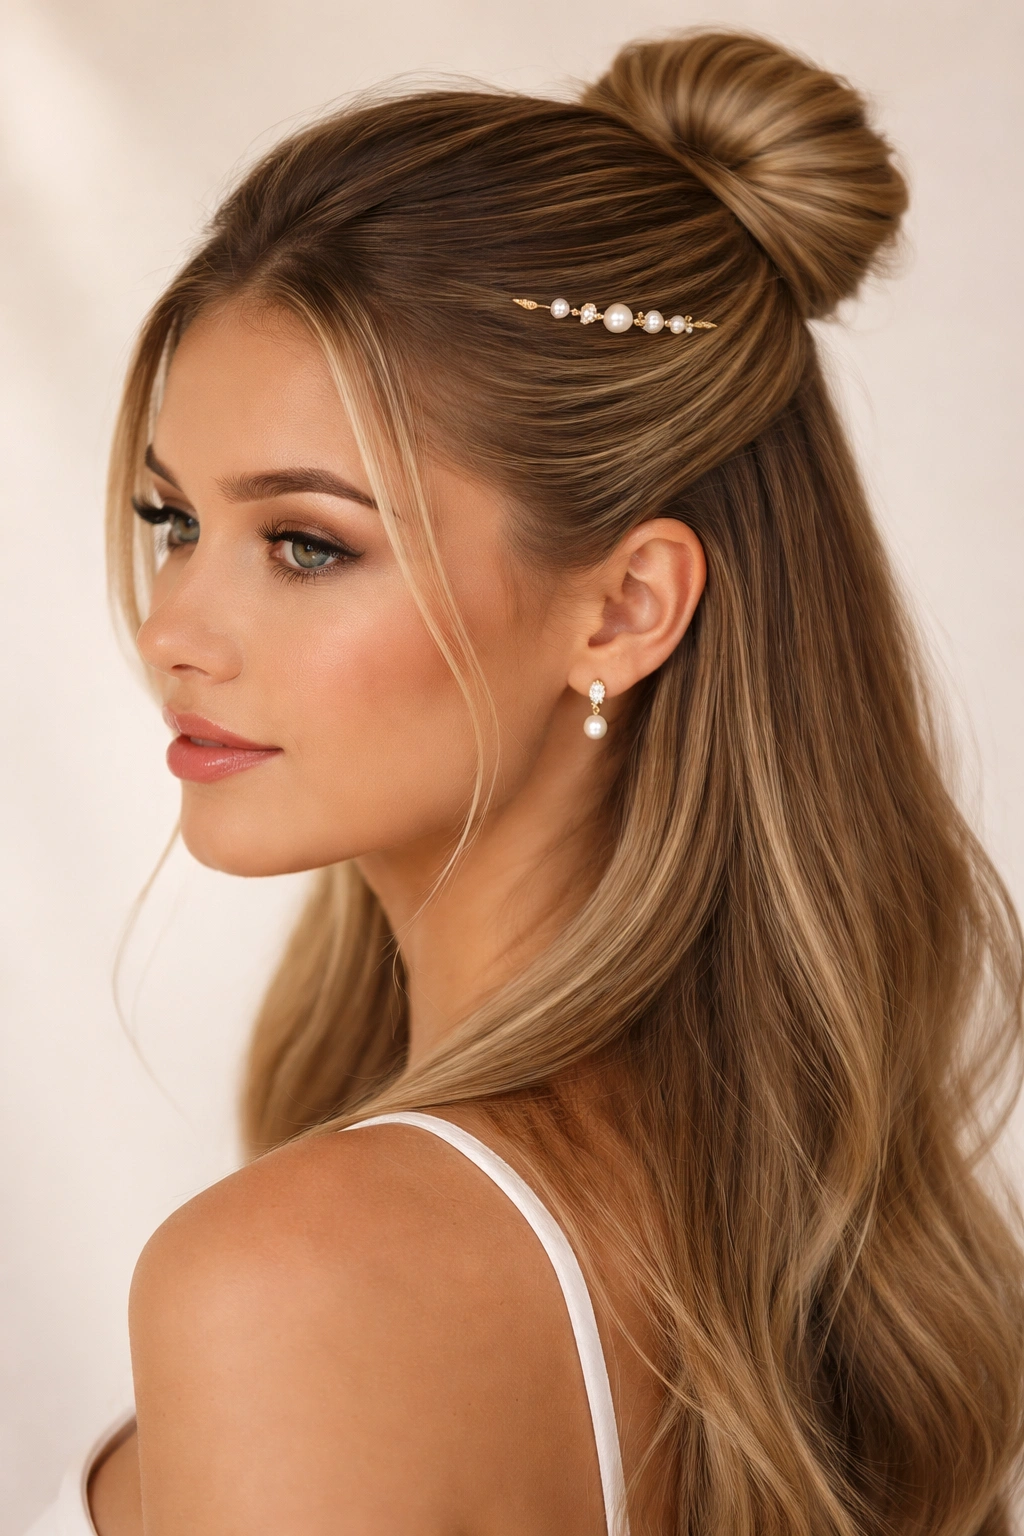
Similar to the basic half-up but with a bun instead of a ponytail, this style is secured with decorative bobby pins or metal bun pins that are left visible. The visible pins become part of the design and add an intentional, polished element.
The Elegance of a Half-Up Bun
A bun feels more formal and finished than a ponytail while still maintaining that half-up balance. When you add decorative pins, you’re signaling that this style is intentional—you’re not just throwing your hair up, you’re styling it. This is a great option for events, work environments, or any situation where you want to look extra put-together.
Building the Half-Up Bun
- Smooth your top section back with a cream or pomade
- Gather the smoothed section into a ponytail at your preferred height
- Roll the ponytail or twist it into a bun formation and secure it with bobby pins
- Once the bun is secure, use 2-3 decorative metal or pearl-studded bobby pins across the front of the bun where they’ll be visible
- Smooth your hairline and sides one more time
- Make sure the bun itself is relatively tight and polished—this creates better contrast with the flowing hair below
Pro tip: Position your decorative pins horizontally across the bun for a balanced look rather than clustered in one spot.
9. Sleek Half-Up with Curved Ends

This style keeps everything smooth and straight in the half-up section while curling the ends of the bottom section. The contrast between the sleek, controlled top and the bouncy, curved bottom creates visual interest and texture.
Why Curved Ends Elevate the Look
Adding a curve or wave to the bottom section transforms a basic half-up from “quick everyday style” to “I put thought into this.” The curved ends catch the light differently and create movement, while the sleek top keeps everything looking refined. It’s a sophisticated approach that works for both casual and dressier occasions.
Styling the Sleek-with-Curves Combo
- Follow your basic slick-back half-up technique: smooth product applied to the top, gathered and secured at your preferred height
- Once the half-up is complete, take the bottom section (still down) and curl or wave it using a curling iron or straightener with a curved technique
- Hold small sections at the ends and turn the tool under slightly to create a subtle upward curve or wave
- Work through the entire bottom section, curling away from your face on the front sections
- Finish with a light hairspray to hold the curves without making them stiff
Insider note: Curves that start lower (about mid-length rather than right at the roots) look more intentional and modern than curls that start at the scalp.
10. Slicked Back Half-Up with Volume at Crown
This style maximizes volume at the crown and top of the head while maintaining sleekness everywhere else. You create the appearance of height and fullness at the very top while keeping sides and front smooth and controlled.
Creating the Illusion of More Volume
This approach works beautifully for people with fine or thin hair, because the sleek sides make the top section appear fuller and more dramatic by comparison. It’s also a smart choice if you want to add height to your face or create a more balanced proportion if you have a rounder or wider face shape.
Building Volume While Staying Sleek
- Use a volumizing mousse or texturizing spray on the crown section of your hair before styling
- Blow-dry the crown area upward with a round brush to build volume
- Apply smoothing cream to your sides and the front section
- Brush the sides and front sleek and flat
- Tease the crown section gently at the roots to add height and fullness
- Gather the half-up section (including the teased crown) and secure it at the back
- Smooth the front and sides down with a comb and gel
- The contrast between the full crown and the sleek sides will create a dramatic, flattering effect
Pro tip: Don’t overdo the teasing—you want volume, not a ratted mess. Light, strategic teasing at the roots is more effective than aggressive backcombing.
11. Half-Up Ponytail with Sleek Underside

This style features a clean, polished half-up ponytail on top while keeping the underside (the part of hair hidden beneath the top section) completely smooth and sleek. The hidden section is your secret—it’s what gives the overall look extra polish even though no one sees it.
The Sophisticated Secret
The sleek underside is the detail that separates amateur styling from expert styling. While the visible top section gets attention, the smooth underside ensures the whole style looks refined and intentional when you move or if your hair shifts. It’s one of those professional styling tricks that makes a difference even when people can’t quite pinpoint what looks so polished.
Creating the Underside Smoothness
- Before creating your half-up ponytail, smooth the entire middle-back section of your hair (where the underside will be) with a smoothing cream or serum
- Brush this section extremely smooth and sleek
- Now create your half-up ponytail as normal, gathering the top section
- The underside stays down but remains smooth and controlled
- From the side, you’ll see the contrast: a sleek line running through your hair
- Apply a light hairspray to keep the underside in place throughout the day
Worth knowing: This works best with straight or wavy hair—curly hair in the underside creates a different aesthetic (still beautiful, just different).
12. Smooth Half-Up with Scarf or Hair Tie Accent
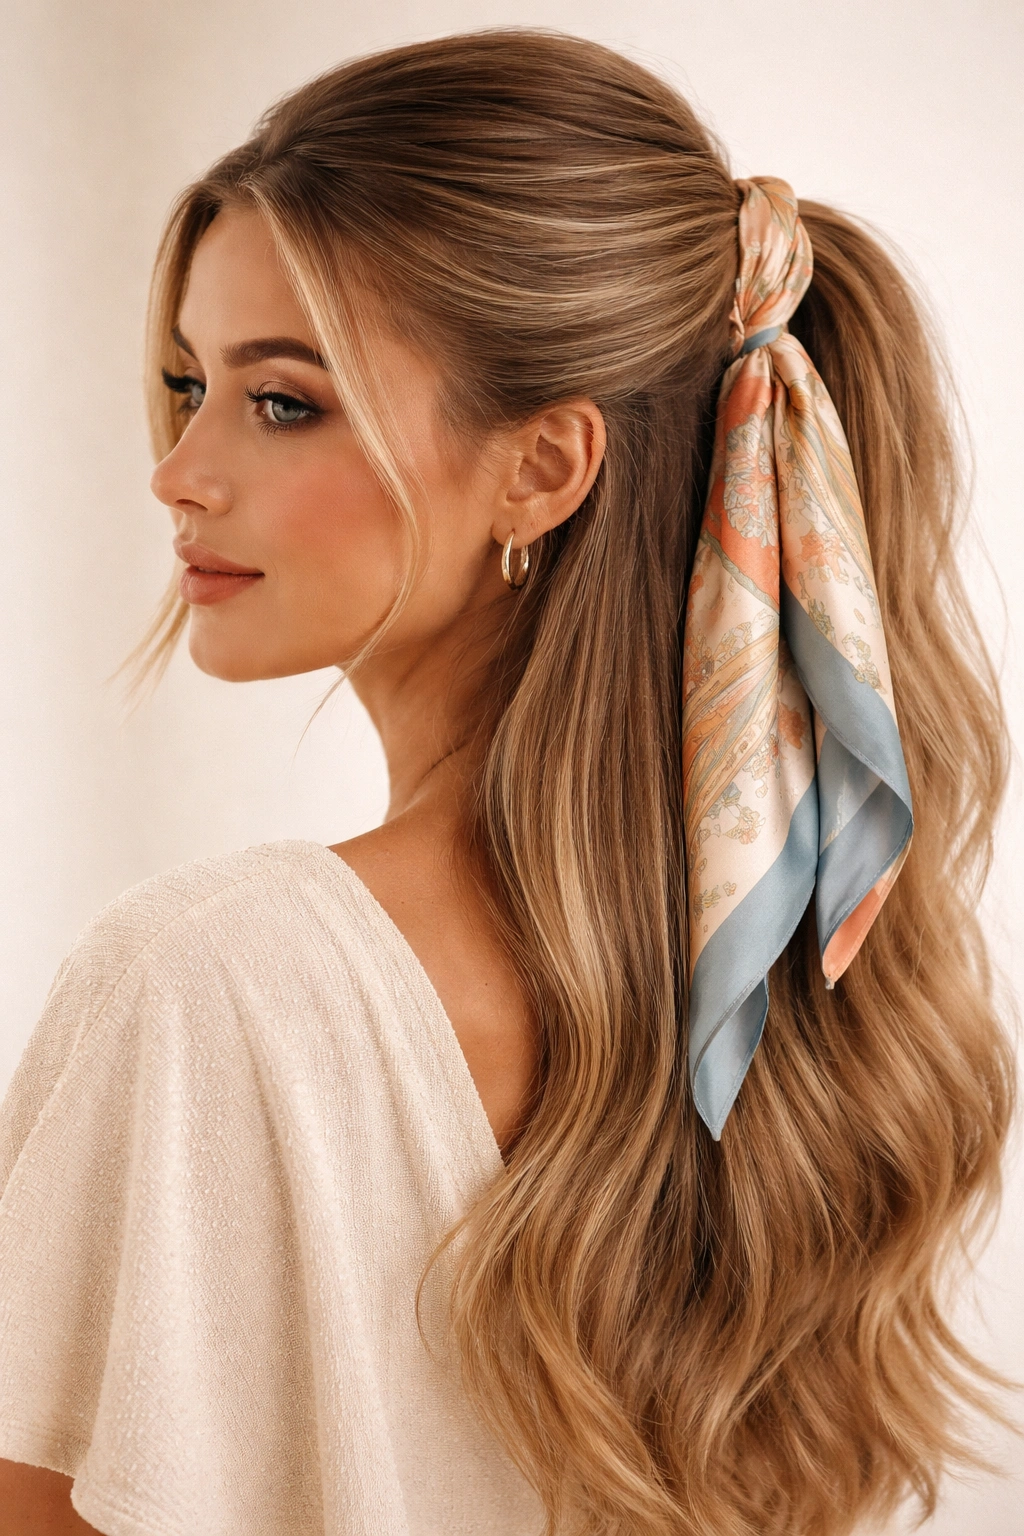
This final style incorporates a silk scarf, patterned hair tie, or decorative band woven through or tied around your half-up section. It’s visually interesting and adds color, pattern, or texture without making the style harder to create.
Making Accessories Work in Your Favor
A scarf or decorative tie transforms a basic half-up into something with personality and intentionality. You’re able to coordinate with outfits, match jewelry, or add a pop of color in a subtle way. It’s also incredibly practical—a good silk scarf protects your hair while looking beautiful.
Styling with Accessories
- Smooth and gather your top section as normal into a half-up ponytail or bun
- Take a silk scarf or wide decorative ribbon and fold it into a thin band
- Wrap it around the base of your ponytail or bun, tucking the ends underneath so they’re hidden
- Alternatively, weave the scarf through the ponytail itself for a more integrated look
- Secure the scarf with bobby pins if needed so it doesn’t slip
- Smooth your hairline and sides with extra gel for definition against the scarf accent
- The scarf adds visual interest and can incorporate color or pattern that coordinates with your outfit
Pro tip: A silk scarf is gentler on your hair than a traditional elastic and looks considerably more intentional, so it’s worth the investment if you’re wearing this style frequently.
Final Thoughts
Slicked back half-up styles offer the perfect balance between polished and effortless—you get the sophistication of a controlled hairstyle without the commitment of a full updo. These twelve variations prove that this basic concept works across different face shapes, hair types, and occasions. The key to making any of them look genuinely polished is the execution: investing in quality smoothing products, taking time to eliminate flyaways, and accepting that the sleekness is what makes the style work.
The beauty of these styles is that they’re surprisingly low-maintenance once you get them right. Your half-up section stays put without needing constant adjustment, and the bottom section has enough volume that it doesn’t flatten against your back or neck throughout the day. Whether you’re reaching for them on lazy mornings or styling intentionally for an event, slicked back half-up styles consistently deliver that “I have it together” feeling.
Start with whichever variation appeals to you most, gather your styling products, and practice until you find your rhythm. Once you nail one or two of these, you’ll have a go-to style that makes you feel confident and polished every single time you wear it. That’s the real magic of a good hairstyle—it becomes second nature, and you get to enjoy the payoff without overthinking the process.