Your curly hair has always been your crown, but getting it into a polished style that lasts all week while keeping your ends protected? That’s where crochet half up half down styles come in. These protective hairstyles combine the sophistication of an updo with the freedom of wearing your hair down, creating a look that’s equally at home at brunch or at the office. The beauty of crochet braiding for curly hair is that it lets you showcase your natural texture while keeping things neat and intentional, without the daily manipulation that kills curls.
What makes crochet styles so perfect for curly hair is how they work with your texture instead of against it. Unlike traditional braiding that can leave crimp marks or require hours at the salon, crochet methods use pre-braided hair or yarn extensions to create defined patterns that integrate seamlessly with your curls. A half up half down approach gives you the versatility—you get an elegant gathered look at the crown while your curls flow freely down your back, creating dimension and movement that feels effortless.
Whether you’re looking for something you can install at home, a style that accommodates your natural curl pattern, or a protective look that lasts two weeks without frizz, crochet half up half down styles offer serious options. The key is understanding which crochet technique works best for your specific curl type, how to prep your hair beforehand, and which styling details will actually make the look work for your lifestyle.
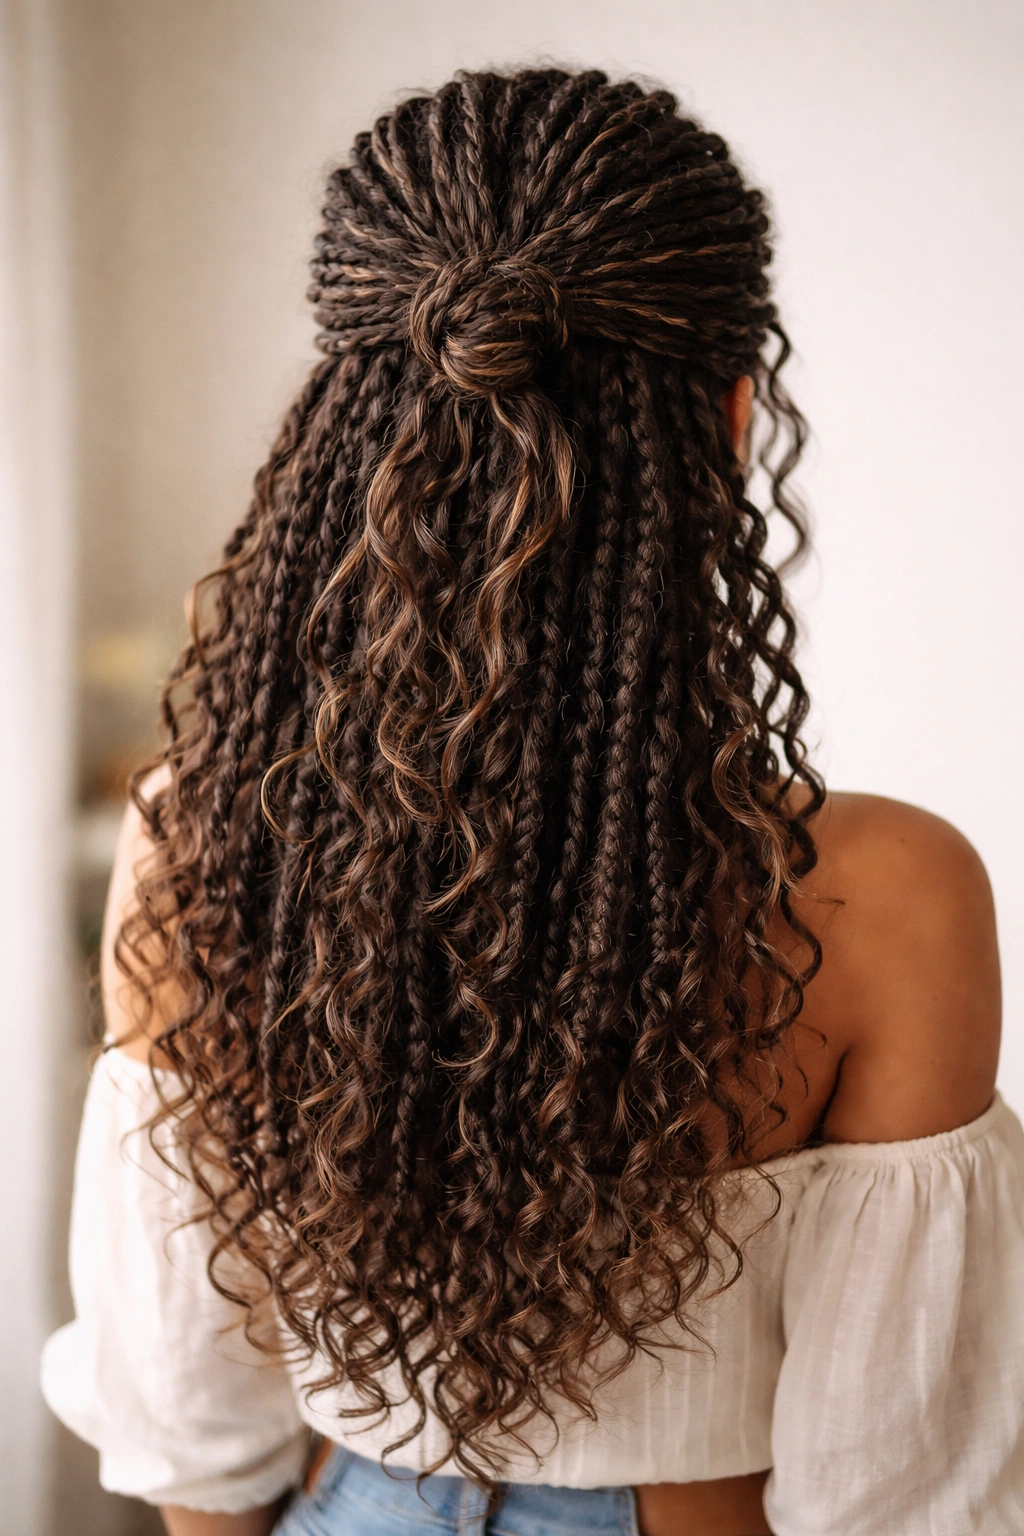
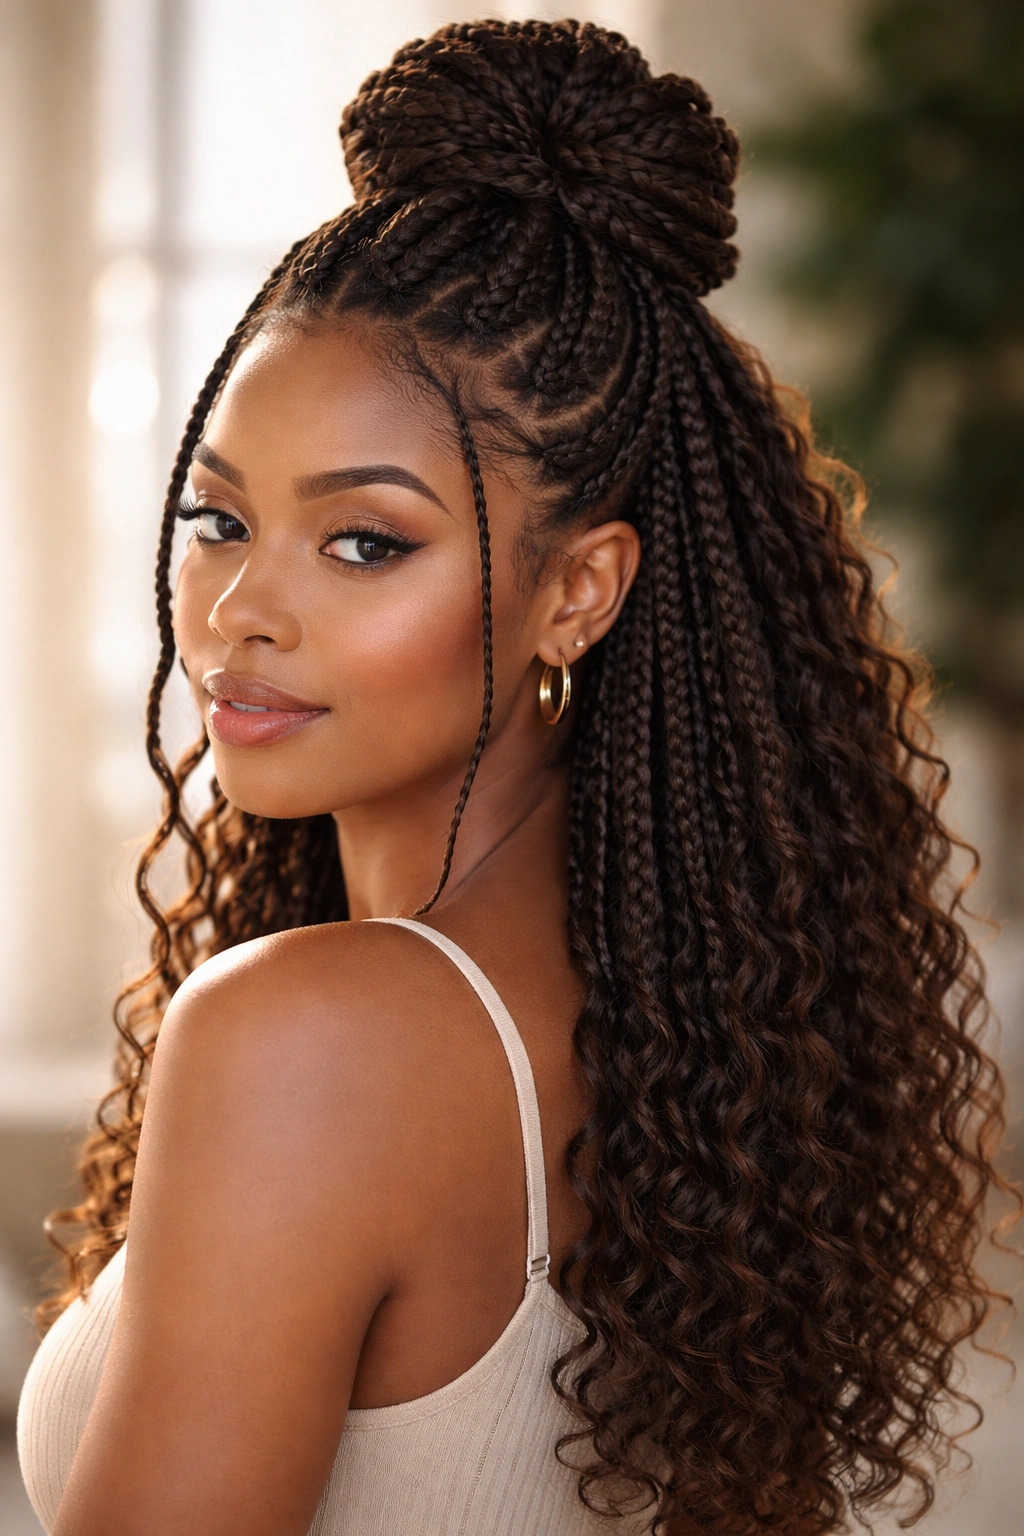
1. Crochet Braids Half Up Bun With Loose Curls
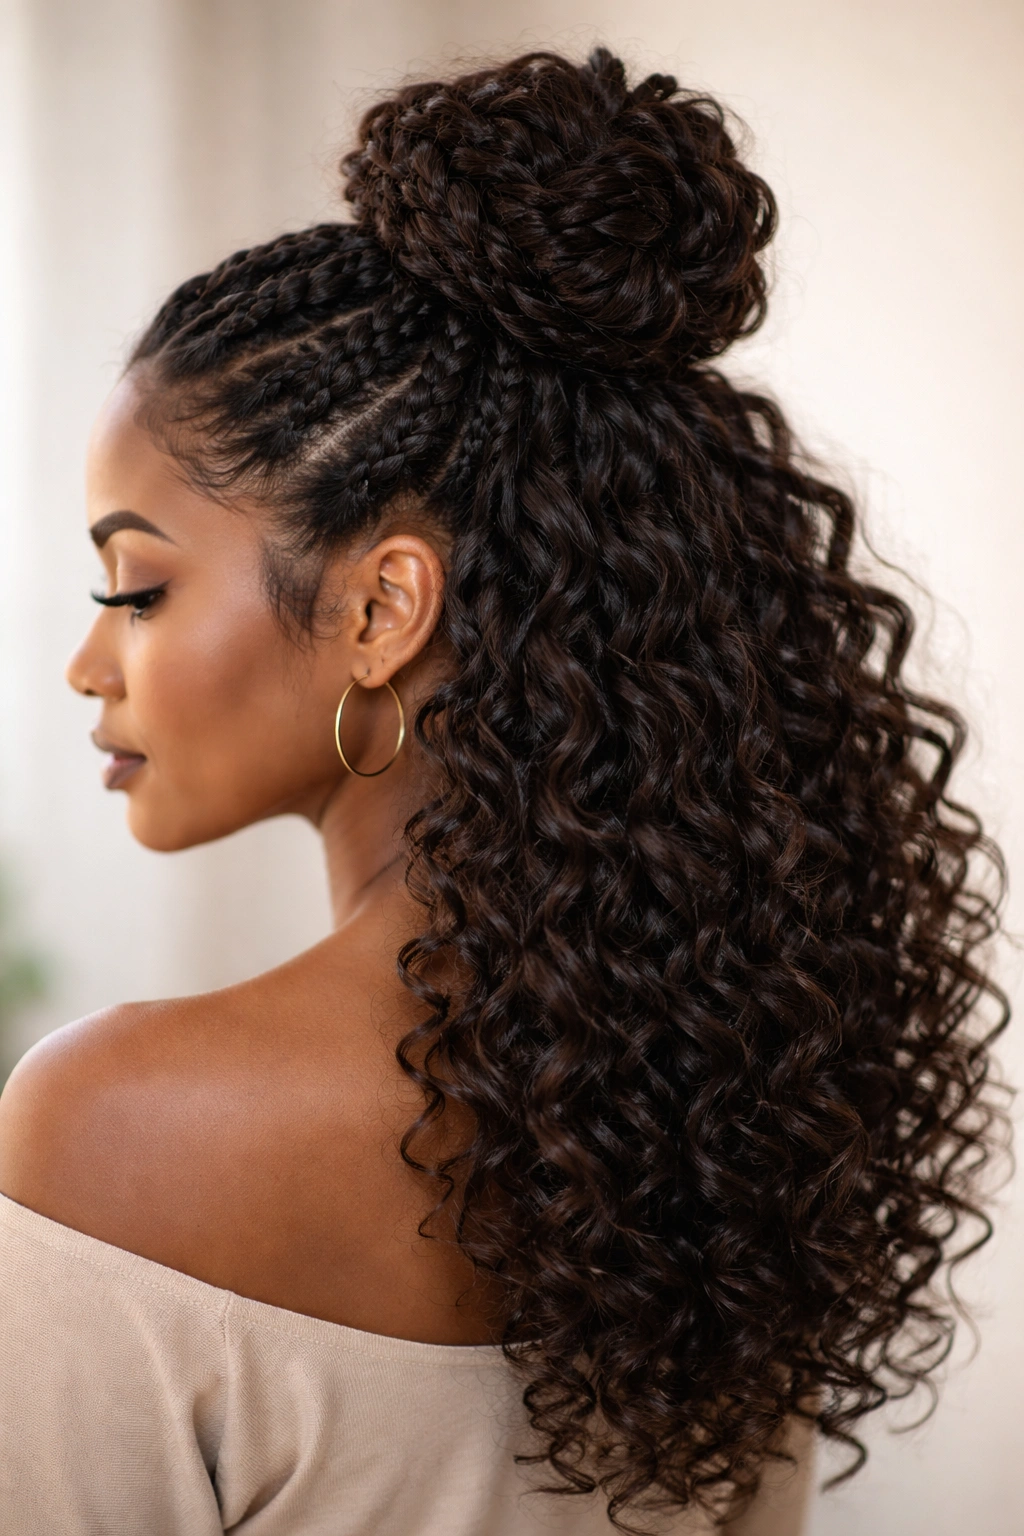
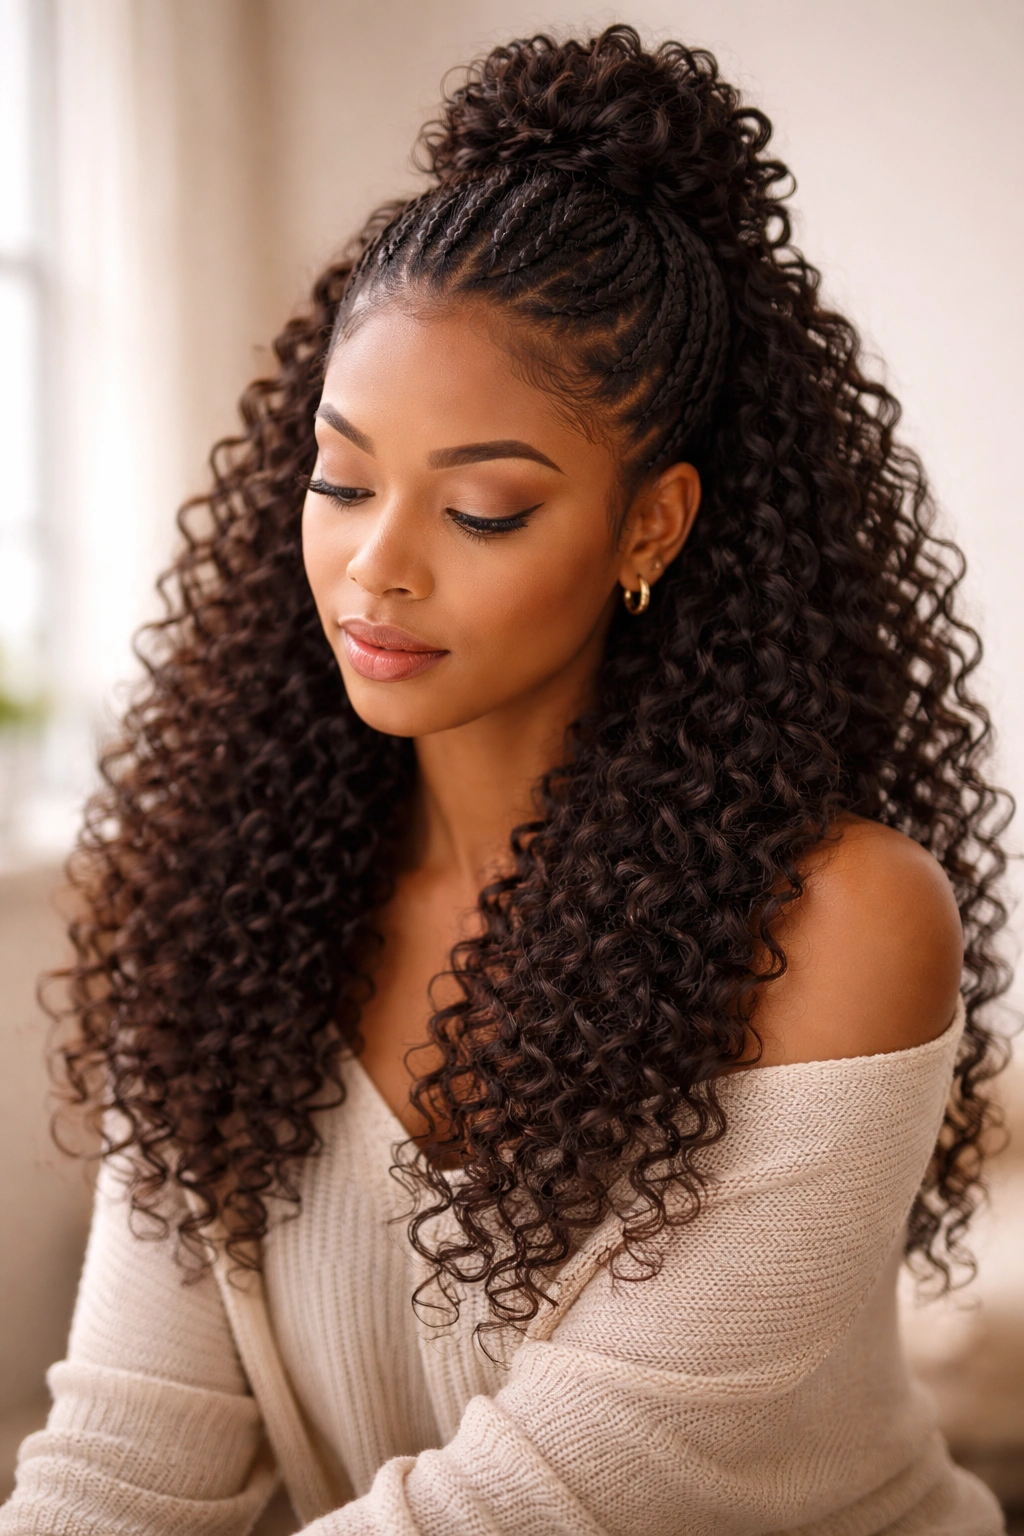
This is the workhorse of crochet half up styles—two or three thick crochet braids gathered at the crown and twisted into a loose, dimensional bun while your curls cascade down the back. The braids anchor everything in place without tension, and the bun sits high enough that it frames your face beautifully without pulling at your hairline.
Why This Look Works So Well
Crochet braids are thicker and more forgiving than traditional box braids, which means they distribute tension more evenly across your scalp. The half-up placement means you’re not gripping the entire weight of your hair at one point, so even if you wear this style for ten days straight, your edges stay intact. The loose curl underneath creates texture contrast—structured braids up top, soft waves below—that reads as intentional rather than accidental.
How to Style It Properly
Start by sectioning your curly hair into two or three thick sections at the crown, depending on your hair density. Crochet braid each section separately using textured yarn or pre-braided hair that matches your curl pattern. Bring the three braids together at the crown and secure with a small elastic, then gently twist or coil them into a loose bun shape. Let your natural curls spill from underneath and around the bun—don’t smooth them. This is where the style gets its visual interest.
Installation and Longevity Tips
- Plan for 45-60 minutes if you’re doing this yourself; longer if you’re having it done professionally
- Use a crocheting method that keeps tension light throughout—too-tight braids will cause breakage at the hairline
- The style typically lasts 7-10 days before the bun loosens from everyday friction
- Sleep in a bonnet or do a loose pineapple to maintain the bun shape overnight
Pro tip: Use yarn that’s one or two shades darker than your hair color—it blends better with curls than exact-match yarn and photographs beautifully.
2. Crochet Locs Half Up With Bohemian Twists
Crochet locs as a protective style have been gaining serious traction, and the half-up version with woven-in twists creates an unexpectedly romantic look. You’re taking two or three thick, defined crochet loc braids and pulling them up while leaving the rest of your loc’d curls down, then adding subtle twists around the gathered section for visual richness.
What Makes This Style Special
This is the move if you want protection that doesn’t scream “protective style”—it reads more like a thoughtful, intentional updo. The locs provide serious longevity because they’re tightly constructed, which means you can wear this for three weeks without reinstalling. The bohemian twists add a feminine touch that softens the structured look of the locs themselves.
Creating the Twisted Detail
After gathering your locs into the half-up section, take two thin strands from the gathered hair and gently twist them around the base of your bun or the elastic holding everything together. This doesn’t have to be tight—a loose, relaxed twist is actually more visually interesting. You can spiral it around once, or create two or three separate twists depending on the volume of your gathered section. The key is that the twists sit on top of the gathered section, not hidden inside it.
Maintenance Between Installs
- Refresh your twists every 3-4 days by unraveling them and retwisting loosely
- Light oil on your locs keeps them from looking dusty or dull
- This style works better in months with less humidity since moisture can cause some frizz in the twists
- The locs themselves don’t require nightly maintenance beyond a loose bonnet
Worth knowing: If you have thick or extra-dense hair, use only two locs for your half-up section instead of three—more can feel bulky and pull uncomfortably at your crown.
3. Two-Tone Crochet Braids With Crown Detail
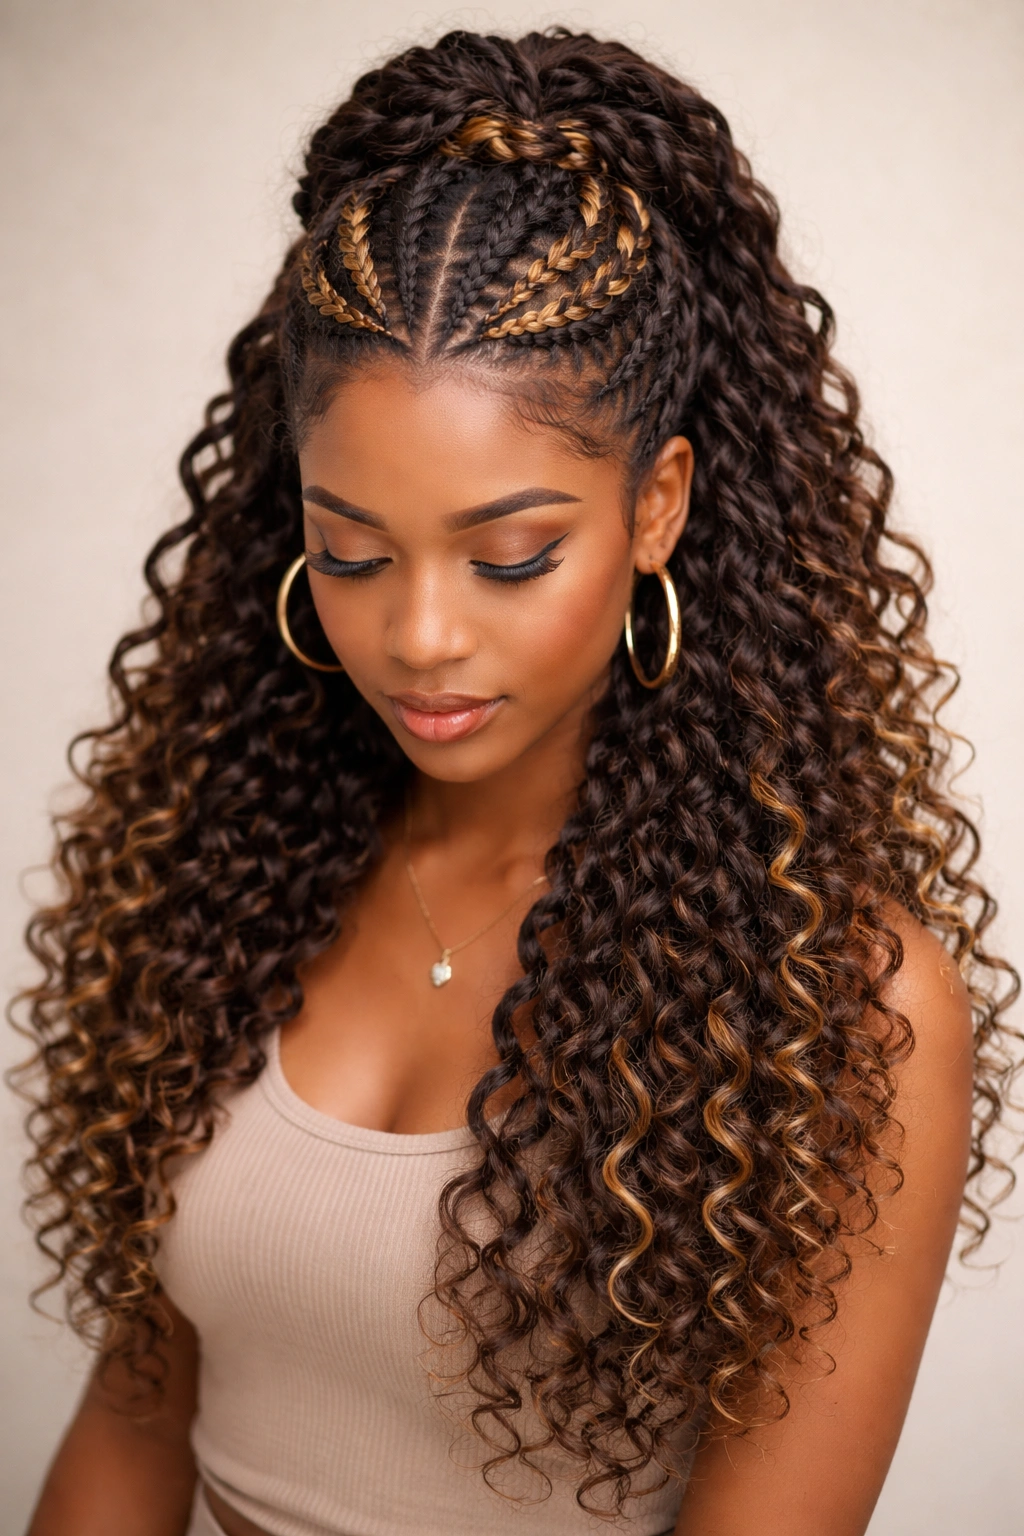
This style uses two contrasting yarn colors for your crochet half-up braids—think charcoal and honey, or burgundy and black—which creates immediate visual impact. The two-tone pattern sits at your crown while your curls hang loose, making the style feel modern and intentional rather than casual.
Why Two-Tone Creates Visual Interest
Monochromatic protective styles are timeless, but two-tone crochet braids draw the eye directly to your crown and create a focal point. The color blocking makes thinner braids look fuller, and it photographs beautifully from every angle. This is especially effective if you have medium to thick hair density—thinner hair can sometimes look sparse with very thick single-color braids, but the pattern of two-tone braids creates an optical illusion of fuller coverage.
Installation Method That Works
Separate your crown into two thick sections instead of three. In the first section, crochet braid with color A (say, black). In the second section, crochet braid with color B (say, gold). When you gather them together at the crown, they sit side-by-side, creating a natural-looking two-tone effect. This is easier than trying to blend two colors within a single braid, which can look messy.
Styling for Maximum Impact
- Wear the two-tone braids slightly to one side rather than perfectly centered—it feels more dynamic
- Let your curls fall in their natural direction without smoothing or shaping them
- If you have a lot of loose curl texture, slightly damp curls on installation day will look fuller and more defined
- The contrast works best when you wear your hair down rather than in additional styles
Pro tip: Choose two colors where one is your natural hair color or very close to it—this makes the transition where the braids meet your loose curls look seamless.
4. Crochet Zig-Zag Braids Half Up With Side Sweep
Instead of traditional neat rows, crochet zig-zag braids create diagonal or offset lines across your crown, gathered into a half-up style that sweeps subtly to one side. This approach works beautifully for curly hair because the angular lines complement natural curl patterns and create visual movement.
The Geometry That Makes This Work
Zig-zag parting creates the illusion of thicker, fuller hair because the offset sections catch light differently than straight rows. The diagonal lines also naturally guide the eye toward your face rather than just straight back, which is flattering for most face shapes. When you gather these braids to one side rather than straight back, you’re creating an asymmetrical look that feels contemporary and intentional.
Parting and Installation
Create your parting pattern before you start crocheting. Use a rat-tail comb to map out diagonal or offset sections across your crown—step the partings over by about a half-inch each row so they create a clear zig-zag pattern. Crochet braid each section, then gather all the braids to one side of your head at the crown, securing with a small elastic or clip. The zig-zag pattern should be visible from the top and side view.
Making It Last Longer
- Zig-zag partings create more surface area, which can make edges more prone to breakage if not installed carefully
- Ensure each braid starts with a loose foundation at the parting—tightness at the root will damage new growth
- Sleep with your gathered braids pinned to minimize friction against your pillow
- This style lasts well for 8-10 days before reinstallation is needed
Insider note: This style photographs exceptionally well for social media because the zig-zag pattern is visually striking from overhead shots.
5. Crochet Butterfly Locs Half Up Knot
Butterfly locs are the lightweight cousin of traditional locs, and the half-up knot version is pure elegance. You’re creating textured butterfly locs through the crown and sides, then gathering them into a loose knot at the back of your head while leaving longer curls flowing freely underneath.
What Butterfly Locs Offer Your Curls
Butterfly locs have more texture and curl definition than traditional crochet locs because they’re created with a looser technique that allows more movement. They’re faster to install than regular locs (usually 3-4 hours versus 6-8), they last just as long (2-3 weeks), and they put less tension on your hairline because they’re genuinely lighter. For curly hair, this means your natural curl pattern stays visible and beautiful even within the protective braiding.
Creating the Knot Detail
After installing butterfly locs through your crown and upper sides, gather them together at the base of your skull—roughly where a low bun would sit—and tie them loosely into an overhand knot. The knot should sit flat against your head, not puff out dramatically. Tuck the ends of the knot under slightly so they blend with your loose curls. The effect is almost like your curls tied themselves up, which feels organic rather than constructed.
Daily Care for Butterfly Locs
- These locs are intentionally textured, so some frizz is actually part of the aesthetic
- Use a lightweight oil or mousse on your loose curls to keep them defined
- The knot will loosen slightly over days 5-7, but you can retie it very loosely without reinstalling
- Pineapple nightly in a loose bonnet to preserve both the knot and your curls
Worth knowing: Butterfly locs work best on hair that’s at least shoulder-length—shorter hair doesn’t have enough length to create a satisfying knot.
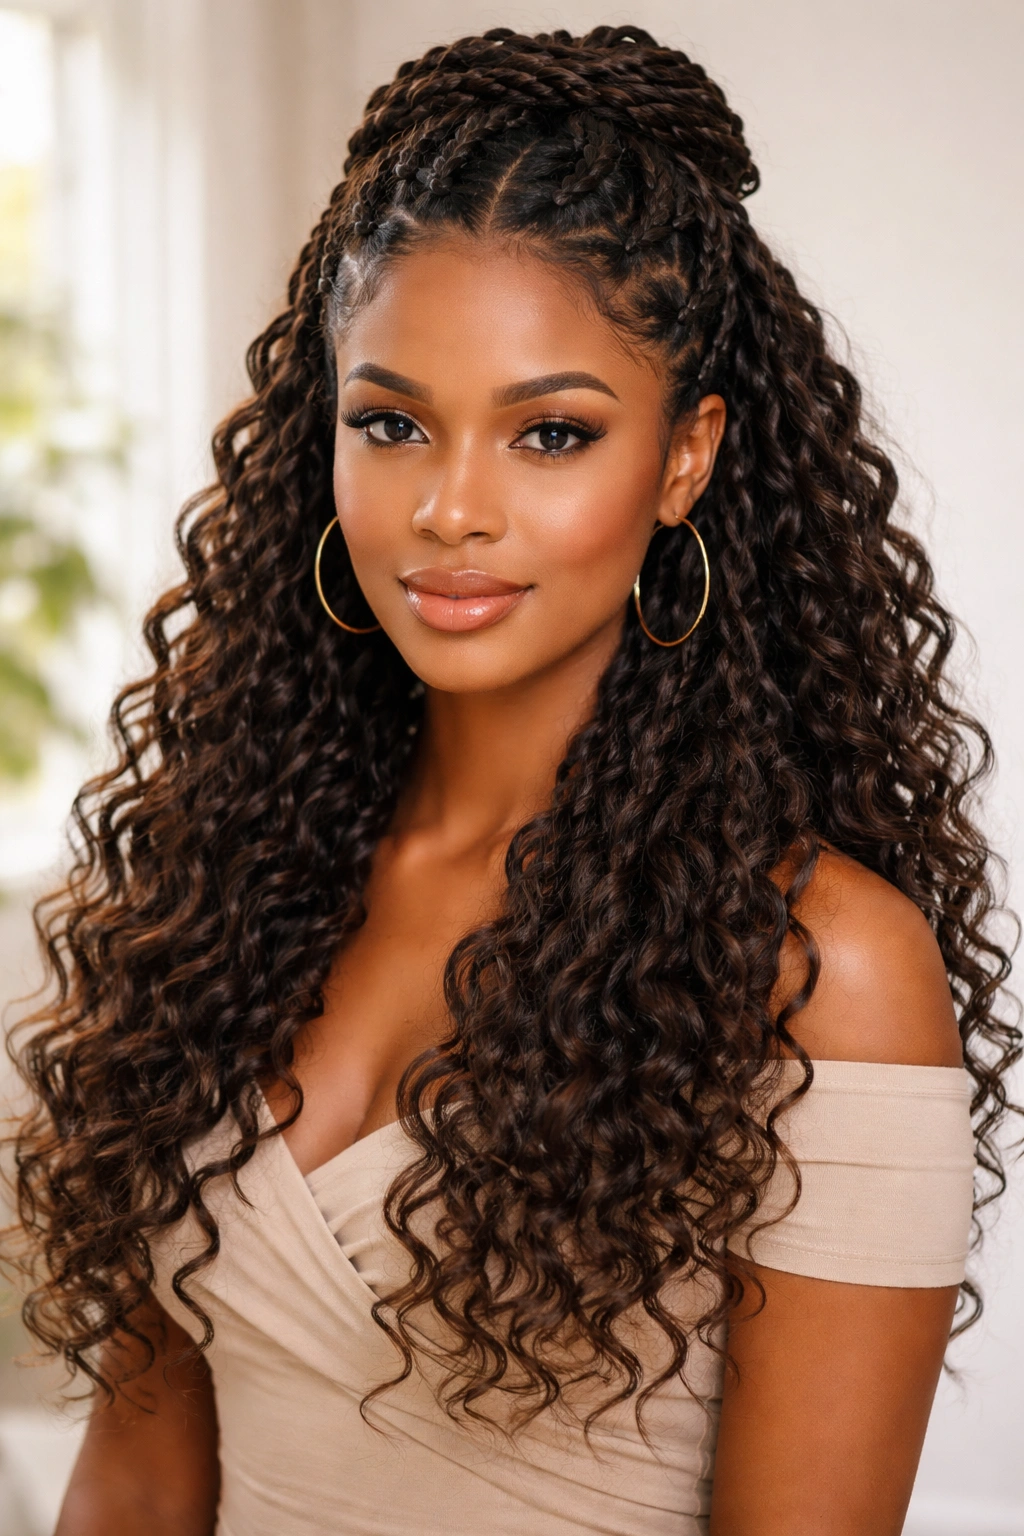
6. Thin Crochet Braids Half Up With Waterfall Effect
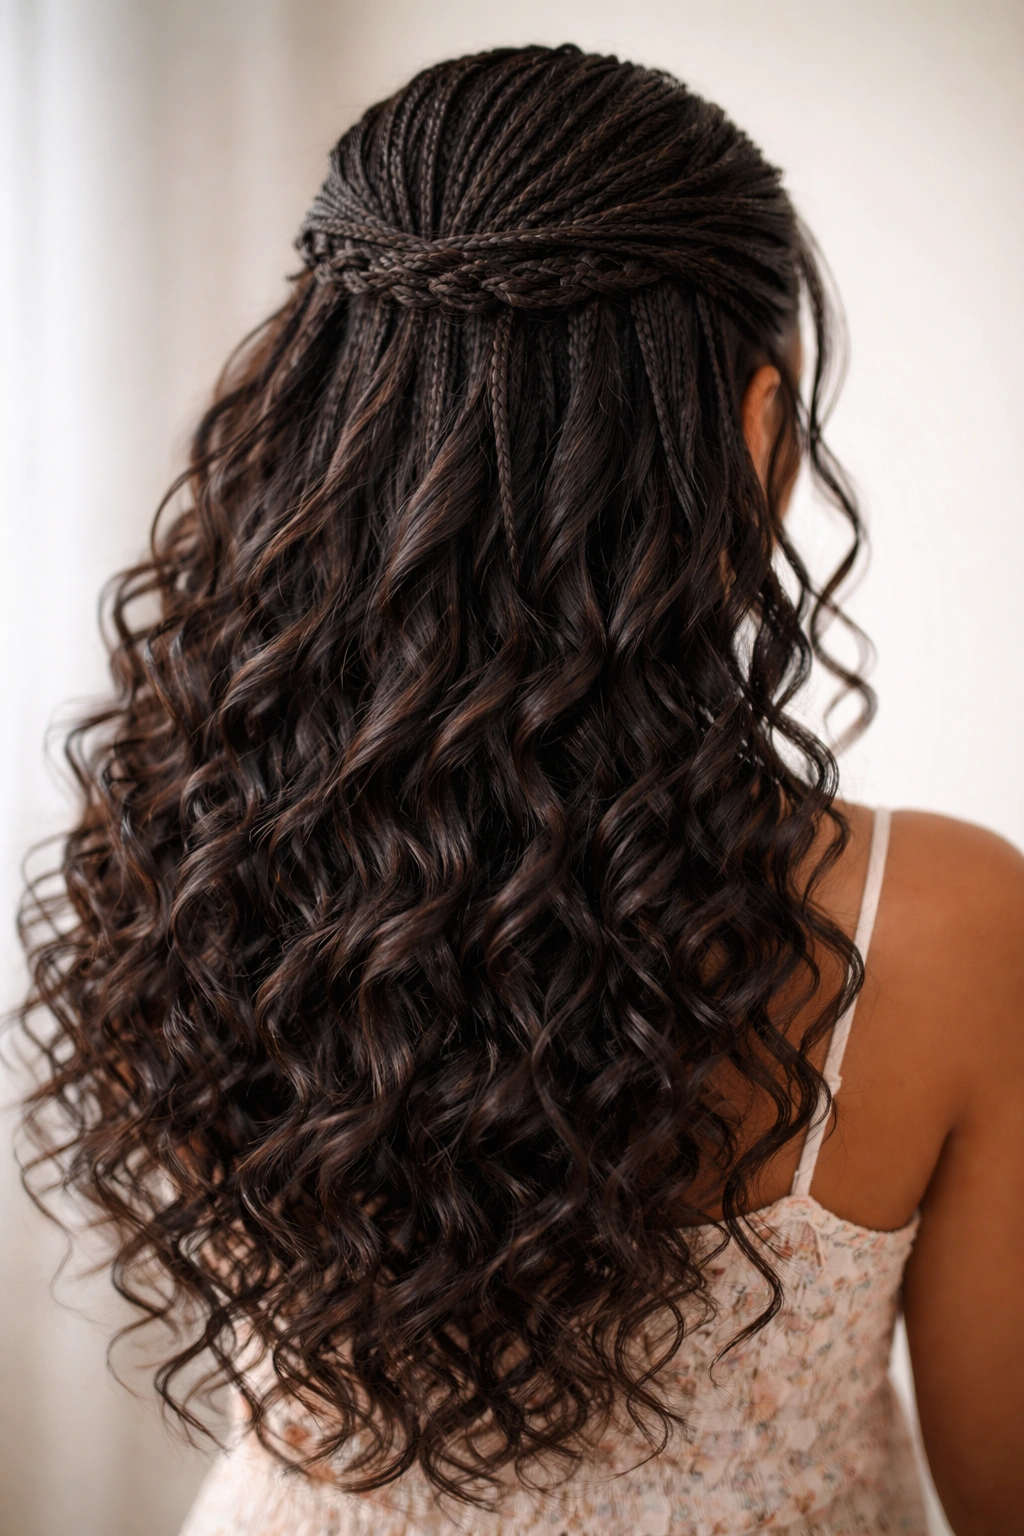
This is the delicate option for curly hair that doesn’t want obvious, thick braiding. You’re creating multiple thin crochet braids across the crown, gathering them loosely, and letting them cascade down the back in a waterfall effect rather than sitting neatly against your head.
Why Thin Braids Read Differently
Thin braids create intricacy and visual interest without the structural heaviness of thicker braids. They’re also less damaging because you’re distributing hair thinner across more sections—each individual section carries less weight. For curly hair specifically, thin braids blend more seamlessly with your natural texture because the braids don’t contrast as dramatically against your curls.
Installation for the Waterfall Look
Create 4-6 thin crochet braids across your crown, spacing them evenly from one side to the other. Don’t gather them tightly—instead, secure them very loosely with a small, flexible elastic. Let the braids spill forward and cascade down your back, creating a gentle waterfall where the braids flow into your loose curls. The braids shouldn’t sit flat against your head; they should have movement and bounce.
Styling Tips That Matter
- Your loose curls underneath should be freshly moisturized and well-defined before installation—they’re a major part of the visual
- The waterfall works best when your curls are longer (chin-length or below)
- Light misting with a texture spray on installation day helps the braids and curls blend visually
- This style works beautifully for semi-formal occasions because it feels polished without being rigid
Pro tip: If your natural curls are very thick or dense, use a slightly heavier crochet yarn for your braids—lightweight yarn can look thin and scraggly against heavy curls.
7. Crochet Twists Half Up With Spiral Crown
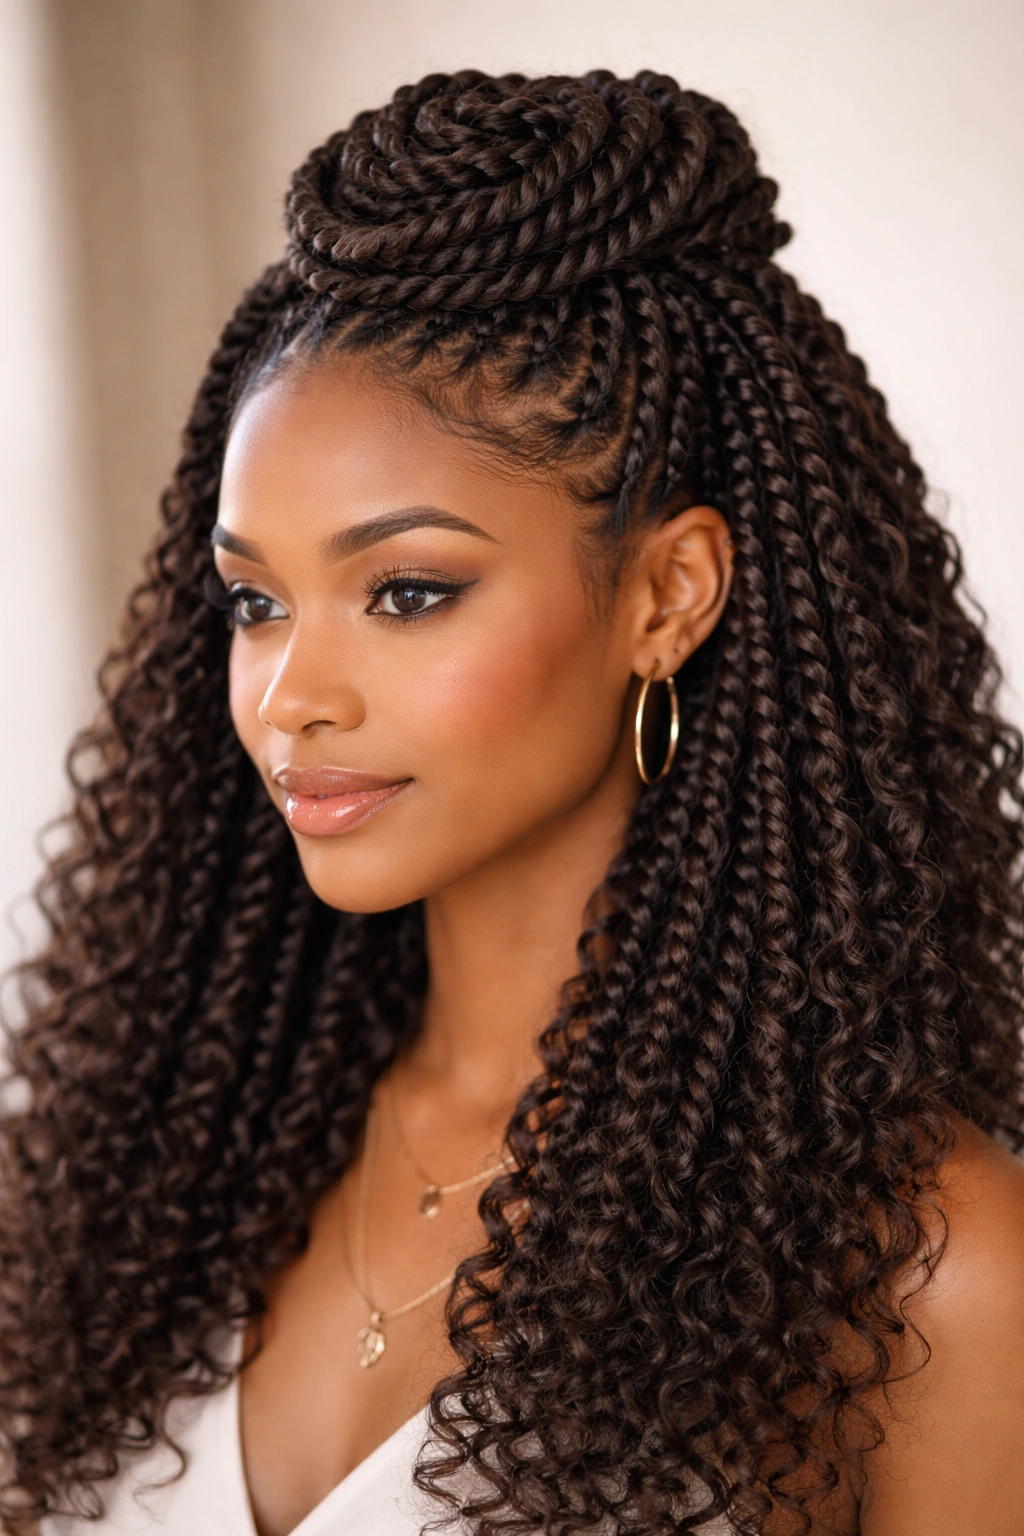
Crochet twists are gentler than braids and create a completely different aesthetic—imagine rope-like texture rather than a woven pattern. The spiral crown version gathers your crochet twists and coils them at your crown rather than pulling them straight back, creating a sculptural, artistic look.
The Gentleness Factor
Crochet twists use a two-strand twist pattern rather than three-strand braiding, which means less tension throughout the installation. For curly hair that’s already been through protective styling, this gentleness matters. You can do crochet twists more frequently (even every 3-4 weeks with proper maintenance) without depleting moisture or causing breakage because the construction itself is less extractive.
Creating the Spiral Crown
Install your crochet twists as usual, then gather them at the crown and begin coiling them around each other in a loose spiral pattern, working from the center outward. Each twist should wrap around the spiral multiple times before disappearing into the coil. The spiral should sit on top of your head with visible dimension—this is where the artistry comes in. It’s almost like a sculptural crown that your curls frame underneath.
Longevity and Refreshing
- Crochet twists last 10-12 days before you need to reinstall
- You can refresh the crown by uncoiling it and re-spiraling every 4-5 days
- Sleep in a bonnet to maintain the spiral shape
- These twists create a softer look overall, so they work better with casual styling than formal occasions
Insider note: Crochet twists photograph beautifully from the back—the spiral crown creates depth that reads incredibly well in pictures.
8. Crochet Box Braids Half Up With Metallic Accents
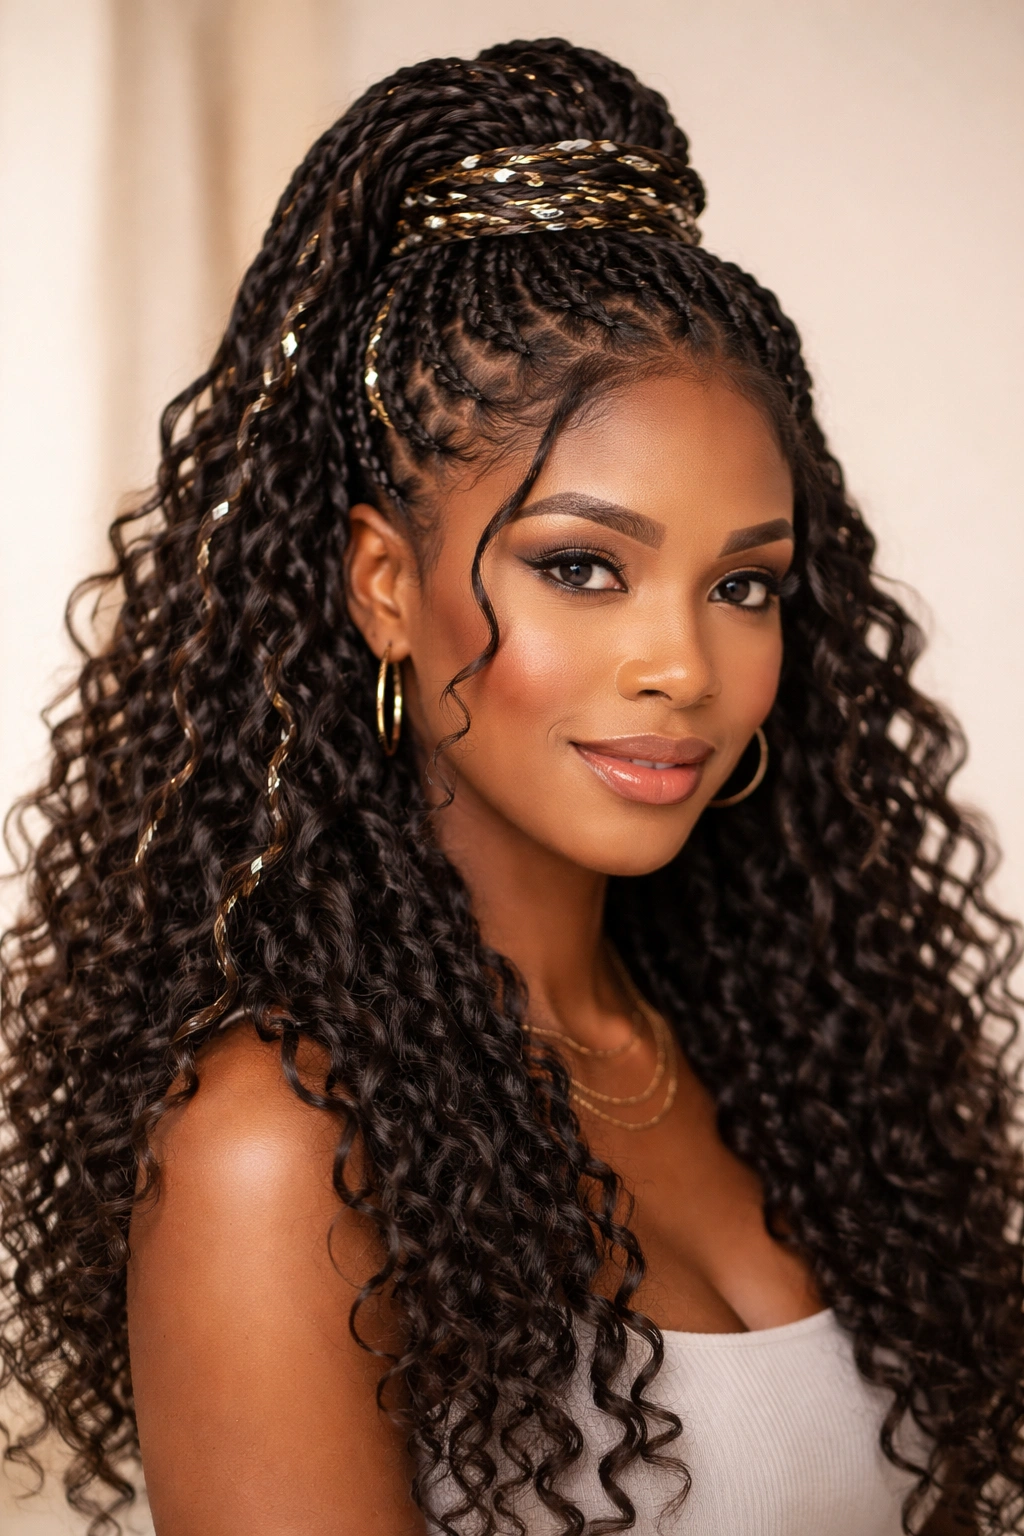
If you want your half-up style to feel celebratory, add metallic crochet yarn to your box braids. You’re creating classic thick box braids for the upper half of your head, pulling them up, then incorporating thin metallic strands woven through or wrapped around the gathered section for shine and movement.
Why Metallics Work for Curly Hair
Gold, silver, or rose-gold metallic yarn catches light beautifully against natural curls and doesn’t look costume-y the way it might in very straight hair. The metallic has presence without being overpowering because your curls provide texture and depth that grounds the shine. This works best for people who want their protective style to feel celebratory rather than understated.
Integration Method
You have two options: blend metallic strands into your braids from the installation, or wrap thin metallic yarn around your gathered braid section after installation. The second method is easier if you’re doing this yourself. After gathering your box braids at the crown, take thin metallic yarn and wrap it around the base of your gathered section in a spiral pattern, or create small loops that sit on top of your braids. The metallic doesn’t need to be hidden—let it be a feature.
When to Wear This Style
- Special occasions, date nights, or nights out
- Workplace settings where you can express personality and creativity
- Photography sessions where you want visual impact
- Summer or warm-weather events where the shine complements the season
Pro tip: Rose-gold metallic works with almost every skin tone and hair color, while gold metallics look stunning on warm undertones and silver on cool undertones.
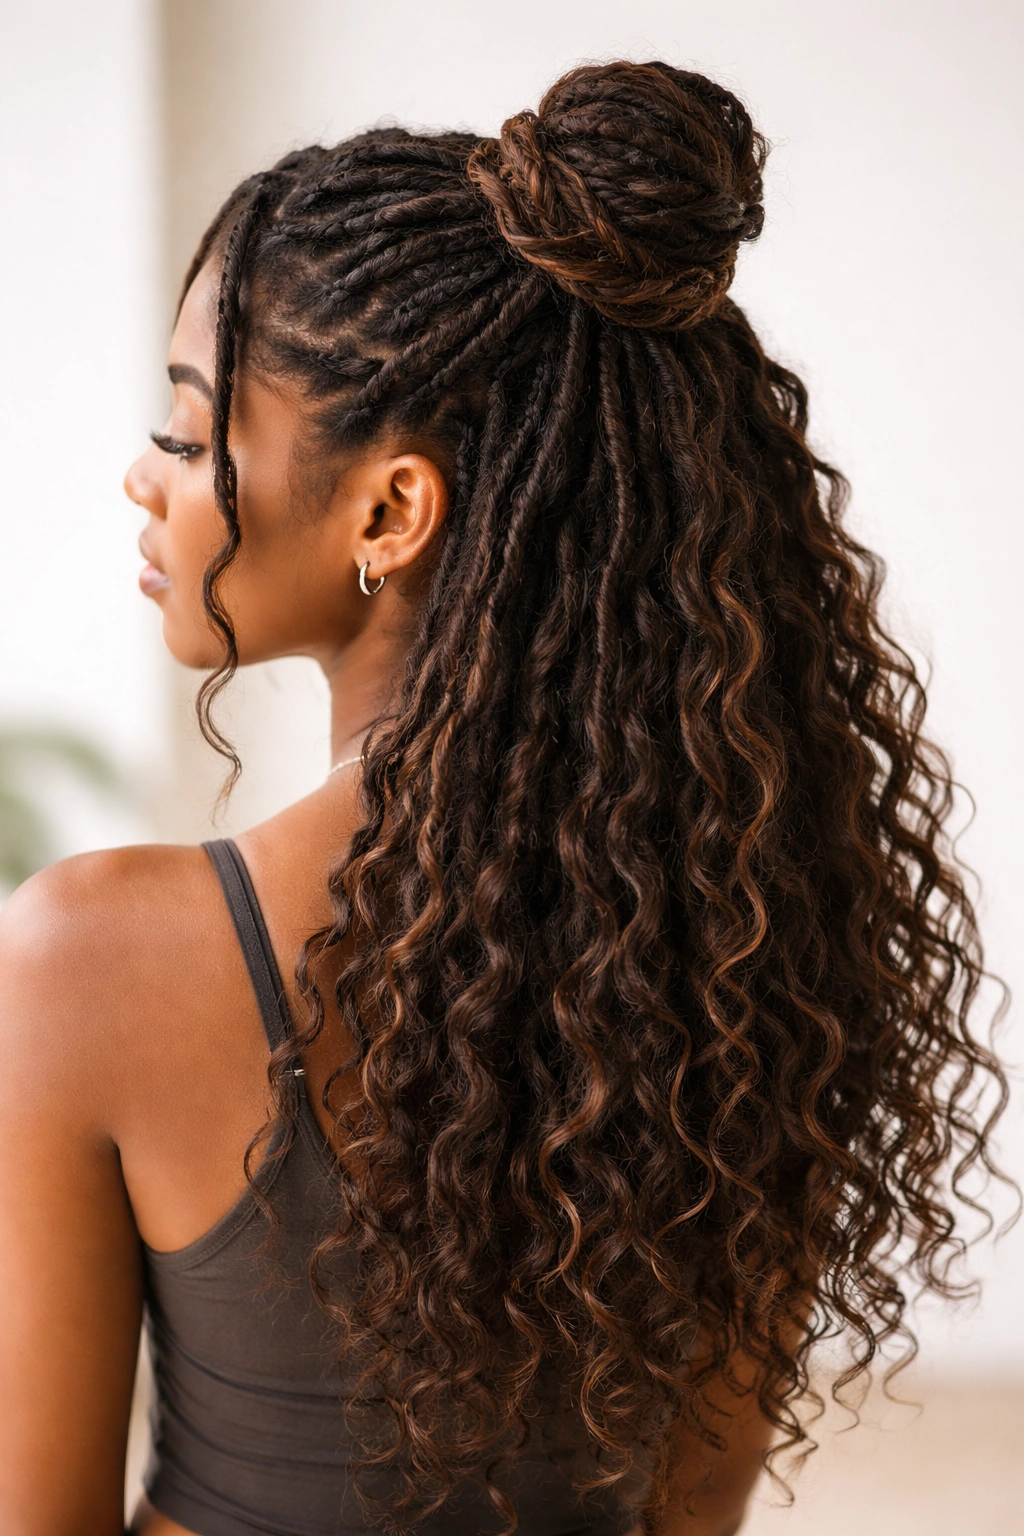
9. Crochet Knotless Braids Half Up Twisted Bun
Knotless crochet braids eliminate tension at the root by starting with a soft, gradually-thickening pattern rather than a tight anchor knot. The half-up version gathers these braids and twists them into a soft bun, creating an incredibly gentle protective style that your hairline will thank you for.
Why Knotless Changes Everything
Traditional crochet braids start with a knot at the root that anchors the yarn to your hair—this knot can create tension that leads to breakage over time. Knotless braids use a method where yarn is gradually introduced, so the beginning is flexible and soft. For curly hair that’s prone to dryness and breakage, this difference is substantial. You can install knotless braids more tightly without damaging your hair because the construction itself distributes tension more evenly.
The Twisted Bun Technique
After installing your knotless braids, gather them at the crown and twist them very loosely around each other to form a soft bun. The twisting should be visible—not too tight. This creates movement and texture rather than a compact, tight bun. Your loose curls flow beneath and around the bun, and because the knotless braids are lighter weight, the bun feels comfortable even if you wear it all day.
Care Instructions
- These braids last up to 3 weeks comfortably
- The knotless starting point means no tension headaches, even on day one
- Sleep in a bonnet to preserve the bun shape
- You can lightly untwist and retighten the bun every 5-7 days to refresh the look
Worth knowing: Knotless braids cost a bit more than traditional crochet braids, but the longevity and reduced breakage usually make up for it financially over time.
10. Crochet Curly Locs Half Up With Ribbon Weave
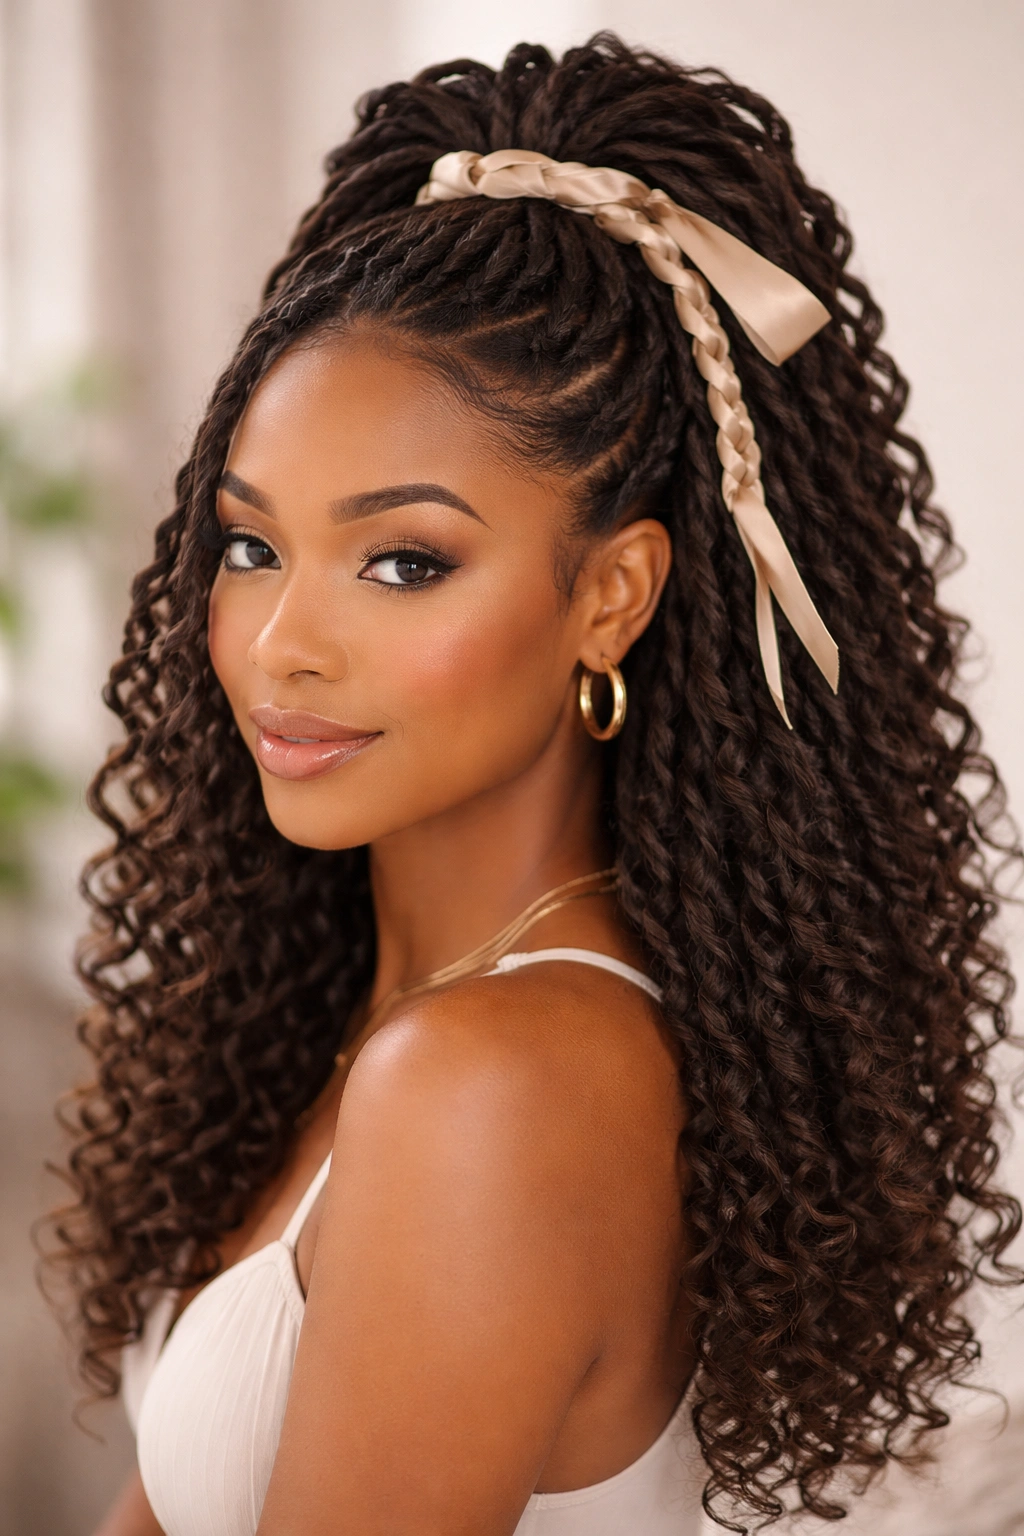
Crochet curly locs maintain your hair’s curl pattern while still offering protection, and adding a ribbon weave through the half-up section creates femininity without looking costume-like. You’re keeping things natural and texture-focused while adding one elegant detail that transforms the whole look.
Curly Locs and Natural Texture
Curly locs are created with a loose crochet technique that maintains your natural curl pattern throughout—they don’t look like rope or twists, they look like your hair locked and defined. Installing a half-up style with curly locs means your entire head celebrates your natural texture, protected and intentional. This is the move if you love your curls and want a protective style that honors rather than minimizes them.
Adding the Ribbon Element
Choose a silk or satin ribbon in a complementary color. After gathering your curly locs into the half-up section, weave the ribbon through them, creating a subtle pattern. The ribbon can go over-under-over through the gathered locs, or you can create a simple spiral by wrapping it around the gathered section. The ribbon should be visible but not overpowering—this is a detail, not a statement.
Styling That Complements
- Wear your loose curly locs down in their natural pattern
- The ribbon works better in warm, jewel tones than bright or neon colors
- This style is beautiful for casual and semi-formal occasions
- Light refresh spray on your loose curls keeps them defined throughout the day
Pro tip: Use silk or satin ribbon rather than regular cotton ribbon—natural hair moves better against smooth materials and you won’t get friction frizz.
11. Crochet Triangle Part Braids Half Up Gathered High
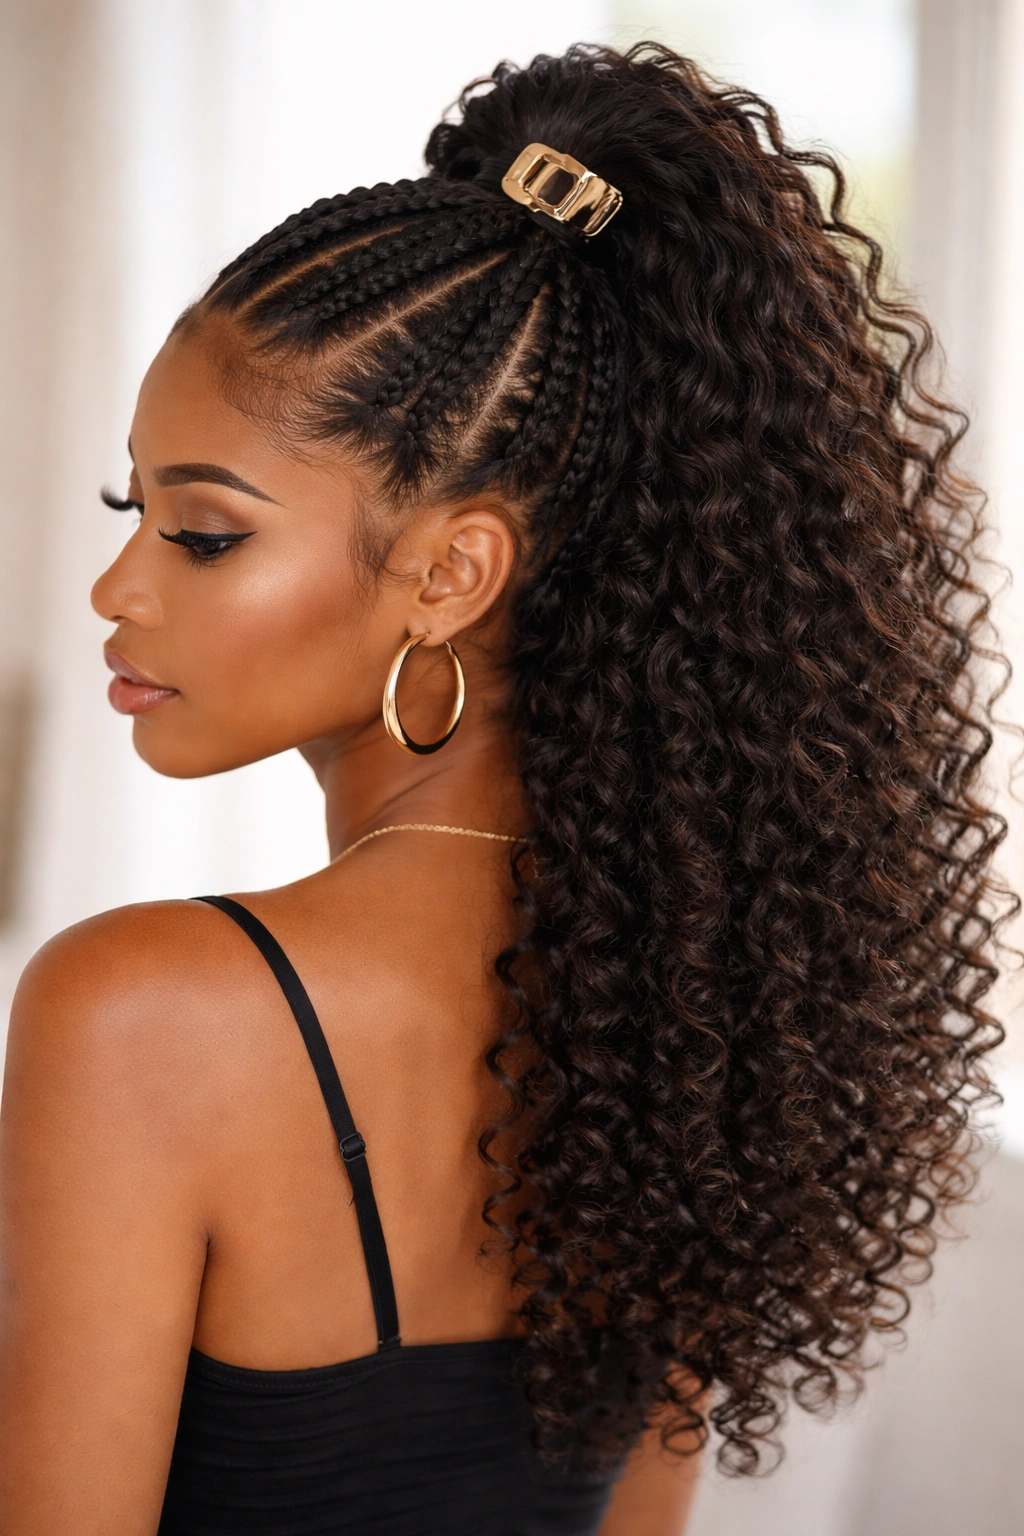
Instead of straight rows, create three thick triangular sections that meet at a point at your crown, crochet braid each one, then gather them very high on your head and secure with a claw clip or gold barrette. The triangle parting creates visual interest and the high gather keeps your curls flowing long and free.
The Triangle Parting Strategy
Create one triangle section at the center crown, pointing backward. Create two more triangle sections on each side, also pointing toward the center. When you crochet braid each triangle section, the three braids naturally come together at one point, making gathering them incredibly easy and visually balanced. This parting works beautifully on all face shapes because the triangular lines are forgiving.
The High Gather Detail
Pull your three braids directly up rather than back—gather them at the very crown of your head with a small elastic, then secure with a metallic clip or claw clip. The height makes your face appear lifted and elongated. Your curls spill down from this gathered point, creating serious volume and movement. From the front, people see your face framed by curls; from the back, they see the architectural detail of your three braids converging.
Styling Versatility
- Wear this style to the gym and have your hair actually stay back
- Works beautifully for professional settings
- The high placement means minimal neck hair contact, so it’s cooler in warm weather
- Lasts 8-10 days before the gather loosens from movement
Insider note: This parting pattern flatters rectangular and long face shapes especially well because the horizontal gathering at the crown creates width at the right point.
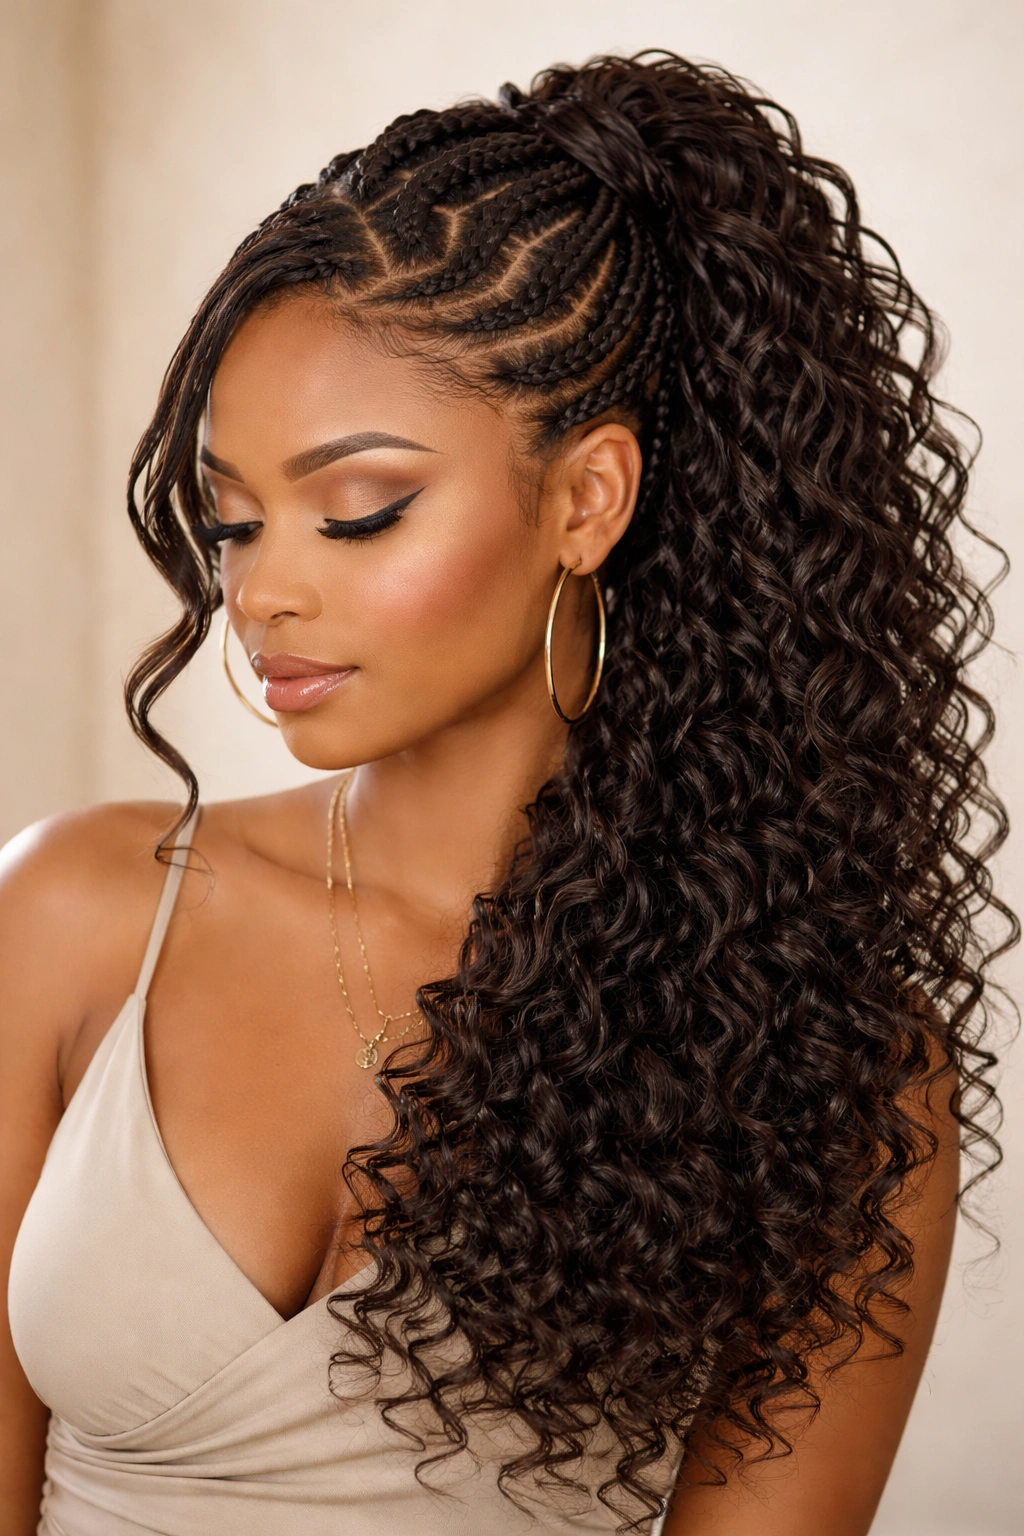
12. Crochet Goddess Braids Half Up Loose
Goddess braids are thicker than regular braids and have a beautiful, slightly puffy aesthetic that photographs gorgeously. The half-up loose version gathers them at your crown then lets them spill into your curls, creating the kind of romantic, effortless-looking style that actually took serious effort.
What Makes Goddess Braids Special
Goddess braids are done with thicker sections and sometimes with yarn woven in from the sides (creating that puffy effect), making them look fuller and more luxurious than regular braids. They’re gentler on your hairline than box braids because the larger sections distribute weight more evenly. For curly hair, goddess braids create stunning contrast—defined, sculpted braids against soft, flowing curls.
The Loose Gathering Technique
Don’t pull your goddess braids tight when gathering them. Instead, secure them very loosely at your crown with a flexible band or clip, and let them have movement. Some of your braids might sit closer to your head while others fall slightly looser—this natural variation is what makes the style feel romantic rather than severe. Your curls should blend seamlessly with the gathered braids, not look like a separate element.
Installation and Maintenance
- Goddess braids take 3-4 hours but last 2-3 weeks
- The loose gathering means you can adjust the style daily—tighter on gym days, looser on chill days
- Light oil on your braids keeps them from looking dull or crunchy
- Sleep with the gathered section pinned or in a bonnet to maintain the loose, romantic shape
Pro tip: Goddess braids work beautifully when you use yarn that has slight texture or sheen rather than flat, matte yarn—the light-catching quality enhances the romantic vibe.
Final Thoughts
The best crochet half up half down style for your curly hair depends on your hair density, your lifestyle, and honestly, what look makes you feel confident. If you’re new to protective styling, start with something gentler like crochet twists or knotless braids so you can learn how your hair responds before committing to a longer installation. Pay attention during installation—any style that creates tension or discomfort isn’t worth it, no matter how beautiful it looks. Your edges and hairline are non-negotiable, and a good protective style should feel invisible by day three, not like an anchor pulling at your crown.
The maintenance piece matters more than people talk about. You can install the most gorgeous crochet style in the world, but if you don’t moisturize your loose curls, refresh your style appropriately, and sleep with protection, you’ll spend weeks undoing the damage. Invest in a good bonnet or sleeping cap, find a moisturizing routine that works for your curls, and don’t stretch a style too long just because you don’t want to reinstall. Two weeks is the sweet spot for most crochet half-up styles—by week three, your roots are showing and your style is loosening anyway.
Most importantly, remember that protective styling should feel protective. If your scalp is sore, your edges are receding, or you’re losing more hair than normal, your style is too tight—period. Loosen it, take it down, or try a gentler method next time. Your curls will thank you for the intentionality, and you’ll get that beautiful half-up look without sacrificing the health of your hair.