Pearl accents have quietly become the ultimate way to elevate any half-up style — they catch light, add instant sophistication, and work equally well for weddings, everyday elegance, or nights out. Whether you’re drawn to classic pearl hairpins clustered near the crown, delicate pearl-studded bobby pins threaded throughout a twisted section, or elaborate pearl-studded combs anchoring a voluminous updo section, the versatility of pearls in half-up hair is staggering. The beauty of combining pearls with a half-up half-down style is that you get the best of both worlds: the polished, intentional look of styled hair combined with the softness and movement of waves flowing freely down your back. Pearl accessories work across every hair texture, age, and occasion — a single pearl clip can transform a casual day look, while a cascade of pearls creates red-carpet drama.
The styling possibilities go far beyond simply pinning pearls into a bun. You can weave them through braids, anchor them at twists, layer them along the sides of your face, or use pearl-studded combs to secure the half-up section while letting them peek out from the crown. Each approach creates a distinctly different vibe, from romantic and soft to bold and editorial. The key is understanding how to work with your hair type, how many pearls create the right impact without looking overdone, and how to position them so they actually stay put while still showcasing their luminous beauty. Let’s walk through fifteen hairstyles that make pearls the hero of your half-up half-down look.
1. Classic Pearl-Studded Bobby Pins at the Crown
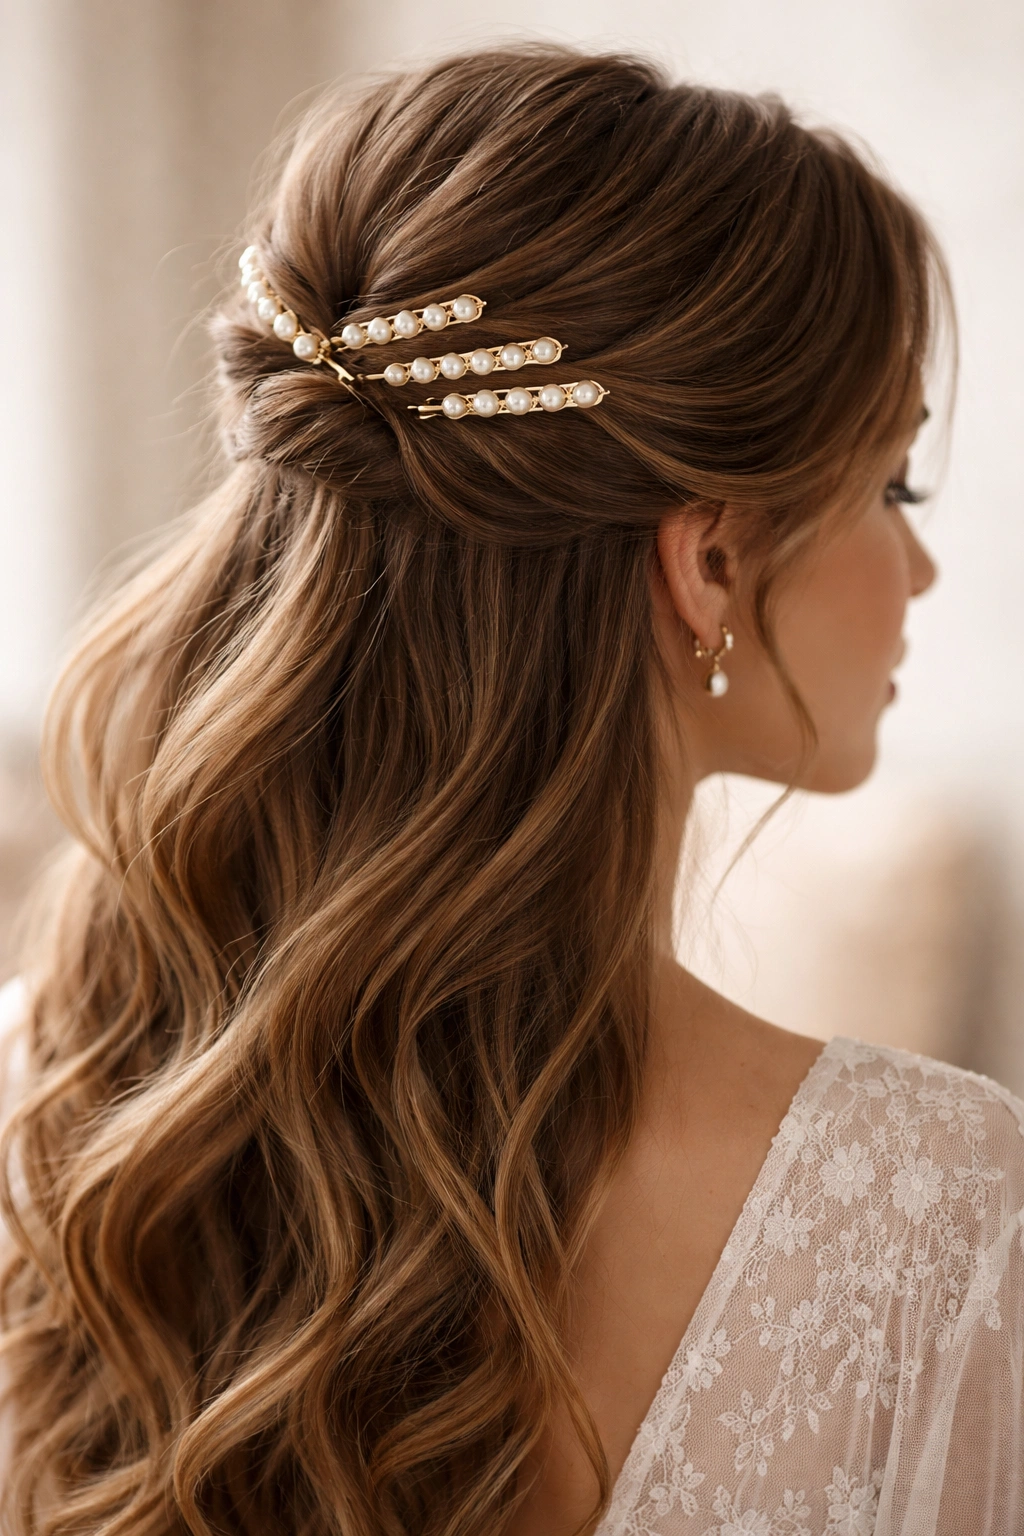
This is the most timeless approach to adding pearls to a half-up style, and it’s deceptively sophisticated. Gather the top section of your hair from temple to temple and secure it with a sleek elastic, then use 3-5 pearl-studded bobby pins fanned across the crown to anchor the updo section while hiding the elastic underneath. The pearls face forward and downward, creating a delicate sparkle that frames your face without overwhelming it.
Why This Works for Everyone
Pearl bobby pins work beautifully on fine hair because you don’t need volume at the crown to make the look feel polished — the pearls do the work for you. On thicker hair, they add just enough embellishment to break up the density at the back of the head. The genius of this style is that it looks effortlessly elegant rather than over-engineered, which is exactly what makes it perfect for work, casual dates, or family events where you want to look intentionally put-together without appearing overdressed.
How to Execute It Perfectly
Start with clean, dry or second-day hair with some texture — pearls slide off perfectly smooth strands. Section off the top quarter of your hair from one temple, across the crown, and down to the other temple, leaving the sides and back free. Twist or braid that top section loosely, secure with a clear elastic, then use 3-5 pearl-studded bobby pins inserted horizontally across the base of the secured section, pushing them in at slight angles so the pearls fan outward and catch light from different directions. The pearl pin size matters — look for ones with small (4-6mm) pearls so they don’t feel heavy on your head. Secure at least two pins vertically underneath the gathered section to ensure it stays put throughout the day, then use the remaining pins purely for visual impact.
Pro tip: If you have shorter or finer hair and worried about the section slipping, use a texturizing spray or light hairspray on the hair before twisting it — this gives the elastic something to grip without making your hair look stiff.
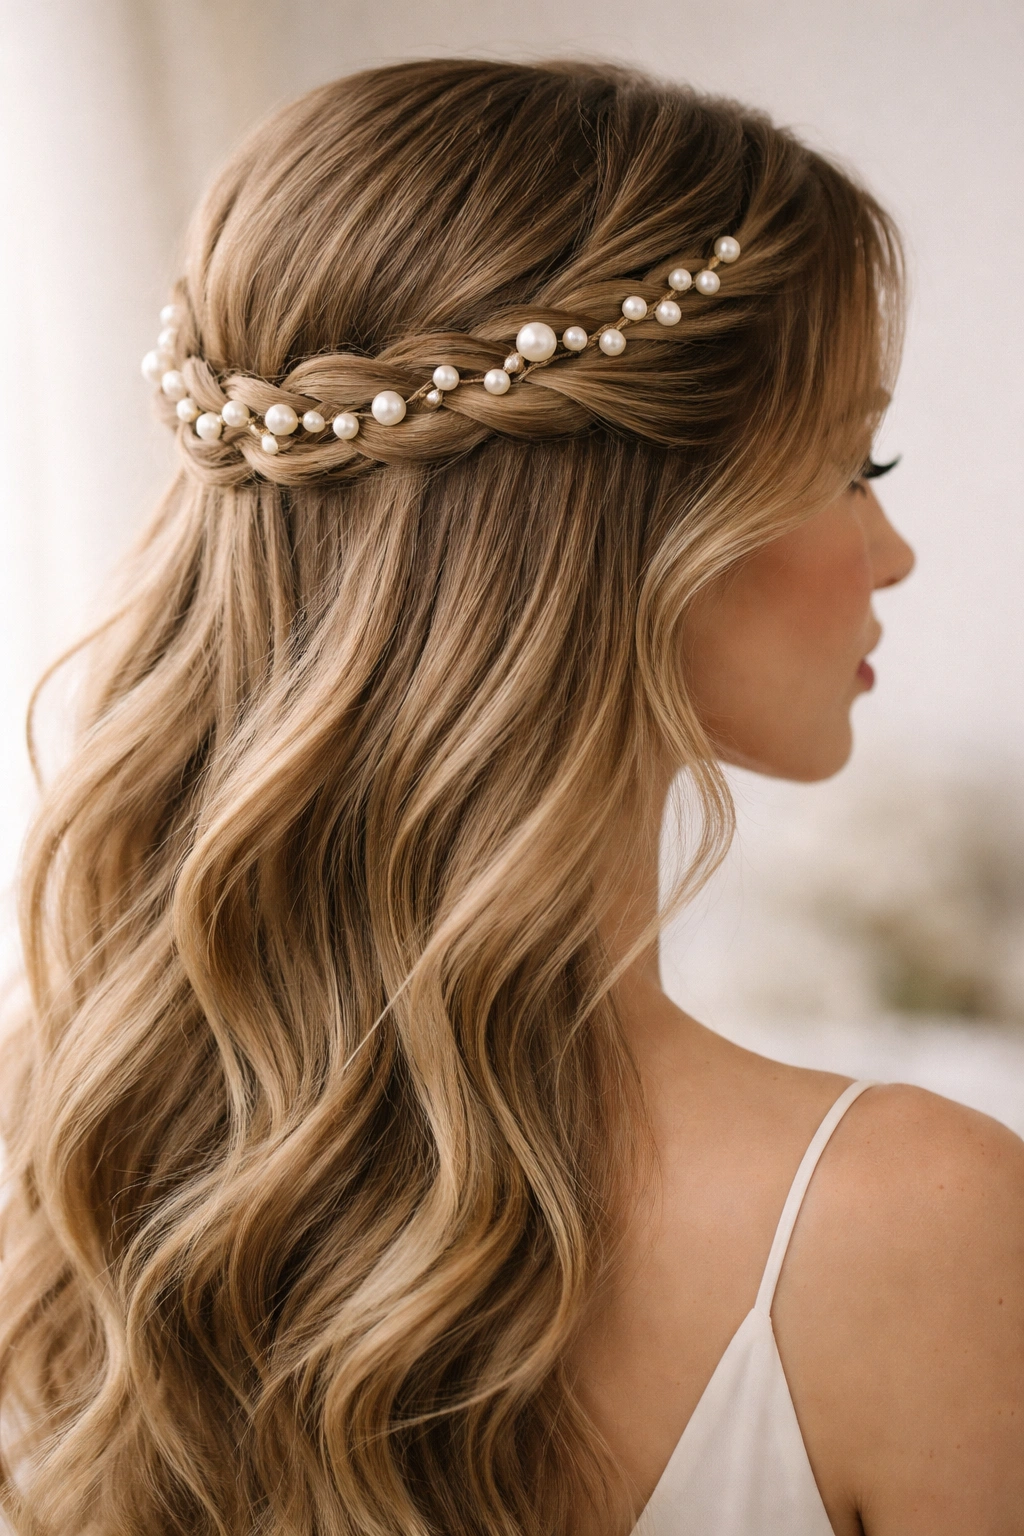
2. Braided Half-Up with Pearl Accents Woven Through
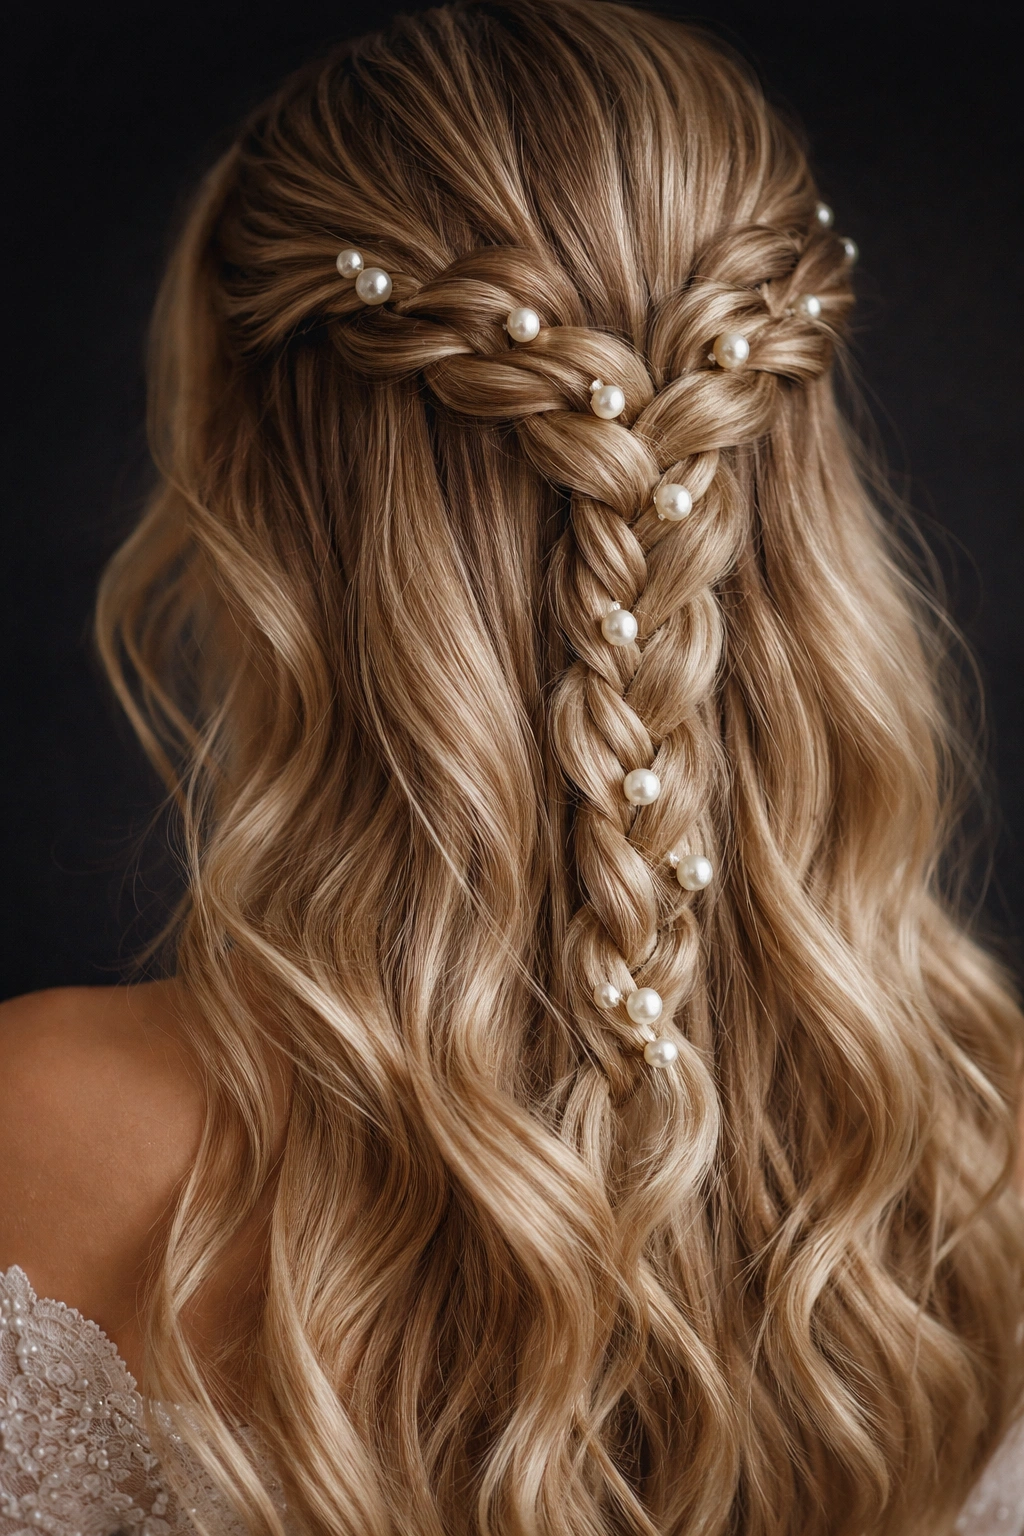
Take the half-up concept to the next level by braiding the top section and threading pearl beads or small pearl-studded bobby pins through the braid itself. This creates the illusion of pearls floating through your hair and works particularly well with loose, romantic waves in the bottom section.
The Visual Impact of Integrated Pearls
When pearls are woven directly into the structure of a braid rather than simply clipped on top, they become part of the hairstyle architecture. This approach reads as more intentional and editorial than a simple pin, and it photographs beautifully because the pearls sit at varying depths within the braid, catching light at different points. The look is especially stunning on darker hair where the luminous quality of pearls creates strong contrast.
Step-by-Step Threading Technique
After creating your braided half-up section, you’ll use one of two methods: either use a thin piece of embroidery floss or invisible thread to sew pearl beads directly into the braid structure (this requires some dexterity but creates a permanent look that lasts all day), or you can simply clip small pearl-studded bobby pins at intervals along the braid as you work. The second method is faster and more forgiving. Work from the base of the braid upward, sliding bobby pins into the braid so the pearls sit visibly on top of the woven strands. Space them about 1-2 inches apart for a balanced look. You’ll want 5-8 pearl pins total to avoid looking scattered.
Worth knowing: This style holds better on day-two or textured hair. If you have slippery strands, spray the section lightly with texture spray before braiding.
3. Low Half-Up with Side Pearl Sweep
Pull only a thin section from each temple area, sweep them back and down into a low ponytail at the nape of your neck, then secure with pearl-studded bobby pins and let that tiny secured section blend into your flowing waves. The key is keeping the gathered portion minimal so it feels like a graceful accent rather than a full half-up style.
Why Minimal Gathering Creates Maximum Impact
A low temple-to-nape pull requires far fewer hairpins and creates a softer, more romantic silhouette than pulling hair from the crown. Because the gathered section is smaller, one or two pearl pins are often enough to do the job and look intentional — you’re not fighting bulk at the back of your head. This style skews younger and more casual than traditional half-ups, making it perfect for everyday occasions where you want your hair mostly down but slightly controlled.
Achieving the Perfect Tension
The trick here is gathering just enough hair to feel deliberate without creating a visible line of demarcation. Take sections approximately 2-3 inches wide from each temple, pull them gently back (not tightly), and secure them at the base of your skull with a small clear elastic. Then use one pearl-studded bobby pin on each side to hide the elastic and anchor everything. The beauty is that the rest of your hair stays completely loose and undone, so you can achieve this look even if you don’t have time for waves — your natural texture will read as intentional.
Pro tip: This works beautifully when your hair is slightly greasy or dirty — it gives you natural texture and grip for the gathered section without requiring any styling tools.
4. Twisted Crown with Scattered Pearl Clusters
Create two soft twists beginning at each temple, wrap them around the back of your head, and secure them together with an elastic at the nape. Rather than using traditional bobby pins, cluster 4-6 pearl-studded pins of varying sizes around the twist intersection point, creating a pearl focal point where the two twists meet.
Building a Pearl Focal Point
Instead of distributing pearls throughout your hairstyle, concentrating them at one point creates drama and draws the eye exactly where you want it. This clustering technique is particularly effective if you’re using pearls of slightly different sizes — a mix of 5mm, 6mm, and 8mm pearls grouped together reads as intentional and luxe rather than haphazard. The clustered approach also means you need fewer individual pins but they create greater visual impact.
Positioning for Maximum Visual Effect
After your two twists are secured with an elastic at the nape, position your pearl pins in a loose semicircle around the twist intersection, with the largest pearl centered and smaller ones on either side. Push each pin in at a slightly different angle so the pearls face different directions and sparkle from all angles. This arrangement reads like an intentional brooch rather than a practical hair accessory. The asymmetry is what makes it feel editorial — if all your pins were perfectly aligned, it would look rigid.
Pro tip: Film yourself from the back with your phone camera while you’re styling to see exactly what angle your pearls are catching light from. This helps you position them more confidently.
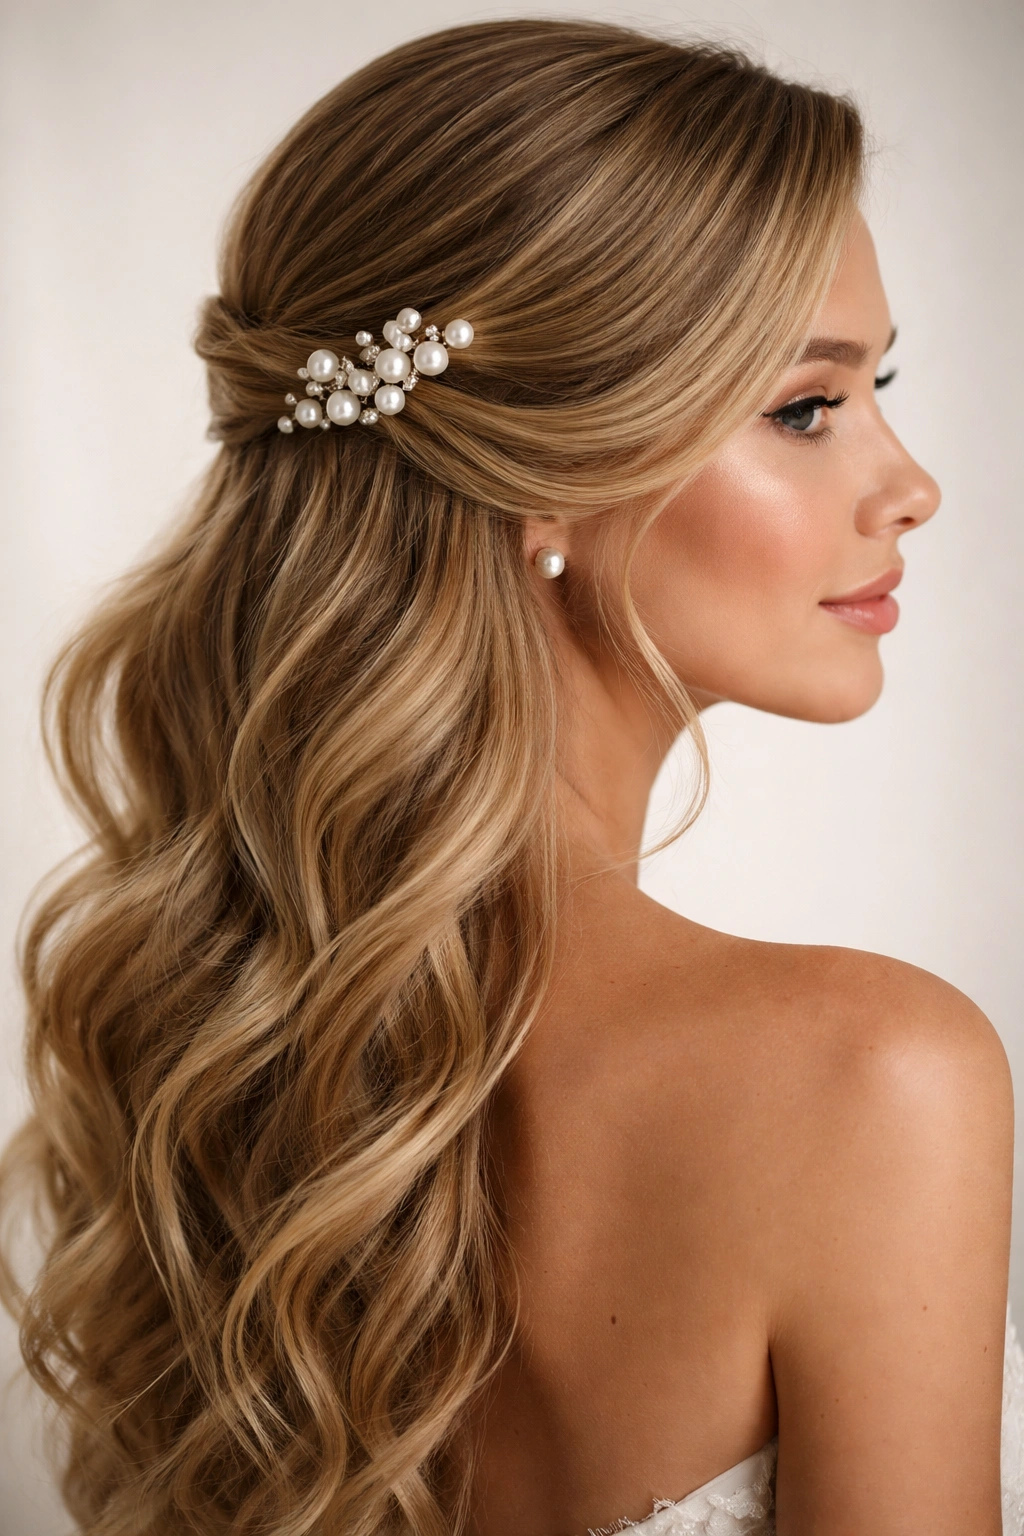
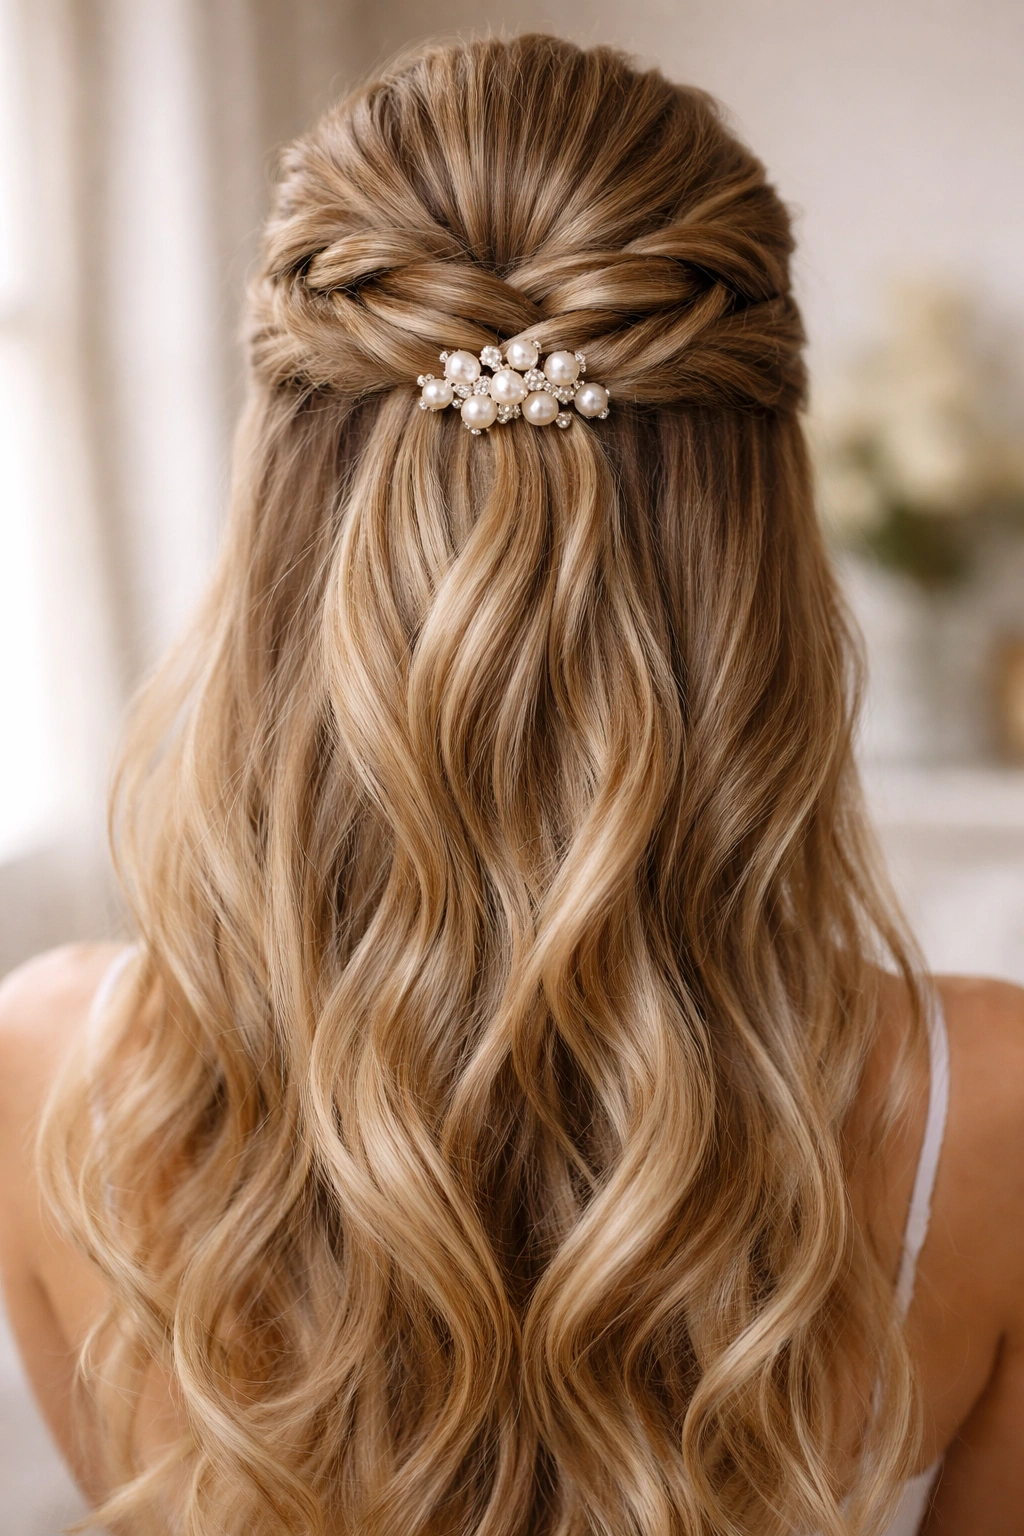
5. Pearl-Adorned Half-Up with Face-Framing Pieces
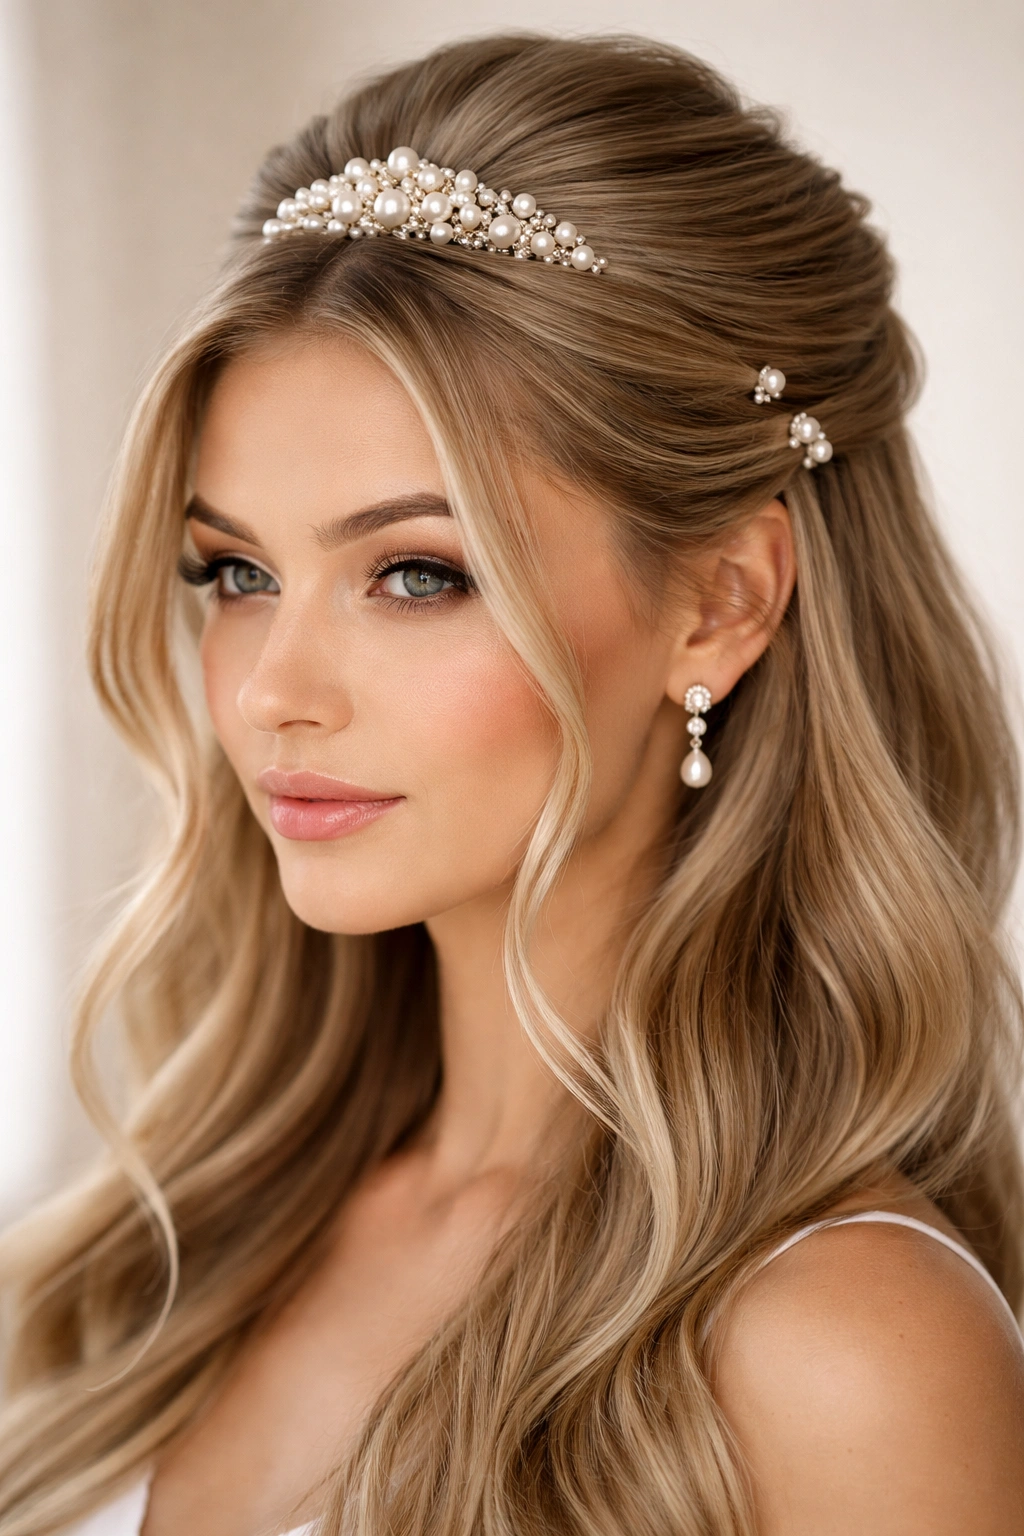
Gather your top section into a half-up as usual, but before securing it, leave two thin face-framing pieces loose on either side of your face. Secure the main section with a pearl-studded comb clipped into the hair at the crown, then use small pearl pins to secure each face-framing piece to the underside of the gathered section, essentially tucking them behind the half-up. This creates a dimensional, intentional look where pieces frame your face but are actually anchored to the updo.
The Sculpting Power of Anchored Face-Framing
Most face-framing pieces fall freely, which is beautiful but can feel accidental. By anchoring them to the half-up section, you’re creating intentional styling that looks planned and polished. The pieces still move softly with your hair, but they stay positioned exactly where you want them rather than migrating behind your ears. This is especially useful if you have fine hair or a smaller face — anchoring the pieces prevents them from overwhelming your features.
Technical Execution
After gathering your top section and before securing it, separate two thin pieces from the hair closest to your temples — you want them thick enough to notice but thin enough that they look like intentional framing rather than a full section. Hold the main gathered section loosely in one hand, then use small pearl bobby pins (3-4mm pearls work best here) to clip each face-framing piece to the underside of the gathered section, positioning each pin just slightly behind where the piece begins. Then secure the main gathered section with your pearl-studded comb or elastic. The effect is that the face-framing pieces appear to float but are actually tethered, giving you control without visible mechanics.
Worth knowing: This technique works best when your face-framing pieces are approximately 8-12 inches long and have some wave or texture to them. Perfectly straight pieces can look stringy when anchored this way.
6. Bubble Half-Up Adorned with Pearls
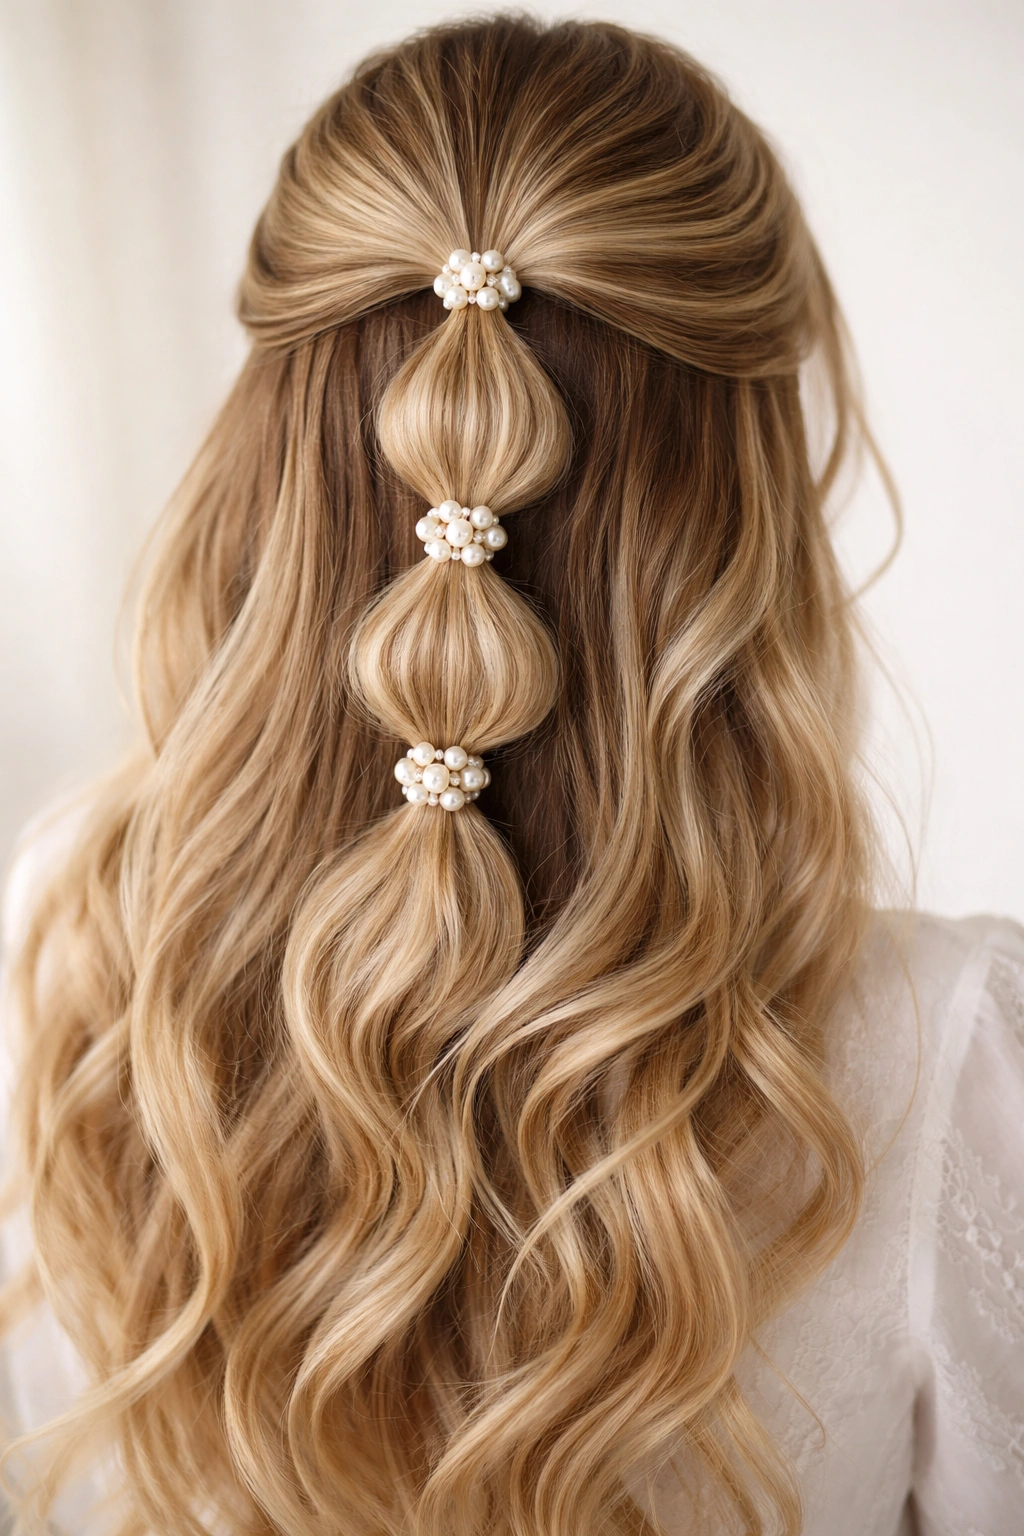
Create a half-up ponytail, then divide it into 3-4 sections with clear elastics spaced about 1.5 inches apart, creating bubble segments. Place pearl-studded bobby pins at the base of each bubble, tucking them into the elastic itself so the pearls sit between each bubble section, creating a pearl-studded ladder effect down the center of your head.
When Playfulness Meets Sophistication
The bubble ponytail trend can read as fun or casual, but adding pearls instantly elevates it into sophisticated territory. The pearls break up what might otherwise feel like too-much styling and add a luxe element that makes the look feel intentional rather than trendy. This style is perfect for occasions where you want to feel playful and polished simultaneously — think garden parties, brunch dates, or Instagram-worthy everyday styling.
Creating Even, Attractive Bubbles
The key to a beautiful bubble half-up is consistent spacing and even bubble sizes. After securing your initial half-up ponytail with an elastic, use the comb end of a fine-tooth comb to section off your first bubble (measuring approximately 1.5 inches down from the elastic), then secure that section with a second clear elastic. Repeat down the length of your ponytail, aiming for 3-4 bubbles total depending on your hair length. The bubbles should all be roughly the same size — inconsistency reads as accidental. Then, at the base of each bubble (between each elastic), insert a pearl-studded bobby pin so the pearl sits in that space between sections, creating visual rhythm as it travels down your ponytail.
Pro tip: Use small elastics in a clear color that matches your hair, and don’t pull them too tight. Slightly loose bubbles with room to breathe look more modern and less severe than super-taut ones.
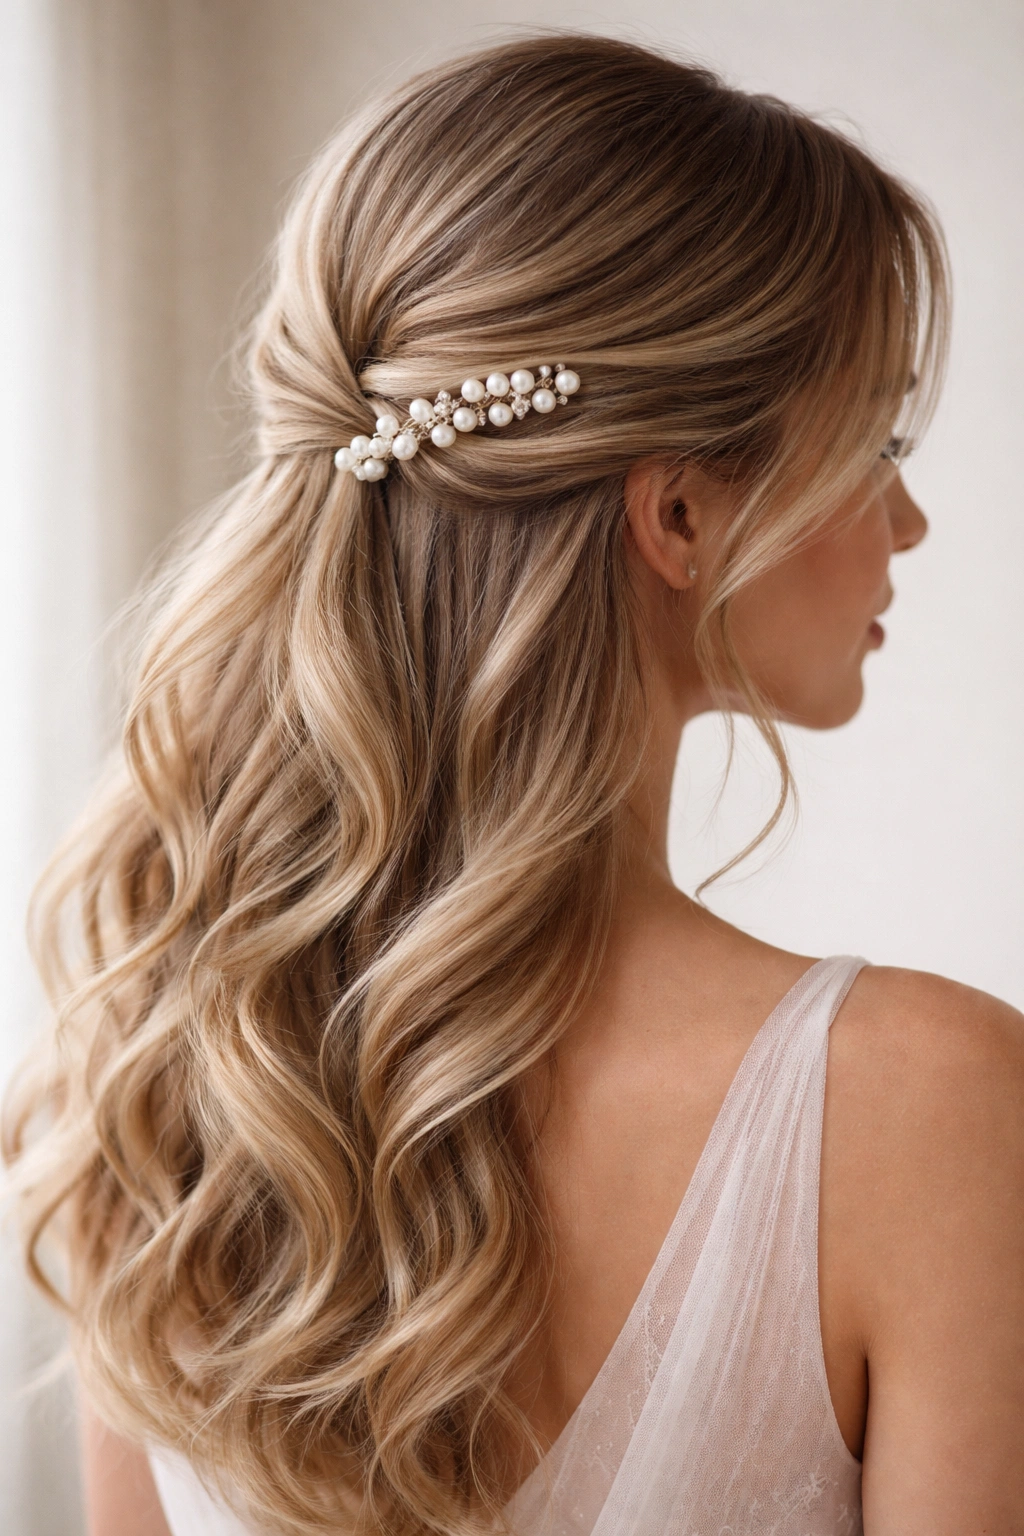
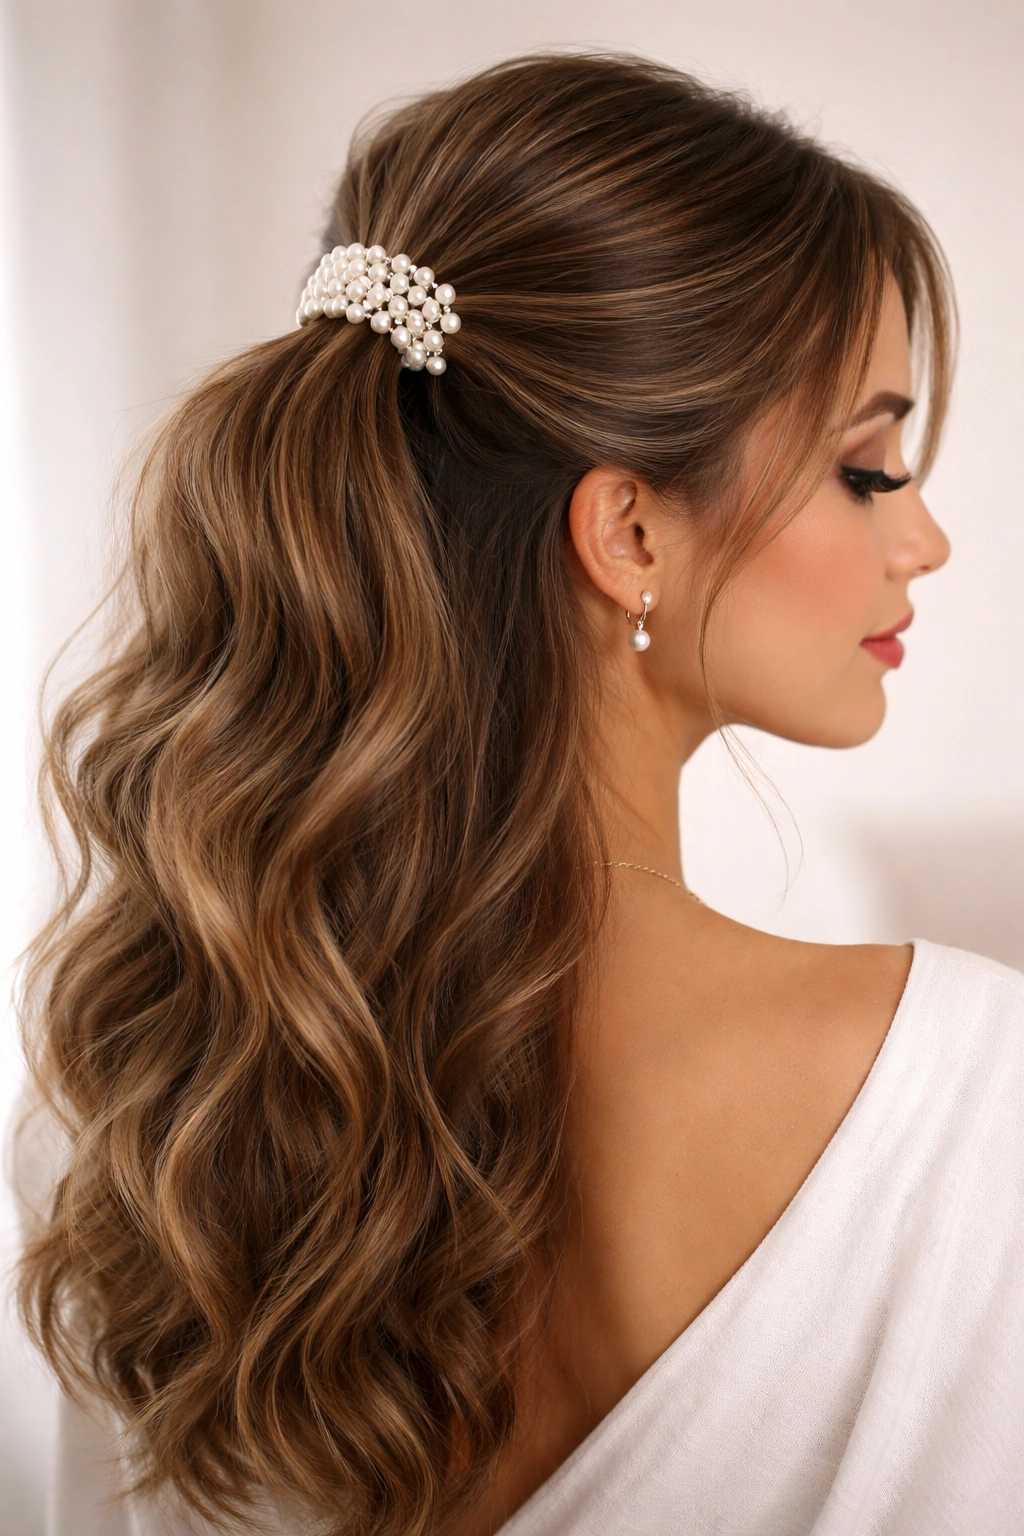
7. Sleek Half-Up with Pearl Statement Comb
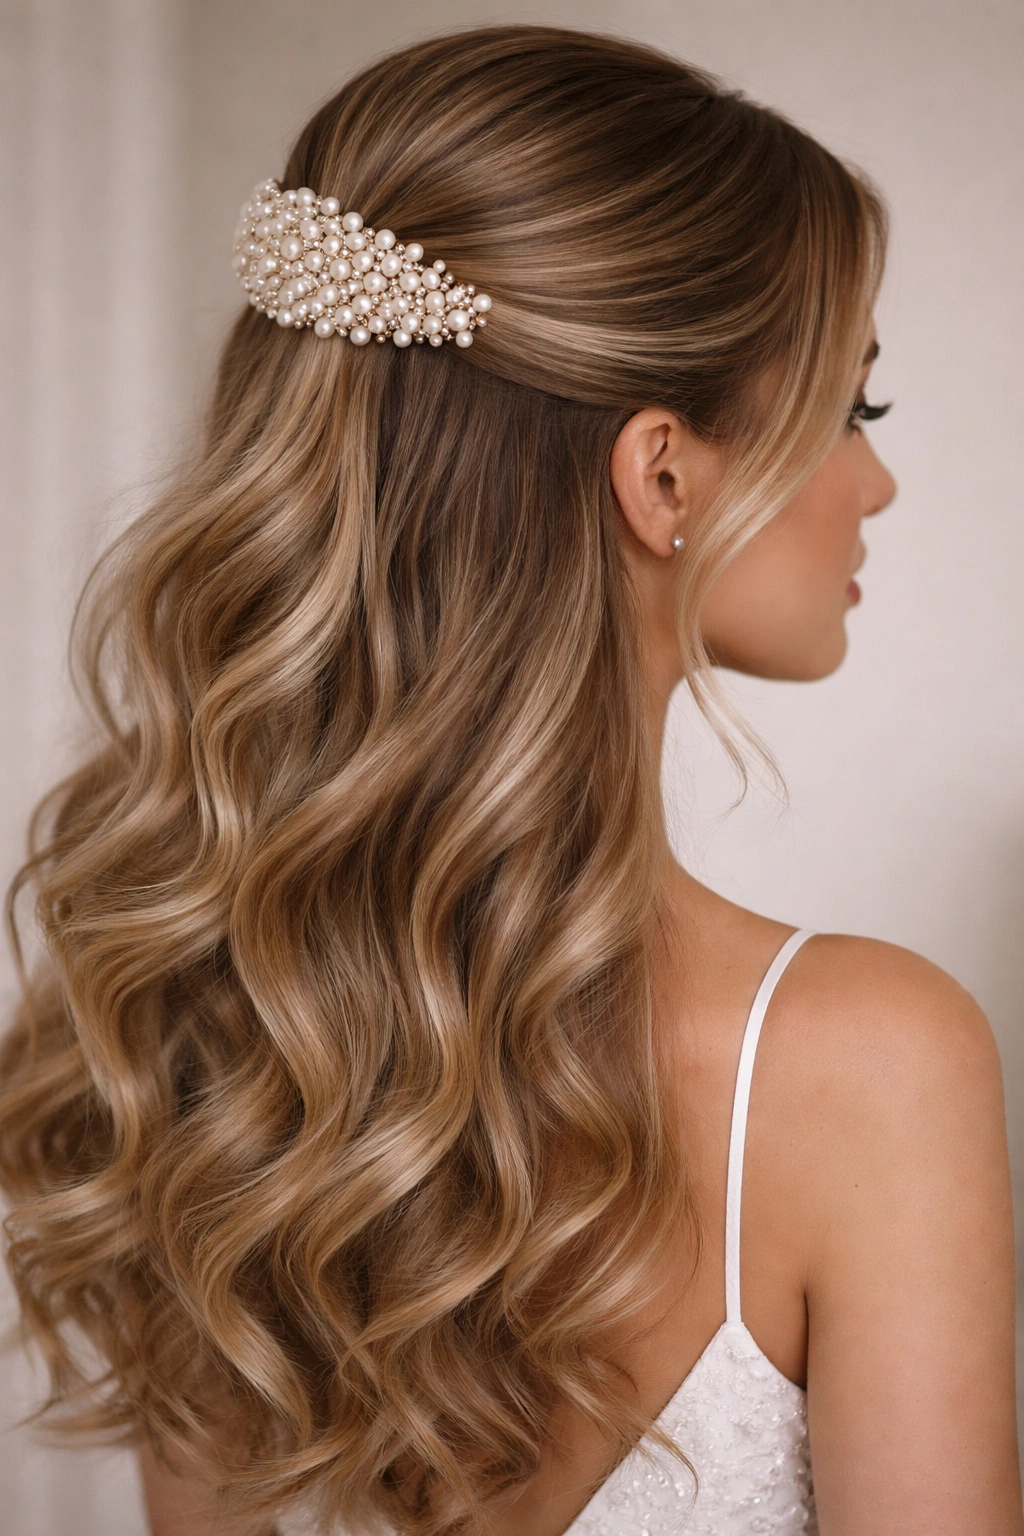
Keep your gathered section smooth and polished — use a brush or straightener to sleek back the top portion of your hair — and secure it with a single large pearl-adorned comb positioned at the crown. Let the bottom section be voluminous waves or curls for maximum contrast between the sleek gathered section and the free-flowing waves below.
The Power of Contrast in Styling
Pairing a severely sleek gathered section with romantic waves creates visual interest and prevents your overall look from feeling one-note. The sleekness reads as intentional and polished, while the waves below feel soft and approachable. The pearl comb becomes a focal point precisely because everything else is controlled and minimal — your eye is drawn straight to it. This is the look of someone who got ready with purpose and precision, which reads as more sophisticated than a style that appears effortlessly done.
Achieving Genuine Sleekness
Start with damp hair and apply a lightweight smoothing serum to the top section before blow-drying. Use a paddle brush to smooth the hair as you dry it, working in the direction you want the hair to go. Once dry, you can either leave it smooth and shiny, or apply a tiny amount of edge control or gel along your hairline and part to create definition. Your gathered section should reflect light and appear almost wet-look smooth. The contrast with textured waves below is what makes this work — if your entire head is smooth, it reads as too formal or like you’re trying too hard.
Worth knowing: This look requires a genuinely large pearl comb (not a small clip-in) to justify the sleekness. If your comb is dainty, the severe styling feels unbalanced. Look for combs that are at least 2-3 inches wide.
8. Romantic Twisted Half-Up with Scattered Pearls
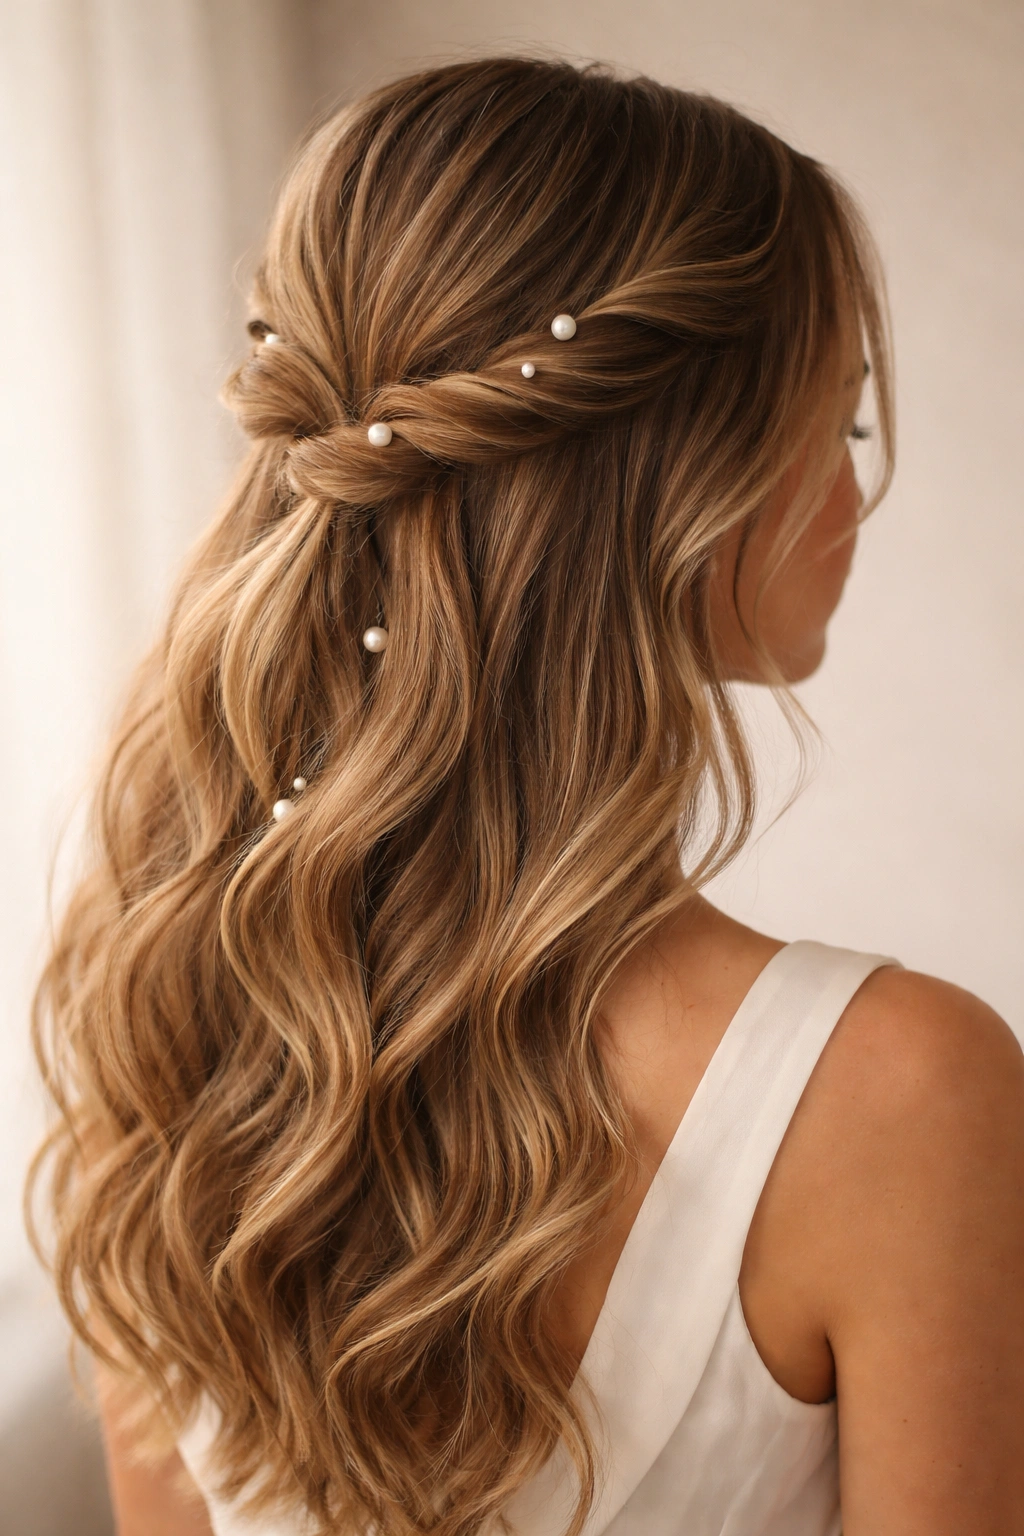
Create two soft, loose twists beginning at the sides of your head at ear level, spiraling them back and securing them together with an elastic at the back of your head. Rather than clustering pearls in one spot, use 2-3 scattered pearl pins placed randomly along each twist and around the central securing point, creating an organic, unstructured look.
The Beauty of Strategic Randomness
Unlike the clustered pearl approach, scattering pearls along twists creates a softer, more romantic aesthetic. It looks less engineered and more like you casually adorned your hair without overthinking it. Scattered pearls work especially well on romantic, loose twists because the imperfection of the pearl placement mirrors the intentional looseness of the twists themselves. The overall effect is soft, feminine, and effortlessly elegant rather than structured and precise.
Placing Pearls for Organic Effect
After creating your two side twists and securing them at the back with an elastic, position pearl pins as you work rather than after. As you’re twisting the first section, every few rotations, slide a small pearl pin into the twist (not so deep that it disappears, but enough that it’s anchored). Do the same with the second twist. Then add 1-2 more pearl pins around the central securing point at the back. The goal is that from the front, you can see 1-2 pearls peeking out of each twist, and from behind, you see additional pearls at the base. It shouldn’t look calculated or symmetrical — it should look like pearls just happen to be scattered throughout your twisted style.
Pro tip: Using pearl pins in slightly different finishes (some with shiny pearls, some with slightly matte pearls) makes the scattered approach look more intentional and less matchy-matchy.
9. Half-Up Ponytail with Pearl-Studded Elastic
Instead of using a clear or matching-color elastic, choose a pearl-studded elastic in gold, rose gold, or silver that matches your jewelry and skin tone. Gather your half-up section and secure it with this statement elastic, making the elastic itself the focal point rather than hiding it with bobby pins.
When the Elastic Becomes the Accessory
Traditional styling wisdom says to hide your elastics, but sometimes making the elastic visible and beautiful transforms it from a practical necessity into a design element. A pearl-studded elastic visible at your crown says you put thought into every detail of your appearance. This approach works especially well if you’re using a pearl-studded comb or additional pearl accessories elsewhere — the pearls in your elastic echo the pearls throughout your styling, creating visual cohesion.
Choosing the Right Elastic
Pearl-studded elastics come in various styles and price points. The best ones have actual pearls (not plastic beads) and have enough elasticity that they hold strongly without breaking your hair. Look for elastics that are studded around the entire circumference rather than just one side — this way, no matter which direction you photograph from, the pearls are visible. Hair-safe elastics with pearl studs are often called “pearl-studded hair ties” and can be found in boutique hair accessory shops. The elastic should feel soft and flexible, not stiff or brittle.
Worth knowing: Pearl-studded elastics are heavier than regular elastics, so they work best on thicker hair or on half-up styles where the gathered section has some volume. On very fine hair, they can pull too heavily and break hairs.
10. Half-Up with Cascading Pearl Pin Waterfall
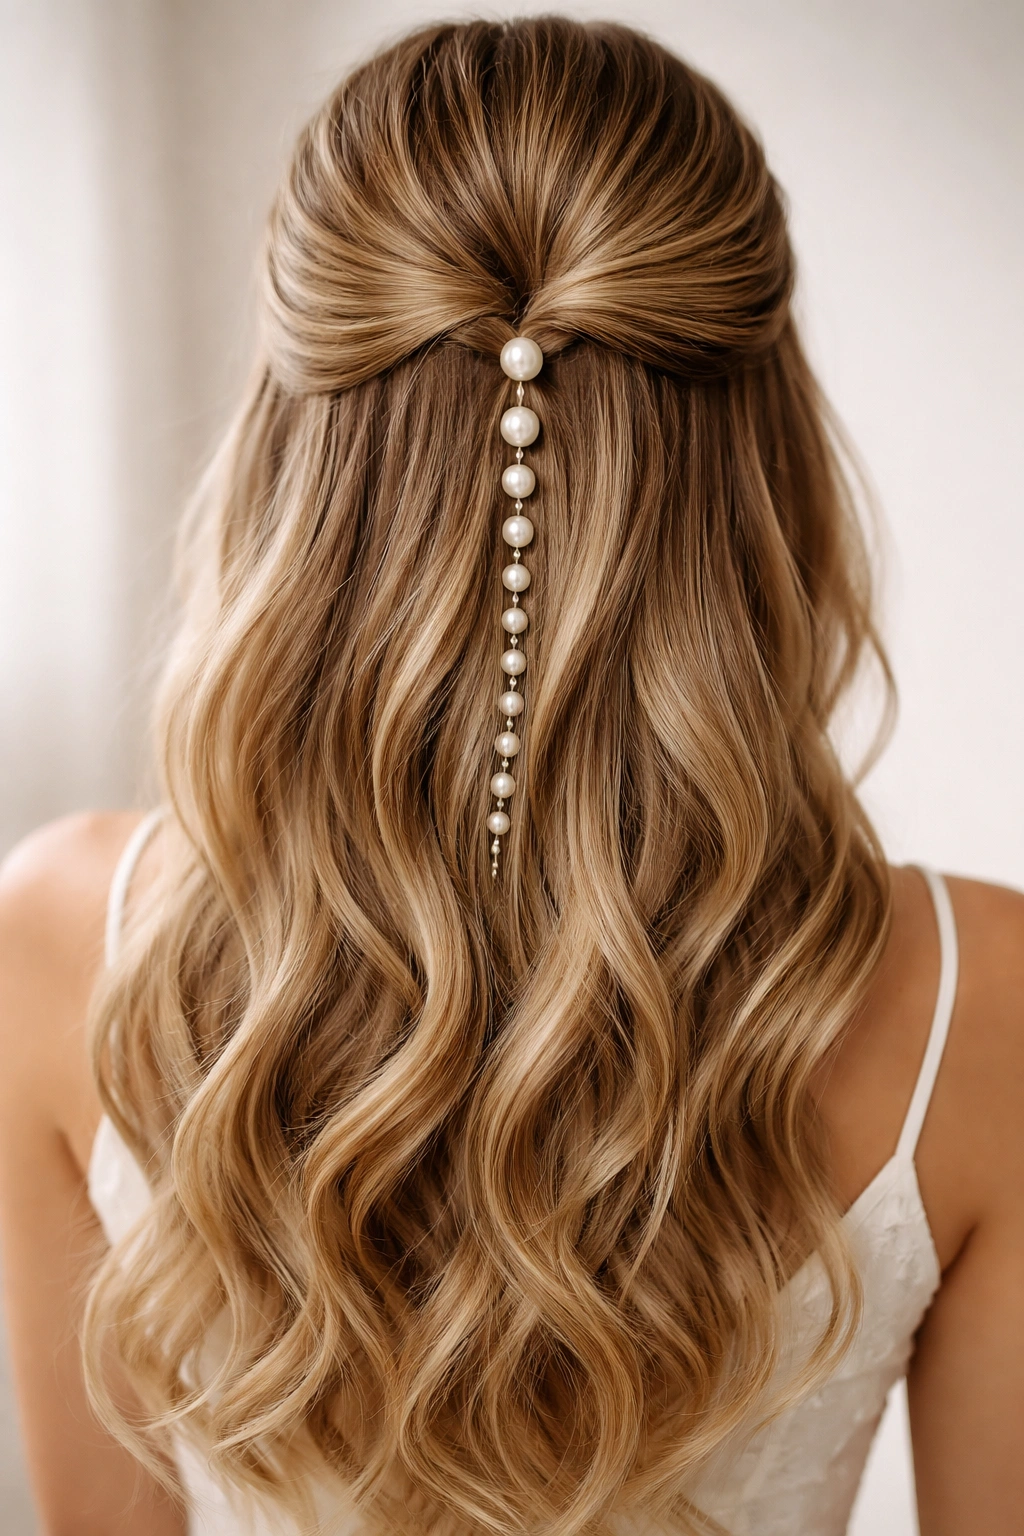
Gather a half-up section at the crown and secure it with an elastic, then use 5-7 pearl pins of varying sizes placed vertically down the center back of your head in a gradient — larger pearls near the elastic, gradually smaller as they descend. This creates the visual effect of a waterfall of pearls cascading down your back.
Creating Visual Movement with Vertical Placement
Instead of clustering pearls at one point or scattering them randomly, a vertical cascade creates the illusion of movement and intentionality. Your eye follows the pearl pins from top to bottom, creating visual flow that echoes the movement of the waves in your bottom section. This approach is particularly effective in photography because it creates a clear focal point and visual direction that feels dynamic rather than static.
Executing the Waterfall Gradient
After securing your half-up ponytail with an elastic at the crown, measure out your pearl pins and arrange them mentally before inserting any of them. Plan to place them approximately 1.5-2 inches apart vertically, with the largest pearl starting just underneath your elastic and progressively smaller pearls descending. The smallest pearl should end approximately 4-5 inches below your elastic. Insert each pin horizontally into the hair just under the ponytail, pushing it in so the pearl faces slightly downward and outward — this creates the cascading appearance. The pins should all be slightly visible on the surface of your hair rather than buried deep, so light catches each pearl distinctly.
Pro tip: Use pearl pins in sizes: 8mm, 7mm, 6mm, 5mm, 5mm, 4mm, 4mm for a smooth gradient. This creates visual progression without looking too matchy.
11. Side-Swept Half-Up with Asymmetrical Pearl Accent
Create a side-swept hairstyle by pulling hair from the deep side part over toward the opposite side of your head, securing it loosely with an elastic at the back of your head slightly off-center. Use 3-5 pearl pins clustered on the side where the gathered section is most prominent, creating an asymmetrical accent that draws the eye toward one side of your face.
Why Asymmetry Feels Modern and Flattering
Asymmetrical hairstyles feel more sophisticated and individualistic than centered styles. They also allow you to strategically place pearls to flatter your face shape — if you want to draw attention toward one side of your face, position the pearl cluster on that side. This style works beautifully if one side of your face is your “good side” or if you have a killer profile you want to showcase. The side sweep also allows more of your face to be visible, so you can wear bolder makeup without feeling like your hair is competing with your features.
Achieving a Flattering Side Sweep
Start with a deep, dramatic side part (the deeper the better). Take the larger section of hair from that deep part and brush it smoothly toward the opposite side of your head. Gather it at the back of your head, slightly off-center toward the side where most of your hair is traveling. Secure with an elastic, then cluster your pearl pins on the same side where your hair is predominantly flowing — this emphasizes the asymmetry and looks intentional. Leave the smaller side of your hair free and relatively undone for maximum contrast.
Worth knowing: This style works best on hair that’s at least shoulder-length and has some texture or wave. Perfectly straight fine hair can look stringy when side-swept, especially with a deep part.
12. Double Half-Up Buns with Pearl-Studded Clips
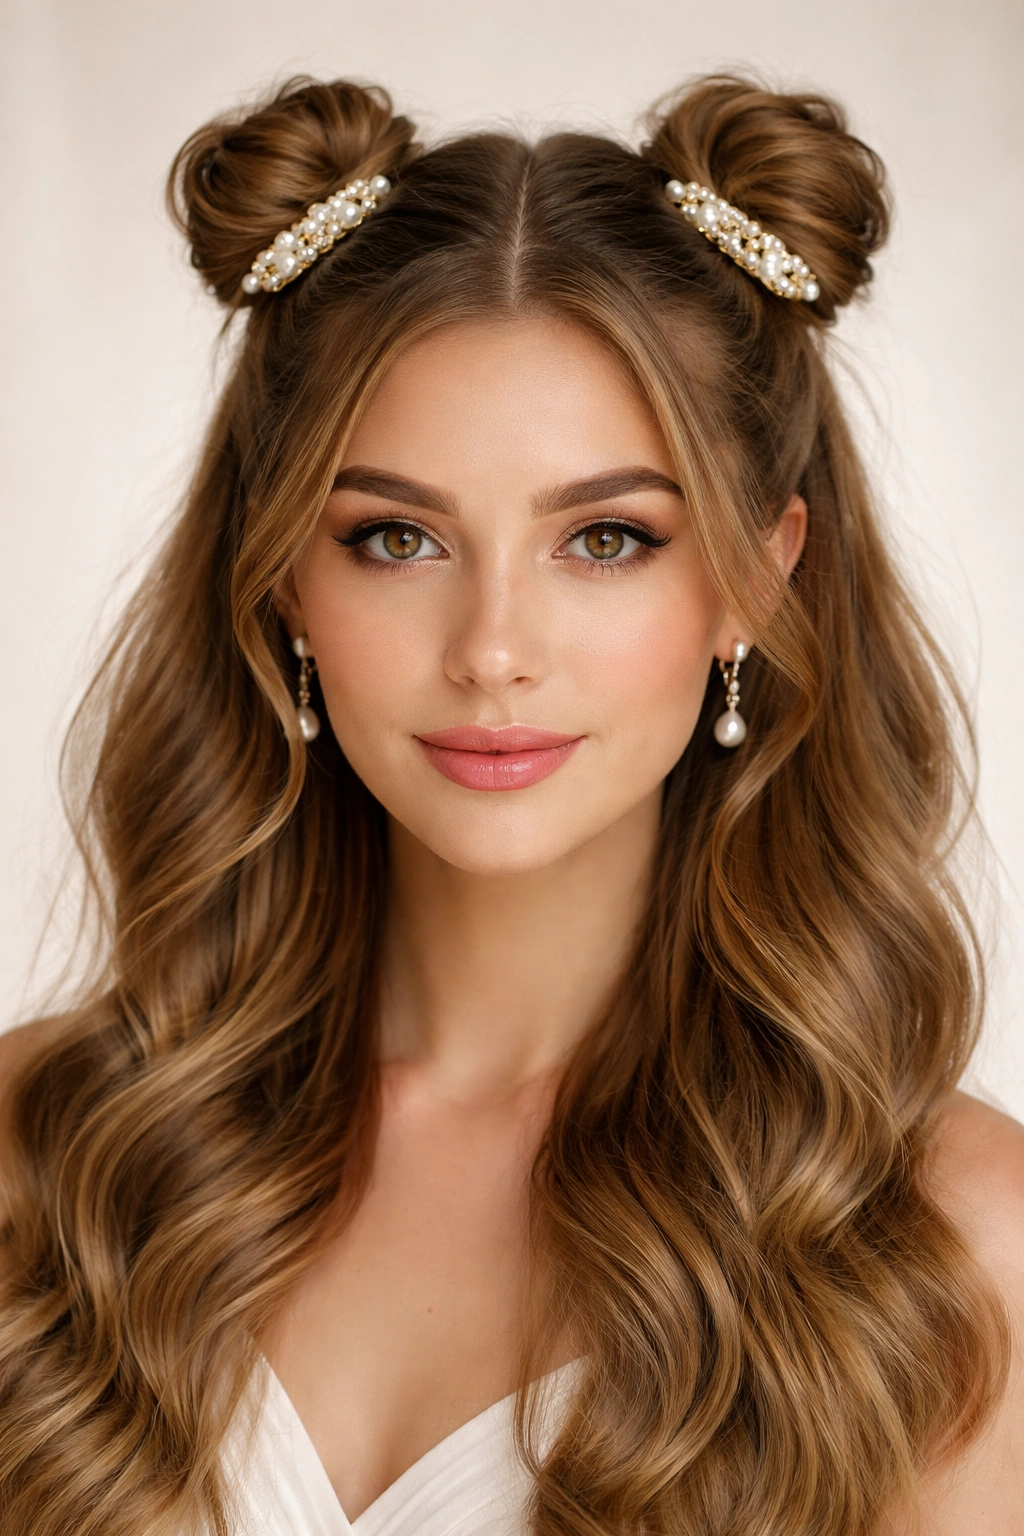
Create two separate half-up sections — one on each side of your head at ear level — twist each lightly, and wrap them around themselves to form small buns. Secure each tiny bun with a single pearl-studded clip placed at the base, creating twin focal points of pearl-adorned buns above your flowing waves.
Double Styling for Playful Sophistication
Two small pearl-topped buns read as more playful and youthful than a single half-up style, while the pearls keep it from feeling cutesy or childish. This style lands in an interesting space — it’s sophisticated enough for date night or upscale casual events, but playful enough to feel creative and individualistic. The symmetry of two identical buns also reads as intentional and designed, especially when pearl clips anchor them.
Creating Balanced Twin Buns
Divide your hair into two equal parts with a vertical line running from your center part to the back of your neck. Take the first section from one side at ear level, making sure you’re gathering from roughly the same spot on each side so your buns will be symmetrically placed. Twist each section lightly (the looser your twist, the softer your final bun will be), then wrap it around itself and pin it into place with 2-3 regular bobby pins. Once both buns are secure, place a single pearl-studded clip at the base of each bun, covering the bobby pins underneath. The pearls should face downward slightly so they’re clearly visible from behind.
Pro tip: The smaller your buns, the more elegant the overall look. Large, voluminous buns feel more playful; tiny, tight buns feel more sophisticated.
13. Half-Up with Pearl-Woven Halo
Take a section of hair from one side, twist it loosely, and anchor it behind the opposite ear with bobby pins. Take a corresponding section from the other side, twist it loosely, and anchor it behind the first ear, creating a twisted halo effect around the back of your head. Weave pearl pins throughout both twists, creating a pearl-studded crown.
The Ethereal Appeal of a Pearl Halo
A halo hairstyle has inherent romance and ethereal beauty — it frames your face from above rather than from the sides, which feels feminine and special. Adding pearls to a halo elevates it beyond romantic into genuinely luxe territory. This style reads as editorial and intentional, perfect for occasions where you want to feel beautifully special without looking overly formal. It’s the kind of hairstyle that makes people stop and ask “how did you do that?”
Building Your Pearl-Studded Halo
Start on one side of your head, taking a section from the temple area at about eye level. Twist this section loosely and begin securing it toward the back of your head by inserting small bobby pins as you go. As you twist, weave in pearl pins every 2-3 inches, letting them sit on top of the twist where they’re clearly visible. Once this side is secured, take a corresponding section from the opposite side, twist it loosely, and wrap it around the back of your head in the opposite direction, overlapping slightly with the first twisted section. Secure this side with bobby pins and weave in pearl pins. The two twists should create a crown effect around the back of your head, with pearls visible throughout.
Worth knowing: This style requires some bobby pin dexterity and is worth practicing a few times before wearing it to an important event. The result, however, looks so striking that it’s absolutely worth the practice time.
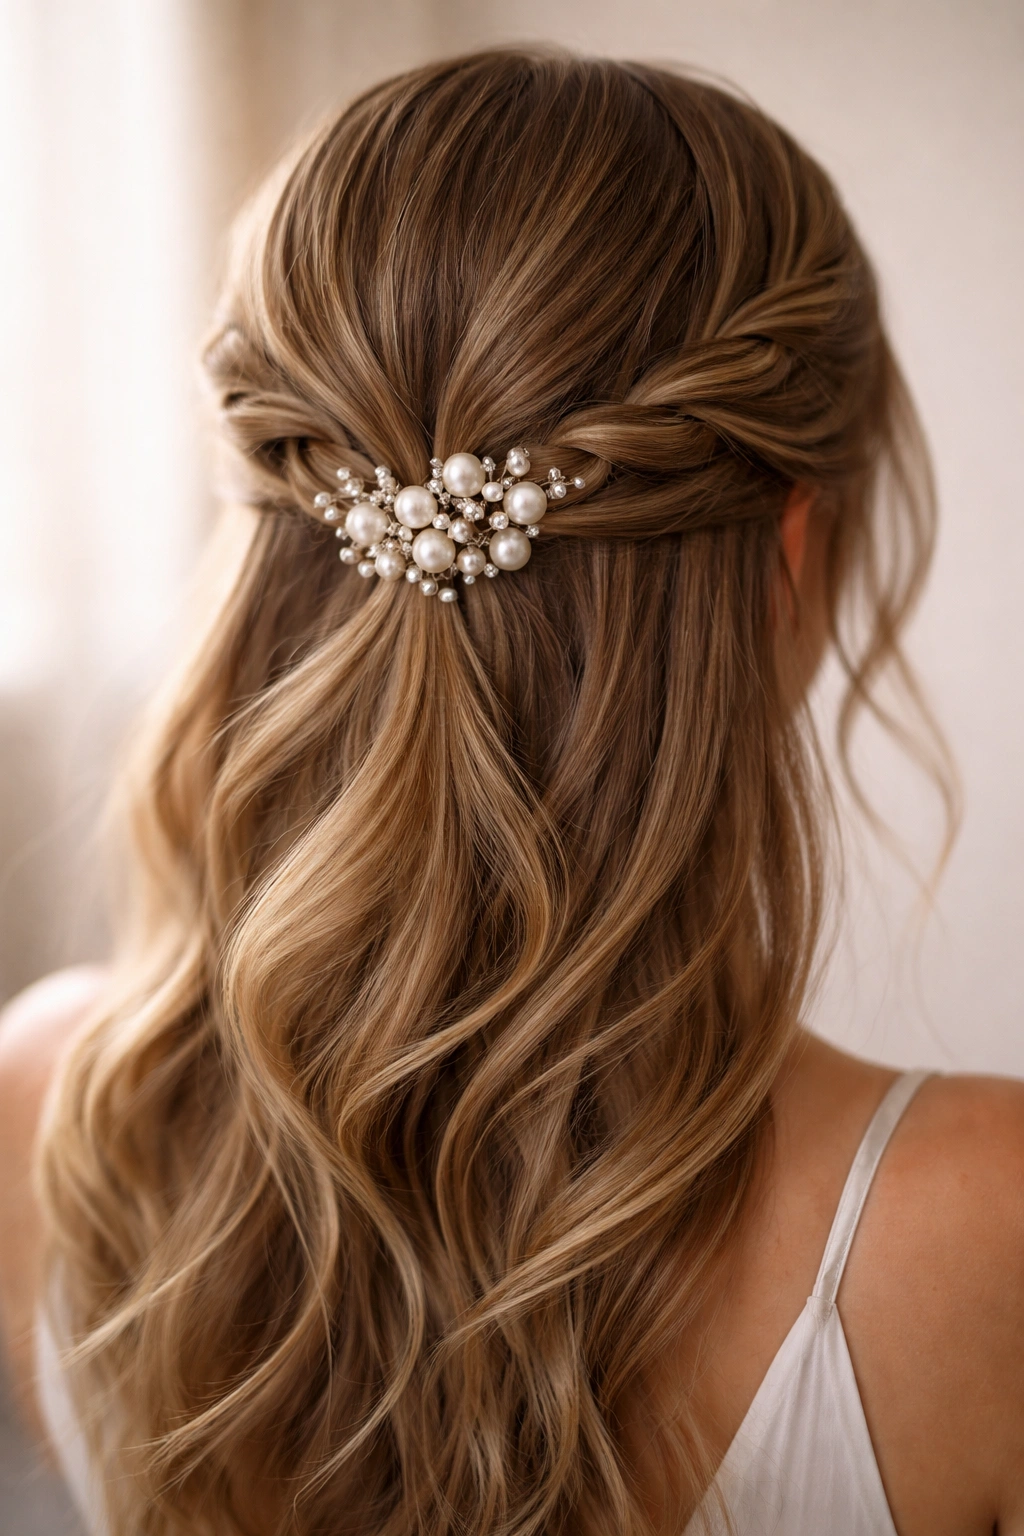
14. High Half-Up Twisted Crown with Clustered Pearl Base
Create a very high half-up ponytail starting at the crown and gathering hair generously, then divide that ponytail section into 3-4 subsections and lightly twist each one, wrapping each twisted subsection around itself to create a crown of mini twists. Secure everything with a cluster of 6-8 pearl pins positioned where all the twists converge at the base, creating a pearl-jeweled crown effect.
Making a Statement with Crown-Level Pearls
A high crown-level half-up immediately reads as more formal and polished than a low half-up. When you add a generous cluster of pearls at the crown, you’re creating a stunning focal point that photographs beautifully from every angle. This style is perfect for special occasions where you want dramatic, intentional styling — weddings, galas, fancy dinners, or any event where you want to feel genuinely special.
Engineering a Sturdy Crown Structure
The key to this style is that each mini twist must be secure on its own before you rely on the pearl pin cluster to hold everything. After creating your high ponytail, divide it into equal subsections (3 for finer hair, 4 for thicker hair). Twist each subsection until it feels taut, then wrap it around itself, tucking the end underneath so it naturally forms a small twist crown. Secure each mini twist with 2-3 small bobby pins. Once all mini twists are individually secure, add your cluster of larger pearl pins at the base where they all converge, creating visual drama. The regular bobby pins are doing the actual work; the pearl pins are creating the gorgeous visual focal point.
Pro tip: Use pearl pins in mixed finishes (matte and shiny pearls together, or pearls in different colors) at the crown to create a more luxe, intentional look rather than perfectly matching pins.
15. Soft Waves with Minimalist Pearl Side Clip
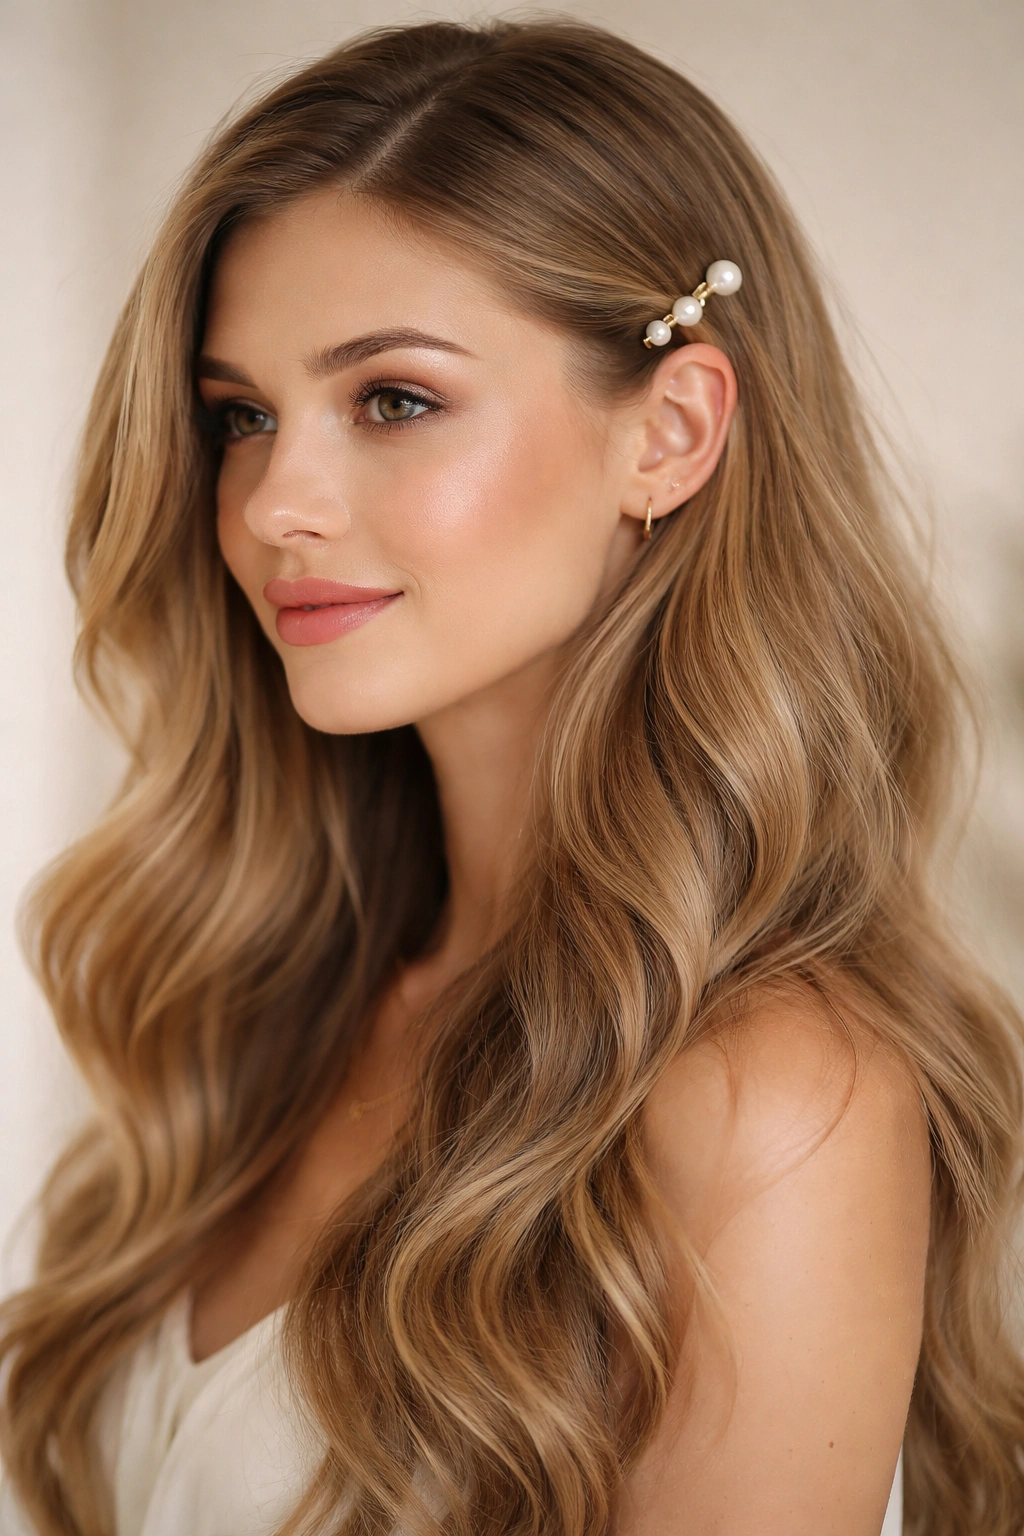
Wear your hair entirely down and wavy, then use a single elegant pearl hair clip positioned on one side of your head just slightly back from your temple, clipping a small section of hair as a subtle accent. The clip itself becomes a piece of jewelry rather than a styling tool.
Sometimes Subtlety Is the Ultimate Sophistication
In a world of maximalist styling, a single pearl clip in a sea of waves reads as refined and intentional. This approach works beautifully if you want to feel styled without looking like you spent significant time on your hair. It’s the perfect option for days when you want polish without effort, or for occasions where you want your face and makeup to be the primary focus with hair as a subtle supporting element. A single pearl clip says you have excellent taste and confidence, not that you’re trying too hard.
Positioning a Single Pearl Clip for Maximum Effect
The placement of your one clip matters enormously. Position it on one side of your head, just slightly back from your temple — close enough that it sits near your face and creates some framing, but back enough that it’s clearly a deliberate accessory, not a styling necessity. Take a small section of hair approximately 2-3 inches wide at that spot and clip it, leaving the rest of your hair completely loose and undone. The clip should hold the section gently in place but allow hair to still move softly. Choose a clip with a pearl large enough to be visible (at least 8-10mm) so it reads as intentional jewelry rather than a practical hair clip.
Pro tip: This look works beautifully when your waves are imperfect and undone rather than salon-perfect and controlled. The contrast between the deliberately placed pearl and the “I didn’t really style my hair” waves is what makes it feel effortlessly chic.
Final Thoughts
Pearl-adorned half-up half-down styles offer remarkable versatility — whether you’re drawn to minimalist elegance or maximalist drama, there’s a pearl styling approach that matches your aesthetic and occasion. The beauty of working with pearls is that they automatically elevate any hairstyle into more polished territory. A simple half-up becomes special the moment you add pearl pins; a casual wave becomes date-night-ready with a pearl-studded comb.
The best pearl hairstyle for you depends entirely on your hair type, the occasion, and how much styling time you want to invest. If you have fine hair, opt for styles with pearl clusters at key points rather than scattered throughout, since fewer pearls won’t weigh your hair down. If you love the maximalist approach, create abundance with bubbles, waterfalls, and halos. If your strength is effortlessness, let a single clip or a minimal cluster do the talking while your waves flow freely.
Start with one style that resonates with you and practice it a few times before wearing it somewhere important. Once you nail one or two pearl hairstyles, you’ll develop the confidence and muscle memory to adapt them to your hair type and create your own variations. Pearls are genuinely forgiving — they look beautiful in almost any position and arrangement, so there’s room for creativity and personalization.